What a "gem" of a motor Rick!
Excellent!
Ernie

Posted 18 December 2022 - 12:50 PM
What a "gem" of a motor Rick!
Excellent!
Ernie
Posted 19 December 2022 - 06:16 PM
Posted 19 December 2022 - 06:28 PM
Glad you like the motor Mark. My floor is a portal to a different dimension. Anything dropped on it is usually gone forever so keeping things in some kind of tray is mandatory.
But what "threaded inserts" are you speaking of? ![]()
Rick Thigpen
Check out Steve Okeefe's great web site at its new home here at Slotblog:
The Independent Scratchbuilder
There's much more to come...
Posted 19 December 2022 - 08:57 PM
Posted 19 December 2022 - 10:01 PM
A picture frame with the glass replaced with something soft, such as sheet cork, makes a good work area for small parts, with a border. A model builder friend of mine showed me this works when slot car building too.
Posted 20 December 2022 - 07:41 PM
Posted 20 December 2022 - 09:07 PM
You're right Mark. I do need a break. ![]() I've been struggling with the "wing thing".......and it's fixed, not even operable.
I've been struggling with the "wing thing".......and it's fixed, not even operable. ![]()
Anyway, I've finally got the mounting system fabricated. I wanted to do something removeable. Now I need to get the 2 wing halves glued together cleanly. ![]()
One more thing on my "build box". I don't actually work within the box. The parts are grouped and put in small craft store jewelry boxes and their lids. As needed I remove the small box with the parts I want and set it on the workbench. The little box keeps thing from rolling around and getting lost as I assemble and I have the whole benchtop to work on:
Rick Thigpen
Check out Steve Okeefe's great web site at its new home here at Slotblog:
The Independent Scratchbuilder
There's much more to come...
Posted 20 December 2022 - 09:49 PM
Posted 20 December 2022 - 09:53 PM
Its beginning to feel a lot like Christmas with all those boxes, have a good one guys. ![]()
Posted 21 December 2022 - 09:27 PM
My "wing saga" is finally winding down. I saw this scale plan of a Chaparral 2F that showed the shape of its wing strut (shown in the red circle):
K&S Metals makes a similar shape "streamlined" aluminum tubing and the smallest size 1/4" X 1/8" looks about right:
I wanted to make the wing easily removable. Mounting the struts to the chassis was a problem with lack of space. One strut was right above the spur gear.
The wing and struts are attached to the body with a couple of 1/8" Evergreen styrene strips, 1-72 flathead screws and 3/32" aluminum tube:
The shorter plastic strip gets taped to the body and the screws attach the struts to it. The struts have the 3/32" aluminum tube glued inside and the flush end is tapped 1-72 for the screws.
The longer plastic strip gets 3/32" holes for the tube protruding from the struts. The strip is glued inside the wing and the wing will be glued to the tubes after paint.
Nothing is ever easy as it seems. The back of the body where the plastic strip get attached is angled so an angle had to be milled into it so the strut would be vertical. And the plastic strip inside the wing had to have the tube mounting holes drilled at an angle too.
I use a little vise sitting on an angle block and clamped into a bigger vise:
I'm pretty happy with how it turned out.....so far:
Is there anything you can't fixture up in a Rick's Jig. The pin spacing proved just right to gently hold the 2 wing halves after gluing:
In hole in the bottom of the wing is larger than it needs to be. The wing had indentations molded in for the narrower 2E Chaparral body which need to be cut out for the plastic strip to sit flat:
The only thing I still need to do is sand the flange around the Lancer wing halves as far as I dare without the thing coming apart.........
Rick Thigpen
Check out Steve Okeefe's great web site at its new home here at Slotblog:
The Independent Scratchbuilder
There's much more to come...
Posted 22 December 2022 - 03:49 AM
Very impressive Rick... like you say, you think a thing like a wing is going to be easy, but no!
Don
Posted 22 December 2022 - 08:49 AM
Posted 22 December 2022 - 12:34 PM
Very clever, Rick! ![]()
Posted 23 December 2022 - 09:03 AM
Posted 23 December 2022 - 09:41 AM
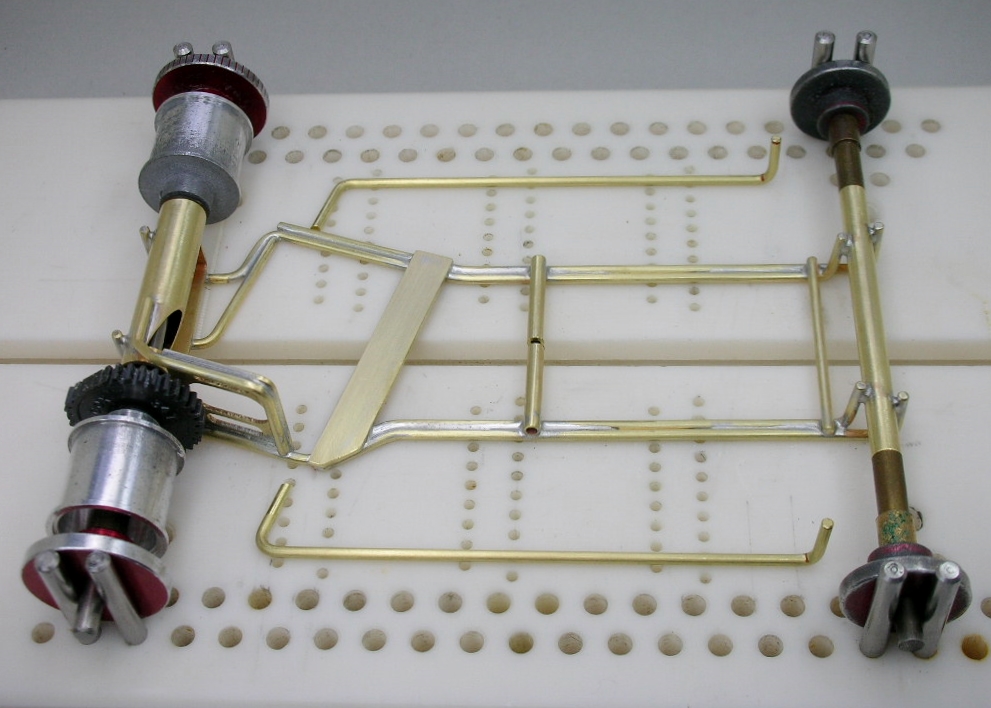
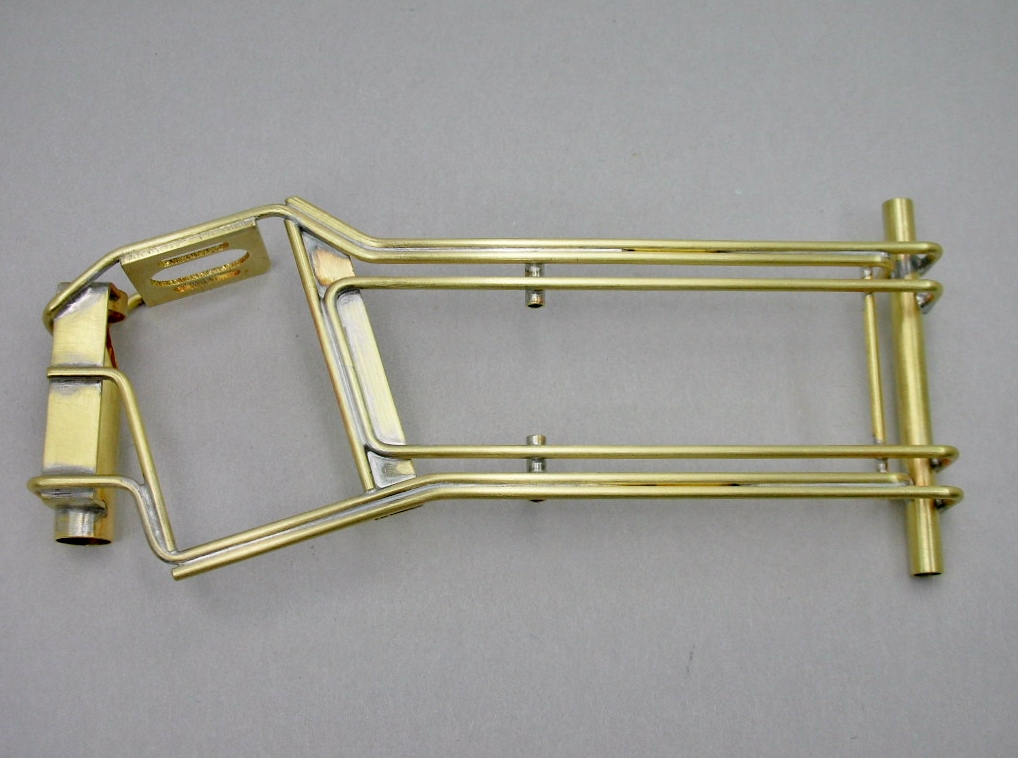
Inner rails are 2 separate pieces. Look closely at the bottom shot of the chassis in post #36 at the brass sheet cross piece. The 2 rods meet there. It's hard to see the gap because the workmanship tolerances are so tight and perfect.
Paul Wolcott
Posted 23 December 2022 - 11:39 AM
Thanks guys. I'm really glad that wing is finished. It was really "bugging me man":
Pablo is right Mark, the inner rails are 2 separate pieces:
With that all cleaned up the drop arm hinge and up stop added, the final inner rails were bent up..........


Rick Thigpen
Check out Steve Okeefe's great web site at its new home here at Slotblog:
The Independent Scratchbuilder
There's much more to come...
Posted 23 December 2022 - 12:02 PM
f'ing GREAT movie, by the way..... LOL
Posted 24 December 2022 - 12:52 PM
The wing assembly turned out great! What kind of glue did you use on the aluminum pieces?
Posted 24 December 2022 - 03:08 PM
Only one rail on the motor mount side by the motor box?
Posted 24 December 2022 - 04:43 PM
Posted 24 December 2022 - 07:04 PM
Posted 24 December 2022 - 07:10 PM
Keep on him, boys. With your help, maybe Rick will finally learn how to build a chassis.
Posted 24 December 2022 - 08:19 PM
OK I get it. The example copied looks to have a much tighter motor box on that side though.
Posted 24 December 2022 - 10:19 PM
It seems to me that the motor bracket would provide the stiffness of a second rail.