Jump to content


Photo

Lancer Honker build now a King Cobra!


87 replies to this topic

#1 dc-65x

dc-65x

    Grand Champion Poster

  • Subscriber
  • PipPipPipPipPipPipPipPip
  • 6,976 posts
  • Joined: 14-February 06
  • Gender:Male
  • Location:Captain Rick: The only vintage slot car nut in SW Oregon?

Posted 21 November 2024 - 04:32 PM

Over the years I’ve had fun building my vintage cars with these two ideas in mind:


  • If the body I’m using was released for sale in early 1968 I’d use mechanical components and chassis designs from early 1968.


  • Also, with the advent of Pro racing I would usually build the car to fit within the appropriate Pro car rules.


This is a fun philosophy that I enjoy and will continue to use.


But, with the advent of the low and wide “handling bodies” that have dominated my builds, lots of very nice but uncompetitive taller and narrower scale bodies have been sitting on my shelf unused and unloved.


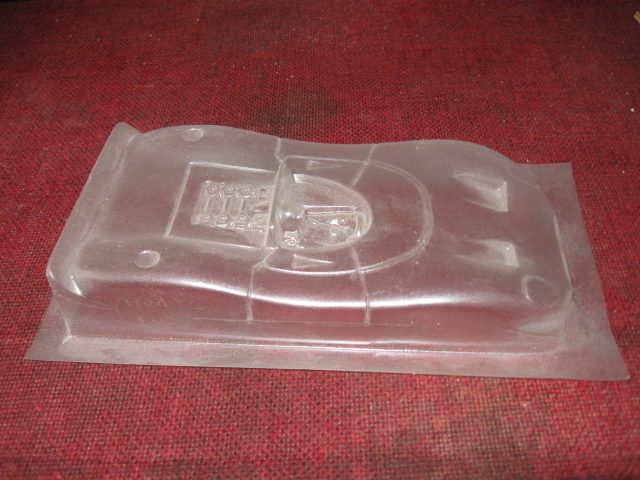
Take for example the taller and narrower 5000 series Lancer scale lightweight version of the Honker Can Am:


 honker.jpg


 Compare the scale body on the left to the low and wide 900 series Lancer Super Competition “handling body” version on the right and you can see why my scale body is still on the shelf:


Steube CMRA Racer 64.jpg


The scale body on the top also shows the LARGE rear wheel openings, taller body sides and a shorter wheelbase:


 Steube CMRA Racer 26.jpg


I want to have some fun with my scale bodies like my Lancer Honker so I’m going to open things up from my usual approach to vintage building by doing the following:


  • Approach this build as if I was a hobbyist back in the early 70’s building just for the fun of it.


  • Use any vintage or repop vintage component available from the early 1960’s to the early 1970’s.


  • Use any style of vintage motor and chassis design from the early 1960’s to the early 1970’s.


OK, time to take my time machine back to the early 1970’s and get to work on my Honker.


  • Tex, Chris Stemman, Alchemist and 3 others like this

Rick Thigpen
Check out Steve Okeefe's great web site at its new home here at Slotblog:
The Independent Scratchbuilder
There's much more to come...


#2 don.siegel

don.siegel

    Grand Champion Poster

  • Subscriber
  • PipPipPipPipPipPipPipPip
  • 5,840 posts
  • Joined: 17-February 06
  • Gender:Male
  • Location:Paris, France

Posted 21 November 2024 - 05:23 PM

Oh boy! Always fun seeing the start of another project from Captain Rick! 


It's kind of sobering seeing the difference in those bodies Rick. I already thought the scale Honker was pretty wide and low - at least I thought it was a scale version that I have... 


Don 


  • Alchemist likes this

#3 Alchemist

Alchemist

    Posting Leader

  • Full Member
  • PipPipPipPipPipPipPip
  • 2,696 posts
  • Joined: 11-November 09
  • Gender:Male
  • Location:Far, far away

Posted 21 November 2024 - 05:36 PM

Hi Rick,


For me, it's always an exciting treat to follow your builds.


I am looking forward to the progress photos.


Thank you for sharing Rick!


Greeting Don - hope all is well!


Ernie


Ernie Layacan

#4 Bill from NH

Bill from NH

    Age scrubs away speed!

  • Full Member
  • PipPipPipPipPipPipPipPip
  • 14,743 posts
  • Joined: 02-August 07
  • Gender:Male
  • Location:New Boston, NH

Posted 21 November 2024 - 05:59 PM

I have a Tom Andersen repop Honker but I don't recall if it's the wide or scale version. Probably it's scale. I'll have to dig it out for a look. I also had Pablo build me a clone of the Phillip Niyazi Cukras brass rod chassis. I never got any further along than this. No local shops to run them anymore.


Bill Fernald
 
I intend to live forever!  So far, so good.  :laugh2:  :laugh2: 

#5 Pablo

Pablo

    Builder

  • Administrator
  • PipPipPipPipPipPipPipPip
  • 18,448 posts
  • Joined: 20-February 06
  • Gender:Male
  • Location:Cleveland, Tennessee

Posted 21 November 2024 - 07:44 PM

OIPMOWX6N97.jpg


:dance3:


  • Larry Horner likes this

Paul Wolcott


#6 dc-65x

dc-65x

    Grand Champion Poster

  • Subscriber
  • PipPipPipPipPipPipPipPip
  • 6,976 posts
  • Joined: 14-February 06
  • Gender:Male
  • Location:Captain Rick: The only vintage slot car nut in SW Oregon?

Posted 22 November 2024 - 12:30 PM

 Okie Dokie, my WayBack time machine has me back in the early 70's so the time to start building.   :D


This isn’t going to be a 1968 Honker Pro car, I have built the Lancer Super Comp handling body version  (click on link below):


Pro sports car build – “last gasp” of the inlines


And it’s not going to be an absolutely scale version either. I'm going to do my best to give this build what Rodney calls “the look”.


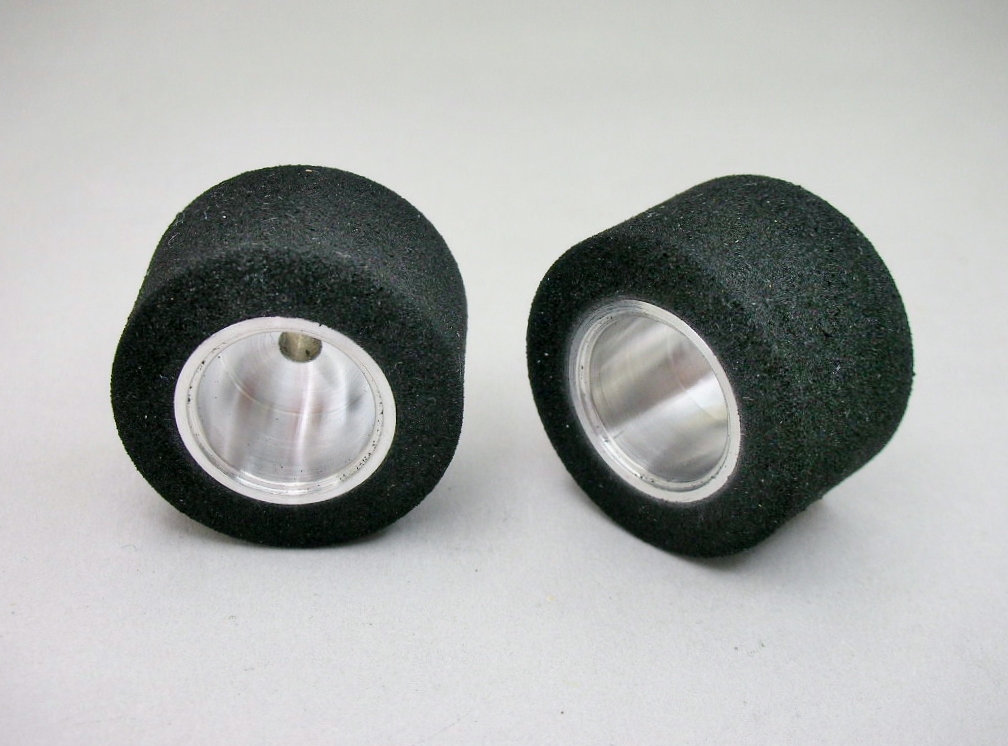
Starting with the tires and wheels, they need to be larger diameter than Pro cars but not necessarily as big as scale diameter. I want to try for a compromise between a scale car and Pro car.


Often on the scale bodies the tires need to fit up inside the fenders to allow the body to sit low on the chassis like the real car. That means the track width will be a bit narrower than the already narrow body.


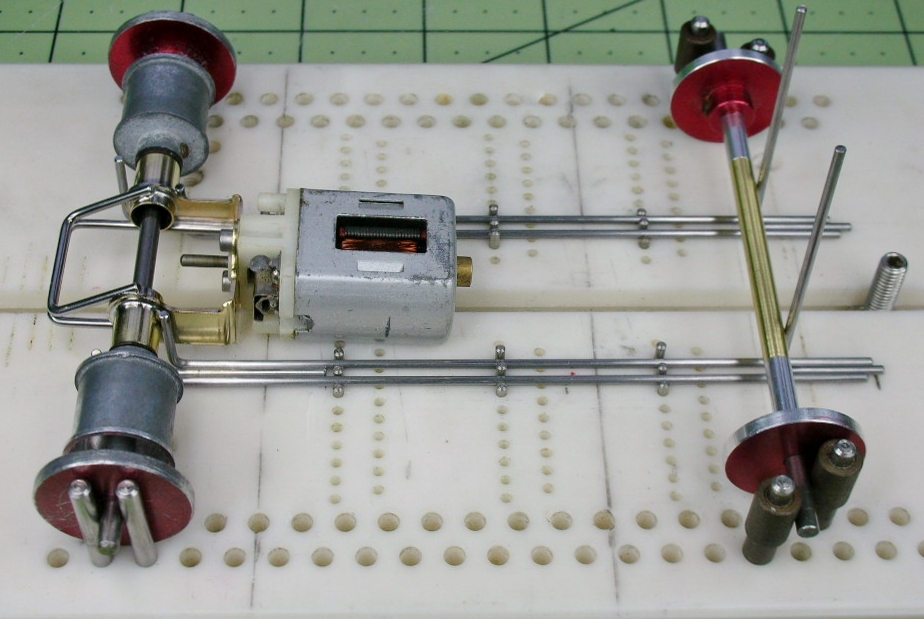
I used my Rick’s setup jig to try different tire diameters and track widths to find what I think gives this Honker, “the look”. After swapping out lots of different sizes of wheels and tires I’ve settled on 15/16” diameter fronts and 1” diameter rears:


 honker (1).JPG


The track widths are 2 7/8” in front and 3” in the rear:


honker (2).JPG


 honker (3).JPG


Front tires are Cox Firestone rears on Russkit wide rear wheels ground down to 15/16” diameter:


 wheels (1).JPG


Treads are cut in the style of many of the lovely MESAC cars:


 wheels (2).JPG


The rears are Alpha Humongous donuts ground down to 1” diameter X 5/8” wide:


 wheels (3).JPG


These sizes staggered the tire diameters a bit…………….


 wheels (4).JPG


…………..to hopefully give the racy look of the real car:


 1967-Holman-Moody-Ford-Honker-II1111577_-1536x1024.jpg


  • don.siegel, Pablo, Tex and 7 others like this

Rick Thigpen
Check out Steve Okeefe's great web site at its new home here at Slotblog:
The Independent Scratchbuilder
There's much more to come...


#7 Larry Horner

Larry Horner

    On The Lead Lap

  • Full Member
  • PipPipPipPip
  • 463 posts
  • Joined: 18-March 17
  • Gender:Male
  • Location:San Francisco

Posted 22 November 2024 - 10:38 PM

I know it's a little early but when it comes time to paint, that Holman Moody car is gorgeous.


#8 dc-65x

dc-65x

    Grand Champion Poster

  • Subscriber
  • PipPipPipPipPipPipPipPip
  • 6,976 posts
  • Joined: 14-February 06
  • Gender:Male
  • Location:Captain Rick: The only vintage slot car nut in SW Oregon?

Posted 22 November 2024 - 11:29 PM

It sure is Larry, it sure is.    :)


Rick Thigpen
Check out Steve Okeefe's great web site at its new home here at Slotblog:
The Independent Scratchbuilder
There's much more to come...


#9 Dave Crevie

Dave Crevie

    Posting Leader

  • Full Member
  • PipPipPipPipPipPipPip
  • 4,509 posts
  • Joined: 16-February 09

Posted 24 November 2024 - 10:32 AM

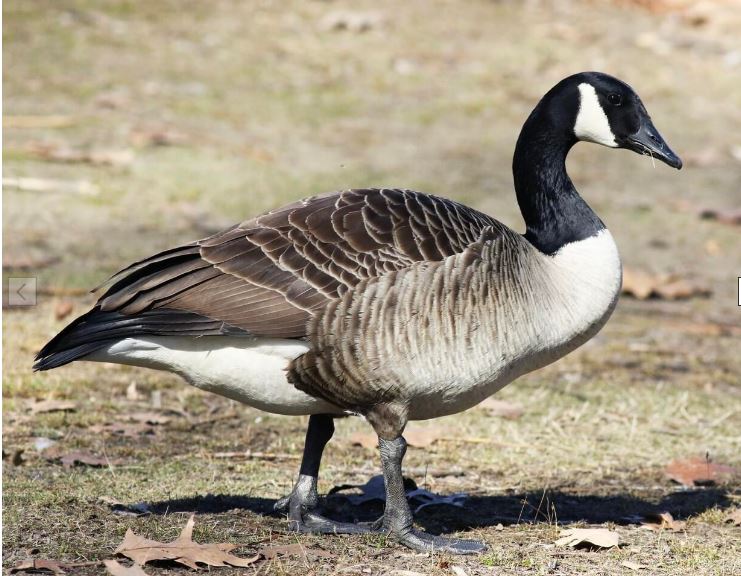
Huh. When I Google "Honker", this is what I get;


aaabiggoose.JPG


Anyway, all levity aside. I have a couple of these re-pops. One I used on a jaildoor frame, all nicely painted and lettered in prototype livery. This one I have been thinking of putting on a wire-and-brass chassis. So I will be watching this build with heightened interest. Probably what I need to get my *** in gear.


IMG_0763.JPG


  • Tex likes this

#10 dc-65x

dc-65x

    Grand Champion Poster

  • Subscriber
  • PipPipPipPipPipPipPipPip
  • 6,976 posts
  • Joined: 14-February 06
  • Gender:Male
  • Location:Captain Rick: The only vintage slot car nut in SW Oregon?

Posted 24 November 2024 - 12:42 PM

Cool looking Honker body Dave.........the goose..........not so much.    :laugh2:    :D


For my "honk'n" motor I think it will be fun to go with a 16D as my last 2 builds have been Mura C-cans. 


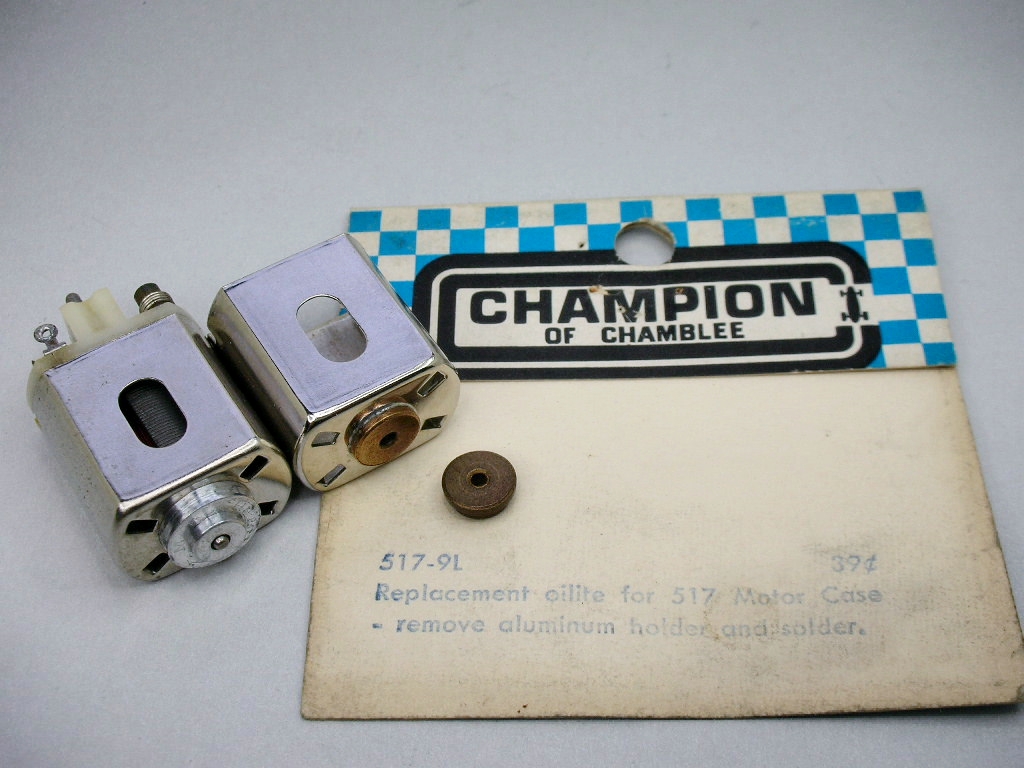
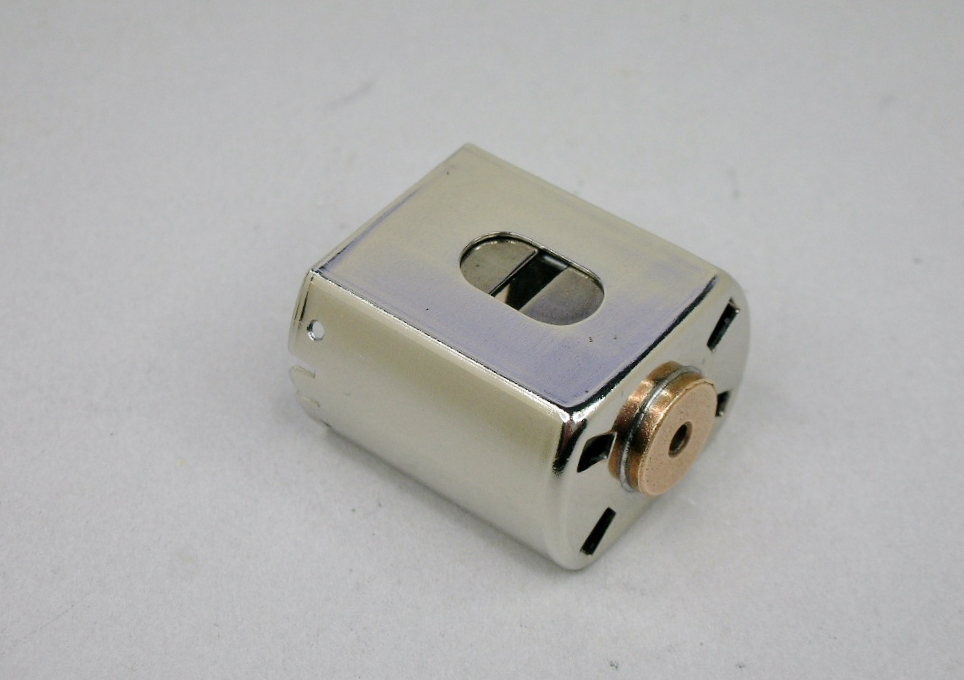
Starting with the motor can, I'm using a 1968 Mabuchi. It's a bit lower profile (about 1/32") than its competitors, the Mura 2-hole A-can on the left and the Champion 517 on the right. I also compared the weight of all 3 (with the magnets and shims I'd be using) and the Mabuchi and Champion were about 3 grams lighter that the big Mura :


motor.JPG


The stock Mabuchi motor on the left with its crappy ball bearing and my reworked can on the right with a Champion oilite bearing installed:


motor (4).JPG


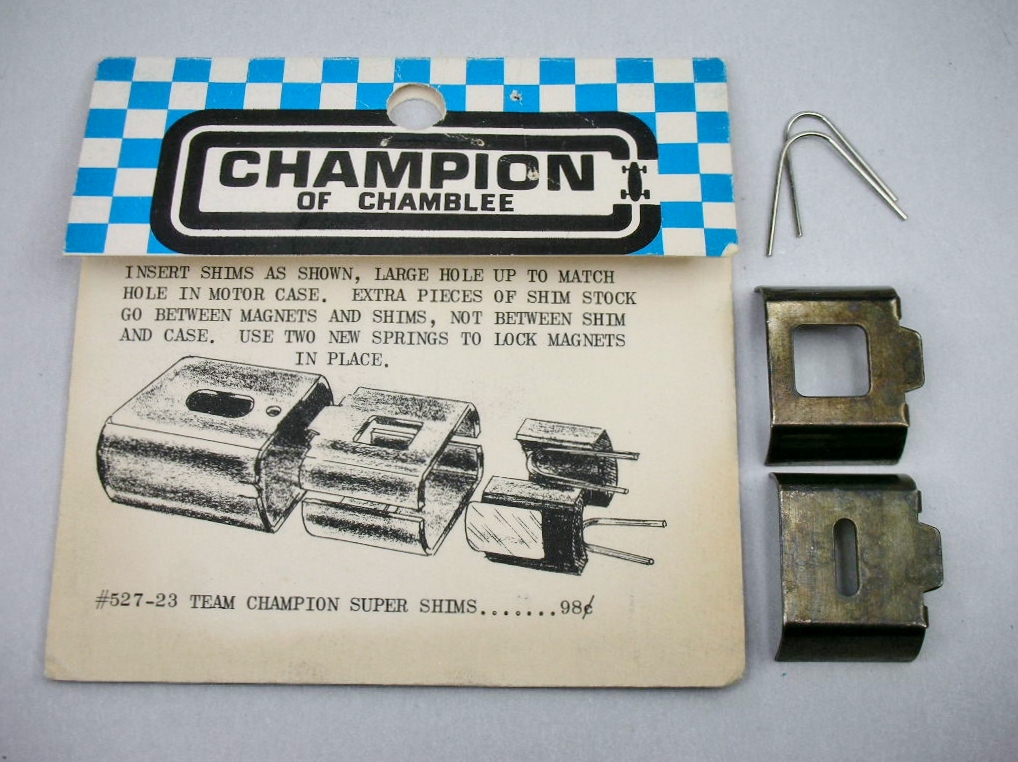
I wanted to use Champion Blue Dot magnets with these Champion 2-piece shims but the combination was a bit too tall for the can:


motor (5).JPG


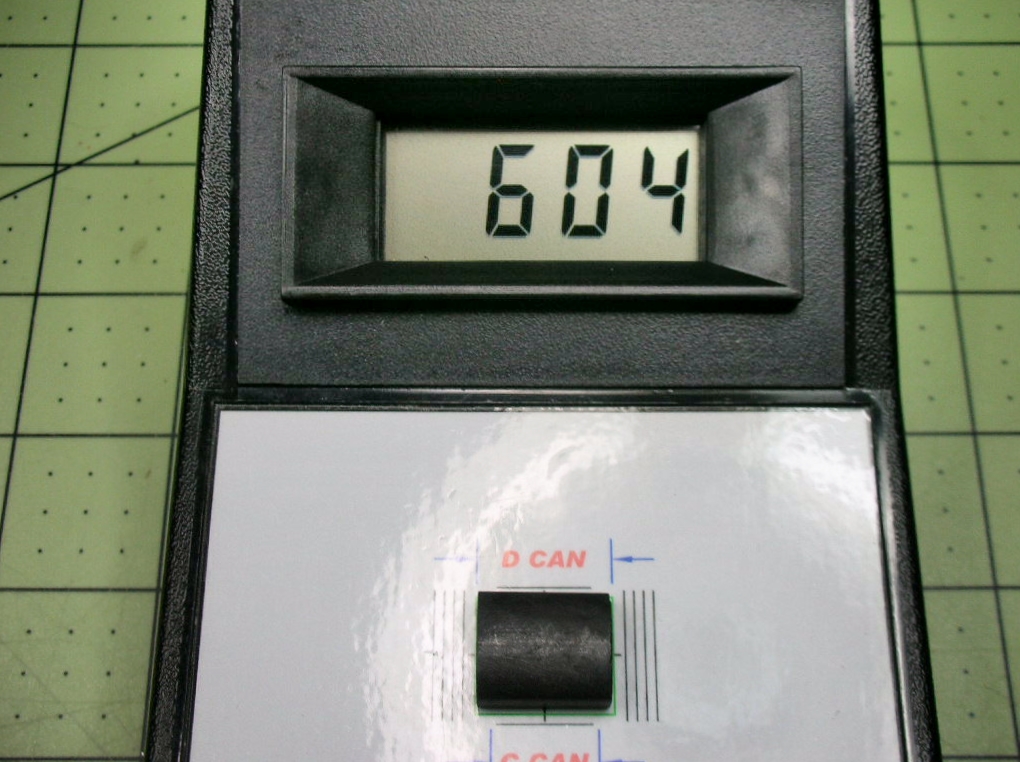
I found these "white dot" magnets which are similar in size to my NOS Champion magnets (some with 4 white dots) but are a bit lower in profile:


motor (6).JPG


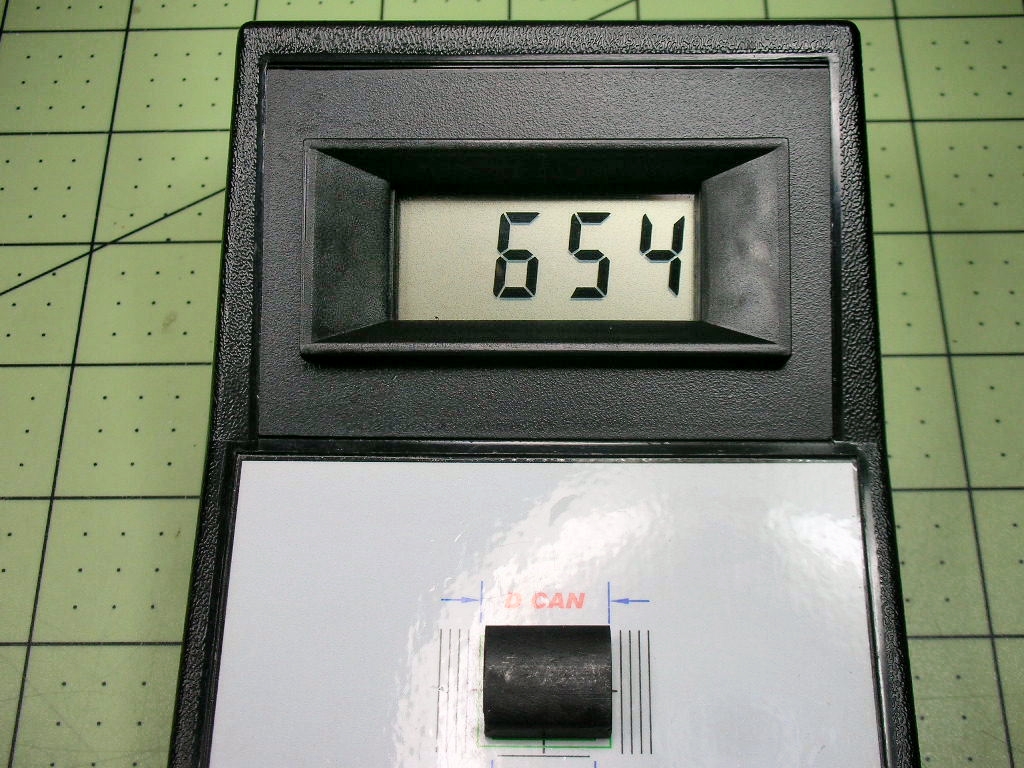
After a good ZAP which charged them up to Blue Dot gauss levels...............


motor (7).JPG


motor (8).JPG


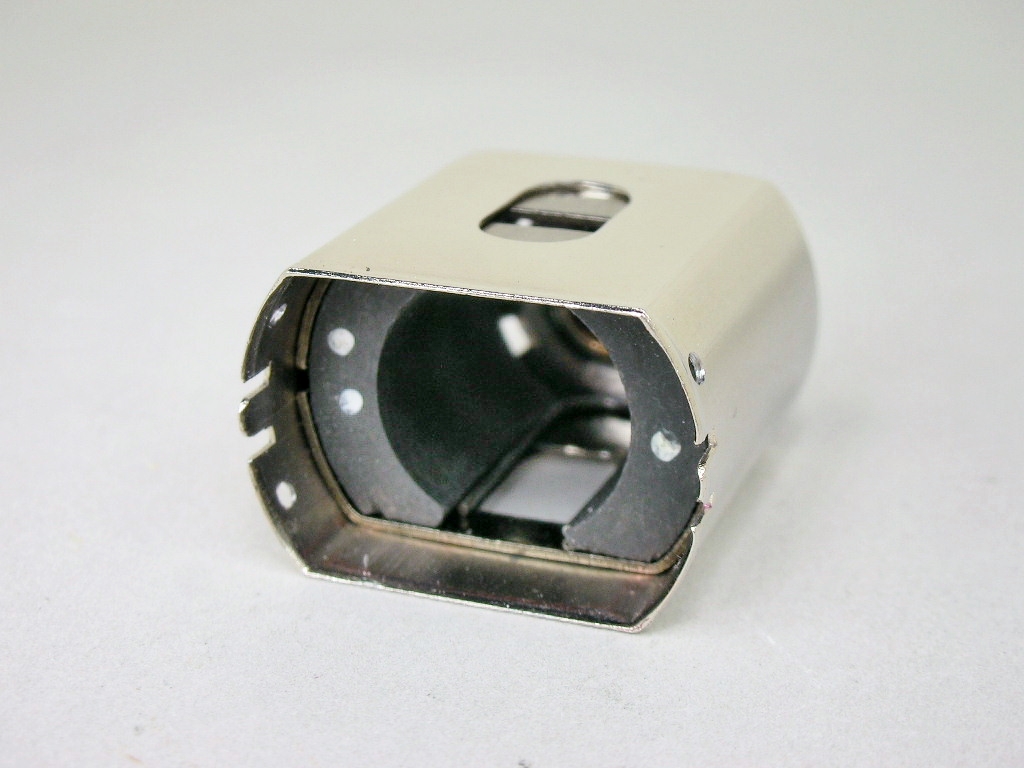
.................they fit perfectly:


motor (9).JPG


motor (16).JPG


The end bell is next.


  • don.siegel, Pablo and Tex like this

Rick Thigpen
Check out Steve Okeefe's great web site at its new home here at Slotblog:
The Independent Scratchbuilder
There's much more to come...


#11 dc-65x

dc-65x

    Grand Champion Poster

  • Subscriber
  • PipPipPipPipPipPipPipPip
  • 6,976 posts
  • Joined: 14-February 06
  • Gender:Male
  • Location:Captain Rick: The only vintage slot car nut in SW Oregon?

Posted 25 November 2024 - 08:36 PM

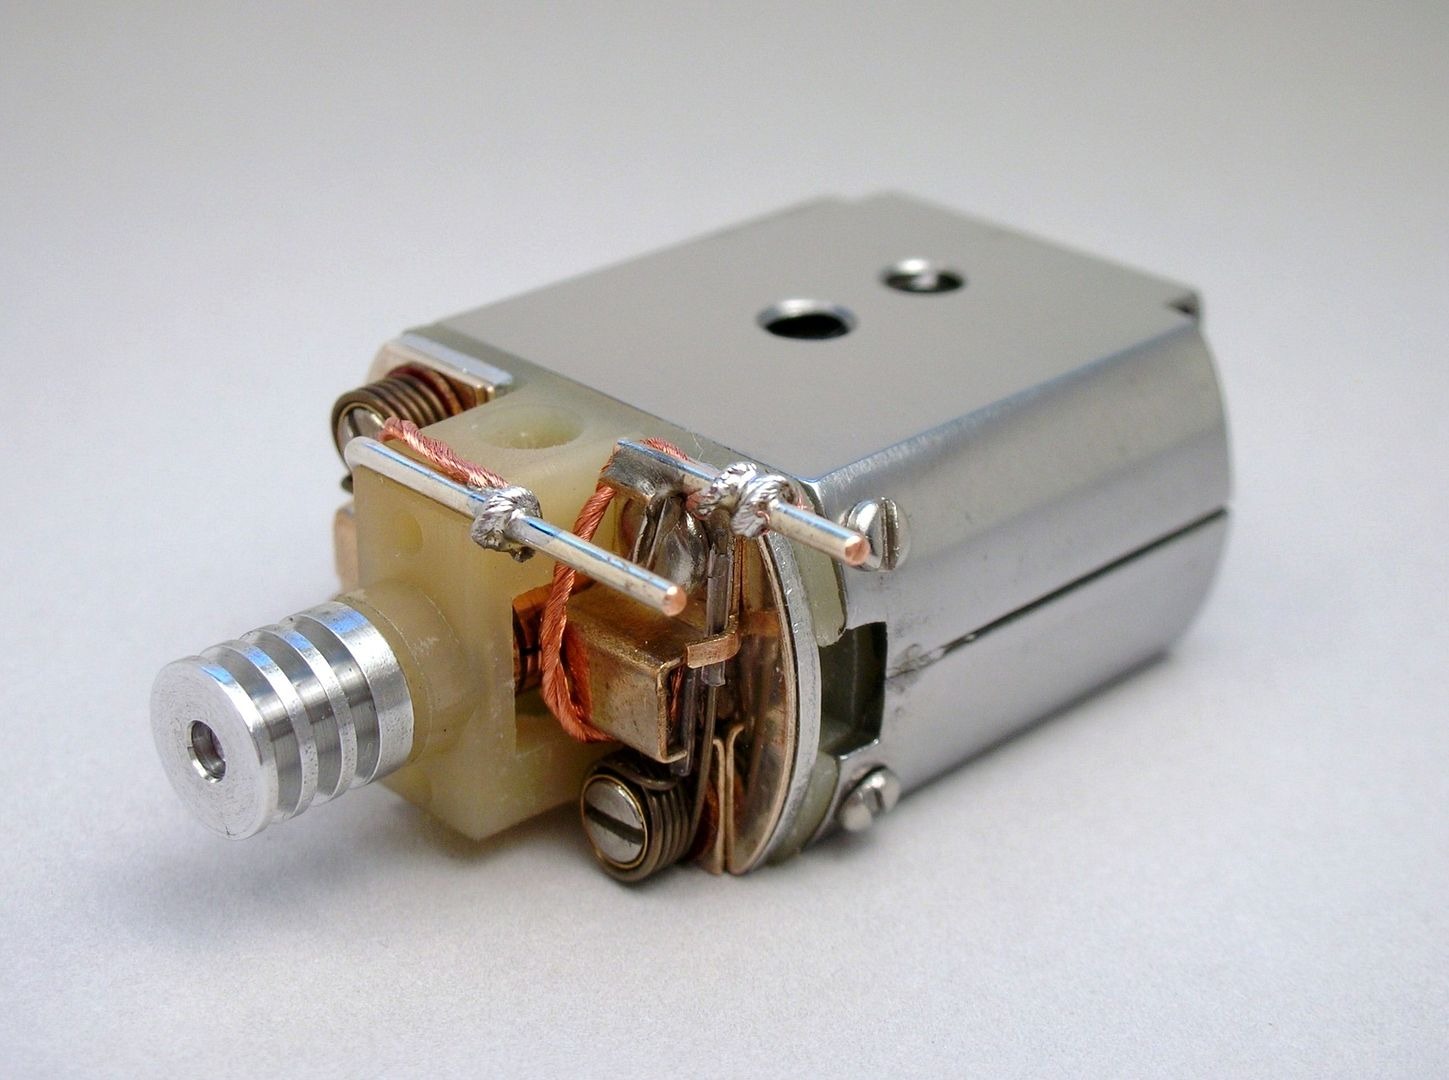
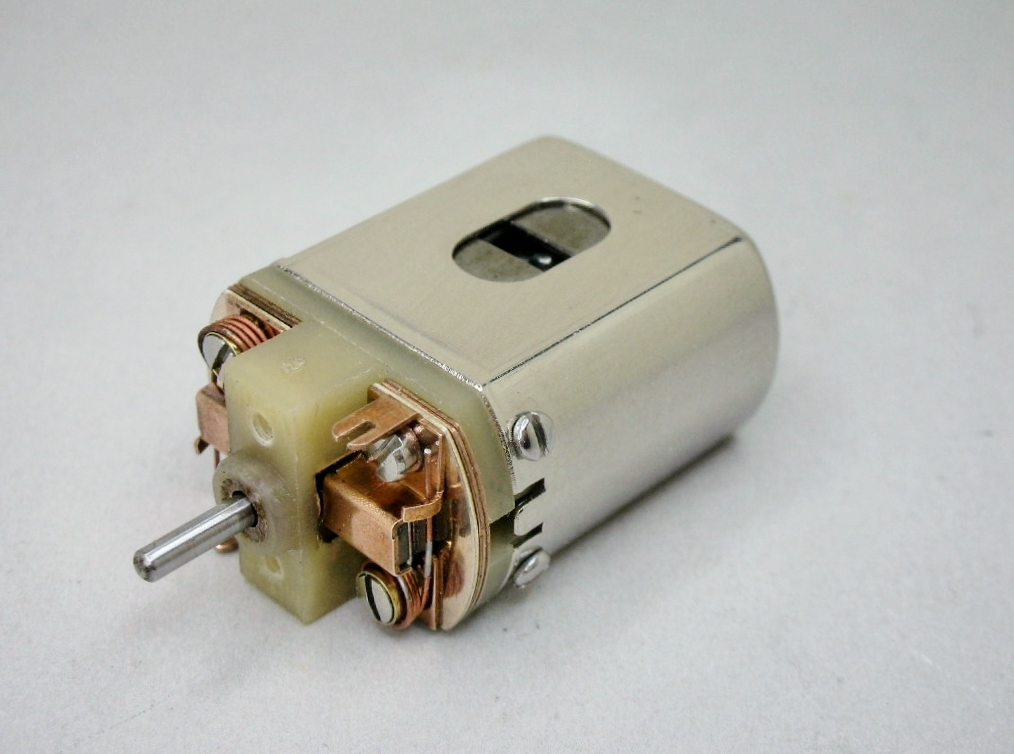
Since I'm building this car in the early 70's, I chose Mura's best A-can endbell. It was patterned after the one on their B-can motor and then used on their great C-can motor.


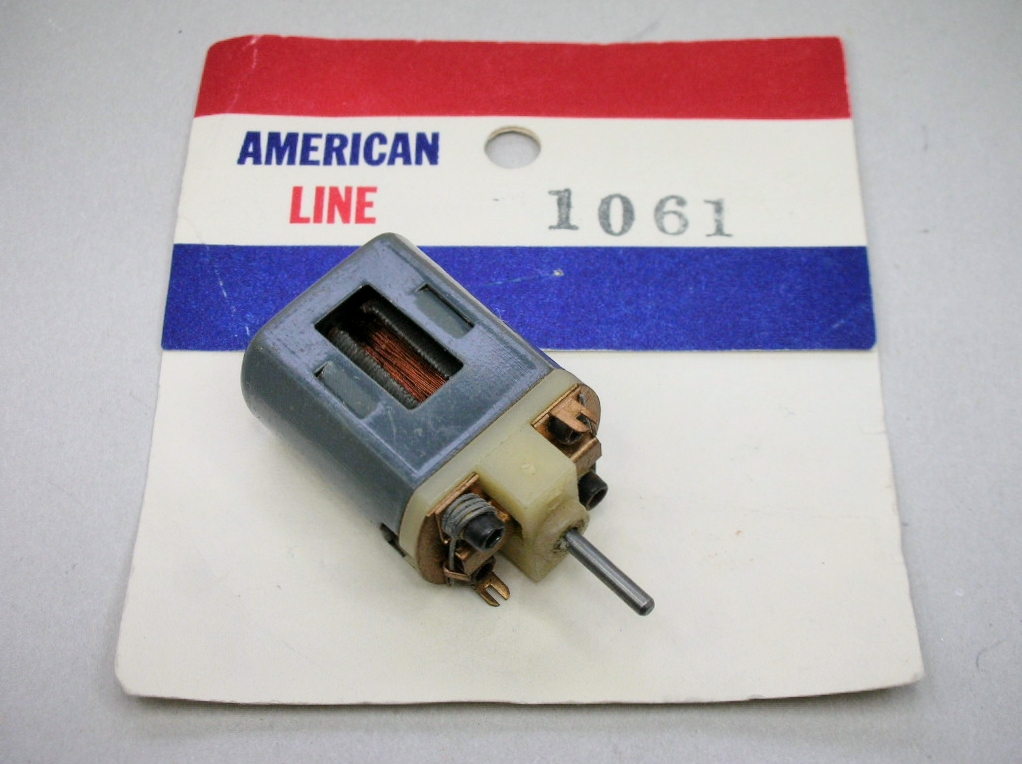
The endbell used to be available assembled onto a stock Mabuchi from REHco under their American Line brand:


motor (2).JPG


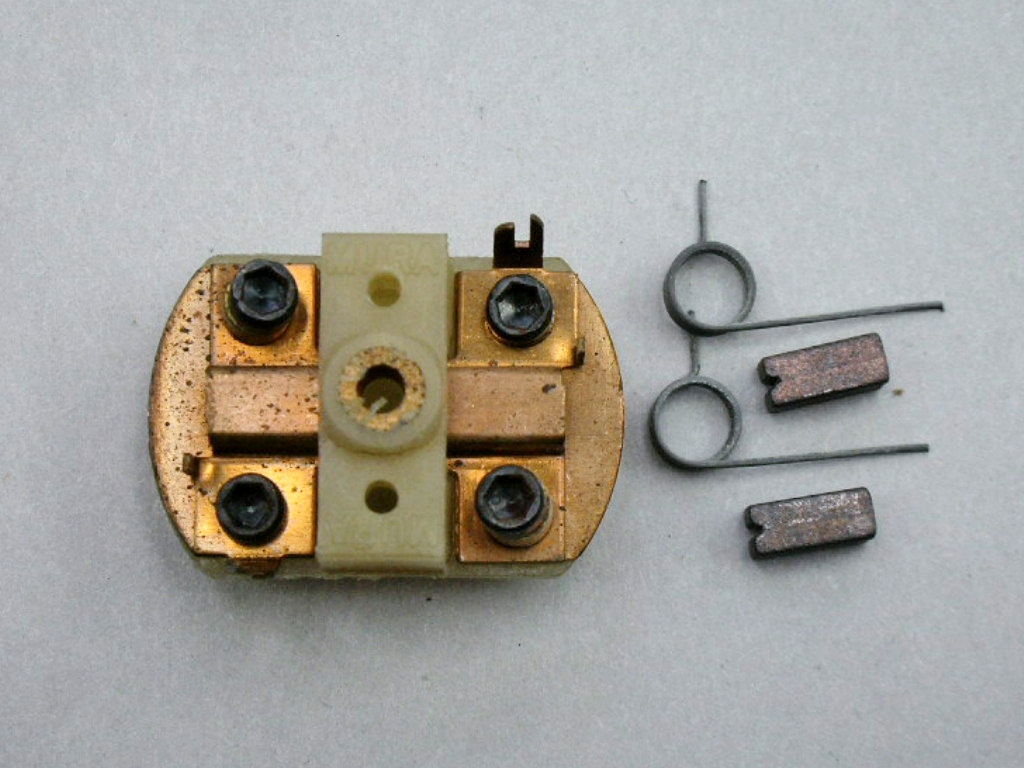
This endbell ditches the previous versions plastic brush spring posts and brush holders buried into the plastic ready to melt down to the center of the earth:


motor (2a).JPG


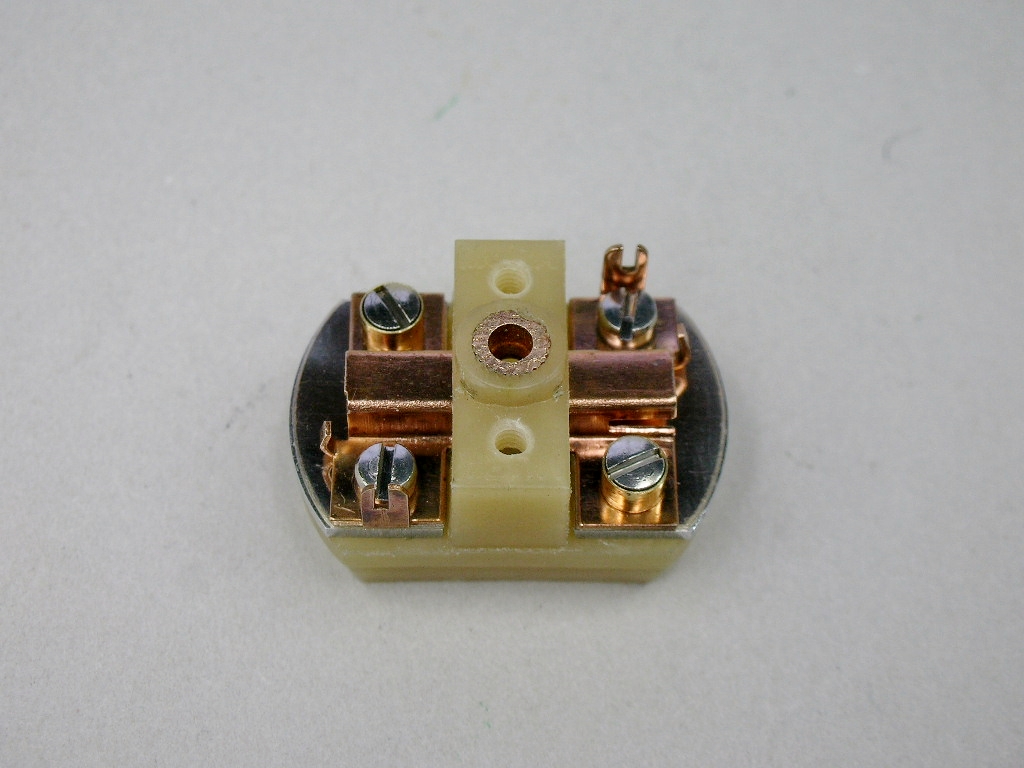
I added Certus Super Proofer thick aluminum and Mura silver plated thin copper brush plates:


motor (1).JPG


All of the endbell parts including modified lower profile brush spring posts and stainless steel machine screws replacing the self tapping stuff:


motor (3).JPG


To attach the endbell to the can I drilled and tapped the old school way of scribed lines and center punch:


drilling endbell mtg holes (2).JPG


A rather tedious process that I actually enjoy way more than detail painting an interior.    :laugh2:   The results can look "factory", at least to my eye:


drilling endbell mtg holes (1).JPG


Finished endbell:


motor (10).JPG


motor (20).JPG


The armature is next.


  • Pablo, Tex and ajd350 like this

Rick Thigpen
Check out Steve Okeefe's great web site at its new home here at Slotblog:
The Independent Scratchbuilder
There's much more to come...


#12 Bill from NH

Bill from NH

    Age scrubs away speed!

  • Full Member
  • PipPipPipPipPipPipPipPip
  • 14,743 posts
  • Joined: 02-August 07
  • Gender:Male
  • Location:New Boston, NH

Posted 25 November 2024 - 10:25 PM

Neat job Rick! We also used to widen the spring slot in each hood by using two Dremel cutoff discs on a mandrel. This was useful when spring insulation was used, particularly the clear tubing that was available then.


Bill Fernald
 
I intend to live forever!  So far, so good.  :laugh2:  :laugh2: 

#13 dc-65x

dc-65x

    Grand Champion Poster

  • Subscriber
  • PipPipPipPipPipPipPipPip
  • 6,976 posts
  • Joined: 14-February 06
  • Gender:Male
  • Location:Captain Rick: The only vintage slot car nut in SW Oregon?

Posted 26 November 2024 - 12:34 PM

Thanks Bill.


When I build a motor with shunts (like the B-motor below) I use clear Teflon tubing too. I widen the brush hood slots with a Dremel cut off disc or a screw slot file from Brownells: 


Pro Car How To 74.jpg


I wasn't sure if the clear tubing I like was used back in the day. Glad to hear that it was Bill.  :victory:


  • Jencar17, Tex, Bill from NH and 1 other like this

Rick Thigpen
Check out Steve Okeefe's great web site at its new home here at Slotblog:
The Independent Scratchbuilder
There's much more to come...


#14 dc-65x

dc-65x

    Grand Champion Poster

  • Subscriber
  • PipPipPipPipPipPipPipPip
  • 6,976 posts
  • Joined: 14-February 06
  • Gender:Male
  • Location:Captain Rick: The only vintage slot car nut in SW Oregon?

Posted 29 November 2024 - 08:45 PM

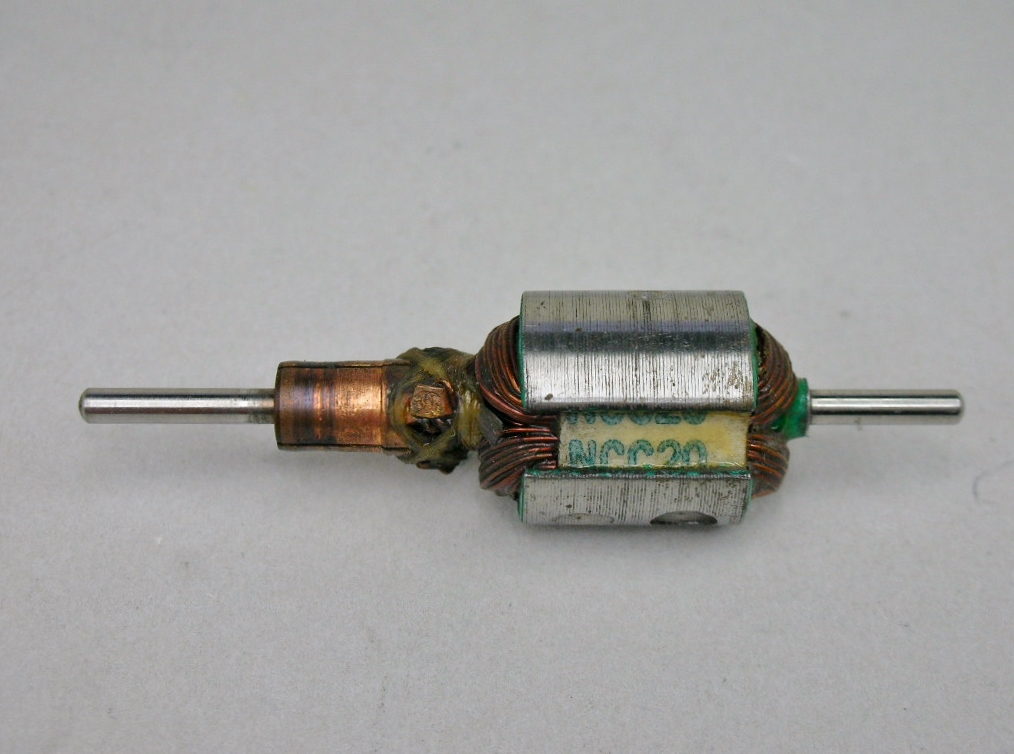
I'm going with a favorite of mine, a good old NCC20 armature for this motor. These arms have had good and easily controllable power and run relatively cool so this puppy is getting the nod:


motor (17).JPG


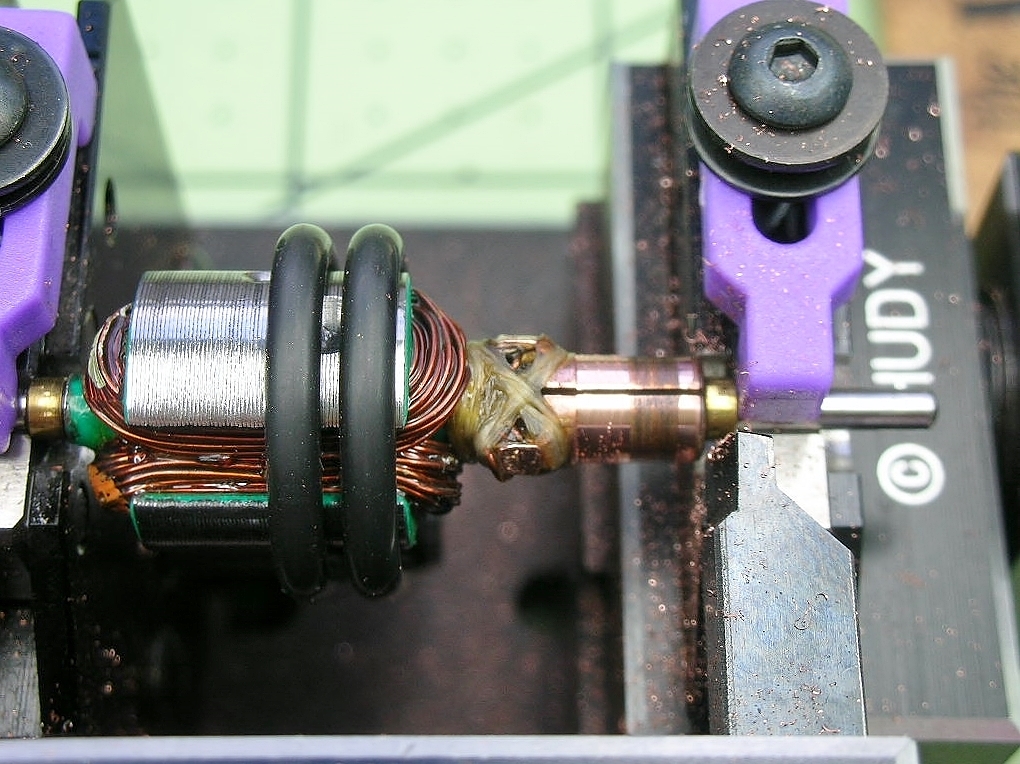
After the first pass in the lathe, "valley of the comm" was reveled:


motor (21).JPG


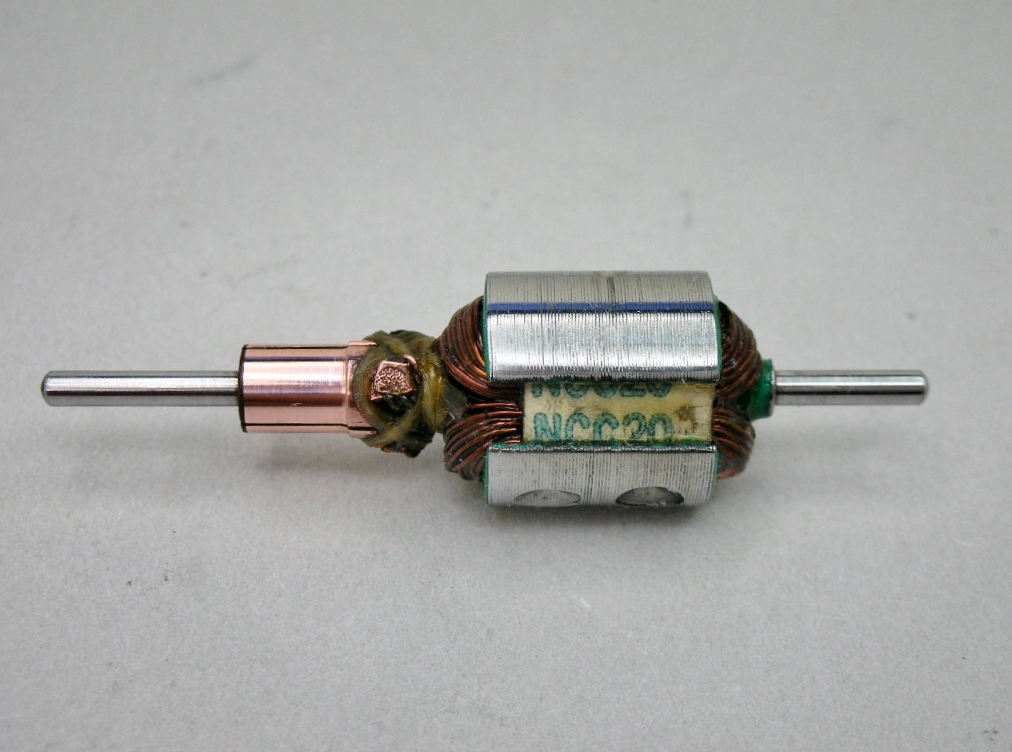
Now that's much better:


motor (11).JPG


motor (12).JPG


The finished motor:


motor (14).JPG


I had to ditch the thick aluminum Certus Super Proofer plates on the end bell. The thickness moved the brush contact slightly off the comm. I replaced them with 2 Mura thin copper plates and things lined up fine.


I also replaced the .016" diameter wire brush springs that came with the American Line motor I pictured. Running at 3 volts the motor drew 2 amps and got hot fast. Switching to .014" diameter wire brush springs the motor now draws just .8 amp and runs cool.


motor (15).JPG


Chassis time.   :)


  • Pablo, Tex and ajd350 like this

Rick Thigpen
Check out Steve Okeefe's great web site at its new home here at Slotblog:
The Independent Scratchbuilder
There's much more to come...


#15 Mad Mark

Mad Mark

    Race Leader

  • Full Member
  • PipPipPipPipPip
  • 761 posts
  • Joined: 03-February 19
  • Gender:Male
  • Location:SoCal

Posted 29 November 2024 - 10:34 PM

Sano motor
Mark Haas

#16 don.siegel

don.siegel

    Grand Champion Poster

  • Subscriber
  • PipPipPipPipPipPipPipPip
  • 5,840 posts
  • Joined: 17-February 06
  • Gender:Male
  • Location:Paris, France

Posted 30 November 2024 - 05:26 AM

Very surprising the difference in current draw with just a slight difference in spring size... 


Don 


  • Half Fast likes this

#17 Bill from NH

Bill from NH

    Age scrubs away speed!

  • Full Member
  • PipPipPipPipPipPipPipPip
  • 14,743 posts
  • Joined: 02-August 07
  • Gender:Male
  • Location:New Boston, NH

Posted 30 November 2024 - 10:21 AM

Not all springs use the same material or are wound exactly alike. That's one reason I keep a Thorp Fiddlestick around.


Bill Fernald
 
I intend to live forever!  So far, so good.  :laugh2:  :laugh2: 

#18 Brian Czeiner

Brian Czeiner

    Race Leader

  • Full Member
  • PipPipPipPipPip
  • 516 posts
  • Joined: 04-March 08
  • Gender:Male
  • Location:Tyler, TX

Posted 30 November 2024 - 11:40 AM

Is there a reason for the second o-ring around the stack on the com lathe or is it just insurance against slippage?


If it's not a Caveman, It's HISTORY!          Support Your local raceways!


cavemanbodeez@gmail.com         CavemanBodeez.com      Womp Mafia


#19 dc-65x

dc-65x

    Grand Champion Poster

  • Subscriber
  • PipPipPipPipPipPipPipPip
  • 6,976 posts
  • Joined: 14-February 06
  • Gender:Male
  • Location:Captain Rick: The only vintage slot car nut in SW Oregon?

Posted 30 November 2024 - 12:33 PM

Thanks Mark.    :D


I used these Certus springs Don:


McLarenMk8A-12.jpg


They "felt" much lighter. After all these years, I haven't run across a Thorp or Sonic fiddlestick yet Bill.  :unknw:


Brian, I'm using two o-rings in the hope that if 1 is good 2 must be better.    :crazy:


Actually, I don't think using 2 o-rings can hurt and it might possibly help to reduce any vibration in the arm that would influence the surface finish of the cut........but who knows?


Rick Thigpen
Check out Steve Okeefe's great web site at its new home here at Slotblog:
The Independent Scratchbuilder
There's much more to come...


#20 Bill from NH

Bill from NH

    Age scrubs away speed!

  • Full Member
  • PipPipPipPipPipPipPipPip
  • 14,743 posts
  • Joined: 02-August 07
  • Gender:Male
  • Location:New Boston, NH

Posted 30 November 2024 - 04:04 PM

If 1 is good, four will fit.  :D  I never saw multiple drive belts used either. I own an older Cobra comm lathe that centers an O-ring in the middle of a stack, unless you adjust the tail "V" block closer to fit a short-stack arm such as a "C-12". 


Bill Fernald
 
I intend to live forever!  So far, so good.  :laugh2:  :laugh2: 

#21 dc-65x

dc-65x

    Grand Champion Poster

  • Subscriber
  • PipPipPipPipPipPipPipPip
  • 6,976 posts
  • Joined: 14-February 06
  • Gender:Male
  • Location:Captain Rick: The only vintage slot car nut in SW Oregon?

Posted 30 November 2024 - 04:13 PM

Inever saw multiple drive belts used either..................


  Maybe I'll be a trendsetter.   :shok:   I could even cut another groove in the lathe pulley and run THREE o-rings!    :laugh2:


  • SpeedyNH likes this

Rick Thigpen
Check out Steve Okeefe's great web site at its new home here at Slotblog:
The Independent Scratchbuilder
There's much more to come...


#22 Bill from NH

Bill from NH

    Age scrubs away speed!

  • Full Member
  • PipPipPipPipPipPipPipPip
  • 14,743 posts
  • Joined: 02-August 07
  • Gender:Male
  • Location:New Boston, NH

Posted 30 November 2024 - 07:25 PM

I'll attribute that to your background as a machinist.   :laugh2:


Bill Fernald
 
I intend to live forever!  So far, so good.  :laugh2:  :laugh2: 

#23 dc-65x

dc-65x

    Grand Champion Poster

  • Subscriber
  • PipPipPipPipPipPipPipPip
  • 6,976 posts
  • Joined: 14-February 06
  • Gender:Male
  • Location:Captain Rick: The only vintage slot car nut in SW Oregon?

Posted 01 December 2024 - 12:55 PM

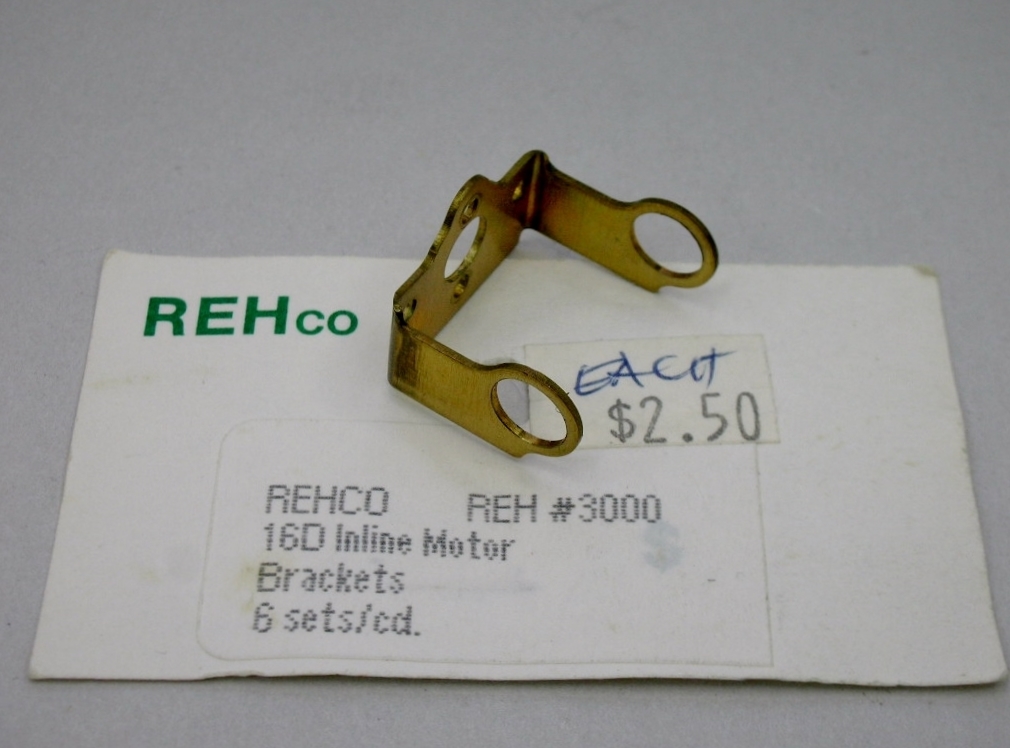
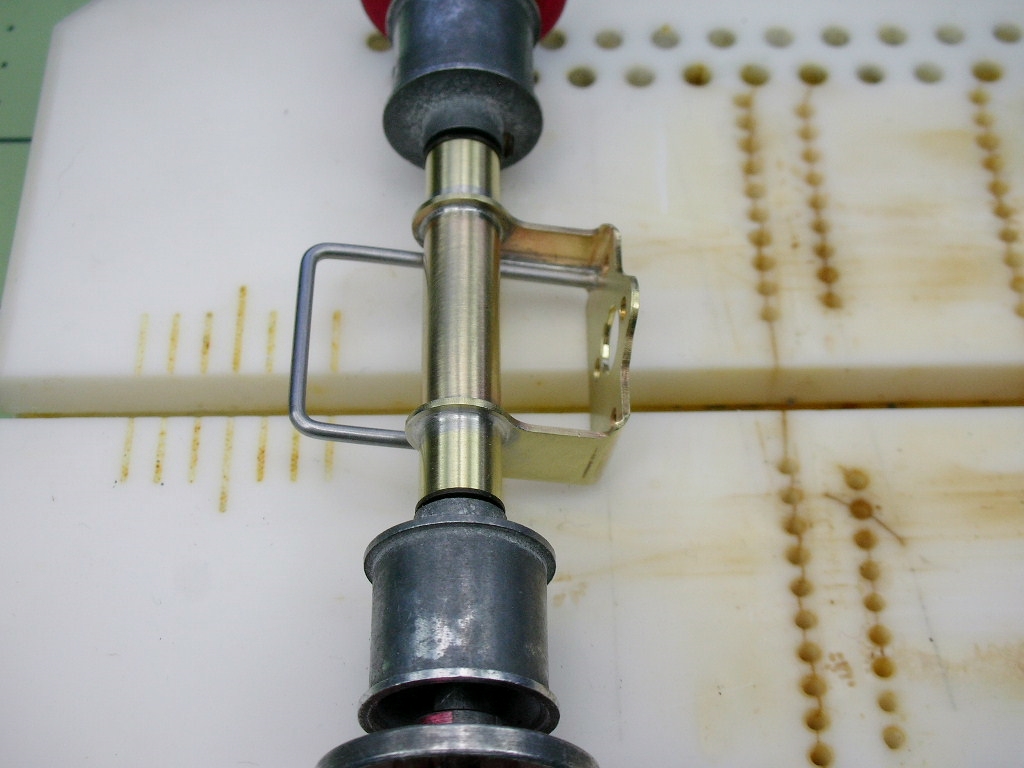
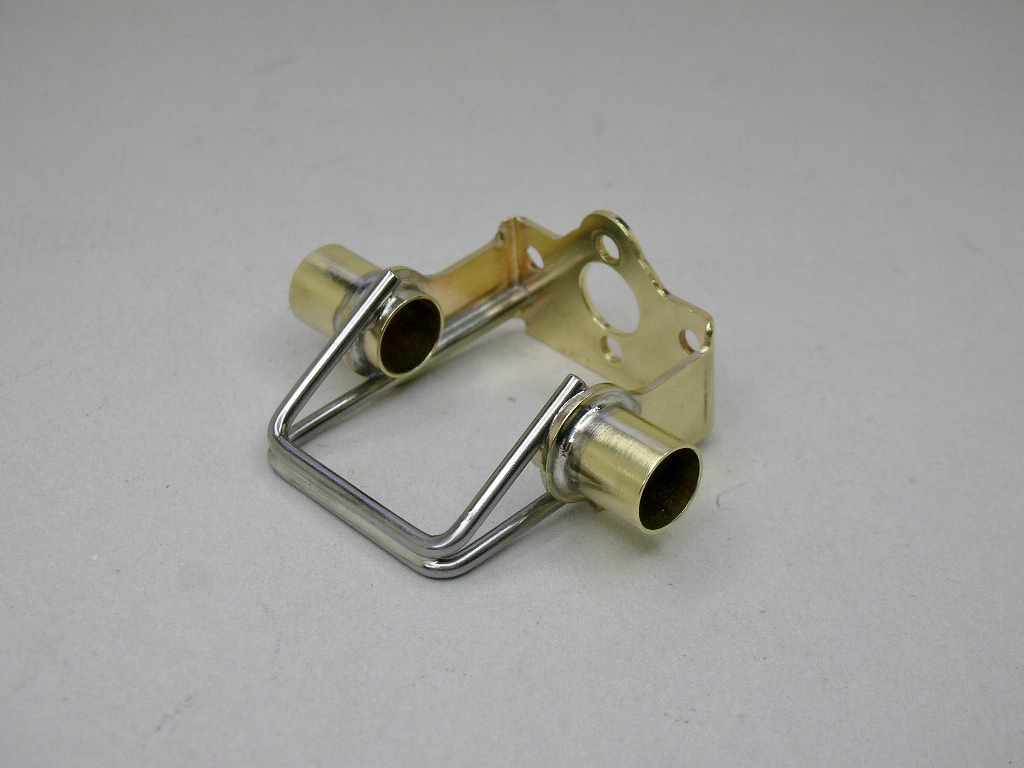
My last 2 builds have been anglewinders. This one is going to be an inline starting with the good old REHco bracket:
 
hoonker chassis (1).JPG
 
The bracket was opened up for 9/32" tube and the first U-brace added:
 
hoonker chassis (2).JPG
 
The second brace:
 
hoonker chassis (3).JPG
 
The center of the tubing cut out and everything cleaned up:
 
hoonker chassis (4).JPG
 
hoonker chassis (5).JPG
 
To fit the scale Lancer Honker body the chassis will be build for these specs:
 
  3 13/16" wheelbase
 
  2 7/8" overall chassis width
 
  2 7/8" front track width
 
  3" rear track width
 
  15/16" front tires
 
  1" diameter tires
 
  1/16" track clearance


I want to have some fun with my scale bodies like my Lancer Honker so I’m going to open things up from my usual approach to vintage building by doing the following:

  • Approach this build as if I was a hobbyist back in the early 70’s building just for the fun of it.
  • Use any vintage or repop vintage component available from the early 1960’s to the early 1970’s.
  • Use any style of vintage motor and chassis design from the early 1960’s to the early 1970’s.
OK, time to take my time machine back to the early 1970’s and get to work on my Honker.


:dance3:  :dance3:  :dance3:


  • don.siegel, Pablo, Tex and 1 other like this

Rick Thigpen
Check out Steve Okeefe's great web site at its new home here at Slotblog:
The Independent Scratchbuilder
There's much more to come...


#24 dc-65x

dc-65x

    Grand Champion Poster

  • Subscriber
  • PipPipPipPipPipPipPipPip
  • 6,976 posts
  • Joined: 14-February 06
  • Gender:Male
  • Location:Captain Rick: The only vintage slot car nut in SW Oregon?

Posted 03 December 2024 - 08:40 PM

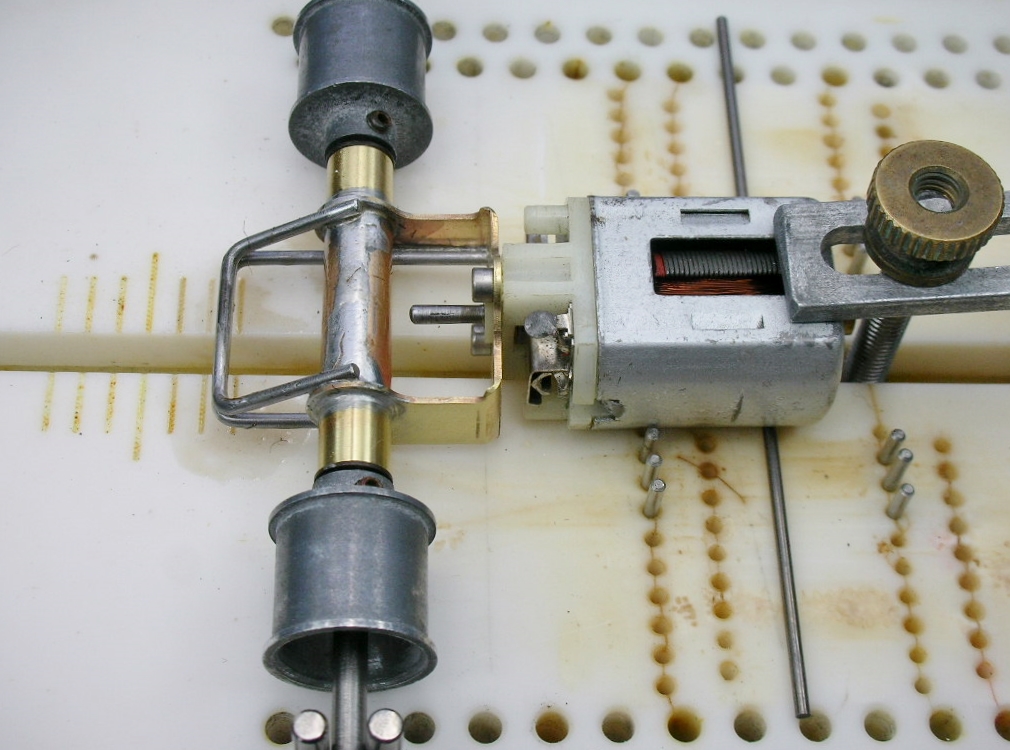
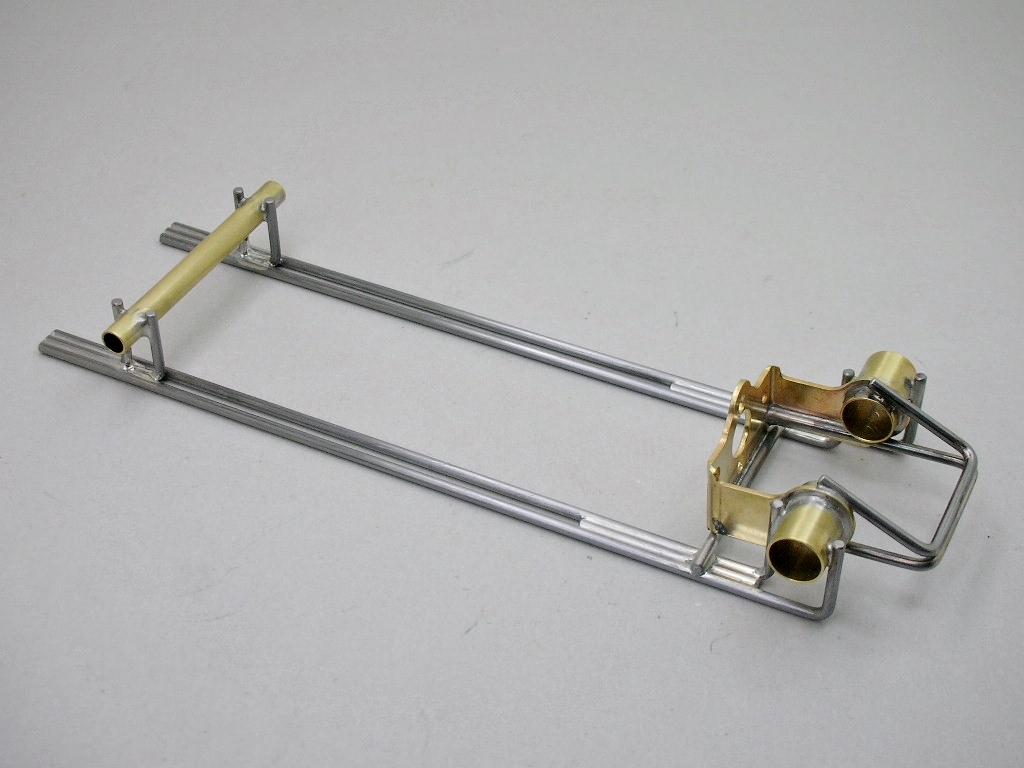
Working on my center section. Here's everything in the Rick's jig ready to solder:


chassis honker (8).JPG


And all soldered up:


chassis honker (14).JPG


Two 1/16" piano wire rails per side and the width set for a 1" wide drop arm:


chassis honker (11).JPG


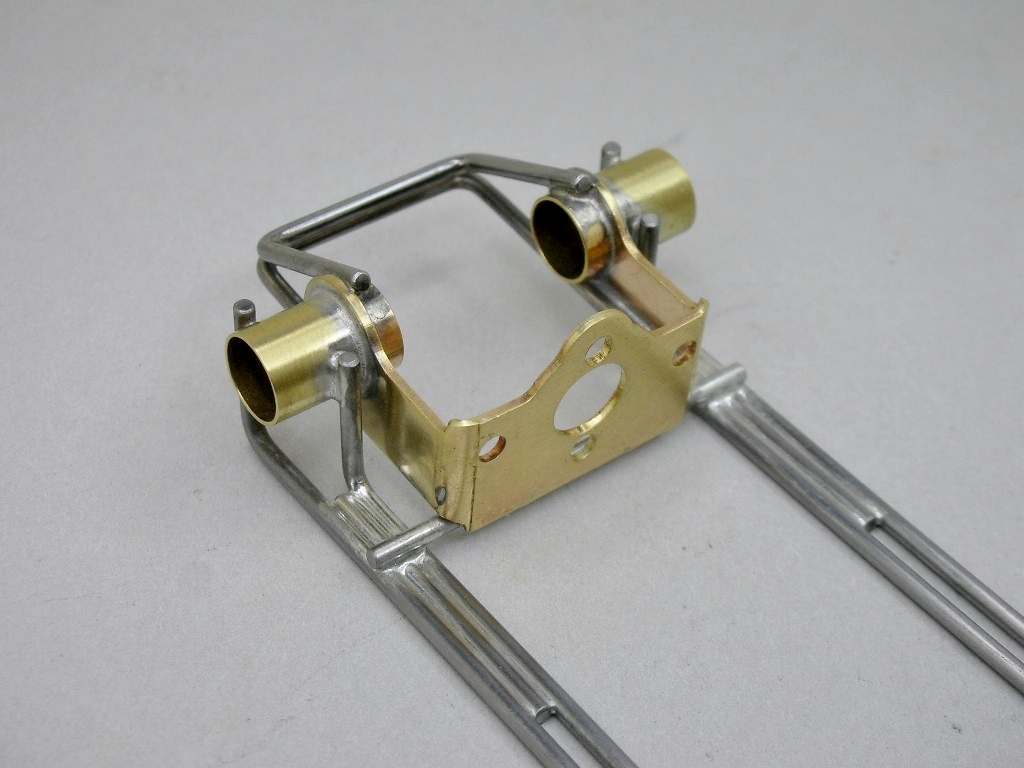
A straight piece of piano wire connects the left and right side rails to the axle bracket:


chassis honker (13).JPG


chassis honker (12).JPG


The drop arm is next.


  • Pablo, vfr750, Tex and 2 others like this

Rick Thigpen
Check out Steve Okeefe's great web site at its new home here at Slotblog:
The Independent Scratchbuilder
There's much more to come...


#25 Larry Horner

Larry Horner

    On The Lead Lap

  • Full Member
  • PipPipPipPip
  • 463 posts
  • Joined: 18-March 17
  • Gender:Male
  • Location:San Francisco

Posted 03 December 2024 - 08:59 PM

I've built several frames in the past that use the REHco motor bracket and it's always bugged me that they are essentially up in the air. I really like your solution to the problem and since I still have lots of REHco brackets in my possession, I'm going to have to steal it!  :shok:


Electric Dreams Online Shop