
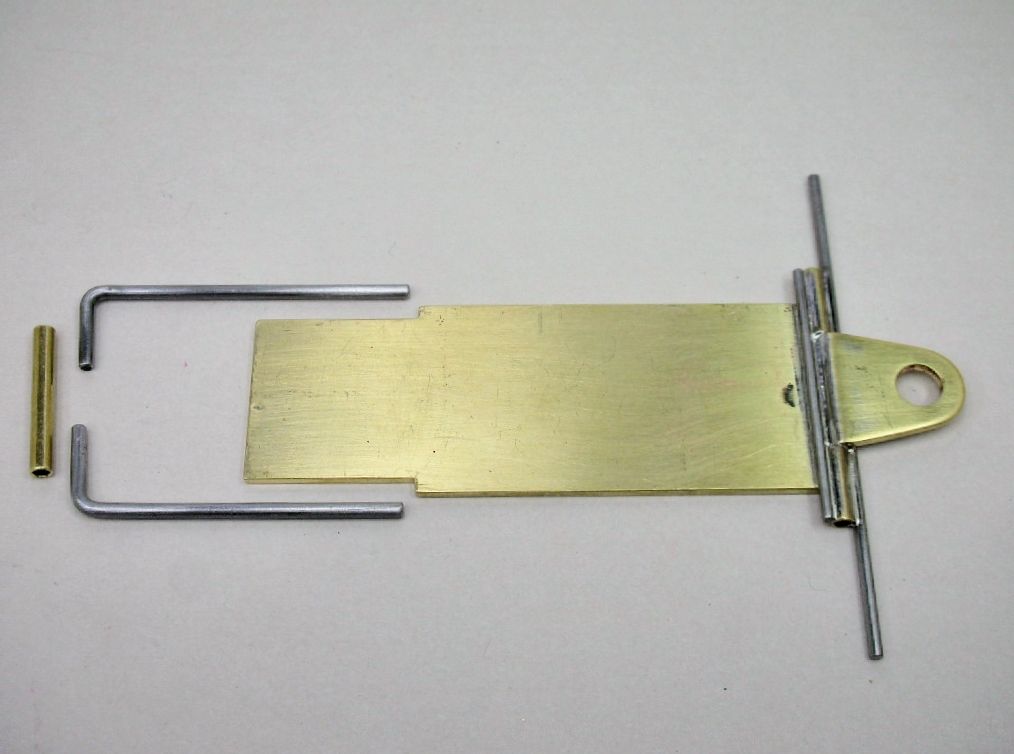
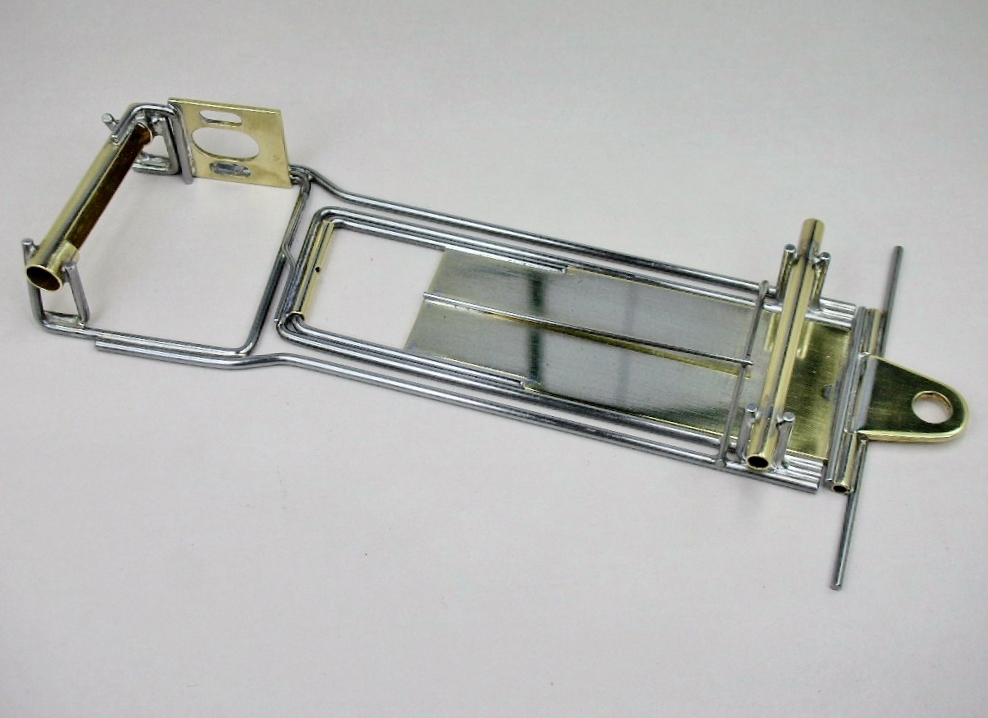
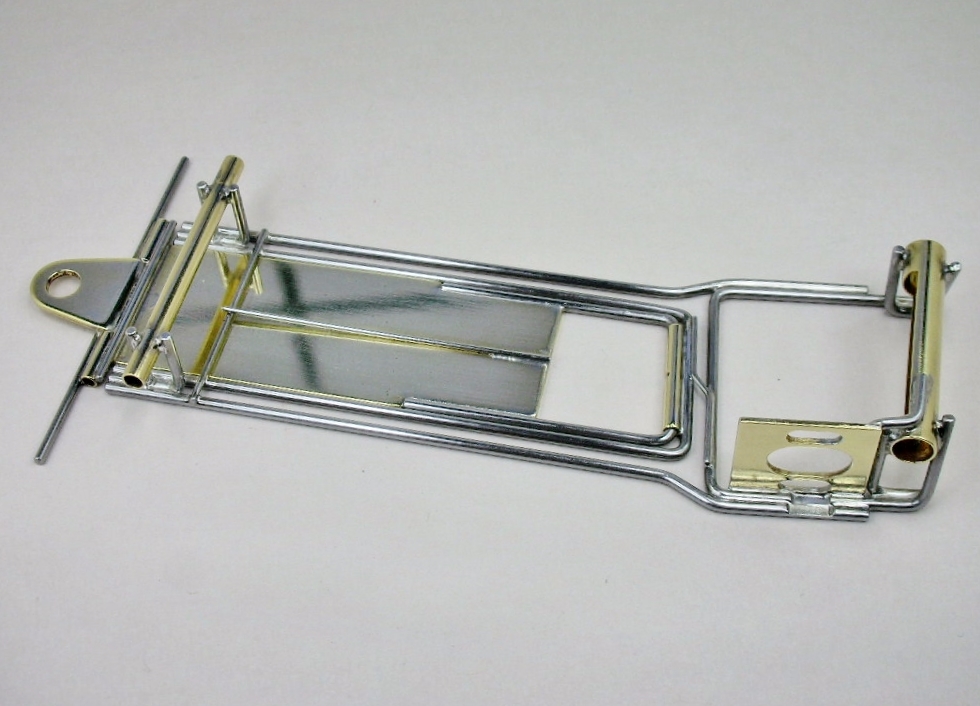
The center section all trimmed and cleaned up:
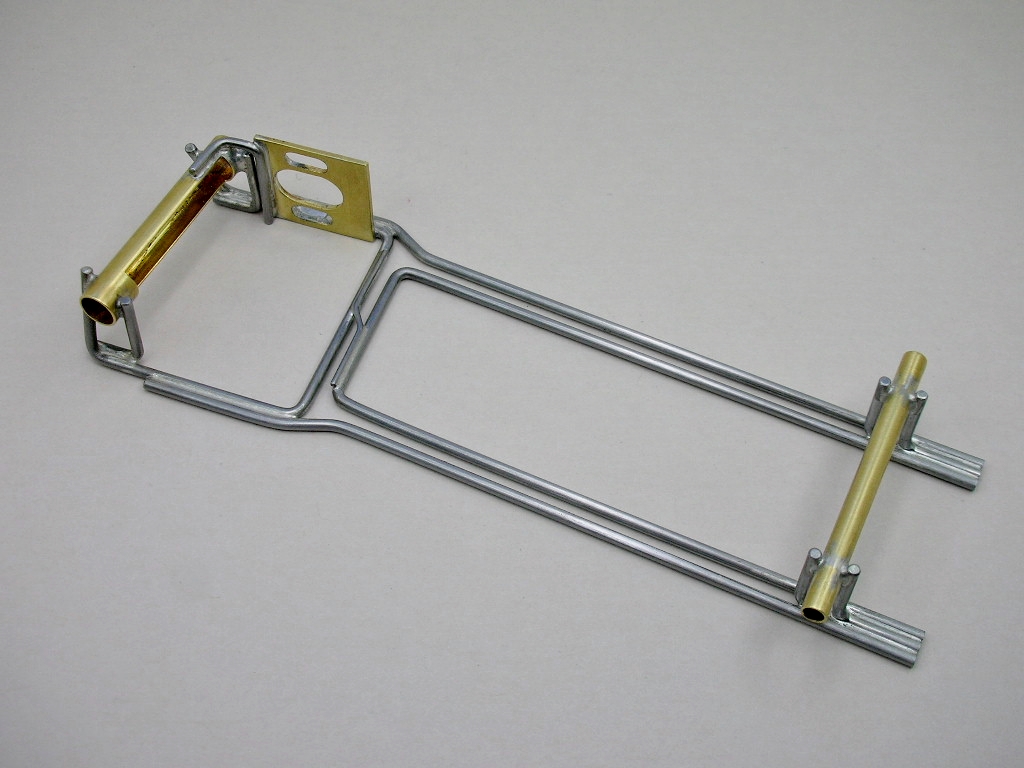
Here's the little flexure gizmo and it does flex at this point:
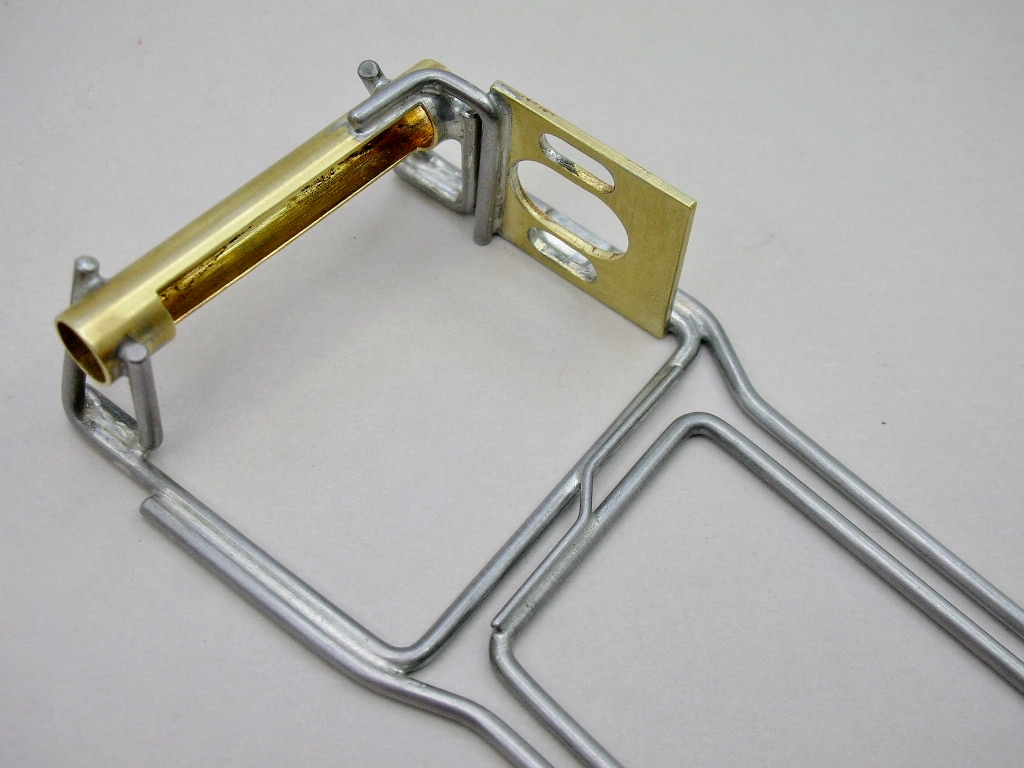
I like it so far:
The drop arm is next.......

|

Grand Champion Poster

Posted 21 February 2025 - 06:16 PM
The center section all trimmed and cleaned up:
Here's the little flexure gizmo and it does flex at this point:
I like it so far:
The drop arm is next.......
Rick Thigpen
Check out Steve Okeefe's great web site at its new home here at Slotblog:
The Independent Scratchbuilder
There's much more to come...
Age scrubs away speed!

Posted 21 February 2025 - 07:41 PM
Perhaps that Aquirre F-1 chassis was built that way for a little added flex. The photos I have of a Russ Aguirre sportscar chassis has the inner rail "U" tight to the front of the motor box & soldered. Of course, each chassis could have been built to run on a different specific track.

Grand Champion Poster
Posted 22 February 2025 - 12:26 PM
Flex it does Bill. Time will tell if it's helpful in this skinny anglewinder with tall tires. 
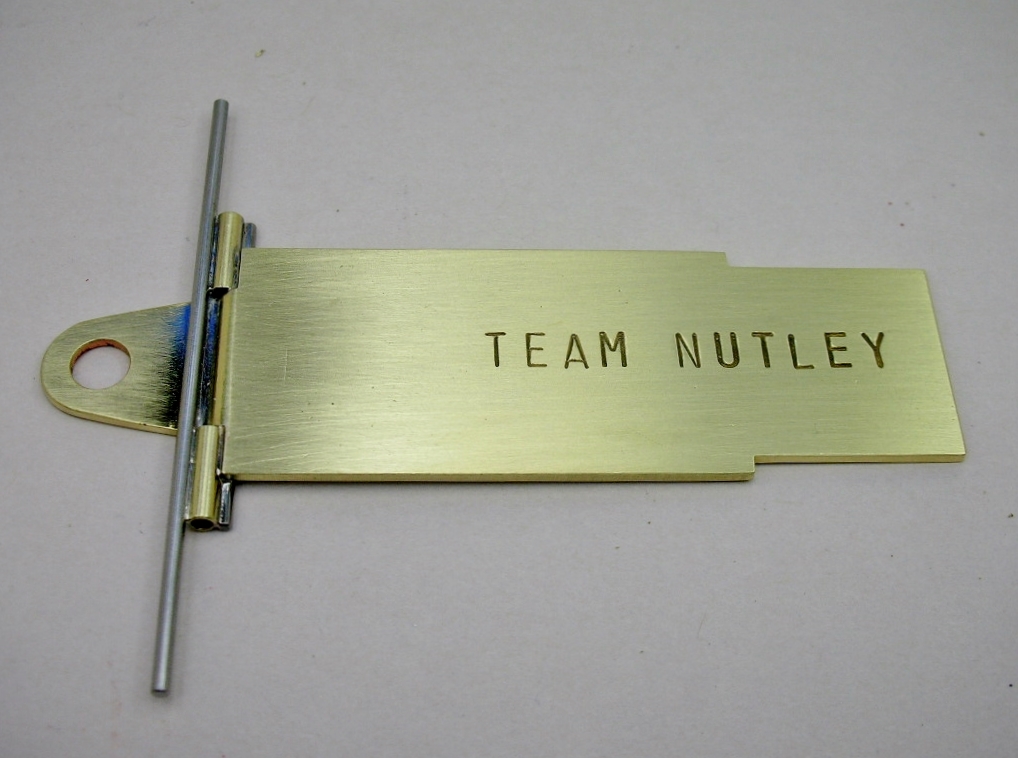
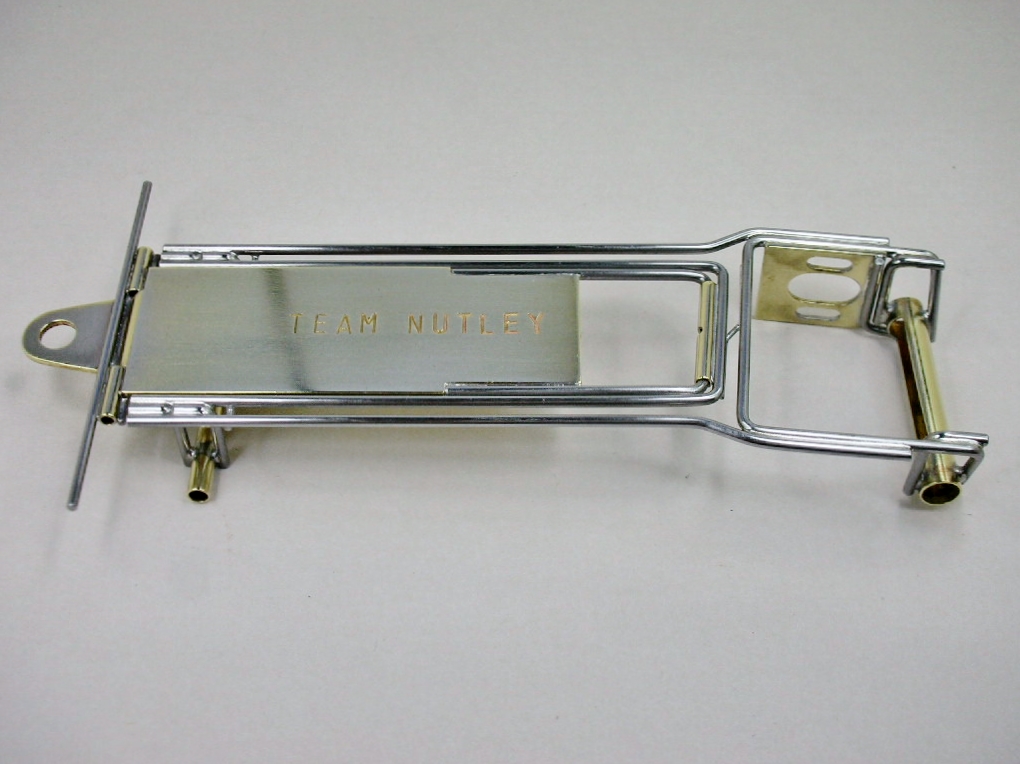
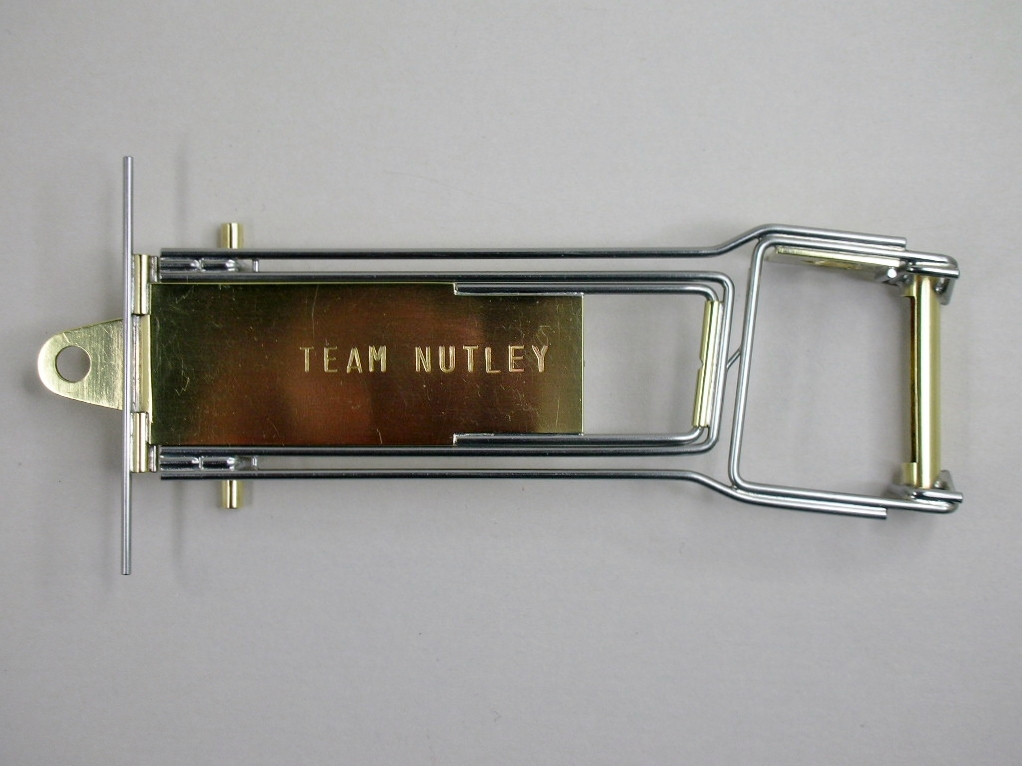
A .050" Team Nutley 1 1/4" wide drop arm on top. My used example on the bottom cut down to 7/8" with additional cuts for the 1/16" piano wire attachments:

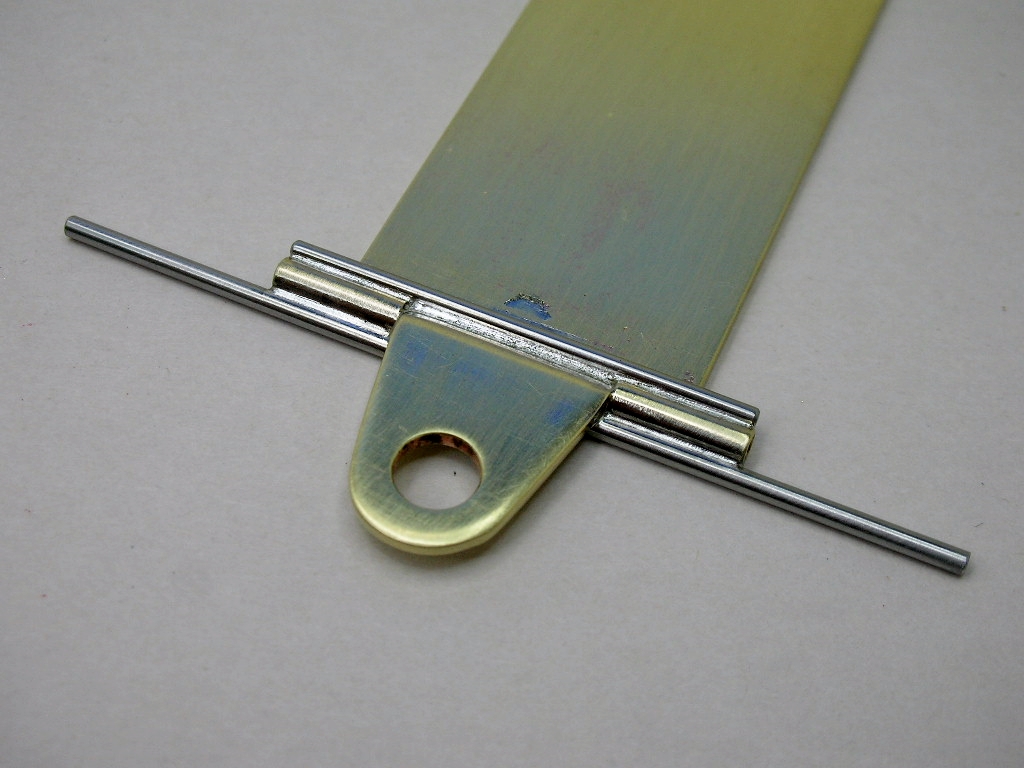
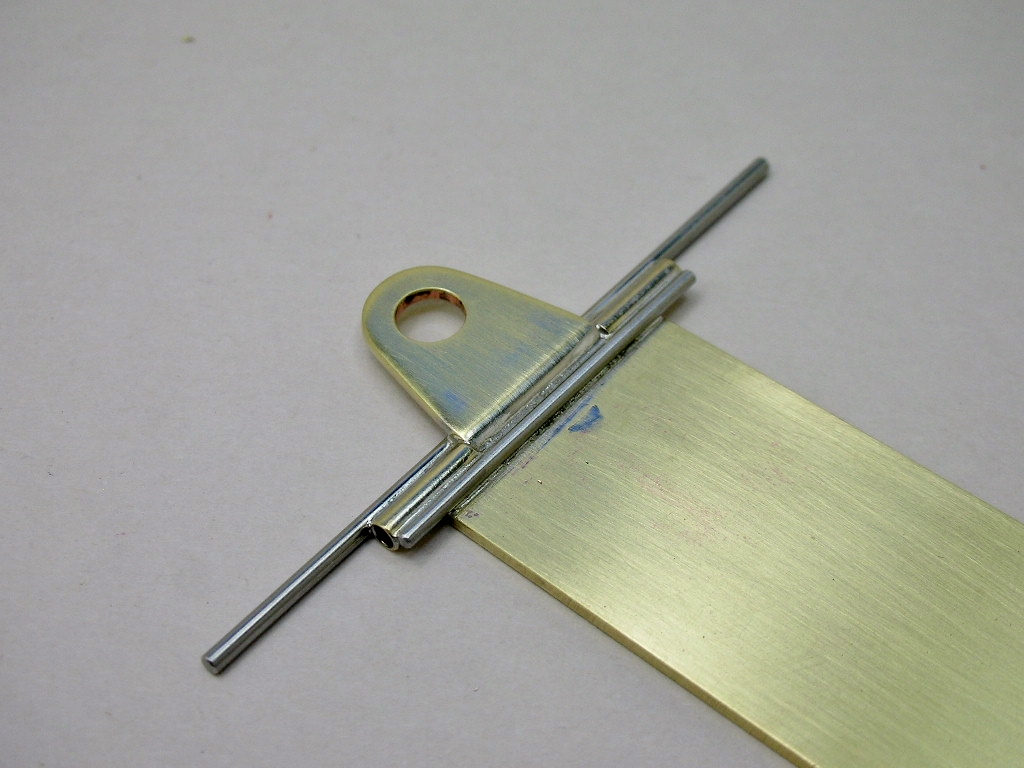
In the jig to attach the plumber hinge tubes, their reinforcement and front bumper:
Cleaned up:
Rick Thigpen
Check out Steve Okeefe's great web site at its new home here at Slotblog:
The Independent Scratchbuilder
There's much more to come...
Grand Champion Poster
Posted 19 March 2025 - 11:18 AM
With my scale bodied King Cobra Can Am finished I'm back working on the Honker. 
It just looks so cool with the engine velocity stacks sitting at least as high as the top of the drivers helmet:
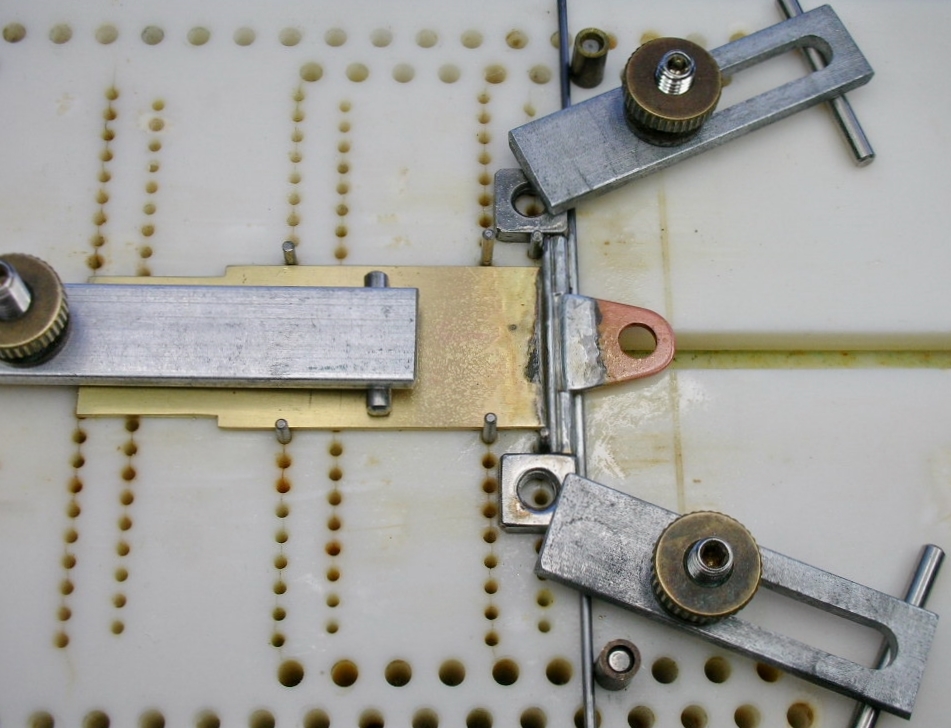
Back to the chassis. Before attaching the drop arm I added an upward stop cross bar. For it to sit flush with the arm the main rails needed to be notched:

I used a screw slot repair file from Brownells guided by pins in my Rick's jig :
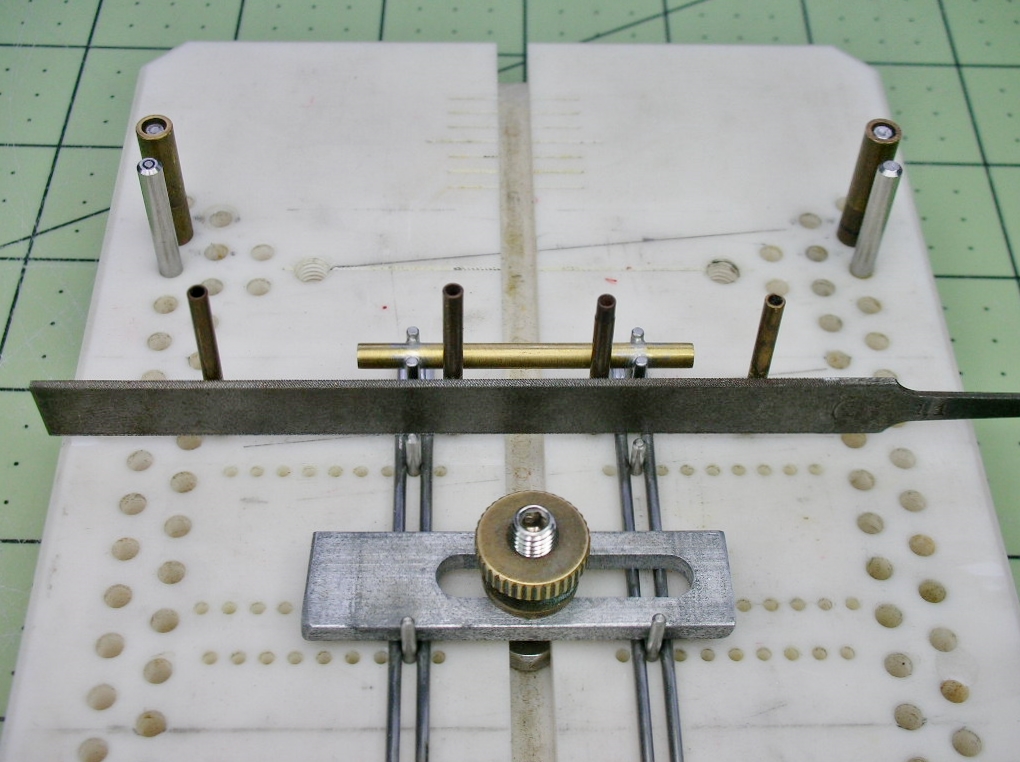
Brass tubes slipped over the pins rolled as the file moved back and forth to cut the notches:
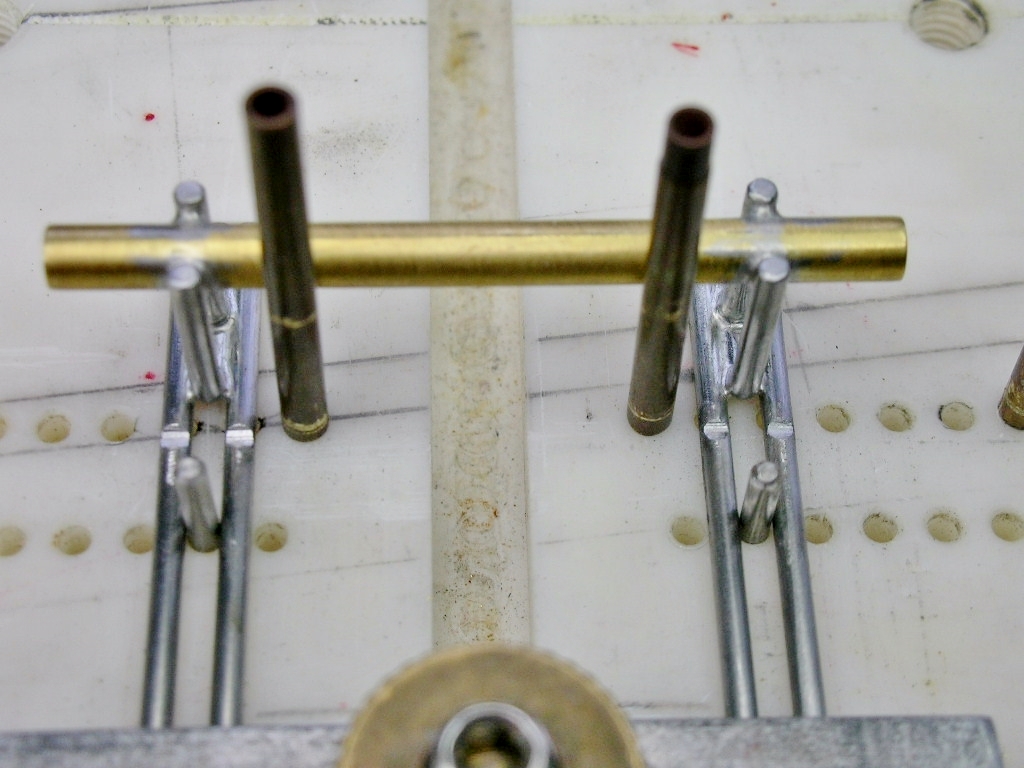
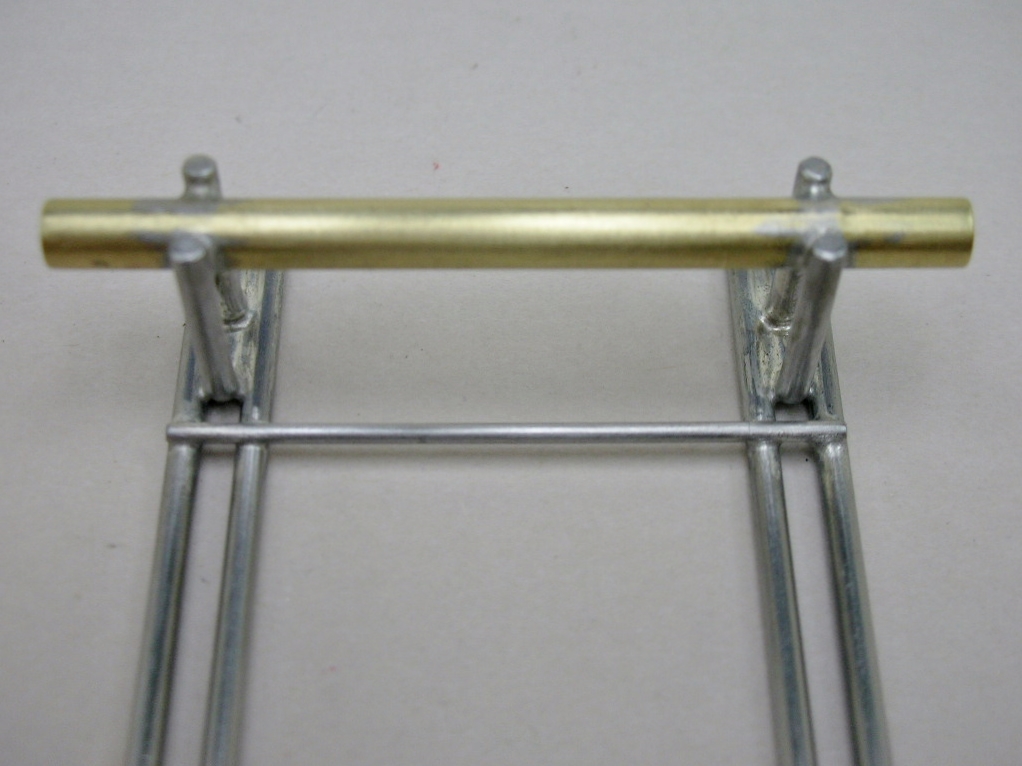
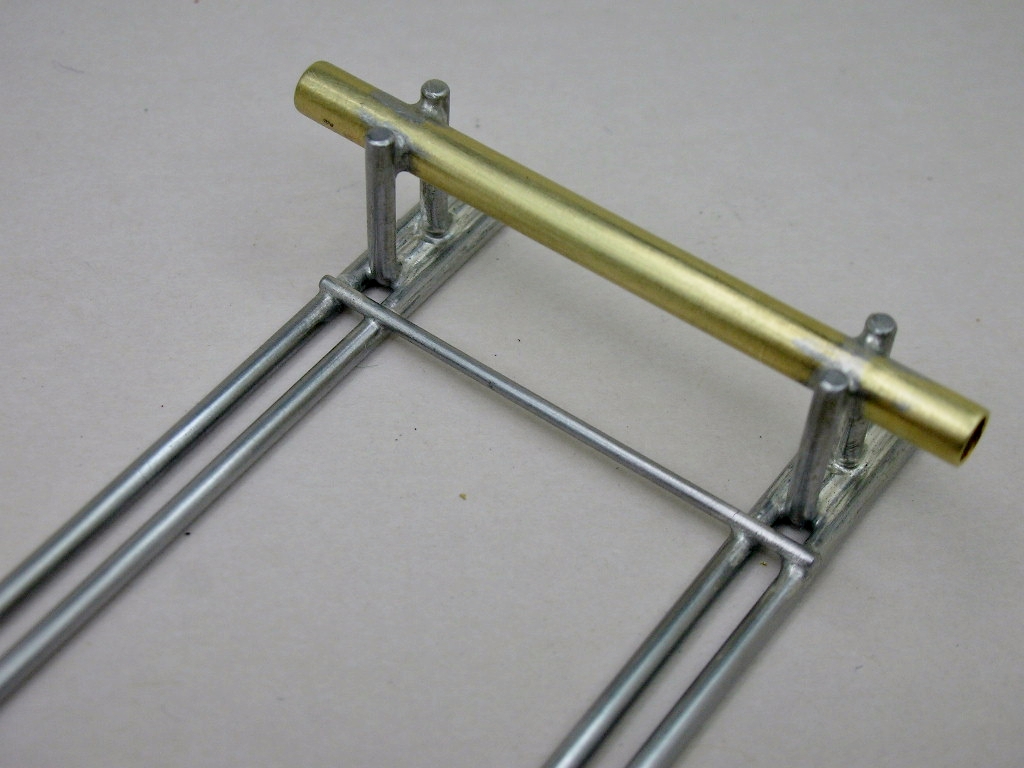
Cross bar all soldered in place and ready for the drop arm install:
Rick Thigpen
Check out Steve Okeefe's great web site at its new home here at Slotblog:
The Independent Scratchbuilder
There's much more to come...
Posting Leader

Posted 19 March 2025 - 12:09 PM
Ingenious way to notch the main rails Rick, not sure I would of had the patience to set up for that clever method 
Grand Champion Poster
Posted 19 March 2025 - 12:23 PM
Hi Martin,
When I was working as a prototype machinist 90% of the time was spent on the "setup" and only 10% actually making the cut.
I have to admit I really enjoy spending time with my R-geo jig figuring out ways to align and hold things to make my chassis builds more precise.
Rick Thigpen
Check out Steve Okeefe's great web site at its new home here at Slotblog:
The Independent Scratchbuilder
There's much more to come...
Grand Champion Poster
Posted 20 March 2025 - 12:30 PM
The pieces needed for the drop arm pivot hinge:
High temperature Kapton tape prevents inadvertently soldering the drop arm to the frame rails. The little piece of brass strip is there to drag off any excess solder from the joint:
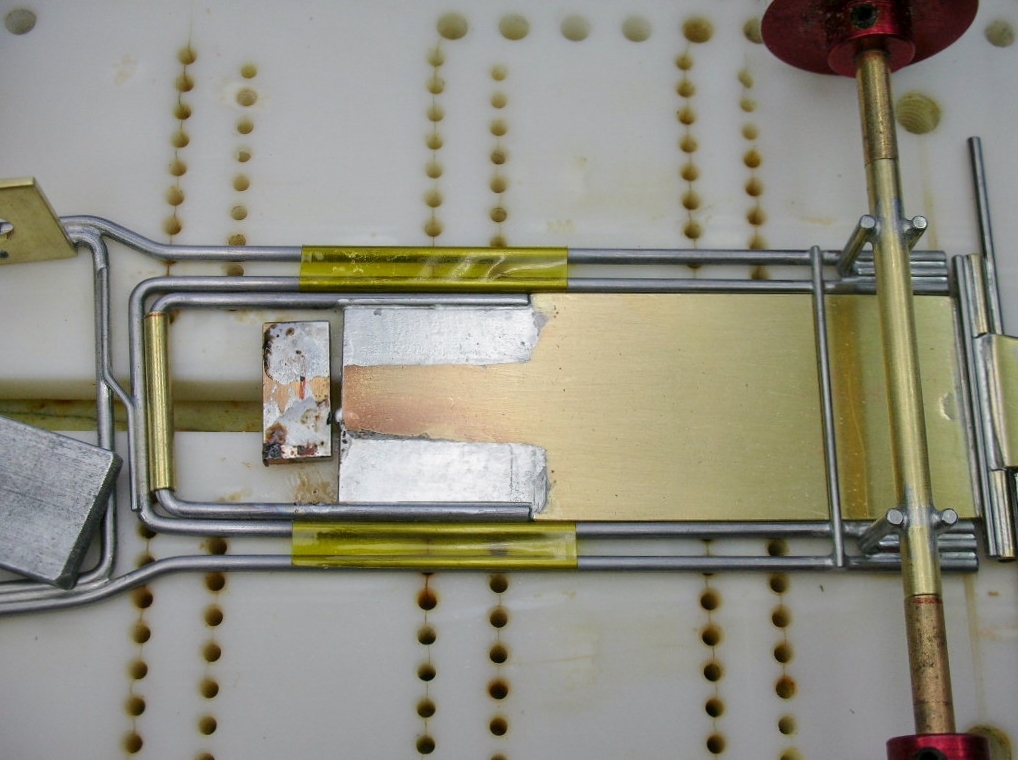
The spring wire centered and soldered in place between a pair of scribe lines finishes off the drop arm:

Soldering on the drop arm will finish the center section and a good cleanup is next:
Rick Thigpen
Check out Steve Okeefe's great web site at its new home here at Slotblog:
The Independent Scratchbuilder
There's much more to come...
Grand Champion Poster

Posted 20 March 2025 - 01:45 PM
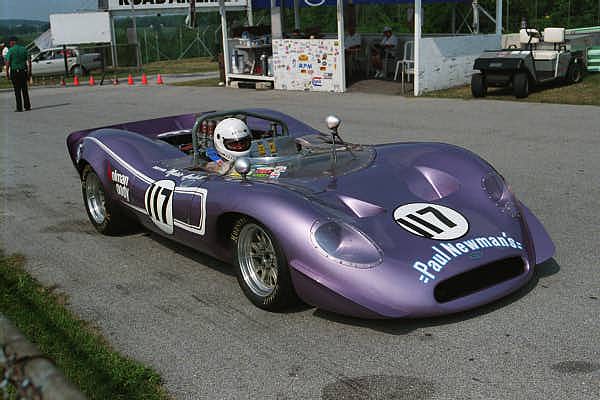
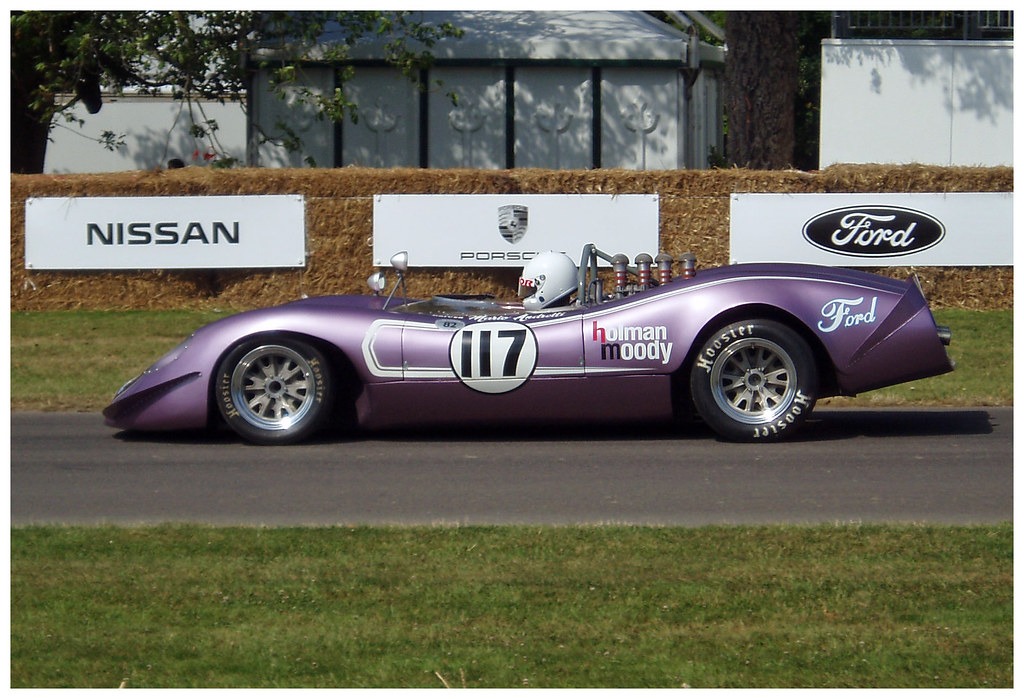
The car was at Road America a few years back.
The owner at that time verified the urban legend that Mario Andretti was so displeased with the handling of the car that he told Paul Newman that He (Newman) could drive it and Andretti would put his name on it.
On The Lead Lap

Posted 20 March 2025 - 02:51 PM
So Rick, how many of these unobtanium drop arms to do you have in your collection!  I like the interesting detail that the drop arm pivot is angled ... I missed that detail before. Doesn't matter with such a shallow angle and the arm's limited swing but it does make for a nice tidy looking design.
And I need to get some of that heat proof tape you're using. I've been placing strips of aluminum foil between pieces I DON'T want inadvertently soldered together but it's such a pain to keep everything align. The tape looks like a much better way of doing this.
Age scrubs away speed!
Posted 20 March 2025 - 03:09 PM
Another product that will stop the flow of solder is liquid "White Out."
Grand Champion Poster
Posted 20 March 2025 - 03:22 PM
The car was at Road America a few years back.
The owner at that time verified the urban legend that Mario Andretti was so displeased with the handling of the car that he told Paul Newman that He (Newman) could drive it and Andretti would put his name on it.
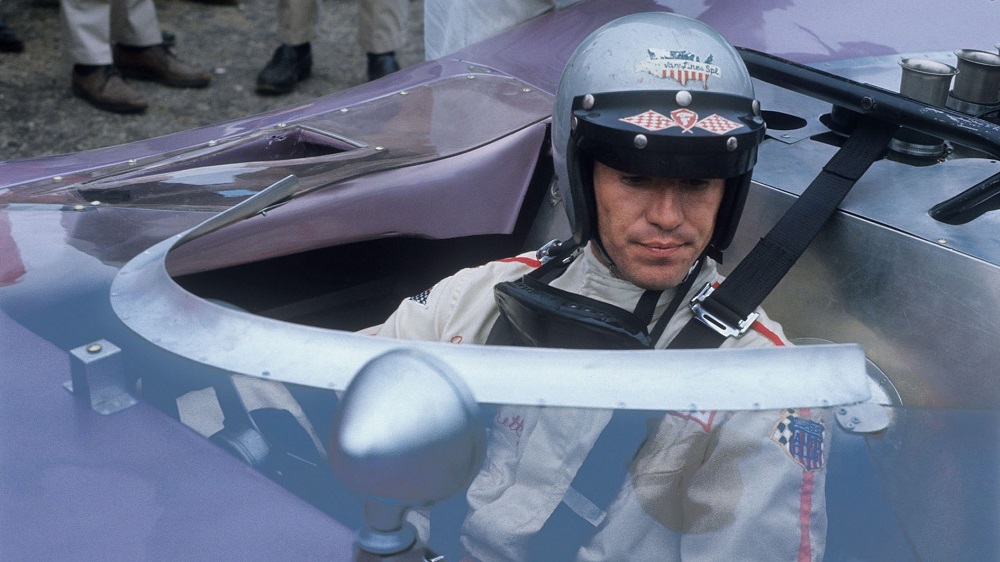
Well, Mario doesn't exactly have on his happy face.
Thankfully, the drop arm swings full travel freely and doesn't even notice the shallow angle Larry.
Rick Thigpen
Check out Steve Okeefe's great web site at its new home here at Slotblog:
The Independent Scratchbuilder
There's much more to come...
Old Engineer

Posted 21 March 2025 - 07:55 AM
Mentioned earlier that he hated this car.
Steve Lang
Race Leader

Posted 21 March 2025 - 09:39 AM
i think the car was not competitive horsepower wise. great looking car and i think an irra approved body
Posting Leader

Posted 23 March 2025 - 10:09 PM
Posting Leader
Posted 24 March 2025 - 01:21 AM
When I was working as a jeweler we used yellow ochre water base paint to protect the last solder joint from melting. It comes off with water.That tape would be handy to have though.
We were silver soldering many parts close together and we also had 3 or 4 solders with different melting points.
I want to say they were a temperature range, maybe 800 to a 1100F ?
Posting Leader
Posted 24 March 2025 - 01:53 AM
Age scrubs away speed!
Posted 24 March 2025 - 07:07 AM
I never used the high content jeweler's silver solder, but I've built several brass/wire chassis using the Harris Stay Brite solder which is 4%. I never had joints come apart while others were being soldered. These silver- soldered joints were stiffer than had they been if something like 60/40 or 63/37 was used. As a result, they often took 2 or 3 races to fully break-in.
Grand Champion Poster
Posted 28 March 2025 - 03:19 PM
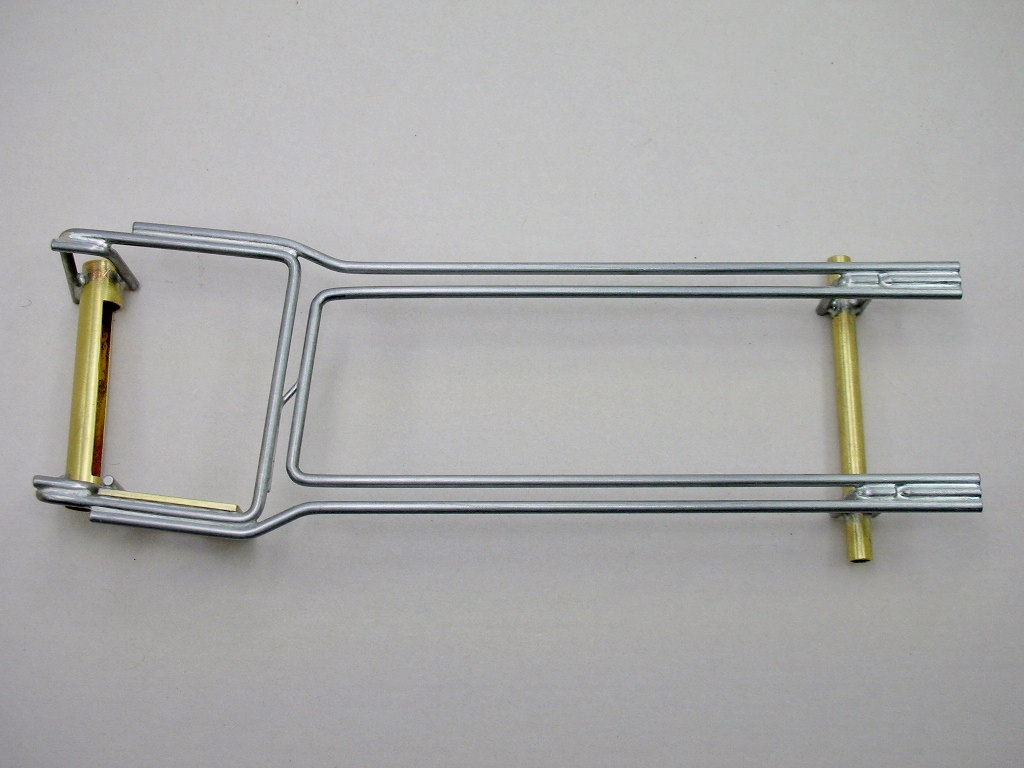
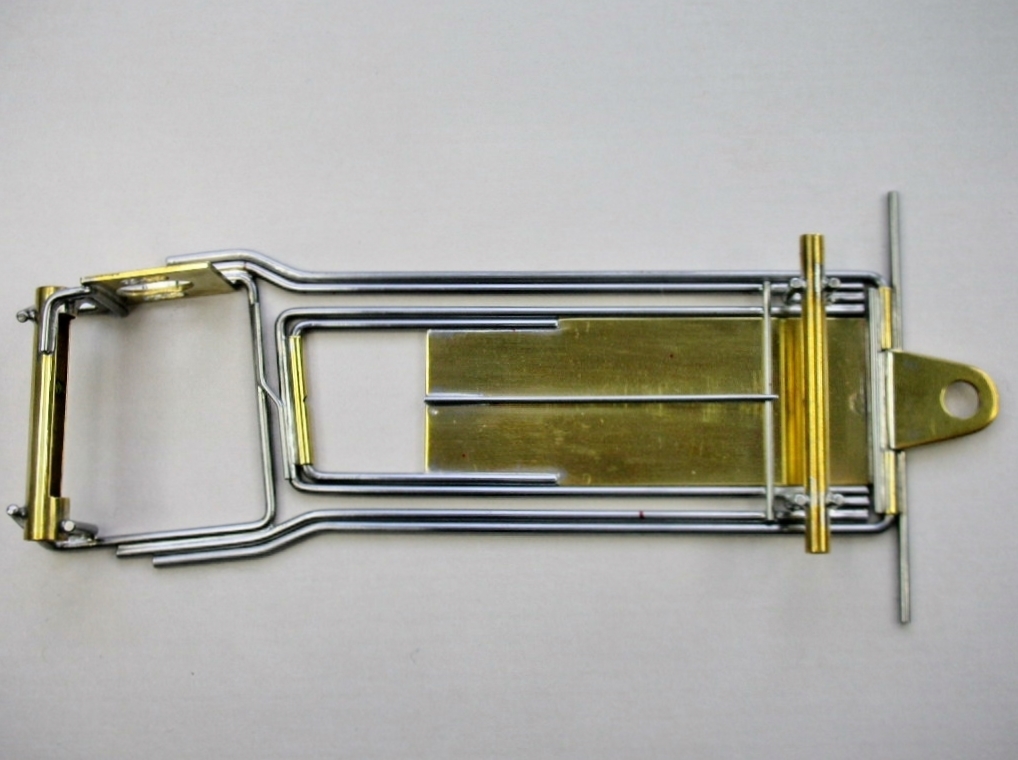
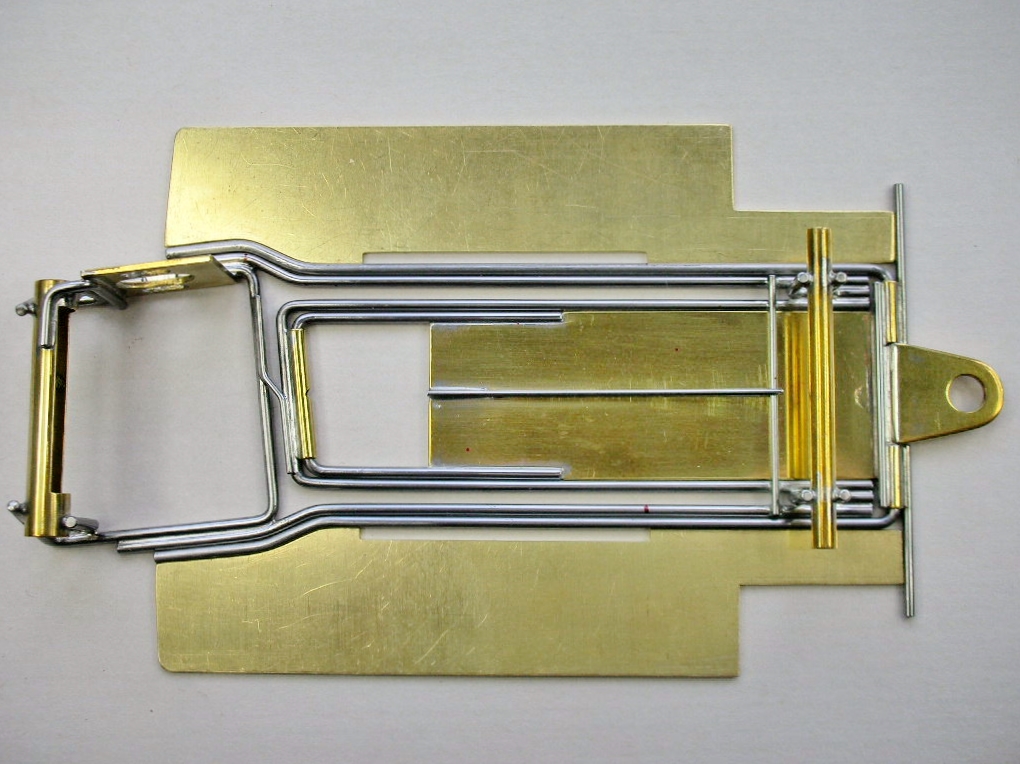
I'm finally back on this project and have the finished center section all spiffed up:
Next I find out how many feet of 1/16" piano wire I ruin bending the full length plumber rails to match the bends in the frame. 
Rick Thigpen
Check out Steve Okeefe's great web site at its new home here at Slotblog:
The Independent Scratchbuilder
There's much more to come...
Age scrubs away speed!
Posted 28 March 2025 - 03:33 PM
Did you ever try bending them out of brass rod first, then bend them from piano wire? That might help.
Grand Champion Poster
Posted 28 March 2025 - 04:02 PM
That makes too much sense Bill.
Ever the optimist I just start flailing away with piano wire.
Rick Thigpen
Check out Steve Okeefe's great web site at its new home here at Slotblog:
The Independent Scratchbuilder
There's much more to come...
Posting Leader
Posted 29 March 2025 - 05:28 PM
Age scrubs away speed!
Posted 29 March 2025 - 06:14 PM
I'm from the days when all K&B piano wire between .032" & .063" sold for a nickel per foot. And it was plated at that price too.
Grand Champion Poster
Posted 29 March 2025 - 07:34 PM
I got lucky guys and got the plumber rails bent with only one scrapper per side. 
Cutting the pans to match is next.
Rick Thigpen
Check out Steve Okeefe's great web site at its new home here at Slotblog:
The Independent Scratchbuilder
There's much more to come...
Age scrubs away speed!
Posted 30 March 2025 - 02:52 PM
I won't mention making a cardboard pattern.
Grand Champion Poster
Posted 31 March 2025 - 12:21 PM
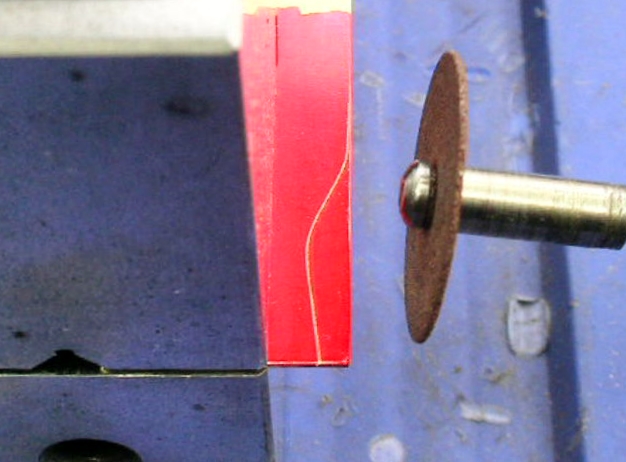
No cardboard pattern on the pans either Bill, but I did do a nice fine scribe line to nibble up to with my cut off wheel:
I used these wider Parma pans and cut out for the plumber rails and the pan hinge tubes:
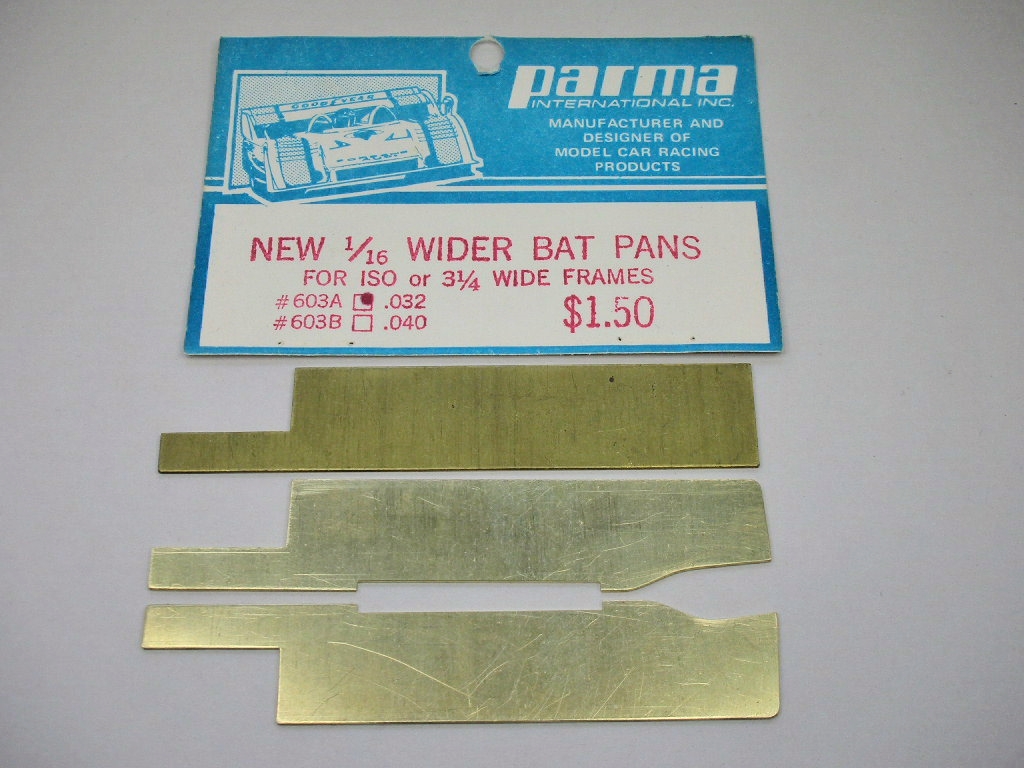
I did an angled cut to the rear of the pans for tire clearance as the pan rotates up. Something I first saw on PdL's Diamond chassis.
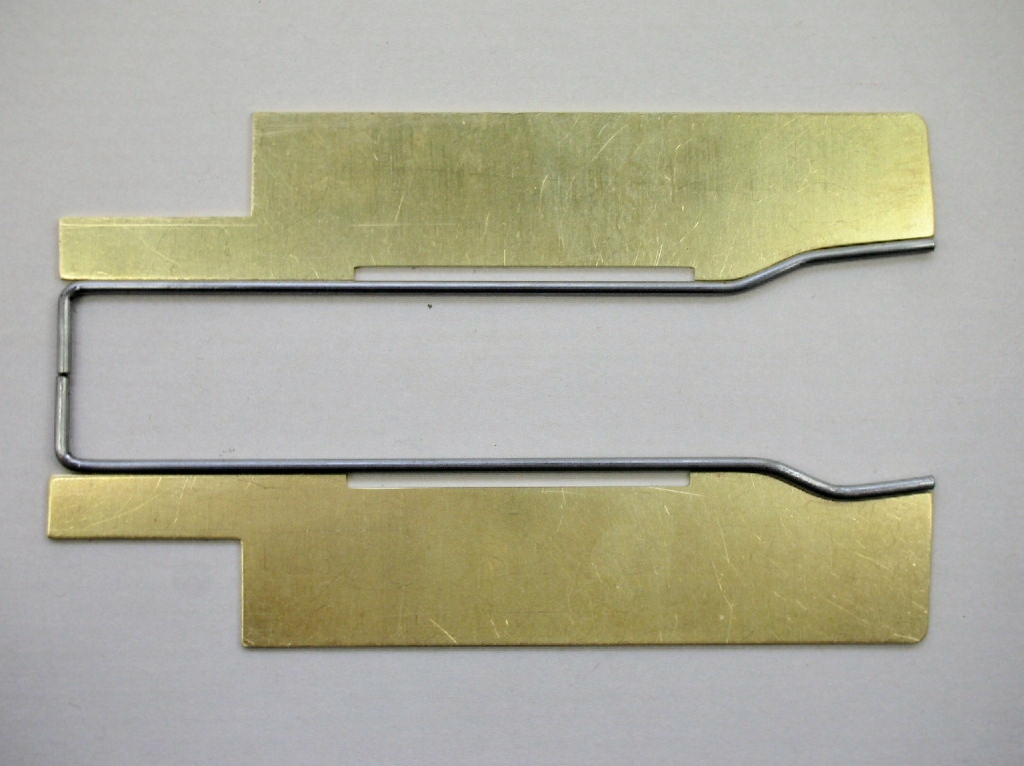
Time to trim that bumper to length on the drop arm and make up the pan hinge wires and hinge tubes:
Rick Thigpen
Check out Steve Okeefe's great web site at its new home here at Slotblog:
The Independent Scratchbuilder
There's much more to come...


