Joel Montague's 1973 Nats Winner
#1
Posted 04 February 2007 - 08:41 PM
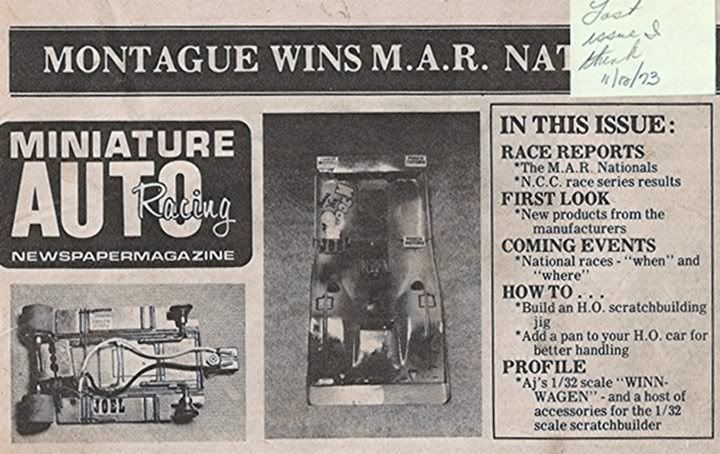
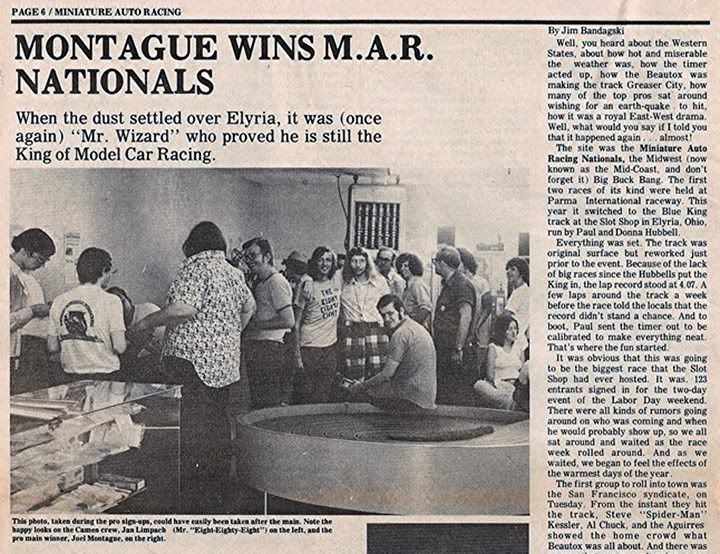
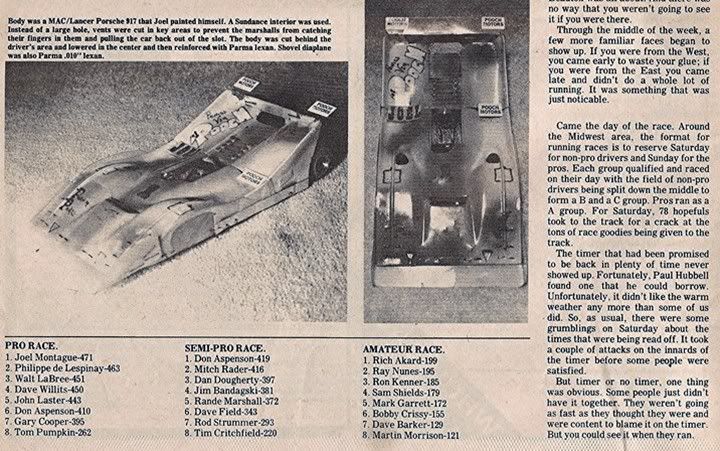
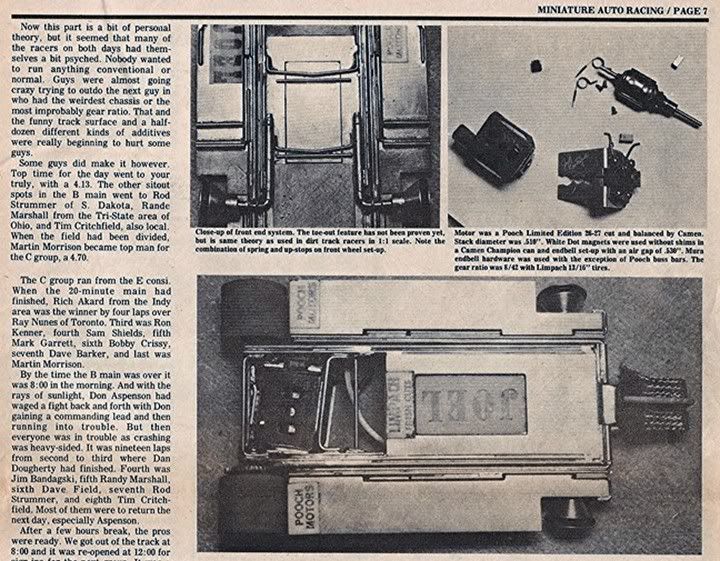
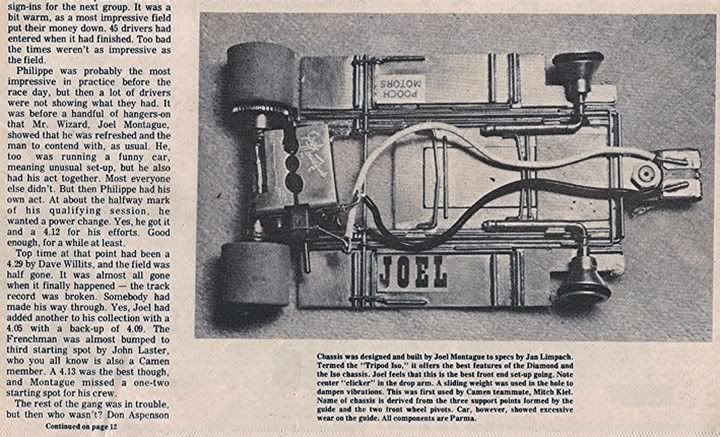
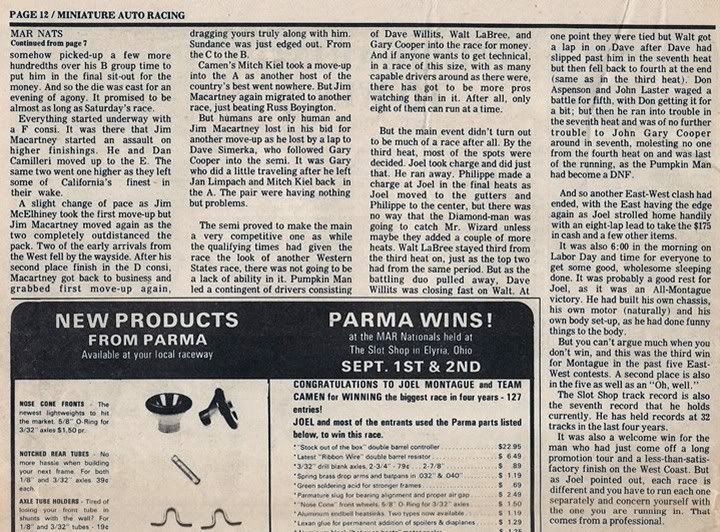
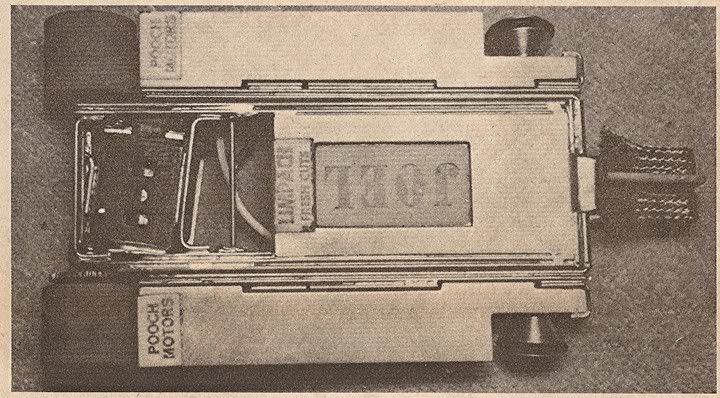
I'd like to mention that the body Joel used is not for the faint of heart if you're a "scale freak". I enjoy both scale and all-out racers from the "dawn of time" thru about 1973. Therefore, I appreciate it for what it was designed to do . . . GO FAST! I believe it is two Lancer Porsche bodies grafted together. I hope to find out more about the body and pass that along soon. Here are the scans of that article:
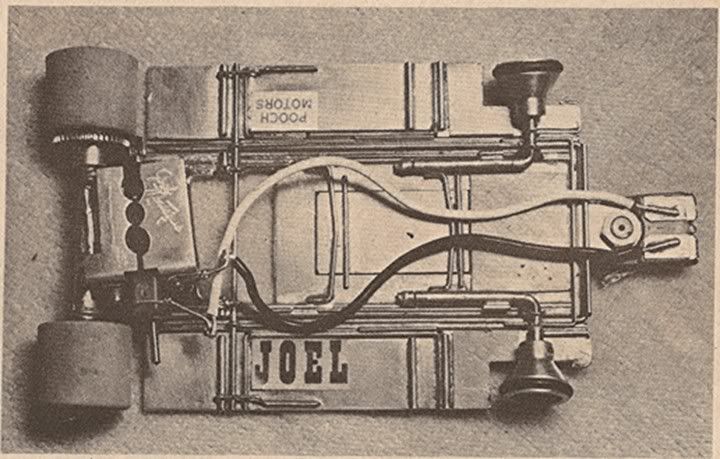
I blew up a top and bottom picture of the car to use as a guide to recreate Joel's car, thinking that would be enough to get the car built:
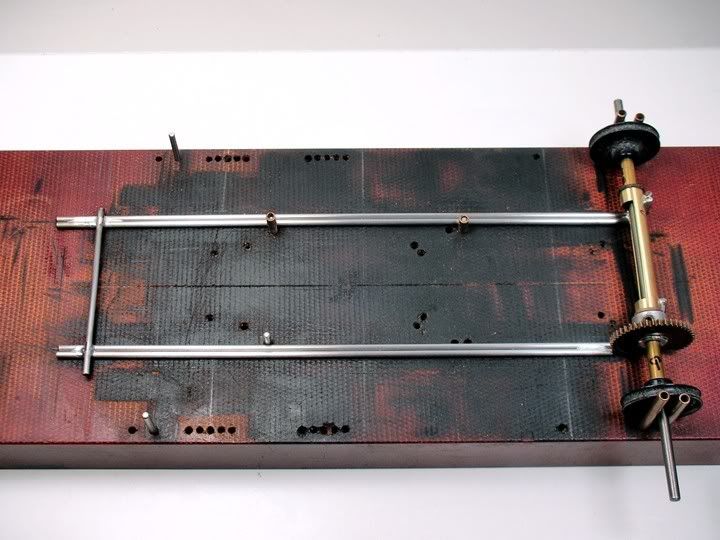
Once I started to look closer at the pictures I realized there were many construction details I was unsure of, especially around the rear of the chassis. I asked my friend and chassis builder extraordinaire Steve Okeefe if he would look at the pictures and help me. Well, he did a lot more than that and this is where "the plan came together". Not only are Steve and Joel old friends who live relatively near one another but Joel still has his Nats-winning car as it came off the track in 1973! AND, Joel agreed to let Steve take pictures of it to help with the project. I now have dozens of great pictures to work from. Joel asked that I not share these here as he wants to take new pictures after he restores the car.
So the soldering iron is heating up and the jig wheels are going in the chassis jig. More to come . . . Onward!
- Jocke P likes this
Rick Thigpen
Check out Steve Okeefe's great web site at its new home here at Slotblog:
The Independent Scratchbuilder
There's much more to come...
#2
Posted 04 February 2007 - 08:42 PM
Notice how all four frame rails are straight? Is this a full sidewinder?
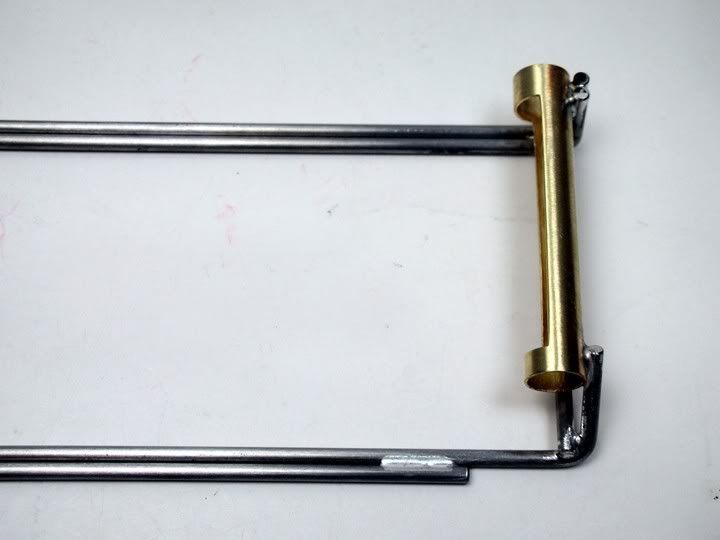
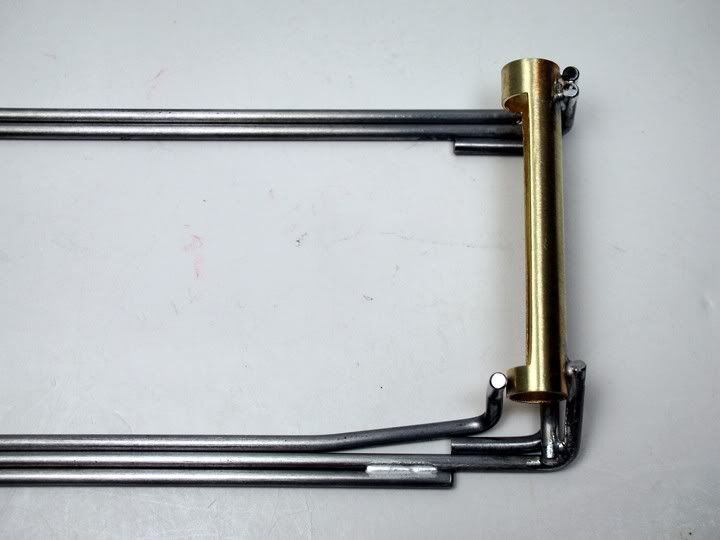
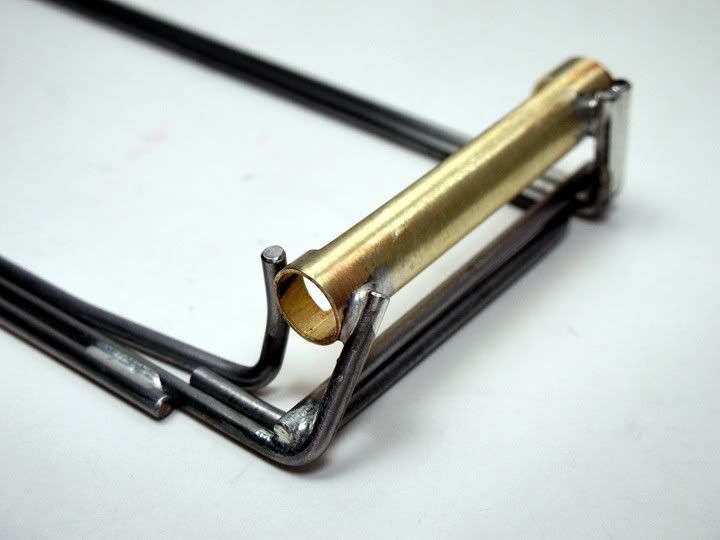
Nope. Here's the solution. A half rail angled to accept the motor and attached to a horizontal rear brace and up to the front of the rear axle tube. It's not soldered in place yet:
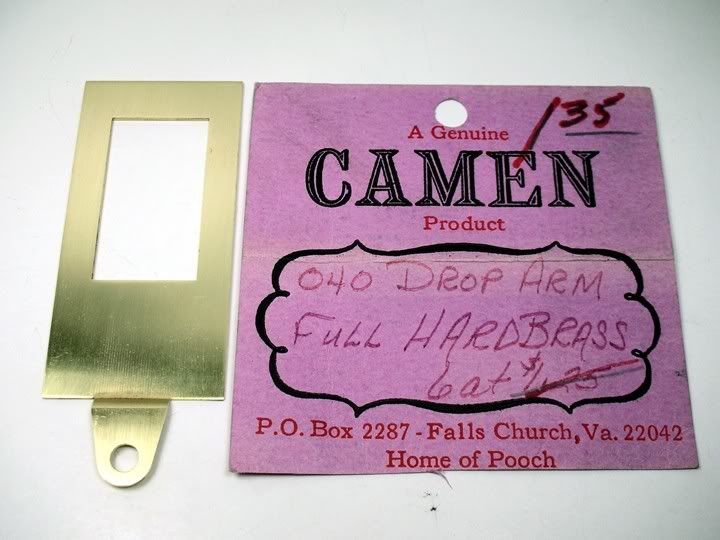
I've got to get the drop arm in place first as the half rail butts up against it. This is the drop arm I'll be using:
I've been saving that drop arm for something special for years. I think this car is it. You owe me big time, Adam! HA!
ONWARD!
- Jocke P likes this
Rick Thigpen
Check out Steve Okeefe's great web site at its new home here at Slotblog:
The Independent Scratchbuilder
There's much more to come...
#3
Posted 05 February 2007 - 04:51 AM
[oneofwos]
#4
Posted 05 February 2007 - 09:17 AM
The Joel Montague "Pooch" motor is using an early thick-wall Champion CEE can that Joel has modified. I'll be getting into the motor mods soon .
Rick
Rick Thigpen
Check out Steve Okeefe's great web site at its new home here at Slotblog:
The Independent Scratchbuilder
There's much more to come...
#5
Posted 05 February 2007 - 09:32 AM
Just checked mine and it's not the same; the two end windows look the similar but mine has a centre hole that's elongated but not quite central and that's on both sides of the can.
[oneofwos]
#6
Posted 05 February 2007 - 12:43 PM
Is that the old version of Tony P in that pic?
Joe "Noose" Neumeister
Sometimes known as a serial despoiler of the clear purity of virgin Lexan bodies. Lexan is my canvas!
Noose Custom Painting - Since 1967
Chairman - IRRA® Body Committee - Roving IRRA® Tech Dude - "EVIL BUCKS Painter"
"Team Evil Bucks" Racer - 2016 Caribbean Retro Overall Champion
The only thing bad about Retro is admitting that you remember doing it originally.
#7 Bill from NH
Posted 05 February 2007 - 01:30 PM
#8
Posted 05 February 2007 - 02:47 PM
Philippe de Lespinay
#9
Posted 05 February 2007 - 05:07 PM
The .040 Champion can we used on high power came with two oval holes. Some folks made a similar oval hole in between them, some drilled a round hole of different sizes. The end of the can was machined square, the sides were turned on a lathe to around .020, endbell mounting holes drilled, can trimmed around bearing, akle tube notch milled in one side.Just checked mine and it's not the same; the two end windows look the similar but mine has a centre hole that's elongated but not quite central and that's on both sides of the can.
Mura endbell needs to be turned on lathe to fit, as it is slightly smaller than Mura can.
"Just once I want my life to be like an '80s movie,
preferably one with a really awesome musical number for no apparent reason."
#10
Posted 10 February 2007 - 07:31 PM
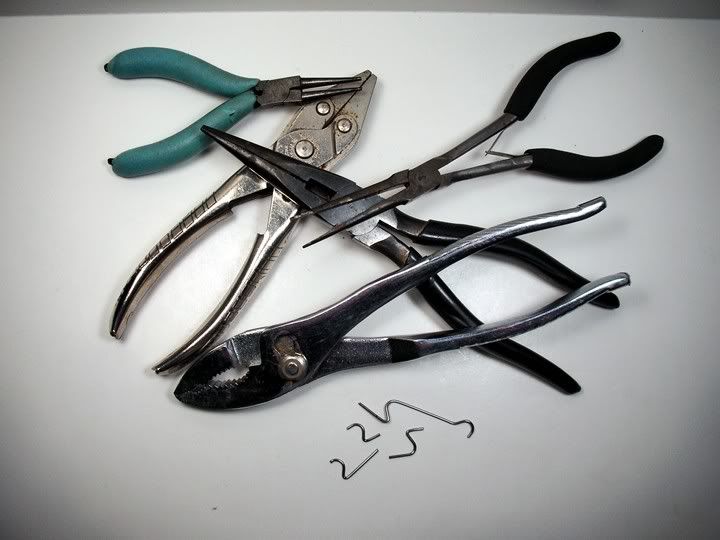
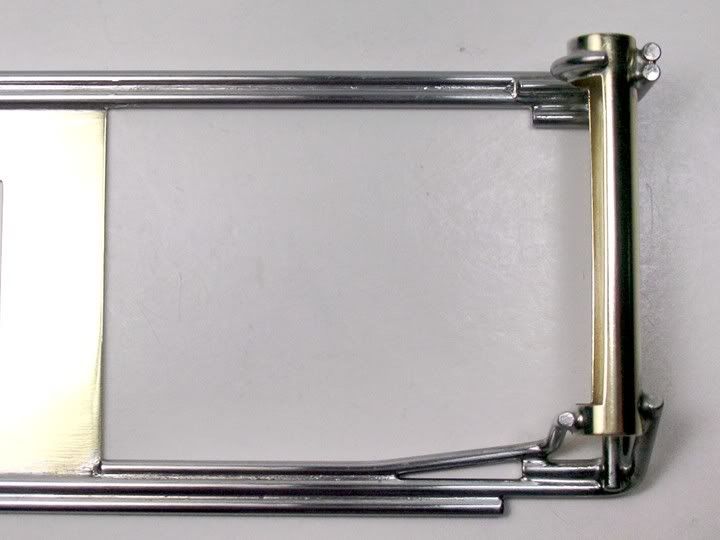
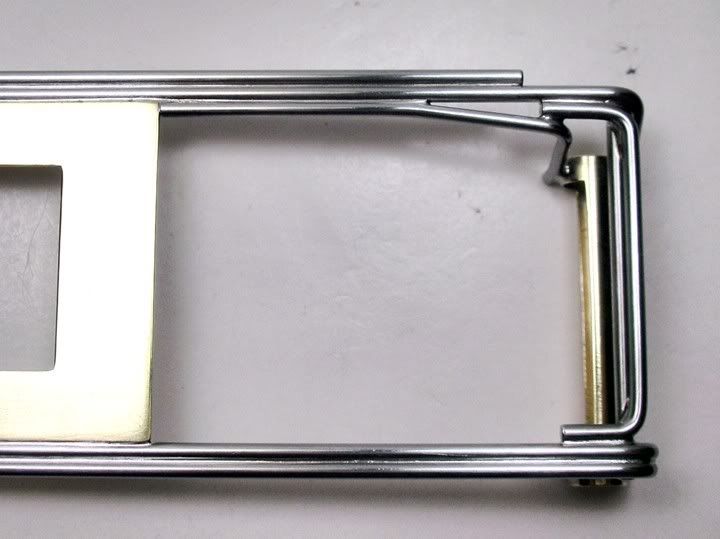
YIKES! Persistence, lots of pliers, and luck resulted in success:
Here it is installed:
The back end finished except for copper wire wrapping the rear axle tube to the frame rails:
Here's a top and bottom shot of the installed half rail that sets the motor angle:
Next will be the front axles . . . I think! Oh, for those who want to build one of these for themselves, Joel told me my axle tube is cut out too much. His was form-fitted to the motor . . . OOPS!
- Horsepower likes this
Rick Thigpen
Check out Steve Okeefe's great web site at its new home here at Slotblog:
The Independent Scratchbuilder
There's much more to come...
#11
Posted 10 February 2007 - 08:36 PM
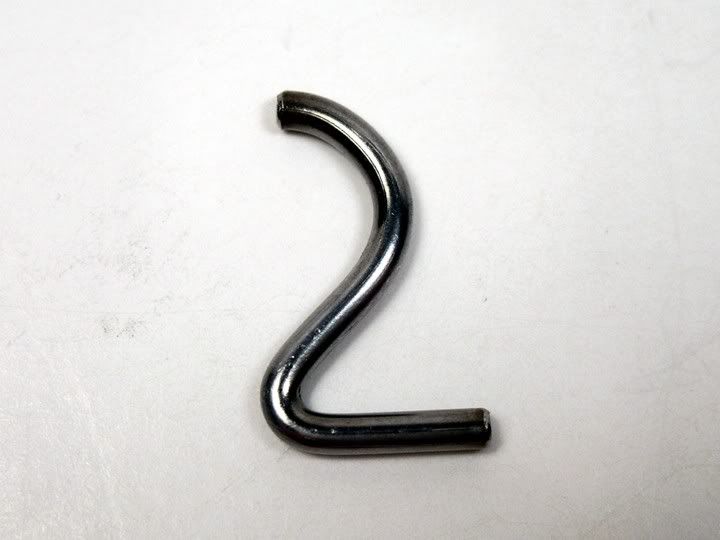
This looks like a great build, thanks for the photos. In true scratchbuilders style, you can never have too many pairs of pliers!
The bevelled finish on each of the ends of those wire pieces is supreme attention to detail! Great job on the S-brace!
Oh dear, now he tells you! :shock:Joel told me my axle tube is cut out too much. His was form-fitted to the motor . . . OOPS!
Good building,
Col.
Colin Neaton
#12
Posted 10 February 2007 - 08:36 PM
- Horsepower likes this
Jairus H Watson - Artist
Need something painted, soldered, carved, or killed? - jairuswtsn@aol.com
www.slotcarsmag.com
www.jairuswatson.net
http://www.ratholecustoms.com
Check out some of the cool stuff on my Fotki!
#13
Posted 10 February 2007 - 08:43 PM
Hi Colin,
I'm sure there will be other things that I don't do quite like the original but I hope it will be pretty darn close. The motor should hide most of that boo-boo.
Rick Thigpen
Check out Steve Okeefe's great web site at its new home here at Slotblog:
The Independent Scratchbuilder
There's much more to come...
#14
Posted 11 February 2007 - 11:14 PM
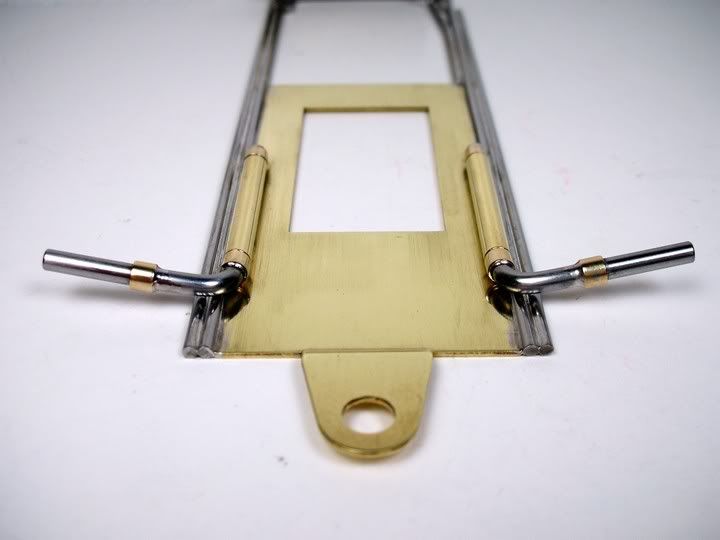
Notice the "toe out" of the front axles:
Also, we have mucho negative camber . . . cool:
Next up we need to fill up that hole in the drop arm with something special . . . Onward!
- Jocke P and Jesse Gonzales like this
Rick Thigpen
Check out Steve Okeefe's great web site at its new home here at Slotblog:
The Independent Scratchbuilder
There's much more to come...
#15
Posted 12 February 2007 - 01:49 AM
Phew . . . thanks for revealing that piece of information. I was ready to throw away the Dremel and the soldering iron. :doh:I also got lazy and used NSR 3/32" by 2.5 mm long axle spacers instead of cutting them myself.
Oh yeah . . . nice lookin' frame! 8)
8/19/54-8/?/21
Requiescat in Pace
#16
Posted 12 February 2007 - 06:51 AM
Jim "Butch" Dunaway
I don't always go the extra mile, but when I do it's because I missed my exit.
All my life I've strived to keep from becoming a millionaire, so far I've succeeded.
There are three kinds of people in the world, those that are good at math and those that aren't.
No matter how big of a hammer you use, you can't pound common sense into stupid people, believe me, I've tried.
#17
Posted 12 February 2007 - 10:08 AM
NSR spacers
You can always cut your own . . . or not :mrgreen:
Hi Butch,
I use fine sandpaper down to 2400 grit, metal polish, and a wire wheel in my Dremel tool. I don't use the wire wheel on brass sheet as it leaves a funny pattern on large flat surfaces. All the polishing I do is completely unnecessary functionally. I do it because I like the way it looks. Your results may vary. Ask your Dr. if polishing is right for you. Don't drink alcohol excessively during polishing . . . well, maybe we should!
- Horsepower and Jesse Gonzales like this
Rick Thigpen
Check out Steve Okeefe's great web site at its new home here at Slotblog:
The Independent Scratchbuilder
There's much more to come...
#18
Posted 12 February 2007 - 10:12 AM
The front wheels that Joel used look a lot like "Parma" cone wheels that Philippe seems to hate so much. True, or are these some other hard-to-find, super-expensive piece?
:|
Jairus H Watson - Artist
Need something painted, soldered, carved, or killed? - jairuswtsn@aol.com
www.slotcarsmag.com
www.jairuswatson.net
http://www.ratholecustoms.com
Check out some of the cool stuff on my Fotki!
#19
Posted 12 February 2007 - 10:34 AM
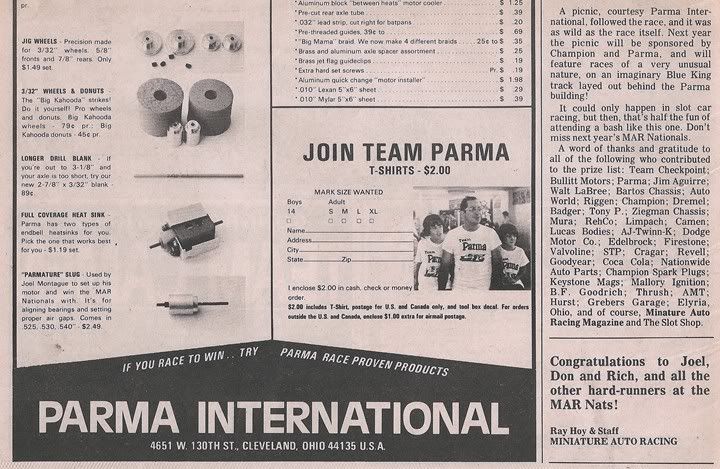
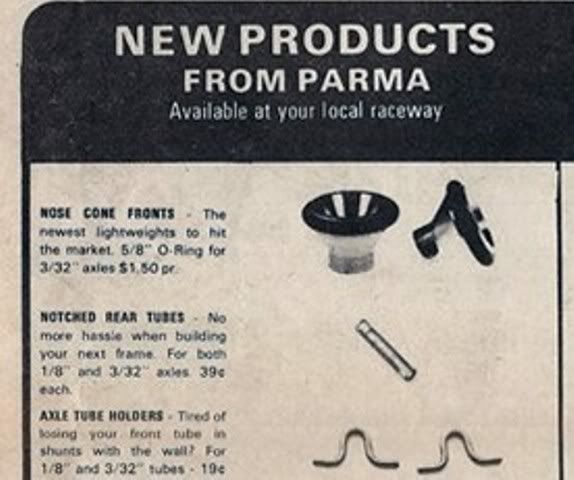
I'm ASSuming they are common Pama wheels like the ones in the Parma ad in the race report:
I took a pair off a vintage Parma "parts car" that Adam sent me. I also took off a big brass guide nut that looks a lot like the one Joel used.
I LOVE Neat Things front wheels , but I'm glad that different builders used different parts and design and construction styles.
Rick Thigpen
Check out Steve Okeefe's great web site at its new home here at Slotblog:
The Independent Scratchbuilder
There's much more to come...
#20
Posted 14 February 2007 - 03:24 PM
Jairus,The front wheels that Joel used look a lot like "Parma" cone wheels that Philippe seems to hate so much. True, or are these some other hard-to-find, super-expensive piece?
Here are Joel's comments on his front wheel choice:
"They were, indeed, over-the-counter Parmas (sans set screws) - Womp Womp wheels!!! Definitely NOT what I would have chosen had I not felt a sincere obligation to promote what I considered to be a company that literally formed the backbone of the industry during that MOST FRAGILE era (and most every other era for that matter) but I thought it a very minor inconvenience given the track/glue conditions prevalent at the time. With ample "toe out" they were just fine, thank you. LOL!!!"
- Jesse Gonzales likes this
Rick Thigpen
Check out Steve Okeefe's great web site at its new home here at Slotblog:
The Independent Scratchbuilder
There's much more to come...
#21
Posted 14 February 2007 - 03:28 PM
Philippe de Lespinay
#22
Posted 14 February 2007 - 09:30 PM
Yes and don't forget Bob Haines' efforts in the "dark ages".It is true to say that without Parma and the controversial (but business-correct) Ken MacDowell, the hobby would have totally collapsed.
#23
Posted 15 February 2007 - 08:43 PM
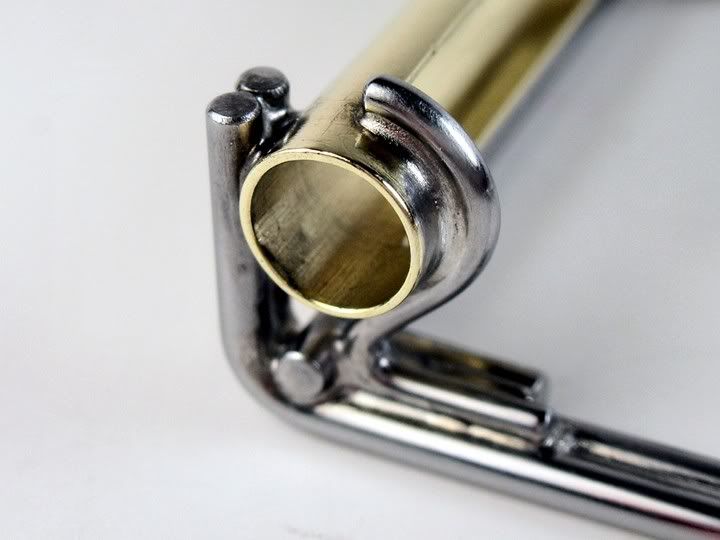
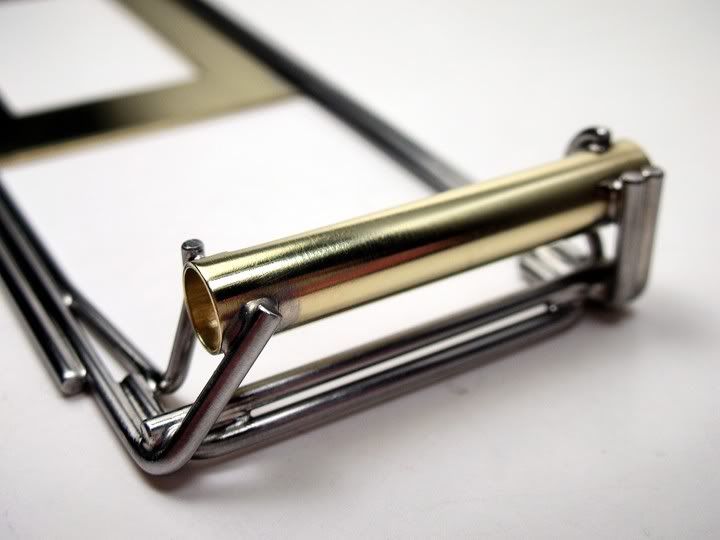
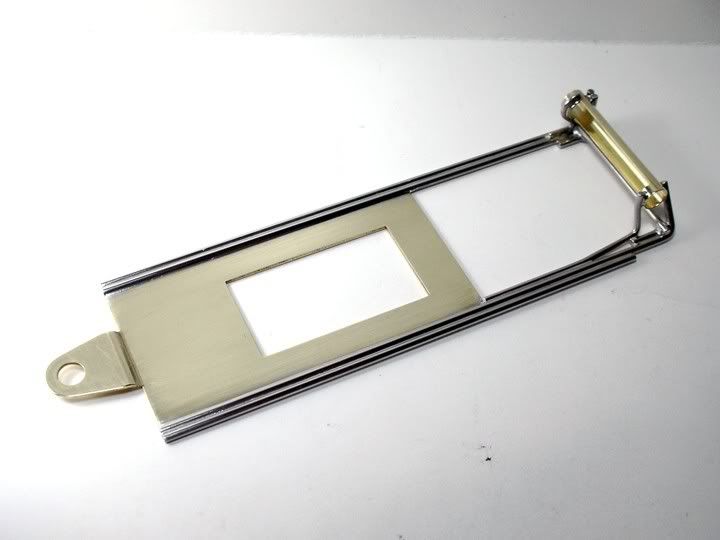
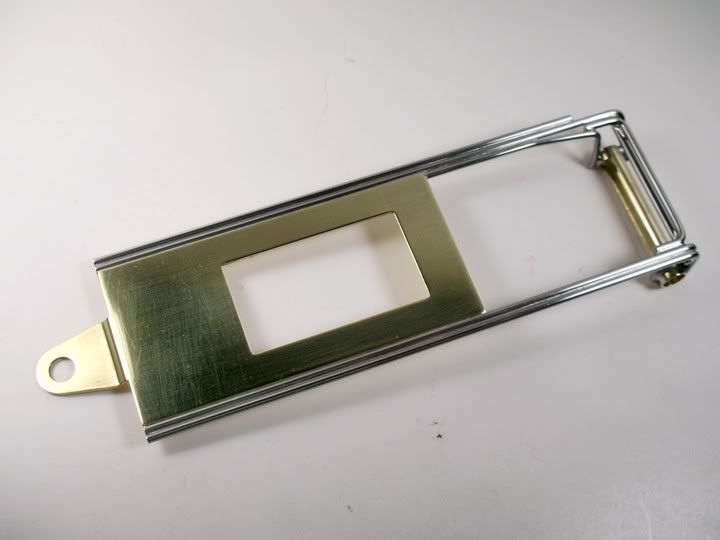
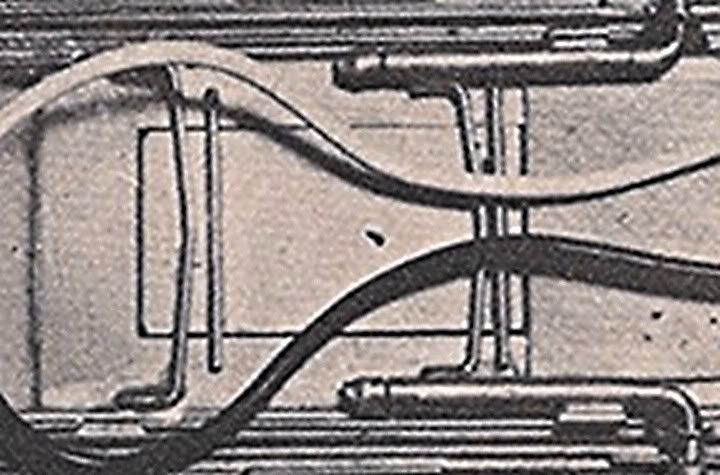
Allrighty then . . . let's get "clicken". . See where the rectangular hole in the drop arm has been filled in with a "gizmo"?
Here is a closer look:
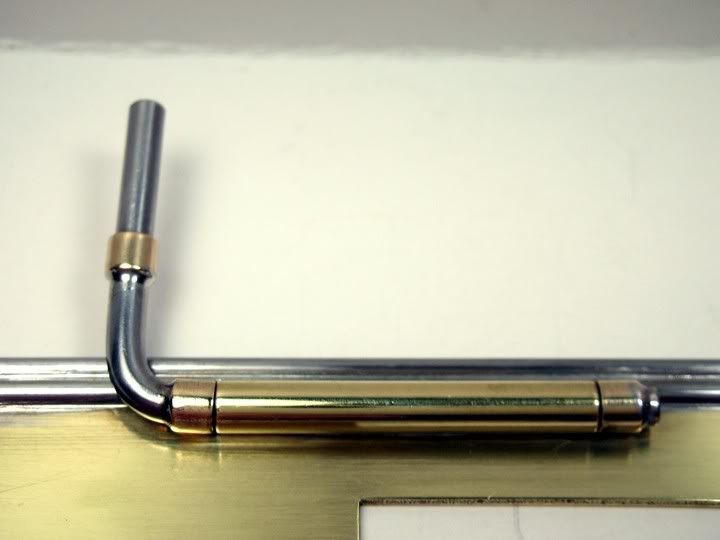
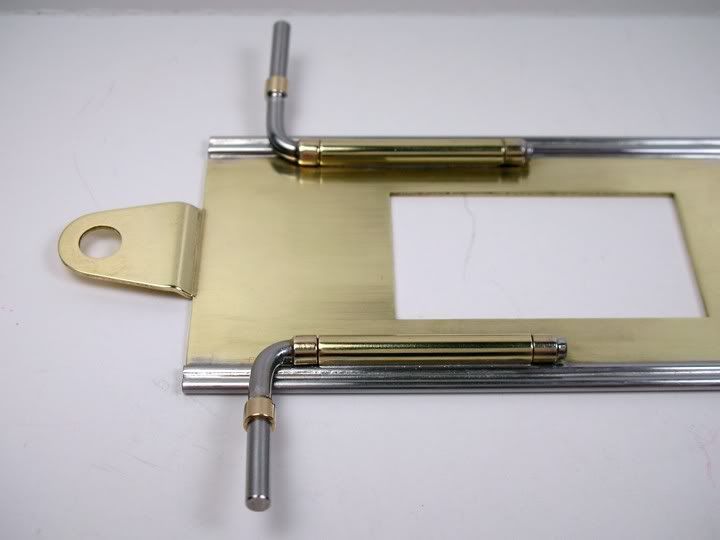
That "gizmo" is a sliding weight. The straight wires are soldered to the plate and keep it from falling out the bottom of the drop arm. The U-shaped wires are soldered to the drop arm and keep the plate from coming out the top of the drop arm.
Here's what Joel told me about it, "The sliding weight was the "clicker". There was approx .015 movement side to side and front to back. Up/down more like .005-.010. A bit more than just enough to move but not a radical amount. The thinking was to add the weight (full glue era, ya know) at a low point in relation to c.g. and to avoid introducing added stiffness and hopefully providing a modicum of vibration dampening in the process. There just may have been some consideration of mind games in there as well, but, hey . . . it was the '70s"
Thanks for the insight, Joel. :up: I'll be clicken' away this weekend and I'll post pictures of the progress.
Onward!
- Jesse Gonzales likes this
Rick Thigpen
Check out Steve Okeefe's great web site at its new home here at Slotblog:
The Independent Scratchbuilder
There's much more to come...
#24
Posted 16 February 2007 - 12:51 PM
My friend Adam REALLY loves early '70s pro cars and he has a short list of ones he'd like recreated. One of them was the 1973 Western States Championship WINNING Neat Things "Diamond" of Philippe de Lespinay. With PdL's help of pictures and technical advise I was able to do my best to make that car. Thank you, Philippe .
Here is a link to the Diamond build (dial-up beware!).
Another car on "the list" is the 1973 National Championship WINNING car of Joel Montague. With the help of my good friend Steve Okeefe I had the opportunity to get in touch with Joel by email. He, too, has been super helpful in providing me with pictures and technical information that I am attempting to share with everyone here. Thank you Joel .
Now, as Isaac Asimov wrote, "I am but an egg", meaning I'm not a famous pro racer. I am a mere enthusiast and student of a HOBBY I love. However, having built PdL's car and being in the process of building Joel's I must say that if both cars were the same I wouldn't bother posting this build. Yes, they are both of the next evolution of pro car (which I believe PdL pioneered) with fixed drop arms and independent front suspension. But, to my eye they are as different as a 1963 Ferrari GTO (PdL's Diamond) and a 1963 Corvette Grand Sport (The Montague Missile).
Look at the difference in the front suspension. The Diamond uses elegant .062" piano wire A-arms with .030" piano wire braces reinforced with fine wire wrapping. These A-arms are nested together and pivot in the center of the drop arm and toe the wheel inward. The Missile uses just a single massive .093" wire L-arm pivoting outboard on each side of the drop arm and toeing the wheels outward.
Look at the main rails. Each has two rails per side soldered to the drop arm and extending back to the rear axle tube. The Diamond's rails on the can side of the motor are bent at an angle to accept the motor. No half rails are used. The Missile's main rails are all straight. The motor angle is established by a half rail inside the two main rails. Again, very different approaches.
Look at the "clicker" I pictured above. It's certainly a novel item that the Missile has and the Diamond doesn't. I don't know if helps performance or not but it makes the chassis different and I can't wait to make it! Those are some of the differences so far and I just started construction.
So, back to my intentions in this post. With the help of the actual builder of this really cool Missile, I hope to show its recreation to the best of my ability. The hidden details will be revealed that you just can't see in the grainy vintage pictures. I hope this will help others to build there own versions or at least give an insight to what it took to create the 1973 National Championship winning car of Joel Montague.
I only have time to work on my hobby on the weekends so Saturday I hope to show details of making the "clicker".
Onward to the fun of scratchbuilding
- MarcusPHagen and Jesse Gonzales like this
Rick Thigpen
Check out Steve Okeefe's great web site at its new home here at Slotblog:
The Independent Scratchbuilder
There's much more to come...
#25
Posted 16 February 2007 - 02:51 PM
After all, Jim, isn't that what we're here for, to provide comic relief for the worker bees as they wade through the morass that is "the workday"?Being able to watch a debate about just who had the most fun at a particular get-together is hilarious, thanks. :mrgreen:
I DO work sometimes. :shock:
Remember, two wrongs don't make a right... but three lefts do! Only you're a block over and a block behind.