Jump to content


Photo

R&C Captain Rick’s entry #1


  • Please log in to reply
105 replies to this topic

#76 dc-65x

dc-65x

    Grand Champion Poster

  • Subscriber
  • PipPipPipPipPipPipPipPip
  • 6,971 posts
  • Joined: 14-February 06
  • Gender:Male
  • Location:Captain Rick: The only vintage slot car nut in SW Oregon?

Posted 25 October 2013 - 05:53 PM

Thanks guys and thank you James. :)


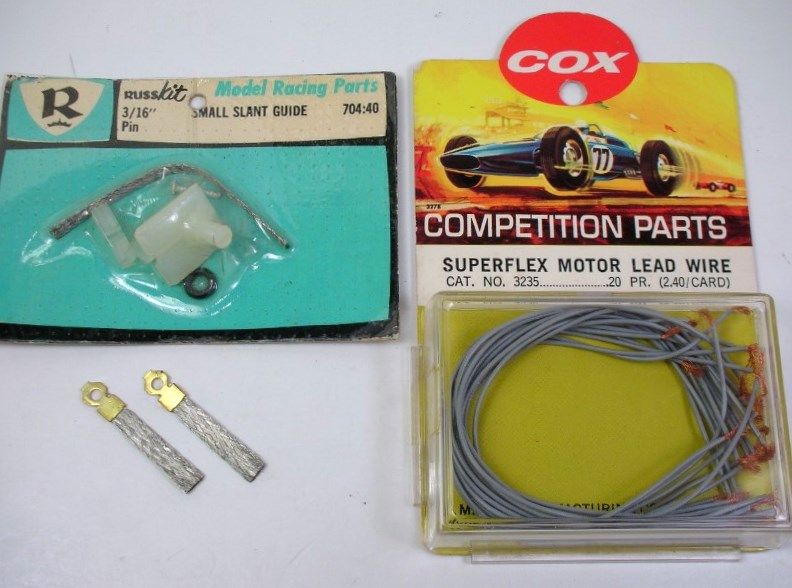
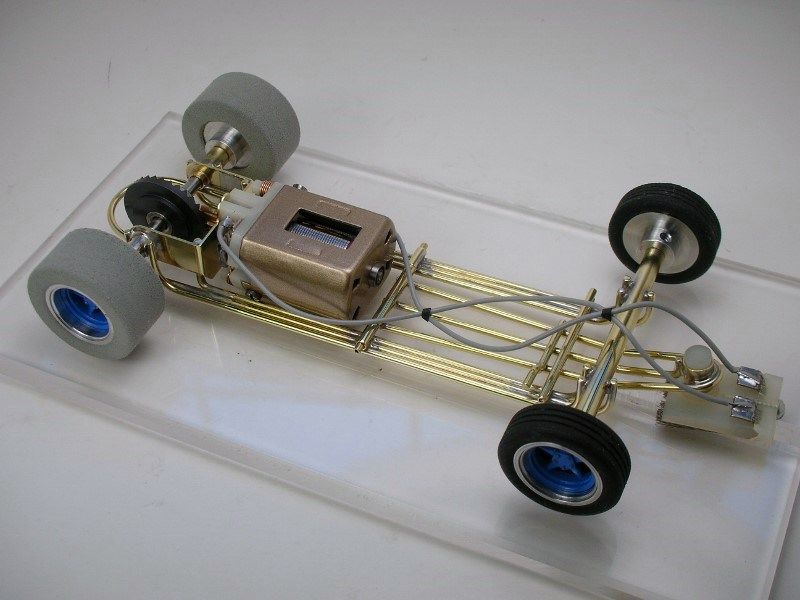
Time to do final assembly. Here's the pieces-parts used:
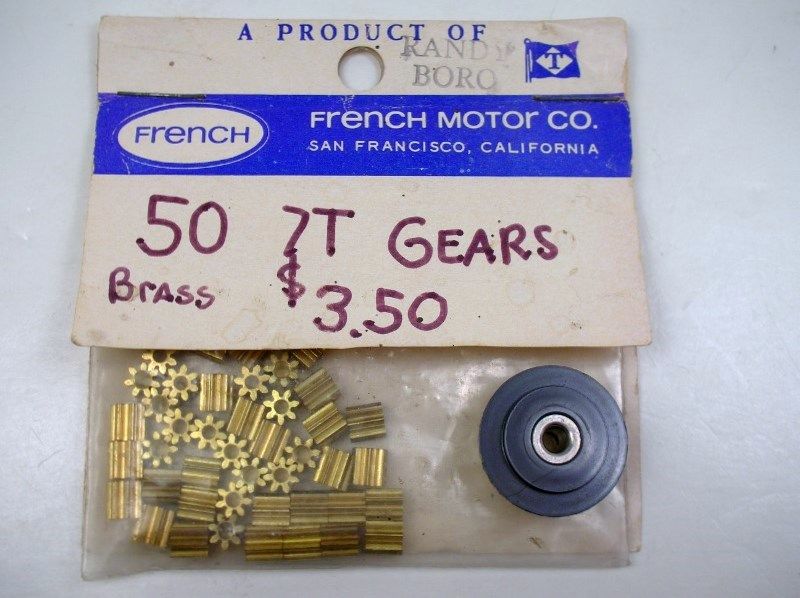
 

PeriodRewind12.jpg


PeriodRewind15.jpg


I've found the Russkit braid to be a bit stiff which is not a good thing with a super light car. Here are some other choices:
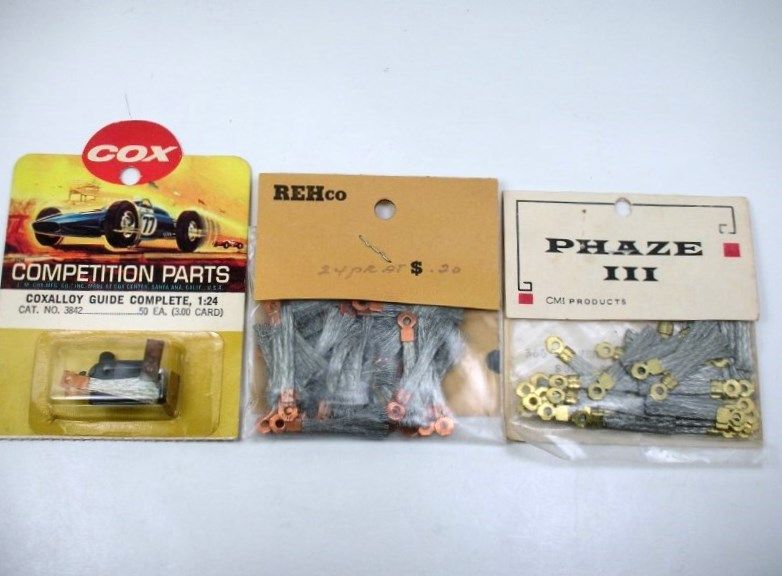
 

Race3Chassis51.jpg


Below we have, left to right, vintage Cox Superflex, REH repop Cox Superflex and some Phaze III that's been popping up on eBay lately:
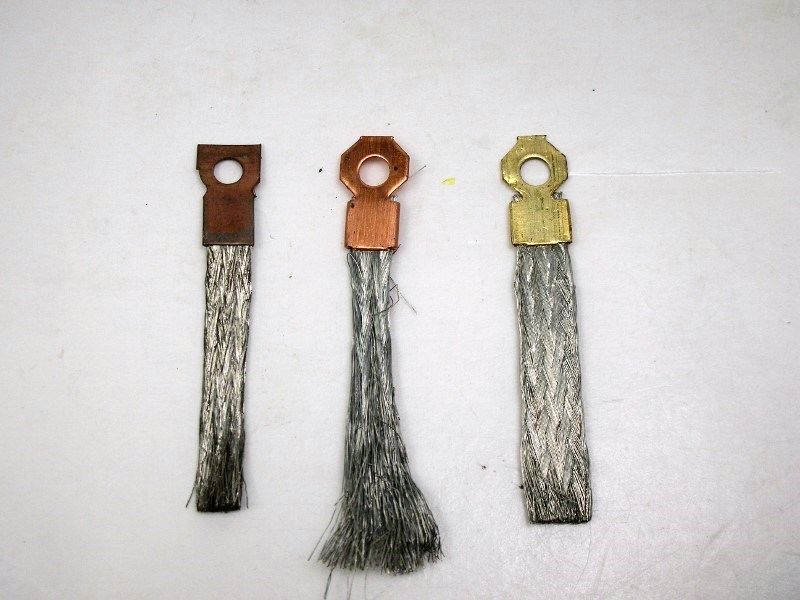
 

Race3Chassis52.jpg


The vintage Cox has been hard for me to get. The REH stuff un-braids itself and burns up quickly. The Phaze III may be a bit later than 1966 but it looks a lot like Cox and I'm going to give it a try. Below the "eyelet" part has been trimmed off and the brass part tinned with solder:
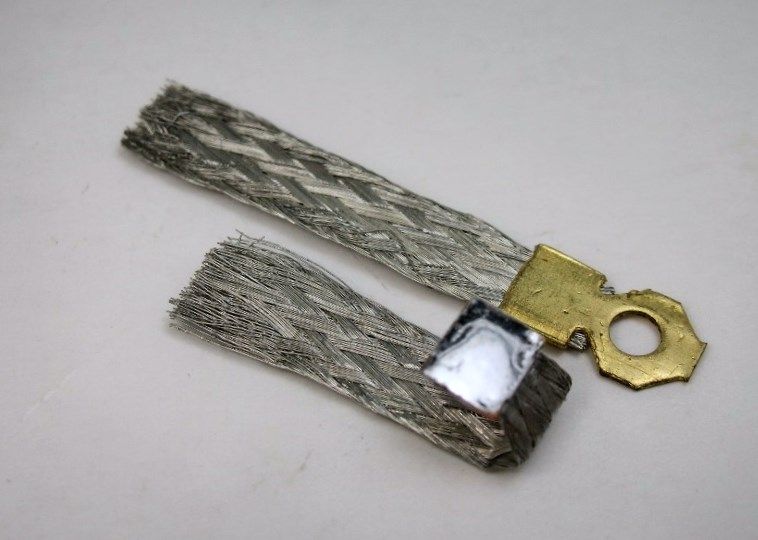
 

Race3Chassis53.jpg


After you snug up the screw that clamps the braid in place, give "the wheeze a squeeze" as shown below:
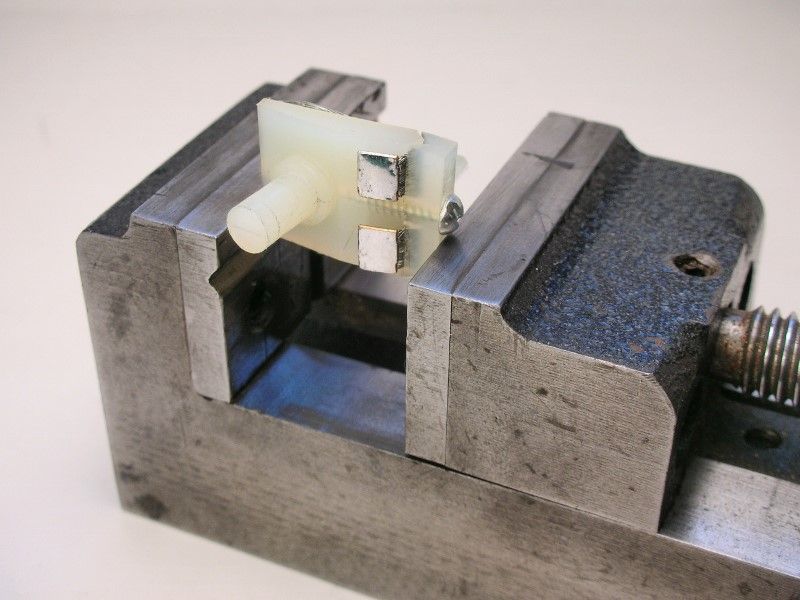
 

Race3Chassis60.jpg


Here's the finished guide and Cox Superflex lead wire. The guide post is tapered and has a larger diameter at the top. It snapped into place and won't fall out:
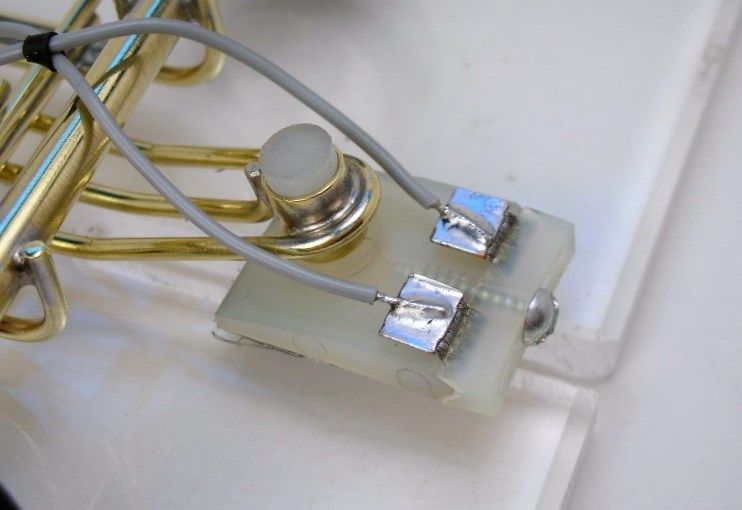
 

Race3Chassis59.jpg


The finished roller:


Race3Chassis56.jpg


Heat shrink tubing was originally developed by Raychem Corporation in the late 1950s. I used it to help organize the lead wires
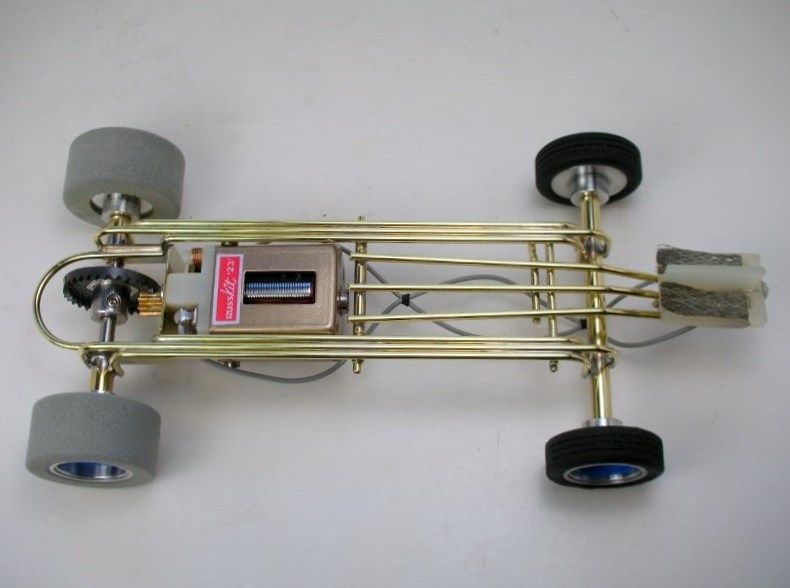
 

Race3Chassis50.jpg


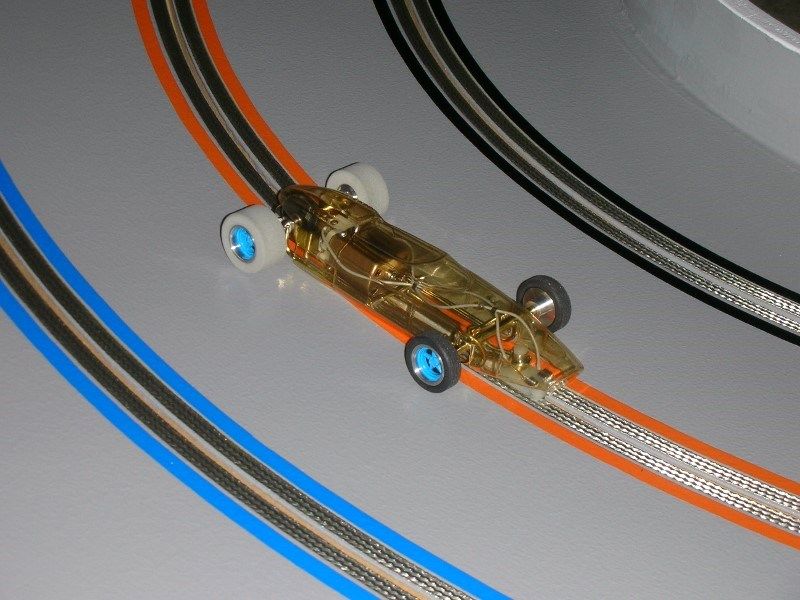
Time to hit the track!


Race3Chassis55.jpg


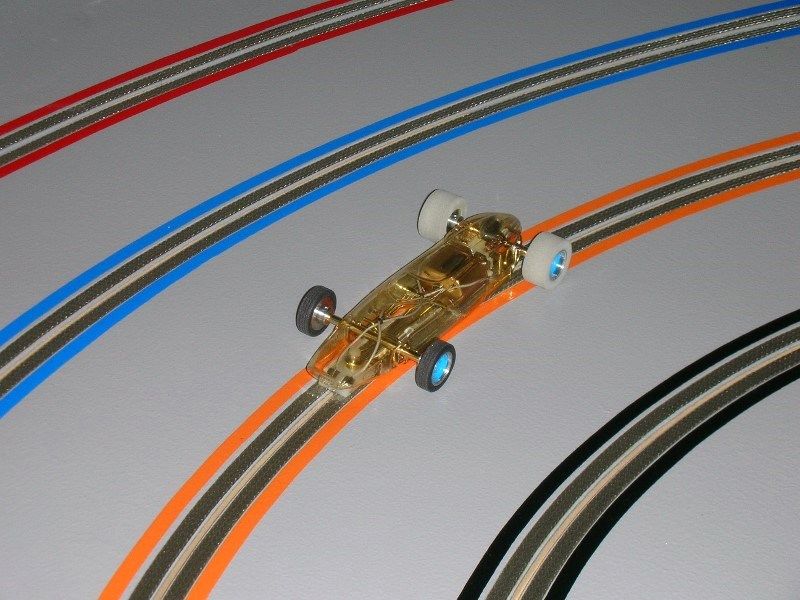
Can you tell that "clear" body is vintage. :crazy: Talk about yellowing. :laugh2: It looks worse in the pictures and it's going to be painted red so it will work out OK.
 

Race3Chassis54.jpg


Okie Dokie, the motor is a bullet. It spins the VC's all the way down the main straight. The track has only had one light application of spray glue (in the turns only) by Gary when we set it up. I just gave it another shot including the first half of the main straight.


Waiting for the Naphtha to evaporate............


  • slotbaker and miko like this

Rick Thigpen
Check out Steve Okeefe's great web site at its new home here at Slotblog:
The Independent Scratchbuilder
There's much more to come...


#77 Pablo

Pablo

    Builder

  • Administrator
  • PipPipPipPipPipPipPipPip
  • 18,447 posts
  • Joined: 20-February 06
  • Gender:Male
  • Location:Cleveland, Tennessee

Posted 25 October 2013 - 06:02 PM

Sweet. I have 2 comments.

1) Greg G's track was very slippery at first. I don't know what Greg did to it, but it got to the point of perfection in a matter of a couple weeks. For what it's worth.

2) A reliable source on Slotblog recently said yellowed old bodies can be improved by direct sunlight for a period of time. I haven't tried it but the guy said it works.


Super SANO, Rick , I'm floored :)


Paul Wolcott


#78 SlotStox#53

SlotStox#53

    Posting Leader

  • Full Member
  • PipPipPipPipPipPipPip
  • 4,084 posts
  • Joined: 13-March 13
  • Gender:Male
  • Location:TX

Posted 25 October 2013 - 06:07 PM

The finished roller looks amazing Rick! Especially on your new track :D :D

That new Russkit decal really shows up with the gold paint & those wheel inserts!!!!!

At least I'm hoping with spinning the tires all down the straight you didn't have the horrible tipping as you've found with other R&C builds?

#79 dc-65x

dc-65x

    Grand Champion Poster

  • Subscriber
  • PipPipPipPipPipPipPipPip
  • 6,971 posts
  • Joined: 14-February 06
  • Gender:Male
  • Location:Captain Rick: The only vintage slot car nut in SW Oregon?

Posted 25 October 2013 - 08:43 PM

Hmmmmmm.....................
 

I think I need to dig out one of my still packed away from moving R&C cars that tilted at Eddie's and try it on my track.


Rick Thigpen
Check out Steve Okeefe's great web site at its new home here at Slotblog:
The Independent Scratchbuilder
There's much more to come...


#80 dc-65x

dc-65x

    Grand Champion Poster

  • Subscriber
  • PipPipPipPipPipPipPipPip
  • 6,971 posts
  • Joined: 14-February 06
  • Gender:Male
  • Location:Captain Rick: The only vintage slot car nut in SW Oregon?

Posted 30 November 2013 - 07:34 PM

I think I got a little carried away with my setup for adding exhaust-a-ma-pipes to my GP Ferrari :shok:


Race3Chassis66.jpg


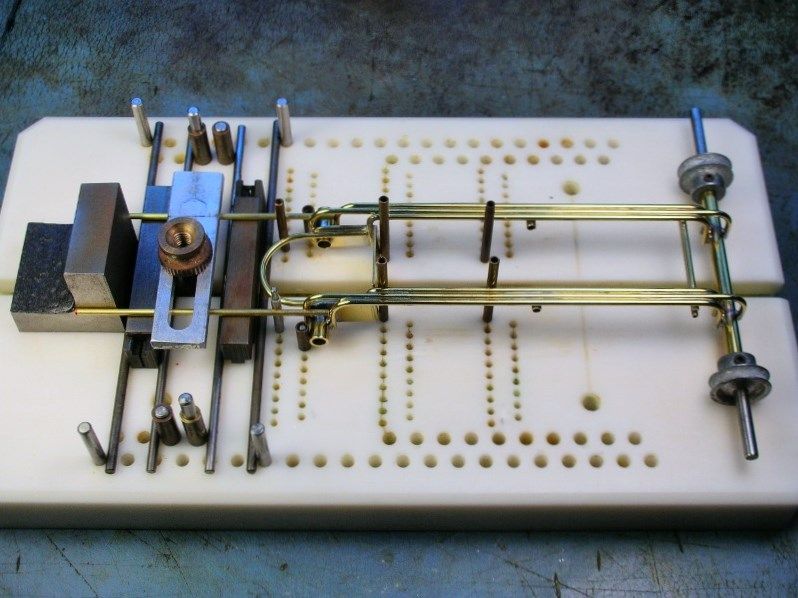
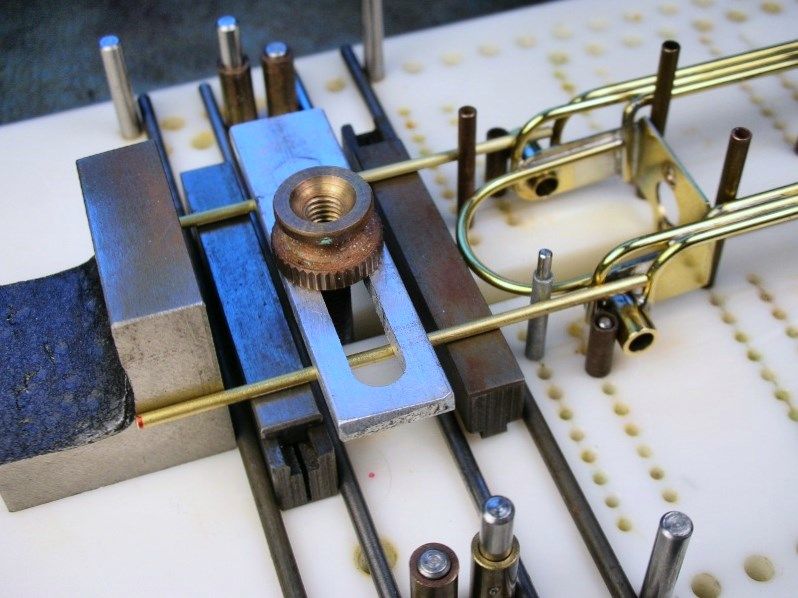
I'm adding those 2 pieces of 1/16" brass rod to attach the pipes to. I needed the chassis to be upside down and parallel to the jig. The rods needed to be clamped at the korrect height, parallel to the jig and to each other too:


Race3Chassis67.jpg


An hour to set it up and a minute to solder them on :laugh2:


TonyP once told me he could just "eyeball" parts into place on his chassis and BAM! The parts were within a few thousandths of perfect location and squareness. That's what a gifted craftsman can do. It's called talent.


Then there's me...........I've got to use everything I can think of to get things into position :dash2:

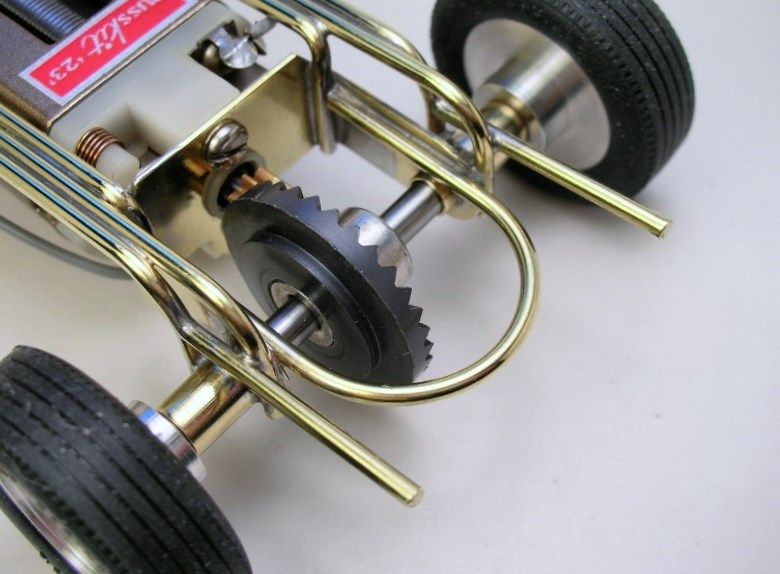
The good news is it worked and the little brass exhaust hangers are in place:


Race3Chassis63.jpg


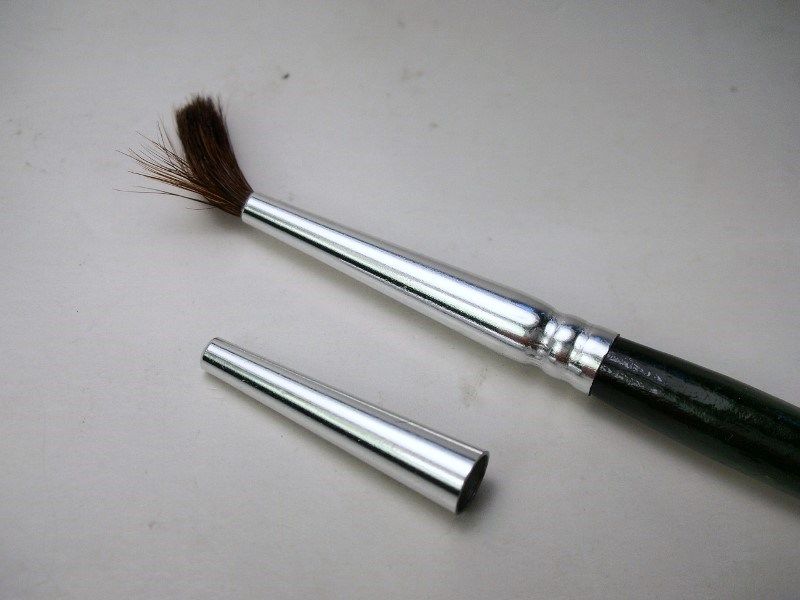
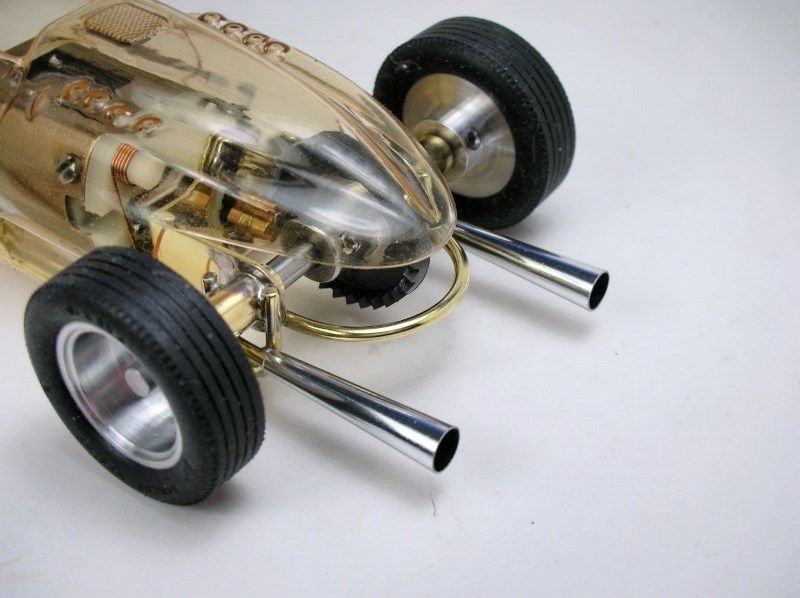
In true 1960's fashion, I cut up paint brushes to use as exhaust "trumpets":


Race3Chassis64.jpg


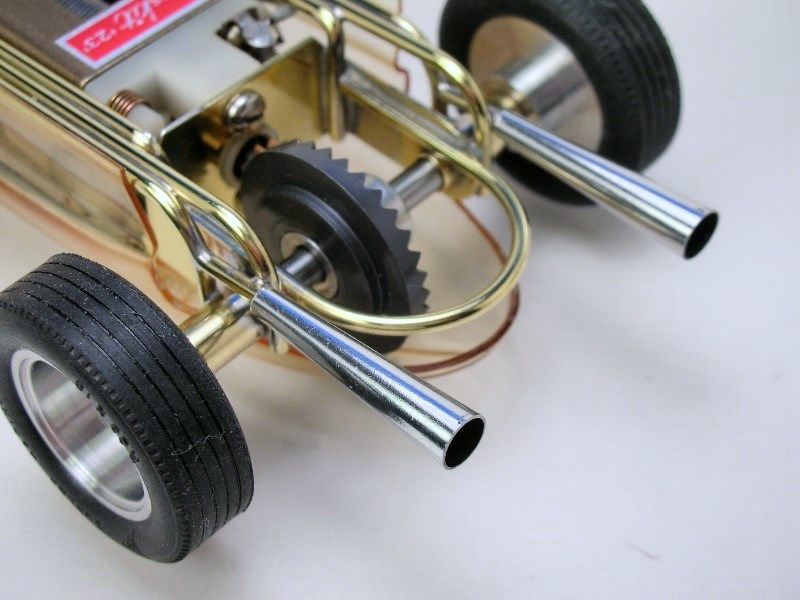
Here they are epoxied in place:


Race3Chassis69.jpg


I think they look pretty cool.


Race3Chassis62.jpg


Probably not a good idea for a Pro Main contender but........I sure don't have to worry about that! :dance3:


  • endbelldrive and slotbaker like this

Rick Thigpen
Check out Steve Okeefe's great web site at its new home here at Slotblog:
The Independent Scratchbuilder
There's much more to come...


#81 SlotStox#53

SlotStox#53

    Posting Leader

  • Full Member
  • PipPipPipPipPipPipPip
  • 4,084 posts
  • Joined: 13-March 13
  • Gender:Male
  • Location:TX

Posted 30 November 2013 - 07:41 PM

Nothing like a good bit of setting up and preparation!!! :D If a job is worth doing, it's worth doing "RIGHT" :D :laugh2:


The end result is well worth it Rick, with those paint brushes looking like real exhaust trumpets.. Outstanding!


#82 Tex

Tex

    Grand Champion Poster

  • Full Member
  • PipPipPipPipPipPipPipPip
  • 9,243 posts
  • Joined: 07-July 06
  • Gender:Male
  • Location:Denton, TX

Posted 01 December 2013 - 02:02 PM

It's those details that really make the car so swell!


Richard L. Hofer

Remember, two wrongs don't make a right... but three lefts do! Only you're a block over and a block behind.

#83 Pablo

Pablo

    Builder

  • Administrator
  • PipPipPipPipPipPipPipPip
  • 18,447 posts
  • Joined: 20-February 06
  • Gender:Male
  • Location:Cleveland, Tennessee

Posted 01 December 2013 - 04:54 PM

:heart:


Paul Wolcott


#84 dc-65x

dc-65x

    Grand Champion Poster

  • Subscriber
  • PipPipPipPipPipPipPipPip
  • 6,971 posts
  • Joined: 14-February 06
  • Gender:Male
  • Location:Captain Rick: The only vintage slot car nut in SW Oregon?

Posted 01 December 2013 - 06:50 PM

That's the kind of details I enjoy doing.....a razor saw, a file and a soldering iron. I'm almost done with that kind of fun and I have to break out the dreaded shaky paint bursh :shok:


Rick Thigpen
Check out Steve Okeefe's great web site at its new home here at Slotblog:
The Independent Scratchbuilder
There's much more to come...


#85 SlotStox#53

SlotStox#53

    Posting Leader

  • Full Member
  • PipPipPipPipPipPipPip
  • 4,084 posts
  • Joined: 13-March 13
  • Gender:Male
  • Location:TX

Posted 01 December 2013 - 07:01 PM

Not the shaky paint brush! :shok: You'll do fine Rick :good: :D


#86 havlicek

havlicek

    OCD Rewinder

  • Subscriber
  • PipPipPipPipPipPipPipPip
  • 11,198 posts
  • Joined: 20-August 07
  • Gender:Male
  • Location:NY

Posted 02 December 2013 - 07:45 AM

Hi Rick,


     Super slick build as always!  In answer to Pablo's question:


How do you remove the epoxy from the comm and shaft areas ?


     You've got a system that works for you for sure, but generally speaking, it's the kiss of death to get epoxy in the com slots and should be avoided.  The com gets the brunt of the heat thing and even with a mild wind, the epoxy can soften and quickly foul (and re-foul after cleaning again).  On the Mabuchi type coms, you're more or less dealing with a flush surface all the way around, so cutting the com can remove most or all of the epoxy.  On the old Kirkwood and Mura coms with actual cut com slots, it's "pretty much" impossible to get the stuff out of there.  Sometimes a ridiculous amount of patience and the back edge of an X-acto blade can work, but you're just as likely to ruin the arm.  Build on!


-john


  • Jocke P likes this
John Havlicek

#87 Pablo

Pablo

    Builder

  • Administrator
  • PipPipPipPipPipPipPipPip
  • 18,447 posts
  • Joined: 20-February 06
  • Gender:Male
  • Location:Cleveland, Tennessee

Posted 02 December 2013 - 08:25 AM

Thanks John


Paul Wolcott


#88 dc-65x

dc-65x

    Grand Champion Poster

  • Subscriber
  • PipPipPipPipPipPipPipPip
  • 6,971 posts
  • Joined: 14-February 06
  • Gender:Male
  • Location:Captain Rick: The only vintage slot car nut in SW Oregon?

Posted 02 December 2013 - 12:00 PM

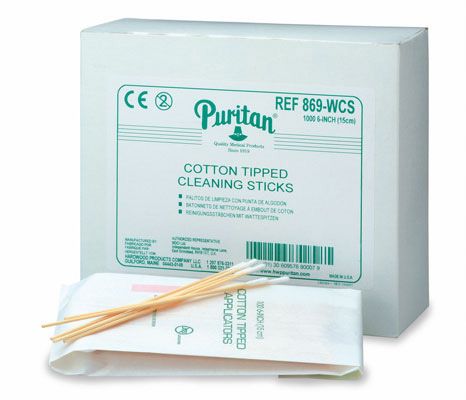
Another method for cleaning the not yet hardened epoxy out of com slots is using wooden cotton swabs, not the cardboard Q-Tip brand:


cottonmini-tipapp.jpg


After you've cleaned off the epoxy with the cotton tip you can carefully break the stick in half. Most of the time it will break unevenly and you'll be left with nice sharp edges that will fit nicely in the comm slots without damaging them.


Or you could use a toothpick :)


What I've done in the past is to just wipe the Crap-O-La off with my finger before it sets up. Any film left can be sanded off with very fine sand paper while spinning the arm in a drill.


In this post I show the process:


http://slotblog.net/...tors-made-easy/


Rick Thigpen
Check out Steve Okeefe's great web site at its new home here at Slotblog:
The Independent Scratchbuilder
There's much more to come...


#89 dc-65x

dc-65x

    Grand Champion Poster

  • Subscriber
  • PipPipPipPipPipPipPipPip
  • 6,971 posts
  • Joined: 14-February 06
  • Gender:Male
  • Location:Captain Rick: The only vintage slot car nut in SW Oregon?

Posted 29 December 2013 - 03:39 PM

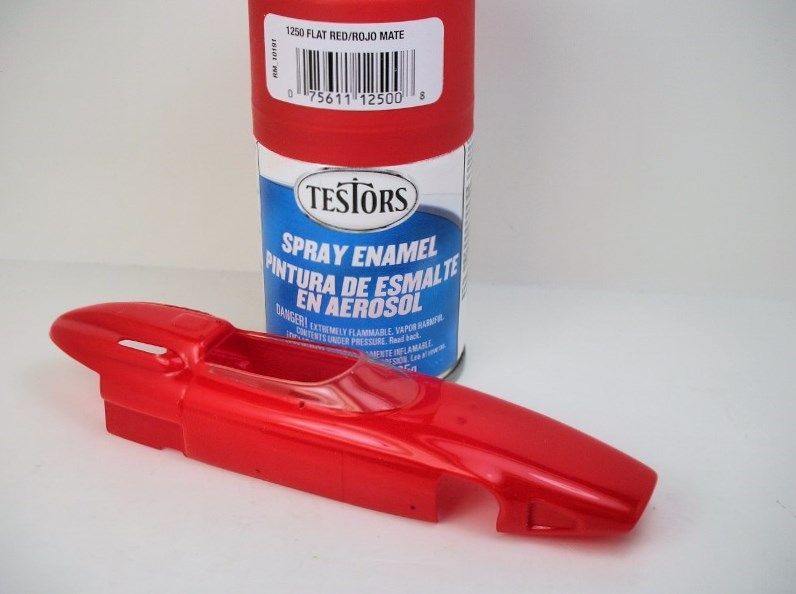
It's been slow going for me. I struggle with the body, driver and detailing process. :wacko2: I've got the bodies main color painted and I've been giving the slow drying enamel a few days to cure. This is the first time I've used the Testors spray cans instead of an air brush:


1017800x600.jpg


The spray can worked just fine. The paint comes out pretty heavy so I had to be careful and let each coat of flat red flash over before going with the next coat. 4 coats did the trick and no backer seems necessary on this non-metallic color.


All the "sub-assemblies" are finished and ready to install on the body. I hope to finish this puppy up soon............

Rick Thigpen
Check out Steve Okeefe's great web site at its new home here at Slotblog:
The Independent Scratchbuilder
There's much more to come...


#90 SlotStox#53

SlotStox#53

    Posting Leader

  • Full Member
  • PipPipPipPipPipPipPip
  • 4,084 posts
  • Joined: 13-March 13
  • Gender:Male
  • Location:TX

Posted 29 December 2013 - 09:03 PM

Looking good Rick :good: here's to seeing it all together, its gonna look sweet :D

Can you use water based paints like creatix on the older bodies? Or does it have to be enamel ?

#91 Bill from NH

Bill from NH

    Age scrubs away speed!

  • Full Member
  • PipPipPipPipPipPipPipPip
  • 14,733 posts
  • Joined: 02-August 07
  • Gender:Male
  • Location:New Boston, NH

Posted 29 December 2013 - 10:11 PM

Createx ought to work good on the older plastics as well as most everything else, but you'll need an airbrush because I don't think any water-based acrylic comes in a rattle can. Not all acrylics adhere to lexan the same. I brush a sample on a scrap of lexan, let it dry 24hrs., then see how easily it scrapes off with a wooden toothpick. Delta Creamcoat paints need 48-72 hrs. before they totally dry. Most others need only 24 hrs..


Bill Fernald
 
I intend to live forever!  So far, so good.  :laugh2:  :laugh2: 

#92 dc-65x

dc-65x

    Grand Champion Poster

  • Subscriber
  • PipPipPipPipPipPipPipPip
  • 6,971 posts
  • Joined: 14-February 06
  • Gender:Male
  • Location:Captain Rick: The only vintage slot car nut in SW Oregon?

Posted 30 December 2013 - 11:46 AM


Can you use water based paints like creatix on the older bodies? Or does it have to be enamel ?


Paul, on butyrate bodies, I've had no reason to use anything but Testors enamel with it's ease of use and vast array of color choices. So I defer to others about the water base paints. Just be sure NOT to use lacquer!


Rick Thigpen
Check out Steve Okeefe's great web site at its new home here at Slotblog:
The Independent Scratchbuilder
There's much more to come...


#93 SlotStox#53

SlotStox#53

    Posting Leader

  • Full Member
  • PipPipPipPipPipPipPip
  • 4,084 posts
  • Joined: 13-March 13
  • Gender:Male
  • Location:TX

Posted 30 December 2013 - 12:40 PM

Gotcha Rick :good: & thanks Bill...

#94 dc-65x

dc-65x

    Grand Champion Poster

  • Subscriber
  • PipPipPipPipPipPipPipPip
  • 6,971 posts
  • Joined: 14-February 06
  • Gender:Male
  • Location:Captain Rick: The only vintage slot car nut in SW Oregon?

Posted 30 December 2013 - 08:43 PM

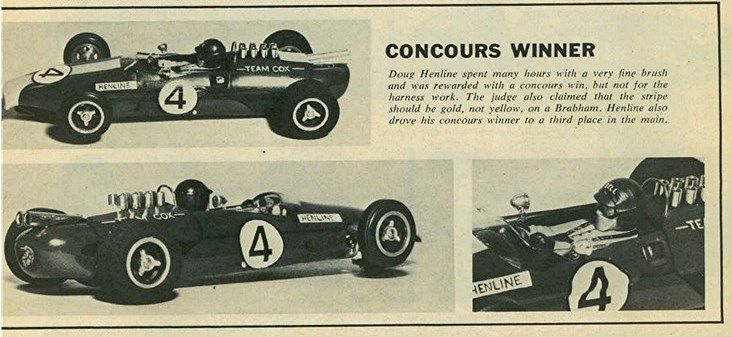
I'm building this car for race #3 in the R&C series as it was one of my favorites. What I really love about it was the concourse cars were real state of the art "racers", not "motorized models".


Check out the concourse winning car by Doug Henline. He also finished 3rd in the main!

henlineRampCbrabhampg3-Copy.jpg


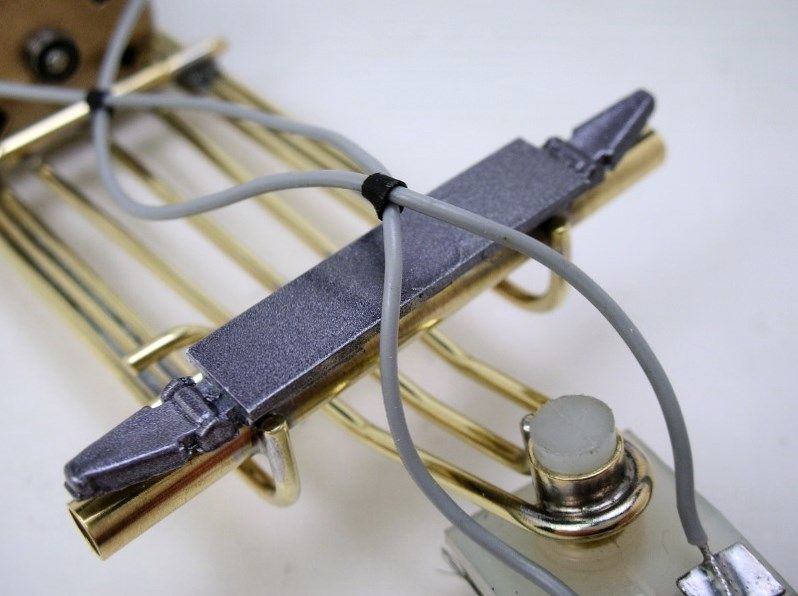
I went to work making up some lightweight detail goodies for my Ferrari. I cut up a Cox plastic front suspension unit and glued it to a piece of sheet styrene to widen it. Here it is painted and glued to the axle tube:


1009800x600.jpg


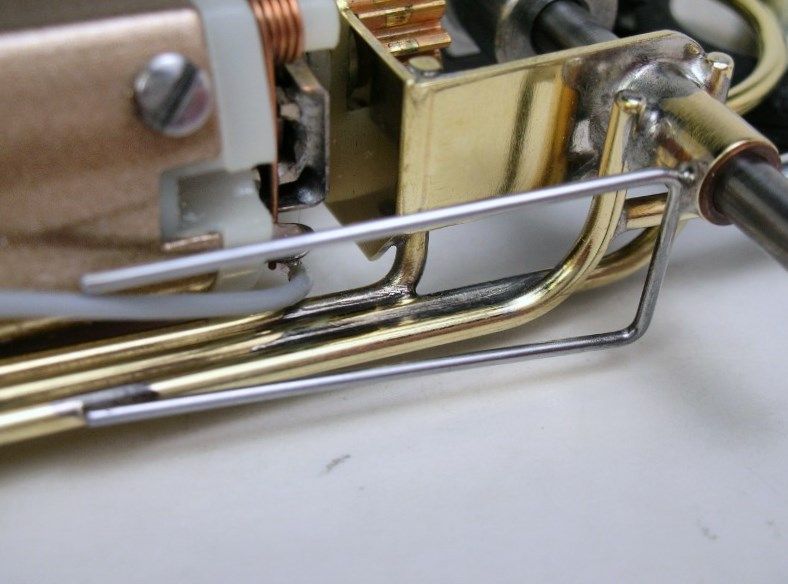
For the rear, I bent up some .030" piano wire and soldered it to the chassis:


1012800x600.jpg


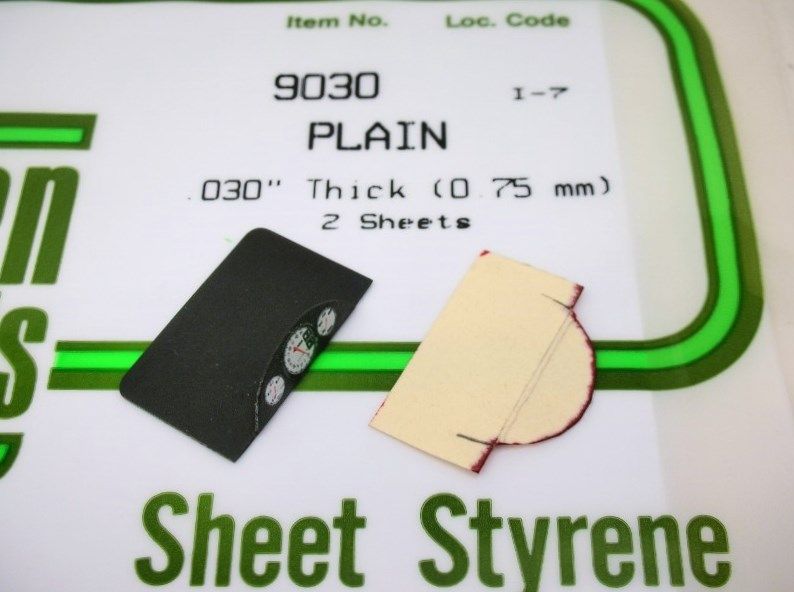
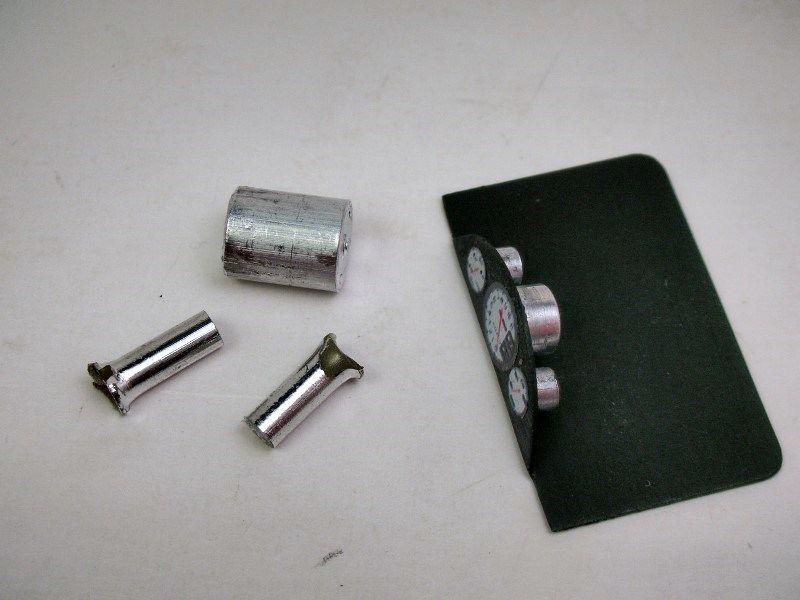
To fancy up the interior a bit I made a dashboard from a card stock template. It's just a piece of sheet plastic......


1001800x600.jpg


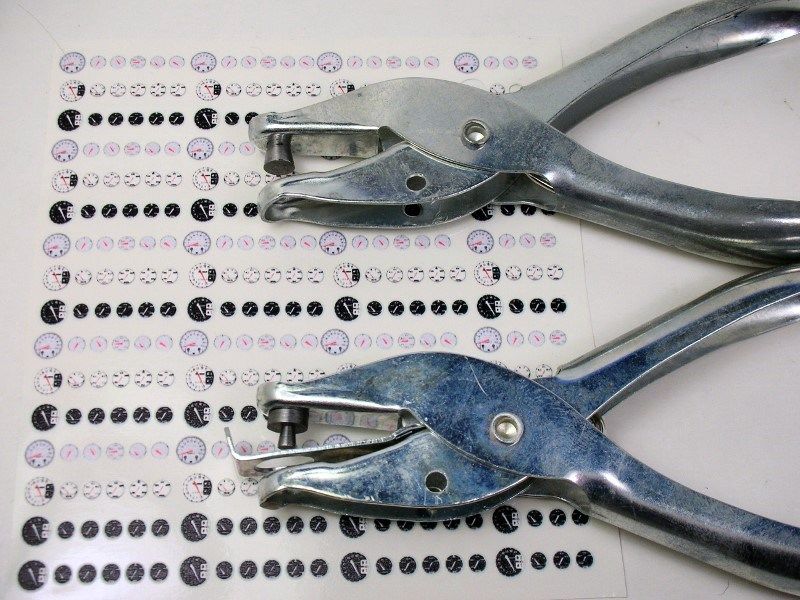
.......with some punched out Patto's Place "peal and stick" gauges:


1004800x600.jpg


The back of the gauges were made up from scrap and glued on:


1006800x600.jpg


The driver is made up from a Russkit body and a Cox head:


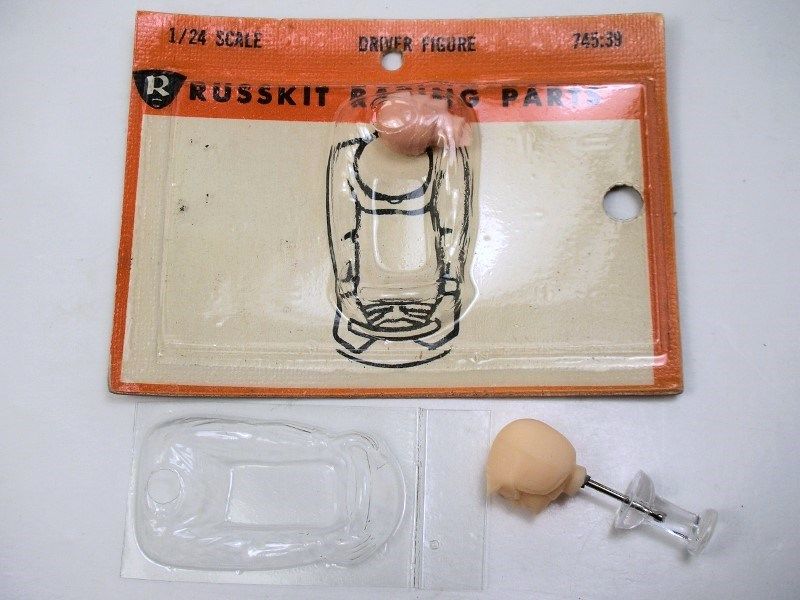
1002800x600.jpg


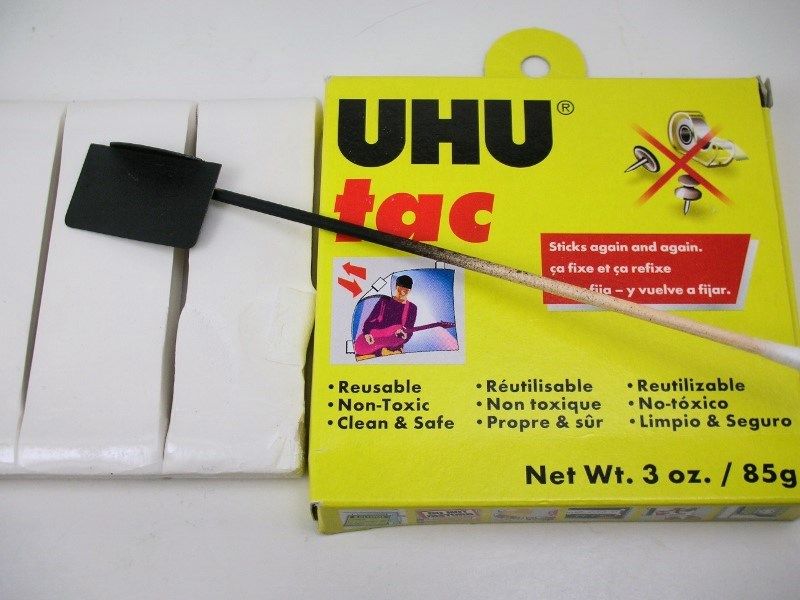
Maybe it will be old news to most but I just discovered this neato "snot" that's like really sticky clay. It's great to hold parts on a stick to paint them:


1005800x600.jpg


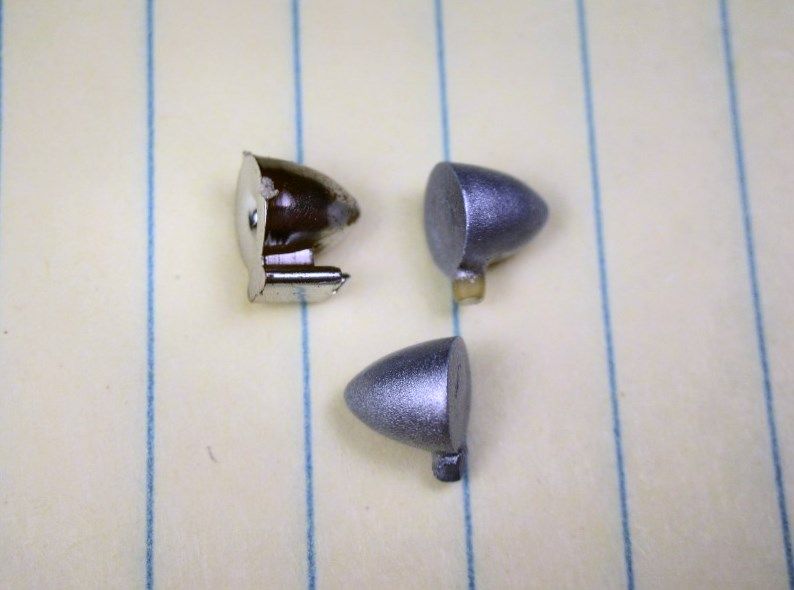
OK, mirrors...........here's a fiddly way to make the somewhat common Revell mirrors work. I cut and filed the huge mounting flange down to a small pin that could be glued into a matching hole. The chrome mirror is the before and the painted mirrors are after the mod:


1008800x600.jpg


Next time I think I'll try cutting the stock flange completely off and see if I can drill a hole in it so a post of some kind can be glued in.


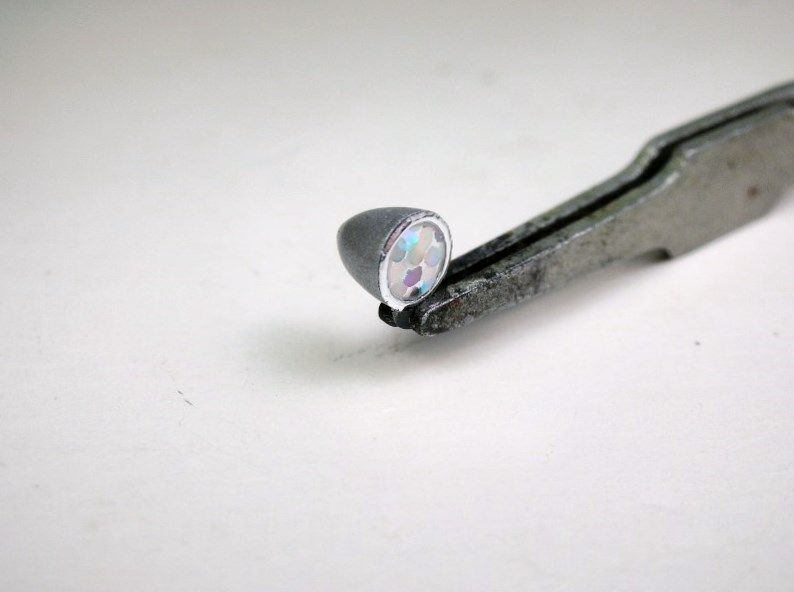
My crafty wife had some of these round chrome stickers..................
 

1014800x600.jpg


.................so I stuck them on as the "mirror":


1013800x600.jpg


Lastly I needed some velocity stacks. Most pictures I've found of the Ferrari 158 GP show it with the stacks covered with a screen cover. :o


Well........"Homey don't play dat". :laugh2:


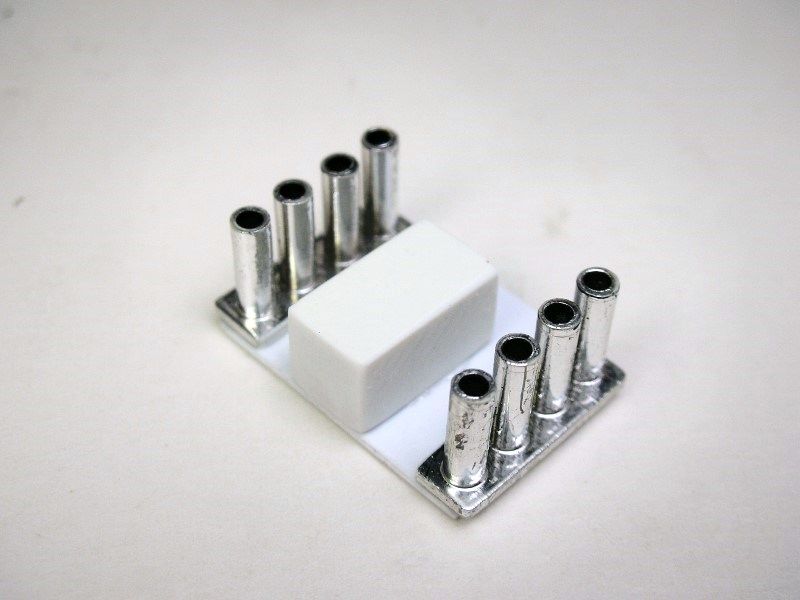
I found a set of 8 stacks in my "box-O-scrap" parts, cut it in half and glued it to some sheet plastic. The plastic piece in the middle is a "stop" that sits on the inside of the body and sets the height:


Race3Chassis84.jpg


All this junk is light and shouldn't affect performance.


Next it all comes together.........
 

Oh, in case anyone else is watching the Alamo Bowl on ESPN..........
 

GO DUCKS!


  • Bruce Wayne likes this

Rick Thigpen
Check out Steve Okeefe's great web site at its new home here at Slotblog:
The Independent Scratchbuilder
There's much more to come...


#95 SlotStox#53

SlotStox#53

    Posting Leader

  • Full Member
  • PipPipPipPipPipPipPip
  • 4,084 posts
  • Joined: 13-March 13
  • Gender:Male
  • Location:TX

Posted 30 December 2013 - 09:02 PM

Very "Concours" Rick :D Love the help with the mirrors by Mrs Rick :good: One cool Ferrari Sir :)


#96 dc-65x

dc-65x

    Grand Champion Poster

  • Subscriber
  • PipPipPipPipPipPipPipPip
  • 6,971 posts
  • Joined: 14-February 06
  • Gender:Male
  • Location:Captain Rick: The only vintage slot car nut in SW Oregon?

Posted 30 December 2013 - 10:05 PM

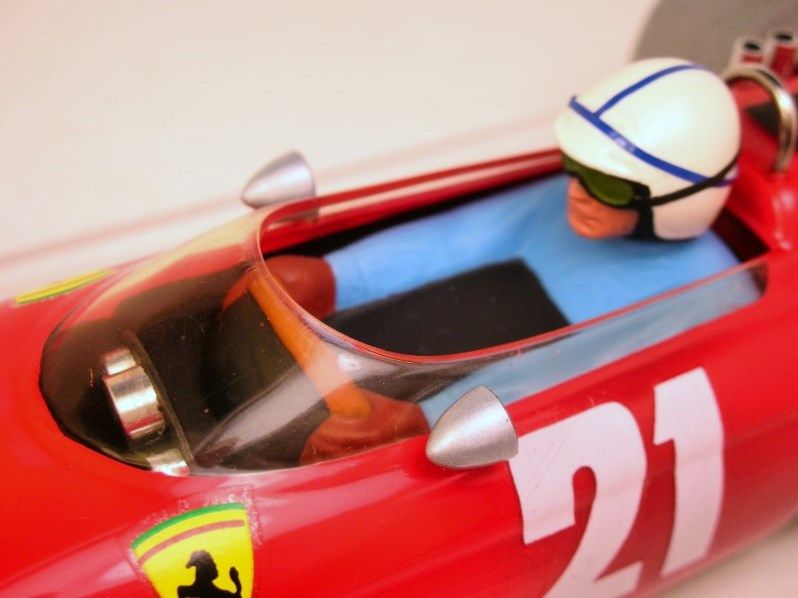
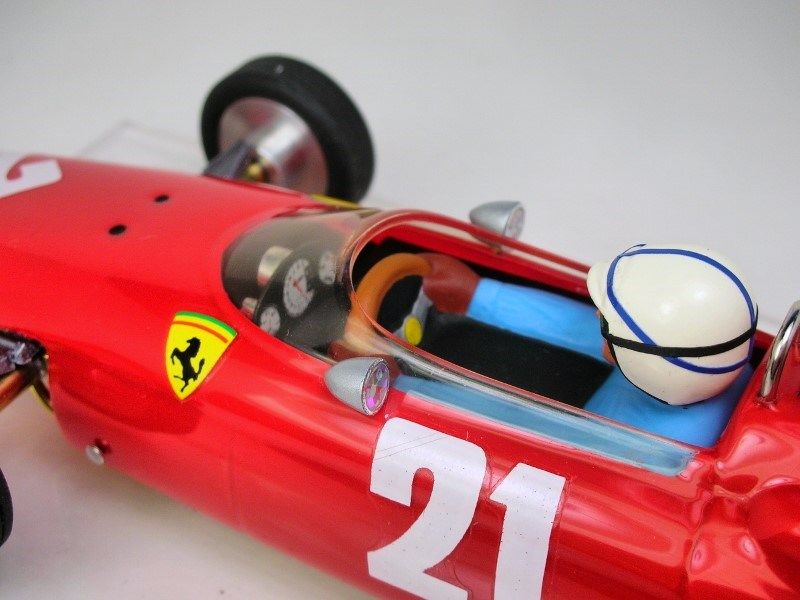
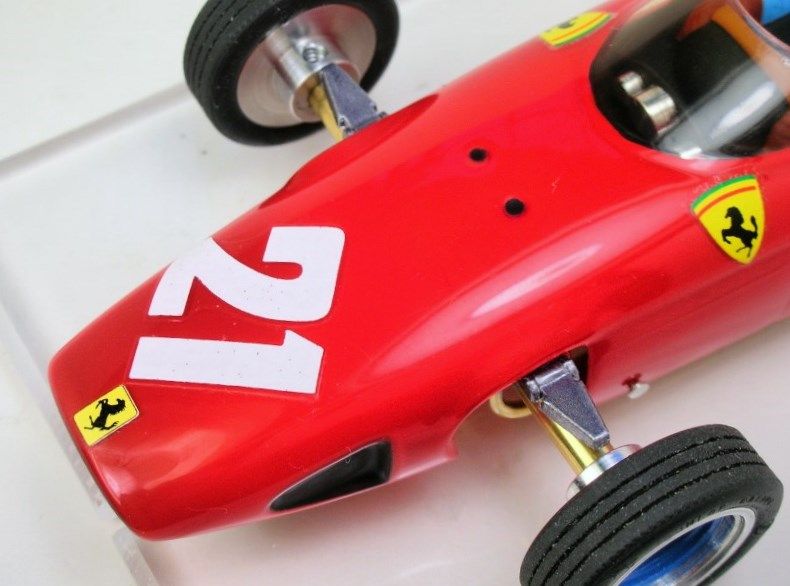
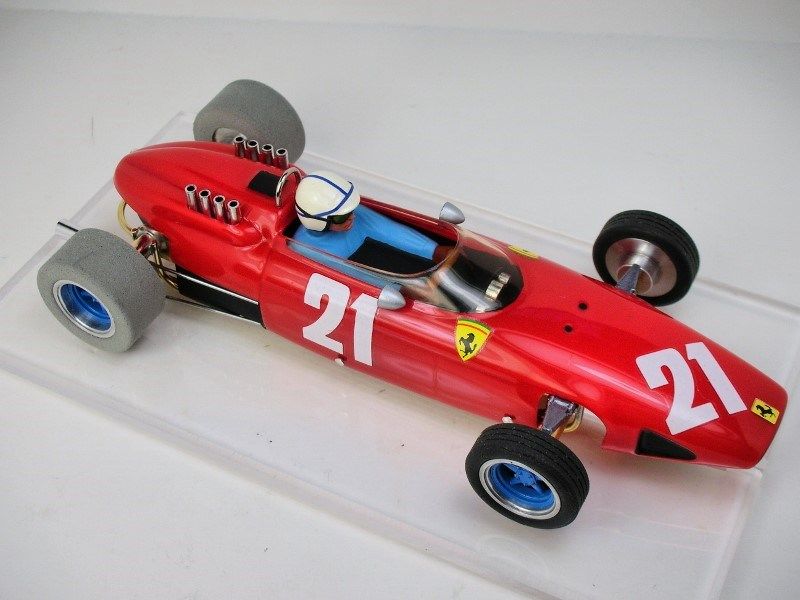
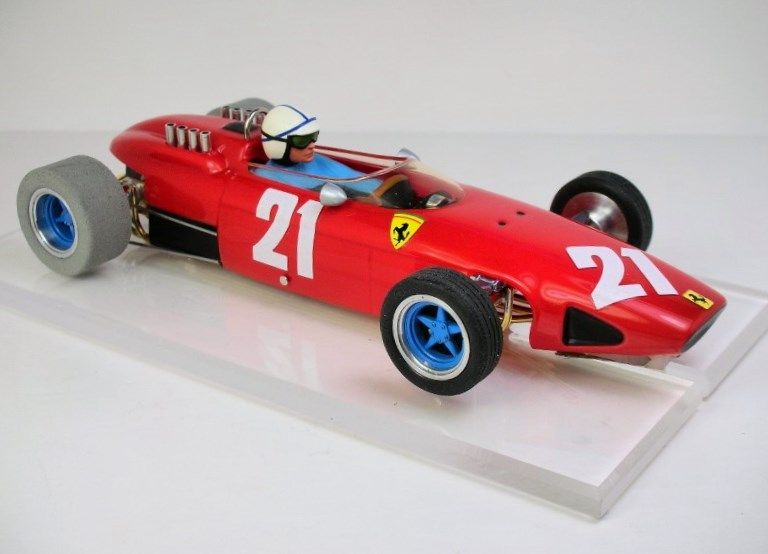
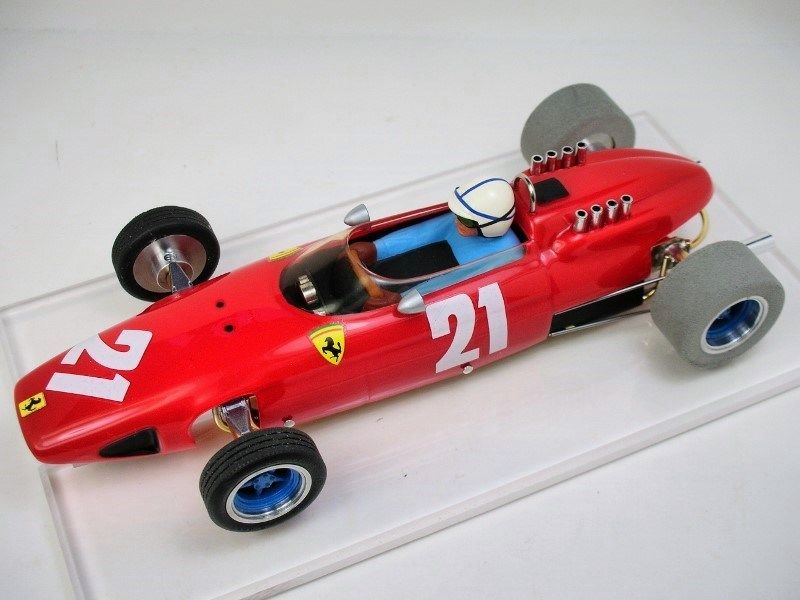
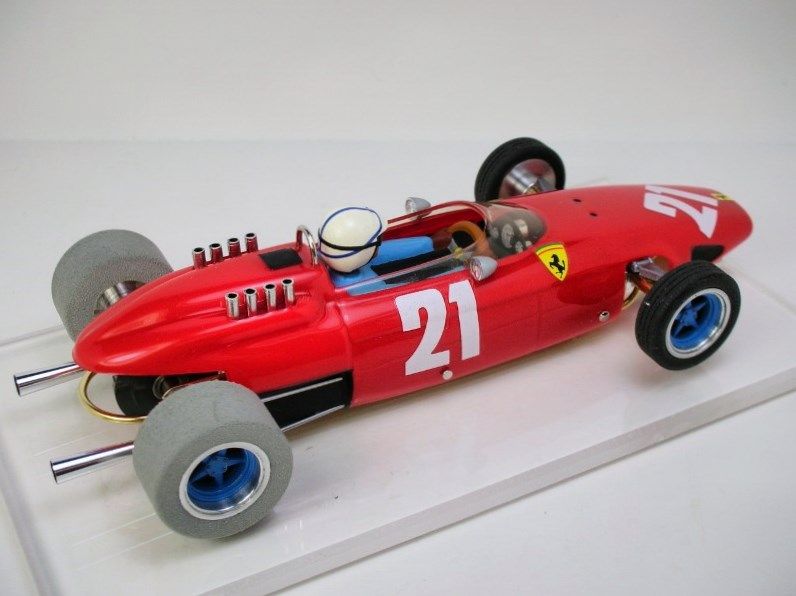
All the fiddly bits are finally together. This car was inspired by the great John Surtees 1964 Monte Carlo car:
 
Race3Chassis78.jpg
 
 
Race3Chassis70.jpg
 

Race3Chassis72.jpg


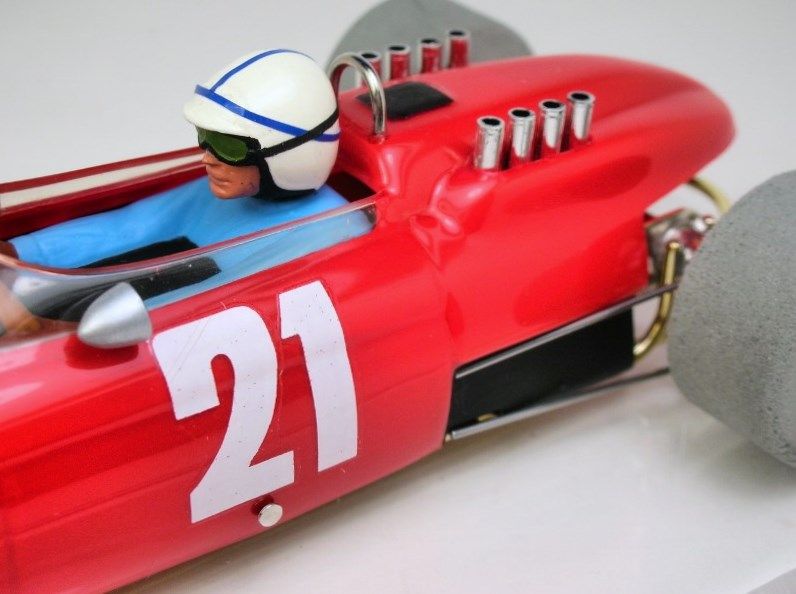
I filed and sanded the goggle strap off the Cox drivers helmet. My paint brushes are too shaky to paint it much less Surtees wonderful helmet stripes. Soooooooooo..........the goggle strap is flat black painted masking tape and the blue stripes are RC striping tape:


Race3Chassis81.jpg


Race3Chassis80.jpg


I like the gauges in the dash and the front suspension arms. It adds some nice detail:


Race3Chassis74.jpg


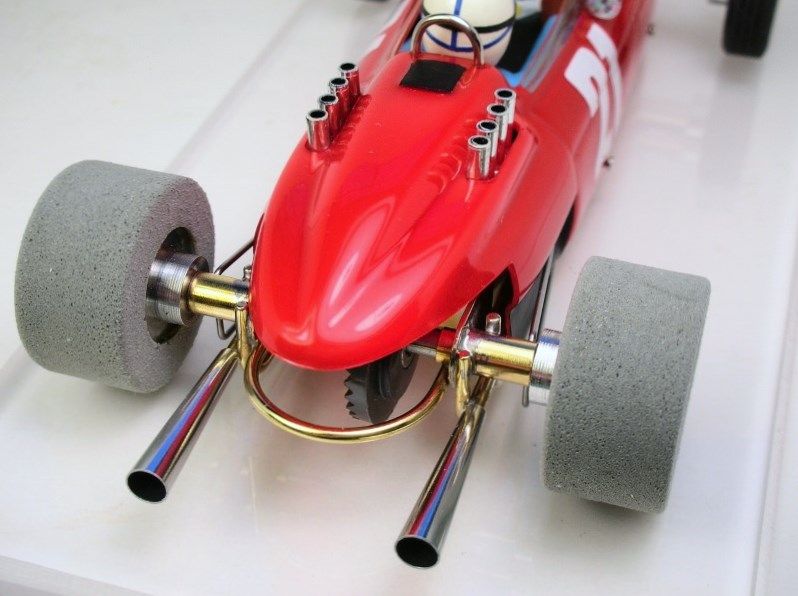
The big honk'n pipes maybe could cause trouble in a crash but I just couldn't help myself:


Race3Chassis76.jpg


The rear suspension bits add something too me thinks:


Race3Chassis75.jpg


One more thing to do, paint the body mounting heads red......then she's done :)


Race3Chassis71.jpg


  • endbelldrive, slotbaker, Bruce Wayne and 1 other like this

Rick Thigpen
Check out Steve Okeefe's great web site at its new home here at Slotblog:
The Independent Scratchbuilder
There's much more to come...


#97 SlotStox#53

SlotStox#53

    Posting Leader

  • Full Member
  • PipPipPipPipPipPipPip
  • 4,084 posts
  • Joined: 13-March 13
  • Gender:Male
  • Location:TX

Posted 30 December 2013 - 10:13 PM

Must get butt in gear and tools/parts fast to finish off Pittman 906 & get my R&C '66 BRM GP started... The level of detail in this Ferrari has raised the concours level :shok: :D Got some nice details for the 906 just been aquiring some parts to git 'er done ... Should be worth the wait :good:


Awesome R&C  revisited car Rick.... Fab build :dance3: certainly given some neat concours ideas and inspiration....


#98 Pablo

Pablo

    Builder

  • Administrator
  • PipPipPipPipPipPipPipPip
  • 18,447 posts
  • Joined: 20-February 06
  • Gender:Male
  • Location:Cleveland, Tennessee

Posted 31 December 2013 - 08:50 AM

Looks like Rick wins concours :clapping:  :good:  :heart:


Paul Wolcott


#99 NY Nick

NY Nick

    Checkered Flag in Hand

  • Full Member
  • PipPipPipPipPipPip
  • 1,051 posts
  • Joined: 14-December 07

Posted 31 December 2013 - 10:35 AM

Really nice


Nick Cerulli

#100 Bill from NH

Bill from NH

    Age scrubs away speed!

  • Full Member
  • PipPipPipPipPipPipPipPip
  • 14,733 posts
  • Joined: 02-August 07
  • Gender:Male
  • Location:New Boston, NH

Posted 31 December 2013 - 11:12 AM

Beautiful car Rick! Have you had the opportunity to put a couple laps on it at your track? :)


Bill Fernald
 
I intend to live forever!  So far, so good.  :laugh2:  :laugh2: 


Electric Dreams Online Shop