Pam's pink Corvette
#51

Posted 10 April 2015 - 07:30 AM
I have a spool of no core (for when I'm using acid flux) and a spool of rosin core.
The rosin core is .022" diam and the no core is .015" diam.
Those diameters are OK for some jobs but when I want thicker solder, I just twist multiple strands together.
#52

Posted 10 April 2015 - 08:07 AM
Rosin core solder. Flows easy, but leaves a nasty mess...
That's why you have a tumbler! ![]()
![]()
I intend to live forever! So far, so good.
#53

Posted 10 April 2015 - 01:03 PM
FWIW, I use 62/36/2 solder for one primary reason - it makes a prettier joint because it's shinier than a 60/40 joint.
I have to agree. On the Corvette chassis, the combination of the golden brass, the copper discoloration, and the bright silvery solder is really nice-looking. For this build I'm going to continue with the Stay Brite stuff (which I've found is Sn - 96%, Ag - 4% with a melting temp of 430F), and do the next with 60-40.
So many options. ;-)
#55

Posted 10 April 2015 - 07:47 PM
Was that lead wire done with the RS torch's small tip? It's as neat as I could do with an iron. ![]()
I intend to live forever! So far, so good.
#56

Posted 10 April 2015 - 08:07 PM
Bill, respectfully, the answer is in post #7.
Normally I wouldn't drift so far, but the subject does pertain. Robb is real tolerant of thread drift.
Dale King's method of twisting solder strands together to create a blend is way out of the box - and I like it. ![]()
Paul Wolcott
#57

Posted 10 April 2015 - 10:27 PM
I know you use the big tip for chassis building. I thought you might have made an exception and used the small tip when doing the minitorched lead wire, but I don't really need to know. ![]()
I intend to live forever! So far, so good.
#58

Posted 10 April 2015 - 10:42 PM
Bill, I throw away the small RS tips. ![]()
Paul Wolcott
#59

Posted 11 April 2015 - 08:57 AM
Minitorched lead wire. SHOW OFF! Looks like it went through the tumbler, too. ![]()
I like it.
#60

Posted 11 April 2015 - 09:54 AM
Wonder where you guys are gonna get that RS stuff once the Shack goes belly-up... as is very likely to occur.
All the rat shacks in my neck of the woods have gone. Closed. Defunct. Sadly goodbye.
Hello to everything being mail ordered in now from McMaster/Carr, Mouser, Digikey, MicroMark, and ePay.
Born to tinker!
#61

Posted 12 April 2015 - 08:47 AM
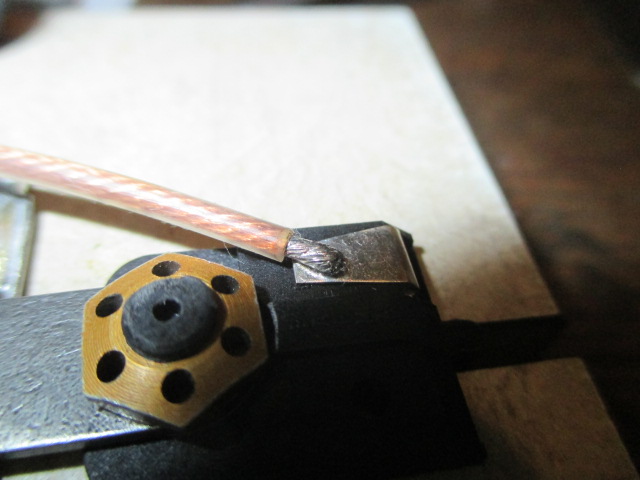
With Robb's permission, a pic for Cheater of the world's first minitorched lead wire.
Are you claiming you torched that leadwire joint in the flag in the pic?
I wanna see you torch a leadwire back onto the clip during a race!!! LOL!
Gregory Wells
Never forget that first place goes to the racer with the MOST laps, not the racer with the FASTEST lap
#62

Posted 12 April 2015 - 09:14 AM
Face it, the dude has mad skills! ![]()
#63

Posted 12 April 2015 - 09:28 AM
"Are you claiming you torched that leadwire joint in the flag in the pic?" Yes
"I wanna see you torch a leadwire back onto the clip during a race!!! LOL!" No ![]()
Paul Wolcott
#64

Posted 12 April 2015 - 09:34 AM
A typo was present in my question to you...
Are you claiming you torched that leadwire joint ON the flag in the pic?
Gregory Wells
Never forget that first place goes to the racer with the MOST laps, not the racer with the FASTEST lap
#65

Posted 12 April 2015 - 09:55 AM
No, sir. I use dummy flags to solder wires to clips no matter what tool I use, however, this time I didn't even use a dummy. ![]()
Paul Wolcott
#66

Posted 12 April 2015 - 10:18 AM
I am thinking he used some sort of a tip on the torch, not the open flame???
#67

Posted 12 April 2015 - 07:19 PM
Eddie, your answer is in post #7. ![]()
Robb, I promise no more thread hijacks from me and I sincerely apologize. ![]()
Paul Wolcott
#68

Posted 13 April 2015 - 07:14 AM
No apologies necessary, kept everybody occupied whilst I was off doing things not related to the Pink Corvette (visiting my mom in the respite home, getting the B-3 out for its first drives of the new year...)
Sunday morning, I returned to it...
Cut out the center of that cross tube to fit the drop arm...
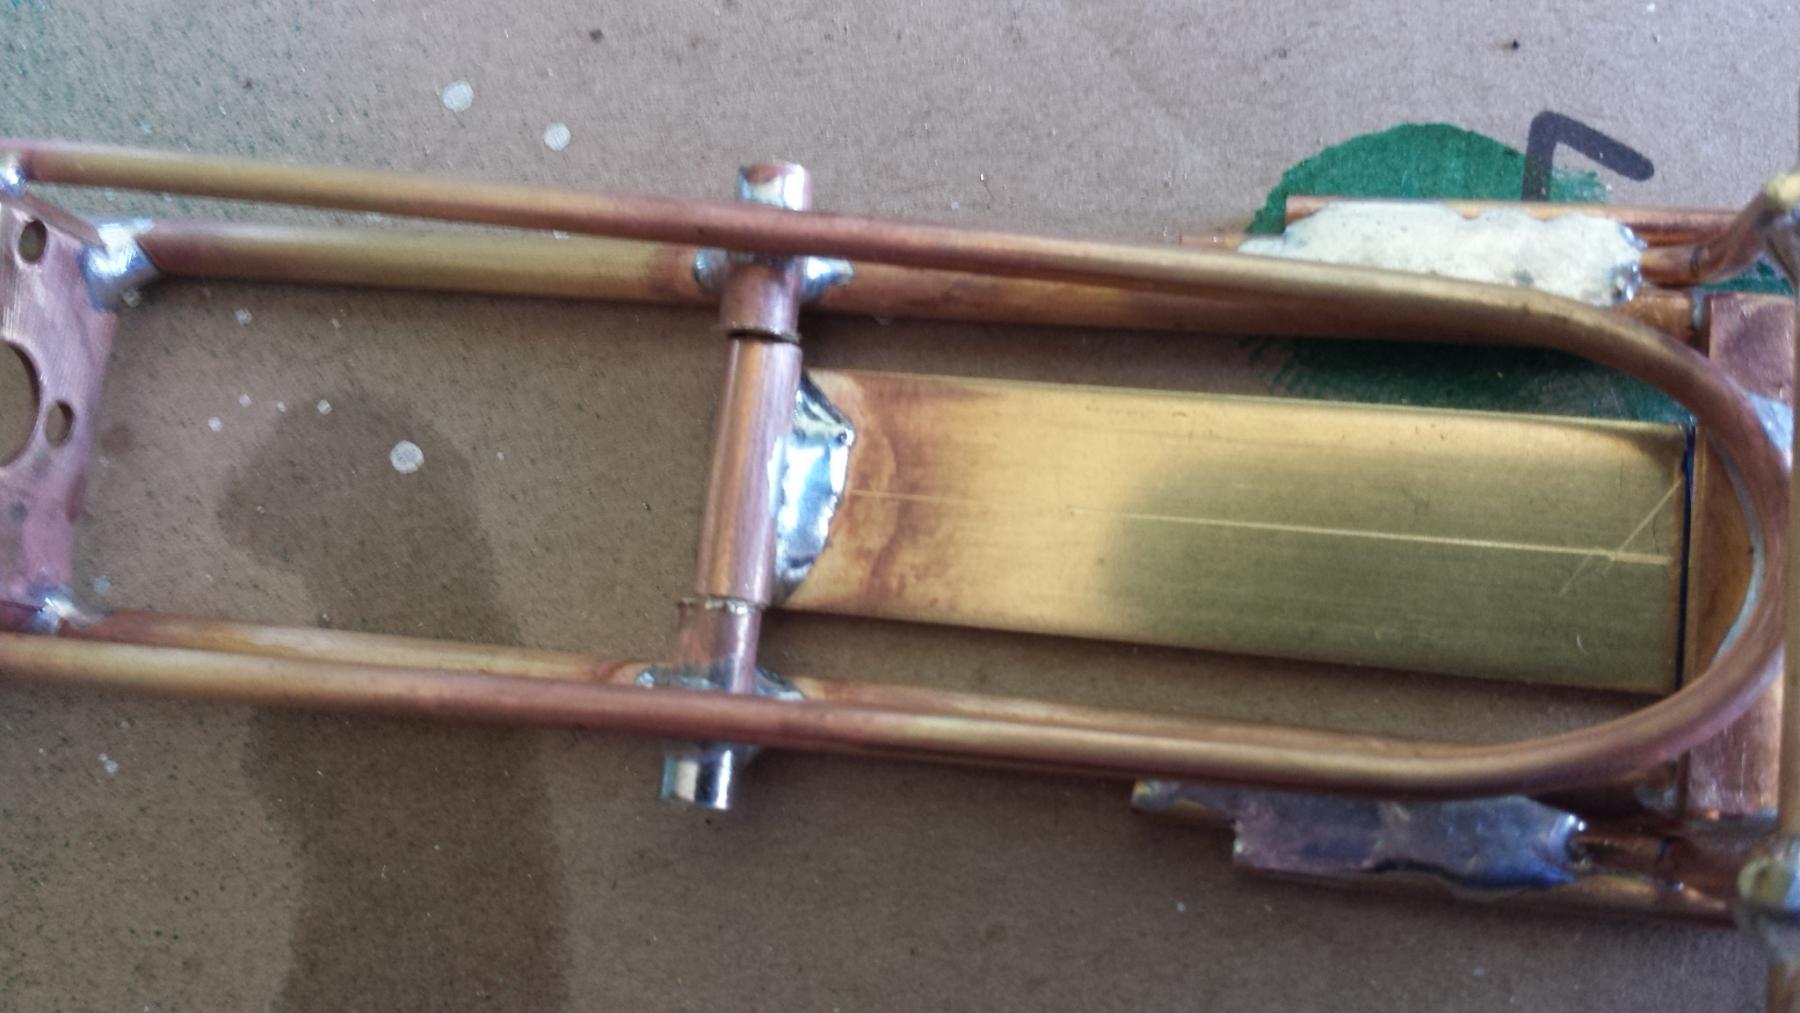
And then shortened the soldered section adn narrowed one of my store-bought guide tongues for soldering.
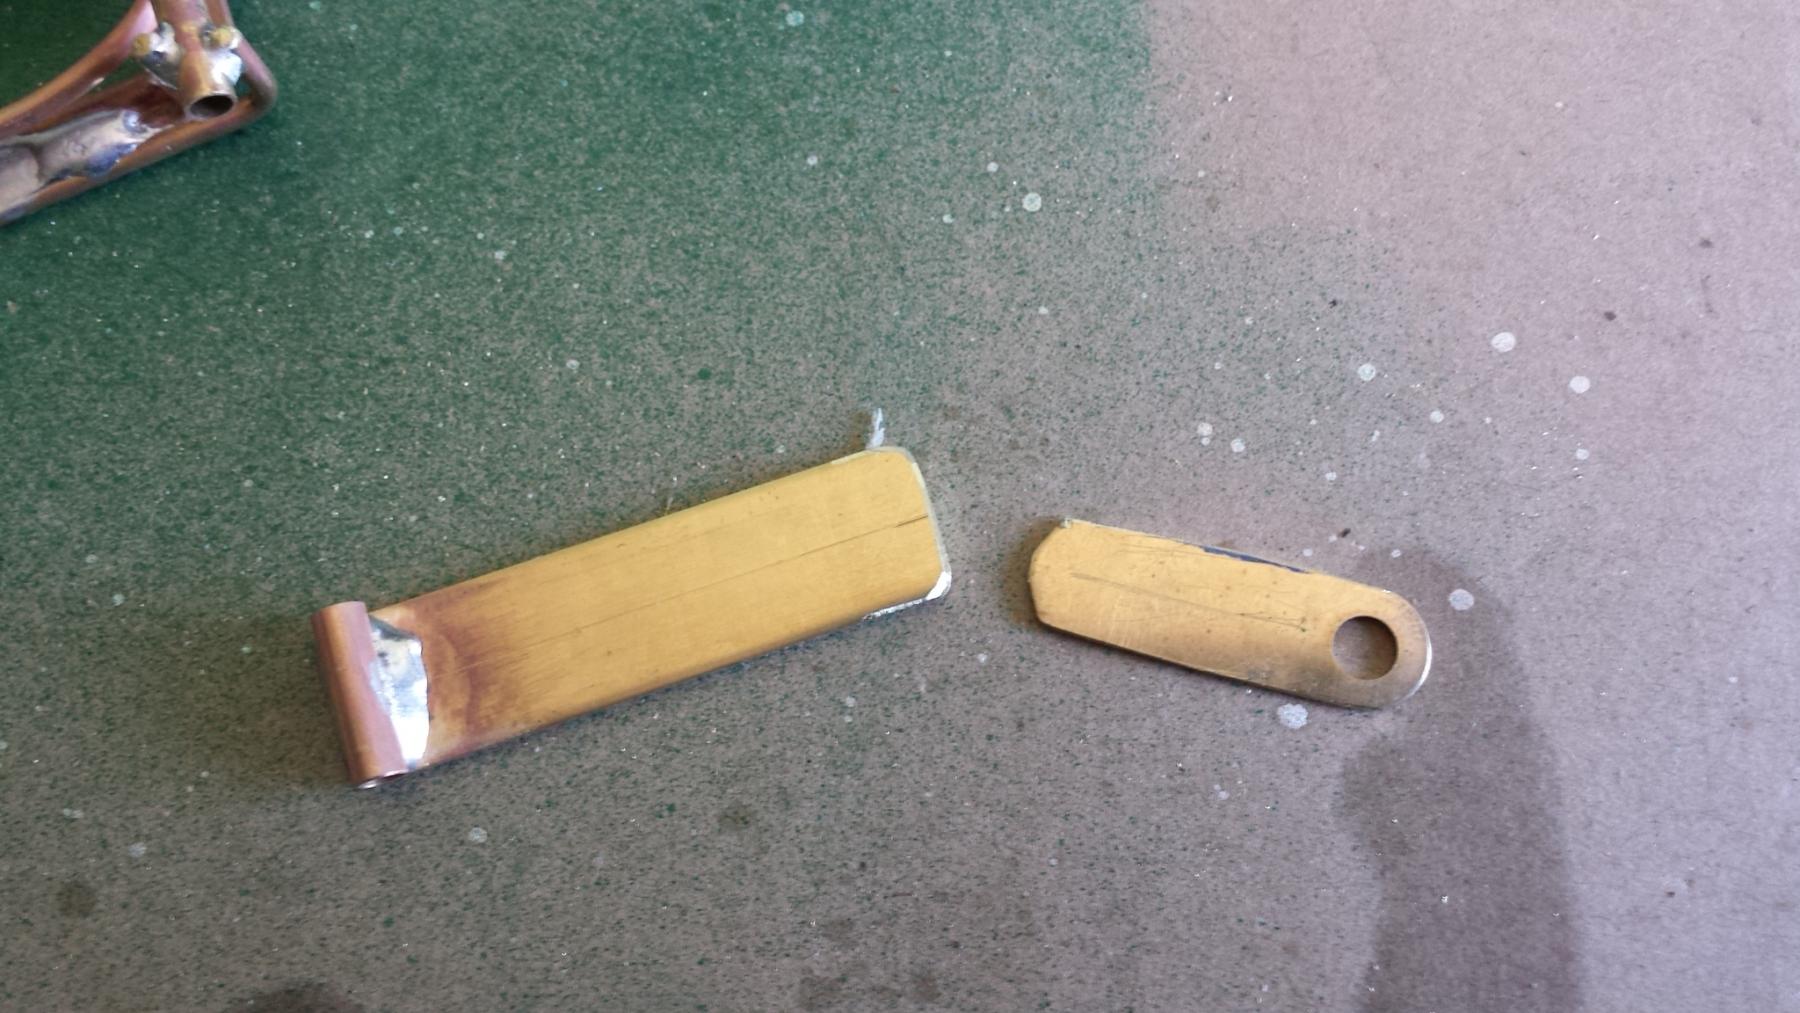
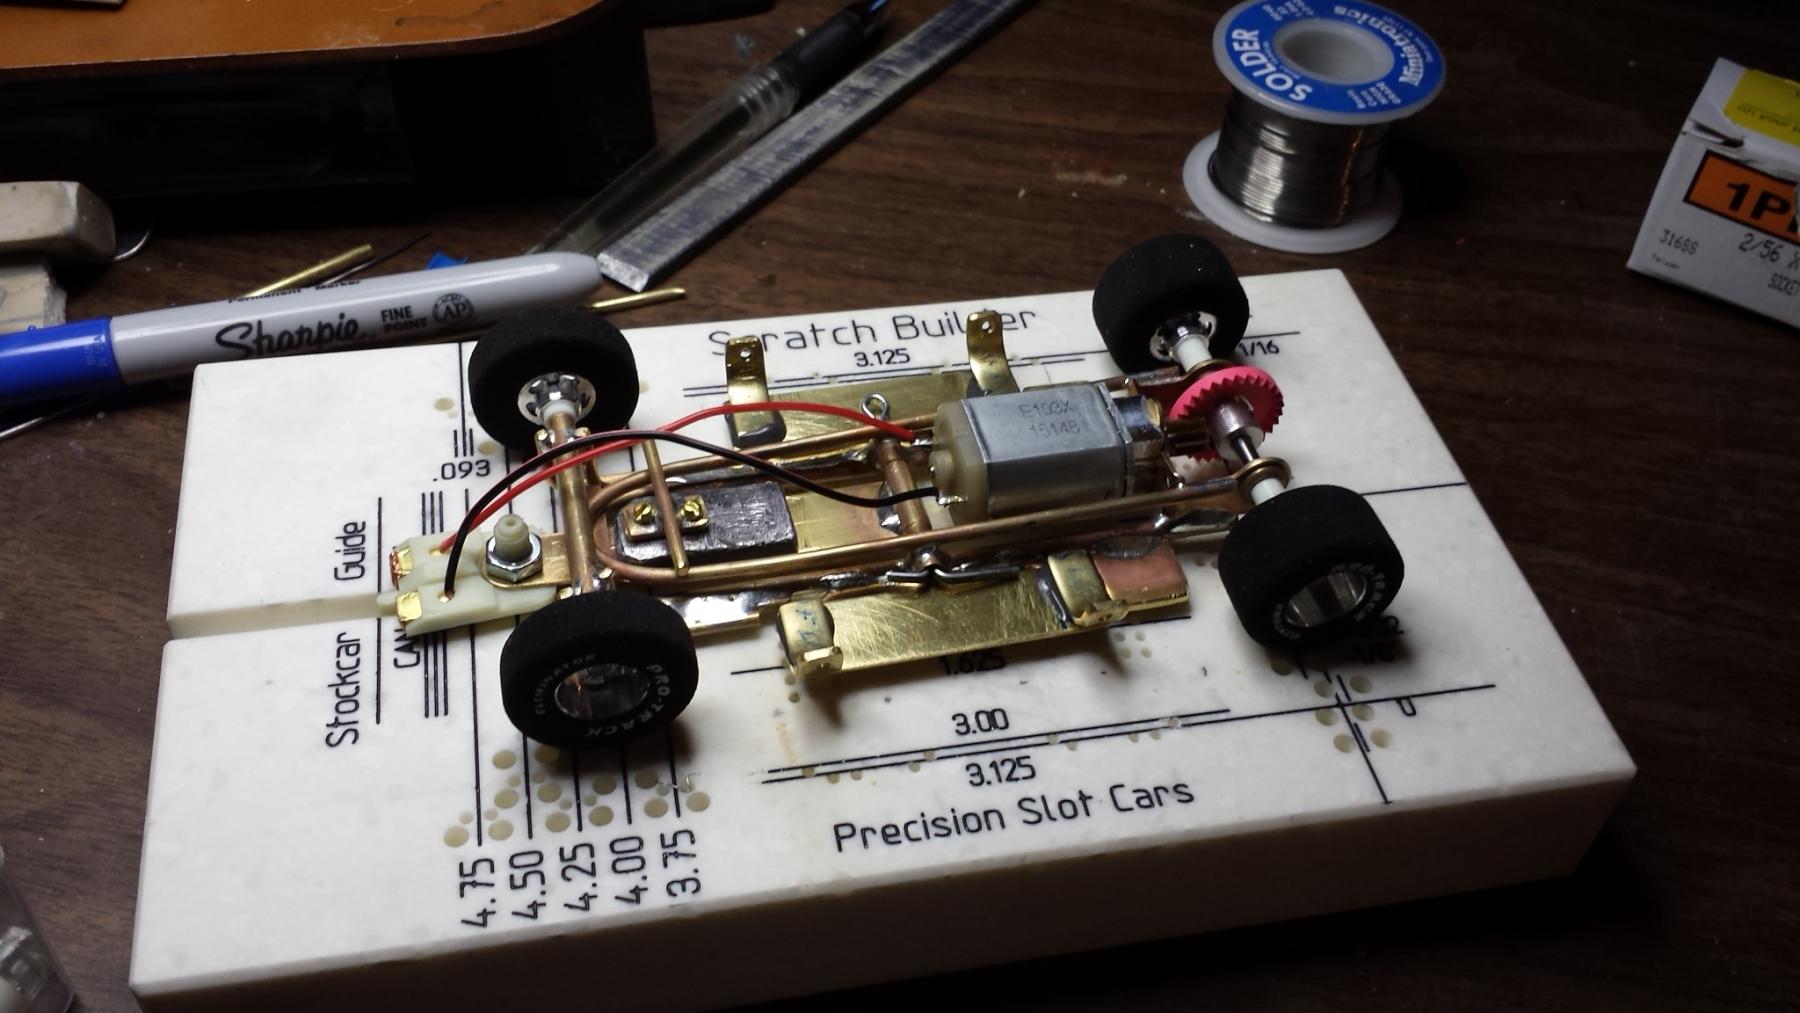
Loaded into the jig (attached to the chassis, to get the correct length), and silver-soldered up using the new Bernzomatic. Wound up looking like this... no, I didn't solder it up with the flag attached. During the solder, the drop arm guide mount was held by jig guide post.
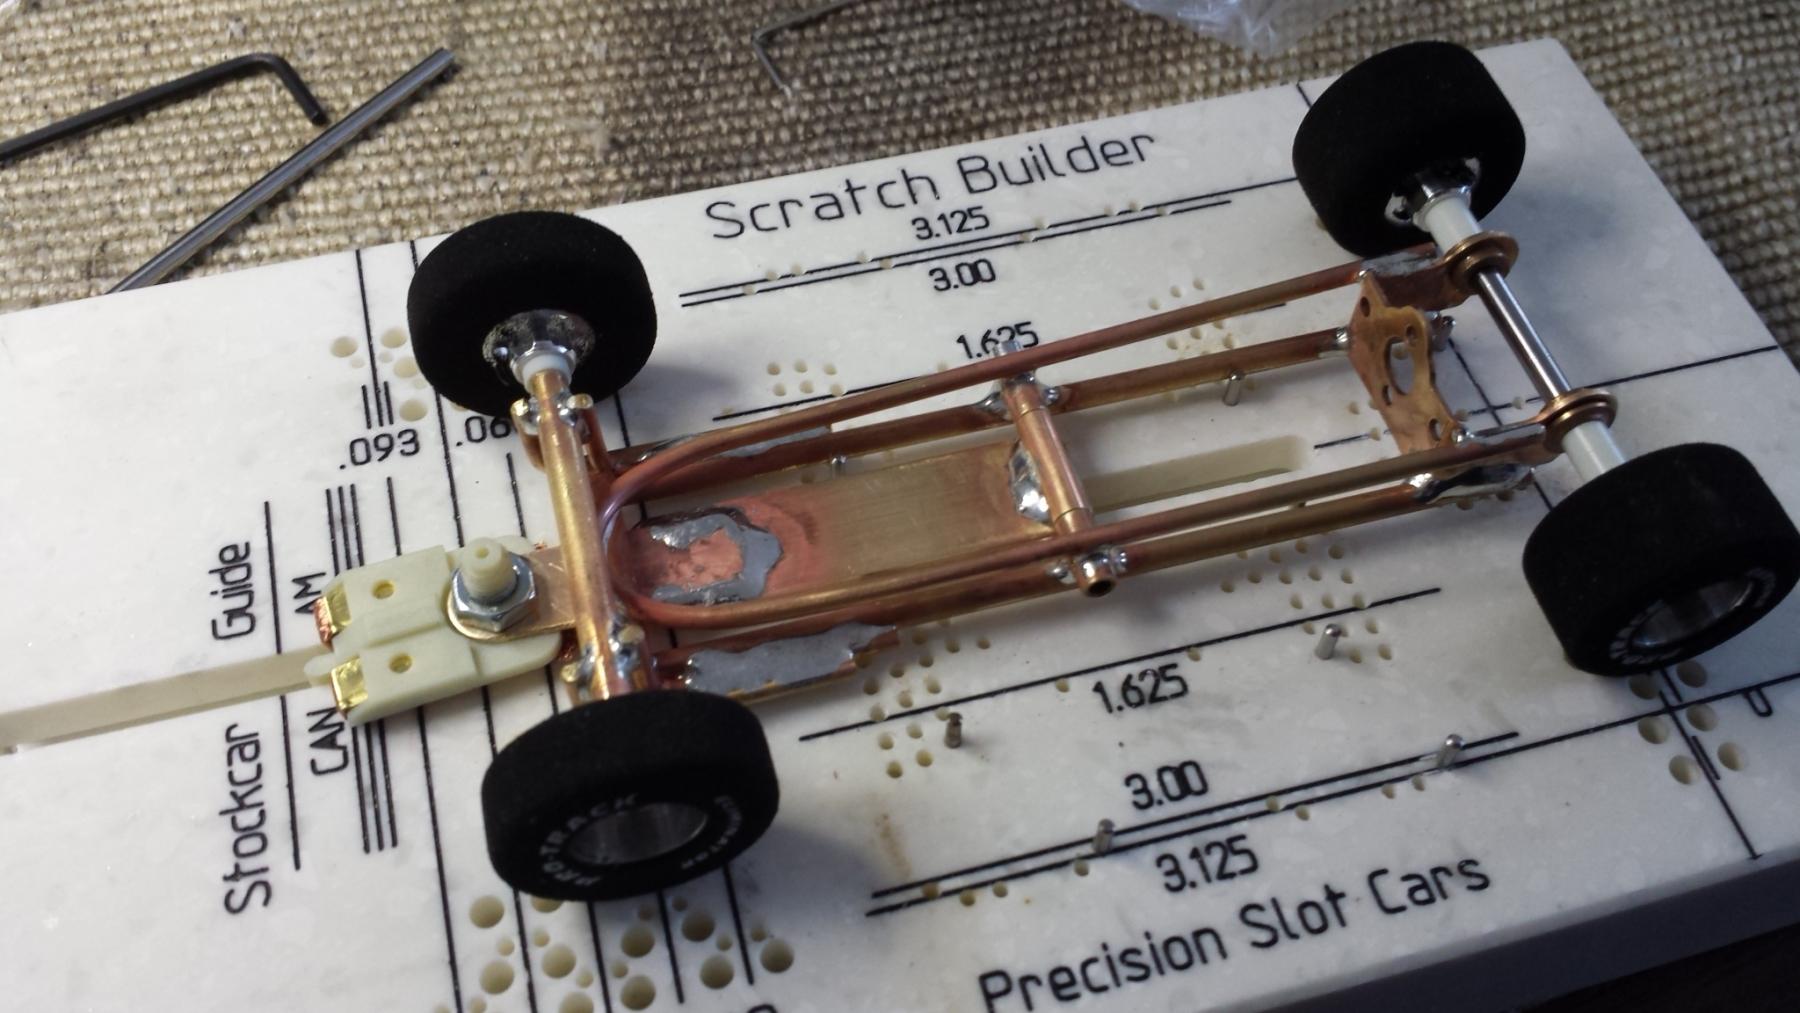
Works mint! Paul, I soldered it using a variation of your "preplaced solder" method. I heated the pieces in the jig and then melted a small ball of the 3% Stay-brite silver bearing onto the joint, and kept the heat on it until the solder ball smoothed out and flowed into the joint. Then I added a bit more along the sides of the joint.
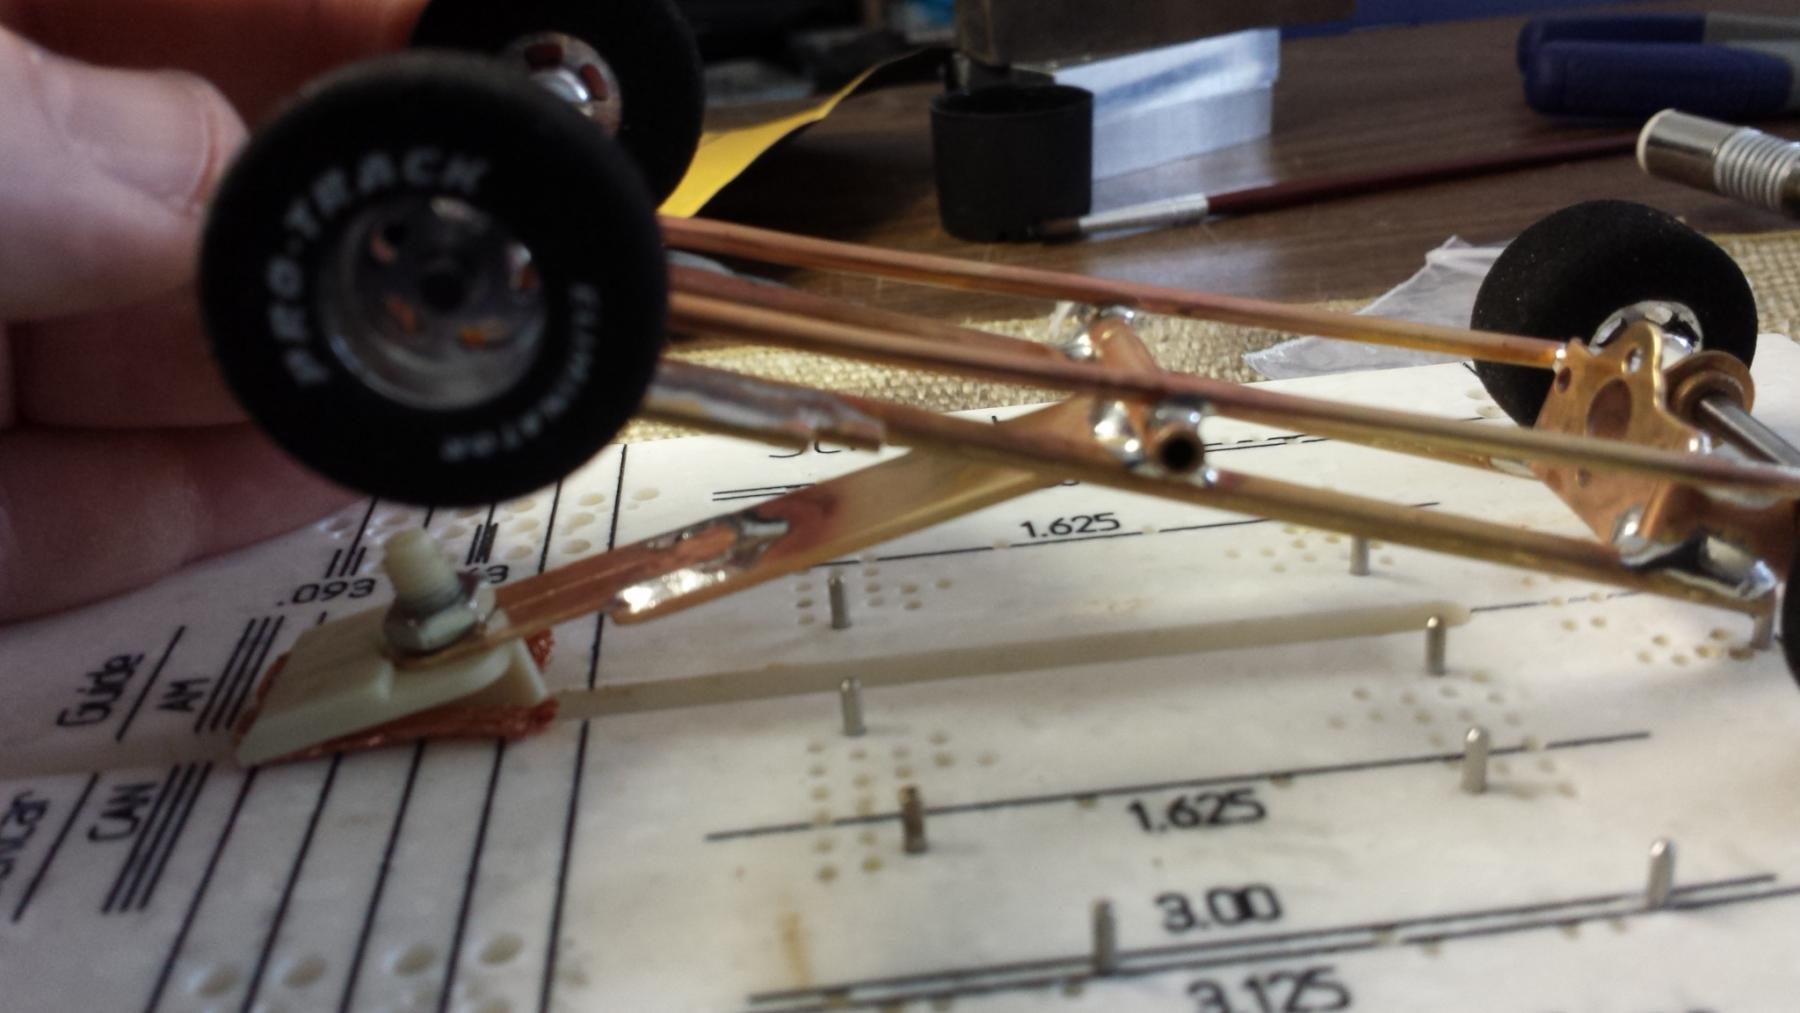
I found that spring tension of the braids lifted the guide up more than I thought would be good for effective slot retention...
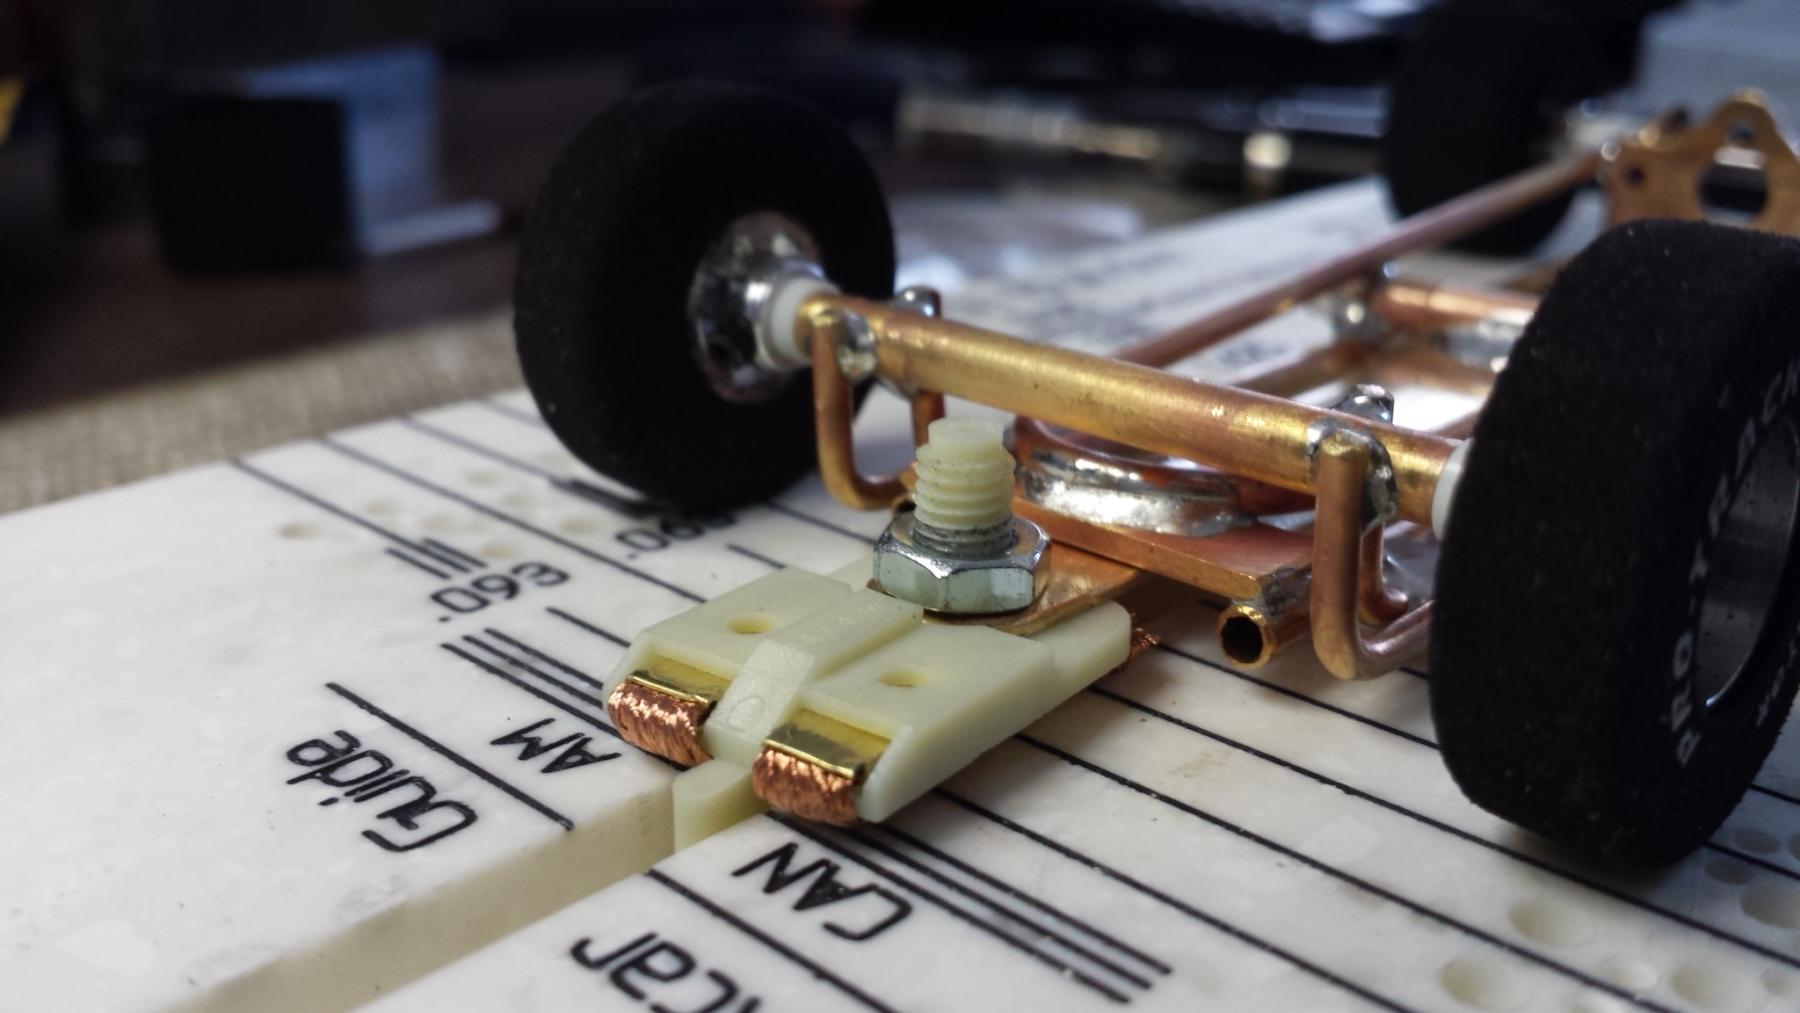
... so I added some weight to the drop arm, stuck on there with five-minute epoxy (understanding that I might want to remove all or part of them, during/after the track testing.). Yes, those are stick-on automotive wheel balance weights, left over from the full size three-wheeler proj.
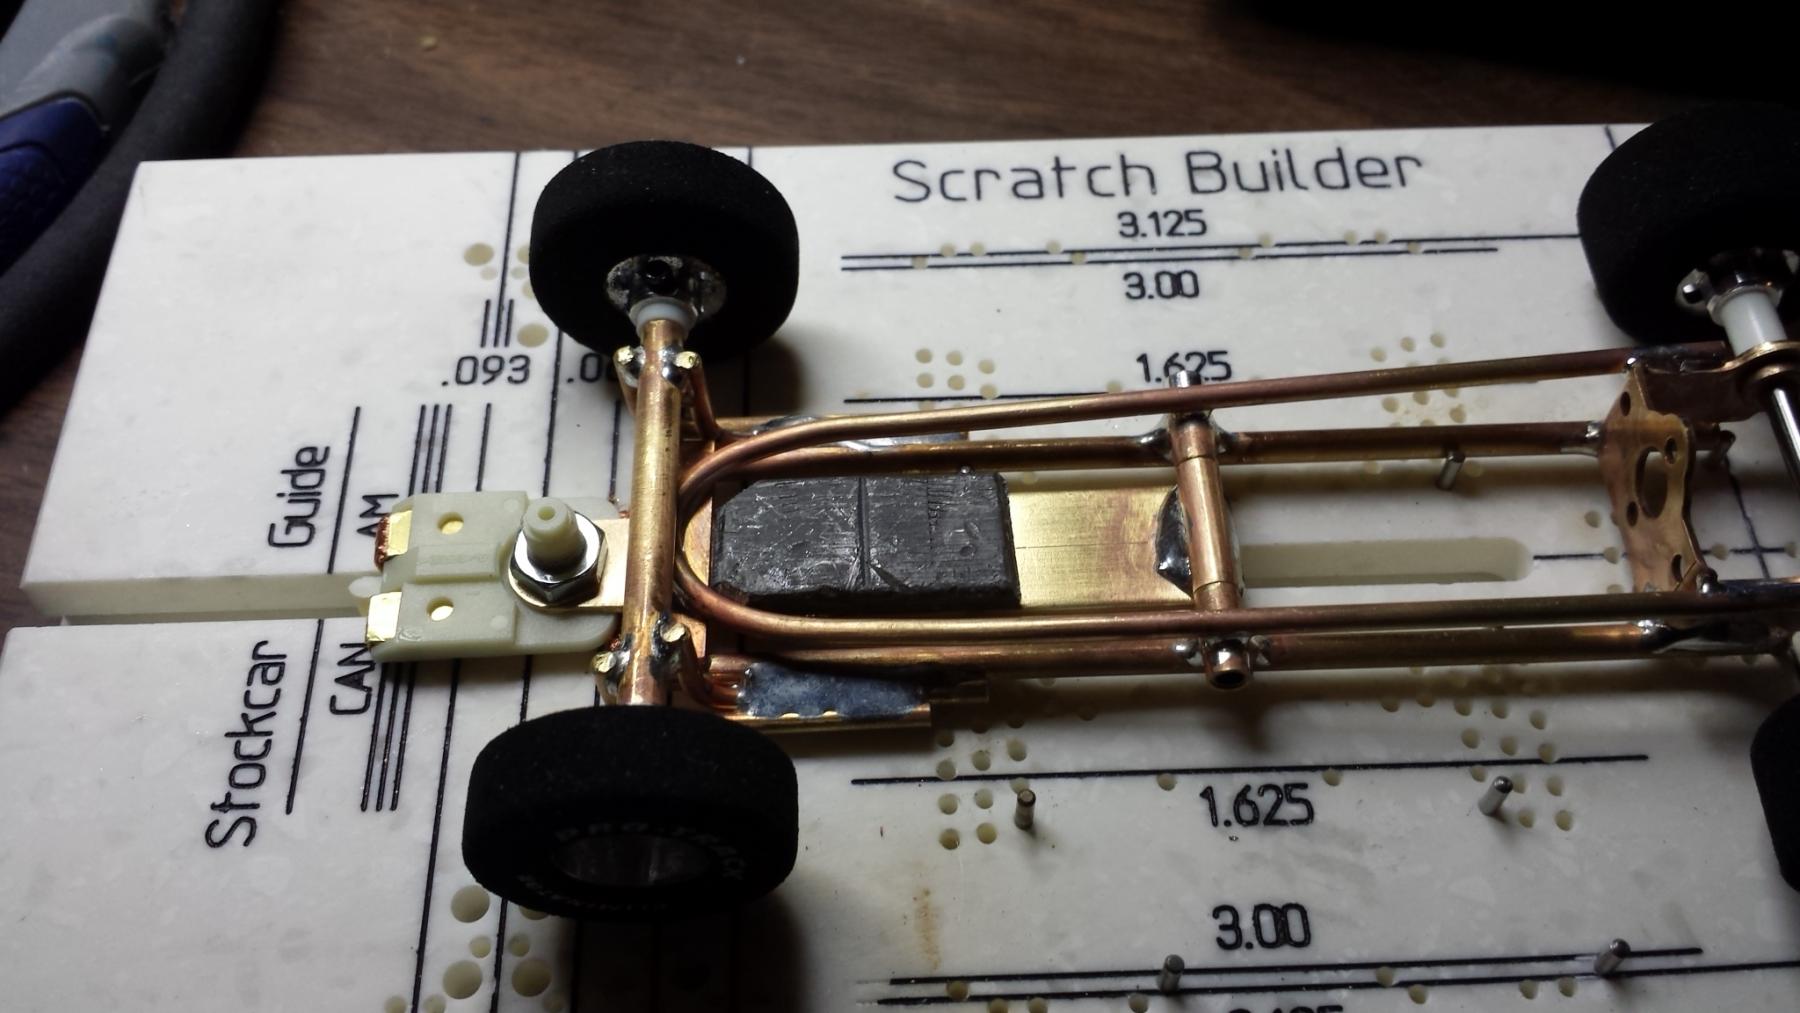
It so happens that the top of the drop arm weights offer up a perfect surface (height-wise) to attach the drop arm limiter, so I made a small solderment (to coin a word, like weldment, or brazement) out of some .25" x .063" brass strap and .065" brass rod, soldered together with rosin core 60/40. Man, that stuff flows easy.
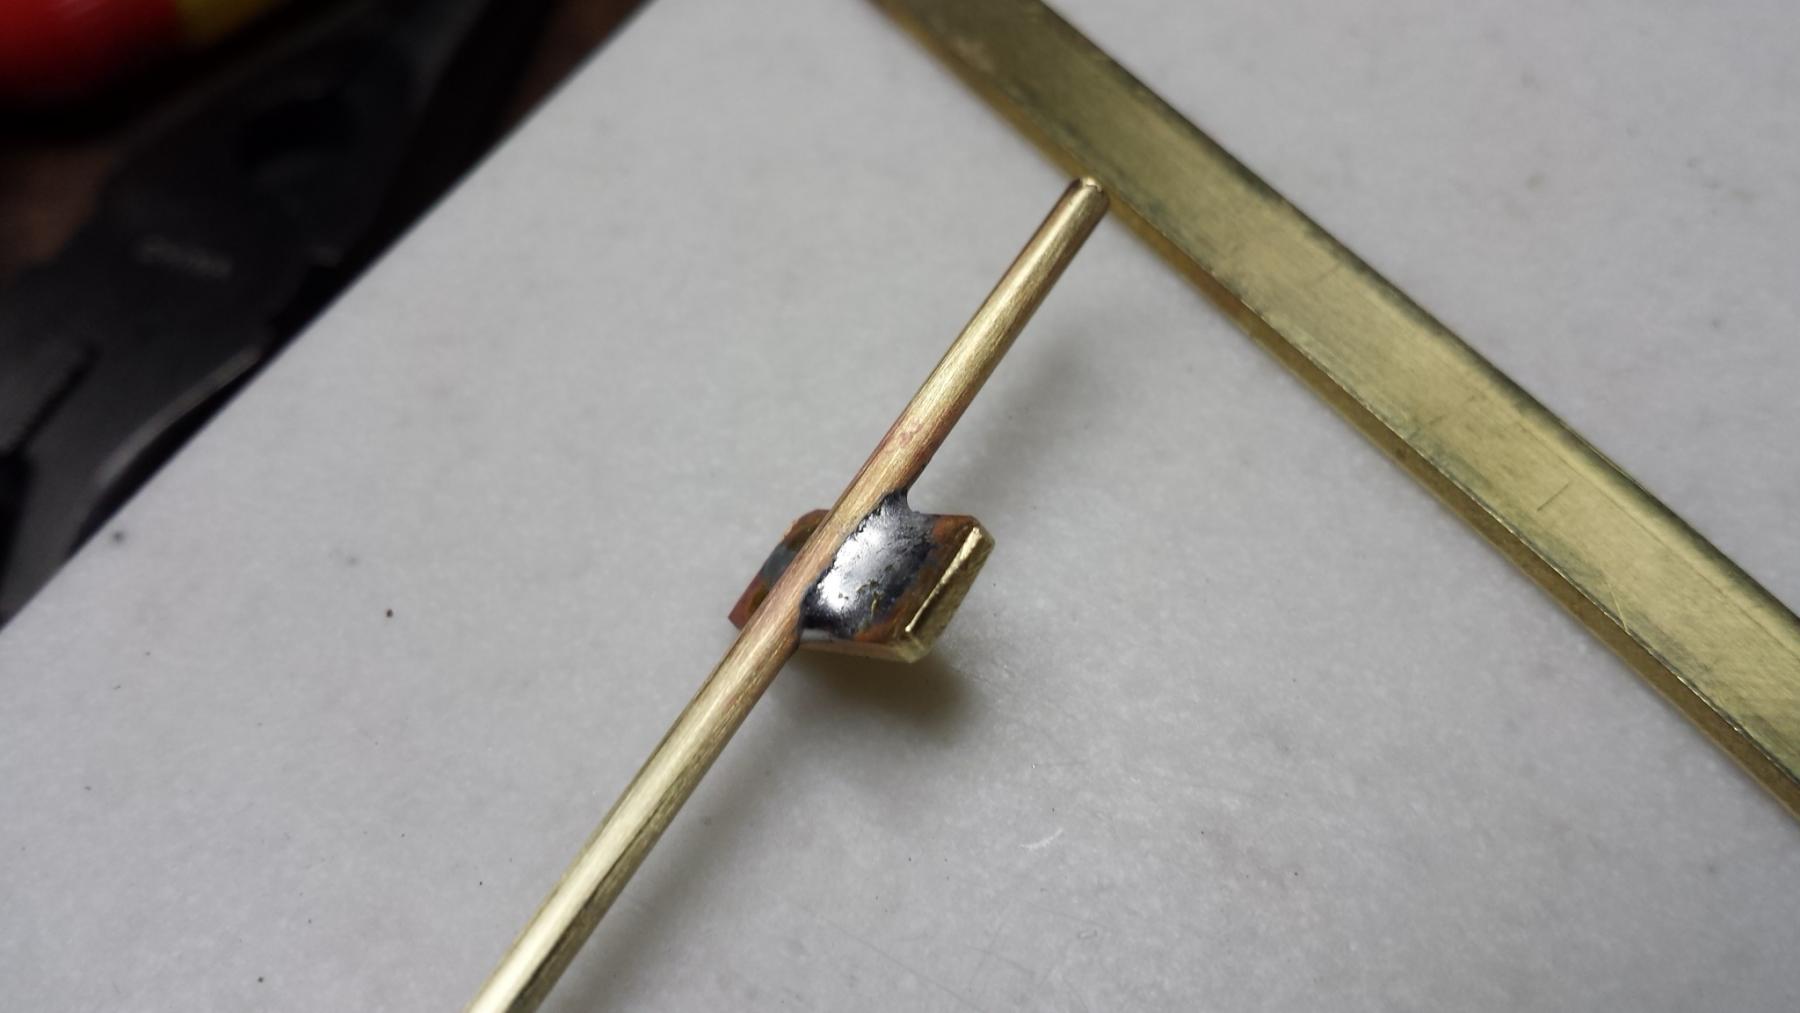
Trimmed and set in place on the top of the drop arm weight. I'm going to attach it with a pair of 2-56 screws threaded into the weight. but I have to head to the hobby shop for some more 2-56 screws that are the right length.
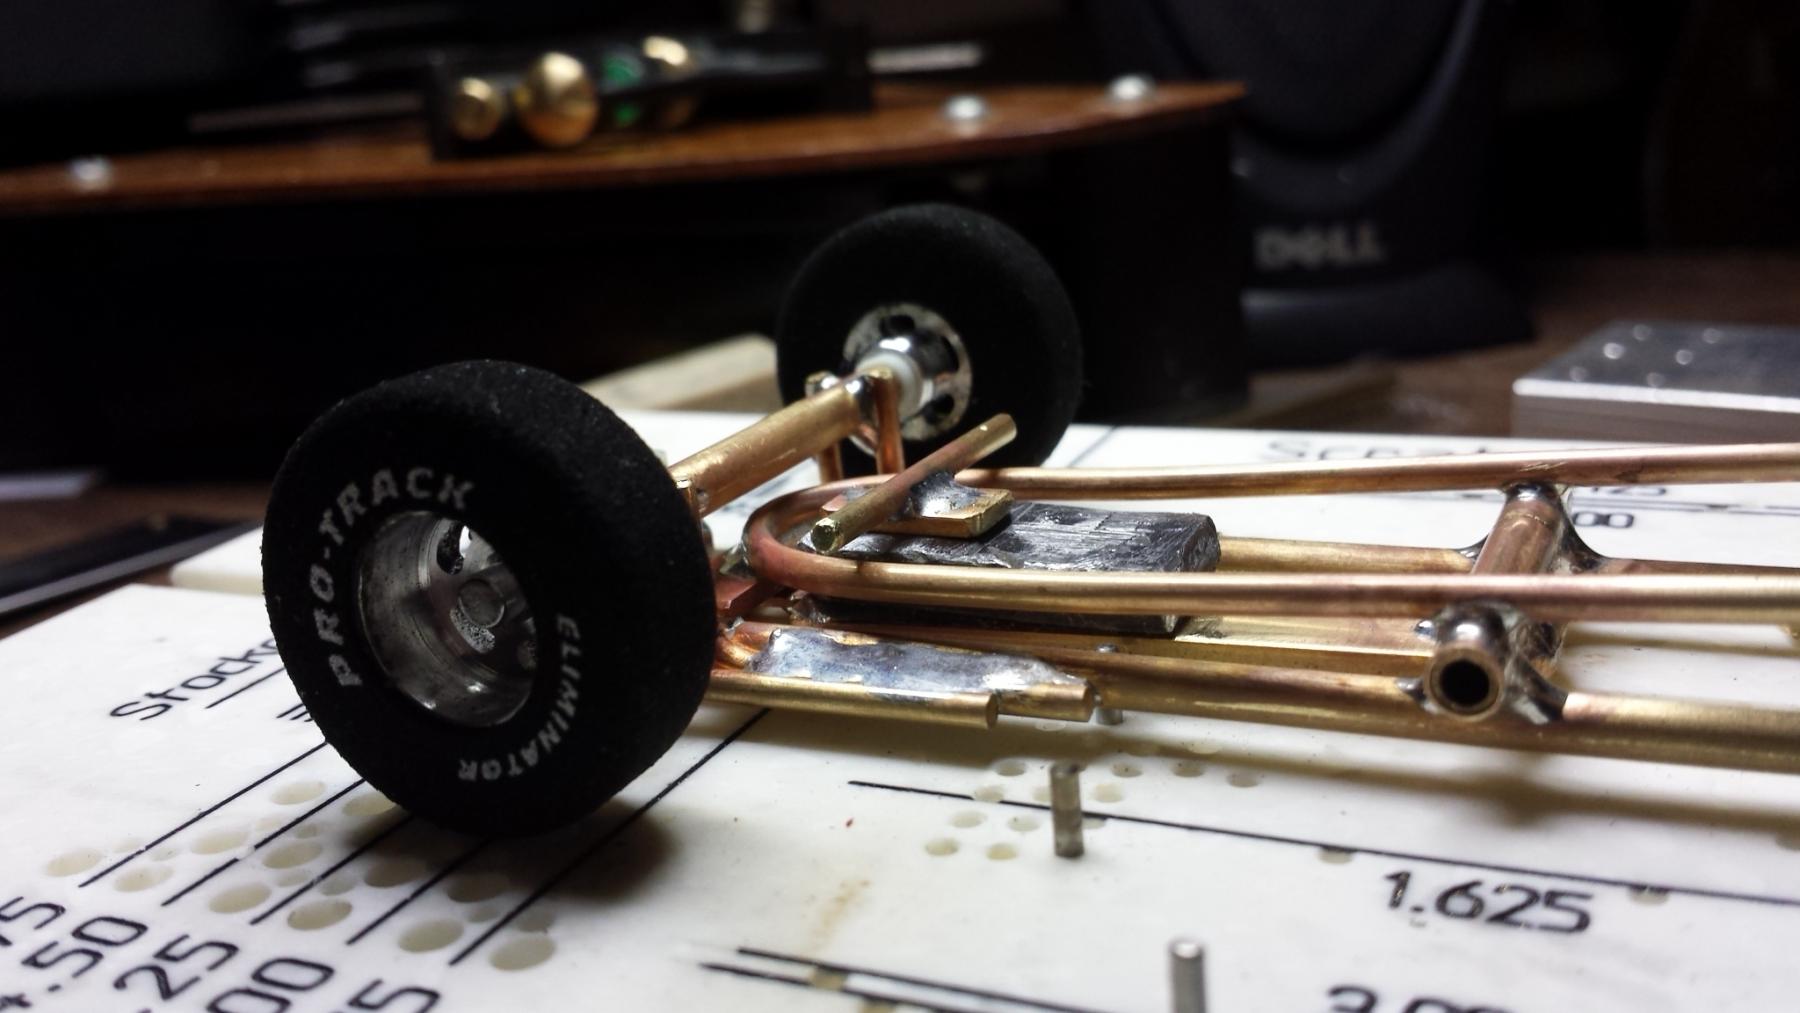
That's where I left things last night. Tonight I should get the drop arm limiter finished and attached, and I have a clear concept in mind for the body mounts, which are going to float a bit.
I'm pretty sure I'm going to solder those up with the 60/40, though we'll see.
- fohoover likes this
#69

Posted 13 April 2015 - 07:44 AM
Paul Wolcott
#70

Posted 22 April 2015 - 11:18 AM
Progress has slowed a little what with the nicer waether and perfroming a clutch refresh on the B-3 (see the sig), but the car is coming together.
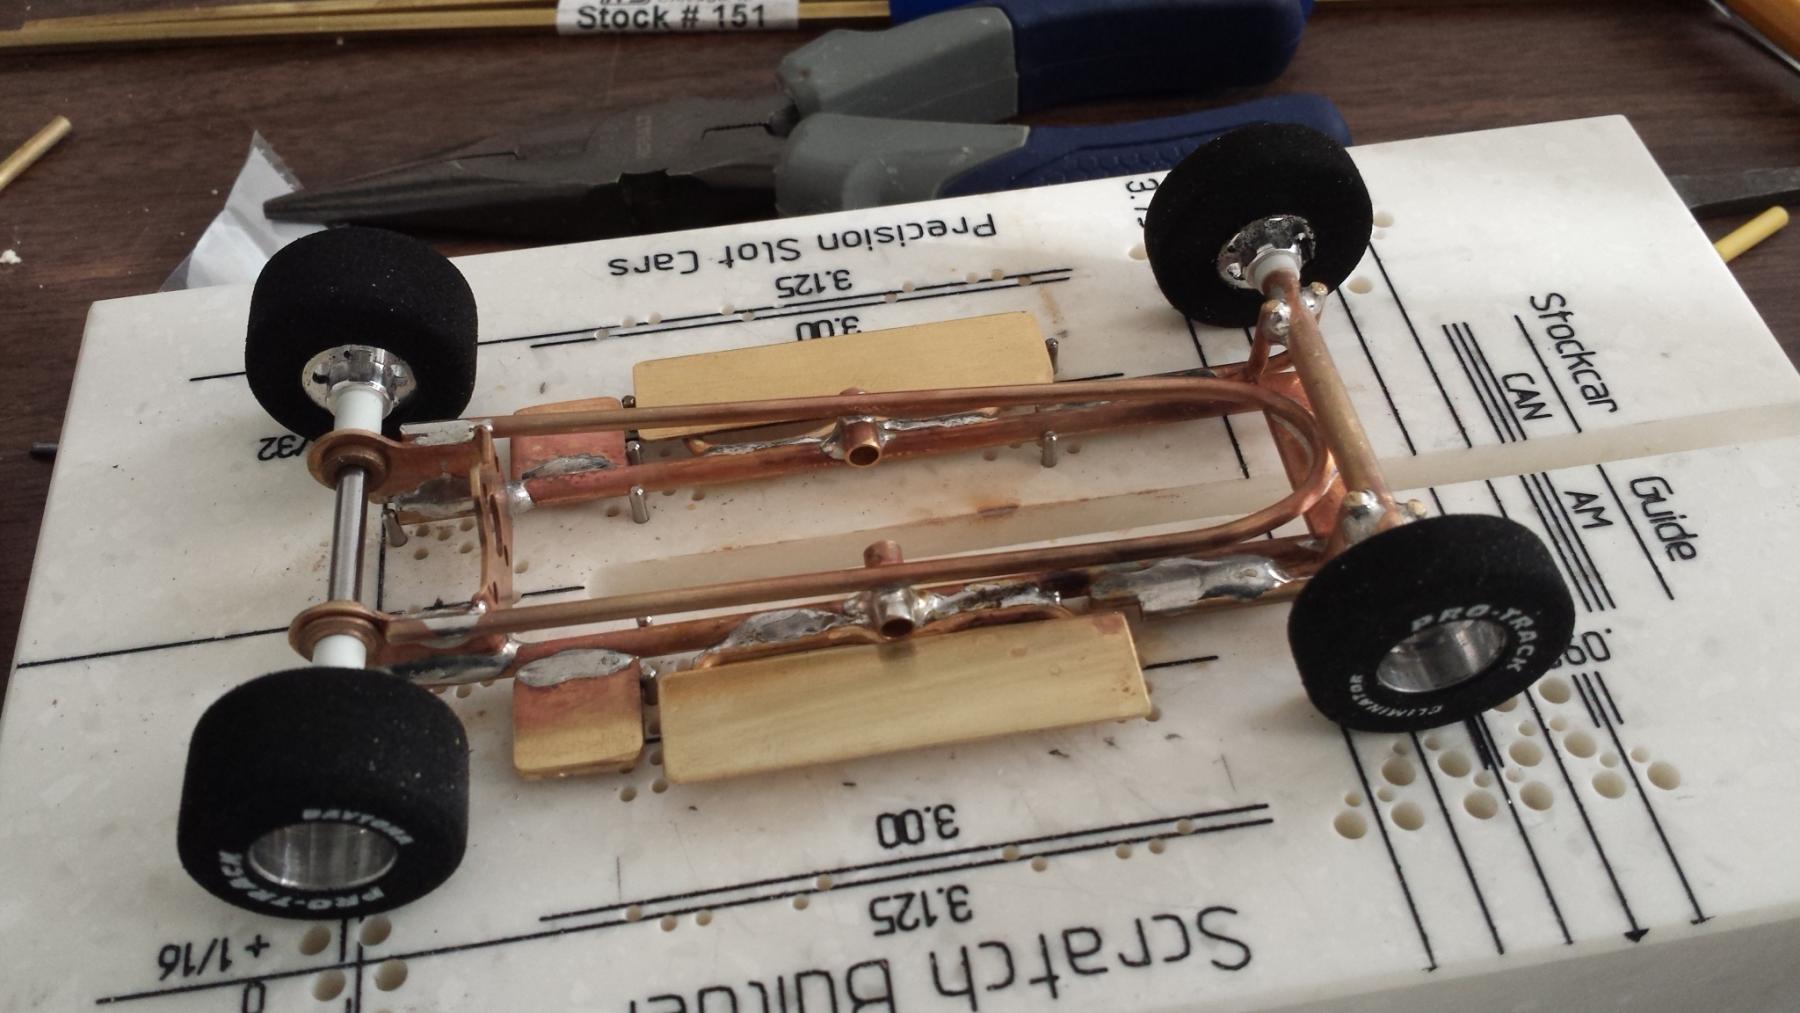
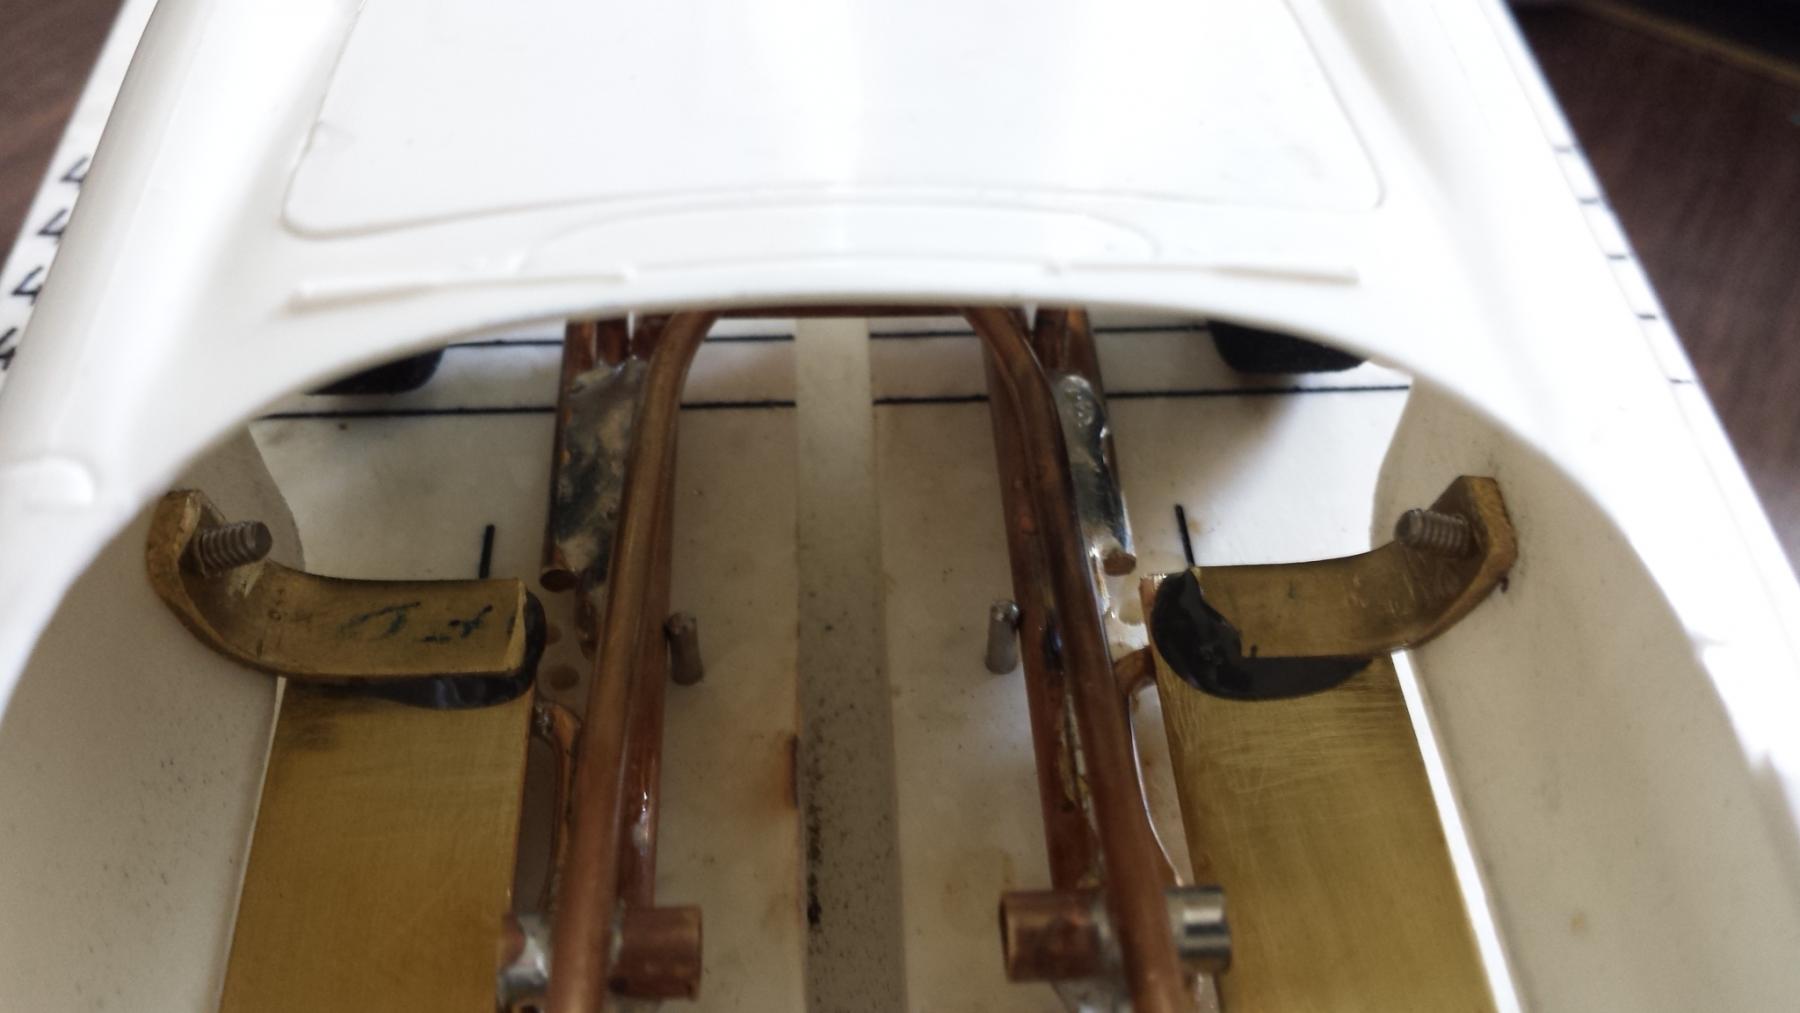
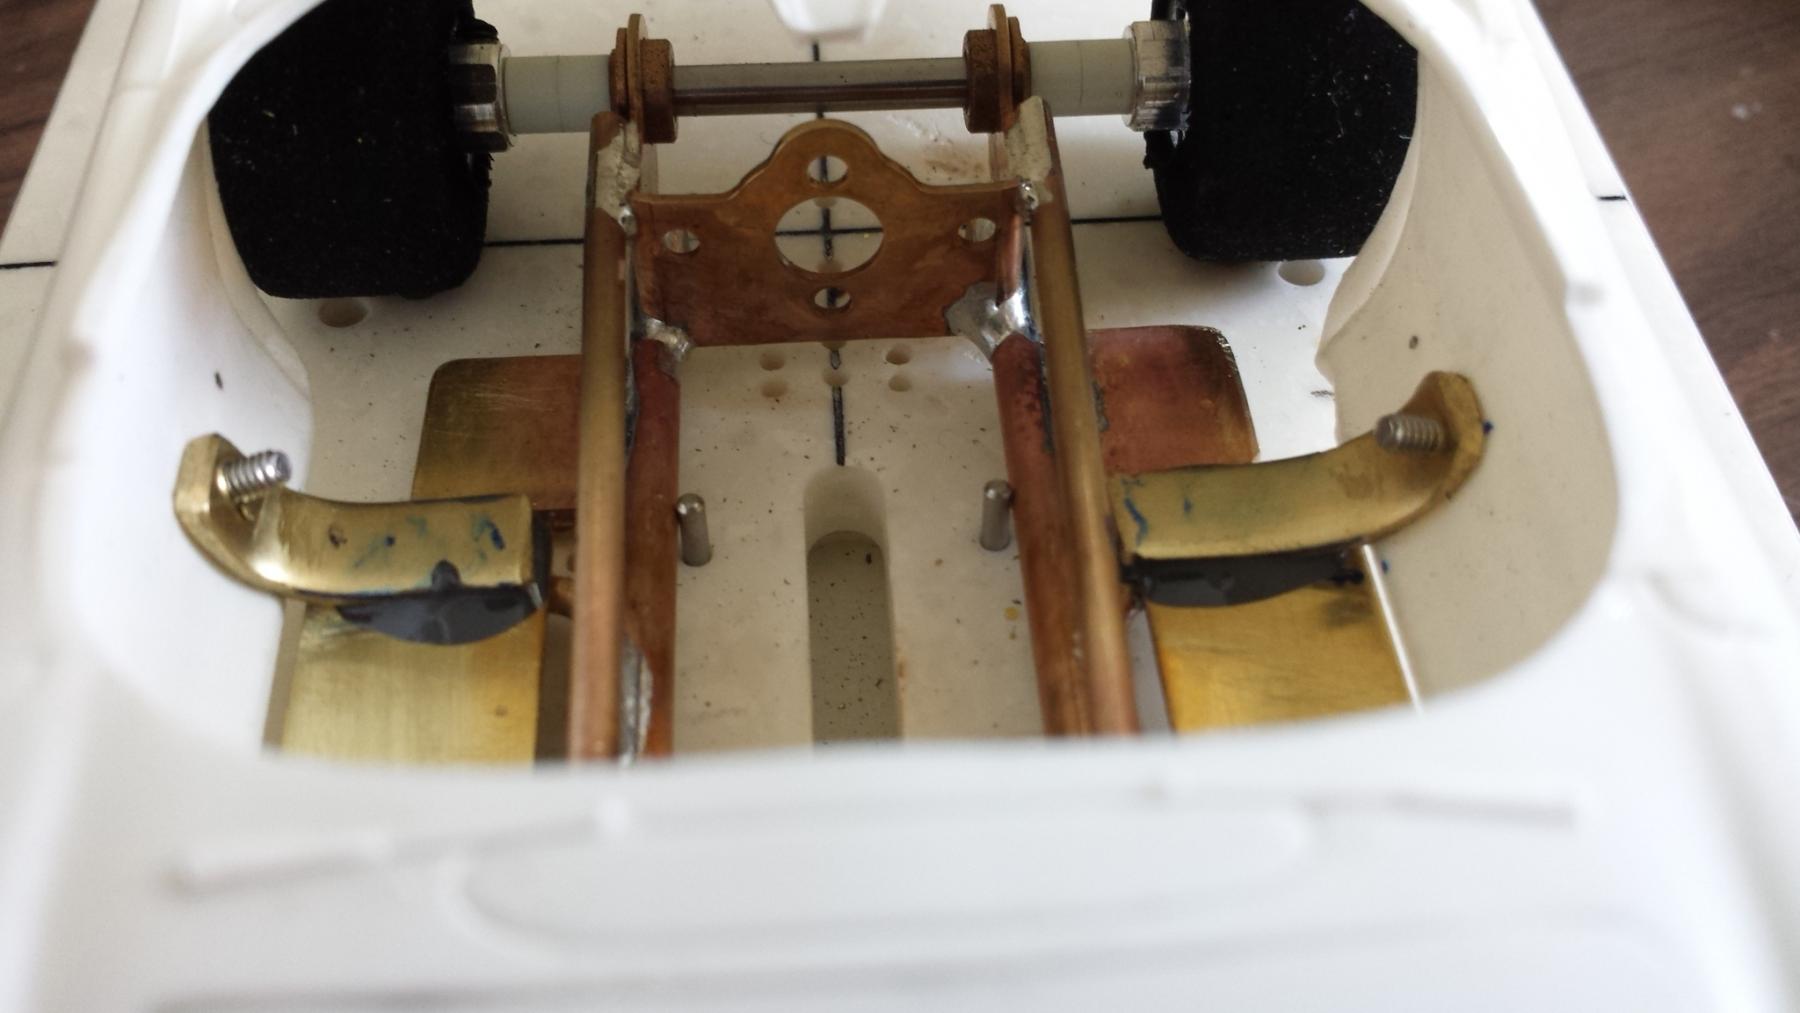
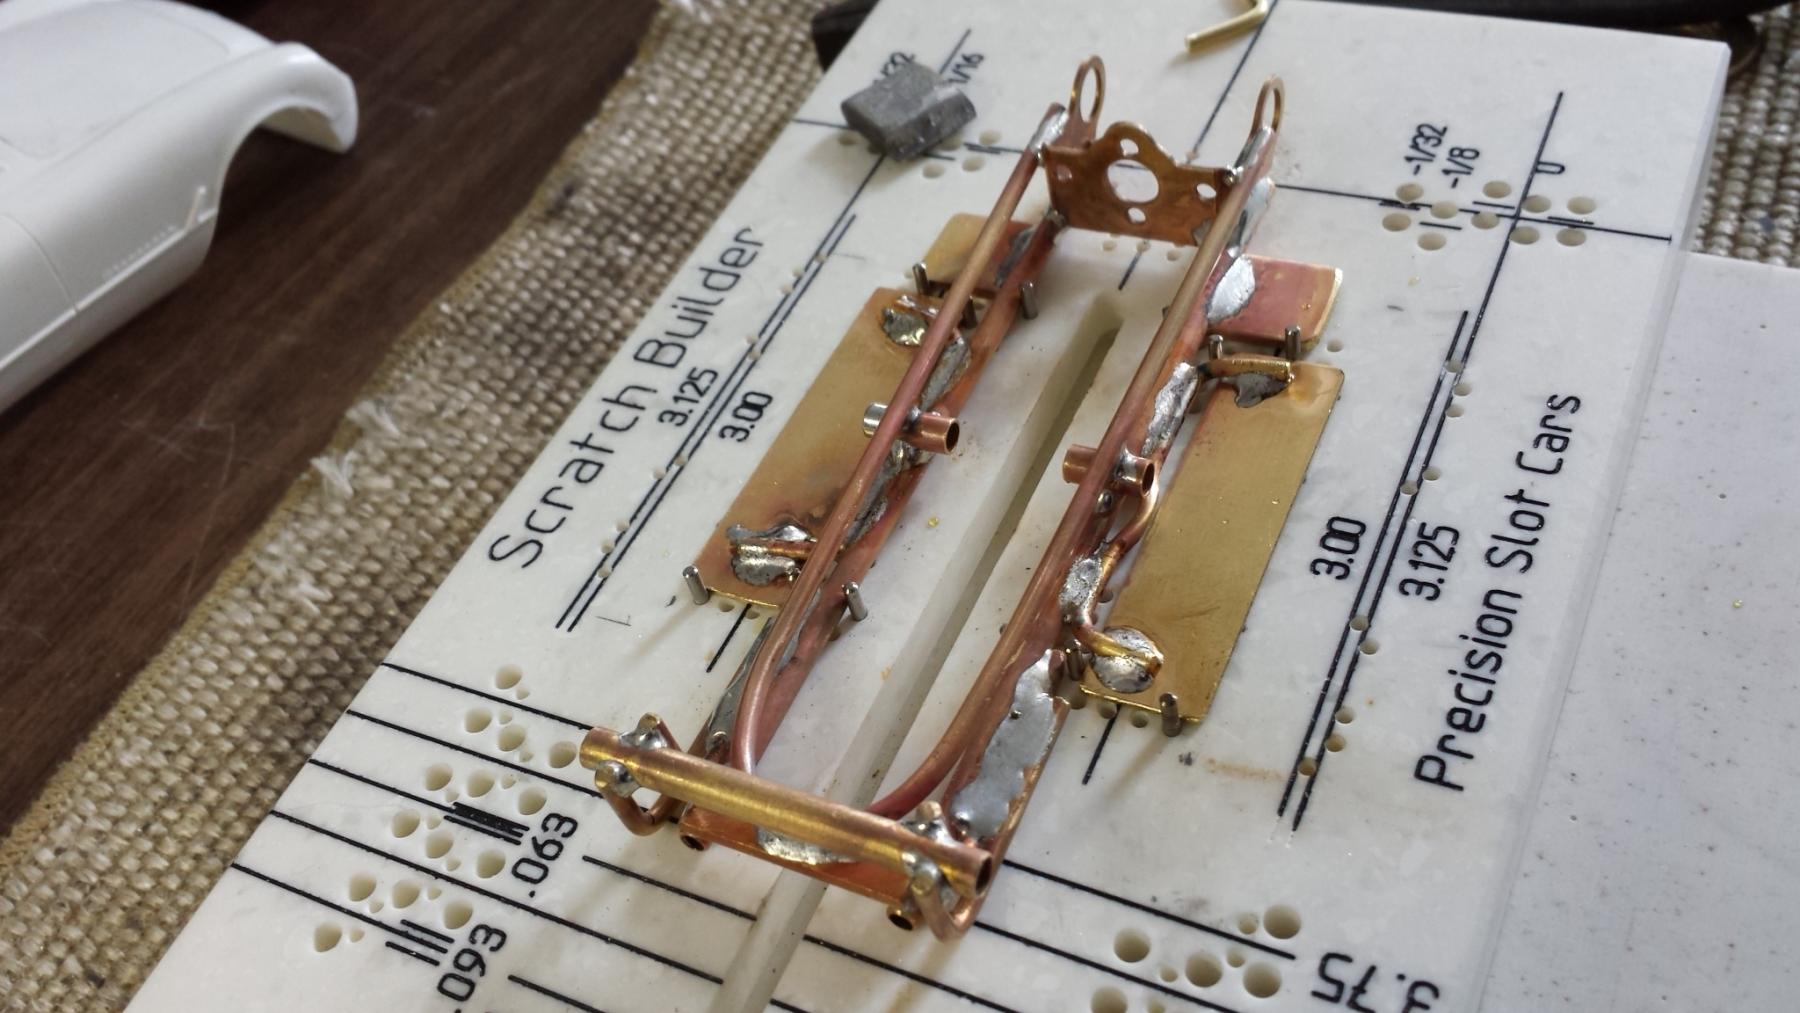
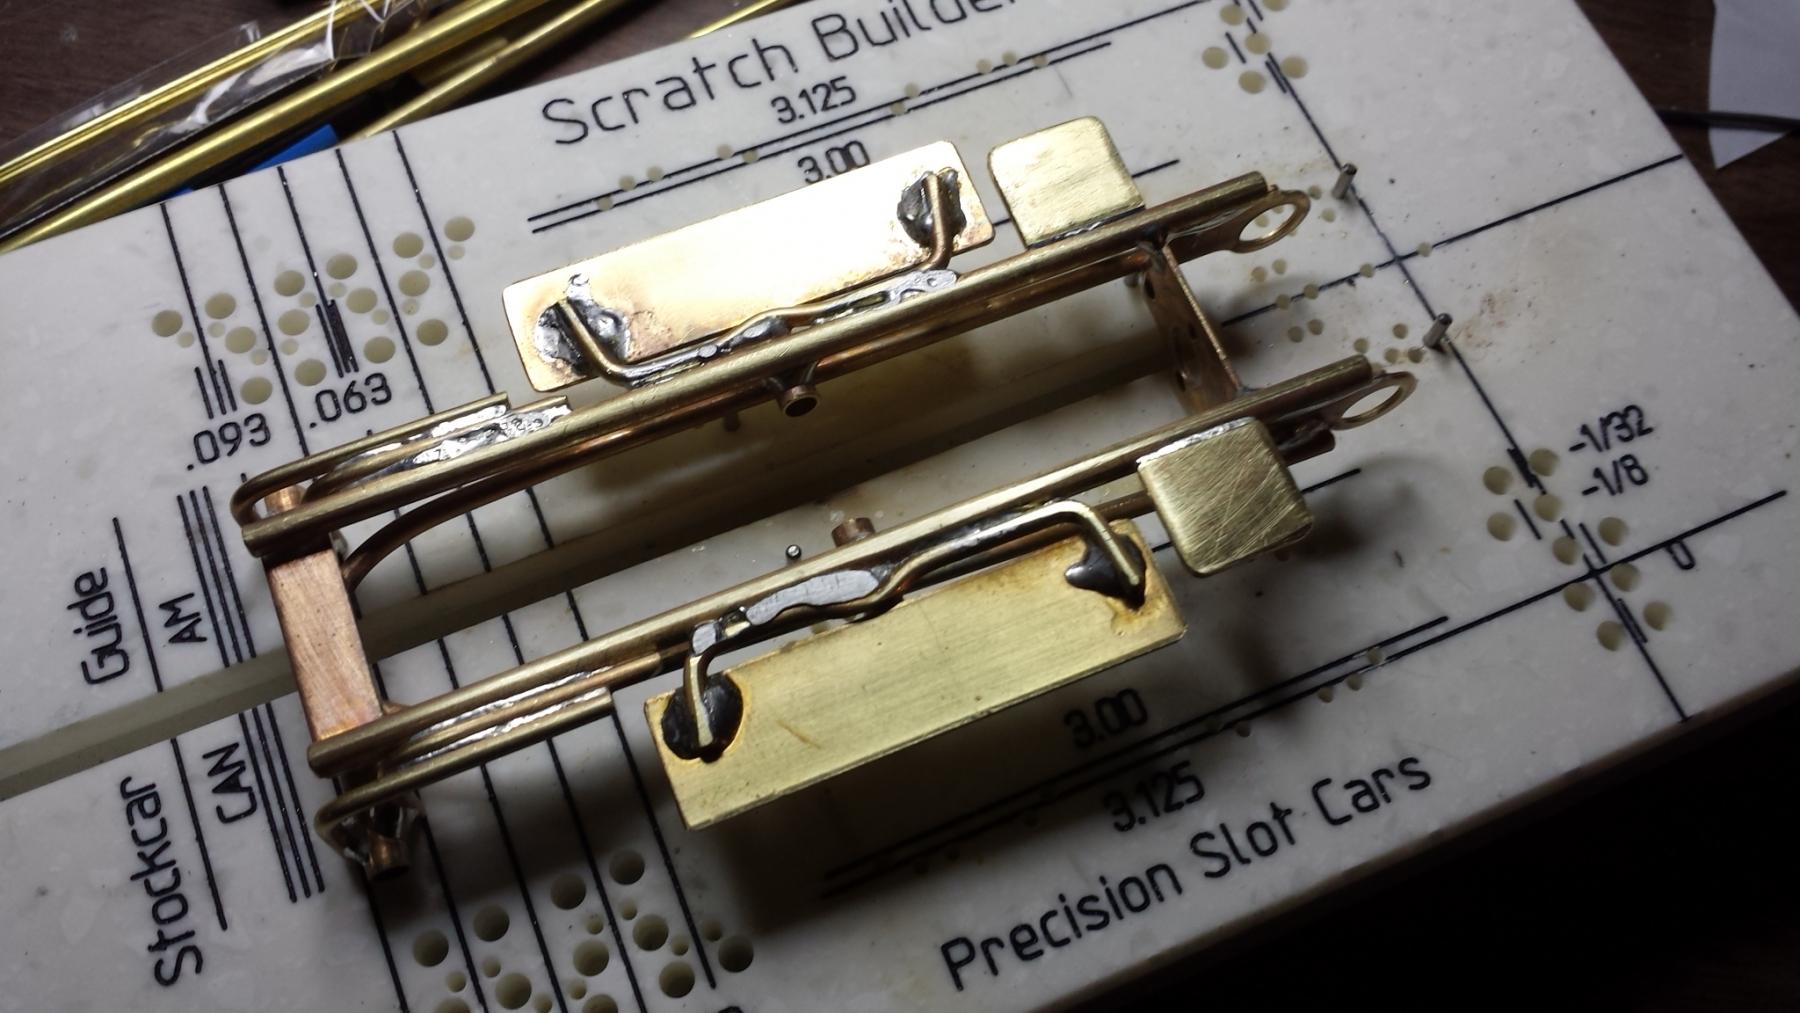
as of last night, the chassis has body mounting pans of .032 strip soldered onto .065 brass rod. I'm still being heavy-handed with the solder, a bit.some of the messiness ont eh pan mounting is also due to me soldering them on once, and then rethinking it, and desoldering them for a do over.
the little pans near the rear tires are for ballast, if it needs it. soldered those using pablo's pre-placed solder method, worked pretty well even with the 97/3 silver-bearing stuff. the body pans and mounts are on there with 60/40 rosin core.
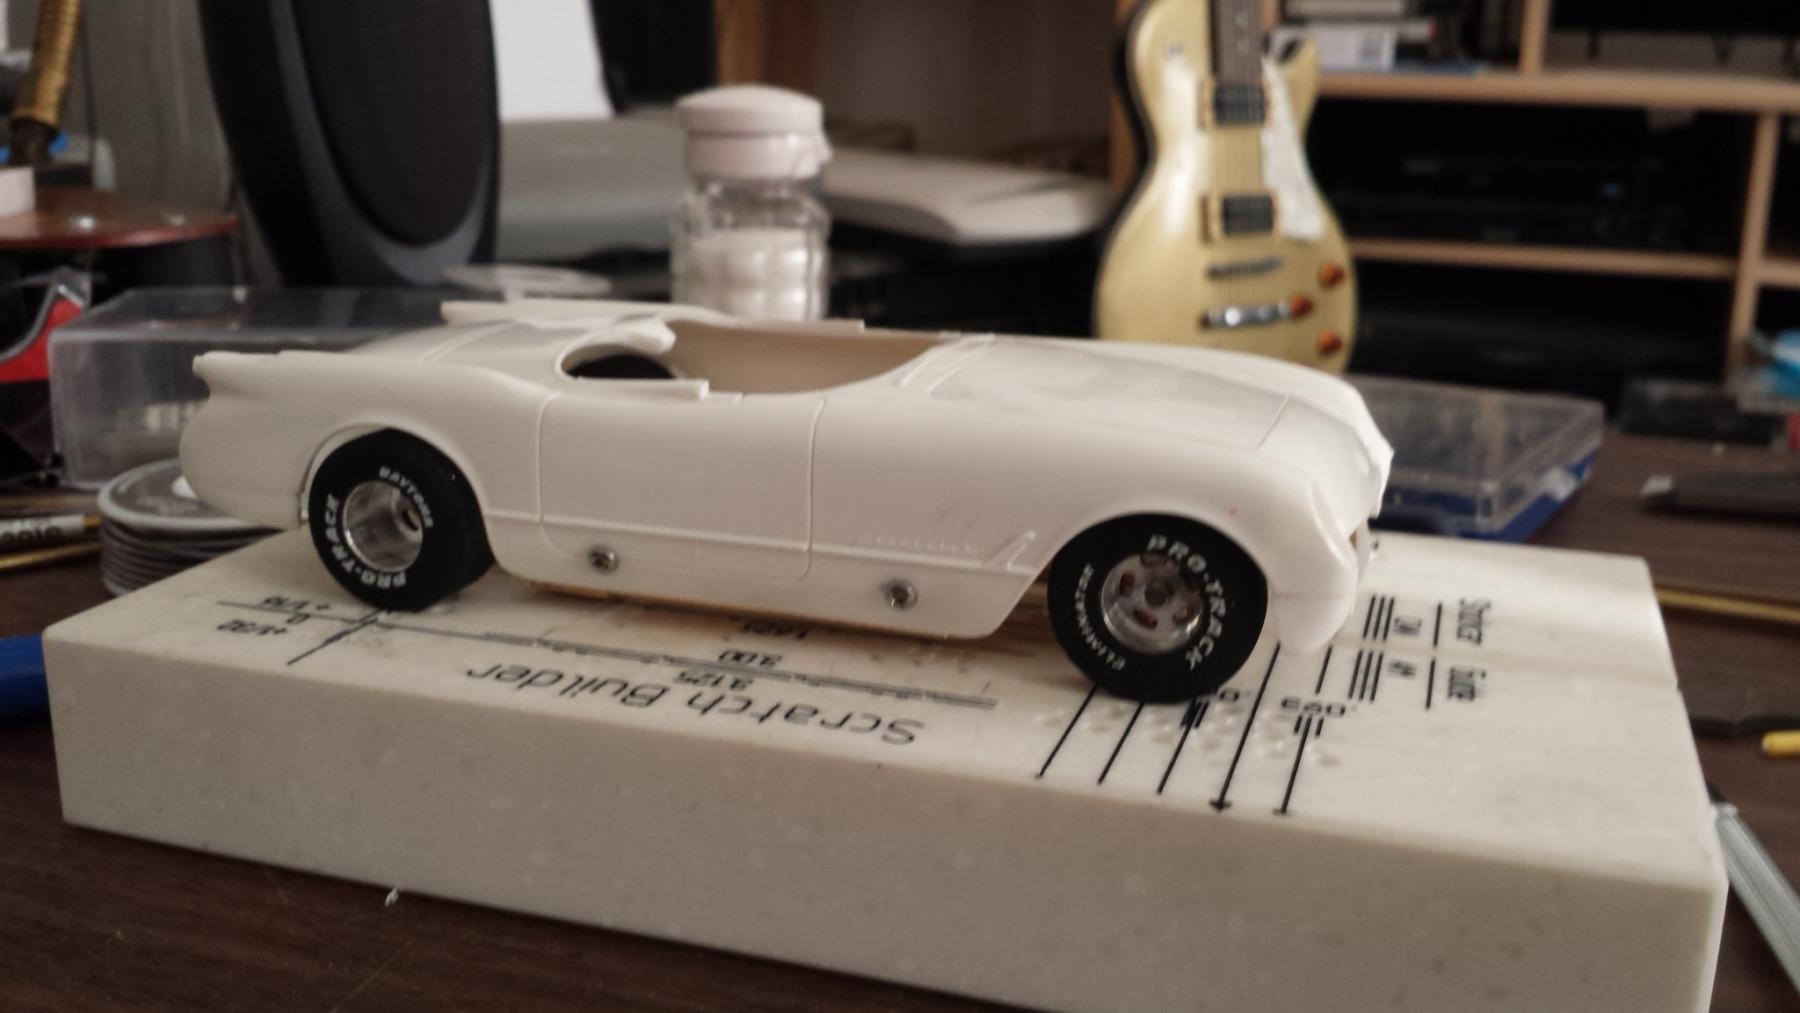
I made another pair of body bars, like I did for the catalina, but once I got them mounted to the body (drilled and tapped for 2-56 screws) I cut out a section in the middle so there are four mounts which will get attached to the pans.
sits about right so far. should be ready for an unpainted test beat this weekend, hopefully.
- hiline2 likes this
#71

Posted 28 April 2015 - 06:45 AM
...after the above reply, I pretty quickly realized that drilling the body and body mount bars/tabs before attaching the tabs to the chassis was rather something of a mistake, and - after a few days thinking - couldn't come up with a reliable method by which I could solder the tabs to the pans and have the mounting holes stay aligned between the body and the chassis.
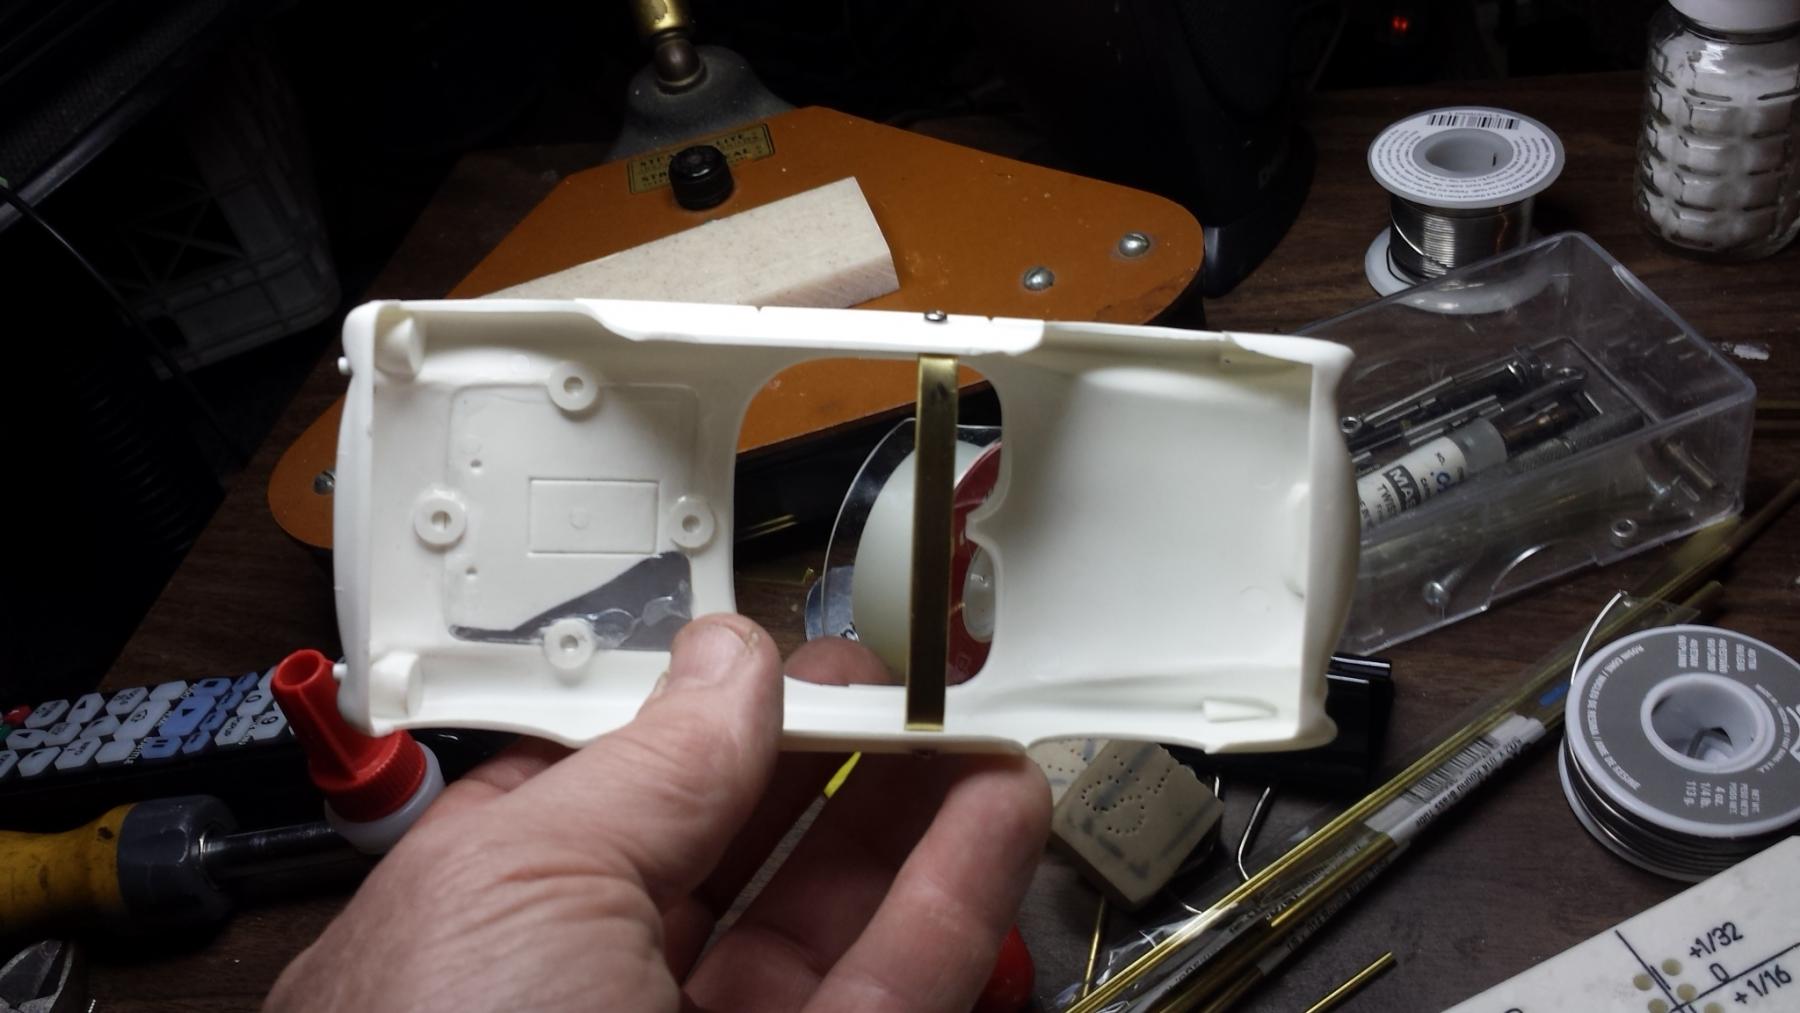
So I gave up on soldering them, scratched up the mating surfaces on the brass parts with some 120 grit, mixed up some JB Weld (which has a fascinating backstory I found, searching on it) and used the body to fixture the tabs as the epoxy cured.
fwd mounts...
rear mounts...
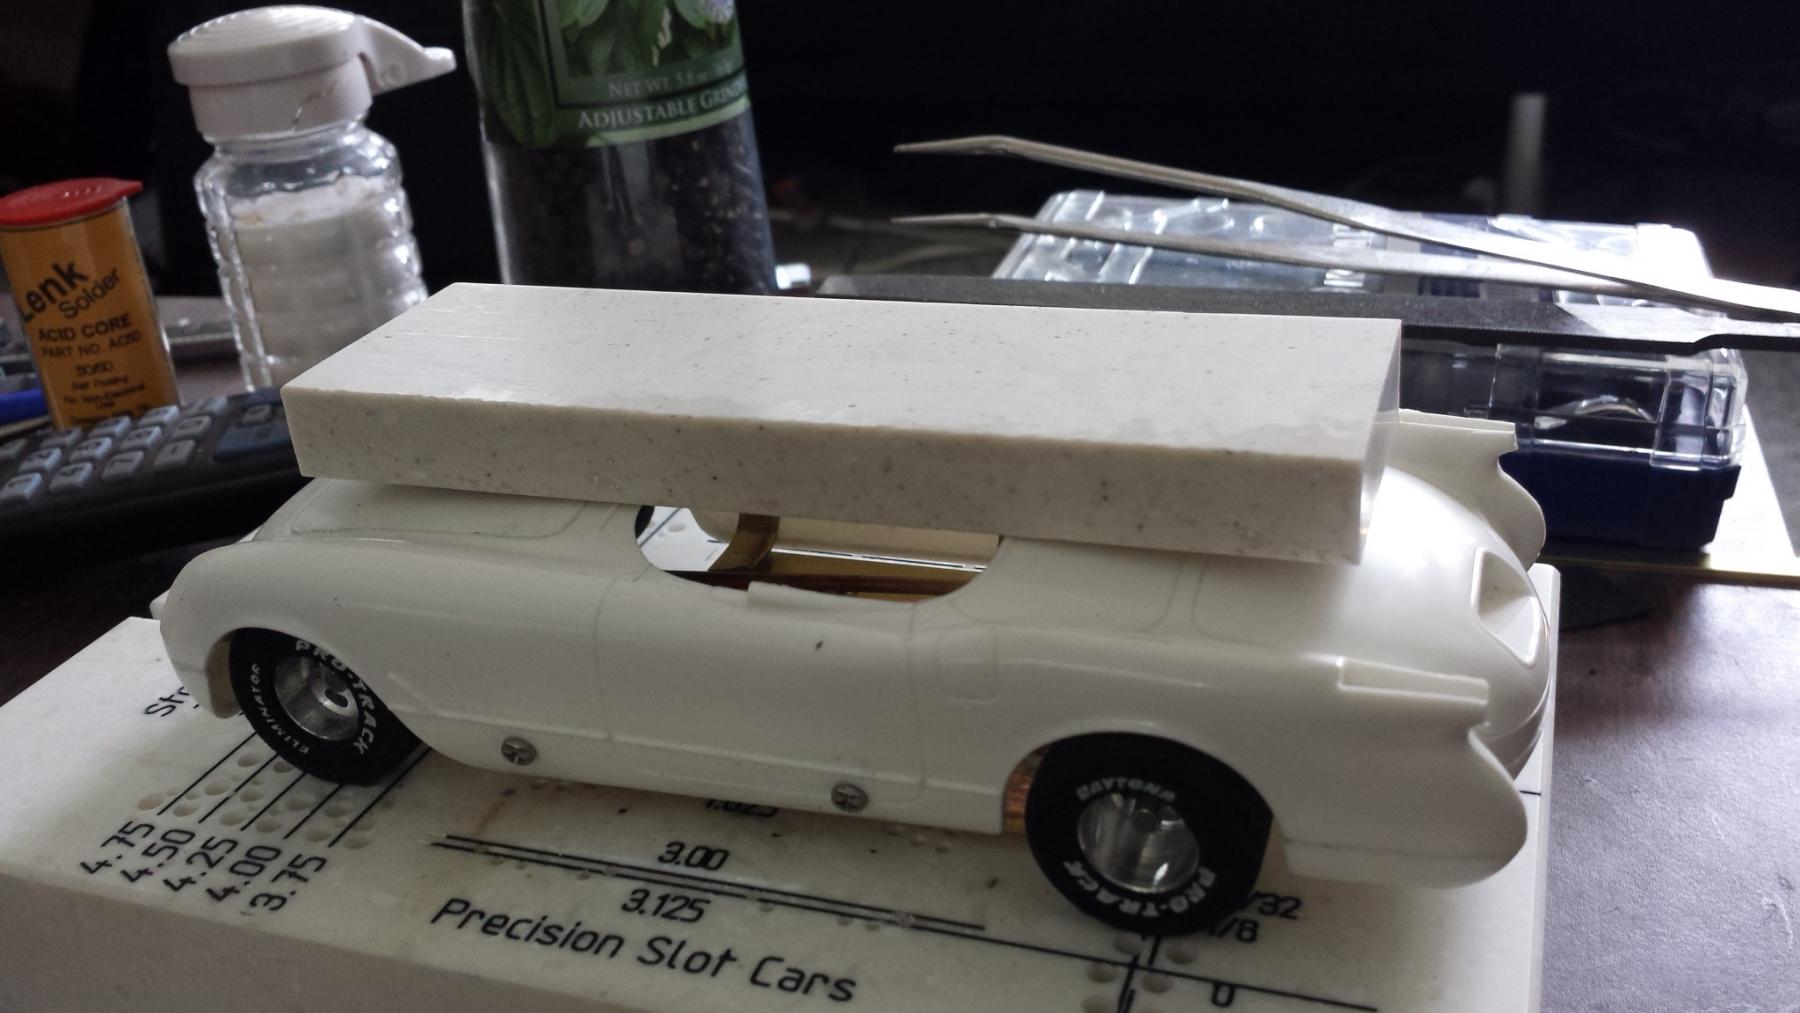
After we'd had our discussion regarding fixturing and weighting of parts I found a box of 10 corian knife handle blanks on ebay (for $5!) and here's one of those weighting the body as the JB Weld cures...
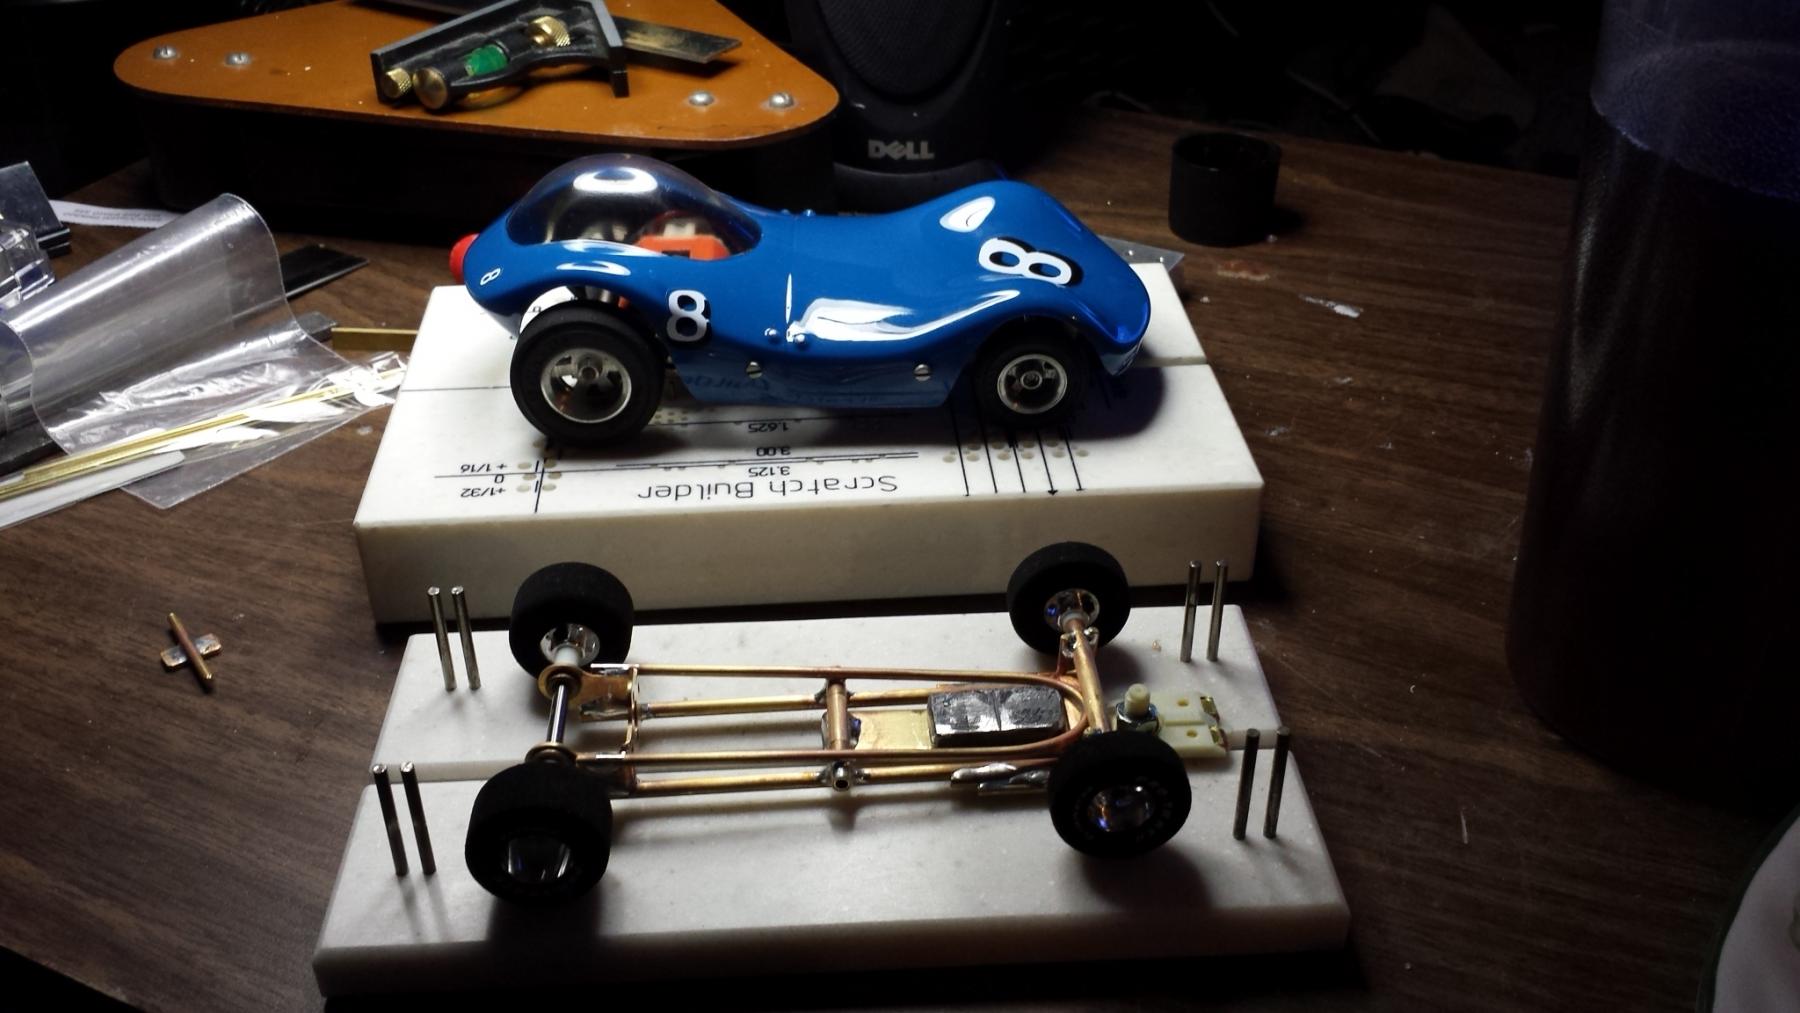
gave the epoxy the requisite 24 hour cure, and then took the body off, and assembled the full running chassis for the first time last night.
that's the motor from the AMT Catalina. the drop arm pivots on a length of .125 OD tube, held in place by a 3/32 X 1.125 cotter...And BTW, the Body mounts do not float. that was a bit beyond my current slot-car chassis fabrication skills, at this point, I found.
I do believe this thing is ready for a track test with the unpainted body. I talked that over with Pam, her comment was "Don't crash it." ;-)
#72

Posted 28 April 2015 - 11:51 AM
In hindsight, do you think you could have placed a microdot of Super Glue on the tabs, laid them on the chassis, then once they dry, clamp them in place with a alligator clip and solder away?
I've never done hard bodies but do you think that would work next time?
Paul Wolcott
#73

Posted 28 April 2015 - 03:58 PM
Two other popular hard body mounting techniques are velcro & packaging tape. The club track I sometimes run at mostly uses velcro, but some of the cars will use both. Many ways exist for mounting hard bodies.
I intend to live forever! So far, so good.
#74

Posted 29 April 2015 - 06:20 AM
Pablo, thats a very good idea. I'll try that on the next one.
the pans on this are also a bit clunky, originally I had them mounted upside down from where they are now...
...but when I test-fitted the body I found that they were way too low. would have been fine for another hardbody I want to do, but not this car, so like I said upthread I de-soldered them and flipped them over...with the seemingly usual-for-me crap ton of solder.
I have another idea for how to mount the pans to the tops of the tubes, much more simply than the rod-and-plate I did on this.
bill I've heard of those methods, I sorta dig the old-school screws-through-the-body thing. Like the Classic manta ray I picked up on ebay a couple weeks ago.
would I be far off in saying that drop arms are pretty much a thing of the past? watching some otehr serious racing slot threads, and looking at the cars I have now, (the old REH brassie, the Parma flex, and JK Cheetah) it really doesn't seem like drop arms are a thing in chassis design anymore.
#75

Posted 29 April 2015 - 08:41 AM
Drop arms have given way to more modern designs, but they worked back in the day and I think it will work fine for that car.
If the handling is poor, it won't be the fault of drop arm design in general.
It's all in the execution and tuning....
The thing that worries me most is the sloppiness of the cotter pin hinge.
Lots of slop and wiggle isn't good for a guide flag because it promotes unpredictable handling.
You want the car to be consistent, not unpredictable. Just like a real car.
Paul Wolcott


