

Good suggestion, Bill. Rick's doing a how-to recap and he deserves to have the thread all to himself.
When I have time, I'll split the history stuff off into a new thread over in the history forum.

The 888 and the 1972 Nats...
Started by
dc-65x
, Feb 02 2008 10:21 PM
71 replies to this topic
#26

Cheater
-

- Root Admin
-

- 25,698 posts Joined: 14-February 06
Headmaster of the asylum
- Gender:Male
- Location:Norcross, GA
Posted 06 February 2008 - 12:42 PM
Gregory Wells
Never forget that first place goes to the racer with the MOST laps, not the racer with the FASTEST lap
#27
dc-65x
-
- Subscriber
-
- 6,979 posts Joined: 14-February 06
Grand Champion Poster
- Gender:Male
- Location:Captain Rick: The only vintage slot car nut in SW Oregon?
Posted 06 February 2008 - 01:02 PM
It's OK.  As someone once said in another of my threads, "We're just talking while we wait for the next installment". I'm sorry it's taken so long but I'm hoping this project will take on an added dimension soon
  .
.
As someone once said in another of my threads, "We're just talking while we wait for the next installment". I'm sorry it's taken so long but I'm hoping this project will take on an added dimension soon .
Rick Thigpen
Check out Steve Okeefe's great web site at its new home here at Slotblog:
The Independent Scratchbuilder
There's much more to come...
#28
Cheater
-
- Root Admin
-
- 25,698 posts Joined: 14-February 06
Headmaster of the asylum
- Gender:Male
- Location:Norcross, GA
Posted 06 February 2008 - 01:05 PM
Too late, Rick! I was splitting the thread while you were making the post above.
This is not to punish anyone at all. Those raceway memories actually deserve their own thread, if only to encourage others to contribute their memories, too.
The thread in the History Forum is titled "Raceway Memories"...
This is not to punish anyone at all. Those raceway memories actually deserve their own thread, if only to encourage others to contribute their memories, too.
The thread in the History Forum is titled "Raceway Memories"...
Gregory Wells
Never forget that first place goes to the racer with the MOST laps, not the racer with the FASTEST lap
#29
dc-65x
-
- Subscriber
-
- 6,979 posts Joined: 14-February 06
Grand Champion Poster
- Gender:Male
- Location:Captain Rick: The only vintage slot car nut in SW Oregon?
Posted 06 February 2008 - 01:22 PM
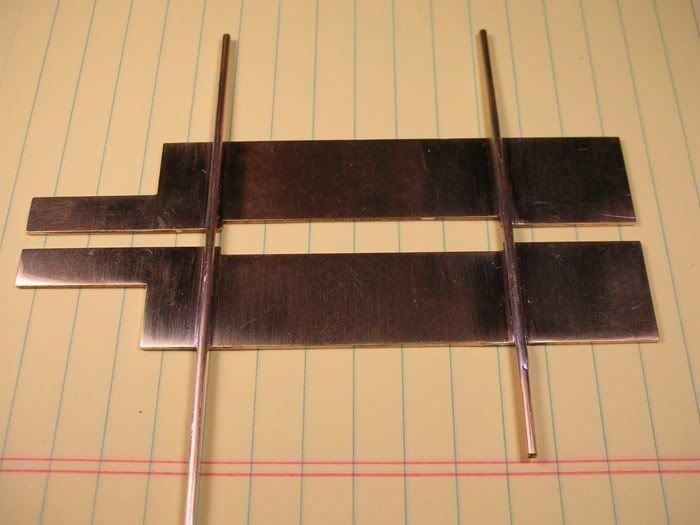
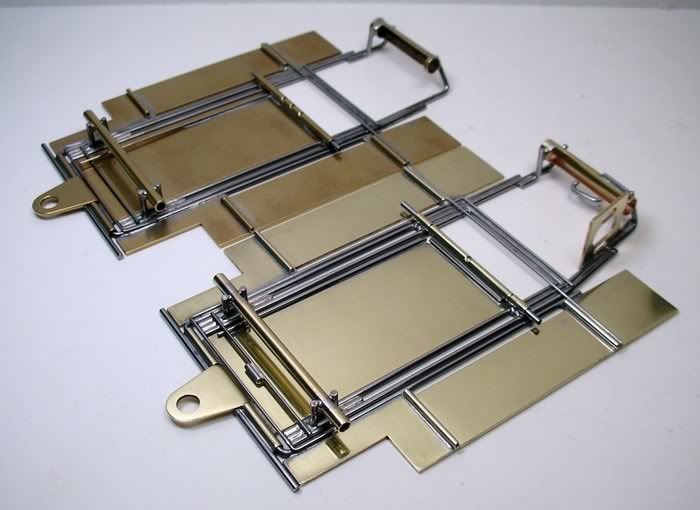
Here's how the take-off pans and drop arm turned out after sucking up and sanding all the solder off:
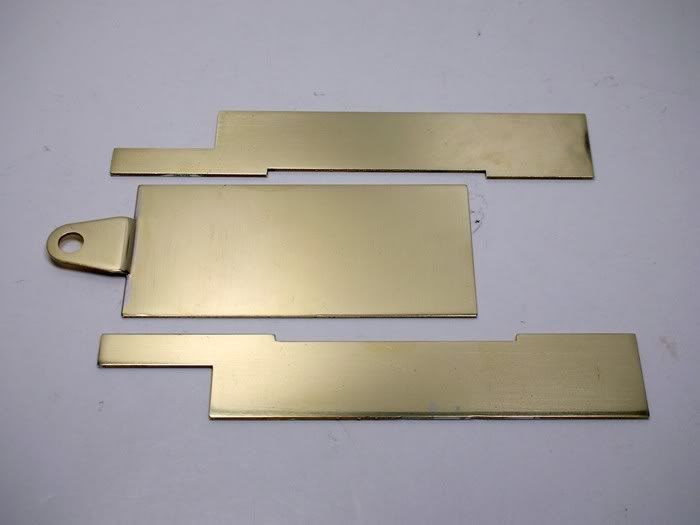
Since my tumbler was just sitting there doing nothing I decided to throw them in while I worked on the center section:

HMMMMMMMMMMMMMMMM.... SHINY GOODNESS!
Since my tumbler was just sitting there doing nothing I decided to throw them in while I worked on the center section:
HMMMMMMMMMMMMMMMM.... SHINY GOODNESS!
Rick Thigpen
Check out Steve Okeefe's great web site at its new home here at Slotblog:
The Independent Scratchbuilder
There's much more to come...
#30
Bill from NH
-

- Full Member
-
- 14,762 posts Joined: 02-August 07
Age scrubs away speed!
- Gender:Male
- Location:New Boston, NH
Posted 06 February 2008 - 03:01 PM
Rick,
I'm watching with interest. I have #112 of the 888s. The center section of mine is built like your first two pictures except the right rear axle brace turns to the front rather than toward the back. Pans are .040" thick as is the solid drop arm.
Only Jan would know for sure if he ever built 888s without a motor bracket and using other thicknesses of brass parts.
Bill Fernald
I intend to live forever! So far, so good.
I intend to live forever! So far, so good.
#31
dc-65x
-
- Subscriber
-
- 6,979 posts Joined: 14-February 06
Grand Champion Poster
- Gender:Male
- Location:Captain Rick: The only vintage slot car nut in SW Oregon?
Posted 06 February 2008 - 06:13 PM
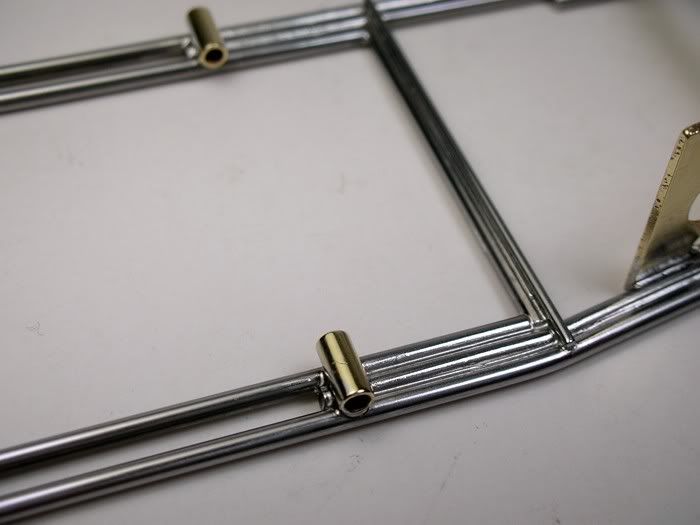
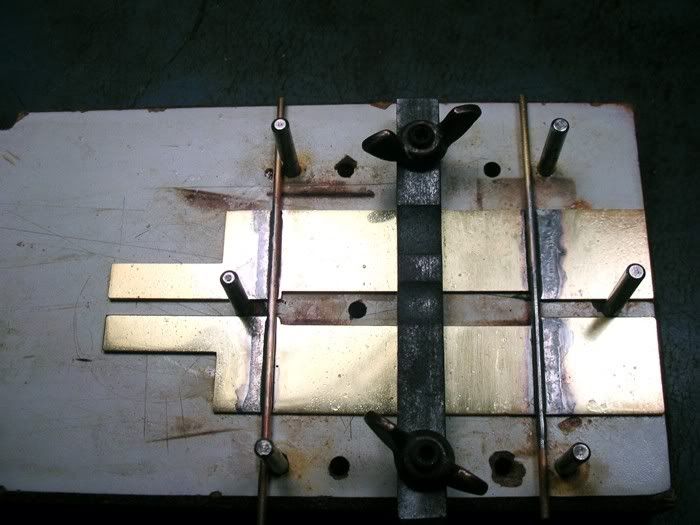
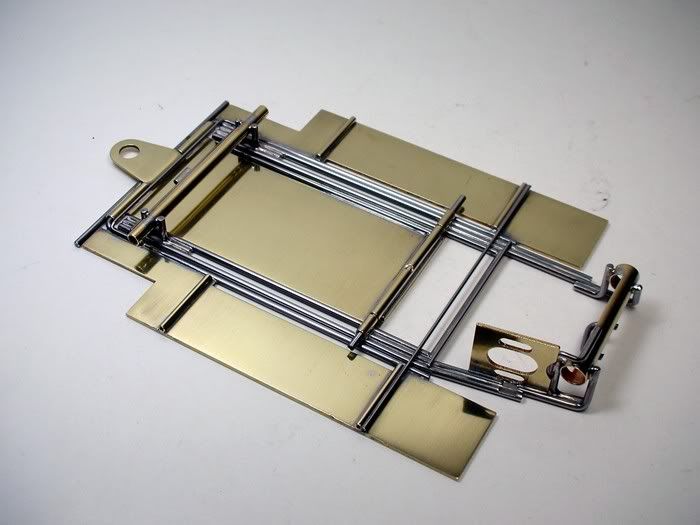
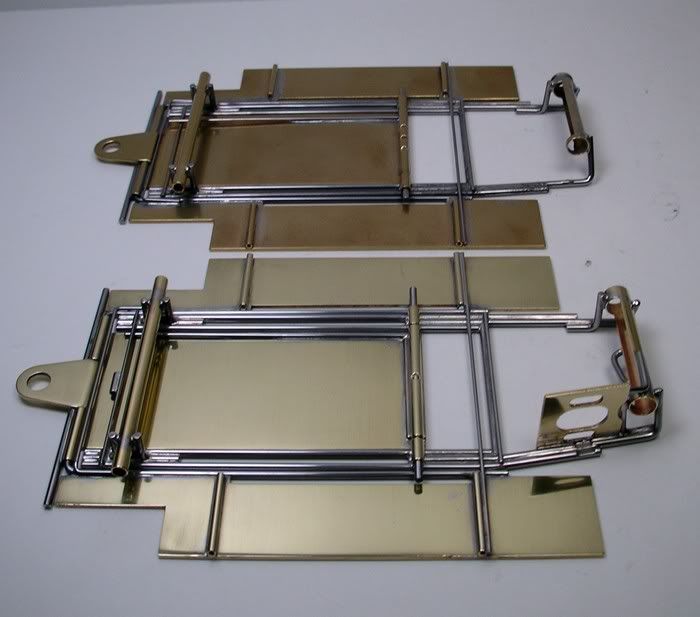
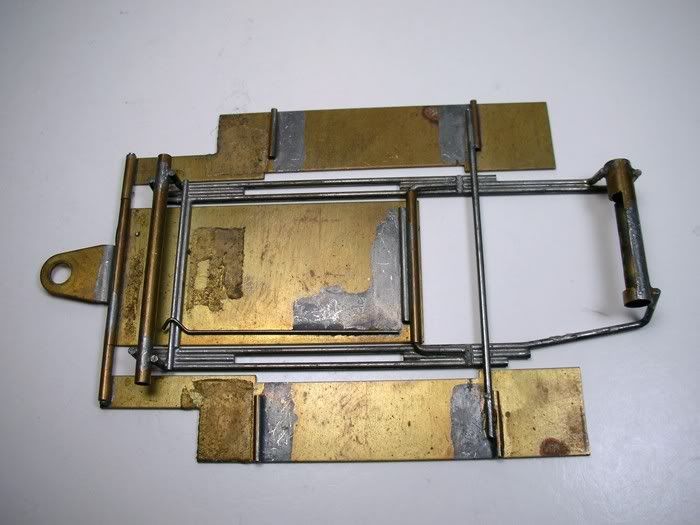
Here is the center section before it gets cleaned up:
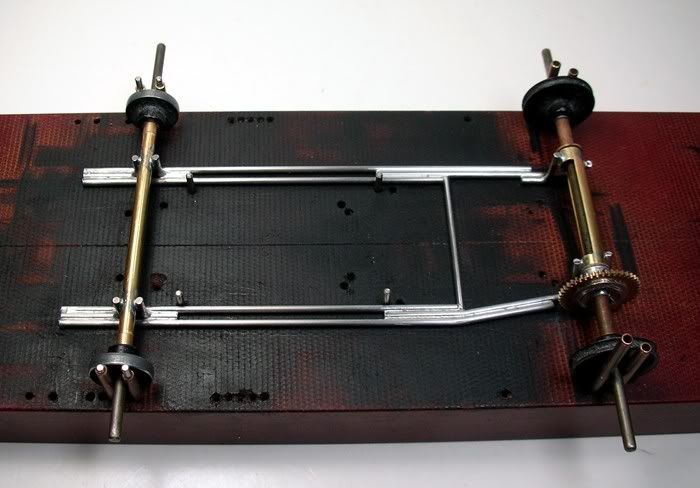
It's really pretty simple which is why I think it will make a good early '70s "Retro Racer". Three of the four main rails are simply straight pieces of wire. One half rail is straight. The other is bent to the motor angle that allows you to get a gear mesh and have the magnet clear the axle.
Next up I'm going to add a motor bracket and brace to mine but you wouldn't have to.
- Peter Horvath likes this
Rick Thigpen
Check out Steve Okeefe's great web site at its new home here at Slotblog:
The Independent Scratchbuilder
There's much more to come...
#32
Howmet TX
-

- Full Member
-
- 363 posts Joined: 12-April 07
On The Lead Lap
- Gender:Male
- Location:London, UK
Posted 07 February 2008 - 03:11 AM
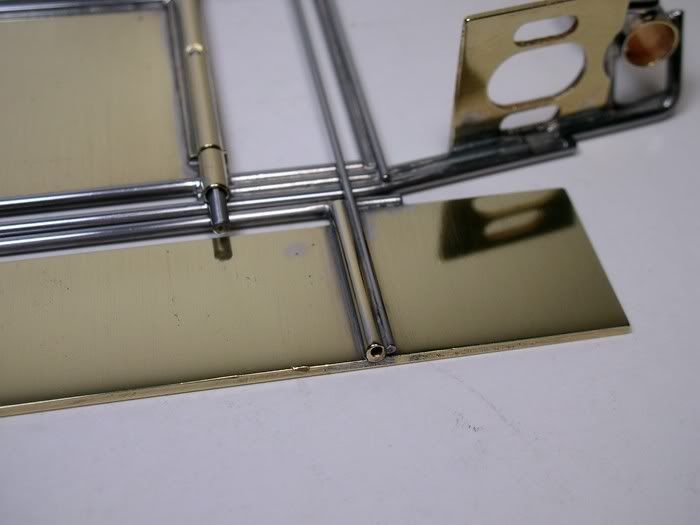
A question out of pure ignorance, DC - my instinct would be to make the inner rails out of a single piece bent into a U shape. The straight butt-soldered cross-piece appears to me to be a potential weak spot where the chassis tends to flex.
But I do notice that a lot of really cool chassis seem to be built this way. Are there other reasons for this sort of construction? And don't tell me it's easier - I've seen what you can do with a box of pliers!
Lost in admiration...
But I do notice that a lot of really cool chassis seem to be built this way. Are there other reasons for this sort of construction? And don't tell me it's easier - I've seen what you can do with a box of pliers!
Lost in admiration...
John Dilworth
#33
tonyp
-

- Member at Peace
-
- 15,325 posts Joined: 12-February 07
Grand Champion Poster
- Gender:Male
- Location:Sanford, FL, land of lizards and big roaches
Posted 07 February 2008 - 11:00 AM
Hi John,
In regards to a one-piece inner rail. The separate rails was a much easier way to build production chassis. This design was easier to rebuild as tweaks from one side of the chassis did not effect the other. You could simply heat up the joint on one side to untweak the rails.
It also handled better in most cases. I never had a car with a single rail that worked as well as one with separate rails.
Anthony 'Tonyp' Przybylowicz
5/28/50-12/20/21
Requiescat in Pace
#34
endbelldrive
-

- Member at Peace
-
- 1,740 posts Joined: 16-February 06
Checkered Flag in Hand
- Gender:Male
- Location:Witless Protection Program
Posted 07 February 2008 - 01:02 PM
But that still doesn't seem like a very good joint, and apparently Limpach didn't think so either. His race chassis has a lot more bracing in that area.
That's an iso-fulcrum chassis so it has the extra brace.
Bob Suzuki
8/19/54-8/?/21
Requiescat in Pace
8/19/54-8/?/21
Requiescat in Pace
#35
dc-65x
-
- Subscriber
-
- 6,979 posts Joined: 14-February 06
Grand Champion Poster
- Gender:Male
- Location:Captain Rick: The only vintage slot car nut in SW Oregon?
Posted 07 February 2008 - 01:43 PM
Here is my Tony P Iso recreation center section:
The drop arm is fixed to the rear of the chassis and the front wheels float. This car hauls on Eddie's flat road course .
The drop arm is fixed to the rear of the chassis and the front wheels float. This car hauls on Eddie's flat road course
.
- Peter Horvath likes this
Rick Thigpen
Check out Steve Okeefe's great web site at its new home here at Slotblog:
The Independent Scratchbuilder
There's much more to come...
#36
endbelldrive
-
- Member at Peace
-
- 1,740 posts Joined: 16-February 06
Checkered Flag in Hand
- Gender:Male
- Location:Witless Protection Program
Posted 07 February 2008 - 01:43 PM
HERE is a great article on the early history of the pro Iso-fulcrum anglewinder design:
The single crossbar was just part of the evolution of chassis building. We used to build the crossbar with a reinforcing strip of .020" X .250" soldered on top... which evolved into a single crossbar and no brass strip, which seemed to improve rear bite. These chassis were designed for a single race and most of us would reset the solder joints if it was used for more races than that.
I also found that it was hard to tune a chassis or get the right flex pattern with an .063" or .055" U-shaped inner rail, although Earl Campbell ran the first official sub-4 second (3.88) with the U inner rail chassis built by a 15-year-old Monty Ohren.
Bob Suzuki
8/19/54-8/?/21
Requiescat in Pace
8/19/54-8/?/21
Requiescat in Pace
#37
JerseyJohn
-

- Subscriber
-
- 4,203 posts Joined: 05-September 07
Jersey John
- Gender:Male
- Location:Northern NJ
Posted 08 February 2008 - 10:50 PM
Please... please... please... when you rebuild that motor, treat it to some P-S Gold Dust or Koford Big Foot motor brushes.
Those brushes you are using are pretty hard on today's commutators.
Beautiful work once again, Rick.
RON, concerning com juice. My understanding is it softens the brushes to break in faster.I see racers put it on every heat. Is that good for the motor?

John Chas Molnar
"Certified Newark Wise Guy since 1984" (retired)
"Certified Tony P Chassis God 2007.2023
Retro Chassis Designer-Builder

#38
dc-65x
-
- Subscriber
-
- 6,979 posts Joined: 14-February 06
Grand Champion Poster
- Gender:Male
- Location:Captain Rick: The only vintage slot car nut in SW Oregon?
Posted 08 February 2008 - 10:55 PM
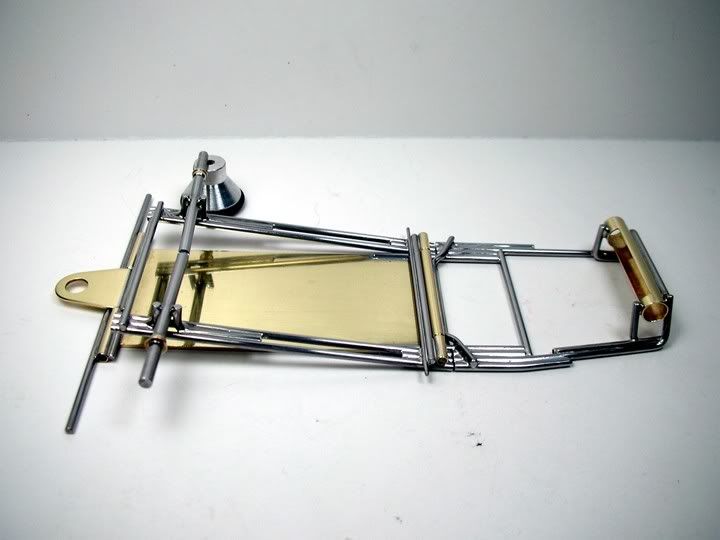
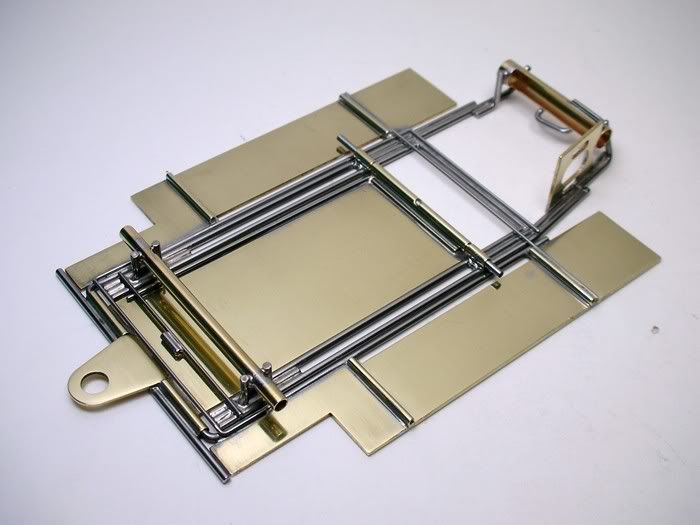
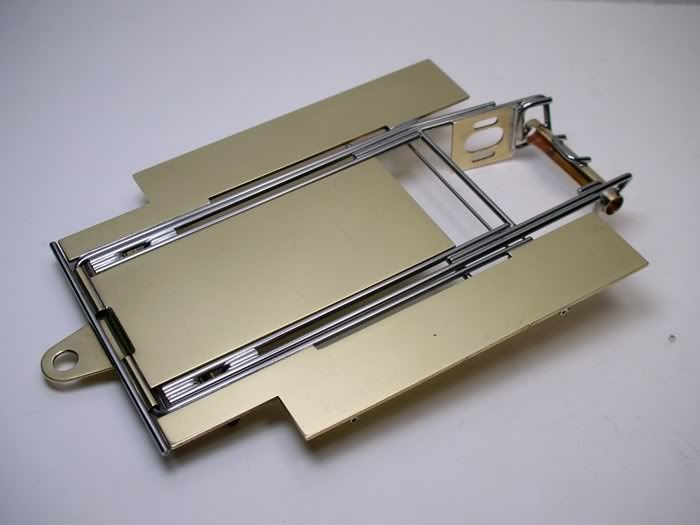
I finished off the center section:
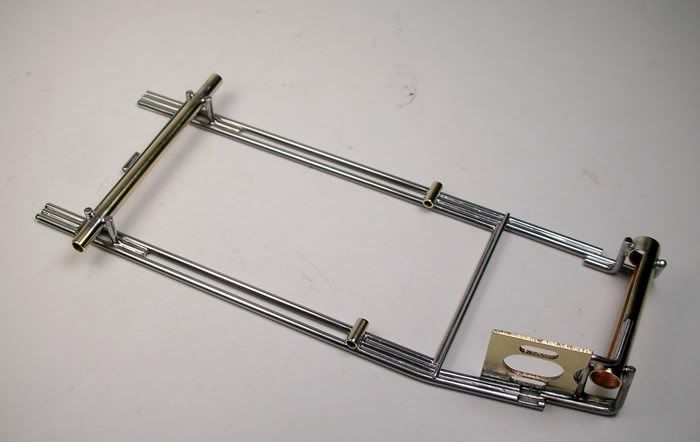
I added a motor mount and brace that ties in one of the rear axle braces and attaches to the top of the axle tube:
I also notched the main and half rails so I could get a turned down screw into the lower can screw hole... can screw hole... can I say that ?
The rear cross piece got a little .032 bullet proofing wire and I installed the drop arm hinge tubes:
Last was this cross piece that acts as a drop arm up stop. The original 888 had a slot ground into the rails to lower the cross piece to the same level as the drop arm. I did mine without the slot and added a short piece of wire as a stop.
Next up are the pans and plumber... and an added dimension to this project.
I added a motor mount and brace that ties in one of the rear axle braces and attaches to the top of the axle tube:
I also notched the main and half rails so I could get a turned down screw into the lower can screw hole... can screw hole... can I say that
?The rear cross piece got a little .032 bullet proofing wire and I installed the drop arm hinge tubes:
Last was this cross piece that acts as a drop arm up stop. The original 888 had a slot ground into the rails to lower the cross piece to the same level as the drop arm. I did mine without the slot and added a short piece of wire as a stop.
Next up are the pans and plumber... and an added dimension to this project.
Rick Thigpen
Check out Steve Okeefe's great web site at its new home here at Slotblog:
The Independent Scratchbuilder
There's much more to come...
#39
dc-65x
-
- Subscriber
-
- 6,979 posts Joined: 14-February 06
Grand Champion Poster
- Gender:Male
- Location:Captain Rick: The only vintage slot car nut in SW Oregon?
Posted 10 February 2008 - 07:28 PM
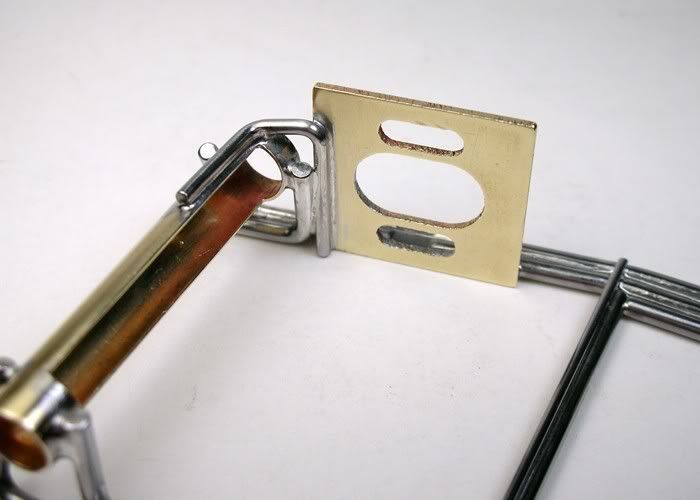
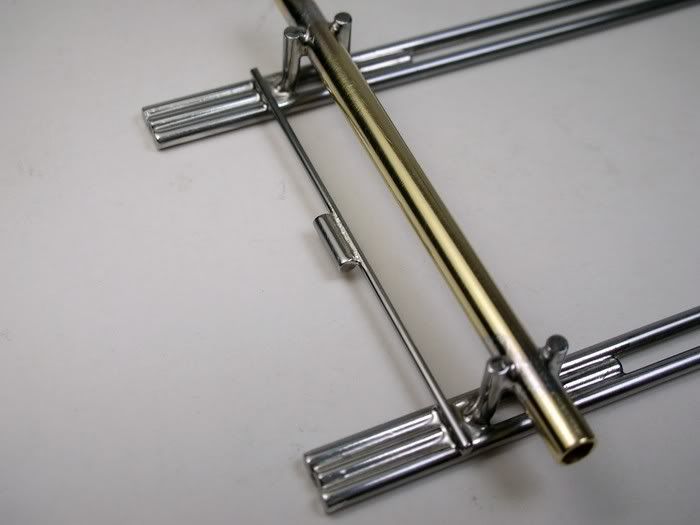
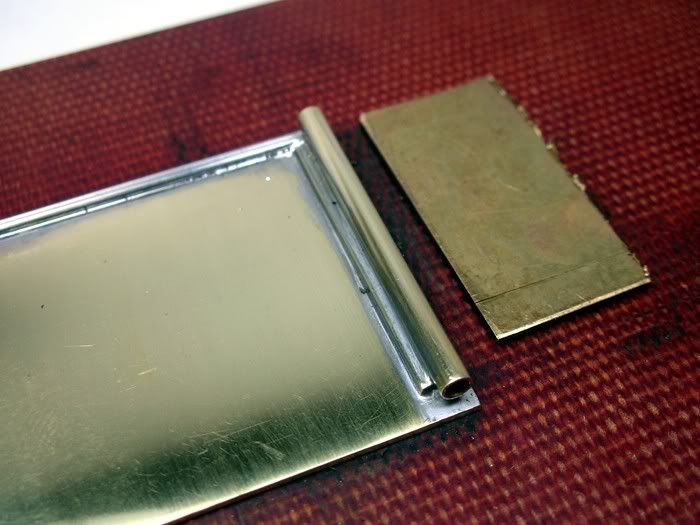
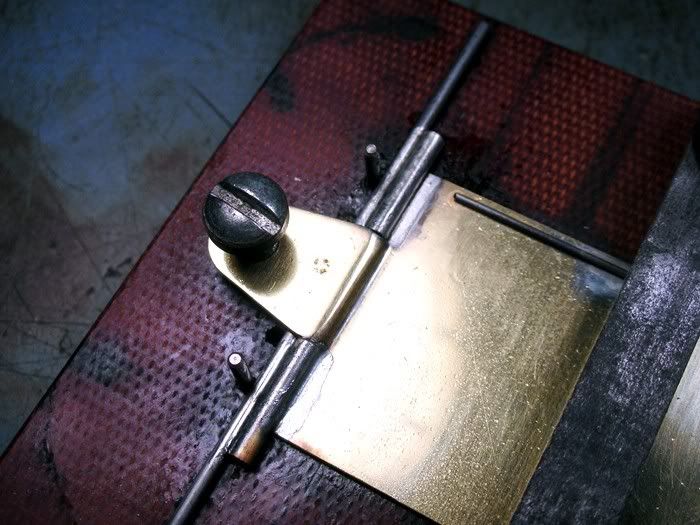
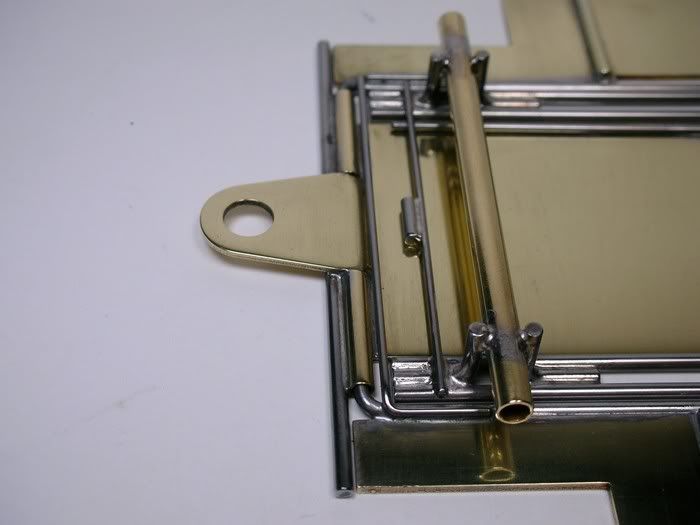
The drop arm from the Parma donor chassis is .030" thick. The 888 used a .040" arm. There is a gap between the top of the drop arm and the bottom of the pivot tube. I decided to fill it with some .030" sheet brass:
The brass shim is a little shorter than the pivot tube. That stopped the solder from flowing and kept me from accidentally soldering the drop arm tube solid with the chassis tubes :
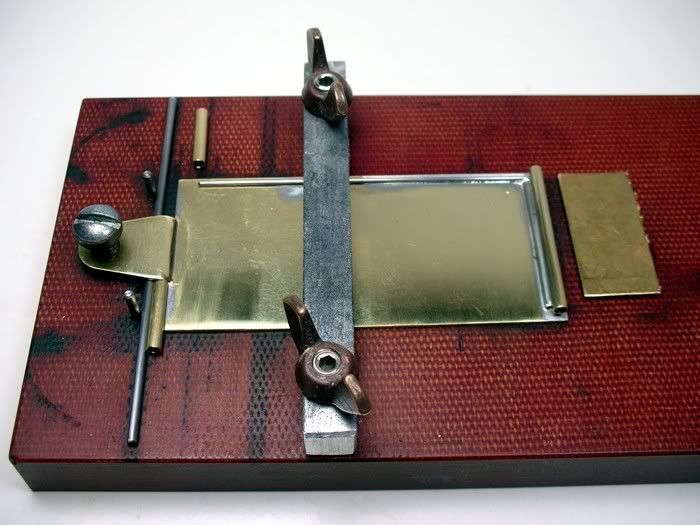
The plumber pivot tube and bumper went on next in my handy-dandy drop arm fixture:
These solder joints came out pretty good. I'll just clean up the top of the hinge tubes a little:
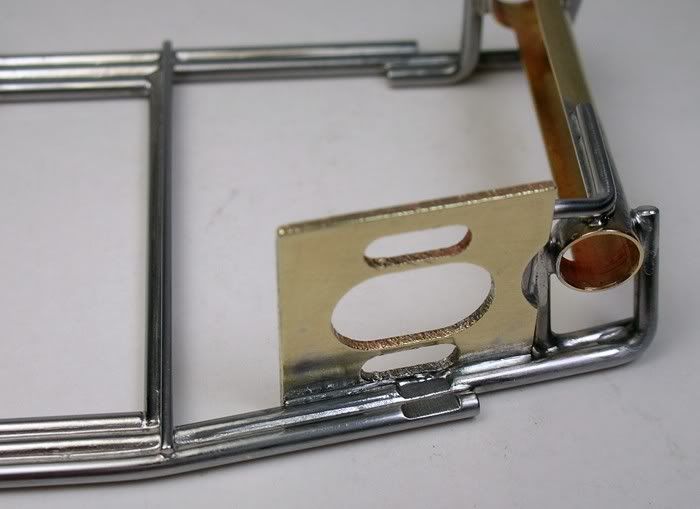
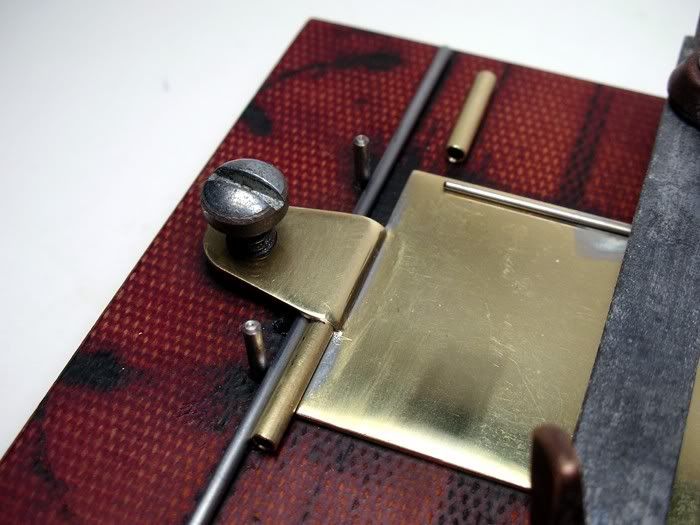
I used this gizmo to align the body mount pin tubes to the pans. It's an ugly thing but it seems to work . Speaking of ugly, look at the mess along side of the pin tubes . Holy smokes, talk about collateral damage!  . The actual joint between the tube and the pan is a nice smooth fillet for a good strong joint but this just looks ugly.
So, as my wife says, "life's messy, clean it up!" If you goof up soldering like I did, don't get mad and throw the chassis into the trash can, fix it. If the joint or fillet between the two parts is good but you've got a mess along side it, sand the Crap-O-La off.
I got on a roll and finished the chassis from here. It's in the tumbler now...
The brass shim is a little shorter than the pivot tube. That stopped the solder from flowing and kept me from accidentally soldering the drop arm tube solid with the chassis tubes
:The plumber pivot tube and bumper went on next in my handy-dandy drop arm fixture:
These solder joints came out pretty good. I'll just clean up the top of the hinge tubes a little:
I used this gizmo to align the body mount pin tubes to the pans. It's an ugly thing but it seems to work
. Speaking of ugly, look at the mess along side of the pin tubes . Holy smokes, talk about collateral damage! . The actual joint between the tube and the pan is a nice smooth fillet for a good strong joint but this just looks ugly. So, as my wife says, "life's messy, clean it up!" If you goof up soldering like I did, don't get mad and throw the chassis into the trash can, fix it. If the joint or fillet between the two parts is good but you've got a mess along side it, sand the Crap-O-La off.
I got on a roll and finished the chassis from here. It's in the tumbler now...
- Peter Horvath likes this
Rick Thigpen
Check out Steve Okeefe's great web site at its new home here at Slotblog:
The Independent Scratchbuilder
There's much more to come...
#40
dc-65x
-
- Subscriber
-
- 6,979 posts Joined: 14-February 06
Grand Champion Poster
- Gender:Male
- Location:Captain Rick: The only vintage slot car nut in SW Oregon?
Posted 10 February 2008 - 08:26 PM
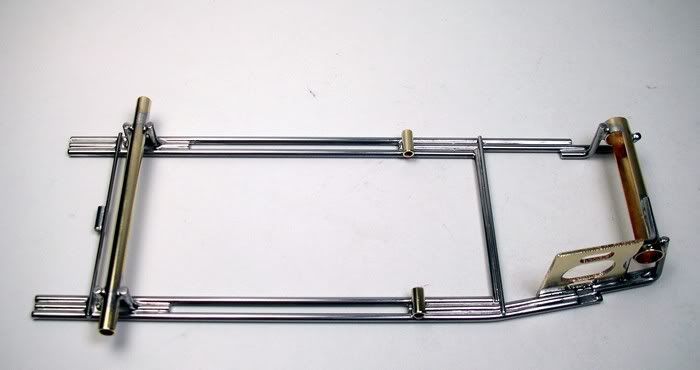
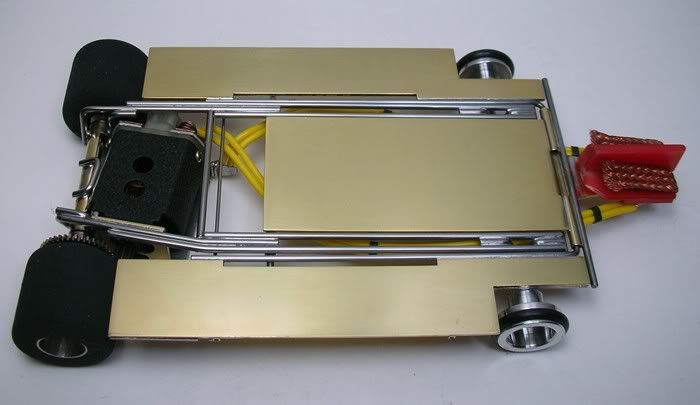
Out of the tumbler for some pictures and then into a WD40 soak:
Here is one of the areas with the mess that I cleaned up. Note the pans are soldered directly to the plumber without any hinges. There is some tilting action from the .055" plumber rails fitting loosely in the .062" ID hinge tubes. I built in a little extra side to side "slopski" in both the drop arm and the plumber rails:
The original 888 I used for inspiration and Adams "2008-888":
Onward...
- Peter Horvath and Samiam like this
Rick Thigpen
Check out Steve Okeefe's great web site at its new home here at Slotblog:
The Independent Scratchbuilder
There's much more to come...
#41
GTPJoe
-

- Full Member
-
- 448 posts Joined: 26-July 07
On The Lead Lap
- Gender:Male
- Location:Manch-Vegas NH
Posted 12 February 2008 - 07:08 AM
Rick,
Another beautiful classic chassis! You're keeping these things alive for us other builders.
"Onward"... to the "no glue chassis" project?? Love to see you do another PdL car!!
Thanks!!
Another beautiful classic chassis! You're keeping these things alive for us other builders.
"Onward"... to the "no glue chassis" project?? Love to see you do another PdL car!!
Thanks!!
GTP Joe Connolly
In theory there is no difference between theory and practice.
In practice there is.
#42
dc-65x
-
- Subscriber
-
- 6,979 posts Joined: 14-February 06
Grand Champion Poster
- Gender:Male
- Location:Captain Rick: The only vintage slot car nut in SW Oregon?
Posted 12 February 2008 - 10:05 AM
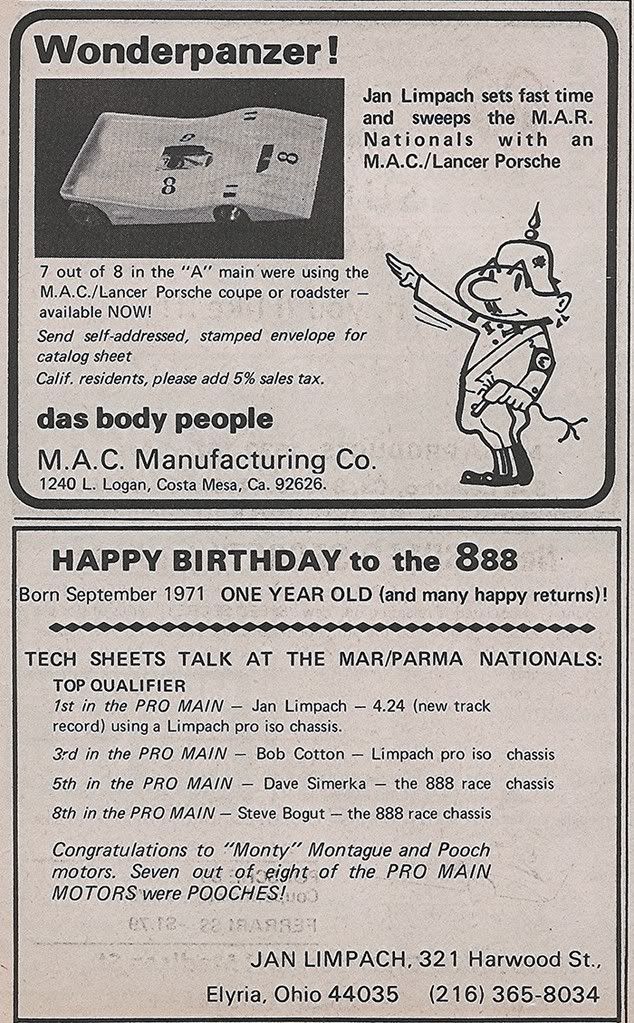
Thanks, Joe. PdL's No Glue Car looks like a fun project. It's is definitely on my "list". As for this project, it needs a body. Here is a MAC ad from the same MAR as the race report:
Associated ran an ad also so their bodies would be period korrect but they didn't make the Nats main:
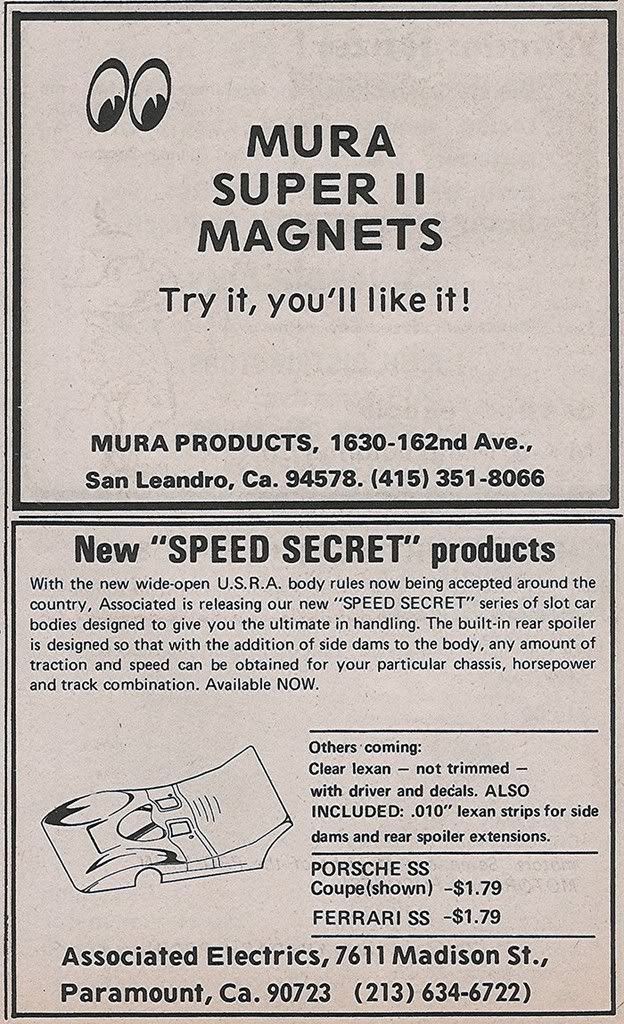
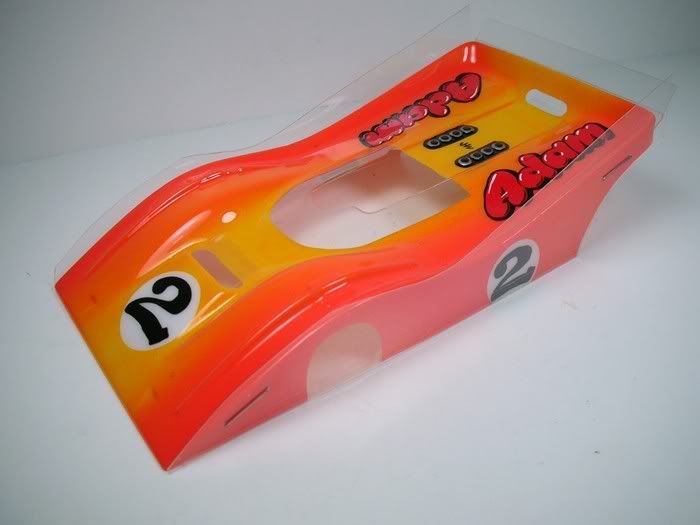
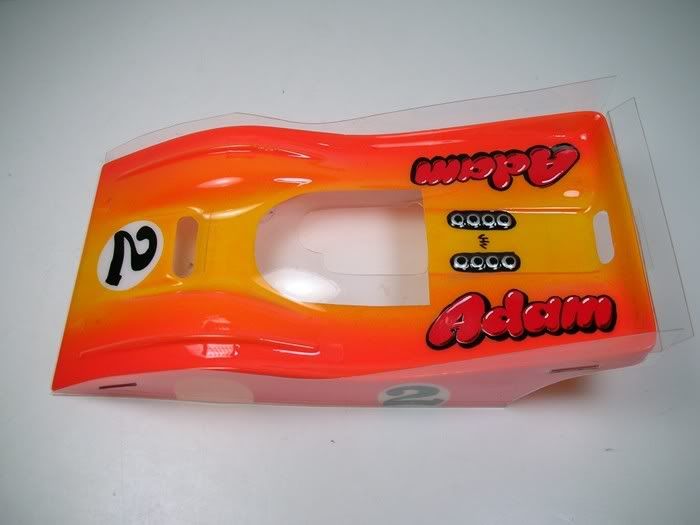
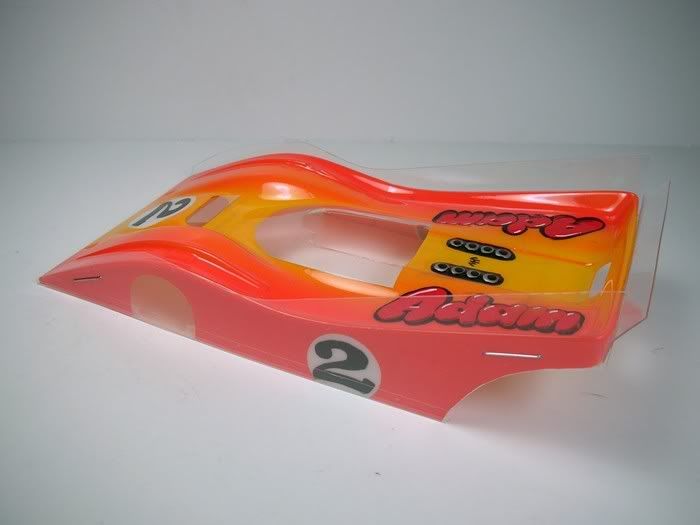
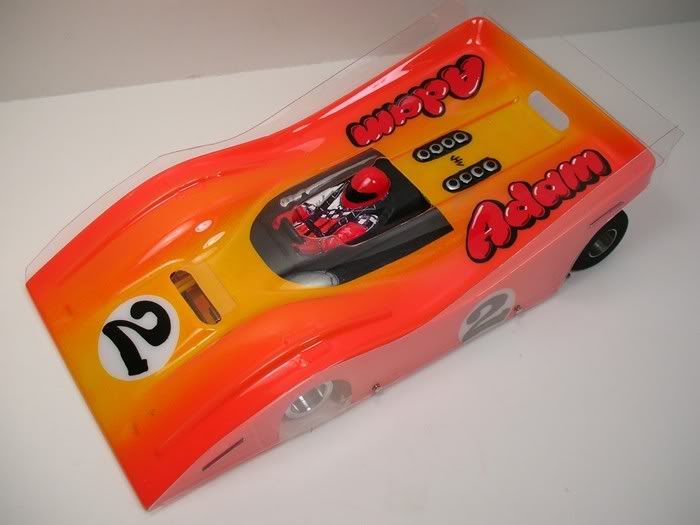
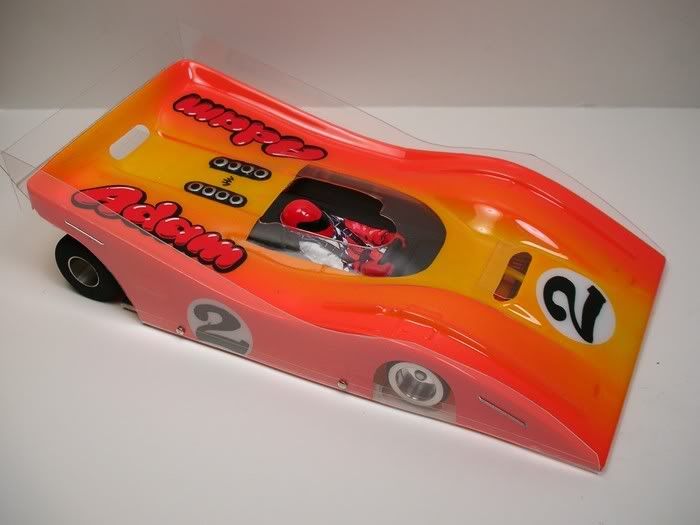
Adam has this Outisight Designs MAC/Lancer Porsche already painted but I'll have to ask if he has other ideas for this car...
Associated ran an ad also so their bodies would be period korrect but they didn't make the Nats main:
Adam has this Outisight Designs MAC/Lancer Porsche already painted but I'll have to ask if he has other ideas for this car...
- Peter Horvath likes this
Rick Thigpen
Check out Steve Okeefe's great web site at its new home here at Slotblog:
The Independent Scratchbuilder
There's much more to come...
#43
TSR
-

- Full Member
-
- 42,299 posts Joined: 02-February 06
The Dokktor is IN
- Gender:Male
- Location:Marxifornia
Posted 12 February 2008 - 12:34 PM
I remember drawing those little characters for the M.A.C. ads... we had a new one for each ad. The name of the character was "Geezer Mac" and I did at least seven or eight comic strips for Miniature Auto racing with the adventures of Geezer Mac... those were the days!

Note the "M.A.C" logo on the helmet and the sleeve. The face of Geezer Mac is also made of the three letters combined in the company's logo.
Note the "M.A.C" logo on the helmet and the sleeve. The face of Geezer Mac is also made of the three letters combined in the company's logo.
Philippe de Lespinay
#44
dc-65x
-
- Subscriber
-
- 6,979 posts Joined: 14-February 06
Grand Champion Poster
- Gender:Male
- Location:Captain Rick: The only vintage slot car nut in SW Oregon?
Posted 12 February 2008 - 01:02 PM
Hi Philippe,
The artwork makes these old ads fun .
How do you think your "No Glue" car you built in the same issue of MAR chassis would work on today's spray-glued tracks?
The artwork makes these old ads fun
.How do you think your "No Glue" car you built in the same issue of MAR chassis would work on today's spray-glued tracks?
Rick Thigpen
Check out Steve Okeefe's great web site at its new home here at Slotblog:
The Independent Scratchbuilder
There's much more to come...
#45
dc-65x
-
- Subscriber
-
- 6,979 posts Joined: 14-February 06
Grand Champion Poster
- Gender:Male
- Location:Captain Rick: The only vintage slot car nut in SW Oregon?
Posted 17 February 2008 - 04:10 PM
Adam’s 2008-888 Retro Racer is finished and ready for a trip to Eddie’s blue King. This is a car that any “Vintage Enthusiast-Scratch Builder" can build today. Here is a quick recap of where the parts came from. The Mura two-hole C-can setup is plentiful on eBay. I bought this lot...
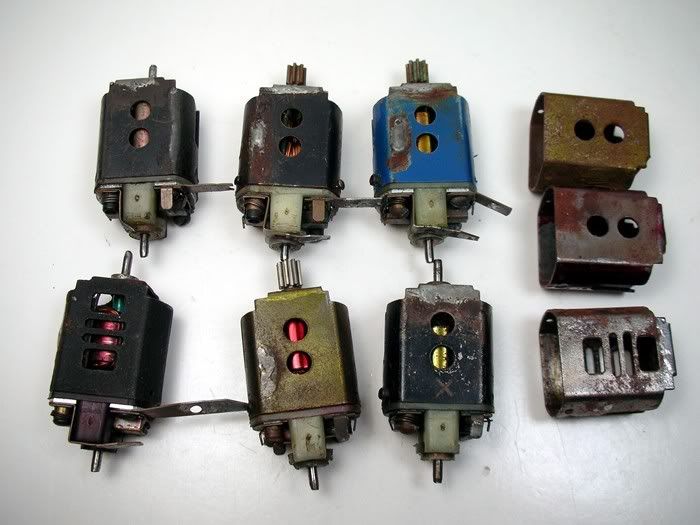
... which yielded these usable parts:
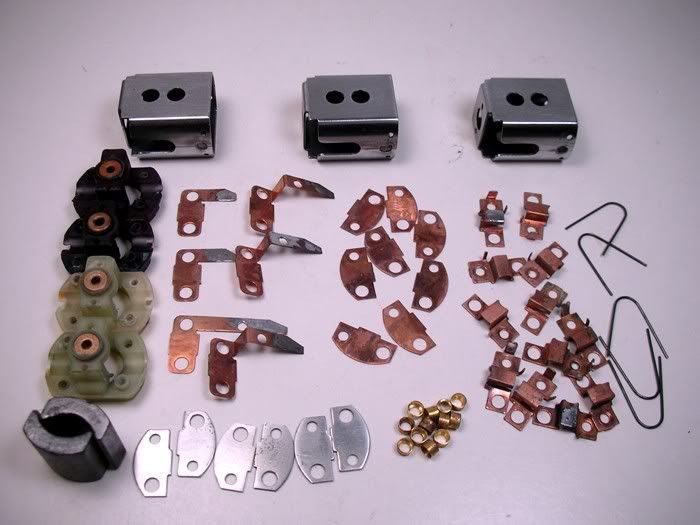
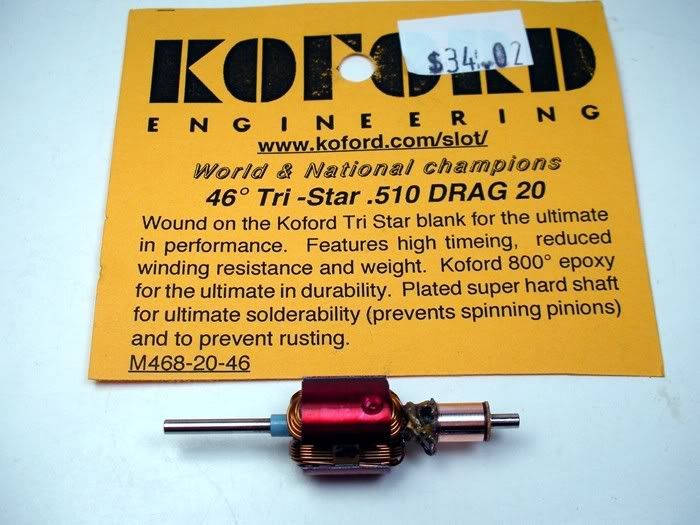
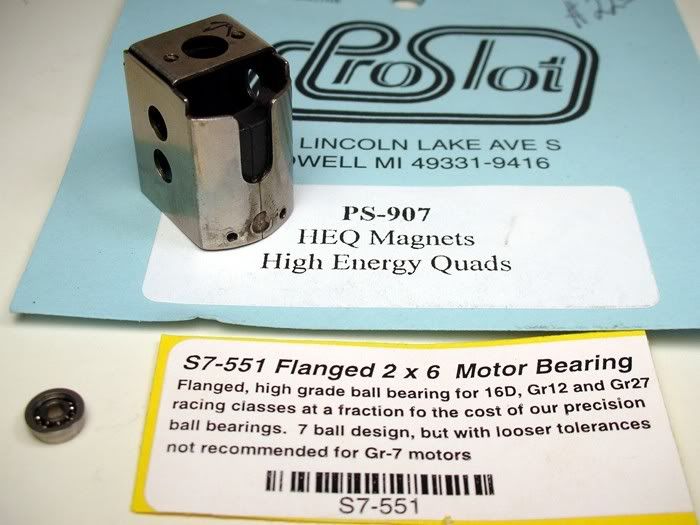
We stuffed the setup with a modern armature, magnets, hardware, brushes, springs, and bearings. In other words, the stuff that wears out. You can keep this setup running forever:
Then we built a pretty simple chassis based on the 1972 Limpach 888 using a junk donor Parma Sliding Plumber chassis, again off eBay:
Here is the finished car ready for its body:
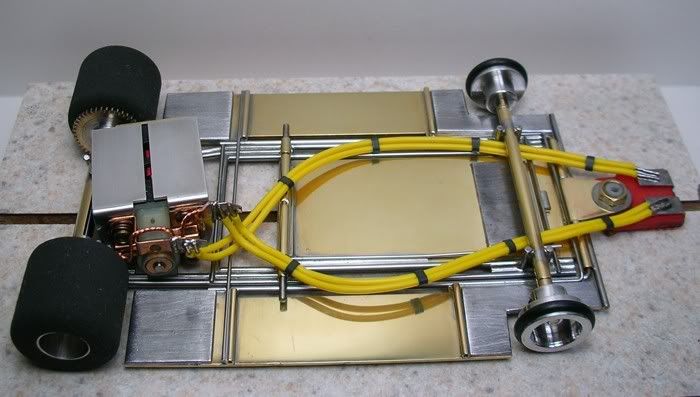
I used Lots-O-Lead for "road-hugging weight" around the turns . This pile is not running a "girlie-man" motor so it can haul the weight  .
.
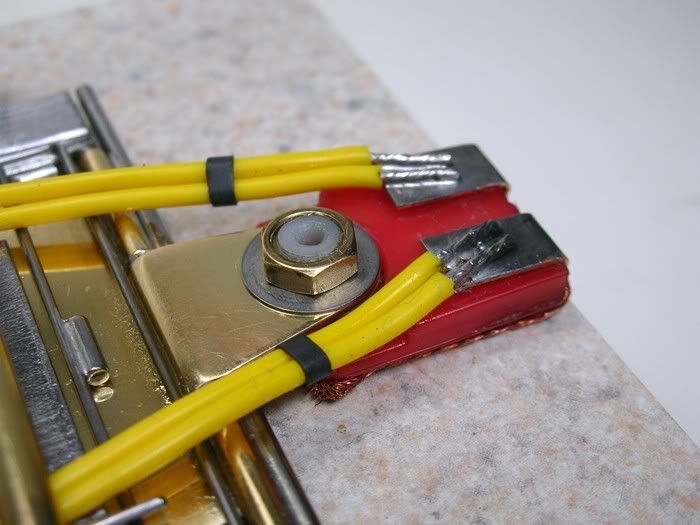
The Jet Flag, guide nut, and braid are from REH. The lead wire and clips are Slick 7:
Sonic spur and pinion, PRI non-shielded axle bearings, and a drill blank axle make up the rear end:
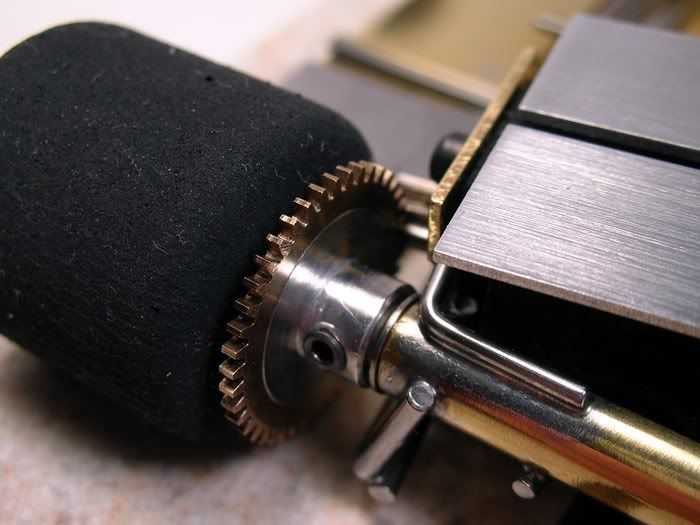
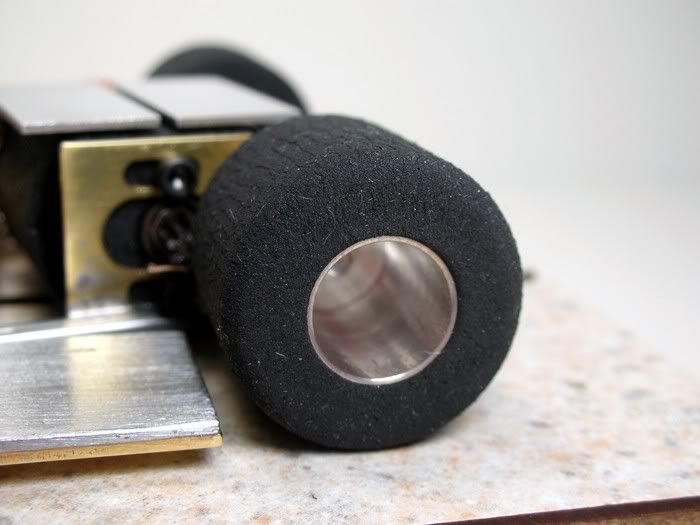
The rear wheels are Alpha regular hub. They look a lot like vintage Aguirre rears (except for the color of course ) if you sand off the rubber on the face of the rim to expose it as I’ve done here:
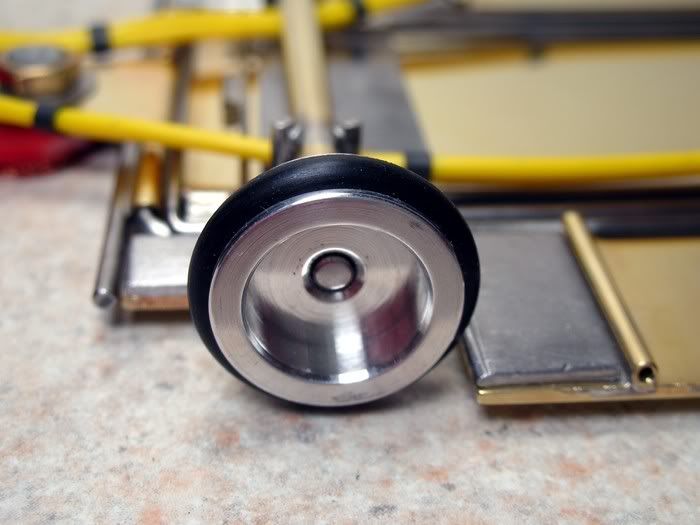
The front wheels I used are some 1972 Aguirres that we had made for our own use. This is really a “do-able” wheel for a retailer to produce as the tires are just simple O-rings:
If any blogger decides to build a Retro Racermobile in the spirit of the early '70s like this one with vintage looks and modern guts I'll supply them with the Aguirre wheels and even the Parma heat sinks for their motor at my cost. You just need to post pictures of your build along the way .
The axle spacer’s front and rear are modern NSR:
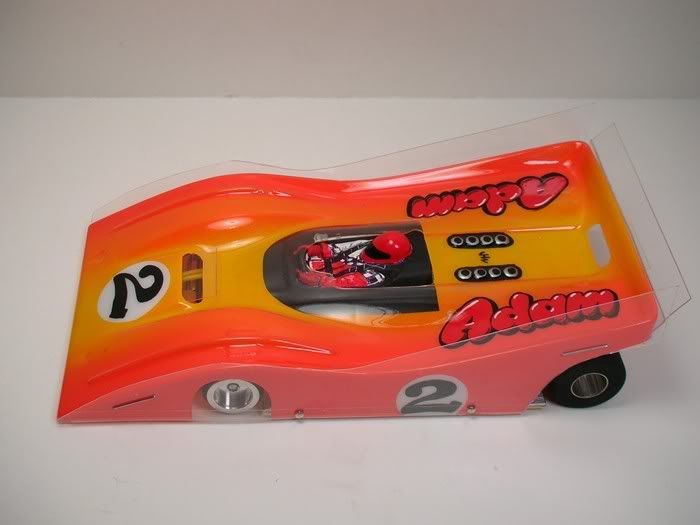
The finished car uses a currently available Outisight Designs MAC-Lancer Porsche body beautifully-painted by Jairus Watson:
Next up, Eddie’s Blue King...
... which yielded these usable parts:
We stuffed the setup with a modern armature, magnets, hardware, brushes, springs, and bearings. In other words, the stuff that wears out. You can keep this setup running forever:
Then we built a pretty simple chassis based on the 1972 Limpach 888 using a junk donor Parma Sliding Plumber chassis, again off eBay:
Here is the finished car ready for its body:
I used Lots-O-Lead for "road-hugging weight" around the turns
. This pile is not running a "girlie-man" motor so it can haul the weight .The Jet Flag, guide nut, and braid are from REH. The lead wire and clips are Slick 7:
Sonic spur and pinion, PRI non-shielded axle bearings, and a drill blank axle make up the rear end:
The rear wheels are Alpha regular hub. They look a lot like vintage Aguirre rears (except for the color of course
) if you sand off the rubber on the face of the rim to expose it as I’ve done here:The front wheels I used are some 1972 Aguirres that we had made for our own use. This is really a “do-able” wheel for a retailer to produce as the tires are just simple O-rings:
If any blogger decides to build a Retro Racermobile in the spirit of the early '70s like this one with vintage looks and modern guts I'll supply them with the Aguirre wheels and even the Parma heat sinks for their motor at my cost. You just need to post pictures of your build along the way
.The axle spacer’s front and rear are modern NSR:
The finished car uses a currently available Outisight Designs MAC-Lancer Porsche body beautifully-painted by Jairus Watson:
Next up, Eddie’s Blue King...
Rick Thigpen
Check out Steve Okeefe's great web site at its new home here at Slotblog:
The Independent Scratchbuilder
There's much more to come...
#46
TSR
-
- Full Member
-
- 42,299 posts Joined: 02-February 06
The Dokktor is IN
- Gender:Male
- Location:Marxifornia
Posted 17 February 2008 - 04:48 PM
I am sure that it would be pretty good compared to the period machinery. I guess the way to find out is... you build a replica?How do you think your "No Glue" car you built in the same issue of MAR chassis would work on today's spray-glued tracks?
Philippe de Lespinay
#47
dc-65x
-
- Subscriber
-
- 6,979 posts Joined: 14-February 06
Grand Champion Poster
- Gender:Male
- Location:Captain Rick: The only vintage slot car nut in SW Oregon?
Posted 17 February 2008 - 05:10 PM
Hi Philippe,
Building a replica of your "No Glue Car" is high on my to do list .
Building a replica of your "No Glue Car" is high on my to do list
.
Rick Thigpen
Check out Steve Okeefe's great web site at its new home here at Slotblog:
The Independent Scratchbuilder
There's much more to come...
#48
dc-65x
-
- Subscriber
-
- 6,979 posts Joined: 14-February 06
Grand Champion Poster
- Gender:Male
- Location:Captain Rick: The only vintage slot car nut in SW Oregon?
Posted 17 February 2008 - 08:35 PM
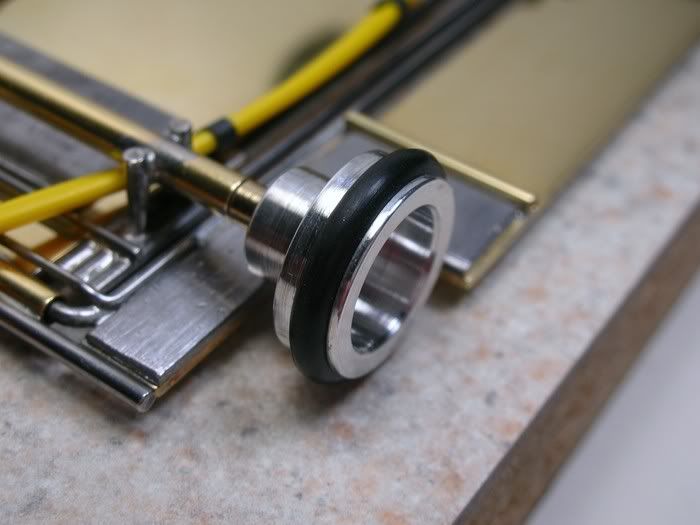
I forgot one little detail. The Aguirre wheels measure .640" in diameter. All the Oakland Speedway collection of original Pro cars have the Aguirre fronts ground down to .625", the legal minimum diameter:

OK, now it's ready for Eddie's.
OK, now it's ready for Eddie's.
Rick Thigpen
Check out Steve Okeefe's great web site at its new home here at Slotblog:
The Independent Scratchbuilder
There's much more to come...
#49
GTPJoe
-
- Full Member
-
- 448 posts Joined: 26-July 07
On The Lead Lap
- Gender:Male
- Location:Manch-Vegas NH
Posted 19 February 2008 - 07:35 AM
Hi Rick!
While not exactly what you had in mind here's what looking at your stuff got me doing.
I started with an American Line chassis. It had a drop arm and basic frame to begin with. Being a rookie at anglewinders I needed some help with setting the motor angle.

It's about a $20 chassis and perfect for starting your first "pro" type chassis build.

It's set up for 1/8" axles but I wanted 3/32" so I replaced the rear axle tube and turned the uprights around (A Tony P. secret for punching the donut) and on the front axle I sleeved it down with a 1/8" brass tube that has 3/32" ID. Then cut it away. Our local tracks are very smooth and everyone said lock down the drop arm so I soldered it to the main inside rail.

I cut some pans from .025" brass, did another main rail from .063" and a plumber rail of .055". Bent up some pan hangers, a bite bar, and up stops, and I'm almost there. Still working on a cross piece and some bulletproofing.

Still working out the way to put the motor in but it's a Mura Green can with PS Mega III mags and a Havlicek custom arm which I believe is a 20T of 24ga. Bill just got it going on his power supply and it sounds amazing. I'm cleaning up some vintage endbells and hardware to replace that modern piece.

It sure could use some front wheels. LOL! Thanks for all the info about building these things. I've never done anything like this before and now I'm hooked. So much fun. I just bought some material to build a jig like you have for making the center sections.
See ya!
While not exactly what you had in mind here's what looking at your stuff got me doing.
I started with an American Line chassis. It had a drop arm and basic frame to begin with. Being a rookie at anglewinders I needed some help with setting the motor angle.
It's about a $20 chassis and perfect for starting your first "pro" type chassis build.
It's set up for 1/8" axles but I wanted 3/32" so I replaced the rear axle tube and turned the uprights around (A Tony P. secret for punching the donut) and on the front axle I sleeved it down with a 1/8" brass tube that has 3/32" ID. Then cut it away. Our local tracks are very smooth and everyone said lock down the drop arm so I soldered it to the main inside rail.
I cut some pans from .025" brass, did another main rail from .063" and a plumber rail of .055". Bent up some pan hangers, a bite bar, and up stops, and I'm almost there. Still working on a cross piece and some bulletproofing.
Still working out the way to put the motor in but it's a Mura Green can with PS Mega III mags and a Havlicek custom arm which I believe is a 20T of 24ga. Bill just got it going on his power supply and it sounds amazing. I'm cleaning up some vintage endbells and hardware to replace that modern piece.
It sure could use some front wheels. LOL! Thanks for all the info about building these things. I've never done anything like this before and now I'm hooked. So much fun. I just bought some material to build a jig like you have for making the center sections.
See ya!
GTP Joe Connolly
In theory there is no difference between theory and practice.
In practice there is.
#50
dc-65x
-
- Subscriber
-
- 6,979 posts Joined: 14-February 06
Grand Champion Poster
- Gender:Male
- Location:Captain Rick: The only vintage slot car nut in SW Oregon?
Posted 19 February 2008 - 12:14 PM
Hi Joe,
Great-looking project! It's nice to see some vintage things being built. Glad you're enjoying scratchbuilding. Is your chassis set up for 3/4" or 5/8" fronts?
Great-looking project! It's nice to see some vintage things being built. Glad you're enjoying scratchbuilding. Is your chassis set up for 3/4" or 5/8" fronts?
Rick Thigpen
Check out Steve Okeefe's great web site at its new home here at Slotblog:
The Independent Scratchbuilder
There's much more to come...


