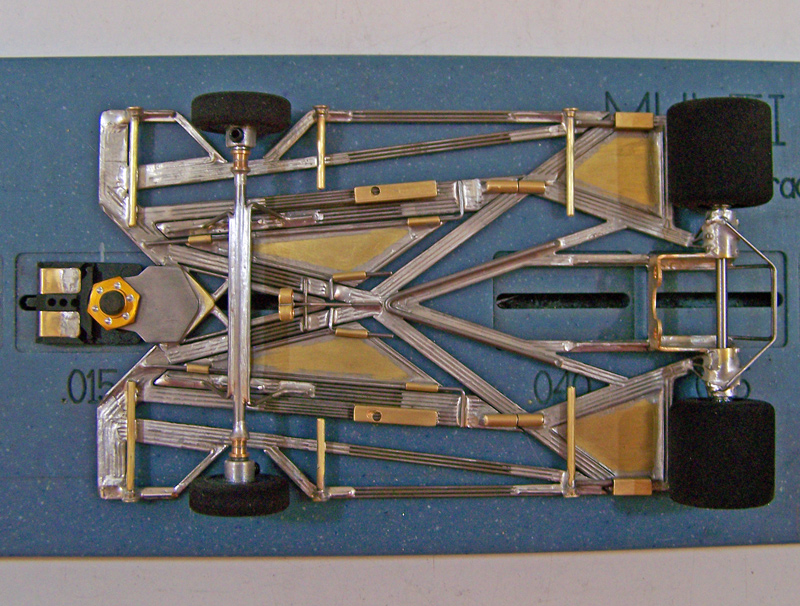
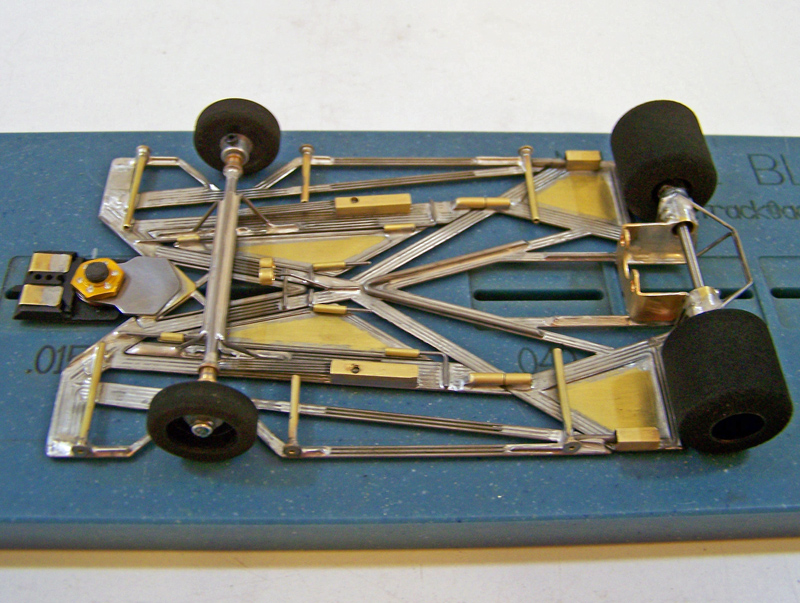
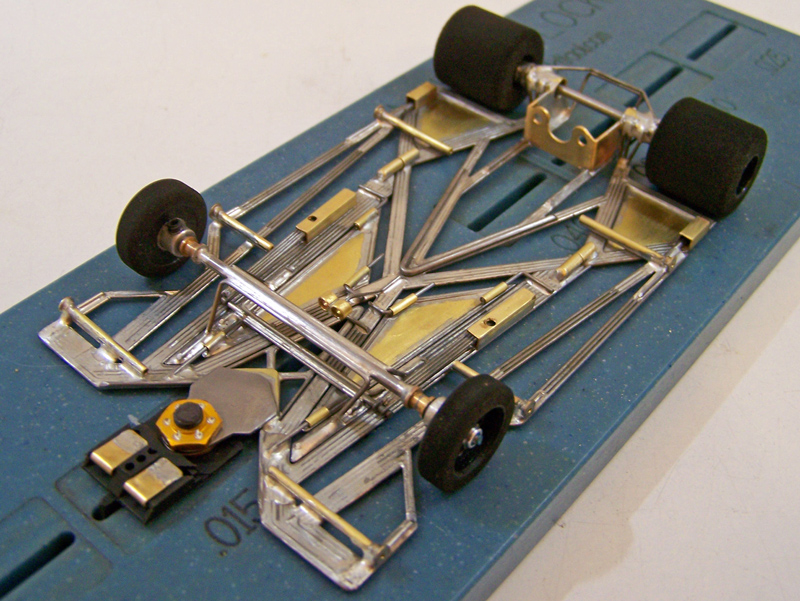
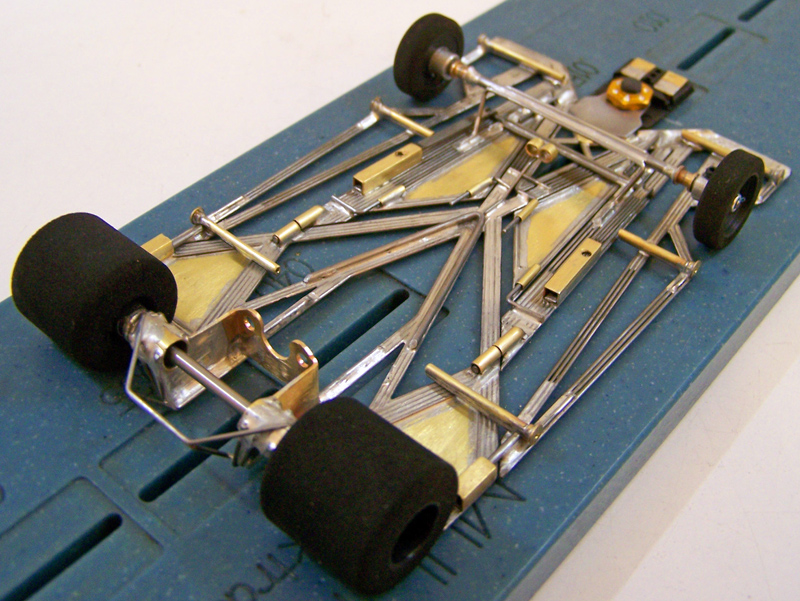
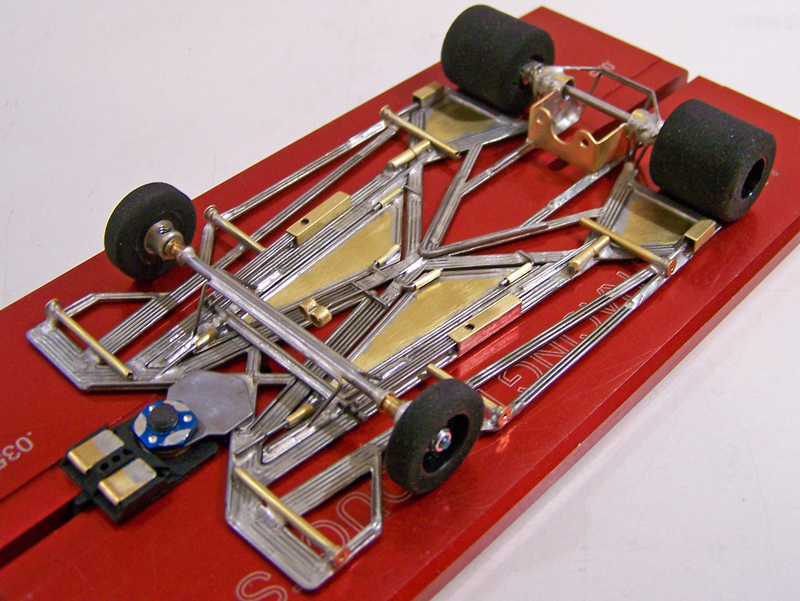
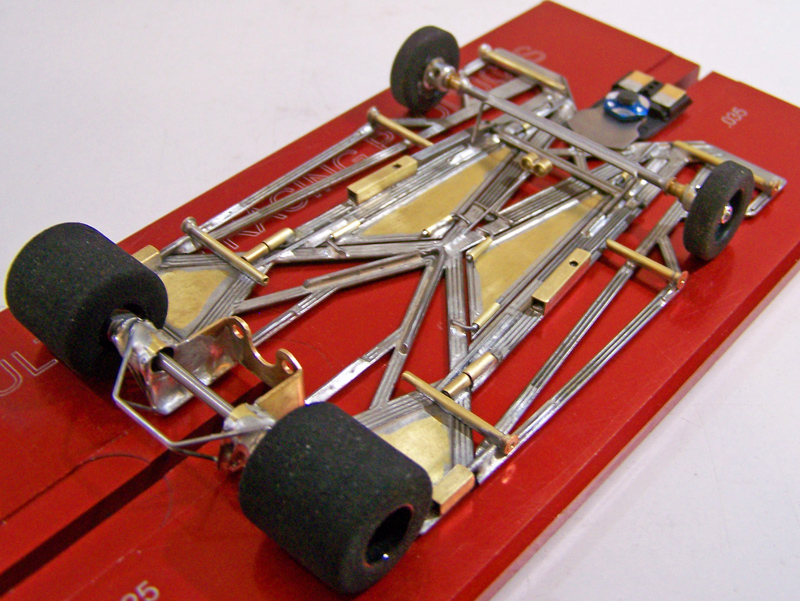
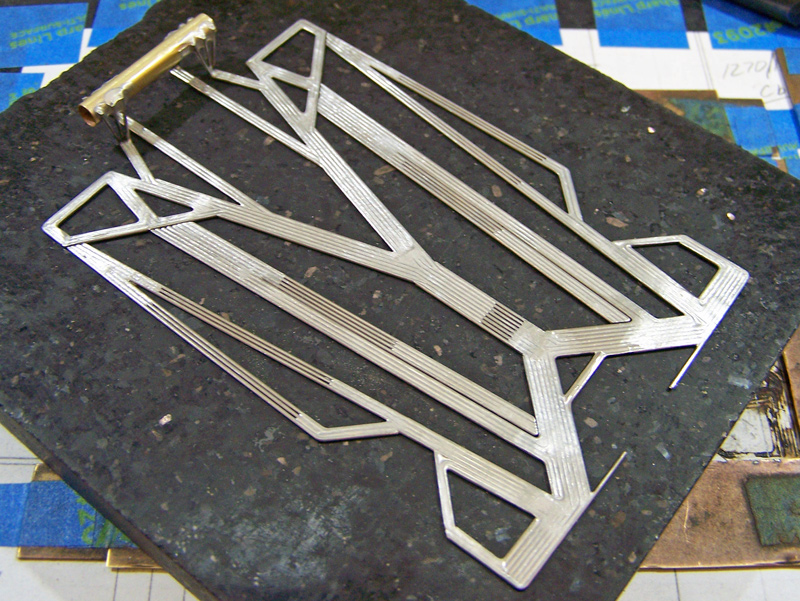
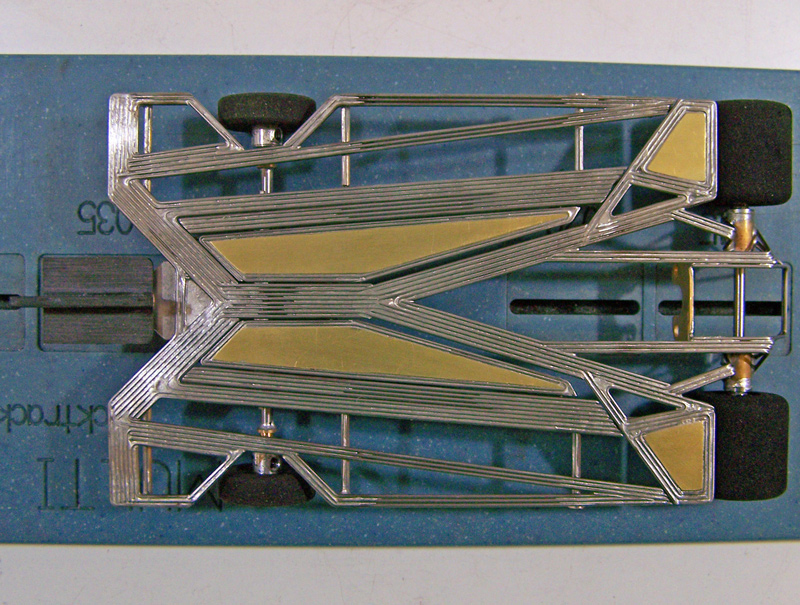
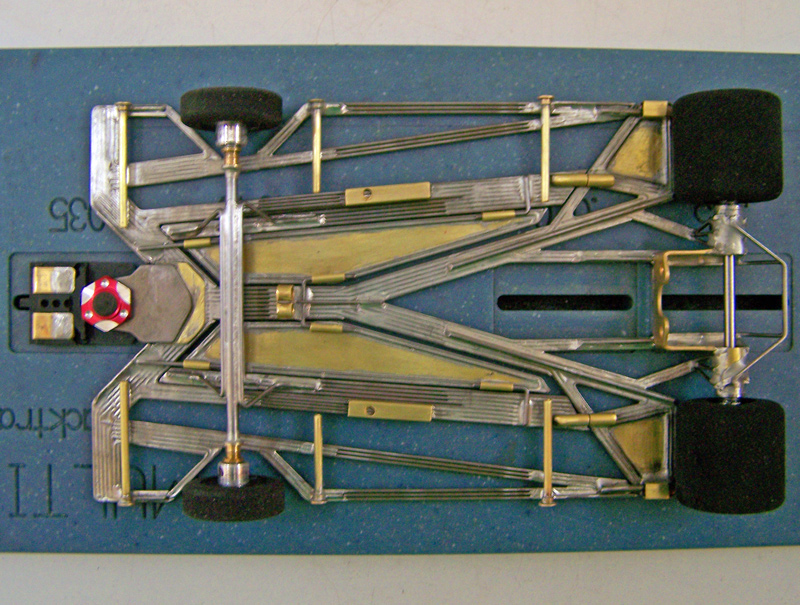
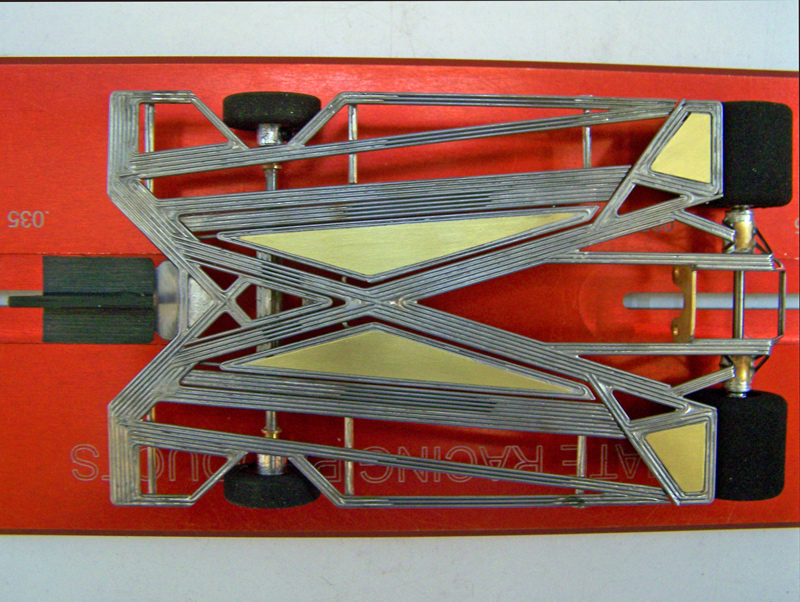
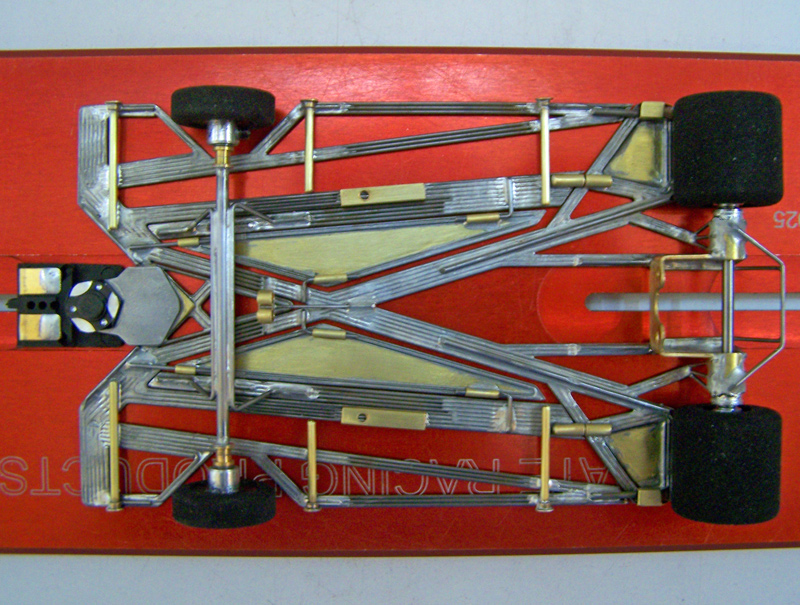
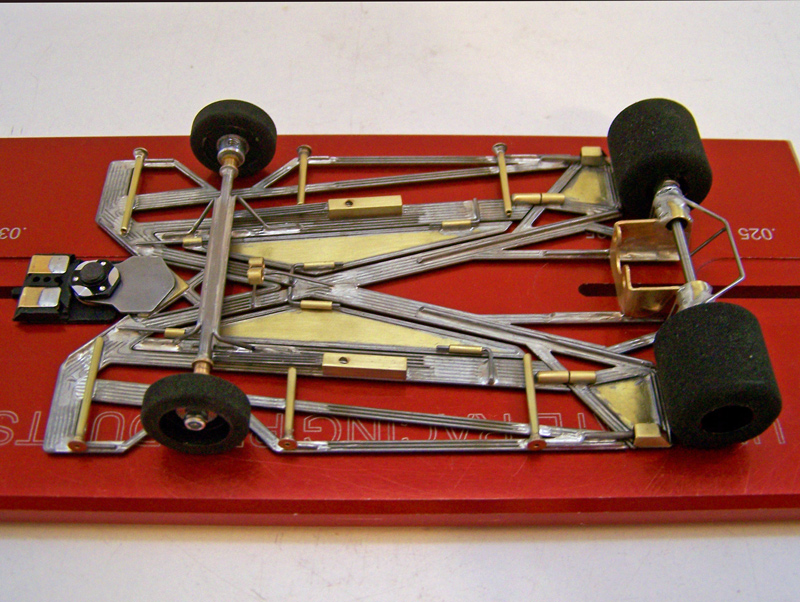
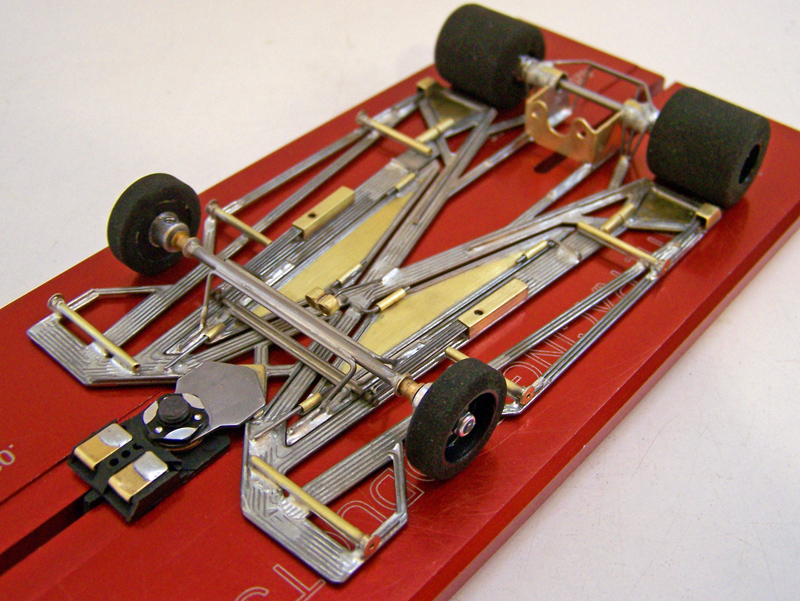
Considering how well you cars seem to work wherever they're run, I'm surprised no one else has dared to build something similar. ![]() Didn't they say great minds think alike?
Didn't they say great minds think alike?

CMF3 1237-series design and build progression
#101

Posted 25 September 2019 - 07:02 AM
I intend to live forever! So far, so good.
#102

Posted 26 September 2019 - 03:48 AM
Sent from my Nokia 7.1 using Tapatalk
- Bill from NH likes this
Chris Wendel
Silver Side Down Racing
Silver Side Down Graphics
The Race Place Retro Crew member
"Failure teaches way more than success. It shows what does not work and what to never do again, again..." 🙊🙈🙉
#103

Posted 01 October 2019 - 10:17 AM
Hey, Bill! You still following this thing? What a trooper. LOL
There are many reasons why others would decide, and I believe rightfully so, not to build in this manner. Time is the biggie. Where many crank out a chassis in hours, mine take days. My earlier all-wire frames (I’m over twenty years in on these things now; ooof!) I could crank out in hours, but as I got a better understanding of what the chassis were/weren’t doing, and better at assembling them, the design and build complexity increased; it has become as much of a challenge to see what design I can make and figure out if it can even be built, which adds even more time to the process. Most don’t have or even want to spend that much time on a chassis that admittedly may or may not work. (Having a long “weekend” off from work, Monday morning to Friday night, affords me a little more time to “fritter and waste the hours” playing with toy cars…)
Another understandable factor is the structural characteristics of the all-wire frames, particularly when using smaller wire for construction (and when you’re putting more than 60, 80, or even 100 wires into the basic frame, small 0.032” wire is a joy to bend and fit compared to that “big stuff” like 0.047”…), as they inherently require shorter “angled” component rails to form stronger “triangulated” structures; my experience has been small-wire all-wire frames where the “rails” are longer and all longitudinal/lateral can be problematic in terms of strength of the frame and the characteristics it may exhibit (that can range from great, to quirky, to scary, and all in the same chassis). That said, all the angled wires/rails in these all-wire frames are not very scratchbuilding chassis jig friendly, which is another major turn-off.
Chris, that doesn’t surprise me with the F1. PM me a pic of it, as I’m always curious to see what others are building. My all-wire F1 frames are still a work progress, and some have exhibited that same turn-exit “loose” characteristic. However, I can tell you right off my all-wire frames, and virtually all of them, will typically run “loose” if I try to use the same tire everyone else is running; if people are using wonder, I’m probably running treated; and if they’re running treated, there’s a good chance my cars are on naturals...
Sorry for the delayed reply, but I was way too busy having fun spending the last week at Fast Eddie’s Raceway for the 2nd annual Southern Retro Rumble this past weekend. Cheap thrills!!! After all that, I decided it was time to do a bit of rethinking on the “process” for the 1237-Series, so that foul burning smell is probably emanating from my cranium…
Have fun, kidz!
Rick / CMF3
- Dominator likes this
#104

Posted 01 October 2019 - 11:37 AM
Sent from my Nokia 7.1 using Tapatalk
- Rick Moore likes this
Chris Wendel
Silver Side Down Racing
Silver Side Down Graphics
The Race Place Retro Crew member
"Failure teaches way more than success. It shows what does not work and what to never do again, again..." 🙊🙈🙉
#105

Posted 01 October 2019 - 07:39 PM

Sent from my Nokia 7.1 using Tapatalk
Chris Wendel
Silver Side Down Racing
Silver Side Down Graphics
The Race Place Retro Crew member
"Failure teaches way more than success. It shows what does not work and what to never do again, again..." 🙊🙈🙉
#106

Posted 23 October 2019 - 12:33 PM
1237-Series Update
Going into and during the 2nd annual Southern Retro Rumble at Fast Eddie’s Raceway it became apparent that I probably needed to reconsider some procedures, structural design elements, and parts used in the 1237-Series progression. Nothing earth-shattering here, but enough to make me hold off any further new builds until I considered and/or addressed the matters I had noticed.
One was a needed change to the 1262 Sub-series builds. I found a “weak point” in these chassis due to the way I had laid out the wires in the framing construction. Nothing major, but enough to get my attention, warrant investigation, and consider appropriate changes. This would limit testing for all the cars in this sub-series, currently the 1262.1.2-Cd3, 1262.6.2-Cd3, 1262.9.2-Cd3, 1263.1.2-Cd3, 1264.1.2-Cd3, and 1262.1.2a-Cd3, until such time as they would be amended, replaced, and/or retired. That would be a bit time-consuming, to say the least.
Another consideration, while it is not often that I build multiple chassis of the same design/version, it does happen. For example, I built three of the 1241-Cd3, affording me the opportunity to try different set-up configurations on the same chassis at the same time. I don’t bother to post any of the chassis that are repeats in this thread here, this thread being repetitive enough. In any case, there are a few of the currently active 1237-Series frames that were annoyingly tempting me to build a few more multiples. More time…
And before any of that, another matter is the way I have approached the entire 1237-Series. I have pretty much considered all these cars as “test platforms”. Due to my work schedule at the hospital, my being one of the weekend workers, it is rare I have the opportunity to actually race these things (the GRRR series is the only Retro racing down here in FL), and is only possible when I take a weekend off, which is the equivalent of other people who work “normal” hours taking an entire week off from their job. My consideration of these cars as “race cars” was for that reason secondary, almost an afterthought, and admittedly one I had not properly thought through.
Adding to this is a problem in my “processes”, an entrenched mentality leftover from the 60’s where I still think any given chassis is “obsolete” in a week or two. Some of these chassis have proven to have more longevity than I typically “think” a chassis could have, so I needed to change this shortcoming in my thinking.
As it is, these cars tend to get a lot of test laps, and I mean A LOT of laps, way more than they do in any racing. And after doing some rough estimation, some of these chassis have a ton of laps. Predictably, this wears out the “runny bits” on the cars, and while things like rear tires, motors, guides, and bodies were just given to be replaceable bits, I had never properly considered the front wheels as part of this equation (due to that old entrenched mindset that the chassis/car would probably be obsoleted/retired before they wore out). The result was I had some active cars with worn down front wheels, less than 0.750” diameter. I also noted some of the JK fronts I use for CanAm and GTC (JK8746PF) on newer cars with fewer overall laps were showing much greater front tire wear than older cars with considerably greater number of test laps (say what?), and some showing erratic wear (what the…?), with some appearing to have softer rubber than others (uh oh…).
I decided it was time to change my approach to front wheels. Currently all the front axles use soldered on collars with spacers to set the front wheels; all these front axles and wheels currently in use are to be removed. I will be replacing them with threaded-end front axles; this will allow me to use “worn” fronts of reasonable size and wear for testing, while keeping a few new sets on reserve if/when any of the chassis are to be raced. This should allow me to better keep track of front tire wear as well, to see if it is a material problem or a design problem. Since all the chassis have spanning front axle uprights, it is relatively easy for me to replace the front axle. However, we’re talking a lot of cars at this point (I’m trying to ignore the actual number…), so we’re talking a bit of time to get them done, and a few bucks at that. But this is something that needs to be done.
And, since I’m replacing the front axles, I figured this was a good opportunity to tear them down and go over each frame with the proverbial fine-tooth comb; makes sense.
And, besides, I figure while I go through all this it’ll give me some time to think about further versions and designs I want to build in the 1237-Series…
As “problems” go, this really ain’t that bad in the grand scheme of things, you know?
The madness never ends… the horror… the horror…
Later, kidz!
Rick / CMF3
- Tex and JBProducts like this
#107

Posted 11 December 2019 - 10:47 PM
1258.2-Cb3
Lookout kidz! The CMF3 Skunkworks are stinking things up in the slot car world again!
Well, I got through all those friggin’ front axles, finally. Also spent a little time sorting through things at the CMF3 World Headquarters, and some required general putzing-around here at The Last Resort… All that gave me a chance to ponder what I wanted to do next, synaptic overload most likely being a contributor to the work bench stench:
The 1262 Sub-series “rebuilds” are still on hold, the wire framing lay-out addressed, but the ordinal processes still being debated…
A couple of JFF builds that came into serious consideration are also on hold whilst I mull over the ponies I want to put in them and a few other details…
So it looked like I was going to build a few multiple repeats of some previously built design, or designs, like I had done on the 1241-Cd3… until late one night I got a thought… and wrote a post-it note so I wouldn’t forget…
Most recently my “go to” CanAm cars for competition possibilities were the 1254’s (“c”, “d”, and “b” versions), the 1256’s (“c”, and “d” versions), and the 1259’s (“c”, “d”, and “b” versions). For instance, at the last Southern Retro Rumble the 1254.2-Cb3, the 1256.2-Cc3, and the 1259.2-Cb3 were all able to get into the CanAm A-main (confusingly and amusingly putting three CMF3 tri-color chevron liveried cars in the race…). Notably absent from that group of cars is that the 1256’s do not have a “b” version yet, so it seemed the natural choice for the next build, to “fill the gap” so to speak…
But there’s a bigger “gap” in the design sequence:
Let’s start with a 1237-Series refresher noting the difference between the 1254/1255/1256’s and 1259/1257/1258’s: with respect to the structural centers of these designs, the 1254’s are geometrically derived, and the 1259’s are mathematically derived; subsequently (and oddly coincidentally) the structural “center” on the 1259’s is midway between that on the 1241’s (furthest rearward) and the 1254’s (furthest forwards); this also makes the length of the center main rail on the 1259’s “midway” between the 1241’s (longest) and the 1254’s (shortest).
Next, in design progression terms (not chronological…), with modifications to the center main rail, the 1254 was followed by the 1255, which was followed by the 1256; as some of you may recall, the 1259’s were a major backtrack in the design/build sequence (I never thought I’d build them, since the 1254 was only supposed to be a “proof of concept” build), which is how they got numerically (and chronologically) out of sequence, since I had already built the 1257, which in the grand scheme of things should have followed the 1259, then followed by the 1258… So when you compare the two framing concepts, 1254/1255/1256 and 1259/1257/1258, side-by-side, it comes out like this: the 1254 is to the 1259 what the 1255 is to the 1257, and what the 1256 is to the 1258…
That ought to get some heads spinning…
I only ever built “c” versions of the 1255 and 1257, as they turned out to be more “proof of concept” than their sequential design predecessors, the 1254’s and 1259’s. However, both the 1255.2-Cc3 and 1257.2-Cc3 are still active in the CMF3 stable of too many slot cars.
But, as the thinking went, if the 1254’s, 1256’s, and 1259’s are my “go to” cars, where the hell are the 1258’s? That’s what the post-it note said, “1258’s?”
Thus far, the “b” dimensional chassis seem to work rather well on the Hillclimb at Fast Eddie’s, so the previously mentioned “b” version of the 1256 was definitely in order. And rather than doing the usual “c”, then “d”, then “b” sequence I’ve done on most chassis, I decided to go head down and careening with the first 1258 and start off with a “b” version on that design/build… With it narrowed down to two “should” builds, I just needed to decide if the next build would be the 1256.2-Cb3 or 1258.2-Cb3… Decisions, decisions…
Either would allow me to begin to verify certain observations within this segment of the series’ designs. I had the thought I would have a better assessment of the 1258.2-Cb3 if I built the 1256.2-Cb3 first, but it was not critical in the grand scheme of things, recalling the 1254.2-Cb3 had been built after the 1259.2-Cb3, and the world didn’t come to an end… So it came down to less of what I should build and more to what I wanted to build… which was…
The 1258.2-Cb3:
Predictable in appearance; still, I always liked the “looks” of the 1256’s, so I find 1258 just as aesthetically gratifying. Plus there is that whole “Slot Car Zen” thing assembling some of the finer chassis framing bits on the 1256/1258’s. Simple minds and cheap thrills.
This was the first chassis to get the threaded-end front axle set-up right from the build; won’t be making that mistake again. It also gets topped with the Parma 1050B Short Narrow-Nose Ti22 body, like all the other “b” dimensioned 1237-Series cars.
Along with other set-up changes and based on the 1256 “c” and “d”, I figured this shorter 1258 “b” had about a snowball’s chance in Floridada (Hell’s vestibule) of making the 100-gram thing; came out to 97.9 grams… a little closer than I thought… and with some dreaded lead added on the dynamic pans brought it up to 100.4 grams.
Test Run:
At this point the primary comparison for the 1258.2-Cb3 is how it matches up versus the 1259.2-Cb3, which is no small task, since the 1259’s are so easy to drive fast around the Hillclimb track at Fast Eddie’s Raceway that even the mental equivalent of a 5-watt light bulb (not very bright) can do it… probably why I like them…
For once I had chosen motors for the 1259.2-Cb3 and the 1258.2-Cb3 that were virtually equivalent performance-wise; better to be lucky than good. First set of laps of the 1258.2-Cb3 were highly promising, about as quick as the 1259.2-Cb3. I added a 0.005” spacer to the guide, and that little bit did it; the 1258.2-Cb3 was running laps as fast as the 1259.2-Cb3 on Orange, Red, and Black, and turned the fastest lap times on all three lanes tonight. Not bad for a first outing.
Well, that was fun. And I still have the 1256.2-Cb3 to build… Time to get my tuchus in gear…
Have fun, y’all!
Rick / CMF3
- Eddie Fleming and JBProducts like this
#108

Posted 12 December 2019 - 09:06 AM
Rick, it's still amazing what you can build on a sheet of paper. Do I understand it all, well no! ![]()
I intend to live forever! So far, so good.
#109

Posted 12 December 2019 - 04:15 PM
Hey, Bill!
What passes for “understanding” is usually a misguided belief that one thinks they know what they are talking about. Seems to be quite the craze these daze… Silly rabbits…
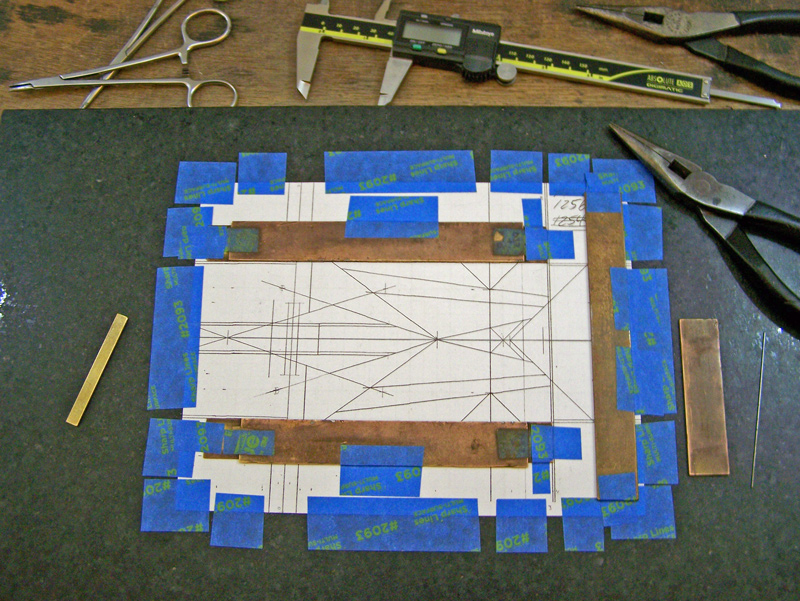
Yep, still using paper and tape…
… along with my prehistoric Align-O-Jig, and some well-worn pieces of brass. Old habits die hard…
FWIW, I did get a scratchbuilding jig to assist me replacing all those friggin’ front axles; definitely made that rather repetitive chore go a bit quicker… However I noticed, except on the sides of course, that not one of all those nice little holes in the jig plate lined up with any of the wires/rails on any of my chassis. What a shocker, huh? I found this highly amusing, but I’m easily amused… So, for my current chassis designs the jig remains pretty much useless (but still handy for setting the front axles).
Besides, I still like doodling on my paper and playing with the blue tape. Pretty basic therapy for an unstable mind… Now, if I could get me a nice pretty basic therapy nursie…
Rick / CMF3
- MSwiss and Jaeger Team like this
#110

Posted 12 December 2019 - 07:43 PM
Some days I get lost in your myriad of chassis numbers & their various alpha suffixes. I know you've explained all that a time or two, so some day I hope to find the time to actually learn what you're doing. ![]() If you really wanted a chassis jig to fit your chassis, you could have a machinist build a 1/8" thick drilling plate with 1/16" pin locations determined by one of your built chassis. You could lay this plate on slate, corian, phenolic, or whatever else material you wanted to use & drill as many jigs as you desired. There's nothing wrong with your current building method, you get good results.
If you really wanted a chassis jig to fit your chassis, you could have a machinist build a 1/8" thick drilling plate with 1/16" pin locations determined by one of your built chassis. You could lay this plate on slate, corian, phenolic, or whatever else material you wanted to use & drill as many jigs as you desired. There's nothing wrong with your current building method, you get good results. ![]()
I intend to live forever! So far, so good.
#111

Posted 23 December 2019 - 10:49 PM
1256.2-Cb3
After completing the 1258.2-Cb3, I wanted to build the 1256.2-Cb3 “toot-sweet” so I could observe the comparison of those two chassis, and have a better assessment of either of these two builds and their relationships in the 1254-1259 grand-scheme-of-things. That, and, as with the 1258.2-Cb3, I really just wanted to build the 1256.2-Cb3. I’m easily amused.
I had previously detailed the dimensional differences between the “c” and “d” versions of 1254-type frames and the 1259-type frames some time back. For the shorter “b” chassis, where “R” is the distance from the rear axle to the chassis framing’s central point of convergence, and “F” is the distance from the framing convergence to the guide pivot, the differences for these two lengths for these chassis are:
1254 / 1255 / 1256: R 2.750” – 2.000” F
1259 / 1257 / 1258: R 2.375” – 2.375” F
As noted previously, that 3/8” difference turns out to be a significant enough percentage of the overall effective length of the chassis (rear axle to guide pivot, 4.75”) where testing has shown it to make observable differences in chassis handling characteristics.
The 1256.2-Cb3:
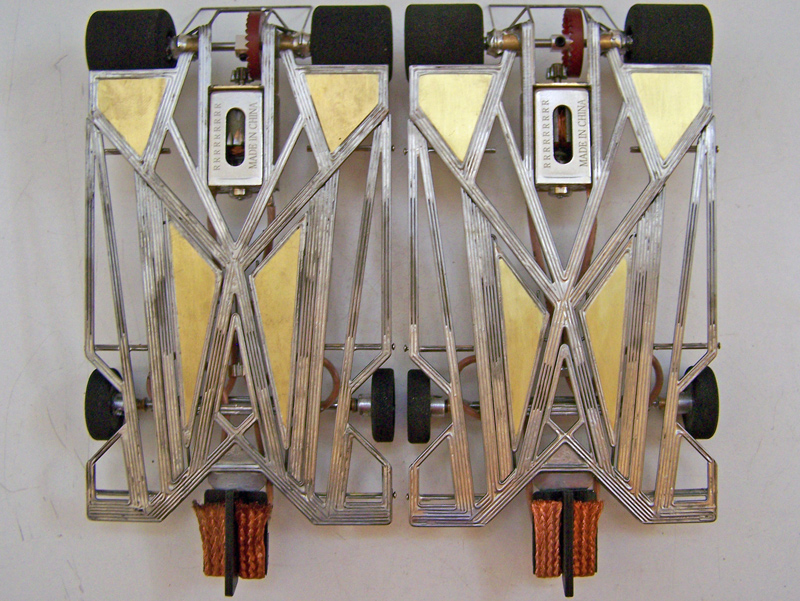
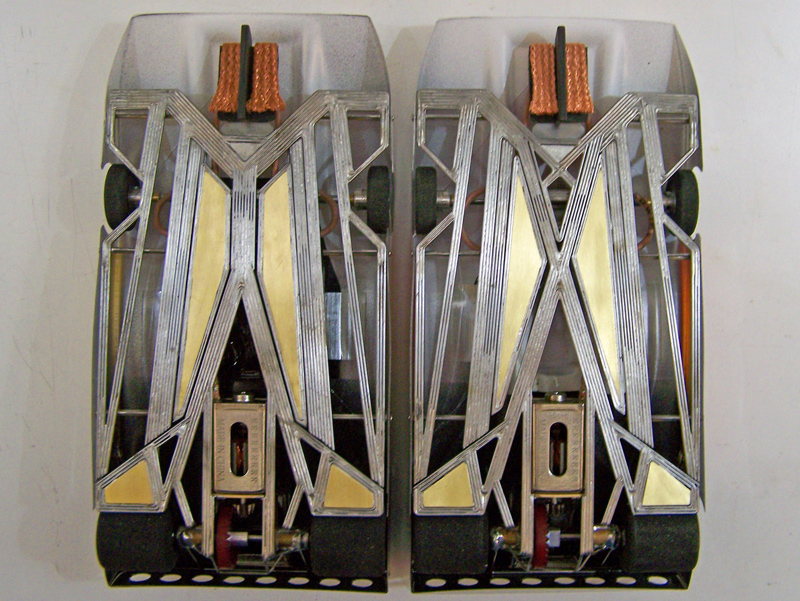
And a side-by-side of the 1258.2-Cb3 (left) and the 1256.2-Cb3 (right):
Looks the same, just different…
All the same runny bits went on the 1256.2-Cb3, and, as with all the previous “b” cars, is topped with the 1050B S-NN Ti22 body.
Once again I had no doubt the 1256.2-Cb3 in RTR trim would come out below the 100-gram ding-dong; and not surprisingly it came out to 96.7 grams (versus 97.9 for the 1258.2-Cb3); added the ding-dong lead to the dynamic pans bringing the car to 100.3 grams. Ding-dong.
Test Run:
I had this past work-weekend off from the hospital, so for the past few days I’ve had no idea what day it is, but, with my having to work the Santa graveyard shift and Fast Eddie’s being closed for Xmas, my only chance was to get in some test laps on Monday evening at the raceway… once I figured out which day was Monday…
Unlike the 1258.2-Cb3, the 1256.2-Cb3 has a bunch of cars to be compared against: the 1254.2-Cb3, the 1256.2-Cc3 and 1256.2-Cd3, as well as the 1258.2-Cb3. This should be fun. I need to get a life…
Very interesting. The four “b” cars, 1254-b, 1259-b, the not-as-new 1258-b, and the newer new 1256-b, were definitely the best on the track tonight. The Orange times, overall and best, were all so close that no one car stood out. Times were only slightly more spread on the gutters, but still so close that it came down to assessing which car just “felt” better. The new 1256.2-Cb3 was my “favorite” on Red, while the not-as-new 1258.2-Cb3 was probably my “favorite” on Black. That said, I was perfectly happy with the 1254.2-Cb3 and 1259.2-Cb3 also. The fact that the two newer 1258-b and 1256-b cars can hold with them is certainly encouraging. Not bad. More testing to come…
Time to hang out with the old pup dog, watch some boob-tube, and rest up for work tomorrow night. Merry jingle bells kidz. Hope y’all get lots of slot car presents.
Rick / CMF3
- crazyphysicsteacher likes this
#112

Posted 05 March 2020 - 08:53 AM
1258.5-Cb3
Greetings slot car culture lovers. It’s time for another installment of the “I don’t think he knows what he’s talking about, and am pretty sure he knows he doesn’t too” musings in the CMF3 1237-Series. Please try to contain your excitement.
Besides a little retooling of the CMF3 Headquarters and Transports, the mulling over of what to do next got extended by the annual Floridada distractions that come one after another this time of year, including the FL State Fair where once again I consumed a ridiculous quantity of fair food causing irreparable major coronary artery damage… yum… Anyway…
Here’s the scoop on this poop:
Back on the 1250 and 1251 chassis I was trying different designs for the front axle rails (FAR) used in the 1237-Series chassis, both of which had the intended and desired construction where the FAR’s were not connected to the buttress rails as on the 1241’s.
That’s when all the FAR designations came into the chassis alpha-numeric ID’s. Since I never listed it before, here’s the short version:
12XX.1 = no FAR
12XX.2 = 1241-style FAR
12XX.3 = 1250-style FAR
12XX.4 = 1251-style FAR
And the combo’s (typically LTO Stockers), are ID’ed left-to-right, for example:
12XX.23 = 1241-style FAR left (2) and 1250-style FAR right (3).
After laps and laps, hours and hours testing the 1241-Cc3, the 1250-Cc3, and the 1251-Cc3, performance-wise all three worked very well, with very little difference overall, but there were definitely subtle but notable differences characteristically and all those test laps would only further confirm this. Of the three, the “problem child” was the 1251; I really liked the way it just seemed to handle the track, especially the gutter lanes; but, as noted, performance-wise it was not enough to warrant the more complex design and increased build-time required. This is why I’ve always considered the 1251-Cc3 a “failure” as a build… but, because I “learned” something about indirect connection of the FAR’s from the 1251, it was definitely NOT a failure as a design concept in the 1237-Series sequence…
I’ve got a bunch of other FAR designs doodled up around here that can be incorporated into the various 1237-Series frames, I just haven’t given any of them a numeric designation yet, at least not until any of them would actually be built, and in some cases I thought if ever... One of those design/build concepts was largely applicable only to the 1255/1256’s and 1257/1258’s; it was a modified version of the 1251-style concept specifically for those frames (though there is another modified version applicable to the 1241, 1254, and 1259…). And, since I’d just built the 1256.2-Cb3 and the 1258.2-Cb3, I figured this might be a good time to give it a numeric ID (.5) and give it a try… and give it a try by building another “b”-version 1258, since the 1258.2-Cb3 had been a fairly recent build, and because I just wanted another 1258. I mean, why not… like I’ve got something important to do…
Now for the confusing part…
The 1237-Series design progression as chronicled here usually does not include some of the last minute redesigns that occur, most often during the build process where reality puts a check on what looked good on paper. Such was the case with the FAR redesign for this chassis.
Instead of the 1241-style “2”-FAR as a single 4x 0.032” wire straight rail directly attached to the medial-rear of the buttress rails, the original design for this new “5”-FAR was to be an inverted “V” of 3x 0.032” wire with the two ends indirectly attached to the forward edge of the rear assembly. On the 1251, as a matter of design consequence, hanging the four-sided dynamic pans within the closed four-sided “4”-FAR’s was a bit more challenging, with the tolerances being very close. By contrast, it was thought, hanging the three-sided pans on the 1255/1256/1257/1258’s within these open-ended two-sided FAR’s would be relatively easier… This turned out to not be the case. The inverted V-rail design, when fabricated but not yet installed, showed that there would be significant difficulty installing the torsion bar between the FAR’s, and make hanging the dynamic pans pretty much impossible. That ended that. So, I came up with a simplified modified version, basically “2” style FAR’s, each one a straight 4x 0.032” wire rail the same as the 1241-style, but instead of attaching them to the buttress rails, they would be indirectly attached to the chassis rear assembly with 2x 0.024” wire connections. My initial concern was the level of stability of a single-rail FAR with indirect connecting points, but by keeping the tolerances fairly tight they seemed to be okay after their construction. In the end, though this “appears” to be little change, the effect of changing to an indirect mount not attached to the buttress rails, a la the 1251, is a significant change to the chassis dynamics.
Got all that? No. That’s okay. Me neither. That’s why I write all this stuff down…
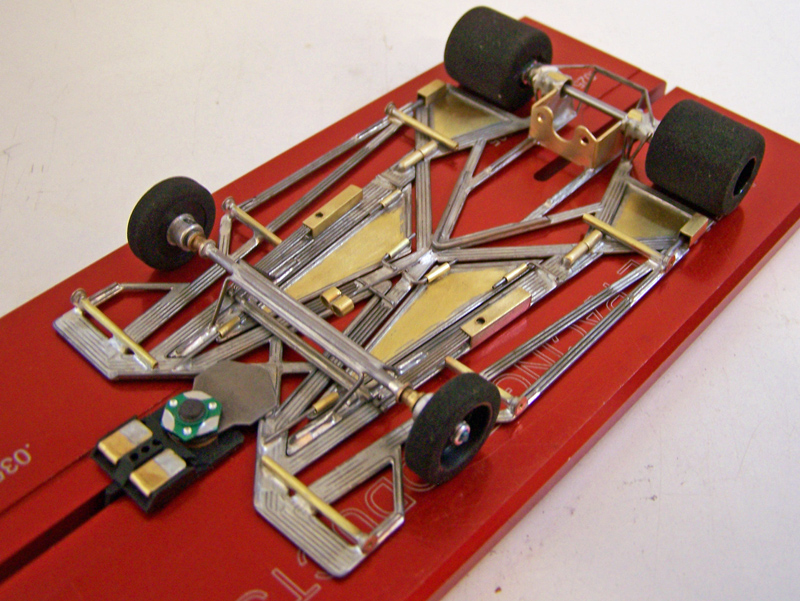
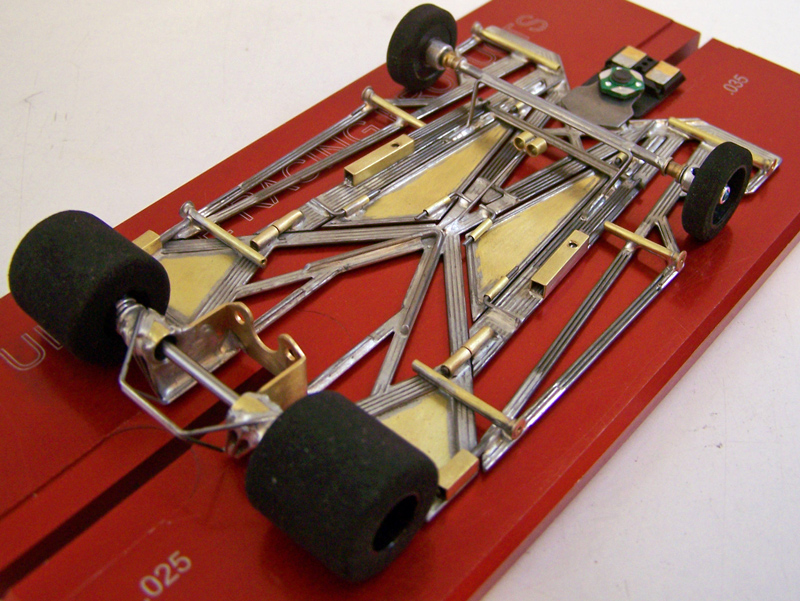
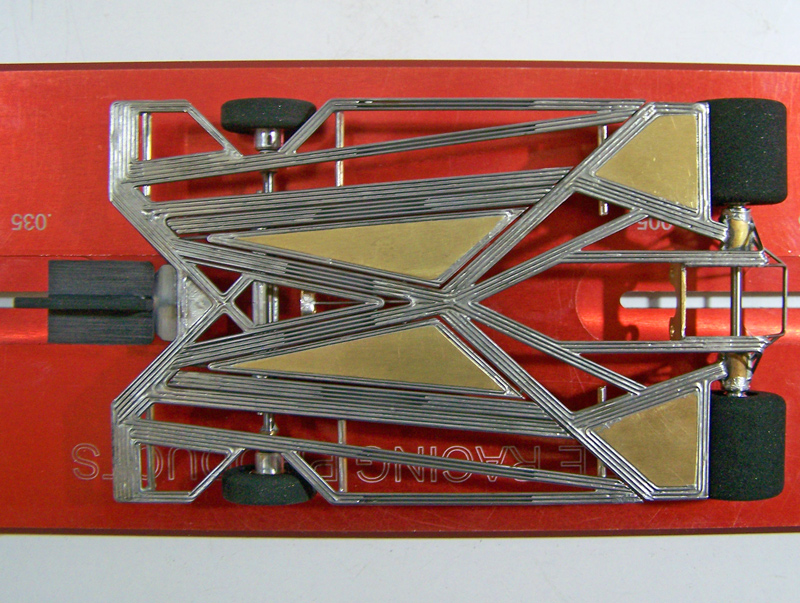
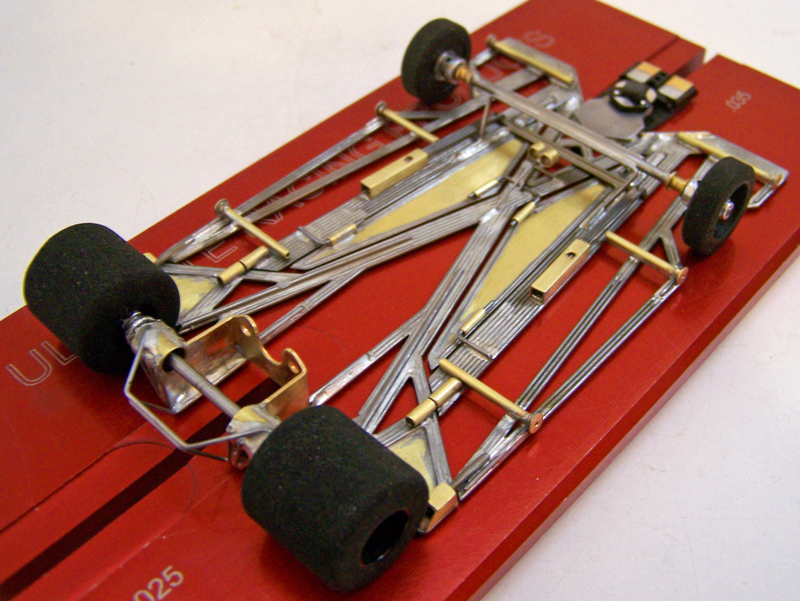
The 1258.5-Cb3:
I didn’t even bother with a side-by-side pic of the 1258.2-Cb3 and the 1258.5-Cb3 because there is so little visual difference. They really look the same… The only differences are the FAR mountings and the lateral rear mount of the dynamic pans.
Speaking of more of the same… wouldn’t… 100-gram… 97.7 grams… added… 100.6 grams… scatological reference…
Test Run:
The idea going in was that the 1258.5-Cb3 would retain the “speed” characteristics of the 1258.2-Cb3, while acquiring the “smoothness” of the 1251-Cc3, particularly on the gutter lanes.
The time: last night. The place: Fast Eddie’s Slot Cars & Raceway, Pinellas Park FL. The job: Try to remember how to drive these things around the Hillclimb.
The 1258.5-Cb3 was in the same range for lap times on Orange as the other “b” cars (1254, 1259, 1256, 1258), but its sister 1258.2-Cb3 was definitely the best on this test run. On the gutters, the 1258.5.Cb3 was the even faster than the 1256.2-Cb3 on Red, and was just as fast as the 1258.2-Cb3 on Black.
It’s a gutter car.
It’s funny, even though it turned out largely as expected, it still raises more questions than answers. Something to ponder. Musings, music, and a good cup of coffee…
Rick / CMF3
- Matt Sheldon, boxerdog, Eddie Fleming and 1 other like this
#113

Posted 05 March 2020 - 02:34 PM
Rick, this chassis looks more complex than your others, as if they didn't look complex enough in their own right. With a quick first look, it looks good. Now I'll have to sit down & see what your words say about this creation. ![]()
I intend to live forever! So far, so good.
#114

Posted 19 March 2020 - 06:32 PM
Tool Time:
Thought I’d sneak this in here on this thread while I’m killing time. Everyone likes to be a tool… uh… I mean… everyone likes to have a tool, especially one that fits their needs so they can be a job… I mean… so they can do a job. Social media can be confusing… So here’s a little tool review for you, since we all like playing with our tools… uh, that doesn’t sound right either…
When I got my Hakko FX-601 soldering iron years ago it became my work bench chassis building iron, and my old Hakko 455 became my slot box “traveling” iron. For temperature control on the 455 I’d been using an old GlasCol PL120, a variable AC controller typically used in laboratories to control temperatures on heating mantles, so it went in the slot car box as well, and would be used as a speed controller for my “travelling” Dremel as well. (I had gotten some used PL120’s and 1202’s many years ago from a lab that was switching from heating mantles to stir-hot plates, and for relatively cheap, as new they are ridiculously priced.) For a “travelling” DC power supply I had a Powerwerx SPS-30DM I’d snagged on sale a few years back. It was a decent set-up, but not ideal for a couple reasons…
One, the Powerwerx had the test lead terminals on the rear panel of the unit; not convenient. Two, the Glascol had the AC outlet also on the back of the unit, so it was always pulled out of the slot car box so I could… Three, either I used the Glascol for temperature control on the Hakko, or speed control on the Dremel, not both at once, and unplugging/plugging as needed, but again not convenient.
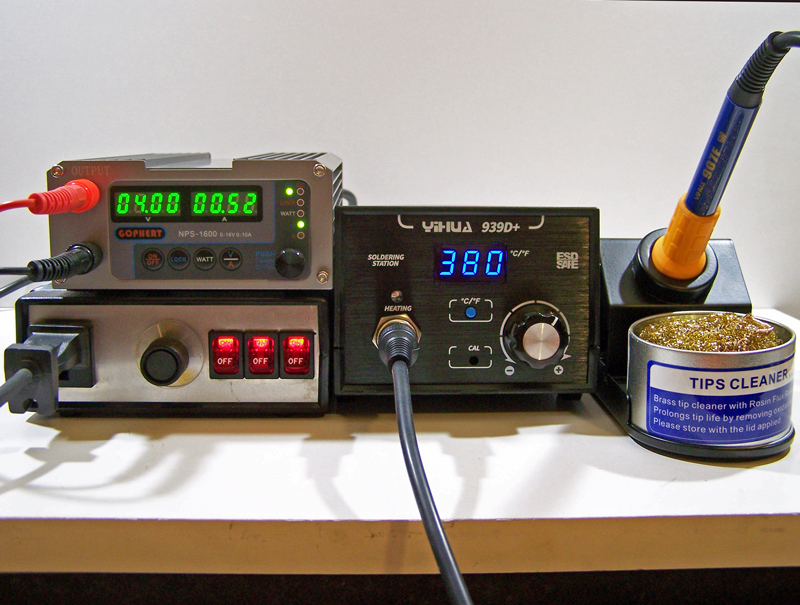
Cruising the web one evening last November I found another small DC power supply, a Gophert NPS-1600 (16V/10A) that had readability to 0.01 V and A, and with test lead connections on the unit front, that would address the two deficiencies on the Powerwerx (only 0.1 readout and those pesky lead connections on the rear). The NPS-1600 was $-cheap-cheap (< $60), but it shipped ex China… I wasn’t in a hurry, so I thought I’d give it a try... If you decide to order one, check that supply is plentiful, as restocking can delay shipping quite a bit, because… It finally arrived in January. After some testing I was very pleased with the Gophert’s performance. The NPS-1600 had the features I wanted, was about the same size but lighter, and the power control and supply are better.
While I was waiting for the Gophert, I started looking around for a smaller and/or better replacement for my Hakko 455 / GlasCol PL120 set-up. I saw the Yihua 939D+ soldering station, saw how $-cheap it was (like the NPS-1600, you can find them on the interwebs for < $60…), and figured it must be crap… but I just needed something for the slot car box for little jobs (motors, lead wires…), not chassis building; the Yihua was the right size for my slot car box, and for the price it was worth a try. It arrived quickly, and when I tried it out it was capable of doing the jobs I wanted just fine…
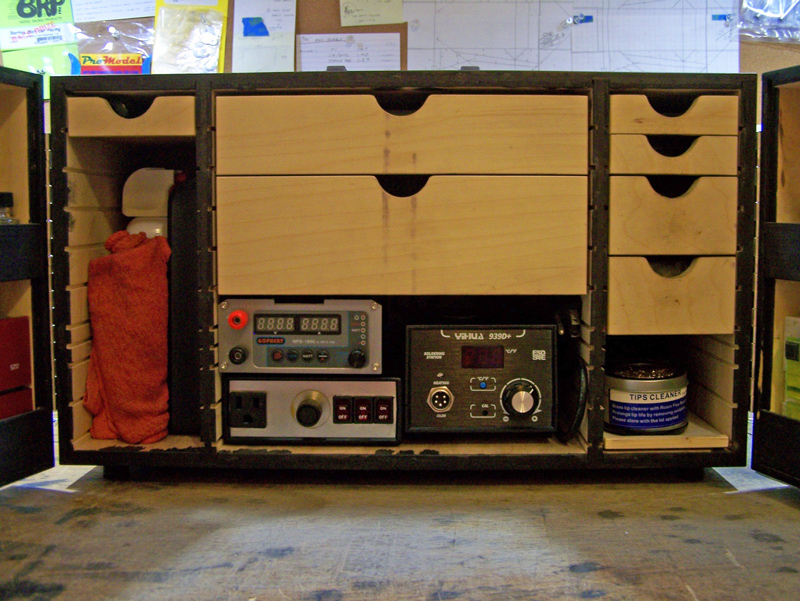
In the meantime, I would still need a speed control for my slot box Dremel, and I also wanted better power/cord management for the Gophert and Yihua. I got a small project box that would fit with everything else in the slot car box; put a C13 receptacle, a breaker, and two switched 5-15R outlets on the back panel; inside I put the power control electronics from one of the PL120’s; and on the front panel is the control knob and 5-15R outlet for the variable AC line, and on/off switches for each of the three outlets.
All together it came out like this:
Just what I needed.
Curiosity got the better of me, and I decided it was worth trying out the Yihua 939D+ soldering station to build a chassis… The 1258.5-Cb3, as seen in my previous build post, was built using the Yihua… Here’s the assessment on that:
The Yihua 939D+ temperature control unit and its digital readout (not a temp of the iron itself like more expensive soldering stations; more on that shortly…) is a plus, allowing me to more easily change temps depending on what I’m soldering. The Yihua 907F iron heats up much faster than my Hakko FX-601. While the Yihua 907F iron is lighter, it is sufficiently heat insulated, and feels just as comfortable in my hand as the 601. Tips for the Yihua are vastly cheaper than the Hakko tips, so I have a wider variety; however, they are also smaller, having less mass; this raised some doubt for heat transfer… I should put this in context: I use silver bearing solder, with a higher melting point, for my chassis building. Also, the vast majority of my soldering is small diameter steel wire and thin brass sheet (as is evident from my chassis pics), so I do not do very much soldering of large steel wire or thick/large brass plate “slabs” where the heat transfer/dissipation is quite different. For tacking and flooding solder between the small steel wires on my chassis the Yihua was excellent. And while the Yihua was capable of soldering the sheet brass and wire, the predicted heat transfer problem started to show. That said, I would not recommend using the Yihua 939D+/907F for chassis building. Hey, you never know till you try.
None of that mattered anyway.
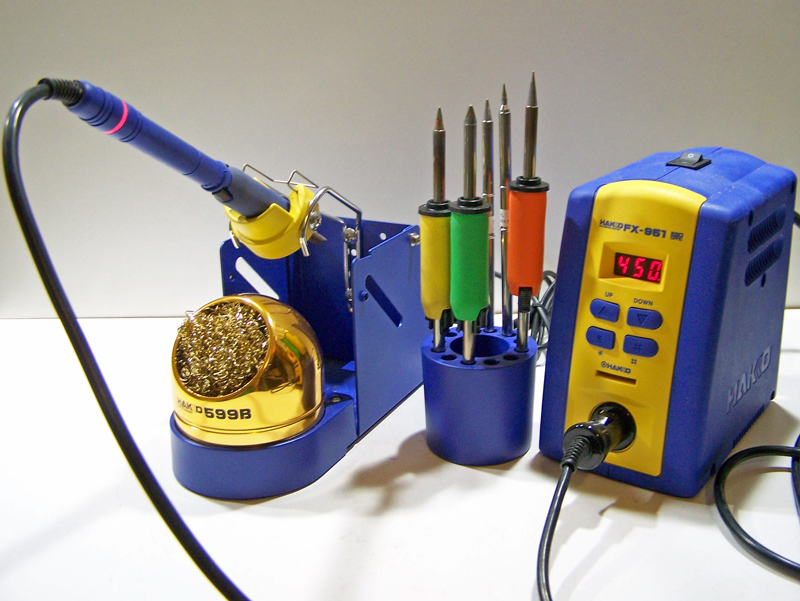
The ensuing chassis, the 1270.2-Cb3 to be posted after this sidebar, was the first I built using a recently acquired Hakko FX-951 soldering station that came with the FM-2027 soldering iron.
The FX-951 soldering station replaced my Hakko FX-601 iron I’ve been using for years, which had replaced my Hakko FX-455 iron I’d been using for years before that. Both the 601 and 455 are still around, and still working, so it was not because I “needed” it, I just “wanted” the 951 for three reasons:
1) The 951/2027 heats up a lot faster, and has the adjustable timer to automatically put it in “sleep” mode where it idles at a lower temp;
2) The 951 has vastly better temperature control, and:
3) By ordering extra sleeves, the tips can easily be changed “on the fly” on the 2027 (though you still need to be careful not to burn yourself).
My assessment after using the FX-951 is that it was worth every penny. The 951 temperature control/regulation is spot on. The 2027 is lightweight, yet well insulated. The 951/2027 heats up fast. Real fast. This makes the sleep mode and tip changing features possible. The ability to instantly change tips while building (unclick sleeve, slide out hot tip with sleeve, insert next tip/sleeve, click, heat up and solder; takes less than a minute) is a feature I never would have imagined having, much less thinking I would ever want or use, but now that I have it I’m really glad I do. I have to admit, like most people, I just couldn’t imagine justifying spending “that much” for a “soldering iron”… silly rabbit… and now I wonder why I put it off so long…
So, there you go. Later, Tool-Heads.
Rick / CMF3
#115

Posted 19 March 2020 - 07:42 PM
Rick, good to hear you're a satisfied customer. Is the "silver bearing" solder you mentioned for chassis building 2%? the last I knew, Ken Stevens of Houston was using it on his chassis too. I have a small roll from Rat Shack, but know others sell it too.
I intend to live forever! So far, so good.
#116

Posted 19 March 2020 - 09:36 PM
Hey, Bill. Currently using Worthington Ind # 331756 "Premium Silver", which is a Sn/Cu/Ag if I recall, but don't remember the formulation...
#117

Posted 19 March 2020 - 09:40 PM
1270.2-Cb3
“Fetchez la vache.”
After a lot of consideration I decided to abandon the 1262 Sub-Series. It wasn’t that they were not good cars, and had actually taught me a little more in the design sequence, but the underlying error of the way I had laid out the wires in the framing, a more important lesson in the 1237-Series (I’ve always thought one could learn more from a mistake than a success…), would have entailed a rebuild of some or all of the frames already produced, a rather time-consuming endeavor that with all due consideration of merely achieving the “same” result made the effort an option that just did not seem warranted. Better to move on, and the lessons learned made the next phase of chassis designs/builds in the 1237-Series viable. So that’s cool. Also, the recent 1256 and 1258 builds played a key role in this decision, giving the “green light” to finish drafting out the specifics of the doodles that had become the next sub-set of designs in the 1237-Series. That said, this pretty much jumps over all the 1262-1269 designs and puts me at…
The 1270 and subsequent designs, so far and subject to change, are less of a sub-series in the 1237-Series and more so a sub-set, as was the case with the 1254-1259 designs. There are two elemental changes to start with on the 1270, one design element and one structural/build element.
Like the 1254, the 1270 starts with another redesign of the rear assembly. Unlike the 1254-1259’s, this redesign pretty much restricts any variation in the length of the main rails. The 1270 rear assembly has less lateral mass, but extends further forward. One result of the redesigned rear assembly is the framing component rails are more equal in length, with better symmetry; another is an increased length to the buttress rails, and, to a lesser extent, the “side pan” assemblies.
The structural change comes in the wire lay-out sequence during the build. Previously, on the forward components after the front spanning assembly and the main rail(s), I’d started building medial-to-lateral, laying out the buttress rail wires first then the side pan wires. On the 1259 and lower numbered frames this construction sequence worked fine, but on the 1262 sub-series with the “VIV” combination main/buttress rails this created a weak juncture at the intersection of the front spanning assembly, the side pans, and the front wings… oops… and since the front wings take more impacts than any other part of the chassis, this is the last place you want a weak junction, thus the beginning of the end of the 1262 sub-series builds. The solution for the 1262’s, etc., would be to construct the wire lay-out lateral to medial, starting with the side pans and then the buttress rails. Part of the design possibilities (…we’ll see…) for the 1270-style chassis is altering the position and/or number of buttress rails; to allow for this the lateral to medial wire layout “fix” for the 1262-series frames would be used for the 1270-type frames.
The first of these new designs, the 1270 will have the single center main rail, similar to the 1254 and 1259. (And, if I proceed, the 1271 will have the diverging forward “V” main rails with “iso-guide” mount found on the 1256 and 1258.) The 1270 will keep the “same” 1254/1259 front spanning, buttress rail, side pan and front wing assemblies; it will also have 1241-style front axle rails, and be built in “b” dimensions, so it can be readily compared with the 1254.2-Cb3 and 1259.2-Cb3. All of which makes it…
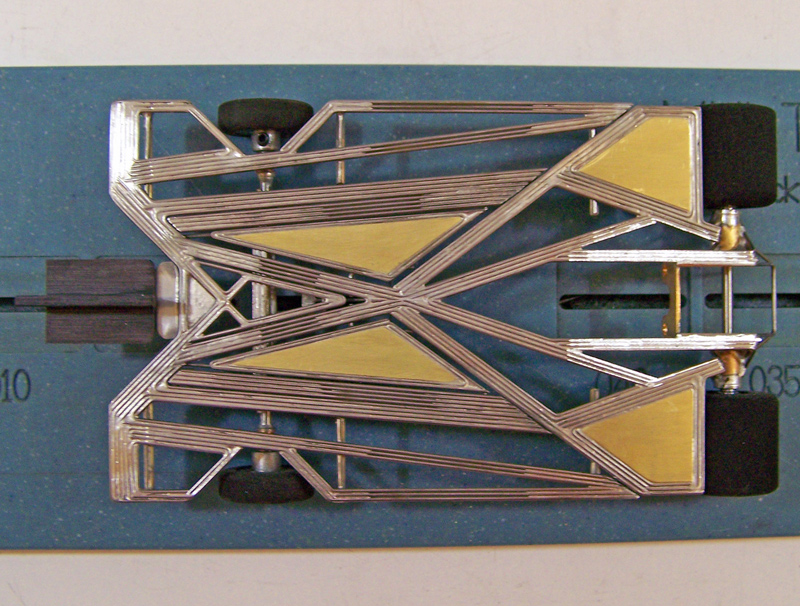
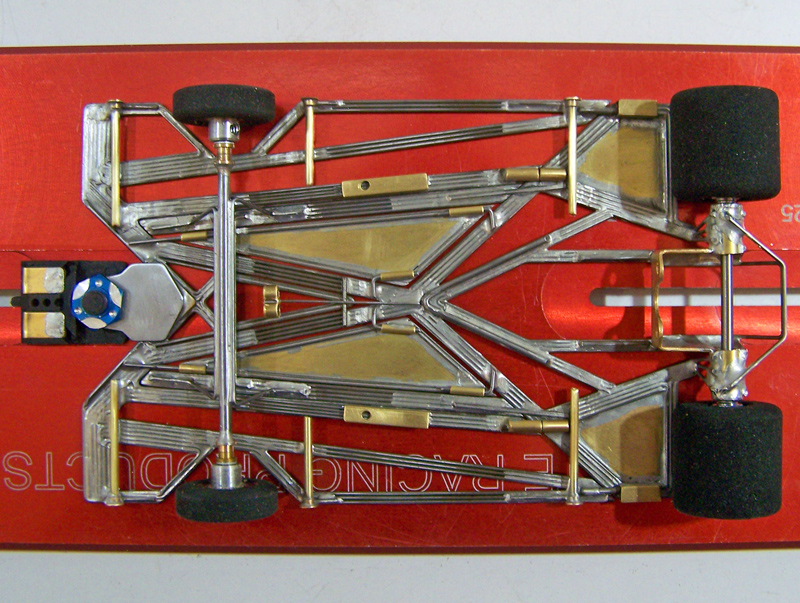
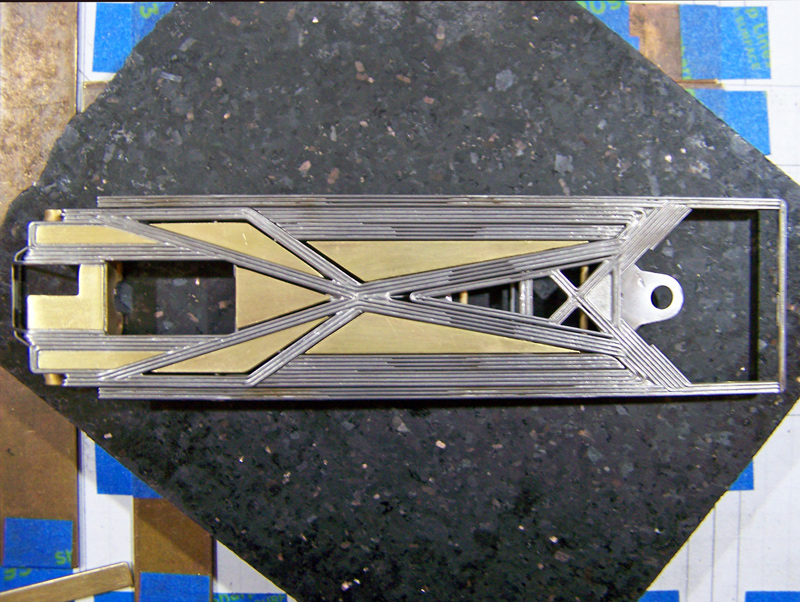
The 1270.2-Cb3:
Crazy stuff. Of course the 1270’s dynamic pans are different than those on the 1254 and 1259, but that’s pretty much a given.
More of the same… 97.1 grams… added lead… dynamic pans… 100.4 grams… Havanese gas…
Test run:
Well… no…
Discretion being the better part of something or other, certainly not valor in this case, what with my healthcare occupation in the main radiology department at the largest hospital in the Tampa Bay area, which is also one of the two Level 1 trauma centers in Florida, I’m limiting my forays into the general population, which unfortunately includes the slot car raceway. Better to hunker down as much as possible and do some playing around with the toy cars here. An update would be forthcoming at some point, we’ll see, subject to change... Though it has occurred to me that I have been practicing “social distancing” for years…
The madness never ends…
“Run away! Run away!”
Rick / CMF3
#118

Posted 20 March 2020 - 08:54 AM
Rick:
The solder you are using has a very wide pasty range so I can see why you have to use a pretty hot iron to get such nice smooth joints. What flux are you using?
Bill F.
Worthington Ind # 331756 "Premium Silver" Solder is 95.6% Tin (Sn), 4% Copper(Cu), .4% Silver (Ag)
Jay Guard
IRRA Board of Directors (2022-Present),
Gator Region Retro Racing Director (2021-Present)
SERRA Co-Director (2009-2013)
IRRA BoD advisor (2007-2010)
Team Slick 7 member (1998-2001)
Way too serious Retro racer
#119

Posted 20 March 2020 - 10:11 AM
Hi Jay! Yeah, always been using Sn/Cu/Ag solder. I have a “thing” about Pb… probably a “thing” I developed working in petroleum laboratories for all those years… among other “things”… For chassis building I use Lucky Bob’s acid flux, and lots of it; always buy a couple bottles at a time; seems to work rather well for the silver-bearing solders. I use small conical #2 artist brushes to put the flux where I need it. And, yes, a HOT iron is a must. (And that Hakko FM-203 station with the 140W FM-2030 iron is looking mighty tempting… I have no control…)
#120

Posted 20 March 2020 - 03:42 PM
I still use the 4% Stay Brite, which is a lead solder, but I'm not always building something these days & I have a supply on hand. Rick, have you heard that silver solder makes stiff joints & you might have to run some laps on a chassis built with silver before it arrives at it's final flex? Dennis "Foamy" Hill used to say it took 2 or 3 races before one got dialed in. I've a number of chassis using all silver solder, with none of the being great right out of the gate. Mine have been of .063 & .055 wire, so your experience using .039 may be different.
Natural bristle brushes work well for applying acid. I've also used Microbrush swabs I got from a hobby shop. I think they come in several different sizes.
I intend to live forever! So far, so good.
#121

Posted 25 March 2020 - 03:28 PM
Hey, Bill. Sorry for the delayed reply; things have been a tad on the hectic side… Yeah, I’ve heard various accounts over the years about using silver-bearing solder, the “run-in” for a chassis being one I’ve heard a couple times (as well as the opposite where the chassis is best new and then gets worse)… I thought about this and even went back through my notes, and I cannot say that I have any experience or information that can confirm this hypothesis. Nothing, in fact, that shows any trend(s) one way or another. Bupkis. And that includes chassis with frames that were 0.047”, 0.039”, and 0.032” wire. I’m not saying the observations of others did not occur, only that I cannot concur. On top of all that, and ignoring the somewhat different structural nature of my chassis, my own experience is that there have been too many variables from car set-ups to various tracks and their surface conditions for me to even begin to make any meaningful assessment. One could, if so motivated to test the hypothesis, build two or more “identical” chassis using different solders and test the cars… of course to be definitive, then they would have to duplicate the results, and have another person somewhere else duplicate them… I’ll probably skip that experiment myself… got enough other crap going on…
Rick / CMF3
#122

Posted 27 March 2020 - 07:51 PM
Gotta ask. I am trying to build lighter and am starting to better understand the amount of flex needed. For your cars, have you found it better to have the front Axle mount on the flexible rails toward the center or toward the outside of your v? And do you find it better to have the front 'suspension' to angle inward or angle outward?
Sent from my Nokia 7.1 using Tapatalk
Chris Wendel
Silver Side Down Racing
Silver Side Down Graphics
The Race Place Retro Crew member
"Failure teaches way more than success. It shows what does not work and what to never do again, again..." 🙊🙈🙉
#123

Posted 28 March 2020 - 11:08 PM
Hey Chris. Dang good questions. You want me to think here… Uh… Okay…
From what I’ve been able to observe it is better to have the front axle rails (FAR’s) more medial than lateral. Theoretically (translation: WAG) there might be a limit to this functionally, but I haven’t tried to find this largely due to the fact you just tend to run out of space for everything the more you move them toward the centerline. What I have found: two “springs” to tension, one each side, is better than a centered single "Y" set-up; a torsion bar between the FAR’s has shown to be beneficial (and a handy place to put the springs); and the springs should be lateral to the FAR’s (definitely better than medial). Even after all these years the spring tension is still a matter of voodoo, but recently I was able to discern some variations that may indicate a trend, so I’m going to try to get some reliable values to use to make some more meaningful observations. Don’t hold your breath…
As for the angle of the FAR’s, I don’t know if converging, diverging, or even straight is better than another or not. Nothing definitive at least. Theoretically (translation: the assumption I’m blindly going with…) converging from rear to front should be more stable, and also moves the axle uprights more medial. That said, when I build an F1 frame all that goes right out the door… So… Honestly, for me, and where I’ve been playing around in the 1237-Series, it is mostly the design of the rest of the framing that pretty much dictates where they go…
All that and Two-Fifty will get you a cup of coffee…
.Rick / CMF3
- crazyphysicsteacher and Eddie Fleming like this
#124

Posted 30 March 2020 - 05:08 PM
1271.2-Cb3
“It's alright, that's in every contract. That's what they call a sanity clause."
“Ha ha... you can't fool me. There ain't no Sanity Clause.”
Nullifications aside, it was time to kill some time and crank out the next chassis. I was chomping at the bit to get this one going anyway.
After completing the still untested 1270.2-Cb3, I dismissed sanity and proceeded with the next 1270 sub-set design build, the 1271.2-Cb3. Everything remains the same as on the 1270, except the 1271 has the two diverging forward main rails (instead of the single center main rail) with the iso-guide tongue mount, features from the 1256 and 1258 designs. While building the next chassis before the previous one has had any test laps is not a wise decision as design/build progressions go, I figured even if both cars turned out to be turds I might have a better chance of figuring out why. And if they’re okay, all the better. Either way they were fun building.
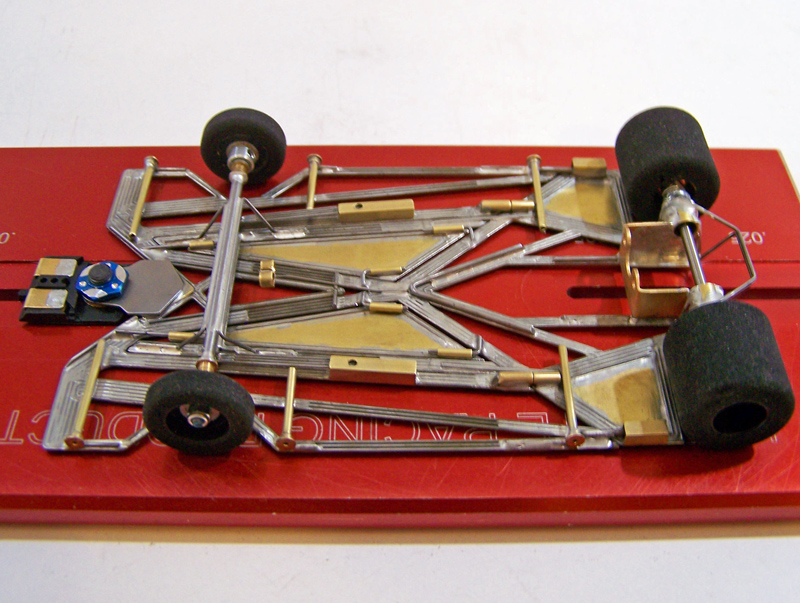
That’s it. Picture time. The 1271.2-Cb3:
A side by side of the 1270.2-Cb3 (left) and the 1271.2-Cb3 (right):
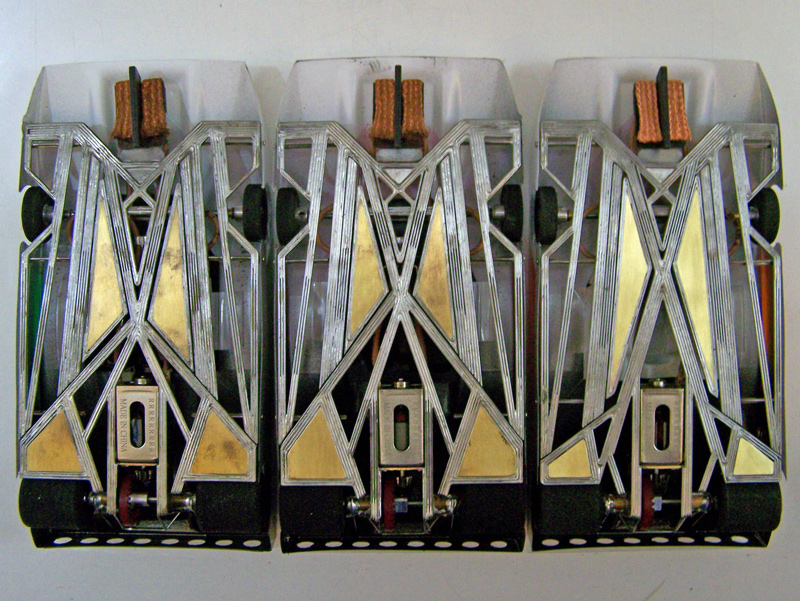
And a pic of the 1258.2-Cb3 (left), the 1256.2-Cb3 (middle) and 1271.2-Cb3 (right):
The symmetry eluded to in the 1270.2-Cb3 post is even better visualized with the 1271.2-Cb3. Cool beans.
…96.9 grams… Pb… 100.5 grams… squeaker…
Test Run(s):
That’s still a “no-go” for now... In the words of Inspector Clouseau, “But, it’s all part of life’s rich pageant, you know”.
At this point I’m pretty much done with any new builds in the 1270 sub-set until I can get these last two around the track for some test laps, so that would restrict any further CanAm chassis builds to variations (or repeats) of previous designs. Of course there are always F1, Stock Car, GT Coupe, or even CanAm-Plus class chassis, not to mention some JFF cars I could piddle about with in the meantime (and we do mean time…).
- - - - - - - - - - - - - - - - - - - - - - - -
1237-Series Footnote (though another part of anatomy may be more applicable):
Having a little time to sort through all this rigmarole I found I had missed a thoroughly interesting, though otherwise pointless, milestone in the 1237-Series designs and builds progression: the 1258.5-Cb3 was the 50th design/chassis in the series… Holy crap… So the 1270.2-Cb3 and the 1271.2-Cb3 represent the 51st and 52nd build respectively… That breaks down to 36 CanAm’s, 3 GT Coupes, 6 F1’s, 5 Stock Cars, and 2 CanAm-Plus… Sheesh… Way back when, which was only a little over 4 years ago, though in “chassis-building-time” seems like a million, I thought this was going to be about 10 or 12 designs and builds, at most… This would not prove to be the first time I’d been wrong in this lifetime, and judging from past data will probably not be the last. Sorry for the inconvenience. The management is not responsible for any lost items, including sanity, during this period…
“Well, you win the white carnation!”
Rick / CMF3
- Tex and Greg Erskine like this
#125

Posted 27 May 2020 - 10:31 AM
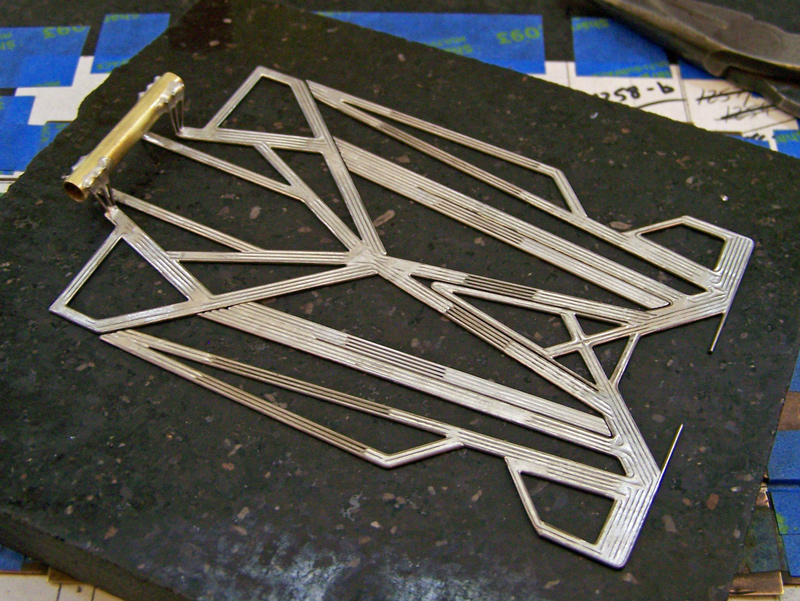
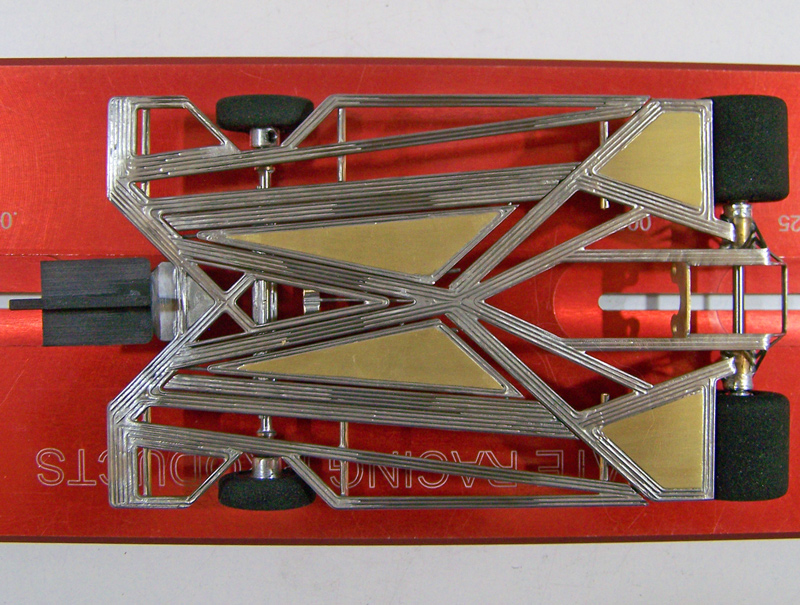
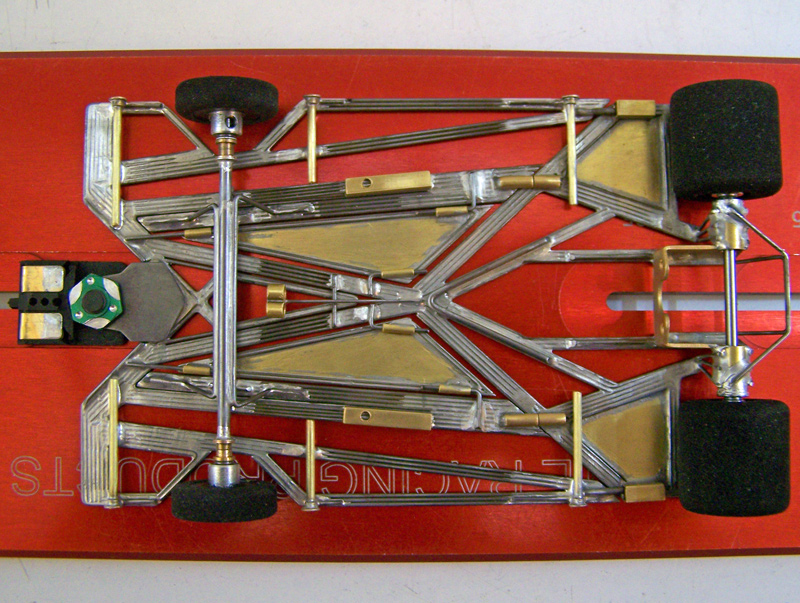
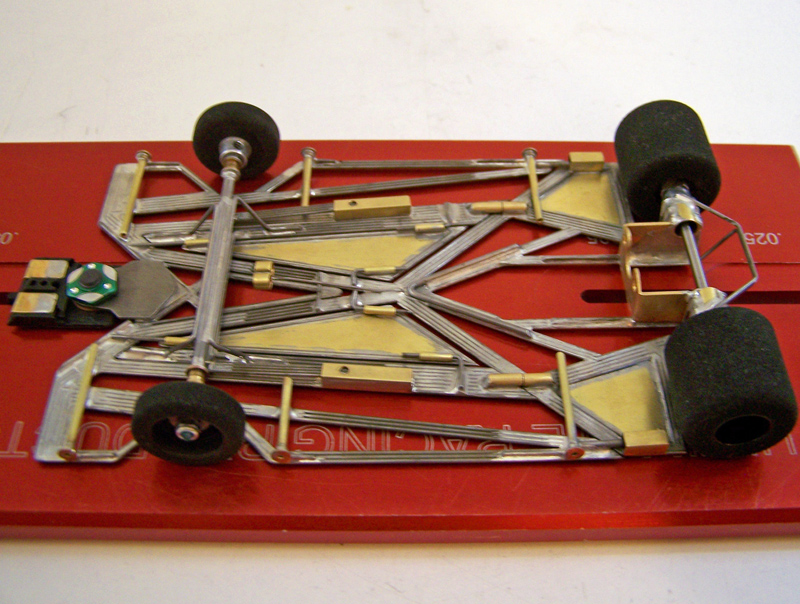
A226.2-e3
With testing of the last two CanAm class cars under “quarantine”, I mentioned there were other retro class chassis that I could build to pile things up here even further (not to mention forays in the JFF builds). In particular, I had already piled up a string of F1 class chassis designs that needed sorting out, with designs out to the A230 and climbing… The last F1 I had built was the A220.2-e3, and that was almost two years ago. Oops. Maybe this would be a good time to get these moving along.
The A226 is pretty much the same as the A220. Dimensionally the A220 had followed the same geometric parameters as the CanAm class 1254/1255/1256’s, with a main rail structure based on the 1256. Not surprising, the F1 A225 design is a “back-track”, not unlike the CanAm 1259 and having the same mathematical parameters; the A225 has the single center main rail (like a 1259), while the A226 has the same diverging main rails found on the 1258, though dimensionally different to those on the A220. Got that? No? That’s quite alright. Just pretend you do.
For expediency, and because I already know enough about the A219 and A220, I decided to skip the A225 and go directly to the A226 build.
Except for the esoteric mathematical parameters, the A226 was going to virtually be another A220 (though as I’ve found on the CanAm’s those differences are significant enough to warrant investigation), but I opted to make another variation on the A225 and A226 designs: they would be constructed so that they would not only fit the current crop of McLaren M7 bodies, but also be able to sport the new Oleg Lotus 63 body. (I have not been able to procure an Oleg Brabham BT26 body as yet, but it appears if I can build the chassis to fit the Lotus 63, then the Brabham should fit with no problem…) Aesthetically I find the retro iterations of the McLaren M7 to be… to put it as nicely as I can… butt-ugly… and we’ll leave it at that…
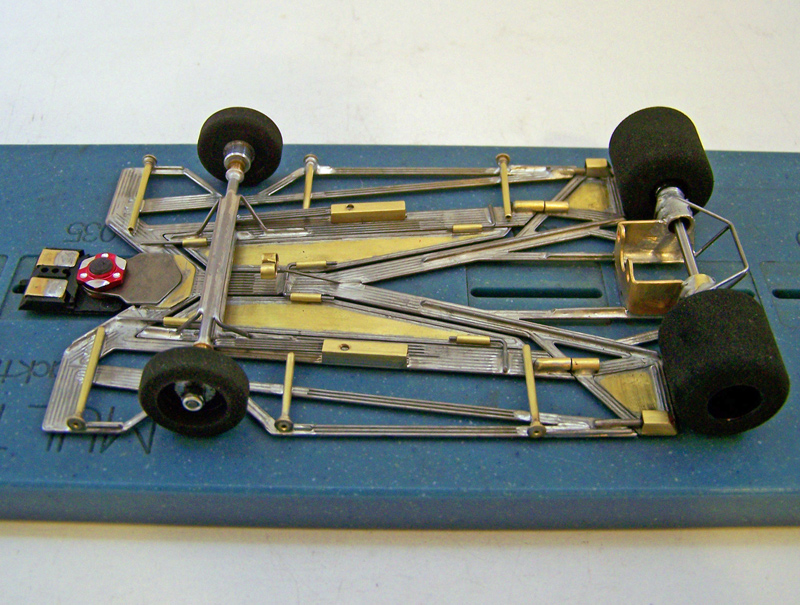
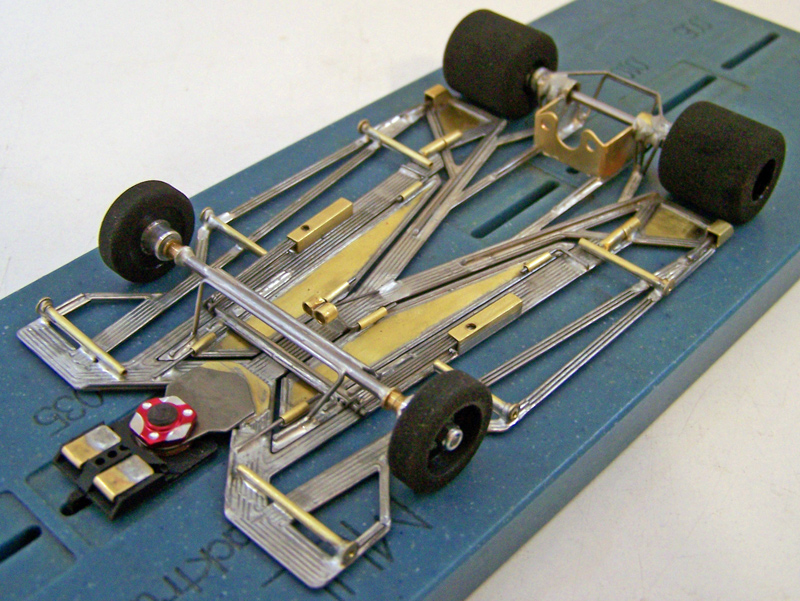
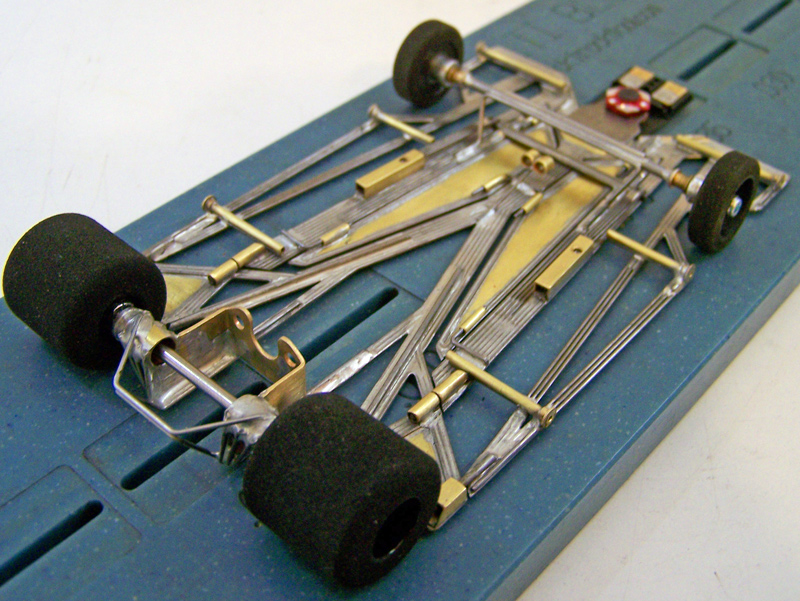
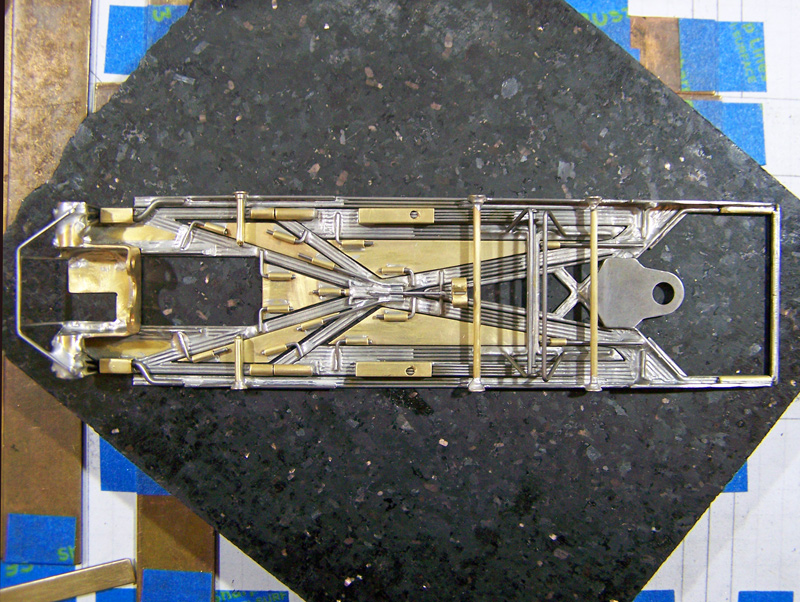
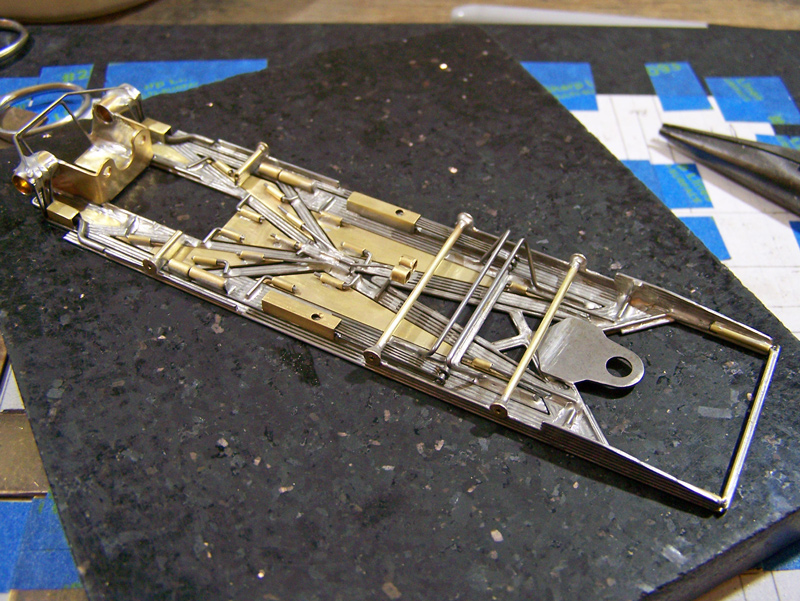
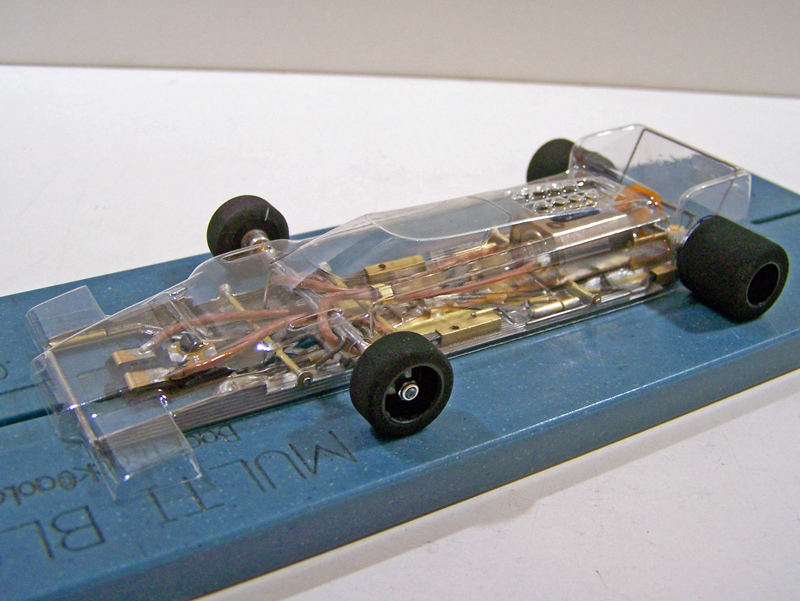
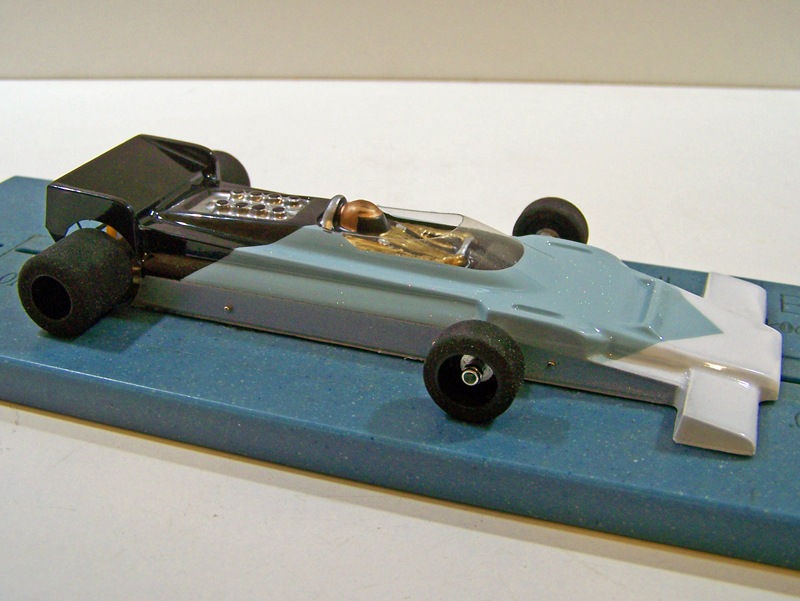
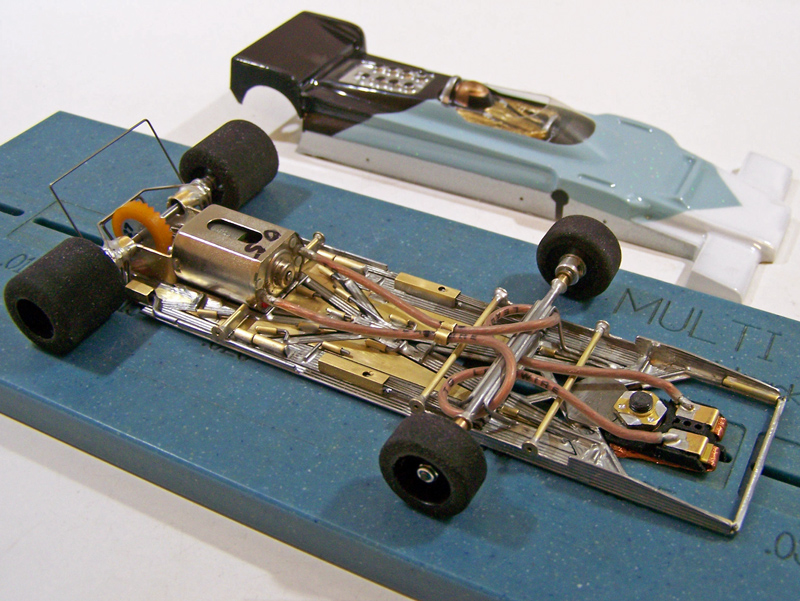
Anyway, the A226.2-e3:
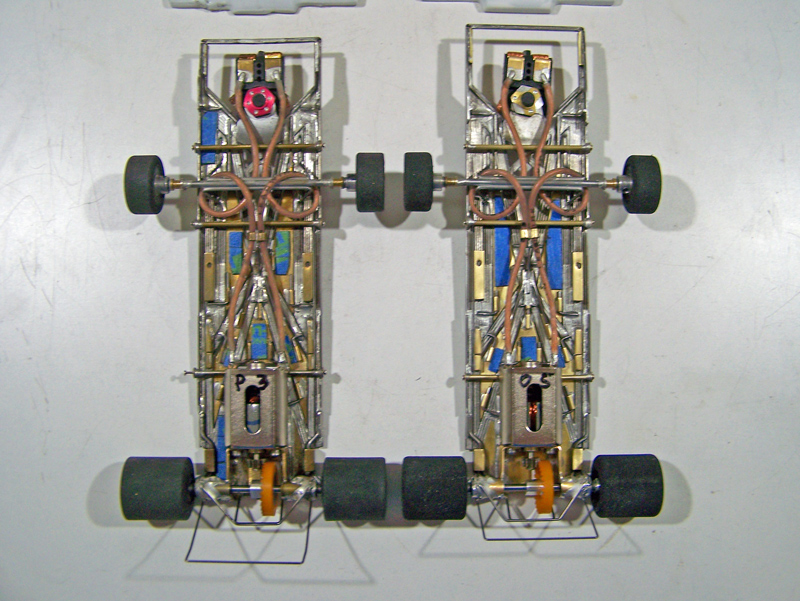
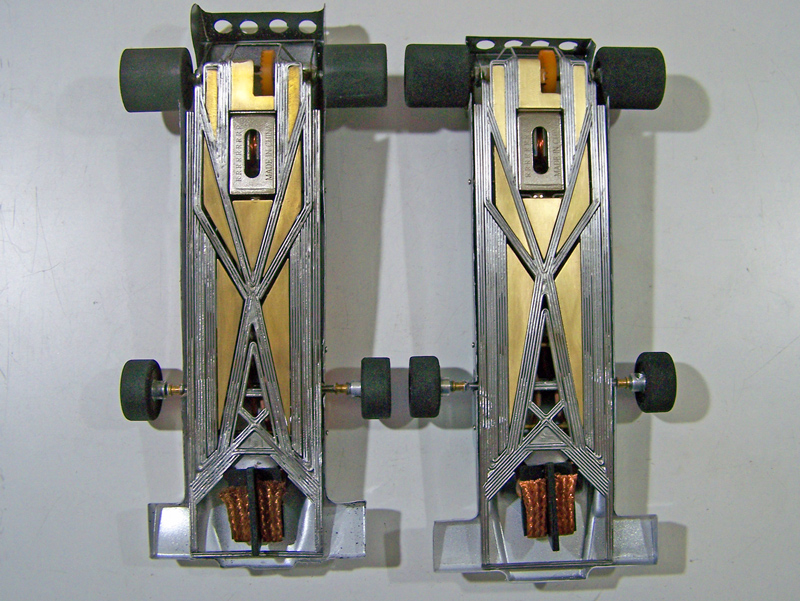
And a side-by-side pics of the A220.2-e3 (left) and the A226.2-e3 (right):
Ah, the chirping of crickets…
As I stated, and as you can see, everything on the A226.2-e3 is pretty much the same as on the A220.2-e3 (as such, I changed up the pics, though mental instability may have been a factor too). For any further comparison you can look back to post # 71, if you want to torture yourself further.
Like the A220, the A226 also has the front extensions and front crossing bumper, though it is a little longer on the A226 to better accommodate the Oleg Lotus 63 body. No other comments in this regard, as previous notation, again post # 71, is still applicable.
Speaking of bodies, I mounted up the Oleg Lotus 63 for this car, and, yes Virginia, the Lotus 63 looks much better than the McLaren M7…
Numberama: WB = 3.875”, RAX-GPC = 5.00”, GL = 1.125”. All 0.032” wire framing; 0.032” brass static pans, 0.025” brass dynamic pans. As completed mass with Lotus 63, 97.0 grams; with pre-cut fruggin-ruggin lead added to dynamic pans, RTR at 100.6 grams (and available Pb pieces for LTO bias if Oval racing).
Test Run:
More crickets…
There may be the odd chance I can get to the raceway this week or later, but currently this would be to: one, to throw some more dollars at Fast Eddie’s during this time, and: two, to get some test laps in, though not a full-on test session. (And, yes, I will wear a mask…) New cars are starting to pile up here. Besides this new A226.2-e3 F1 class car, there were also the last two CanAm cars, the 1270.2-Cb3 and 1271.2-Cb3 that needed some laps, and even two JFF cars, the A401-01 Lotus 56B and the 1405-01 Chaparral 2D, that have yet to see the track. And, more to come. I’ll just have to add some testing synopsis in future 1237-Series posts as they are attained and warranted.
Even with no testing or limited testing, I wanted to get this A226 F1 build knocked out so I could move on to the next F1 design/build…
Sorry for the inconvenience. Please refer any complaints to Joey.
Rick / CMF3
- Tex, boxerdog and Eddie Fleming like this


