Jump to content


Photo

My sexy new JK C43 GTP car - step by step


  • This topic is locked This topic is locked
92 replies to this topic

#1 Pablo

Pablo

    Builder

  • Administrator
  • PipPipPipPipPipPipPipPip
  • 18,437 posts
  • Joined: 20-February 06
  • Gender:Male
  • Location:Cleveland, Tennessee

Posted 02 December 2016 - 02:09 PM

Chassis prep 101: I didn't really find any serious burrs on the edges so I just gently:

- ran a small fine file to all edges top and bottom, followed by 400 grit

- spun a round file in all the holes - bite bars, bushing uprights, and body mounts

- wet sanded flat parts of both tops and bottoms with 400 grit wet/dry


IMG_3820.JPG


Not sure if I'm going to use the stock bite bars yet, so I left them alone for now.


I sanded the motor brace also, just to ensure it's fairly flat and has fresh new metal for solder.

Yes, it's overkill, but I have lots of time...   :)


  • Mad Mexican, Geary Carrier and CougarChris like this

Paul Wolcott


#2 Bill from NH

Bill from NH

    Age scrubs away speed!

  • Full Member
  • PipPipPipPipPipPipPipPip
  • 14,700 posts
  • Joined: 02-August 07
  • Gender:Male
  • Location:New Boston, NH

Posted 02 December 2016 - 02:28 PM

We wondered where you were hiding the past couple of days! :)


  • olescratch likes this
Bill Fernald
 
I intend to live forever!  So far, so good.  :laugh2:  :laugh2: 

#3 Pablo

Pablo

    Builder

  • Administrator
  • PipPipPipPipPipPipPipPip
  • 18,437 posts
  • Joined: 20-February 06
  • Gender:Male
  • Location:Cleveland, Tennessee

Posted 02 December 2016 - 03:15 PM

Not hiding, just prepping cars for The Dungeon in 2017 :)


First thing I did on the center section was check the tilt.

I need "some" - the rules I'm building for are no fronts, no min. front clearance, and .032" min. clearance rear.

Mine, out of the bag, was angled very slightly down. Tongue Tweaker fixed it easily - I held the wings tight on the block and they stayed flat.

Then I checked it on my flattest block - it was plenty flat enough, nothing to correct.


IMG_3826.JPG


Pan section needed some minor hand tweaking to get flat, no problemo.


IMG_3830.JPG


I found doing one half first with the other half off the block, then the other half, then all together, makes it simpler.

When I get to the point of questioning which is flatter - the chassis or the block - I know I'm done.  :dance3:


  • Tim Neja and Samiam like this

Paul Wolcott


#4 Pablo

Pablo

    Builder

  • Administrator
  • PipPipPipPipPipPipPipPip
  • 18,437 posts
  • Joined: 20-February 06
  • Gender:Male
  • Location:Cleveland, Tennessee

Posted 02 December 2016 - 04:53 PM

Before I examine the stock bite bars, I was curious about something -

now that I have a flat two-part chassis, will straight pieces of (.039" front/.047" rear) wires pass through the holes freely?


IMG_3833.JPG


Yup. They went right through absolutely perfect.

While my test wires were in there, I noted the design of the pan movement limiters.

Fore and aft limits are perfectly equal, and left to right amounts are slightly more rear than front.

Very precise, obviously designed that way and the further I go, the more I like what I see.  :good:


  • Tim Neja and glueside like this

Paul Wolcott


#5 JK Products

JK Products

    On The Lead Lap

  • Full Member
  • PipPipPipPip
  • 205 posts
  • Joined: 12-December 15
  • Gender:Male
  • Location:Carson City, NV

Posted 02 December 2016 - 04:56 PM

  :popcorm1:


  • Cheater and Mike K like this

Tim Homola
JK Products


#6 Cheater

Cheater

    Headmaster of the asylum

  • Root Admin
  • PipPipPipPipPipPipPipPip
  • 25,652 posts
  • Joined: 14-February 06
  • Gender:Male
  • Location:Norcross, GA

Posted 02 December 2016 - 05:04 PM

You are learning.  :)


He had a good teacher... LOL!
  • C. J. Bupgoo likes this

Gregory Wells

Never forget that first place goes to the racer with the MOST laps, not the racer with the FASTEST lap


#7 MSwiss

MSwiss

    Grand Champion Poster

  • IRRA National Director
  • PipPipPipPipPipPipPipPip
  • 25,849 posts
  • Joined: 16-April 06
  • Gender:Male

Posted 02 December 2016 - 05:17 PM

Greg,

How many posts does Pablo have to make in this thread, for you to upgrade him to tome status?

Mike Swiss
 
Inventor of the Low CG guide flag 4/20/18
IRRA® Components Committee Chairman
Five-time USRA National Champion (two G7, one G27, two G7 Senior)
Two-time G7 World Champion (1988, 1990), eight G7 main appearances
Eight-time G7 King track single lap world record holder

17B West Ogden Ave., Westmont, IL 60559, (708) 203-8003, mikeswiss86@hotmail.com (also my PayPal address)

Note: Send all USPS packages and mail to: 692 Citadel Drive, Westmont, Illinois 60559


#8 JK Products

JK Products

    On The Lead Lap

  • Full Member
  • PipPipPipPip
  • 205 posts
  • Joined: 12-December 15
  • Gender:Male
  • Location:Carson City, NV

Posted 02 December 2016 - 05:58 PM

See, I want him to stop for fear of giving away too many of our secrets!


  • Cheater, Mike K and glueside like this

Tim Homola
JK Products


#9 Cheater

Cheater

    Headmaster of the asylum

  • Root Admin
  • PipPipPipPipPipPipPipPip
  • 25,652 posts
  • Joined: 14-February 06
  • Gender:Male
  • Location:Norcross, GA

Posted 02 December 2016 - 06:09 PM

How many posts does Pablo have to make in this thread, for you to upgrade him to tome status?


He's already got his own subforum.

When he's done this thread will almost certainly be moved to Tech How-Tos & Tutorials.


  • Frankie Schaffier and olescratch like this

Gregory Wells

Never forget that first place goes to the racer with the MOST laps, not the racer with the FASTEST lap


#10 Pablo

Pablo

    Builder

  • Administrator
  • PipPipPipPipPipPipPipPip
  • 18,437 posts
  • Joined: 20-February 06
  • Gender:Male
  • Location:Cleveland, Tennessee

Posted 02 December 2016 - 06:21 PM

Jaroslav Recek obviously understands what makes a slot car handle.  :good:
 
Bill of NH suggested the forward bite bar could be assigned double-duty as a front axle - I checked it - he is right. Would take some clever technique, but it's totally doable. :D Just for those who are challenged with front wheel mandates...
 
Another tuning design feature I noted is the pan crossover (which makes the chassis a two-piece vs a three-piece) does not interact with the center section. In other words, you have the advantage of the pans being connected, without the disadvantage of friction with the center section when the body moves.
 
In a situation where you actually wanted that friction, you can add some Lexan strips under the crossover and get it.


  • race301 likes this

Paul Wolcott


#11 Pablo

Pablo

    Builder

  • Administrator
  • PipPipPipPipPipPipPipPip
  • 18,437 posts
  • Joined: 20-February 06
  • Gender:Male
  • Location:Cleveland, Tennessee

Posted 03 December 2016 - 05:46 PM

Bite bars - here is what I found. The bends and curves that form the attachment end(s) make it practically impossible to lay it on a block and expect it to be flat. I tried to make them so, and couldn't. By no means is this a problem, and I'm sure you can just use them as is and do fine.
 
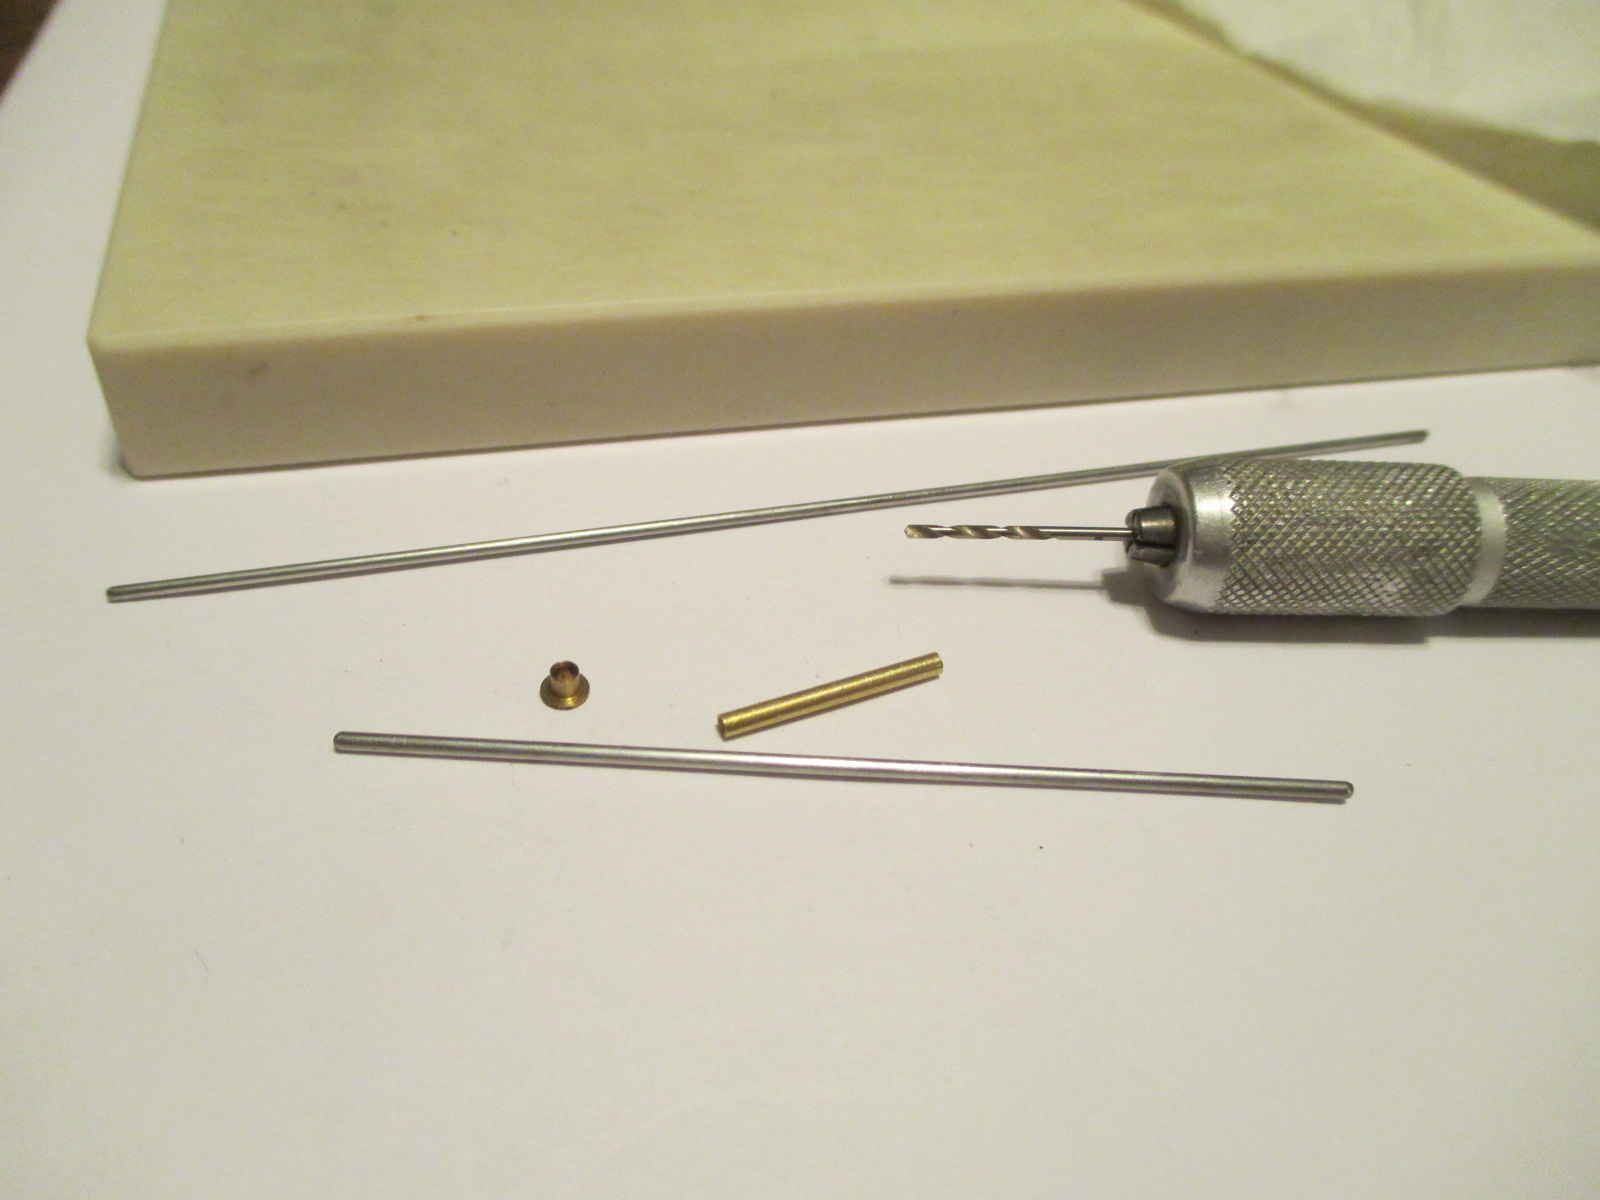
I set about to see if I could improve on them. My first thought was, small pieces of square tubing soldered to the pans rear, and .050" keepers outside of simple straight pieces of wire, front. The rear would be a piece of cake since it's basically the same way the Cheetah chassis bite bars are managed. The front would require some work - .050" keepers would be too sloppy over .039" wire, so I'd have to drill out some .063" brass tube to .039" and shim them up to make the keepers fit nice.
 
IMG_3873.JPG
 
Wait a minute, hold the phone - about that time, I started to really understand the way the stock bite bar keeper bends work. They just need to be tweaked properly. All the small parts and tools got put away – all I need is a pair of pliers. My stock bite bars are done.   :dance3:
 
IMG_3867.JPG
 
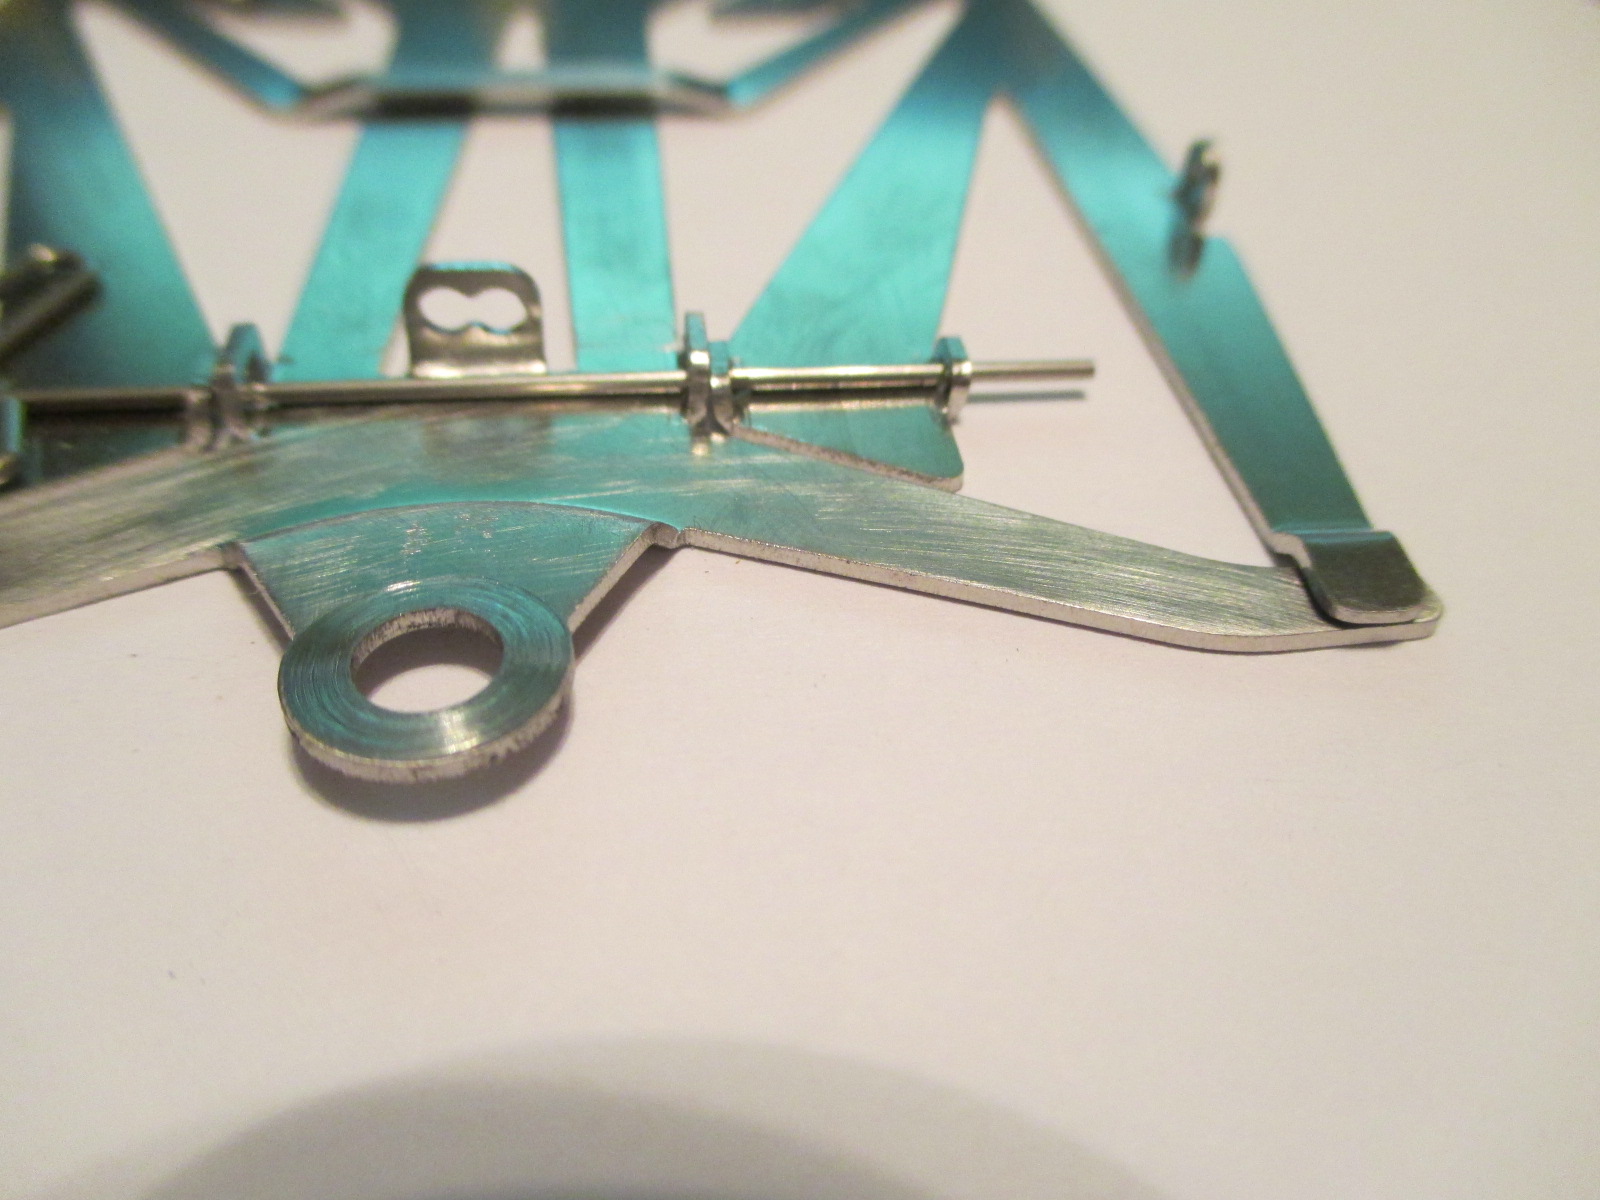
Here is my method. The convoluted bends look complicated, but I finally realized they are very simple, and only perform one single basic function - keep the bite bar from falling out. They are well designed to do that, and I doubt it can be improved from that standpoint. The problem is, not only are they doing the basic job, they can also prevent the bite bar from being an "independent thinker." In other words, they are influencing the bite bar due to (unwanted) interaction with the chassis surfaces. So, I think all we need to do is ensure the bar is straight where it passes through the chassis holes, and prevent the curved/bent section from touching the chassis.
 
First, let the bent areas lay off the block while you ensure the main part is straight. Notice the light coming under mine – not good – easy to fix
 
IMG_3839.JPG
 
Now tweak the bent portion upward the way you want it oriented on your chassis. Just enough to ensure all of it ends up elevated off the chassis about 10 thou. Like this:
 
IMG_3862.JPG
 
Now the bite bars are laying exactly as they would without the keeper bends, and everything is still flat. Plus you still have the capability of rapid removal as designed.  :good:


  • glueside and JK Products like this

Paul Wolcott


#12 Pablo

Pablo

    Builder

  • Administrator
  • PipPipPipPipPipPipPipPip
  • 18,437 posts
  • Joined: 20-February 06
  • Gender:Male
  • Location:Cleveland, Tennessee

Posted 03 December 2016 - 06:21 PM

Both tongue surfaces faced as usual with a Magnehone.


I'm not going to reinforce the tongue – JK says it's a stronger chassis, and my meaty fingers verify that. Whether due to the thickness, or different material, I don't know.


IMG_3879.JPG


Bunky, the gap between the pan finger and wing tip you called a flaw and fixed with a shim?  Well, I call it something else.   :dirol:


Paul Wolcott


#13 Pablo

Pablo

    Builder

  • Administrator
  • PipPipPipPipPipPipPipPip
  • 18,437 posts
  • Joined: 20-February 06
  • Gender:Male
  • Location:Cleveland, Tennessee

Posted 03 December 2016 - 08:05 PM

I checked the upright holes for accuracy and to see what size wheels will give me .032" clearance.


Looks like the JK C43 was designed for about .063" clearance using about .720" wheels. It's accurate enough so no drilling/filing/etc. is needed, and I'll probably race it with about .685" wheels.


Found a pair of VBX un-shielded ball bearings – after a lighter fluid bath they will be soldered in... tomorrow...  :)


IMG_3881.JPG


  • glueside likes this

Paul Wolcott


#14 glueside

glueside

    On The Lead Lap

  • Full Member
  • PipPipPipPip
  • 422 posts
  • Joined: 07-February 12
  • Gender:Male
  • Location:IA

Posted 04 December 2016 - 08:09 AM

Pablo gets it!!!
  • JK Products likes this

Jeff Strause

Owner, Strause's Performance Racing (SPR)


USSCA 2016 4" NASCAR Champion & 4 1/2" NASCAR Champion & Retro Can-Am Champion

USSCA 2017 All Around Champion

USSCA 2019 All Around Champion


#15 Koford fan

Koford fan

    Backmarker

  • Full Member
  • PipPip
  • 54 posts
  • Joined: 16-December 13
  • Gender:Male
  • Location:Norway

Posted 04 December 2016 - 10:34 AM

I notice you have taped in middle on your bite bars. Any reason for it? Just test? How it looking without?

Great work so far.
Tom Blantern

#16 Pablo

Pablo

    Builder

  • Administrator
  • PipPipPipPipPipPipPipPip
  • 18,437 posts
  • Joined: 20-February 06
  • Gender:Male
  • Location:Cleveland, Tennessee

Posted 04 December 2016 - 10:38 AM

The bearing holes are precise enough, I didn't feel the need to jig it up before soldering home the BBs. Simply taped it down with axle center elevated .2975". This will make it (mathematically) clear .032" with .659" wheels or .062" with .720".
 
IMG_3885.JPG
 
IMG_3890.JPG
 
Slick 7 brace fits perfectly.
 
IMG_3889.JPG

Paul Wolcott


#17 Pablo

Pablo

    Builder

  • Administrator
  • PipPipPipPipPipPipPipPip
  • 18,437 posts
  • Joined: 20-February 06
  • Gender:Male
  • Location:Cleveland, Tennessee

Posted 04 December 2016 - 10:42 AM

I notice you have taped in middle on your bite bars. Any reason for it?

 
Good question, Tom, thanks. I simply wanted the bent end of the bar to sit high for the photo just to make my point clear about keeping it up off the chassis.
 
Without the tape, it doesn't sit so high. Doesn't have to – just enough so it isn't hindering the bar from doing whatever it wants.

Paul Wolcott


#18 JK Products

JK Products

    On The Lead Lap

  • Full Member
  • PipPipPipPip
  • 205 posts
  • Joined: 12-December 15
  • Gender:Male
  • Location:Carson City, NV

Posted 04 December 2016 - 11:51 AM

The force is strong with this one.   :popcorm1:


  • Cheater likes this

Tim Homola
JK Products


#19 Pablo

Pablo

    Builder

  • Administrator
  • PipPipPipPipPipPipPipPip
  • 18,437 posts
  • Joined: 20-February 06
  • Gender:Male
  • Location:Cleveland, Tennessee

Posted 04 December 2016 - 04:07 PM

Centerline permanently marked at the rear.
 
IMG_3906.JPG
 
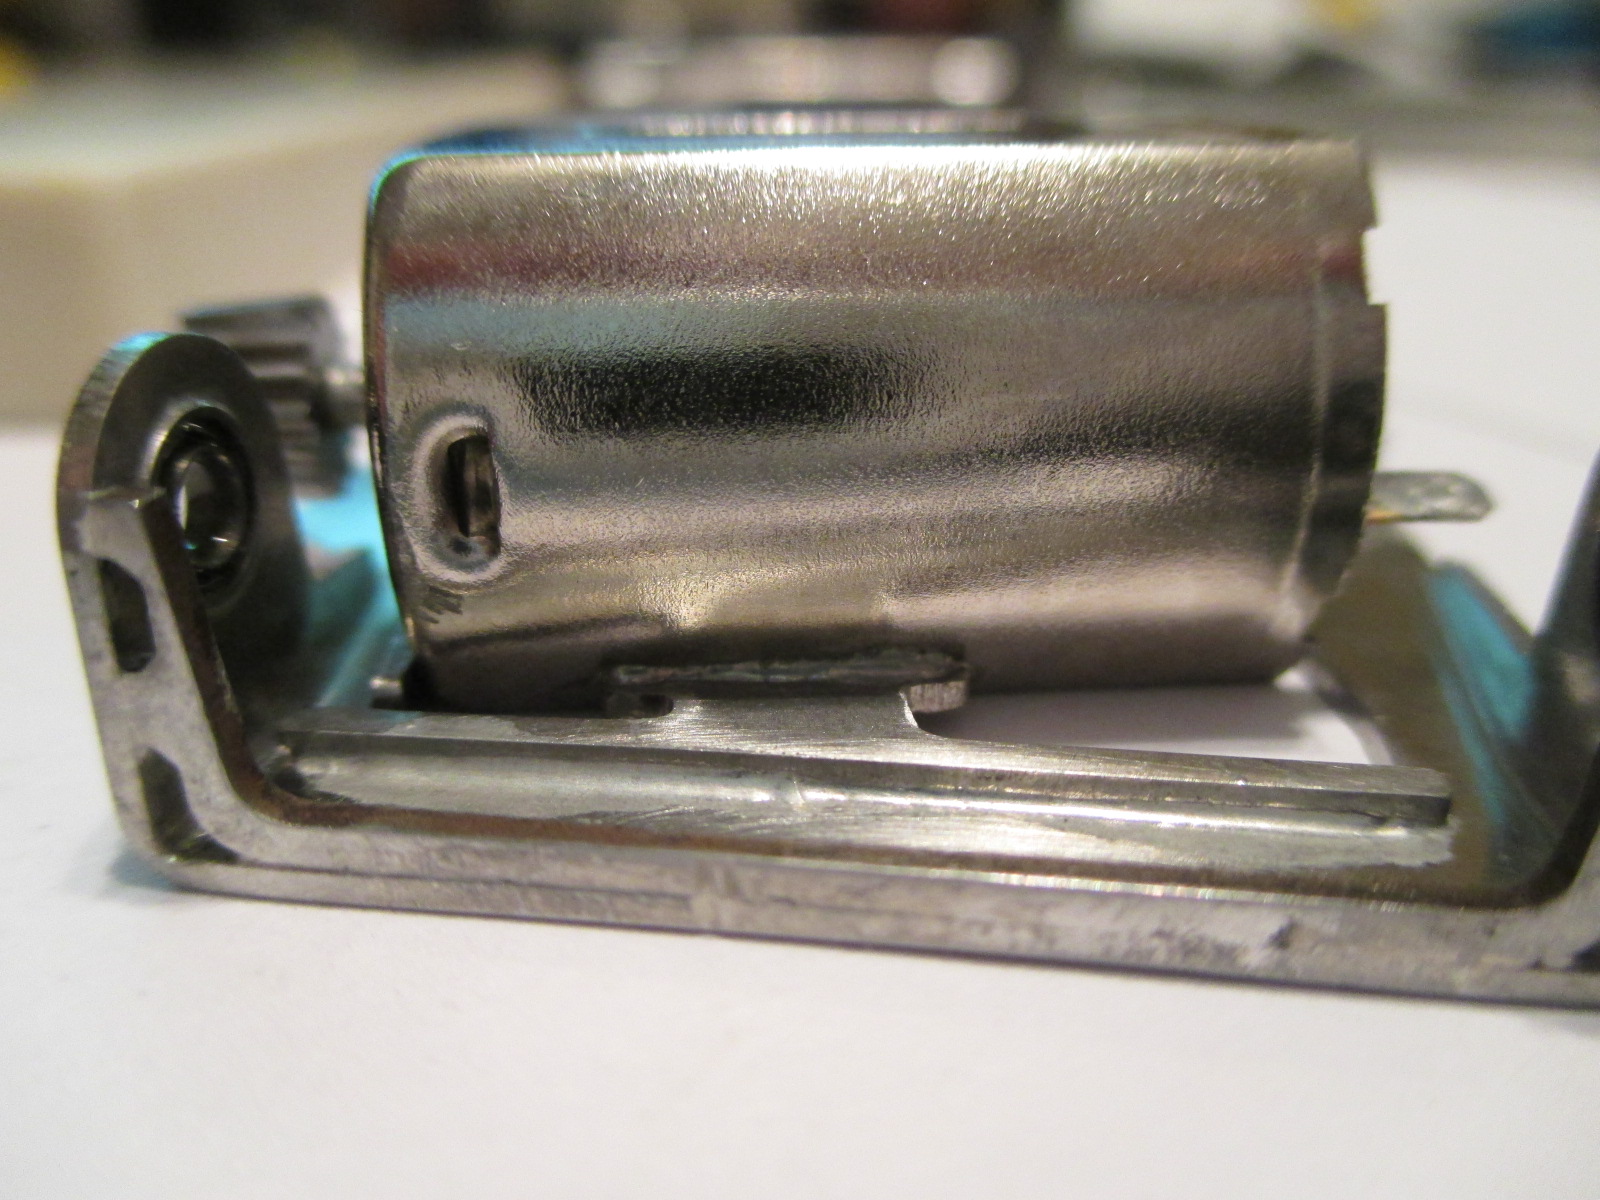
I've been using a different technique than the usual sales receipt to set gear mesh on JK chassis lately. I like to end up with a 10 thou spacer inboard of the spur, so I tack the motor in with a 20 thou to the hilt.
Then the 20 thou is removed and 10 thou goes in. So far it's worked perfect every time.
 
Gears on my car will be 72 pitch 15/40. Hawk 7 motor has been broken-in and wire connectors tinned. You can see my tack solder blob on the lower forward edge

IMG_3912.JPG
 
I took the time to find the left/right balance point of the motor (at the angle it ends up in of course).

Previous chassis versions didn't always have the motor sitting in the perfect spot, so I'd compensate for it.
The C43 does. Laying flush with the gear side right in its nest, it's in perfect balance left/right. :good:

Also, the space between the endbell side and chassis on the C11 was really tight - the C43 fixes that.
 
IMG_3904.JPG
 
Motor is in its happy place, now it's time to install some bracing...

Paul Wolcott


#20 Pablo

Pablo

    Builder

  • Administrator
  • PipPipPipPipPipPipPipPip
  • 18,437 posts
  • Joined: 20-February 06
  • Gender:Male
  • Location:Cleveland, Tennessee

Posted 04 December 2016 - 05:38 PM

I was planning to install a S7-389 motor brace up front but the bite bar won't allow it. The standard JK brace and gear side attachment point will be plenty strong enough.
 
IMG_3916.JPG
 
I'm done acid soldering so center section/motor, etc., got a warm soapy bath scrubbing.
 
IMG_3921.JPG
 
Soon you will see why I titled my thread with the word "sexy"... :)


  • MSwiss likes this

Paul Wolcott


#21 Koford fan

Koford fan

    Backmarker

  • Full Member
  • PipPip
  • 54 posts
  • Joined: 16-December 13
  • Gender:Male
  • Location:Norway

Posted 04 December 2016 - 05:50 PM

Nice work, Pablo. I like it.
  • JHMerriman and Frankie Schaffier like this
Tom Blantern

#22 Pablo

Pablo

    Builder

  • Administrator
  • PipPipPipPipPipPipPipPip
  • 18,437 posts
  • Joined: 20-February 06
  • Gender:Male
  • Location:Cleveland, Tennessee

Posted 04 December 2016 - 10:09 PM

Thanks, Tom. 
 
The rest of the assembly was easy, no problems, nothing special other than the usual "Wolcott Ranch" race car attention to detail:
 
- pan doesn't need nursing to attach it - drop it over the center section, insert bite bars with a click, done. Brilliant design.
 
- Parma flag blueprinted, all rotating surfaces faced, Koford aluminum drilled nut and two 10 thou bronze spacers for tuning (one top one below to start), Slick 7 wires, TQ clips, Prime braid, Koford axle.
 
- spur gear balance tested using the BBs on the car – screw was the heavy point – tried a few different screws until I found the one that made it happy. :)
 
IMG_3932.JPG
 
The wheels I'll be using are .680" OD Alpha Wonder rubber on carbon fiber hubs and are .800" wide. I used a single thin spacer between spur and BB, a couple thin spacers between spur and (left) wheel, and two 20 thou spacers on the right side. Look close and you can see my marks aligned.
 
IMG_3927.JPG
 
My opinion is, the C43 has raised the bar in many ways and it's probably the easiest flexi chassis to make race ready of any I've ever built.

I give it three thumbs up (that's the max Cheater Wells allows).  :good: :good: :good:
  • Jencar17, Maximo, Vlado Yankov and 2 others like this

Paul Wolcott


#23 Pablo

Pablo

    Builder

  • Administrator
  • PipPipPipPipPipPipPipPip
  • 18,437 posts
  • Joined: 20-February 06
  • Gender:Male
  • Location:Cleveland, Tennessee

Posted 04 December 2016 - 11:47 PM

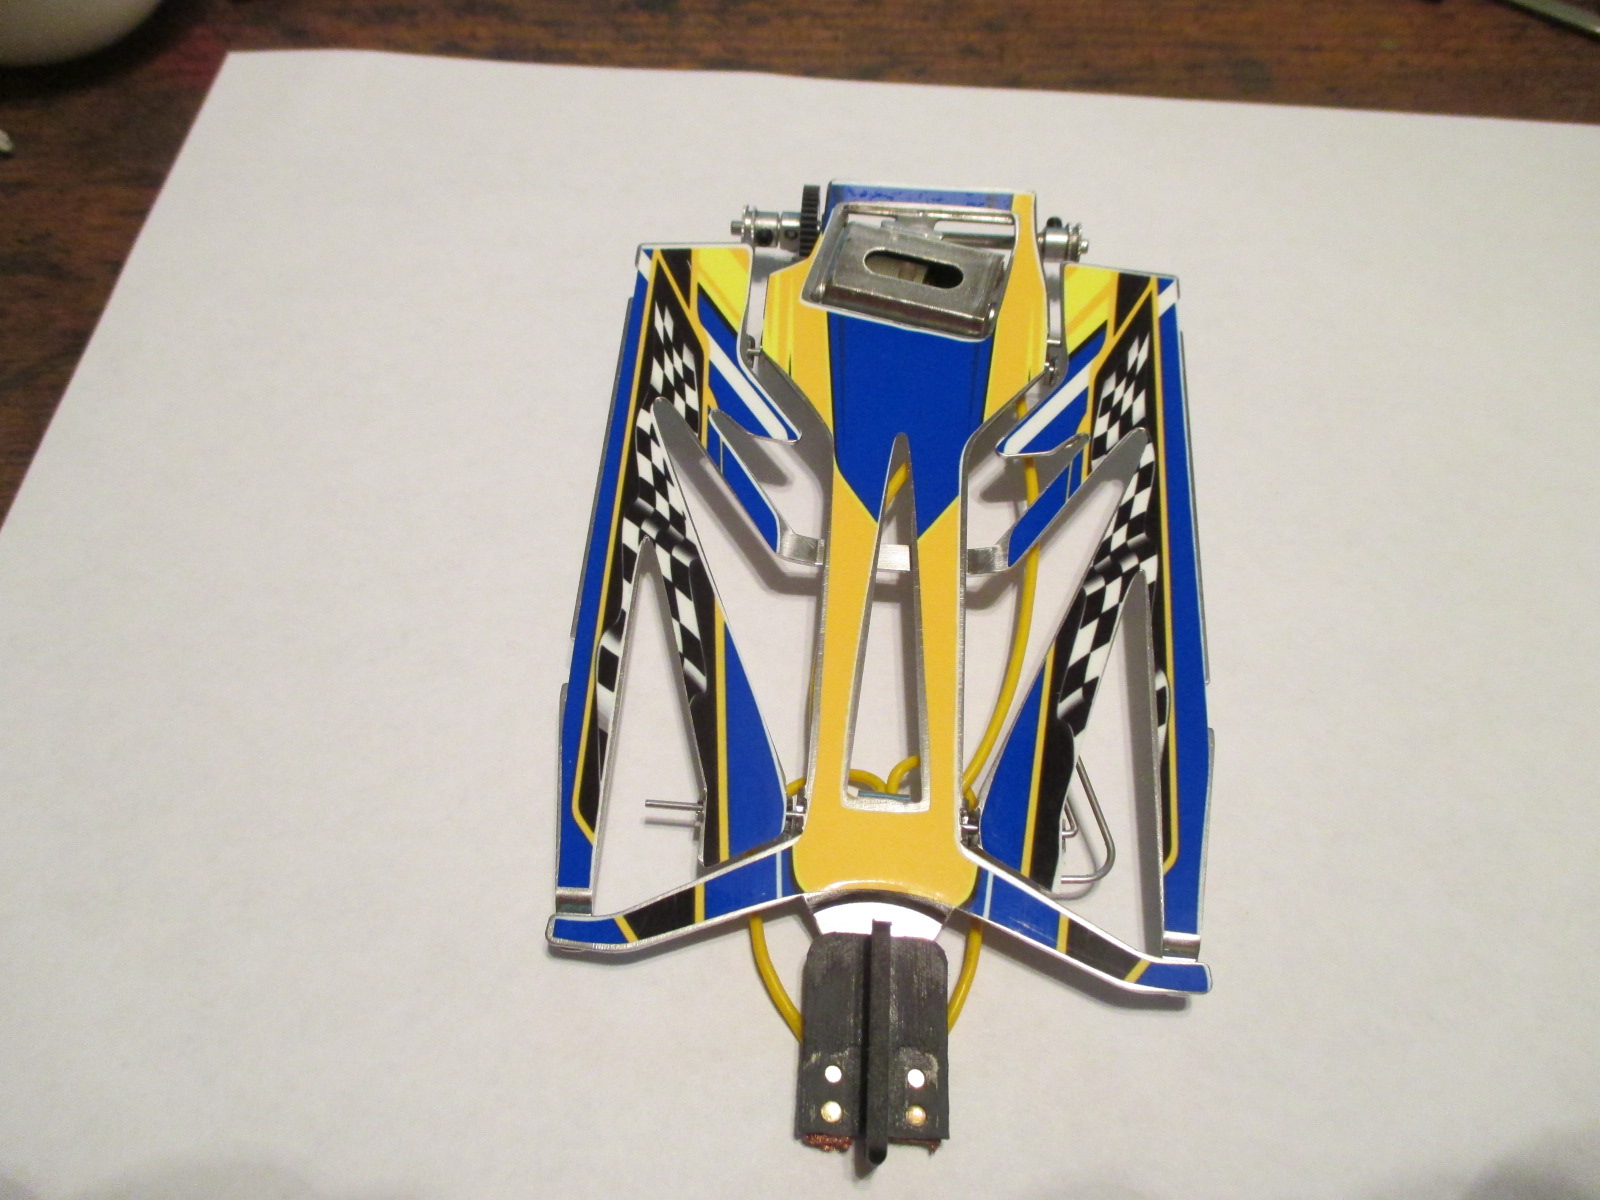
My "sexy" chassis is dressed with a skin from ralphthorneracing.com


IMG_3940.JPG


IMG_3949.JPG


  • Jencar17, Vlado Yankov, Bud Greene and 1 other like this

Paul Wolcott


#24 Zippity

Zippity

    Grand Champion Poster

  • Banned
  • PipPipPipPipPipPipPipPip
  • 5,278 posts
  • Joined: 05-March 06
  • Gender:Male
  • Location:Wellington, New Zealand

Posted 04 December 2016 - 11:54 PM

Paul,
 
Are you going to install a SS or brass floating pin tube in the front?  :)
Ron Thornton

#25 Bill from NH

Bill from NH

    Age scrubs away speed!

  • Full Member
  • PipPipPipPipPipPipPipPip
  • 14,700 posts
  • Joined: 02-August 07
  • Gender:Male
  • Location:New Boston, NH

Posted 05 December 2016 - 12:13 AM

What happens to those chassis skins when you solder motors in and out of a chassis? Years ago we made chassis skins using 3M colored plastic tape, but we never skinned the motorbox.


Bill Fernald
 
I intend to live forever!  So far, so good.  :laugh2:  :laugh2: 


Electric Dreams Online Shop