Jump to content


Photo

My sexy new JK C43 GTP car - step by step


  • This topic is locked This topic is locked
92 replies to this topic

#51 Pablo

Pablo

    Builder

  • Administrator
  • PipPipPipPipPipPipPipPip
  • 18,437 posts
  • Joined: 20-February 06
  • Gender:Male
  • Location:Cleveland, Tennessee

Posted 15 January 2017 - 02:16 AM

Track test was delayed a week due to icy, windy weather across the southern continental USA on Jan. 7.


My sexy new C43 GTP car worked great (yesterday), just like I expected. Right out of the box it was perfectly race ready.


In the short amount of time I had to test, here are my findings/opinions:


1. My estimation of needing to add a 5 thou flag spacer to compensate for the Ralph Thorne chassis skin was spot on and I was happy with my scum patterns.


Instead of burn marks on the underside of the chassis where it normally shorts out and slows you down, I got a slick surface that is slightly scratched.


The skin, IMO, performed exactly as advertised. It's still intact and all I did after the race was wipe it with lighter fluid. I give this product an A+.


2. I have no scientific data to back it up, but the C43 worked super for me, first time out. I didn't adjust a single thing. It will dive into a corner and plant as well as, if not better than, any JK chassis I've even driven.


I did way overcook some entrances into the dead man and every time it would forgive, plant, and turn.


Usually my JK chassis perform this way, so I'm used to it. All I can say is, this one does it and maybe a better driver could push it even further.


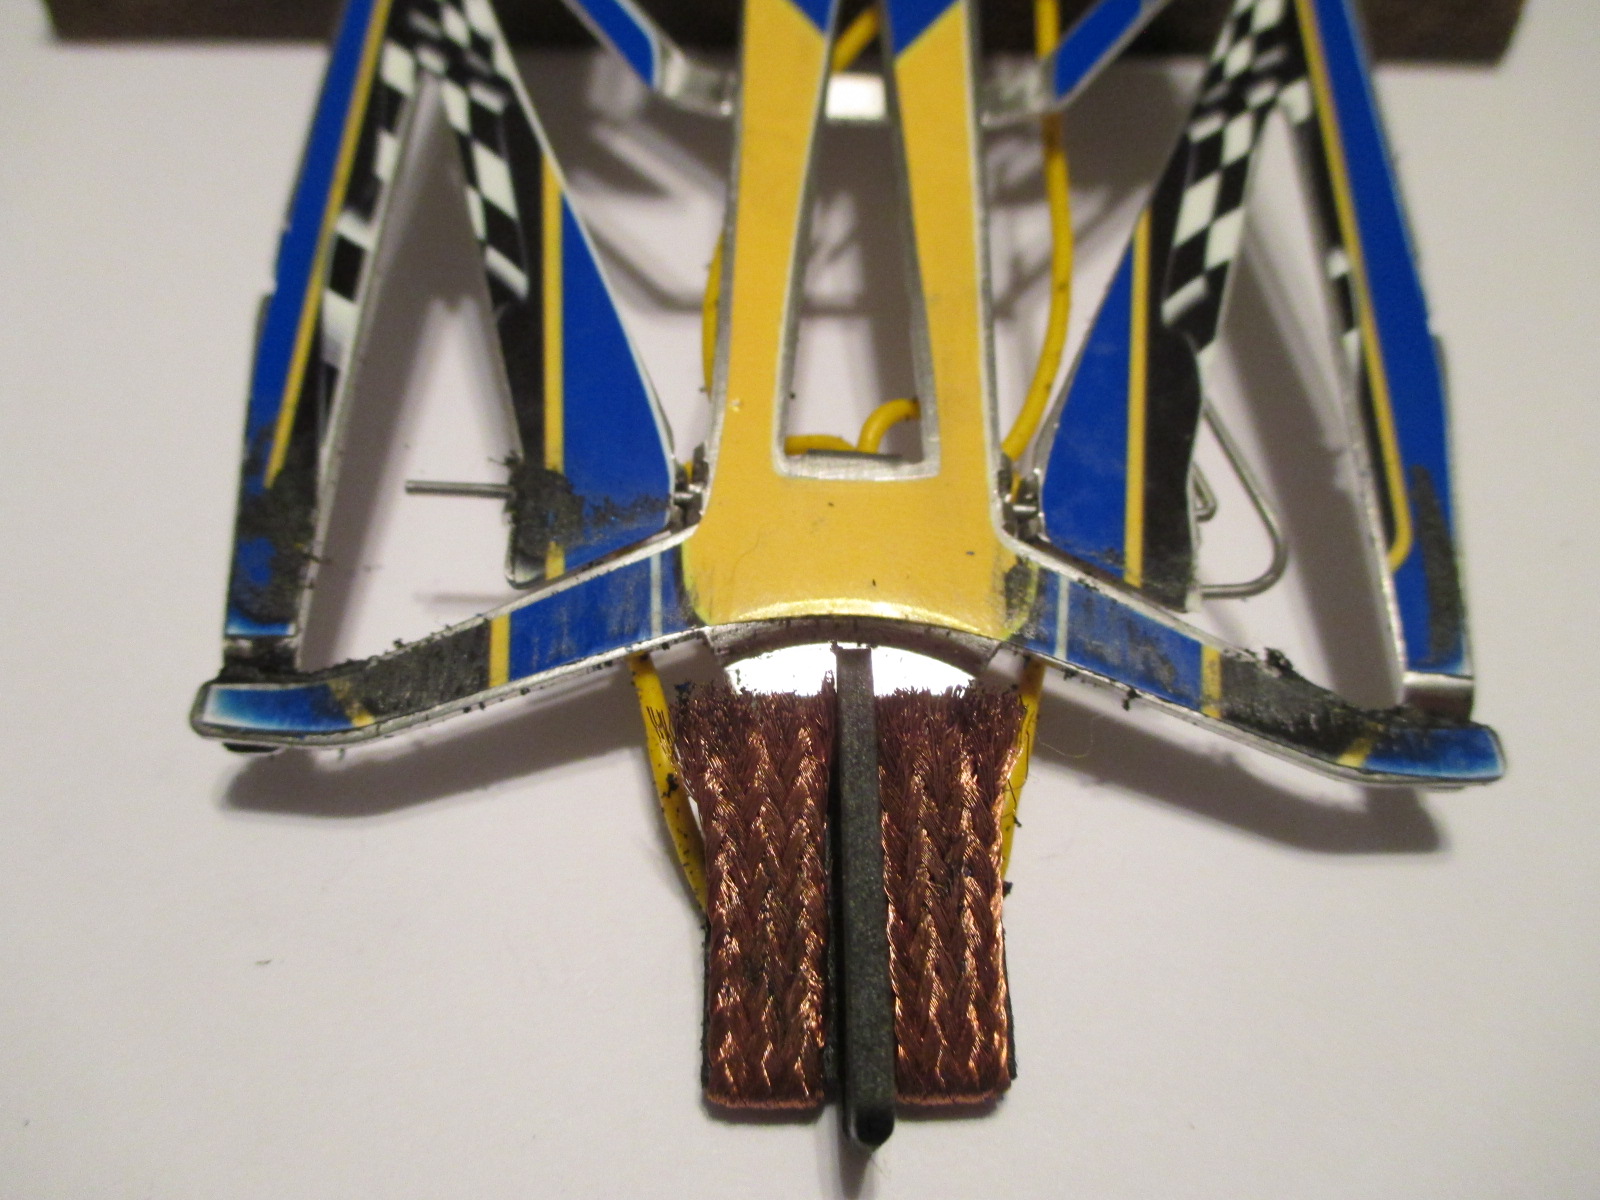
Here is the braid wear and scum pattern after the race:


IMG_4645.JPG


And after I wiped it with lighter fluid:


IMG_4659.JPG


Skin still looks great and ready to rock n roll again.


The 7 thou Bentlee body was completely destroyed in a really bad crash but the car worked fine right to the end.  :)  :good:


Damage assessment to follow, tomorrow, but I don't think there will be much.


  • Jencar17, John C Martin and C. J. Bupgoo like this

Paul Wolcott


#52 Samiam

Samiam

    Posting Leader

  • Subscriber
  • PipPipPipPipPipPipPip
  • 4,763 posts
  • Joined: 18-January 12
  • Gender:Male
  • Location:Long Island, NY

Posted 15 January 2017 - 09:34 AM

I seem to have exceeded my " Like " quota so here's my :good: .


Sam Levitch
 
"If you have integrity, nothing else matters, and if you do not have integrity, nothing else matters."
    Robert Mueller, special counsel (2013)
 
"... because people have got to know whether or not their president is a crook."
    Richard M .Nixon, Nov 17, 1973
 
"Fool me once, same on... shame on you. Fool me... you can't get fooled again."
    George W. Bush

#53 Pablo

Pablo

    Builder

  • Administrator
  • PipPipPipPipPipPipPipPip
  • 18,437 posts
  • Joined: 20-February 06
  • Gender:Male
  • Location:Cleveland, Tennessee

Posted 15 January 2017 - 02:32 PM

Post-race teardown: zero damage, other than a destroyed .007 Bentlee body and the clips need a new paint job :laugh2:

Believe me, it took some really hard hits. The C43 is still perfectly flat and true. I didn't even bother to remove the bite bars.

It's ready for the next race :D


IMG_4666.JPG


I oiled and braid juiced the car a half hour before the race. Other than an emergency body fix and changing lane stickers, that's all I did.

No frantic motor cooling, tweaking, juices, magic squid oil potions, nothing. Change lane sticker and slap it down.


Just for trivia's sake, this car (with chassis skin) weighs about 5 grams more than my C11 car. I don't think it even matters.


My conclusion is, the new JK C43 chassis is a winner and, as advertised, much stronger than previous JK chassis.

It retains the magic handling flex of previous versions. Easy to race prep and very low maintenance.

You won't see top level racers ripping the body off and tweaking the C43 back into shape between each heat like the C11's.

I give it an A+ :good: :good: :good:


Mission accomplished. I'll go back to my vintage trailer now


image5.JPG


  • Jencar17, glueside, JK Products and 1 other like this

Paul Wolcott


#54 JK Products

JK Products

    On The Lead Lap

  • Full Member
  • PipPipPipPip
  • 205 posts
  • Joined: 12-December 15
  • Gender:Male
  • Location:Carson City, NV

Posted 15 January 2017 - 03:20 PM

Hey Pablo, 


You musta used one o dem "screamer unicorn" motors cause you tore the hubs right off the back of a dat bad boy. 


Thanks for the kind words.

Tim 


Tim Homola
JK Products


#55 Pablo

Pablo

    Builder

  • Administrator
  • PipPipPipPipPipPipPipPip
  • 18,437 posts
  • Joined: 20-February 06
  • Gender:Male
  • Location:Cleveland, Tennessee

Posted 15 January 2017 - 03:38 PM

Yep, drove the wheels right off it :laugh2:  Motor was a Hawk 7 with a new secret break in method - dry at 3 V for 15 mins.

No testing no tachometer reading no dyno no cherry picking - bought one and put it in the car. Just the facts  :dance3: 


  • Samiam and pmwslots like this

Paul Wolcott


#56 elinsley

elinsley

    On The Lead Lap

  • Subscriber
  • PipPipPipPip
  • 450 posts
  • Joined: 29-April 15
  • Gender:Male
  • Location:Waterbury, CT

Posted 15 January 2017 - 06:53 PM

Awesome build, Pablo!!


Eric Linsley

#57 Ralph Thorne

Ralph Thorne

    Posting Leader

  • Full Member
  • PipPipPipPipPipPipPip
  • 2,152 posts
  • Joined: 30-September 08
  • Gender:Male
  • Location:Snellville, GA

Posted 16 January 2017 - 12:35 PM

Also that RTR skin only serves to raise the chassis cg .005, it only looks cool.


Dave, the chassis skin does look cool as you stated! However they are actually only .002" thick, and that would be such a small change in CoG that it would be virtually unnoticeable. The big plus to them is that they prevent braid arcing which is very much appreciated by track owners.


  • pmwslots likes this

#58 Pablo

Pablo

    Builder

  • Administrator
  • PipPipPipPipPipPipPipPip
  • 18,437 posts
  • Joined: 20-February 06
  • Gender:Male
  • Location:Cleveland, Tennessee

Posted 16 January 2017 - 01:50 PM

25 thou JK C11 with steel 25 thou pans, no skin. The clearance rules it runs on is: no limitation in front, min. .032" rear.

The turn marshal says "Hey Pablo, your car is sparking over here" as I'm turning the fastest times on the track and winning the race.

I just grinned, nodded, and kept the trigger pulled as hard as I could :laugh2:


IMG_4675.JPG


IMG_4673.JPG


IMG_4683.JPG


The thickness of the skins issue may have been my fault, if it was I apologize.

I theorized some more flag spacing may be needed in order to compensate for the addition of the skin, so I guessed and added a 5 thou.

The first thing I checked after a few practice laps was the scum patterns. I was happy with what I saw and it worked fine so I didn't change it.


Anyway, the skins don't conduct electricity so those days are over for me :victory:


  • Ralph Thorne likes this

Paul Wolcott


#59 gotboostedvr6

gotboostedvr6

    Posting Leader

  • Full Member
  • PipPipPipPipPipPipPip
  • 2,321 posts
  • Joined: 19-July 11
  • Gender:Male
  • Location:Mt. Laurel

Posted 16 January 2017 - 01:57 PM

The next thing I purchase at the track will end up being one of those skins.
  • Ralph Thorne likes this
David Parrotta

#60 Greg VanPeenen

Greg VanPeenen

    Checkered Flag in Hand

  • Subscriber
  • PipPipPipPipPipPip
  • 1,200 posts
  • Joined: 26-March 10
  • Gender:Male
  • Location:MI

Posted 16 January 2017 - 08:42 PM

Paul,
 
Great build and a great read.
 
I have one question.
 
I have a diamond tool for spot facing the guide tongue top and bottom and the guide making sure everything is flat. I just came up from the work shop where I was working on two of the new JK chassis. Found the same thing with the tongues on both as they also had a slight downward tilt fixed that and then went to spot-face the guide tongue and found the top needed a little clean up then checked the bottom side and both needed extensive work to get them flat on the bottom.
 
I was wondering if you did this and found the same thing and just overlooked telling us.
 
Love your builds.

Greg VanPeenen
Greg VanPeenen
12/4/49-4/17/24
Requiescat in Pace

#61 Pablo

Pablo

    Builder

  • Administrator
  • PipPipPipPipPipPipPipPip
  • 18,437 posts
  • Joined: 20-February 06
  • Gender:Male
  • Location:Cleveland, Tennessee

Posted 16 January 2017 - 11:42 PM

Thanks for the kudos, GVP, and thanks for asking the question.  :)


No, I didn't overlook posting about facing the tongue - look at my post #15 on page 1, a very sexy faced tongue if I do say so myself  :crazy:


Years ago Greg Wells started training me on flexi building and I've been fortunate to have learned from his vast knowledge along with many other greats.


PA Watson, Jay Guard, Bill Fernald, Danny Zona, JC Martin, Biscuit, Swiss... I could go on. But the times, they are a changin' and the chassis have changed.


What worked on a T-Flex may or may not apply to a C11 or a C43. But some things will never change, like the importance of a smooth flag rotation.


My late night conversations after a day's racing with Greg and Jay always ended in agreement that a perfectly-faced flag and tongue with minimal wobble was optimum.


Having the hole slightly larger than need be was not considered bad. In other words, allow the flag to move laterally but keep the wobble minimized.


Swiss school of flag wobble suggests a "looser" flag connection is not a problem and he proved it in actual track experiments. Sorry if I didn't word that right but it influenced my thinking.


So my mindset nowadays is to make the rotation as perfect as possible but don't overthink it, and error on the side of "loose." If it self-centers every time but needs the nut a little looser to make it happen, I'm fine with it.


GVP, I don't know what tools you are using for adjusting tilt and facing. Here is what I use:


- The reason I like using a Tongue Tweaker to adjust tilt instead of just a bolt and nuts is, the washers are large and strong enough to adjust the entire rotating surface of the tongue as opposed to just bending a piece of it. I hold the Tweaker in one hand and hold the chassis down tight on a flat block so I'm only bending the tongue.


It's tricky on a stamped steel chassis – bend just a portion of the tongue and you end up with a creased tongue. Let the chassis lift off the block when you tweak it and you end up with a bent chassis with perfect tilt.


- You call it "spot-facing" and I don't know what that is or what tool you are using. Here is what I use:


tool.jpg


That's probably a lot more info than you bargained for, but I hope some of it may help you.


I didn't have any problem adjusting my C43 tilt and facing was easy.


  • Cheater and old & gray like this

Paul Wolcott


#62 Pablo

Pablo

    Builder

  • Administrator
  • PipPipPipPipPipPipPipPip
  • 18,437 posts
  • Joined: 20-February 06
  • Gender:Male
  • Location:Cleveland, Tennessee

Posted 01 April 2017 - 09:57 PM

My sexy C43 won GTP today.  :dance3:


  • Cheater, Wizard Of Iz, Samiam and 4 others like this

Paul Wolcott


#63 Pablo

Pablo

    Builder

  • Administrator
  • PipPipPipPipPipPipPipPip
  • 18,437 posts
  • Joined: 20-February 06
  • Gender:Male
  • Location:Cleveland, Tennessee

Posted 09 April 2017 - 04:54 PM

Here is are my second post-race inspection results:


-rear clearance check - more than enough remains - matter of fact, too much. My notes say .690 give the required .032 but I had them at .697.

I put 'em on the Hudy and spun to check for concentricity. They looked fine, so I took 'em down to .692 and called it done.


-thin yellow lead wires did their job fine for 2 races, but I don't have enough confidence or love for them to attempt 3. So they will be changed.


IMG_5539.JPG


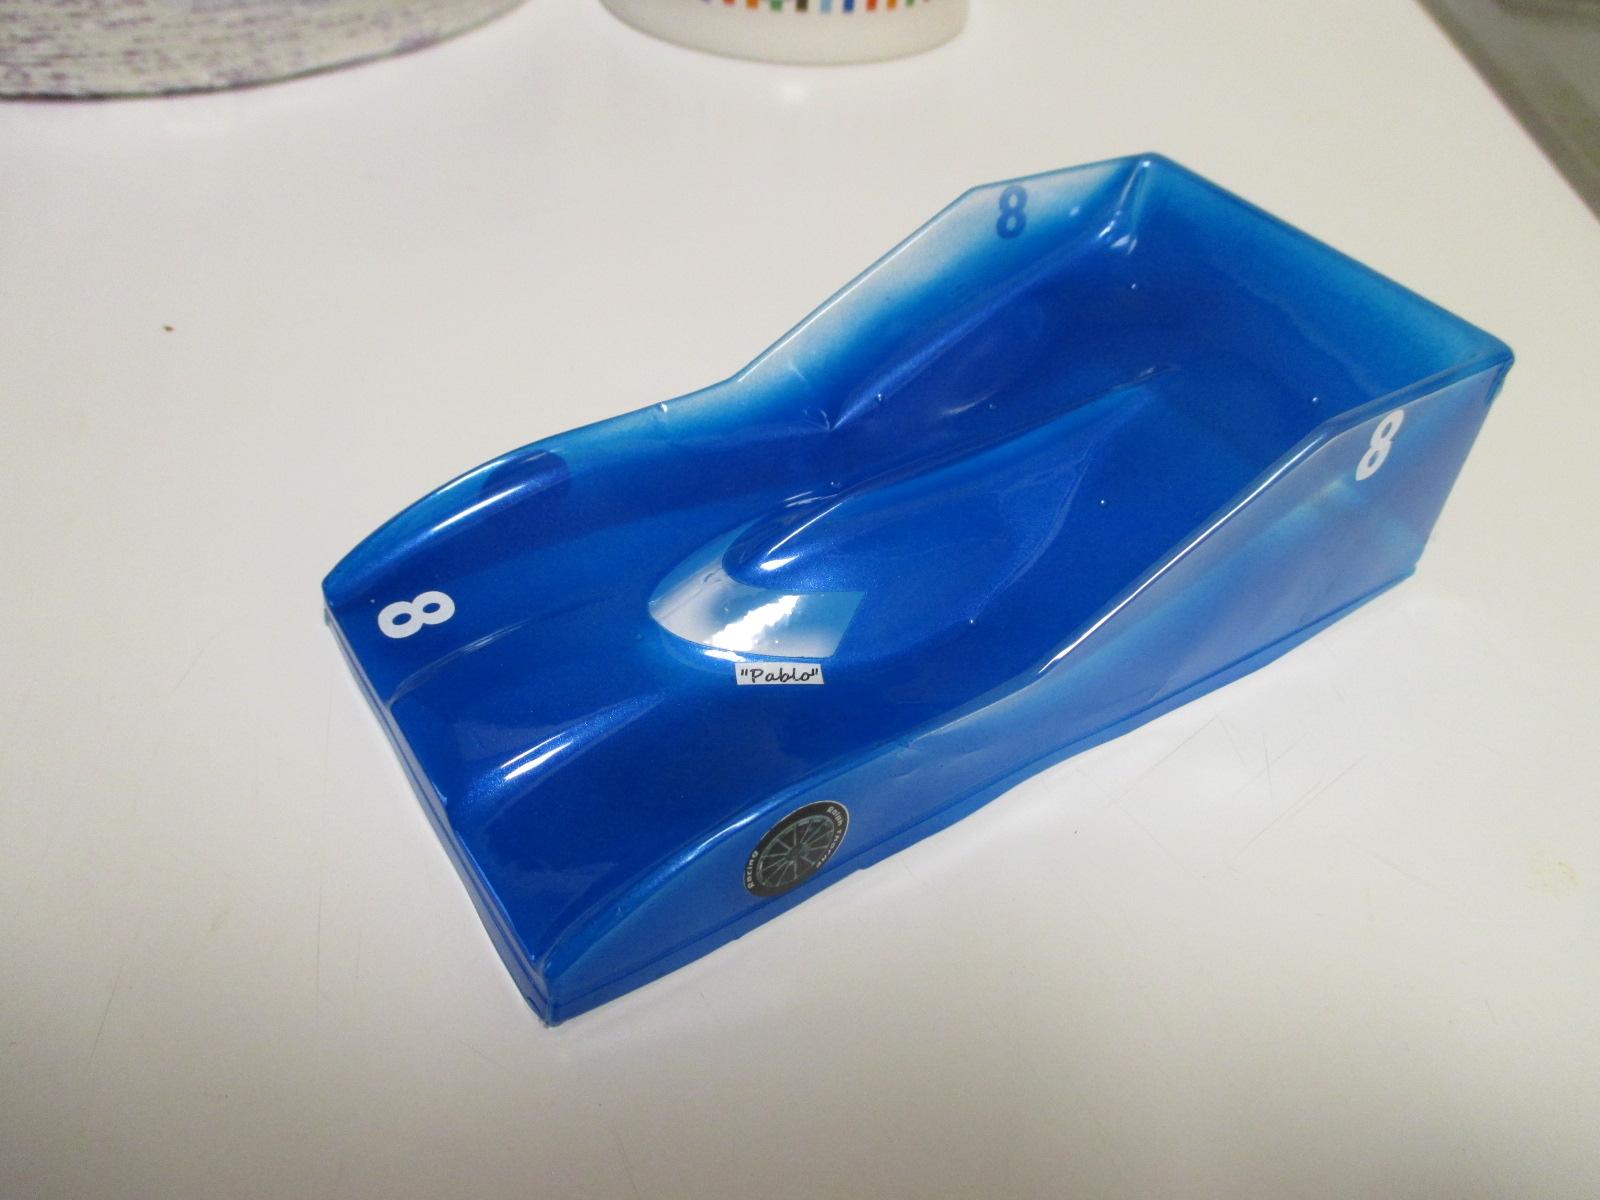
-7 thou Bentlee body was an enamel paint color experiment for one of my vintage butyrate builds. It served it's purpose but is done.


IMG_5541.JPG


-new Ralph Thorne 5 thou Warrior body, rattle can painted with Testors One Coat Lacquer


IMG_5548.JPG


-my read of the scum pattern is slightly more than I like up front, and almost none in the middle and rear. To compensate, I'll add a 5 thou spacer to the flag and I've already lowered the rear by trimming the wheels. No welding burns, and I enjoy thinking it keeps my motor happy. You can debate the theory one way or the other all you want, but the fact is the competition cooked a motor trying to beat me  :)


IMG_5552.JPG


Paul Wolcott


#64 Eddie Fleming

Eddie Fleming

    Posting Leader

  • Subscriber
  • PipPipPipPipPipPipPip
  • 2,890 posts
  • Joined: 27-April 14
  • Gender:Male
  • Location:Fayetteville, GA USA

Posted 09 April 2017 - 05:59 PM

Question Pablo. When you say no welding marks are you talking about burn marks from the chassis shorting to the track braid?


Eddie Fleming

#65 Pablo

Pablo

    Builder

  • Administrator
  • PipPipPipPipPipPipPipPip
  • 18,437 posts
  • Joined: 20-February 06
  • Gender:Male
  • Location:Cleveland, Tennessee

Posted 09 April 2017 - 06:47 PM

Yup. See the photos in my post #111. Whatever you want to call it, if it causes pits in the chassis it is, IMO, most certainly capable of doing bad things to a $13 motor.


Not a plug for the skin product, just letting you know my mindset when I opened my wallet and bought one :to_become_senile: I like mine for sure.


  • Ralph Thorne likes this

Paul Wolcott


#66 Pablo

Pablo

    Builder

  • Administrator
  • PipPipPipPipPipPipPipPip
  • 18,437 posts
  • Joined: 20-February 06
  • Gender:Male
  • Location:Cleveland, Tennessee

Posted 09 April 2017 - 07:17 PM

Next step - motor examination. Using geezer goggles over my 3X reading glasses, I shine a light at the comm area.

Brushes are about 75%, comm track is even, don't see any obvious problems, wire color looks like new.

Gears look fine, BB's still good, axle still straight, no broken solder joints. Ready to race again.


Note the keepers on the axle, made by cutting the hubs off old wheels - they cost nothing. Next race, I know the wheels will be in perfect position again.


IMG_5554.JPG


Paul Wolcott


#67 Pablo

Pablo

    Builder

  • Administrator
  • PipPipPipPipPipPipPipPip
  • 18,437 posts
  • Joined: 20-February 06
  • Gender:Male
  • Location:Cleveland, Tennessee

Posted 09 April 2017 - 08:33 PM

Pardon my jumping ahead a little, but I have run out of bulletproofing.

Took a piece of painted 7 thou Lexan and placed double sided wing tape over it.

The result is, slightly thinner (lighter) than store-bought stuff, and works fine :ok:


IMG_5557.JPG


John C. Martin is the absolute king of body mounting preventive tips, and I bow to him and all my other great mentors of flexi racing :good: :D


  • Danny Zona likes this

Paul Wolcott


#68 Pablo

Pablo

    Builder

  • Administrator
  • PipPipPipPipPipPipPipPip
  • 18,437 posts
  • Joined: 20-February 06
  • Gender:Male
  • Location:Cleveland, Tennessee

Posted 10 April 2017 - 08:46 AM

With all the attention to detail on chassis and body setup, it just makes sense to check the body clips also.

Flag clips, flag, and washers cleaned. New Prime braid trimmed and ready.


The flag shaft had a sliver of loose thread near the base, which I removed. Checked for cracks, then a pass through my flag sander gizmo.


The flag had 20 thou of spacers underneath and a spare 10 thou up top. I'll add a 5 thou under.


IMG_5559.JPG


Paul Wolcott


#69 Pablo

Pablo

    Builder

  • Administrator
  • PipPipPipPipPipPipPipPip
  • 18,437 posts
  • Joined: 20-February 06
  • Gender:Male
  • Location:Cleveland, Tennessee

Posted 10 April 2017 - 09:56 AM

Now that I'm done reading my scum pattern, time to clean up and check the chassis.


I checked for 2 things on the bite bars:

-straightness (one of them had a very slight tweak)

-"paper clip" ends bent slightly up so only the bar itself influences the chassis

(in other words, checking to ensure they are exactly the same as I made them in post # 14)


IMG_5562.JPG


Pan section was very slightly tweaked in a couple places and only took a minute to make it flat again.

I also ran wires (.039" front and .047" rear) through the holes to eyeball proper athwartship alignment - it was fine


IMG_5564.JPG


Center section had a very slight tweak and was also easy to fix. Tongue tilt checked in both axis and it's still good


IMG_5565.JPG


C43 steel is harder yet seems easier to work with compared to Cheetah chassis. Better memory? :)


Paul Wolcott


#70 Pablo

Pablo

    Builder

  • Administrator
  • PipPipPipPipPipPipPipPip
  • 18,437 posts
  • Joined: 20-February 06
  • Gender:Male
  • Location:Cleveland, Tennessee

Posted 10 April 2017 - 04:59 PM

New lead wires - these white ones from PCH are OK for a race or two, but not near as good as the old Alpha white.

Note the insulation already failing on the positive wire where I bent it - this would not happen on quality wire.


IMG_5569.JPG


It will last a race or two, just like the yellow did. I'm open to suggestions on a new lead wire that makes me happy.


Paul Wolcott


#71 Pablo

Pablo

    Builder

  • Administrator
  • PipPipPipPipPipPipPipPip
  • 18,437 posts
  • Joined: 20-February 06
  • Gender:Male
  • Location:Cleveland, Tennessee

Posted 11 April 2017 - 04:19 PM

C43 ready for battle (again). In summary, it was a simple inspect/clean-up/fine tune event.


IMG_5571.JPG


The new Warrior body is very nicely made, consistent thickness, cut lines clearly marked, easy to mount and trim.


IMG_5574.JPG


Having a clean, prepped car at the start of a race doesn't guarantee success.

But I wonder how much care the competitor's cars had before the power comes on.


Confidence gives you an edge. Hope some of this info helps you, and good racing.  :)


  • Ralph Thorne and pmwslots like this

Paul Wolcott


#72 Wizard Of Iz

Wizard Of Iz

    Slot Parrothead

  • Subscriber
  • PipPipPipPipPipPip
  • 1,845 posts
  • Joined: 15-November 06
  • Gender:Male
  • Location:Jacksonville, FL

Posted 11 April 2017 - 08:09 PM

Pablo... thank you for the write-up.


Two quick questions...


Have you tried the new aluminum pan for the C43?


Is there a particular reason for putting the "J" end of the J-Bars on the same side?  Or, just coincidence?


  • Dave Person likes this

Rollin Isbell


#73 Pablo

Pablo

    Builder

  • Administrator
  • PipPipPipPipPipPipPipPip
  • 18,437 posts
  • Joined: 20-February 06
  • Gender:Male
  • Location:Cleveland, Tennessee

Posted 12 April 2017 - 07:49 AM

No, and I probably won't, since I feel I have plenty of speed. Where I race the limiting factor seems to be passing lappers clean.


As far as I know, makes no difference which side the paper clip end is on. Other than having the up bend I use on the correct side.


My take is, the paper clip bends are not intended to do anything other than make installation and removal easy and quick. They do that job well.


  • Wizard Of Iz likes this

Paul Wolcott


#74 JK Products

JK Products

    On The Lead Lap

  • Full Member
  • PipPipPipPip
  • 205 posts
  • Joined: 12-December 15
  • Gender:Male
  • Location:Carson City, NV

Posted 12 April 2017 - 04:07 PM

That is correct Pablo, just to retain the bar and be removable. The bar, and not the J should be the "active" component.


  • bluecars likes this

Tim Homola
JK Products


#75 Pablo

Pablo

    Builder

  • Administrator
  • PipPipPipPipPipPipPipPip
  • 18,437 posts
  • Joined: 20-February 06
  • Gender:Male
  • Location:Cleveland, Tennessee

Posted 12 April 2017 - 04:13 PM

:)


Paul Wolcott


Electric Dreams Online Shop