Jump to content


Photo

Ferrari 330 P4 comes back to life


  • Please log in to reply
90 replies to this topic

#1 Pablo

Pablo

    Builder

  • Administrator
  • PipPipPipPipPipPipPipPip
  • 18,438 posts
  • Joined: 20-February 06
  • Gender:Male
  • Location:Cleveland, Tennessee

Posted 09 December 2016 - 07:32 PM

Nice 45+ year old paint job/interior on a Dynamic body with original box and instruction sheet


IMG_4087.JPG


IMG_4077.JPG


First thing I did was secure the instruction sheet on a flat surface in an attempt to flatten the creases out


IMG_4071.JPG


Body has curling issues - I'll do is the best I can to get it up and running with a period endbell drive 16D motor and inline jaildoor chassis


IMG_4082.JPG


  • Jencar17, Tex, Bud Greene and 1 other like this

Paul Wolcott


#2 Bill from NH

Bill from NH

    Age scrubs away speed!

  • Full Member
  • PipPipPipPipPipPipPipPip
  • 14,702 posts
  • Joined: 02-August 07
  • Gender:Male
  • Location:New Boston, NH

Posted 09 December 2016 - 07:46 PM

I use a stack of books or magazines to straighten out unflat sheets. A steam iron on a low setting would probably work, too.
  • tonyp likes this
Bill Fernald
 
I intend to live forever!  So far, so good.  :laugh2:  :laugh2: 

#3 Pablo

Pablo

    Builder

  • Administrator
  • PipPipPipPipPipPipPipPip
  • 18,438 posts
  • Joined: 20-February 06
  • Gender:Male
  • Location:Cleveland, Tennessee

Posted 09 December 2016 - 07:57 PM

Thanks Bill. I'll lay a big heavy book on top tonight.

Of the instruction sheet, that is :)


Curling solutions for old bodies welcomed also......


Paul Wolcott


#4 dc-65x

dc-65x

    Grand Champion Poster

  • Subscriber
  • PipPipPipPipPipPipPipPip
  • 6,937 posts
  • Joined: 14-February 06
  • Gender:Male
  • Location:Captain Rick: The only vintage slot car nut in SW Oregon?

Posted 09 December 2016 - 08:49 PM

That's a really cool body Pablo. Should be an interesting project. Thanks for sharing it!


Rick Thigpen
Check out Steve Okeefe's great web site at its new home here at Slotblog:
The Independent Scratchbuilder
There's much more to come...


#5 Pablo

Pablo

    Builder

  • Administrator
  • PipPipPipPipPipPipPipPip
  • 18,438 posts
  • Joined: 20-February 06
  • Gender:Male
  • Location:Cleveland, Tennessee

Posted 15 December 2016 - 11:36 AM

Thanks, Rick :)  I scanned the instruction sheet - if anybody wants it let me know - it has some good info.


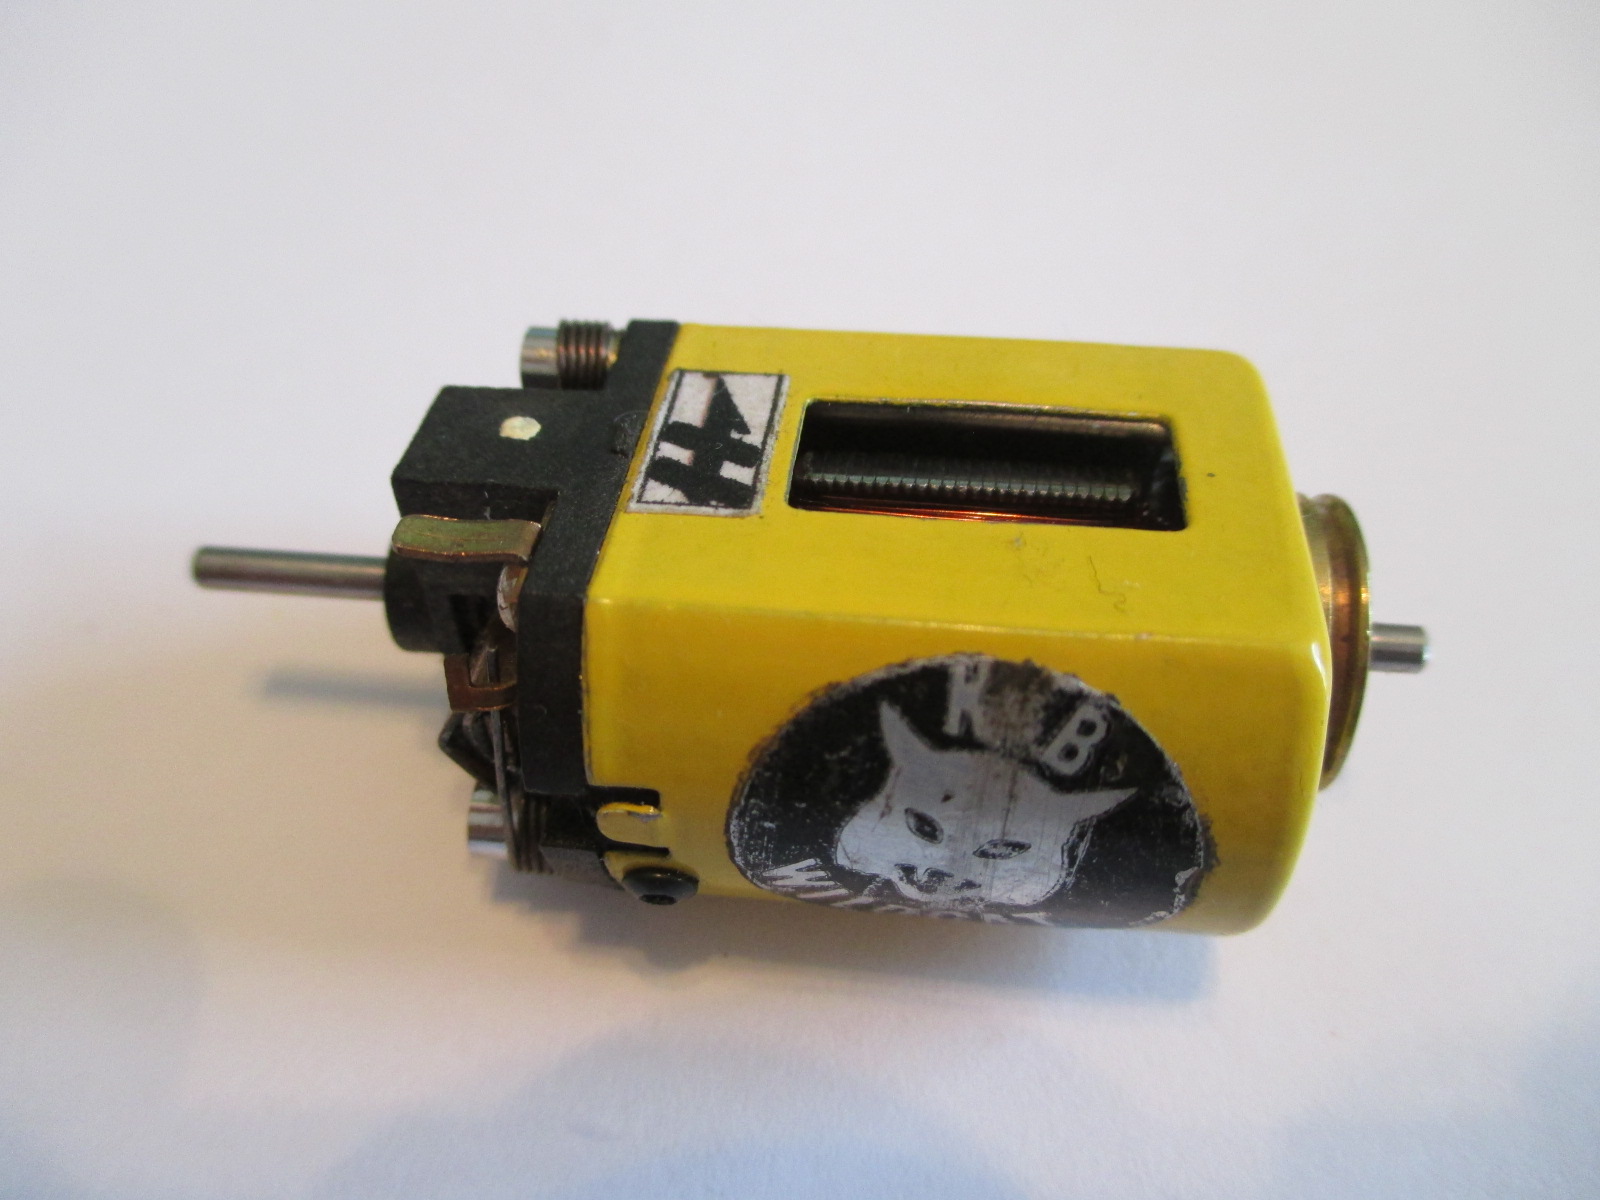
Motor will be a Havlicek built K & B Wildcat 16D with Tradeship endbell and stock gimbal can bushing


IMG_4172.JPG


  • Jencar17, Samiam and C. J. Bupgoo like this

Paul Wolcott


#6 Pablo

Pablo

    Builder

  • Administrator
  • PipPipPipPipPipPipPipPip
  • 18,438 posts
  • Joined: 20-February 06
  • Gender:Male
  • Location:Cleveland, Tennessee

Posted 16 December 2016 - 10:54 AM

Parts gathering for this build was kind of a "collect everything that may work" deal due to the body.

At this point the only sure things are:

Car Model 1968 rules - 3/4" OD fronts, 7/8" OD X 5/8" wide rears
WB 3 7/8"

GL 3/4"

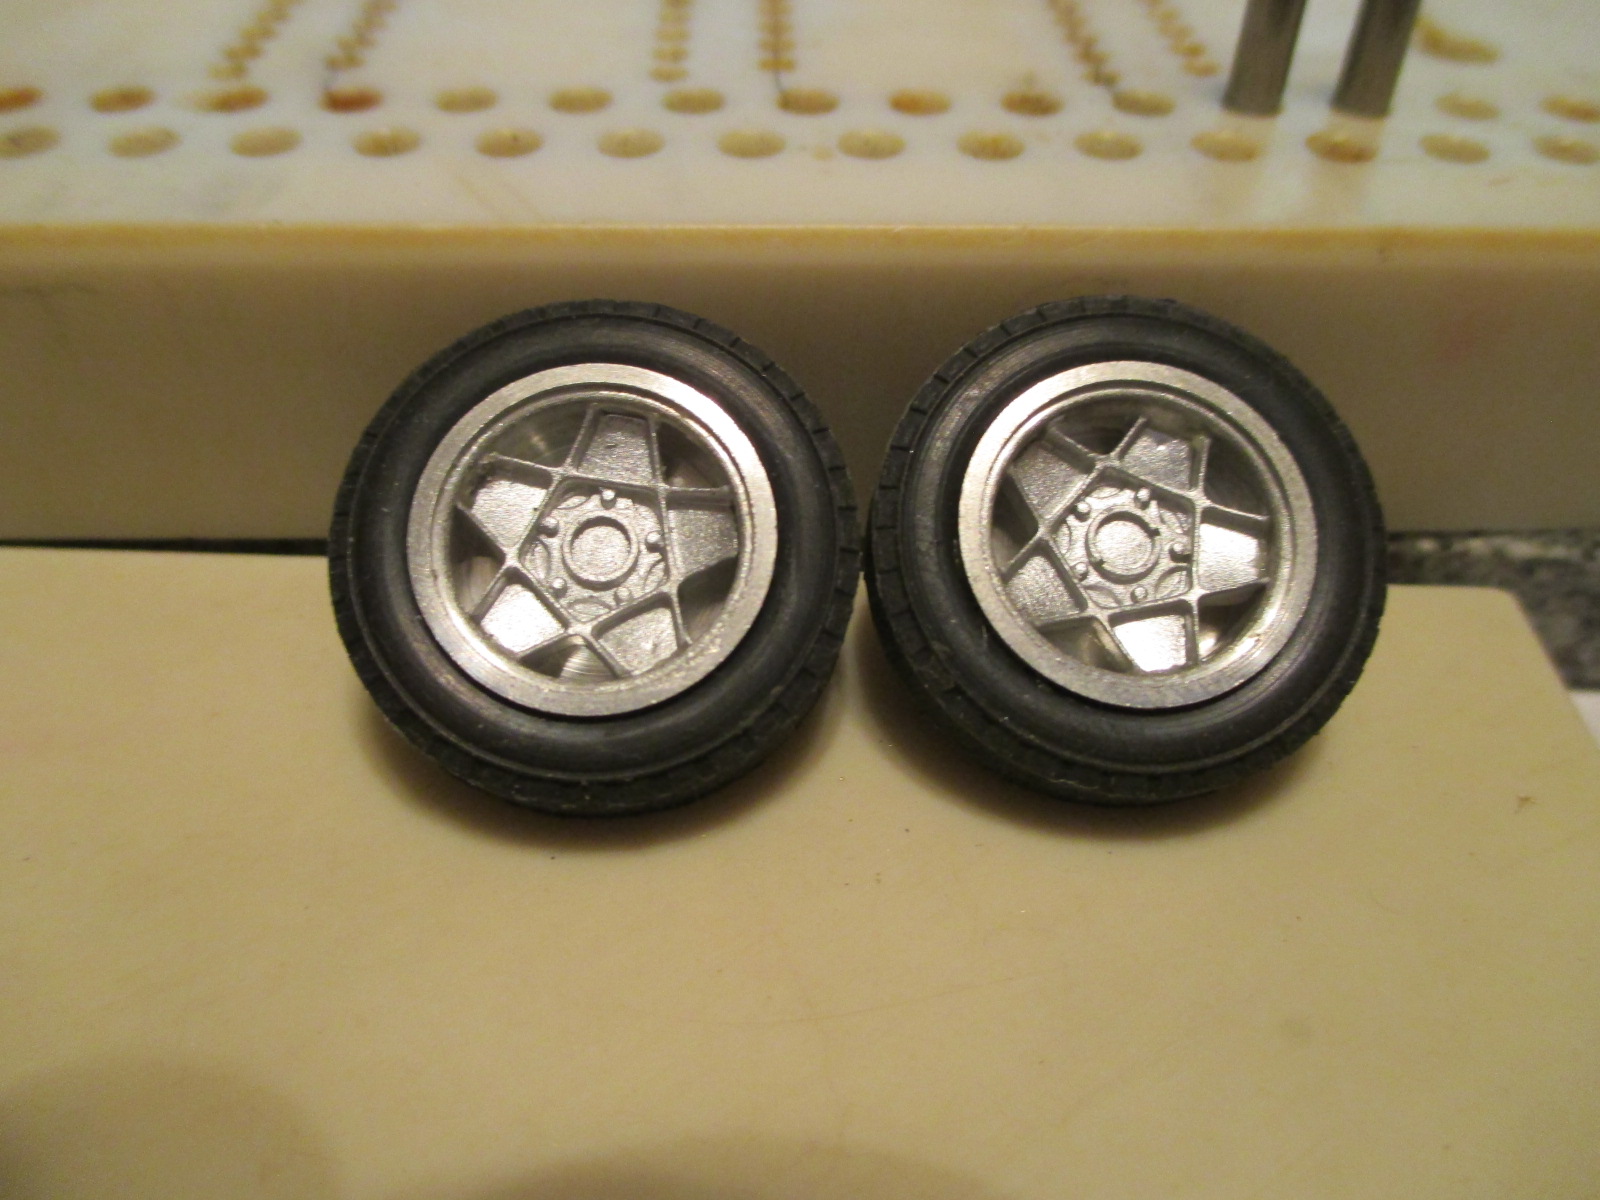
Professor Motor Russkit replica wheels

EJ's #15 front tires

Orange donuts rear

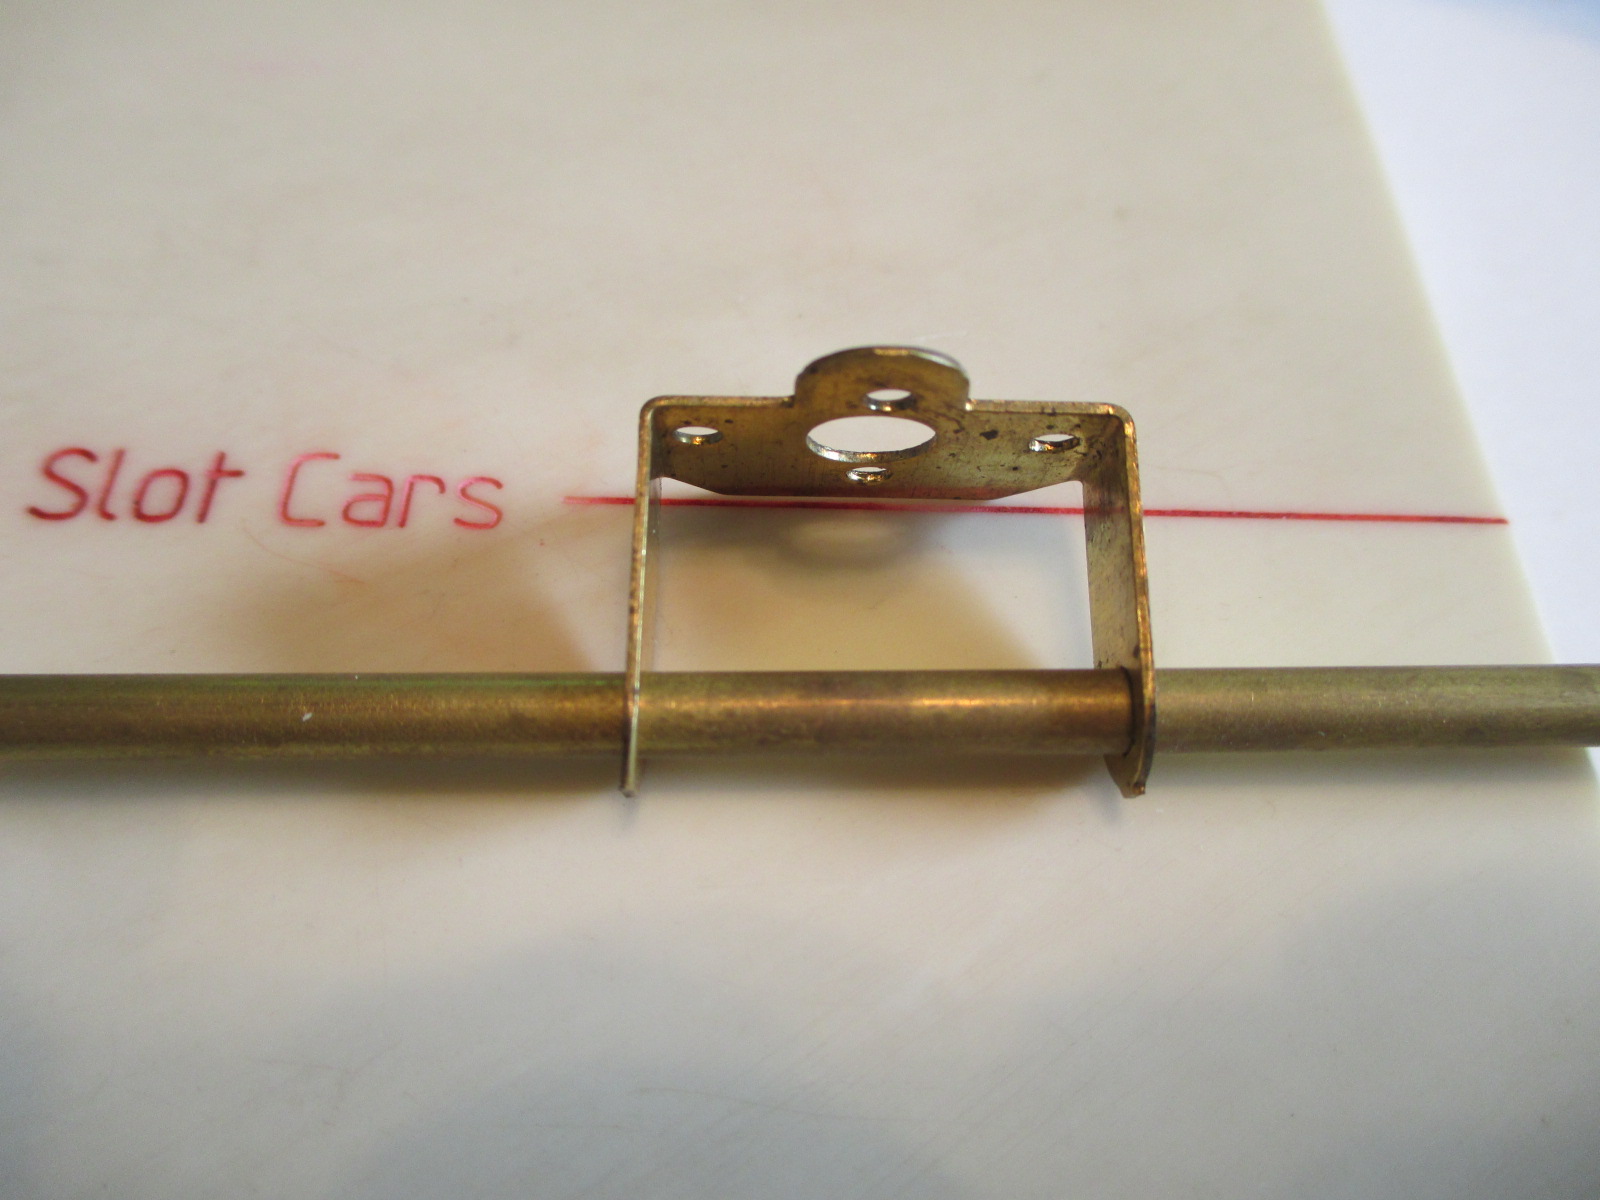
Castleton motor bracket, with axle riding in tubing

7T Sonic steel pinion

Cox 33T crown gear


IMG_4177.JPG


  • Jencar17 likes this

Paul Wolcott


#7 gc4895

gc4895

    On The Lead Lap

  • Full Member
  • PipPipPipPip
  • 493 posts
  • Joined: 04-March 16
  • Gender:Male
  • Location:Walnut Creek, CA

Posted 16 December 2016 - 01:09 PM

This is a fun topic for me. My first slotcar back in the 60's-not a La Cuch or Cox Chaparral-was a Champion jaildoor chassis, Champion 16d motor with THIS Ferrari body - though painted by me with a rattle can. That was my "gateway drug". Next thing I knew I had an Ungar iron, Champion jig, borrowing my dad's Dremel tool and was buying piano wire and brass rod. Lots of late nights and chassis with way too much solder on them.


  • Pablo likes this
Mark Bauer

#8 Pablo

Pablo

    Builder

  • Administrator
  • PipPipPipPipPipPipPipPip
  • 18,438 posts
  • Joined: 20-February 06
  • Gender:Male
  • Location:Cleveland, Tennessee

Posted 16 December 2016 - 08:13 PM

Not much has changed for me - still soldering late at night, but now I suck up excess solder with "Soder-Wick" :)

Nowadays I have things I didn't in 1966 - patience, lots of tools, access to parts, and helpful friends worldwide at the click of a few buttons.


Haven't found a Castleton bracket yet that was even close to being true like a Russkit. This one was no exception.

Bad bends, misaligned holes, arch above upper hole needs complete reshaping, etc. so it took a couple hours to get it right.


The (trued) bracket, when attached to the Wildcat and sitting face vertical at ground zero, will result in the motor being level and elevated just a hair.

Now all I have to do is jig the height for .062" clearance using .875 wheels, make the face sit square with bottom edge on the block, and tack the tubes.

No bushings or bearings - just tubing - and my centering methods will be done differently this time.

I just used a long piece and didn't centering anything perfectly - yet - gonna use my dc-65x gizmo for all four cuts :dance3:


IMG_4180.JPG


  • Jencar17 and C. J. Bupgoo like this

Paul Wolcott


#9 Bill from NH

Bill from NH

    Age scrubs away speed!

  • Full Member
  • PipPipPipPipPipPipPipPip
  • 14,702 posts
  • Joined: 02-August 07
  • Gender:Male
  • Location:New Boston, NH

Posted 16 December 2016 - 09:17 PM

I have a question on the Castleton motor bracket from your photo. What are the horizontal holes used for? Absent on the Russkit bracket, are they for mounting the small Hemi can? What size is the motor bushing hole between the vertical mounting holes on the Castleton brackets? Is it 6 mm? I've not had any Castleton brackets, but I'm thinking they were made to fit more than just an endbell mounted Mabuchi.


Bill Fernald
 
I intend to live forever!  So far, so good.  :laugh2:  :laugh2: 

#10 Pablo

Pablo

    Builder

  • Administrator
  • PipPipPipPipPipPipPipPip
  • 18,438 posts
  • Joined: 20-February 06
  • Gender:Male
  • Location:Cleveland, Tennessee

Posted 16 December 2016 - 09:48 PM

Horizontal holes are same spacing as horizontal holes on a REHCO. I don't know what they are for.

Big hole is same as Russkit - .250"/6.35mm


Tube secured and bracing done


IMG_4187.JPG


  • Jencar17 and C. J. Bupgoo like this

Paul Wolcott


#11 Bill from NH

Bill from NH

    Age scrubs away speed!

  • Full Member
  • PipPipPipPipPipPipPipPip
  • 14,702 posts
  • Joined: 02-August 07
  • Gender:Male
  • Location:New Boston, NH

Posted 16 December 2016 - 11:44 PM

The horizontal holes on a REHCO bracket are to fit a Hemi can which has a 6 mm can bushing, So these Castleton brackets are either modified (Russkits) or manufactured to fit Hemi cans & Mabuchi 16D endbells.


Bill Fernald
 
I intend to live forever!  So far, so good.  :laugh2:  :laugh2: 

#12 Pablo

Pablo

    Builder

  • Administrator
  • PipPipPipPipPipPipPipPip
  • 18,438 posts
  • Joined: 20-February 06
  • Gender:Male
  • Location:Cleveland, Tennessee

Posted 17 December 2016 - 11:01 AM

I'd say you are right on Castletons fitting a Hemi can.

They were probably NOT modified from Russkits due to the raised nub above the upper screw hole - it's wider and raised higher than the Russkit.

(note the poor alignment of the nub)


IMG_4196.JPG


Here's mine, a better view of my nub after modification


IMG_4204.JPG


Here's a stock one, Bill. Maybe they were designed for Hemi racing on right handed oval tracks ? :crazy:


IMG_4197.JPG


  • Jencar17 and C. J. Bupgoo like this

Paul Wolcott


#13 dc-65x

dc-65x

    Grand Champion Poster

  • Subscriber
  • PipPipPipPipPipPipPipPip
  • 6,937 posts
  • Joined: 14-February 06
  • Gender:Male
  • Location:Captain Rick: The only vintage slot car nut in SW Oregon?

Posted 17 December 2016 - 11:46 AM

IMHO the only good Castleton bracket is one Pablo or some other craftsman has spent hours working over! :D Otherwise they are junk.


Nice job Pablo.  :good: Great looking bracket and bracing.


Rick Thigpen
Check out Steve Okeefe's great web site at its new home here at Slotblog:
The Independent Scratchbuilder
There's much more to come...


#14 SlotStox#53

SlotStox#53

    Posting Leader

  • Full Member
  • PipPipPipPipPipPipPip
  • 4,084 posts
  • Joined: 13-March 13
  • Gender:Male
  • Location:TX

Posted 17 December 2016 - 12:01 PM

Looking forward to seeing how you straighten out the body on this one Pablo :)

With all the issues with the Castleton bracket you might as well use one of the REHco 16D ones.

HPower motor with a Pablo build, pure FUN :D

#15 Pablo

Pablo

    Builder

  • Administrator
  • PipPipPipPipPipPipPipPip
  • 18,438 posts
  • Joined: 20-February 06
  • Gender:Male
  • Location:Cleveland, Tennessee

Posted 17 December 2016 - 12:25 PM

I don't think there is any good solution to straightening the body. If it was unpainted that would be different.

It says in the instructions using too much paint will curl it, so I think straightening would be a disaster.

My plan is to simply make body mounts with lots of surface area that aren't sharp.


Did they have REHCO brackets in 1968 ?


Paul Wolcott


#16 SlotStox#53

SlotStox#53

    Posting Leader

  • Full Member
  • PipPipPipPipPipPipPip
  • 4,084 posts
  • Joined: 13-March 13
  • Gender:Male
  • Location:TX

Posted 17 December 2016 - 01:16 PM

Sounds like a good plan for having wide area body mounts/sides to keep it flat.

As for the REHco brackets in 68, have no clue but they are vintage brackets aren't they? Maybe not 68 vintage but still in the "spirit" ?

#17 Bill from NH

Bill from NH

    Age scrubs away speed!

  • Full Member
  • PipPipPipPipPipPipPipPip
  • 14,702 posts
  • Joined: 02-August 07
  • Gender:Male
  • Location:New Boston, NH

Posted 17 December 2016 - 01:28 PM

I doubt there is any good way of straightening out curled painted bodies either. At least I never found the way, if there was one. I didn't begin painting my own bodies until 1970, I don't know the type of paint(s) used by the likes of Lancer, Dubro, & Russkit, but not all factory painted bodies before that time curl. When you put the Castleton & Russkit brackets beside each other, it's real easy to see the Castleton isn't a modified Russkit bracket.On the Castleton is the nub offcenter or are the three vertical holes placed off center?  In the day, I never saw either the Castleton or REHCO mentioned or used. Everything used the Russkit. REHCO might have been around in 1966, I first became acquainted with them in 1967, but I have no idea when they began to carry the REHCO bracket. There was a period of time the pro racers used Hemi cans, my assumption is the Castleton & REHCO (Durbro?) brackets were both made then.


Bill Fernald
 
I intend to live forever!  So far, so good.  :laugh2:  :laugh2: 

#18 Pablo

Pablo

    Builder

  • Administrator
  • PipPipPipPipPipPipPipPip
  • 18,438 posts
  • Joined: 20-February 06
  • Gender:Male
  • Location:Cleveland, Tennessee

Posted 17 December 2016 - 06:22 PM

I marked and cut the tubes, trued the ends with the gizmo, removed the flash, and polished with 2,000 grit.

Axles and front axle tube cut to length and polished. Insides of tubes polished also.

7T Sonic soldered on and wire connection tabs tinned


IMG_4210.JPG


IMG_4223.JPG


  • Jencar17, Bud Greene and C. J. Bupgoo like this

Paul Wolcott


#19 Pablo

Pablo

    Builder

  • Administrator
  • PipPipPipPipPipPipPipPip
  • 18,438 posts
  • Joined: 20-February 06
  • Gender:Male
  • Location:Cleveland, Tennessee

Posted 17 December 2016 - 06:32 PM

I need one pair (2) of these BWA Ferrari inserts, .500 OD for the rears. Can anybody help ?

I have lots of other inserts and parts to trade, or cash


IMG_4224.JPG


  • Jencar17 and Bud Greene like this

Paul Wolcott


#20 Eddie Fleming

Eddie Fleming

    Posting Leader

  • Subscriber
  • PipPipPipPipPipPipPip
  • 2,892 posts
  • Joined: 27-April 14
  • Gender:Male
  • Location:Fayetteville, GA USA

Posted 17 December 2016 - 07:15 PM

Where did you get the Gizmo? I have a case trimmer for reloading but have yet to make it work that well.


The build looks great so far by the way.


Eddie Fleming

#21 Pablo

Pablo

    Builder

  • Administrator
  • PipPipPipPipPipPipPipPip
  • 18,438 posts
  • Joined: 20-February 06
  • Gender:Male
  • Location:Cleveland, Tennessee

Posted 17 December 2016 - 07:35 PM

Thanks Eddie. It came from McMaster-Carr.


Paul Wolcott


#22 gc4895

gc4895

    On The Lead Lap

  • Full Member
  • PipPipPipPip
  • 493 posts
  • Joined: 04-March 16
  • Gender:Male
  • Location:Walnut Creek, CA

Posted 18 December 2016 - 12:53 PM

Ok, I have spent the last hour pouring over the McMasters catalog. Alas, to no avail. Not being a machinist by trade I don't know what to properly call the afor mentioned "gizmo". Consequently out of the 550,000 items they carry I can't end up in the correct department. Can anyone help with correct terminology? I would really enjoy some square tube ends! Thank you!
Mark Bauer

#23 Samiam

Samiam

    Posting Leader

  • Subscriber
  • PipPipPipPipPipPipPip
  • 4,763 posts
  • Joined: 18-January 12
  • Gender:Male
  • Location:Long Island, NY

Posted 18 December 2016 - 02:45 PM

It is some sort of end mill. Not sure if the bore is custom or just a run of the mill item.


Sam Levitch
 
"If you have integrity, nothing else matters, and if you do not have integrity, nothing else matters."
    Robert Mueller, special counsel (2013)
 
"... because people have got to know whether or not their president is a crook."
    Richard M .Nixon, Nov 17, 1973
 
"Fool me once, same on... shame on you. Fool me... you can't get fooled again."
    George W. Bush

#24 dc-65x

dc-65x

    Grand Champion Poster

  • Subscriber
  • PipPipPipPipPipPipPipPip
  • 6,937 posts
  • Joined: 14-February 06
  • Gender:Male
  • Location:Captain Rick: The only vintage slot car nut in SW Oregon?

Posted 18 December 2016 - 03:52 PM

It's called a "tight-spot" reverse counterbore:


https://www.mcmaster...rbores/=15iy7tb


You might also like the "changable-pilot" counterbores


When possible I often spin the tube in a drill motor and dress the end with the side of a Dremel cut off wheel.


Rick Thigpen
Check out Steve Okeefe's great web site at its new home here at Slotblog:
The Independent Scratchbuilder
There's much more to come...


#25 Pablo

Pablo

    Builder

  • Administrator
  • PipPipPipPipPipPipPipPip
  • 18,438 posts
  • Joined: 20-February 06
  • Gender:Male
  • Location:Cleveland, Tennessee

Posted 18 December 2016 - 03:53 PM

Mark, now you know why I call it a "gizmo".

Looked through my files and the receipt has been purged long ago.

Looked at my order history and it's not listed.


I see dc-65x has come to your rescue :)


Paul Wolcott


Electric Dreams Online Shop