Jump to content


Photo

1967 Car Model magazine series sports car build


  • Please log in to reply
138 replies to this topic

#26 Steve Okeefe

Steve Okeefe

    The Independent Scratchbuilder

  • Administrator
  • PipPipPipPipPipPip
  • 1,134 posts
  • Joined: 16-February 06
  • Gender:Male
  • Location:State of Independence

Posted 05 May 2018 - 12:29 PM

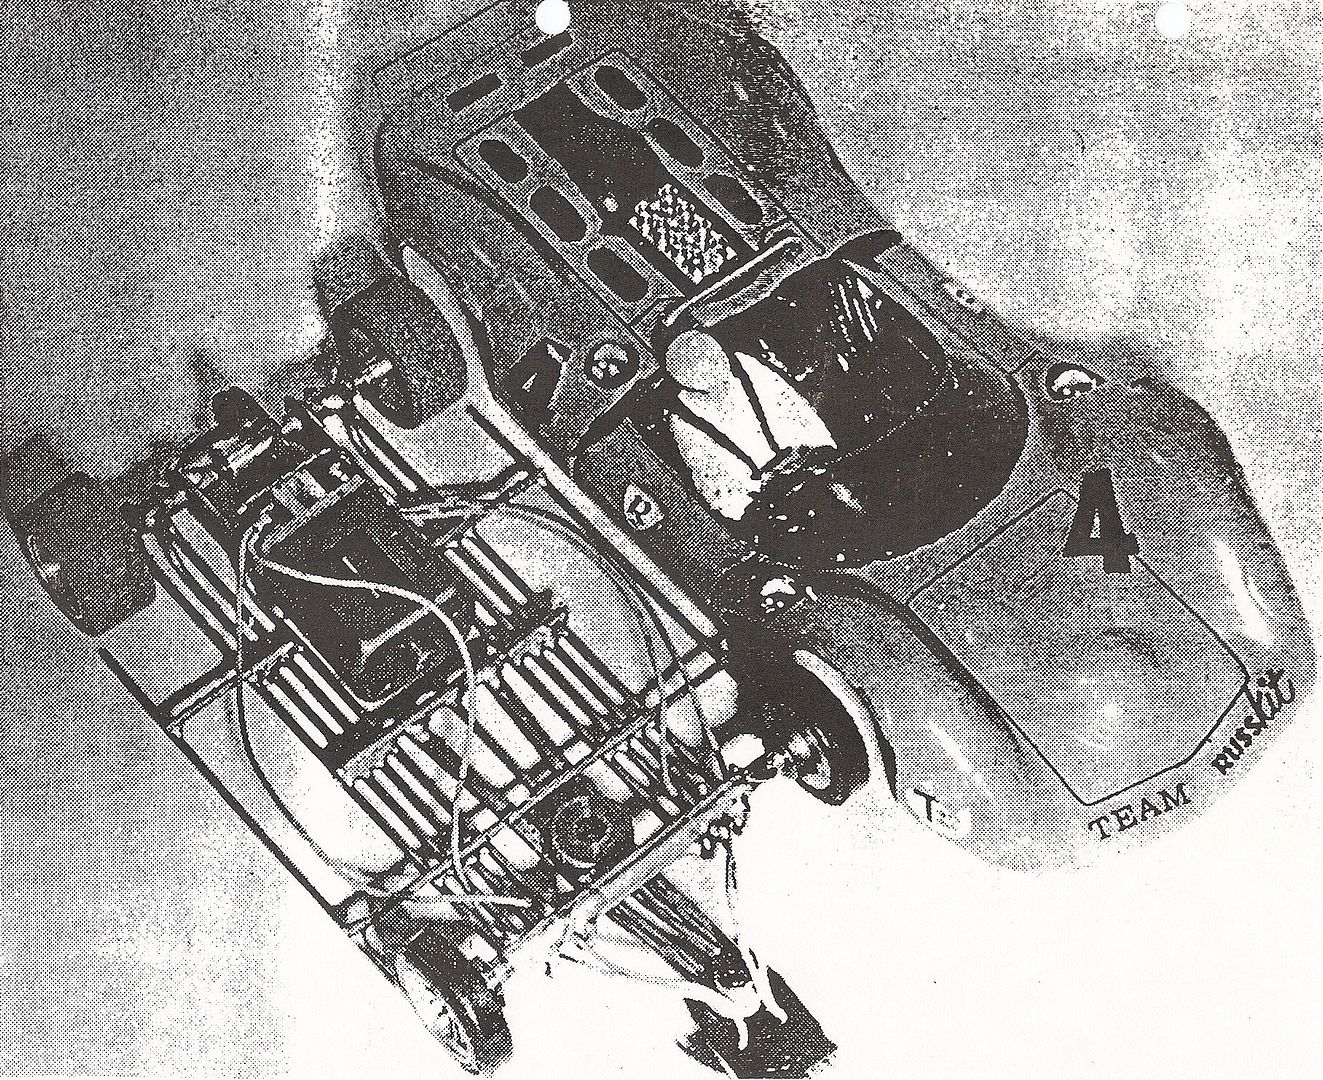
Steve, didn't you wind Rick's arm to be blow-proof anyway? :laugh2:


Of course!  I can guarantee 80,000 RPM with a flat torque curve running ice cold on early 1967 Buzz-a-Rama transformer power!  Don't all the period motor and rewinding ads guarantee that?   :dance3:


And if you believe the hype, I've got this bridge I'd like to sell you (and it's conveniently located only a few miles from Buzzy's too!)  There is of course no such thing as a "blow proof" arm, or pretty much any other motor related component.  In this case, the 52 year old NOS Tradeship commutator could easily explode after only a few laps.  :pardon:


From the historical standpoint for those who might be interested, at the beginning of 1967, rewinders had these little motors running at 100 to 300% overload (compared to their stock form).  Notwithstanding the notoriously poor efficiency ratings (another whole show in another tent), clocking a motor at two to four times it's designed power meant a great deal more heat was being produced.  None of this about excessive heat is news to anyone who tried to build competitive slot racing motors in 1967.


In the real world white Mabuchi endbells were never intended to withstand this sort of thermal abuse, but in early 1967 there were as yet no alternatives and no improved protection from the heat (ie: post protectors or the like).  As a result you had a situation where anything you do as a motor builder that does not help maintain or improve efficiency or cooling or both, is an engraved invitation to disaster - no matter how much horsepower you've managed to eek out of the motor.  Aside from having the motor blow up late in the race, a snoot-full of melted white nylon endbell will help punctuate that point.


29 gauge wire is about the practical limit for an unprotected white Mabuchi endbell, and 65 turns (although not easy to cram in neatly on a period blank) is better than 60 or 55 or anything less because it helps maintain the amp-turns while restricting the total amps flowing through the motor.  Good strong magnets and moderate comm timing will also help restrict the total amps by increasing the back-emf, and provide additional torque to boot.  It's all a balancing act with the Mabuchi melt-o-matic being the limiting factor.


Barring unforeseen comm explosions, I think this little arm will do just fine.  :wink3:


  • Tex and Geary Carrier like this

Steve Okeefe


I build what I likes, and I likes what I build


#27 SlotStox#53

SlotStox#53

    Posting Leader

  • Full Member
  • PipPipPipPipPipPipPip
  • 4,084 posts
  • Joined: 13-March 13
  • Gender:Male
  • Location:TX

Posted 05 May 2018 - 01:49 PM

Exactly the specifications of your Rod N Custom Ferrari Steve :D

Seem to remember that motor spun up pretty well as did Your 906 entry!

#28 Steve Okeefe

Steve Okeefe

    The Independent Scratchbuilder

  • Administrator
  • PipPipPipPipPipPip
  • 1,134 posts
  • Joined: 16-February 06
  • Gender:Male
  • Location:State of Independence

Posted 05 May 2018 - 03:24 PM

True enough.  In fact the Ferrari chassis design reflected a remnant of the 1966 "ultralight" paradigm and turned out to be (relatively speaking) too light for the motor output.  The 906 did okay though.


I'm sure Rick's early 1967 chassis will be somewhat heavier and so be able to make much better use of the power.


Steve Okeefe


I build what I likes, and I likes what I build


#29 dc-65x

dc-65x

    Grand Champion Poster

  • Subscriber
  • PipPipPipPipPipPipPipPip
  • 6,818 posts
  • Joined: 14-February 06
  • Gender:Male
  • Location:Captain Rick: The only vintage slot car nut in SW Oregon?

Posted 07 May 2018 - 06:42 PM

It's time to get on with building that chassis Steve. The can and end bell are finished and ready to be used as the jig motor.


The can was drilled and tapped for a No.2 machine screws to hold the end bell in place. A 1/2" rod was clamped in a small vise to support the can during center punching prior to drilling:


CM%20Trophy%20Car%2020.jpg


I also drilled and tapped the end bell for No.2 machine screws. The 50 year old plastic is brittle and I don't want to crack it driving in self tapping screws. I used machine screws with similar head styles to the Mabuchi jobs.


The hex brush holders were chamfered to clear the comm and soldered to the brush hoods:


CM%20Trophy%20Car%2021.jpg


The can and end bell are ready for duty as a jig motor. The end bell is covered with teflon tape to protect it from flux damage. Also ready to go are a Russkit bracket and some fairly tight ID axle tube:


CM%20Trophy%20Car.jpg


For a chassis design I've decided to be heavily influenced by Team Russkit just as I was back in the day............ :D


  • endbelldrive, slotbaker, Tex and 1 other like this

Rick Thigpen
Check out Steve Okeefe's great web site at its new home here at Slotblog:
The Independent Scratchbuilder
There's much more to come...


#30 Steve Okeefe

Steve Okeefe

    The Independent Scratchbuilder

  • Administrator
  • PipPipPipPipPipPip
  • 1,134 posts
  • Joined: 16-February 06
  • Gender:Male
  • Location:State of Independence

Posted 08 May 2018 - 12:03 PM

Already I am liking this...  :i-m_so_happy:   
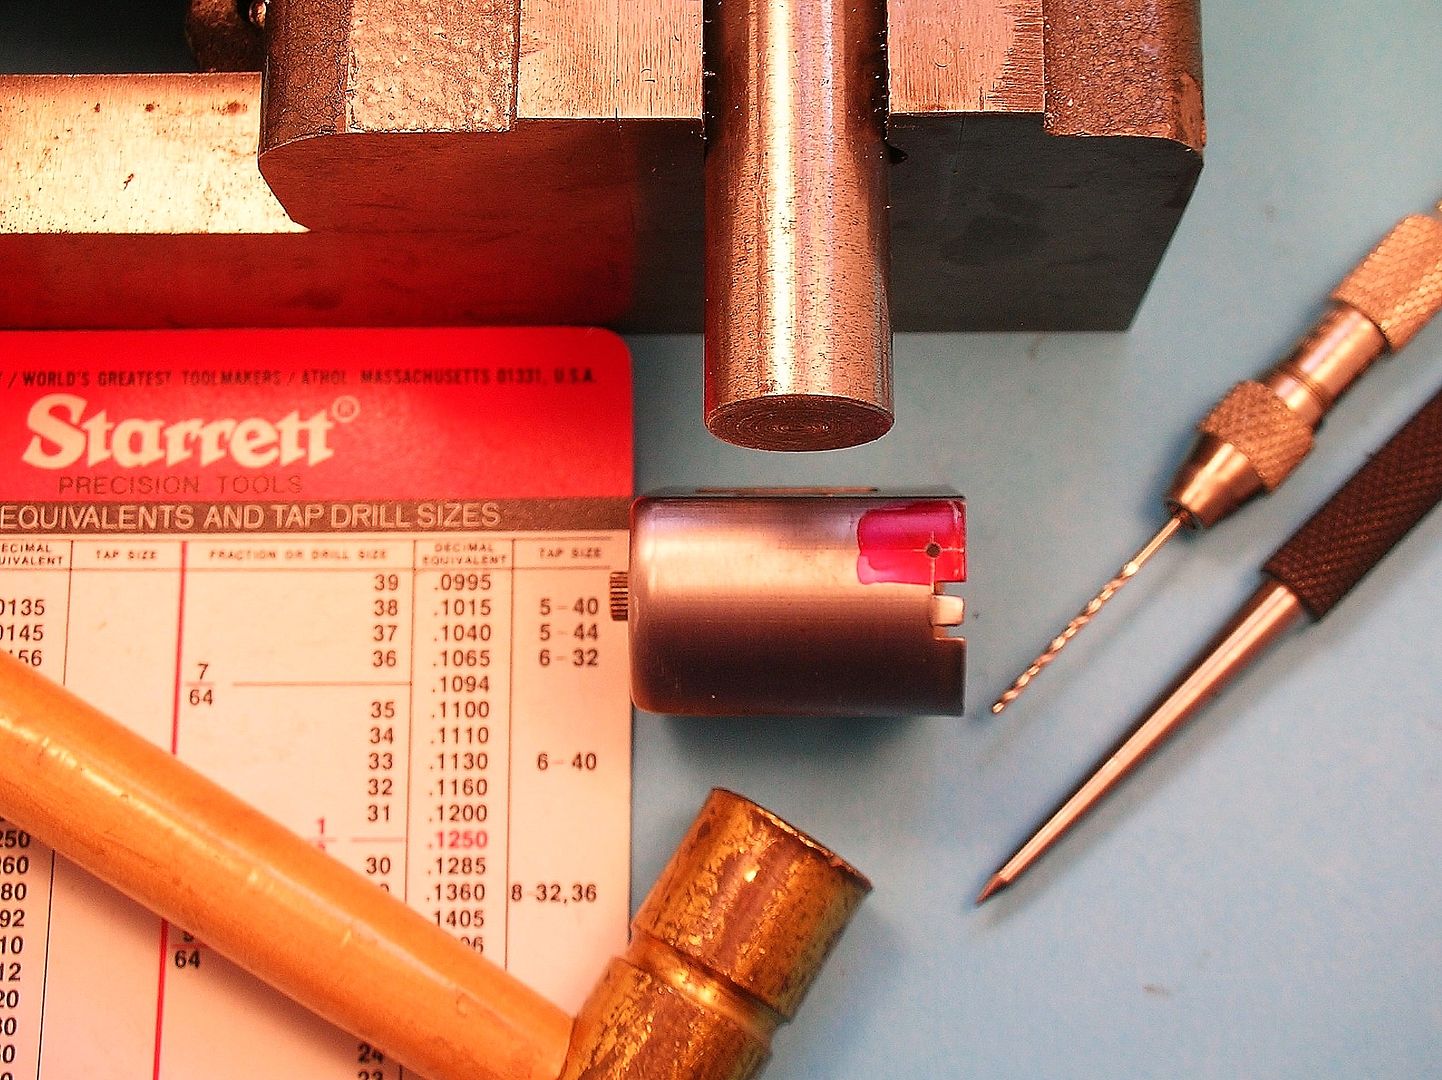
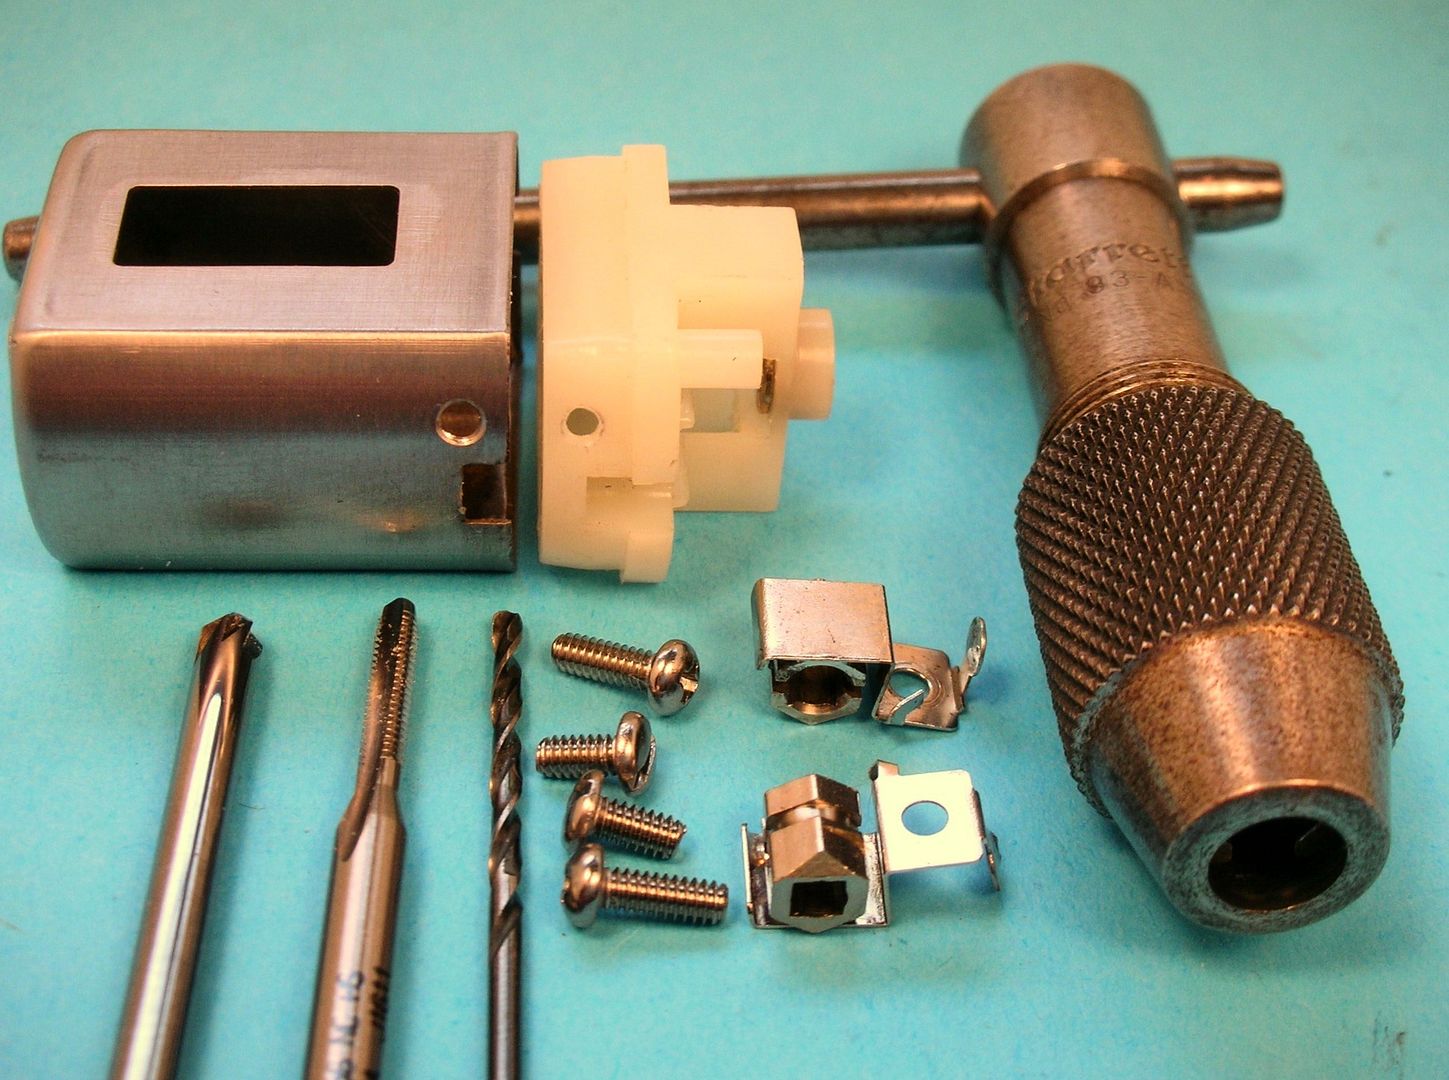
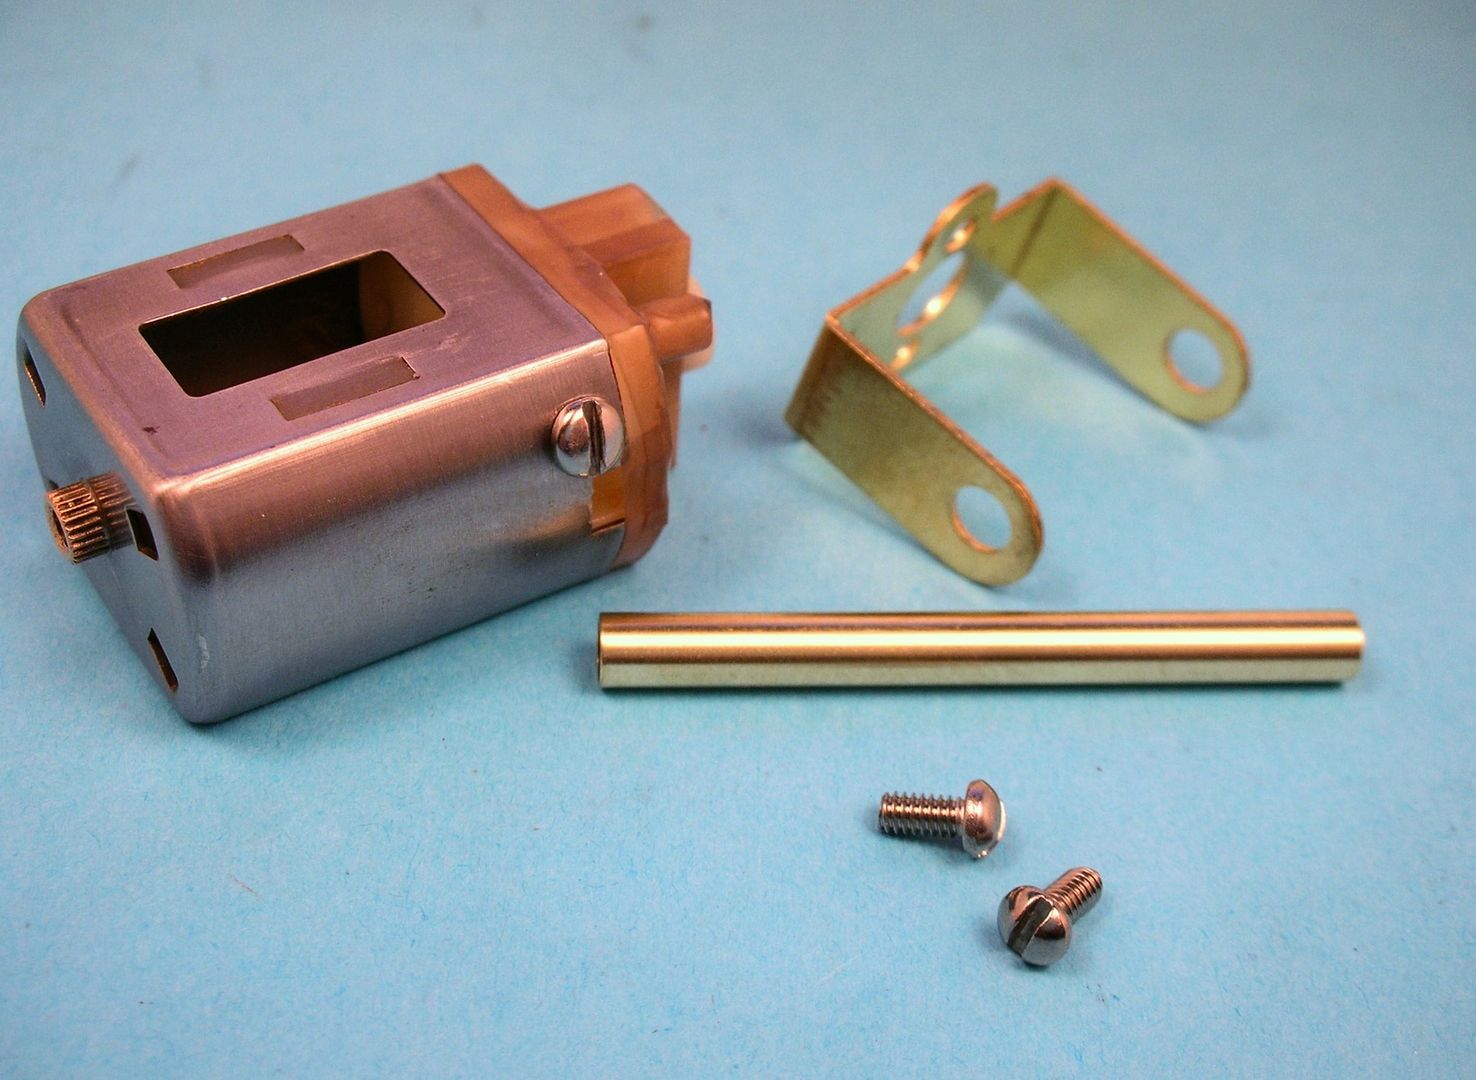
There is something elegant and beautiful about the simplicity of brass tube axle bushings.  The old axiom about how "simpler is always better" applies here; it would be hard to be simpler than two pieces of brass tube.


I wouldn't pretend to know why Russkit chose to punch 5/32" holes (for the brass tube axle bushings) in their motor brackets, but clearly someone thought it was the right thing to do.  Team Russkit had a lot of success in 1966 with cars that had brass tube axle bushings, and it wasn't as though they didn't have choices; a large percentage of RTR cars in 1966 (Including Russkit) had rear axles riding in Oilites or similar separate bushings.


Going forward into 1967, builders and drivers still made good use of the simplicity and ruggedness of brass tube axle bushings.  For example: there were six Car Model Road Races in 1967; fully half of the winning cars were equipped with brass tube axle bushings (races 1, 4 and 5).  If you count only the sports car and coupe races, it was three out of four, with Cukras taking the remaining coupe race driving a car that had threaded wheels.


Rick, it is no secret that you prefer rear axle ball bearings over anything else, and use them wherever you can.  I'm really liking the fact that you're using brass tube because it arguably belongs on this car.  :dance3:


Steve Okeefe


I build what I likes, and I likes what I build


#31 Martin

Martin

    Posting Leader

  • Full Member
  • PipPipPipPipPipPipPip
  • 3,955 posts
  • Joined: 22-February 09
  • Gender:Male
  • Location:US

Posted 08 May 2018 - 04:10 PM

following along with this build

I always thought the brass axle tube held the bushings.(or bearings)at the ends of the brass tube. You are saying the axle is riding on the brass tube. That seems like a lot of  surface area with a lot of friction. But if that's what the pros did it must be fine. Always learning.

Be interesting to see a roll out test, bushings vs ball bearings vs brass tube. Maybe it makes no difference ? When the brass tubing wears out and gets loose do you replace the tube or does that never happen?


Found this from the Morrissey Gp car build in car model 10/67.


Morrissey wrote "the most significant change we've made lately is the switch from 5/32" tubing to dynamic oilite bushings for rear axle location. The tubing has been standard procedure ever since I can remember, as it always seemed to make for a neater, tighter setup than any oilites that were available in the past. But the Dynamic bushings are made to very close tolerances and their close fit around the axle makes for a very smooth-running car"


Martin Windmill

#32 Jaeger Team

Jaeger Team

    On The Lead Lap

  • Full Member
  • PipPipPipPip
  • 435 posts
  • Joined: 27-January 17
  • Gender:Male
  • Location:Palermo, Italy

Posted 08 May 2018 - 04:28 PM

in the days we used to lubricate them with molybdenum disulphide


Maurizio Salerno

#33 dc-65x

dc-65x

    Grand Champion Poster

  • Subscriber
  • PipPipPipPipPipPipPipPip
  • 6,818 posts
  • Joined: 14-February 06
  • Gender:Male
  • Location:Captain Rick: The only vintage slot car nut in SW Oregon?

Posted 08 May 2018 - 05:34 PM

Boy, using tubing for the rear axle sure makes things easy compared to setting up a Russkit bracket for ball bearings!


1.  Cut tube to length

2.  Solder tube to bracket

3.  Done  :crazy:


Here's a closer look at a Team Russkit car from the race that I'll be using for "inspiration":


Team%20Russkit%201967.jpg


  • tonyp likes this

Rick Thigpen
Check out Steve Okeefe's great web site at its new home here at Slotblog:
The Independent Scratchbuilder
There's much more to come...


#34 tonyp

tonyp

    Grand Champion Poster

  • Member at Peace
  • PipPipPipPipPipPipPipPip
  • 15,325 posts
  • Joined: 12-February 07
  • Gender:Male
  • Location:Sanford, FL, land of lizards and big roaches

Posted 08 May 2018 - 05:38 PM

The belief was that the tubing in the rear was lighter, easier to build and gave more brakes.

Gene Hustings in one of his race reports raced about plastic gears I forget either the cox or Weldon because they could be meshed tighter to get brakes.


Sent from my iPhone using Tapatalk

Anthony 'Tonyp' Przybylowicz

5/28/50-12/20/21
Requiescat in Pace


#35 Steve Okeefe

Steve Okeefe

    The Independent Scratchbuilder

  • Administrator
  • PipPipPipPipPipPip
  • 1,134 posts
  • Joined: 16-February 06
  • Gender:Male
  • Location:State of Independence

Posted 08 May 2018 - 09:27 PM

Martin,


You wrote:


You are saying the axle is riding on the brass tube. That seems like a lot of  surface area with a lot of friction.


Yes, the axle rides directly in the brass tube.  Friction however is essentially independent of surface area.  Consider for example the front axle in it's 2 inch long tube; the pros were happy for several years with the way that arrangement worked.  What is more important is the characteristics of the two materials sliding against each other, and the roughness of their surfaces.  Hard steel (axles) and brass tube happen to get along particularly well.


But if that's what the pros did it must be fine.


That's what the pros did because it was simple, easy and worked well enough in the application at that time.


Be interesting to see a roll out test, bushings vs ball bearings vs brass tube. Maybe it makes no difference ?


In a roll out test, with all other things being equal, it seems reasonable to me that the ball bearings will win every time, followed by the Oilites, and then the brass tube.  TonyP mentioned in post #34 that brass tube was believed to provide better brakes, and that makes sense because brass tube axle bushings are almost certainly a higher friction system than either ball bearings or Oilites.


But in this particular case it's not about what works best.  It's about which system is historically correct, and that would be brass tubes.


When the brass tubing wears out and gets loose do you replace the tube or does that never happen?


The brass tube is usually part of the structure of the chassis and would be very difficult to replace.  However, if the axle is polished where it rides in the tubes (or is at very least smooth and shiny), and kept lubricated with light oil, it should last for many hours of running time (cars like this did successfully participate in enduros).


But as with any sliding joint it will eventually wear and become a bit sloppy.  This is where a larger surface area is actually a benefit; it should last longer.  It's also important to remember these chassis were in reality only meant to run one race and then be replaced by a more advanced design, so it's pretty much a moot point.


Found this from the Morrissey Gp car build in car model 10/67.


Morrissey wrote "the most significant change we've made lately is the switch from 5/32" tubing to dynamic oilite bushings for rear axle location. The tubing has been standard procedure ever since I can remember, as it always seemed to make for a neater, tighter setup than any oilites that were available in the past. But the Dynamic bushings are made to very close tolerances and their close fit around the axle makes for a very smooth-running car"


No argument from me with any of that.  By 10/67 cars were heavier, more powerful and quite a bit faster.  Hardened drill blank axles running in good quality Oilites were at that point a superior choice.


There is one other detail that bears mentioning.   Brass tube axle bushings got a bit of a bum rap as being loose and sloppy when threaded wheels were still popular.


The reason for that is simple; most threaded axles are undersized, some significantly so.  I've seen a few that were smaller in diameter than .123".  Put that together with bushings made of "telescopic brass tubing" that could be as much as .129" inside diameter and you have a system that begins with .006" slop.


Pause for a sidebar: In the second 1967 Car Model race John Cukras got away with using a threaded rear axle to mount those Riggen threaded wheels (he was a member of Team Riggen at the time) by using good quality Oilites (wide ones in fact), not brass tube.  It's also possible that he hand-selected the threaded axle for the closest possible fit.


On the other hand, drill blank axles are by definition a full and consistent .125" diameter.  If you can hand-select your 5/32" brass tubing and find some that is closer to .125" inside diameter than the average, you can get a fit that is almost as close as an Oilite.


  • Half Fast likes this

Steve Okeefe


I build what I likes, and I likes what I build


#36 Martin

Martin

    Posting Leader

  • Full Member
  • PipPipPipPipPipPipPip
  • 3,955 posts
  • Joined: 22-February 09
  • Gender:Male
  • Location:US

Posted 08 May 2018 - 10:40 PM

Thanks Steve for taking the time and laying that out.

A while back I built a run of Morrissey GP cars from that how to MC article printed 10/67.( not sure what the lead time was back then? So I followed along not realizing that bushings were a mid (67) upgrade, at least for Morrissey. It made sense to me so I did not even consider that more friction and a tighter gear mesh would net a faster lap time (TonyP) .But I will never get back all that time spent getting the perfect backlash in the gear-set.

Thanks again guys for sharing your knowledge. Build on Rick pay no mind to me in the peanut gallery.


Martin Windmill

#37 tonyp

tonyp

    Grand Champion Poster

  • Member at Peace
  • PipPipPipPipPipPipPipPip
  • 15,325 posts
  • Joined: 12-February 07
  • Gender:Male
  • Location:Sanford, FL, land of lizards and big roaches

Posted 09 May 2018 - 05:25 AM

Basically the chassis did not last long enough to wear out the rear tubing.


Sent from my iPhone using Tapatalk
  • Pete L. likes this

Anthony 'Tonyp' Przybylowicz

5/28/50-12/20/21
Requiescat in Pace


#38 slotcarone

slotcarone

    Posting Leader

  • Full Member
  • PipPipPipPipPipPipPip
  • 3,934 posts
  • Joined: 23-January 07
  • Gender:Male
  • Location:Dutchess County, NY

Posted 09 May 2018 - 05:55 AM

About 8 or 9 years ago Retro East started racing Jail Door cars. I have built probably 35 chassis between GP and Sports Car that were sold through the raceway. The very first one I built which is the one I have been racing did wear out the rear axle tubes. It was very simple to slice the tubes between the rail uprights then just heat each piece with the iron to remove it. I did a little cleaning of the solder and was able to slide a new tube back in. Good to Go!!IMG_20130624_223157_329.jpg


  • Tex, Pete L., SlotStox#53 and 1 other like this

Mike Katz

Scratchbuilts forever!!


#39 SlotStox#53

SlotStox#53

    Posting Leader

  • Full Member
  • PipPipPipPipPipPipPip
  • 4,084 posts
  • Joined: 13-March 13
  • Gender:Male
  • Location:TX

Posted 09 May 2018 - 09:57 AM

When building my Rod N Custom Proxy cars I sliced the tube using a tube cutter and that made the ends a nice close fit on the axle :)

Look forward to seeing the Russkit influence in the chassis Rick :D

#40 dc-65x

dc-65x

    Grand Champion Poster

  • Subscriber
  • PipPipPipPipPipPipPipPip
  • 6,818 posts
  • Joined: 14-February 06
  • Gender:Male
  • Location:Captain Rick: The only vintage slot car nut in SW Oregon?

Posted 09 May 2018 - 10:10 AM

This will be one of only a couple of cars I've built since the 60's with brass tube for the axle bushings. My supply of 5/32" tube measured .130" ID with a small hole gauge and micrometer. The axle felt pretty sloppy in this stuff.


I decided to purchase a new supply of (supposedly) K&S tube from eBay. The new stuff measures .127" or a bit less and an axle feels like a pretty good fit. I was leery of building with the big ID stuff but the fit of the axle in the new tubing should be fine for a 1967 style car.


Rick Thigpen
Check out Steve Okeefe's great web site at its new home here at Slotblog:
The Independent Scratchbuilder
There's much more to come...


#41 Tex

Tex

    Grand Champion Poster

  • Full Member
  • PipPipPipPipPipPipPipPip
  • 9,227 posts
  • Joined: 07-July 06
  • Gender:Male
  • Location:Denton, TX

Posted 09 May 2018 - 11:05 AM

since y'all are on the subject of axles, axle tubes, and the slop enountered at times due to mismatched (in)tolerances....


back when retro jail door cars were just ramping up, I built one. the same subject of axle "slop" came up then. I don't remember if it was in an open forum/post or in a PM, but I was told of one method of to overcome the slop. racers would put a small layer/bead of solder at the end of the axle tube. initially(and obviously), the axle could not go through the axle tube. but then take a small round file and begin reaming out the solder, a little at a time. eventually, the axle could go through, a bit snug at first. then you could run it in under power and it would loosen up to a nice fit; essentialy, the axle was riding on a thin/narrow layer of solder. of course, this nice fit only lasted so long before becoming loose again.


  • endbelldrive likes this
Richard L. Hofer

Remember, two wrongs don't make a right... but three lefts do! Only you're a block over and a block behind.

#42 Bill from NH

Bill from NH

    Age scrubs away speed!

  • Full Member
  • PipPipPipPipPipPipPipPip
  • 14,312 posts
  • Joined: 02-August 07
  • Gender:Male
  • Location:New Boston, NH

Posted 09 May 2018 - 01:33 PM

Tex, I never read of the solder trick in a post here, so it was probably in a PM. I think it was Dennis Samson who suggested using a tube cutter with a dull cutting wheel to partially cut through the axle tube. This scoring reduces the tube I.D. that can be reamed out to a perfect 1/8". I wonder if you could do the same thing by placing an axle inside the tube & squeezing it in a tightened 3-jaw chuck?


  • Tex likes this
Bill Fernald
 
I intend to live forever!  So far, so good.  :laugh2:  :laugh2: 

#43 Don Weaver

Don Weaver

    Checkered Flag in Hand

  • Subscriber
  • PipPipPipPipPipPip
  • 1,820 posts
  • Joined: 26-October 07
  • Gender:Male
  • Location:Lexington. SC

Posted 09 May 2018 - 02:44 PM

I wonder if you could do the same thing by placing an axle inside the tube & squeezing it in a tightened 3-jaw chuck?


GOOD IDEA!  I'll try it the next time I'm building a jaildoor.  Thanks.....


Don


Don Weaver

​A slot car racer who never grew up!


The supply of government exceeds demand.
L.H. Lapham
 
If the brain-eating amoeba invades Washington
it will starve to death...


#44 Rick Moore

Rick Moore

    CMF3

  • Full Member
  • PipPipPipPipPip
  • 500 posts
  • Joined: 22-November 09
  • Gender:Male
  • Location:Tampa

Posted 09 May 2018 - 02:58 PM

In those days I was taught to keep any "best-fit" pieces of 5/32” tube for rear axle tubes; for some reason we didn’t care so much about the front axle… Another method one of the guys I raced with would do was to use 3/16” tube as his framed/soldered in rear axle tubes, then use 5/32” tube as “free-spinning” inserts, with the 1/8” axle inside the inserts. I know I built a few like that after seeing it; can’t recall exactly how, or even how well they may have worked... None of those chassis had any sort of life expectancy, since any given chassis was usually scrapped for parts in pretty short order as the “next best thing” came along as fast as you could build them…


Rick / CMF3


#45 Phil Smith

Phil Smith

    Posting Leader

  • Member at Peace
  • PipPipPipPipPipPipPip
  • 3,582 posts
  • Joined: 03-November 07
  • Gender:Male
  • Location:Irving, TX

Posted 09 May 2018 - 08:55 PM

since y'all are on the subject of axles, axle tubes, and the slop enountered at times due to mismatched (in)tolerances....


back when retro jail door cars were just ramping up, I built one. the same subject of axle "slop" came up then. I don't remember if it was in an open forum/post or in a PM, but I was told of one method of to overcome the slop. racers would put a small layer/bead of solder at the end of the axle tube. initially(and obviously), the axle could not go through the axle tube. but then take a small round file and begin reaming out the solder, a little at a time. eventually, the axle could go through, a bit snug at first. then you could run it in under power and it would loosen up to a nice fit; essentialy, the axle was riding on a thin/narrow layer of solder. of course, this nice fit only lasted so long before becoming loose again.


Babbitt bearings!  :good:


  • Tex, Eddie Fleming and C. J. Bupgoo like this
Phil Smith
???-2/31/23
Requiescat in Pace

#46 John Secchi

John Secchi

    Mid-Pack Racer

  • Member at Peace
  • PipPipPip
  • 168 posts
  • Joined: 18-February 06
  • Gender:Male
  • Location:London, UK

Posted 10 May 2018 - 02:34 AM

The 3 jaw chuck does work and have done this on the cheap Champion inline chassis a few times, best done on a lathe.  You get a 3 point contact which allows the oil to get round the axle, only problem is if you have enough axle tube to do this!

[oneofwos]


1956-2020
Requiescat in Pace

#47 Martin

Martin

    Posting Leader

  • Full Member
  • PipPipPipPipPipPipPip
  • 3,955 posts
  • Joined: 22-February 09
  • Gender:Male
  • Location:US

Posted 10 May 2018 - 05:04 PM

Anybody know when these Champion kits became available? I do not see this part # 285-1 in the 67 catalog?

Notice the nice big thrust washers to stop the brass tubing wearing on the wheel hub.

Attached Images

  • s-l1600.jpg

Martin Windmill

#48 slotcarone

slotcarone

    Posting Leader

  • Full Member
  • PipPipPipPipPipPipPip
  • 3,934 posts
  • Joined: 23-January 07
  • Gender:Male
  • Location:Dutchess County, NY

Posted 10 May 2018 - 06:35 PM

Notice the Champion kit lists assembled or a kit and both the same price!


Mike Katz

Scratchbuilts forever!!


#49 Martin

Martin

    Posting Leader

  • Full Member
  • PipPipPipPipPipPipPip
  • 3,955 posts
  • Joined: 22-February 09
  • Gender:Male
  • Location:US

Posted 10 May 2018 - 06:58 PM

Did notice that Mike. Also this bracket is not like the Champion nickle plated ones, and looks more like the Russkit bracket.


Martin Windmill

#50 Steve Okeefe

Steve Okeefe

    The Independent Scratchbuilder

  • Administrator
  • PipPipPipPipPipPip
  • 1,134 posts
  • Joined: 16-February 06
  • Gender:Male
  • Location:State of Independence

Posted 10 May 2018 - 09:07 PM

Martin,


Those part numbers do not appear in the 1968 catalog either, but a search of the Champion ads in Car Model turns up this:


Champ Bracket 285 6804CM15.jpg   Champ Bracket 285 6805CM13.jpg


These are just clips of full page ads.  The one on the left is from April 1968, and the one on the right is from May 1968.


So these parts came onto the market right about the time anglewinders were making them obsolete.  :pardon:


  • endbelldrive likes this

Steve Okeefe


I build what I likes, and I likes what I build


Electric Dreams Online Shop