Jump to content


Photo

Arm winding #1

Closed due to length

  • This topic is locked This topic is locked
3573 replies to this topic

#501 Michael Rigsby

Michael Rigsby

    SRT Motorsports

  • Full Member
  • PipPipPipPipPipPip
  • 1,914 posts
  • Joined: 27-July 08
  • Gender:Male
  • Location:a Southern state

Posted 14 August 2009 - 02:42 PM

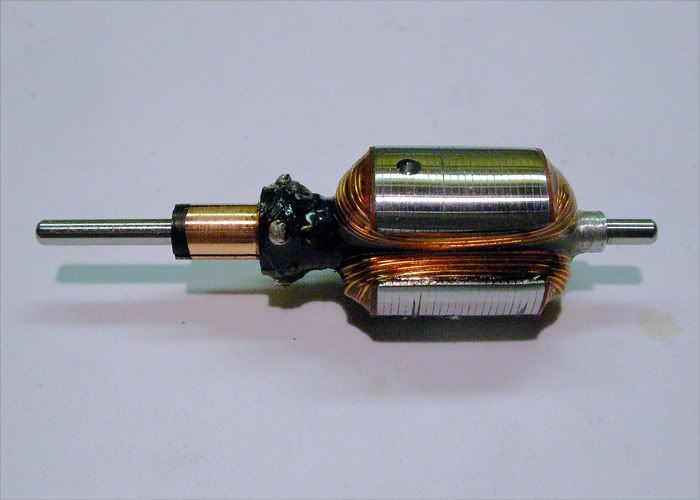
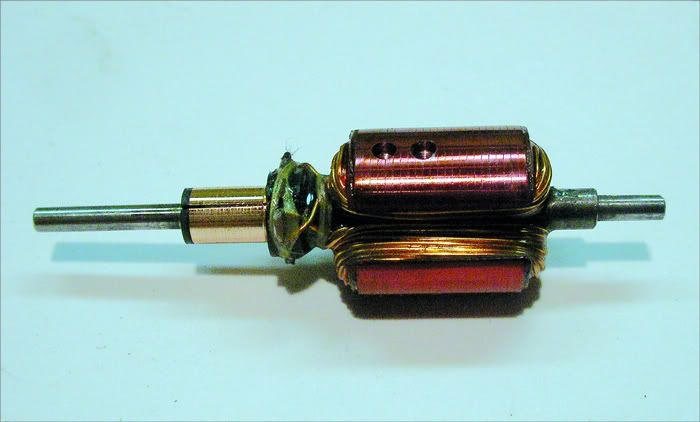
Perfect size for a retro Can-Am, don't ya think??? Certainly would have a little more punch than a Puppy Dog, and I bet in a super light RetroPro car it would be killer.

Oh... and John... armature #2 is a beauty. :wub:

Michael Rigsby

"... a good and wholesome thing is a little harmless fun in this world; it tones a body up and keeps him human and prevents him from souring." - Mark Twain


#502 havlicek

havlicek

    OCD Rewinder

  • Subscriber
  • PipPipPipPipPipPipPipPip
  • 11,198 posts
  • Joined: 20-August 07
  • Gender:Male
  • Location:NY

Posted 14 August 2009 - 05:17 PM

Hi Doug,

Looks like you took a V-8 and made a V-6 out of it.


:laugh2: I like to think I made a smaller V8 out of a big V8 :) Yeah, that wasp motor you did sounds like a real zippy motor, that's the way to recycle!

Hi Michael,

You might be right about that...but I'm thinking more like a poor-man's wing car using a thingee body. I'm real happy with arm#2 so thanks! , I was surprised that a #26 wind in such a short arm would work.

-john
John Havlicek

#503 havlicek

havlicek

    OCD Rewinder

  • Subscriber
  • PipPipPipPipPipPipPipPip
  • 11,198 posts
  • Joined: 20-August 07
  • Gender:Male
  • Location:NY

Posted 18 August 2009 - 03:51 PM

A vintage Tradeship "short stack blank and com" done-up with #26 AWG for an endbell drive FT16D Mabuchi. I did the epoxy sorta "oldstyle" and really piled it on there which was really difficult to do since the epoxy I use has very low viscosity. Anyway, it has more of the look of some of the old arms.

Posted Image

-john
John Havlicek

#504 havlicek

havlicek

    OCD Rewinder

  • Subscriber
  • PipPipPipPipPipPipPipPip
  • 11,198 posts
  • Joined: 20-August 07
  • Gender:Male
  • Location:NY

Posted 18 August 2009 - 07:02 PM

...and all comfy in it's "new"/old setup. The can was a ball bearing one, but the "balls" were gone so I drilled the brass retainer out, soldered it to the can and then soldered a new bushing in place of the old ball bearings. Magnets/shim are Dynamic...can shim and "208" magnets. I have a better way of handling the spring post protectors too. Pablo had said to try Speed FX spring cups by reaming them out a little. I had tried Mura brass spring cups in the past (pretty much exactly the same ID)...but they are kinda short. I trimmed the Tradeship spring posts a little, reamed out the Speed FX spring cups by twirling a Dremel bit between my fingers for a few minutes, and then pushed them onto the spring posts. I finished by drilling the spring posts and fastened the new post protectors with 0-3/16" tapping screws. Worked like a charm! (thanks Pablo!).

Posted Image

-john
John Havlicek

#505 Pablo

Pablo

    Builder

  • Administrator
  • PipPipPipPipPipPipPipPip
  • 18,437 posts
  • Joined: 20-February 06
  • Gender:Male
  • Location:Cleveland, Tennessee

Posted 18 August 2009 - 08:40 PM

Good thing I have a friend who races those FX motors :laugh2:

Paul Wolcott


#506 havlicek

havlicek

    OCD Rewinder

  • Subscriber
  • PipPipPipPipPipPipPipPip
  • 11,198 posts
  • Joined: 20-August 07
  • Gender:Male
  • Location:NY

Posted 21 August 2009 - 03:20 PM

Prepping arm #2 for this old Mabuchi. This one came out of an old Russkit 22. I was able to push out the old shaft which was splined and pretty "not-straight" :blink: I reassembled the stack on a new shaft made from .078" music wire and epoxied the inside of the stack to prevent shorts. I also epoxied-on the end insulators so they could be trimmed flush with the stack ends. For me anyway, this makes winding the arm neatly a bit easier and those insulators still do their thing where they're needed most...namely the sharp corners at the ends of the stack. After all that, I polished the stack so it will only need a finish touch-up after winding and balancing. Time so far...about 2 1/2 hours :blink: Imagine if this stuff was "on the clock" work...these things would be $100 motors :shok: Of course, the shaft is just a "touch" too long still :laugh2:

Posted Image

-john
John Havlicek

#507 Bill from NH

Bill from NH

    Age scrubs away speed!

  • Full Member
  • PipPipPipPipPipPipPipPip
  • 14,700 posts
  • Joined: 02-August 07
  • Gender:Male
  • Location:New Boston, NH

Posted 21 August 2009 - 06:39 PM

Of course, the shaft is just a "touch" too long still :laugh2:


John, isn't that the arm for your mid-motored chassis? :rolleyes:
Bill Fernald
 
I intend to live forever!  So far, so good.  :laugh2:  :laugh2: 

#508 havlicek

havlicek

    OCD Rewinder

  • Subscriber
  • PipPipPipPipPipPipPipPip
  • 11,198 posts
  • Joined: 20-August 07
  • Gender:Male
  • Location:NY

Posted 21 August 2009 - 07:34 PM

:D Funny guy! Actually it's for a RC helicopter :D Seriously Bill, I've been waiting for someone to ask me to do something like that. A couple of extra bearings or bushings for end support and maybe a 4WD Jeep body (circa WWII or course)...or a pickup truck and...well...nevermind :)

-john
John Havlicek

#509 havlicek

havlicek

    OCD Rewinder

  • Subscriber
  • PipPipPipPipPipPipPipPip
  • 11,198 posts
  • Joined: 20-August 07
  • Gender:Male
  • Location:NY

Posted 24 August 2009 - 04:45 PM

I finished-off the arm.

Posted Image

-john
John Havlicek

#510 Champion 507

Champion 507

    Checkered Flag in Hand

  • Full Member
  • PipPipPipPipPipPip
  • 1,521 posts
  • Joined: 06-March 09
  • Gender:Male
  • Location:OK

Posted 24 August 2009 - 04:53 PM

John,

Is that a 22º CW Tradeship comm?
Doug Azary
"We offer prompt service... no matter how long it takes!"
"We're not happy unless you're not happy"
"You want it when?"

#511 havlicek

havlicek

    OCD Rewinder

  • Subscriber
  • PipPipPipPipPipPipPipPip
  • 11,198 posts
  • Joined: 20-August 07
  • Gender:Male
  • Location:NY

Posted 24 August 2009 - 06:01 PM

Hi Doug,

Yes it is, but I backed-off the built-in timing advance. If you look at the top com segment, you'll notice what I just noticed...it's loose and coming off :o :dash2: :bomb: :hang3:

-john
John Havlicek

#512 Champion 507

Champion 507

    Checkered Flag in Hand

  • Full Member
  • PipPipPipPipPipPip
  • 1,521 posts
  • Joined: 06-March 09
  • Gender:Male
  • Location:OK

Posted 24 August 2009 - 10:48 PM

John,

Oh man, I see that now. :cray: :cray: :cray:

Probably no way to fix it? Anyway to put some kind of cap on the end, similar to what they do for modern hi-perf arms to try to save what you've spent so much time on?

I hope there's a solution somewhere, somehow.
Doug Azary
"We offer prompt service... no matter how long it takes!"
"We're not happy unless you're not happy"
"You want it when?"

#513 havlicek

havlicek

    OCD Rewinder

  • Subscriber
  • PipPipPipPipPipPipPipPip
  • 11,198 posts
  • Joined: 20-August 07
  • Gender:Male
  • Location:NY

Posted 25 August 2009 - 05:38 AM

Hi Doug,

Unfortunately, I learned a while back that stuff like that is often a lost cause and better to toss it than have to wonder when it will self-destruct. I wouldn't be able to be comfortable sending that to anyone and if and when it goes, it could damage other stuff...magnets, endbell whatever. "Life in the fast lane" :)

-john
John Havlicek

#514 wilbor56

wilbor56

    Backmarker

  • Full Member
  • PipPip
  • 60 posts
  • Joined: 15-June 09

Posted 25 August 2009 - 07:40 AM

have you ever tried using a hi tem apoxy inject it under the com then use a vary small series of o rings on the come to hold it down while the apoxy sets up then after the opoxy starts to set cure it in oven the rest of the way removing the o rings first. i have used this method a couple time back in the day to repair some coms. just make sure you use the smallest o rings that you can fit on it this way you get a round seal for pressure that should get it close enough to allow you to recut the comm.

bill harris
Bill Harris

#515 Prof. Fate

Prof. Fate

    a dearly-missed departed member

  • Member at Peace
  • PipPipPipPipPipPipPipPip
  • 6,580 posts
  • Joined: 20-February 06
  • Gender:Male
  • Location:Salt Lake City, UT

Posted 25 August 2009 - 11:49 AM

Hi

Last week, just playing, I had a 40 year old 85/32 in a Dynamic Angleinder let go! See, they are ALL doomed!

Fate
Rocky Russo
3/6/48-1/1/12
Requiescat in Pace

#516 havlicek

havlicek

    OCD Rewinder

  • Subscriber
  • PipPipPipPipPipPipPipPip
  • 11,198 posts
  • Joined: 20-August 07
  • Gender:Male
  • Location:NY

Posted 25 August 2009 - 04:59 PM

Nah Bill...into the trash it went. Yes Rocky...sooner or later they'll all go (better later).

Finished up another SCX motor for Ed Miller. Tweaked the wind a little hoping for better driveability. These SCX motors sure are an appealing little package and fun to work on.

Posted Image

-john
John Havlicek

#517 havlicek

havlicek

    OCD Rewinder

  • Subscriber
  • PipPipPipPipPipPipPipPip
  • 11,198 posts
  • Joined: 20-August 07
  • Gender:Male
  • Location:NY

Posted 26 August 2009 - 12:55 PM

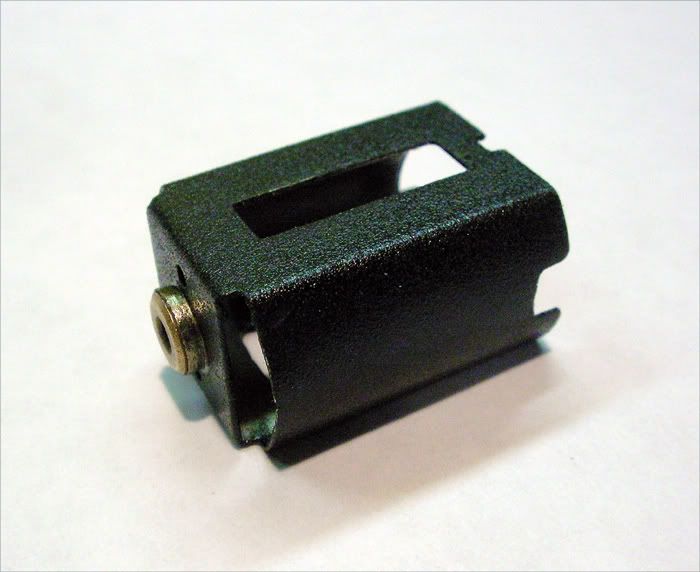
I got an SCX RX42B for myself as a "play motor" because ...well...just because they're cool little motors :) . First thing I did after tearing it down was go to work on the can. I removed the factory bushing, reamed out the hole a bit and soldered-in a Mura bushing that fits nice and snug on the arm shaft. I then filled the side seams and the magnet stops on the outside with solder and smoothed them all down. Magnet stops are still "there" on the inside, just filled on the outside. I then took off the can tabs and smoothed-out the notches where they were and opened-up the hole where the magnet tabs are so the hole is a rectangle for a bit more air circulation. I finished it off with a coat of textured black finish for that "serious" look :blink: I like the way it came out and have hope that it will run as good as it looks.

Posted Image

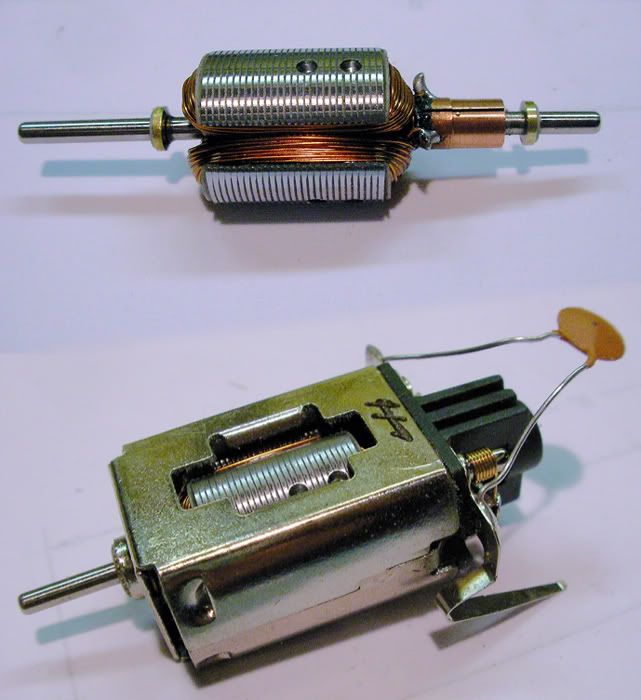
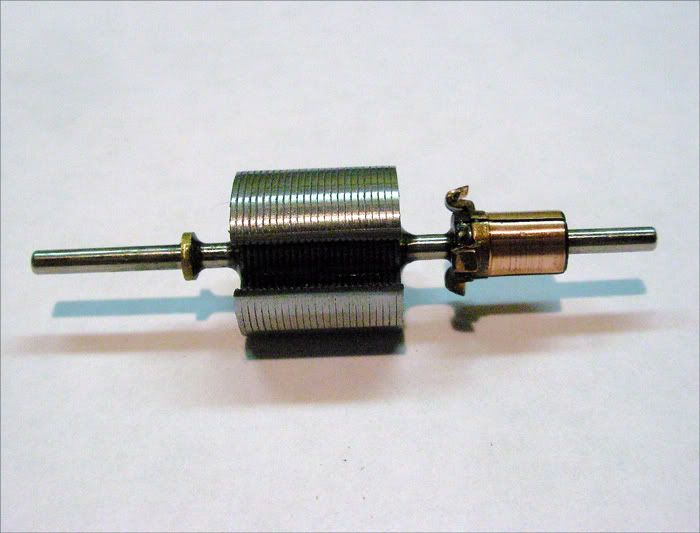
I then took the stock arm and removed the magnet wire. I then took off the stack insulators and several lams to get the stack down to .482" so there'd be plenty of room between the stack and the com. Next I did a coat of epoxy to insulate the stack and added a salvaged Kirkwood com (I'll cut the com after the arm is wound) and finished up by giving the stack a rough polish.

Posted Image

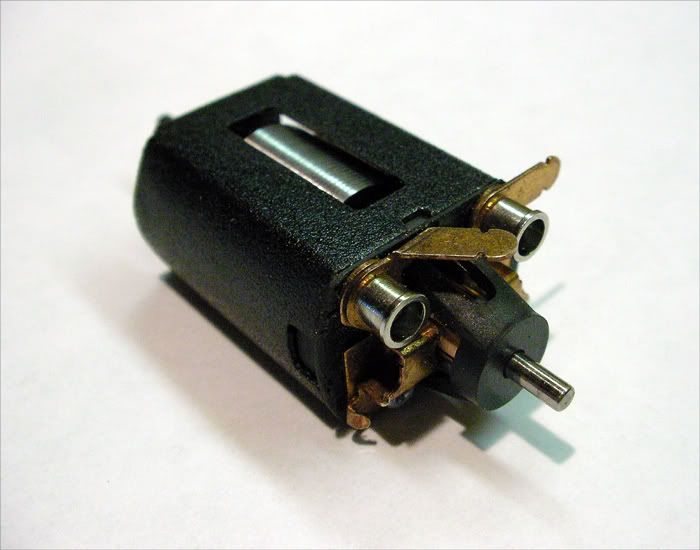
Then...unholy of unholy alliances, I got a spare C can endbell (I think it's a Pro Slot) and started carefully removing material from all four sides until it was a snug fit in the can. I used a digital caliper to measure each side, removing the same amount of material from opposite sides (the two curved sides and the two flat sides) as I went until the fit was just right. The end result is that without removing too much, the endbell is a really nice tight fit and the arm spins really nicely. Now I can use regular larger brushes and have a choice of springs, aside from the benefit from the tighter bushings in both the can and the endbell (the Pro Slot endbell seems like a really nice piece). Heck, I could easily add ball bearings later on should this all work out. :unsure: Anyway, it's starting to look like a serious motor.

Posted Image

Why do all this?...because it's fun of course. It's also nice to be able to mess-around with motors without looking-for and paying for vintage stuff or newer uber-dollars stuff. So for those who want to do the motor thing, there are inexpensive projects just waiting to happen all around. This one in particular seems like a natural for either an inline formula car or a sidewinder since the can is so narrow. Ack...reminds me that I have to notch the rear of the can for axle clearance should it go sidewinder :rolleyes:

-john
John Havlicek

#518 Tex

Tex

    Grand Champion Poster

  • Full Member
  • PipPipPipPipPipPipPipPip
  • 9,241 posts
  • Joined: 07-July 06
  • Gender:Male
  • Location:Denton, TX

Posted 26 August 2009 - 01:22 PM

Go, John, go! I like your lack of inhibition regarding what you can or can't do with a motor.
Richard L. Hofer

Remember, two wrongs don't make a right... but three lefts do! Only you're a block over and a block behind.

#519 havlicek

havlicek

    OCD Rewinder

  • Subscriber
  • PipPipPipPipPipPipPipPip
  • 11,198 posts
  • Joined: 20-August 07
  • Gender:Male
  • Location:NY

Posted 26 August 2009 - 01:35 PM

I'm going, I'm going Tex! :) This comes right out of a time when you were supposed to tear apart motors and put stuff together to make stuff go better. I see it as the modern equivalent of what we did way back then..."retro"! Thanks tex.

-john
John Havlicek

#520 Bill from NH

Bill from NH

    Age scrubs away speed!

  • Full Member
  • PipPipPipPipPipPipPipPip
  • 14,700 posts
  • Joined: 02-August 07
  • Gender:Male
  • Location:New Boston, NH

Posted 26 August 2009 - 02:01 PM

John, this creation looks pretty nice! The endbell hardware is definitely Proslot, so good guess on the endbell. Got time for a couple questions? What diameter is the SCX blank? Any idea what size hole the magnets provide & any idea how strong they might be? The Mura bushings are 6MM diameter. If the SCX can bushing is a 5MM one, there are plenty of quality ones of those around too. Have a look at your endbell, it's a 5MM bushing. I'm not too familiar with SCX motors, but I've heard Fate talk about their rebuildability. Any idea what their approximate retail price might be?
Bill Fernald
 
I intend to live forever!  So far, so good.  :laugh2:  :laugh2: 

#521 Champion 507

Champion 507

    Checkered Flag in Hand

  • Full Member
  • PipPipPipPipPipPip
  • 1,521 posts
  • Joined: 06-March 09
  • Gender:Male
  • Location:OK

Posted 26 August 2009 - 03:45 PM

JH, you've done it again, buddy! ;) Nice job of "imagineering".

Whatcha' ya' gonna wind her with?

I keep seeing you talking about your #28 wire arms and #26 wire arms, do you do #27's?
Doug Azary
"We offer prompt service... no matter how long it takes!"
"We're not happy unless you're not happy"
"You want it when?"

#522 Ed Miller

Ed Miller

    S&E Raceway

  • Full Member
  • PipPipPip
  • 178 posts
  • Joined: 29-November 08
  • Gender:Male
  • Location:Bechtelsville, PA

Posted 26 August 2009 - 04:20 PM

John,
As always your arm winding amazes me. Great job on the SCX arm. We here at S&E Motorsports already has a name for these motors "Little Terror". ;)
Can't wait to do more testing ,this wind & combo should be what we need for more HP and more torque. :rolleyes: :rolleyes:

Thank you very much,
Ed
S&E Raceway
S&E Motorsports
Ed Miller

S&E MOTORSPORTS
S&E Raceway

#523 havlicek

havlicek

    OCD Rewinder

  • Subscriber
  • PipPipPipPipPipPipPipPip
  • 11,198 posts
  • Joined: 20-August 07
  • Gender:Male
  • Location:NY

Posted 26 August 2009 - 10:28 PM

John, this creation looks pretty nice! The endbell hardware is definitely Proslot, so good guess on the endbell. Got time for a couple questions? What diameter is the SCX blank? Any idea what size hole the magnets provide & any idea how strong they might be?


Hi Bill,

I don't have the arm out of the setup right now, but judging from the way it snaps into my winding crank, I would say it was right around .508" - .510" diameter after polishing. The stock airgap is very tight in these motors, but I haven't measured it. Visually, it looks pretty darned snug and the whole setup is well-engineered because tolerances all around are pretty tight. Pretty impressive for such a cheap-o motor. The magnets are very thin in cross section (which is why the whole can is so skinny), but seem quite stout. The first #29 wind I did held fine so they must be at least fairly strong. I do have a gaussmeter, but it only gives relative readings so it wouldn't (as far as I know) give any really useful info except say comparing these to a known magnet. Anyway these motors are cheap, have good potential for hot-rodding kinda like a modern Russkit 22, and are close enough in some dimensions to be adaptable to other makers parts' upgrades...cool!

The Mura bushings are 6MM diameter. If the SCX can bushing is a 5MM one, there are plenty of quality ones of those around too. Have a look at your endbell, it's a 5MM bushing. I'm not too familiar with SCX motors, but I've heard Fate talk about their rebuildability. Any idea what their approximate retail price might be?


I'm not sure if the original bushing here was a 5MM, but it very well might have been. I always keep some of the Mura-sized 6MM stuff around, so I just made that size work. The bushing was an easy fit with a tapered reamer and some of the bushing flange was still there after reaming. The PS endbell was a little more tedious, but still not nearly as tough as I thought it might be. Truthfully, the last motor I did ran really fine with the stock endbell/springs/brushes. I just wanted to take this one further. As for price, I see the motor ...the new "hotter" :) RX 42 B listed as $9.99 on a website called Hobbylinc.com. What I'd like to know is where all the old RX42s went since people were apparently turning them in for the new ones. Seems like those might be available for super-duper cheap somewhere and could ideal for people wanting to tear motors apart since the can/endbell and magnets are identical.

JH, you've done it again, buddy! Nice job of "imagineering".

Whatcha' ya' gonna wind her with?

I keep seeing you talking about your #28 wire arms and #26 wire arms, do you do #27's?


Hi Doug and thanks fellow motor maniac :). I just don't happen to have any #27 wire and will probably get some at some point. The more of this stuff I do, the more I could see a use for it too as #26 is just too much for some motors and #28 seems a bit mild for others. This one will be a #28 for sure as I'm pretty sure the magnets are up to that and now I KNOW the can and endbell are too. If it works out, I'll probably go the "rest of the way" and add can and endbell bearings.

John,
As always your arm winding amazes me. Great job on the SCX arm. We here at S&E Motorsports already has a name for these motors "Little Terror".
Can't wait to do more testing ,this wind & combo should be what we need for more HP and more torque.

Thank you very much,
Ed
S&E Raceway
S&E Motorsports


Hi Ed,

I sure hope this one is in the zone and it should have a little less RPMs, a slight bit more torque. I gave the arm "neutral" timing (the other one had a small advance), but the arm still runs slightly better CCW (viewed from the endbell). I'm glad I got to mess with these motors (thanks to your request) and am really impressed with their value for a $10 motor. Lots of fun and potential for customizing/rebuilding and very reminiscent of the old Mabuchi cans...cool! Your motor is on the way!

-john
John Havlicek

#524 havlicek

havlicek

    OCD Rewinder

  • Subscriber
  • PipPipPipPipPipPipPipPip
  • 11,198 posts
  • Joined: 20-August 07
  • Gender:Male
  • Location:NY

Posted 27 August 2009 - 06:09 AM

What diameter is the SCX blank? Any idea what size hole the magnets provide


Bill,

I just checked and the arm diameter is .508" as I had thought after a pretty solid polishing where I'm sure I took off a few thousandths. The airgap in the magnets measures .528", I think that's pretty snug for a stock setup and an inexpensive motor. Everything seems very concentric and that gap could probably be closed up even more...maybe even a .005" shim on each magnet, but I don't have any shims to try it with and I don't know it would be helpful as the setup seems about ideal right now???

-john
John Havlicek

#525 Bill from NH

Bill from NH

    Age scrubs away speed!

  • Full Member
  • PipPipPipPipPipPipPipPip
  • 14,700 posts
  • Joined: 02-August 07
  • Gender:Male
  • Location:New Boston, NH

Posted 27 August 2009 - 10:06 AM

John, thanks for all your answers. :)

Ed Miller, what sort of a track layout are you running these SCX motors on & what's it's powering? Do I recall seeing a small trioval on a website somewhere or do I have you mixed up with someone else?
Bill Fernald
 
I intend to live forever!  So far, so good.  :laugh2:  :laugh2: 


Electric Dreams Online Shop