#676

Posted 20 October 2009 - 01:38 PM
Anthony 'Tonyp' Przybylowicz
5/28/50-12/20/21
Requiescat in Pace
#677

Posted 20 October 2009 - 03:40 PM
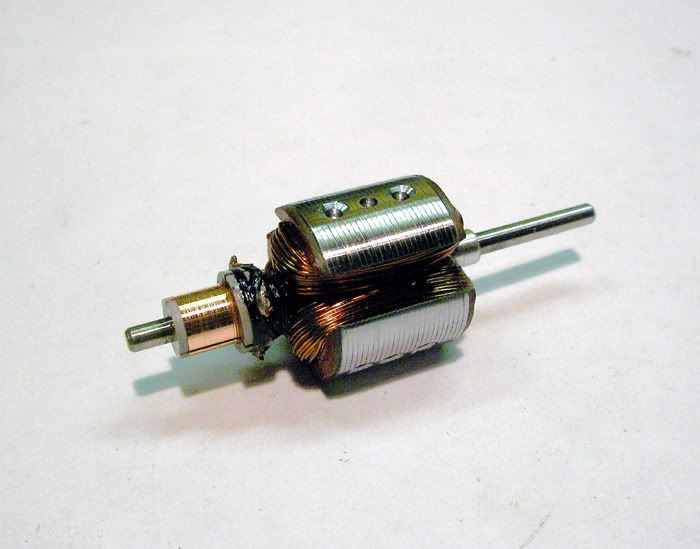
Thanks. I didn't want to come off as cocky or anything about the arm, but I've gotten to the point with these things where I'm confident with some of them. As you'd expect of a 24, this thing does draw some current, but runs smooth and scarey-fast without even getting unduly warm for such a big wire arm. In say a vintage Mura or even modern C can, it'll be a real rocket. I had done a similar one not long ago that ran the same that's gone now, so I wanted to do another one to have ready. I have to be careful that I don't get too confident thouigh, next thing you know I'll be winding 23s again
-john
#678

Posted 20 October 2009 - 03:59 PM
My life fades, the vison dims. All that remains are memories... from The Road Warrior
#679

Posted 20 October 2009 - 04:55 PM
I intend to live forever! So far, so good.
#680

Posted 20 October 2009 - 04:59 PM
Insert into variable speed hand drill....
Rotate armature slowly, while applying arm dye w/ brush... a few coats, to get it on evenly...
This has always worked for me...
Good luck!
Jeff Easterly
P.S. - Oooops! ...
I agree, John... very nicely done!
Jeff Easterly - Capt., Team Wheezer...
Asst. Mechanic, Team Zombie...
Power is coming on... NOW!!!
#681

Posted 20 October 2009 - 06:40 PM
Gary, I just use the little brush that comes in the bottle. I never really thought about how I do it but I did used to have more difficulty getting the stuff even. I think one problem is to use too little; I put a pretty good amount of the stuff on there and only remove a little from the brush as I remove it from dunking in the bottle.
-john
#682

Posted 20 October 2009 - 08:45 PM
It seems as though I've seen that arm somewhere earlier down the line. Is this deja vu all over again?
"We offer prompt service... no matter how long it takes!"
"We're not happy unless you're not happy"
"You want it when?"
#683

Posted 20 October 2009 - 09:35 PM
All your arms are nice but THAT one is REALLY nice
Rick Thigpen
Check out Steve Okeefe's great web site at its new home here at Slotblog:
The Independent Scratchbuilder
There's much more to come...
#684

Posted 21 October 2009 - 05:26 AM
-john
#685

Posted 21 October 2009 - 09:53 AM
Maybe I'll just donate it to some daring soul who wants to go fast for just a little while at a time

-john
Don't give it to Boemker or Foamy then; they'll use it to dial up PGE's profit margin real fast!
Remember, two wrongs don't make a right... but three lefts do! Only you're a block over and a block behind.
#686

Posted 21 October 2009 - 10:11 AM
" I used some green but sanded it off 3 times because I can't get an even finish".
_____________________________________________________________________
Gary, in my experience with three of Lucky Bob's armature dyes (red, green and yellow) green is the hardest to get a smooth even finish. Red is by far the easiest to apply and get the finish you want. It's not necessary to sand off the dye in case you're not happy with it. Any popular brand of motor spray will take it off or the 90% rubbing alcohol you can get cheaply at Wal Mart will do the trick. Neither one of those will harm the windings or epoxy.
"We offer prompt service... no matter how long it takes!"
"We're not happy unless you're not happy"
"You want it when?"
#687

Posted 21 October 2009 - 12:35 PM

-john
#688

Posted 21 October 2009 - 02:07 PM
Remember, two wrongs don't make a right... but three lefts do! Only you're a block over and a block behind.
#689

Posted 21 October 2009 - 04:29 PM
You're not far off, and the stuff is really hard to keep straight and tight without abusing it. I overwound this thing by a fair amount and I still can't wind it past 6V without it sounding like it might explode. I should have just done my "normal" 23 wind and face the fact that a 23 is a 23 is a 23 no matter what.
-john
#690

Posted 21 October 2009 - 05:44 PM
RIDE 'EM, COWBOY !!!!
I remember messin' w/ a Mura "green-goop" 23-single, way back when... Might have been one of Bob Green's MPP arms... We all ran steel center-section chassis, & it was JUST before the wrap-around rear spoilers made their appearence...
The Mura "B" motor modification article ? ... The one Rick posted ? ... I did all those mods, & set the air-gap at .008" per side... We were still running 7/8ths rears, so I geared it 11- 45... I backed the cut can w/ a .007" piece of steel shim, to retain some magnetic field from the cut-up can...
MAN! ....
It ran REALLY nicely, on the old American Red track, at Monaco in Buena Park...
Thanks for the great photos, John... Man! ... I always felt that 23 was about the biggest size we could run, in 1/24th scale slots... But, I remember seeing a few 25-26's, so ......
Great job, buddy....
Jeff Easterly
Jeff Easterly - Capt., Team Wheezer...
Asst. Mechanic, Team Zombie...
Power is coming on... NOW!!!
#691

Posted 22 October 2009 - 06:15 AM
You are a "motor madman"...just my kind of guy
-john
#692

Posted 22 October 2009 - 07:11 AM
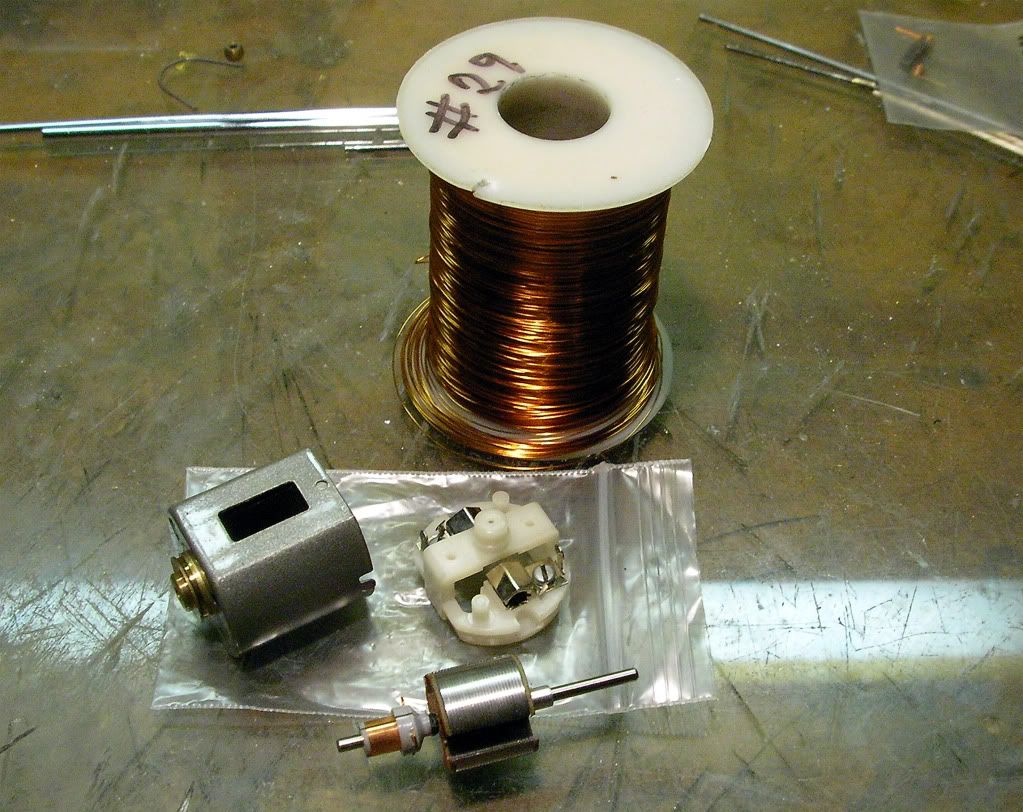
I have a nice blank that I cleaned-up and prepped with a new Tradeship com from Electric Dreams. I do have several Champion coms which seem very stout by looking at them, but they're all rescued from other motors. I set up the blank for can drive as I didn't have the heart to drill the endbell shaft hole for endbell drive. Also, I didn't want this motor to hang by the endbell as there's not much material there...especially around the bearing, and I didn't want to subject the endbell to cracking by hanging such a big motor from it. Other than maybe soldering the brush tubes/heatsinks (if they need to be), I won't be doing anything else to modify the endbell. I'm going for smooth/fast/torque instead of revs with this motor and think a #29 wind will be just the thing to take it step or two above stock. Really, I don't see much point in going any thinner than #29 wire for any of these old motors, regardless of type or intended use. I still might go to #28, but think that #29 is more suitable.
36Ds are brutes; big heavy and potentially very torquey sonofaguns. All the right "pieces" are here and now it's just a matter of doing them justice. A motor like this in the right project can be a beautiful thing! More pix to follow.

-john
- MarcusPHagen likes this
#693

Posted 22 October 2009 - 11:41 AM
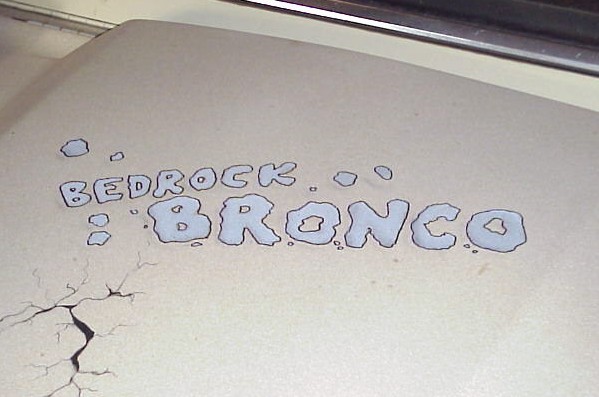
I just caught up with this thread after a week of working in 1:1 on the old Bronco (get'in ready for Montana hunting)
I'll take the blame for the skewed arms! Looks great! I know that when we do a arm it will be a skewed stack arm in a Mabuchi motor! Still thinking about that...... what do I want to do..... building another "care pak" for you now. Oh.. will test the labels for you tonight and if they work will get'em in the mail asap!
JH "I have no idea which is less destructive to the field potential"
About balance grinding John. It does mess with the fields on the blank and makes more eddy current problems at the head of the arm just where you want the best transfer out to "see" the magnet. If it made no difference we could use solid blanks but the fields of each coil would suffer greatly along with the performance we all love! Drilling makes the best balance as it effects less area on the head of the blank. So unless you are doing a period correct and MFG. correct arm stick with drilling.

Barney Poynor
12/26/51-1/31/22
Requiescat in Pace
#694

Posted 22 October 2009 - 12:25 PM
I finished off the 36D arm doing a #29S. It's a relative puppy dog, but runs nice and smooth...drawing around .6 amp. I've got a few minor tweaks to do to the setup, but here's what I got so far:

Very cool on the skewed-lam Mabuchi. They're definitely weird...for me anyway
-john
#695

Posted 22 October 2009 - 12:52 PM
In the day, John, most of us were doing 28s! Grin. Comon, you can Do it!
But I have to admit that my current survivors are usually 30s and 29s because they have enough reliability to run for years.
now, you need a CAR.
For me, in the day, this was a typical midwest plate chassis. This motor/chassis with a 10/42 is a very good option on most tracks. Or just do an AMT replica, though the inline is a little twitchy with that power level.
Fate
3/6/48-1/1/12
Requiescat in Pace
#696

Posted 22 October 2009 - 01:10 PM
Yep, since adapting a spare clamp for my trusty RGEO winding crank to handle 36Ds I have done a couple of 28 winds for them and they do really sound great in these things. I have several more blanks/coms (both Tradeship and Champion) in fairly good shape and may do an alternate arm as a 28, but that would definitely be the max for this thing. I did one #28S 36D for Tom Scott that had the Champion ball bearing can that sounded awfully nice...strong and smooth. I don't recall the current draw on that one, but it was still very reasonable...although I did make up some post protectors for it just in case.
now, you need a CAR.
Nah, the car will come from whoever gets the motor when I get it done. Almost all of my motors go to other folks who are either having cars built or are building themselves. I have a couple of sweet Champion 16D sized motors (501???) that I've managed to hang onto so far though.
-john
#697

Posted 22 October 2009 - 10:37 PM
SWITCHBLADE QUTOE:
" I used some green but sanded it off 3 times because I can't get an even finish".
_____________________________________________________________________
Gary, in my experience with three of Lucky Bob's armature dyes (red, green and yellow) green is the hardest to get a smooth even finish. Red is by far the easiest to apply and get the finish you want. It's not necessary to sand off the dye in case you're not happy with it. Any popular brand of motor spray will take it off or the 90% rubbing alcohol you can get cheaply at Wal Mart will do the trick. Neither one of those will harm the windings or epoxy.
First, thanks to John for the response. Second, thanks to Doug! That's the one, Doug! The green Lucky Bob's dye. What a pain to get evened out. I'll have to invest in another color or try the Havlicek approach; drown it with dye!
My life fades, the vison dims. All that remains are memories... from The Road Warrior
#698

Posted 23 October 2009 - 03:28 AM
Then apply the dye with a small modeling brush or Q-Tip.
I've also used Sharpies and Magic Markers...you can have any color of the rainbow stacks to mix and match your can or body colors.
It's a lot easier to apply an even coat on the slowly spinning arm.
You can have more than one or two color bands on a stack w/ a Sharpie or Magic Marker...if ya wanna get carried away...
Tom Hemmes
Insert witty phrase here...
#699

Posted 23 October 2009 - 05:26 AM
My life fades, the vison dims. All that remains are memories... from The Road Warrior
#700

Posted 23 October 2009 - 05:30 AM
The thing about the Lucky Bob's stuff is that it not only dries very quickly, but subsequent coats tend to melt/re-liquify the previous coats. Because of that, putting it on too thin means it can dry while you're still brushing it making a mess of things. Also, when you try and add a second coat, the first coat melts...again making things messy. Sometimes I get the amount I want on the brush just right, by taking off just enough as I remove the brush fromn the bottle...sometimes I don't
-john


 This topic is locked


