https://www.ebay.com...traset&_sacat=0
Replicating Husting's 1966 Top Fuel Eliminator magwinder
#276

Posted 04 June 2020 - 11:13 AM
- Phil Smith likes this


"Kinky Kar"
#277

Posted 04 June 2020 - 12:52 PM
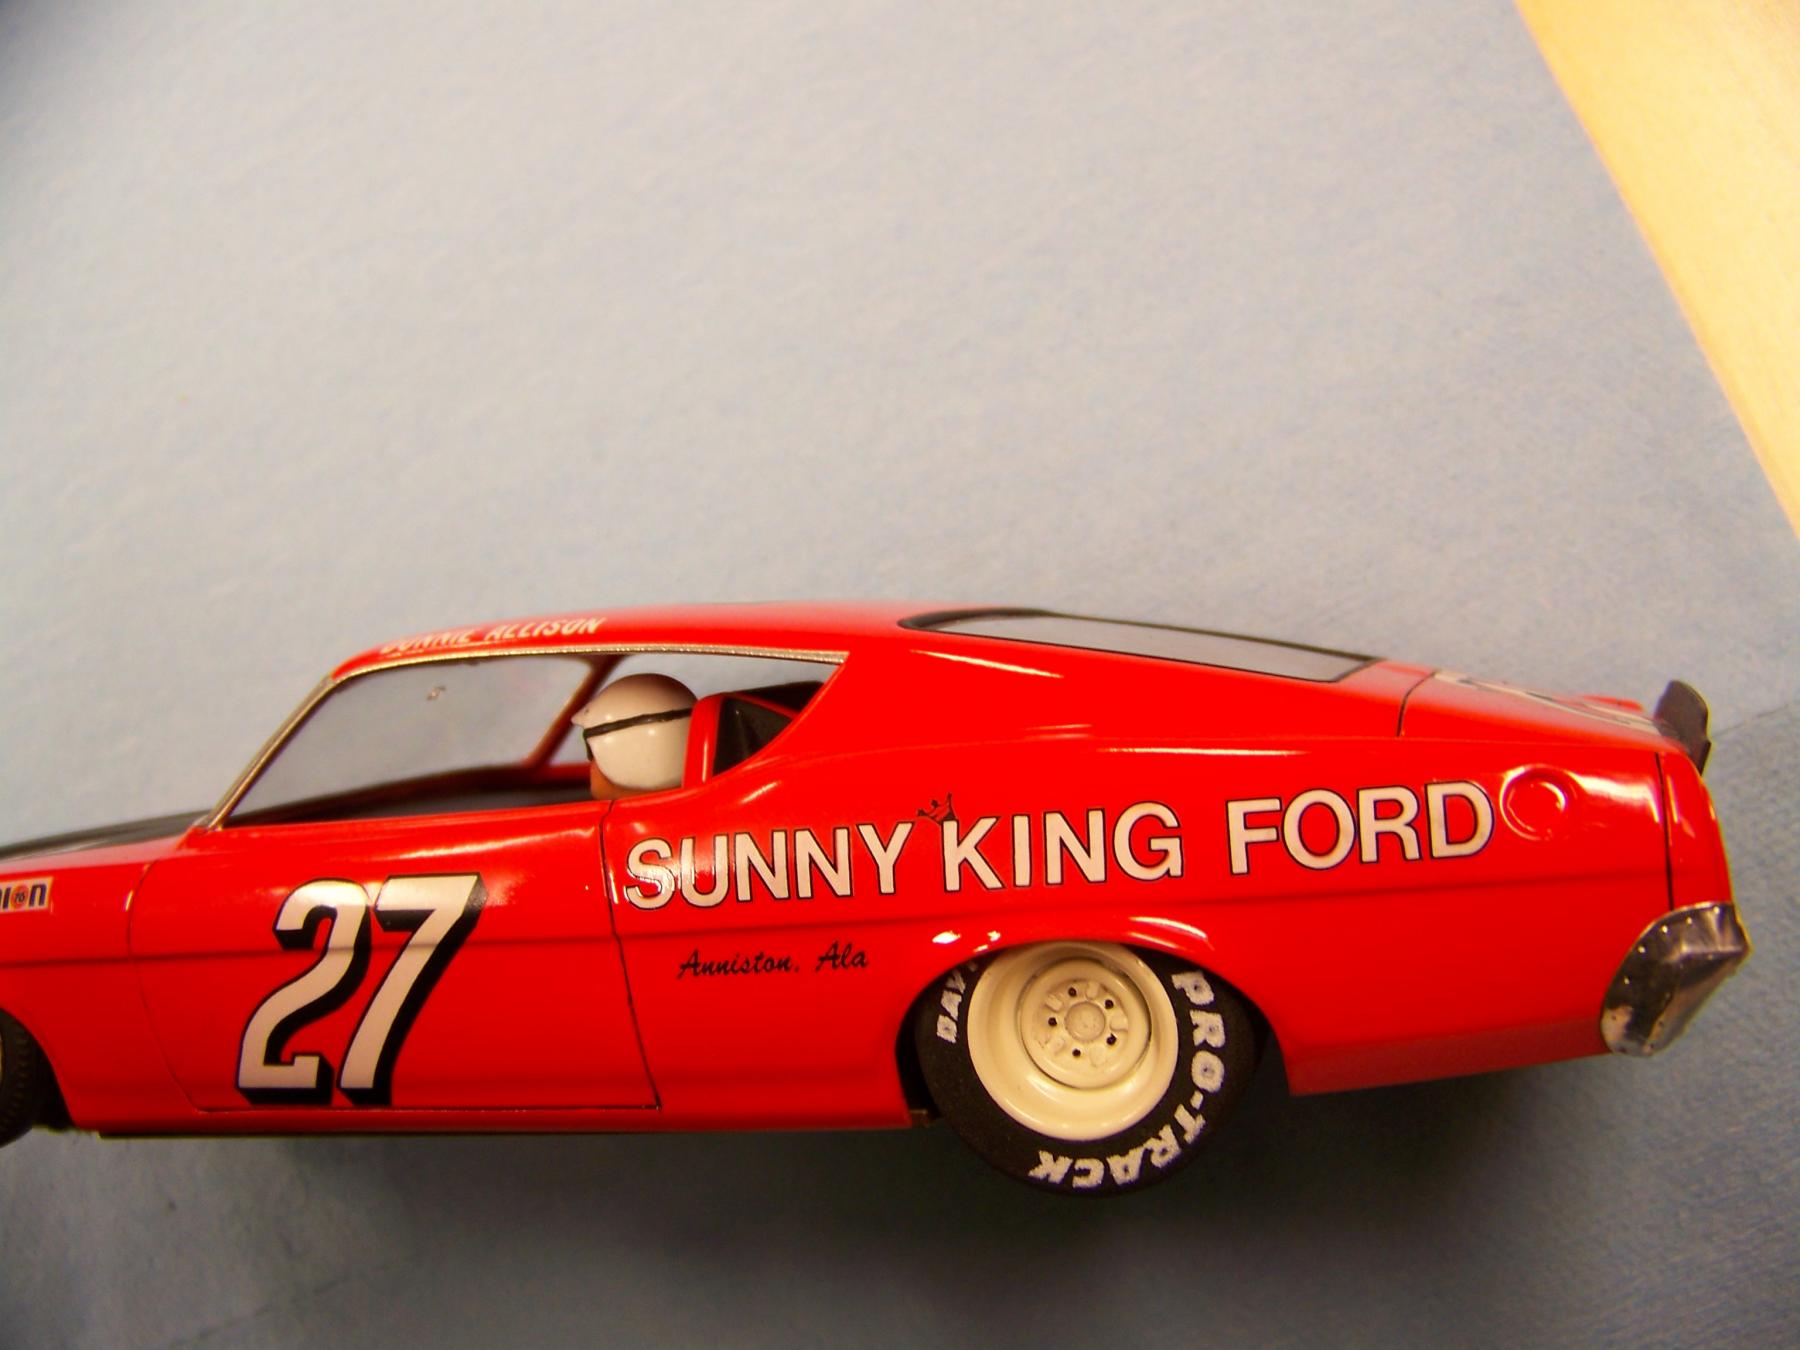
I actually used Letraset on this build as the decals did not exist.
It was challenging as there are 2 layers, black and white that have to be lined up.
But sounds like you have a solution with Ricks decals.
Just wanted to show what could be done with Letraset.
- MSwiss, Phil Smith, Regis4446 and 3 others like this
#278

Posted 04 June 2020 - 02:25 PM
Check the model railroad department in your local hobby shop. They most likely will still have some Letraset letter and number sets in stock. Also, they
will have a good selection of Thinfilm water slide decals which are great for metal. Use Champ Decal-set to disolve the film so that only the printing will
be left. Makes it look like the letters were actually painted on.
- Rotorranch likes this
#279

Posted 04 June 2020 - 03:32 PM
All my body painting experience was with race bodies. No decals. So I've never heard of Letraset. Very cool!
Nice work, Martin. Is the small script also Letraset?
???-2/31/23
Requiescat in Pace
#280

Posted 04 June 2020 - 04:03 PM
Hi Martin,
I'd never have guessed that body has Letraset instead of decals on it. Nice job!
Alan
#281

Posted 04 June 2020 - 07:31 PM
Thanks Alan,Phil sorry if I detract from your intense build. I try to be respectful audience.
The small script is from a decal sheet. The crown I hand painted. Many years later Pola lights came out with this car in 1/25 scale. ![]()
Mine is 1/24 to maximize to width for hard body stock car racing.
- Phil Smith likes this
#282

Posted 05 June 2020 - 03:09 PM
No worries. ![]()
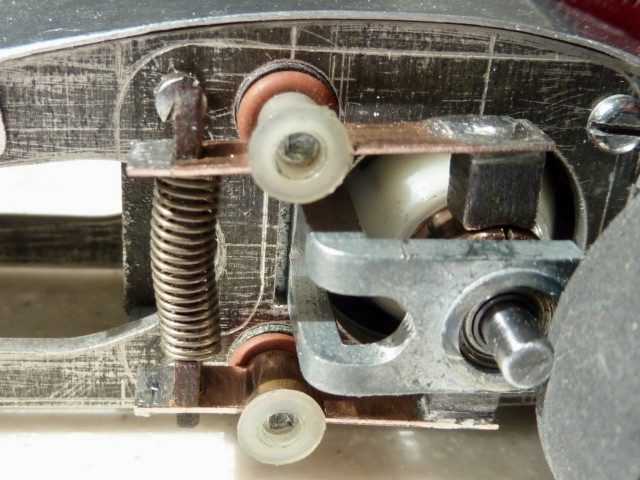
I wanted to get the"details" of the driver and drop arm spring sorted out and built before turning my attention to the rear end of the car in general and the motor in particular.
My next task will be to epoxy the Ram 6 volt armature, balance it, true the commutator, and finally, cut off excess shaft length on both ends of the arm.
Since I'm teeing up the replica Maldonado dragster project to begin soon after I complete the Husting replica, I will epoxy a couple of additional 6 volt Ram armatures at the same time as I do the Husting armature, saving time overall with a small batch process.
- hiline2 likes this
#283

Posted 06 June 2020 - 09:16 PM
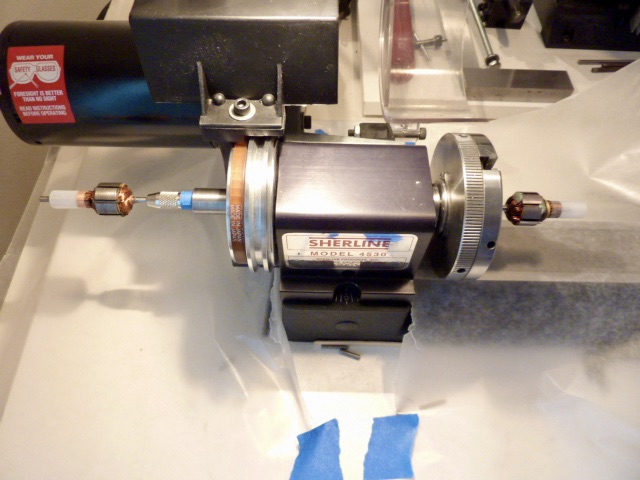
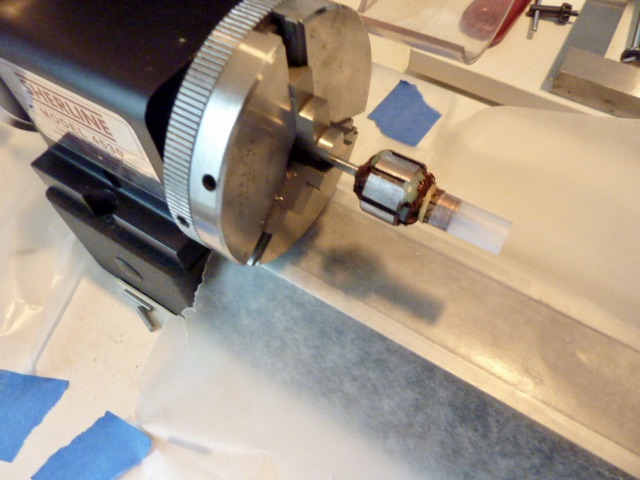
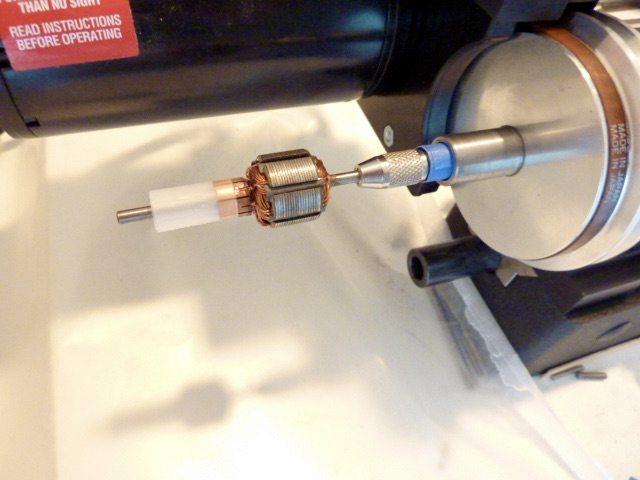
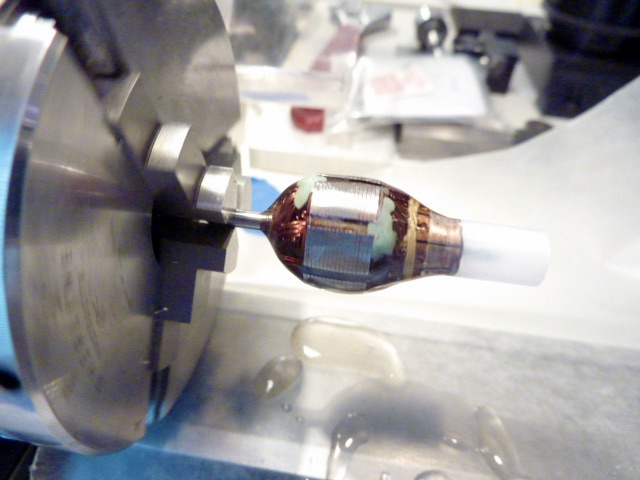
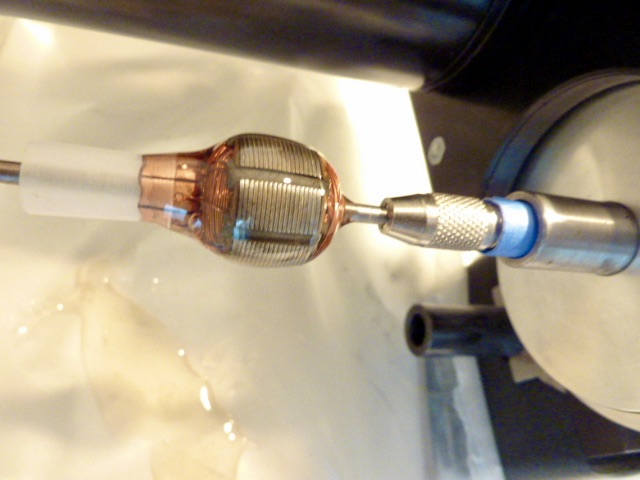
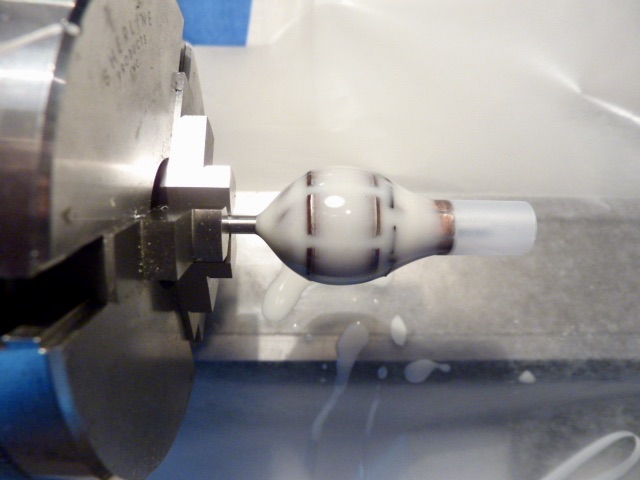
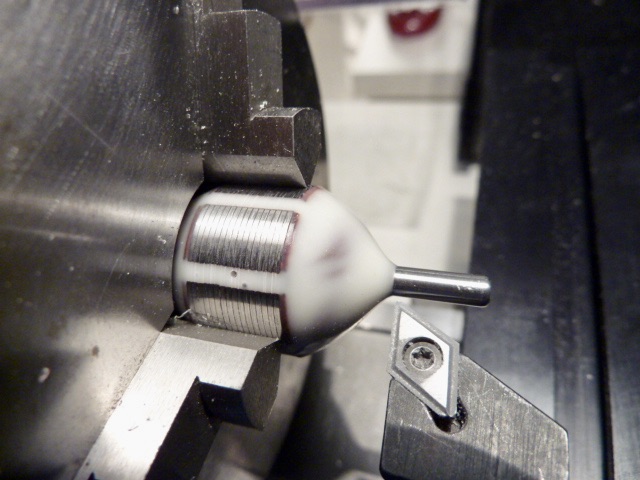
Following Gene Husting's advice, I taped the commutators of two Ram 857 6-volt armatures and mounted them in the Sherline lathe. The Husting replica's arm was mounted in the 3-jaw chuck. The other arm for the Maldonado dragster was mounted in a pin vise. The pin vise with the arm was inserted into the lathe's hollow spindle at the opposite end. Wax paper was placed underneath both arms to catch epoxy drippings.
- hiline2 likes this
#284

Posted 06 June 2020 - 09:33 PM
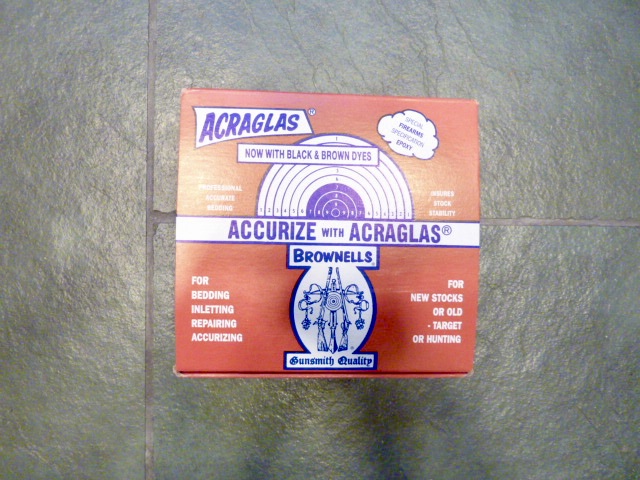
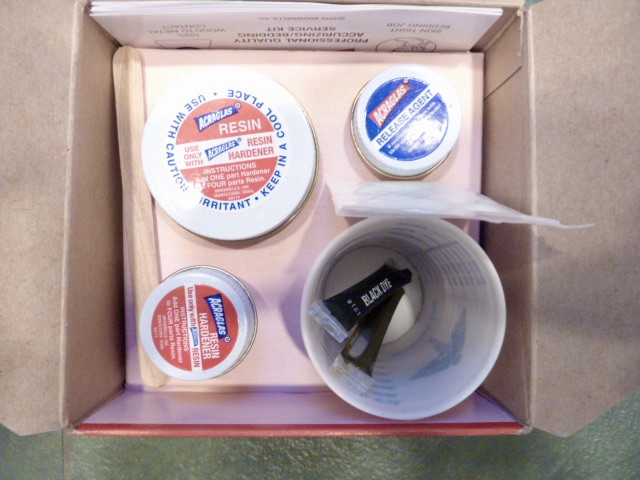
This is the Acraglas epoxy Howie Ursaner mentioned was the choice of many NYC area drag racers in the 1960's.
The minimum amount you can mix at one time is 1.25 fluid oz. I did two armatures with one batch, but 1.25 oz. of epoxy could easily do six arms if you had the equipment.
Needless to say, much of the 1.25 oz. batch I mixed was wasted. ![]()
- hiline2 and Howie Ursaner like this
#285

Posted 06 June 2020 - 09:34 PM
I set the lathe to rotate at a very slow speed, about one rotation every 1.5 - 2 seconds.
After the resin and hardener are mixed, epoxy is dribbled onto the arms' windings and laminations as they turn slowly on the lathe.
There are about 15 to 20 minutes of working time from mixing to when the epoxy begins to set up and harden.
- hiline2 and Howie Ursaner like this
#286

Posted 06 June 2020 - 09:44 PM
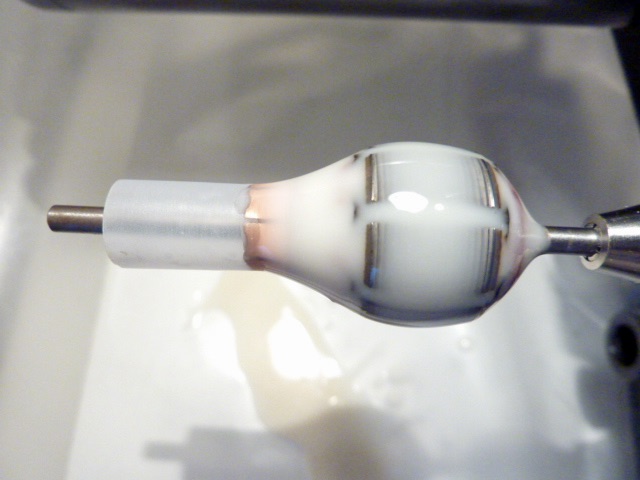
The lathe's slow rotation allows epoxy to flow around the armature's windings and laminations evenly and symmetrically.
Turning the armature slowly like it's on a barbecue spit is the key to perfectly even distribution and epoxying success.
In fact, the Rod & Custom build article shows Husting used a motorized barbecue spit inside an oven to turn his armatures while first applying and later curing the epoxy.
Interestingly, Acraglas epoxy goes from clear at mixing to milky white after it's applied to the armature and it begins to set up and harden.
I kept the lathe slowly turning both armatures for a few hours until I was sure the epoxy was hard and the arms didn't need to be rotated anymore.
- TSR, hiline2 and Tom Katsanis like this
#287

Posted 06 June 2020 - 09:56 PM
I'll let the epoxied armatures cure for a day. Once the epoxy is fully cured I'll mount the armatures in the lathe and file off the excess at the laminations and at the commutator, then remove the tape protecting the commutator's surface.
- hiline2, Howie Ursaner and Tom Katsanis like this
#288

Posted 08 June 2020 - 02:26 PM
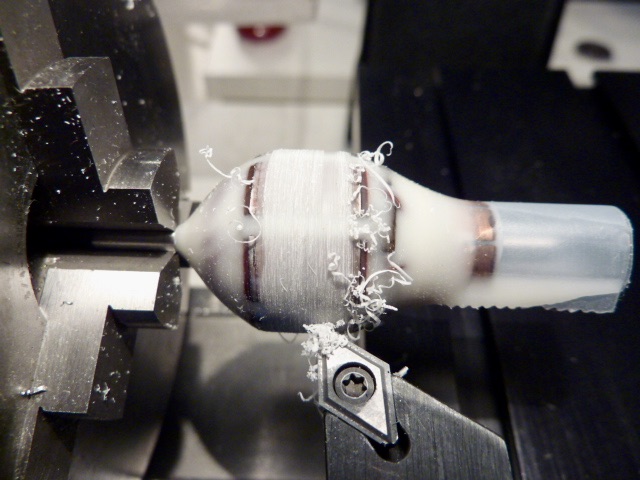
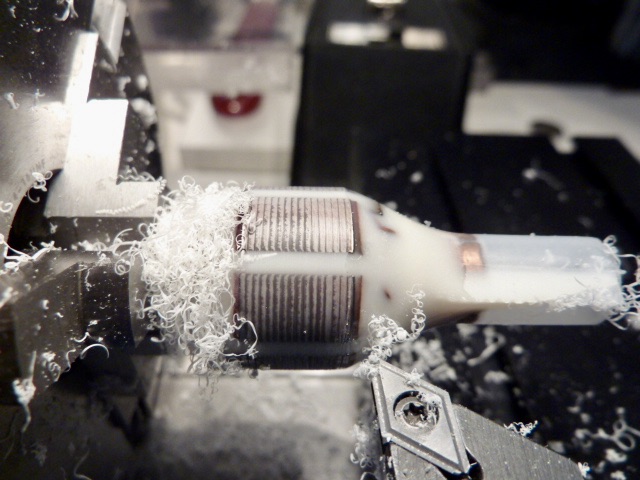
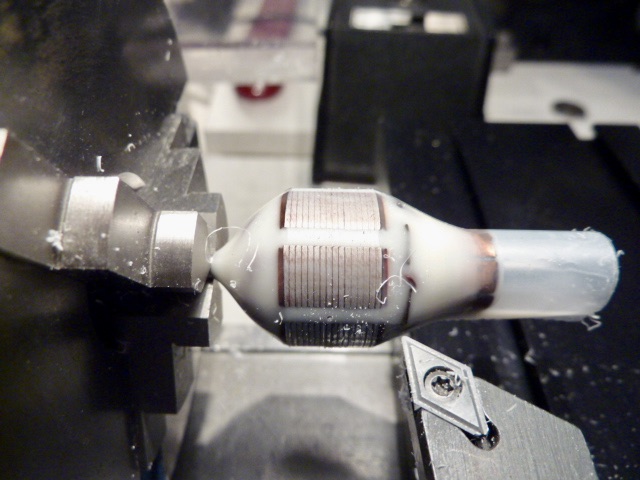
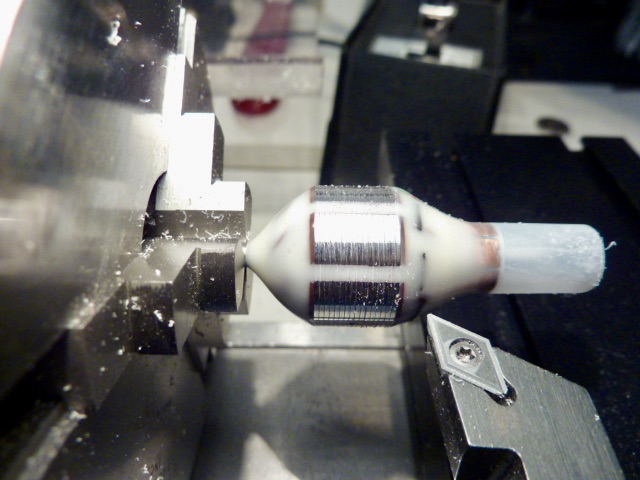
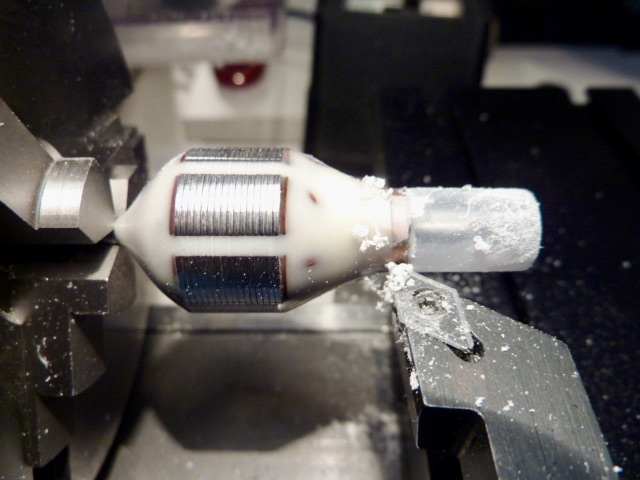
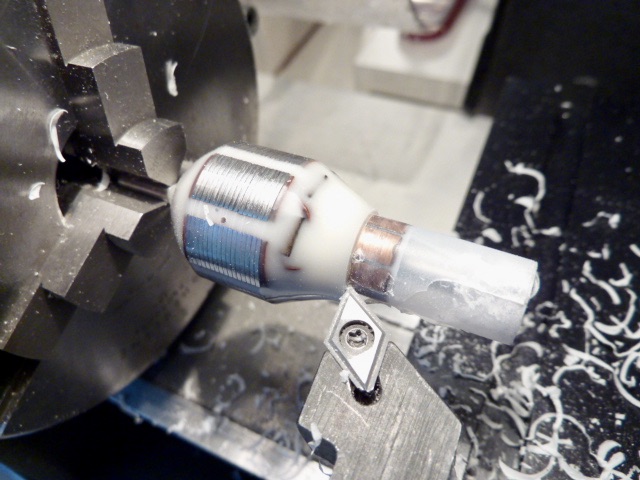
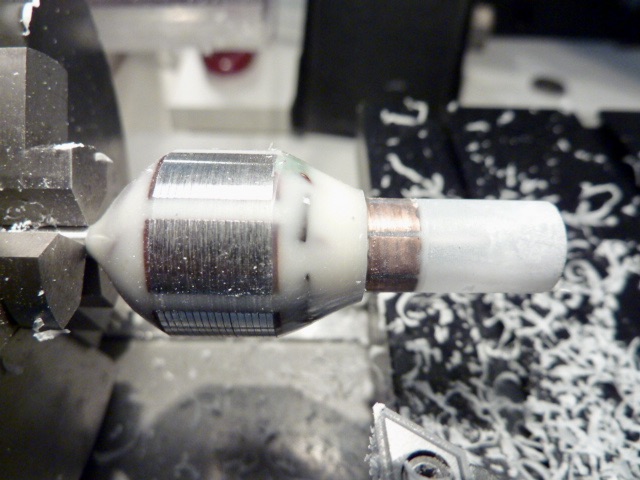
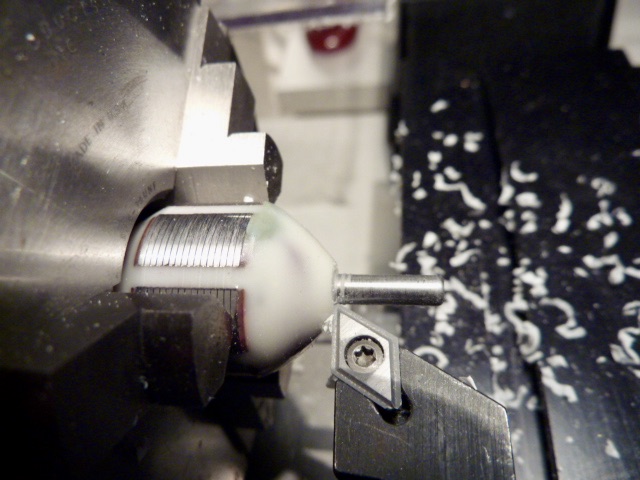
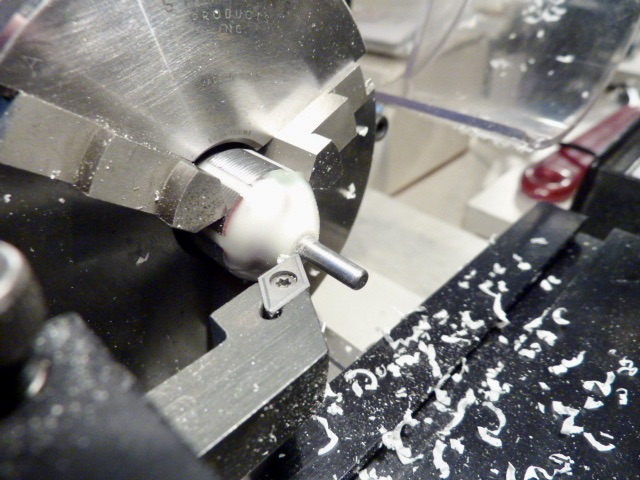
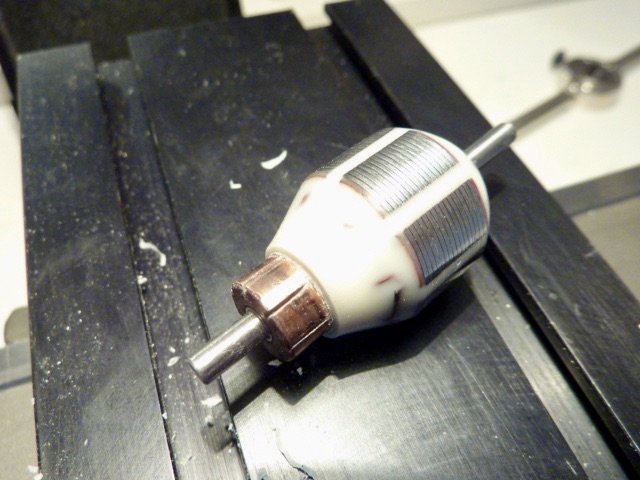
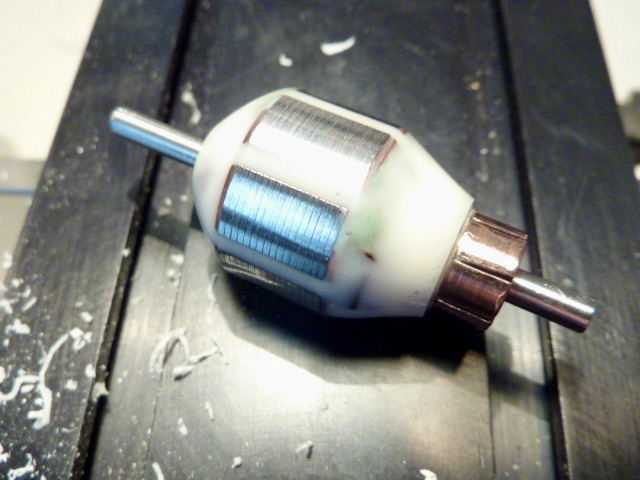
After the armatures cured for a day or so, I took the one destined for the Gene Husting dragster and installed it in a 3-jaw chuck on the lathe.
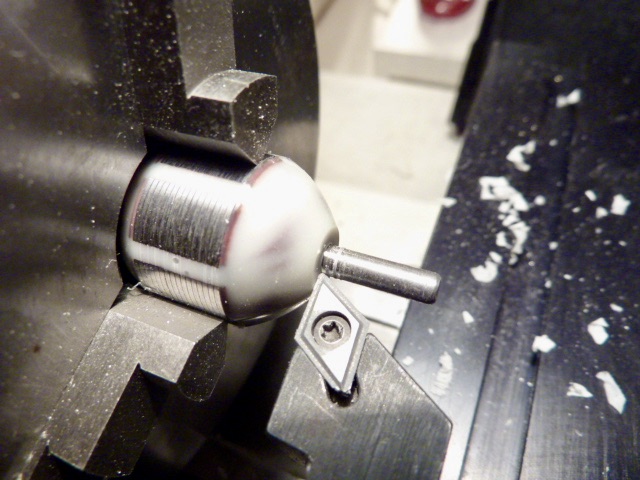
I began by removing excess epoxy on the laminations and continued until the seven pole laminations were exposed. Then I trued the laminations until all were equal in height and concentric with the armature shaft.
- hiline2 likes this
#291

Posted 08 June 2020 - 02:41 PM
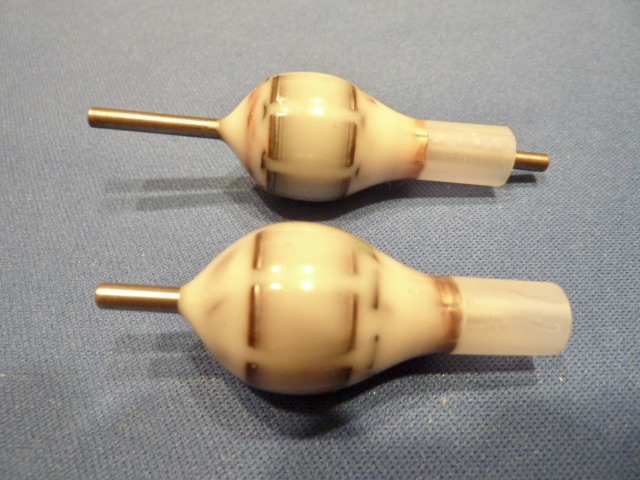
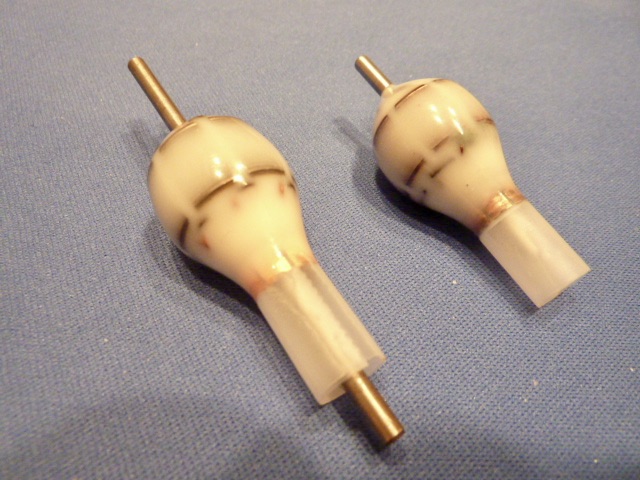
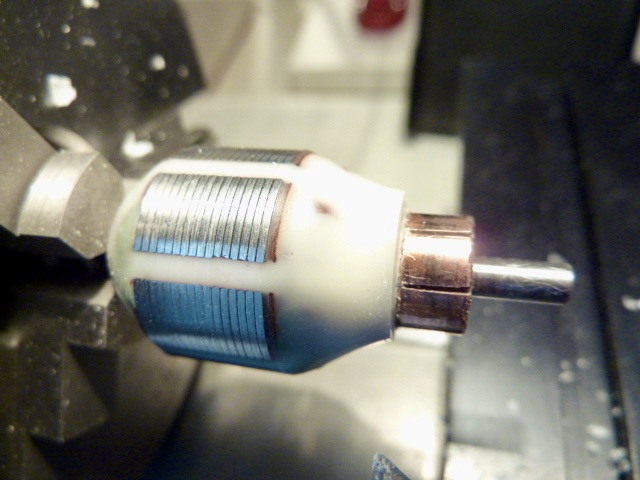
The finished product...
Acraglas comes with one tube each of black and brown dye which you can add two minutes into mixing the resin and hardener. (Remember this product is designed for bedding, inletting gun stocks, barrels, scopes, and repairs, so black and brown are the appropriate colors).
The next pair of Ram armatures I epoxy will have black dye added. They will be unique-looking armatures. ![]()
- hiline2, Geary Carrier and Phloidboy1 like this
#292

Posted 08 June 2020 - 03:05 PM
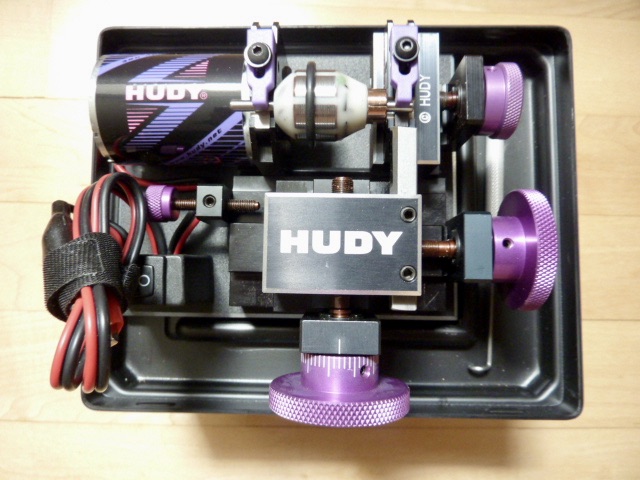
I'll balance the armature next, then I'll true the commutator on a Hudy comm lathe. Finally, I'll trim off excess shaft lengths.
I checked to see how the Ram armature will fit on a Hudy comm lathe.
Since this a large diameter armature compared with most slot car motor arms, the rubber O-ring linking the Ram arm to the lathe motor's drive pulley gets stretched pretty tight.
If this doesn't look like it's going to work optimally, I'll true the comm on the Sherline lathe.
- hiline2 likes this
#294

Posted 10 June 2020 - 06:14 PM
It can be a U.S. O ring.
Czech O ring not necessary. Lol
- Rotorranch likes this
Mike Swiss
Inventor of the Low CG guide flag 4/20/18
IRRA® Components Committee Chairman
Five-time USRA National Champion (two G7, one G27, two G7 Senior)
Two-time G7 World Champion (1988, 1990), eight G7 main appearances
Eight-time G7 King track single lap world record holder
17B West Ogden Ave., Westmont, IL 60559, (708) 203-8003, mikeswiss86@hotmail.com (also my PayPal address)
Note: Send all USPS packages and mail to: 692 Citadel Drive, Westmont, Illinois 60559
#295

Posted 10 June 2020 - 09:29 PM
"Go to a hardware store, and get a bigger O ring."
I never thought of that! So used to buying everything online!
I'll have to check out the Home Depot nearby, if it hasn't been looted yet. ![]()
- Phloidboy1 likes this
#296

Posted 10 June 2020 - 09:42 PM
The other thing I have to do with the motor is grind the upper and lower sets of laminations to conform with the shapes shown in Gene Husting's Rod & Custom magazine build articles for this car.
I decided that the only way to do this step right is to use a bench grinder.
Since I don't have or need one that's full size like Husting's, I bought a mini 3" tool grinder with buffing wheel from Harbor Freight last week online that's inexpensive.
It's half the cost of the same model sold online by various vendors (under different brand names), but it takes twice as long to get. ![]()
- hiline2 likes this
#297

Posted 10 June 2020 - 09:56 PM
So, while I'm waiting for the bench grinder to arrive, I am starting to work on getting tires mounted and trued for this car and for the next dragster I build as well.
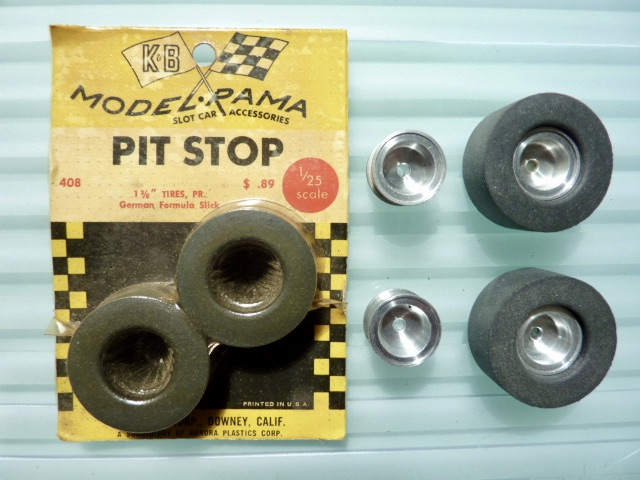
One of the first things that I want to try are the vintage K&B Model-Rama "German Formula" drag tires from the 1960's. Sealed inside their shrink-wrapped packaging, these 50+ year old rubber tires are reportedly still "fresh" today and perform well.
I'll mount/ cement a pair of the K&B tires onto vintage Russkit rear drag wheels.
I'll true/ grind them to size meeting class rules (1-3/8" diameter max. x 0.500" wide).
I want to see if the K&B tire rubber is porous underneath its smooth skin like other German rubber, such as Graupner model airplane tires, for example.
- hiline2 likes this
#298

Posted 10 June 2020 - 10:08 PM
The K&B tires fit perfectly on the Russkit wheels. All I need to do is take the tires out of the package and glue them to the wheels.
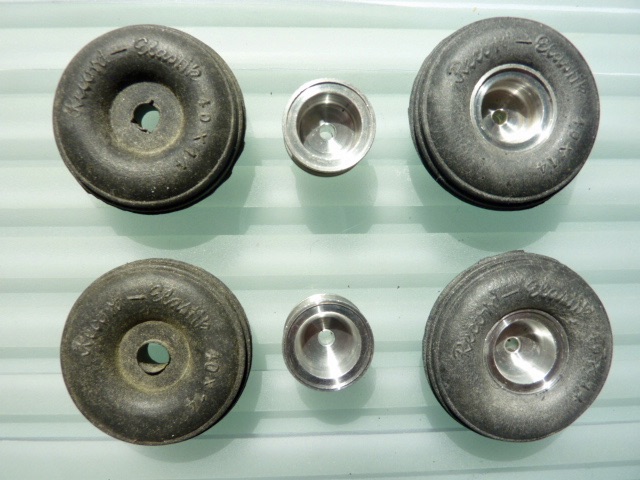
Graupner tires take more work.
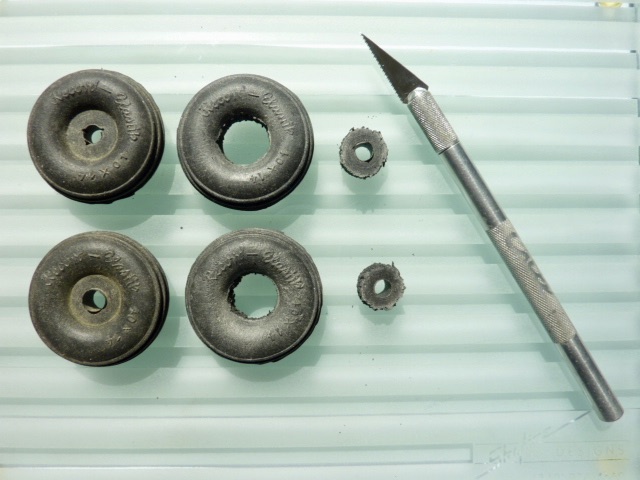
First I needed to sort the Graupner tires by firmness, separating "medium" from "hard" tires. There aren't any "soft" tires in my batch.
I used an Exacto knife with a saw-toothed blade edge (instead of a standard razor edge) to saw the center holes out of a pair of "medium" firm Graupner donuts.
- hiline2 likes this
#300

Posted 10 June 2020 - 11:30 PM
I won a lot of races with Graupner tires on all my track cars. They were all we had for quite a while.
- boxerdog and Alan Draht like this


