Jump to content


Photo

Rick Davis' 1971 Car Model at Parma Raceway TQ Pro car


  • Please log in to reply
85 replies to this topic

#26 dc-65x

dc-65x

    Grand Champion Poster

  • Subscriber
  • PipPipPipPipPipPipPipPip
  • 6,976 posts
  • Joined: 14-February 06
  • Gender:Male
  • Location:Captain Rick: The only vintage slot car nut in SW Oregon?

Posted 08 May 2020 - 03:02 PM

Great pictures Bob, thank you again.


I was very apprehensive about trying to cut an 1/8" off the length of Blue Dot magnets with a diamond saw.....but that's what Rick Davis did.


Not having any diamond saws laying around I searched eBay and found these:


Diamond cutoff wheels.JPG


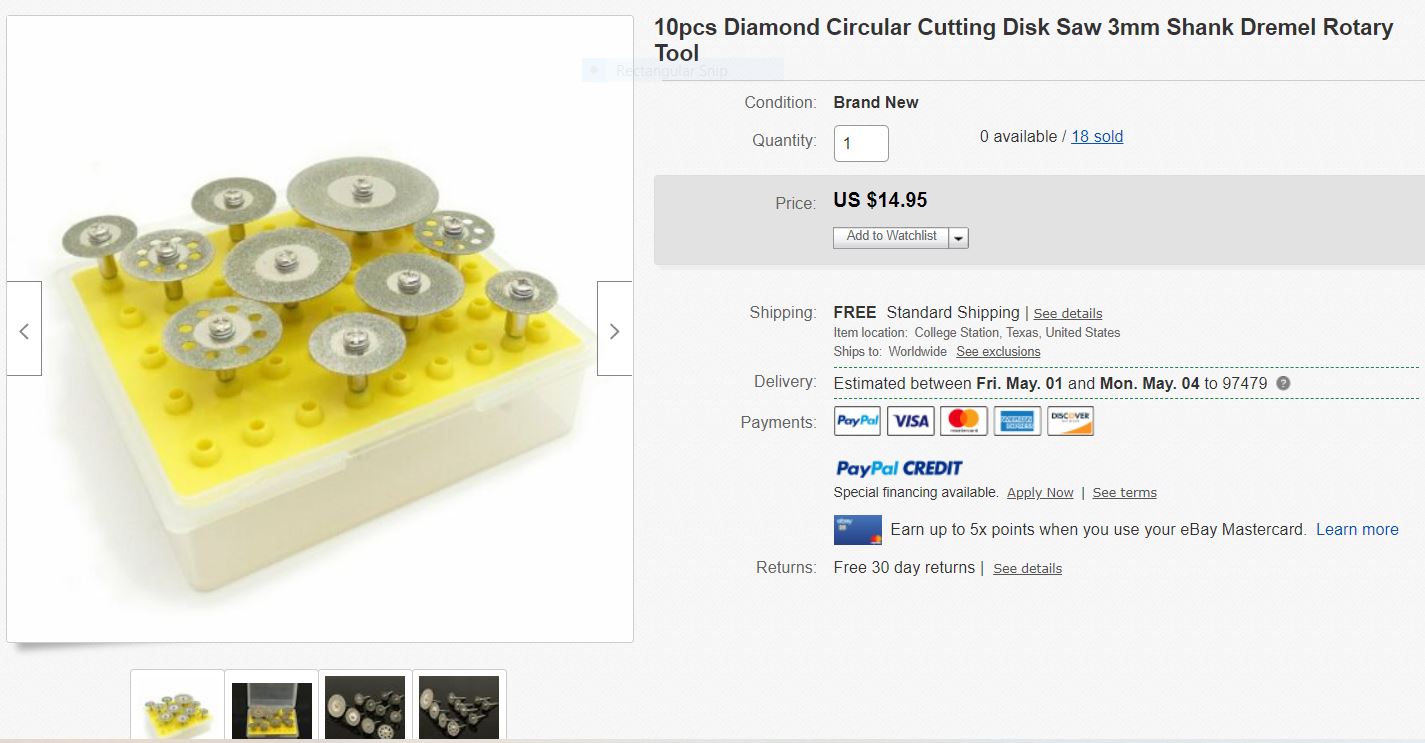
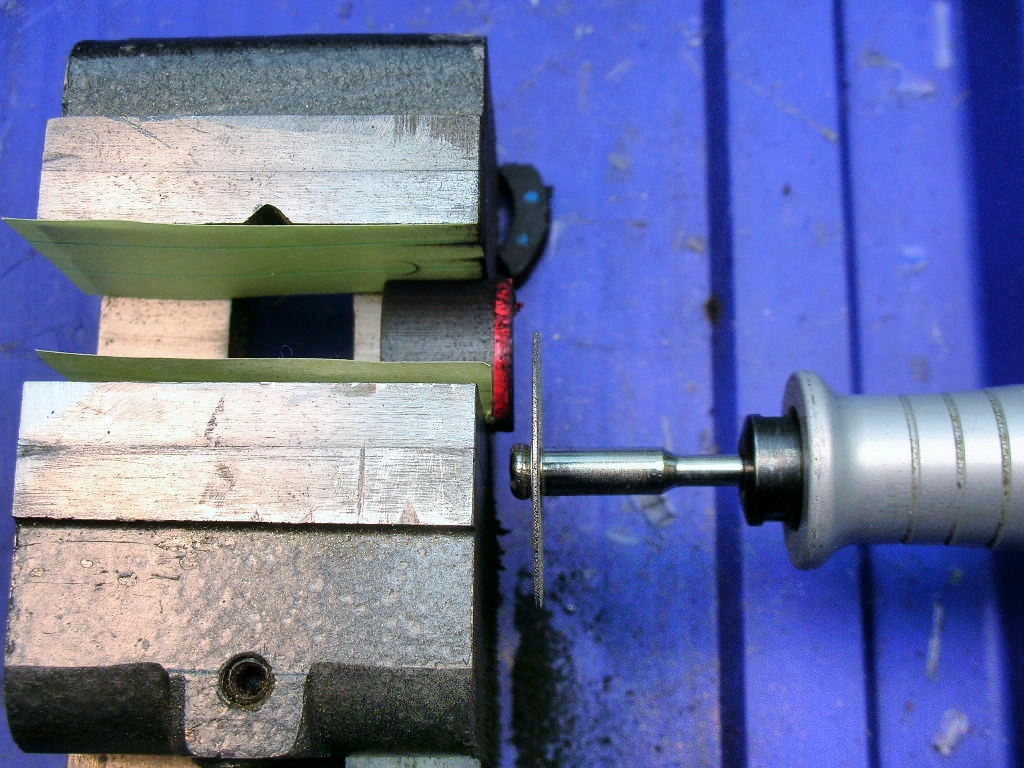
I had no idea if these would work but at least they were cheap. I had visions of the wheel blowing apart and fragments embedding in my forehead. I found a pair of Blue Dots with corner chips since I thought I'd be ruining them anyway. The magnet was clamped in a small vise and the rotary tool hand-piece clamped in another vise to help keep the cut off wheel aligned.


C-can shorty (18).JPG


To my absolute delight it cut through the magnet like a hot knife through butter:    :shok:    :D


C-can shorty (17).JPG


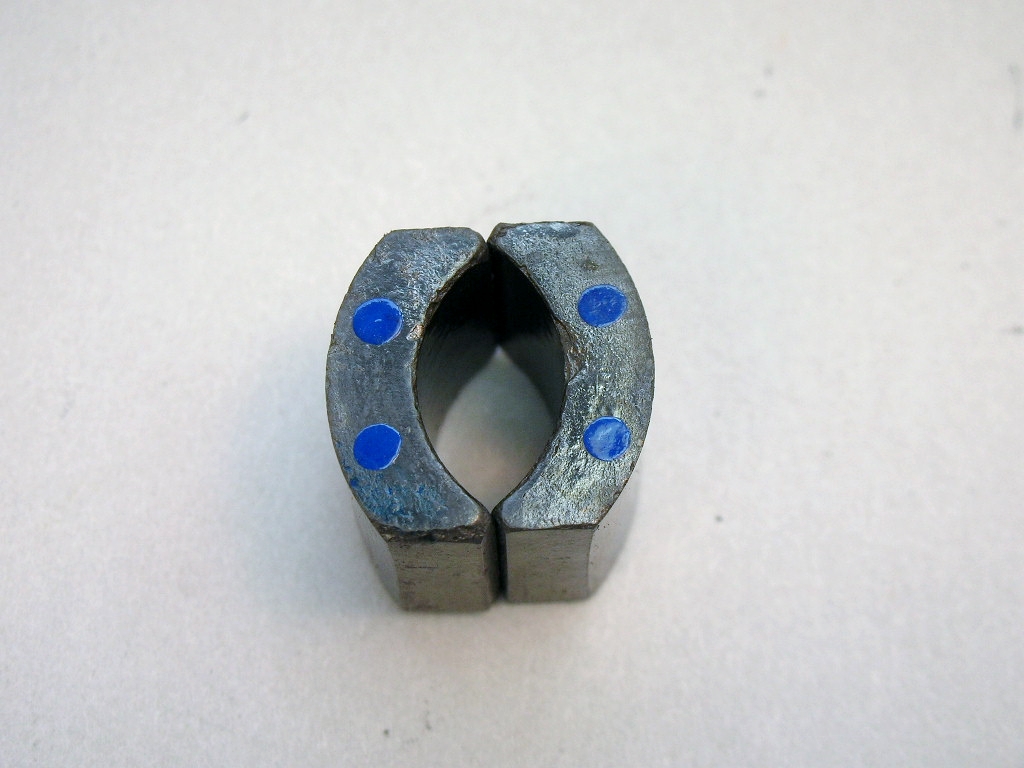
The "blue dots" were repainted for the heck of it:


C-can shorty (26).JPG


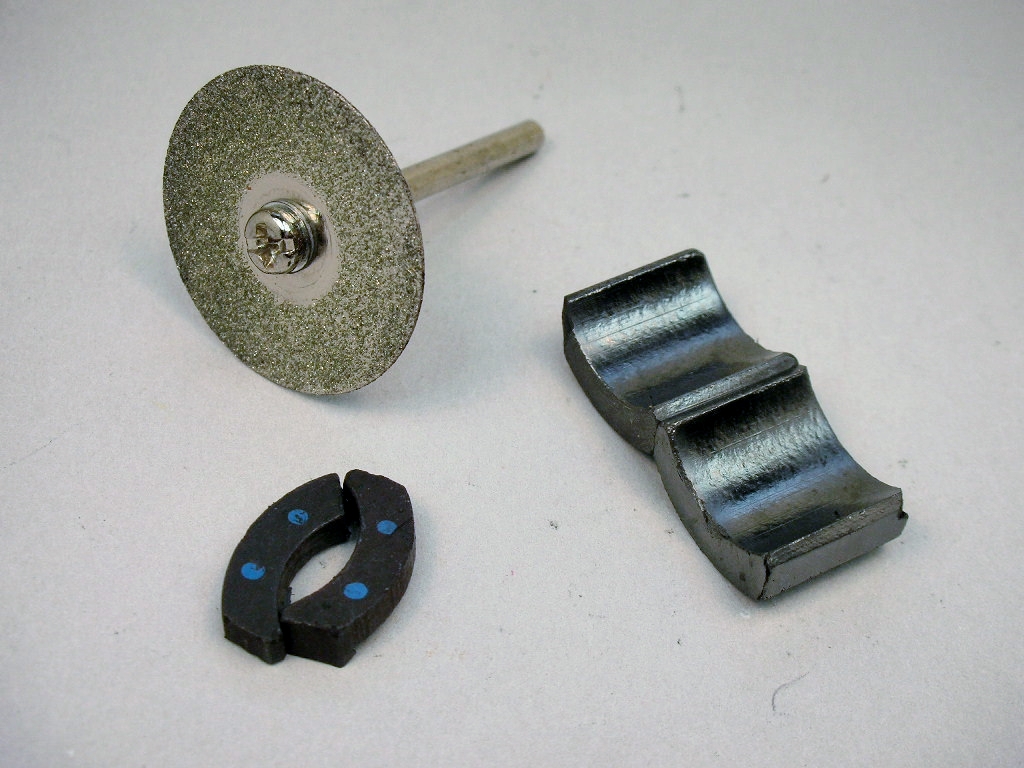
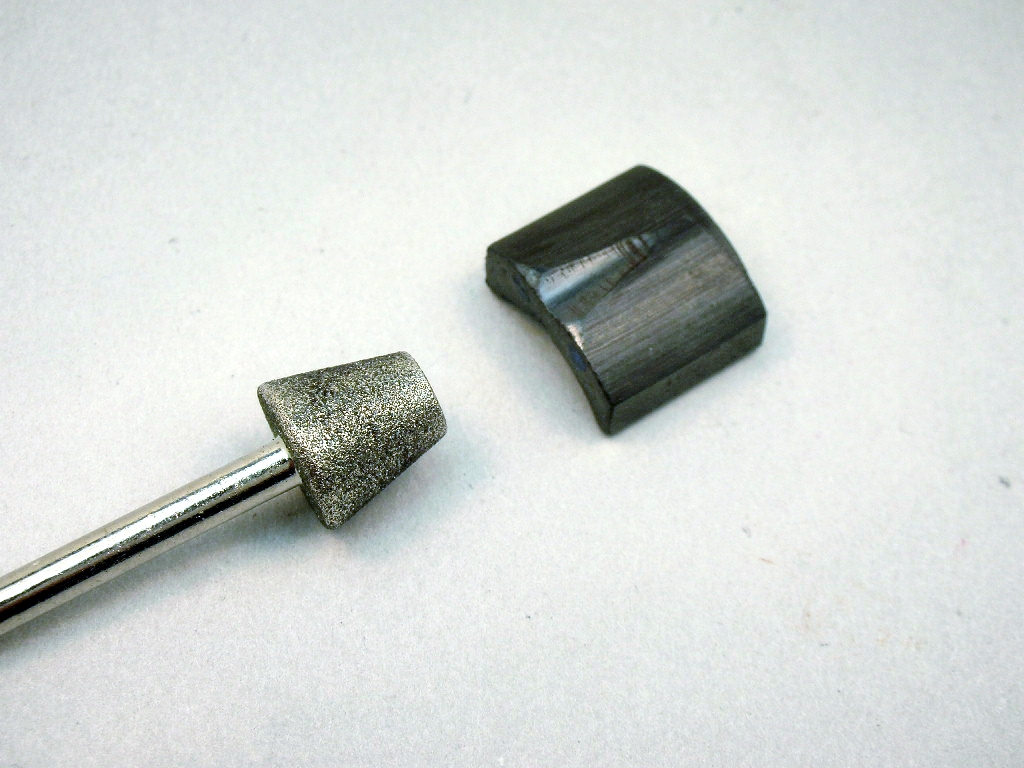
I ground a little relief in one magnet for axle clearance with another eBay diamond tool:


C-can shorty (30).JPG


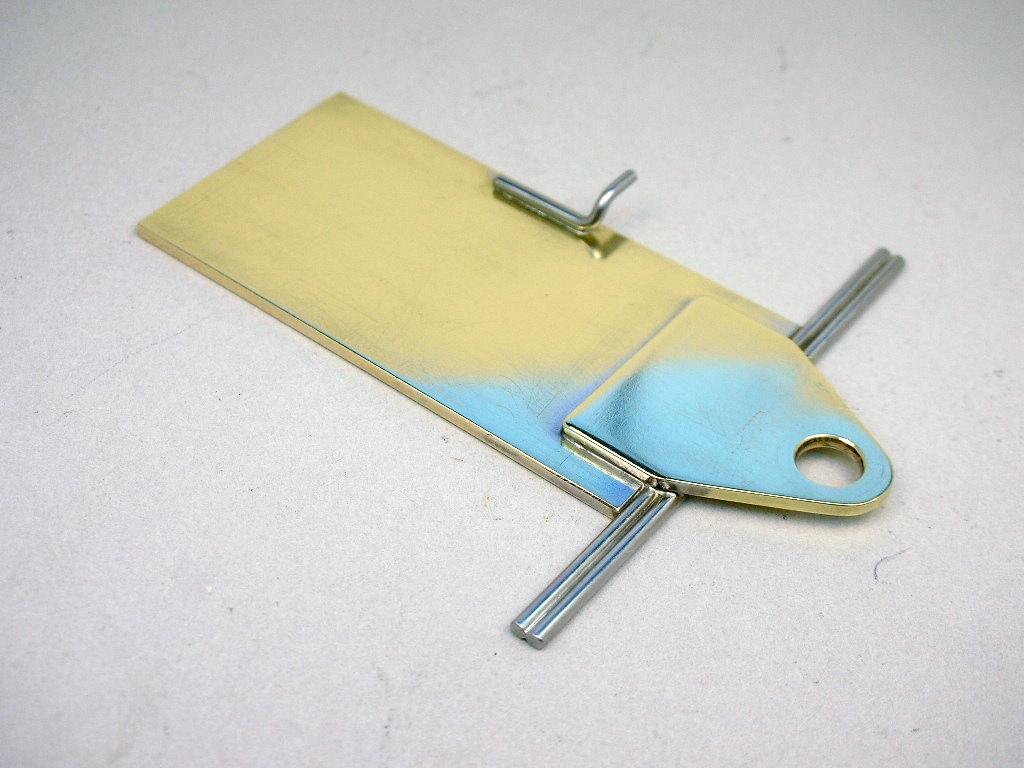
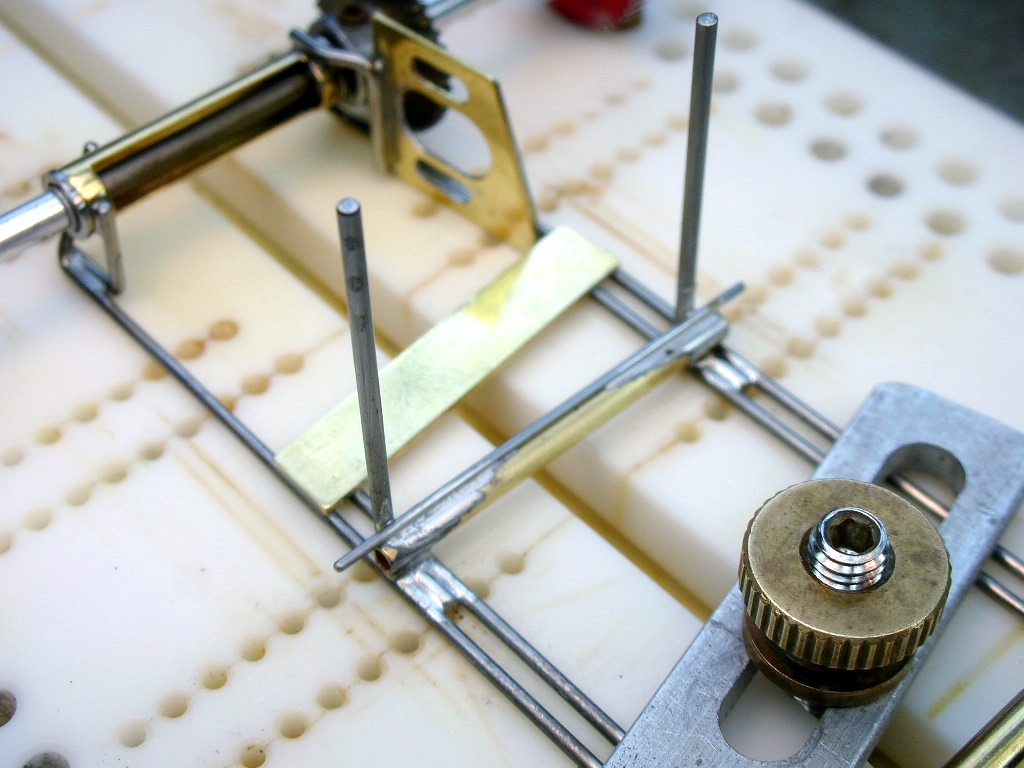
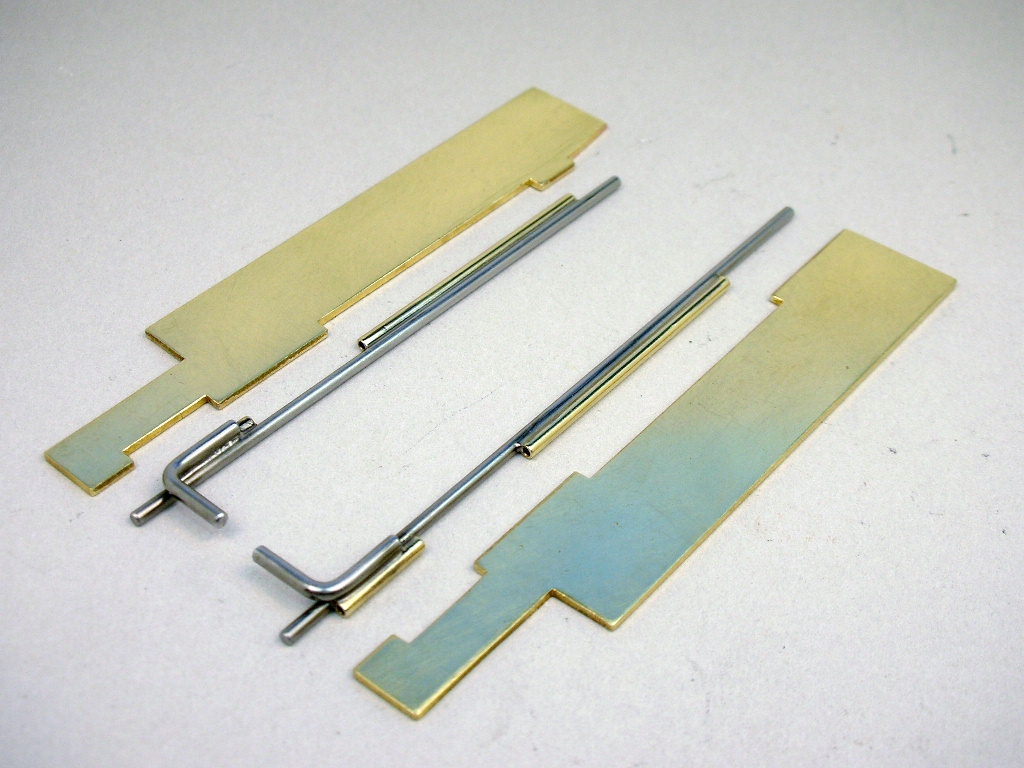
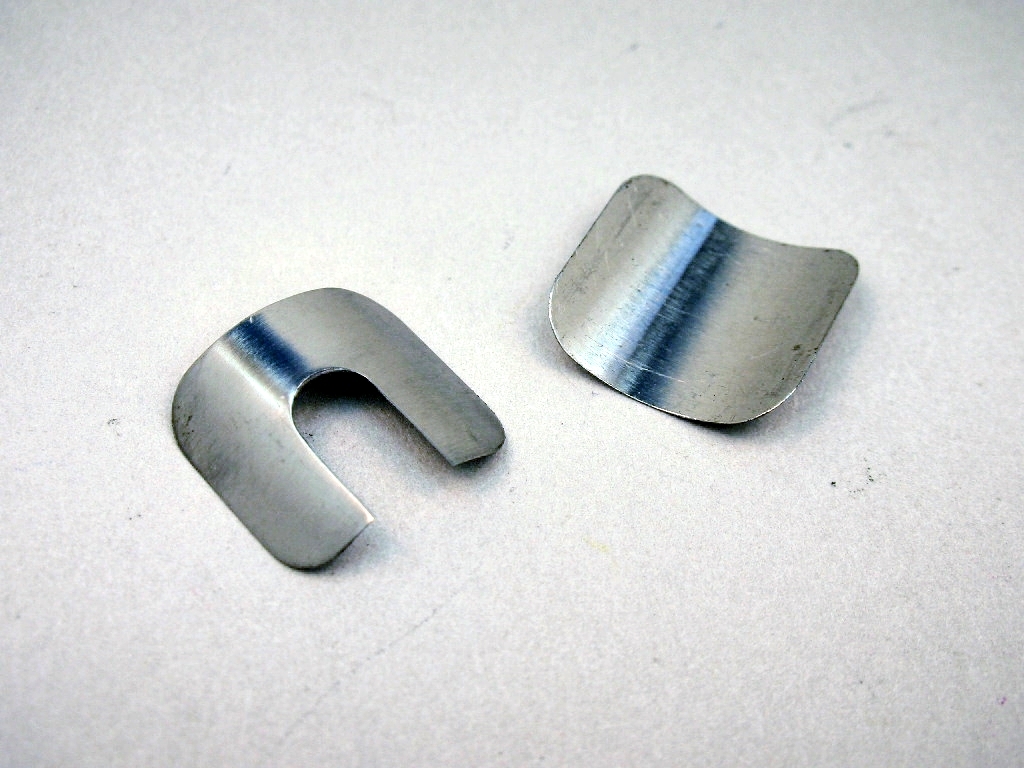
.005" steel shim stock was cut out for magnet shims:


C-can shorty (28).JPG


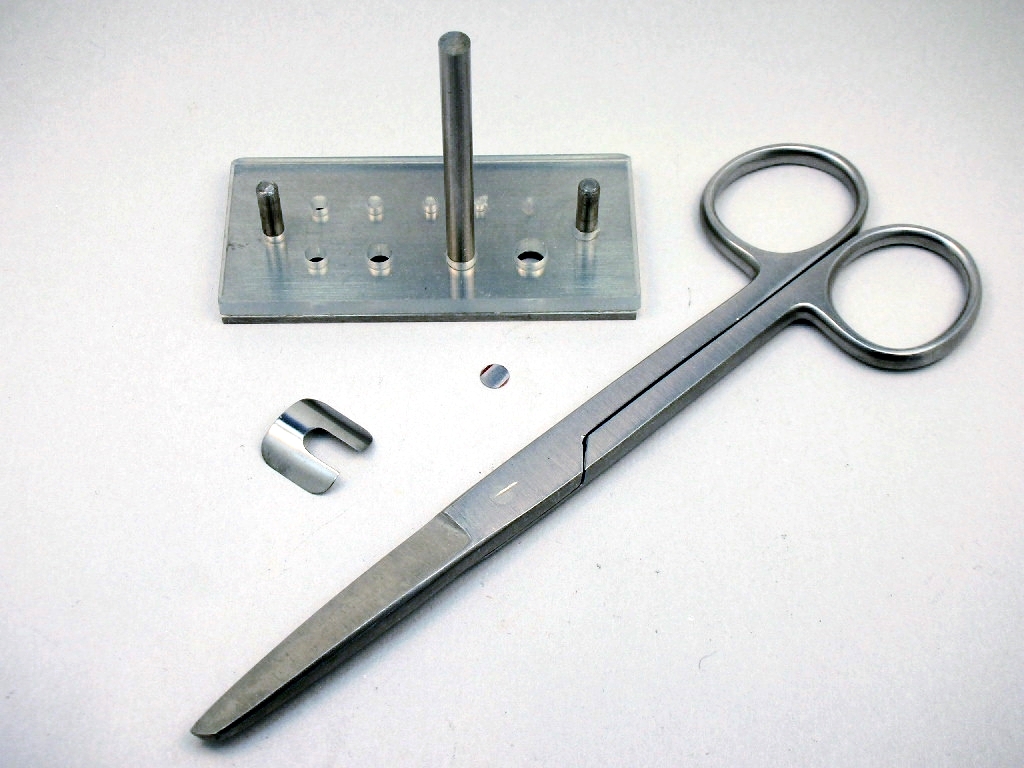
With the shims made.........


C-can shorty (29).JPG


............the freshly zapped and cut down magnets and shims are epoxied into the can. When the epoxy cures I can hone and true the magnets......


  • NSwanberg, Peter Horvath and SpeedyNH like this

Rick Thigpen
Check out Steve Okeefe's great web site at its new home here at Slotblog:
The Independent Scratchbuilder
There's much more to come...


#27 Pablo

Pablo

    Builder

  • Administrator
  • PipPipPipPipPipPipPipPip
  • 18,454 posts
  • Joined: 20-February 06
  • Gender:Male
  • Location:Cleveland, Tennessee

Posted 08 May 2020 - 03:31 PM

:heart:  :heart:  :heart:  :heart:  Genius. 


Paul Wolcott


#28 Bob Appelle

Bob Appelle

    On The Lead Lap

  • Subscriber
  • PipPipPipPip
  • 254 posts
  • Joined: 07-December 09
  • Gender:Male
  • Location:Washington, MI

Posted 08 May 2020 - 08:03 PM

I can picture Rick doing this on a bench in the backroom of his Dad's Bike shop with a Unimat, Dremel and a few pair of pliers and a weller soldering gun. I would say he was 23 or 24 years old at the time. I couldn't do it with a lathe, mill, and any other tool that might help the build. LOL Rick Thigpen I commend you on your building skills, I can't wait to see the finished car. Bob


  • Half Fast, Steve Deiters and NSwanberg like this
Hemi Bob

#29 dc-65x

dc-65x

    Grand Champion Poster

  • Subscriber
  • PipPipPipPipPipPipPipPip
  • 6,976 posts
  • Joined: 14-February 06
  • Gender:Male
  • Location:Captain Rick: The only vintage slot car nut in SW Oregon?

Posted 10 May 2020 - 11:55 AM

The endbell for this 1971 motor needs to be the early style. They were a modified by Mura B-motor endbell narrowed to fit the C-can. Here is an stock early C-can endbell on the left, my modified early endbell in the middle and the later C-can specific "big bearing" endbell on the right:


C-can shorty (7).JPG


My modified version in the middle has the frame cutout that would later become standard and a small cut on top for the early wire style buss bar:


C-can shorty (8).JPG


Modified endbell:


C-can shorty (9).JPG


Here are all the parts (less the buss bars) that go into the endbell. All the screws are modified stainless steel 2-56 machine screws. The brass strips go in the top and bottom of the endbell and are necessary to square it up the low profile B-endbell in the taller C-can.  The fiber armature washers are used to insulate the spring posts.


C-can shorty (2).JPG


The "low profile" insulated spring post on the left and a stock one on the right:


C-can shorty a.jpg


A modified, deburred and polished brush hood is on the left. The slot is opened up to fit the brush springs with insulation. The spring retaining "hook" is also reshaped to fit the insulated spring:


C-can shorty (12).JPG


The assembled endbell. No buss bars just yet:


C-can shorty (11).JPG


OK, the motor is far enough along that I can use it to build the chassis............


  • Tex, Rob Voska and Peter Horvath like this

Rick Thigpen
Check out Steve Okeefe's great web site at its new home here at Slotblog:
The Independent Scratchbuilder
There's much more to come...


#30 SpeedyNH

SpeedyNH

    Old Engineer

  • Full Member
  • PipPipPipPipPip
  • 763 posts
  • Joined: 18-July 15
  • Gender:Male
  • Location:Cow Hampshire

Posted 10 May 2020 - 03:39 PM

nice job!  a lot of people don't realize just how much work goes into building a motor.  especially a modified one!  


Steve Lang


#31 dc-65x

dc-65x

    Grand Champion Poster

  • Subscriber
  • PipPipPipPipPipPipPipPip
  • 6,976 posts
  • Joined: 14-February 06
  • Gender:Male
  • Location:Captain Rick: The only vintage slot car nut in SW Oregon?

Posted 13 May 2020 - 11:19 AM

As I said in my post #1:
 

This is going to be an "inspired by" build (not a true clone)........... 

 
I'm doing what I did back in the day. I would have opened up my new issue of Car Model magazine, saw Rick Davis' cool car and set about build a version of my own. Mine is going to be a bit different based on my personal building style, skill level and the components I have available. The available components part of this is especially troublesome today, 49 years later.
 
I spent a lot of time trying to fit together a center section and get everything squeezed into such a small package. One of the required parameters for the car is the maximum rear track width and the wheels and tires to be used. I scaled the original photos as best I could and came up with a .600" overall wheel width with a .550" tire. Here are the "super corrodo" wheels I scrounged up:
 
C-can shorty (33).JPG
 
I'm using Riggen orange donuts and Faas 3/32" reducers on the vintage wheels. I'm also going to try a pair of modern French urethane tires on a pair of our narrowed up reproduction Associated wheels:
 
C-can shorty (13).JPG
 
Here are the rough ground down rear tires..........
 
C-can shorty (25).JPG


..........and the Cobra motor mount bracket, modified screws and a piano wire spacer/stiffener:


C-can shorty (18).JPG


The center section was a challenge for me and I struggled with it for two days. I literally tore it completely apart two times trying to get everything to fit within the required parameters...........  


  • Steve Deiters and Peter Horvath like this

Rick Thigpen
Check out Steve Okeefe's great web site at its new home here at Slotblog:
The Independent Scratchbuilder
There's much more to come...


#32 dc-65x

dc-65x

    Grand Champion Poster

  • Subscriber
  • PipPipPipPipPipPipPipPip
  • 6,976 posts
  • Joined: 14-February 06
  • Gender:Male
  • Location:Captain Rick: The only vintage slot car nut in SW Oregon?

Posted 13 May 2020 - 06:13 PM

What I really like about the Davis chassis design is the absence of traditional half rails. Since late 1969 most Pro style anglewinder chassis used a half rail attached to the rear axle tube with a main rail connected to each side. These main rails then went forward to the front axle:


Steube 1970 Pro Car- 030.JPG


What Davis did was narrow the center section by eliminating the traditional half rail and having it run all the way up to the front axle. Very cool:


Davis car 1.jpg


After 3 complete rethinks and rebuilds I finally got to this point:


C-can shorty (6).JPG


Trying to fit the motor, gears and tires into this wee space was interesting to say the least:


C-can shorty (32).JPG


In typical 20 20 hindsight perhaps I should have clearanced less of the axle tube and fitted the rear upright inside it as shown by the red dot:


C-can shorty (32) - Copy.JPG


Anyway, the center section I've got now seems to fit everything and follows Rick Davis' no half rail design:


C-can shorty (9).JPG


C-can shorty (5).JPG


C-can shorty (10).JPG


C-can shorty (11).JPG


C-can shorty (12).JPG


C-can shorty (23).JPG


Whew!    :laugh2:


  • Pablo, Tex, Steve Deiters and 3 others like this

Rick Thigpen
Check out Steve Okeefe's great web site at its new home here at Slotblog:
The Independent Scratchbuilder
There's much more to come...


#33 elvis44102

elvis44102

    On The Lead Lap

  • Full Member
  • PipPipPipPip
  • 274 posts
  • Joined: 08-April 13
  • Gender:Male
  • Location:OH

Posted 13 May 2020 - 06:50 PM

having built two cars for this race mine and bloodworths the first thing that stood out for me in the picture was the cox gear..i thought we had switched to faas gears by then but now im not sure...i know i did not shorten my cans for this and i just hated grinding magnets lol...


i notice there is little room in this with the cox gear being wider...it seems he was giving away the thickness of the upright brace as well...


i did not go the other way (13D) as that was to much unfamiliar ground..this track was 1/32 but the two long straights were maybe 30 ft or more making the motor more relevant than maybe a 13D could have handled...there were many many very tight turns and esses at about five feet off the ground making just good visiblity an issue as well

you have wonderful workmanship and as i just mentioned to Jan i can remember obsessively staying awake all night bending a 90 degree angle to within a thousandth and he said "TEN/thousandth" lol


  • Rob Voska and SpeedyNH like this
John Wisneski

#34 NSwanberg

NSwanberg

    Posting Leader

  • Full Member
  • PipPipPipPipPipPipPip
  • 2,036 posts
  • Joined: 01-April 09
  • Gender:Male
  • Location:Canton, MI

Posted 14 May 2020 - 02:59 AM

Having built several 1/24 cars of a similar nature to race with Rick in Tom's basement (77-78) I can see some of the compromises he had to make to pull this build off. Correct me if I am wong but it looks like Rick's build does not have the motor mounting bracket right up against the main rail. That was someting he had to do to get the motor to clear given the 1/32 dimensions. The sharper angle pulls the endbell away from the right rear tire.


Remember the Steube bar! (ask Raisin)
SUPPORT YOUR LOCAL RACEWAY!!
"The denial of denial is the first sign of denial." Hank, from Corner Gas

"Death before disco!" Wanda from Corner Gas
Nelson Swanberg 5618

Peace be with all of us and good racing for the rest of us.
Have controller. Will travel. Slot Car Heaven


#35 dc-65x

dc-65x

    Grand Champion Poster

  • Subscriber
  • PipPipPipPipPipPipPipPip
  • 6,976 posts
  • Joined: 14-February 06
  • Gender:Male
  • Location:Captain Rick: The only vintage slot car nut in SW Oregon?

Posted 14 May 2020 - 10:42 AM

Thank you both for chiming in with your insights as racers who were "there". Rick had his motor bracket at a different angle than the frame rail. It looks like the steeper angle of the frame rail helped it clear the thicker Cox gear. Then the motor bracket was positioned to best align the motor..........I think.   :)


Aesthetically, I chose to keep the frame rail and motor bracket at the same angle. That's probably why I had so much trouble getting everything to work.  :dash2:  
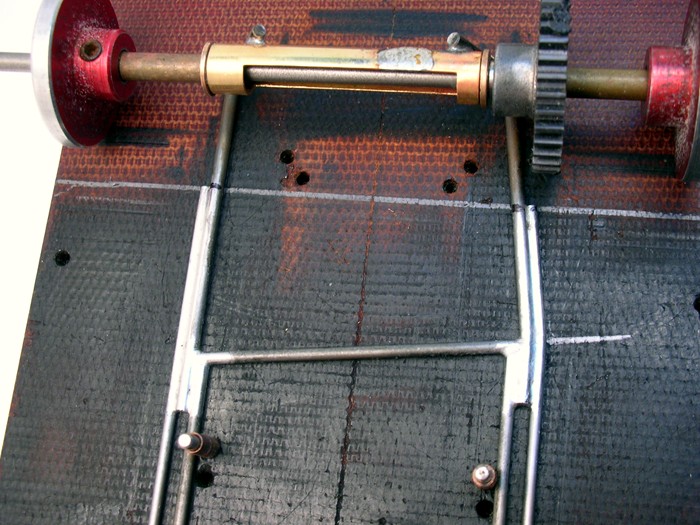
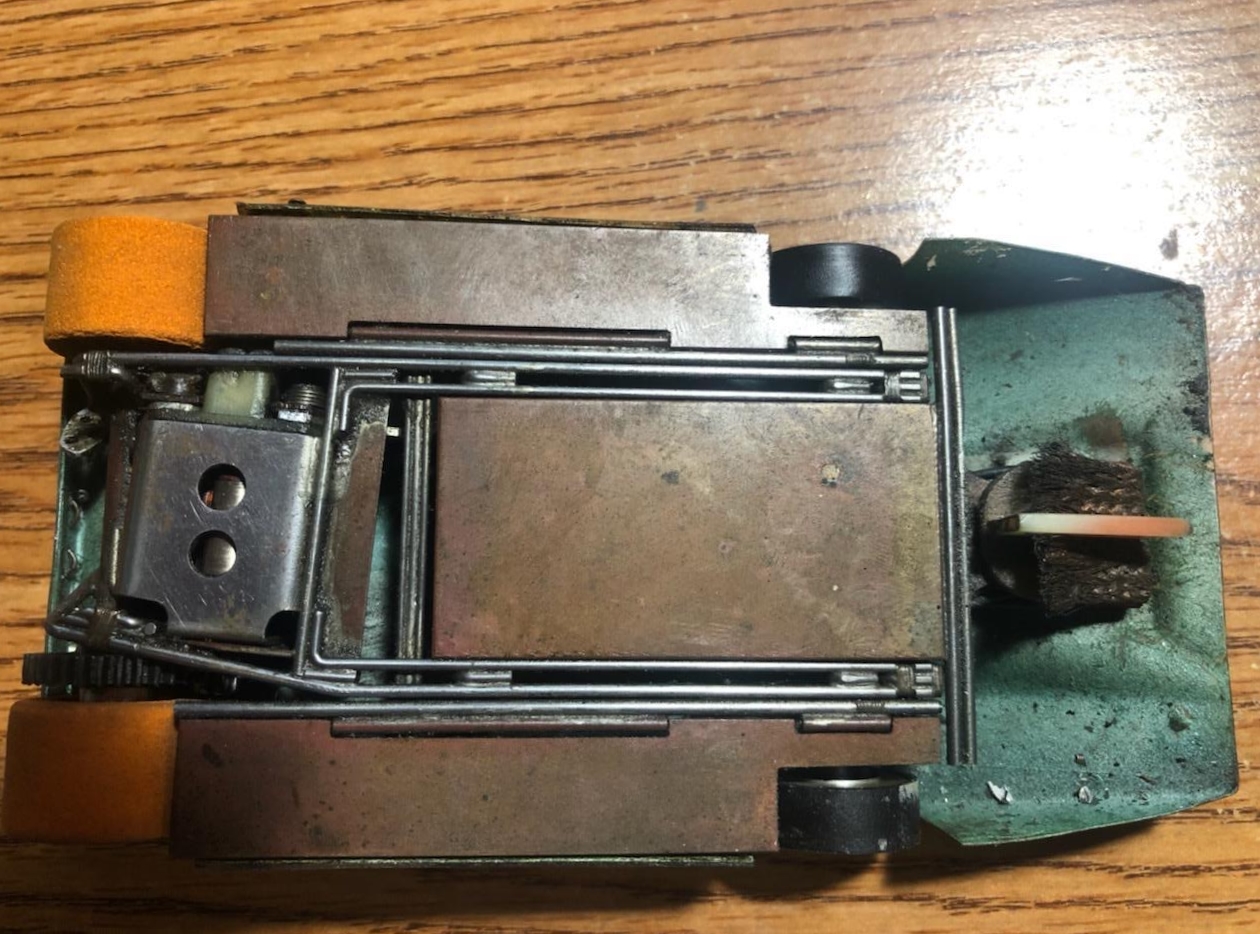
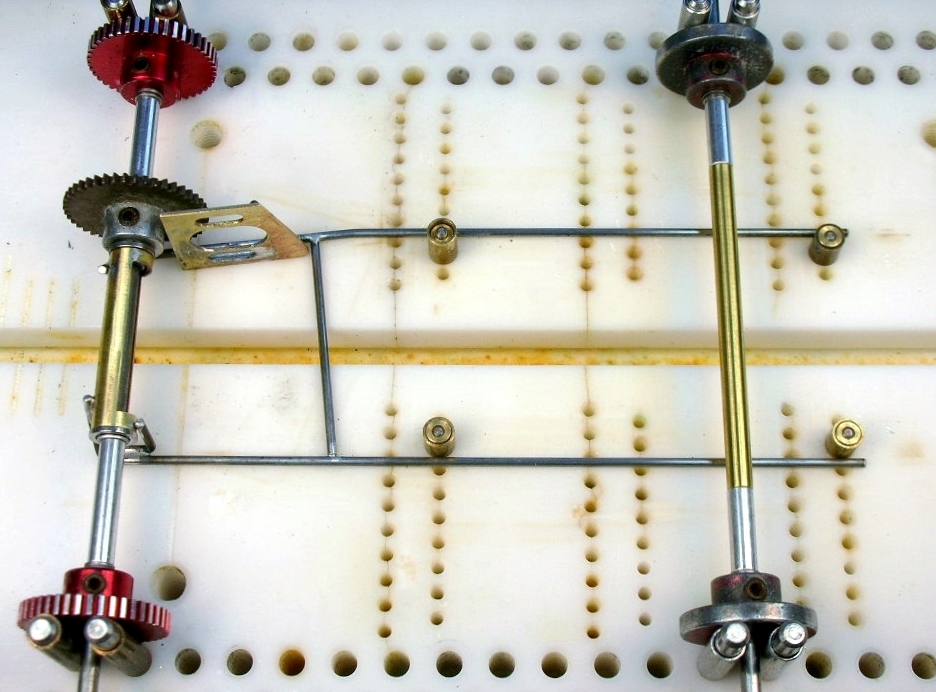
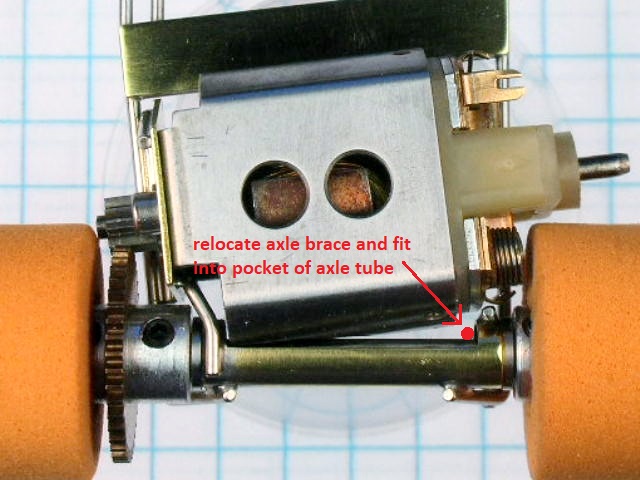
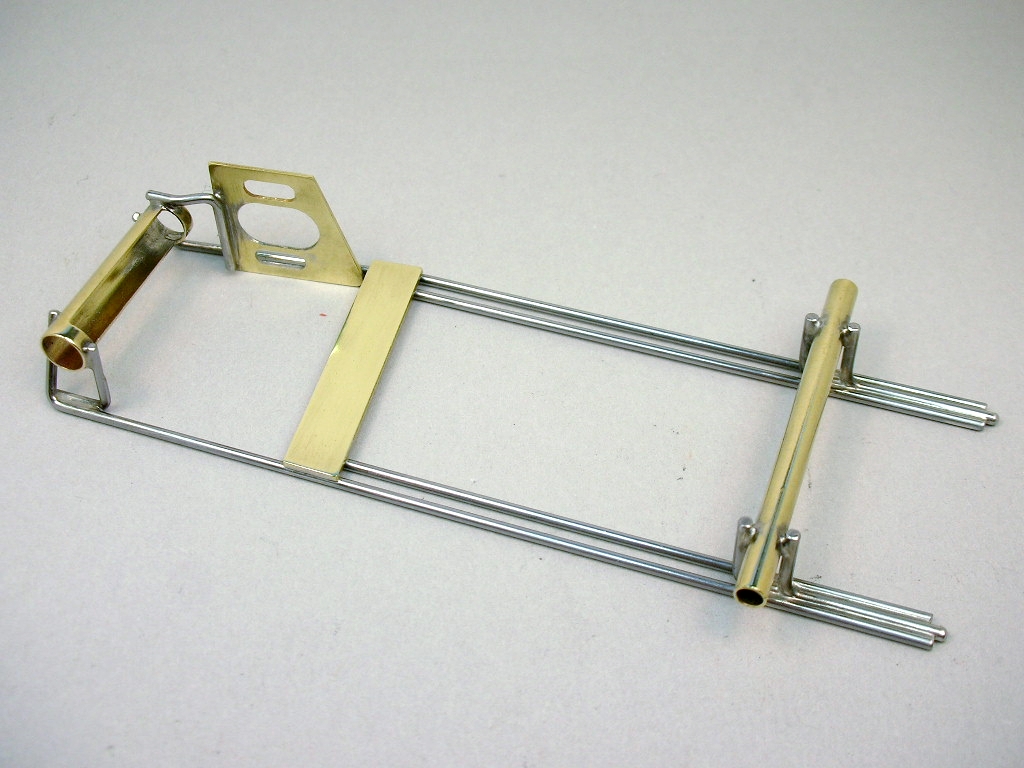
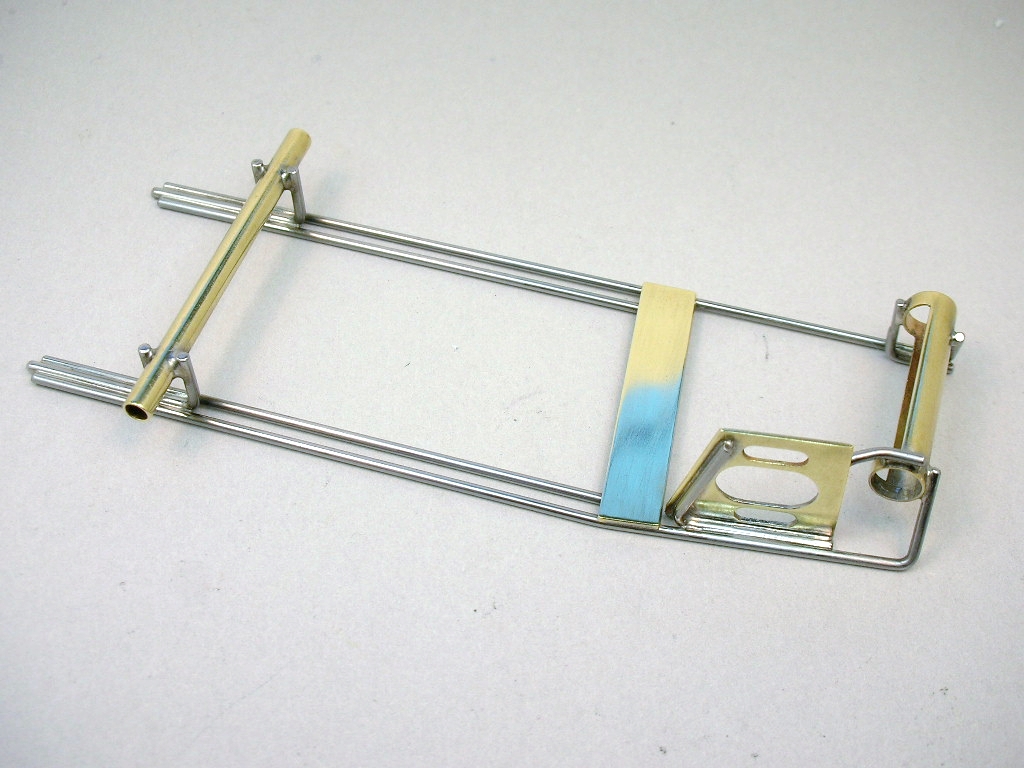
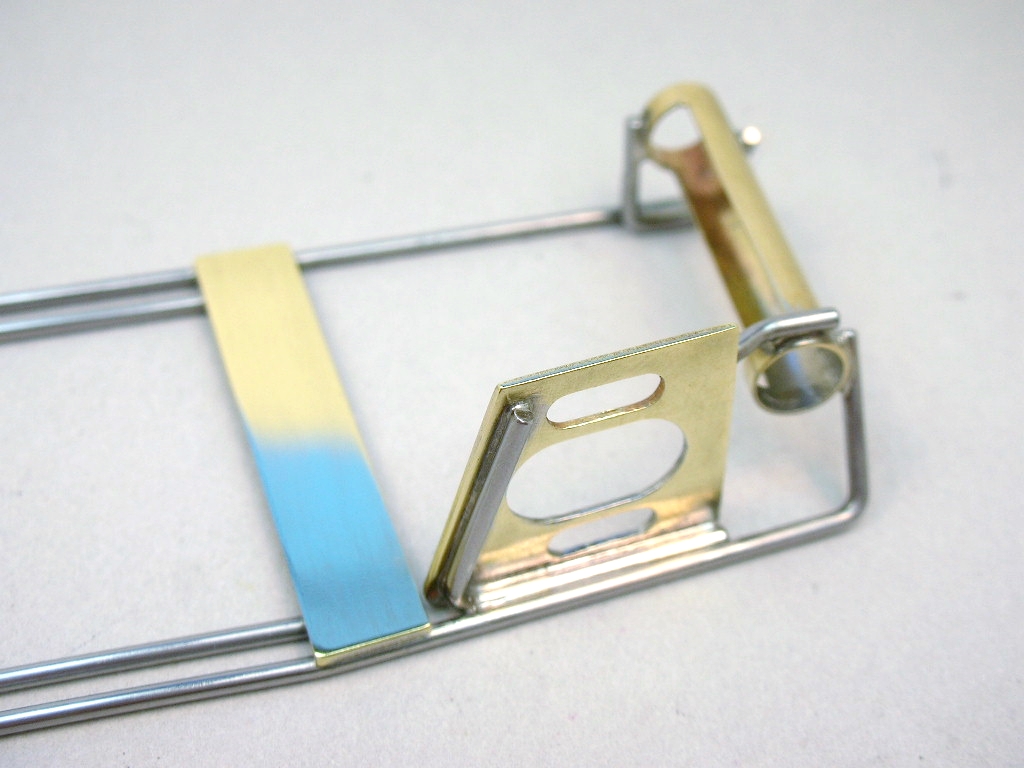
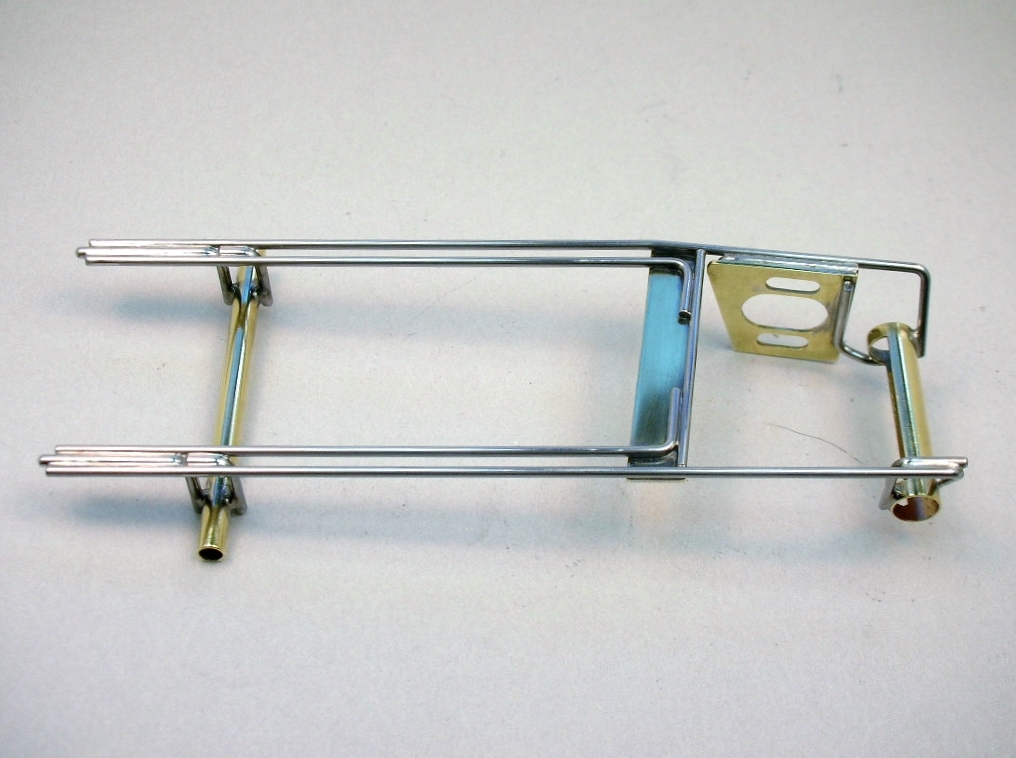
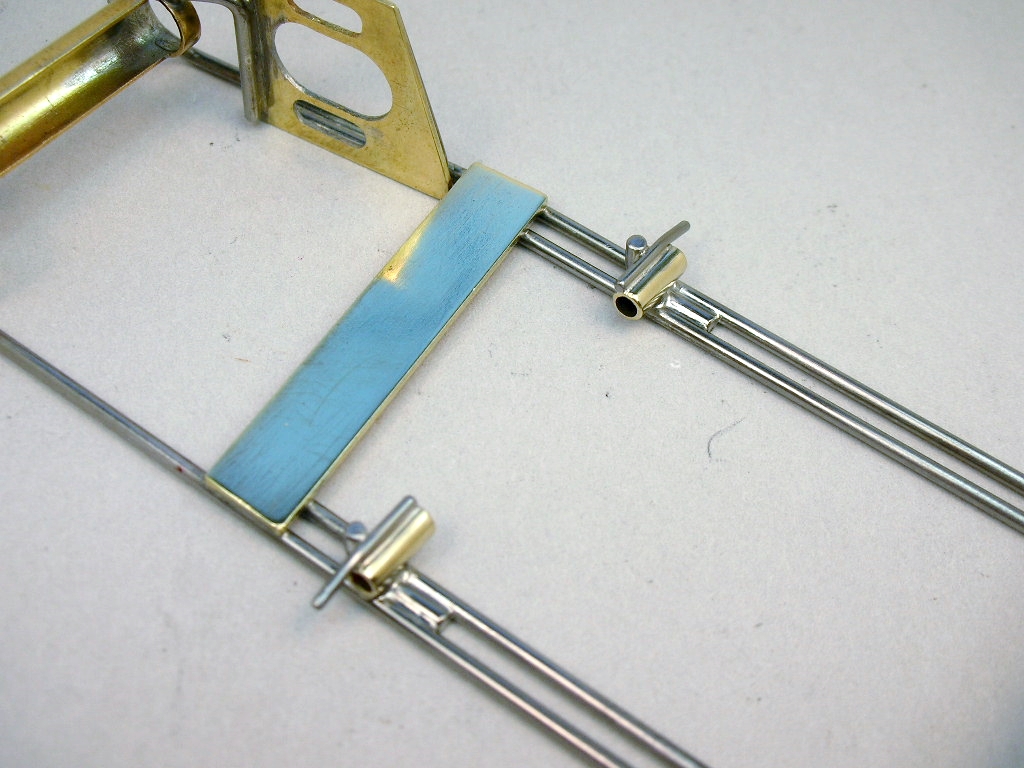
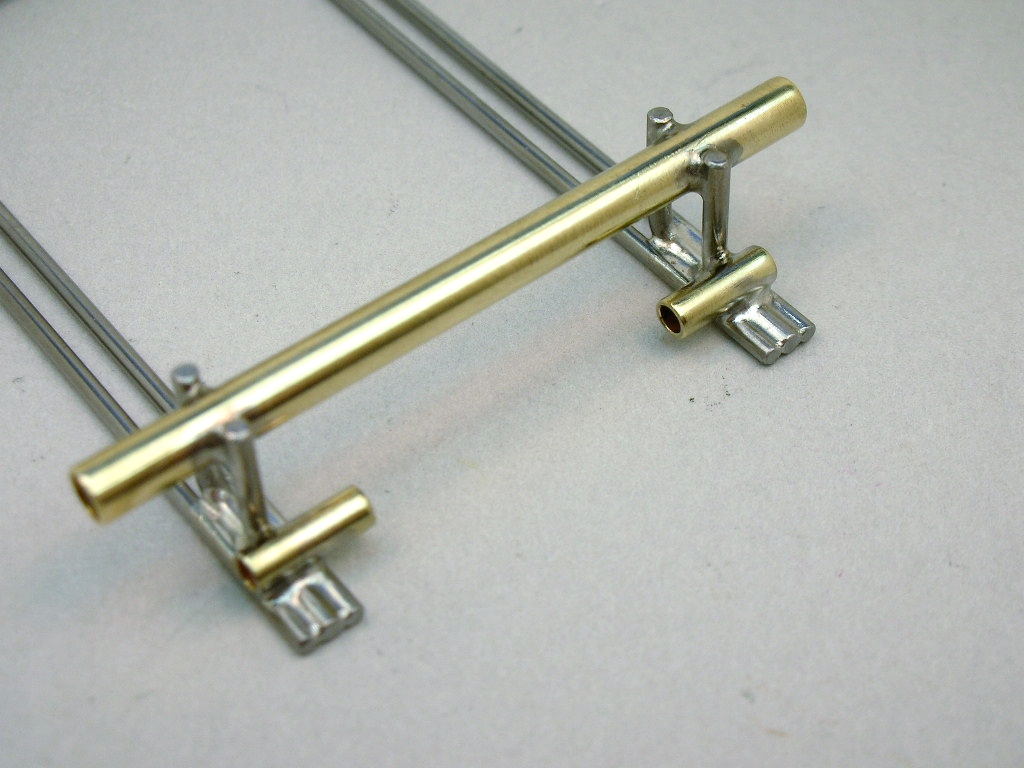
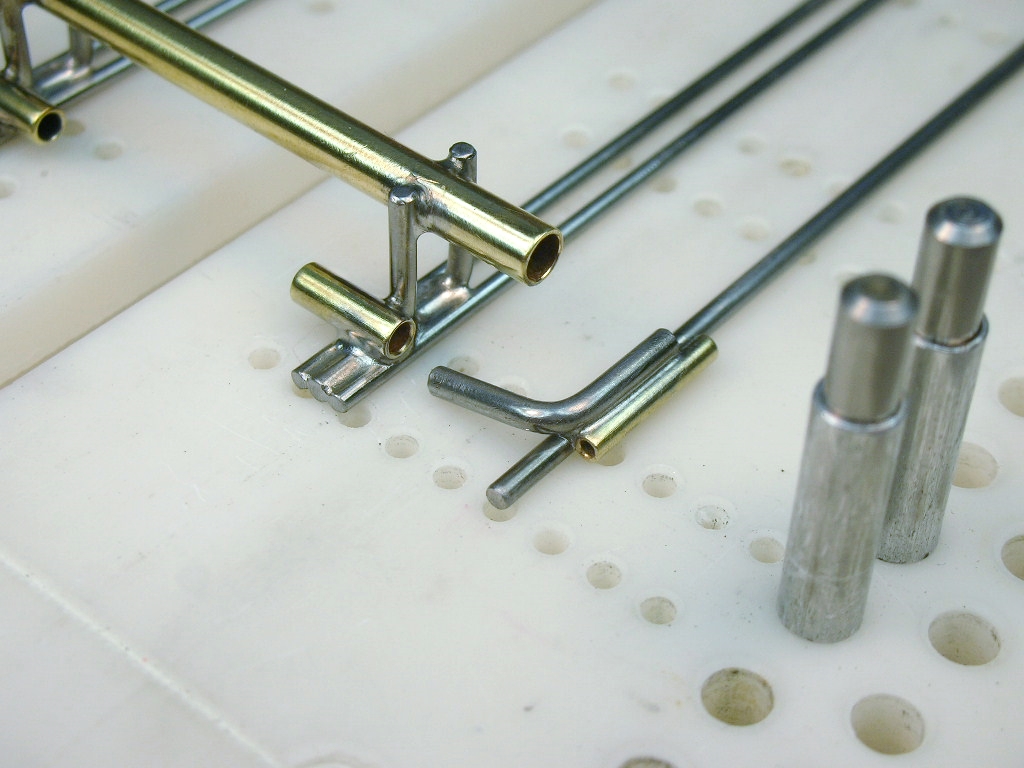
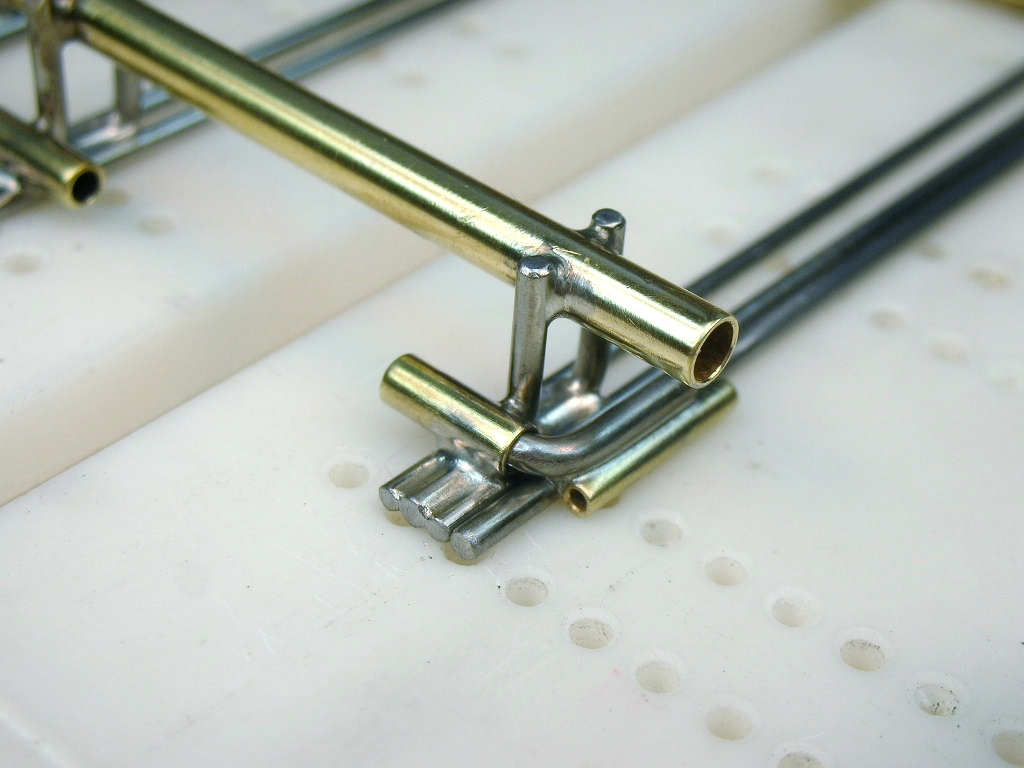
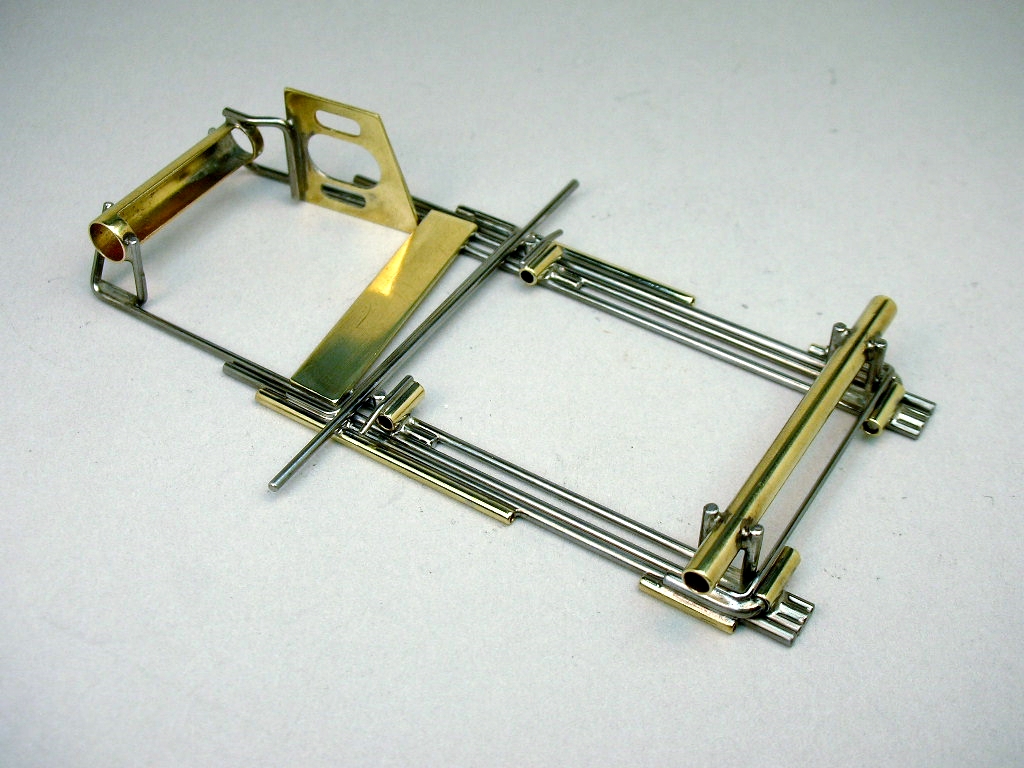
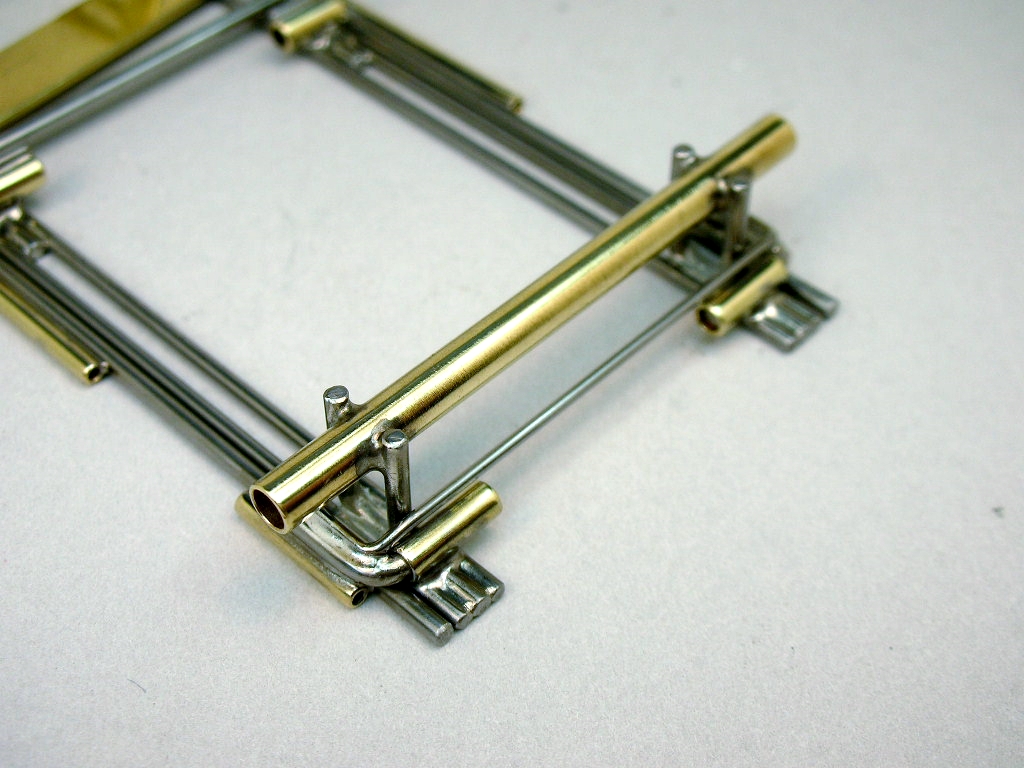
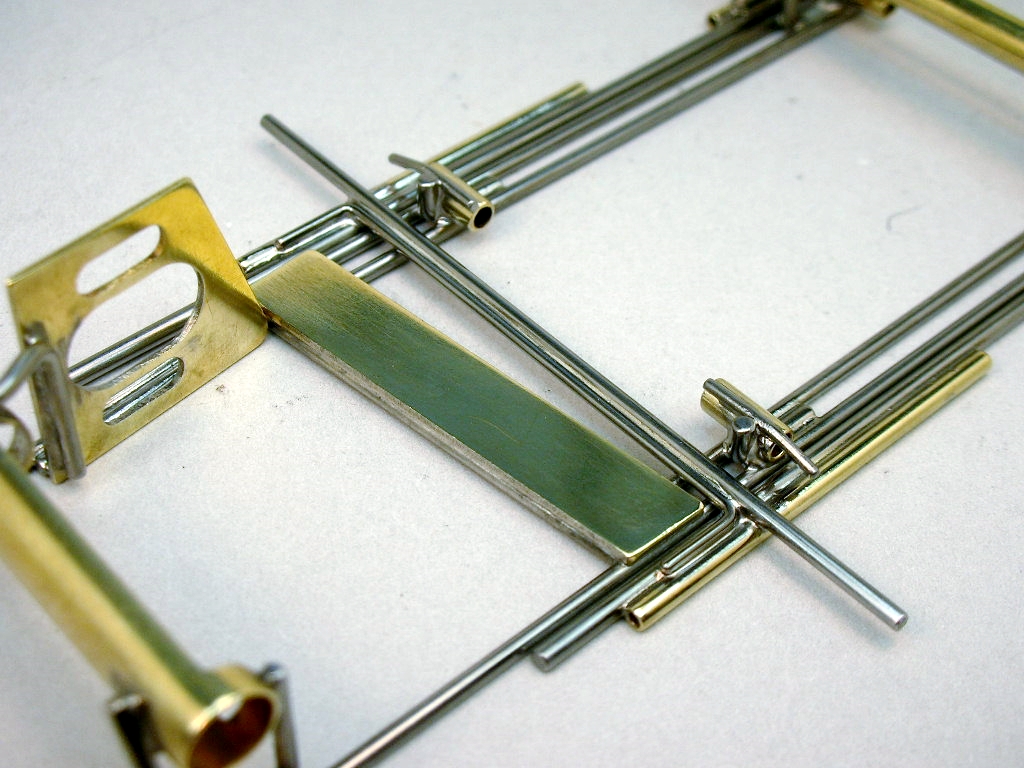
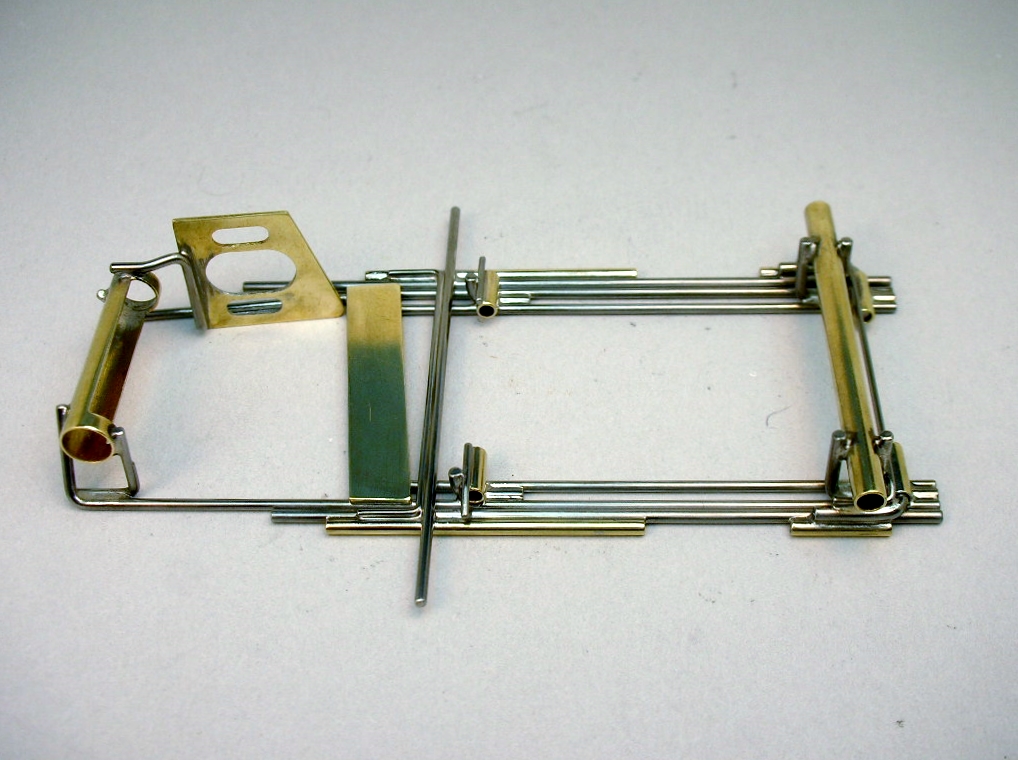
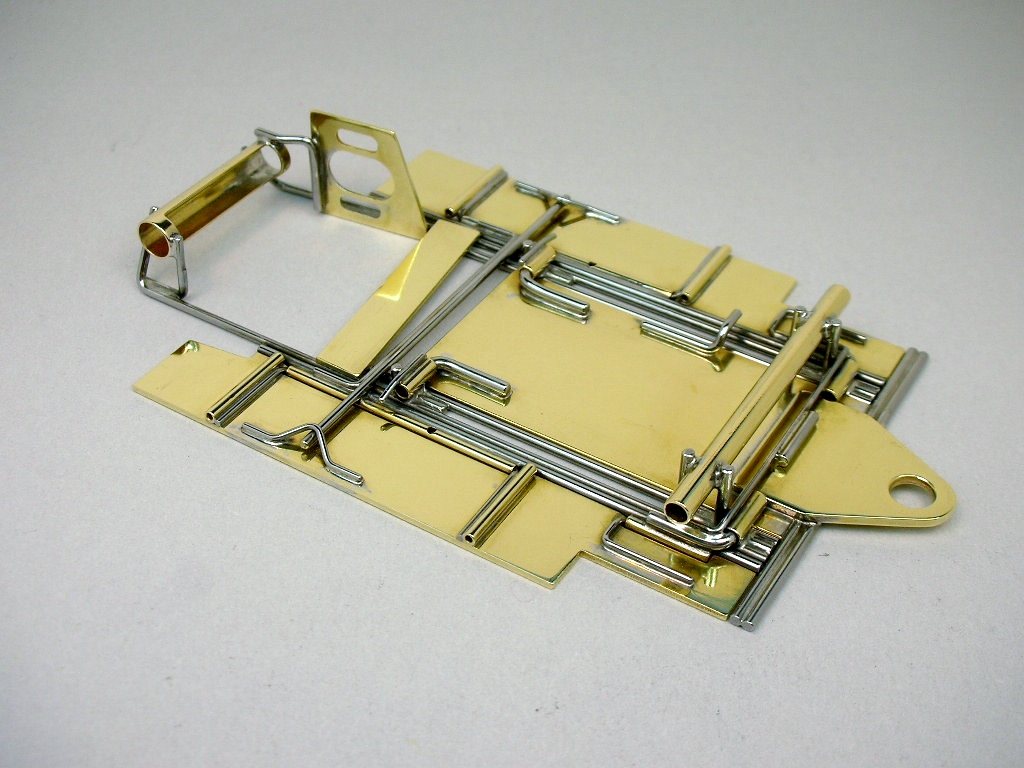
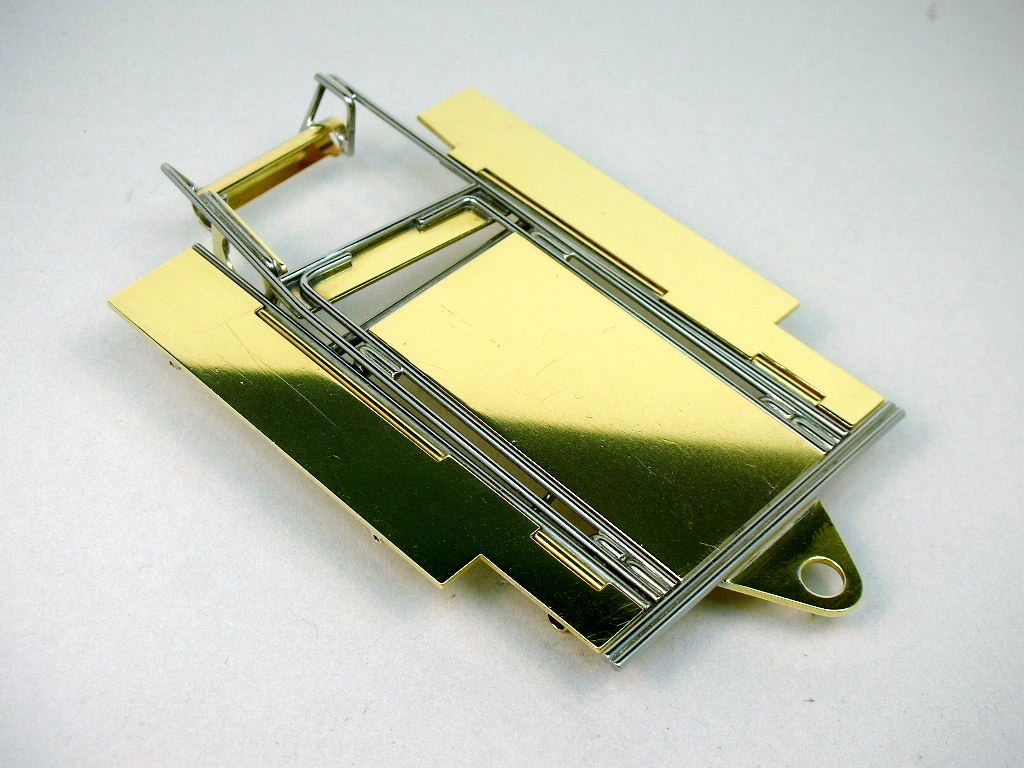
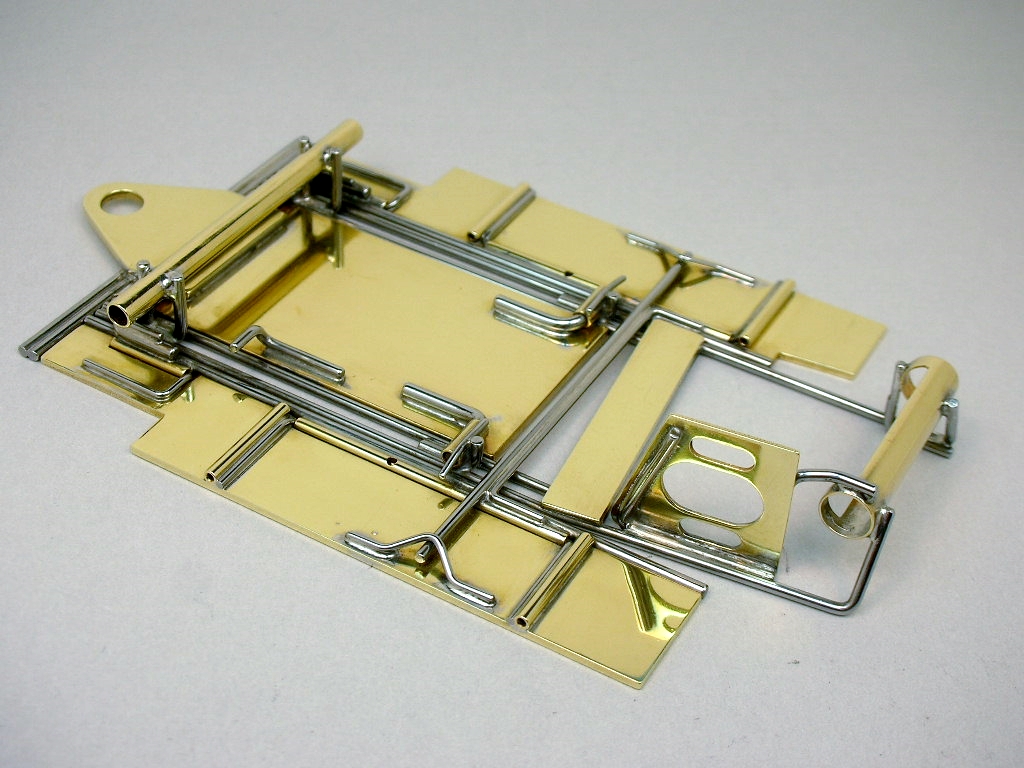
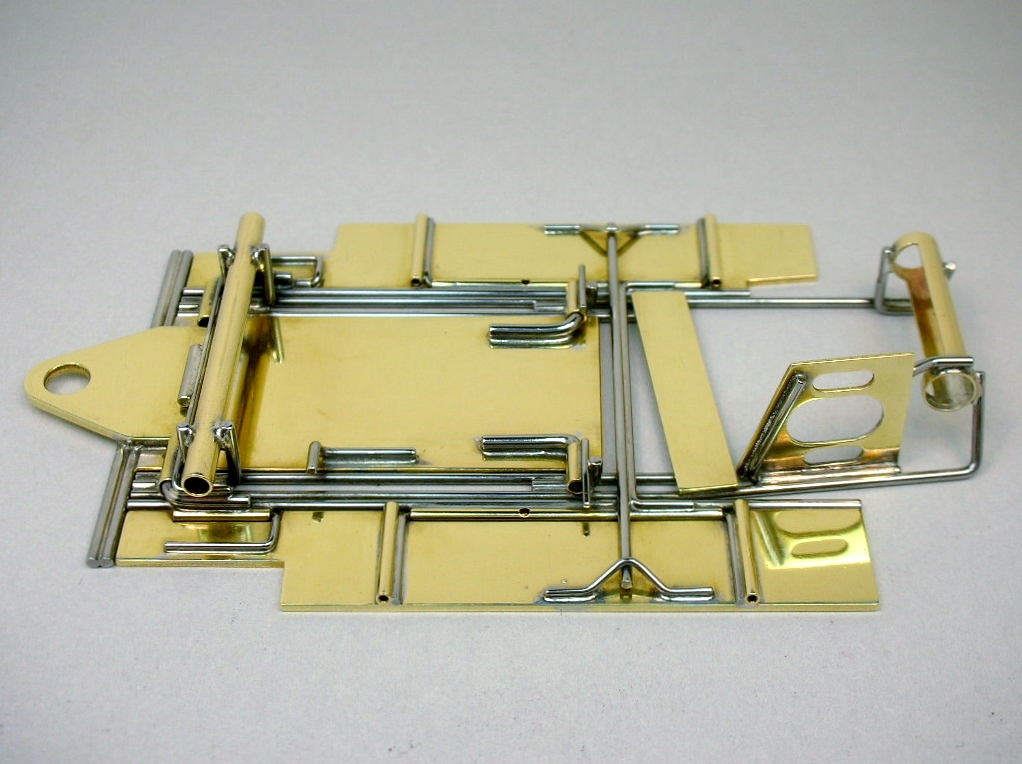
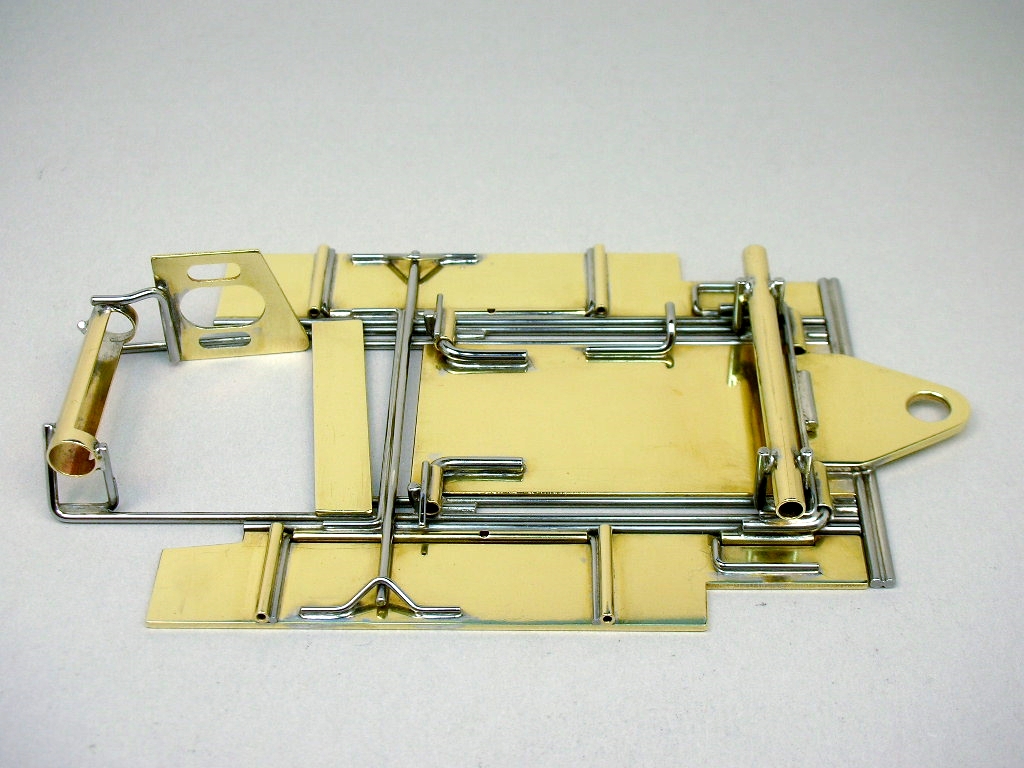
I also had to add a wire spacer between the motor bracket and the frame rail and run the narrower Fass gear to clear that frame rail. Luckily, everything seems to work now and I REALLY like those 64P Faas gears.  :crazy:


  • NSwanberg likes this

Rick Thigpen
Check out Steve Okeefe's great web site at its new home here at Slotblog:
The Independent Scratchbuilder
There's much more to come...


#36 NSwanberg

NSwanberg

    Posting Leader

  • Full Member
  • PipPipPipPipPipPipPip
  • 2,036 posts
  • Joined: 01-April 09
  • Gender:Male
  • Location:Canton, MI

Posted 15 May 2020 - 01:09 AM

Upon further review, I have it just the opposite. The angle is sharper to move the motor back. It is still difficult to make the motor side rail at the right angle to both run along the motor and solder to the axle tube. That is the on piece of wire I always had to have two bends in.


You did a nice job of it.


Remember the Steube bar! (ask Raisin)
SUPPORT YOUR LOCAL RACEWAY!!
"The denial of denial is the first sign of denial." Hank, from Corner Gas

"Death before disco!" Wanda from Corner Gas
Nelson Swanberg 5618

Peace be with all of us and good racing for the rest of us.
Have controller. Will travel. Slot Car Heaven


#37 dc-65x

dc-65x

    Grand Champion Poster

  • Subscriber
  • PipPipPipPipPipPipPipPip
  • 6,976 posts
  • Joined: 14-February 06
  • Gender:Male
  • Location:Captain Rick: The only vintage slot car nut in SW Oregon?

Posted 15 May 2020 - 06:30 PM

Thanks Nelson. Now that I have a center section I want to move on to the drop arm. It's a built up piece with a .047" plate, a soldered on guide tongue and 2 bumper bars. But I need the guide flag to know where to locate the tongue on the plate.


Simple just get a JET flag and you're set..........no...........this is a wee pro car and nothing goes unmodified.  :laugh2:  So it was off to the band saw to cut a chunk off the front:


C-can shorty guide (1a).JPG


Radius the heck out of the back:


C-can shorty guide (2a).JPG


Now figure out a way to put braid in the thing. I read and reread the Car Model article about the braid modification. I don't know if this is what Rick did but it really works slick.


Here's the step by step braid mod:


C-can shorty guide (3a).JPG


C-can shorty guide (4a).JPG


C-can shorty guide (5a).JPG


This is the finished braid. It forms its own lead wire clip:


C-can shorty guide (6a).JPG


I think this is slick. The guide and lead wire attachment clip are all reduced in size and size matters in this build:


C-can shorty guide (7a).JPG


On to the drop arm..........


  • NSwanberg, Peter Horvath and boxerdog like this

Rick Thigpen
Check out Steve Okeefe's great web site at its new home here at Slotblog:
The Independent Scratchbuilder
There's much more to come...


#38 Pablo

Pablo

    Builder

  • Administrator
  • PipPipPipPipPipPipPipPip
  • 18,454 posts
  • Joined: 20-February 06
  • Gender:Male
  • Location:Cleveland, Tennessee

Posted 15 May 2020 - 06:44 PM

:heart:  :heart:  :heart:  :heart: 


As if you weren't already the best, 1/24 is going to be a stroll in the clouds after this  :D 


Paul Wolcott


#39 SpeedyNH

SpeedyNH

    Old Engineer

  • Full Member
  • PipPipPipPipPip
  • 763 posts
  • Joined: 18-July 15
  • Gender:Male
  • Location:Cow Hampshire

Posted 16 May 2020 - 09:11 AM

nice. it does make it more difficult if you ever want to change braids, tho. 


Steve Lang


#40 dc-65x

dc-65x

    Grand Champion Poster

  • Subscriber
  • PipPipPipPipPipPipPipPip
  • 6,976 posts
  • Joined: 14-February 06
  • Gender:Male
  • Location:Captain Rick: The only vintage slot car nut in SW Oregon?

Posted 16 May 2020 - 11:04 AM

1/24 definitely seems easier Pablo. I have a Mura Short Magnum motor I want to build a home for so another 1/32 is in my future.........for better or worse.   :laugh2:


Steve, this was my first thought for fitting braid into a shortened JET flag. Cut the end off the earlier style braid and shorten up a Parma guide clip:


C-can shorty guide (8a).JPG


But I kept going back to try and figure out what Steve Deiters described in his CM article. Hopefully what I've done in my previous post is at least "in the spirit" of what Rick Davis did.


The drop arm components. I don't have a brass Champion guide tongue described in the article. I used a Cobra piece and modified it to look like the Davis piece:


C-can shorty (29).JPG


For the drop arm plate this Phase III drop arm was,,,,,,,,,,,,,extensively modified:   :crazy:


C-can shorty (28).JPG


The ready to install drop arm with the bumpers and down stop:


C-can shorty (42).JPG


  • Pablo, Steve Deiters and Peter Horvath like this

Rick Thigpen
Check out Steve Okeefe's great web site at its new home here at Slotblog:
The Independent Scratchbuilder
There's much more to come...


#41 Steve Deiters

Steve Deiters

    Posting Leader

  • Full Member
  • PipPipPipPipPipPipPip
  • 2,311 posts
  • Joined: 28-May 07
  • Gender:Male
  • Location:Cincinnati, OH

Posted 16 May 2020 - 01:29 PM

The shortened guide. 


When you think about it you are packing a lot of stuff into a very short wheelbase. A guide 1/8" longer could impact the handling in a significant manner not to mention overall under the body "packaging"....like the guide sticking out the front of the body if it wasn't trimmed.


Another thought is that when this race happened we weren't that many years removed from club racers in the Detroit area using guide pins with very fuzzy braids that was basically braid unbraided. So a small compact guide system seemed like a logical evolution. Leave it to Rick D. to be on the leading edge as this whole car demonstrates.


#42 dc-65x

dc-65x

    Grand Champion Poster

  • Subscriber
  • PipPipPipPipPipPipPipPip
  • 6,976 posts
  • Joined: 14-February 06
  • Gender:Male
  • Location:Captain Rick: The only vintage slot car nut in SW Oregon?

Posted 16 May 2020 - 03:37 PM

Hi Steve,
 

Leave it to Rick D. to be on the leading edge as this whole car demonstrates.


I agree, I think that's why I like his car so much. The more I get into building mine the more unique little things I see that he's done.


  • Pablo, Steve Deiters and NSwanberg like this

Rick Thigpen
Check out Steve Okeefe's great web site at its new home here at Slotblog:
The Independent Scratchbuilder
There's much more to come...


#43 dc-65x

dc-65x

    Grand Champion Poster

  • Subscriber
  • PipPipPipPipPipPipPipPip
  • 6,976 posts
  • Joined: 14-February 06
  • Gender:Male
  • Location:Captain Rick: The only vintage slot car nut in SW Oregon?

Posted 17 May 2020 - 01:03 PM

The drop arm hinge tubes roughed in place:


C-can shorty (31).JPG


And all cleaned up:


C-can shorty (43).JPG


Hinge tubes for the plumber rails:


C-can shorty (24).JPG


The pans are next up......


  • Tex and Peter Horvath like this

Rick Thigpen
Check out Steve Okeefe's great web site at its new home here at Slotblog:
The Independent Scratchbuilder
There's much more to come...


#44 dc-65x

dc-65x

    Grand Champion Poster

  • Subscriber
  • PipPipPipPipPipPipPipPip
  • 6,976 posts
  • Joined: 14-February 06
  • Gender:Male
  • Location:Captain Rick: The only vintage slot car nut in SW Oregon?

Posted 18 May 2020 - 11:43 AM

I modified a pair of 1/24 Parma pans for my car:


C-can shorty (44).JPG


I have a pair of 1/32 Parma pans. I didn't think there was enough material on the front to fit a hinge tube. One is shown on top for comparison:


C-can shorty (20).JPG


The plumber rails fit into its hinge tube:


C-can shorty (26).JPG


C-can shorty (27).JPG


The plumber rails with pan hinges:


C-can shorty (40).JPG


Time to tie the plumber rails together on the center section.........


  • NSwanberg, Peter Horvath and SpeedyNH like this

Rick Thigpen
Check out Steve Okeefe's great web site at its new home here at Slotblog:
The Independent Scratchbuilder
There's much more to come...


#45 dc-65x

dc-65x

    Grand Champion Poster

  • Subscriber
  • PipPipPipPipPipPipPipPip
  • 6,976 posts
  • Joined: 14-February 06
  • Gender:Male
  • Location:Captain Rick: The only vintage slot car nut in SW Oregon?

Posted 19 May 2020 - 03:36 PM

The plumber rails are on:


C-can shorty (46).JPG


Attached at the front:


C-can shorty (47).JPG


And the rear:


C-can shorty (48).JPG


C-can shorty (49).JPG


The pan install is next:


C-can shorty (45).JPG


  • Tex, NSwanberg, Peter Horvath and 1 other like this

Rick Thigpen
Check out Steve Okeefe's great web site at its new home here at Slotblog:
The Independent Scratchbuilder
There's much more to come...


#46 Pablo

Pablo

    Builder

  • Administrator
  • PipPipPipPipPipPipPipPip
  • 18,454 posts
  • Joined: 20-February 06
  • Gender:Male
  • Location:Cleveland, Tennessee

Posted 19 May 2020 - 03:42 PM

The bar keeps getting higher all the time WOW that is a jewel of a race car chassis  :heart:  :heart:  :heart:  :heart:  :heart:


Paul Wolcott


#47 dc-65x

dc-65x

    Grand Champion Poster

  • Subscriber
  • PipPipPipPipPipPipPipPip
  • 6,976 posts
  • Joined: 14-February 06
  • Gender:Male
  • Location:Captain Rick: The only vintage slot car nut in SW Oregon?

Posted 20 May 2020 - 01:08 PM

The pans and body mounts soldered in place. Leaving things extra long lets me pull any excess solder off the pan and down the long pin tube:


C-can shorty (3).JPG


Here's the chassis all cleaned up. The front pan hinge:


C-can shorty (15).JPG


The pan down stops:


C-can shorty (16).JPG


And the whole enchilada:


C-can shorty (32).JPG


Pablo, I used my faux Mississippi water (distilled water) to tumble the chassis. It sure shiny!   :sun_bespectacled:


C-can shorty (52).JPG


C-can shorty (37).JPG


C-can shorty (50).JPG


C-can shorty (51).JPG


The chassis is nice and square, sits flat and all the hinges work smoothly..............Whew!  


  • slotbaker, Half Fast, Steve Deiters and 4 others like this

Rick Thigpen
Check out Steve Okeefe's great web site at its new home here at Slotblog:
The Independent Scratchbuilder
There's much more to come...


#48 Steve Deiters

Steve Deiters

    Posting Leader

  • Full Member
  • PipPipPipPipPipPipPip
  • 2,311 posts
  • Joined: 28-May 07
  • Gender:Male
  • Location:Cincinnati, OH

Posted 20 May 2020 - 02:12 PM

A work of art if I ever saw one.


I had forgotten/didn't know that Parma made 1/32 scale bat pans back in the day.  I now wonder whatever happened to the tooling for that part and if there would be a demand for such parts from a retro point of view. 


#49 SpeedyNH

SpeedyNH

    Old Engineer

  • Full Member
  • PipPipPipPipPip
  • 763 posts
  • Joined: 18-July 15
  • Gender:Male
  • Location:Cow Hampshire

Posted 20 May 2020 - 02:34 PM

that sure is a gorgeous enchilada!  well done. 


Steve Lang


#50 Jaeger Team

Jaeger Team

    On The Lead Lap

  • Full Member
  • PipPipPipPip
  • 476 posts
  • Joined: 27-January 17
  • Gender:Male
  • Location:Palermo, Italy

Posted 20 May 2020 - 03:03 PM

"Stendhal syndrome, Stendhal's syndrome or Florence syndrome is a psychosomatic condition involving rapid heartbeat, fainting, confusion and even hallucinations, allegedly occurring when individuals become exposed to objects or phenomena of great beauty."
  • Pablo and Fergy like this
Maurizio Salerno


Electric Dreams Online Shop