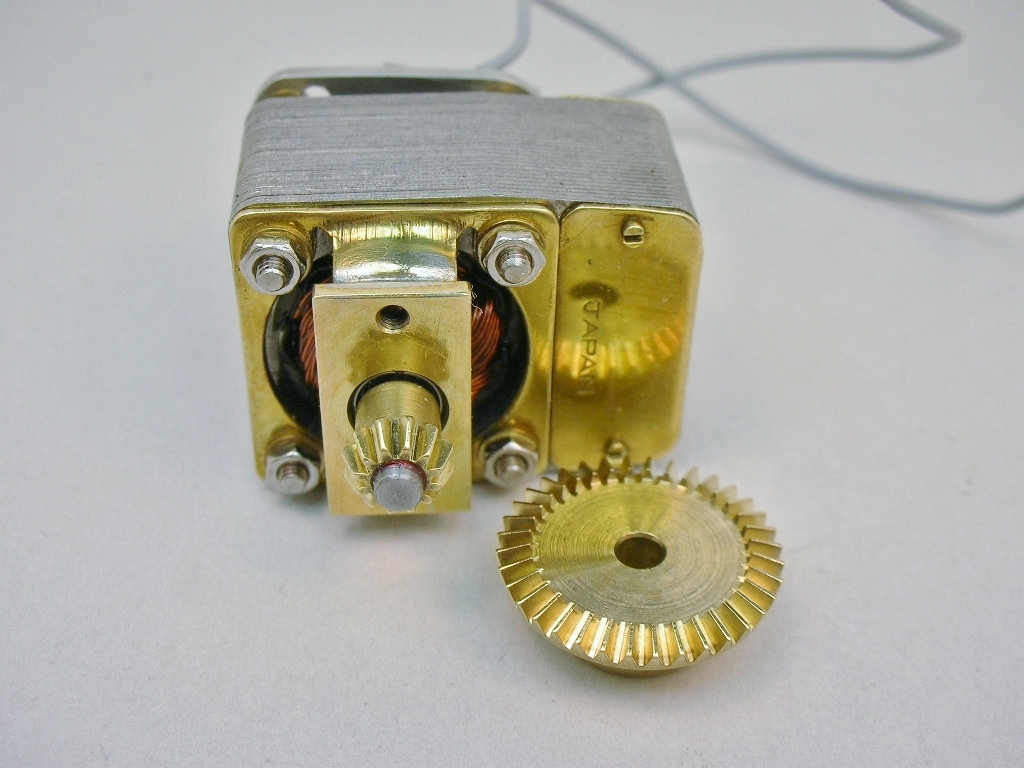
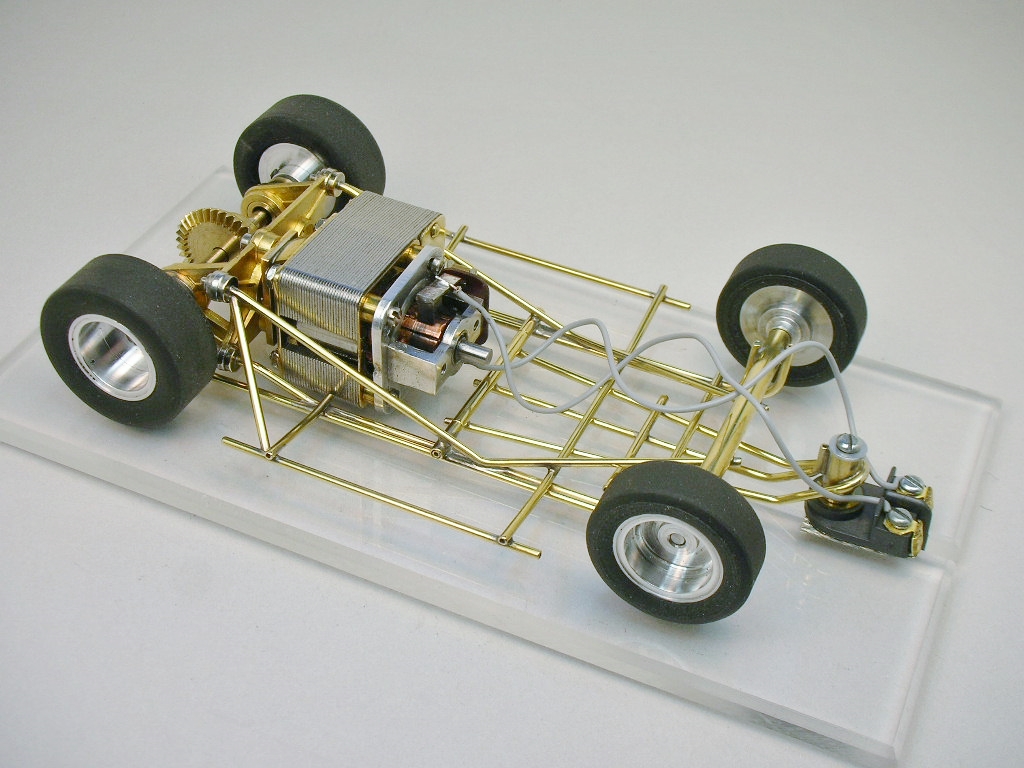
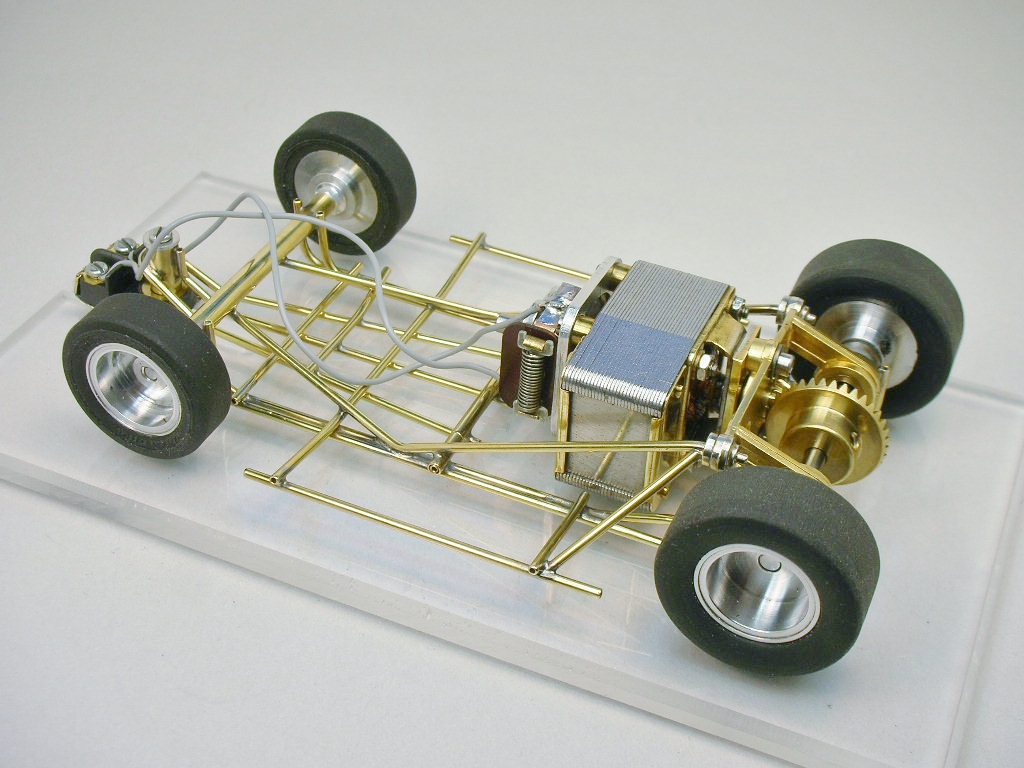
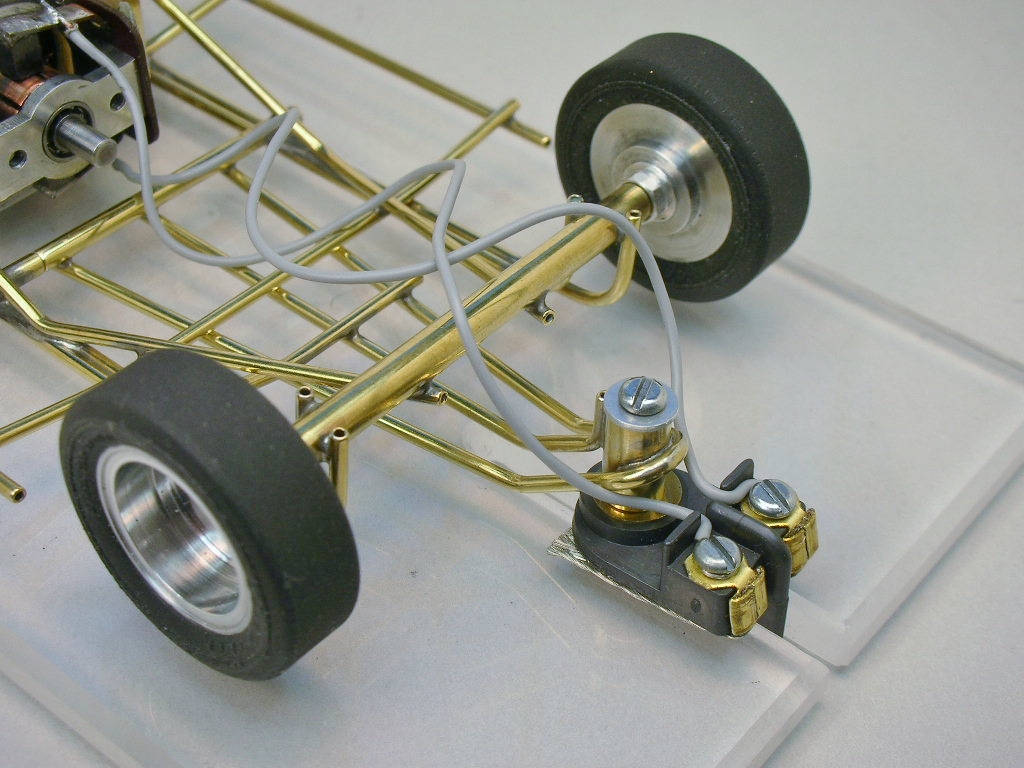
Thanks Martin. I already have an alternate body trimmed and mounted so I'm good to go.

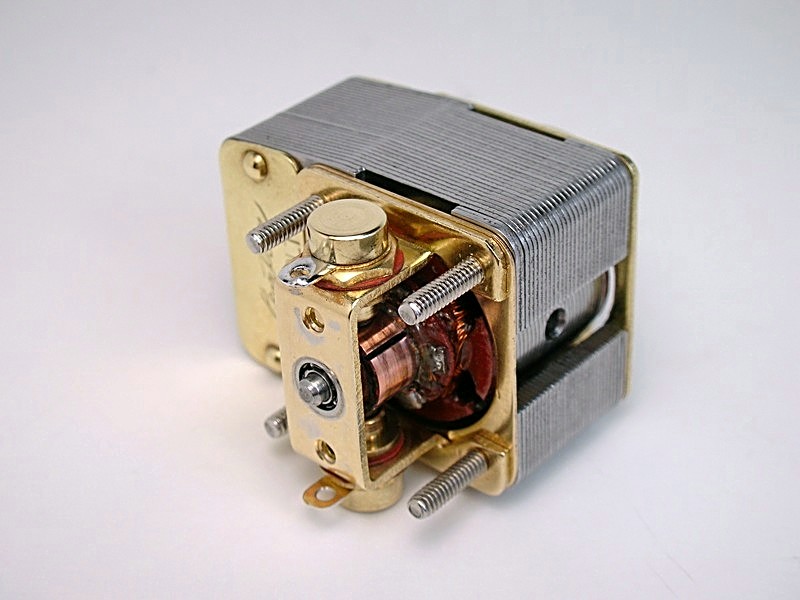
RAM and Kemtron motor mashup - the RAMtron 850
#51

Posted 12 August 2020 - 11:36 AM
Rick Thigpen
Check out Steve Okeefe's great web site at its new home here at Slotblog:
The Independent Scratchbuilder
There's much more to come...
#52

Posted 12 August 2020 - 01:03 PM
Anthony 'Tonyp' Przybylowicz
5/28/50-12/20/21
Requiescat in Pace
#53

Posted 12 August 2020 - 02:00 PM
Hi Tony,
I love cars with big old motors like this. So far the chassis is plenty stiff but I haven't cut out the drop arm hinge yet. The cool thing about the old space frames is I can always add more tube braces if I need to. ![]()
- tonyp and boxerdog like this
Rick Thigpen
Check out Steve Okeefe's great web site at its new home here at Slotblog:
The Independent Scratchbuilder
There's much more to come...
#54

Posted 14 August 2020 - 05:32 PM
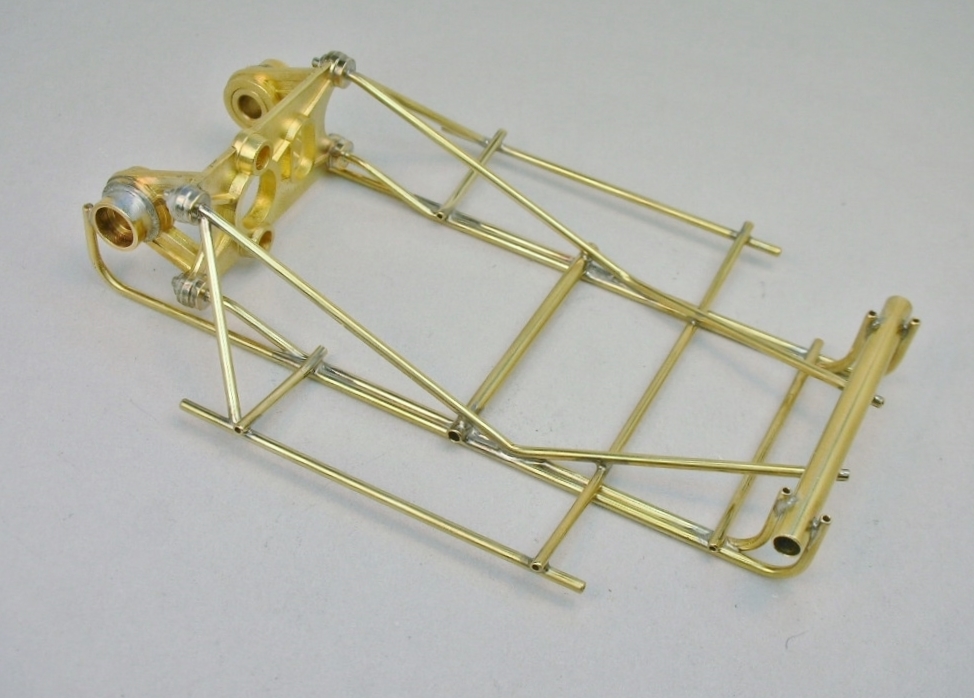
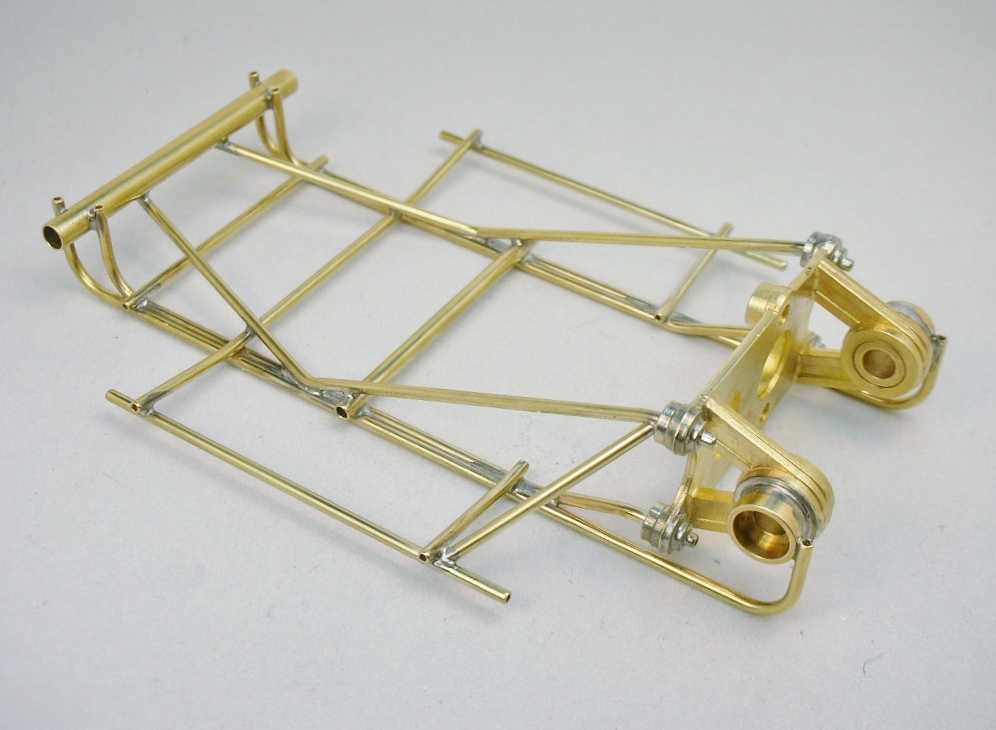
I've cleaned up the chassis..........
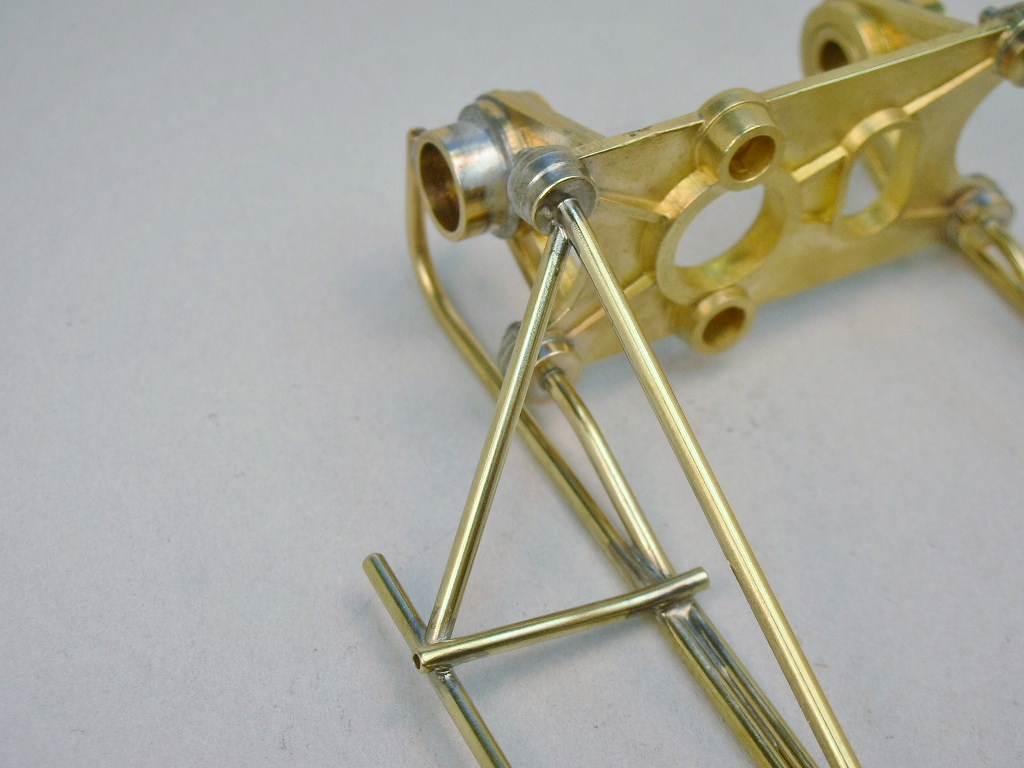
.......and added a rear body mount brace like Mike Morrissey did in the article I posted:
I filed a "birdsmouth" notch to fit the tubes:
Now I can make that drop arm.
- slotbaker, Tex, tonyp and 3 others like this
Rick Thigpen
Check out Steve Okeefe's great web site at its new home here at Slotblog:
The Independent Scratchbuilder
There's much more to come...
#55

Posted 14 August 2020 - 05:51 PM
Very cool and interesting looking frame. ![]()
![]()
Steve King
#56

Posted 14 August 2020 - 07:14 PM
I'm really curious about how well the motor will run, I think it will be very good. Kemtron tried to do that, or at least thought about it with the Mustang/Bronco series but stopped short...just think. Nice work, as always!
- Geary Carrier likes this
#57

Posted 14 August 2020 - 08:29 PM
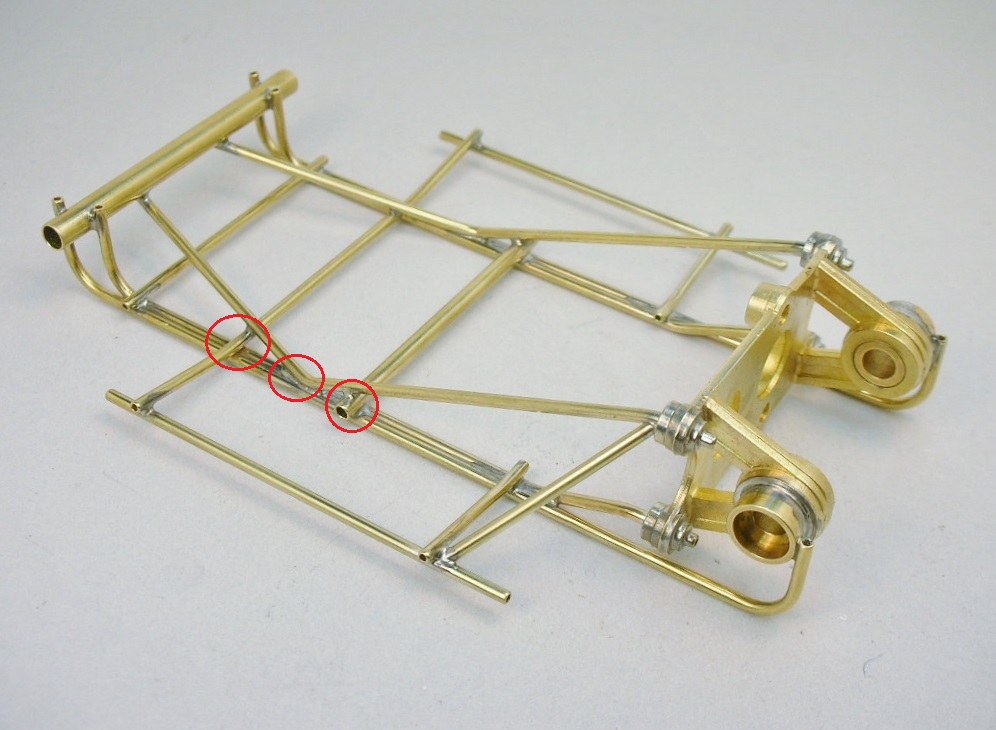
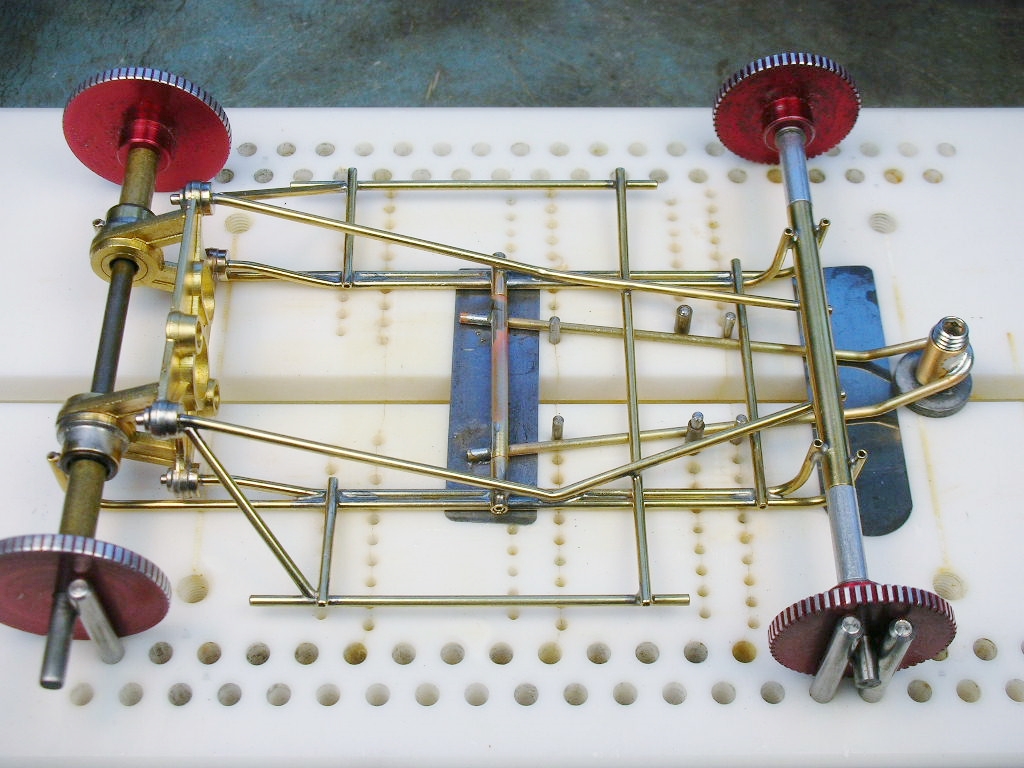
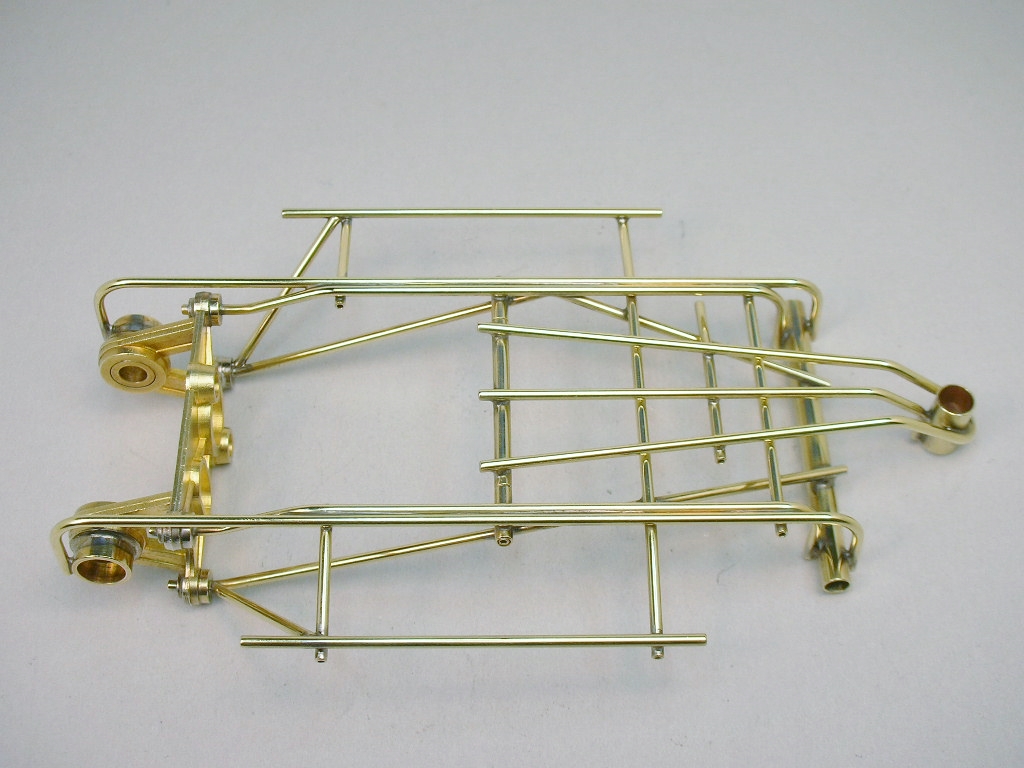
Thanks Steve. I didn't want to do a Pro era zillion brass rod "jail door" frame that's often seen in current old motor builds. It was fun to try and figure out a way to stiffen up the pin tube space frame without adding lots of extra braces.
Tying the upper rails with the lower rails and cross pieces together really helped to strengthen things up (see the red circles):
I looking forward to getting this Ramtron on the track too David to see how it runs. I have a "hopped up" 6 volt Kemtron to compare it too:
![]()
- slotbaker, Tex, Alchemist and 3 others like this
Rick Thigpen
Check out Steve Okeefe's great web site at its new home here at Slotblog:
The Independent Scratchbuilder
There's much more to come...
#58

Posted 22 August 2020 - 05:21 PM
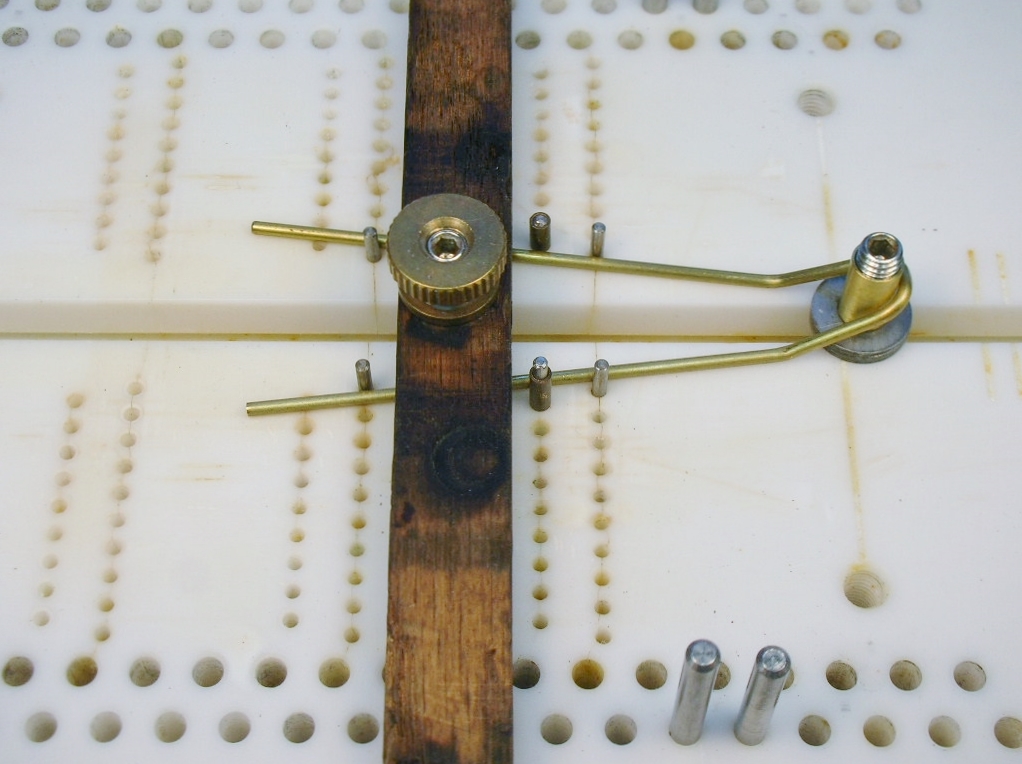
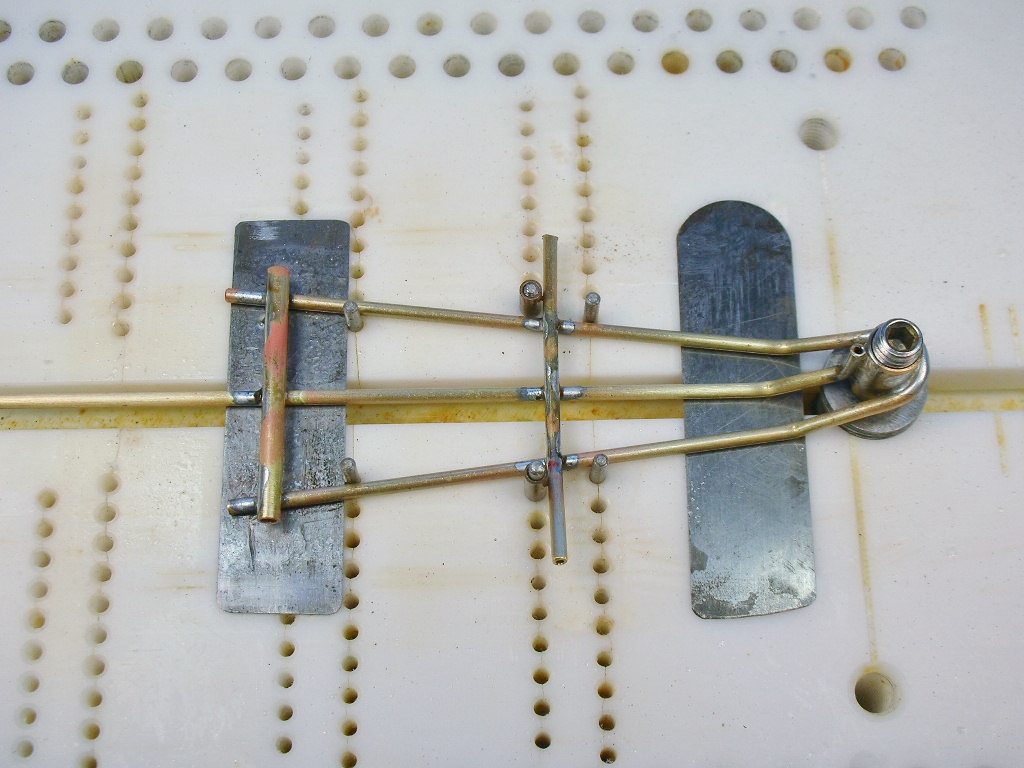
While building the drop arm my Rick's jig sure came in handy. The pins hold the main drop arm tube at the correct angle and the guide tube in place for soldering:
Then the chassis was dropped on and the arm soldered to the hinge tube:
With the chassis removed the center rail and down stop are soldered on:
The drop arm all trimmed and spiffed up............
........and installed in the finished chassis:
- slotbaker, Tex, Peter Horvath and 3 others like this
Rick Thigpen
Check out Steve Okeefe's great web site at its new home here at Slotblog:
The Independent Scratchbuilder
There's much more to come...
#59

Posted 23 August 2020 - 01:27 PM
![]() Nice way to combine part of the kemtron frame with brass tubes.
Nice way to combine part of the kemtron frame with brass tubes.
#60

Posted 23 August 2020 - 02:34 PM
impeccable...........
Remember, two wrongs don't make a right... but three lefts do! Only you're a block over and a block behind.
#61

Posted 23 August 2020 - 03:38 PM
Thank you. I just love a brass chassis. I know steel is far stronger but that shiny brass just look so good.
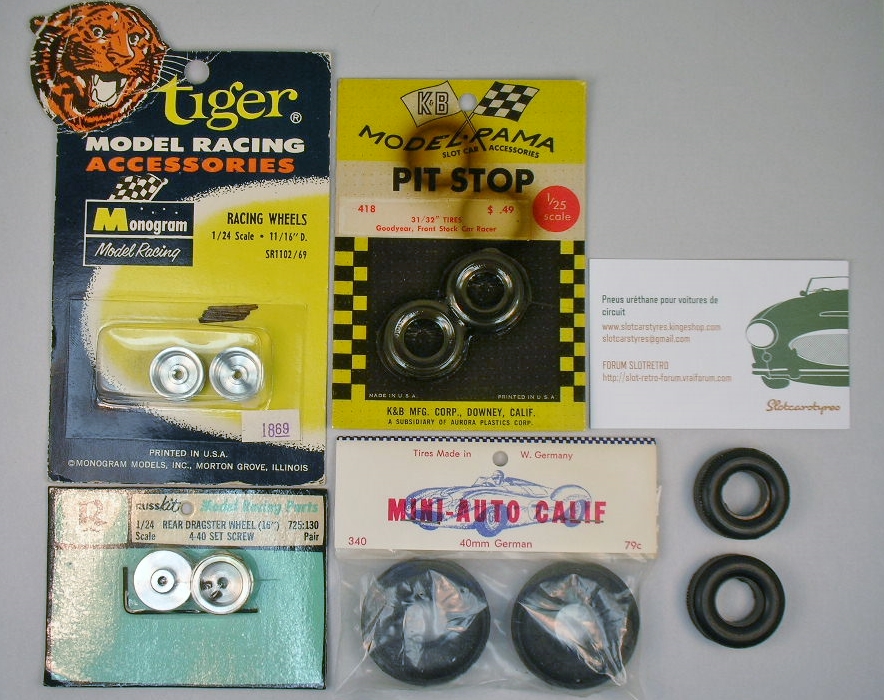
I want to get this car on the track so I need to gather up the rest of the parts. I'm starting with the wheels and tires:
Monogram 11/16" front wheels (the average OD for a scale 15" wheel)
Russkit dragster set screw rear wheels
K&B 31/32" Goodyear front tires
40mm "Germans" rear tires
I would have used the Germans back in the day but now I run urethane repops of vintage tires. For this build I'm using French made Cox Chaparral tires from the eBay seller "dauremy".
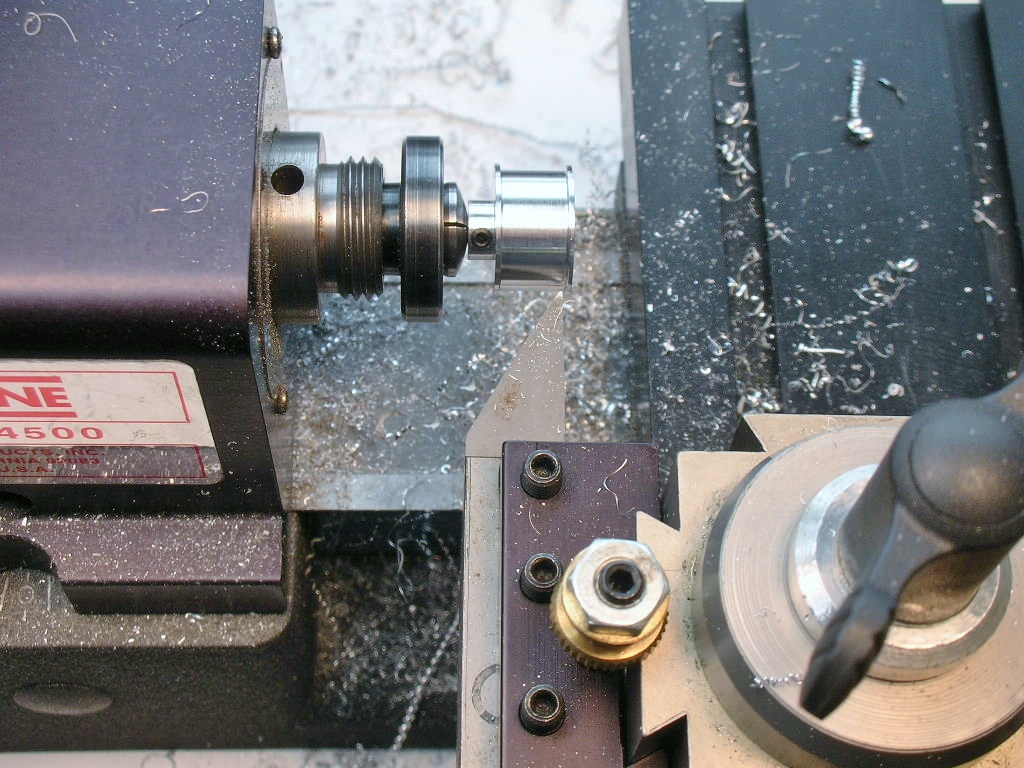
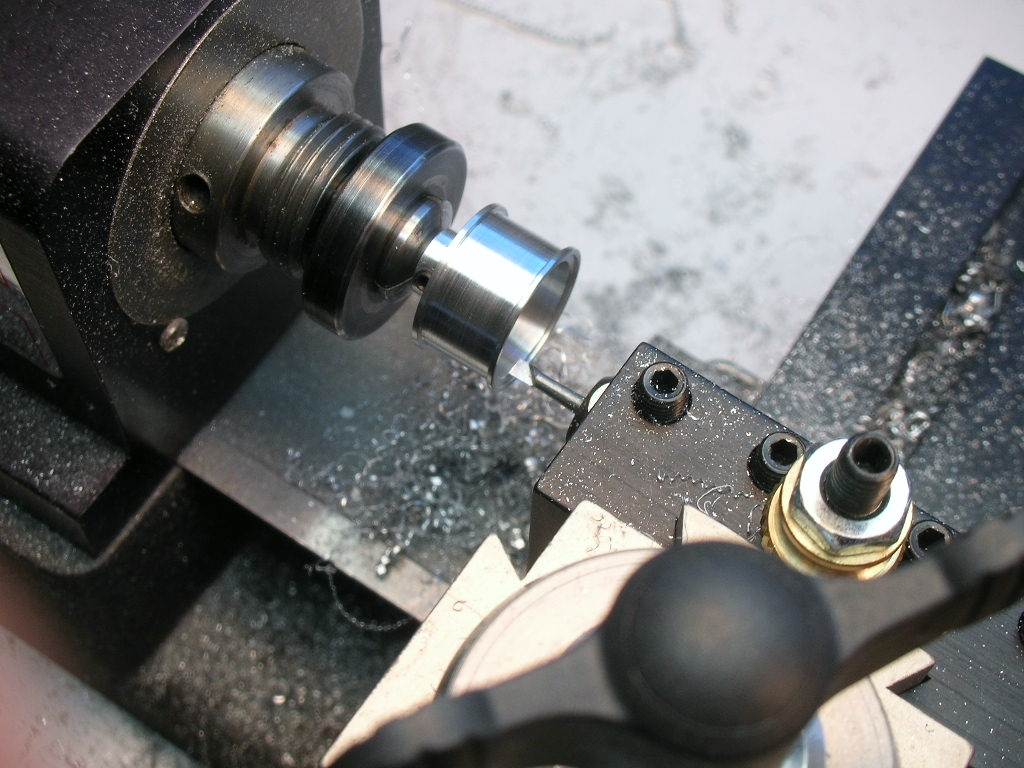
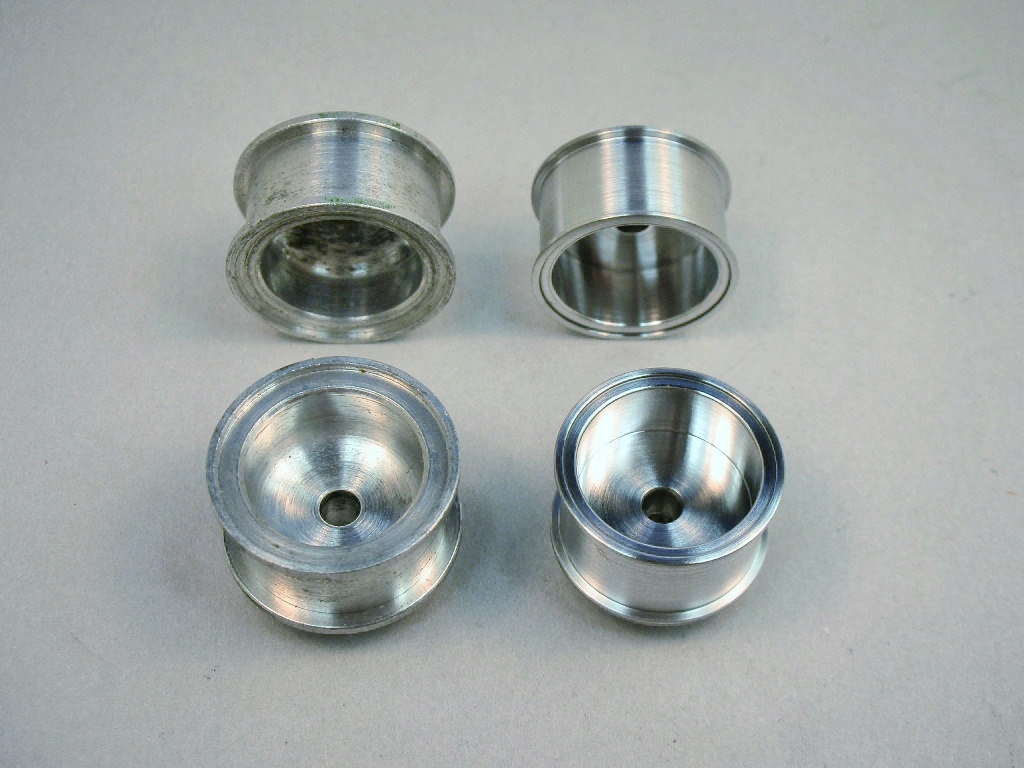
The Russkit drag wheels need to be turned down to 11/16" and the tire mounting surface re cut between the flanges to the same specs as a Cox Chaparral wheel:
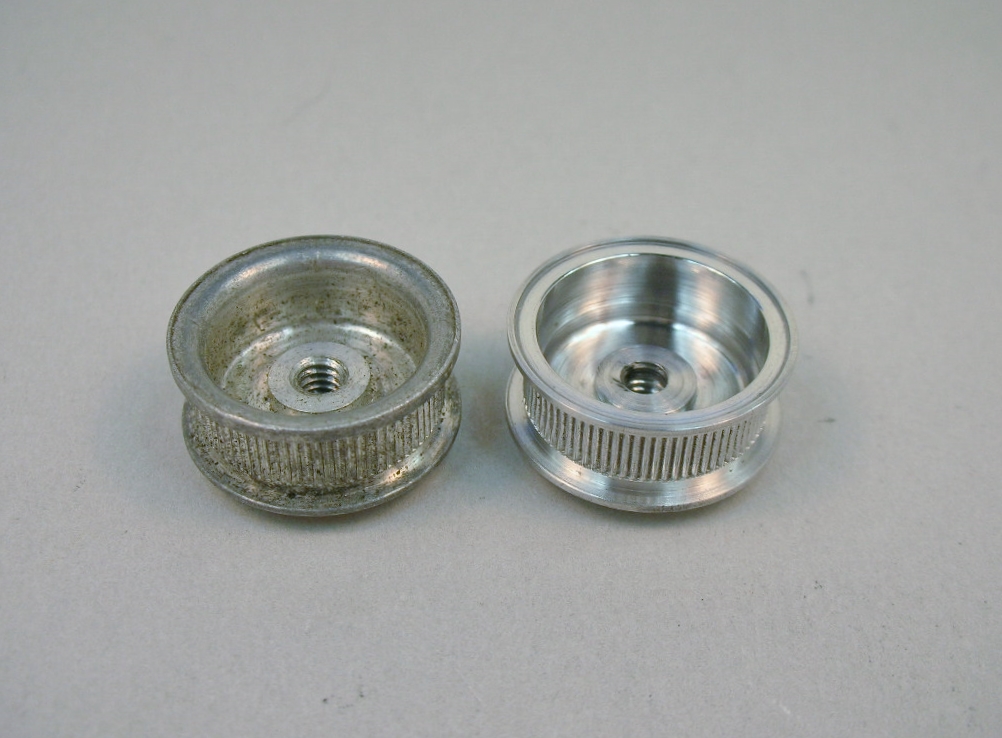
The insides were bored out to .545" to work with the wheel inserts I'm making:
The modified wheel on the right:
The monogram wheel on the right is bored out to the same size:
Tire mounting and truing time.......
- slotbaker and Peter Horvath like this
Rick Thigpen
Check out Steve Okeefe's great web site at its new home here at Slotblog:
The Independent Scratchbuilder
There's much more to come...
#62

Posted 23 August 2020 - 06:56 PM
nice work!
Steve Lang
#63

Posted 25 August 2020 - 01:09 PM
Thanks Steve.
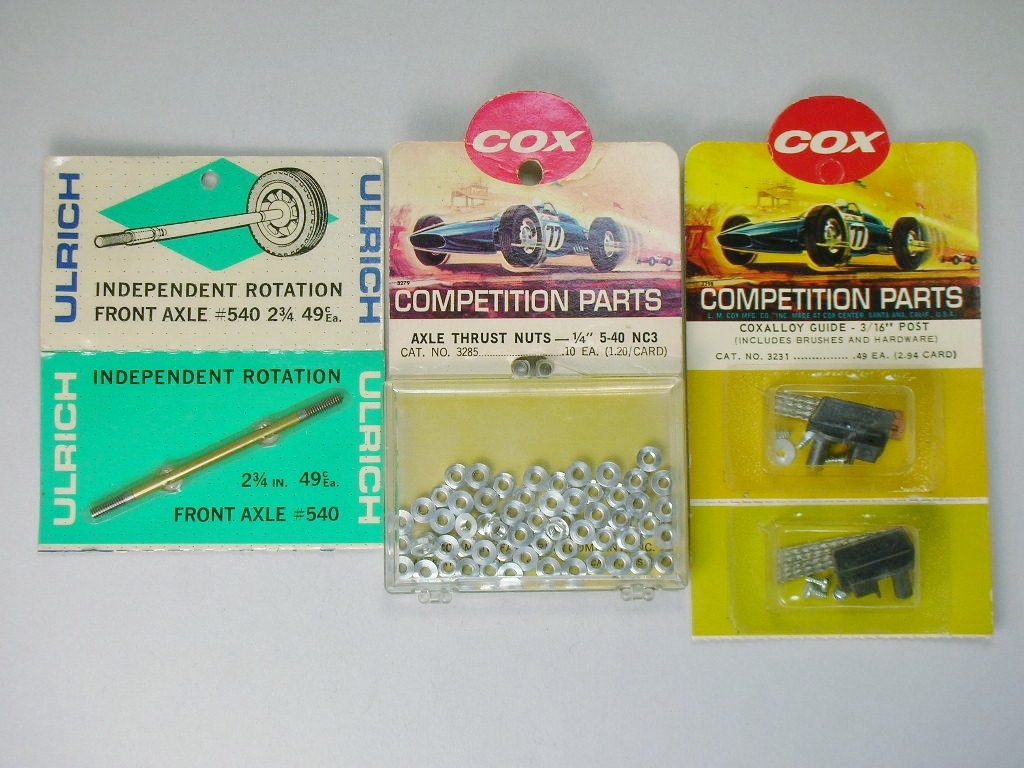
Here are the parts for the front end:
I pictured an Ulrich independent front axle but I found an unpackaged beefier piece (Associated?) so I using it
The Cox super precise aluminum thrust nuts
A "pre-quick change" Cox guide
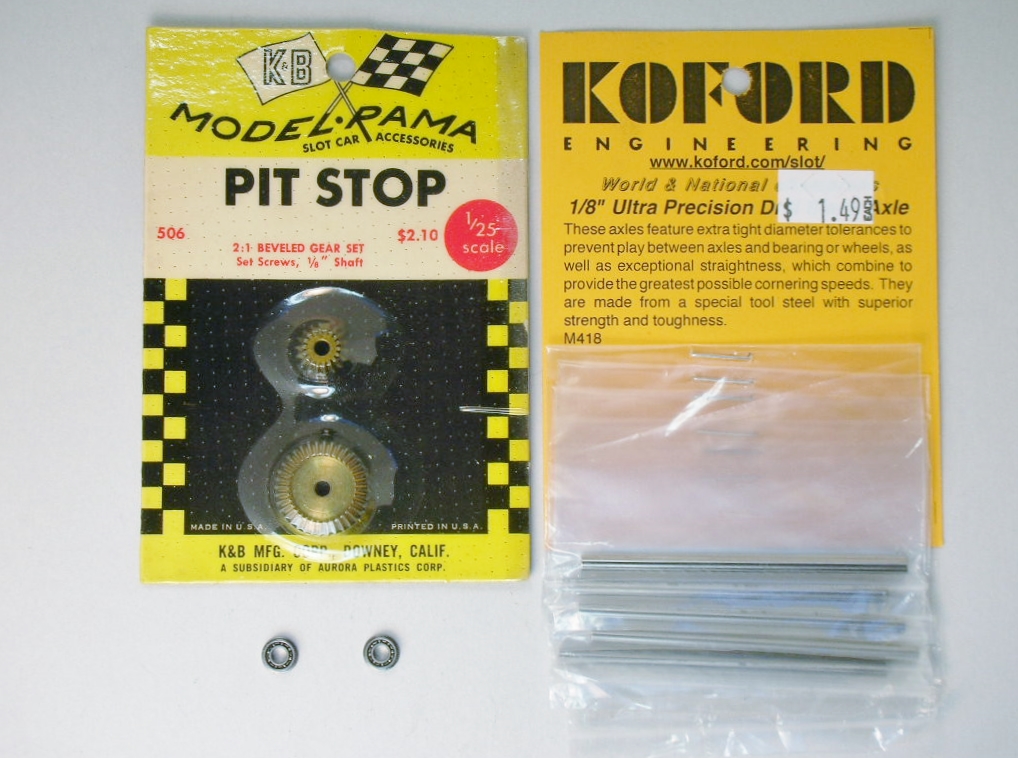
For the rear:
K&B 3:1 bevel gears (I took the picture of the 2:1 set with the bigger pinion by mistake) ![]()
Flanged shieldless ball bearings from Boca Bearing
Koford drill blank axle from Mike Swiss
Yummmmmm...........more polished brass:
Almost time to hit the track for a test....fingers crossed it's not a slug! ![]()
- slotbaker, Tex, Peter Horvath and 2 others like this
Rick Thigpen
Check out Steve Okeefe's great web site at its new home here at Slotblog:
The Independent Scratchbuilder
There's much more to come...
#64

Posted 25 August 2020 - 01:50 PM
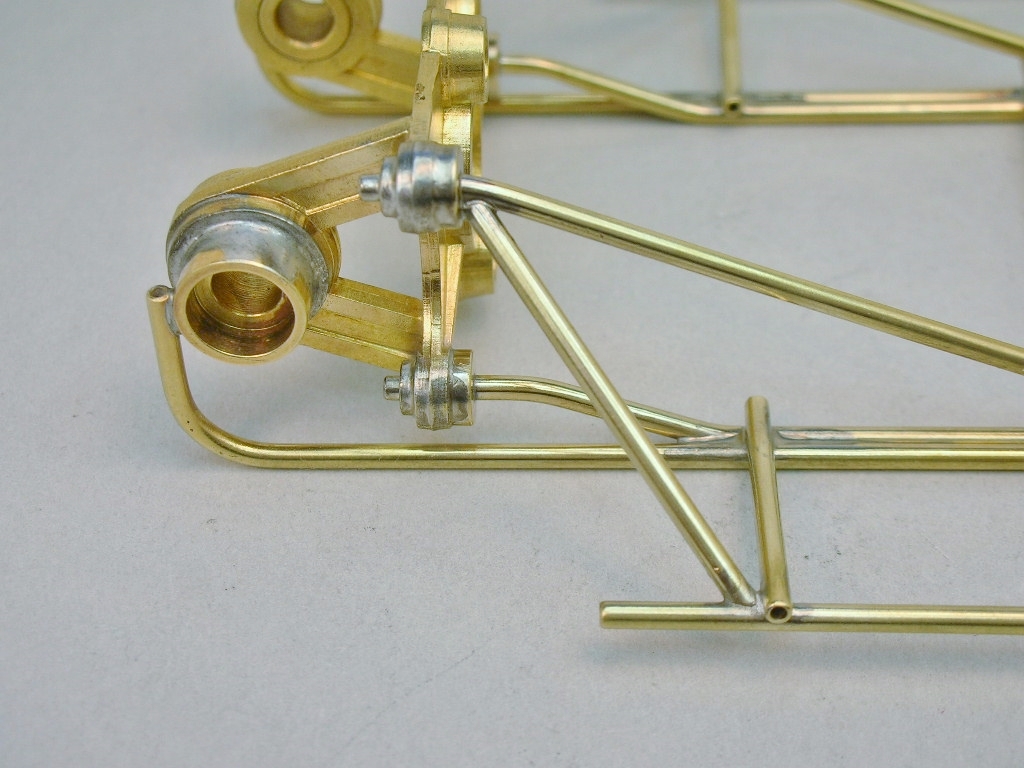
Jesus, Rick. This pic shows the coping you did on the ends of that brace. Getting one end right would have been impressive enough, but you got both ends dead on while hitting the overall length on an inside brace. It doesn't get any harder than that.
Only someone that sold their soul at the crossroads could have pulled that off! ![]()
- Tex and Peter Horvath like this
???-2/31/23
Requiescat in Pace
#65

Posted 25 August 2020 - 03:10 PM
Thanks Phil. Doing things like this is why these builds take me so long. It took several days just to get "in the mood" to tackle those braces. ![]()
![]() File a little and test fit and repeat.
File a little and test fit and repeat.
- Phil Smith and boxerdog like this
Rick Thigpen
Check out Steve Okeefe's great web site at its new home here at Slotblog:
The Independent Scratchbuilder
There's much more to come...
#66

Posted 25 August 2020 - 11:20 PM
Only someone that sold their soul at the crossroads could have pulled that off!
https://youtu.be/CqdL36VKbMQ?t=111
- Horsepower likes this
???-2/31/23
Requiescat in Pace
#67

Posted 27 August 2020 - 03:38 PM
Cool video Phil. ![]()
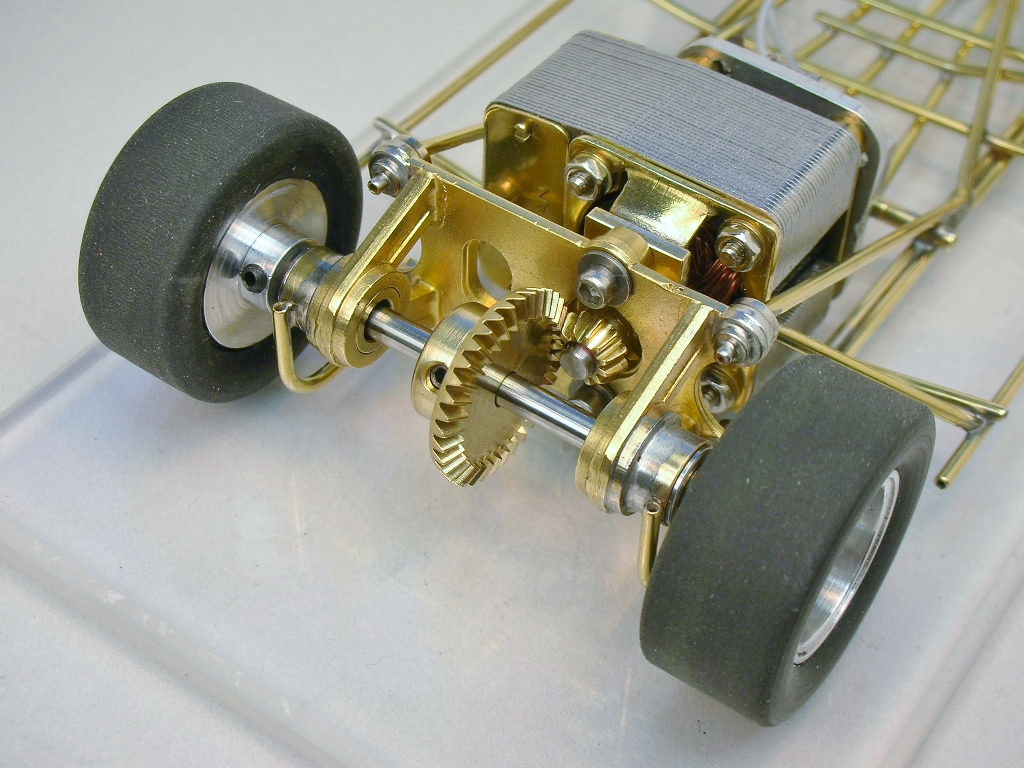
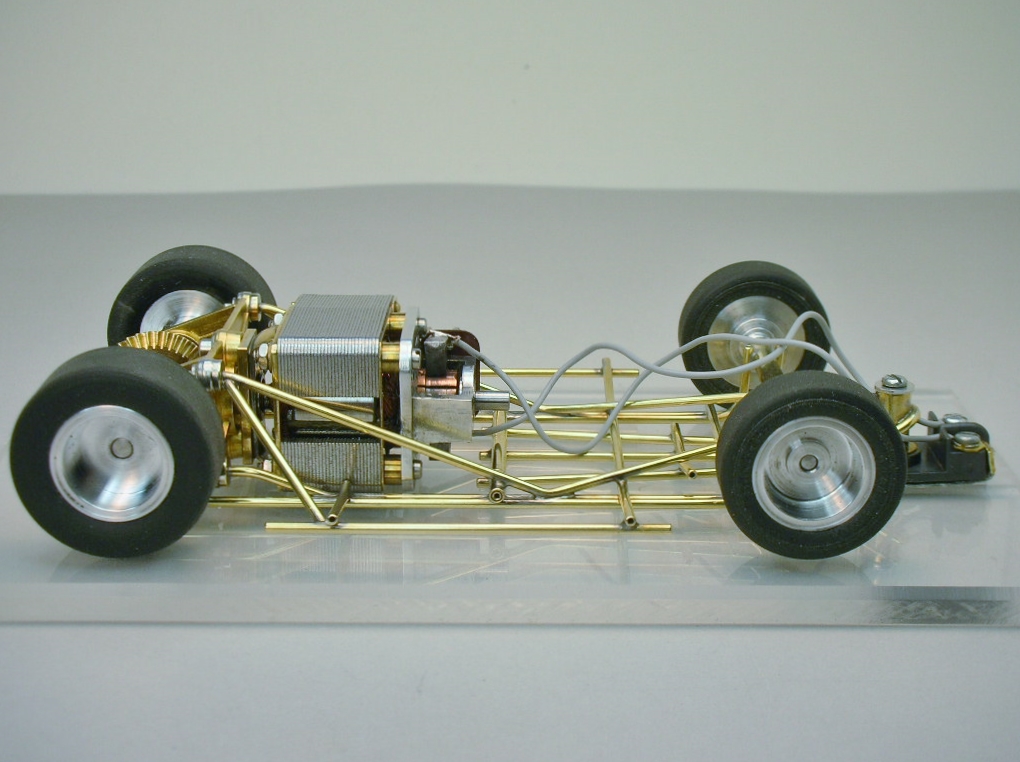
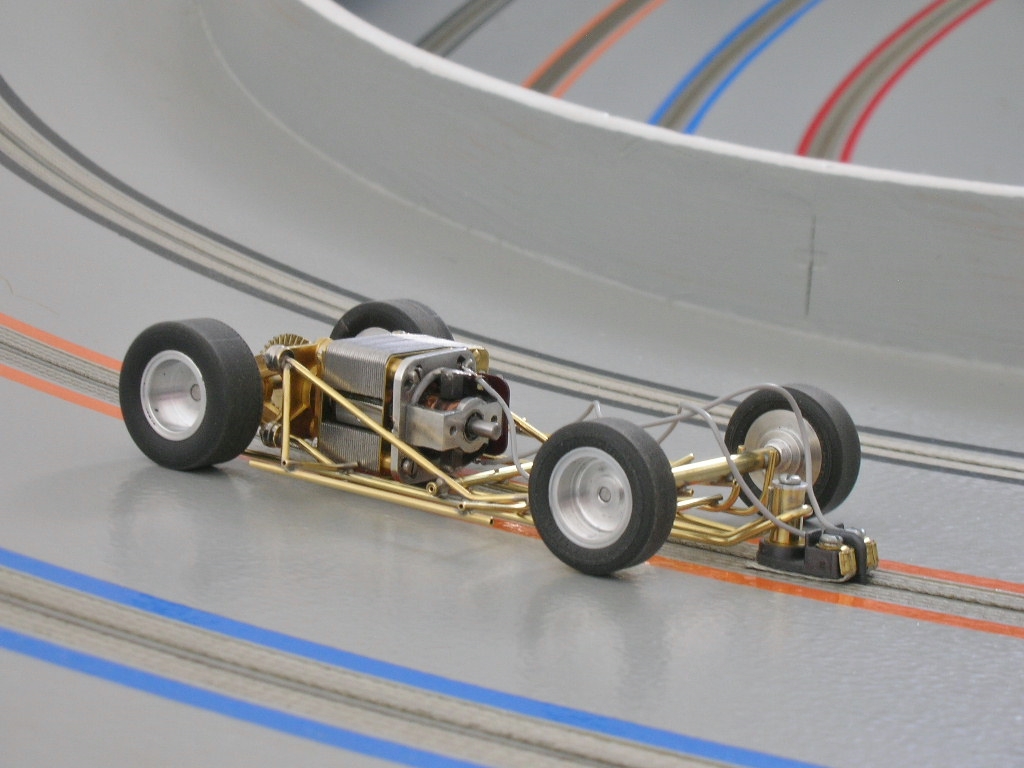
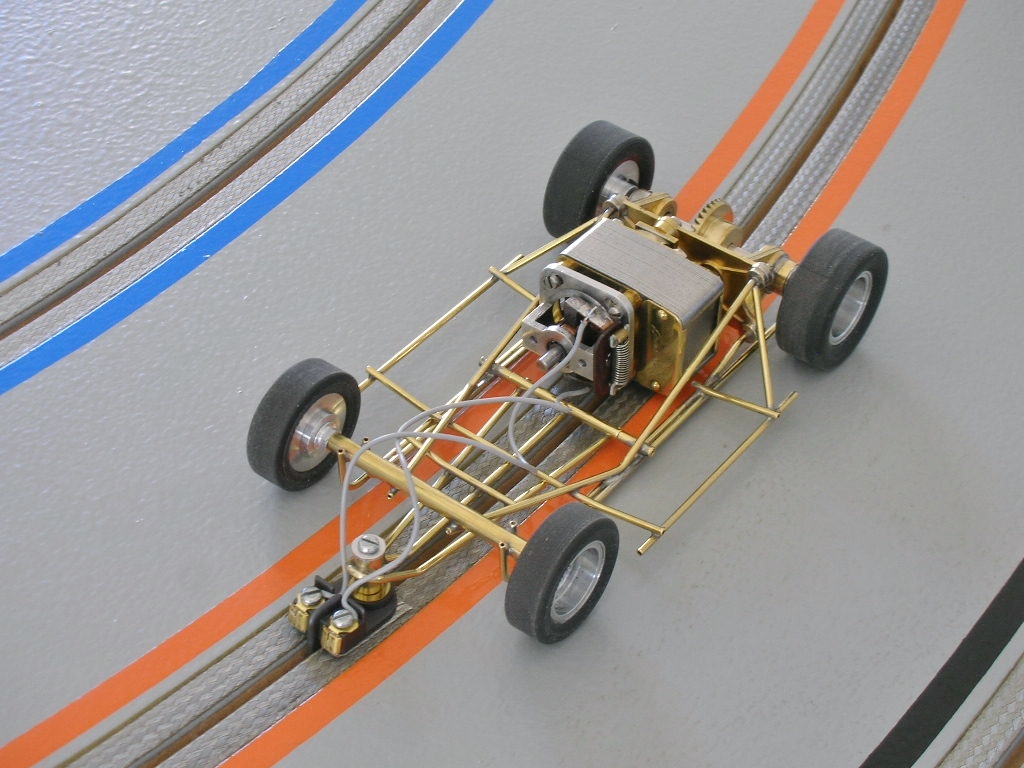
Here it is ready for it's first track test:
1/2" X 1 1/8" rears, 3/8" X 1 1/32" fronts, 2 7/8" track width front and rear with 1/16" track clearance:
On the track I wasn't just happy with how it performed, I was thrilled. ![]()
Lots of power, really great brakes and it ran cool as a cumber. ![]() The handling was solid and predictable. Hopefully adding a body won't upset anything.
The handling was solid and predictable. Hopefully adding a body won't upset anything.
Maybe I'm being overly optimistic with my initial impression but this could be a really great car. I'm going to do some timed laps with it and with some other cars to see it it's really as good as I think.
But first I need to get a body on it.........
- slotbaker, Jencar17, Tex and 6 others like this
Rick Thigpen
Check out Steve Okeefe's great web site at its new home here at Slotblog:
The Independent Scratchbuilder
There's much more to come...
#68

Posted 27 August 2020 - 08:32 PM
Hey Rick:
Given that proper backlash is so critical when using bevel gears would it make sense to add a spacer between the bracket and hub of the gear to eliminate the possibility of the gear backing away from the pinion. Maybe overkill for the situation in which this car will be run but it would be such a shame to see those beautiful brass gears get damaged due to the gear backing off just a tiny bit.
Jay Guard
IRRA Board of Directors (2022-Present),
Gator Region Retro Racing Director (2021-Present)
SERRA Co-Director (2009-2013)
IRRA BoD advisor (2007-2010)
Team Slick 7 member (1998-2001)
Way too serious Retro racer
#69

Posted 27 August 2020 - 11:49 PM
Mechanical jewellery, love it.
![]()
![]()
Steve King
#70

Posted 28 August 2020 - 12:47 AM
I love all this shinny brass Rick. ![]()
I keep looking at all those open tubes, what do you think about pushing shortened pins in the holes. Give them a chrome dome. You can always remove them if you don't like the look.
Not a criticism, just a thought. ![]()
Holy moly I just counted 27 open tubes including the body pins holes. I would not want those shortened pins to mess up the handling.
#71

Posted 28 August 2020 - 10:06 AM
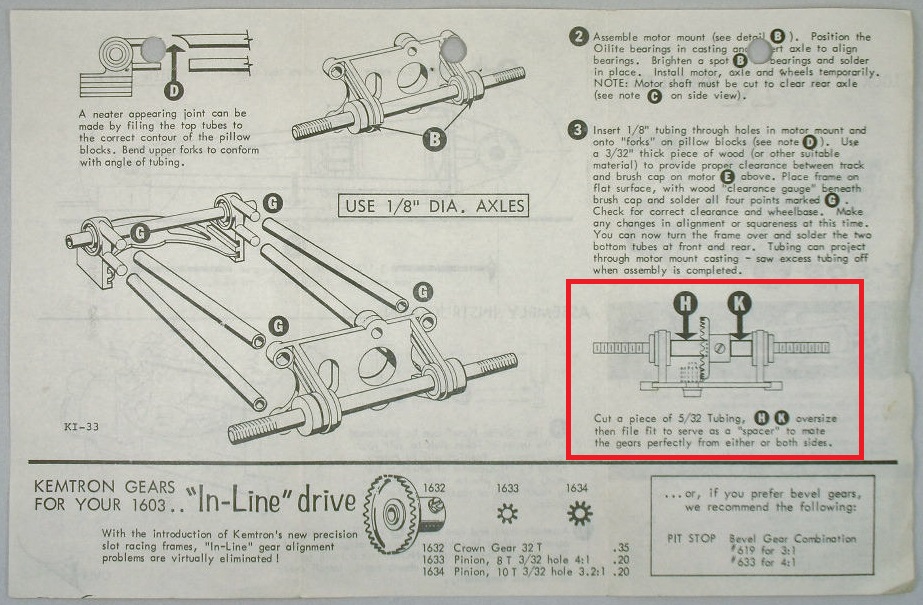
Jay, your comment got my brain cells motivated and I remember we used to set up our cars with spacers on the inside of the bracket. I've even seen it done in the old magazine articles. In fact Kemtron said that's the way to set up the rear end for this very chassis:
Thanks Steve ![]()
That's interesting Martin. That would cover up what I'm actually trying to emphasize.
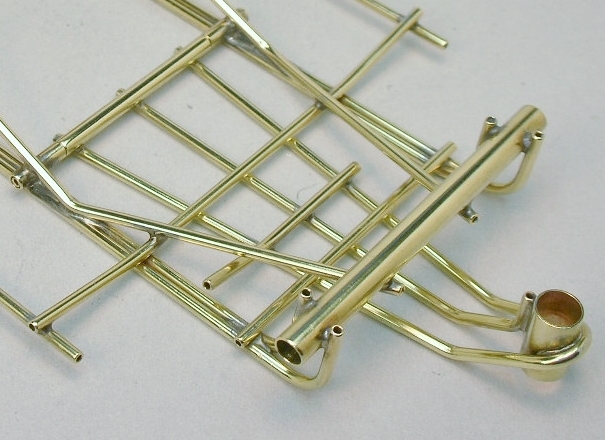
I chamfered the outside ends of the tubes and bought a small 1/8" carbide tool to countersink the holes in the tubes:
That old saying, "different strokes for different folks" is definitely called for here. ![]()
- slotbaker, Peter Horvath and boxerdog like this
Rick Thigpen
Check out Steve Okeefe's great web site at its new home here at Slotblog:
The Independent Scratchbuilder
There's much more to come...
#72

Posted 28 August 2020 - 11:05 AM
I understand.
Just an old habit when building motorcycle and cars frames with steel tubing.
You do not have to worry about rust here.
Nice detail on the tube ends. I missed the back of the drop-arm so that makes 30 holes you had to deal with. But I am sure you know that.
#73

Posted 28 August 2020 - 11:59 AM
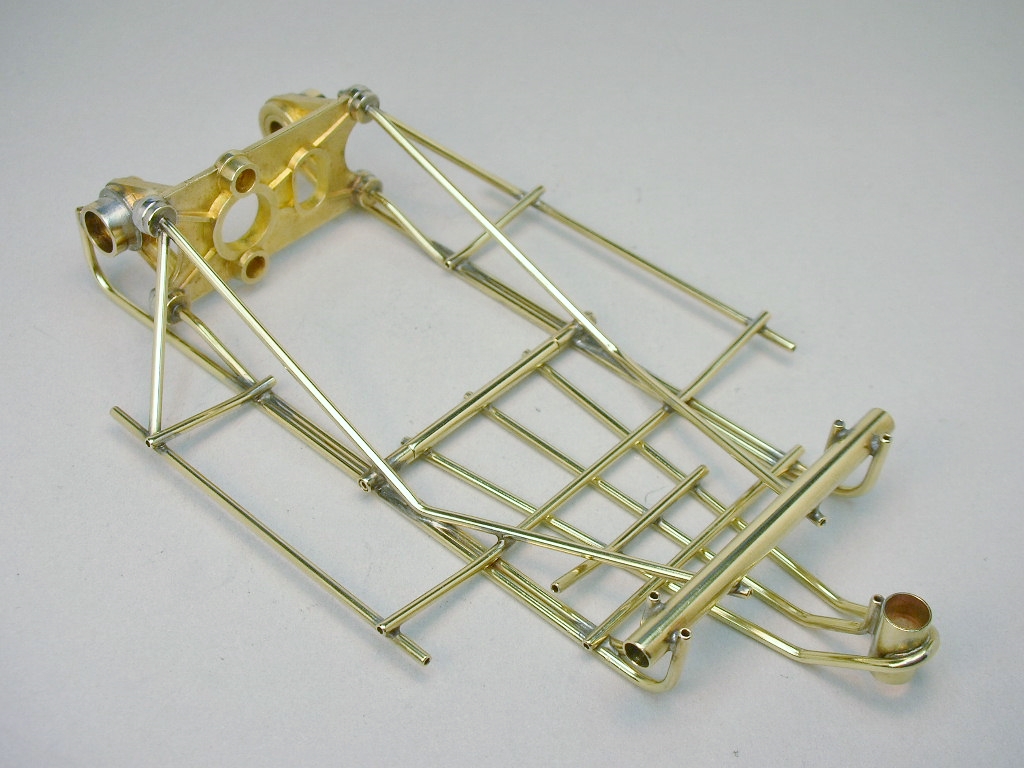
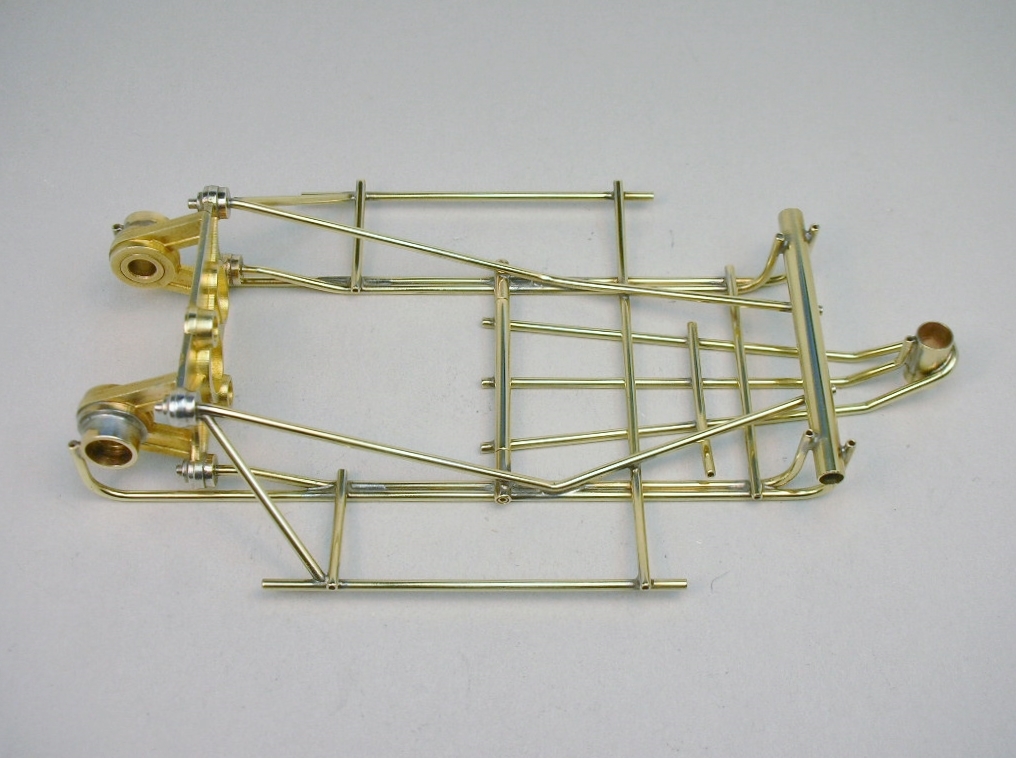
I did cover up (but truly plug up) 2 of those tubes Martin to make exhaust pipes. ![]()
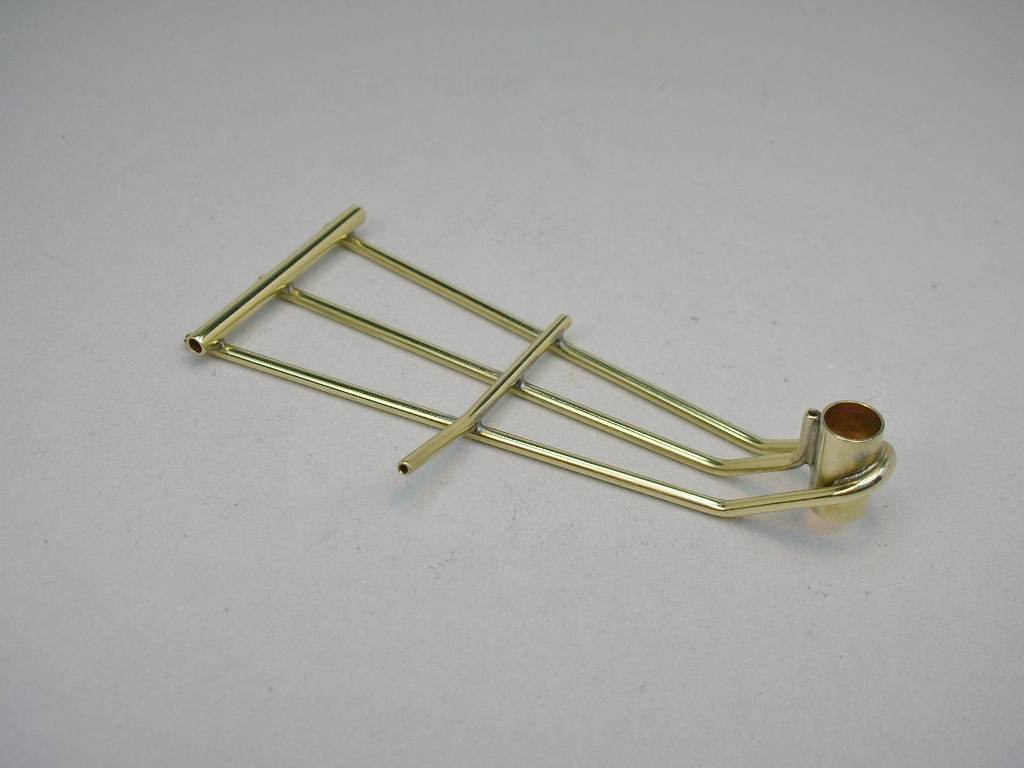
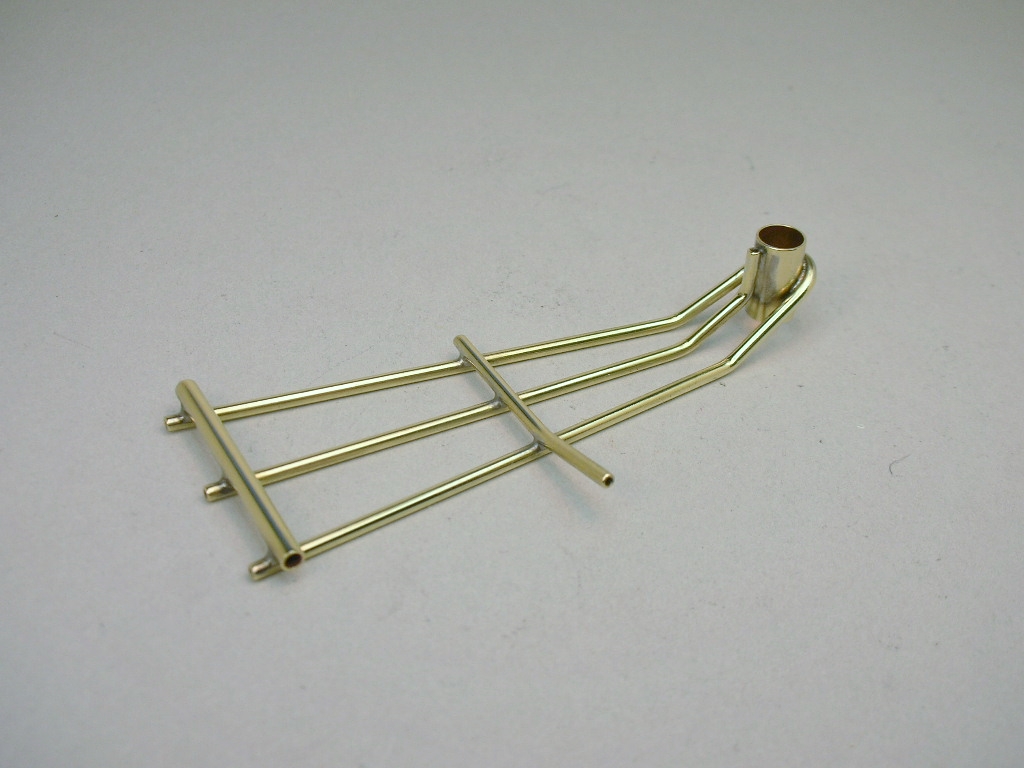
A 3/32" tube is slipped over a frame rail tube sticking through the back of the motor bracket. The other end of the tube is notched out to fit the other frame rail as it curves up to the bearing holder.
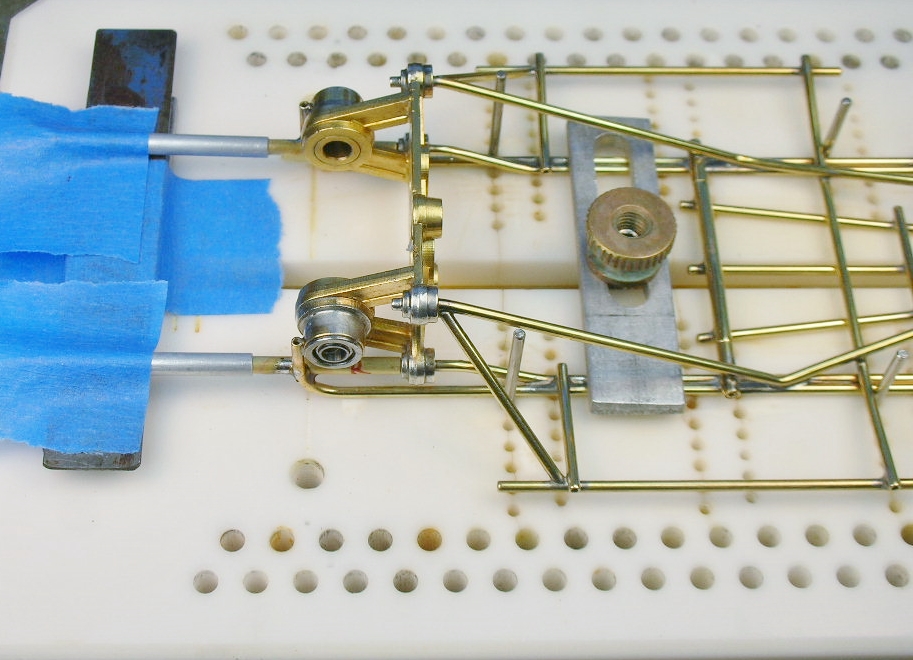
Here is a setup that shows sometimes simple is the way to go. Just some shims and masking tape ![]()
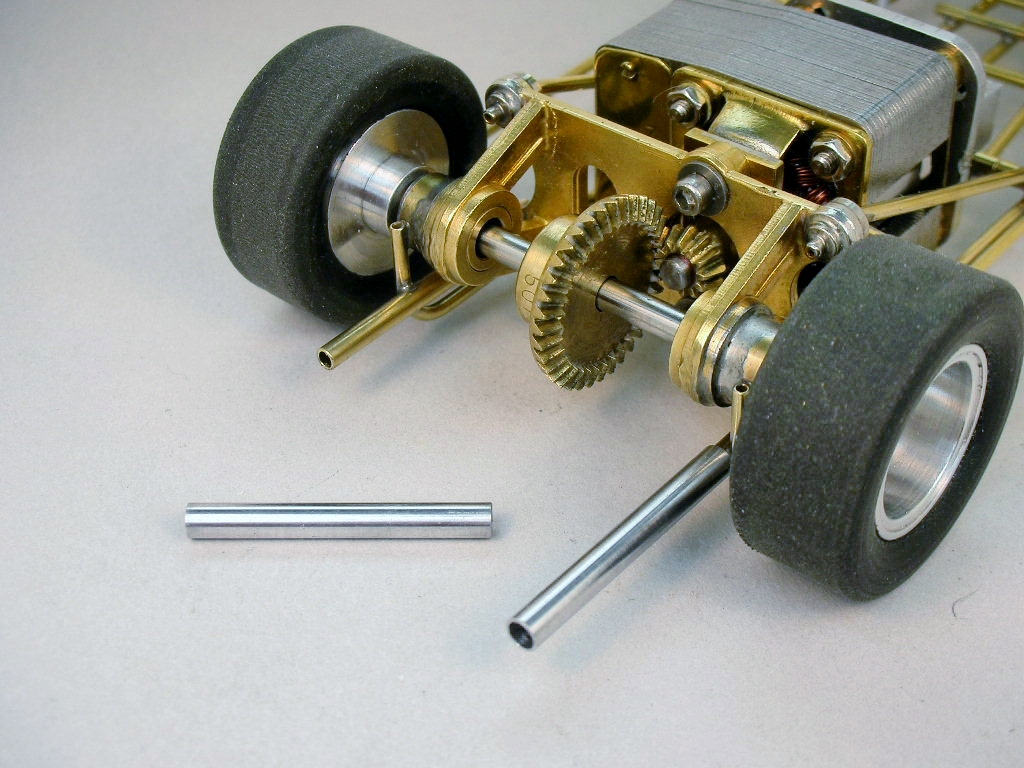
1/8" aluminum tube get slipped on and glued in place:
Now for that body...........
- slotbaker, Tex and Peter Horvath like this
Rick Thigpen
Check out Steve Okeefe's great web site at its new home here at Slotblog:
The Independent Scratchbuilder
There's much more to come...
#74

Posted 28 August 2020 - 03:12 PM
Looking good. ![]()
On the edge of my seat waiting to see your body choice. Is it a Ferrari or a Ford GT?
Got me in suspenders ![]()
#75

Posted 28 August 2020 - 03:54 PM
On the edge of my seat waiting to see your body choice. Is it a Ferrari or a Ford GT?
Hmmmmmmm............
- Peter Horvath likes this
Rick Thigpen
Check out Steve Okeefe's great web site at its new home here at Slotblog:
The Independent Scratchbuilder
There's much more to come...


