Jump to content


Photo

Building a four-lane MDF wood track


255 replies to this topic

#201 Bigdogbro1

Bigdogbro1

    Mid-Pack Racer

  • Full Member
  • PipPipPip
  • 144 posts
  • Joined: 23-April 24
  • Gender:Male
  • Location:near Hell, MI

Posted 08 April 2025 - 08:31 AM

Another milestone reached today!

I have completed all of the sidewall top and bottom trimming.  I will need to finish the wood sanding, staple and screw head filling.  This is the near the end of the woodworking portion of the build.  I will still need to build the control panel console.  The Idea I have for that is to have I curved around both ends of the section one (S1) short straight about 12" to 16" to blend in to the two adjacent turns.  No sharp corners to bang into.  I plan to hang the console on a kleat system to be removable.  All the wiring will have XT60 connectors between the console and S1 track section.    My good friend (co-worker) since the early 80's has been helping with the sidewall build almost three days a week for the last two months.  Prepping, gluing, bending clamping, stapling and screwing the layered turn sidewalls and 1/2" MDF straights, a huge amount of work!  I admire Steve Ogilvie's builds by himself in his out-building.  I'm glad we made it through it!  Thanks buddy!

Attached Images

  • 20250407_160901.jpg
  • 20250407_160923.jpg
  • 20250407_160931.jpg
  • 20250407_161118.jpg

  • Eddie Fleming likes this
Rob Armbruster


#202 MSwiss

MSwiss

    Grand Champion Poster

  • IRRA National Director
  • PipPipPipPipPipPipPipPip
  • 26,012 posts
  • Joined: 16-April 06
  • Gender:Male

Posted 08 April 2025 - 09:33 AM

Great job on the track, Rob.


IMO, this thread has progressed where the current title is outdated.


If you'd like, I can edit it to something you would think is a bit more appropriate.


  • Paul Menkens likes this

Mike Swiss
 
Inventor of the Low CG guide flag 4/20/18
IRRA® Components Committee Chairman
Five-time USRA National Champion (two G7, one G27, two G7 Senior)
Two-time G7 World Champion (1988, 1990), eight G7 main appearances
Eight-time G7 King track single lap world record holder

17B West Ogden Ave., Westmont, IL 60559, (708) 203-8003, mikeswiss86@hotmail.com (also my PayPal address)

Note: Send all USPS packages and mail to: 692 Citadel Drive, Westmont, Illinois 60559


#203 Bigdogbro1

Bigdogbro1

    Mid-Pack Racer

  • Full Member
  • PipPipPip
  • 144 posts
  • Joined: 23-April 24
  • Gender:Male
  • Location:near Hell, MI

Posted 12 April 2025 - 08:01 AM

Great job on the track, Rob.


IMO, this thread has progressed where the current title is outdated.


If you'd like, I can edit it to something you would think is a bit more appropriate.


Hi Mike,  Thanks for the compliment!  

I think an update would be good at this point.  "Building a four lane MDF wood track".


Cheers  


  • Paul Menkens likes this
Rob Armbruster

#204 Bigdogbro1

Bigdogbro1

    Mid-Pack Racer

  • Full Member
  • PipPipPip
  • 144 posts
  • Joined: 23-April 24
  • Gender:Male
  • Location:near Hell, MI

Posted 28 April 2025 - 12:40 PM

Hi there everyone,

I have been making more progress on my track build after a few days off and spending time developing a router fixture for cutting the joint block vertical braid drop channels.  I was going to use a 1/4" spike tooth paddle drill but my first attempt was not as hoped for.  The end result was not to my liking so I designed a sliding router fixture the mounts to the track ends and guides a router to cut in the 1/4" wide channel for each braid.  This method gives me great results and will reduce the error of drilling holes freehand thru the track.  It also gives me a squared off end (router bit end cut) that will better fit the 1/4" wide braid later. 


The 24" long deep reach wood clamp I had is used to clamp down the fixture onto the track.  How you say...well when the clam is tightened on the joint block the backbone rod of the clamp bends downward pinching the 2x4 block down onto the fixture.  The 1/8" drill bit locates the fixture to the the track slot. 

Attached Images

  • 20250424_160250.jpg
  • 20250424_160345.jpg
  • 20250428_140607.jpg
  • 20250428_140520.jpg
  • 20250428_140850.jpg

  • Alchemist likes this
Rob Armbruster

#205 Bigdogbro1

Bigdogbro1

    Mid-Pack Racer

  • Full Member
  • PipPipPip
  • 144 posts
  • Joined: 23-April 24
  • Gender:Male
  • Location:near Hell, MI

Posted 28 April 2025 - 12:48 PM

Here are the results of my efforts and time on the fixture.  


The first picture shows the test cut on a piece of scrap MDF after adjusting the fixture for the correct dimensional sizes.  Trial and error but it all came together in the end.


The last picture shows top down on the track surface.  The joint is not clamped together giving the air gap in the center.  That will dissapear in the final assembly.  The depth of cut is .050" and the track braid thickness is .025".  I end up with a 10 degree total separation angle for the two channels.


I am trying some polyurathane on the joint block ends prior to routing to see if the chip out will be better controlled on the bottom edges of the tounges.


I am getting closer to finishing but I still have alot of work ahead to finish.  Had I known how much work was involved before starting this project I may have reconsidered it.  In the end I will be enjoying the track with family and friends. 

Attached Images

  • 20250425_112138.jpg
  • 20250428_102523.jpg
  • 20250428_102254.jpg

  • Alchemist and Sloter like this
Rob Armbruster

#206 Mark Onofri

Mark Onofri

    Posting Leader

  • Subscriber
  • PipPipPipPipPipPipPip
  • 2,633 posts
  • Joined: 18-November 20
  • Gender:Male
  • Location:Syracuse, NY

Posted 28 April 2025 - 08:09 PM

Two things that I learned the expensive way:
1) paint both sides of the board
2) even though it's a walk out basement (the only way to fly) invest in a dehumidifier
You're going to love it
Ps: if you're going to run multiple lengths of braid per lane, invest in what they call " bugs". They use them to connect wires and they are much better than just twisting the braid.

#207 Bill from NH

Bill from NH

    Age scrubs away speed!

  • Full Member
  • PipPipPipPipPipPipPipPip
  • 14,992 posts
  • Joined: 02-August 07
  • Gender:Male
  • Location:New Boston, NH

Posted 28 April 2025 - 08:59 PM

1. A good woodworking tip is to finish both sides of a board to prevent increased moisture absorption & warping. I've
been under several commercial tracks & I never saw one painted on the underneath.

2.A basement dehumidifier is a good idea for having many different things last longer in a cellar.

3.Steve Ogilvie took the two pieces of braid at a joint, folded them together & stapled them to the
track's underside. There are many different ways to connect two pieces of braid.
  • Paul Menkens likes this
Bill Fernald
 
I intend to live forever!  So far, so good.  :laugh2:  :laugh2: 

#208 Bigdogbro1

Bigdogbro1

    Mid-Pack Racer

  • Full Member
  • PipPipPip
  • 144 posts
  • Joined: 23-April 24
  • Gender:Male
  • Location:near Hell, MI

Posted 19 May 2025 - 08:22 AM

Hope everyone is enjoying life.


Update:

Here are a few pics of the track since I reassembled it after routing in braid drop channels.  It reassembled very well!


I was working on the drivers station console and wanted something different than the usual square box on the side of the track so I decided to curve the ends to mimic the track turns.


I also wanted the console to be removable so I used a cleat system to hang it from.  The top surface is 1/4" hardboard from the track build with structural support brackets resting on the track cleat hanger.  The top is tilted just over 7 degrees downward from the track.  NO FOOD OR DRINKS! It was a tricky build but that's what I wanted....something unique.


The R,W,B,Y are lane colors for the stations positions.  I was checking line-of-sight from the closest and furthest stations to points on the track to minimize obstructions to each of the driver stations. 

Attached Images

  • 20250506_174935.jpg
  • 20250506_175015.jpg
  • 20250507_144330.jpg
  • 20250509_190816.jpg

  • Alchemist likes this
Rob Armbruster

#209 Bigdogbro1

Bigdogbro1

    Mid-Pack Racer

  • Full Member
  • PipPipPip
  • 144 posts
  • Joined: 23-April 24
  • Gender:Male
  • Location:near Hell, MI

Posted 19 May 2025 - 08:34 AM

Once the underside support structure was built I began building the ends.  Flexible plywood (barrel bend) 3/8" thick for the first layer then later after the glue dries I added the outer finish 1/8" Birch.  The layers are full double face glued together just like all of the track.  Again lots of clamps involved and waiting for the glue to dry.


I custom fit a underside corner block to the curved corners where it meets the track wall for support and strength.  A screw will anchor that block to the track sidewall from the backside of the lower track wall.  That MDF backing block is temporary for clamping, a permanent block was glued in afterwards.

Attached Images

  • 20250515_105521.jpg
  • 20250516_100625.jpg
  • 20250516_101015.jpg
  • 20250516_135726.jpg

Rob Armbruster

#210 Bigdogbro1

Bigdogbro1

    Mid-Pack Racer

  • Full Member
  • PipPipPip
  • 144 posts
  • Joined: 23-April 24
  • Gender:Male
  • Location:near Hell, MI

Posted 19 May 2025 - 08:48 AM

The results I feel were worth the extra effort and I'm very pleased with the end results.  


I have finished the drivers console and it's prepped for paint.  This was a bit of a challenge to build due to the end curves but I scratch built it from an idea and it worked out perfectly as planned.  I wanted curved ends on it to match the track and also eliminate anyone running into a square corner with their legs.  

Attached Images

  • 20250517_100423.jpg
  • 20250517_192901.jpg
  • 20250518_145904.jpg
  • 20250518_145910.jpg

  • MSwiss, Alchemist and mickey thumbs like this
Rob Armbruster

#211 Bigdogbro1

Bigdogbro1

    Mid-Pack Racer

  • Full Member
  • PipPipPip
  • 144 posts
  • Joined: 23-April 24
  • Gender:Male
  • Location:near Hell, MI

Posted 19 May 2025 - 08:59 AM

I have decided on my track colors just recently.  I have made my choice based upon my past history of this color and wanted  a color that would pop and grab your attention when you seen it.  So my choice is a 1973 Corvette Yellow which was the color of my first car after high school.  I purchased a stock Baby Blue metalic 1964 Corvette convertable from a friend and made it my own.  I was running a machine shop for a local auto parts store that had a speed shop so I went to town.  I loved the color I had that Corvette painted because it went with the chrome and black accents.


Recently I rode over to the Hell Saloon in Hell Michigan in a Hot Rodder neighbors 1961 Chevy Biscayne with a Hemi Hellcat twin turbo engine to meet with some past MC riding friends and this Plymouth pulls in.  I immeadiately knew that color was my old Vette color.  I talked to the owner and he confirmed it.  He said I was one of a handfull who knew what that color was.  Well that locked it in for me and I made my choice.


If you think these colors look familiar it's because it's similar to what Electric Dreams track colors are.  I will use Sherwin Williams WB epoxy top coat over a oil base polyurethane base for the track and a light gray tinted primer for the yellow sidewalls top, bottom and outsides.  Still asking questions at Sherwin Williams to confirm everything for compatability.

Attached Images

  • Robs 64 Corvette_0001.jpg
  • 20250510_165557.jpg
  • 20250513_143140.jpg

  • Bill from NH, Brian Czeiner, Alchemist and 2 others like this
Rob Armbruster

#212 Brian Czeiner

Brian Czeiner

    Race Leader

  • Full Member
  • PipPipPipPipPip
  • 564 posts
  • Joined: 04-March 08
  • Gender:Male
  • Location:Tyler, TX

Posted 21 May 2025 - 11:13 AM

I like the gray as opposed to black for the track surface. It helps hide rubber build up and allows darker colored car bodies to be seen easily.  


  • NSwanberg, Alchemist and Paul Menkens like this

If it's not a Caveman, It's HISTORY!          Support Your local raceways!


cavemanbodeez@gmail.com         CavemanBodeez.com      Womp Mafia


#213 Bigdogbro1

Bigdogbro1

    Mid-Pack Racer

  • Full Member
  • PipPipPip
  • 144 posts
  • Joined: 23-April 24
  • Gender:Male
  • Location:near Hell, MI

Posted 23 May 2025 - 12:08 PM

Update:


I have finished the Oil-base polyurethane coating today (one coat) it soaks into the mdf so one coat should be fine.  I might do the outer sidewalls but because I'm using a Sherwin Williams primer under the yellow latex I might decide not to poly them.  My reasoning was the poly would harden the MDF and resist ding damage but the TOP sidewall edge is coated with poly which is what I was concerned about.  The Varathane Ultimate Oil-base polyurethane Satin finish goes on well and soaks into the MDF using a 4" wide foam roller.  I worked the poly into the slot groove with a shaved cheap dollar brush to get into the slot better.  I then rolled that distance and dry rolled the top coat to remove any excess poly.  Overlap is kept to a minimum.  It will need to all be sanded once cured after a week before the Sherwin Willliams "Pro Industrial" B73-300 Series Water Based Catalyzed Epoxy is applied.


This is a critical time after all this build work invested so I'm a bit anal about these products being applied and all the prep.  All this has been discussed with Steve O. and he has given me a level of confidence with the polyurethane coating and epoxy top coat.  Although Steve O. has used Rust-Oleum WB 5300 epoxy for a topcoat my results hopefully result in success as well.


There may not be much to report for 5 to 7 days as the poly cures but I will continue to keep you all informed of my progress.


Regards

Attached Images

  • 20250521_153522.jpg
  • 20250521_153542.jpg
  • 20250522_154909.jpg
  • 20250523_121126.jpg

  • Alchemist and mickey thumbs like this
Rob Armbruster

#214 Bigdogbro1

Bigdogbro1

    Mid-Pack Racer

  • Full Member
  • PipPipPip
  • 144 posts
  • Joined: 23-April 24
  • Gender:Male
  • Location:near Hell, MI

Posted 23 May 2025 - 12:52 PM

I like the gray as opposed to black for the track surface. It helps hide rubber build up and allows darker colored car bodies to be seen easily.  

Hi Brian,

I agree, I wanted a top track color that would not be too dark with basement light reflecting off it and you would be able to see those dark color cars.  I also didn't want a light gray that showed wear and tear on the track easily.  So my choice was a medium gray like I have shown and I like the darker gray better as it looks richer in color tones.


Rob Armbruster

#215 Bigdogbro1

Bigdogbro1

    Mid-Pack Racer

  • Full Member
  • PipPipPip
  • 144 posts
  • Joined: 23-April 24
  • Gender:Male
  • Location:near Hell, MI

Posted 28 May 2025 - 08:22 AM

While I have been waiting for the polyurethane to cure before sanding I have been starting the console driver station wiring layout.  I added a few MDF mounting blocks for the barrier strips I'm using.  These terminals will be used for power supply input power to each station and outgoing lane power to the control relay under the track section 1.  The Track Call button also goes thru the strip.

Attached Images

  • 20250527_171540.jpg
  • 20250527_171529.jpg

Rob Armbruster

#216 Bigdogbro1

Bigdogbro1

    Mid-Pack Racer

  • Full Member
  • PipPipPip
  • 144 posts
  • Joined: 23-April 24
  • Gender:Male
  • Location:near Hell, MI

Posted 28 May 2025 - 08:30 AM

Here are a few new pictures of the track after the poly coat.

Attached Images

  • 20250526_090304.jpg
  • 20250526_090347.jpg
  • 20250526_090431.jpg
  • 20250526_090632.jpg
  • 20250526_090717.jpg

  • Bill from NH, glueside, John Luongo and 1 other like this
Rob Armbruster

#217 Bigdogbro1

Bigdogbro1

    Mid-Pack Racer

  • Full Member
  • PipPipPip
  • 144 posts
  • Joined: 23-April 24
  • Gender:Male
  • Location:near Hell, MI

Posted 30 May 2025 - 07:35 AM

When I went to the Sherwin Williams store to purchase the paint for the track I was thinking of looking at a shade darker for the track epoxy and the top console board.  I looked at the color samples and decided to go with a "Grays Harbor" color instead to the "Foggy Day".  I wanted a bit more contrast with the Yellow sidewall color.  


Once I have the track painted I will post all the Sherwin Williams product numbers of what I used.

Attached Images

  • 20250530_082652.jpg

Rob Armbruster

#218 dc-65x

dc-65x

    Grand Champion Poster

  • Subscriber
  • PipPipPipPipPipPipPipPip
  • 7,075 posts
  • Joined: 14-February 06
  • Gender:Male
  • Location:Captain Rick: The only vintage slot car nut in SW Oregon?

Posted 30 May 2025 - 11:00 AM

I bet your beautiful track will really come alive once it is painted.   :good:


Rick Thigpen
Check out Steve Okeefe's great web site at its new home here at Slotblog:
The Independent Scratchbuilder
There's much more to come...


#219 mickey thumbs

mickey thumbs

    Mid-Pack Racer

  • Full Member
  • PipPipPip
  • 195 posts
  • Joined: 10-November 18
  • Gender:Male
  • Location:Western NC

Posted 30 May 2025 - 08:31 PM

Your patience at this point is admirable. On so many projects I reach the stage of almost there, I can’t wait, and rush through the final steps, often ruining many hours of painstaking work. So I’m glad you are in charge because “I can’t wait” to see the finished track. 
Fantastic project!


  • Alchemist likes this
Mike Vernon

#220 Bigdogbro1

Bigdogbro1

    Mid-Pack Racer

  • Full Member
  • PipPipPip
  • 144 posts
  • Joined: 23-April 24
  • Gender:Male
  • Location:near Hell, MI

Posted 03 June 2025 - 07:33 AM

I have taken some time to paint the control console since recently buying the paint and wanted to see what the colors looked like.  I also wanted to get some portion of the build done and move along the wiring as well.  The control board is going under the track (Section 1) at the lap finish line where the optical interrupt sensors go under the track.  The four relay board (10A) controls power to each lane for race control via a Elegoo (Arduino Uno R3) controller board in the middle and Race Coordinator software on a PC laptop.  The smaller white board is a handmade wire interface board to connect the four optical interrupt sensors, power and track call buttons.   The console holds the four driver stations that have XLR connectors for the hand controllers (yes I do have 3-wire adapter harnesses), polarity reversing switches for car direction and a track call button that all gets wired to a barrier strip.  All the wiring that goes elsewhere (power supplies and track control board) is terminated with an XT60 connector so the console can be disconnected and removed at some point.  All track wire is 12 ga.


I setup the relays and Race Coordinator software to use the N.C. contacts so I can use the track without requiring the computer and software to be running.  Sometimes you just want to play.


For now I have decided to name the track "Stingray Speedway".  It was also my handle back in the CB radio days and it's unique for a track name from what I can tell.


Thanks for the support and kind words on my project!

Attached Images

  • 20250530_134654.jpg
  • 20250531_162150.jpg
  • 20250602_145126.jpg
  • 20250601_100821.jpg

  • MSwiss, Bill from NH, Alchemist and 1 other like this
Rob Armbruster

#221 Sloter

Sloter

    Mid-Pack Racer

  • Full Member
  • PipPipPip
  • 165 posts
  • Joined: 27-May 21
  • Gender:Male
  • Location:Venice, FL

Posted 03 June 2025 - 11:18 AM

Awesome job on the wiring!


Bob


  • MSwiss likes this
Bob Roberts

#222 Alchemist

Alchemist

    Posting Leader

  • Full Member
  • PipPipPipPipPipPipPip
  • 2,748 posts
  • Joined: 11-November 09
  • Gender:Male
  • Location:Far, far away

Posted 10 June 2025 - 12:23 PM

Hi Rob,


How wonderful of you for sharing your exciting track project.


It is looking excellent and as the days go by, towards  your completion of your track, I get more excited each time you post photos of your progress.


I know I'm excited to see the finished product.


Thank you Rob!


Ernie


Ernie Layacan

#223 Bigdogbro1

Bigdogbro1

    Mid-Pack Racer

  • Full Member
  • PipPipPip
  • 144 posts
  • Joined: 23-April 24
  • Gender:Male
  • Location:near Hell, MI

Posted 15 June 2025 - 08:21 AM

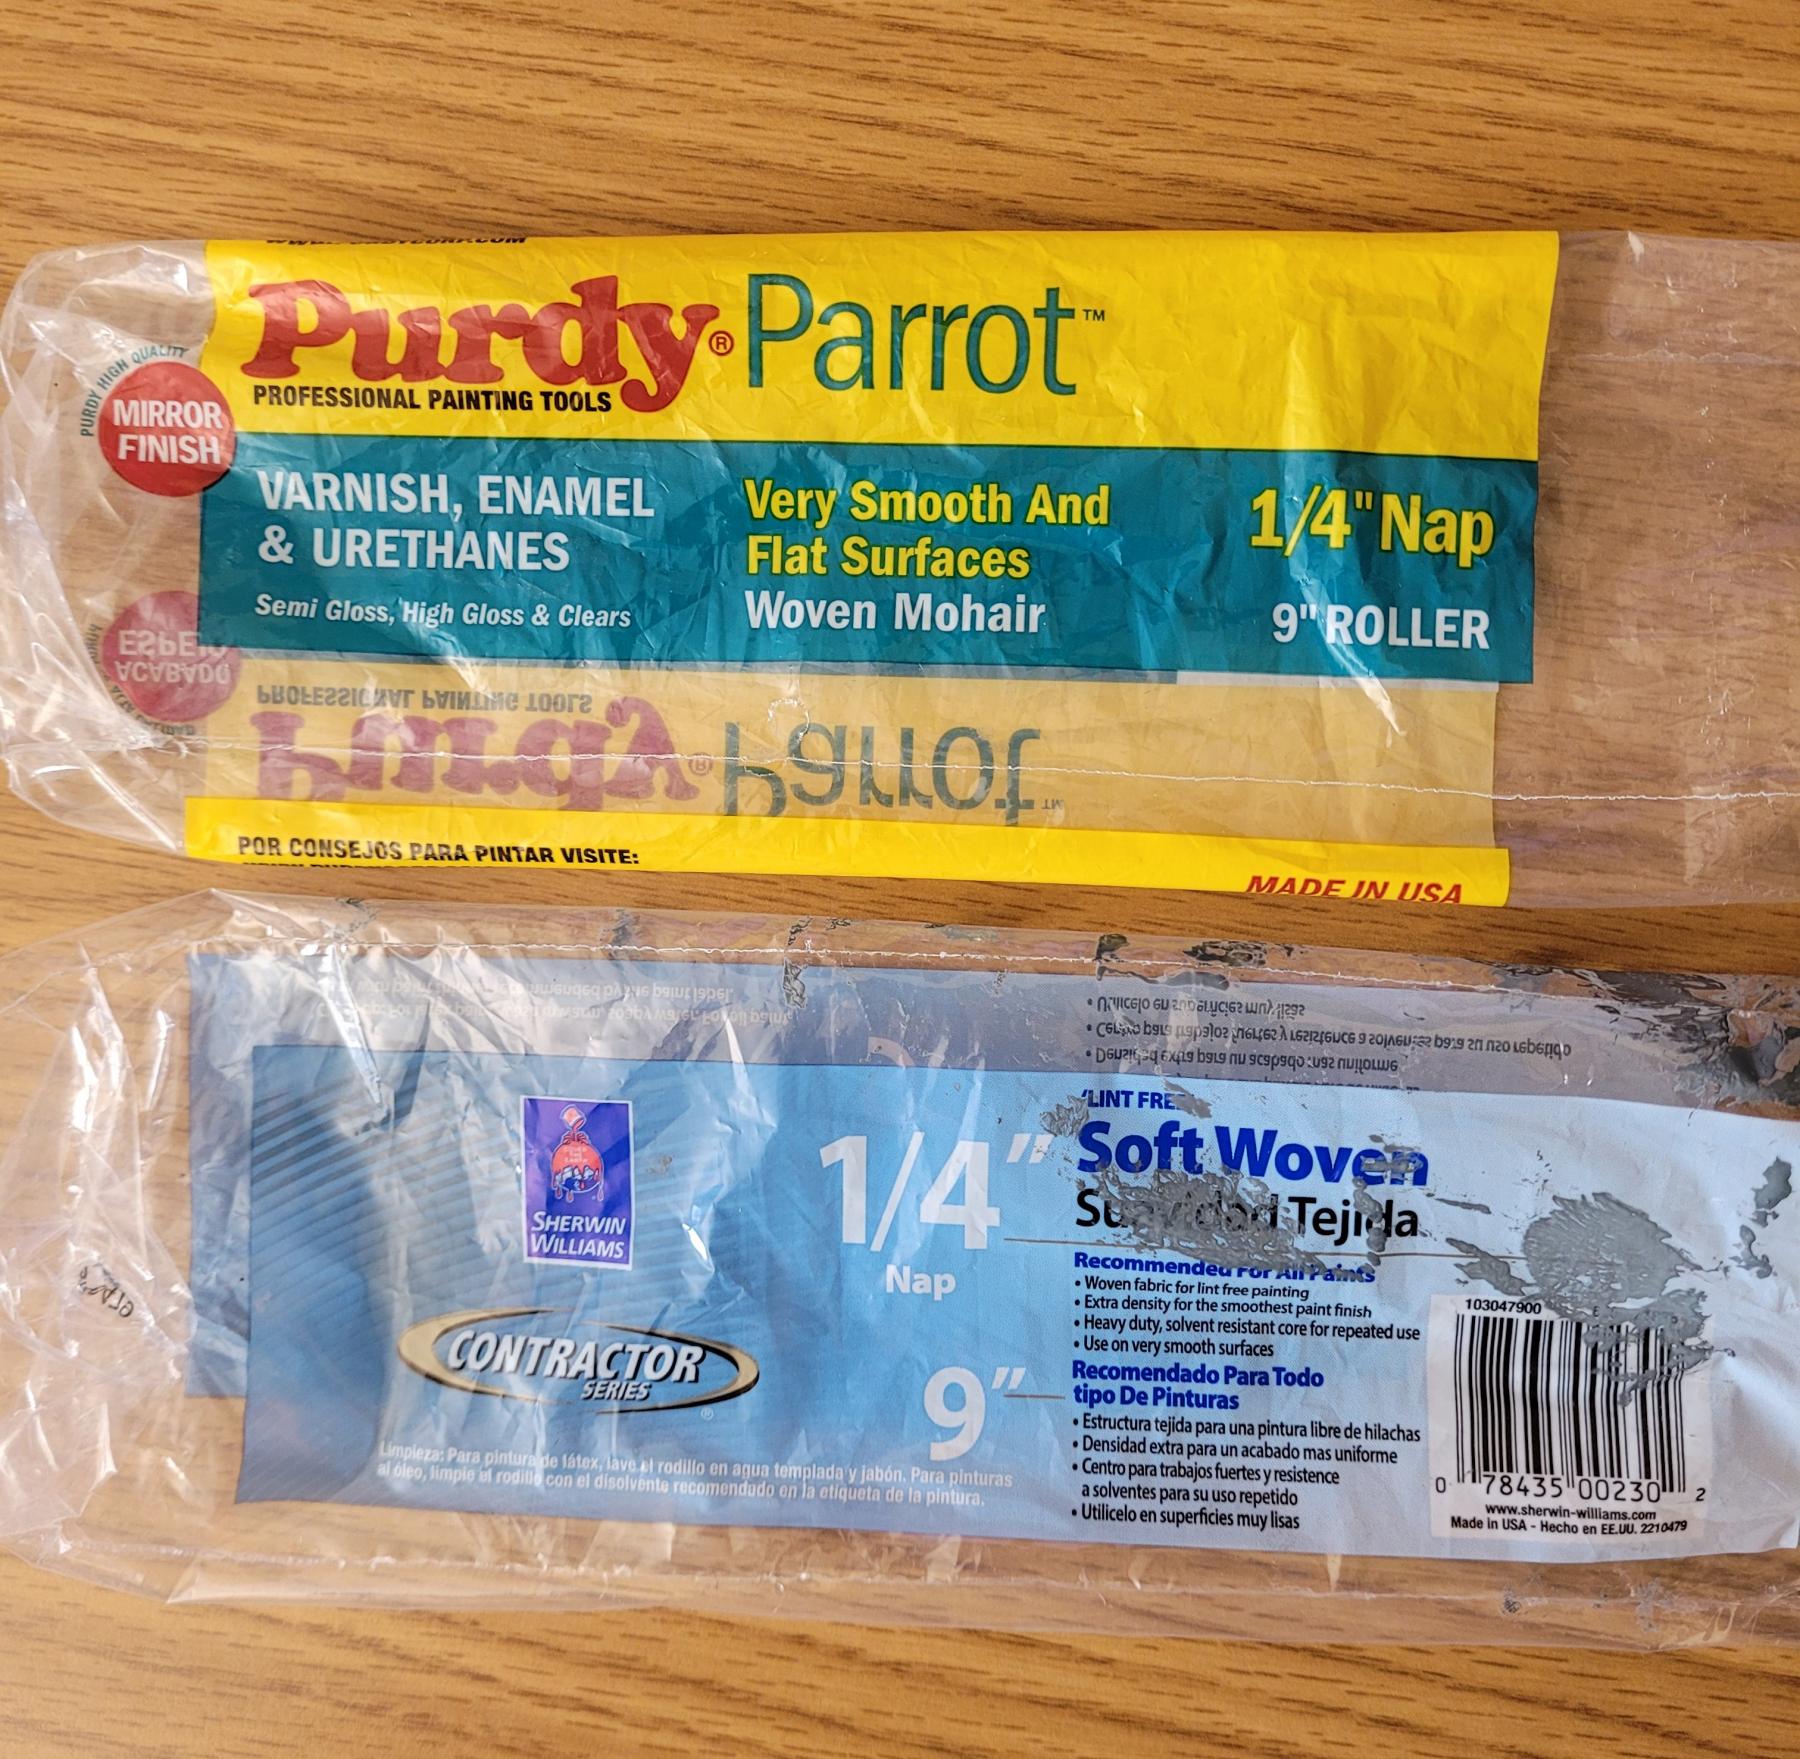
Well I finally got to the first coat of the 2-part water based epoxy top coat.  The entire track was hand sanded and prepped for paint and yesterday the anxiety was low enough to attempt the topcoat.  Pre-stiring all the components separately then measuring and mixing the parts A&B together.  I mixed 2 quarts A to one pint B 4:1 and power agitated with a drill motor mixer.  I poured what I needed into the metal roller tray and covered the remainder in the mixing tub.  I used a 1/4" Purdy Parrot Mohair 9" roller which I defuzzed with Duct tape but trashed it as it was putting down roller filaments into the paint so I switched to a Sherwin Williams Contractor Series 1/4" nap. 


The Sherwin Williams roller worked very well with a smoother finish and no nap residue.  I will need to sand the small bad area (fuzzed) with some 240 to 400 grit to get the fuzz knocked off before the second coat.  I had nearly a quart of mixed paint left over but not knowing what the coverage would be I didn't want to be mixing more during the application process because this waterbase epoxy will tac up in 10 minutes.  So you don't want to re-roll to far back but keep a wet edge as you go around. 


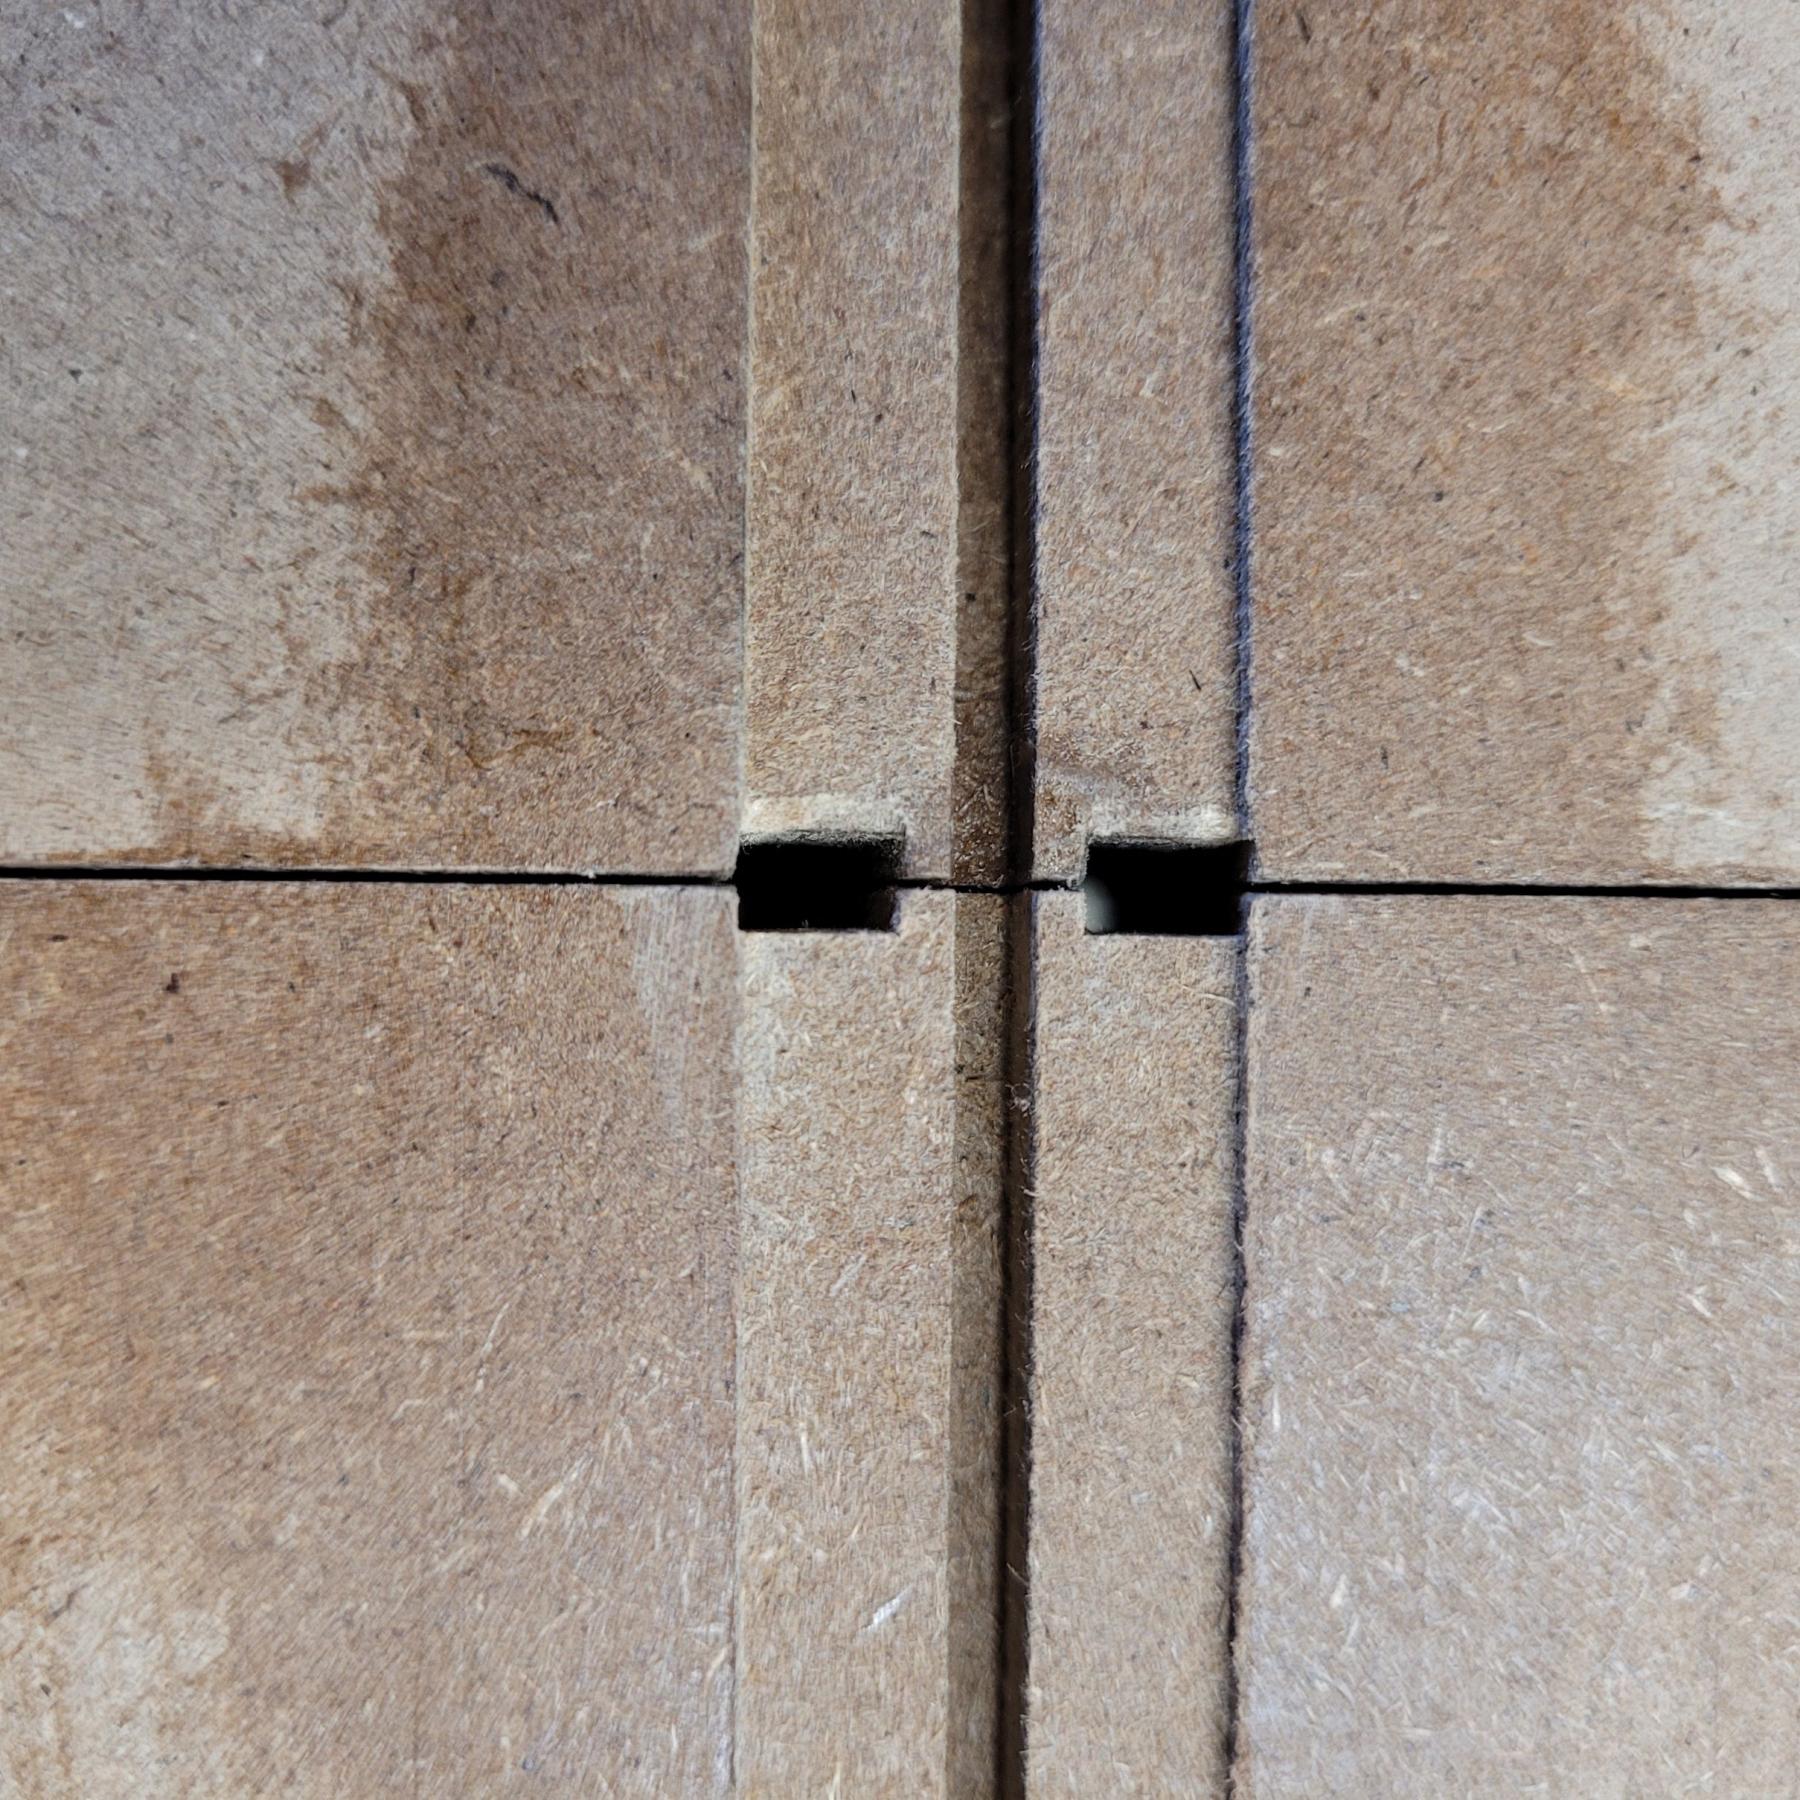
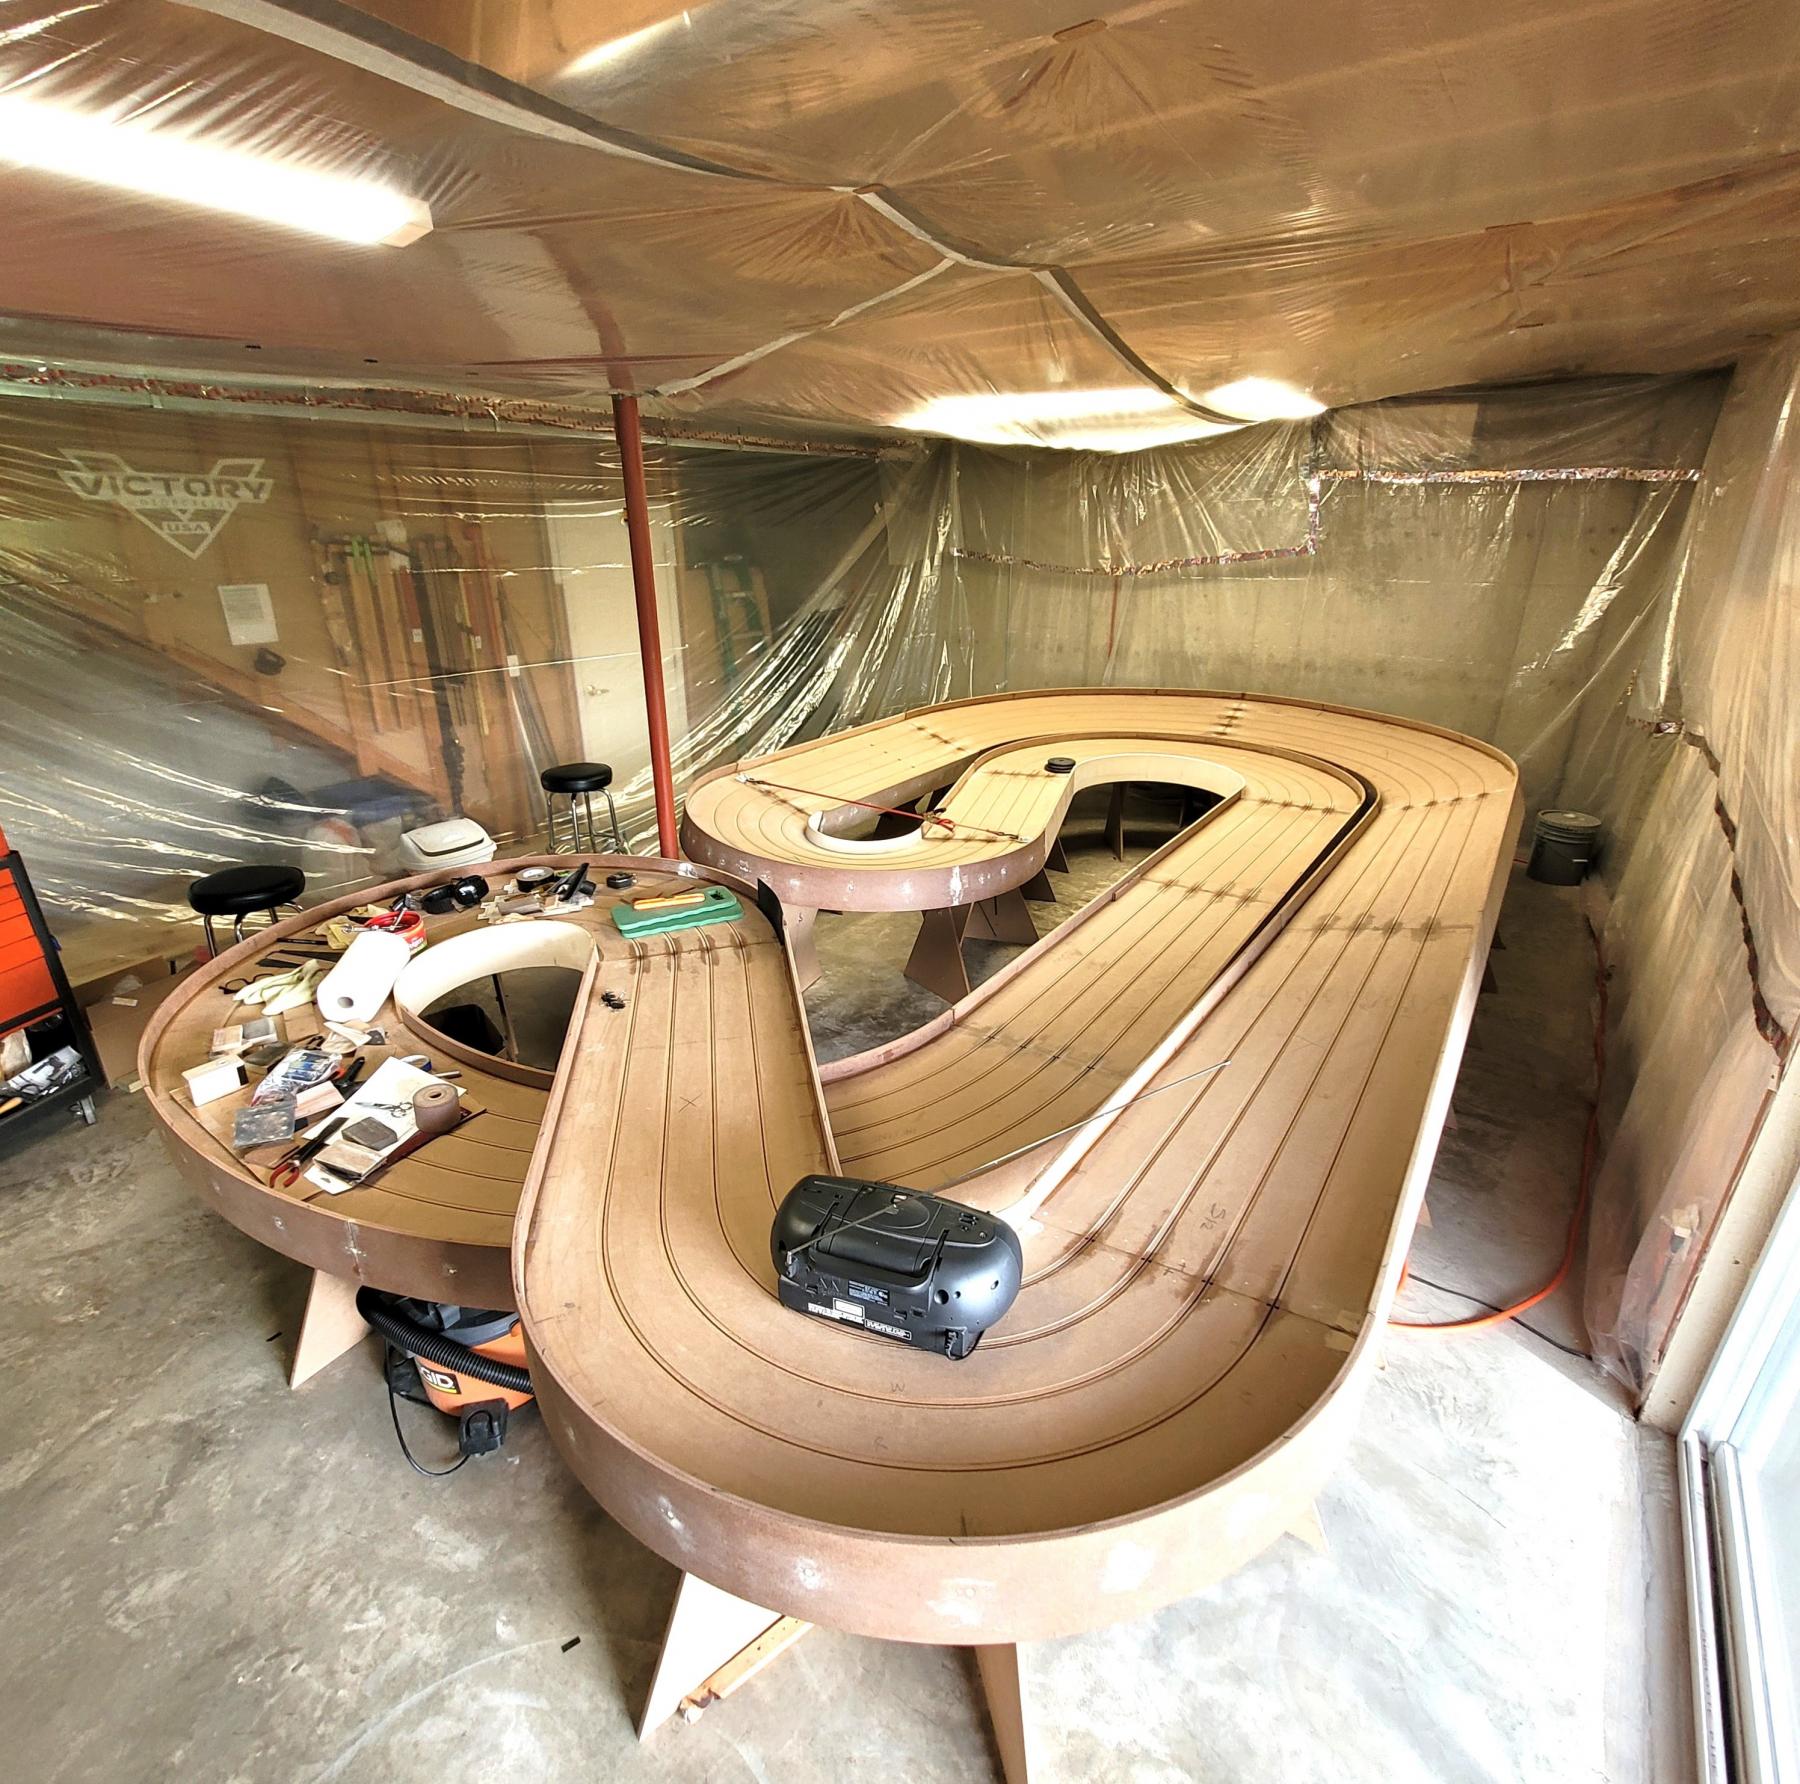
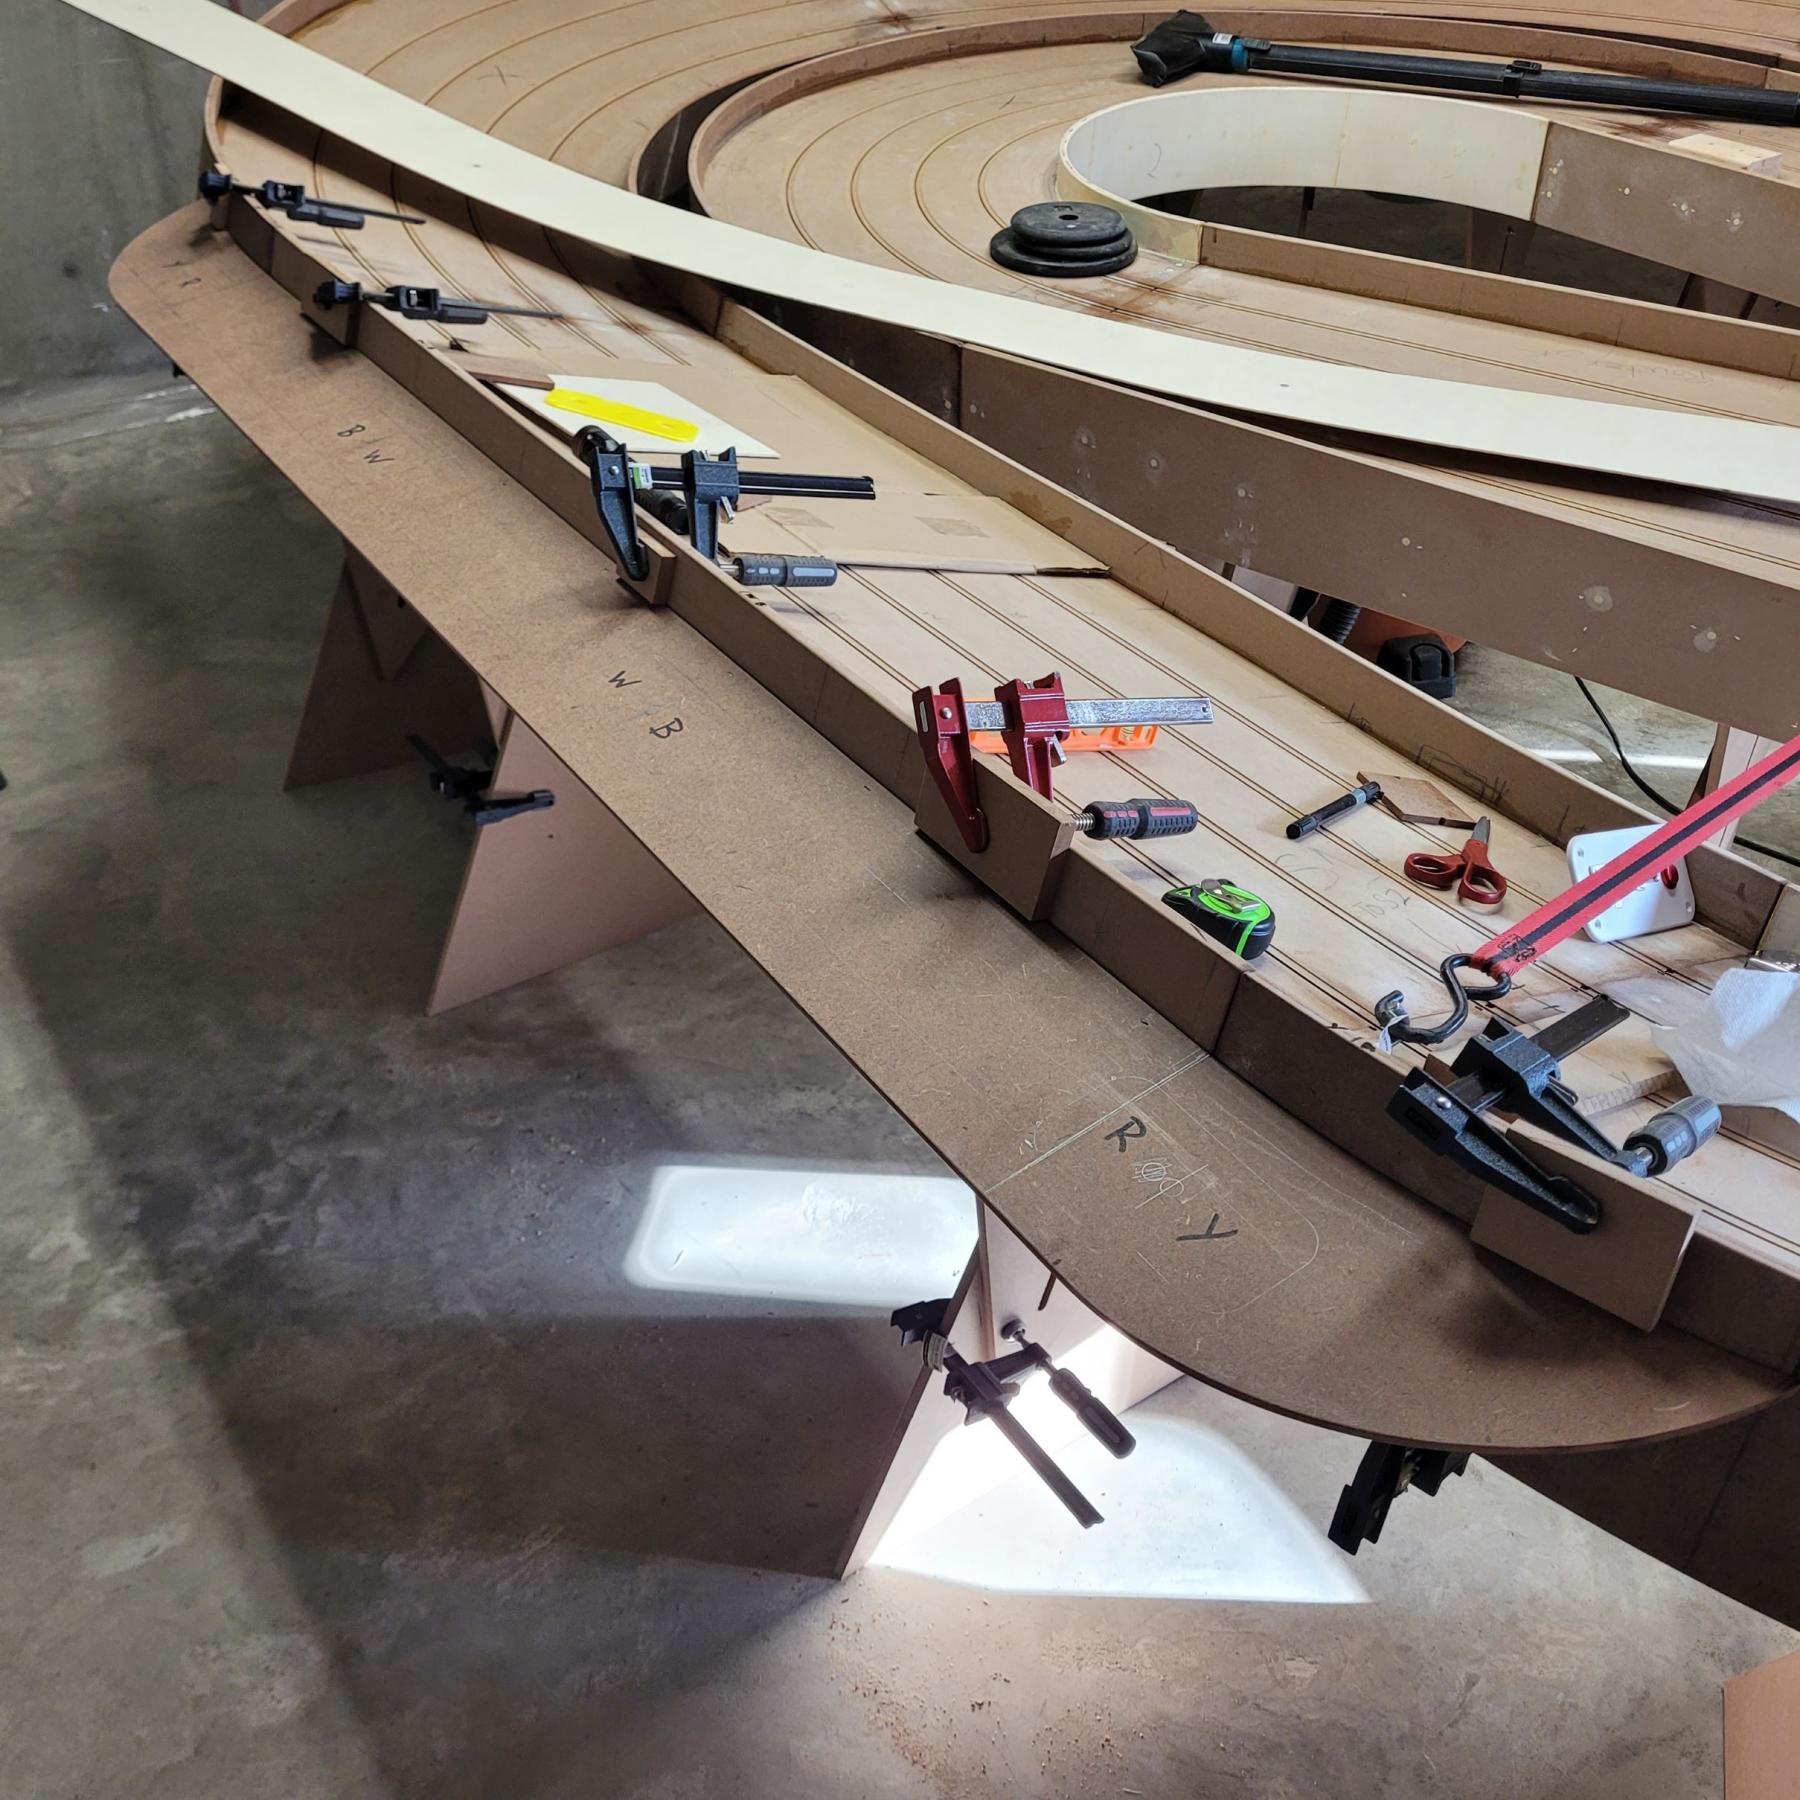
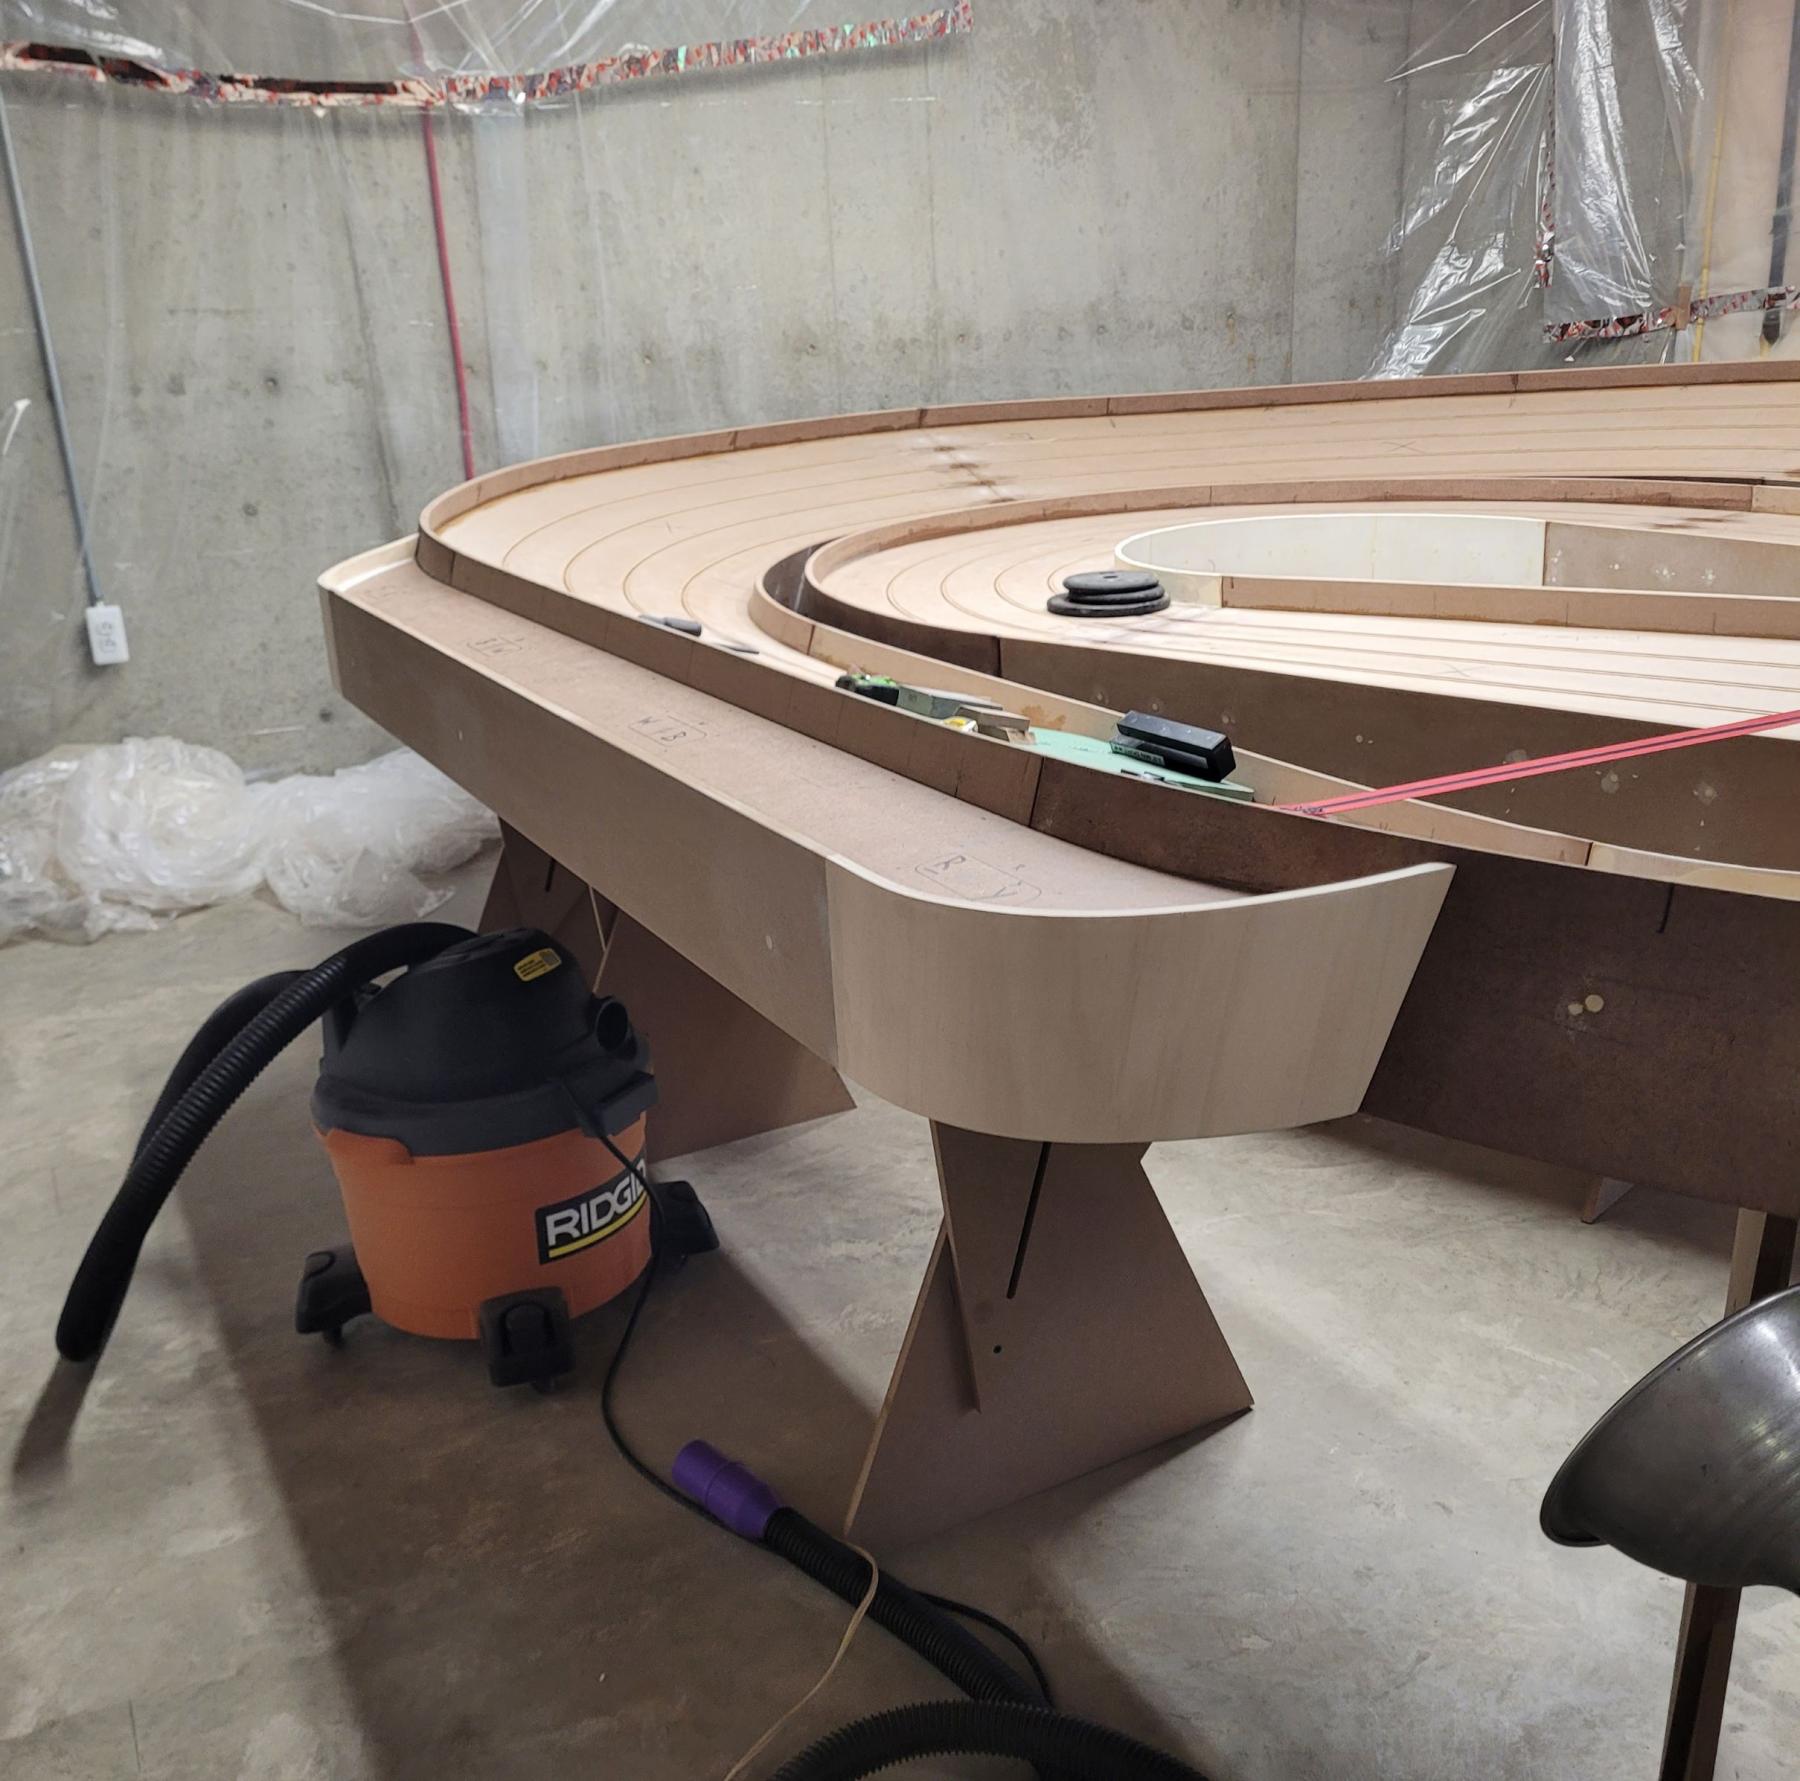
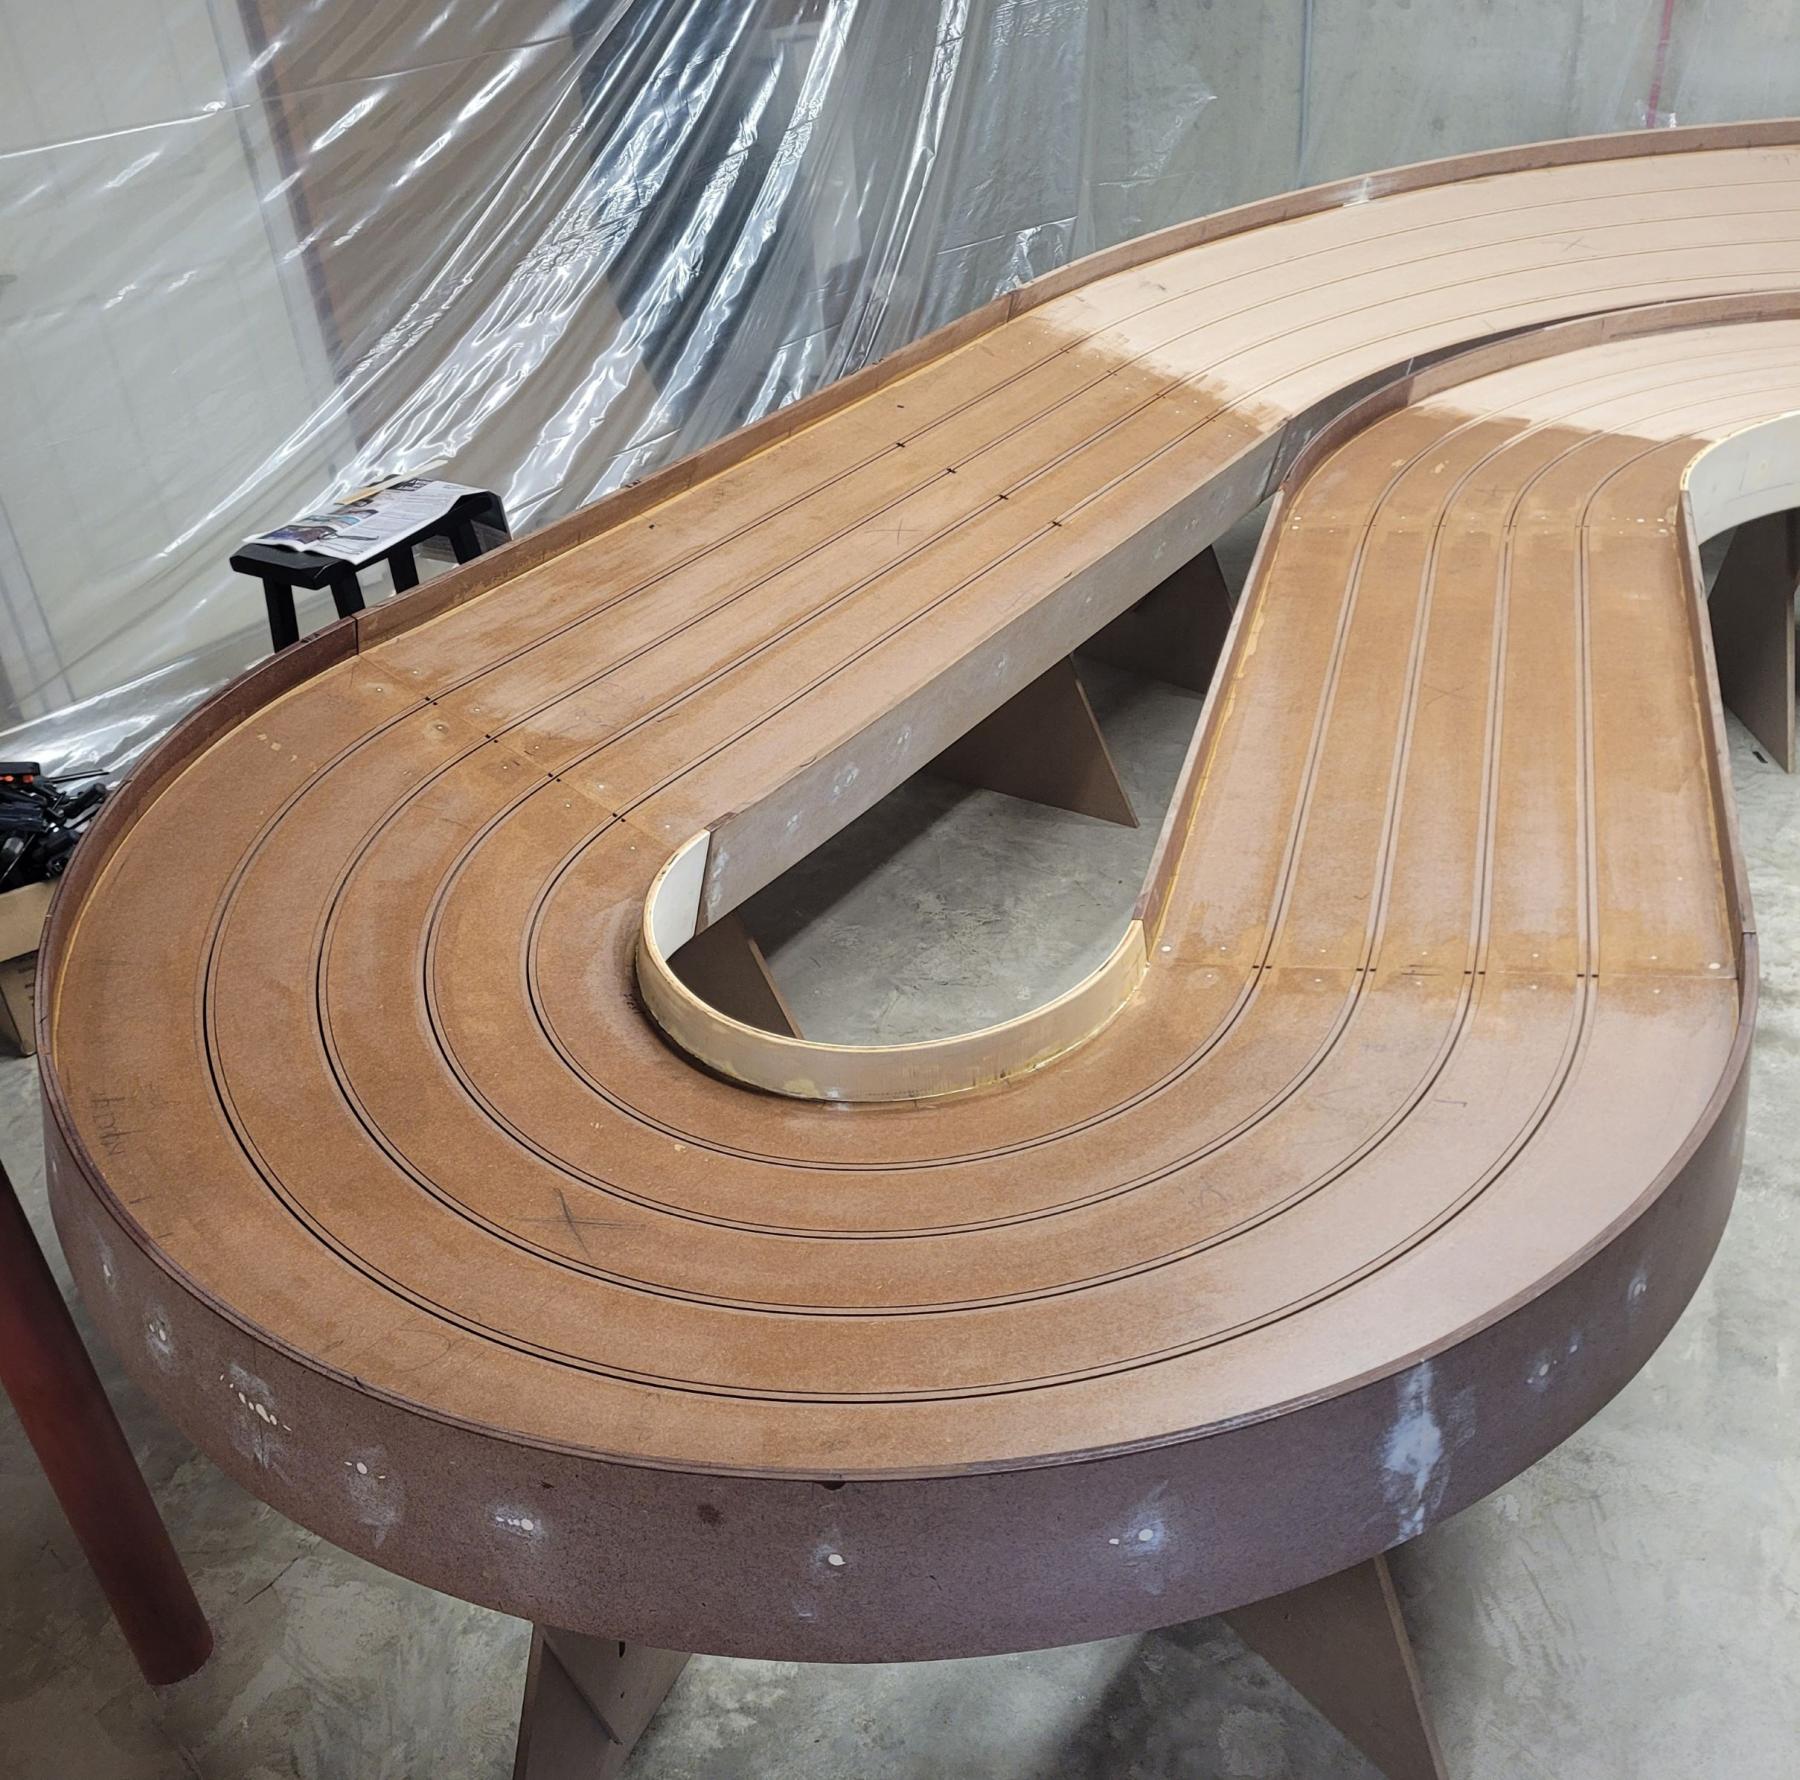
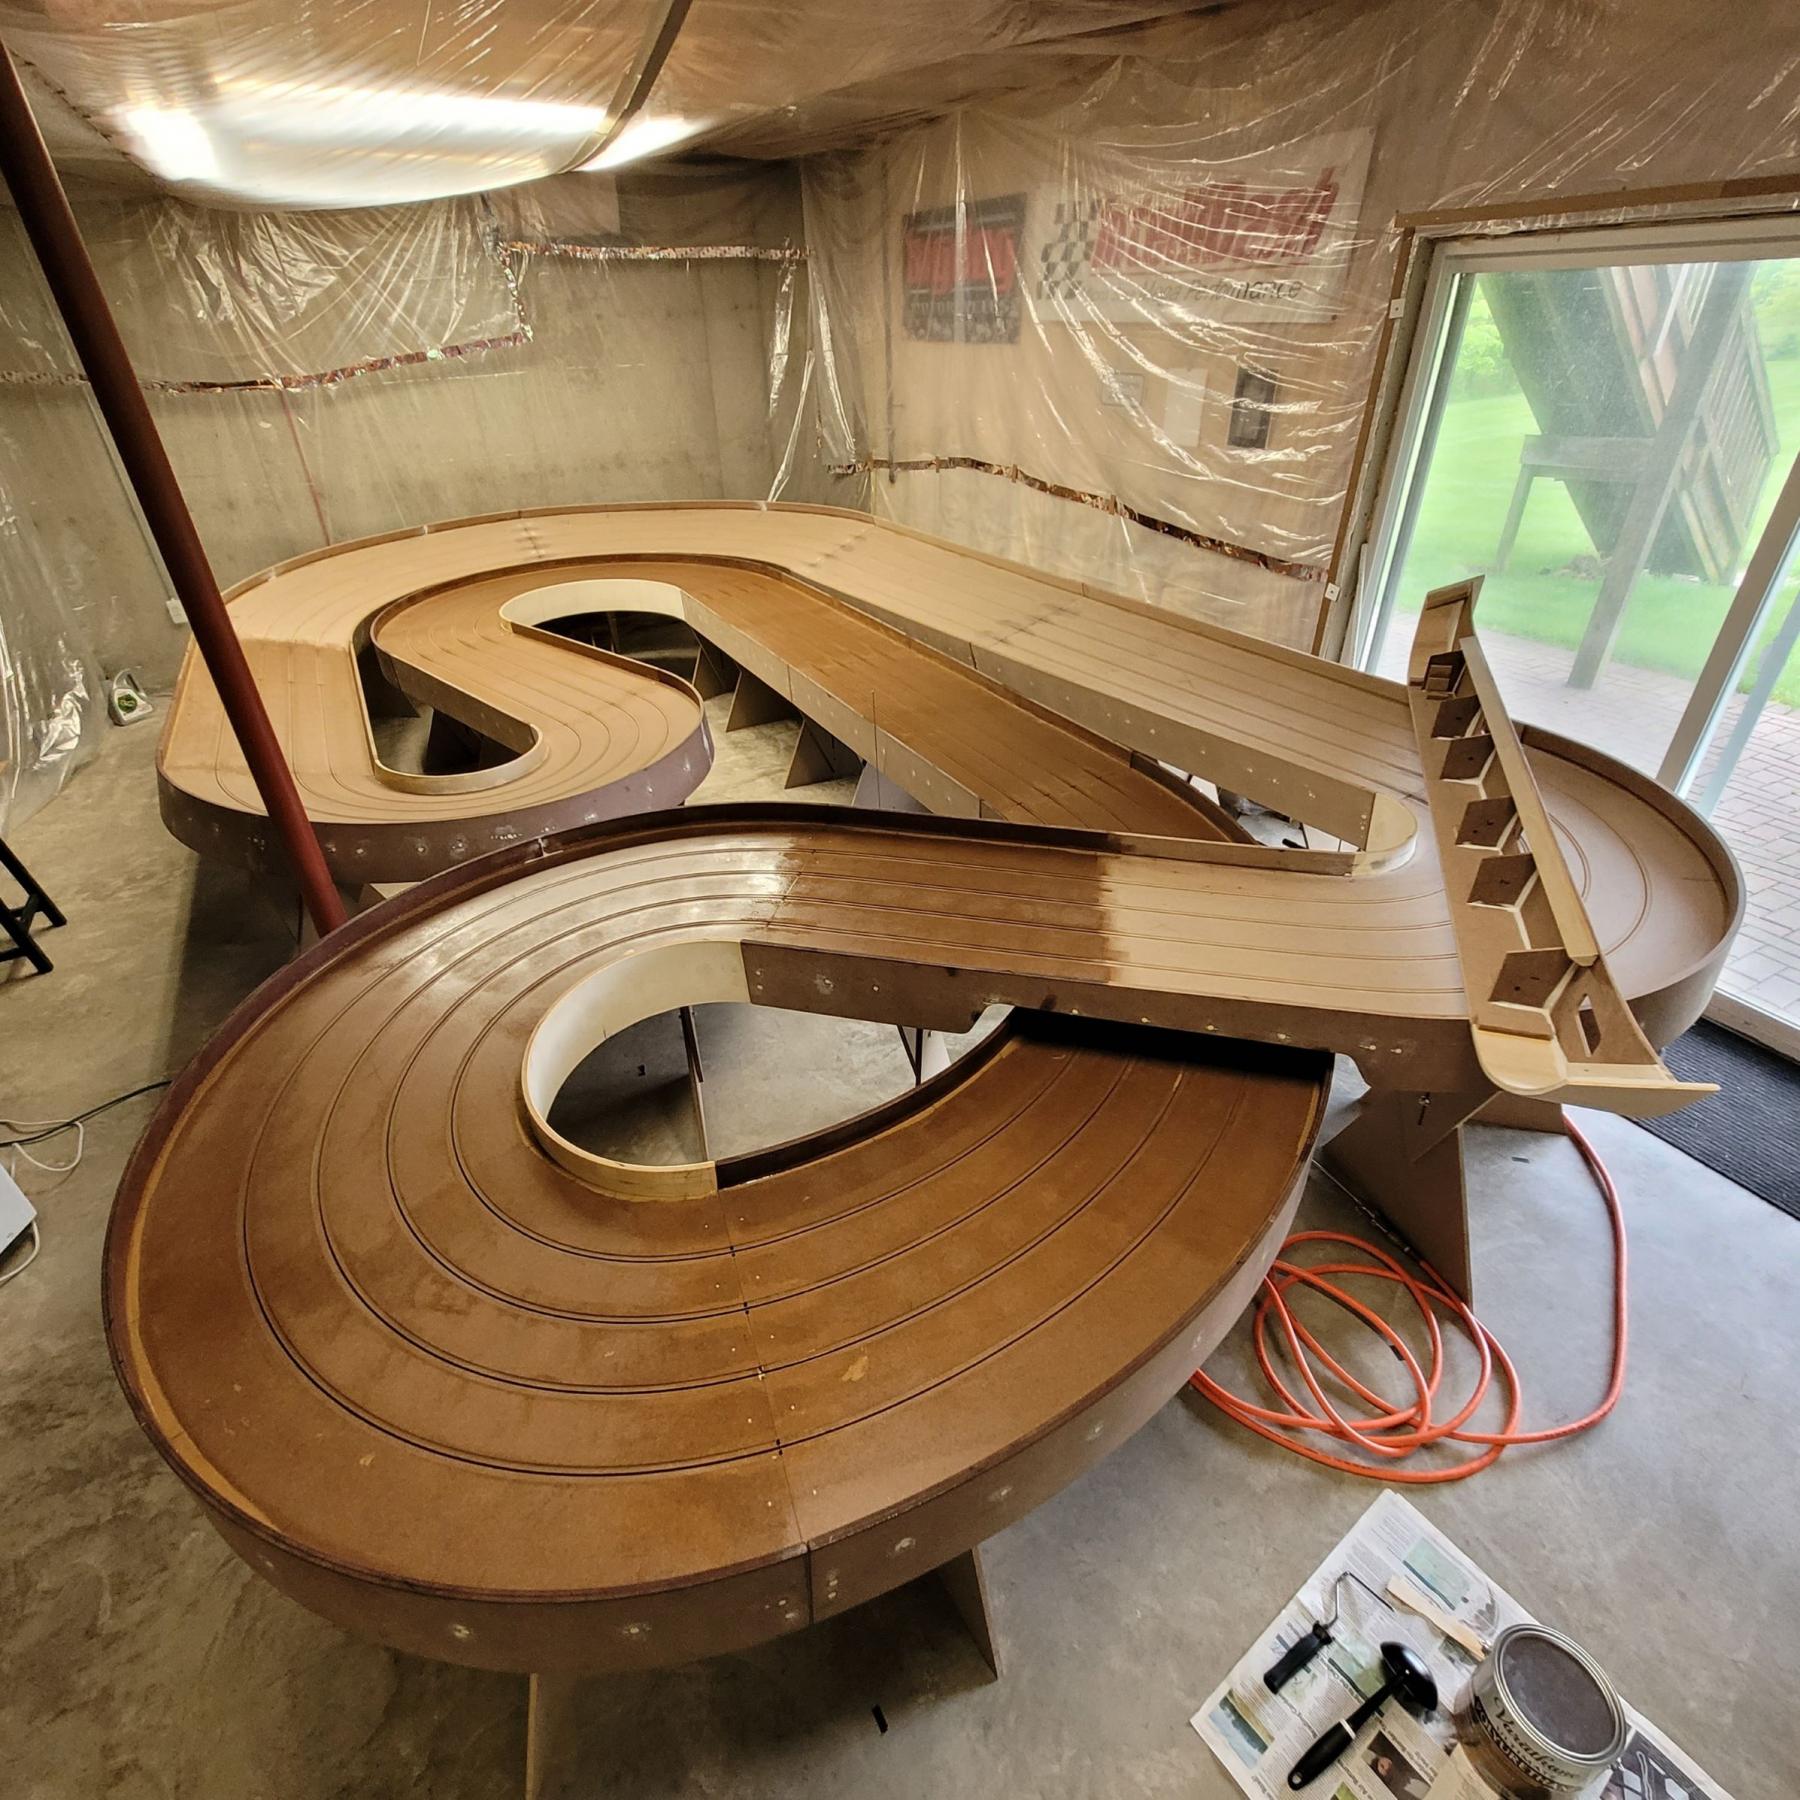
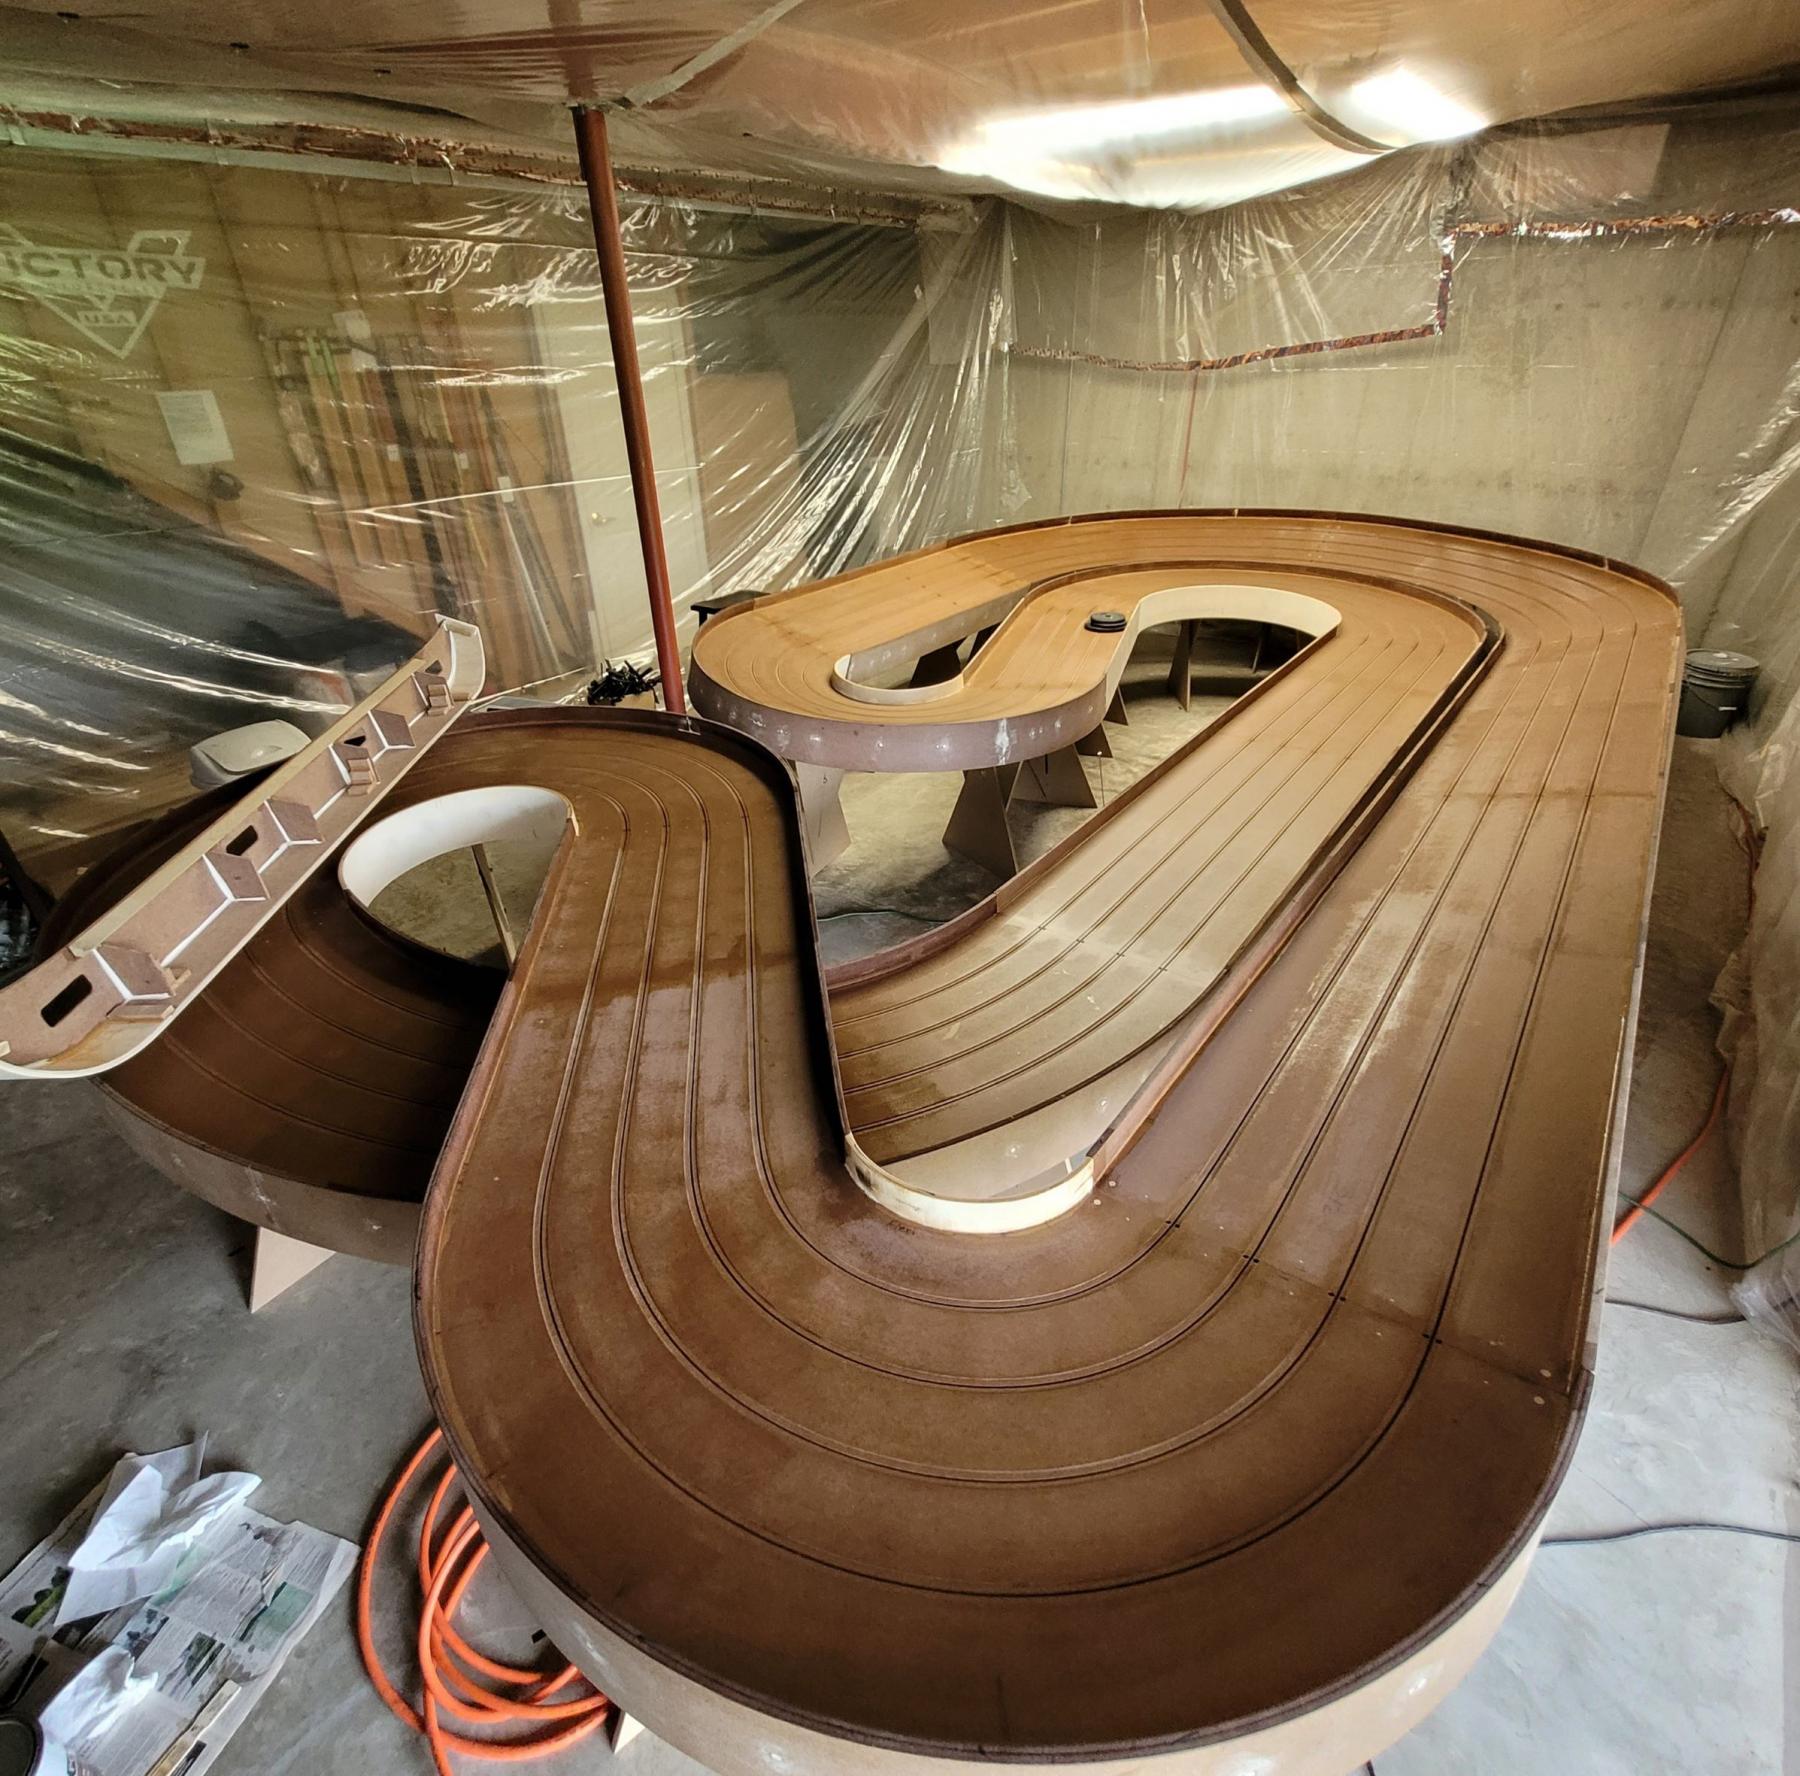
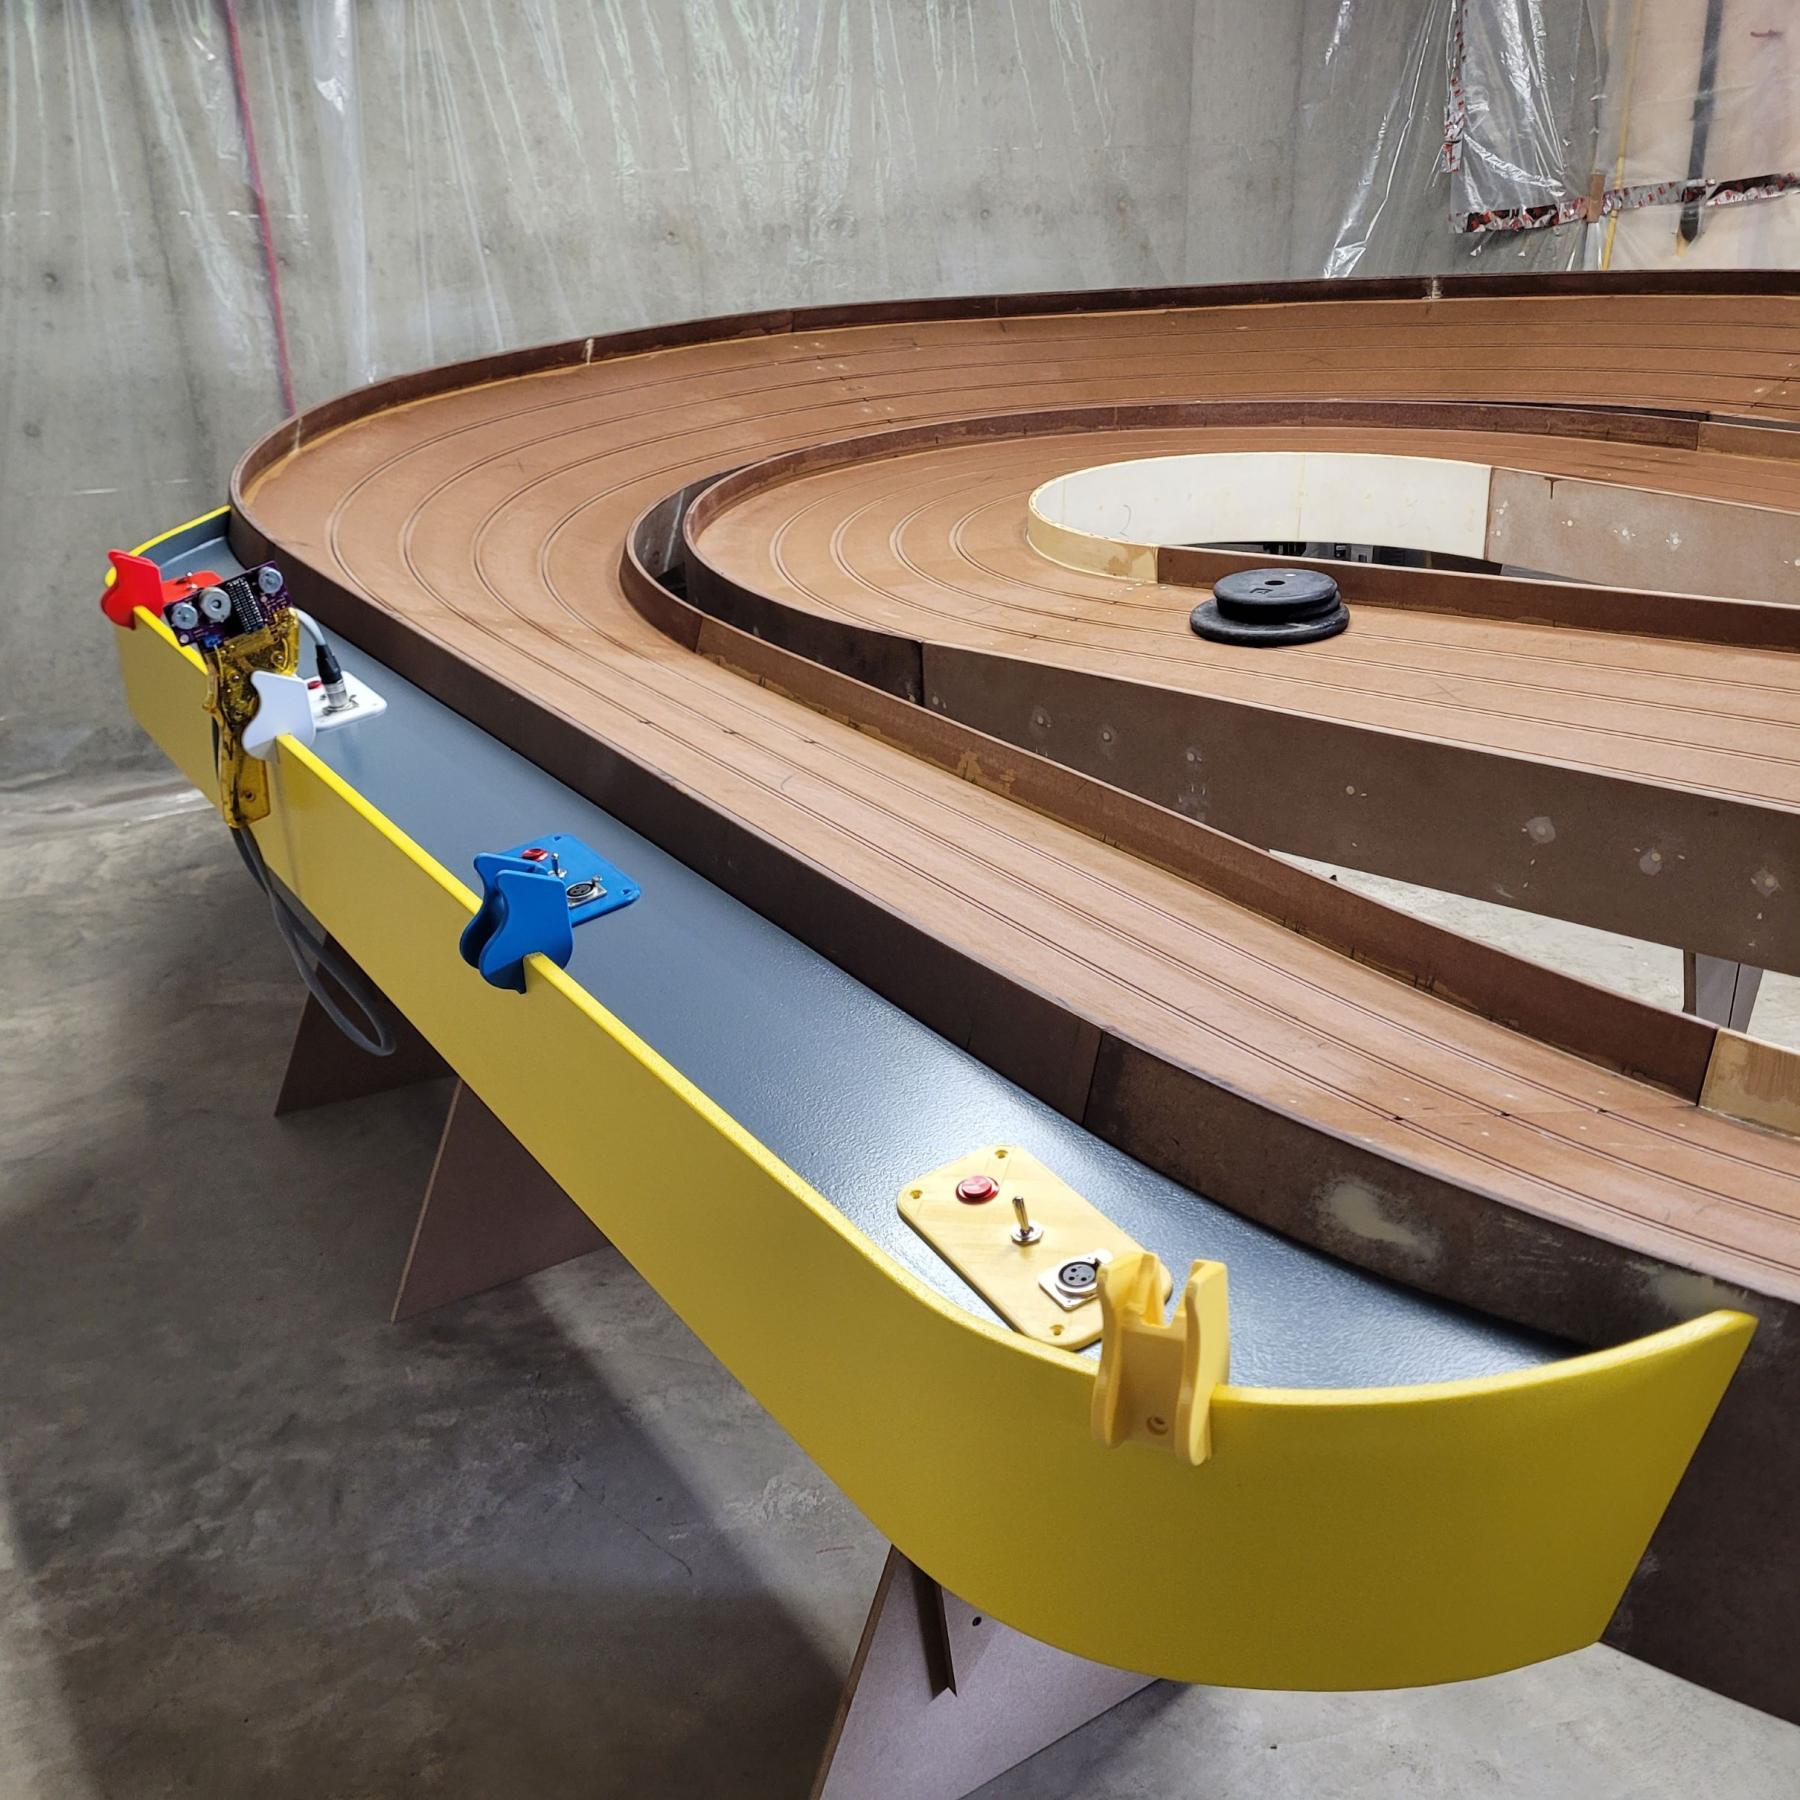
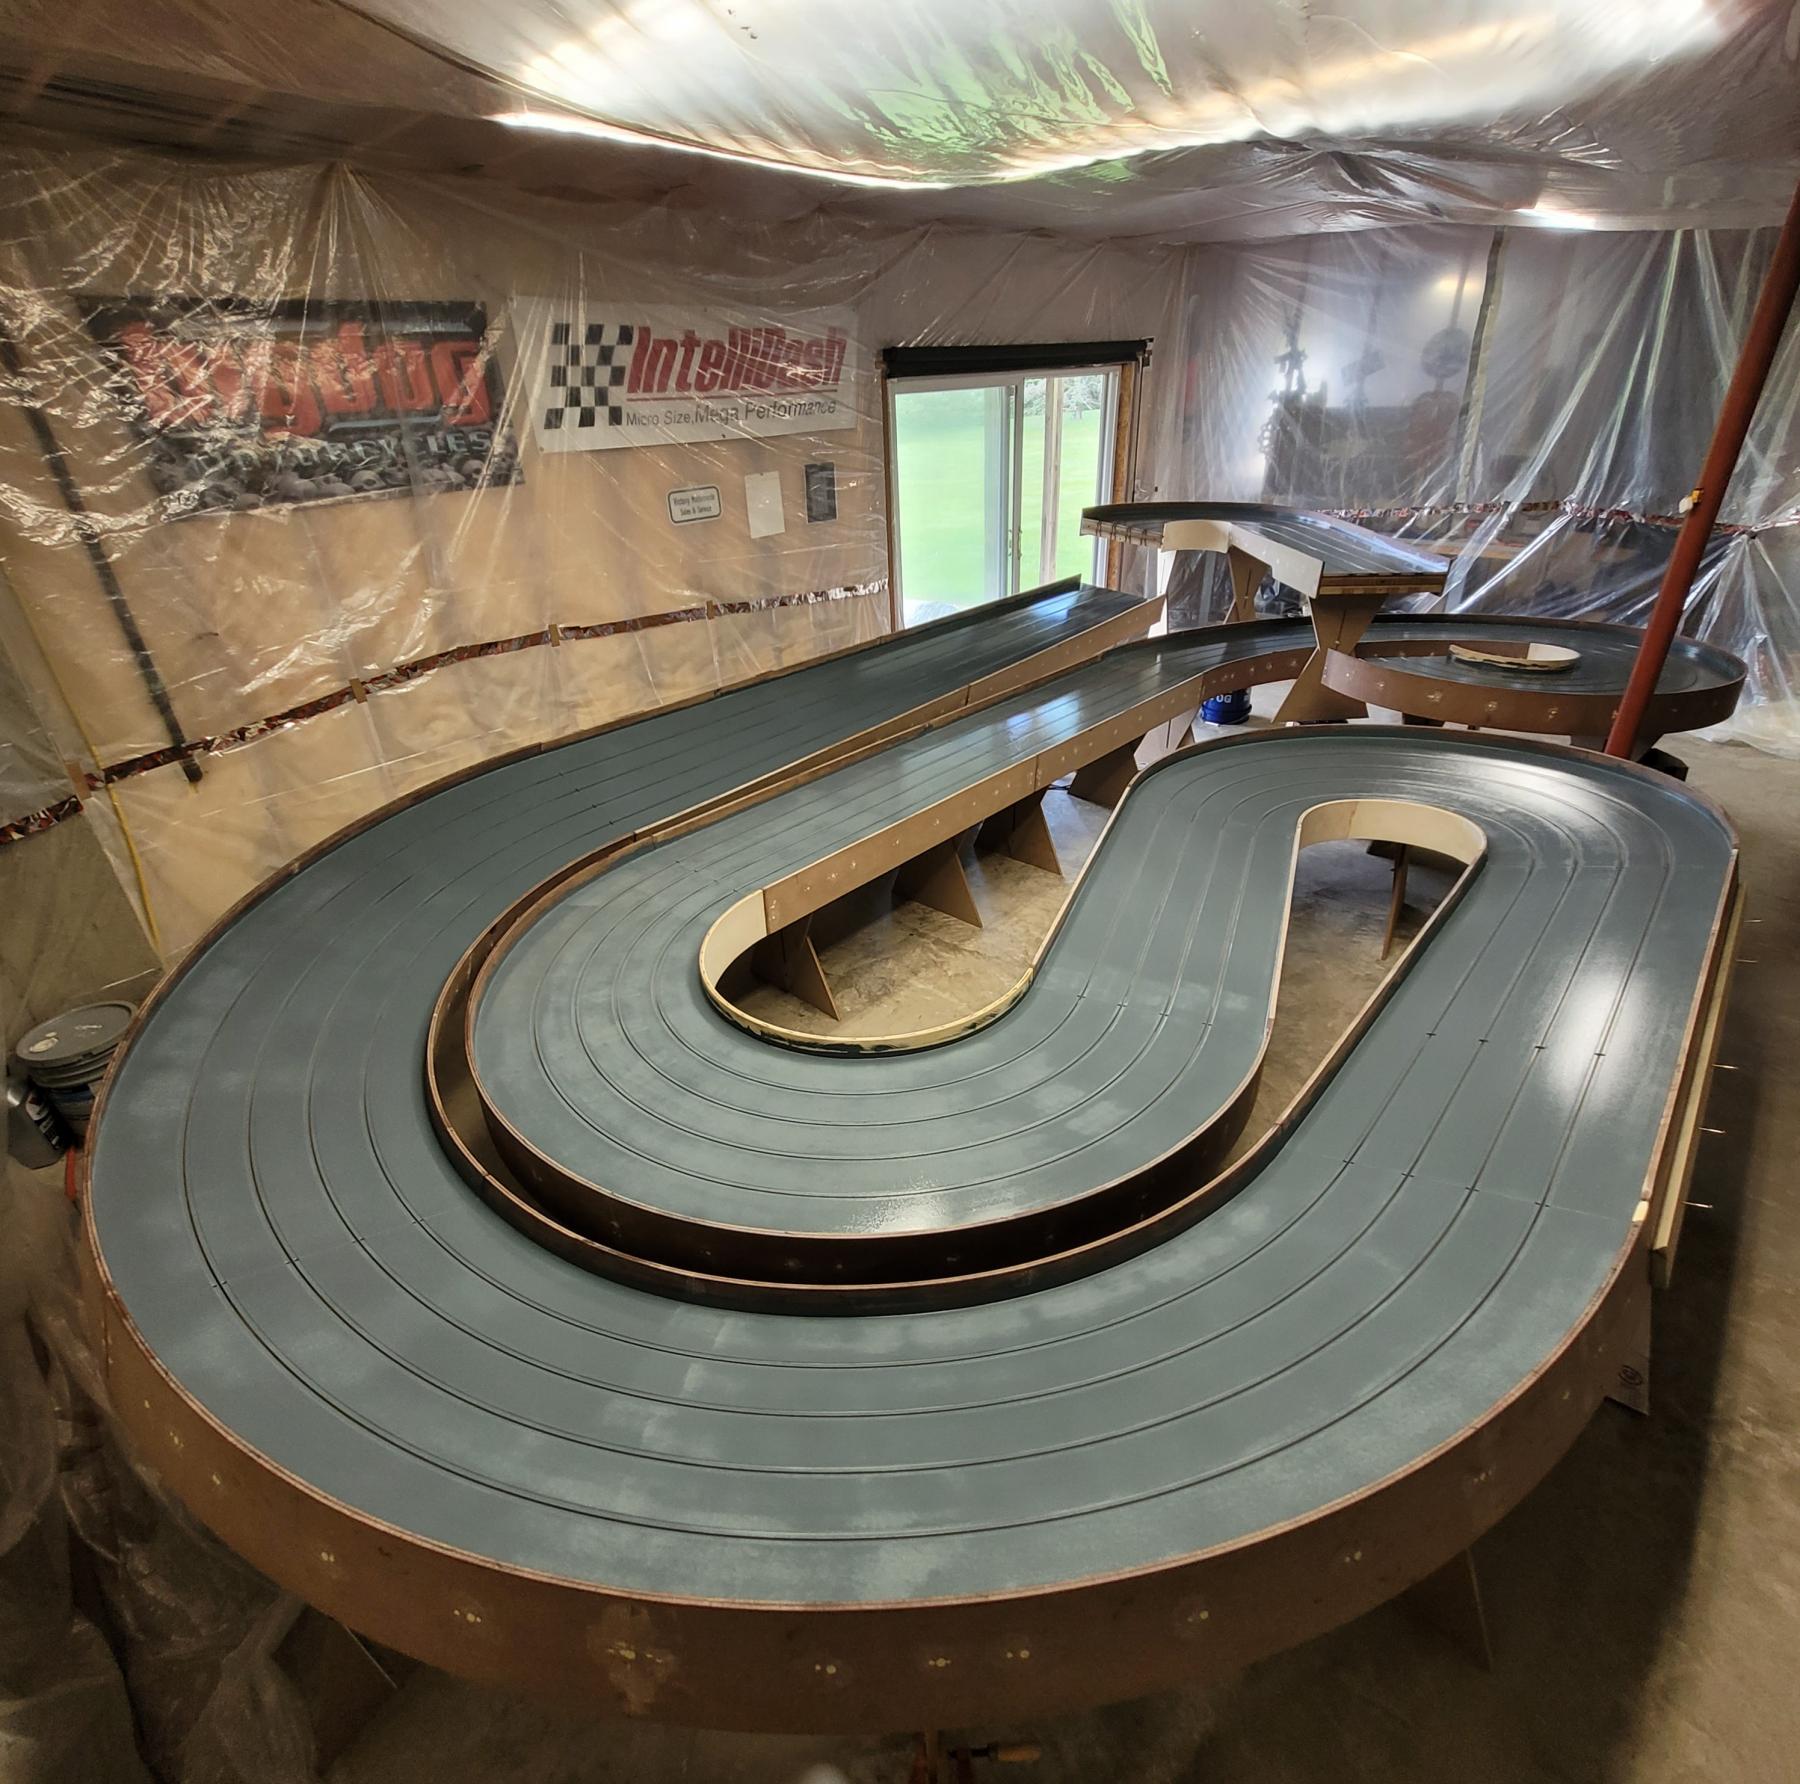
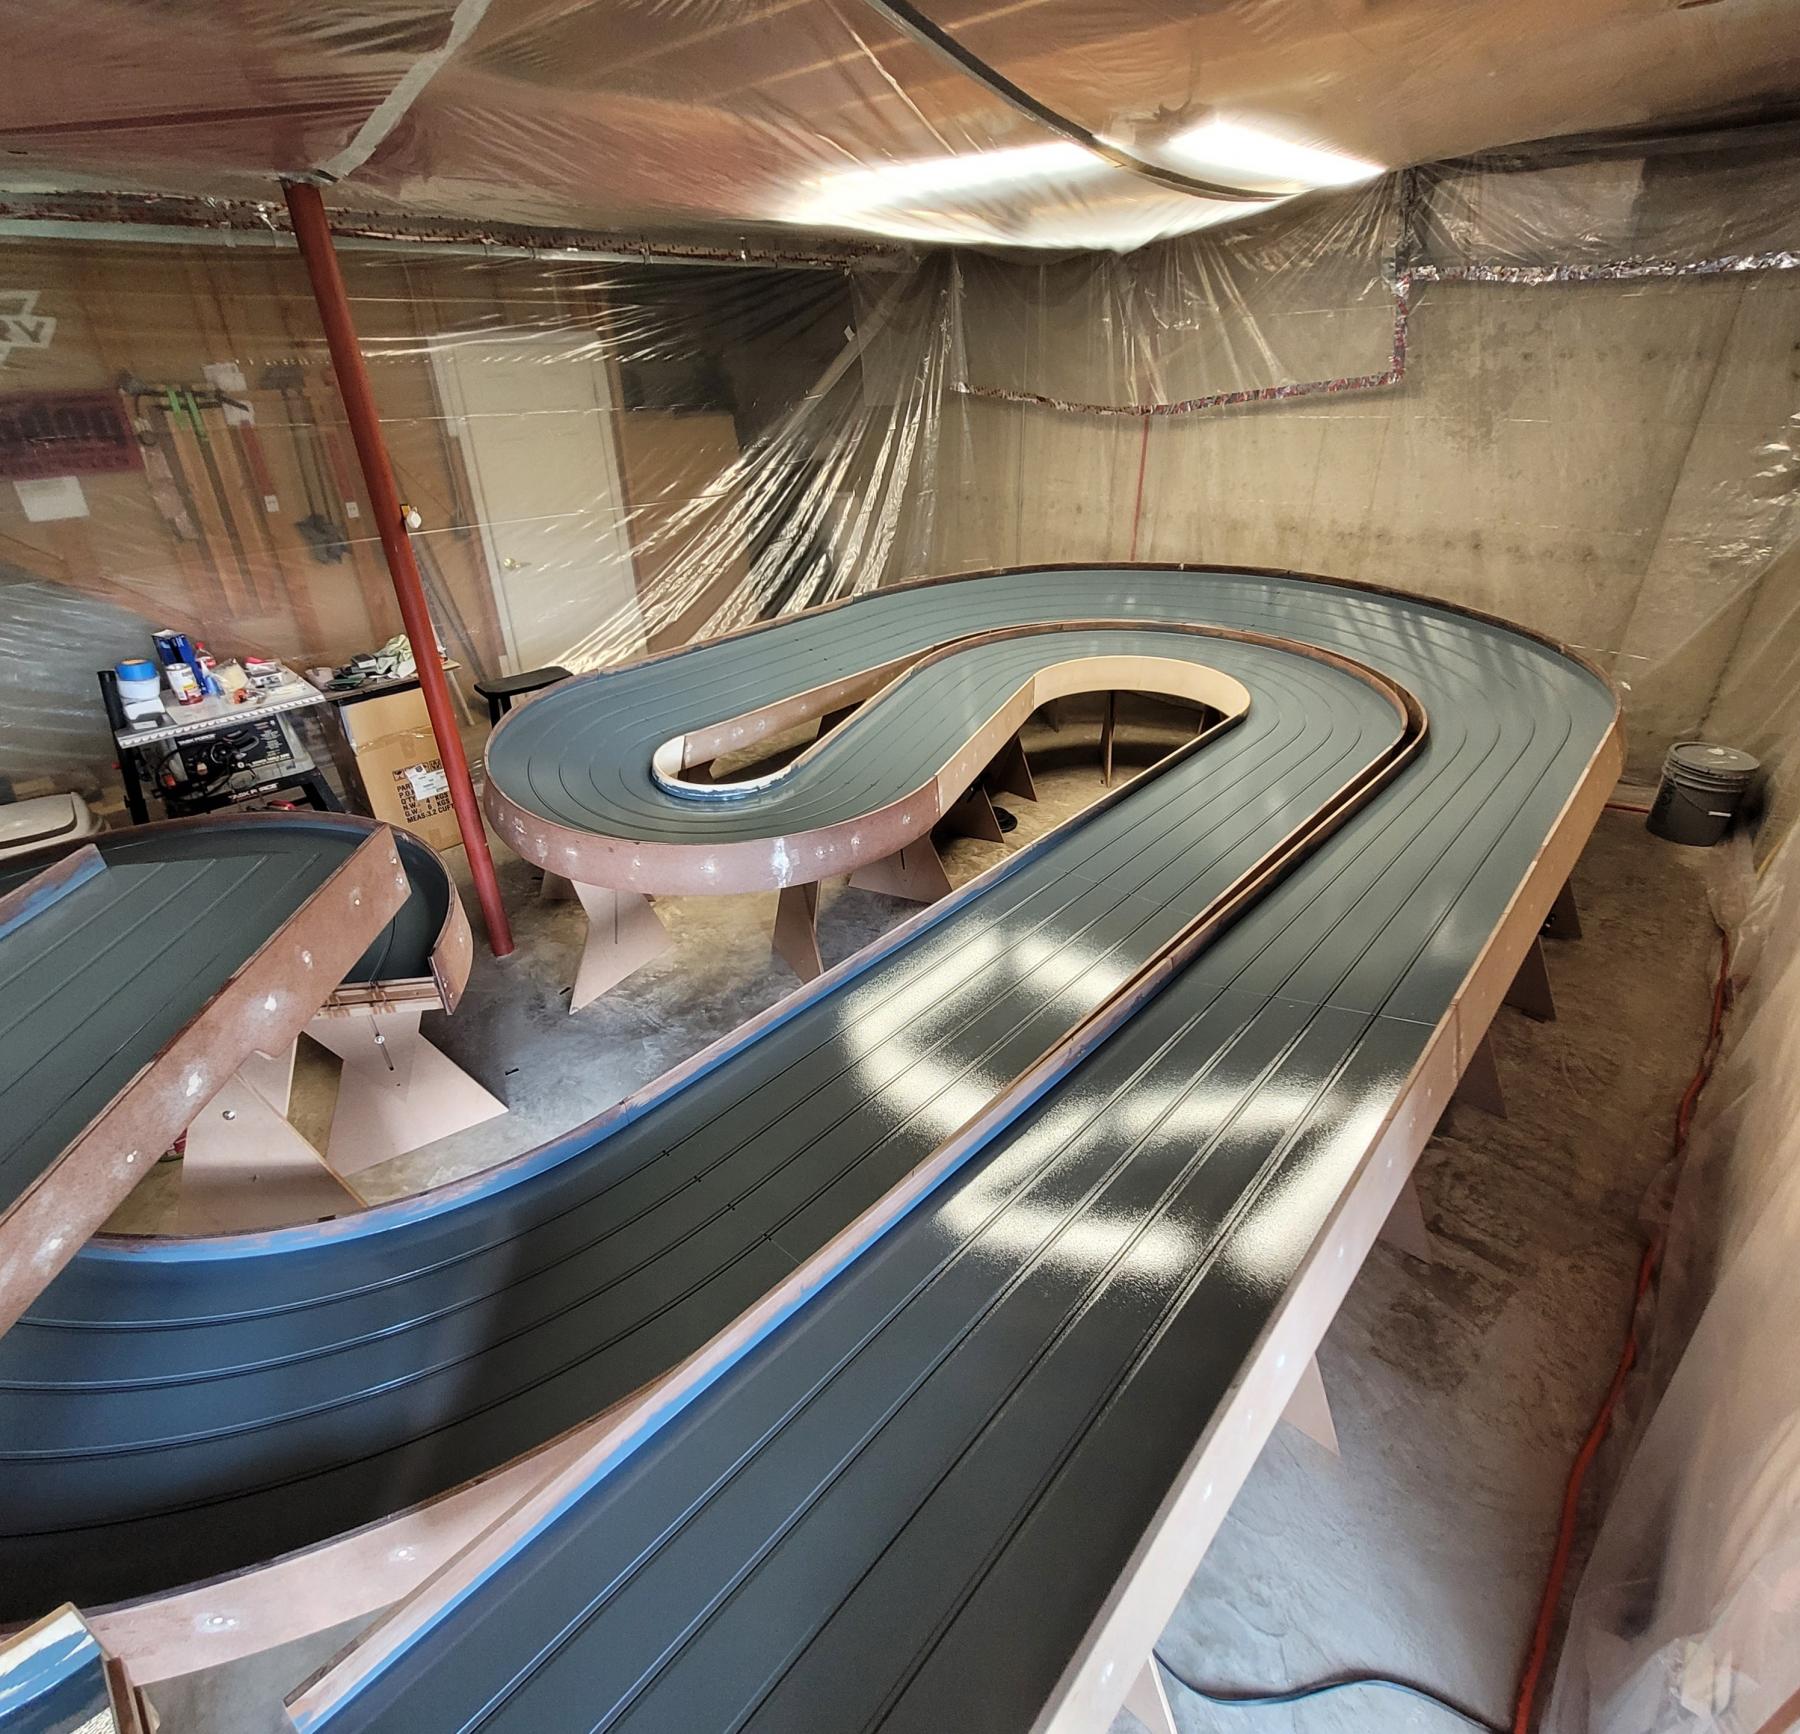
The Sherwin Williams material is similar to a medium thichness latex and rolls on and levels out nicely.  I started under the bridge then around the loop then over the bridge to the lead-on turn to the back straight where I paused to raise the brigde section onto three five gallon buckets.  I did that so I can get under the bridge properly on the return.  I had to roll and work in the paint into the gains groove with the edge of the roller to get them covered completely and checked that I haven't left any paint blobs down in the slot groove.   The slot groove has about a 1/16" of paint film down each inner wall of the groove which is fine by me. 


The Polyurethane was previously applied into the groove slots to harden the MDF.   After applying the initial layer of paint and working the gains I rolled the sidewall gutter lanes and did a final smooth out of the surface.  I also raised the roller off the surface as I rolled into the previous painted surface to help blend the wet coat overlap.  This material flowed out nicely!  I must say the fumes from this product are similar to painting with wall latex but I still wore my 3M respirator mask for safety. 


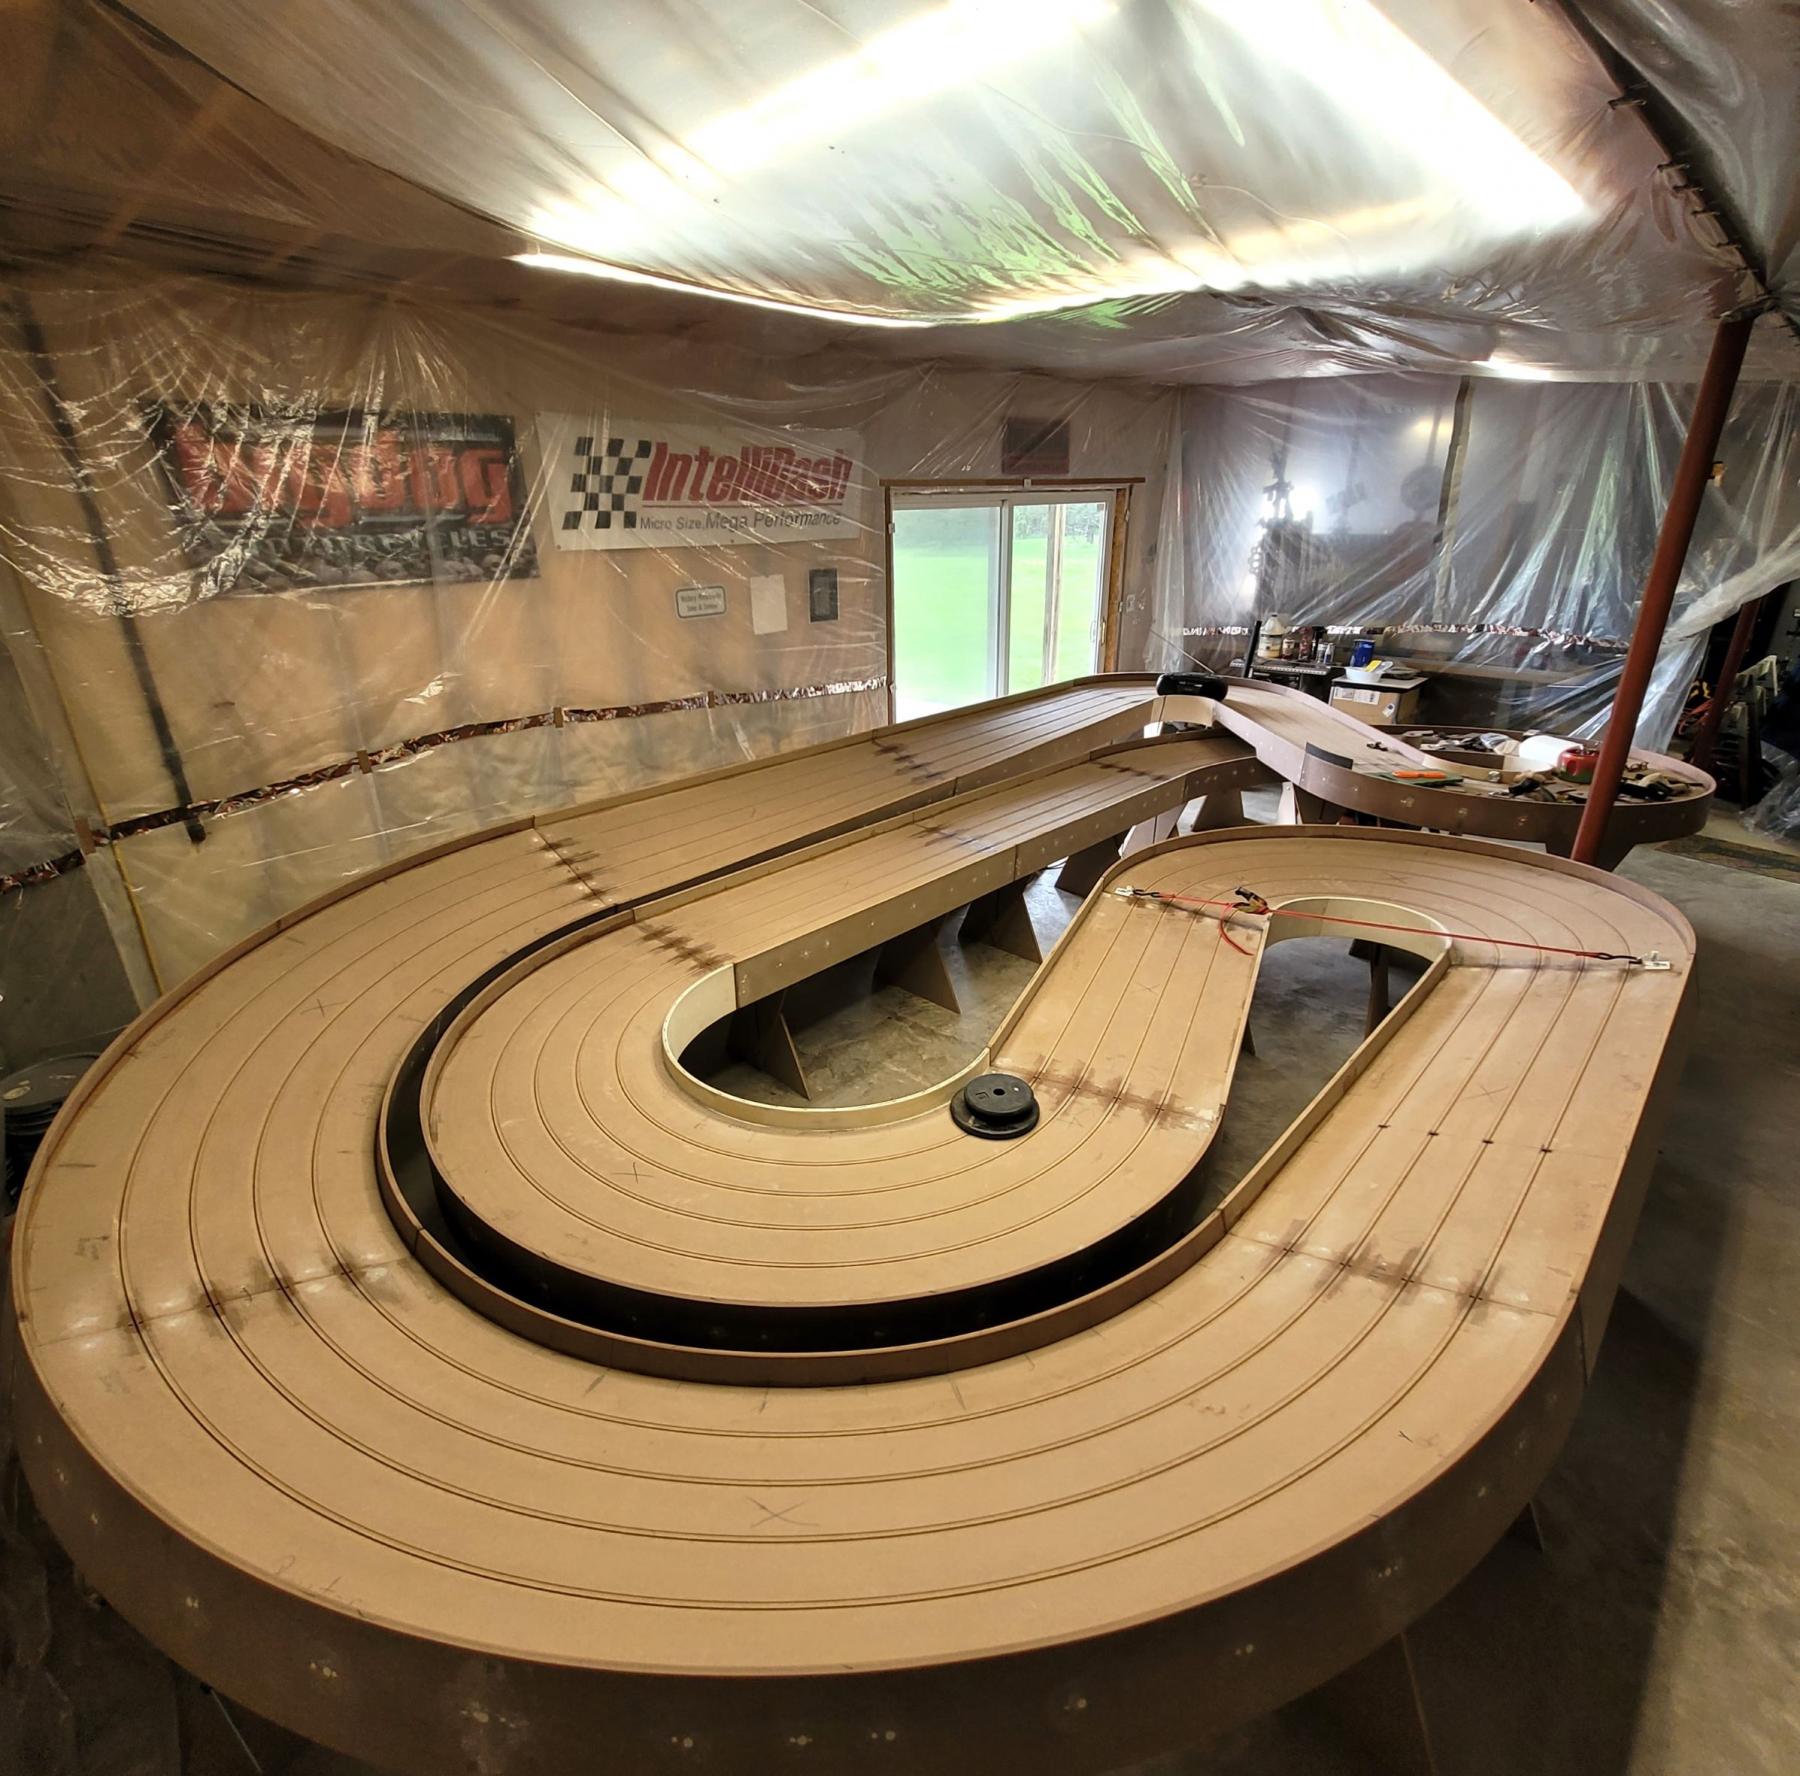
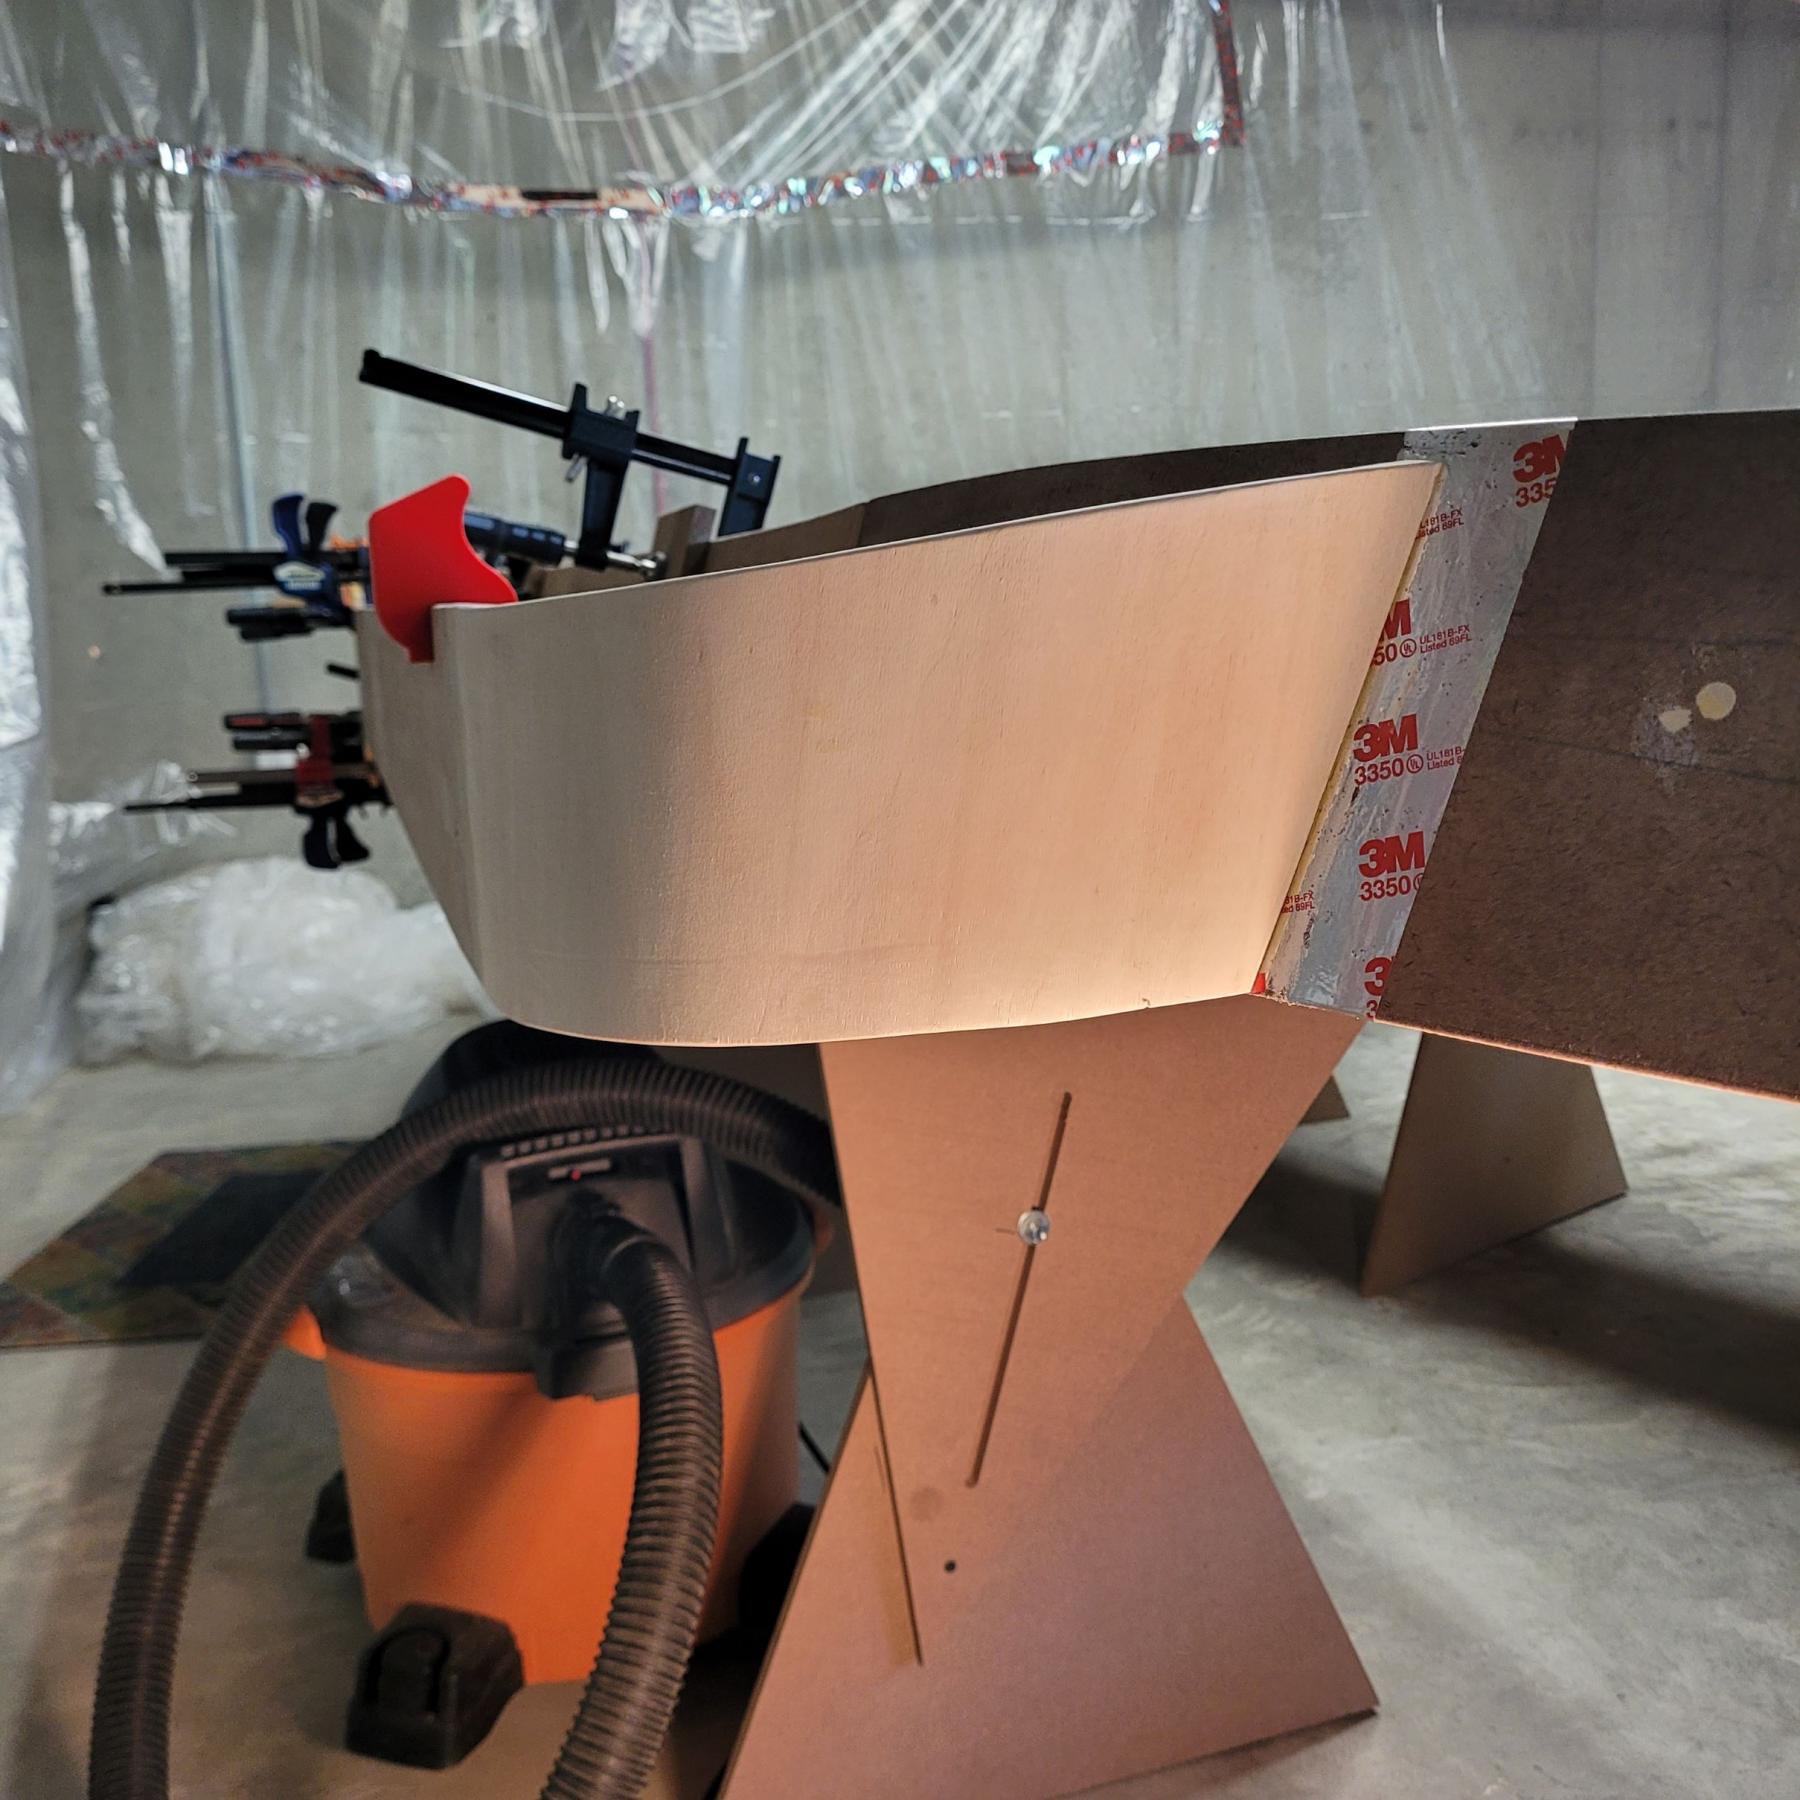
You can see the wet and dryer areas of the fresh paint on the banked turn and other places.  The material went on a bit lighter then dried to the darker chossen color.


I used a 2" wide foam sitck brush to apply material into the sidewall corners and onto the track surface with good coverage.  I made sure there wasn't any heavy smudges and runs on the sidewalls and the track.  The V-point of the brush worked well for this because I only wanted about 1/2" of paint on either side of the sidewall corner.  


I didn't want roller spin marks on the sidewalls.  I rolled the loaded roller down one side the return on another path to help initially spread out the material before rolling and covering the entire surface.  One cleaver thing I thought of before I started rolling was a 3D printed plastic dome button .150" high that I glued onto the end of the roller to bump against the sidewall.  This dome helped me keep the roller edge from rubbing paint on the inside of the sidewall and making a paint mess but got me close enough to cover the foam brushed area.


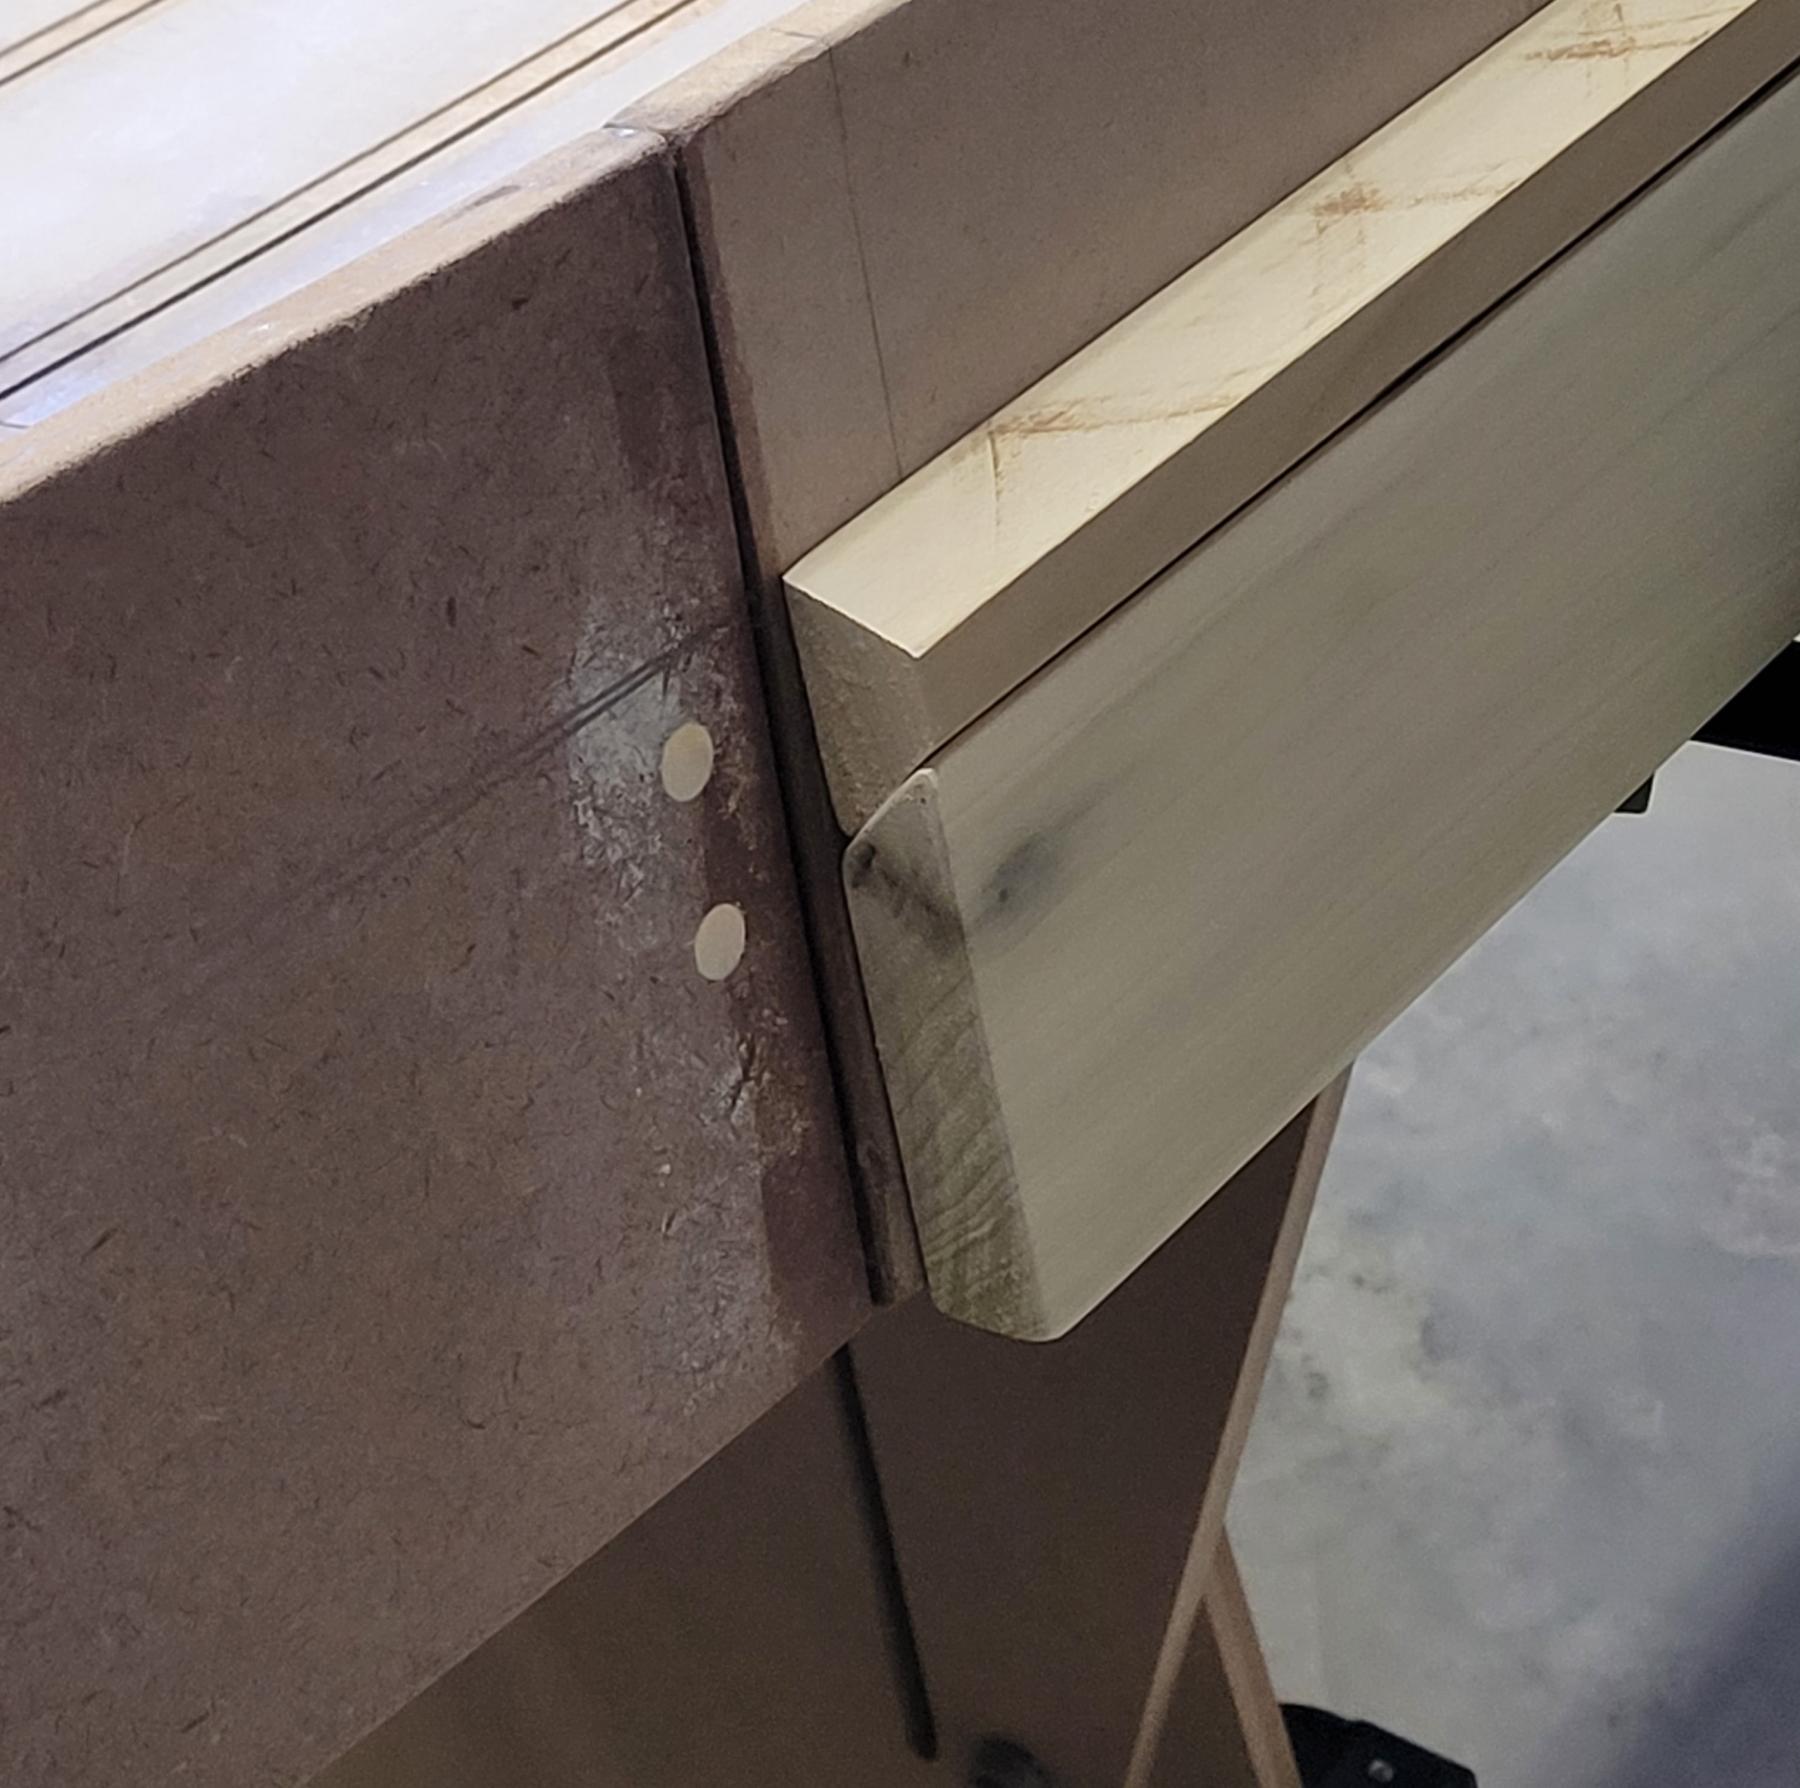
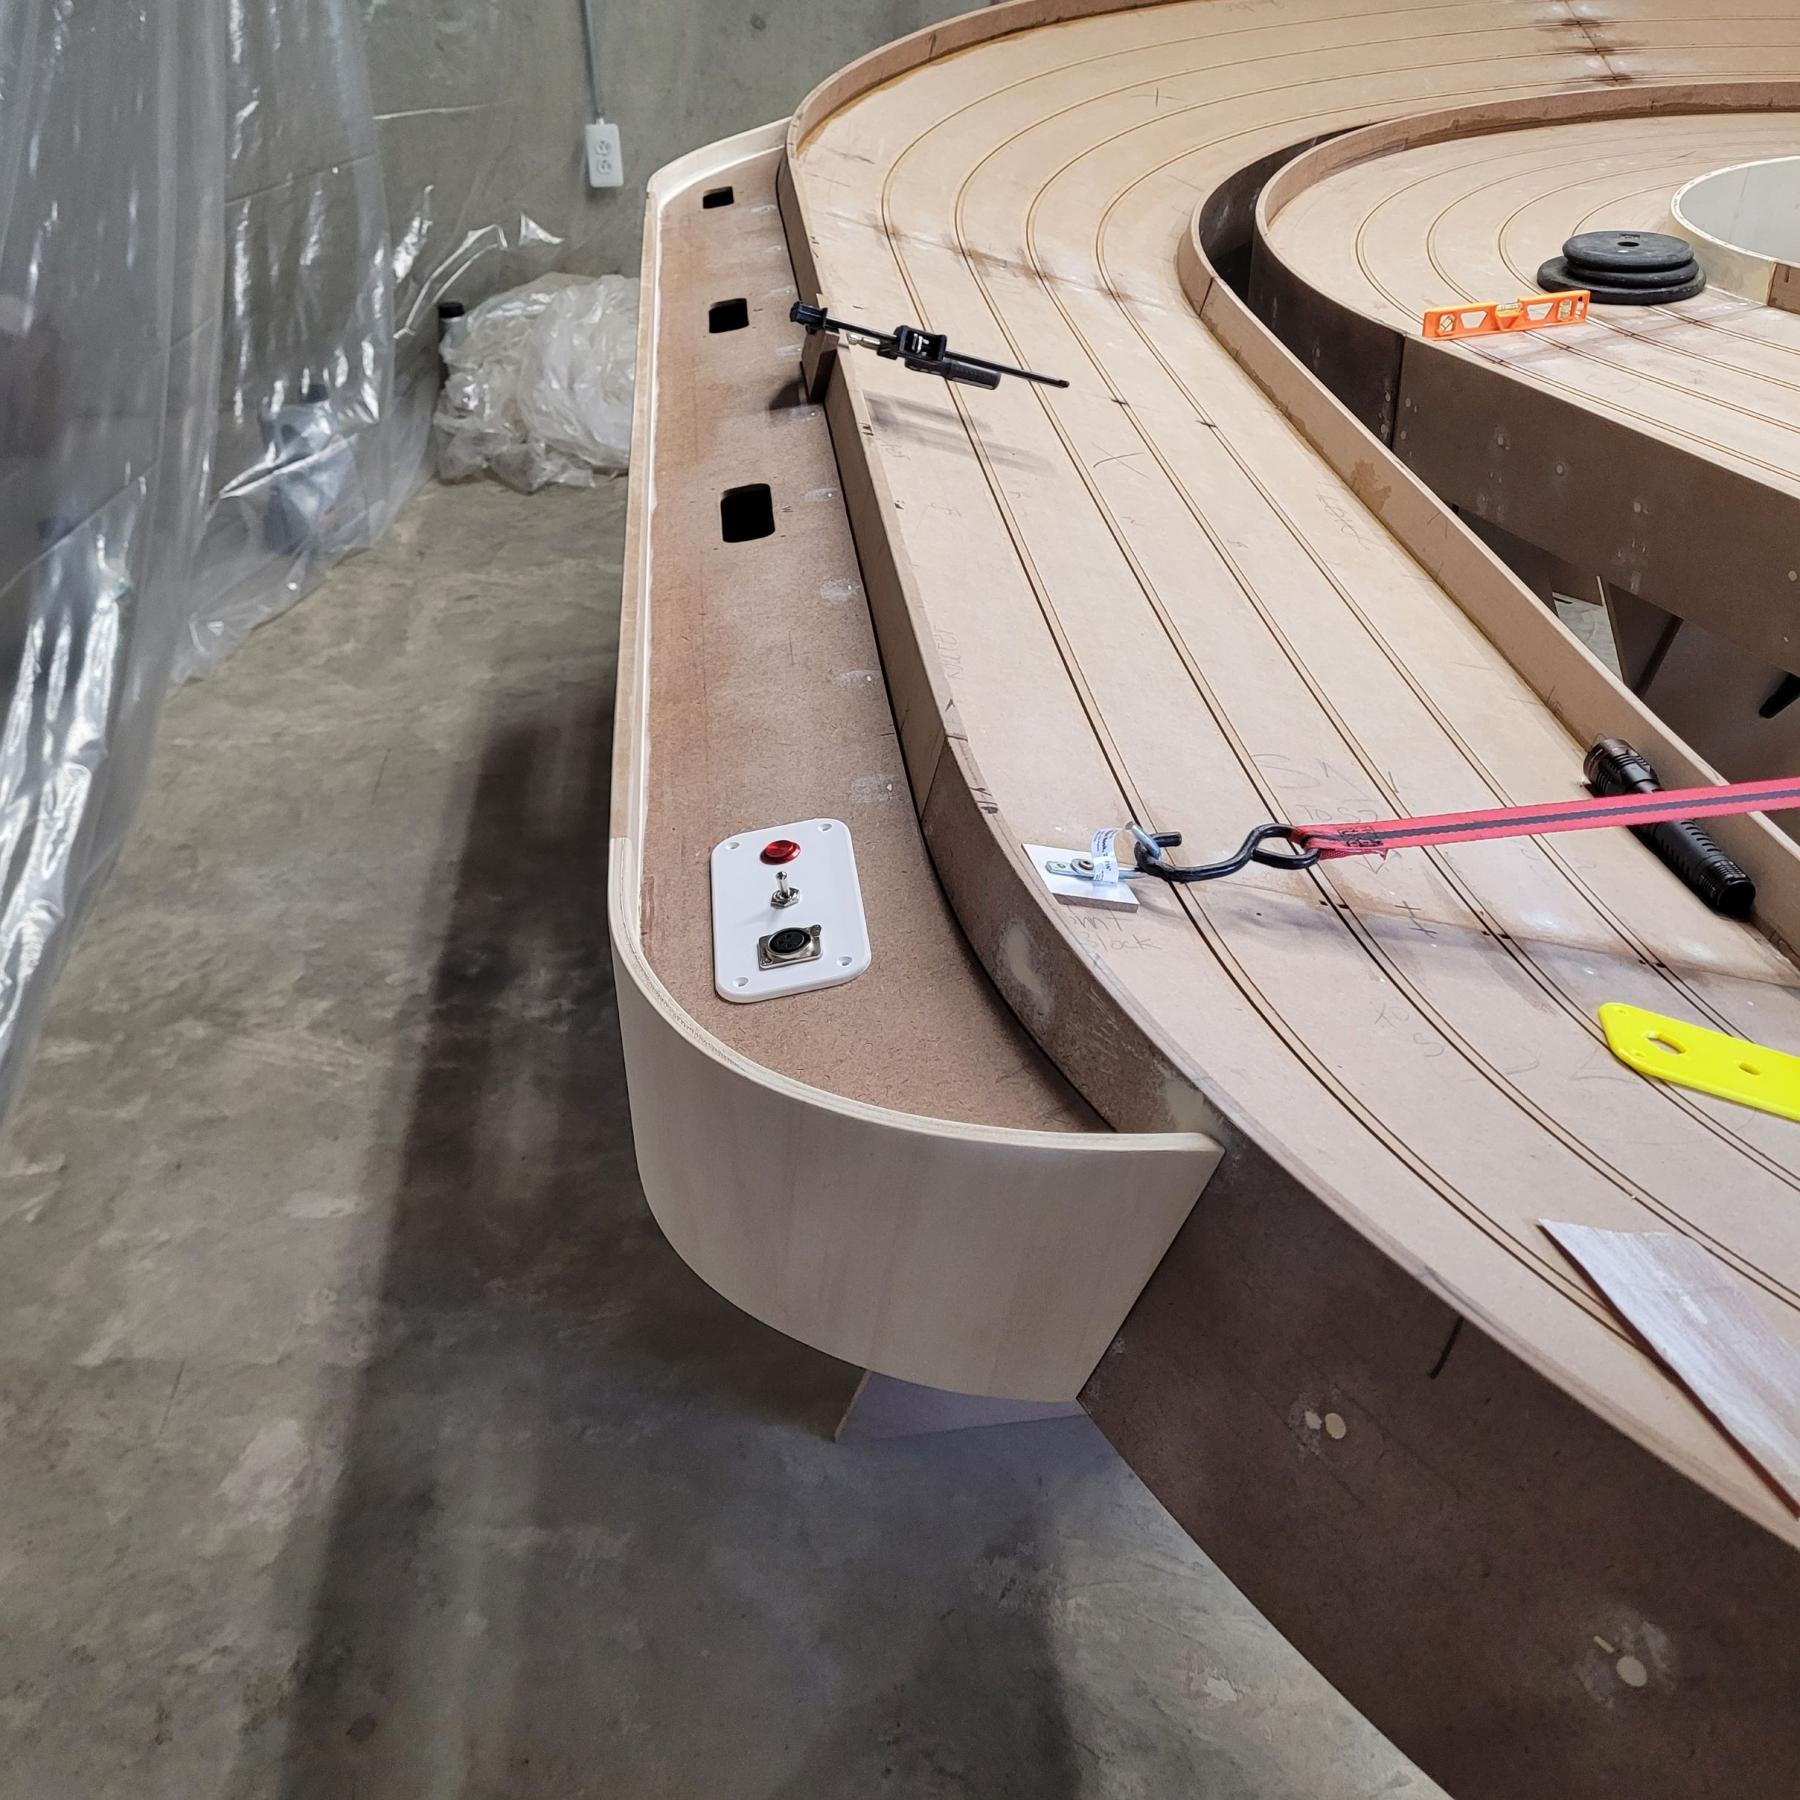
I didn't paint the inside sidewalls with epoxy as originally planned because I was unsure of the amount of paint needed.  I decided to paint the inner sidewalls with primer and the track colored latex I used on the console.  If I do need touch-up on the inner sidewalls I will use the latex paint which is much easier to deal with.  I will paint all the sidewalls in and out once the track sections are separated so as not to fill the sidewall section gaps with excess paint.  The shelf life on the epoxy components is one year.


I might do a second final coat on Monday depending on how hard the epoxy is after 48 hours to sand the fuzz out.  I had high anxiety on this portion of the build so I wanted to let any fellow builders know what I did and why.


Happy Fathers Day those of you that matter.

Rob

Attached Images

  • 20250614_143640.jpg
  • 20250615_082803.jpg
  • 20250615_090903.jpg

  • vfr750, NSwanberg, glueside and 1 other like this
Rob Armbruster

#224 Bigdogbro1

Bigdogbro1

    Mid-Pack Racer

  • Full Member
  • PipPipPip
  • 144 posts
  • Joined: 23-April 24
  • Gender:Male
  • Location:near Hell, MI

Posted 17 June 2025 - 08:00 AM

A milestone has been reached as I have applied the second and final coat of WB Epoxy track topcoat.  The second coat was applied as the first coat method and it has turned out very nice.  The bridge was not installed so the painting was easier.  I was careful applying paint at the open joints so no excess paint went in the joint face.  I am glad it's done and behind me and I'm ready to move on to the next job.  I will split all the joints and paint the sidewalls and apply braid.  I used about 25oz of the 40oz total mixed material (32oz Part A and 8oz Part B) on the second coat.  I made sure the roller was properlty loaded and applied it evenly to the best of my ability.

Attached Images

  • 20250616_175115.jpg

  • dc-65x, vfr750, MSwiss and 3 others like this
Rob Armbruster

#225 dc-65x

dc-65x

    Grand Champion Poster

  • Subscriber
  • PipPipPipPipPipPipPipPip
  • 7,075 posts
  • Joined: 14-February 06
  • Gender:Male
  • Location:Captain Rick: The only vintage slot car nut in SW Oregon?

Posted 17 June 2025 - 11:00 AM

Beautiful!


Rick Thigpen
Check out Steve Okeefe's great web site at its new home here at Slotblog:
The Independent Scratchbuilder
There's much more to come...


Electric Dreams Online Shop