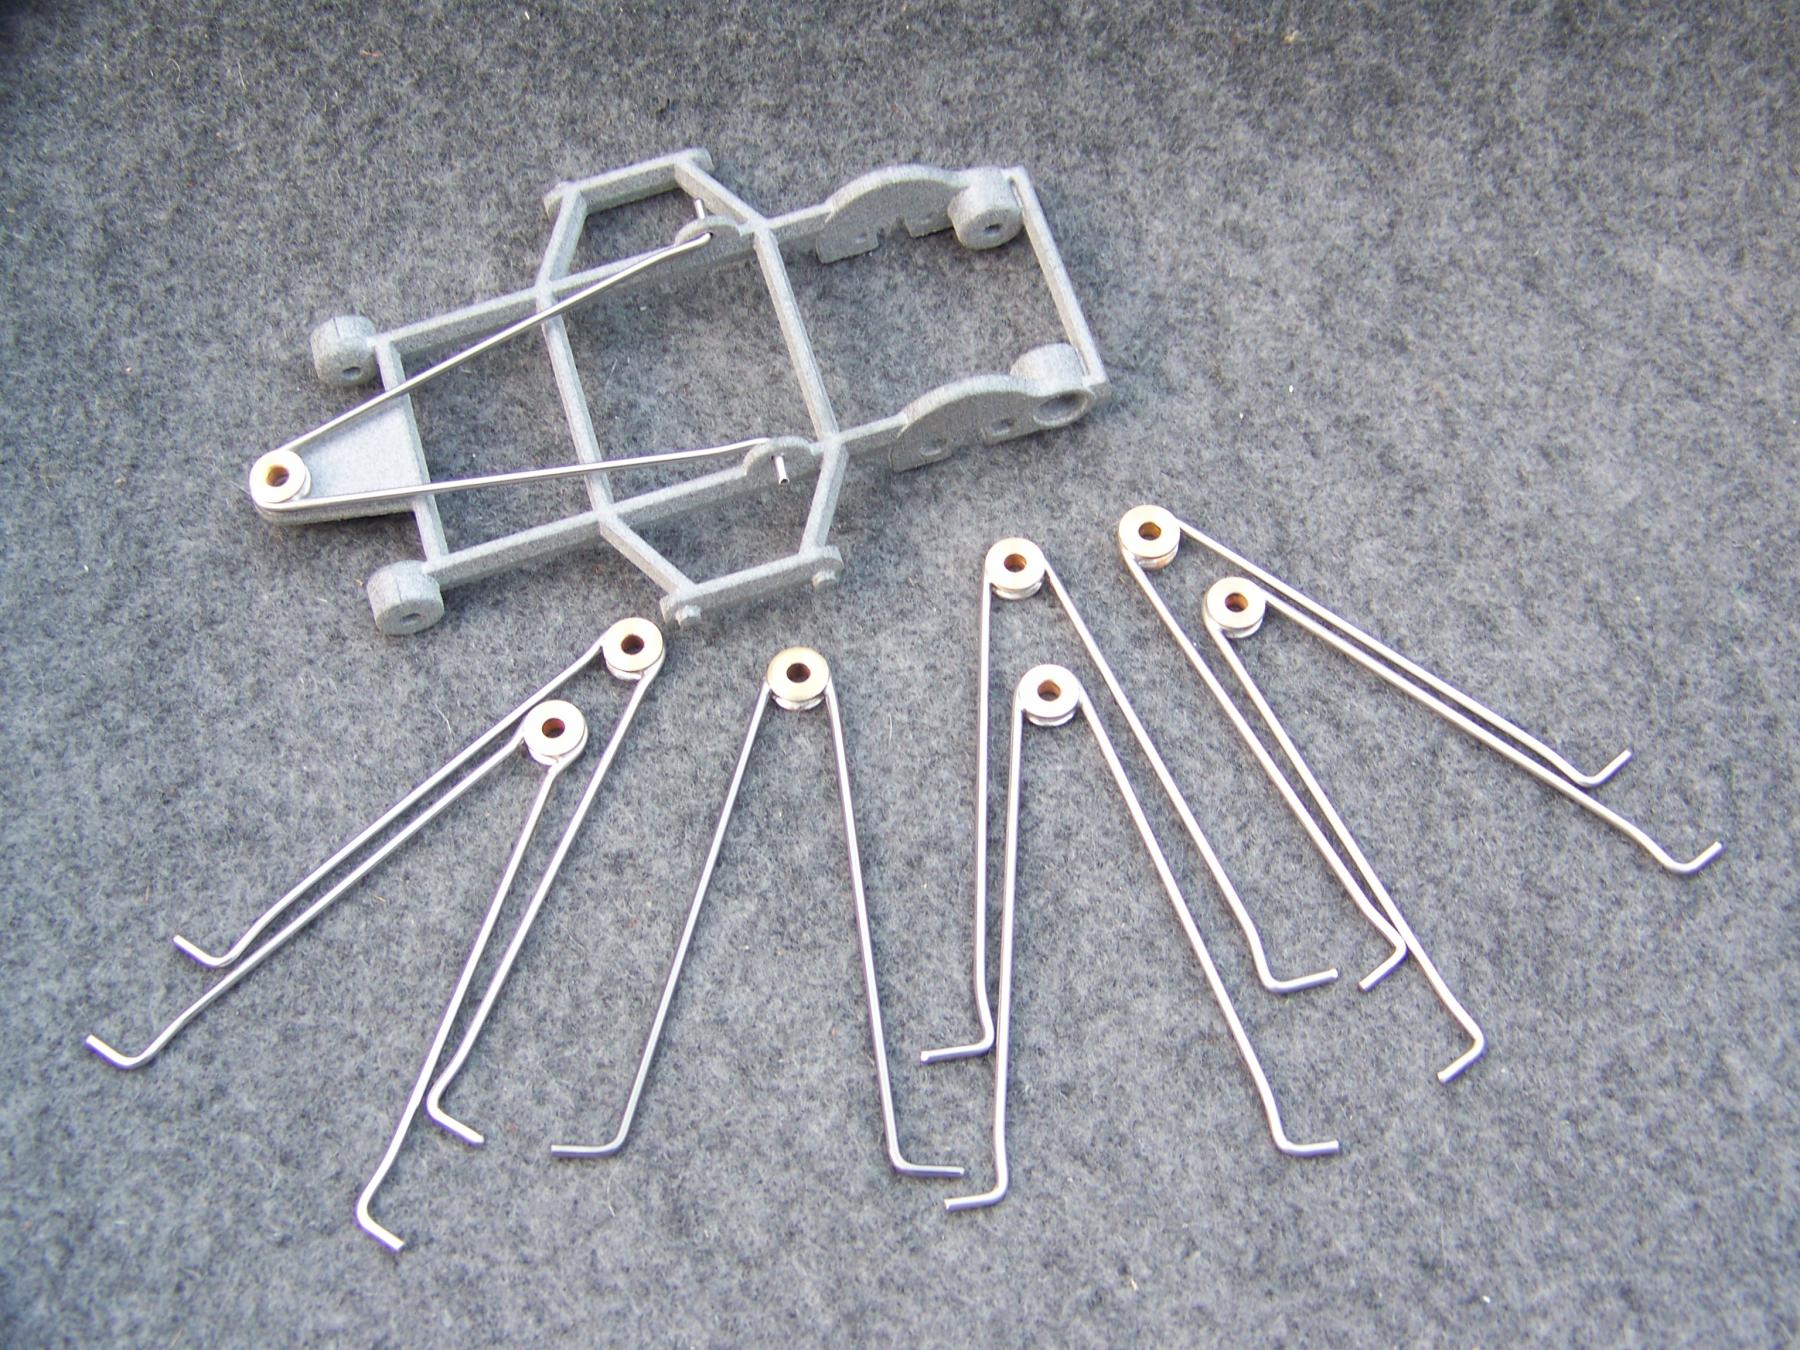
I would go with either of the two in the bottom photo, mainly because they look closer to the original - and that seems to be the main reason behind this project. Of the two, the "original" seems slightly simpler and would be my choice.
Don

|


Grand Champion Poster


Posted 14 November 2024 - 12:21 PM
I would go with either of the two in the bottom photo, mainly because they look closer to the original - and that seems to be the main reason behind this project. Of the two, the "original" seems slightly simpler and would be my choice.
Don
Grand Champion Poster

Posted 14 November 2024 - 01:01 PM
The drop arm on the left gives more solder area, and therefore will be a stronger joint. More work in bending, though. The originals were probably done on a four-slide machine like this;
https://youtu.be/QvR...2nP_VyDDEbL0hcO
It is an old cam operated machine like those used for a hundred years. Now, they are using servo operated machines to do the same jobs, but in a tenth of the production time.
https://youtu.be/YCB...pUYC1oyMvgQtlZ8
Posting Leader
Posted 14 November 2024 - 02:17 PM
Thanks Don and Dave for your input the "Original" is the easiest of the 3 as you can imagine. 
I did make my own small bending block. It works just fine for the few we need.

Posting Leader

Posted 19 November 2024 - 08:52 PM
Posting Leader
Posted 19 November 2024 - 09:37 PM
Thanks Mark, I just wanted to make sure I was far enough along before I posted. It's been a long process.
The rims you refer to are Riggen's in front and Testors in rear that I painted black to match the front.
We have a 3D printed wheel set in the works, with a novel gear attachment design, so as to keep the rear width under the body.
Once I have more parts to the puzzle and we can finish a complete car I will pay for an add in "The Parts Counter" here on Slotblog.
Not ready just yet but once there I will show parts and prices for anyone that wants to build a MDC Bat.
I do wonder how many of us did buy bodies when they were being sold on eBay 4 at a time? I have extras if some of you missed out.
Posting Leader
Posted 21 May 2025 - 07:29 PM
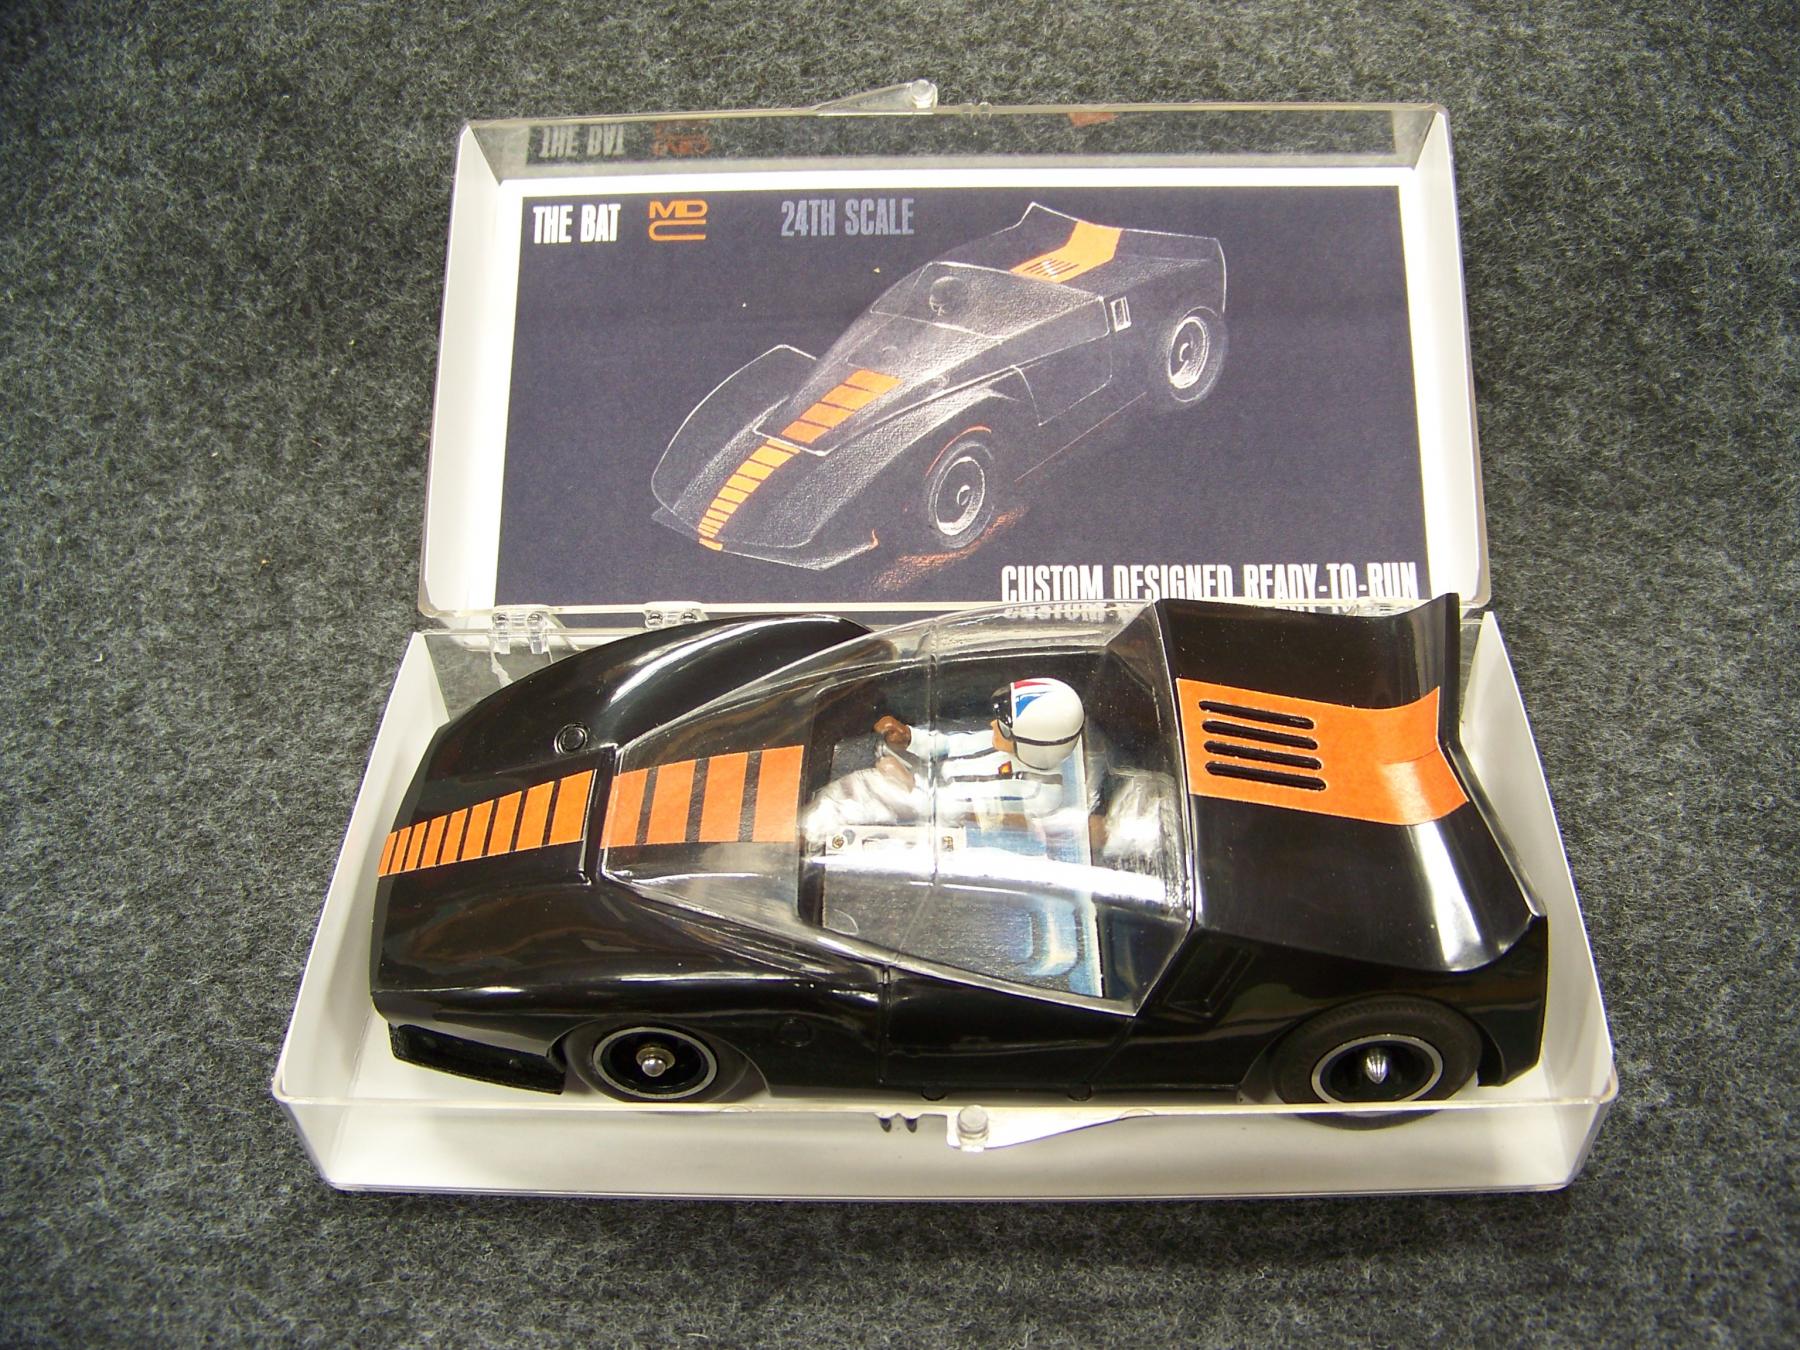
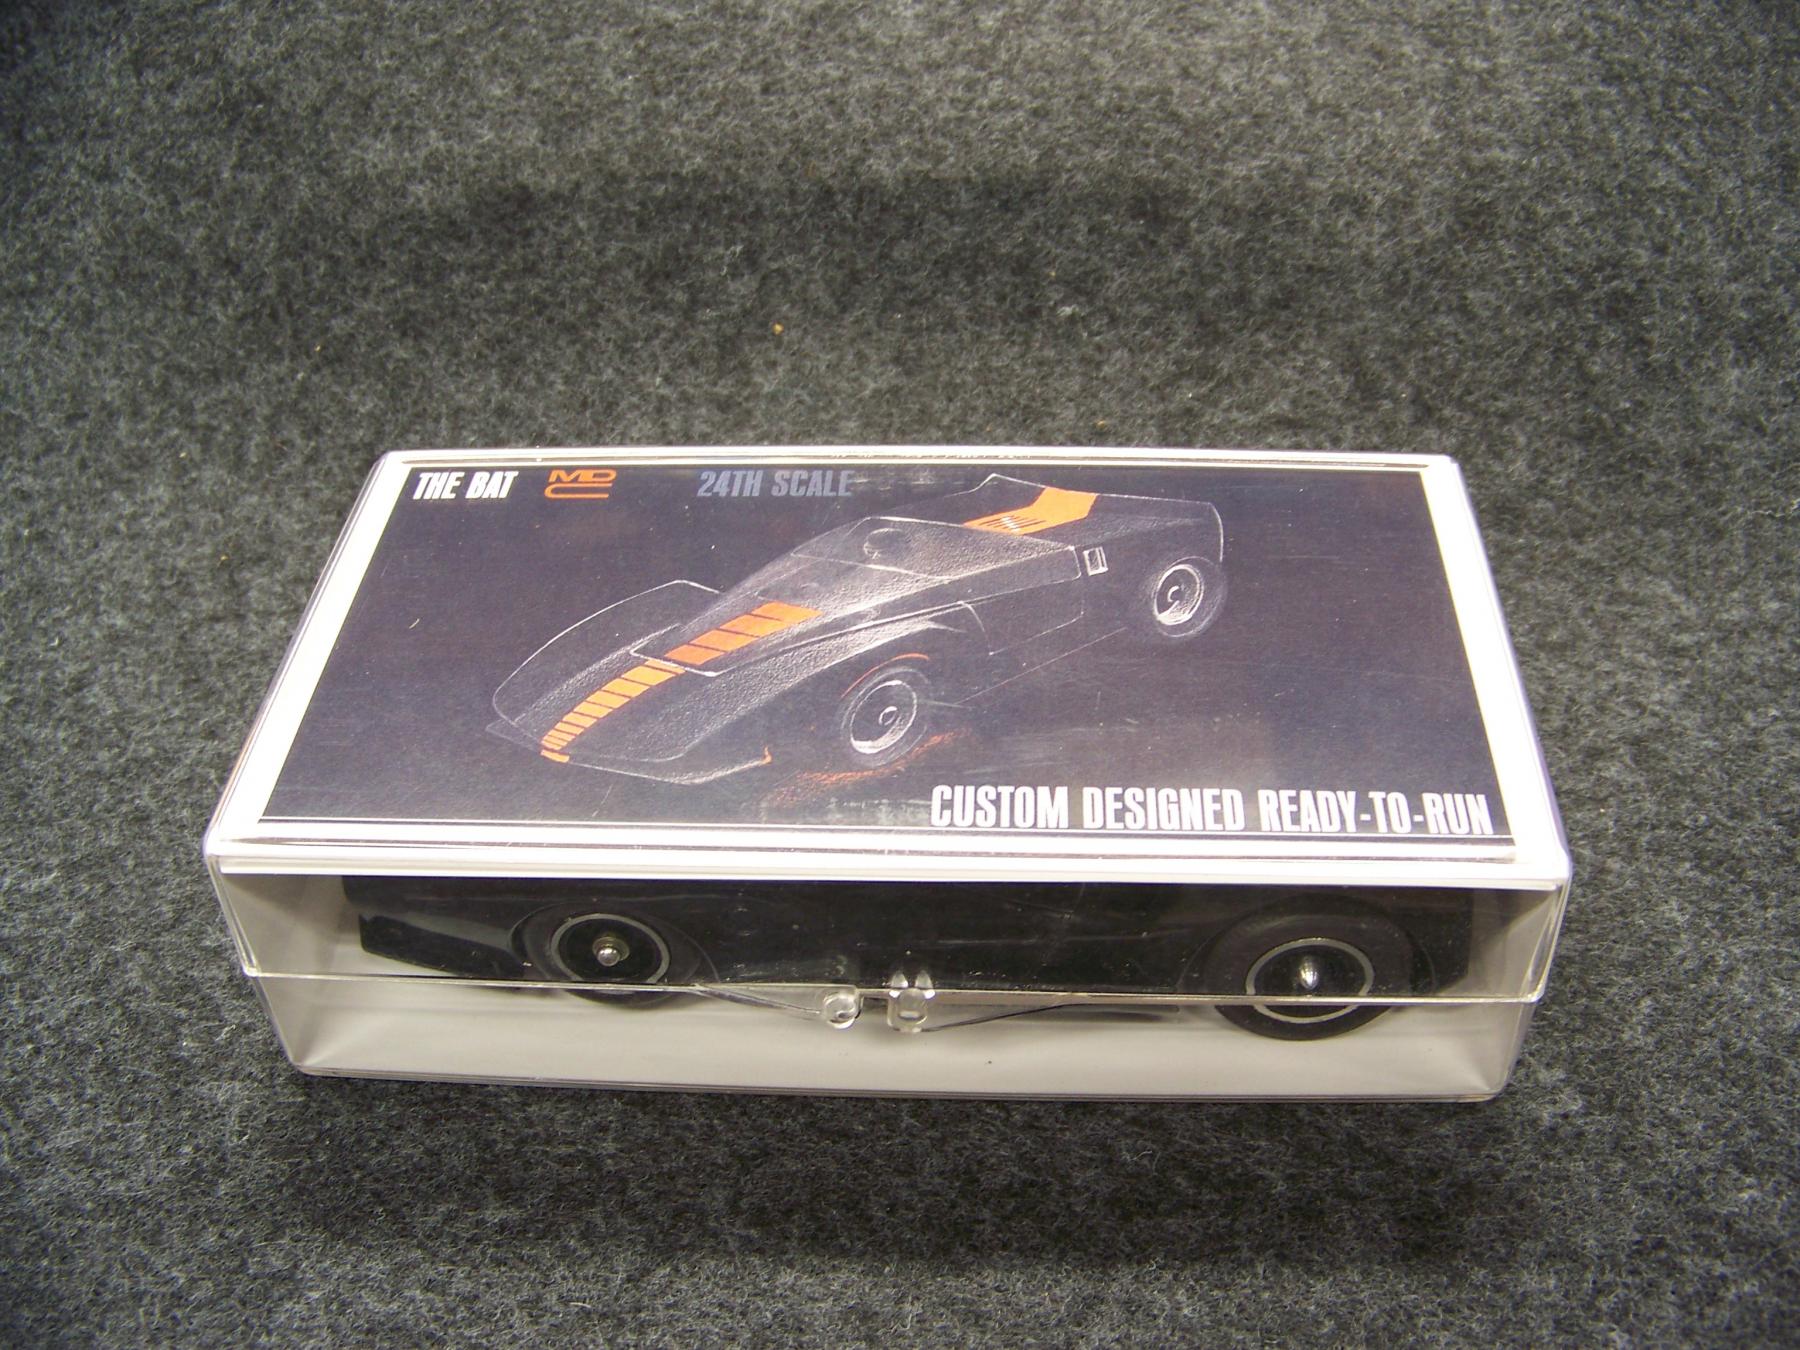
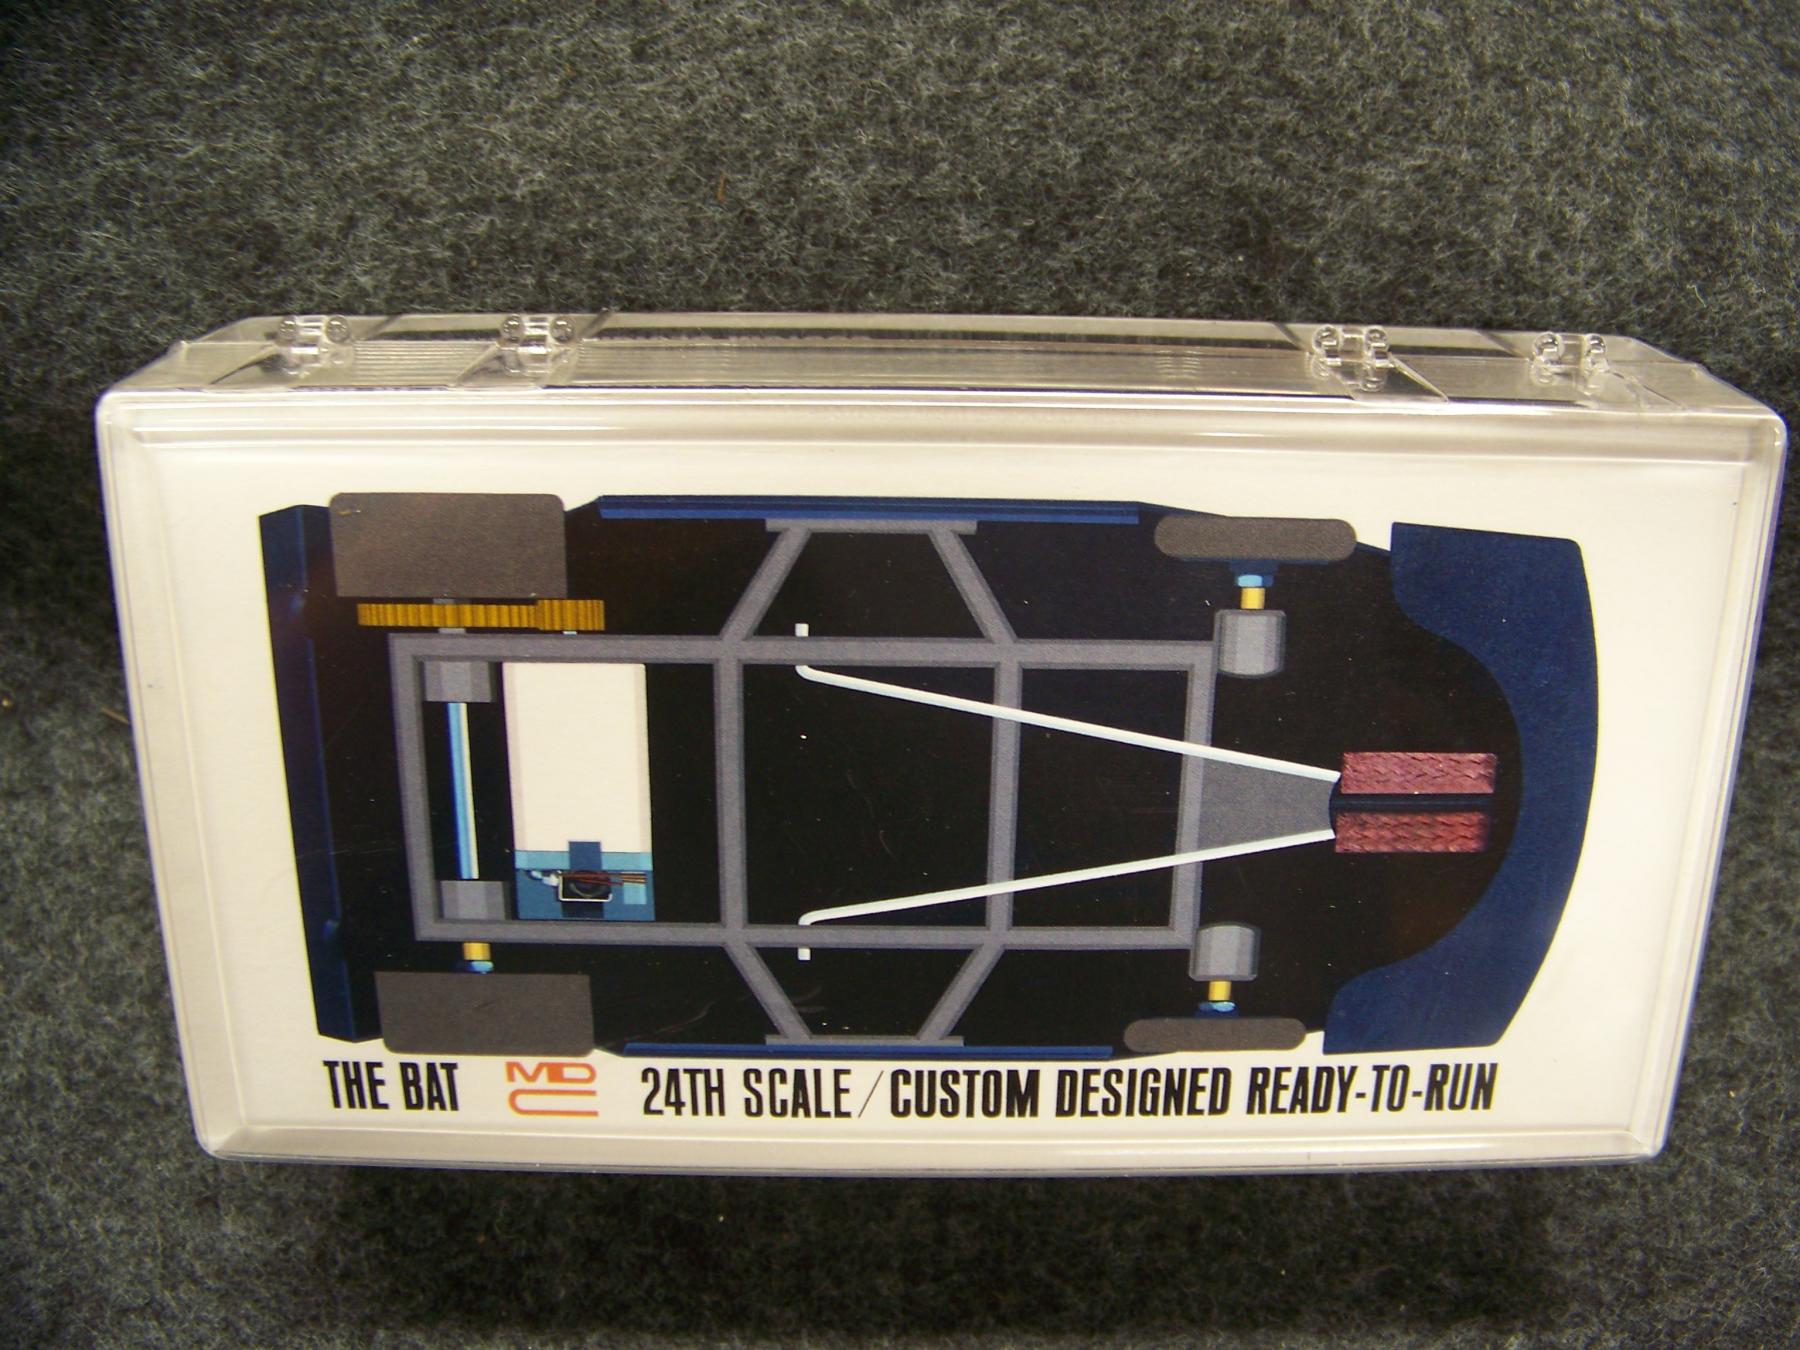
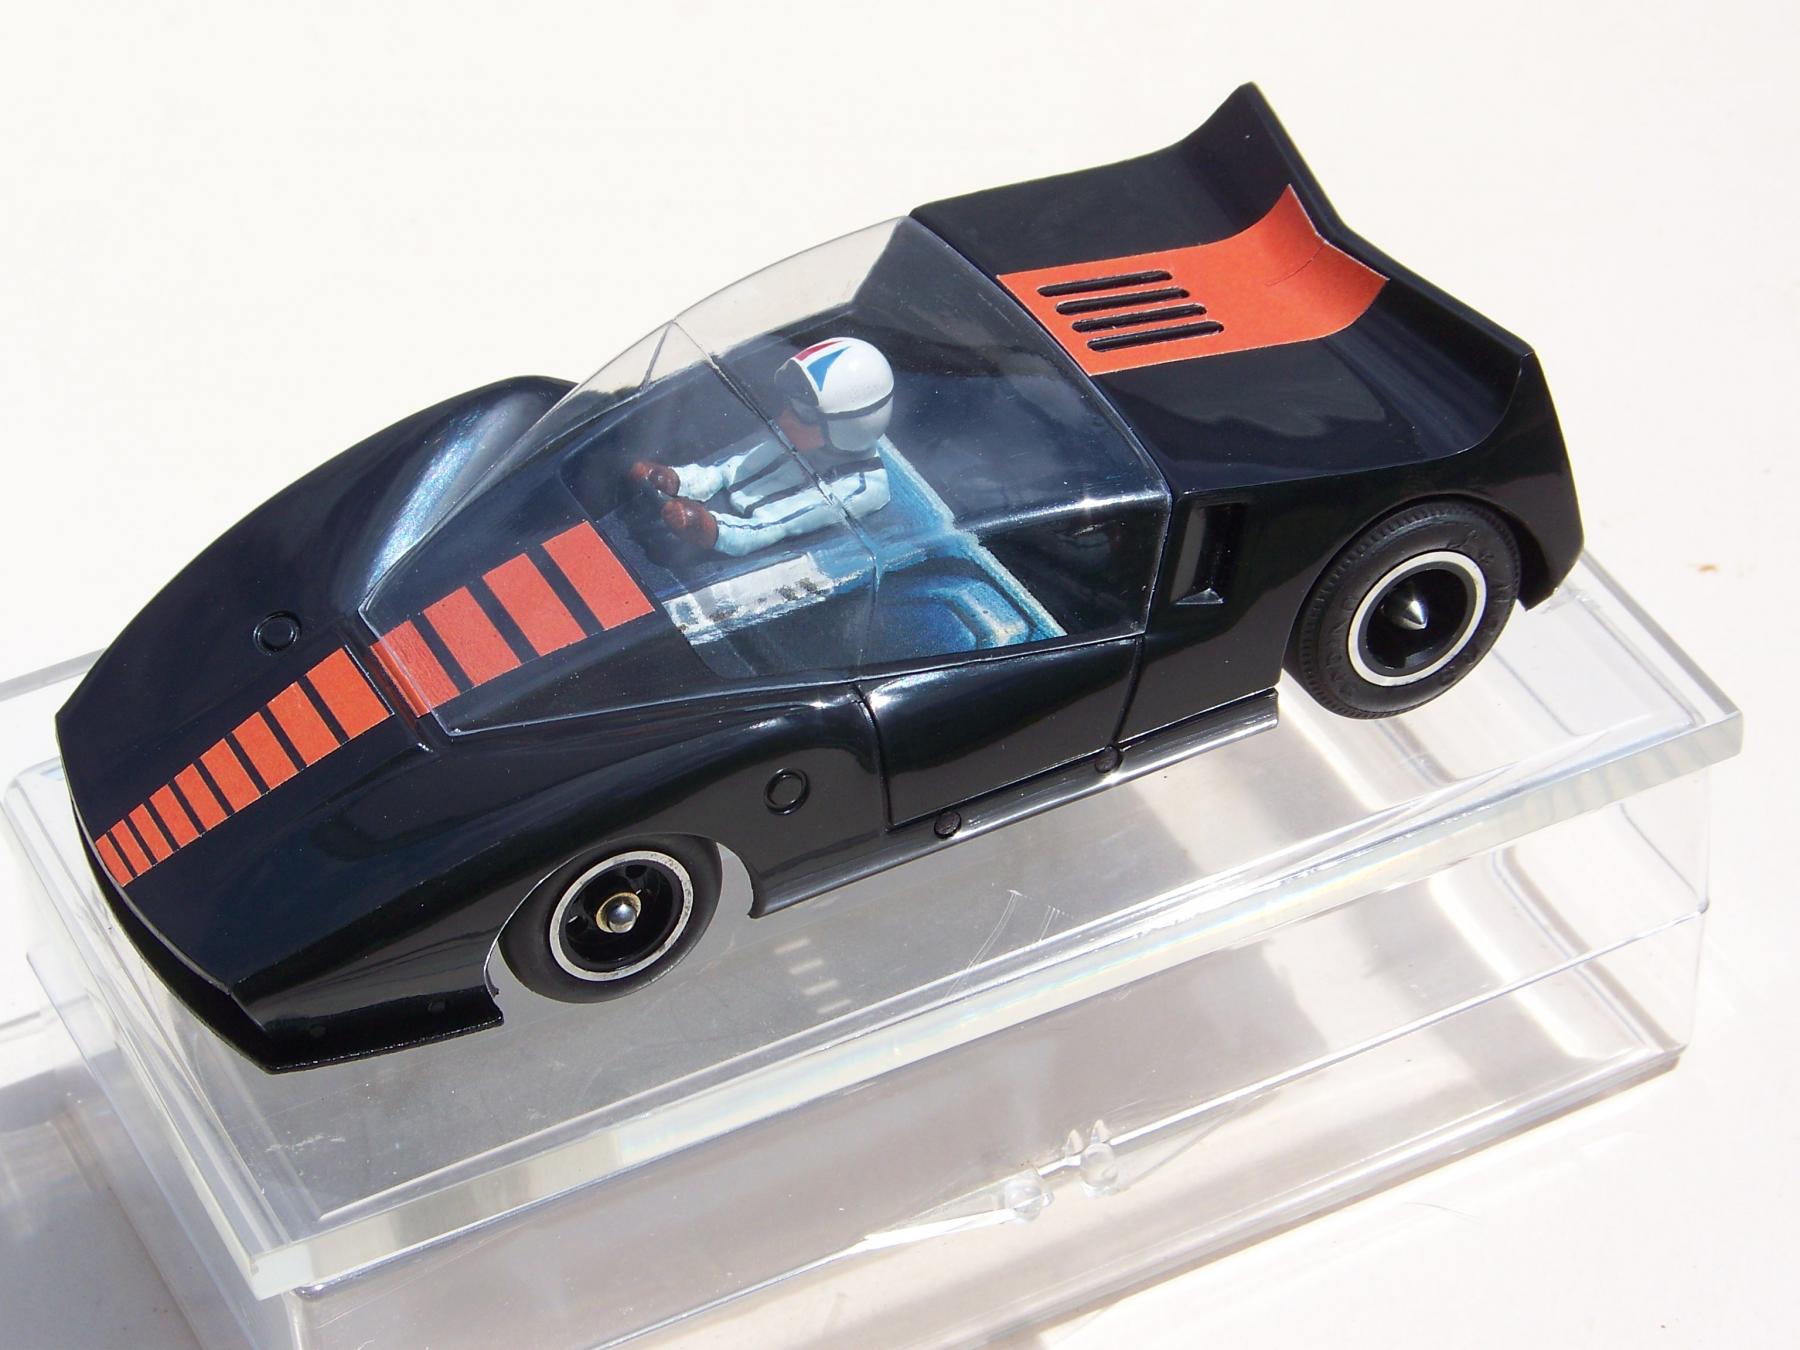
It's been awhile but I got around to making a finished car and a display box to show it off.
There will be an add in the "The Parts Counter"once approved, but for now I will add some new pics.
http://slotblog.net/...-bat-kit-parts/ Now approved, thanks Greg.
If you have any questions feel free to ask.
Posting Leader
Posted 21 May 2025 - 07:41 PM
Some more pics as I exceeded the max file size in the last post.
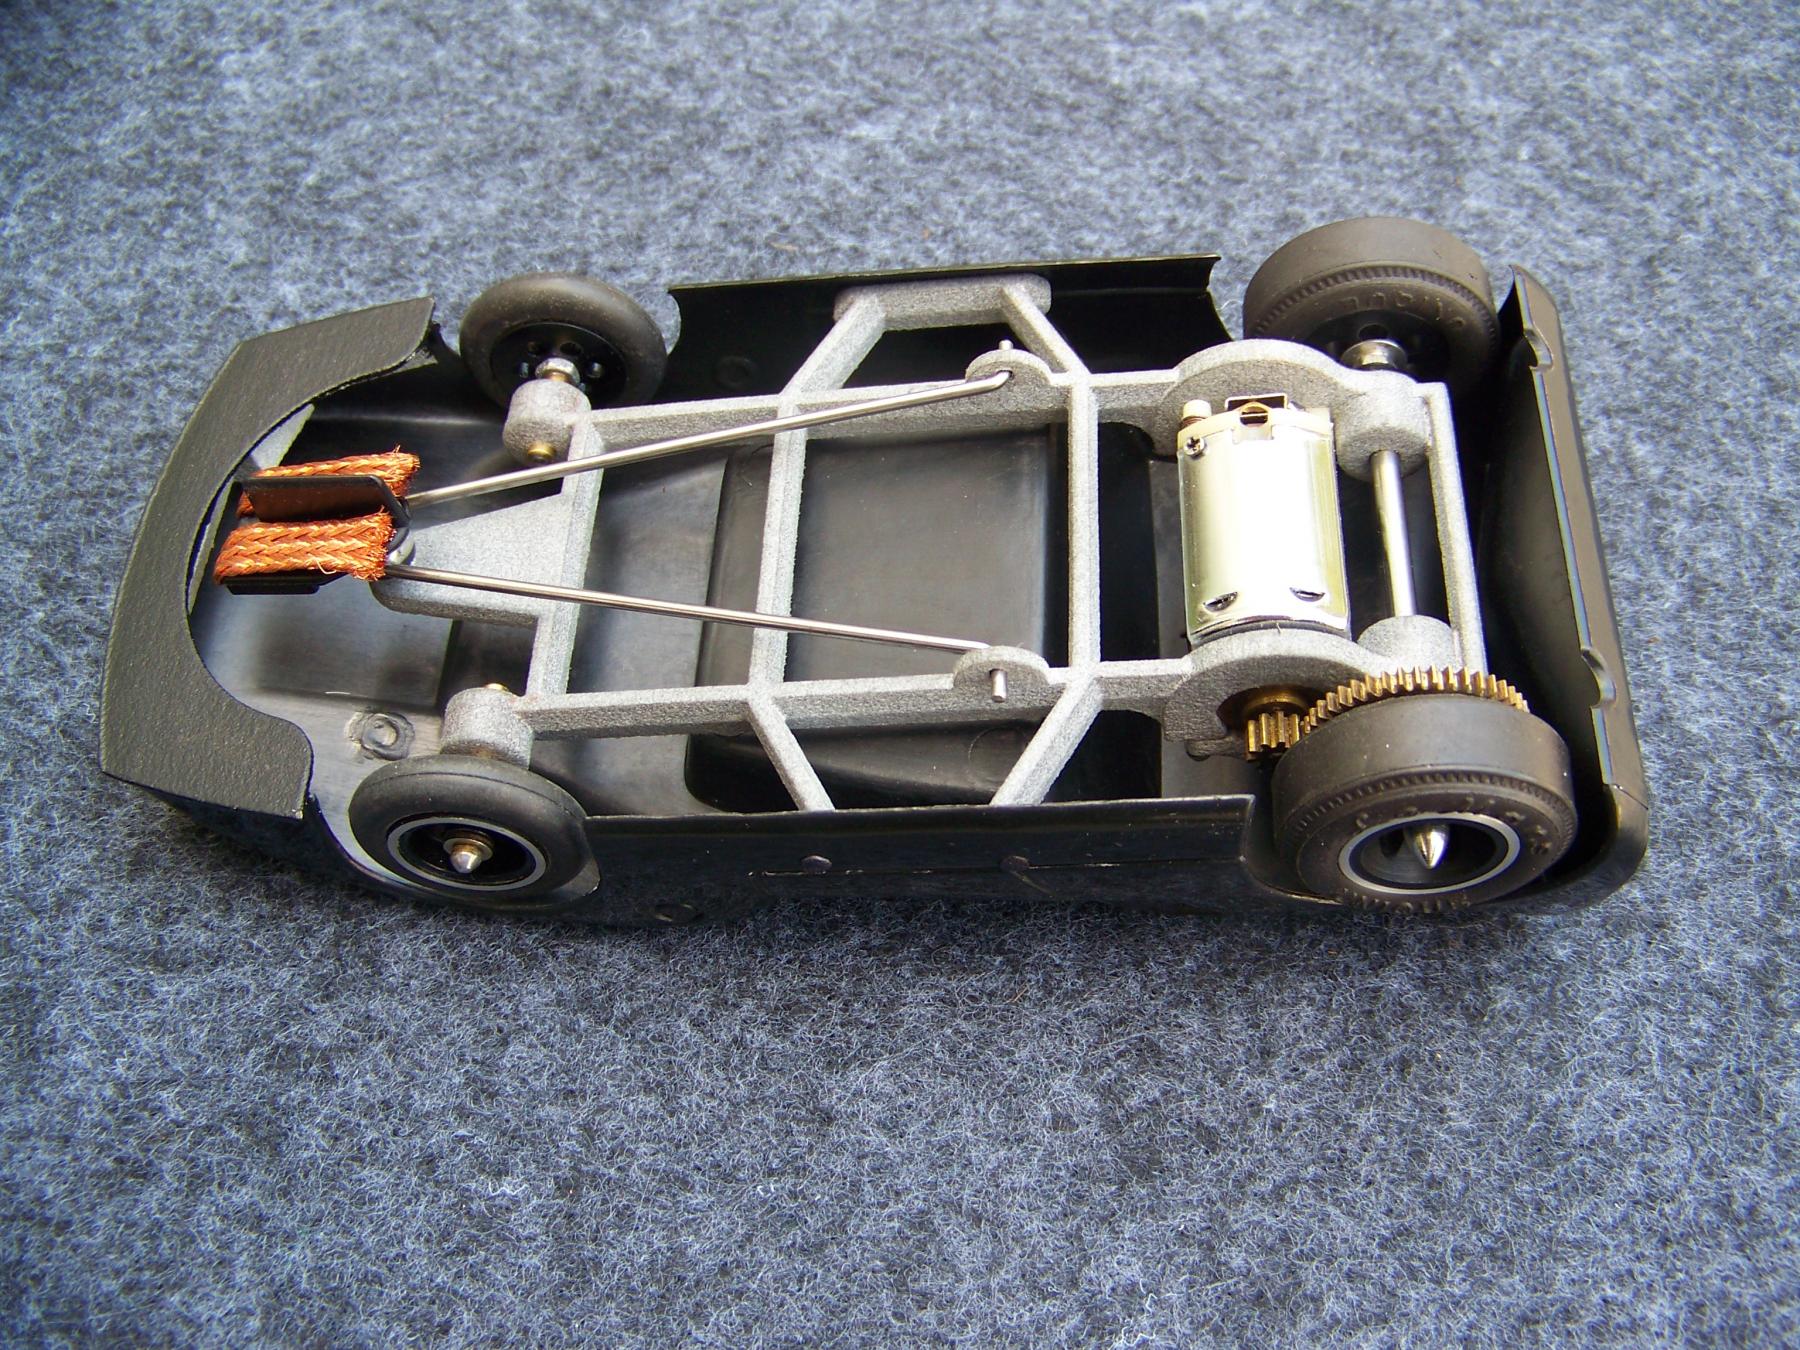
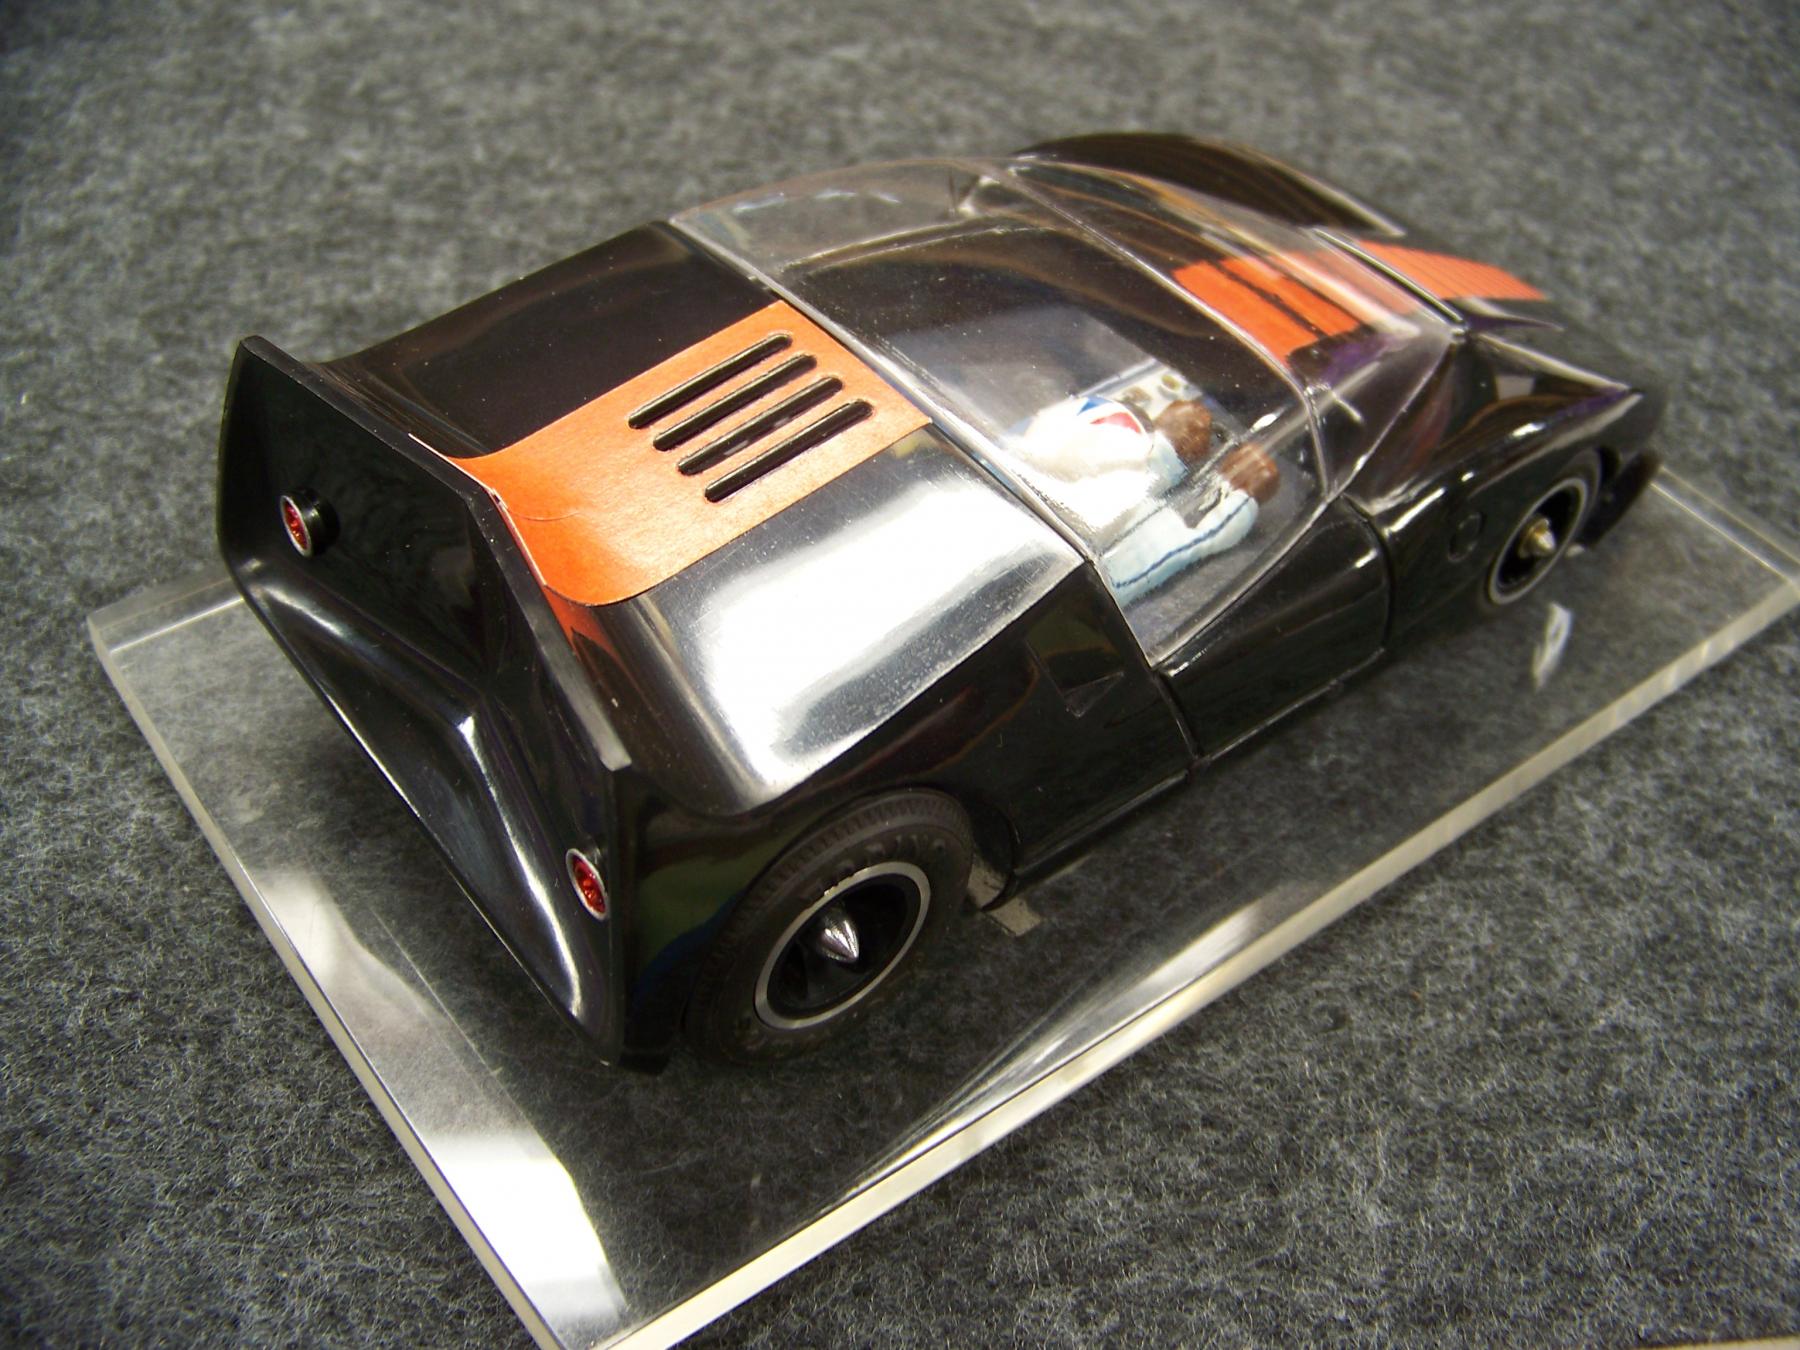
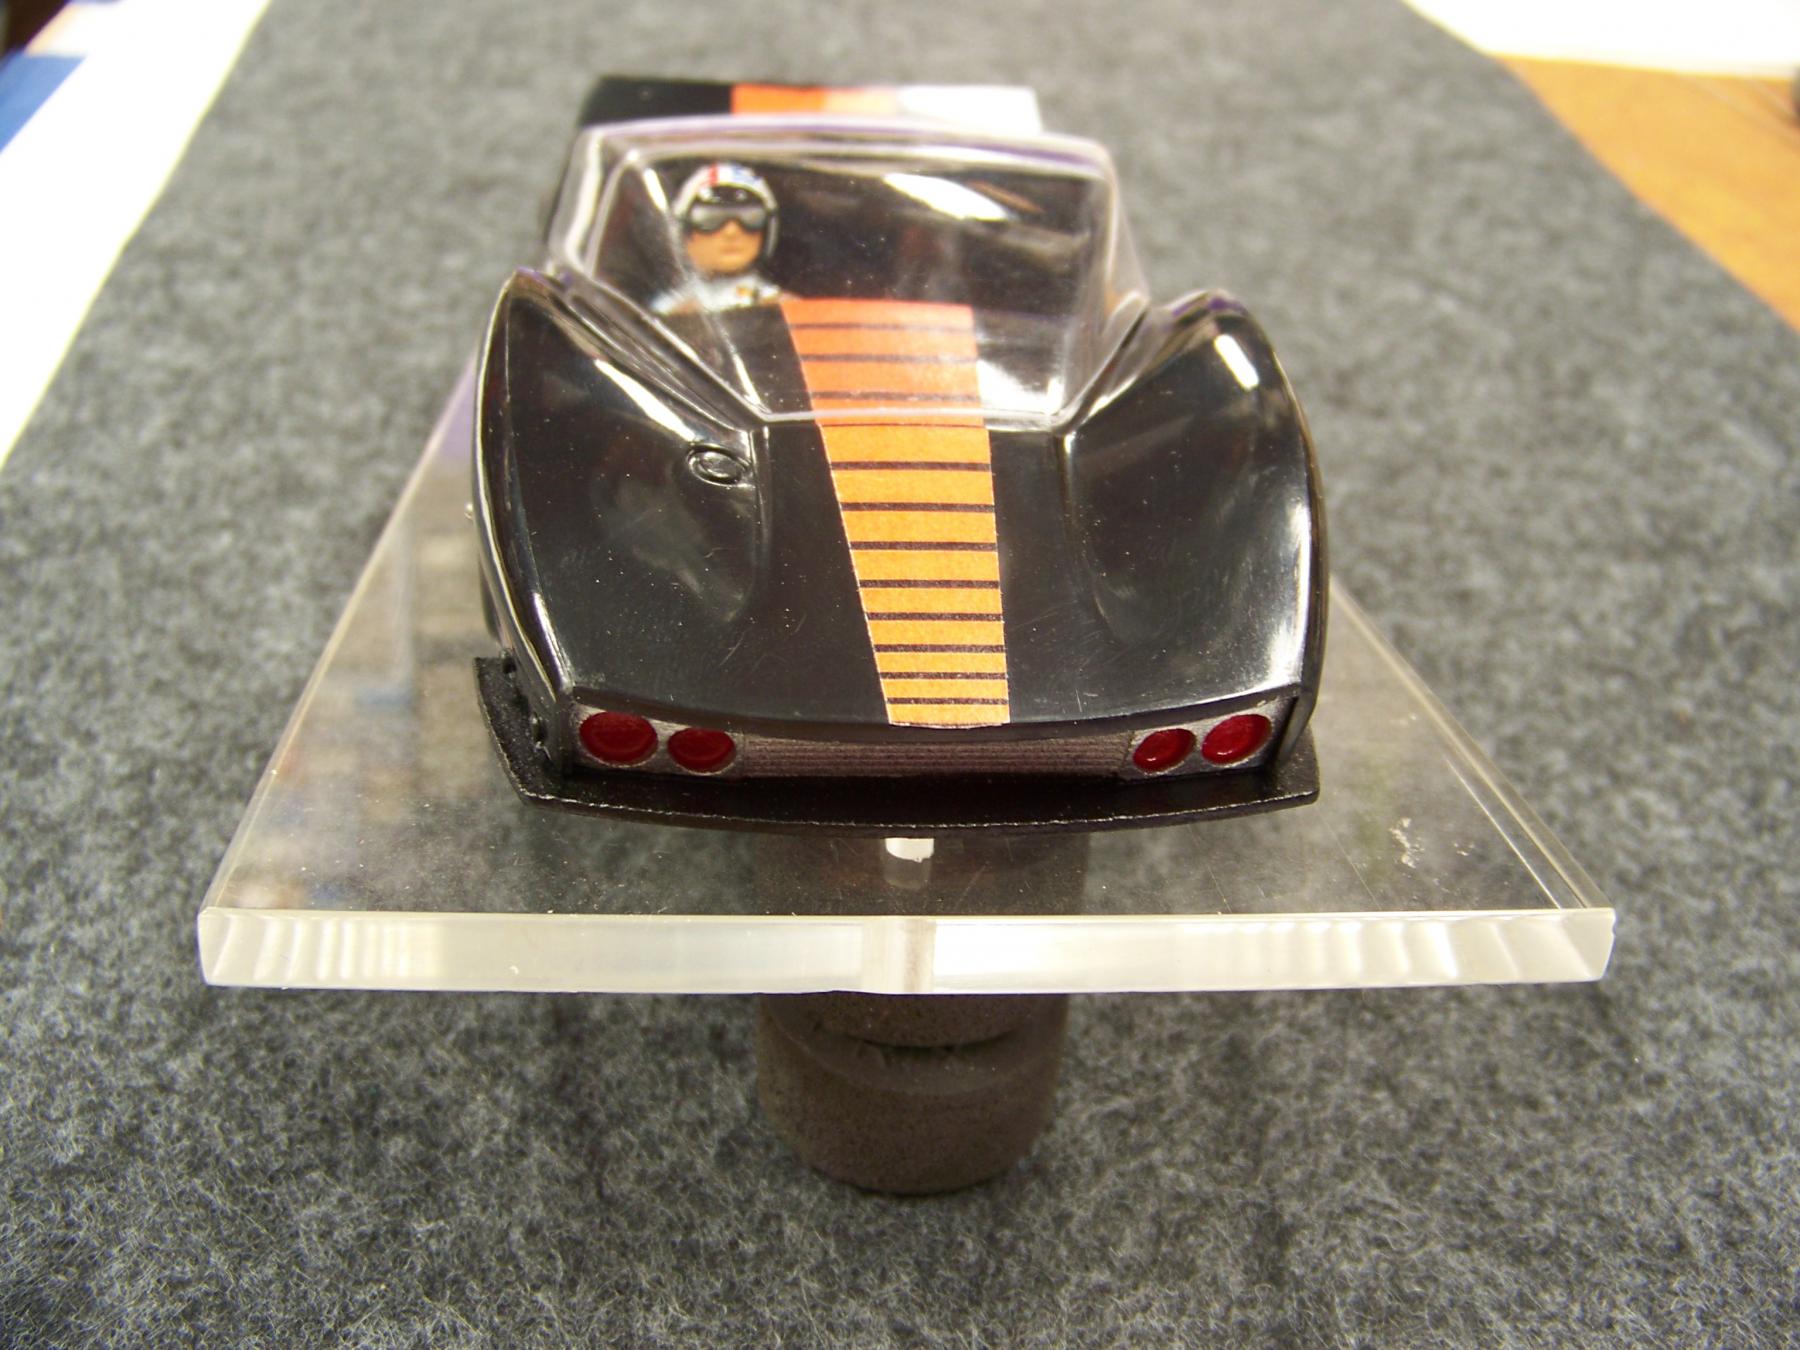
There 2 variations of chassis one for the 16D with small blind bearing EBD and the other can drive with the big bearing.
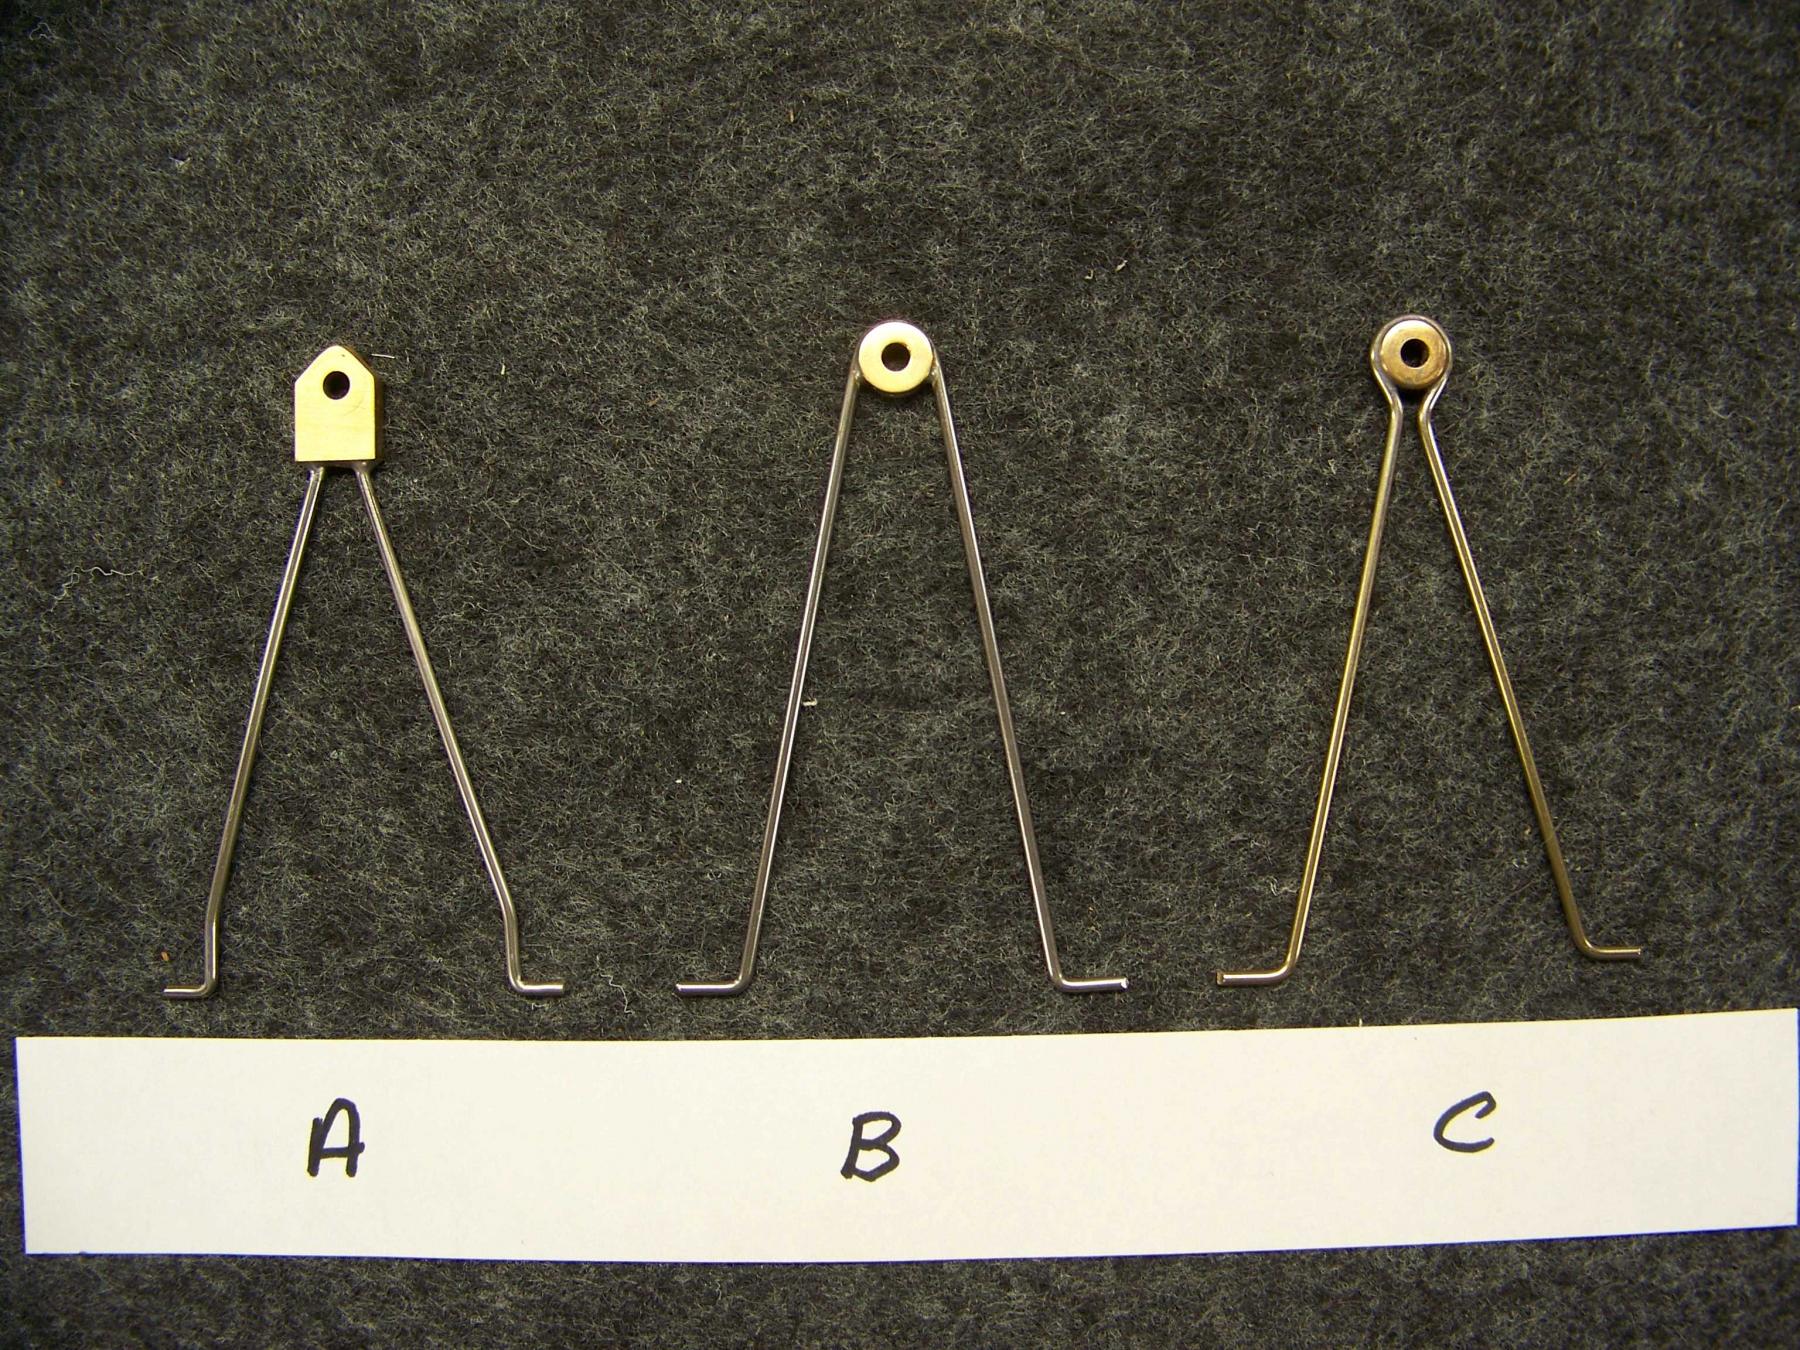
There are also 3 styles of drop arms to choose from. A, B. or C.
Grand Champion Poster
Posted 22 May 2025 - 03:41 AM
An excellent job Martin, really impressive. Let us know when parts are available...
Don
Posting Leader
Posted 22 May 2025 - 08:16 AM
Thank you Don, to be able to finish a piece of slot car history was very rewarding. Once the original bodies were found and sold I knew I had to make a chassis that fit those bodies.
Who knows how many were in that box found in the back of a warehouse then sold in lots on ebay.
When I started this project I had no idea of the outcome, or even how to make the chassis in an affordable method. It take a village as they say.
Without help of friends this project would of been a one off sitting in my collection only.
I have a small number of repo MDC Bat chassis with drop arms, original body kits with repo front bumper and clear canopies. Also available a clear display box with art work.
PM me and I can send price list and availability.
Grand Champion Poster
Posted 22 May 2025 - 08:35 AM
Pretty enterprising project. I have to admit, I didn't think it would make it to this point. Sorry for that. Most projects of this magnitude become stillborn at some point along the way. A lot of work went into it. I'm very impressed.
Posting Leader
Posted 22 May 2025 - 09:25 AM
Thanks Dave, I had my doubts too, and I am still adding items to the list. e.g. a dedicated interior. exhaust tips and special wheels.
But I felt these items were well within reach of builders here on slotblog. So time to let go.
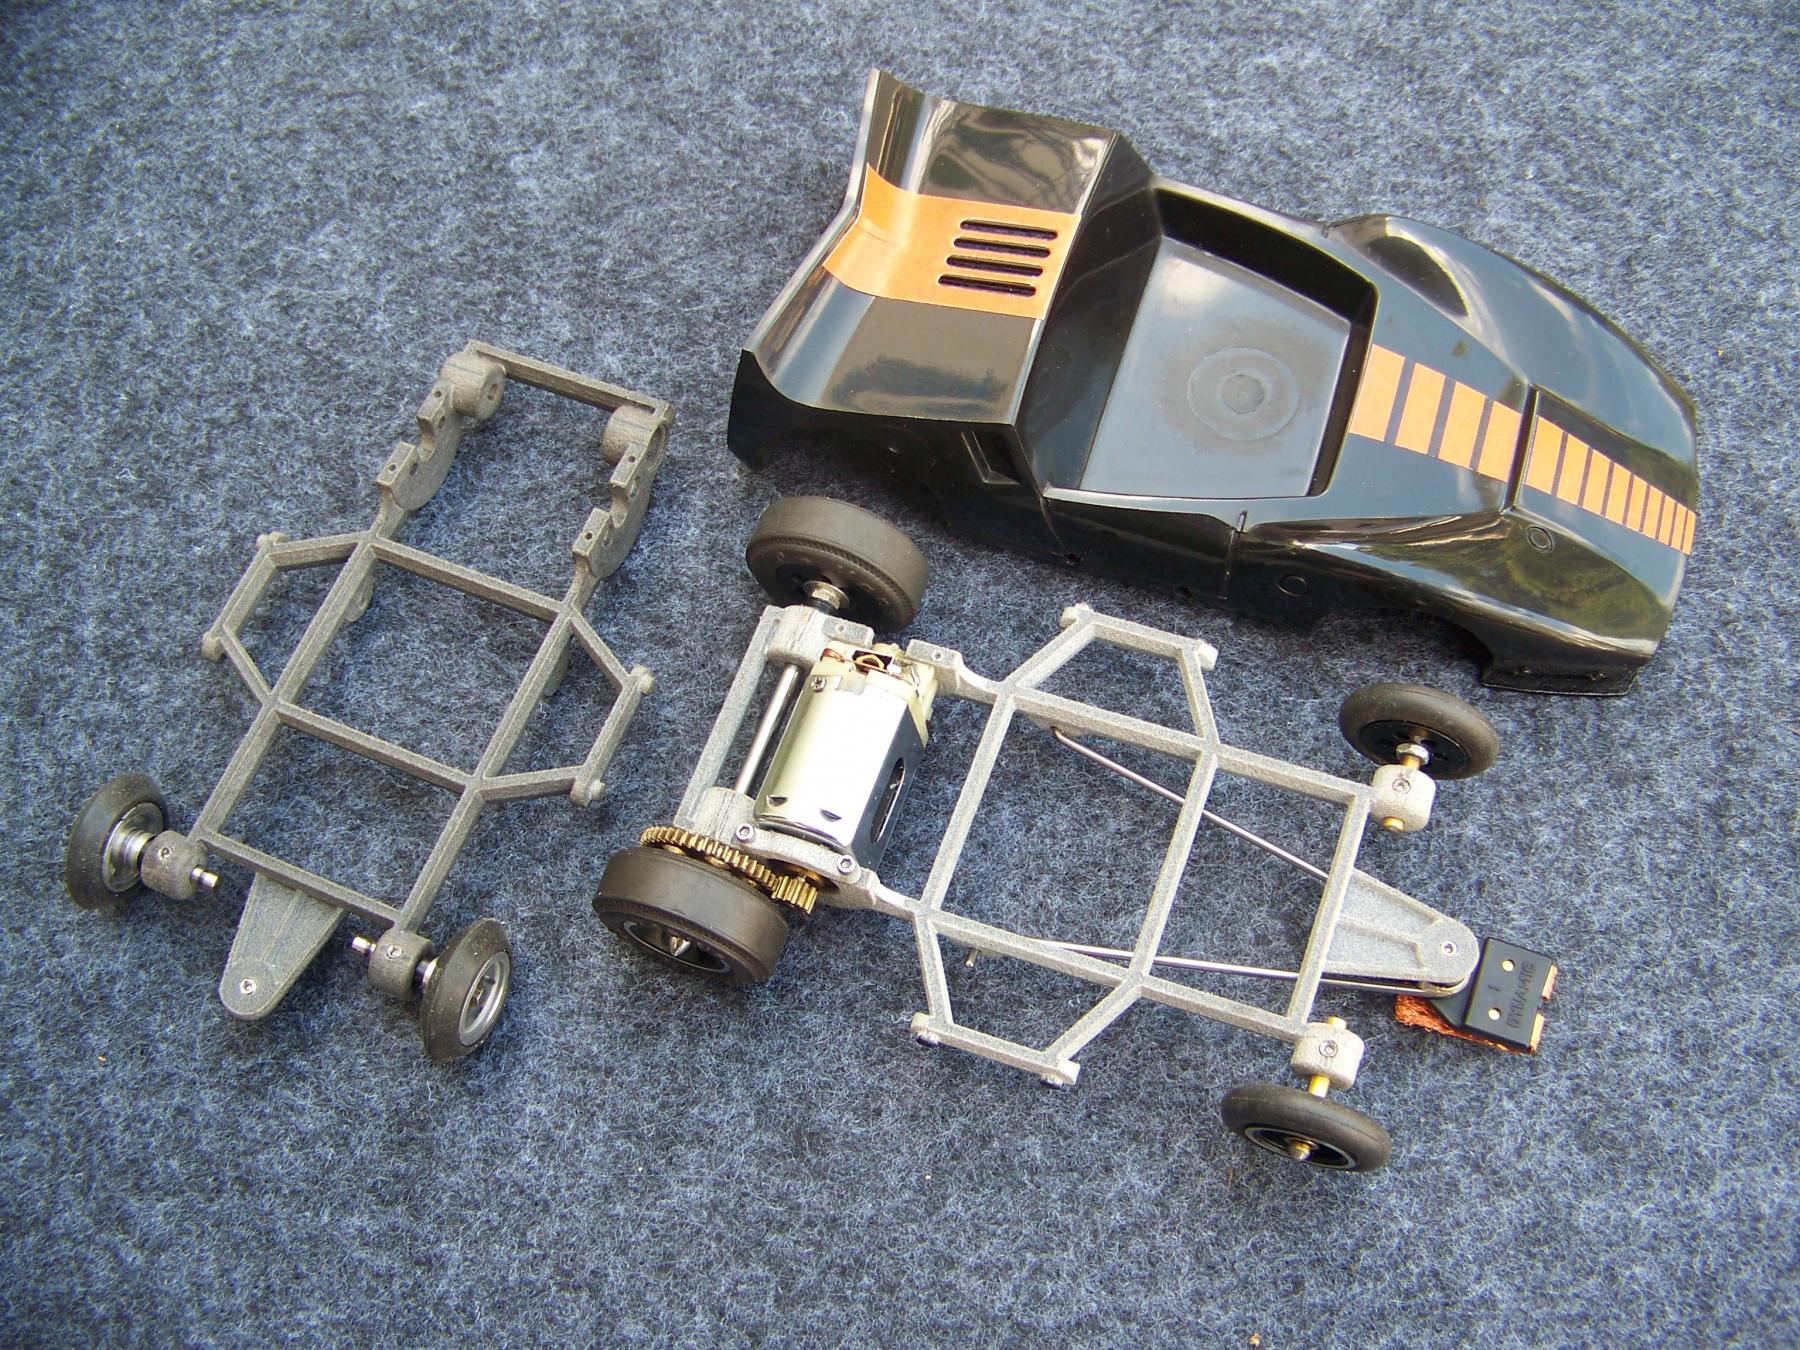
Here is a pic of both variations of chassis.
There are choices here, the main one being the 16D motor you will use. Small bearing is the Revell/Russkit type typically with blind bearing. This can be run right hand or left hand drive as the chassis and motor are symmetrical. Big bearing is the can drive 16D that I am sure you are familiar with. That has to run right hand drive only.
Notice too, a choice of the darker chassis material on the left. Small bearing chassis. I have also added a bit more red to the stripe, but have both orange and red orange in stock.
Posting Leader
Posted 22 May 2025 - 10:08 AM
Other questions that have come up are the rear axle bearings?
Here are the 3 ways It has been designed to except.
The chassis is reamed to except an 1/8" axle and rides on the nylon infuse material.
The chassis is also designed to fit standard bronze bushings or ball bearings available on request or available at and any raceway.
The front axle is also another multi choice question.
In keeping with the original MDC prototypes the stub axles are the way I chose.
With some small mod it could be made to have an standard thru axle, and I could do that for you on request.
Notice the set screws on top of the chassis front axle boses. This make for a convenient method of front wheel width adjustment.
I also like the set screw on the guide up stop. Whatever diameter front wheels you choose (within a reasonable range) you can adjust that height to track with ese.
Let me know if you any other questions, and as I think of details I will add them here for anyone wanting to build this car.
Grand Champion Poster
Posted 22 May 2025 - 10:13 AM
Martin,
Do the wheels turn on the stub axle, or does the stub axle itself (1/8 version) turn?
Don
Posting Leader
Posted 22 May 2025 - 10:31 AM
Thanks for the question Don.
The front axle is fixed via the set screw (this provides easy width adjustment) and can be nothing more than a short piece of 1/8" steel or Brass that free floating wheels spins on. Washer soldered on as a retainer.
If the brass tubing with the 1/16" I.D. is chosen you then have the additional choice of using 1/16" pinwheels.
The chassis to the right in last pic has 1/8" threaded Riggen wheels with those hard to find pin wheel adaptors. Not in stock BTW.
Reaming the threads out to 1/8" is a work around to have more wheel choices.
I have also used old free floating 1/8" Cox axles that I have cut short and have the 2/56 thread to use a acorn or knock off nuts.
On special request I have put a small notch in the chassis upstop and run the full width axle. So that is a choice too.
I have all these choices in hand if you need me to provide these parts and or service ?
Grand Champion Poster
Posted 22 May 2025 - 10:35 AM
I have all those too Martin, just wanted to make sure I understood the system!
Posting Leader
Posted 22 May 2025 - 09:45 PM
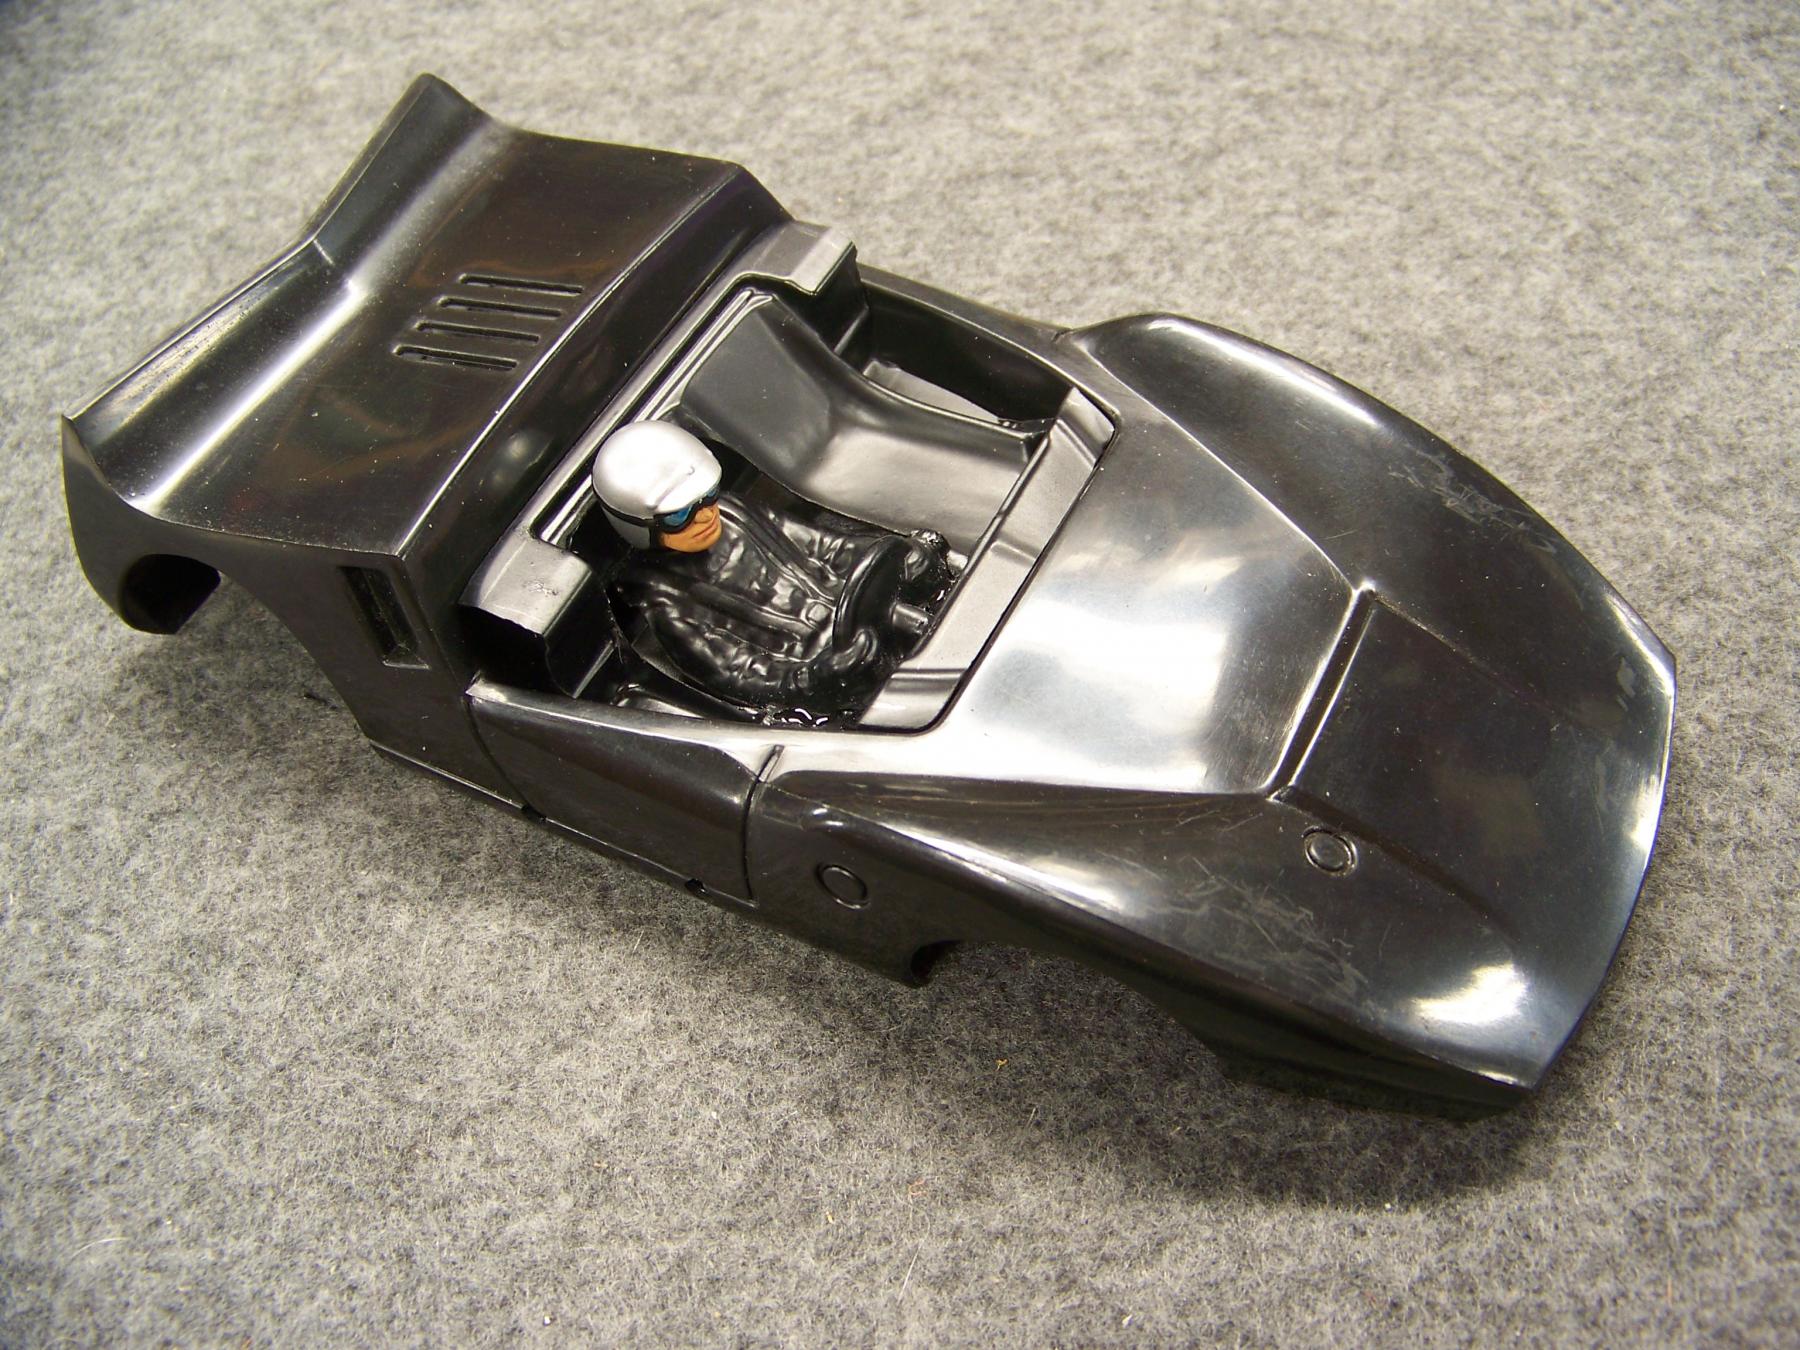
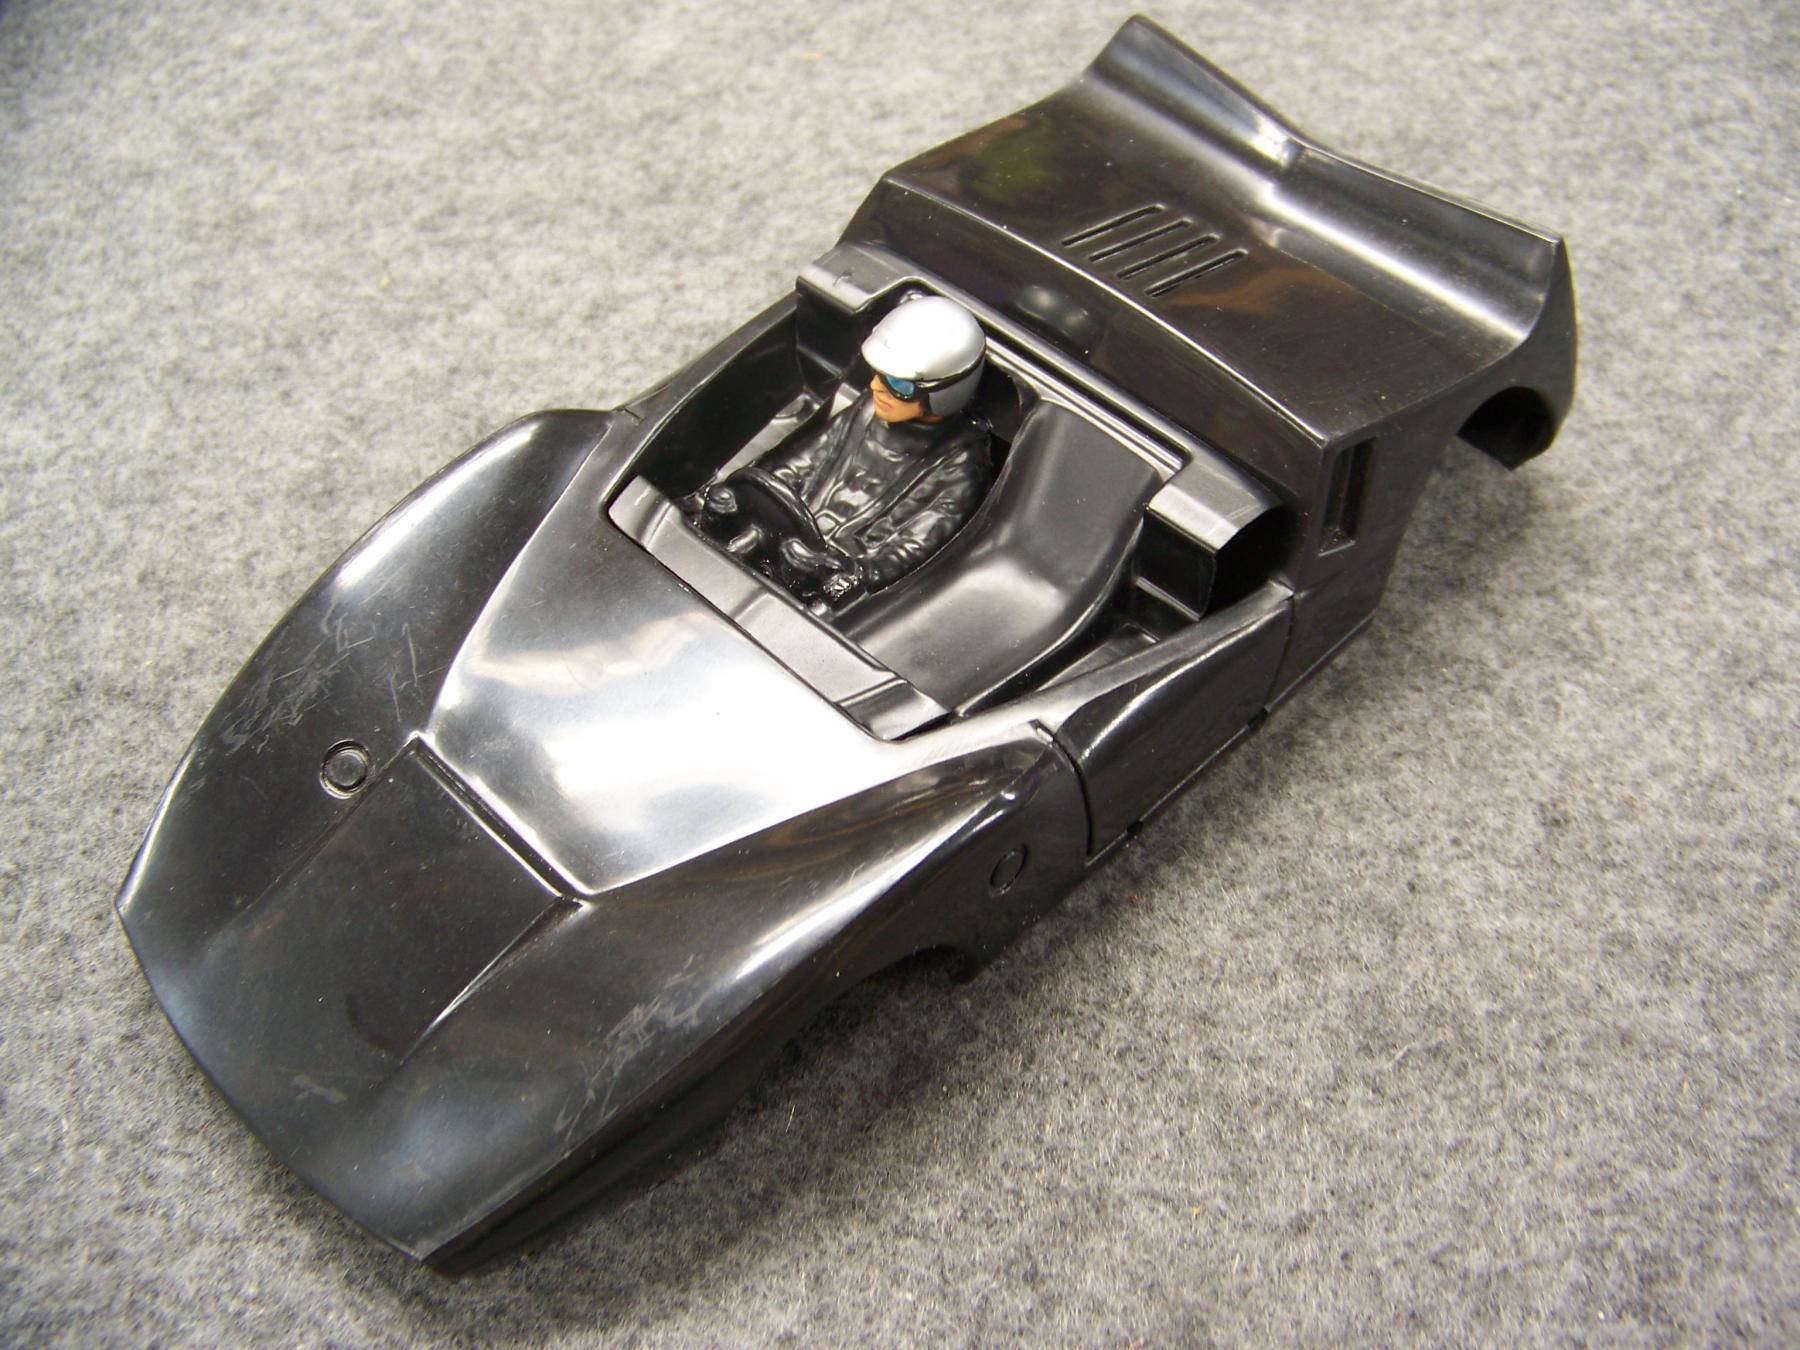
Trying to find the best looking interior.
I wanted a right side driver as that's the way it was in the artwork created by MDC and I wanted a removable head.
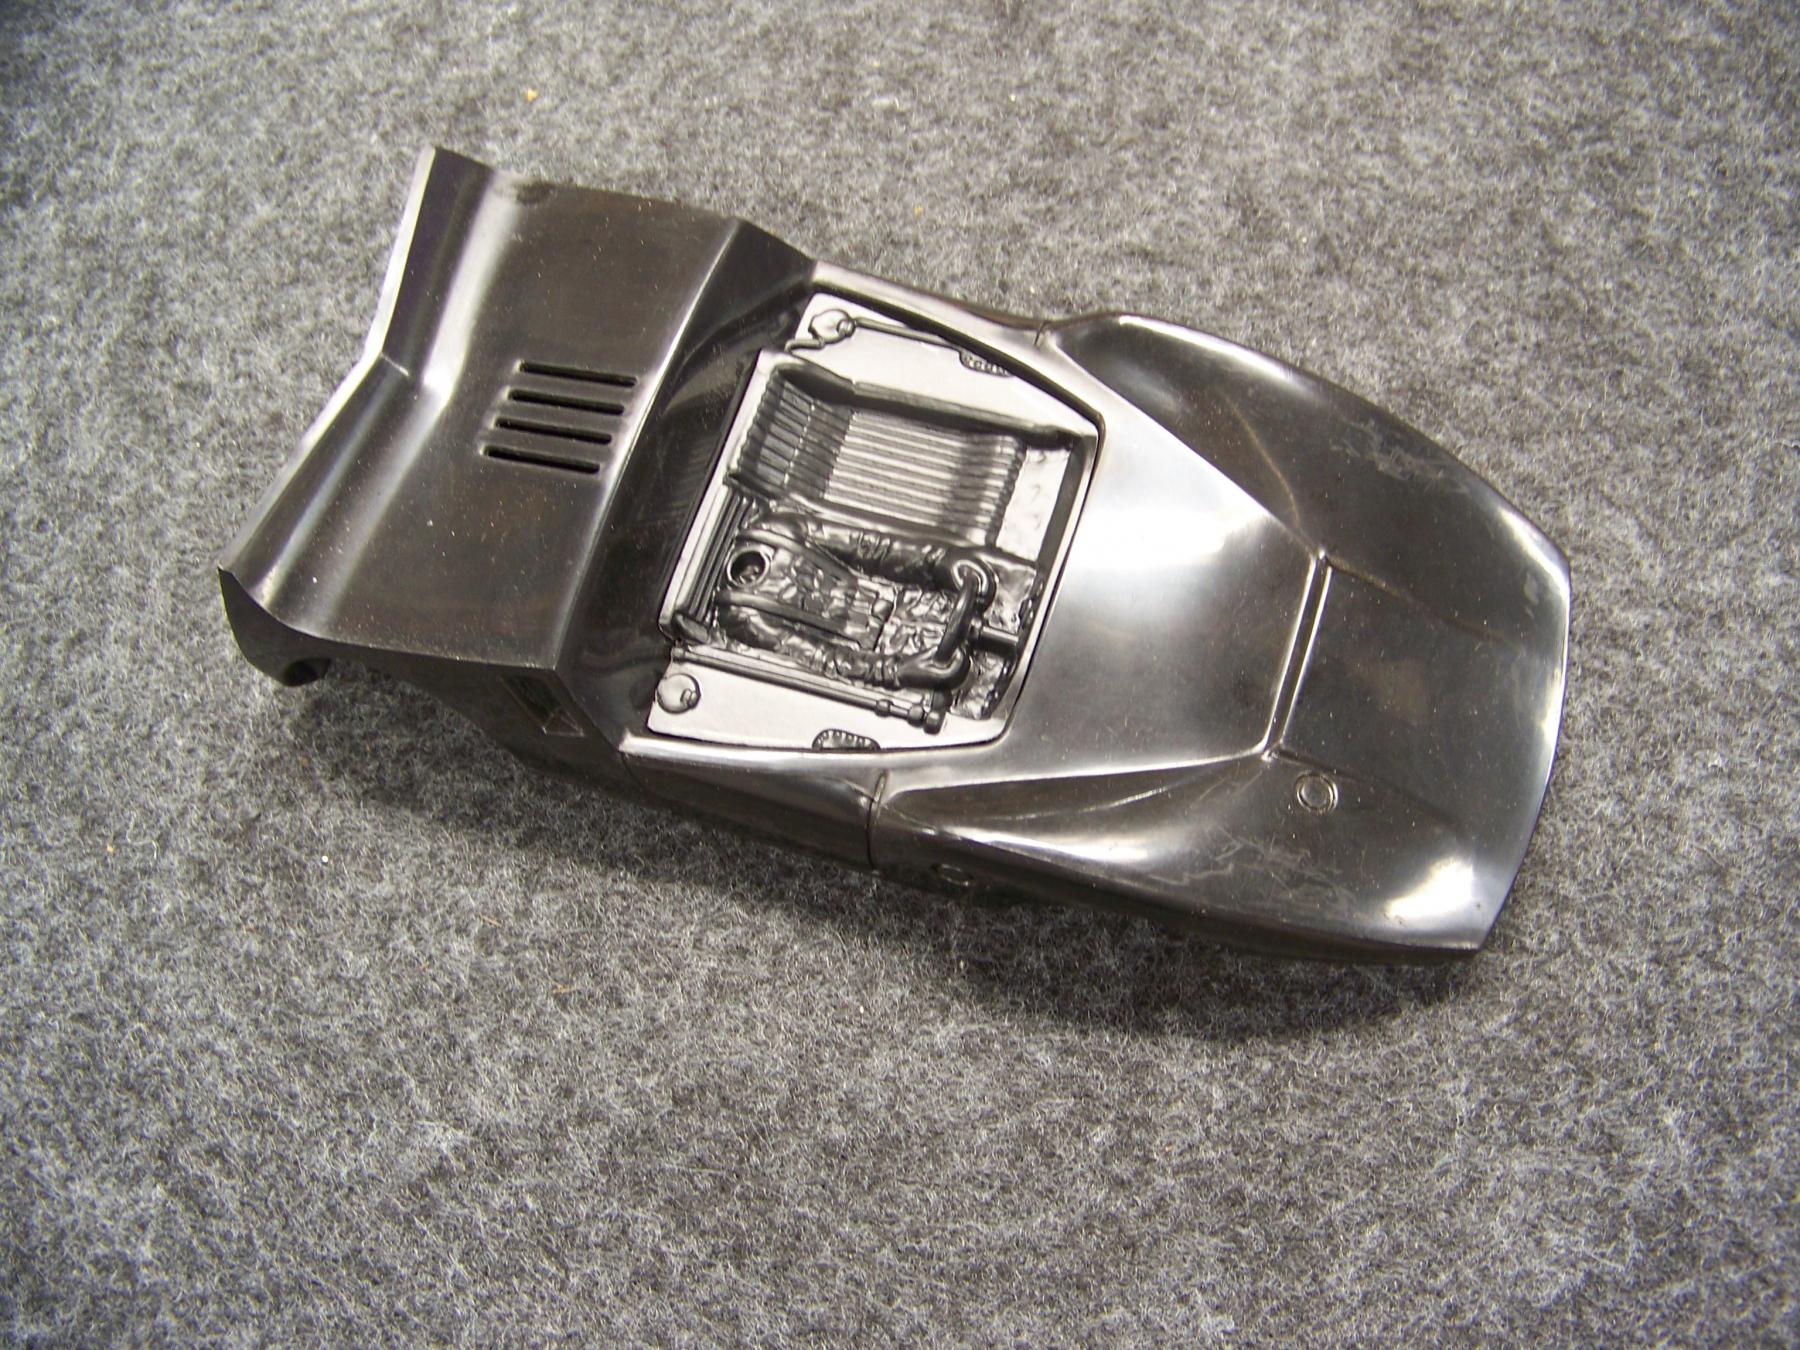
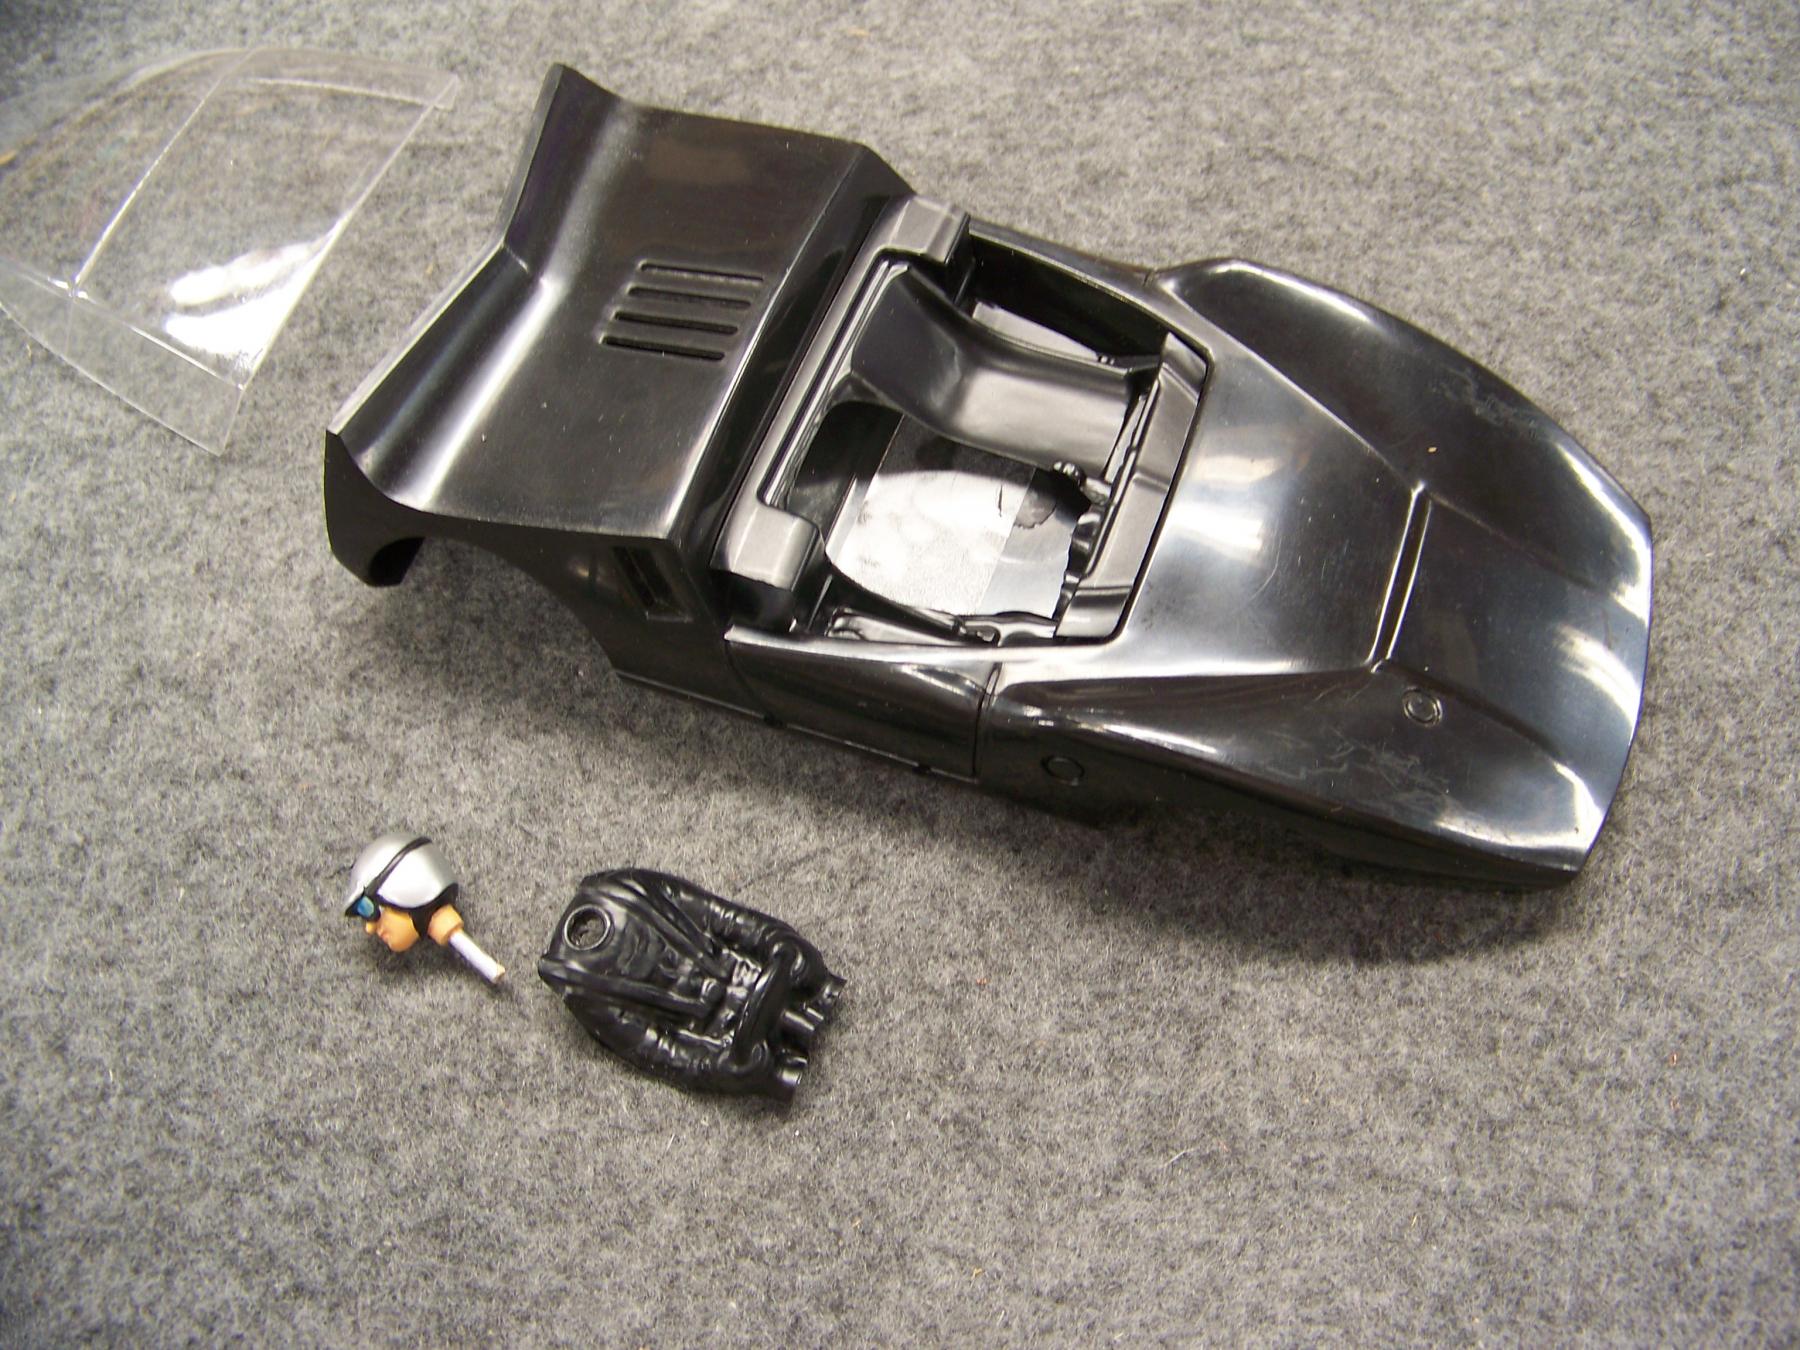
Looking through my stash of interiors I narrowed it down to these two.
The first was a little flat but still not bad if a bit generic.
The second was, I think intended for a Lancer Chaparral 2E or 2G I believe?
After trimming and placing drivers head I found his helmet hit the clear top. So I cut the driver from its seat and lowered him so his helmet now has clearance.
Once the glue has set I will go back and fill the gaps I created.
Please let me know which one you like better. I want to make a custom fit interior for these Bat bodies so they look their best.
Grand Champion Poster
Posted 23 May 2025 - 04:06 AM
Ah, tough question.
While the second is more realistic, I think the first is more faithful to the spirit of the car - after all, it's not a realistic car!
But they both look very good.
Don
Posting Leader
Posted 23 May 2025 - 09:15 AM
Good input Don,thanks.
I like the first one as it does fit nice front to back and it has nice crisp detail.
What I like about the second one is you can see the depth of the Original tray sides. That is the same MDC molded tray that sent the project into obscurity.
Just my opinion. So got to show it off I think 
So if I cut the interior wings ( did not like the gas tank detail there anyway) on the first interior and add a lower floor I think I have the best of both TBC .
Posting Leader
Posted 08 June 2025 - 06:29 PM
There were black bodies and red bodies sold. The MDC Bat body in black has art work that lays out orange stripes. But what would the color of the stripe be on a red body?
Blue on red, yellow on red maybe, these are the first colors that seemed to work in my mind.
I changed the original artwork to see what you all think works best?
Any other suggestions are welcome.
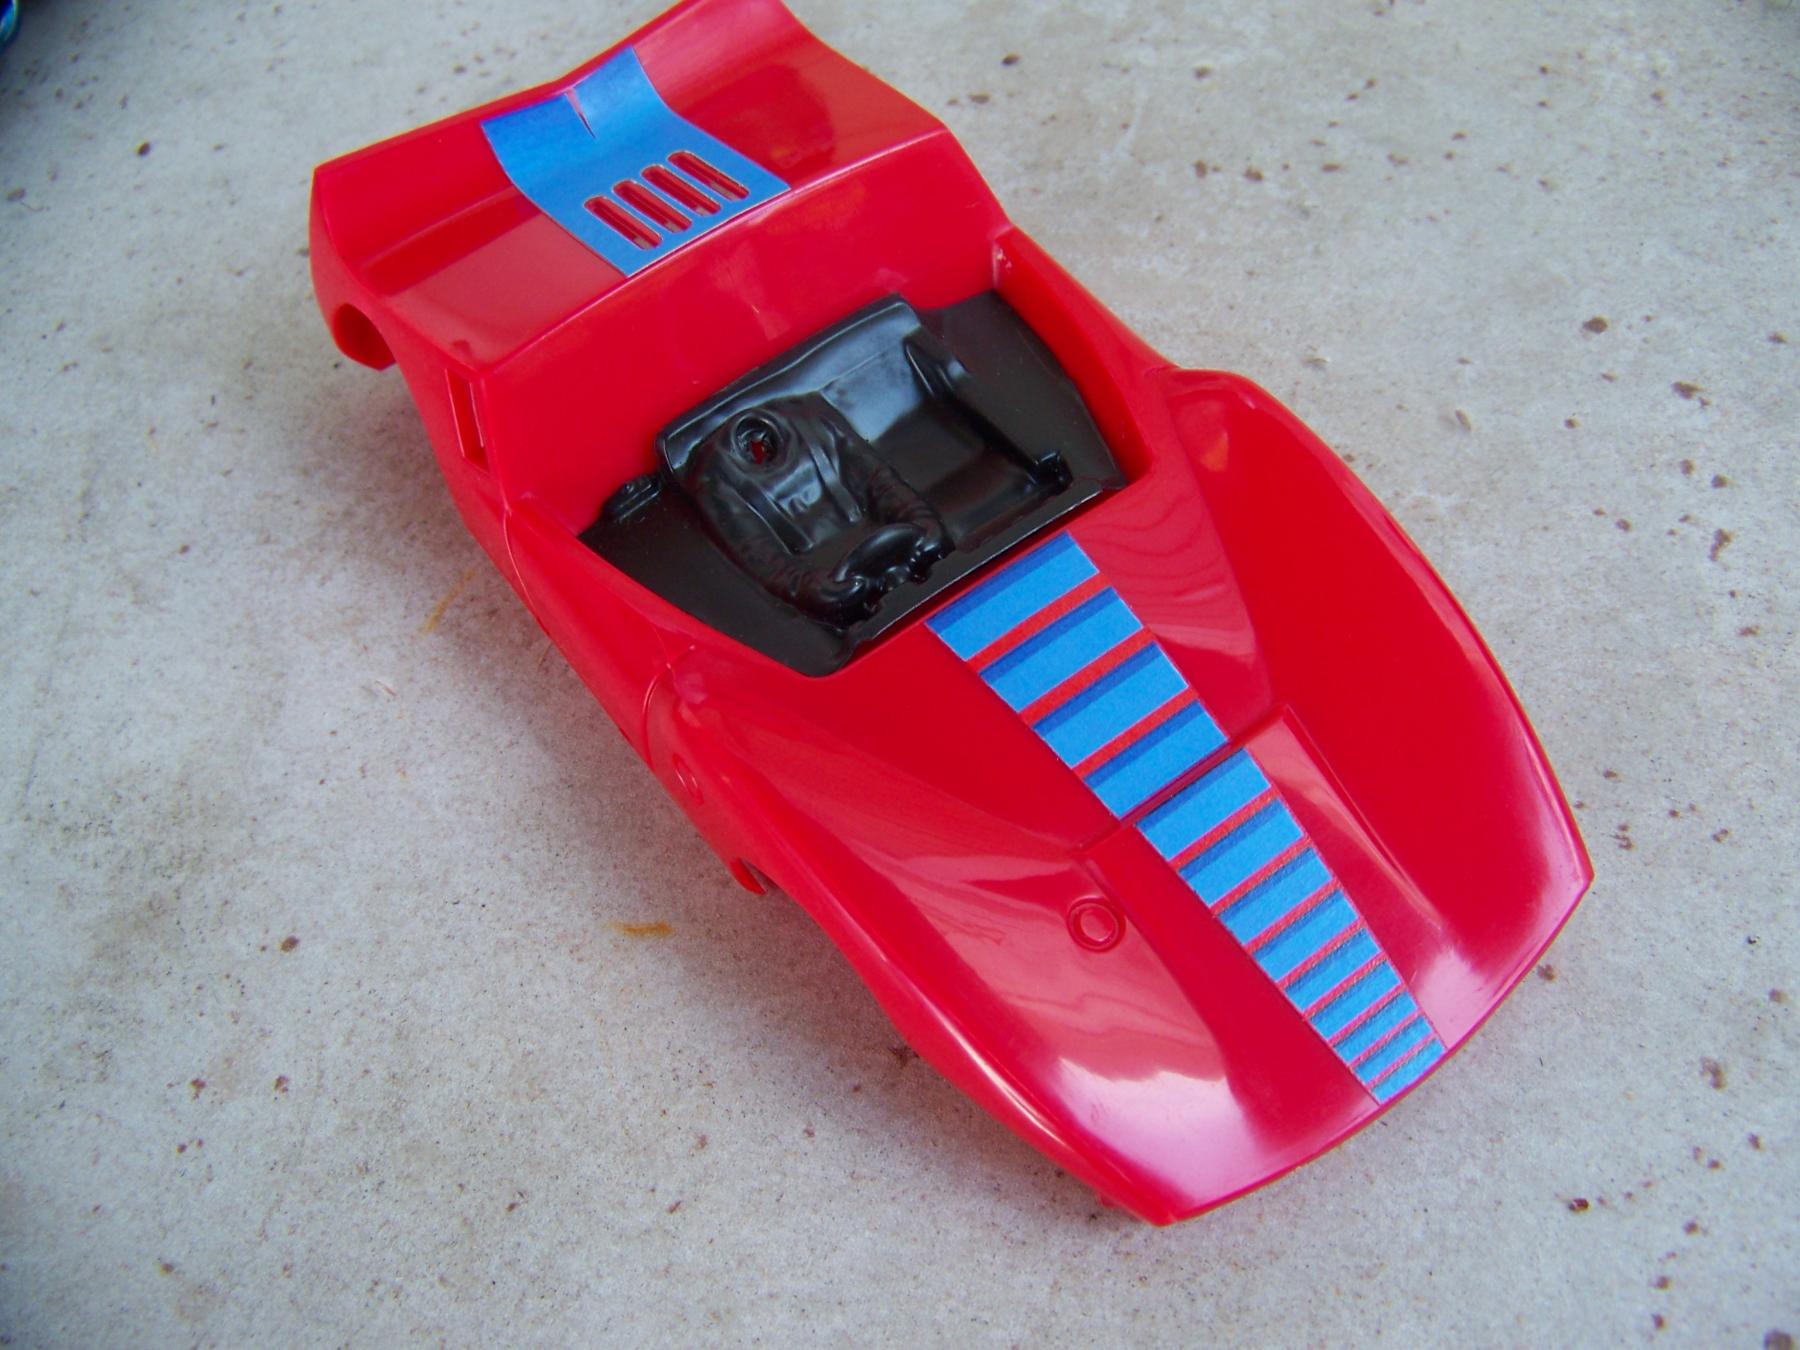
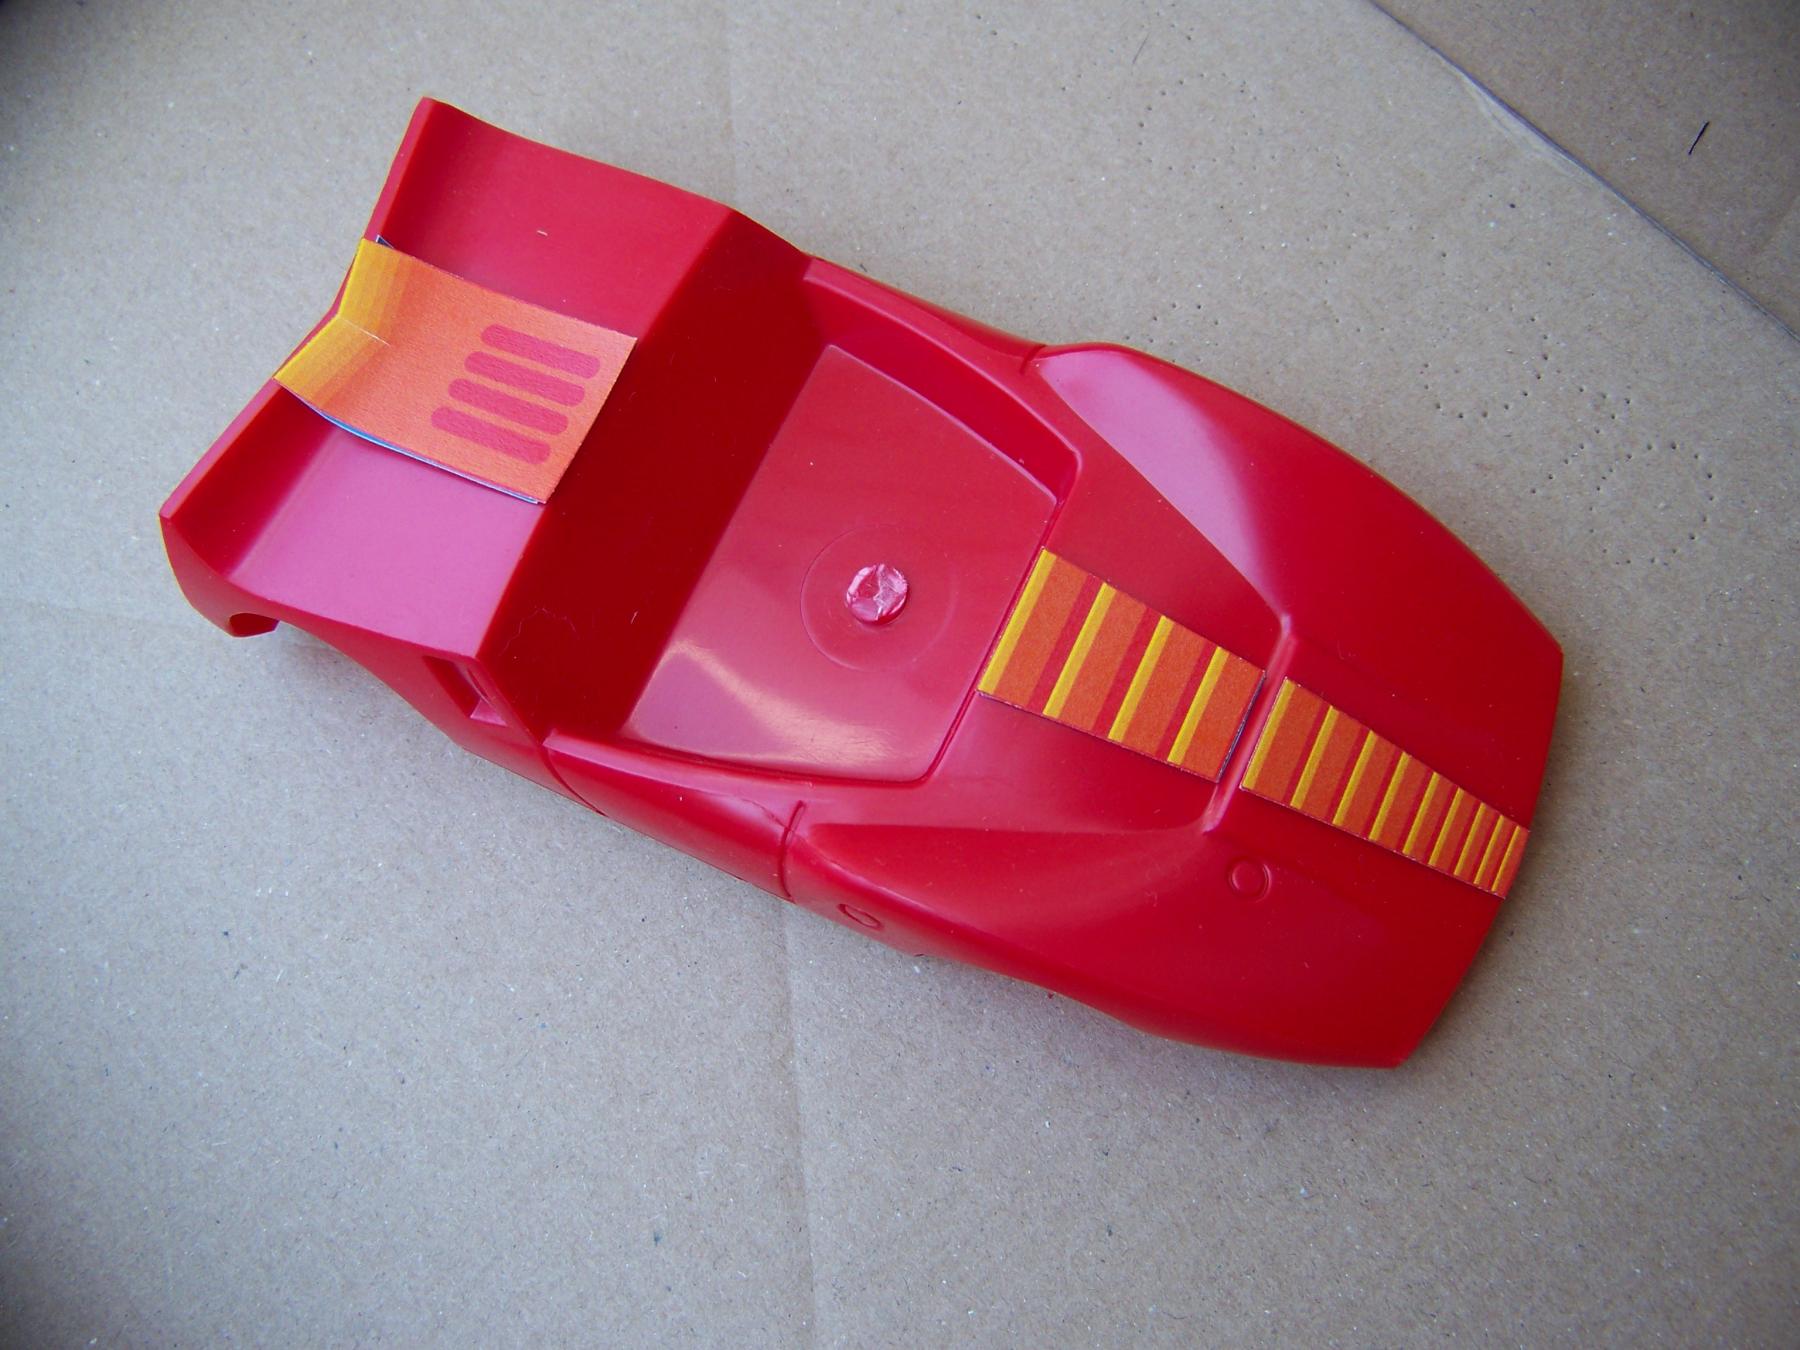
This yellow and orange stripe is just layed on top to get the idea, hope you get that?
Age scrubs away speed!

Posted 08 June 2025 - 06:59 PM
I like the blue on red.

Posting Leader
Posted 09 June 2025 - 02:01 PM
Thanks Guys for the comments and the likes.
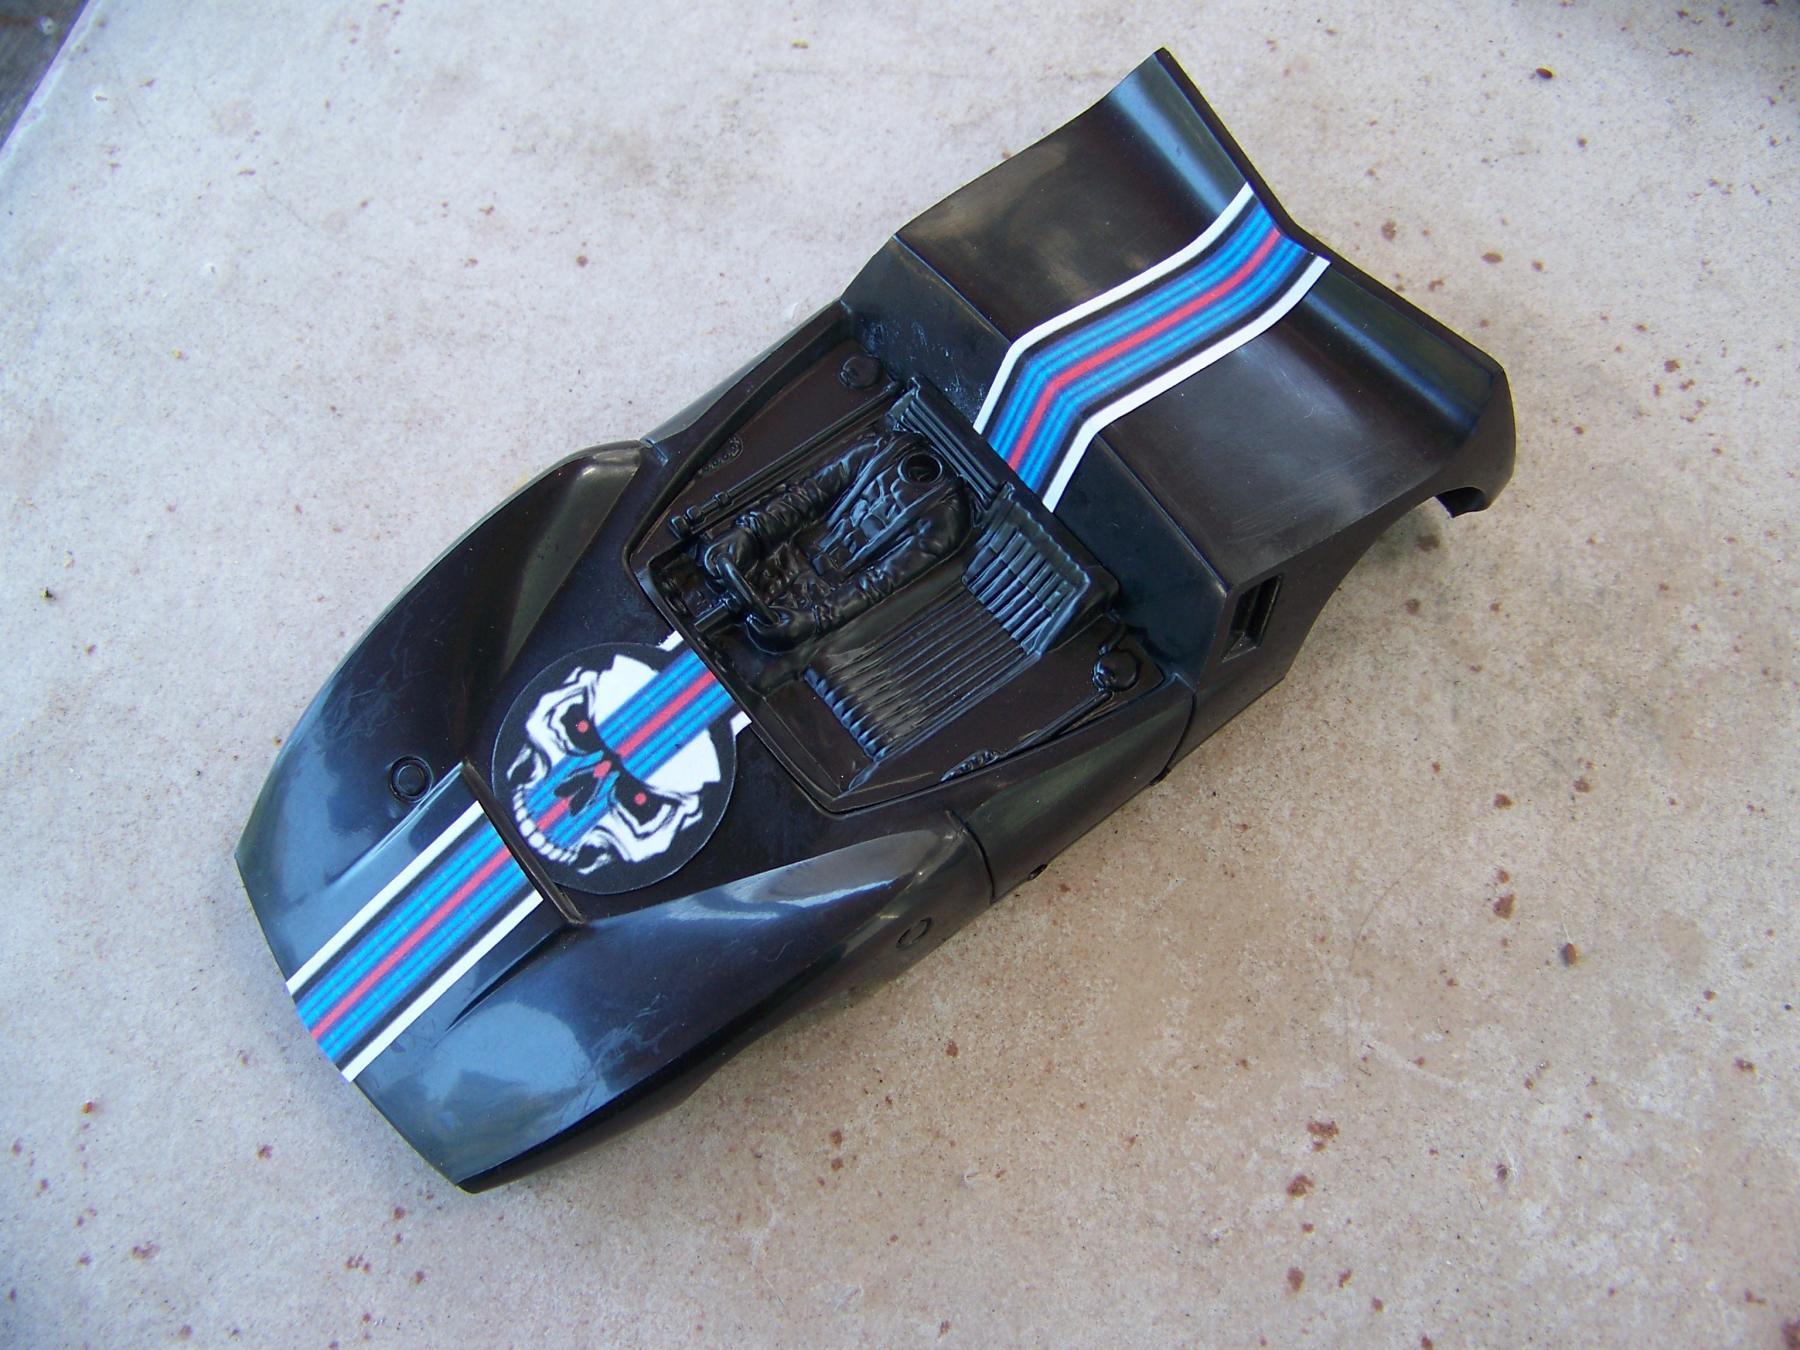
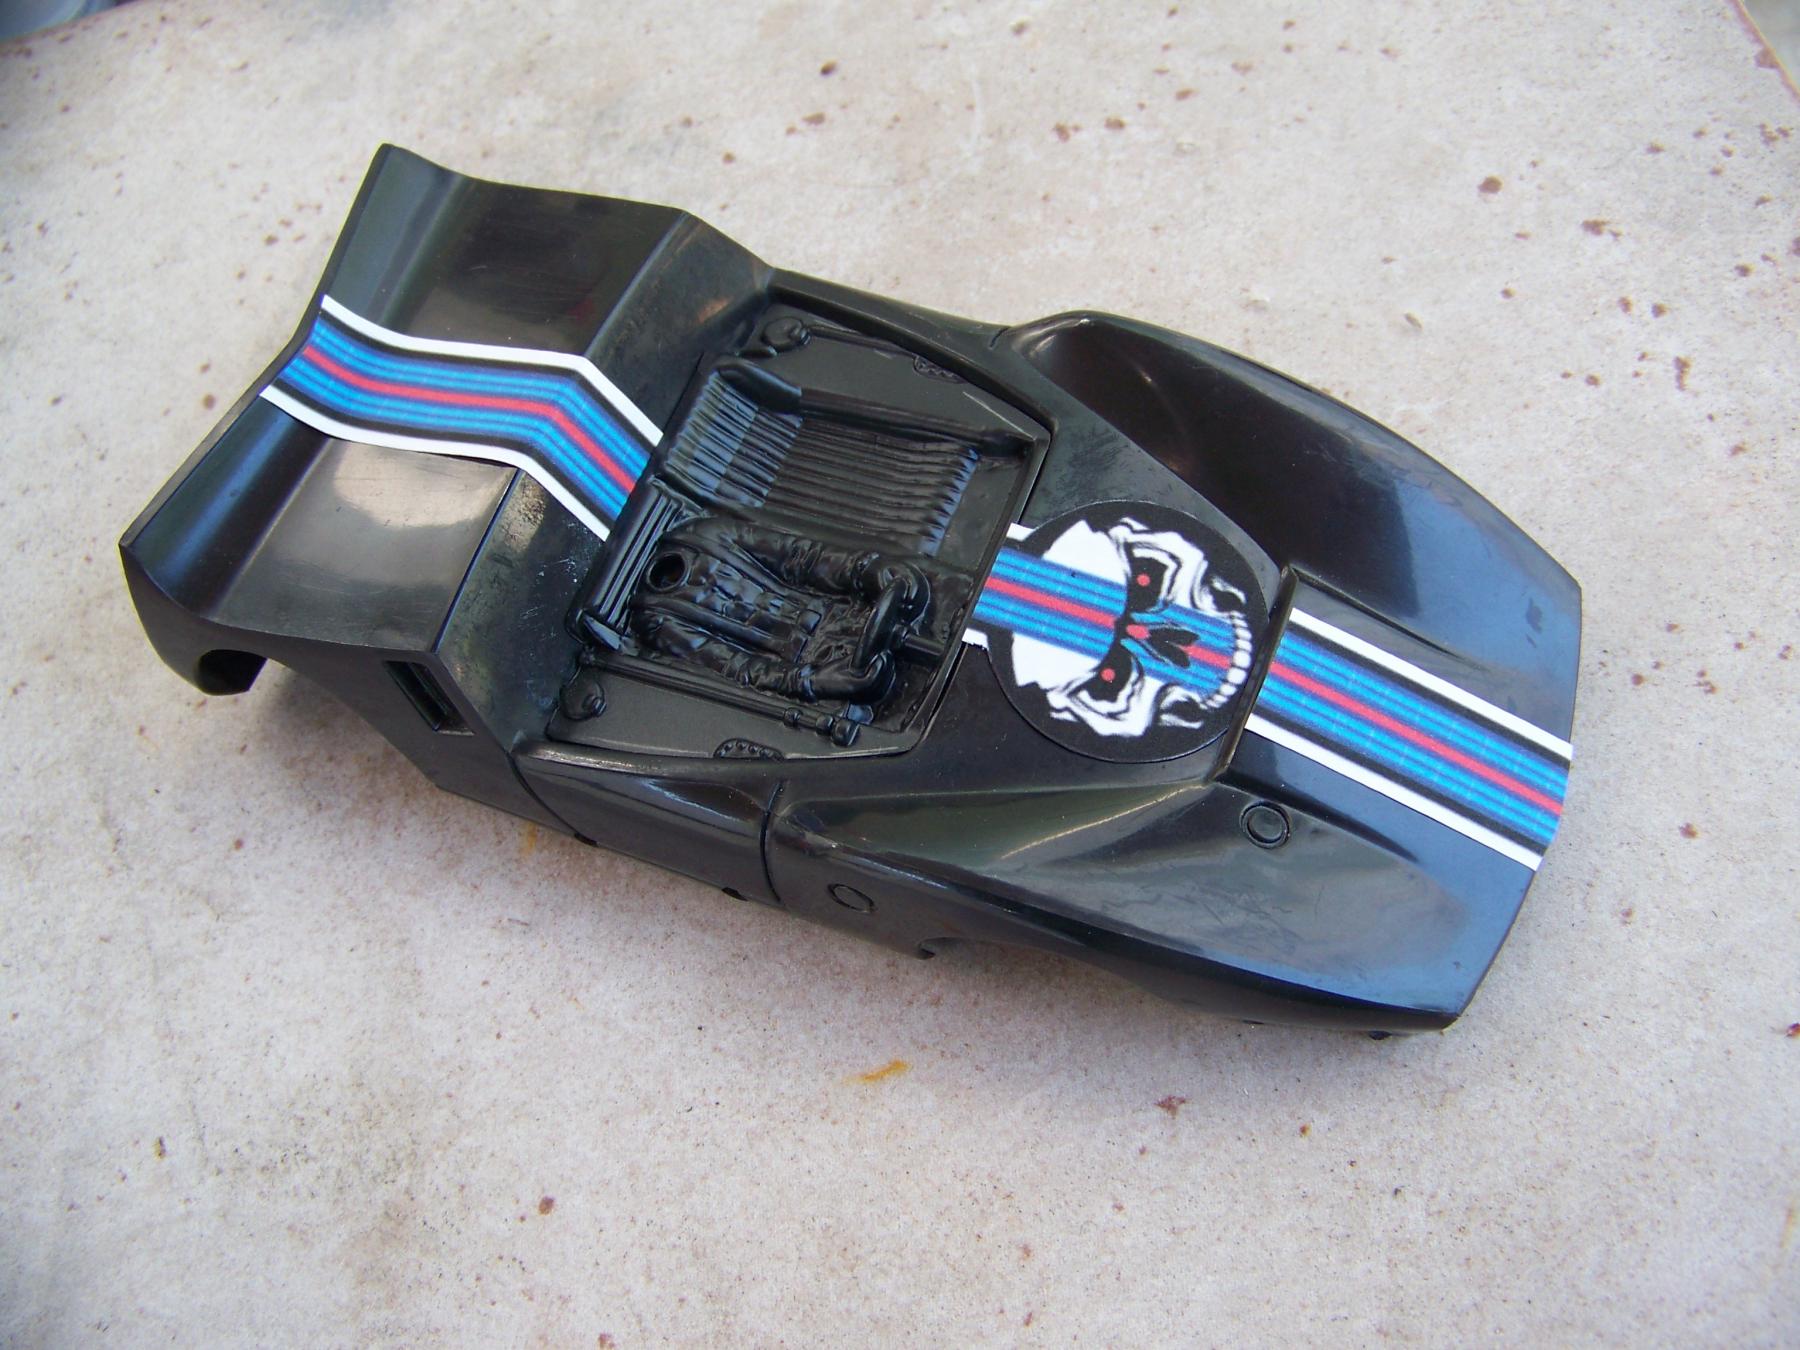
..and now for something completely different. Martini colors? and as a reminder the MDC chassis was called the "skeleton"
Grand Champion Poster
Posted 09 June 2025 - 02:12 PM
Not sure about that one Martin... maybe because I was never a martini fan.
I do like the red/orange scheme however.
Don
Posting Leader
Posted 09 June 2025 - 02:51 PM
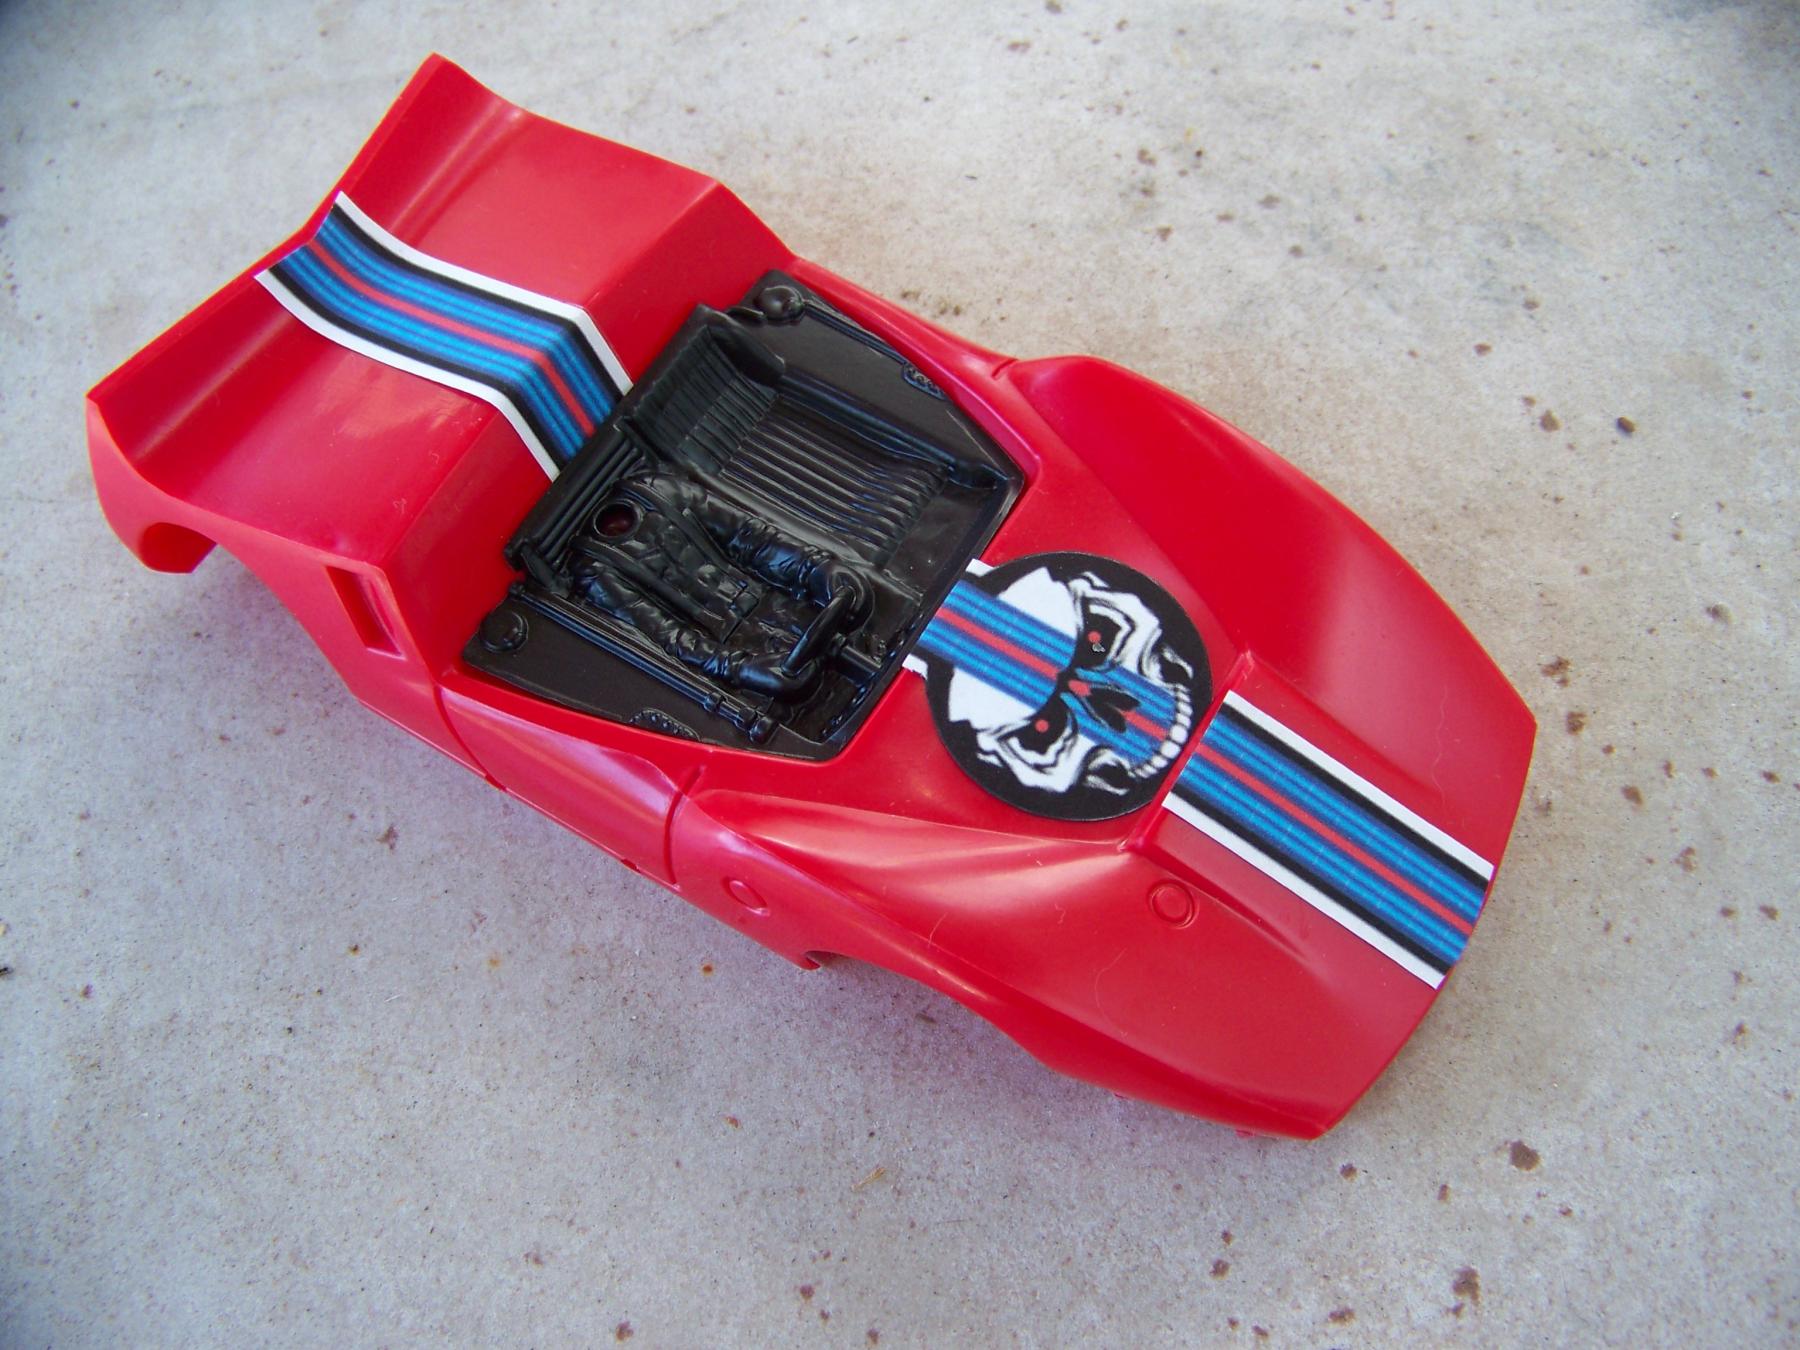
Thanks for that Don,I thought everyone liked the Martini colors (or are you talking about the drink?) maybe it has to be on a Porsche ?
Anyway I thought I would see how it looks on the red body? It sort of works on the black and red IMO. Let me know in the comments section, oops wrong format.
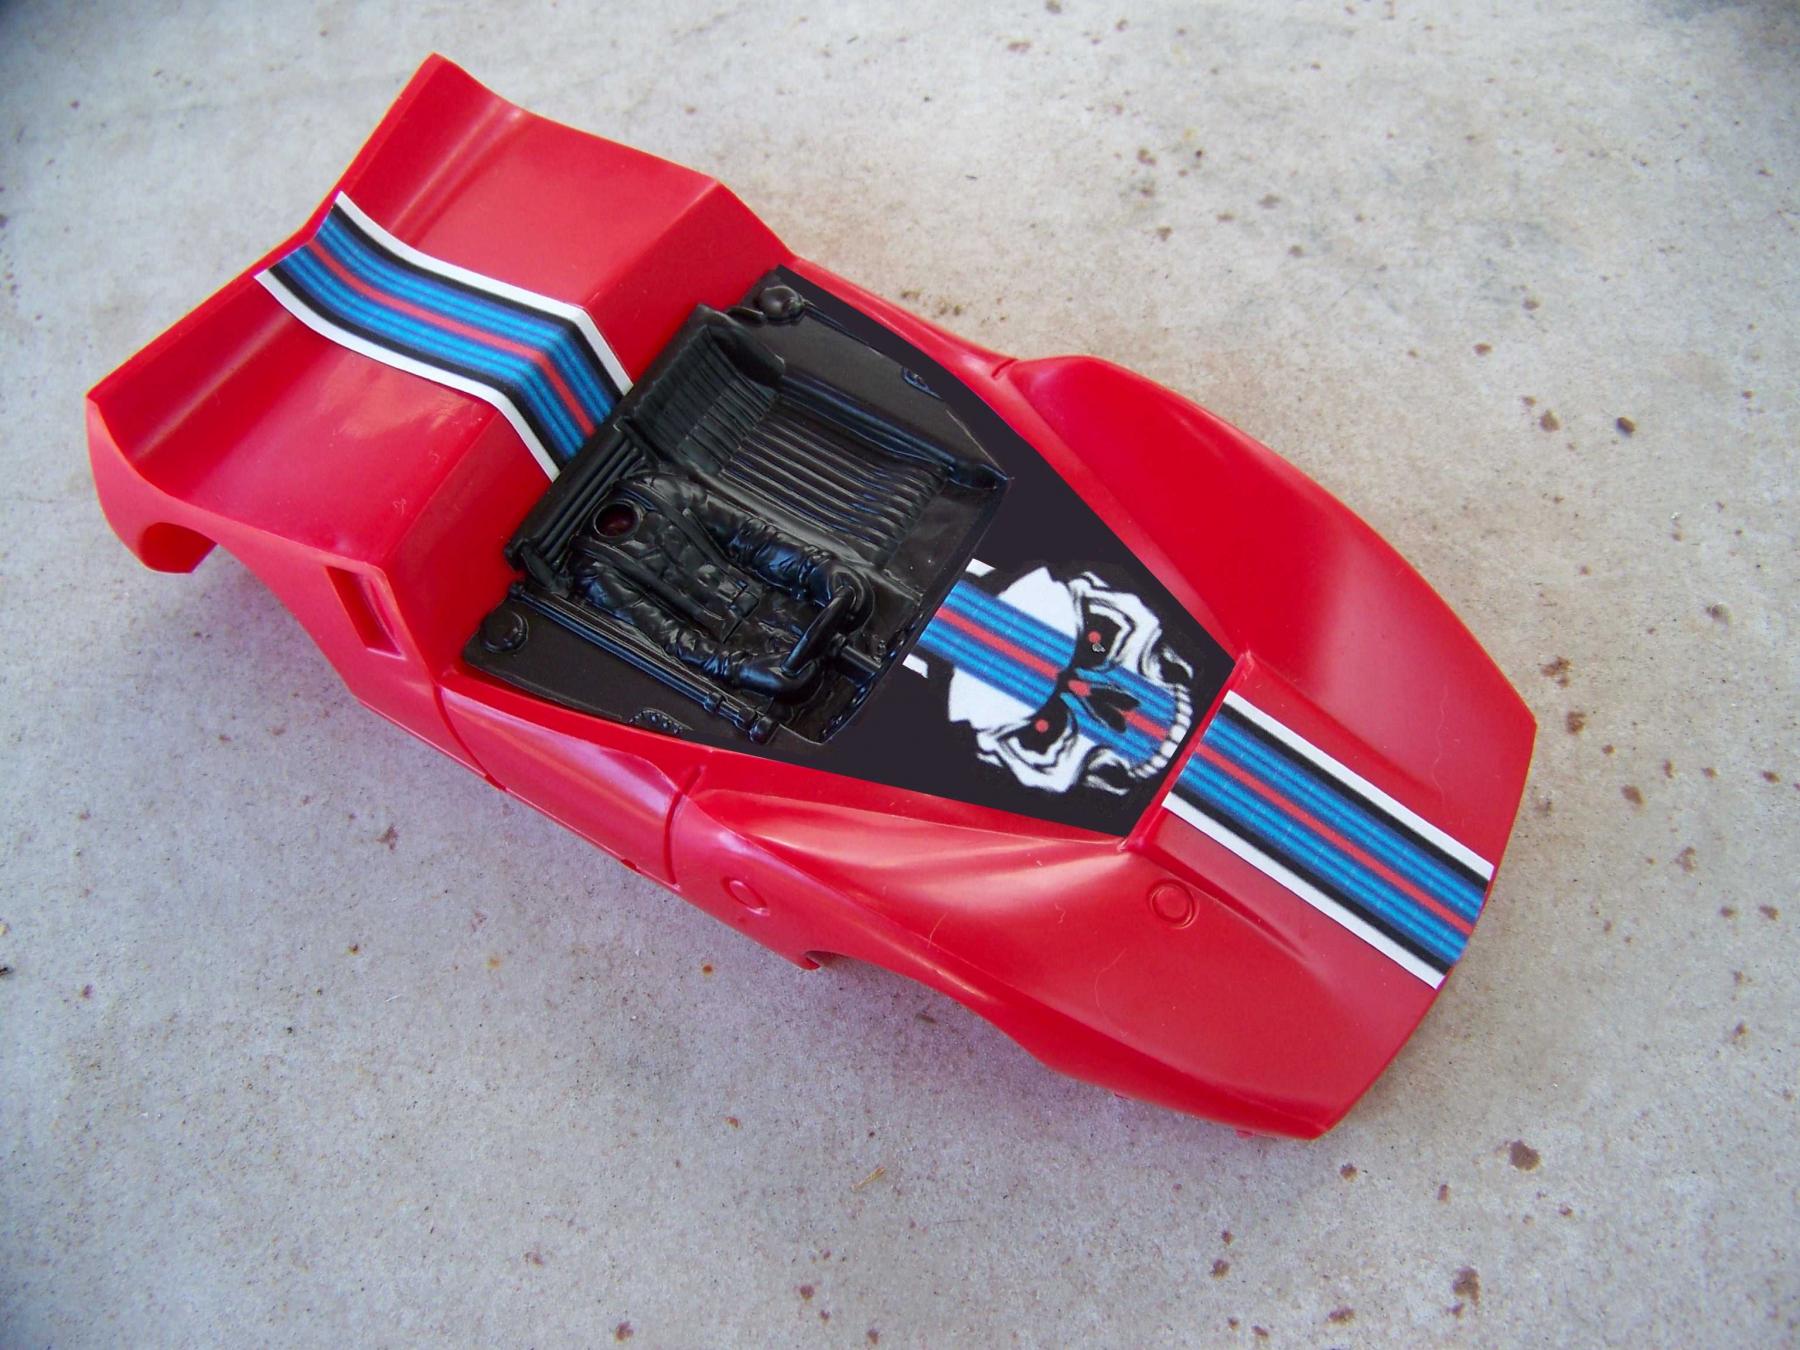
As the Skull will be under the windshield I blacked it out, like this, and that could be part of the sticker, no painting required.
Posting Leader
Posted 09 June 2025 - 08:27 PM
My goal here was to always have a canopy the can be removed easily, to this end I wanted to try this method.
First step is to carefully cut a full width slot in the nose exit vent just ahead of the front of the windshield.
MDC should have done this, unless they had another method of attaching the windshield.
Once the slot is cut, filed and polished I rough trimmed the windshield but fitting the tang so it fit snug in the slot.
Leaving excess on the bottom and rear edges until you can see where it touches the body first. Trim and check multiple times.
I did leave a small amount on the trailing edge as this seemed to be the best fit.
Last piece of the windshield mounting is how to hold the rear part, I am using clear tape for now, but have a plan in mind, stay tuned.
If you are about to fit your windshield take a look at the pics below and please ask questions any time.
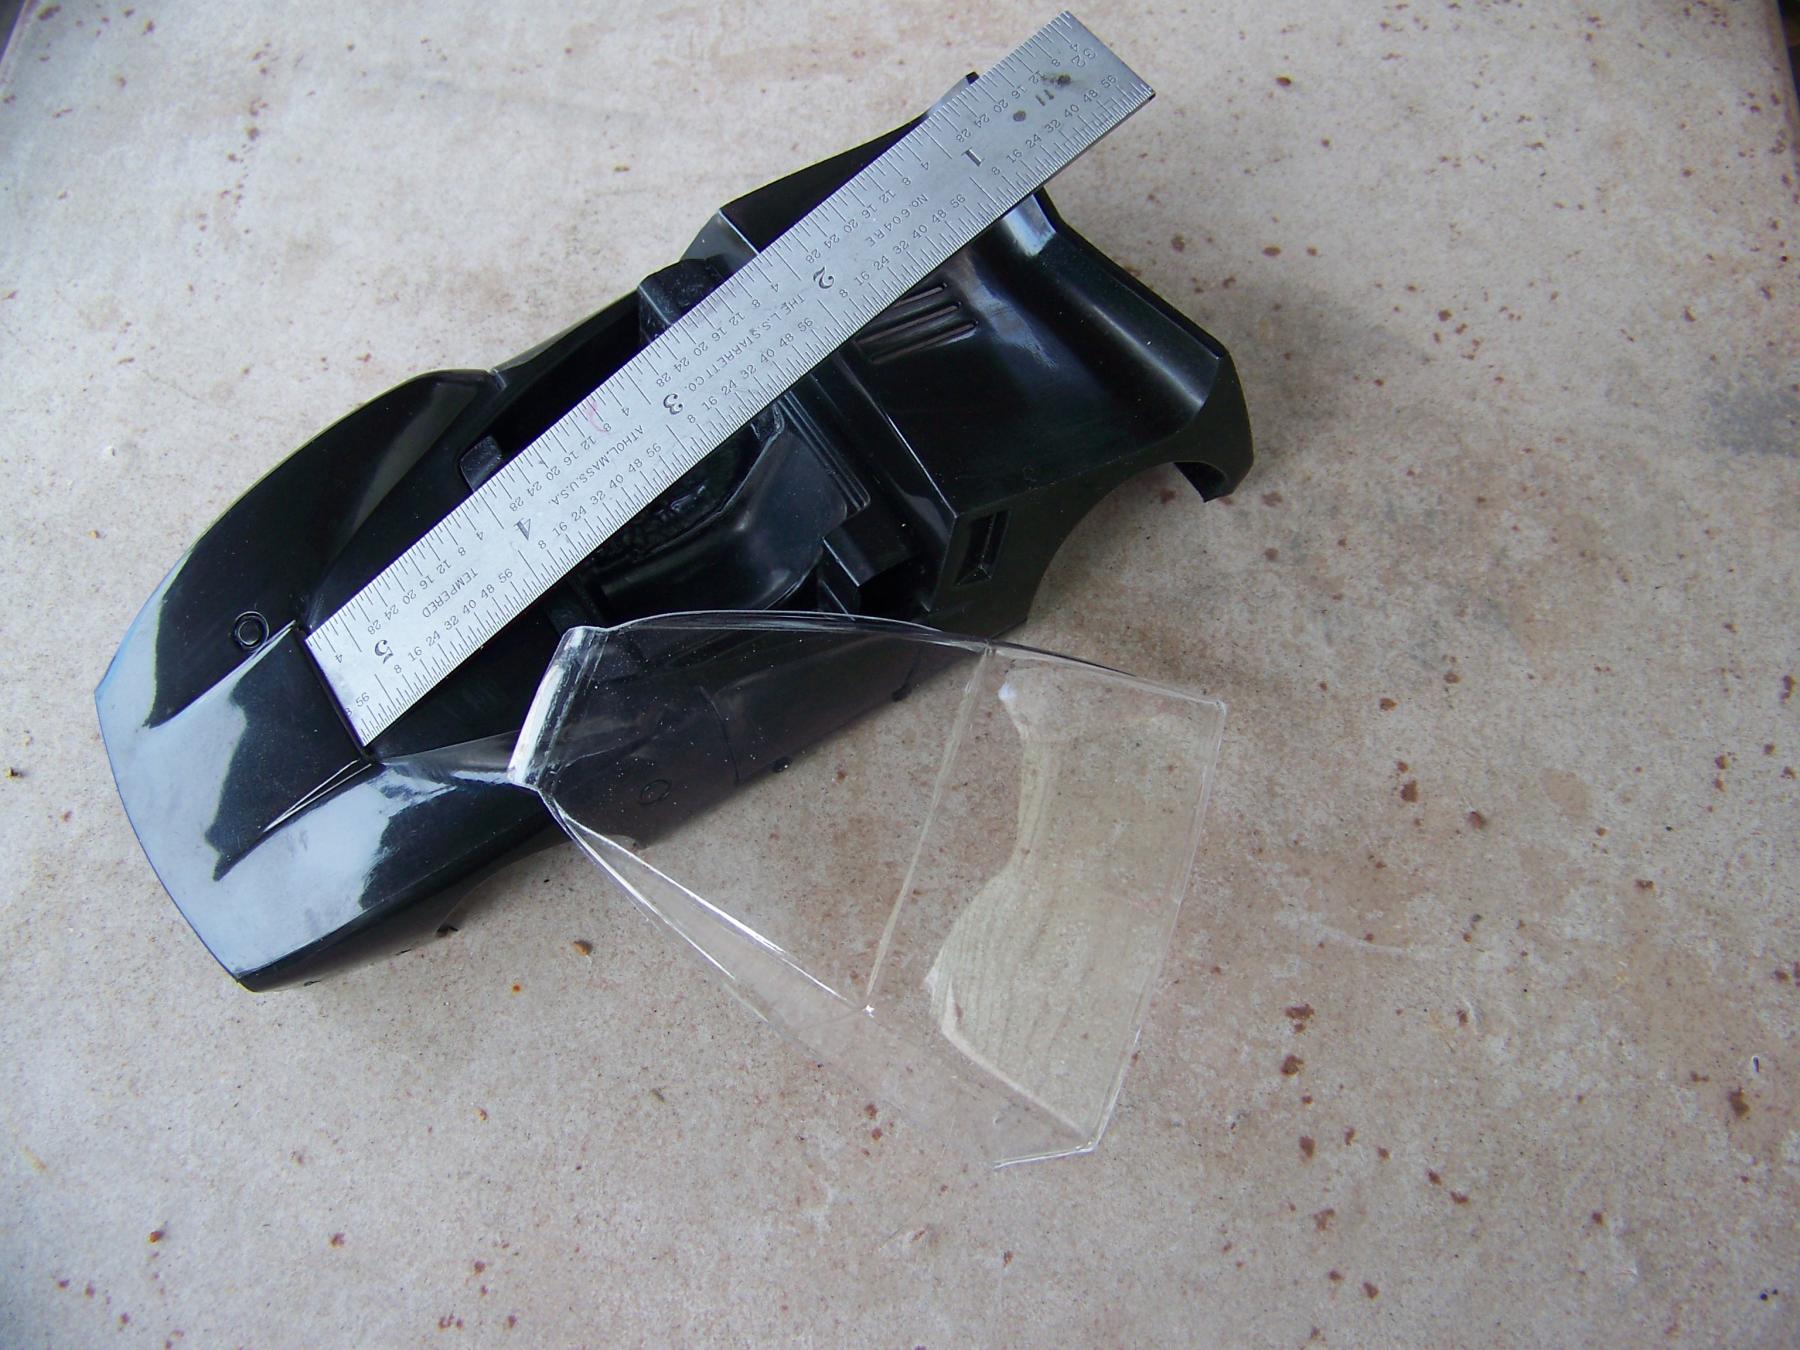
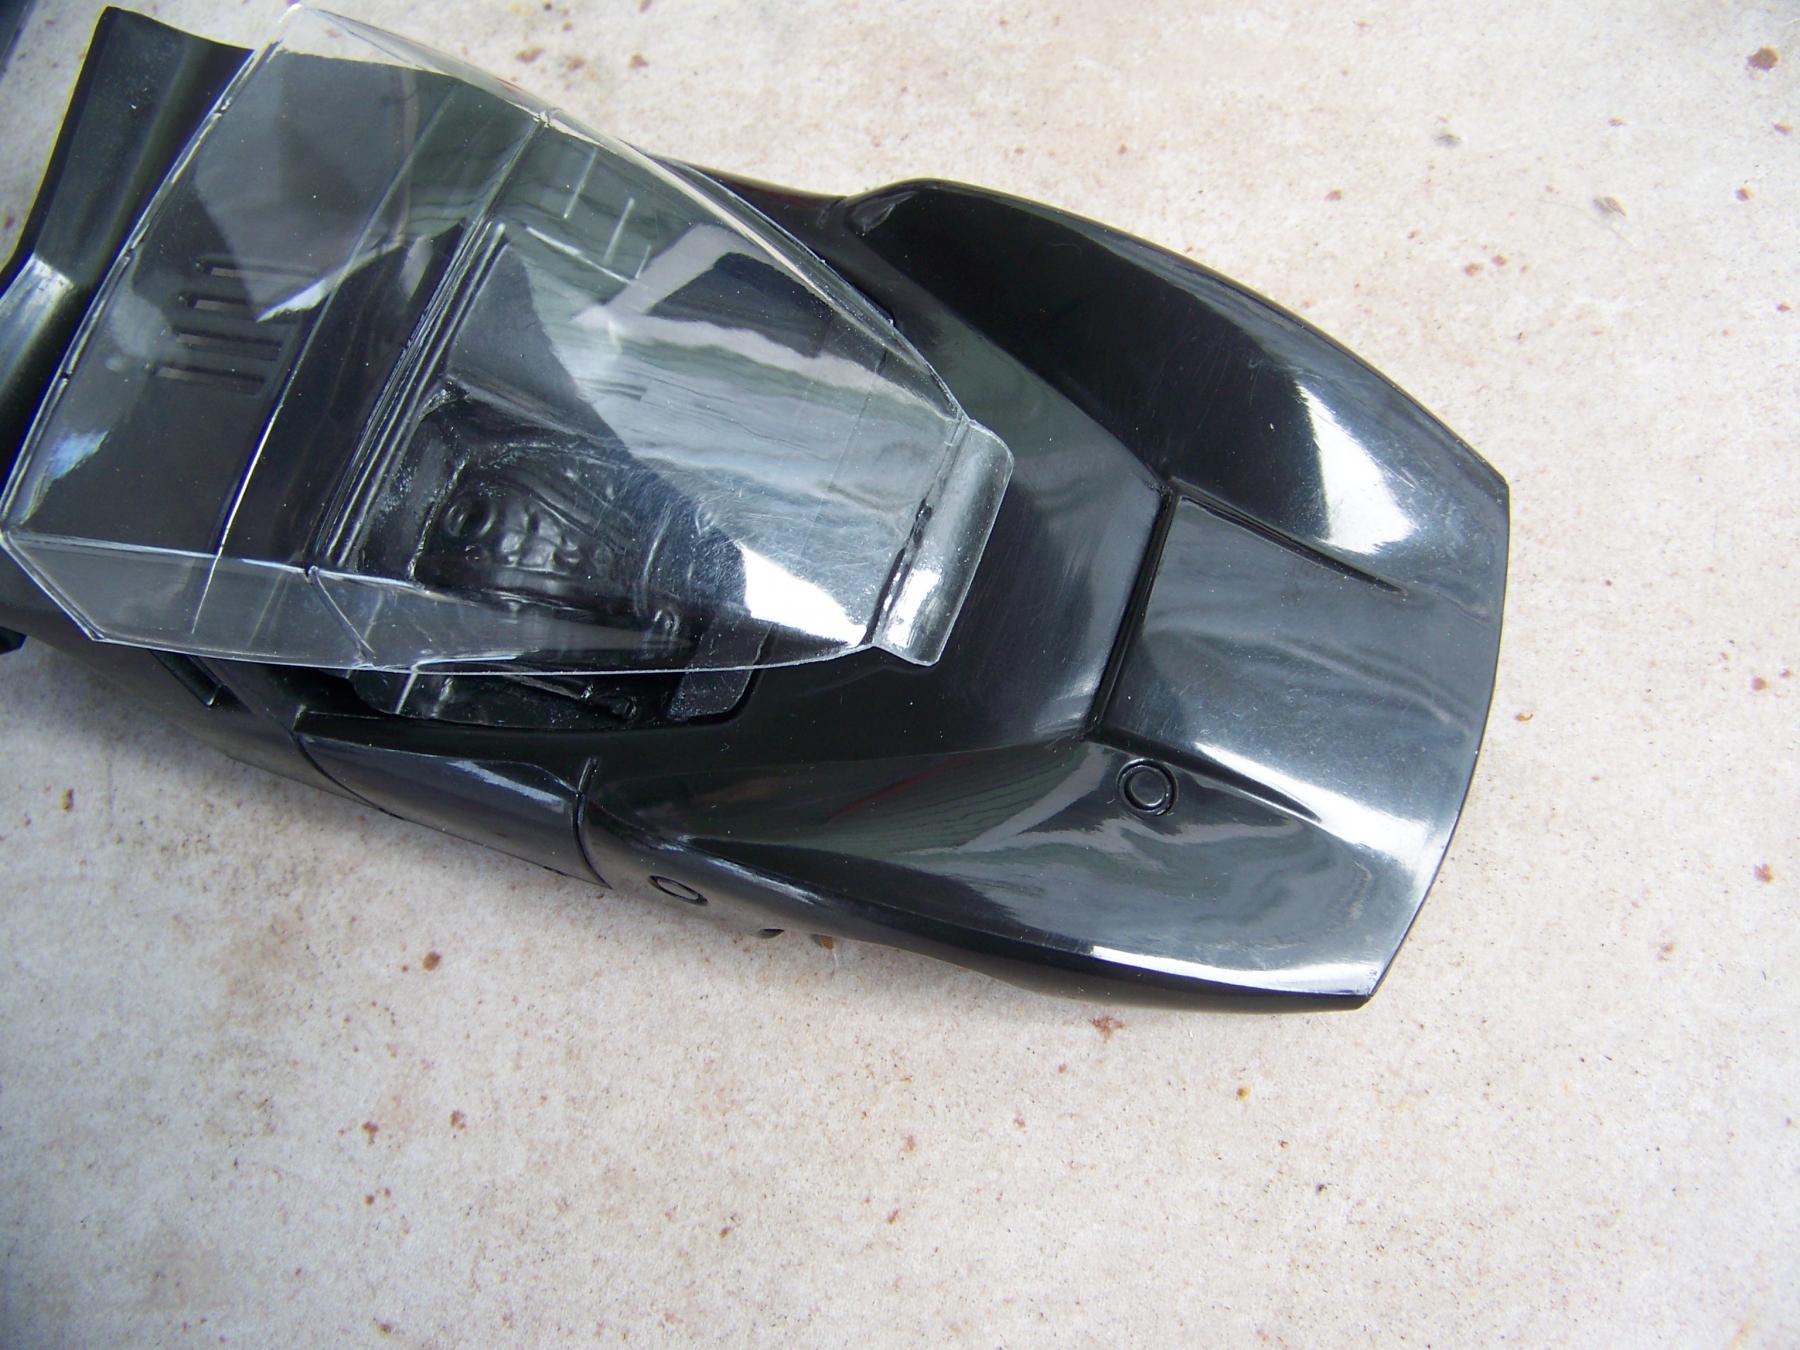
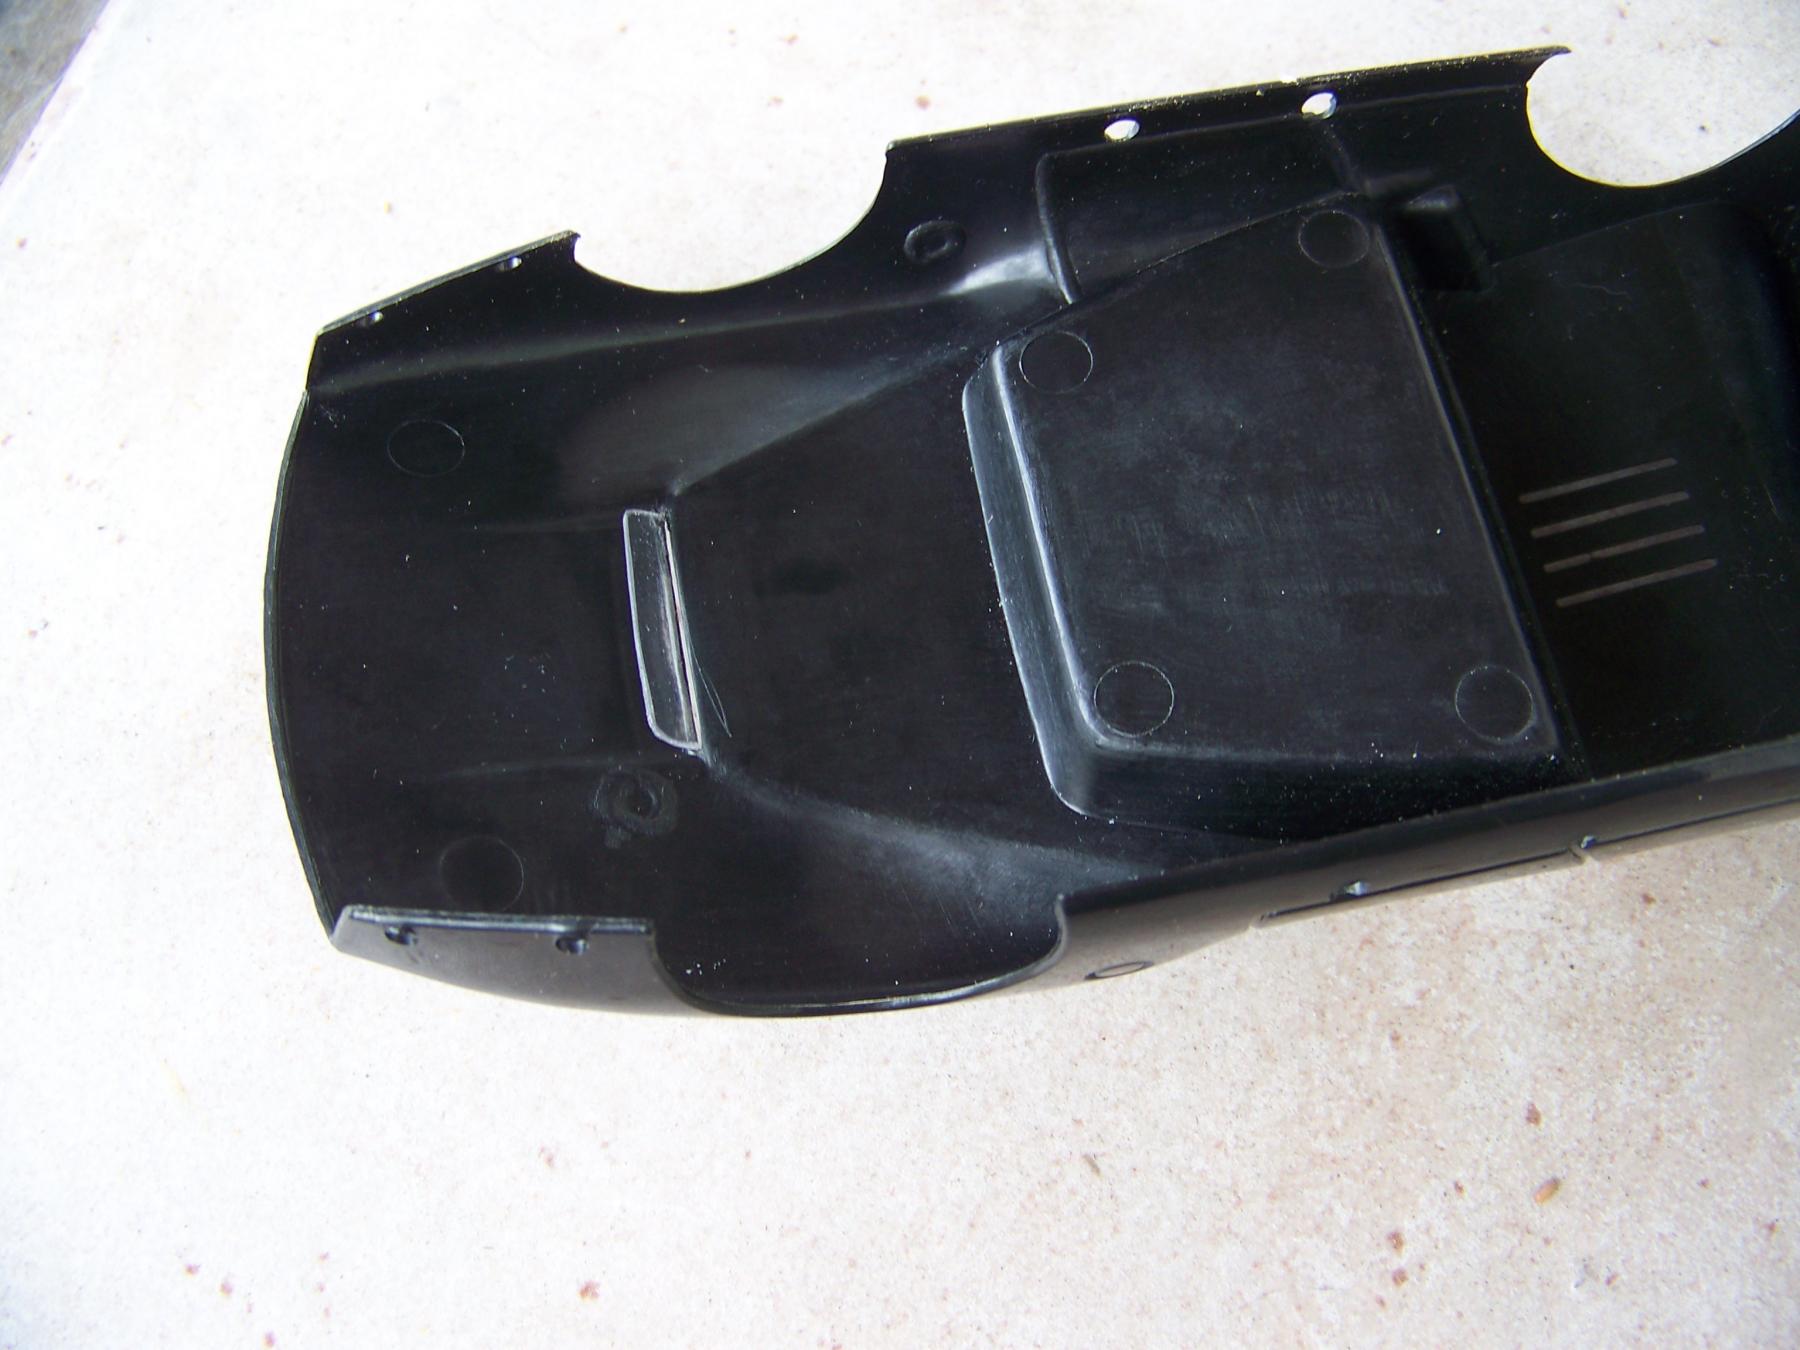
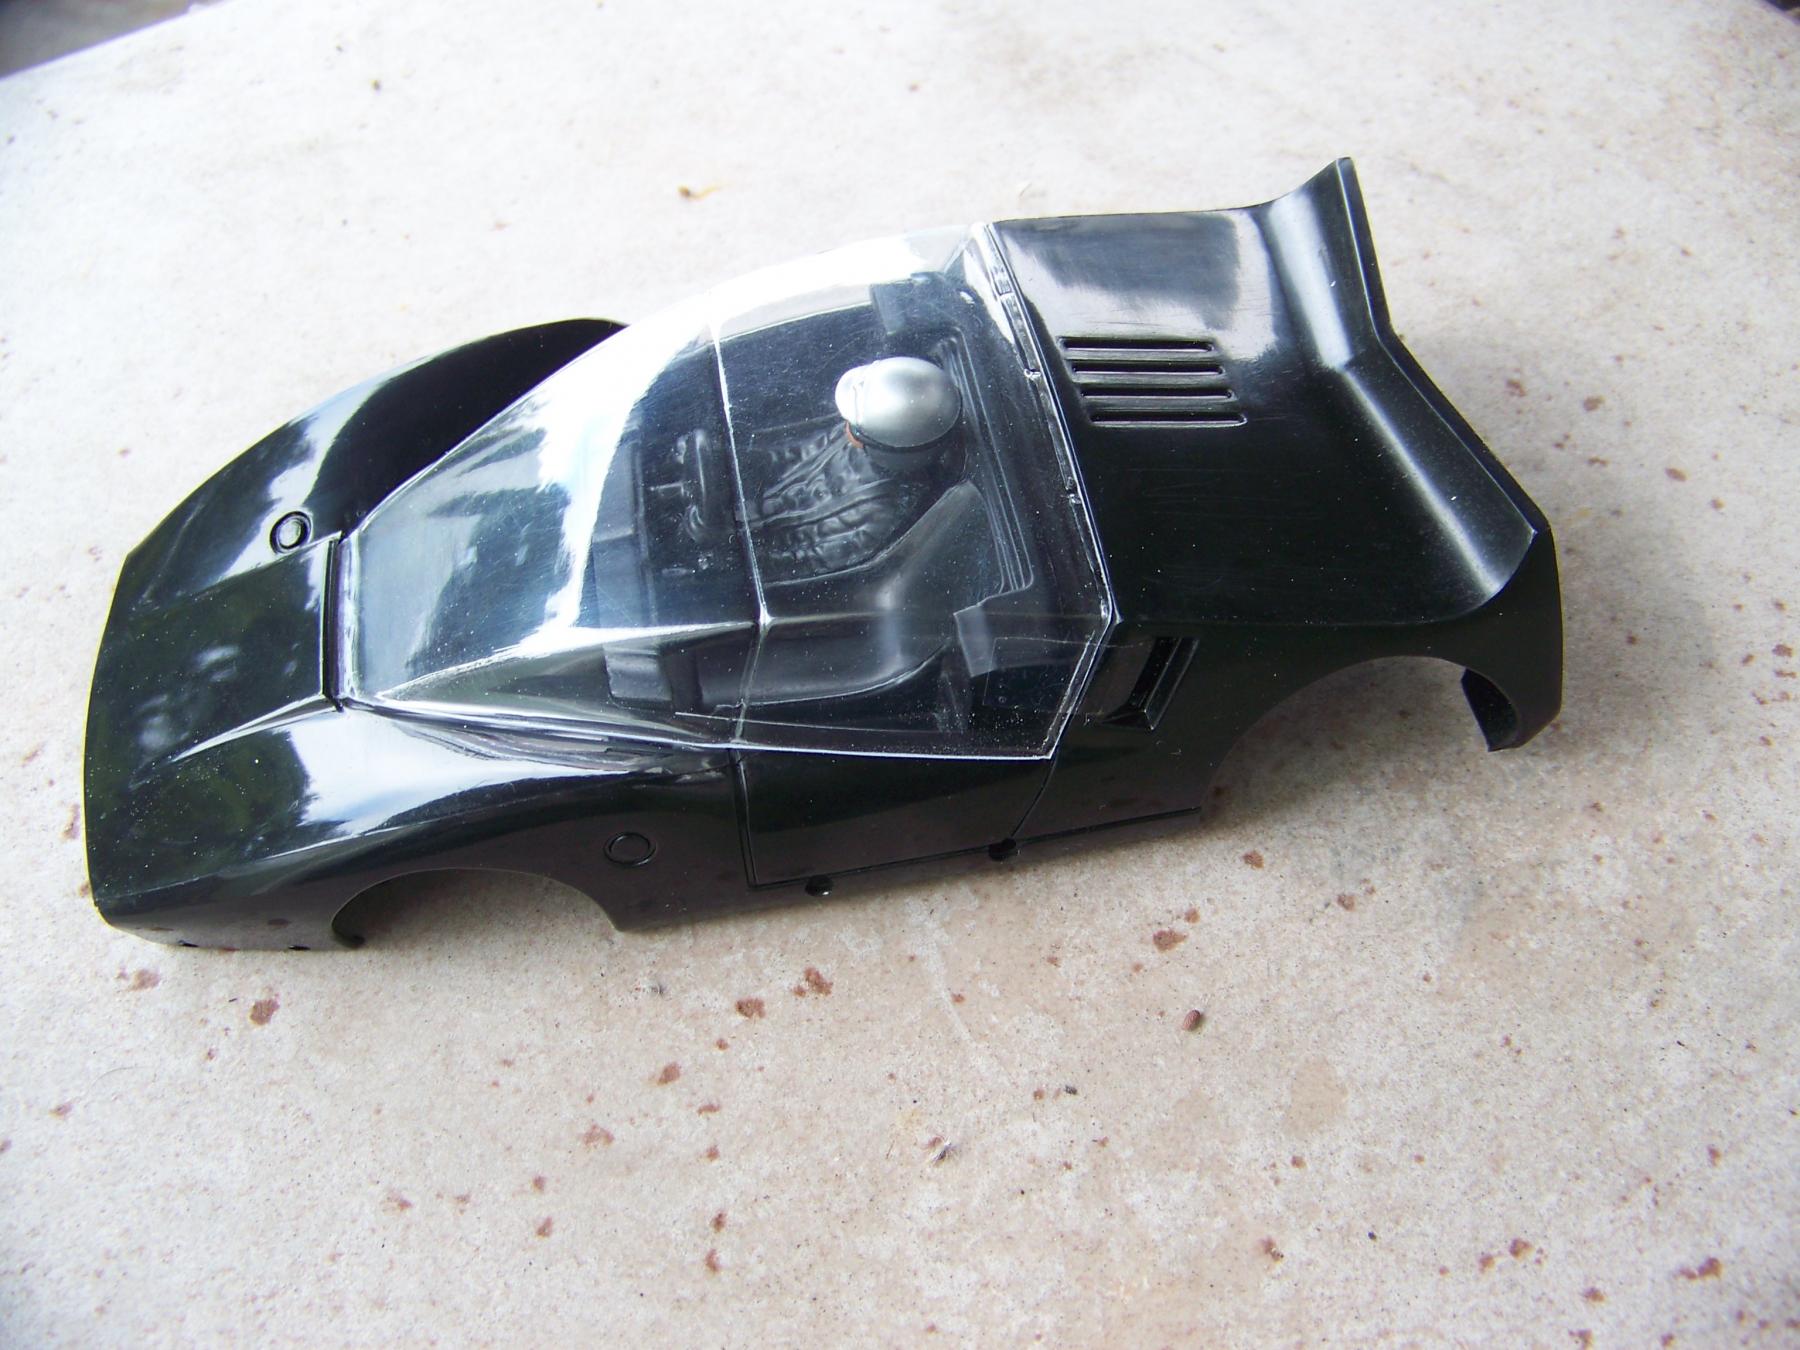
Posting Leader
Posted 12 June 2025 - 09:21 PM
Feeling the need to bend some steel wire and make a few brass guide pivots I set about making some drop arms for the Bat chassis. Love my micro touch, I use it any chance I can. Roll gas on, click for flame, heat and add solder, roll of gas.All with one hand.
Do not know why it took me so long to get one. Once I was in the rhythm is was quite rewarding.
Somehow a bit of production can be meditative.