Jump to content


Photo

MDC Bat chronicles


  • Please log in to reply
180 replies to this topic

#51 Martin

Martin

    Posting Leader

  • Moderator
  • PipPipPipPipPipPipPip
  • 4,649 posts
  • Joined: 22-February 09
  • Gender:Male
  • Location:US

Posted 14 June 2025 - 11:02 AM

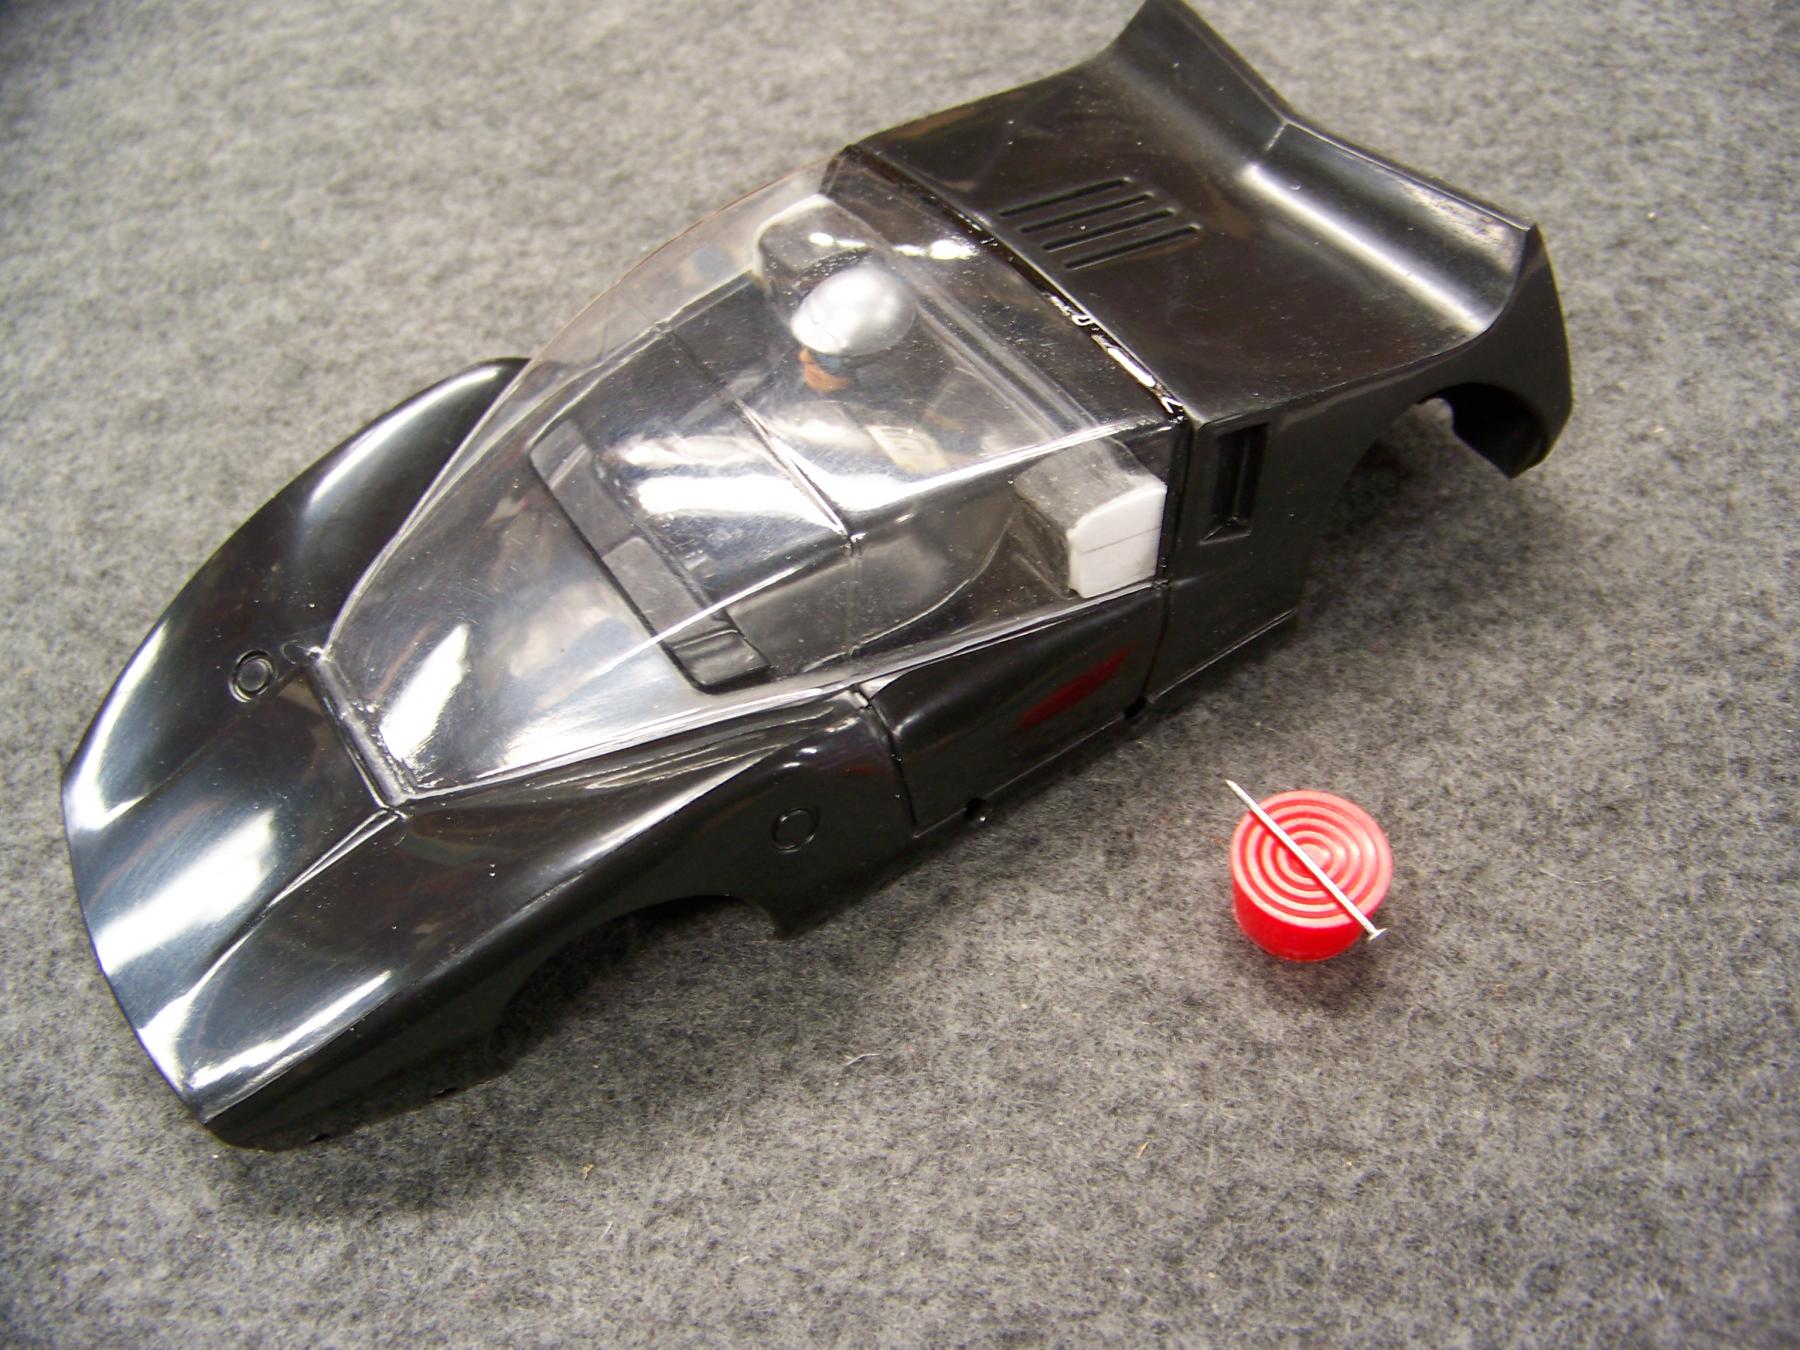
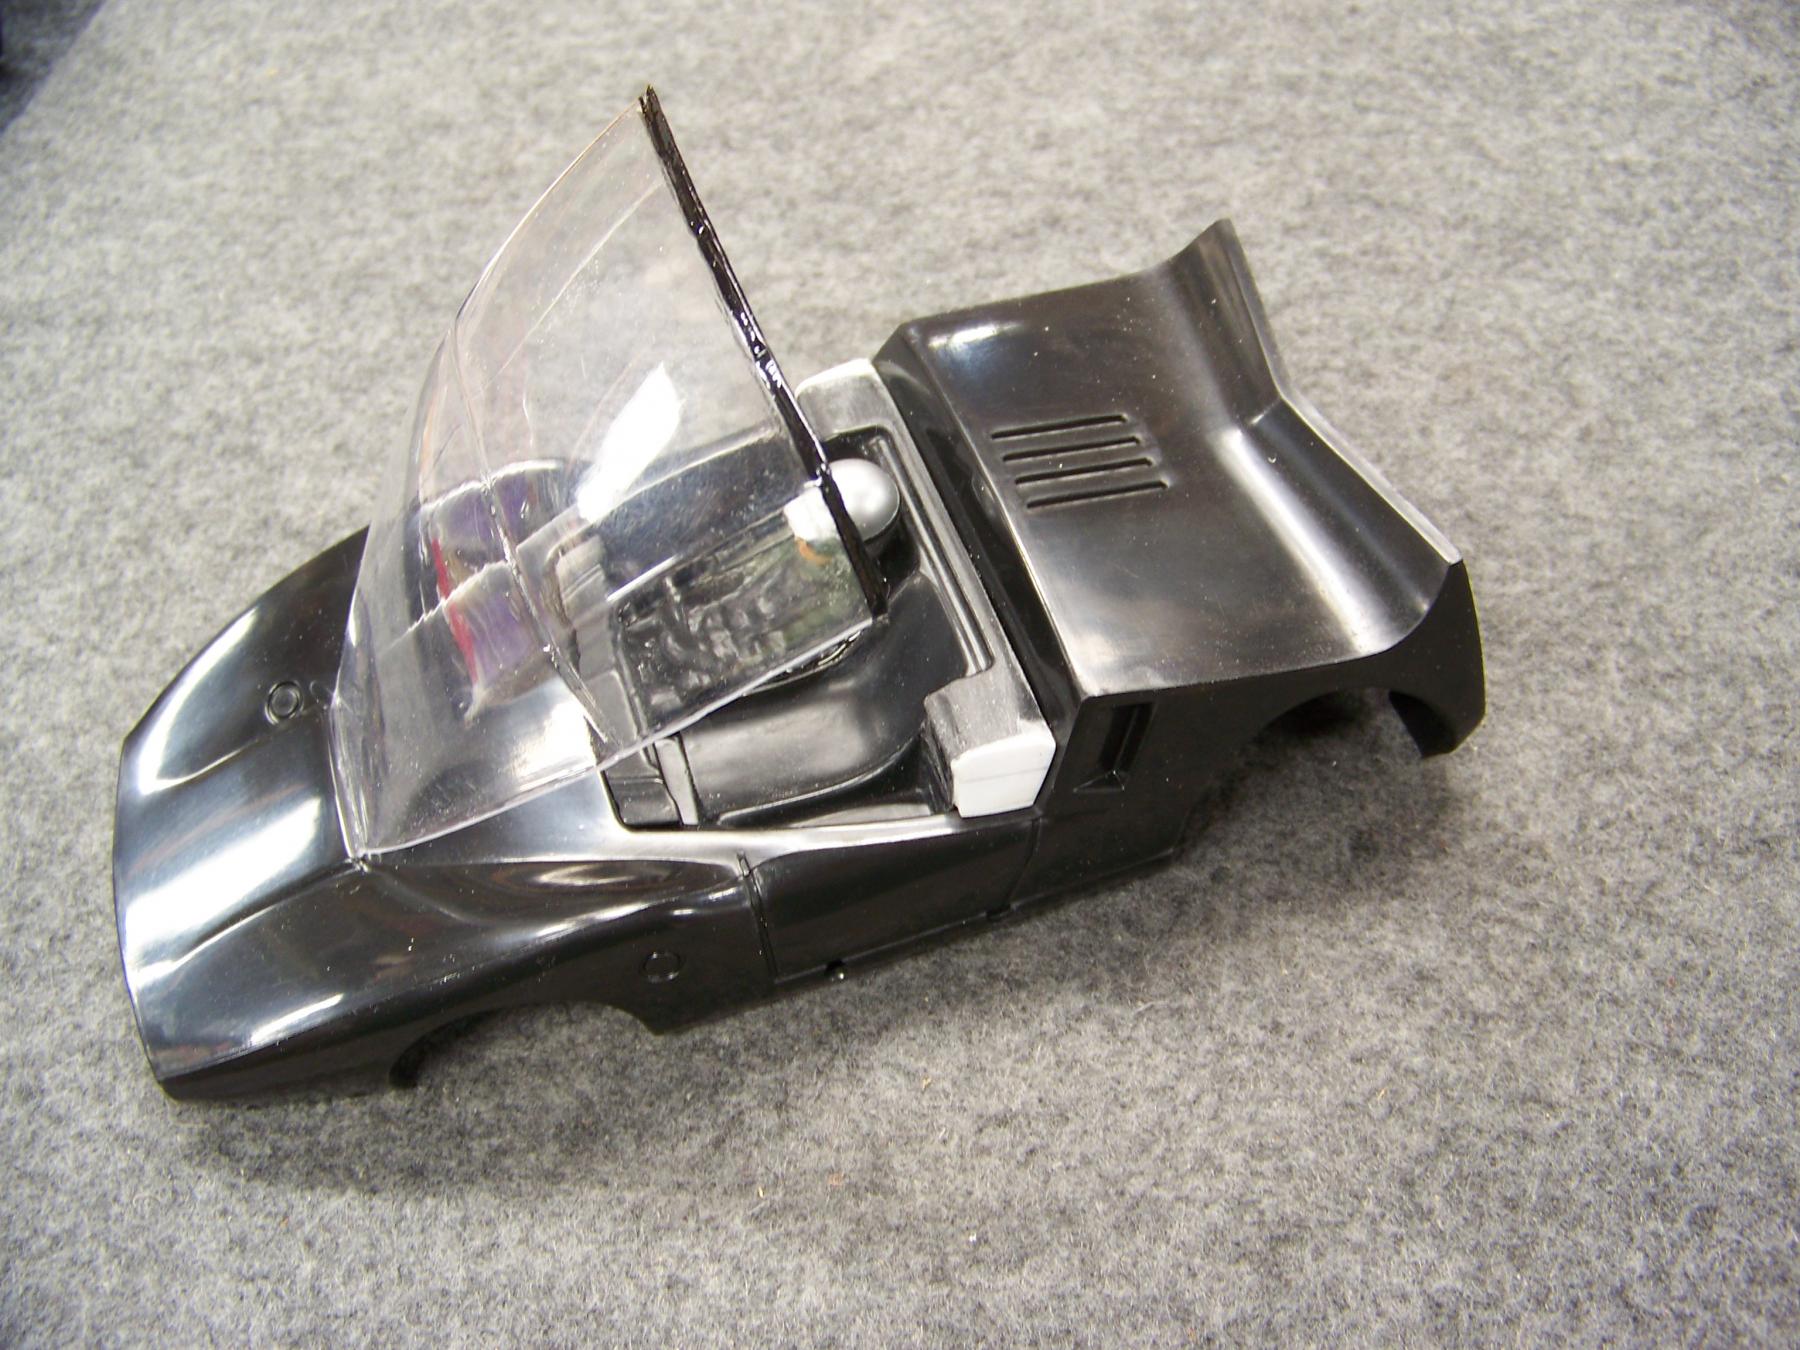
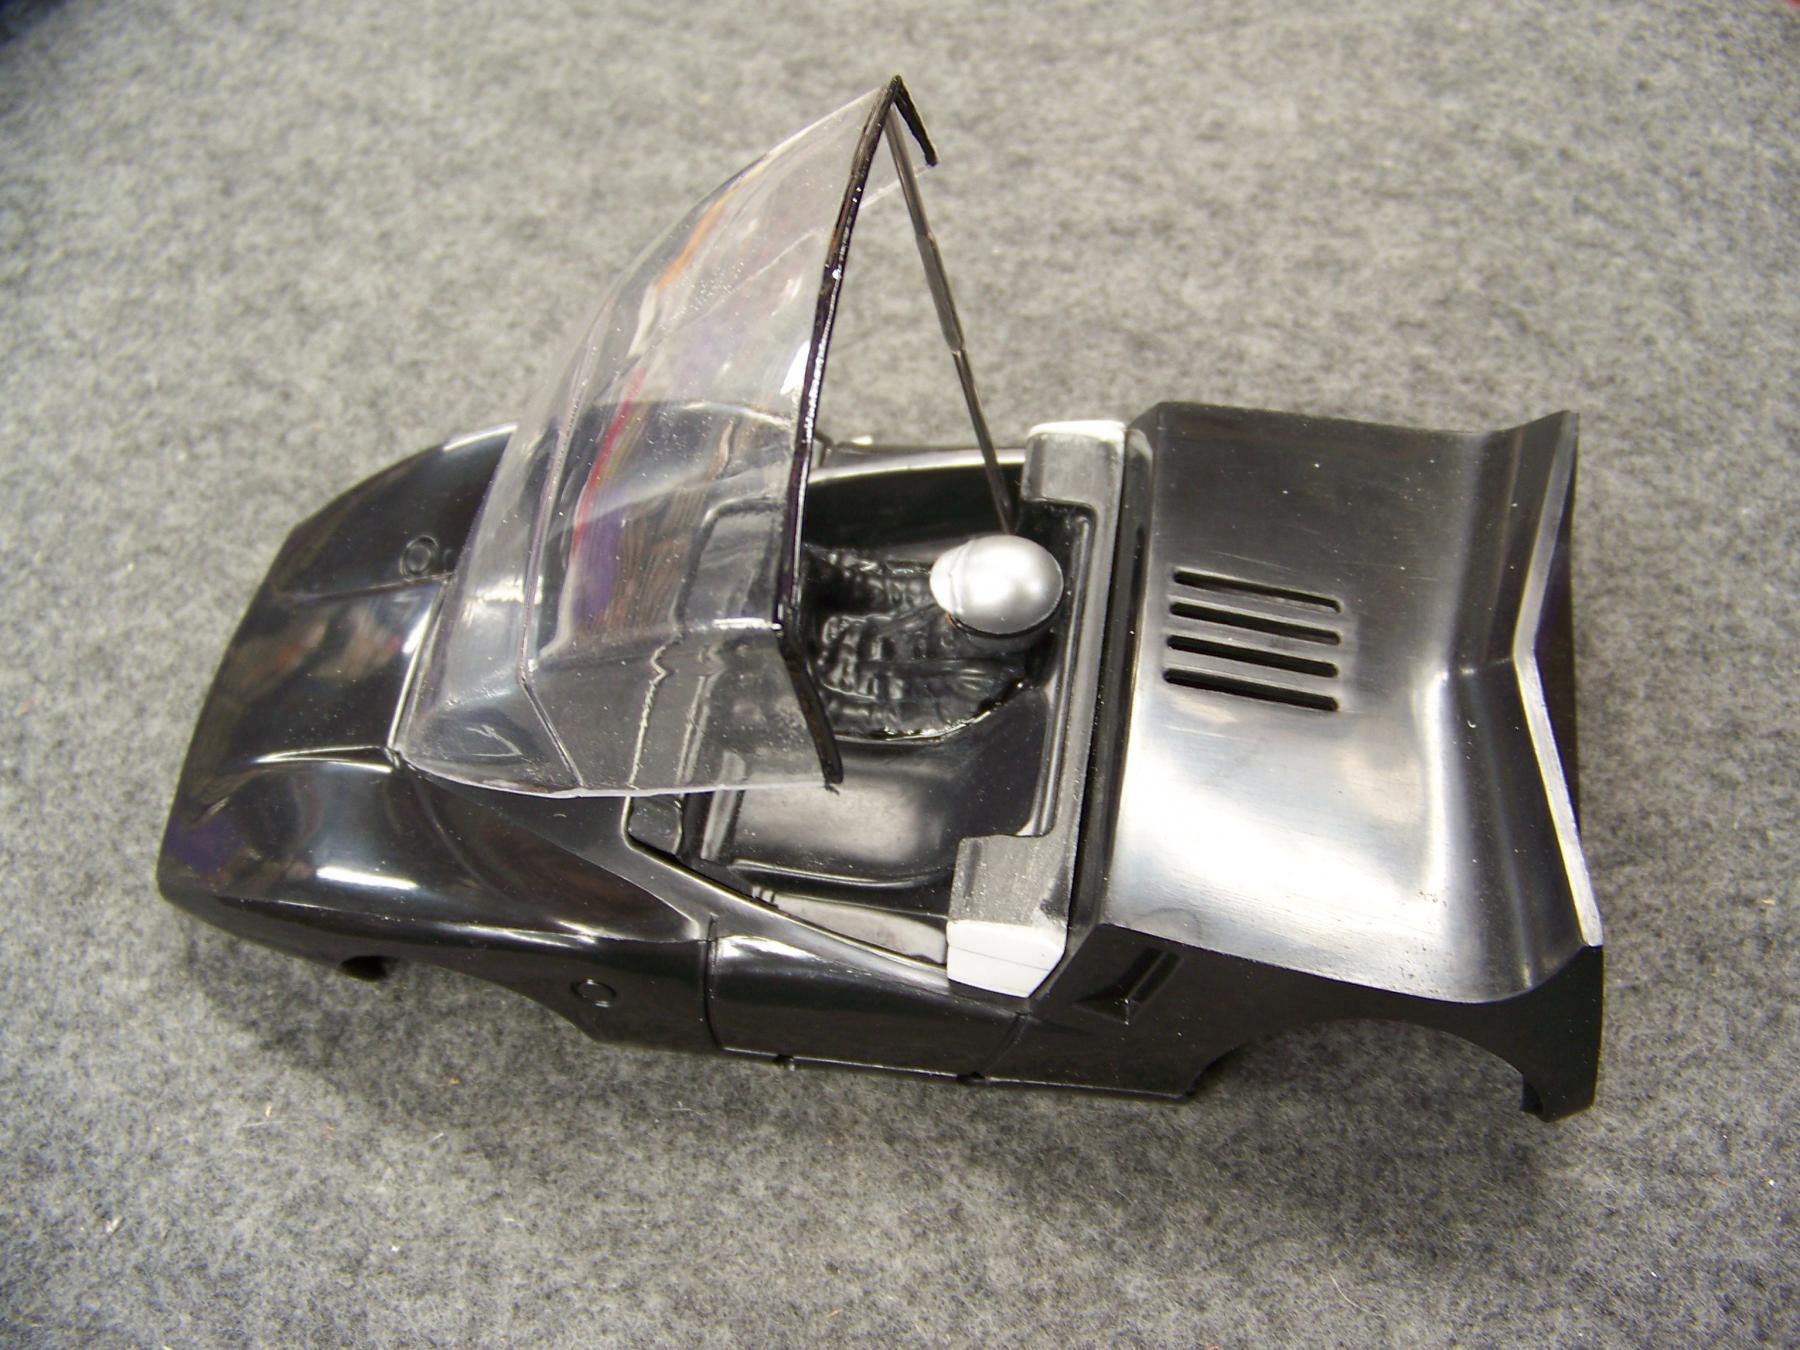
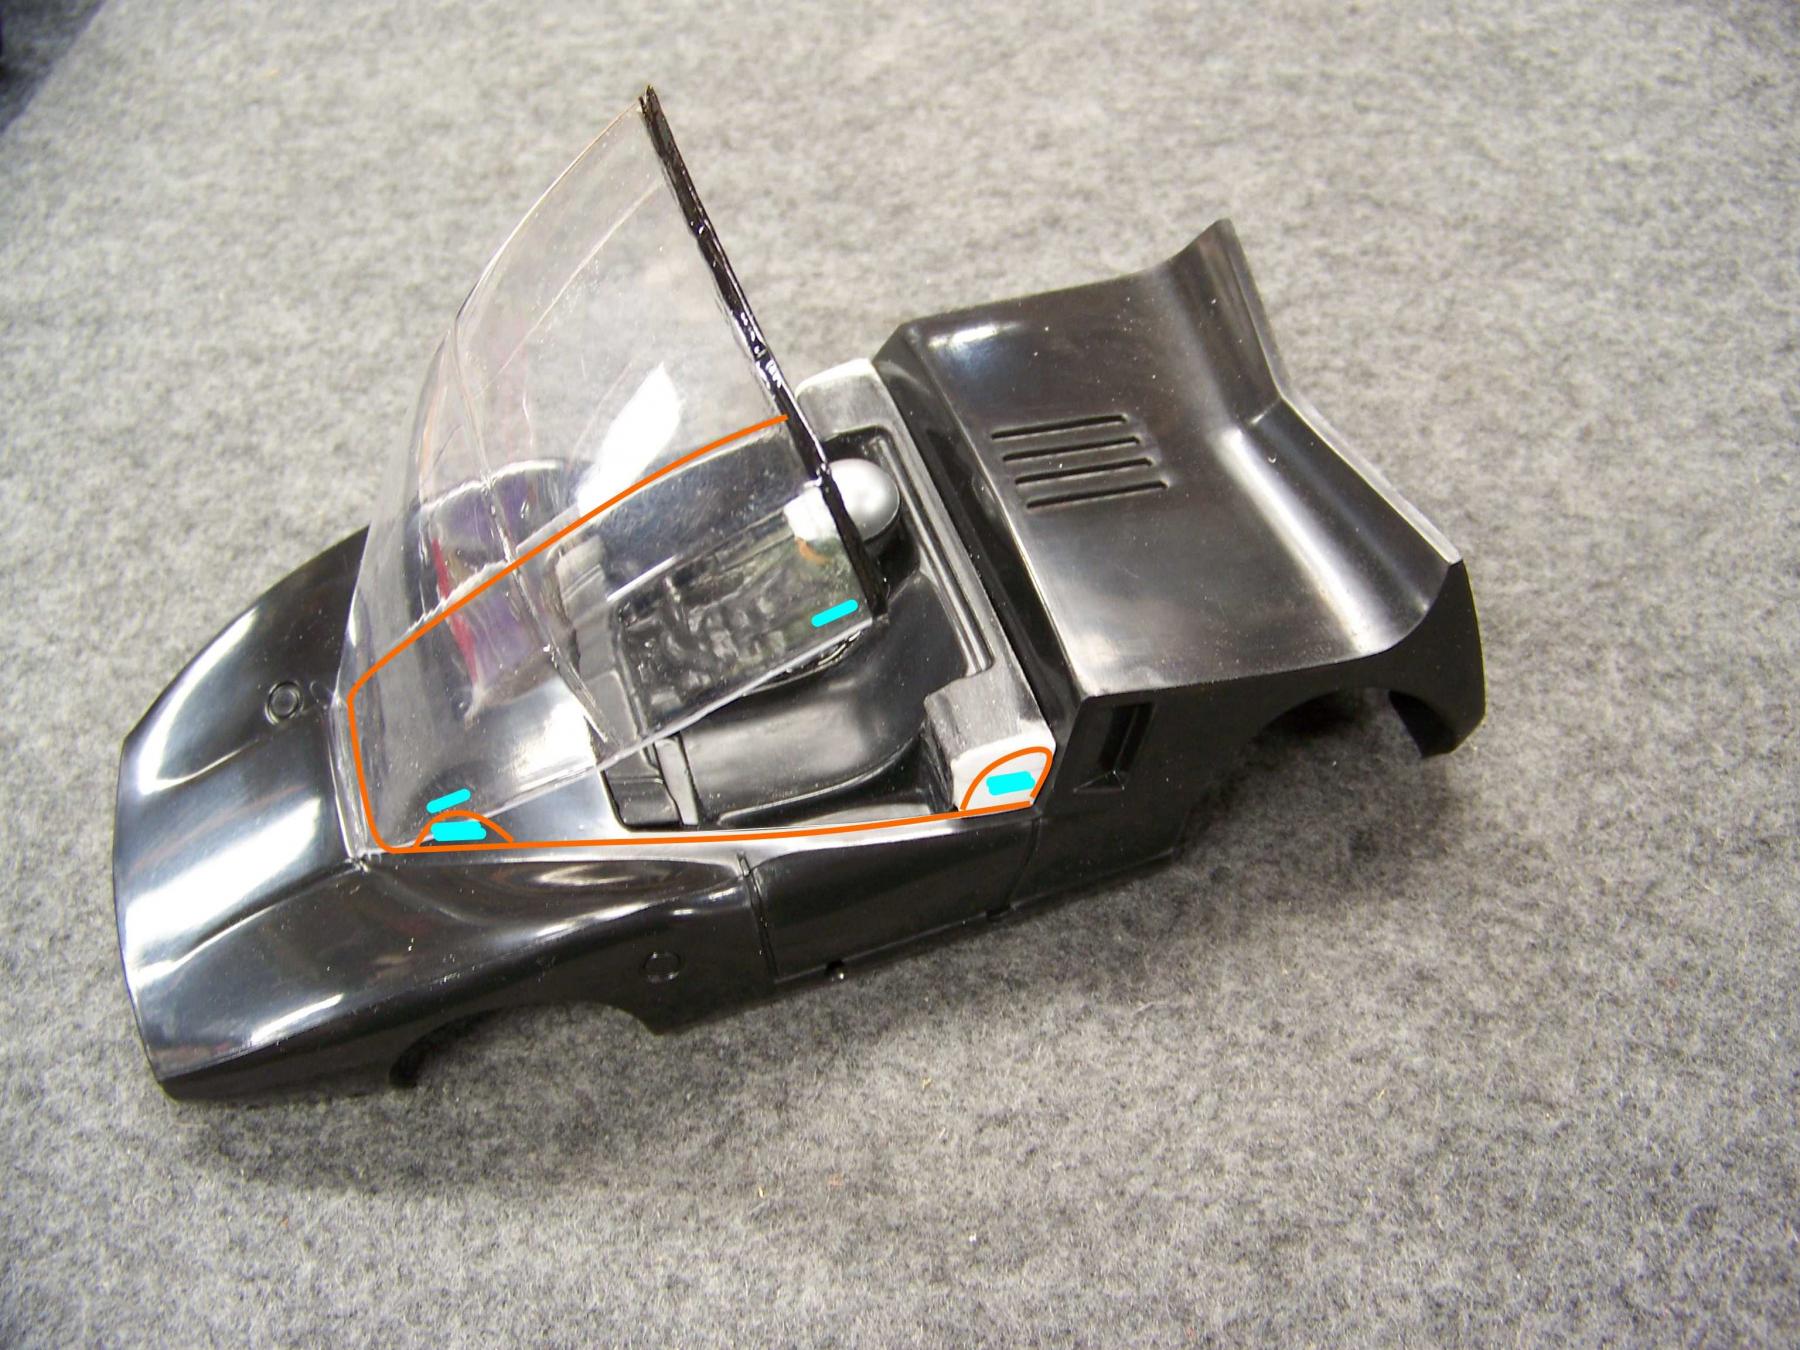
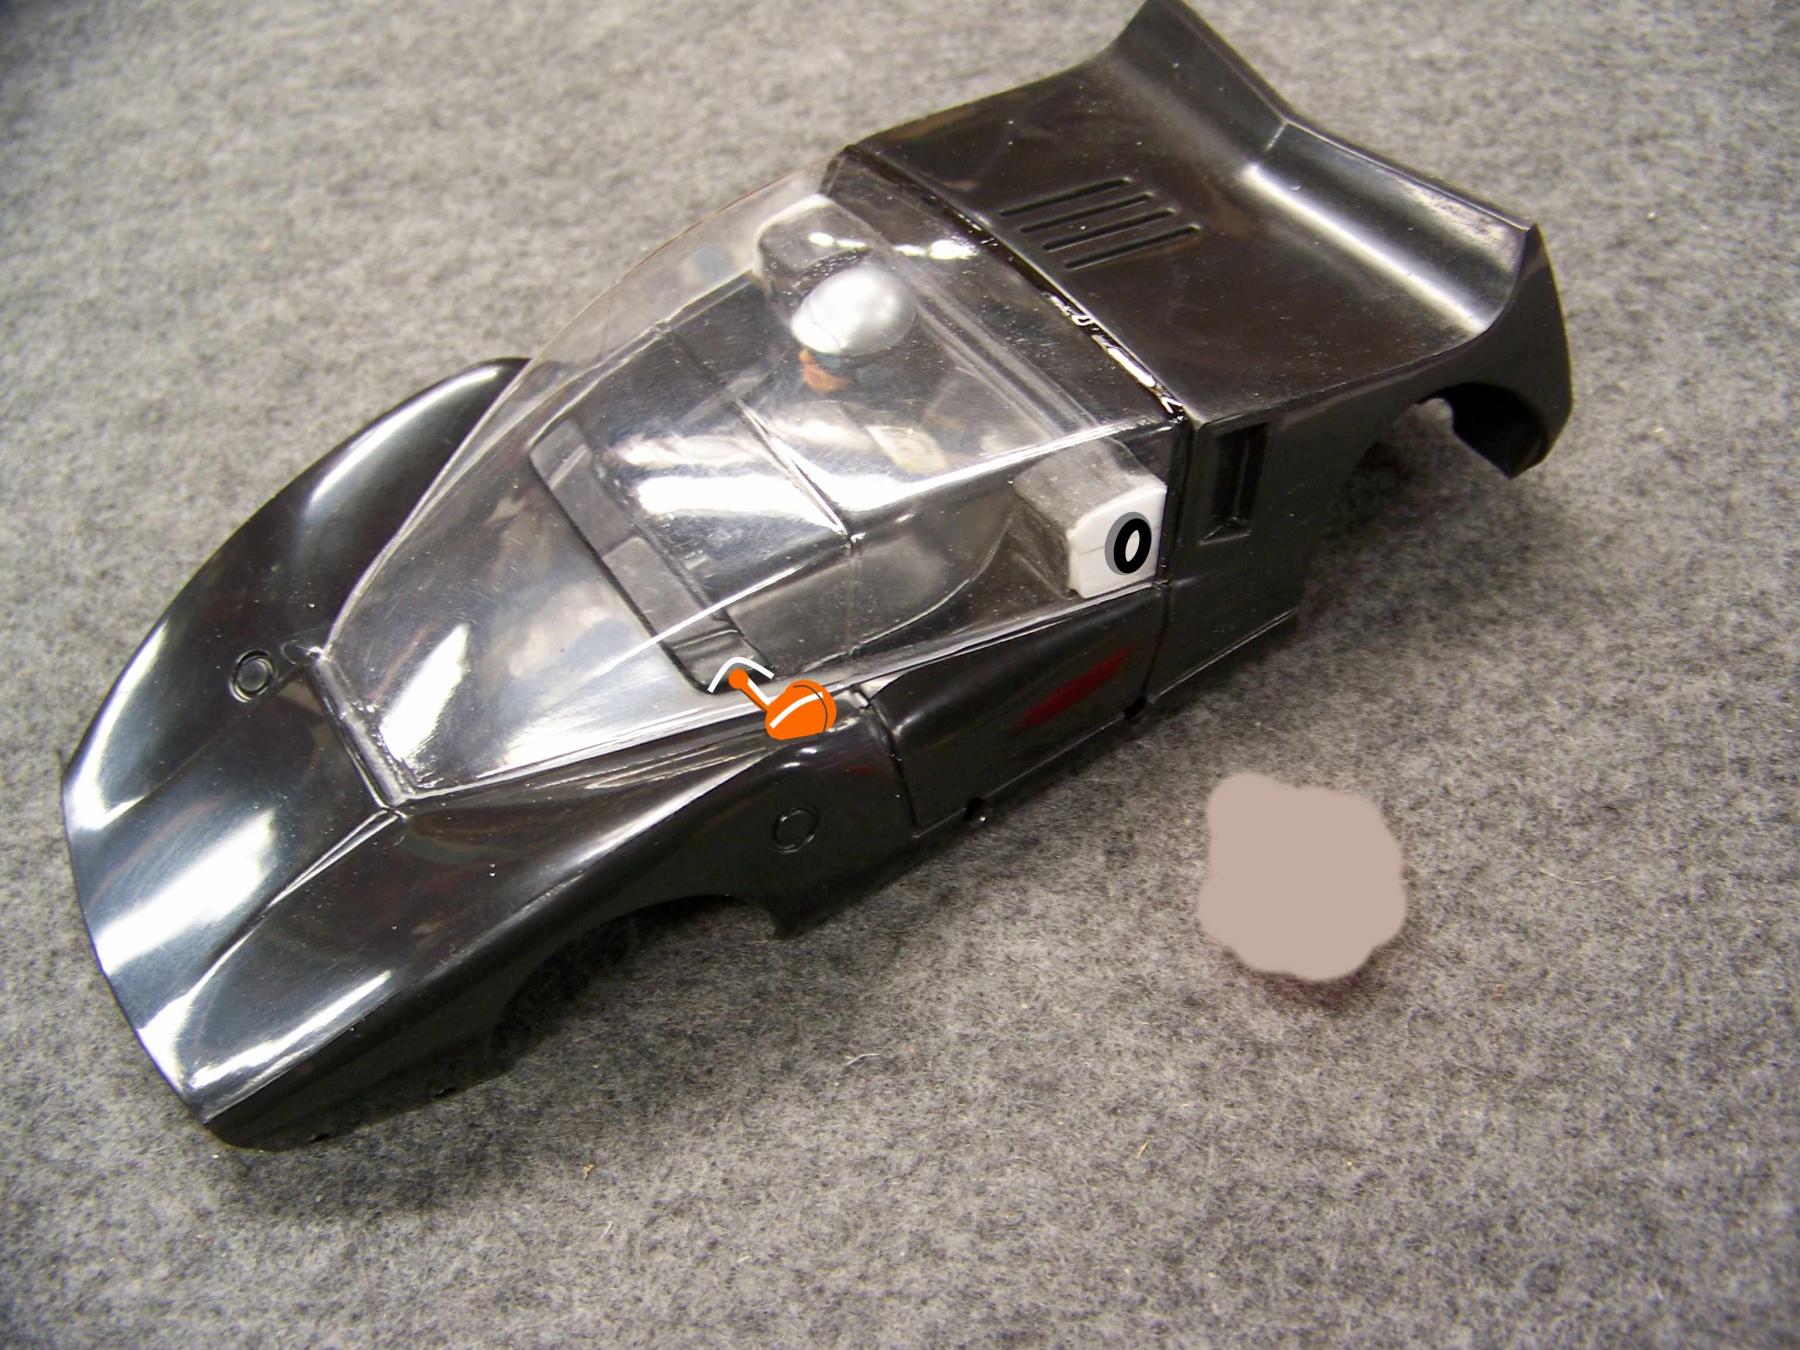
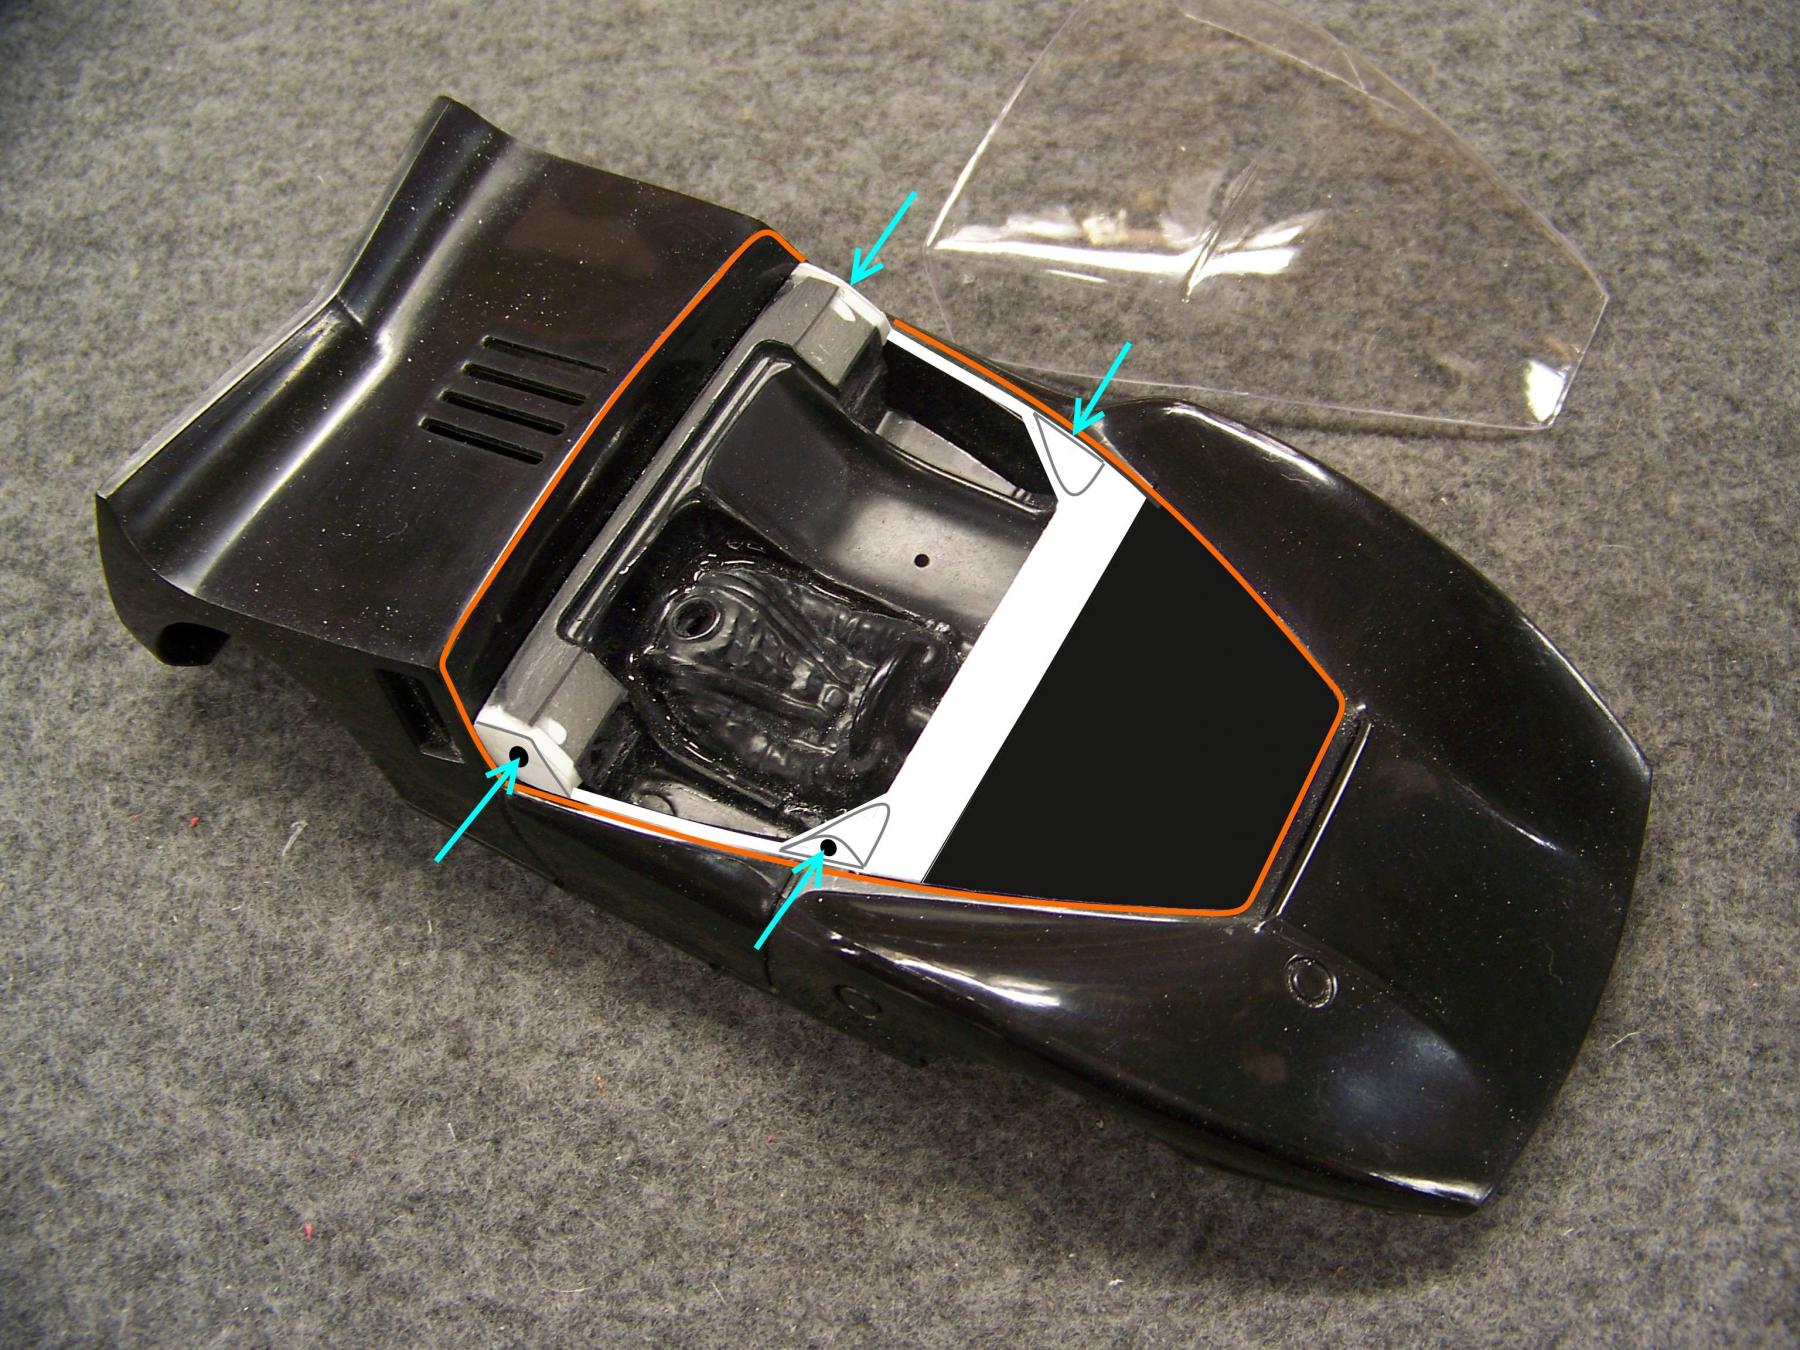
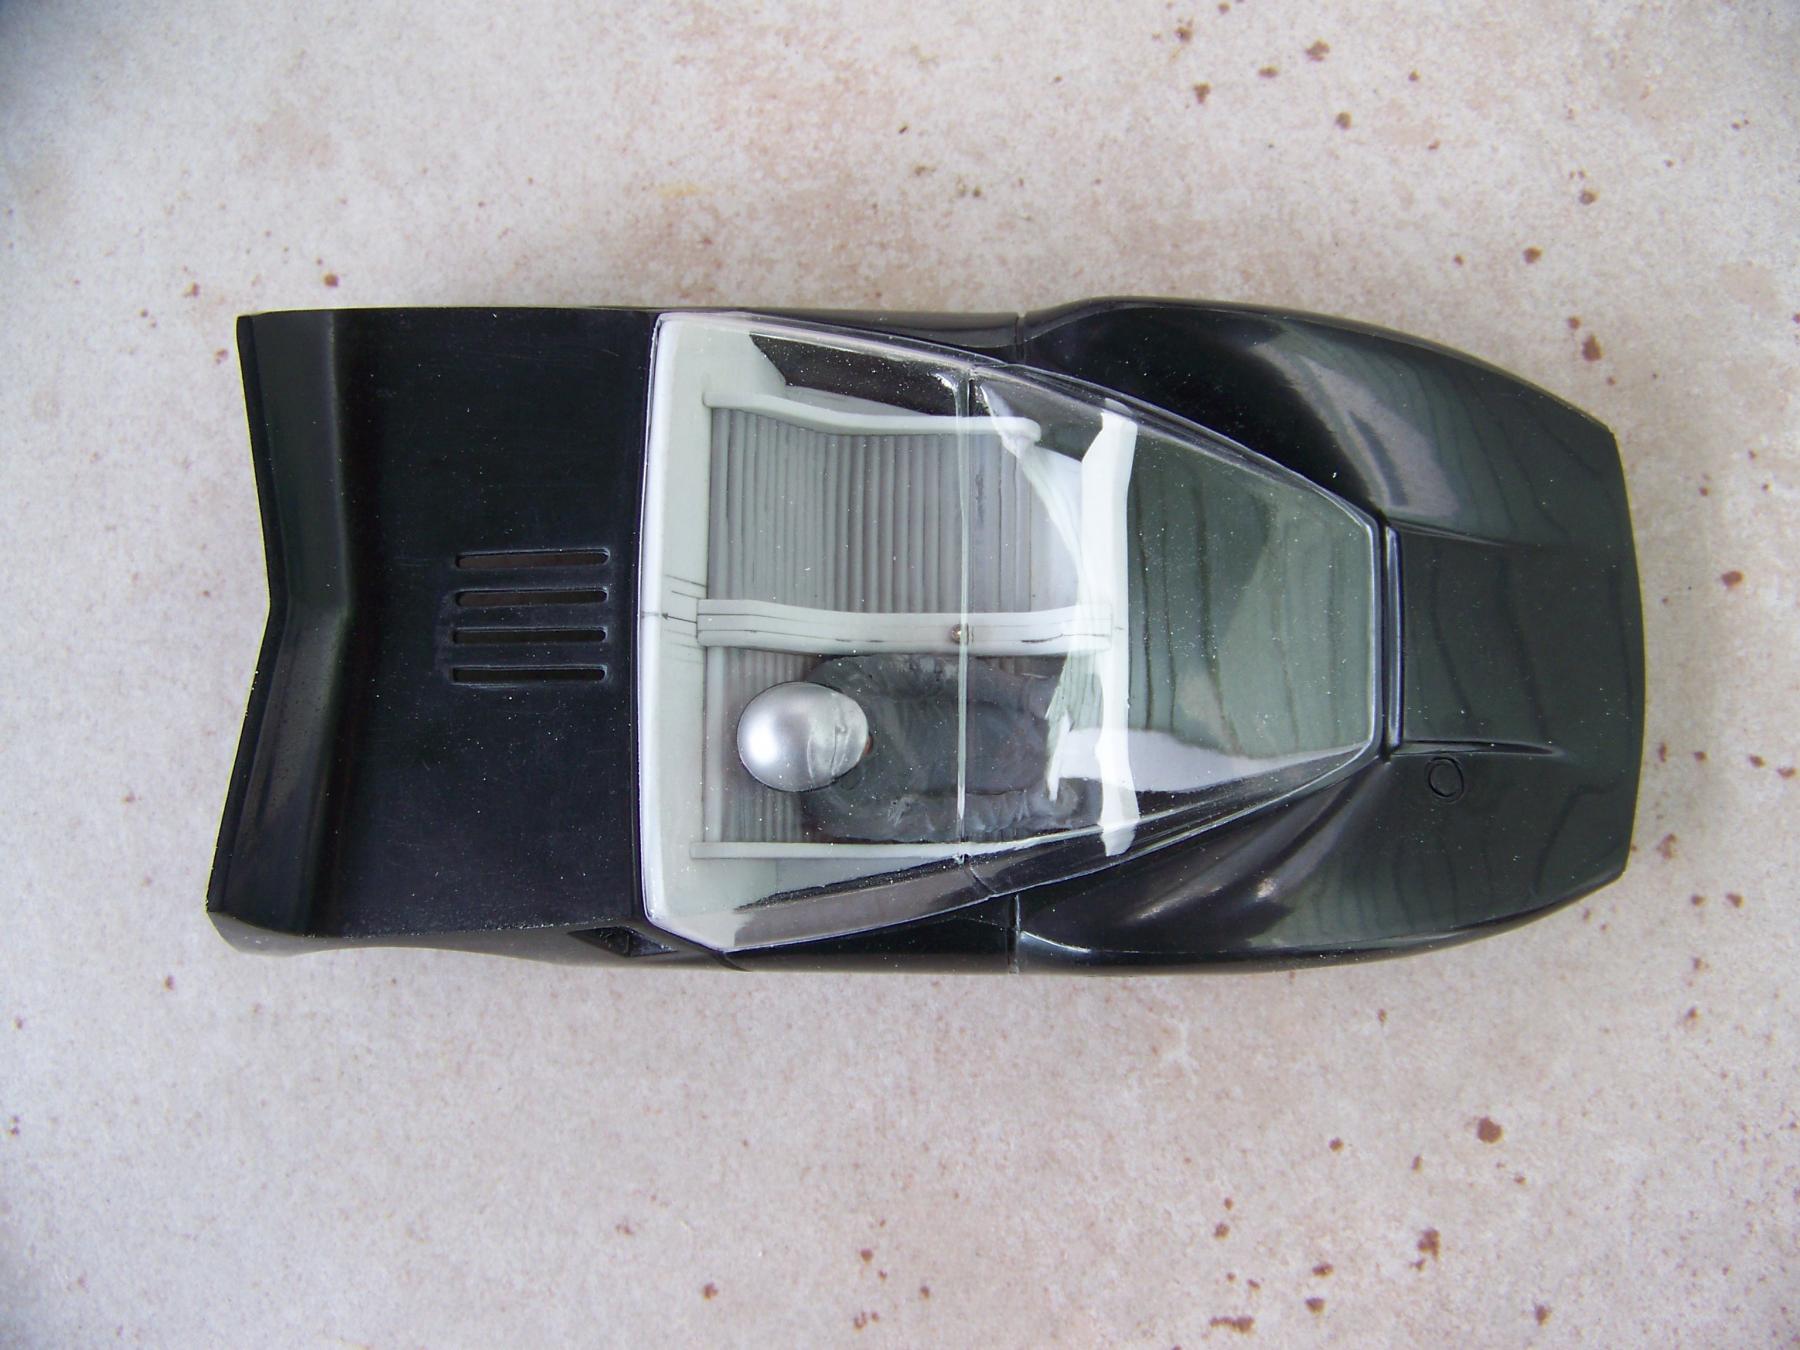
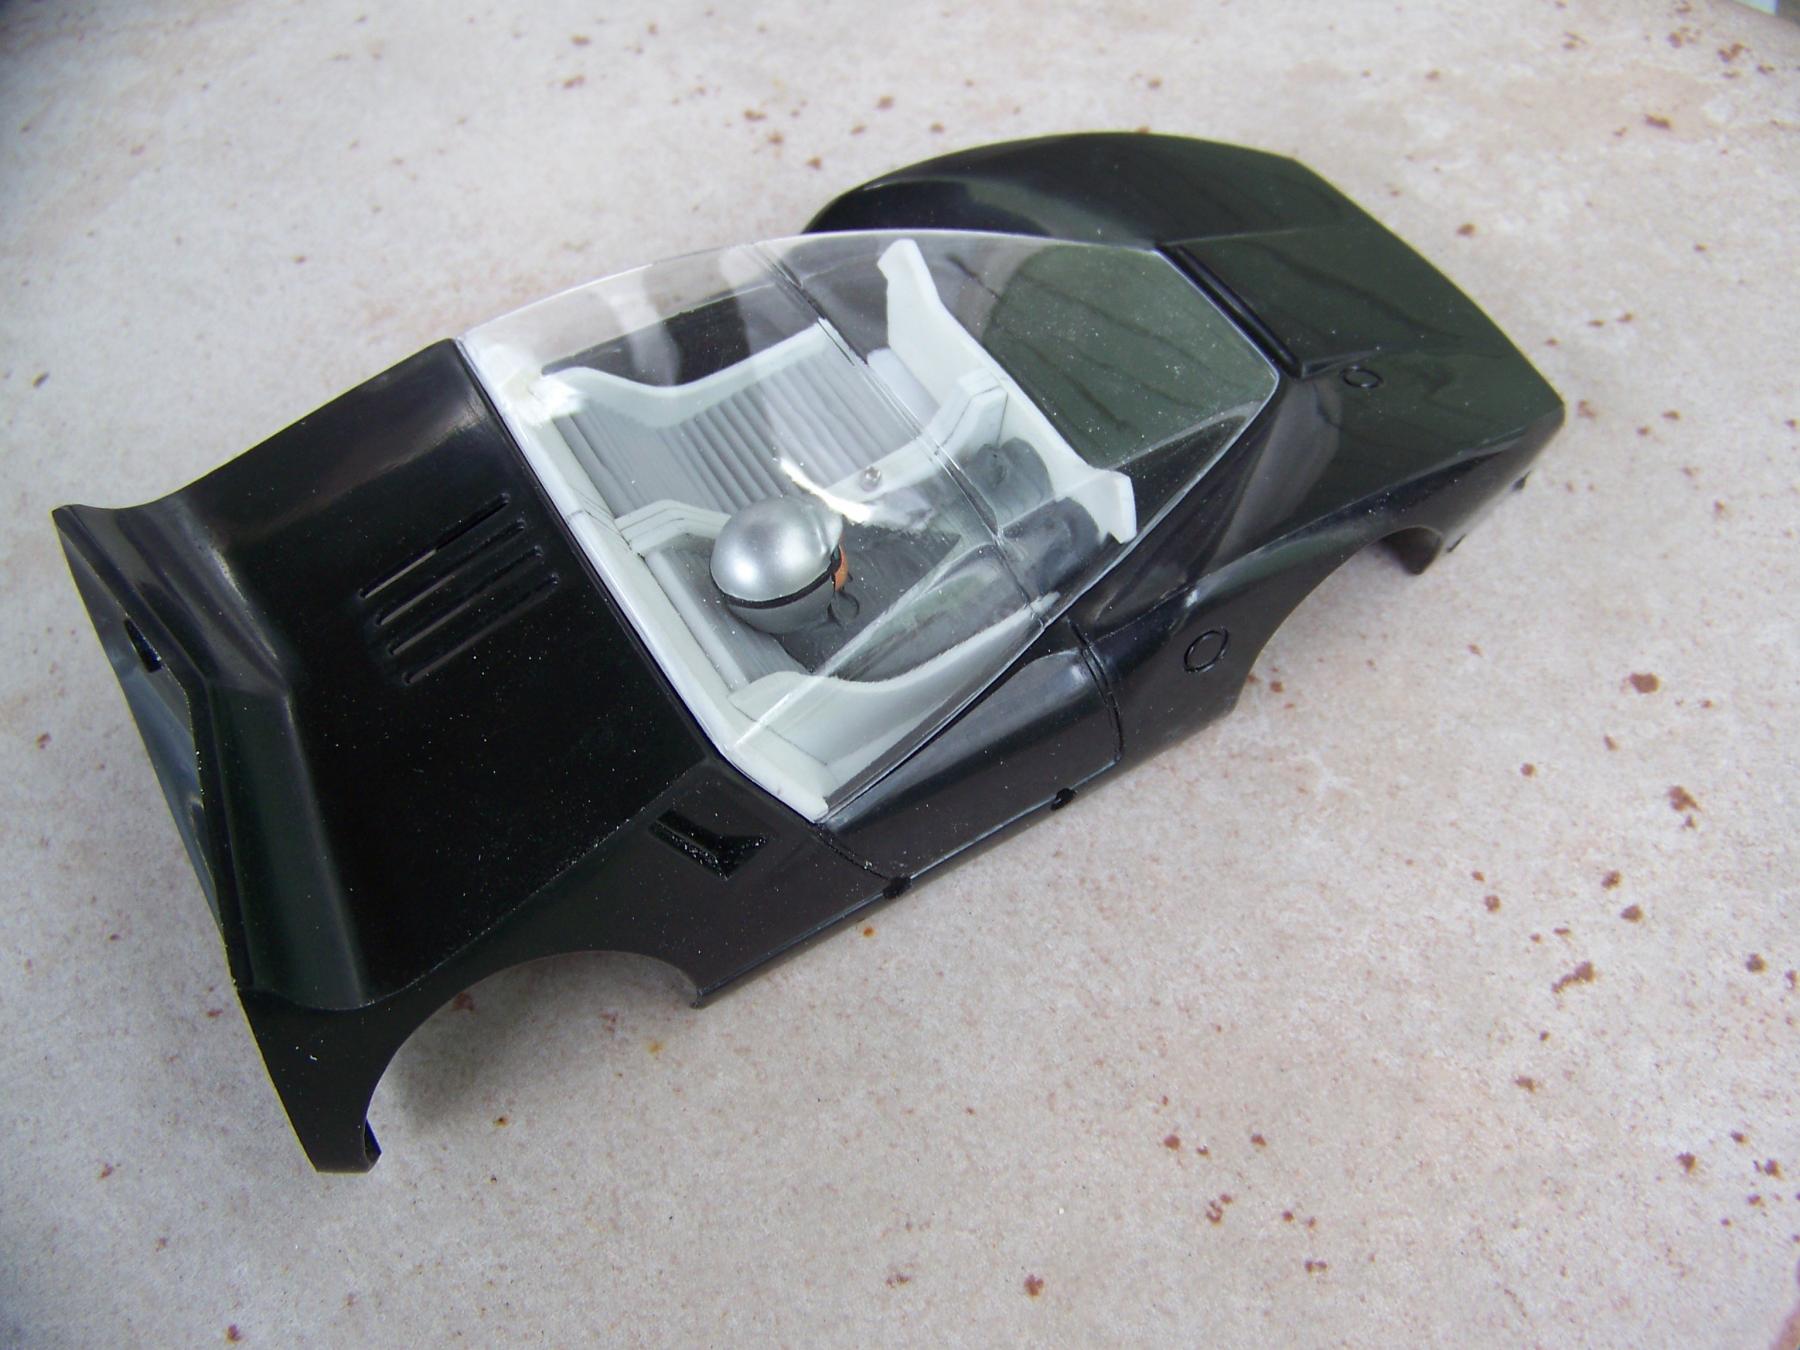
The slot in the nose vent seems to be an good way to hold  the front of the canopy in position IMO, but now what to do with the rear of the canopy?


I picked an interior that has some bowlsters on the outside of the seats. By adding some thickness there I can plan for a pin to lock down the rear of the canopy in place.  Even if this is not the finale interior, a small piece of brass tubing could be glued in the corner to except 2 body pins.


I side benefit of this method is ,not only does it make sense of a way for a driver to get in and out, with a prop rod you could display the car this way to show off the driver and seating detail.


I have cut 3 of the bodies with vent slots and can show the method I find best if anybody wants to do this to there Bat ?


Please let me know your thoughts and questions. 


102_9459.JPG


102_9457.JPG


102_9458.JPG


  • don.siegel likes this
Martin Windmill


#52 Mark Onofri

Mark Onofri

    Posting Leader

  • Subscriber
  • PipPipPipPipPipPipPip
  • 2,981 posts
  • Joined: 18-November 20
  • Gender:Male
  • Location:Syracuse, NY

Posted 14 June 2025 - 08:04 PM

I probaly missed it but, could you elaborate on the canopy fabrication? I've been wondering how it's done. If it's already posted, then forgetaboutit.(yes, it's one word)

#53 Martin

Martin

    Posting Leader

  • Moderator
  • PipPipPipPipPipPipPip
  • 4,649 posts
  • Joined: 22-February 09
  • Gender:Male
  • Location:US

Posted 14 June 2025 - 10:39 PM

What I have mentioned is MDC never completed this project, to my knowledge no tooling has been found to make the canopy. 

As MDC made metal dies, we can safely assume that if they had taken this project to market the canopy would of had its own metal die to produce this part.

I had seen some folks taking vac-formed poor quality repo Bat bodies and salvage the canopy from those. That seemed to me to be a waste of material and they were thin and not well made.


As I have mentioned before this project was a team effort. That team included a Larry a great CAD guy  and a one of the best Vac-forming guys around, Gene. Without there skills and enthusiasm this project would have possibly stayed incomplete.

MDC did make a vac-formed body of the Bat and it was that body we reversed molded a dedicated plug to pull canopies from.

We can make them from thicker material to better replicate an injection molded part. They are crystal clear and strong.


How MDC planned to mount the canopy is another question. I see no clue or method as to how MDC would have mounted the canopy in production.

One line of thinking is, it may be locked into the interior and then the interior is just glued in place. But there again no interior or tooling for that part has been found.

The last few post are what I came up with to solve the mounting problem, I do not think it is what MDC planned to do, they probably did not have a plan. This product was shelved 60 years ago and once this project went sideways, nobody cared. We may never know all the answers.  


The reboot of this car was when hundreds of bodies were found in a warehouse and auctioned off  3-4 at a time weekly.  I, like many bought a few with plans to make a chassis and its missing parts one day. This canopy is just one of those parts.


The short answer Mark, its Vac-u-formed from from an original MDC Bat then retooled by the best so as not to lose detail.


Martin Windmill

#54 Mark Onofri

Mark Onofri

    Posting Leader

  • Subscriber
  • PipPipPipPipPipPipPip
  • 2,981 posts
  • Joined: 18-November 20
  • Gender:Male
  • Location:Syracuse, NY

Posted 15 June 2025 - 12:19 PM

Thanks Martin. If it was intended to be a injection molded, usually it would have been melted tougher. I believe that we had discussed this before and referred to it as welded.


#55 Martin

Martin

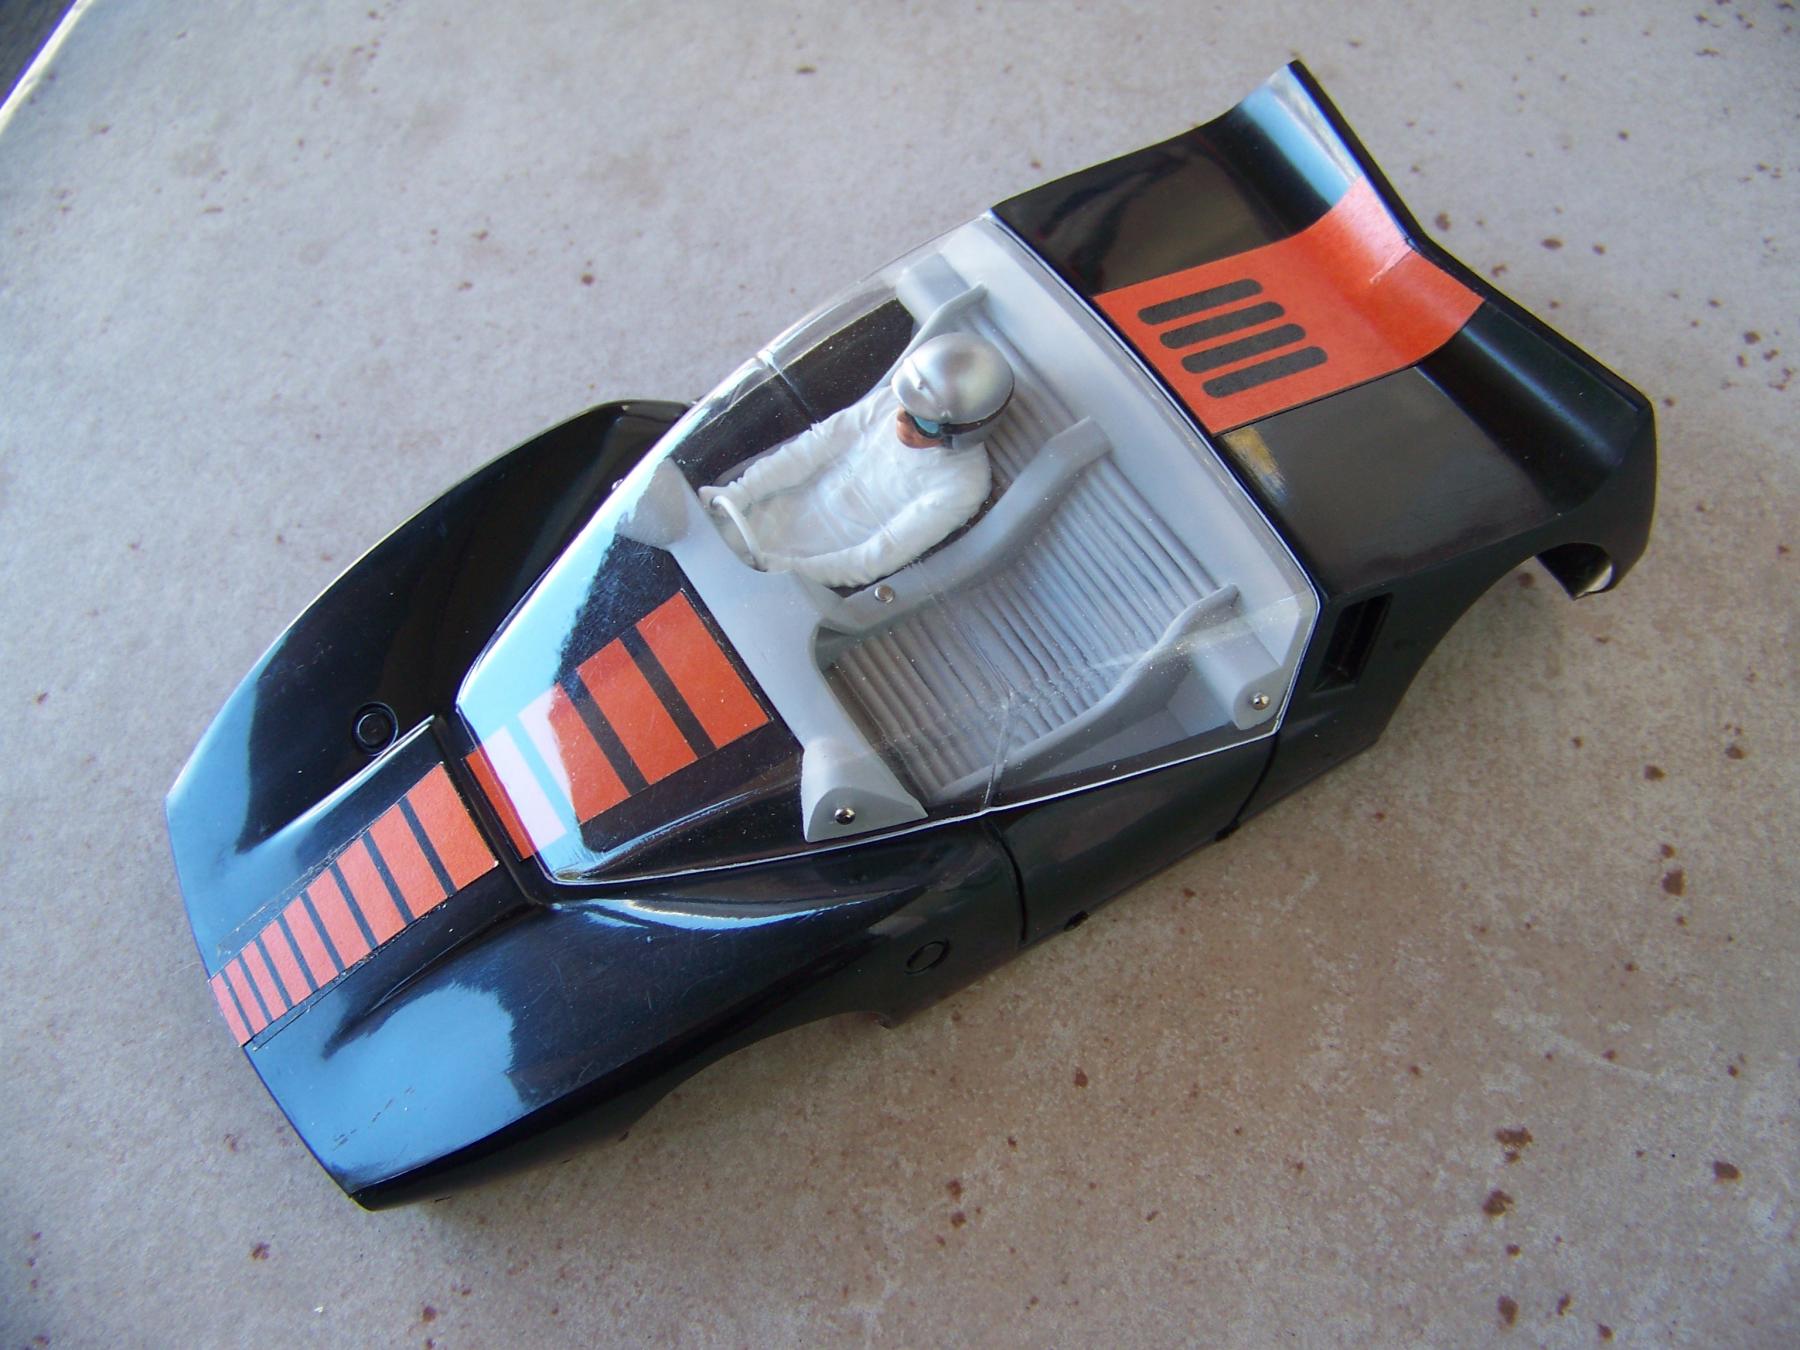
    Posting Leader

  • Moderator
  • PipPipPipPipPipPipPip
  • 4,649 posts
  • Joined: 22-February 09
  • Gender:Male
  • Location:US

Posted 17 June 2025 - 09:19 AM

Staying with the canopy mounting solution for a bit here.


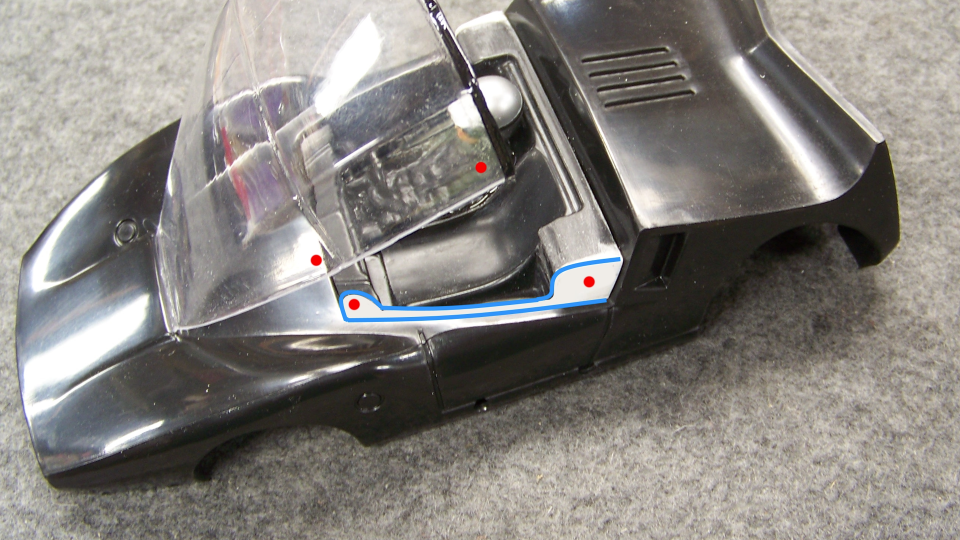
How would MDC do it in production ? My thinking is they would have made an interior that screws in from the bottom and has the canopy attachment locations (shown here as red dots) this could be tabs in slots or other positive method? This means no extra work to the original body, other than the holes in the bottom of the bodies interior tray and a custom interior molding to do the job.


Here is my quick concept to get your eyes on what I am talking about, ideas welcome.


Screenshot 50 per.png


Or I could extend the interior to pick-up more of the front of the canopy, like this? 


canopy fit 2 50per.jpg


or this, 


102_9459 fit 40.jpg


  • Alchemist likes this
Martin Windmill

#56 Martin

Martin

    Posting Leader

  • Moderator
  • PipPipPipPipPipPipPip
  • 4,649 posts
  • Joined: 22-February 09
  • Gender:Male
  • Location:US

Posted 17 June 2025 - 07:19 PM

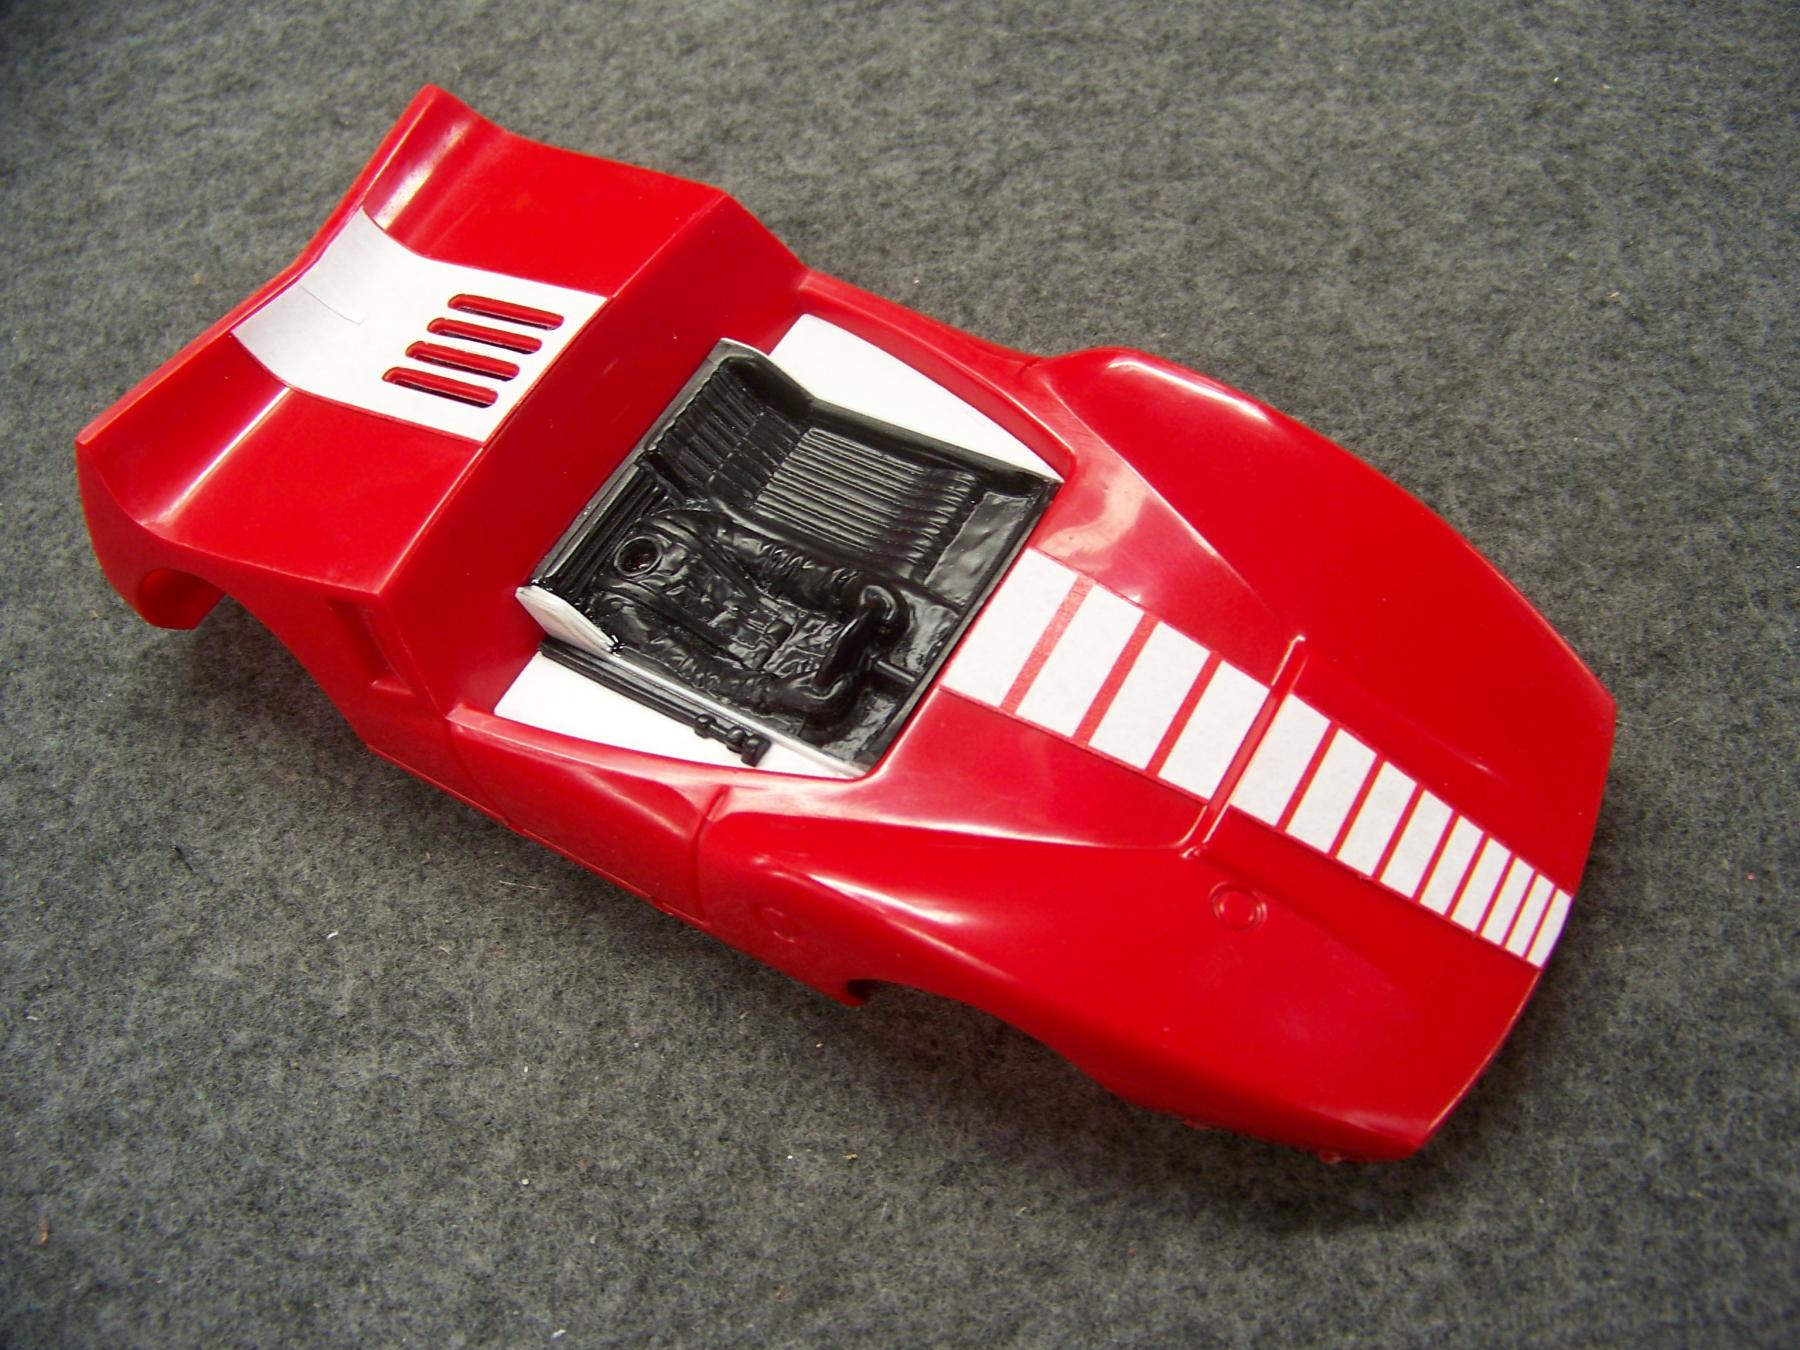
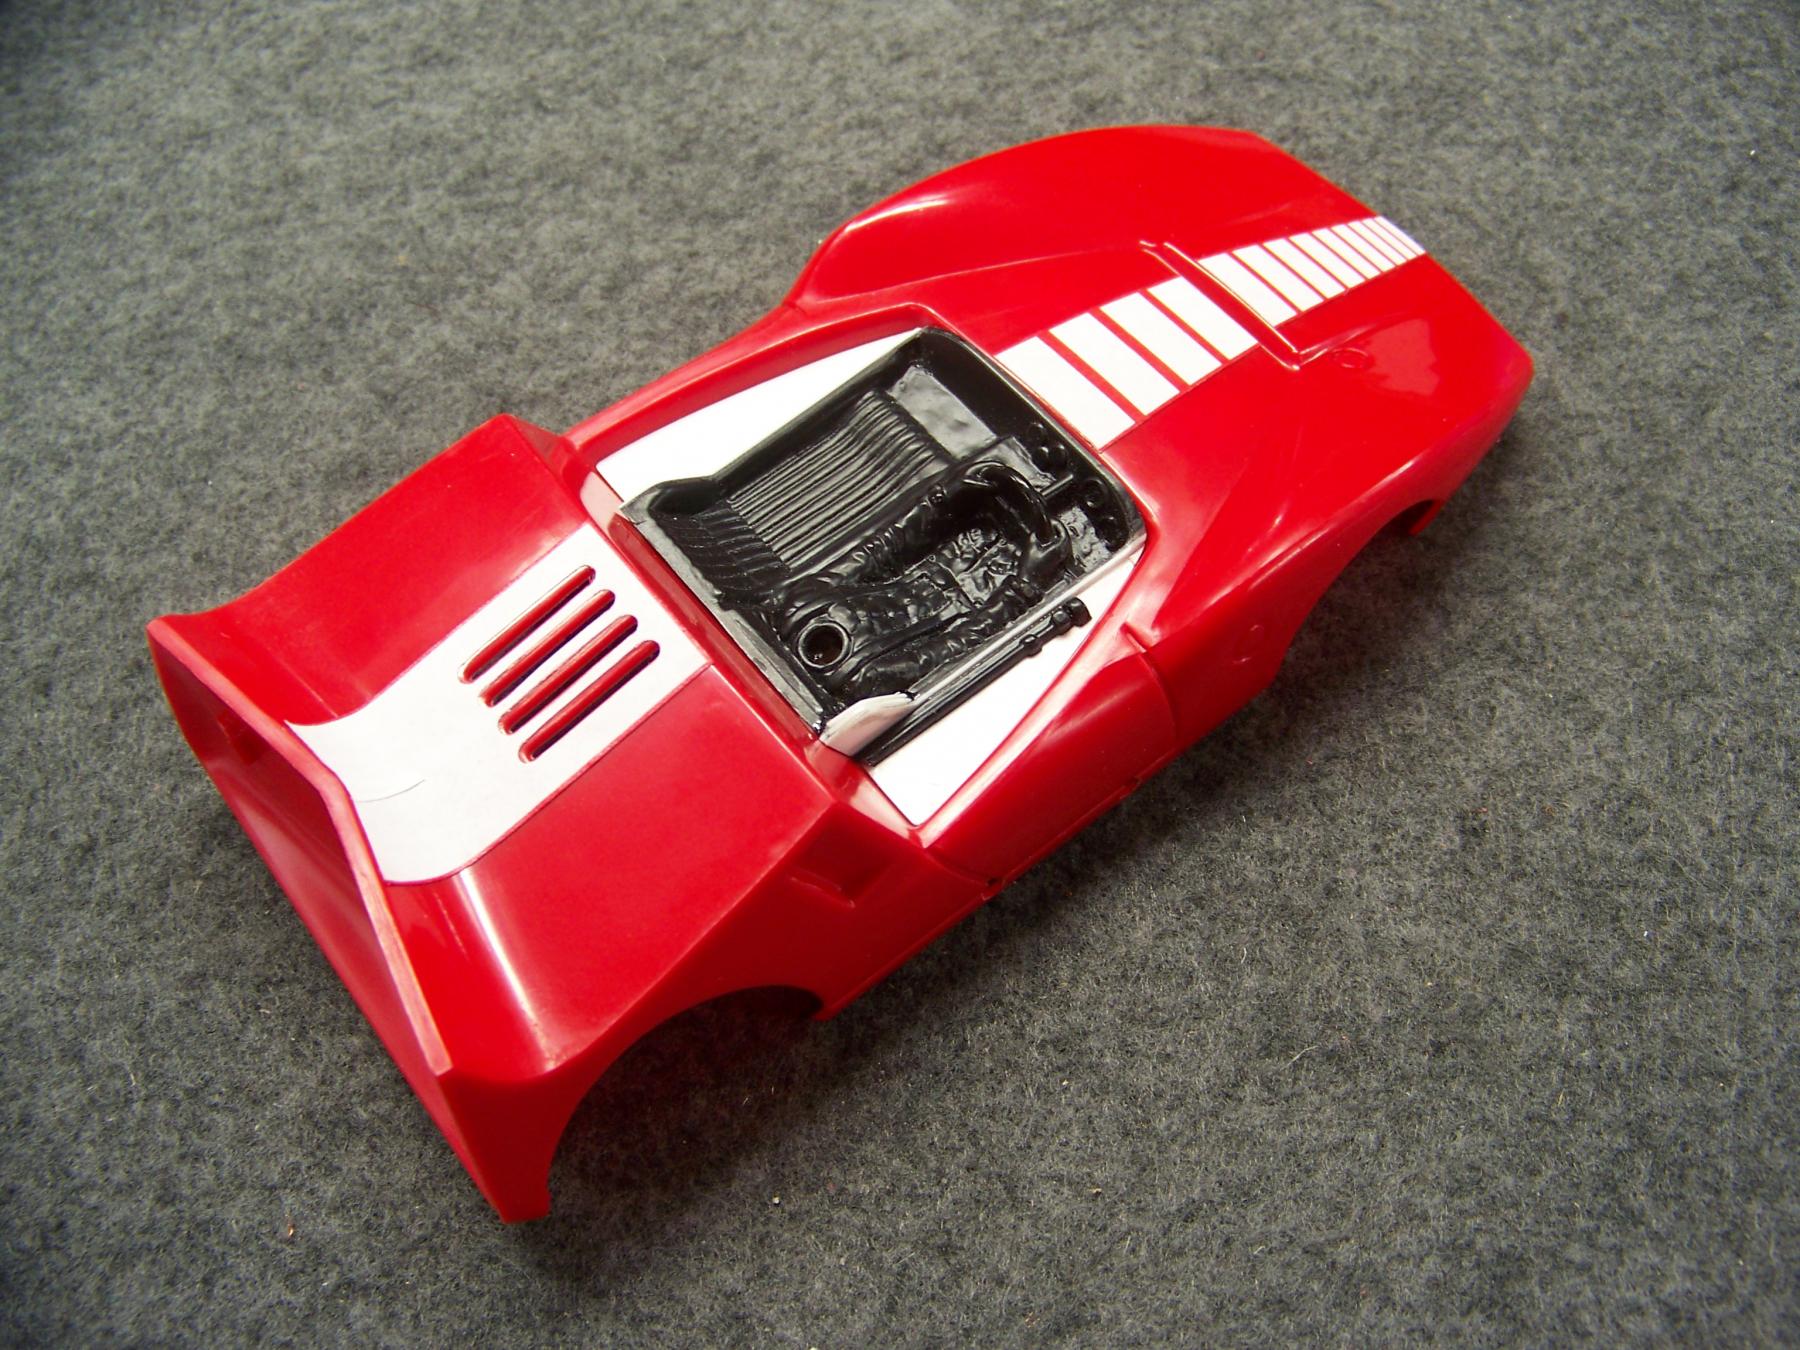
The art work for this has been done for sometime now, but until today had not had a chance to try a simple white stripe on the red.

A customer who bought a Bat kit (Loren) thought it might look good and I do too. What do you guys think?  


102_9468.JPG


102_9469.JPG


  • MSwiss, Alchemist, olescratch and 3 others like this
Martin Windmill

#57 don.siegel

don.siegel

    Grand Champion Poster

  • Subscriber
  • PipPipPipPipPipPipPipPip
  • 5,954 posts
  • Joined: 17-February 06
  • Gender:Male
  • Location:Paris, France

Posted 18 June 2025 - 03:19 AM

It looks great! 


Don 


#58 Martin

Martin

    Posting Leader

  • Moderator
  • PipPipPipPipPipPipPip
  • 4,649 posts
  • Joined: 22-February 09
  • Gender:Male
  • Location:US

Posted 19 June 2025 - 06:00 PM

Thanks Don for your encouragement.


I am happy with this method of mounting the canopy. It meets the criteria I set myself. 


No slot in front nose of the body. No rough material left on canopy. Easy canopy trim to the line.

Positive mounting to the custom interior. 

Screw mounted custom interior from the underside. 

This is a method MDC could have used as it would have been in there wheelhouse to make a form fit interior. 


canopy mount66.jpg


Martin Windmill

#59 don.siegel

don.siegel

    Grand Champion Poster

  • Subscriber
  • PipPipPipPipPipPipPipPip
  • 5,954 posts
  • Joined: 17-February 06
  • Gender:Male
  • Location:Paris, France

Posted 20 June 2025 - 02:43 AM

Martin, 


Not sure I understand how the canopy actually attaches to the interior. Are the black dots holes? Is it just a force fit? And where does the underside screw for the interior go? 


Puzzled in Paris


#60 Martin

Martin

    Posting Leader

  • Moderator
  • PipPipPipPipPipPipPip
  • 4,649 posts
  • Joined: 22-February 09
  • Gender:Male
  • Location:US

Posted 20 June 2025 - 07:24 AM

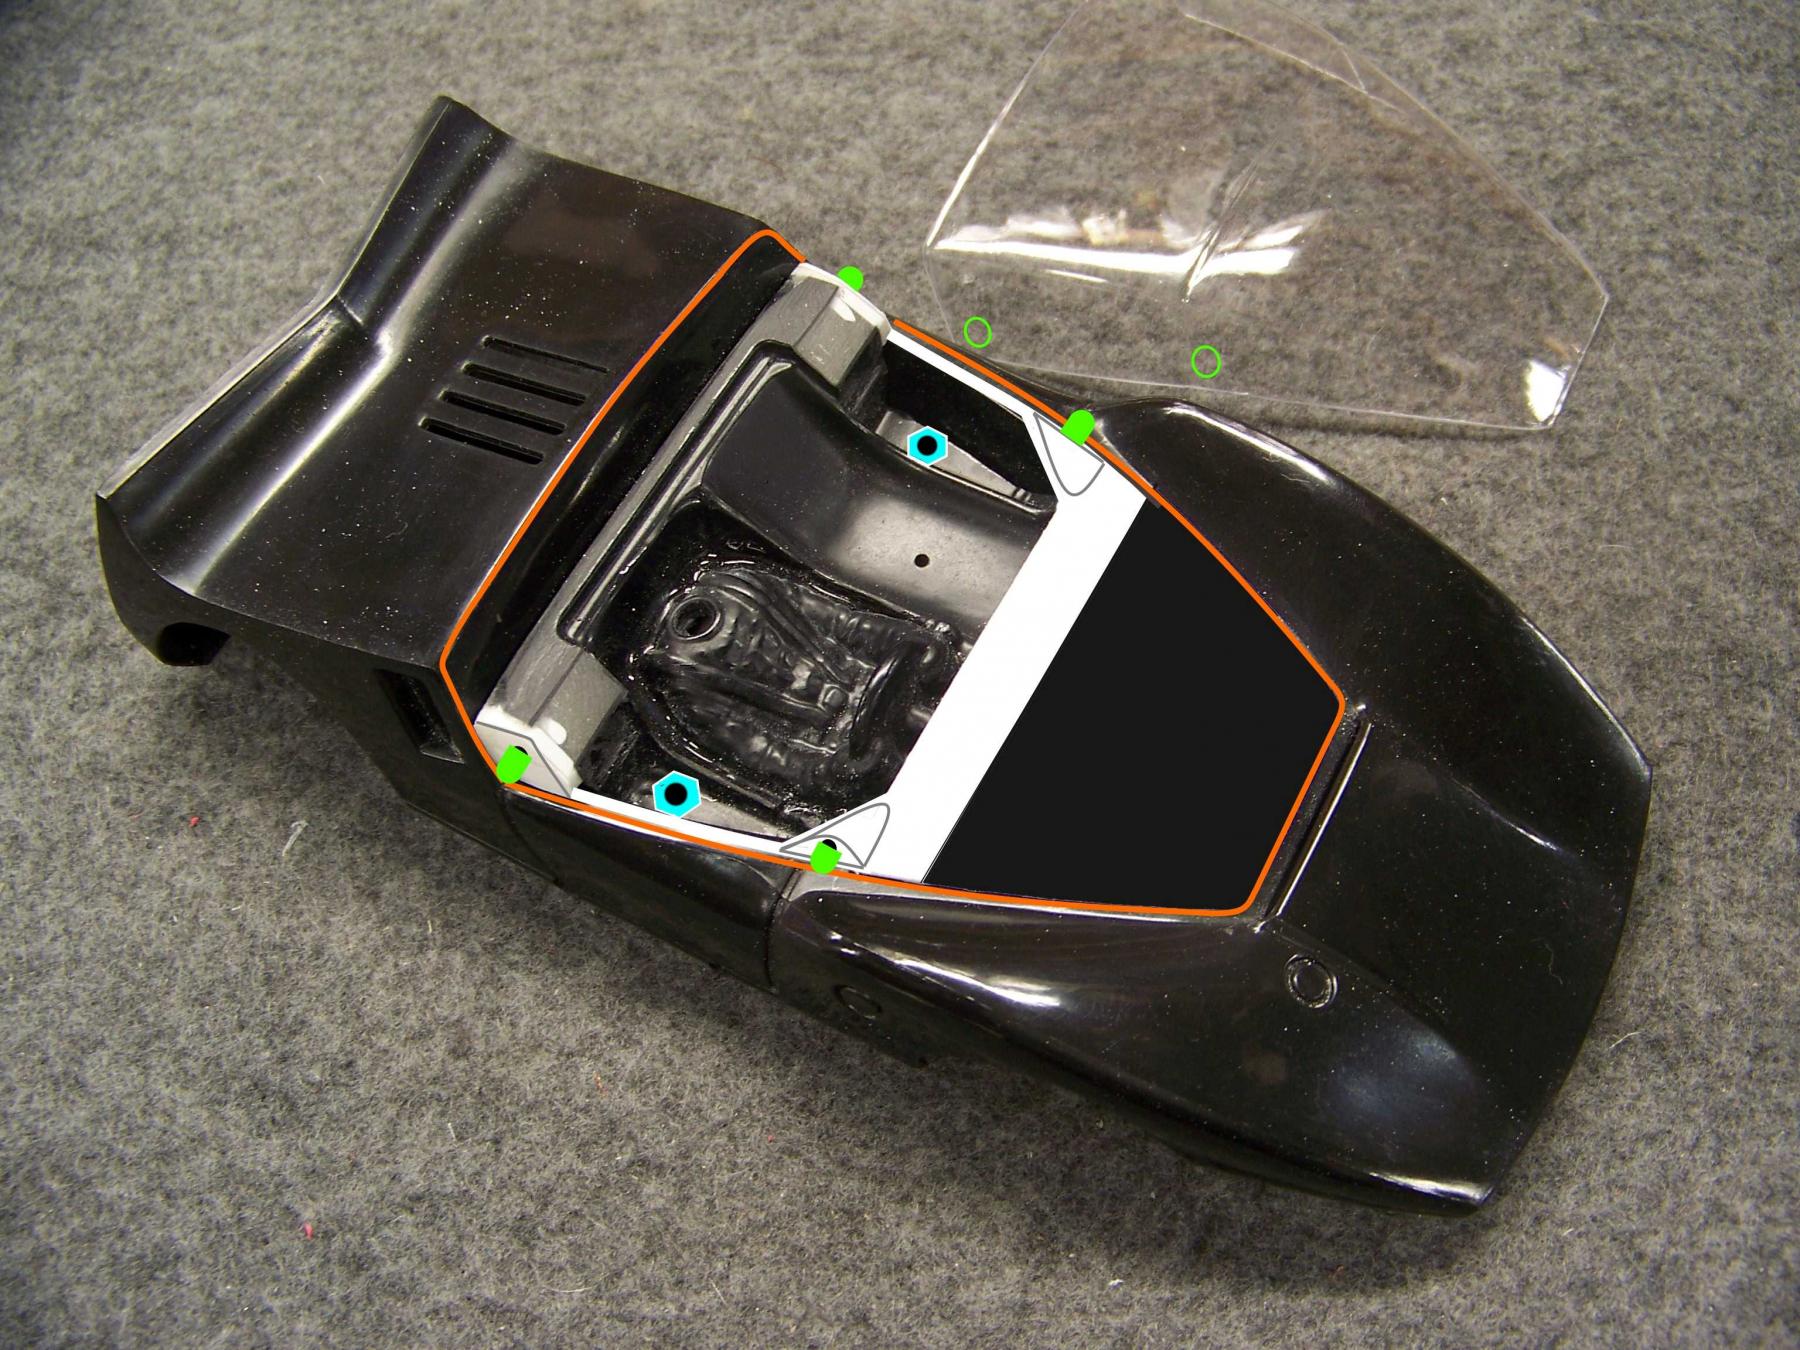
Just imagine the custom interior as the slot car chassis with brass pin tubes and canopy as a clear body. So yes the black dots will be holes and the blue arrows show where the body pins would install.

I will also try small protrusions sticking out of the interior where those black dots are.Those protrusions (in green) would locate into canopy holes, very similar to how MDC mounted this Bat body to the chassis.


As to interior screws, there are perfect locations on either side of the seats. I will sink 2 small nuts into that location on the custom interior. So just 2 small holes in the base of the bodies flat bottom so that small screws can come up from the underside to hold the interior firmly in place. Nuts will not be seen, I just wanted to show the location I had in mind.


 Clarity in California (I hope)  :)  


interior mounting 50%.jpg


  • don.siegel and Carter like this
Martin Windmill

#61 Mark Onofri

Mark Onofri

    Posting Leader

  • Subscriber
  • PipPipPipPipPipPipPip
  • 2,981 posts
  • Joined: 18-November 20
  • Gender:Male
  • Location:Syracuse, NY

Posted 20 June 2025 - 12:19 PM

Ummm, green arrows?

#62 Martin

Martin

    Posting Leader

  • Moderator
  • PipPipPipPipPipPipPip
  • 4,649 posts
  • Joined: 22-February 09
  • Gender:Male
  • Location:US

Posted 20 June 2025 - 01:32 PM

That would be BLUE arrows and GREEN nipples  :laugh2:


Martin Windmill

#63 Martin

Martin

    Posting Leader

  • Moderator
  • PipPipPipPipPipPipPip
  • 4,649 posts
  • Joined: 22-February 09
  • Gender:Male
  • Location:US

Posted 21 June 2025 - 10:01 AM

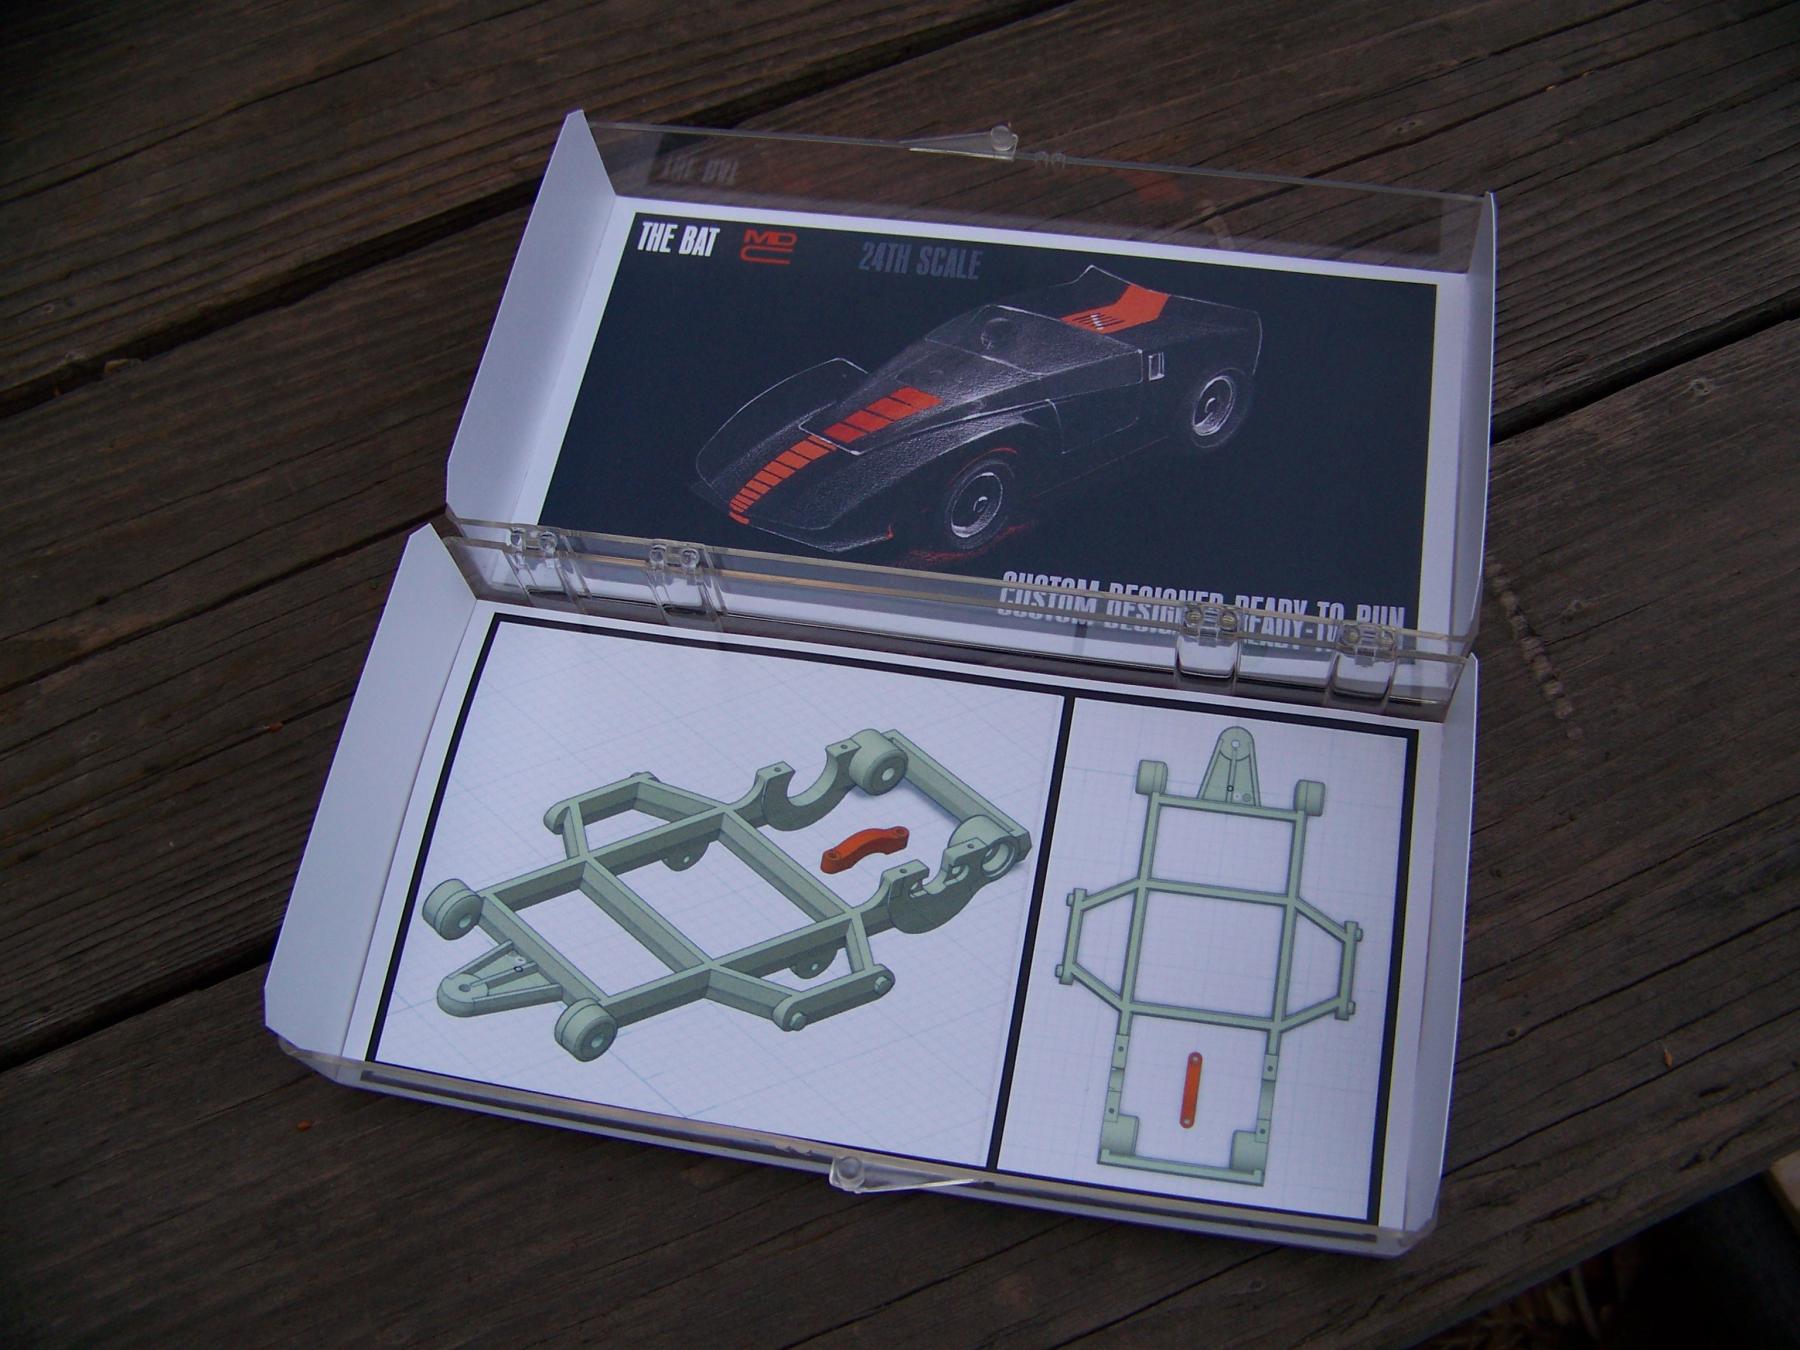
Just to add to the display box, I added an image that captures when Larry and I were ready to print the chassis. It captures that moment when we could offer a chassis that fit the body as close to what MDC would have sold in 1966 but with the necessary mods. 


In a conversation with a customer(Loren) he mentioned " I have wanted to own the MDC Bat slot car ever since I , as a kid , first saw the advertisement in a mid 1966 issue of Car Model magazine , that I had purchased in a local hobby shop" 

I look forward to seeing Loren's kit car completion.


102_9491.JPG


  • Gene/ZR1 and Carter like this
Martin Windmill

#64 Martin

Martin

    Posting Leader

  • Moderator
  • PipPipPipPipPipPipPip
  • 4,649 posts
  • Joined: 22-February 09
  • Gender:Male
  • Location:US

Posted 23 June 2025 - 08:21 PM

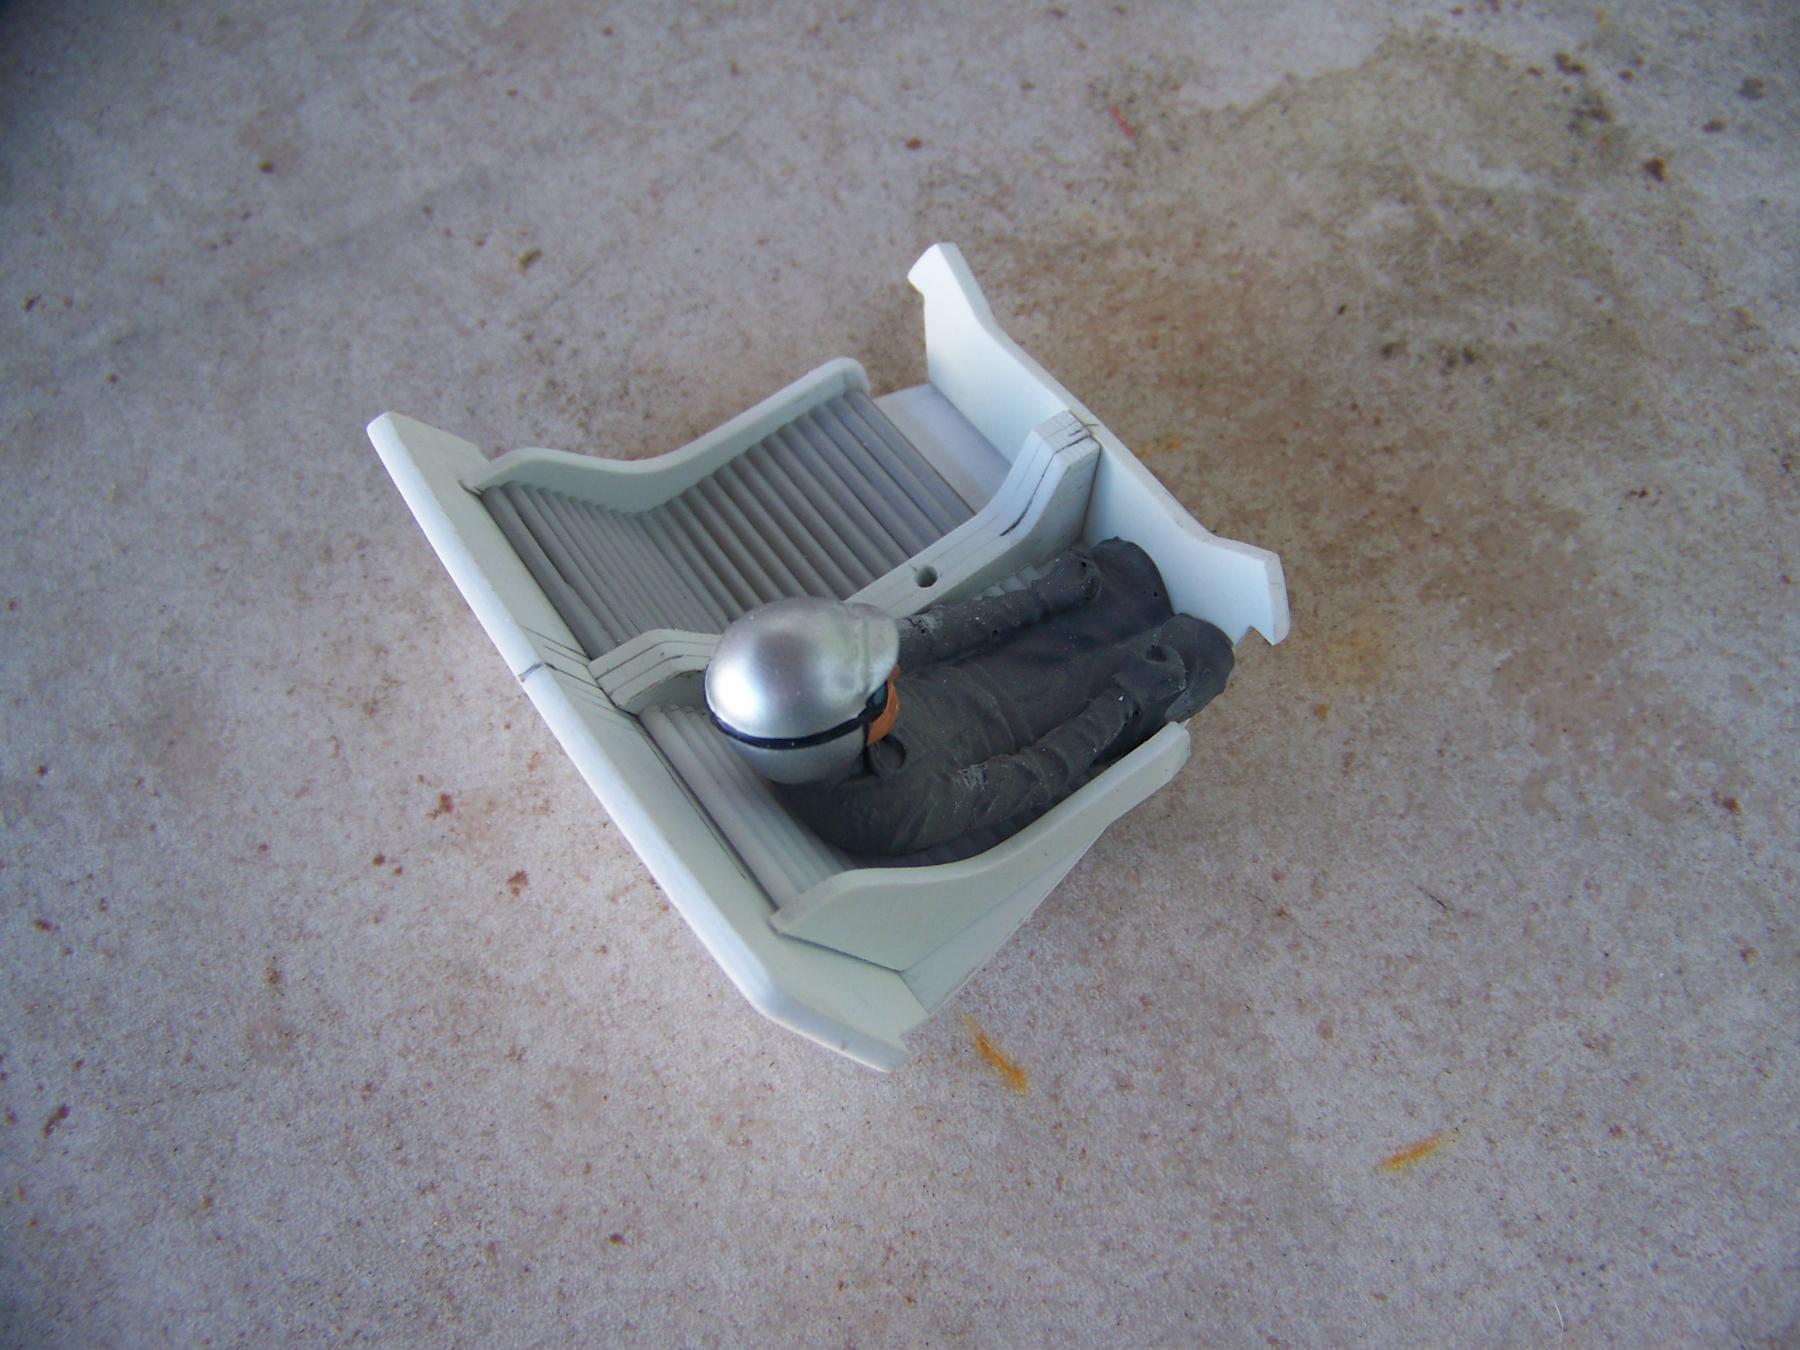
You may of noticed I have a couple of different interiors going. But there comes a point where I just said, maybe it's time to make one from scratch.

If I break the parts down to there 2D shapes we could have something that is an exact fit, with canopy mounting designed in.


The process is, I hand fit each individual part to the Bat body then make a dimensioned drawing of that part, then larry converts this into CAD. With the goal of 3D printing and making them available. 


This is the interior so far. It is constructed from flat and round styrene stock. Driver of your choice can be added, unless we can find the CAD for that?

Notice the hole in the center console. It has a bolt that screws into that MDC injection molding boss, so that does not have to be removed, it now has the function of holding the interior and canopy securely in place.


102_9519.JPG


102_9514.JPG


102_9525.JPG


  • don.siegel, Pablo and Alchemist like this
Martin Windmill

#65 Mark Onofri

Mark Onofri

    Posting Leader

  • Subscriber
  • PipPipPipPipPipPipPip
  • 2,981 posts
  • Joined: 18-November 20
  • Gender:Male
  • Location:Syracuse, NY

Posted 24 June 2025 - 07:20 PM

I can see why you didn't take my suggestion for pink and purple tuck and roll.
Martin, that looks phenomenal. Hopefully you can find the time to provide interiors for other popular cars. Who could resist acquiring a interior of this caliber?

#66 Martin

Martin

    Posting Leader

  • Moderator
  • PipPipPipPipPipPipPip
  • 4,649 posts
  • Joined: 22-February 09
  • Gender:Male
  • Location:US

Posted 24 June 2025 - 08:33 PM

Hey Mark, when it comes time for paint, I am not opposed to some 60's wild color's.  This interior is reminding me of something you may of seen in a 60's custom.


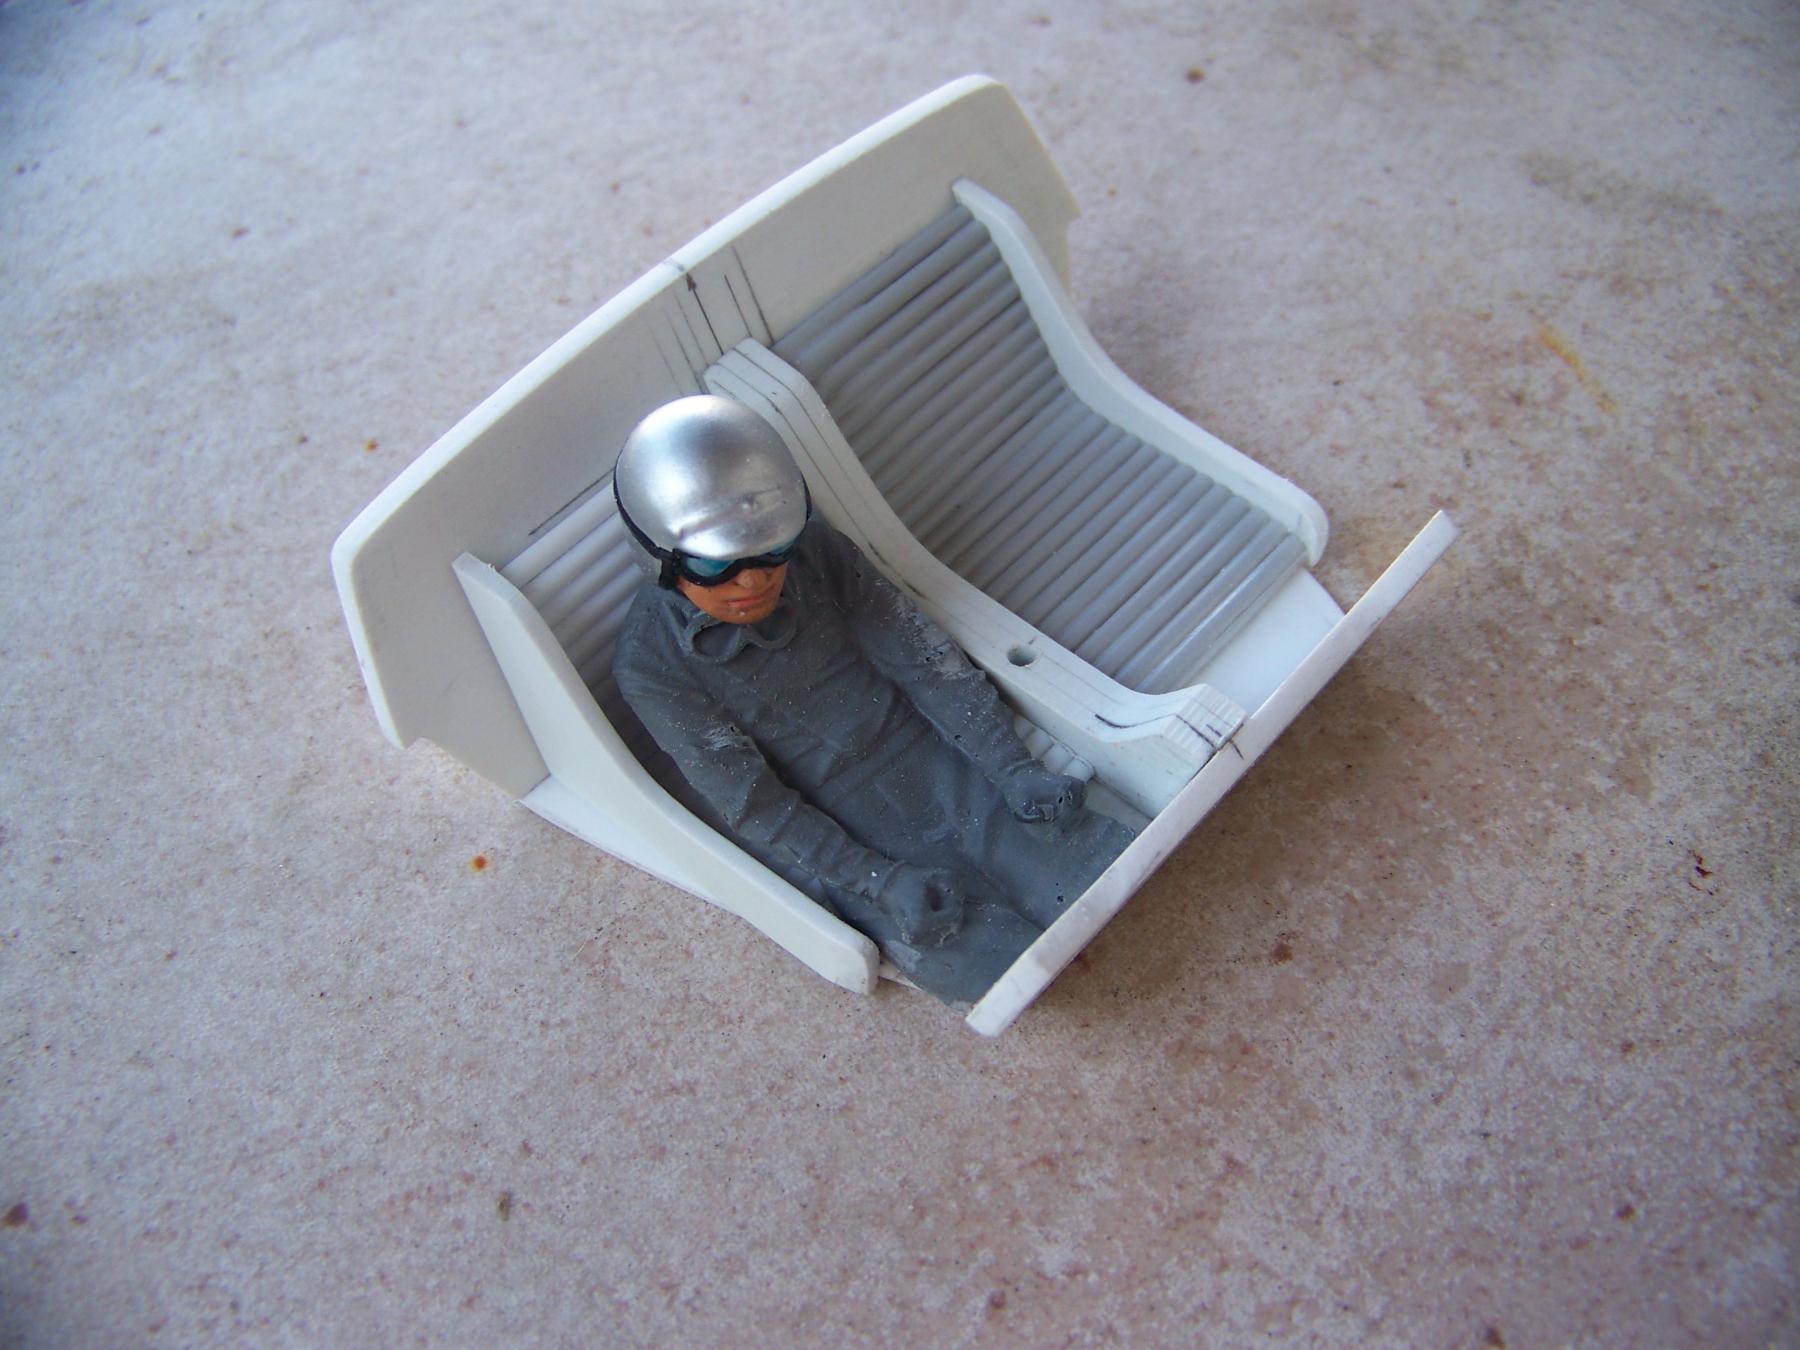
Driver is now sitting comfortably. AND the canopy still fits, for a minute there I thought I was going to need a Gurney bubble.

Here are some pics so far.


Now to do the dash and the canopy mounting. 


102_9535.JPG


102_9534.JPG


102_9538.JPG


102_9537.JPG


  • don.siegel, Gene/ZR1 and Carter like this
Martin Windmill

#67 Mark Onofri

Mark Onofri

    Posting Leader

  • Subscriber
  • PipPipPipPipPipPipPip
  • 2,981 posts
  • Joined: 18-November 20
  • Gender:Male
  • Location:Syracuse, NY

Posted 25 June 2025 - 02:49 PM

Party on Martin

#68 Martin

Martin

    Posting Leader

  • Moderator
  • PipPipPipPipPipPipPip
  • 4,649 posts
  • Joined: 22-February 09
  • Gender:Male
  • Location:US

Posted 25 June 2025 - 10:09 PM

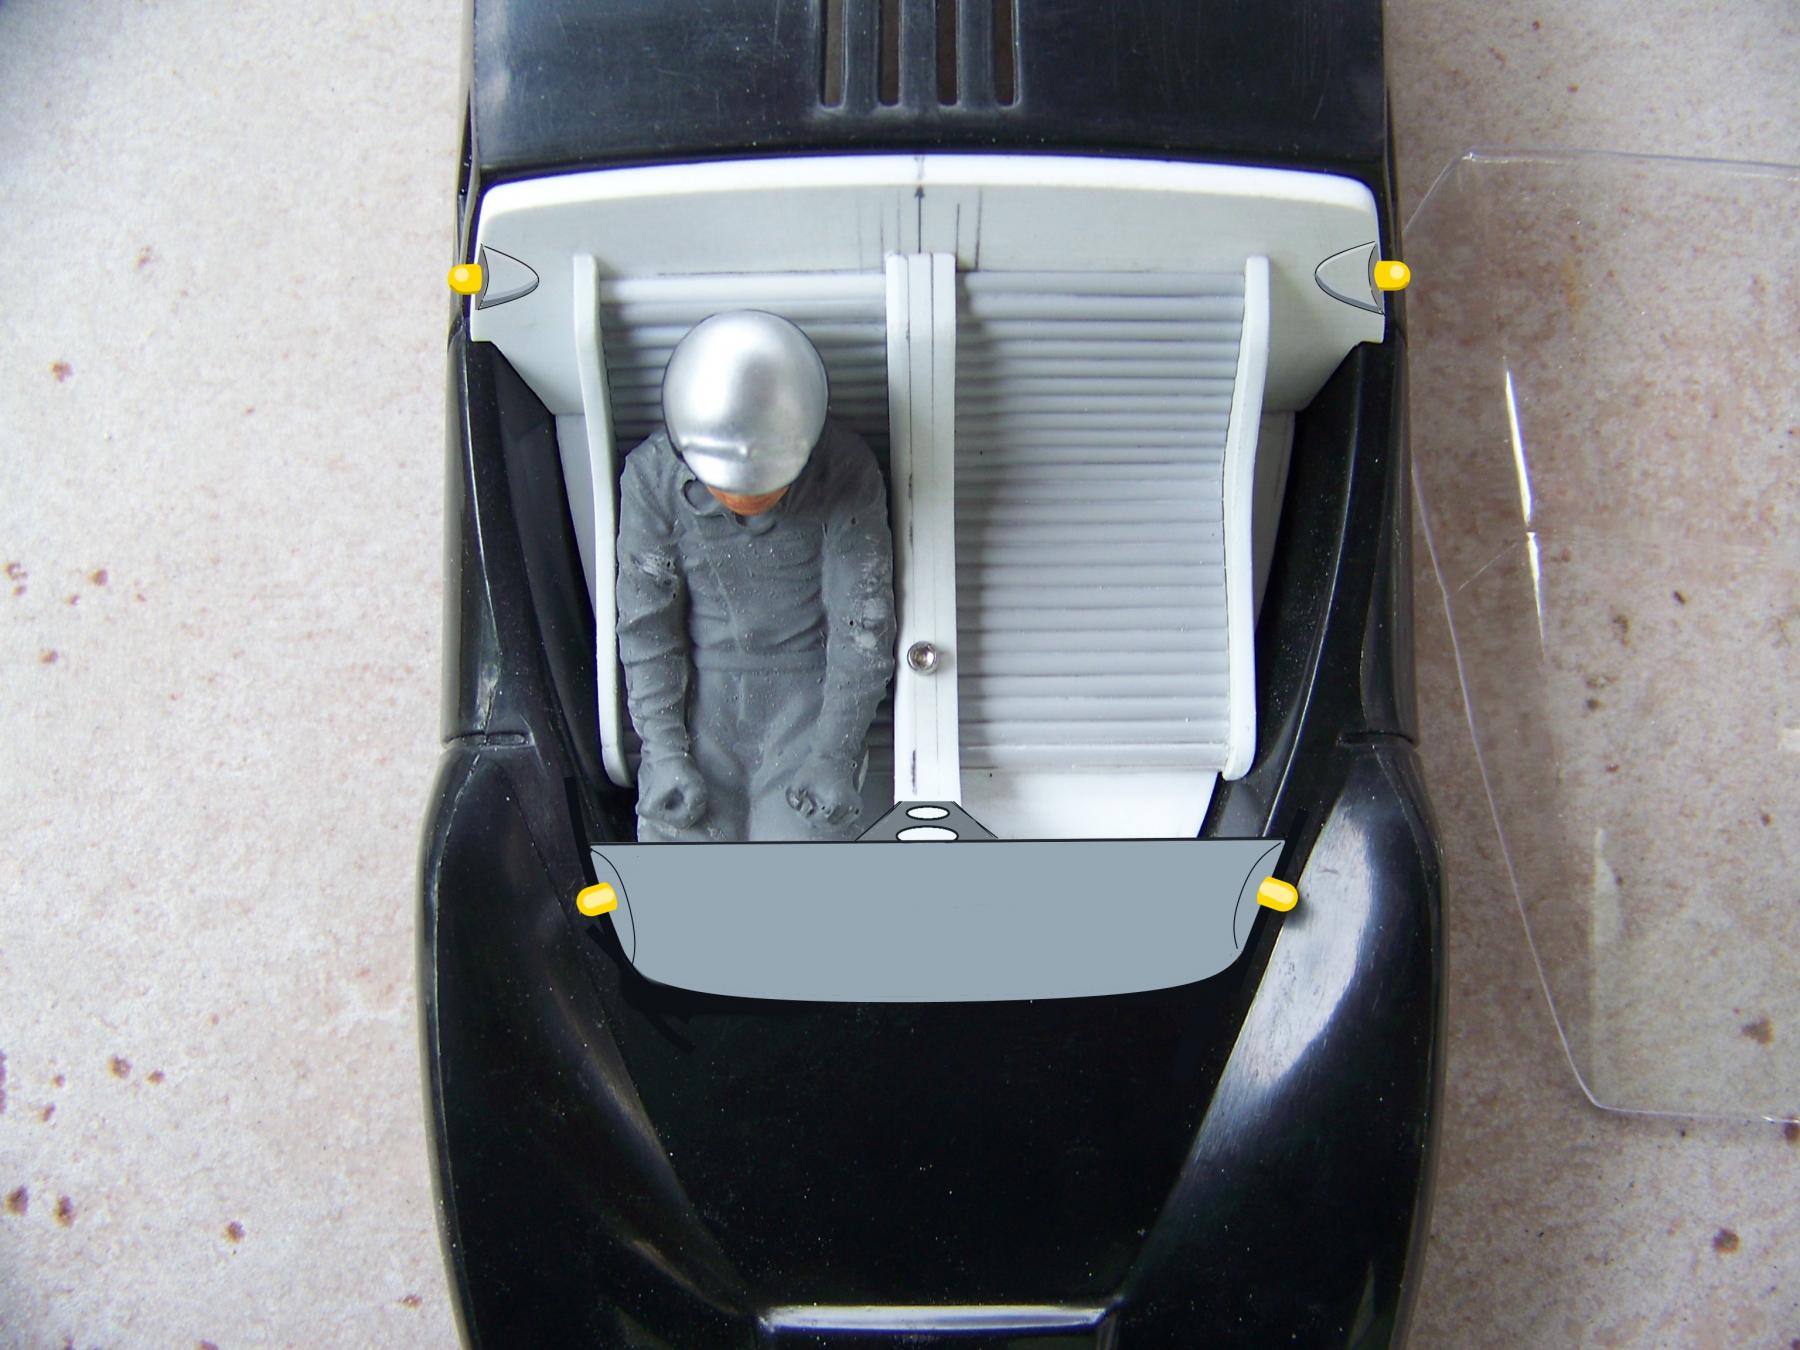
I not sure I am ready to party Mark(yet) but this is a photoshop version of the plan. The pins shown here in yellow will snap into matching holes in the canopy.


view dash with pins.jpg


  • Jaeger Team and Carter like this
Martin Windmill

#69 Mark Onofri

Mark Onofri

    Posting Leader

  • Subscriber
  • PipPipPipPipPipPipPip
  • 2,981 posts
  • Joined: 18-November 20
  • Gender:Male
  • Location:Syracuse, NY

Posted 28 June 2025 - 02:29 PM

I seem to have missed where the driver is from. Would you refresh what's left of my mind.

#70 Martin

Martin

    Posting Leader

  • Moderator
  • PipPipPipPipPipPipPip
  • 4,649 posts
  • Joined: 22-February 09
  • Gender:Male
  • Location:US

Posted 28 June 2025 - 07:51 PM

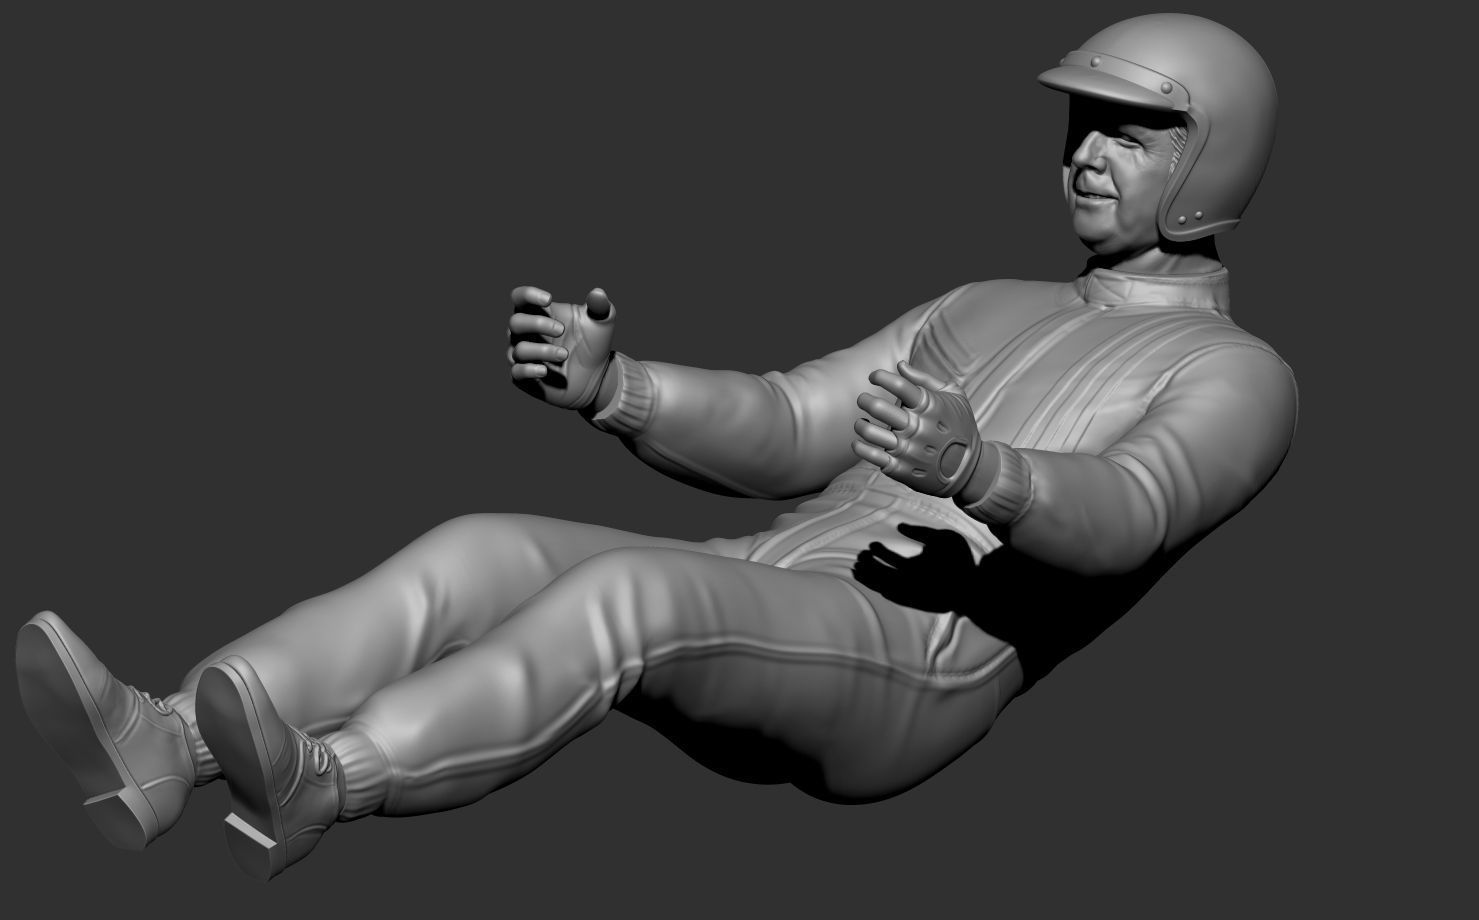
I am looking for some 3D CAD so we can print the driver to fit into the custom interior. 

This guy looks like a winner

If anybody knows where to find the CAD for this or a similar driver I would appreciate it.


jack-brabham-car-driver-3d-model-211469104f.jpg


Martin Windmill

#71 Martin

Martin

    Posting Leader

  • Moderator
  • PipPipPipPipPipPipPip
  • 4,649 posts
  • Joined: 22-February 09
  • Gender:Male
  • Location:US

Posted 02 July 2025 - 06:52 PM

I have been looking forward to sharing this moment for awhile now.

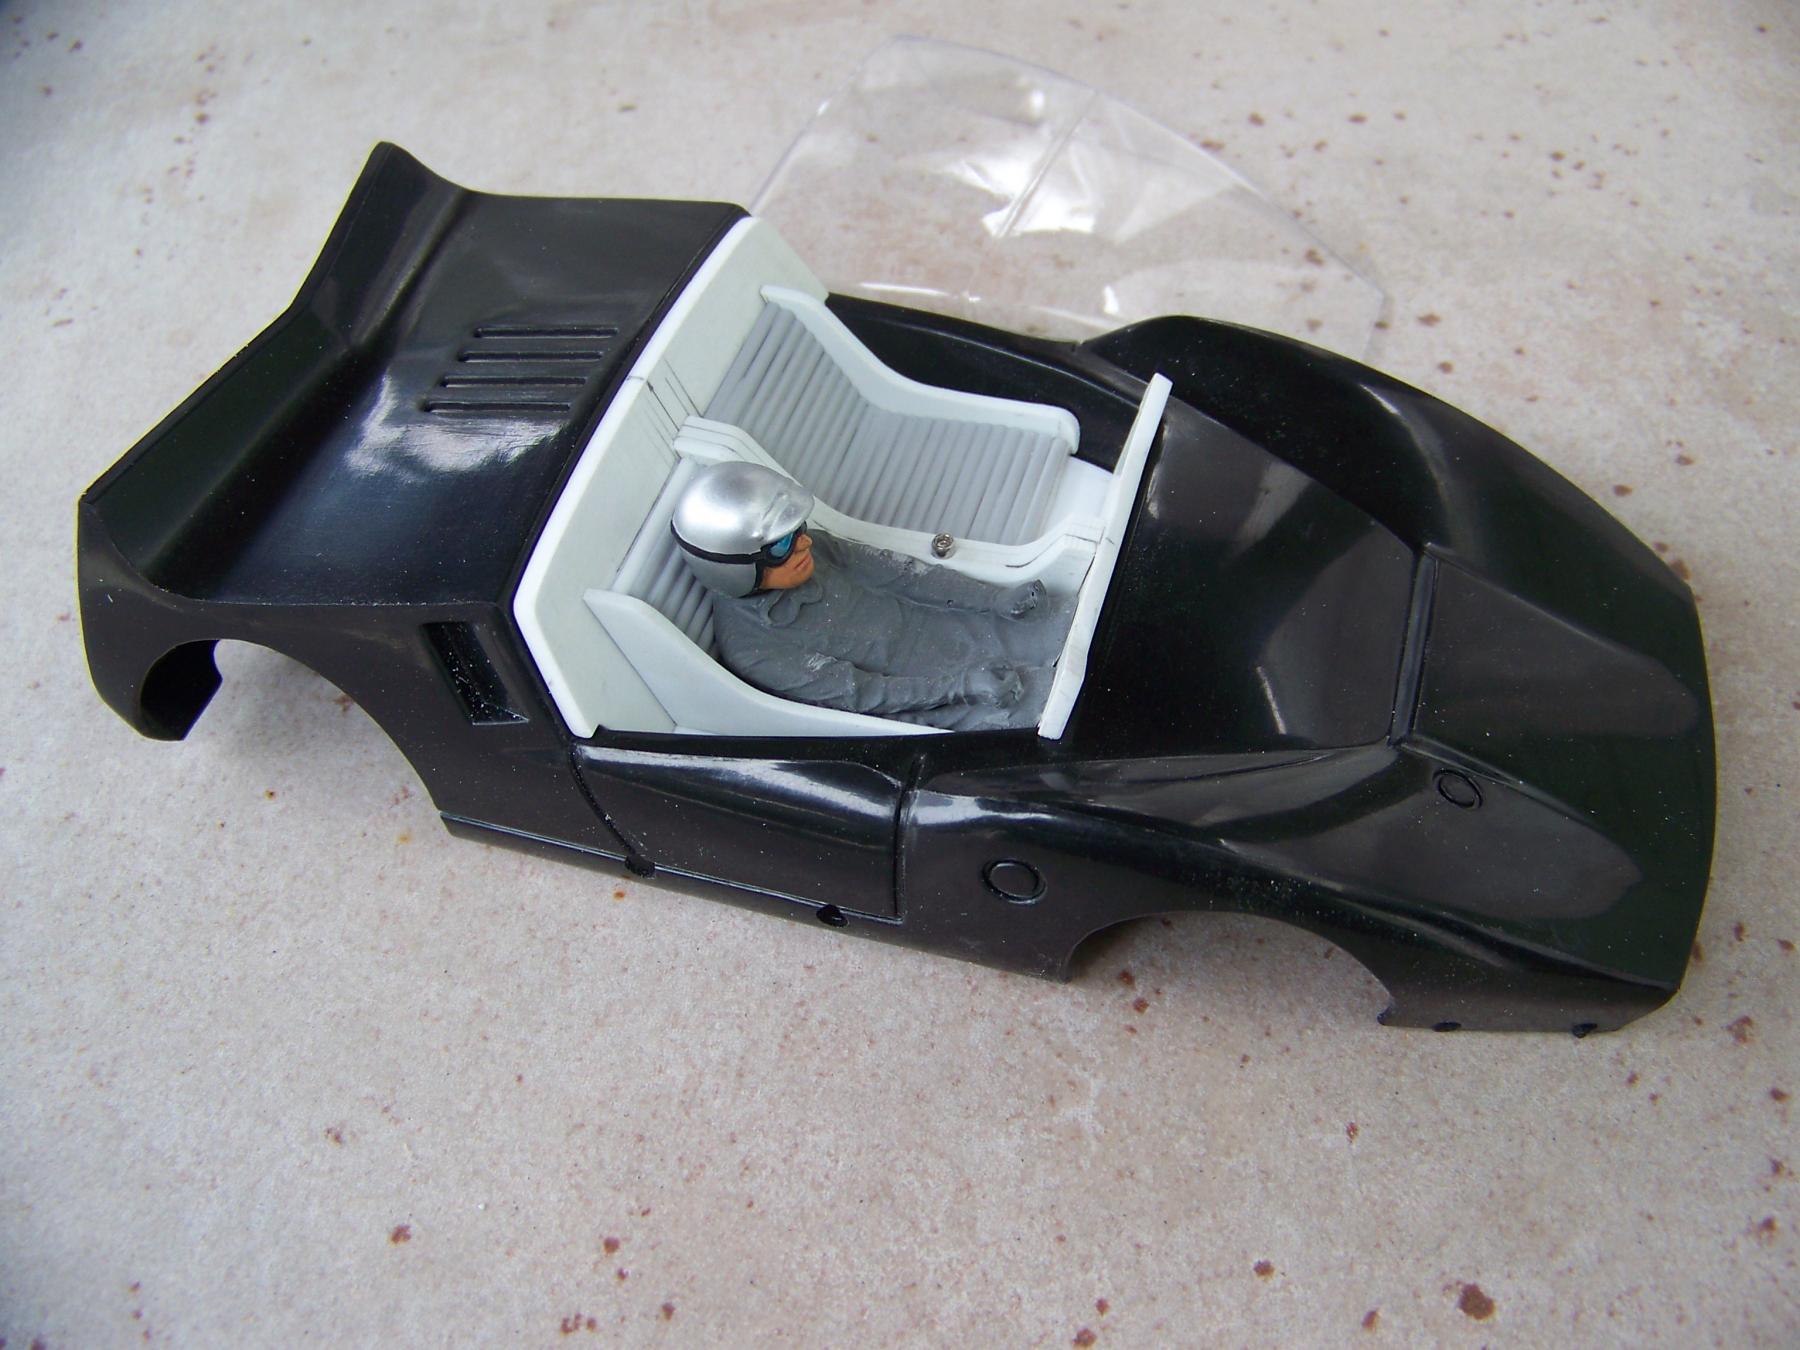
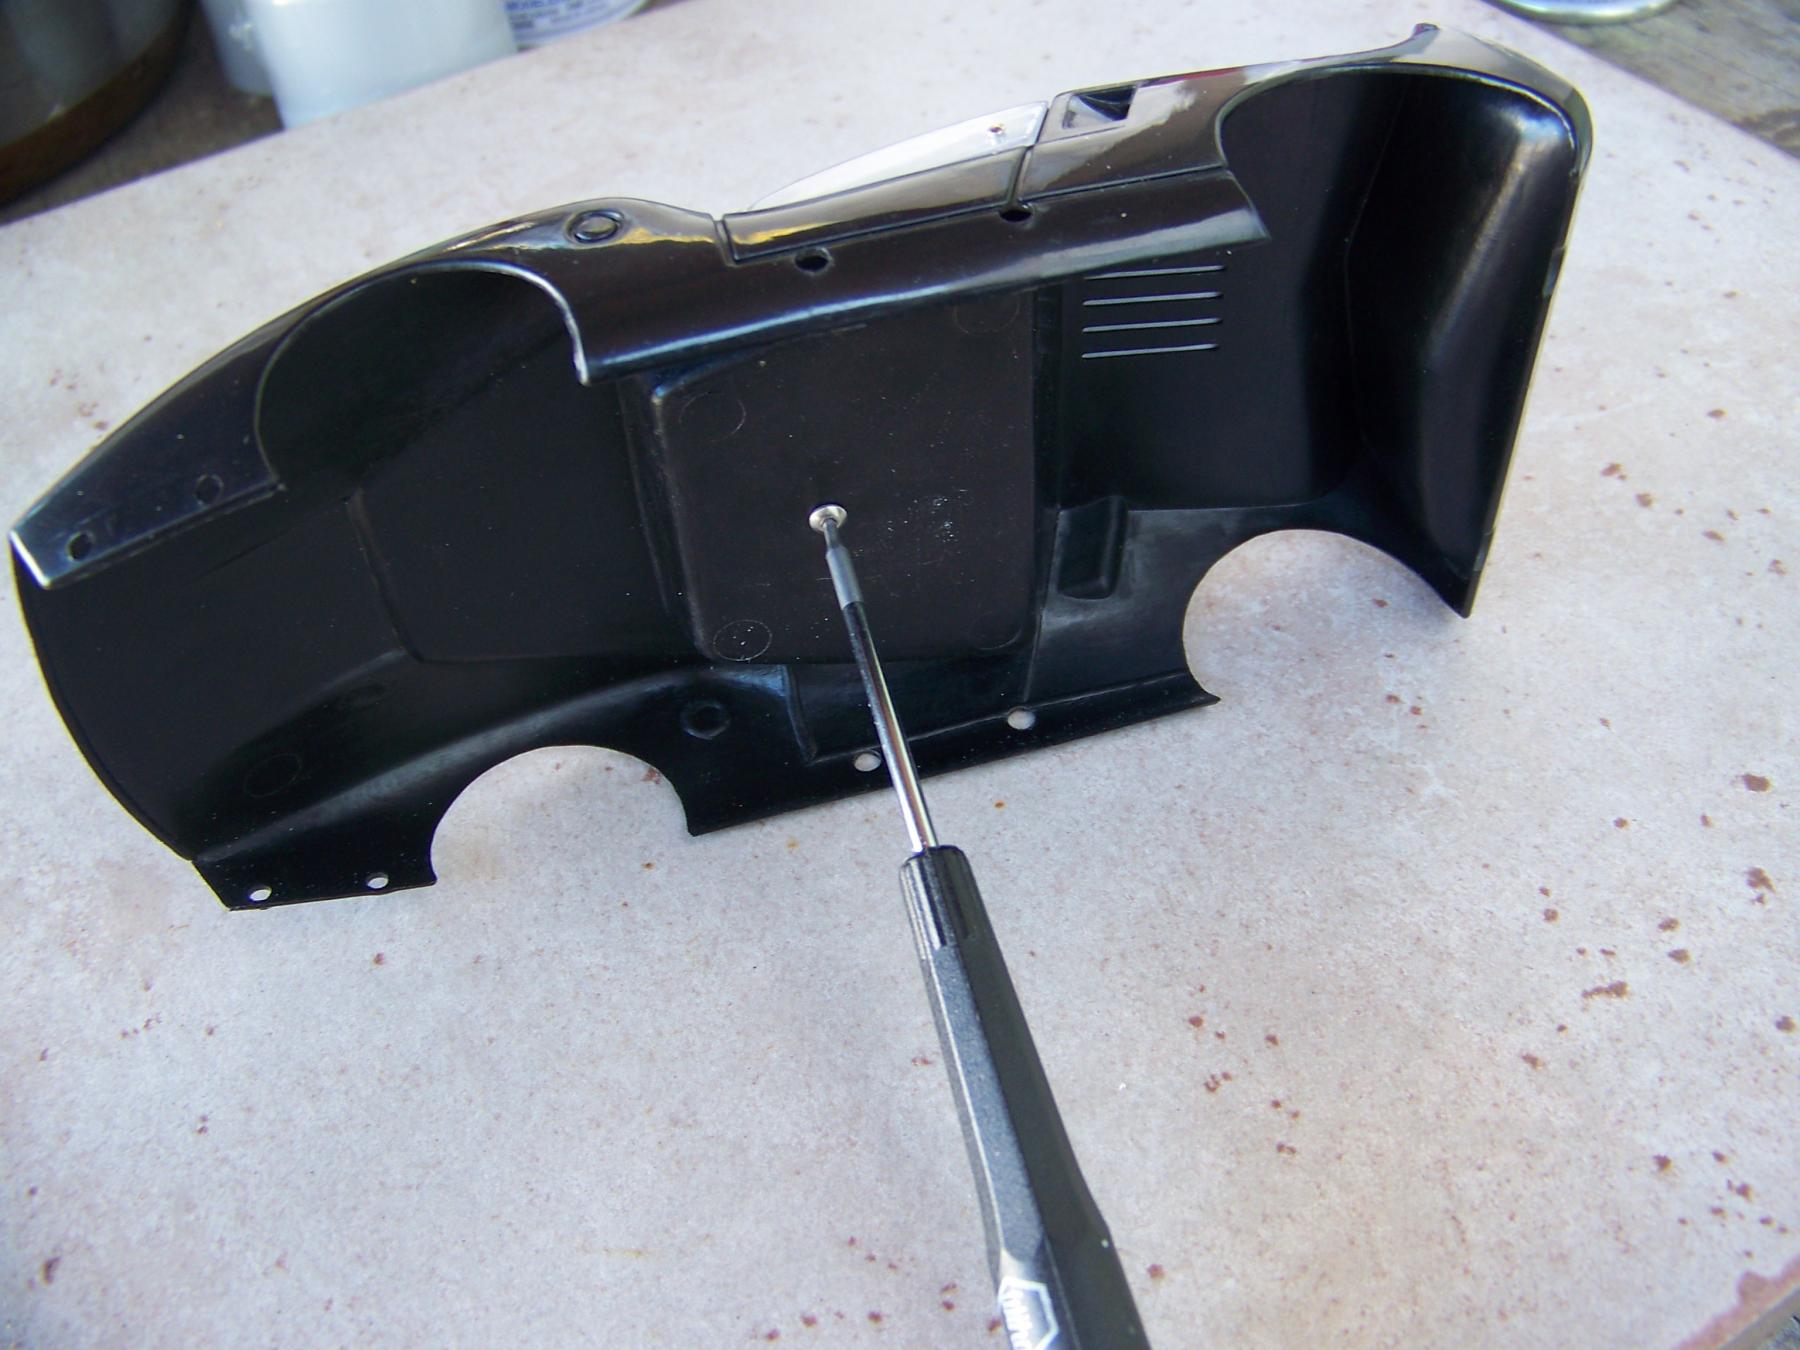
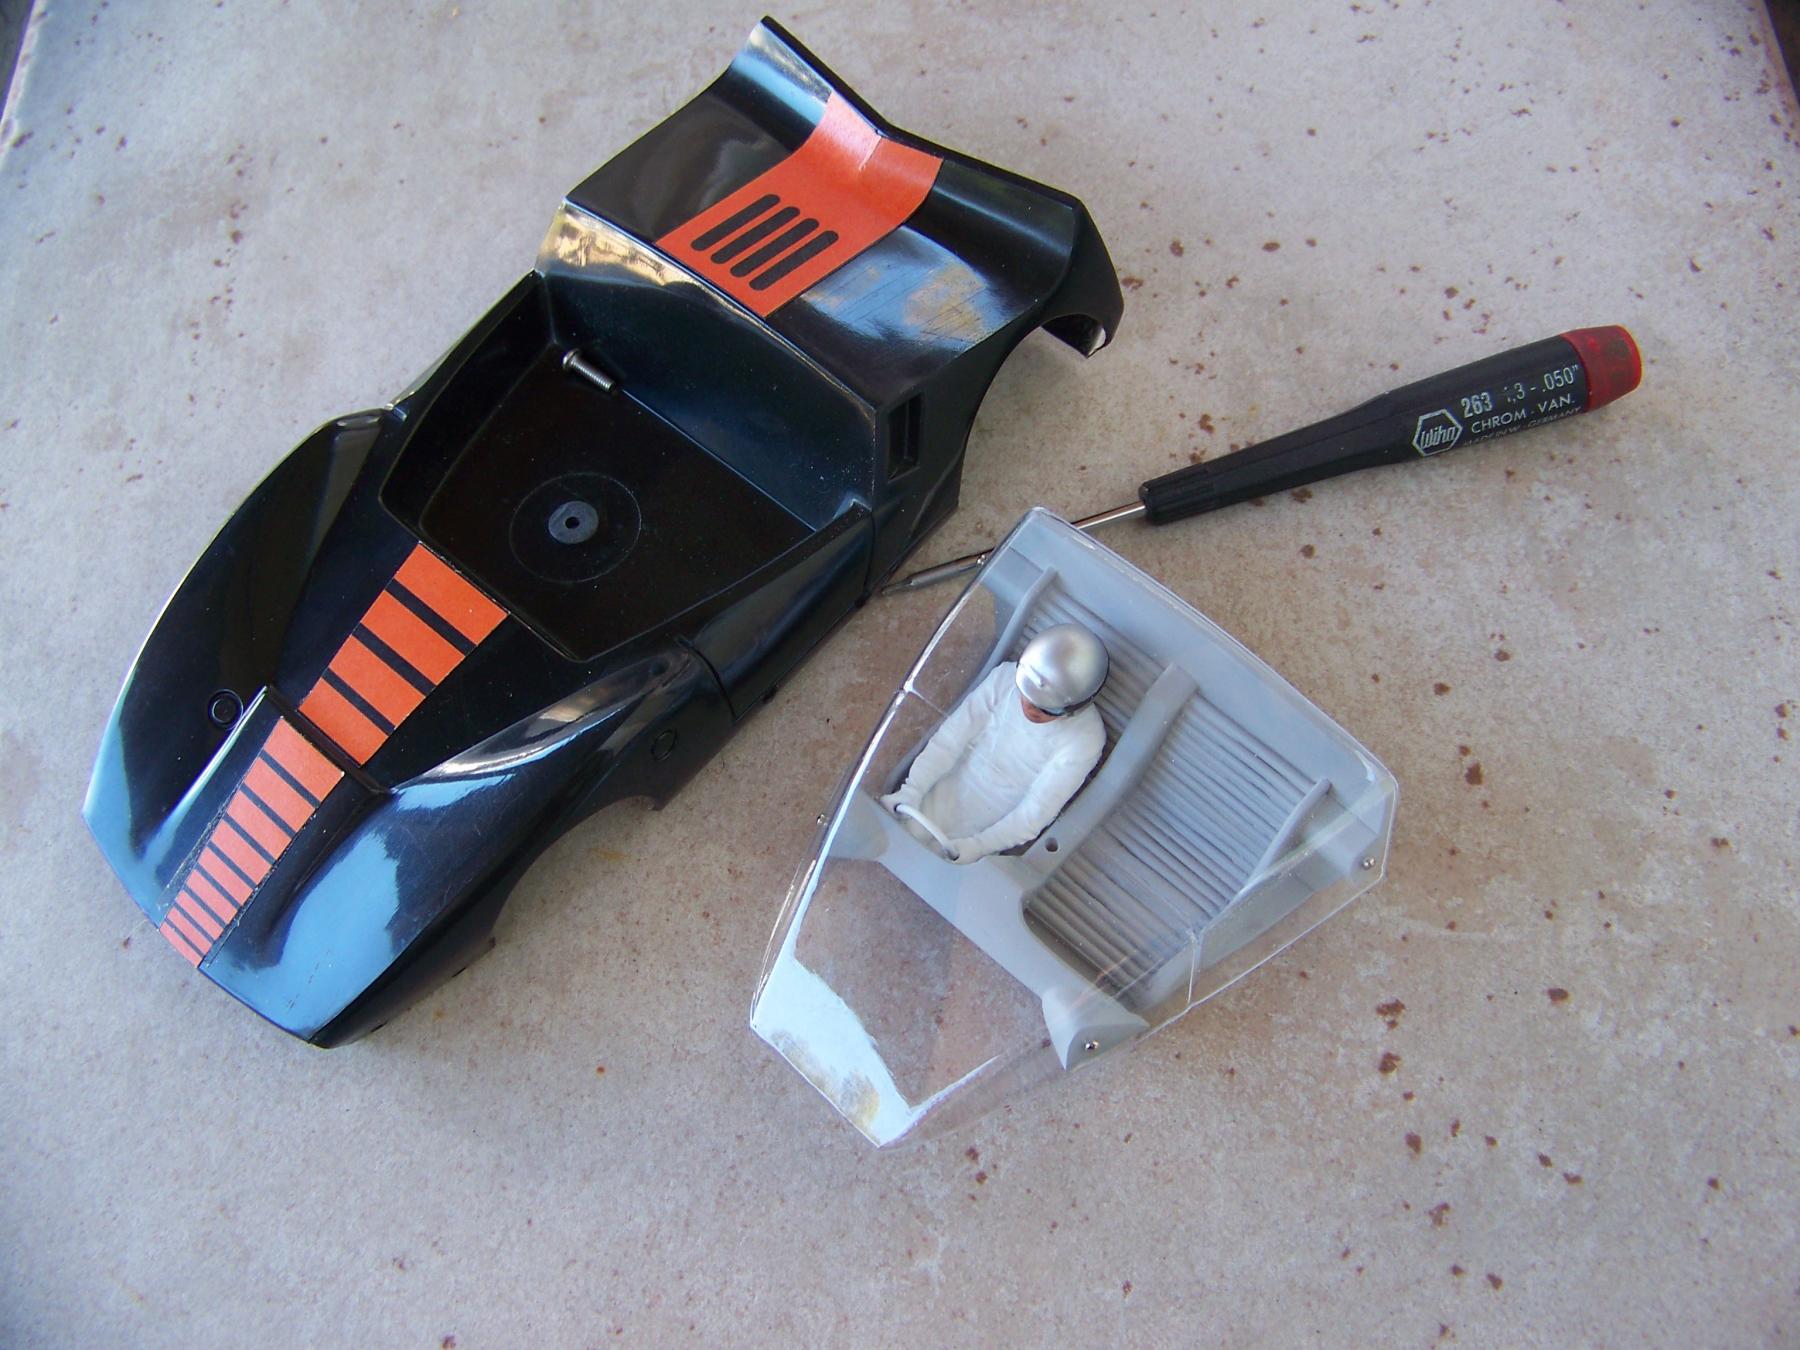
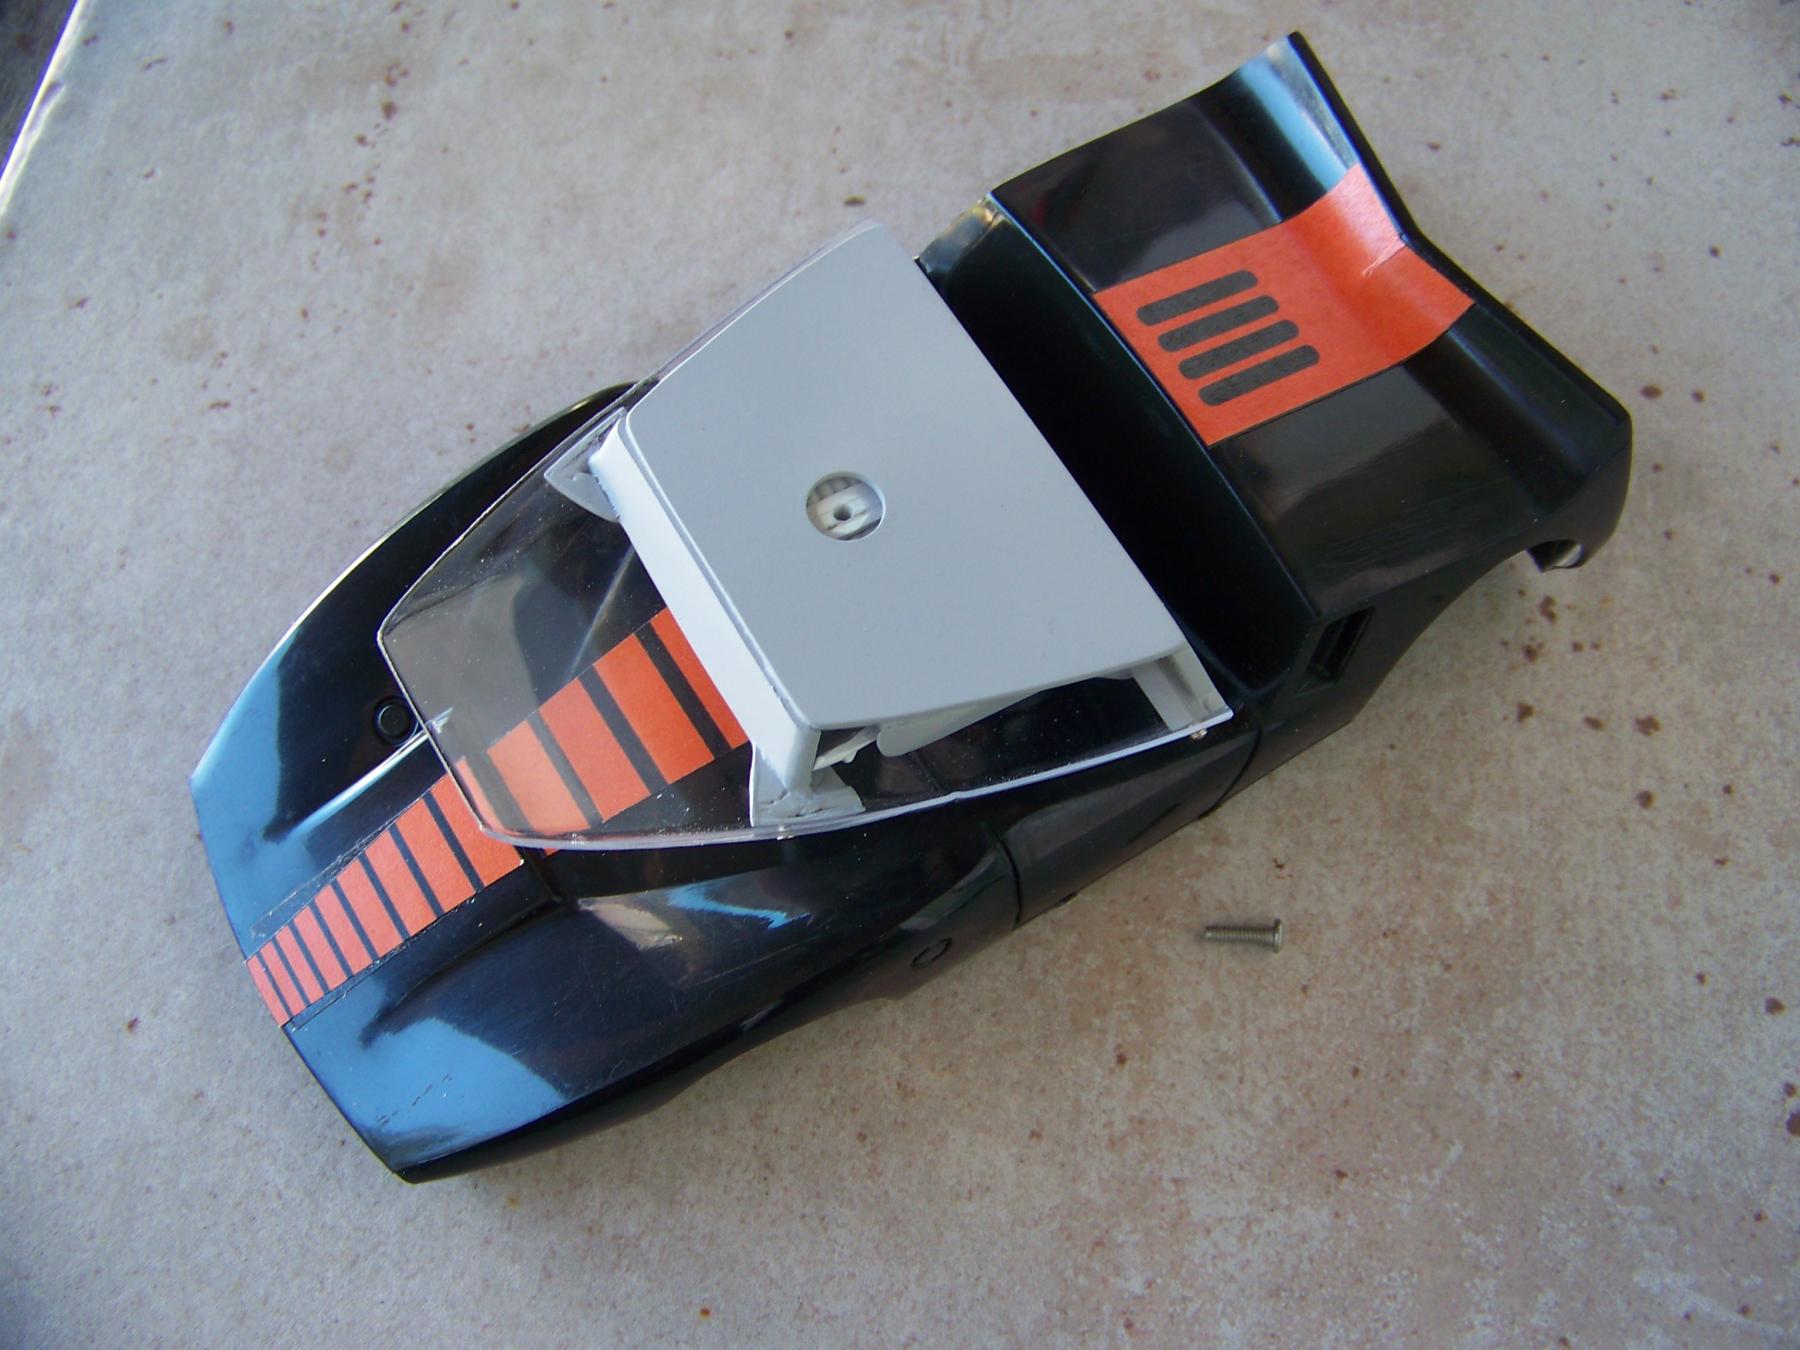
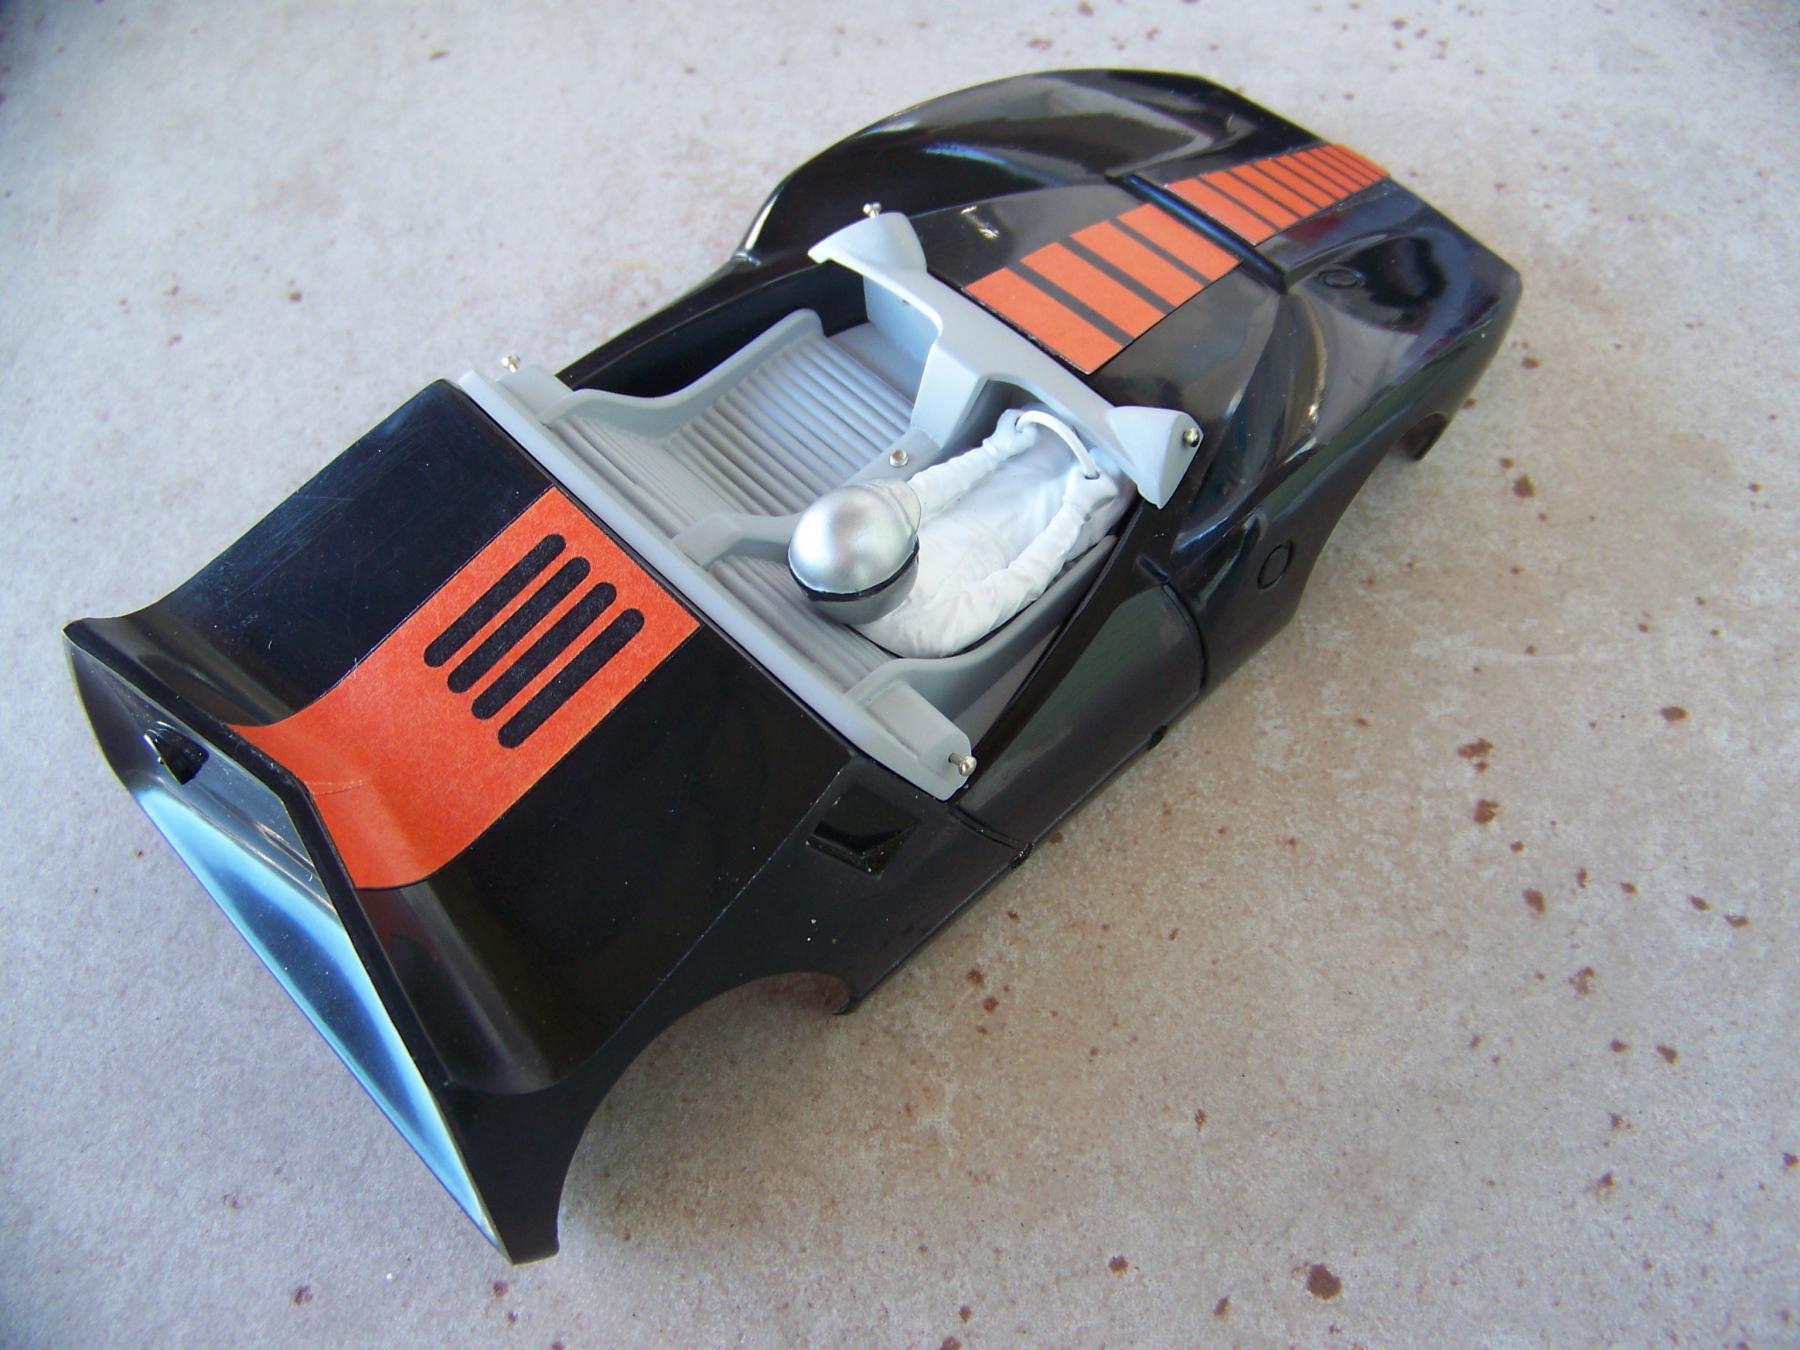
The prototype interior is done, well the basics are done, I will add some more details at some point but I am happy with the concept. :victory:

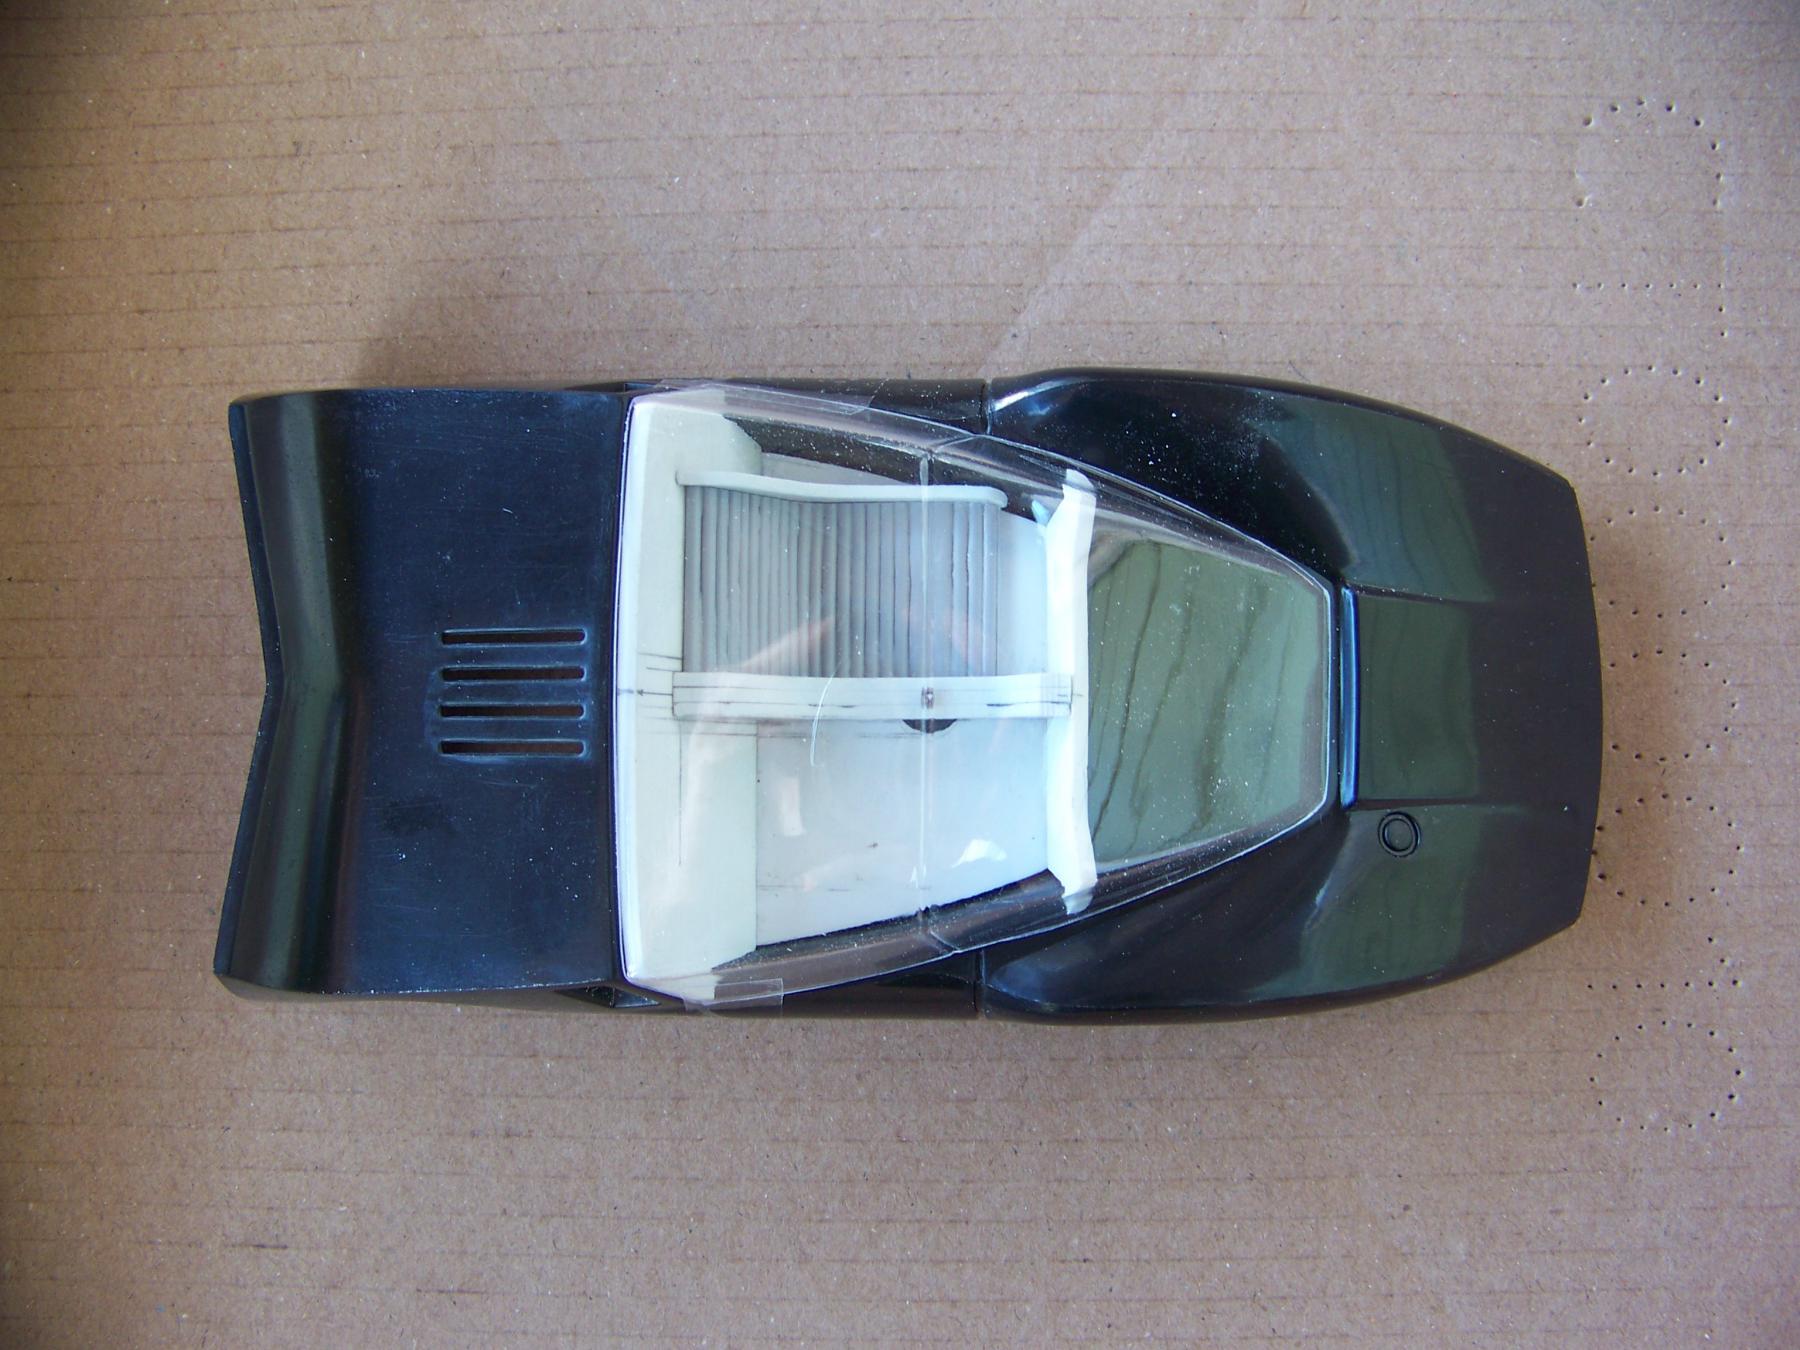
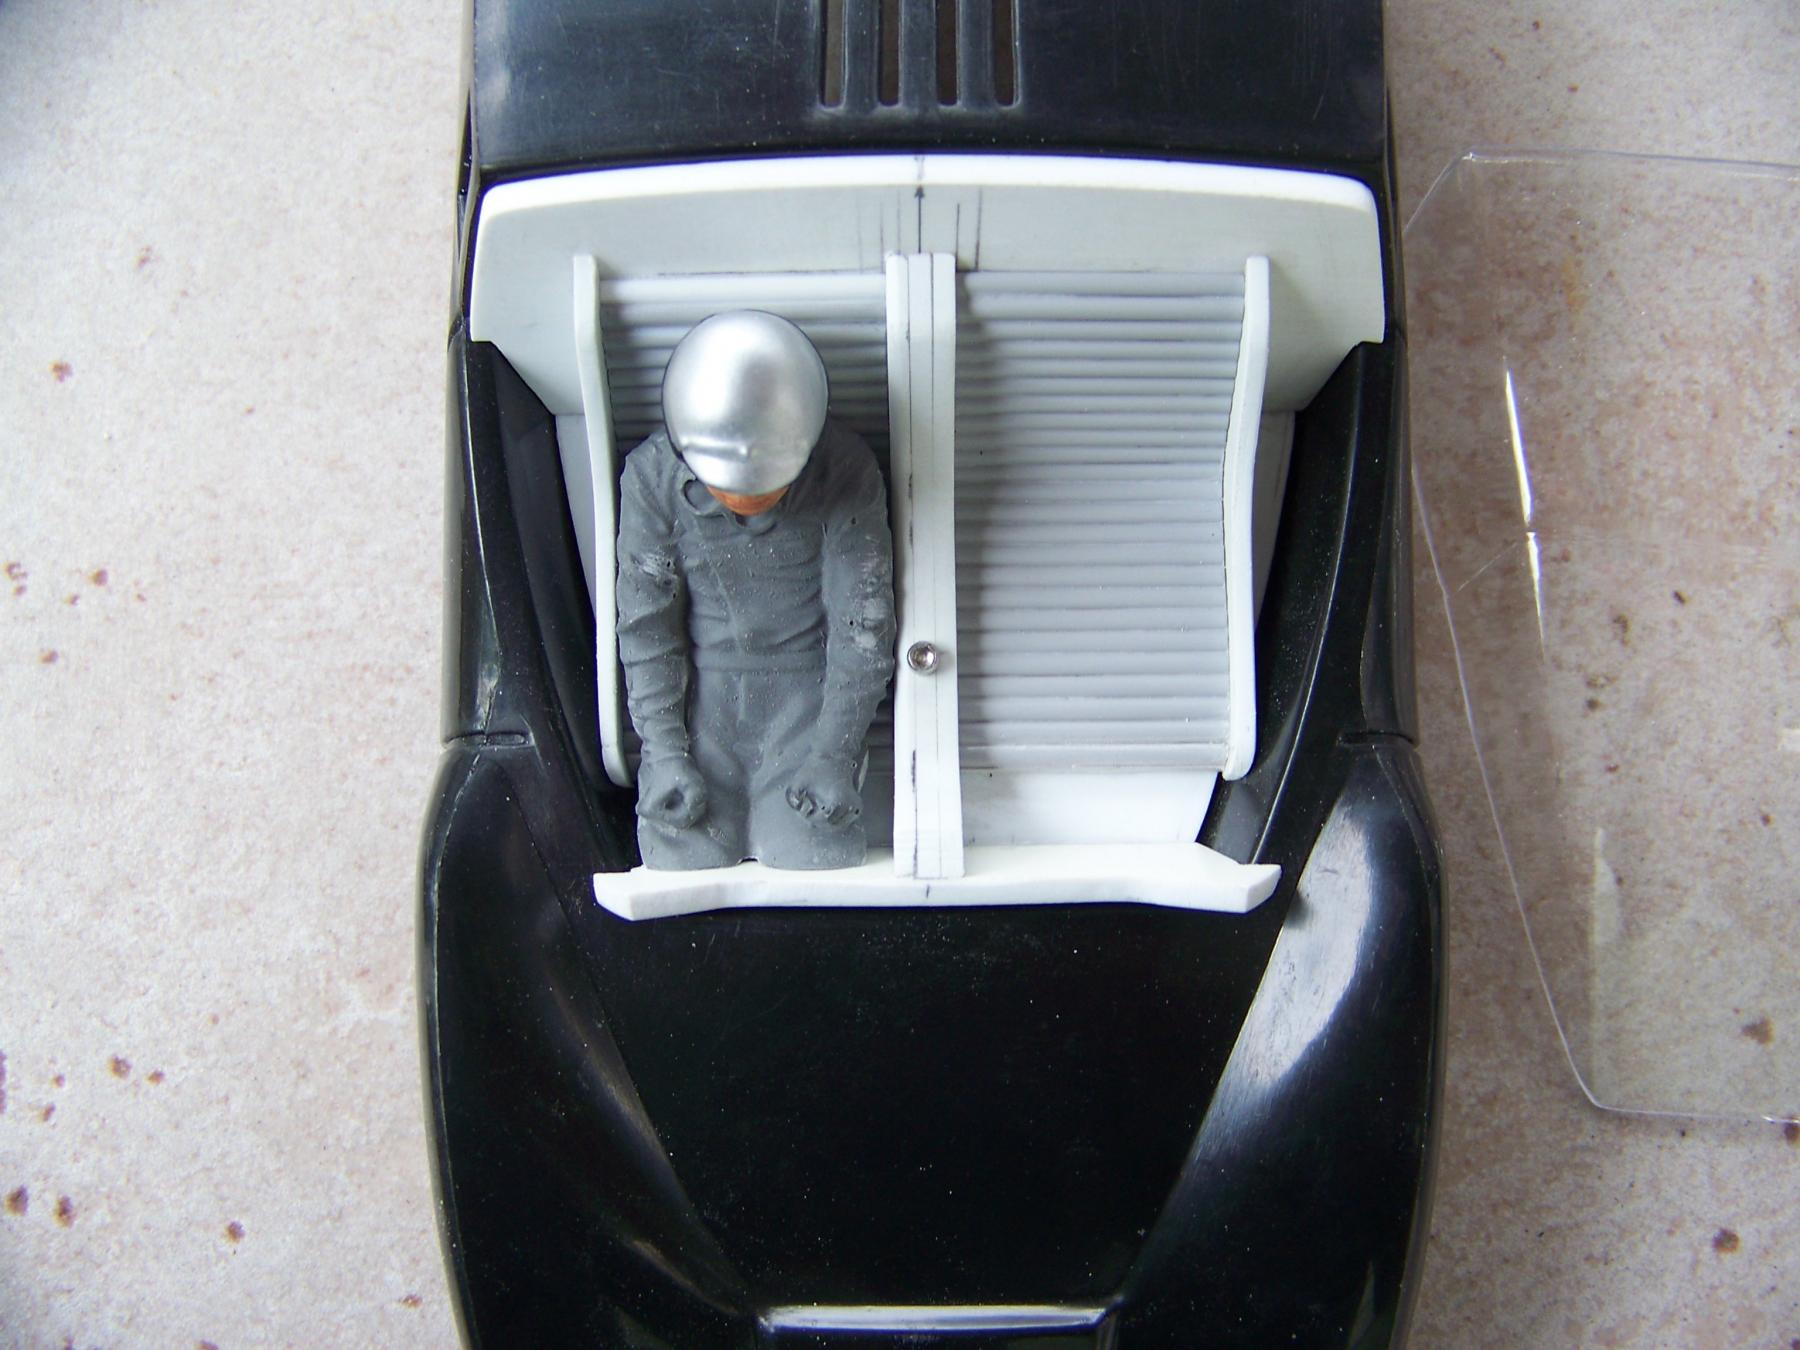
4 pins and 1 screw and it all comes apart, and at some point it made no sense to do anything different to the way we all mount clear bodies. Find the hole and stick a pin in it. :)


102_9587.JPG


102_9585.JPG


102_9586.JPG


102_9581.JPG


102_9584.JPG


  • don.siegel and olescratch like this
Martin Windmill

#72 pn6

pn6

    Mid-Pack Racer

  • Full Member
  • PipPipPip
  • 199 posts
  • Joined: 13-December 19
  • Gender:Male
  • Location:SoCal

Posted 03 July 2025 - 08:46 AM

That guy is a model of Jack Brabham and I think it was on Cults3D. I too have been looking for an STL of a 60’s driver.

This is a fun project you’ve got going here!

Paul Nadeau


#73 Jaeger Team

Jaeger Team

    Race Leader

  • Full Member
  • PipPipPipPipPip
  • 586 posts
  • Joined: 27-January 17
  • Gender:Male
  • Location:Palermo, Italy

Posted 03 July 2025 - 09:17 AM

Superlativo!
Maurizio Salerno

#74 pn6

pn6

    Mid-Pack Racer

  • Full Member
  • PipPipPip
  • 199 posts
  • Joined: 13-December 19
  • Gender:Male
  • Location:SoCal

Posted 03 July 2025 - 09:55 AM

Here it is........https://cults3d.com/...bham-car-driver


Paul Nadeau


#75 Martin

Martin

    Posting Leader

  • Moderator
  • PipPipPipPipPipPipPip
  • 4,649 posts
  • Joined: 22-February 09
  • Gender:Male
  • Location:US

Posted 03 July 2025 - 10:30 AM

Thanks for the complements and interest guys, now Larry and I will reverse engineer this part so we can make it available.


Several changes will be made as making it this way, I learned how to improve it. The main change will be the base floor. Now it seems obvious, there is already a floor in the car. The way I did it raises the driver up .040" the change will be the seats will now sit on the MDC floor. 

The other item I am not completely happy with is the front pin mount.

It is where it is because if you move that front mount forward, the rise of the fender blocks the straight shot at that location. Move it back, that leaves a lot of canopy unsupported. 

Is it a good location for mirrors, maybe, that may make some sense of the supports surrounding the pin tubes?


Thanks Paul, I did go to your link but I got this........ 

Access to cults3d.com was denied

You don't have authorization to view this page.


Martin Windmill


Electric Dreams Online Shop