Good Wood Revival Proxy - work in progress
#1
Posted 30 October 2012 - 04:22 AM
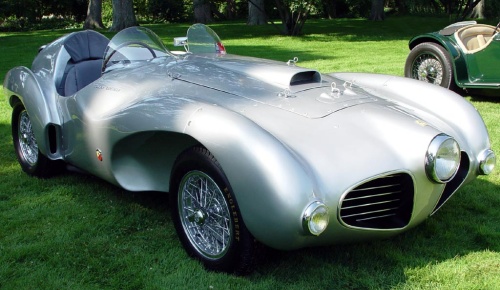
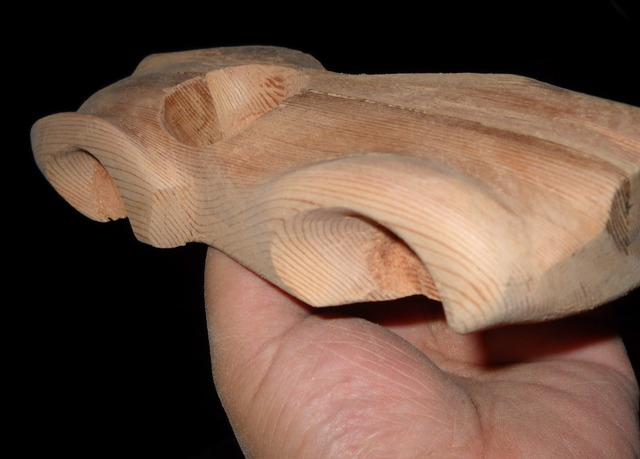
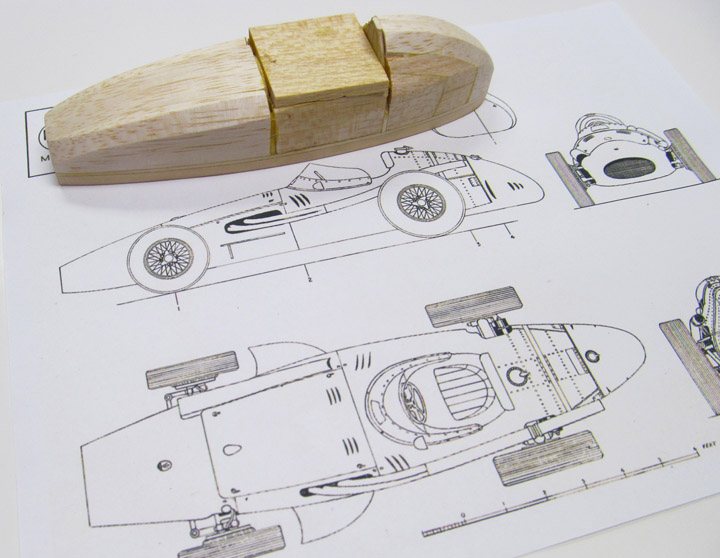
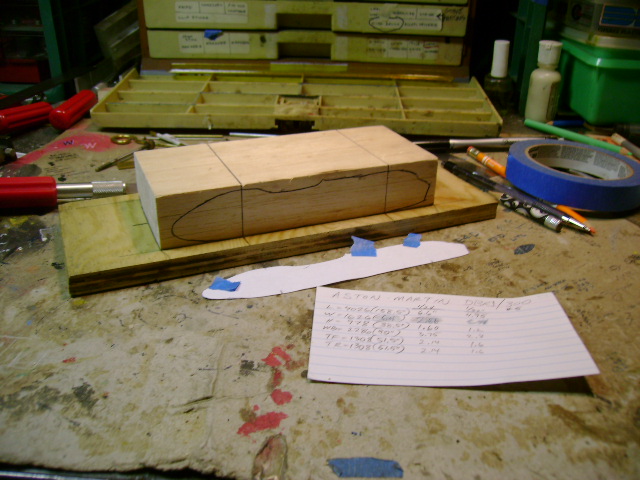
I'm resurrecting an old 1/32 balsa body I started carving about ten years ago. It is the #54 Auto World 1955 Ferrari 857 Sport that was also used as a logo on bottom left corner of the cover of the 1963 catalogue.
I originally only had plans and some blurry black and white photos in an old issue of Car Model magazine. It's a little rough after sitting in a box for the last decade. I gave up on it because of the fenders overhang slightly which wouldn't have left it with much meat...
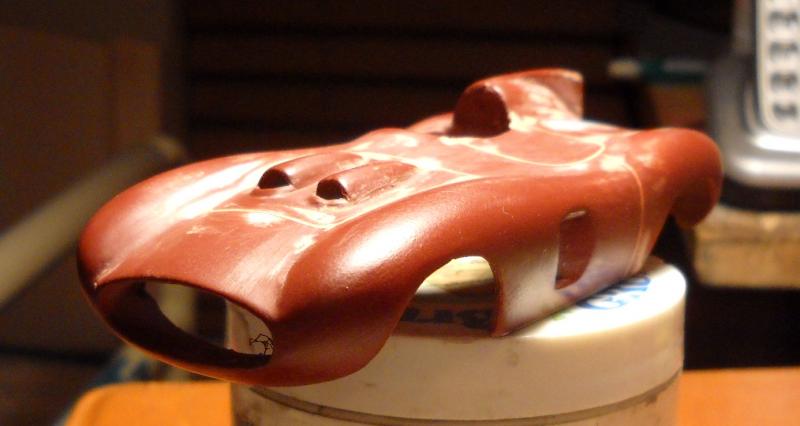
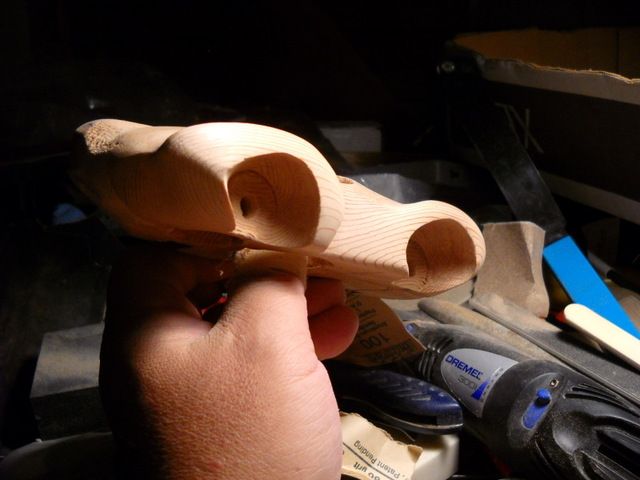
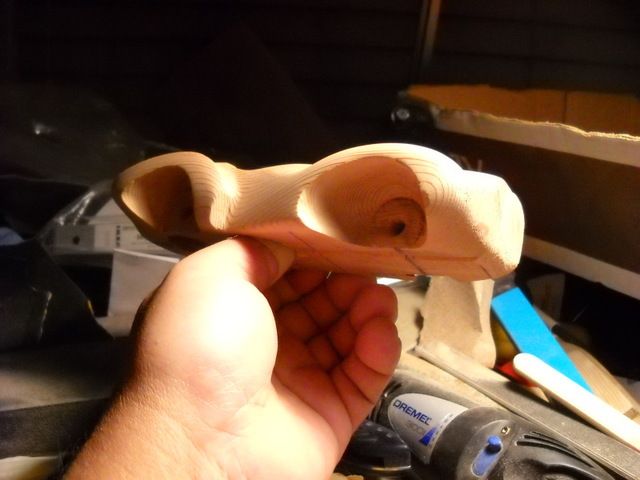
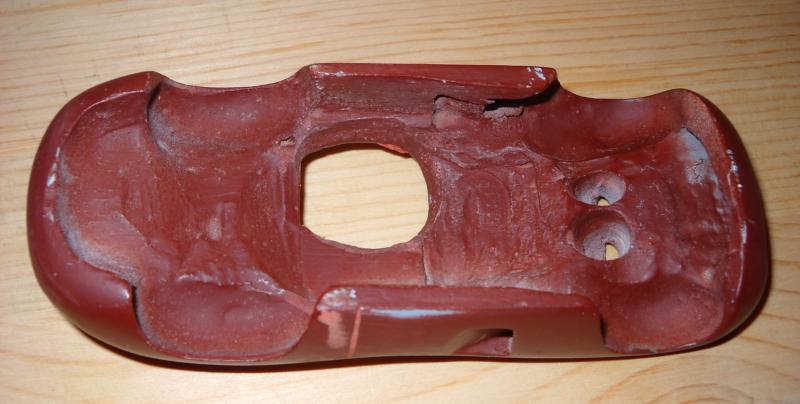
... but I took a chance today and shaved the insides of the fenders and reinforced it with a thin layer of epoxy.
Coincidently, Jairus posted a photo of the recently restored Auto World Car 54.
There is also a clip of the restoration which has some shots of Car 54 at the 1:36 mark.
OK, anybody else got wood?
8/19/54-8/?/21
Requiescat in Pace
#2
Posted 30 October 2012 - 09:56 AM
Actually, I have a bunch of customers cars to finish paint on before I can start carving. But looks like you have a huge jump on the rest of us. Very nice job with that Ferrari!
Jairus H Watson - Artist
Need something painted, soldered, carved, or killed? - jairuswtsn@aol.com
www.slotcarsmag.com
www.jairuswatson.net
http://www.ratholecustoms.com
Check out some of the cool stuff on my Fotki!
#3
Posted 30 October 2012 - 01:13 PM
Am wondering if anyone has a balsa wood 1/24 scale body of a '50s era sports car like the Ferrari pictured here to sell. I'm keenly interested in checking how a balsa body would work in our model world.
Jairus, you got anything?
8/9/38-1/9/20
Requiescat in Pace
#4
Posted 30 October 2012 - 01:29 PM
Jairus H Watson - Artist
Need something painted, soldered, carved, or killed? - jairuswtsn@aol.com
www.slotcarsmag.com
www.jairuswatson.net
http://www.ratholecustoms.com
Check out some of the cool stuff on my Fotki!
#5
Posted 30 October 2012 - 03:11 PM
It's old school but I've been sealing balsa with either Tamiya grey putty thinned with methyl hydrate and/or Green Squadron putty thinned lacquer thinner brushed like paint. Both puttys can be sanded to a smooth finish but I'm not sure how many crashes they can take.
The late great Rocky Russo suggested an old RC plane trick for protecting balsa... a woman's nylon stocking can be stretched over the outside and painted with lacquer thinner. It melts into the balsa and forms a lightweight protective coating.
8/19/54-8/?/21
Requiescat in Pace
#6
Posted 30 October 2012 - 03:17 PM
Nope, Todd, this is a completely new medium to me and quite exciting. Why don't you carve one yourself?
Wish I could!
8/9/38-1/9/20
Requiescat in Pace
#7
Posted 30 October 2012 - 04:26 PM
Thanks for all the tips! Are you carving free form from drawings, or do you do any kind of templates? That's the part that scares me more than the carving itself!
The Ferrari looks very nice!
Don
#8
Posted 30 October 2012 - 04:53 PM
I did some technical illustration the previous century and learned to trust my eye.
Edit: There is one exception. I'll cut templates if I'm working with Bob Clidinst's Indy Roadster drawings which are meticulous and accurate.
8/19/54-8/?/21
Requiescat in Pace
#9
Posted 30 October 2012 - 08:46 PM
I use Bondo to build up larger areas. I like how hard it cures and also how well it takes detail, particularly around wheel arches. I also use green Squadron putty to fill in the grain of the wood and any slight imperfections before shooting primer.
Again, terrific start, Bob - really looking forward to seeing it progress! Thanks for sharing.
Regards,
Brad
#10
Posted 30 October 2012 - 09:03 PM
8/19/54-8/?/21
Requiescat in Pace
#11
Posted 31 October 2012 - 11:06 AM
Rick Thigpen
Check out Steve Okeefe's great web site at its new home here at Slotblog:
The Independent Scratchbuilder
There's much more to come...
#14
Posted 01 November 2012 - 10:53 AM
Jairus H Watson - Artist
Need something painted, soldered, carved, or killed? - jairuswtsn@aol.com
www.slotcarsmag.com
www.jairuswatson.net
http://www.ratholecustoms.com
Check out some of the cool stuff on my Fotki!
#15
Posted 01 November 2012 - 12:18 PM
John Dilworth
#16
Posted 01 November 2012 - 01:24 PM
8/19/54-8/?/21
Requiescat in Pace
#17
Posted 02 November 2012 - 03:41 AM
... body is quite a bit lighter...
... might clear-coat the wood and run it like that...
... time to hack away at the other side...
8/19/54-8/?/21
Requiescat in Pace
#18
Posted 02 November 2012 - 09:02 AM
But you go too fast, I have not yet purchased the wood.
#19
Posted 02 November 2012 - 09:21 AM
I could convert the rules to French and post them in the Scratchbuilding section.
Jairus H Watson - Artist
Need something painted, soldered, carved, or killed? - jairuswtsn@aol.com
www.slotcarsmag.com
www.jairuswatson.net
http://www.ratholecustoms.com
Check out some of the cool stuff on my Fotki!
#20
Posted 02 November 2012 - 09:51 AM
No need to translate, google translation ago.
There will be some nice cars, and French is interested.
#21
Posted 02 November 2012 - 10:04 AM
Jairus H Watson - Artist
Need something painted, soldered, carved, or killed? - jairuswtsn@aol.com
www.slotcarsmag.com
www.jairuswatson.net
http://www.ratholecustoms.com
Check out some of the cool stuff on my Fotki!
#22
Posted 02 November 2012 - 02:21 PM
Does Milan in the Czech Republic read this? He does fantastic work. What a pleasure it would be to have him join in!
- endbelldrive likes this
John Dilworth
#23
Posted 02 November 2012 - 04:11 PM
Steve King
#24
Posted 05 November 2012 - 10:30 AM
Maserati is now blocked up and glue dried. Took a week to assemble using basswood and balsa to build up this shape.
With exception for the two bulkheads, the body is hollow so no inside carving required other than axle clearance. (And maybe rear gear clearance.)
Now it's time to start some serious sanding.
The nose will be a piece of model aircraft plywood to keep its shape and strengthen it just in case of a wall hit. But also considering installing an oval of aluminum...
- endbelldrive likes this
Jairus H Watson - Artist
Need something painted, soldered, carved, or killed? - jairuswtsn@aol.com
www.slotcarsmag.com
www.jairuswatson.net
http://www.ratholecustoms.com
Check out some of the cool stuff on my Fotki!
#25
Posted 09 November 2012 - 10:59 AM
The two bottom sheets had holes cut in the center so it won't need as much hollowing out.
The block gets attached to a base of 1/2" plywood that will serve as a body jig.
The jig will have all the dimensions laid out on it to serve as a reference once the carving starts.
Hope to rough it out and make some sawdust this weekend
- endbelldrive likes this