Thank you Don.Great input!
Onward

Posted 29 September 2013 - 01:09 PM
Thank you Don.Great input!
Onward
Rick Thigpen
Check out Steve Okeefe's great web site at its new home here at Slotblog:
The Independent Scratchbuilder
There's much more to come...
Posted 01 October 2013 - 06:39 PM
I put the stock RAM arm in the setup and fired her up..........YIKES! The thing vibrated and buzzed like a $1 electric tooth brush

This arm was supposedly balanced by the factory but mine sure isn't. Maybe it's a reject? Anyway, the first thing I did was check the shaft for straightness........
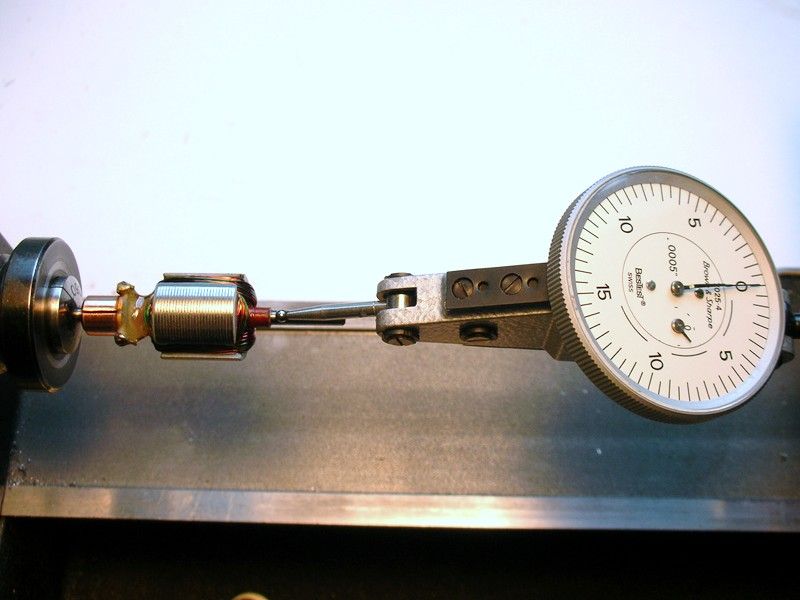
....it was super bent. ![]() I spent a lot of time getting it pretty darn straight considering how bad it was.
I spent a lot of time getting it pretty darn straight considering how bad it was.
Next it went on the static balancer:
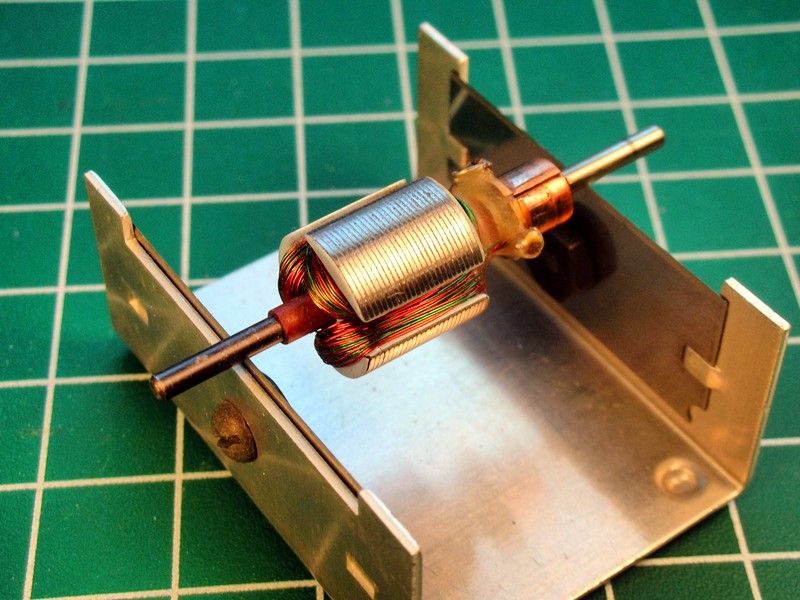
I've never seen an arm so out of balance. The heavy poles swung downward faster than a jack rabbet running from a shotgun blast. ![]()
Before I started the static balancing process I coated the windings with epoxy to make sure the laminations wouldn't start coming apart during the drilling process.
2 poles were way heavy so I drilled and drilled AND DRILLED. I was running out of room to take material out when it finally started to respond. 3 deep holes in one pole, 2 deep holes and one shallower hole in the second pole and the arm settled down on the balancer.
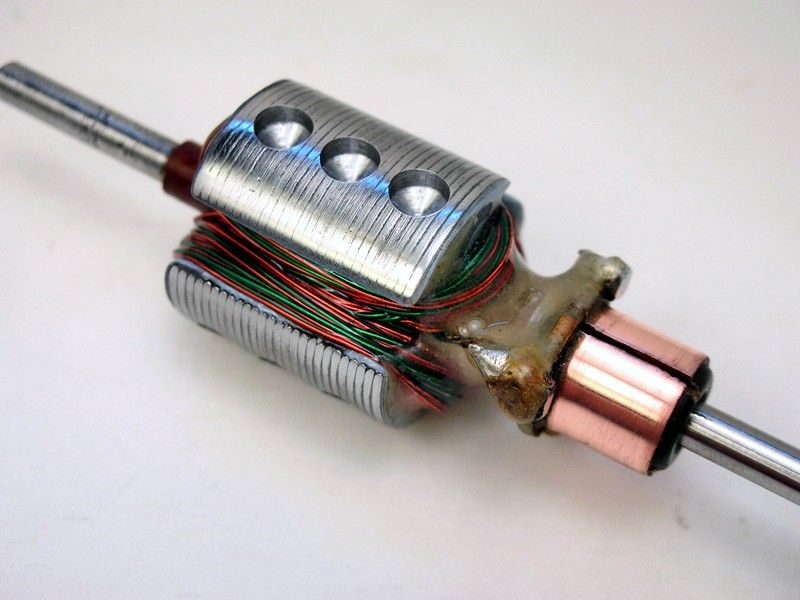
Back on the power supply the motor was much smoother though not as smooth as I would like. It was driving the Koford power supplies amp and volt meters crazy. The readings were all over the place or they would just stall out.
I swapped out the super hard RAM brushes with good old Pittman DC-196A pieces:
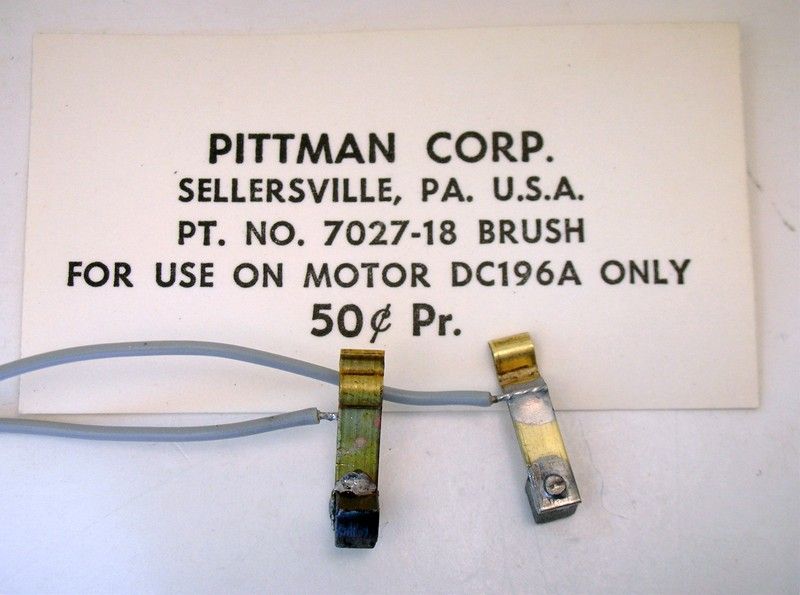
That smoothed things out. It draws just over an 1 amp at 6 volts. It still doesn't spin up to as high a speed as I would have thought which makes me wonder about this:
Rumor is that the Russkit Team was the first to receive the "secret" mags. Check the team's results and see how the Arcos magnet bound their motors. It took three or four months to find the winds that worked with the harsh magnetic field.
I'm going to put my best "ear bone tachometer" on and and run this thing wide open. I'll give a good listen with ARCO's and then with Mabuchi magnets.
To be continued but first here's the assembled Maverick motor "in the white" before paint:
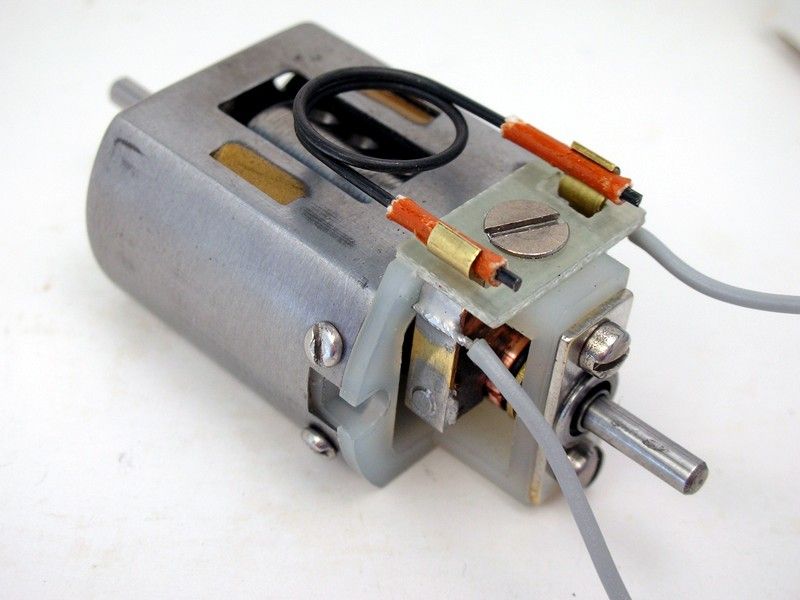
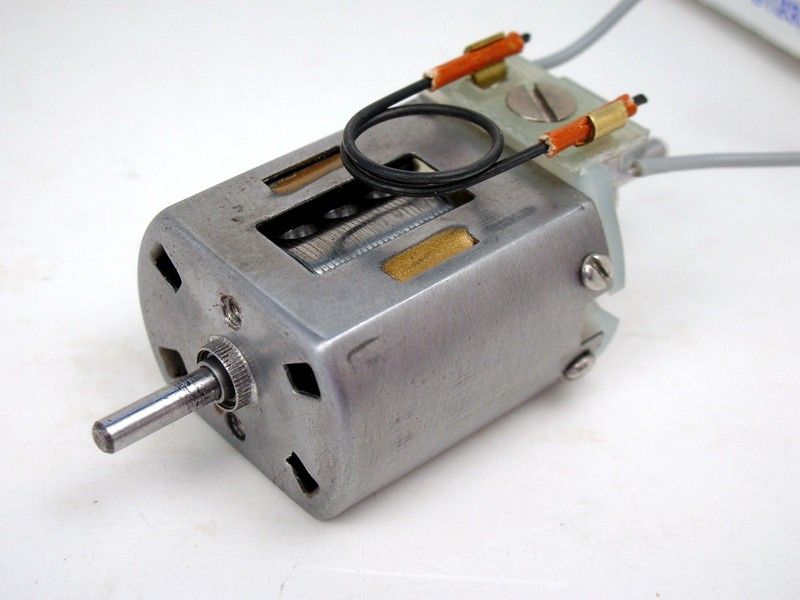
Onward......
Rick Thigpen
Check out Steve Okeefe's great web site at its new home here at Slotblog:
The Independent Scratchbuilder
There's much more to come...
Posted 01 October 2013 - 06:52 PM
Wow you certainly did have to drill the snot out of the armature!!! ![]()
Glad it smoothed out some with all your hard work & changing to softer brushes. Interesting point about the arm/winding possibly being magnet bound by those "secret" broken Arcos!!
Venture Forth! ![]()
Posted 02 October 2013 - 02:10 PM
hey Rick and Paul,
You may want to try a couple of applications of armature dye. The laminations are phosphate coated on their sides as an insulator to reduce back emf and when you drill and polish the lams you increase the chance of shorted (grounded) laminations (look IN the holes you drilled). The dyes tend to reinsulate the lams (reduce back emf) and there are probably better dyes today. Also, with such an out of balance condition (2 poles heavy and 1 light), there may be a different wind (amount of copper) on one pole. Also arms may be statically magnetically in the midpoint of motor but when energized through the com the arm may shift and try to tumble on its axis......you may need to check your dynamic shimming. Looking at your original picture of the arm from the com shaft end, it appears the arm ran into something (end bell or brushes or heat sinks) while it was rotating and the solder joint has melted the epoxy on the rear side. Only my observations that you may have already evaluated. I am not sure of the month/year of Thorpe Balancing, but I used them when it became available so I am not sure for your R/C RAM Recreation except that Ram Engineering said it was balanced.
Shakey George
Posted 02 October 2013 - 02:51 PM
Hi George,
Thank you for your detailed input.
If I may summarize........This arm is a disaster! ![]()
![]()
Even so, I'm looking forward to having a "What If " Team Ram car.
Rick Thigpen
Check out Steve Okeefe's great web site at its new home here at Slotblog:
The Independent Scratchbuilder
There's much more to come...
Posted 02 October 2013 - 03:04 PM
Posted 31 March 2015 - 08:24 PM
Rick, did you ever revisit this super rare armature equipped motor & manage to get it running any faster/smoother?
Aquired another one of the Maverick arms a while back and just like this one it appears to have a bent shaft , haven't measured it but sure feels to tighten up then loosen up as you turn it in a setup.
The arm is wrapped up in the parts hoard along with one of those sweet RAM endbells ready for the time I can get around to sorting it out ![]() Or it could just stay in the collection as one very scarce piece of slot car history & get a modern arm double wound to recreate it...
Or it could just stay in the collection as one very scarce piece of slot car history & get a modern arm double wound to recreate it...
Posted 01 April 2015 - 05:03 PM
Hi Paul,
The box-O-parts is still sitting on my "limbo project" shelf.
Maybe someday.............
Rick Thigpen
Check out Steve Okeefe's great web site at its new home here at Slotblog:
The Independent Scratchbuilder
There's much more to come...
Posted 04 April 2015 - 10:23 PM
The one I built took a lot of work to get right also . Mine was not balanced at all either so it went to alpha , The next day he raised the price
of balancing . I also ground the pinion area to .078 ..
Posted 05 January 2018 - 07:57 PM
Well, it's been almost 3 years since I gave up on my RAM Maverick motor. I tired everything, or so I thought at the time, and the motor was a disaster. I had completely given up on it.
Then out of the blue our Slotblog friend Don Siegel PM's me with an offer I couldn't refuse. A new old stock, boxed RAM Maverick motor kit. ![]()
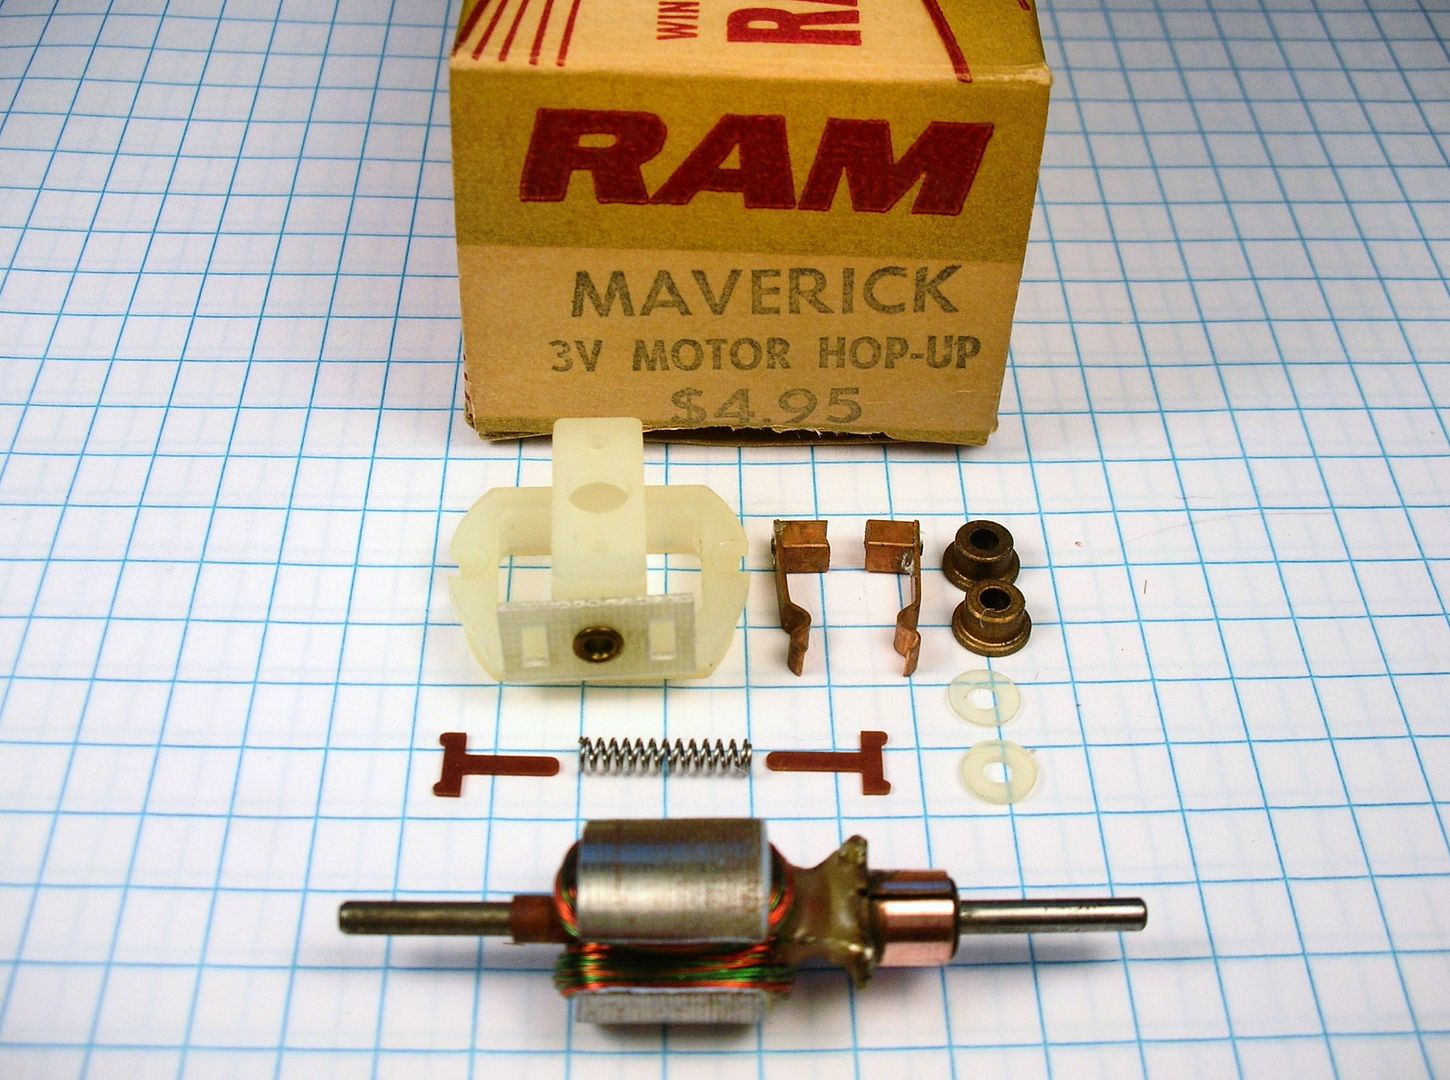
Now I could compare a for sure NOS armature with my programmatic arm to see if I could figure out what was wrong with it:
Both arms measured .4 ohms. The new arm's shaft was slightly bent just like mine was before I spent a ton of time straightening it. The new arm also has 2 poles that are heavy and swing to the bottom of my static balancer. My static balanced arm seems OK never landing in the same place twice when spun on the razor blades.
My problem child arm is on the right:
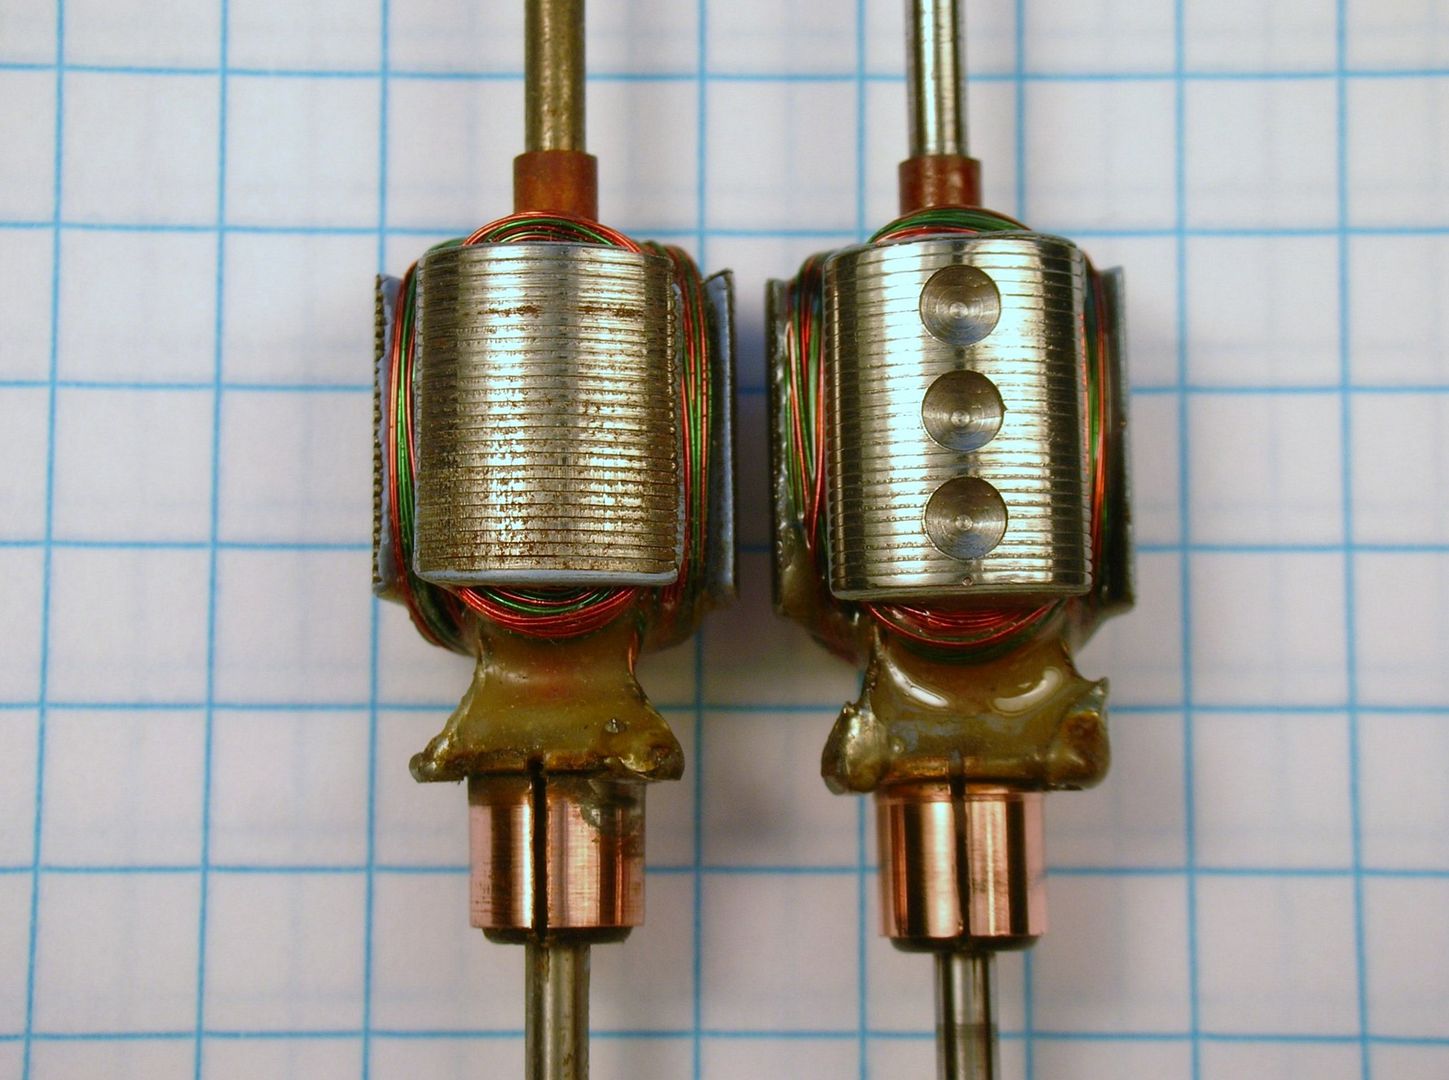
Both arms have had the tabs on the commutator machined to cut back huge blobs of solder:
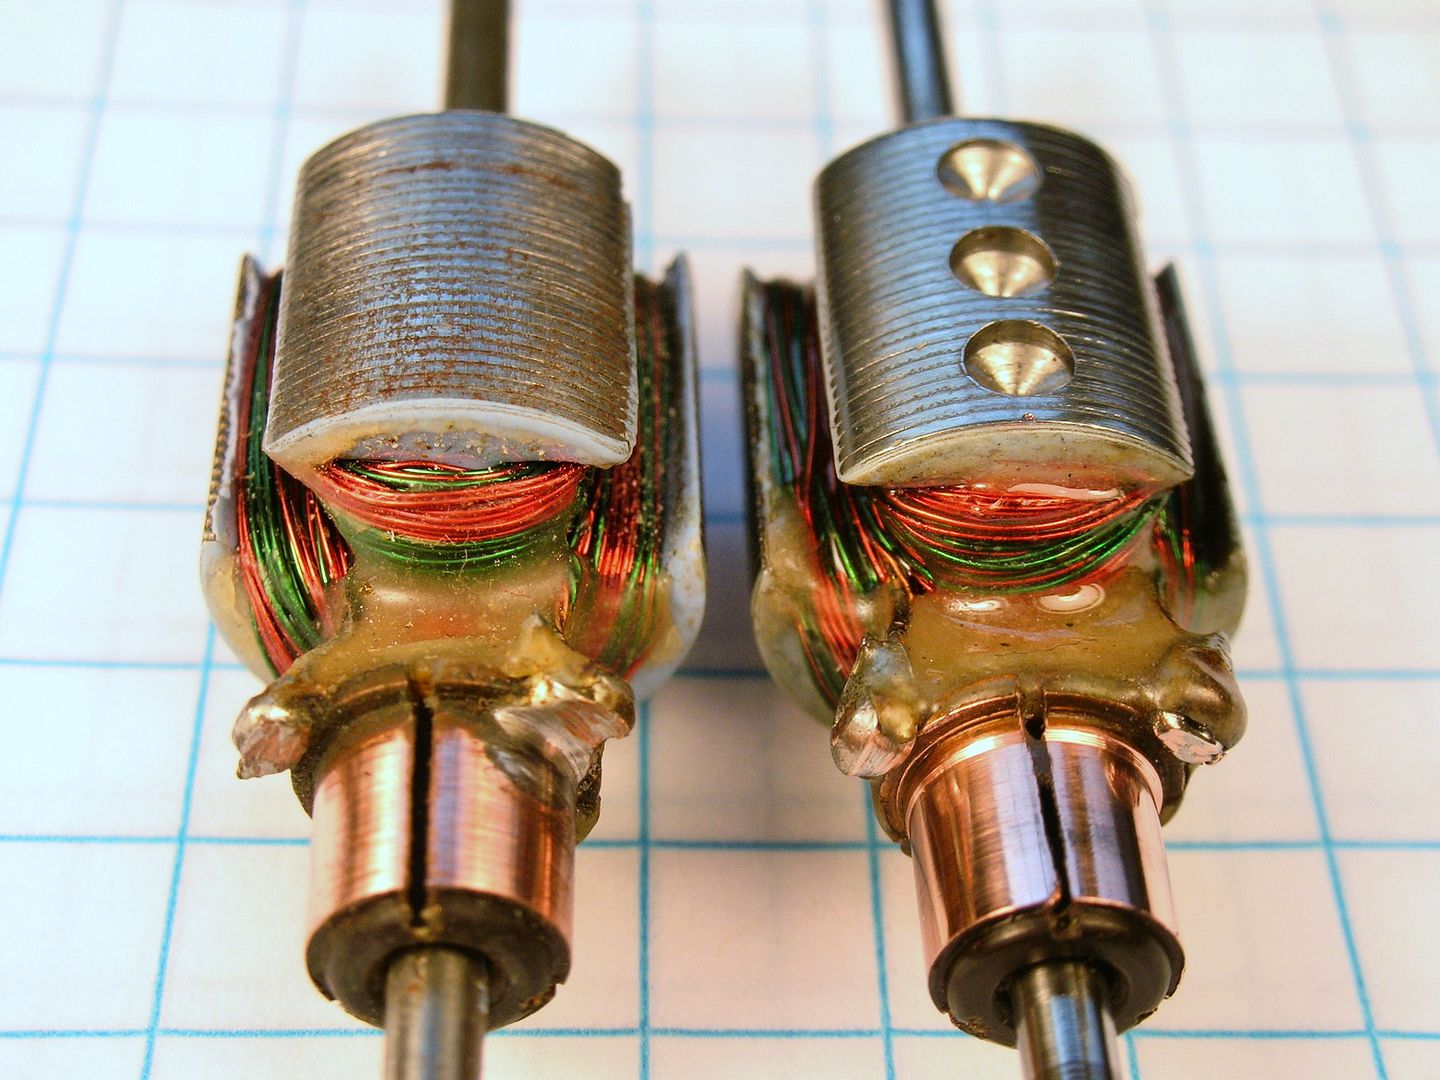
I really couldn't find anything different between the 2 arms. So why does mine run so horribly, with a fierce vibration and a low "sounding" top speed? ![]()
Then I got to looking at the pictures of my arm when I first got it and man that comm was UGLY: ![]()
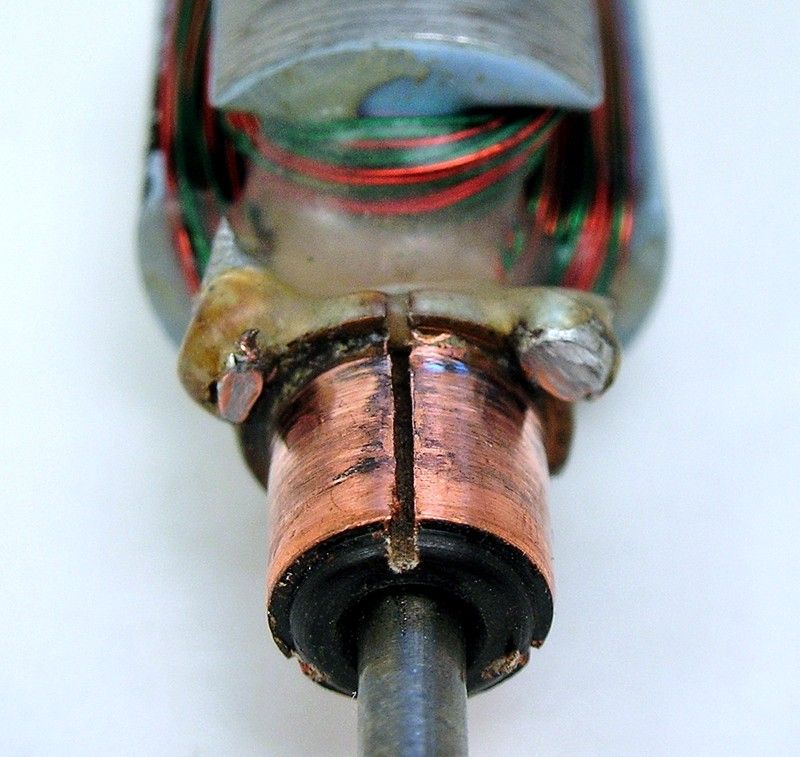
I never tried to true it in my Hudy comm lathe because my lathe tool height is set for "standard" .078" shaft armatures. The RAM arm has a .093" shaft and I didn't want to mess with the tool height adjustment. I know I was lazy.... ![]() and I knew that the larger shaft would raise up the comm in relation to the tool. Generally, a lathe tool should be on center with the work piece or slightly below center line. A tool higher than center line is bad.
and I knew that the larger shaft would raise up the comm in relation to the tool. Generally, a lathe tool should be on center with the work piece or slightly below center line. A tool higher than center line is bad.
After careful consideration I said screw it and just mounted the arm in the Hudy and took a cut. To my delight, the first pass worked great. The first 2 comm segments were already cleaned up but the 3rd segment was untouched!!!!!!!!!!!!
It was like that 3rd comm segment was sitting way lower than the other 2. I was amazed and just kept cutting finally marking the comm with a black Sharpie to show the low segment:
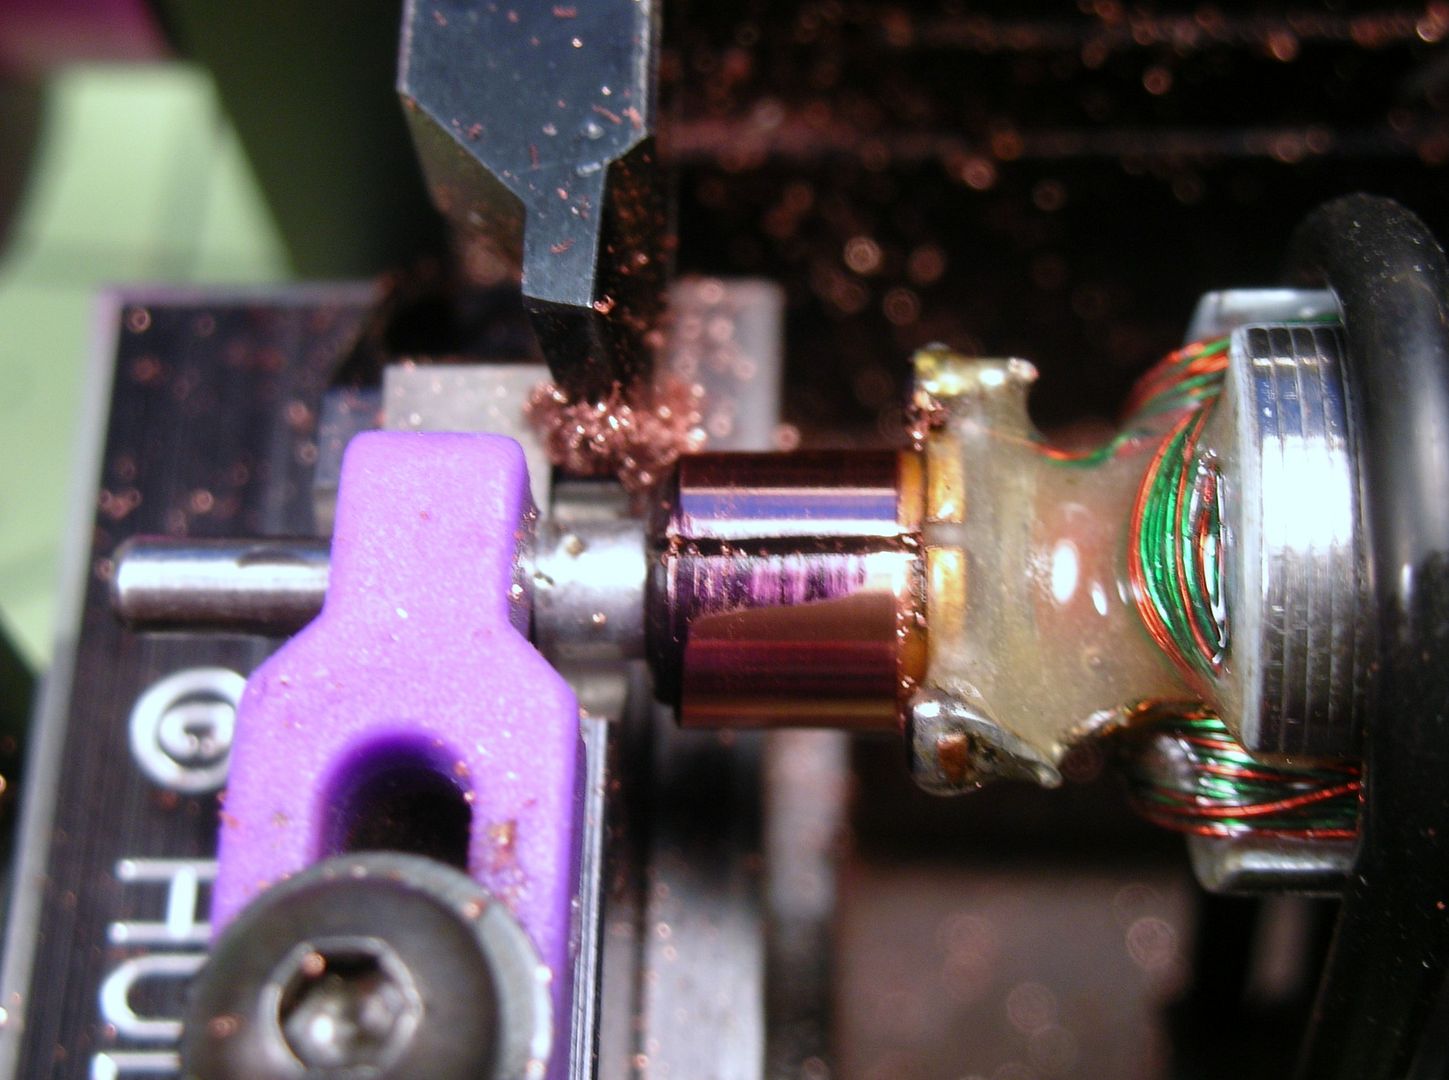
I had to cut .008" of the comm to get that 3rd segment trued up. ![]()
When I reassembled the motor and put it on the power supply............It ABSOLUTELY SCREAMED and it was pretty darn smooth to boot. ![]()
Well better late than never! Now I can build a R&C car to put this baby in. ![]()
Thanks Don! ![]()
Rick Thigpen
Check out Steve Okeefe's great web site at its new home here at Slotblog:
The Independent Scratchbuilder
There's much more to come...
Posted 05 January 2018 - 08:24 PM
![]()
![]()
Paul Wolcott
Posted 05 January 2018 - 09:56 PM
What Pablo said ![]()
Posted 05 January 2018 - 10:26 PM
Posted 06 January 2018 - 05:37 AM
Great news Rick and glad I could help. I'll be receiving one pretty soon as well, and will see what I can do with it. Looking forward to your R&D car!
Funny how things can be right in front of our eyes and we don't see them...
Re the .093 shaft, just tach tested another 16D motor, but with an .091 shaft, which surprised me! Now I have to remember which one it was...
Don
Posted 06 January 2018 - 11:54 AM
I forgot to mention that I did this most recent test using a pair of fairly strong (500 gauss reading) and nicely matched Mabuchi magnets. The armature has a rather large diameter of .535" so magnet choice is limited without buying an appropriate hone.....if one is even made. The Mabuchi magnets gave me a .550" air gap and the motor seemed to like them, at least on the power supply.
"Broken ARCO" magnets would also work so if the car lacks brakes I'll give them a try.
Here's the instruction sheet that came in the RAM box. It is the same as the one used for the 36D RAM-Boochie version...............
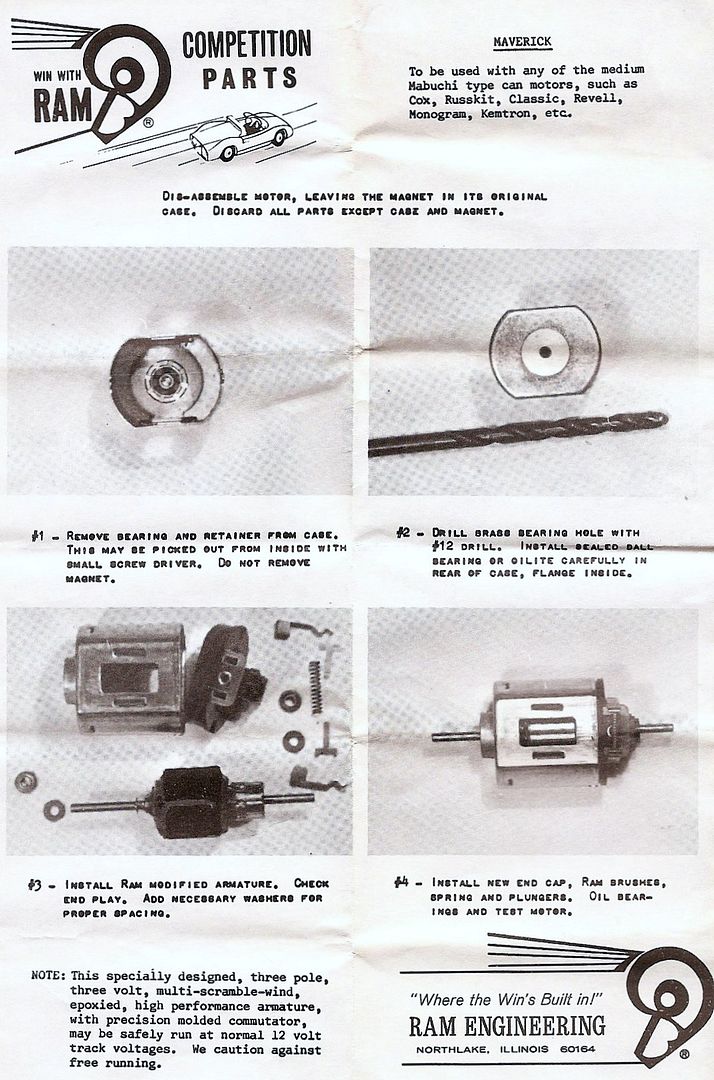
................except for this paragraph in the upper right corner:

Time to choose a body for this delayed project................
Rick Thigpen
Check out Steve Okeefe's great web site at its new home here at Slotblog:
The Independent Scratchbuilder
There's much more to come...
Posted 06 January 2018 - 12:34 PM
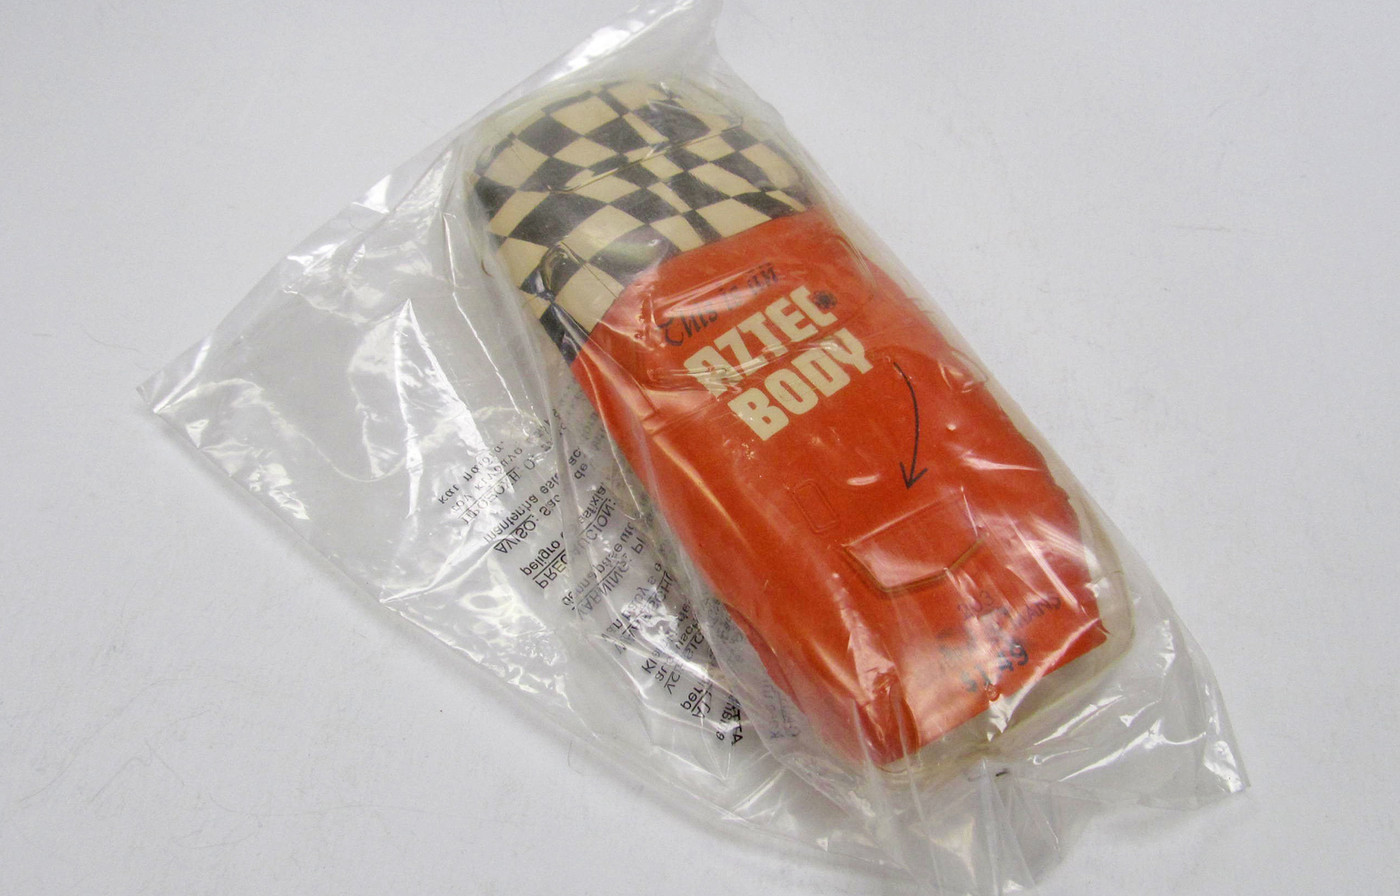
Mint Aztech Shelby Cobra Le Mans?
Jairus H Watson - Artist
Need something painted, soldered, carved, or killed? - jairuswtsn@aol.com
www.slotcarsmag.com
www.jairuswatson.net
http://www.ratholecustoms.com
Check out some of the cool stuff on my Fotki!
Posted 13 January 2018 - 05:29 PM
Rick,
Just received the other Maverick kits from this lot. I just checked a couple of them, but they both seem to have bent shafts, just judging from an eyeball test!
How does one go about straightening a shaft?
As to bodies, if you're doing a 67 Car Model race, it should probably be a Lola T70/Lotus 40 in the sports cars, or a Ferrari P3/Chappy 2D in the GTs ... hmm pretty boring, but that was the full grid in the first two races! Don't think they were handling bodies yet, but flaring allowed...
Don
Posted 13 January 2018 - 06:09 PM
Don,
I straightened the shaft like so:
This arm was supposedly balanced by the factory but mine sure isn't. Maybe it's a reject? Anyway, the first thing I did was check the shaft for straightness........
....it was super bent.I spent a lot of time getting it pretty darn straight considering how bad it was.
This is not ideal but it sure improved the arm straightness. I think a better method would be a fixture with v-blocks for each end of the armature shafts and a dial indicator touching the armature stack. I think Pablo has one but I don't believe they are made any longer.
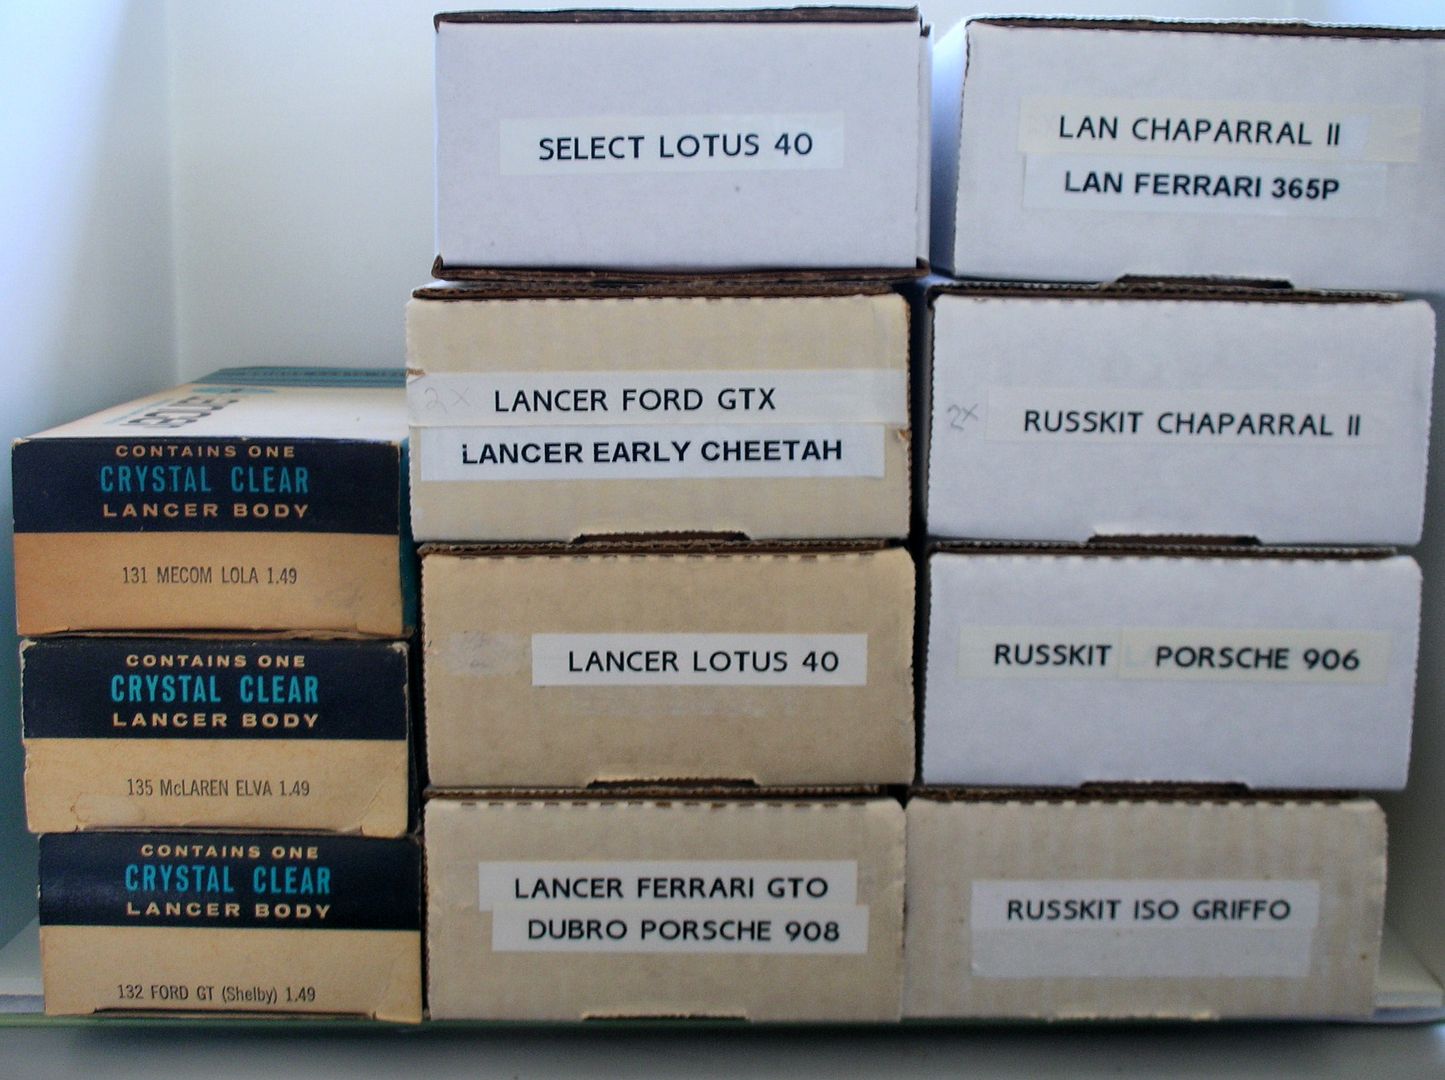
As for bodies, I started this thread to make a 1966 Rod & Custom racer so I decided to stick with that era with this initial stack of bodies:
The problem I'm dealing with body wise is my decision to run can drive with a motor that has a tall brush setup:
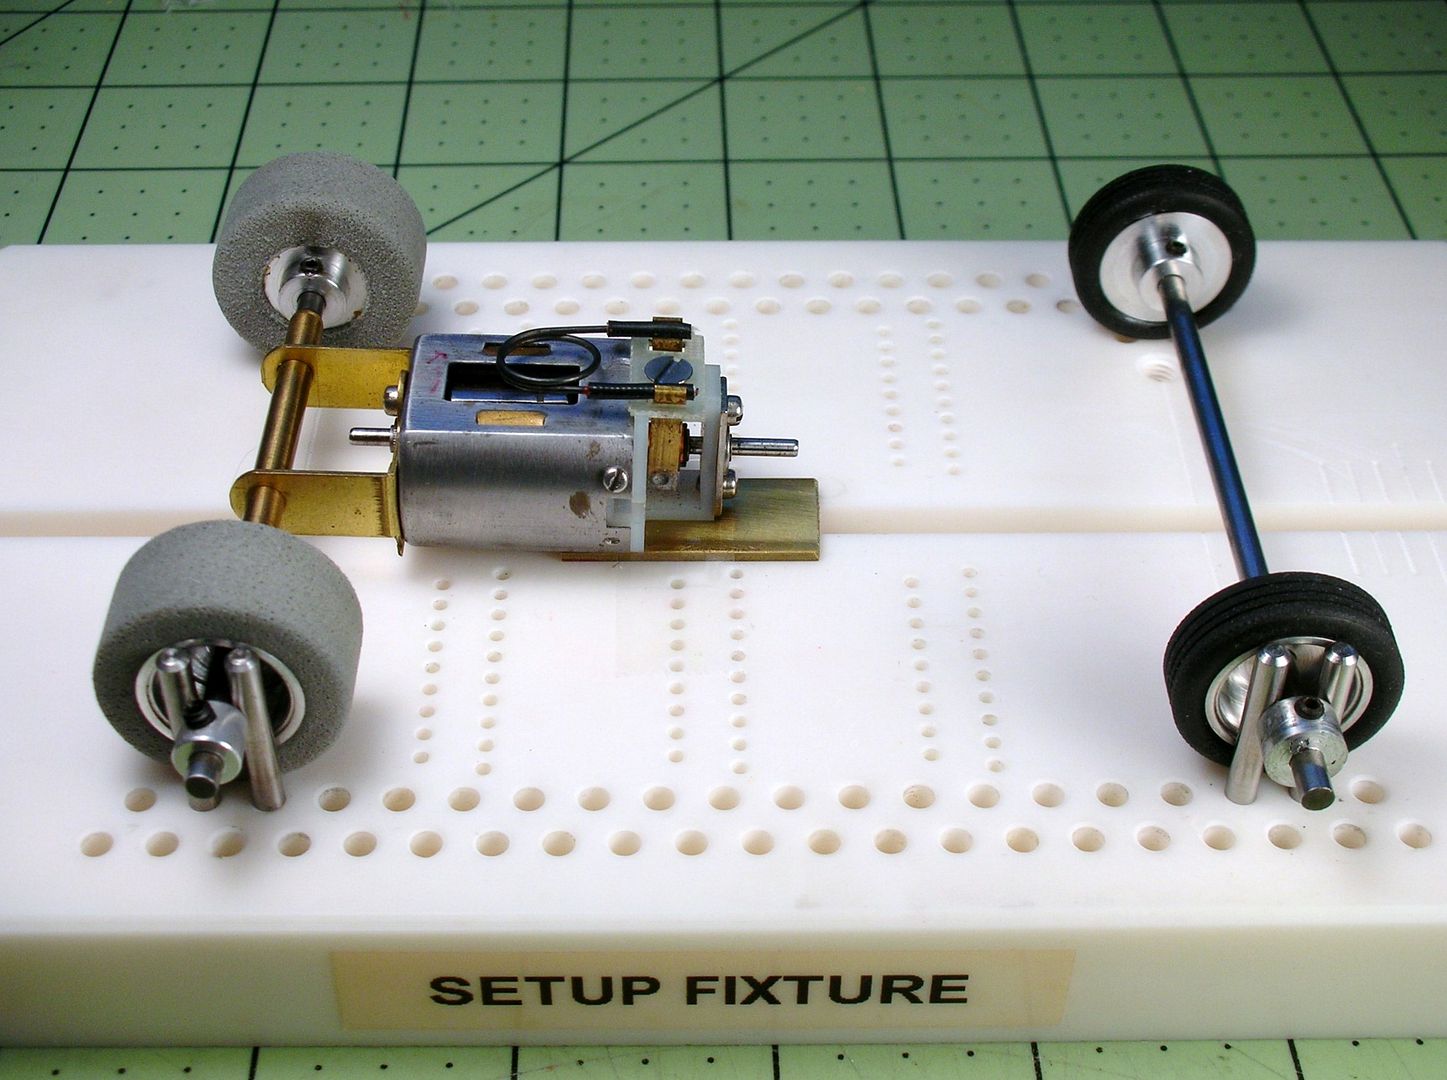
The brushes and spring stick up right where the driver goes. ![]()
I initially settled on a Lancer Ford GT40 Mk1 (Shelby). The body is pictured in the concours event in the 2nd GT R&C race:
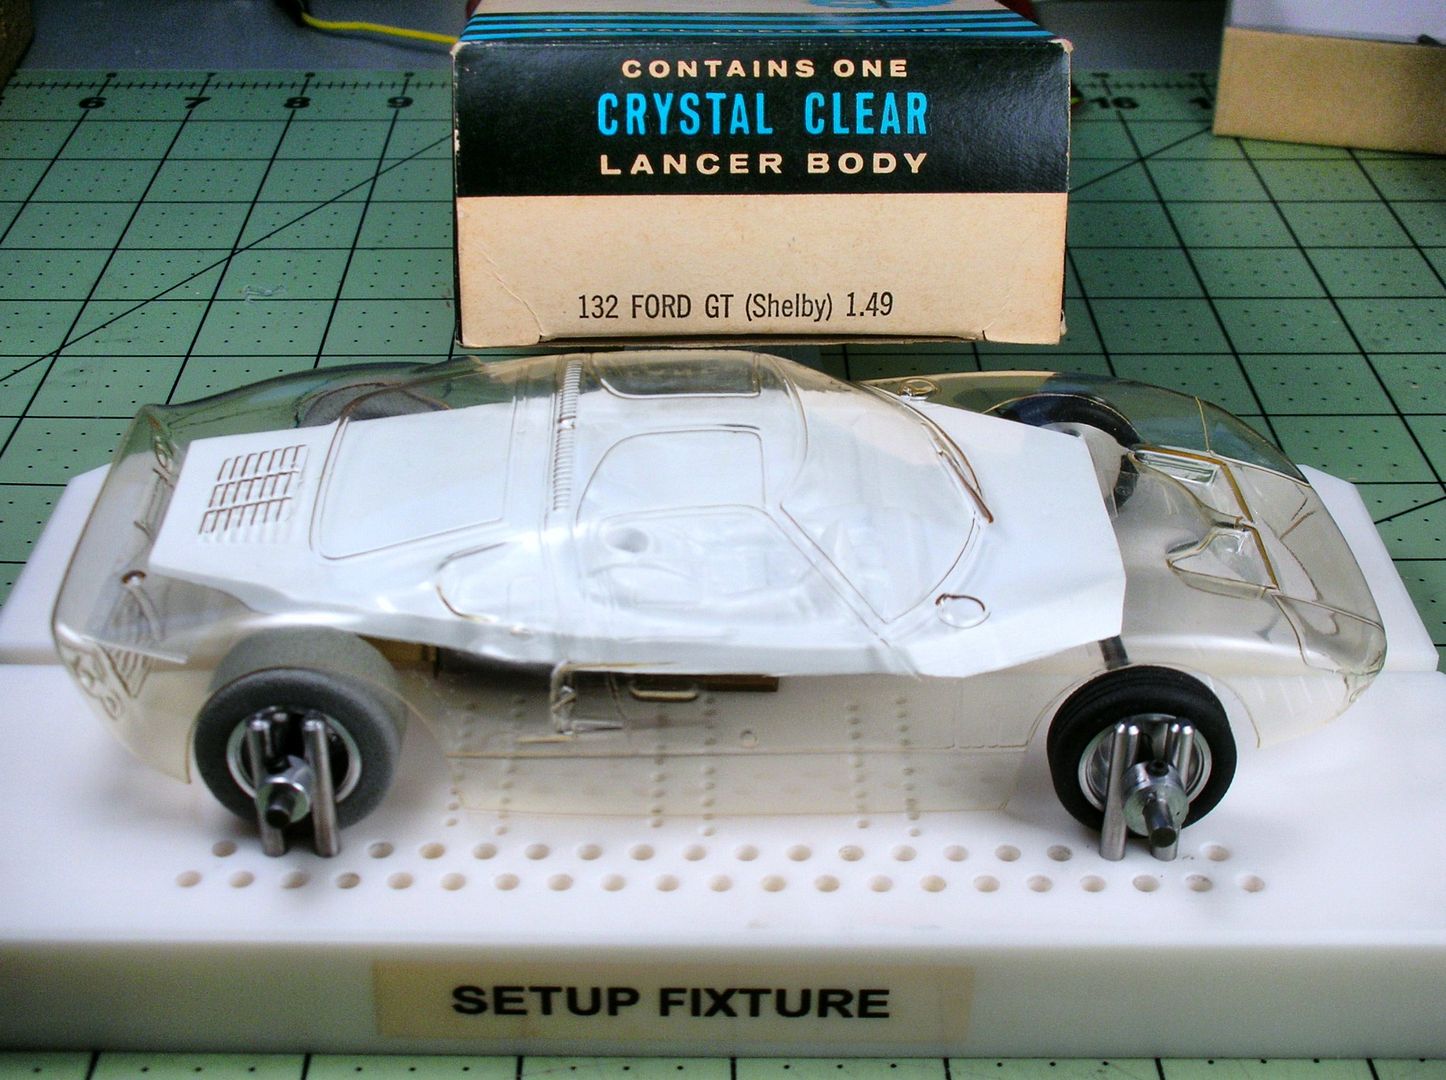
I still wasn't happy with the choice. The motor revs up so nice, almost like a late 60's Mura rewind, I really wanted it to go into a low and swoopy sports car.
So, body trial round 2. Out came the Lotus 30's and 40's:
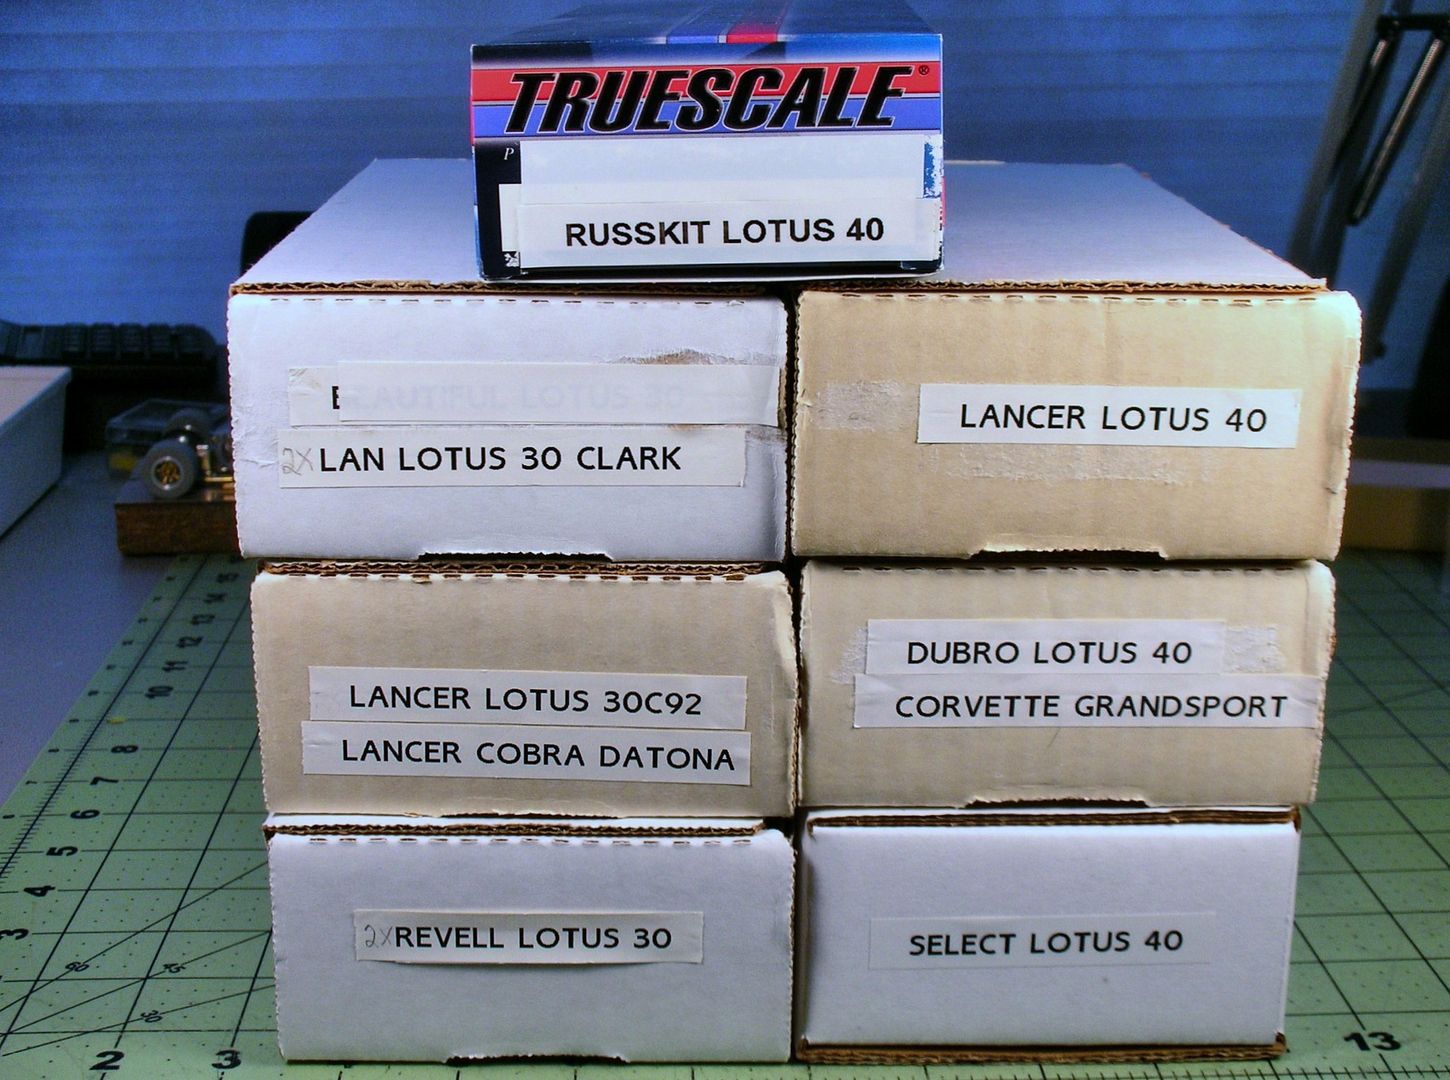
I settled on a Revell Lotus 30. It's got a nice long wheelbase and nose for guide lead and is almost 3" wide. It's a bit taller than the Russkit Lotus 40 but not much:
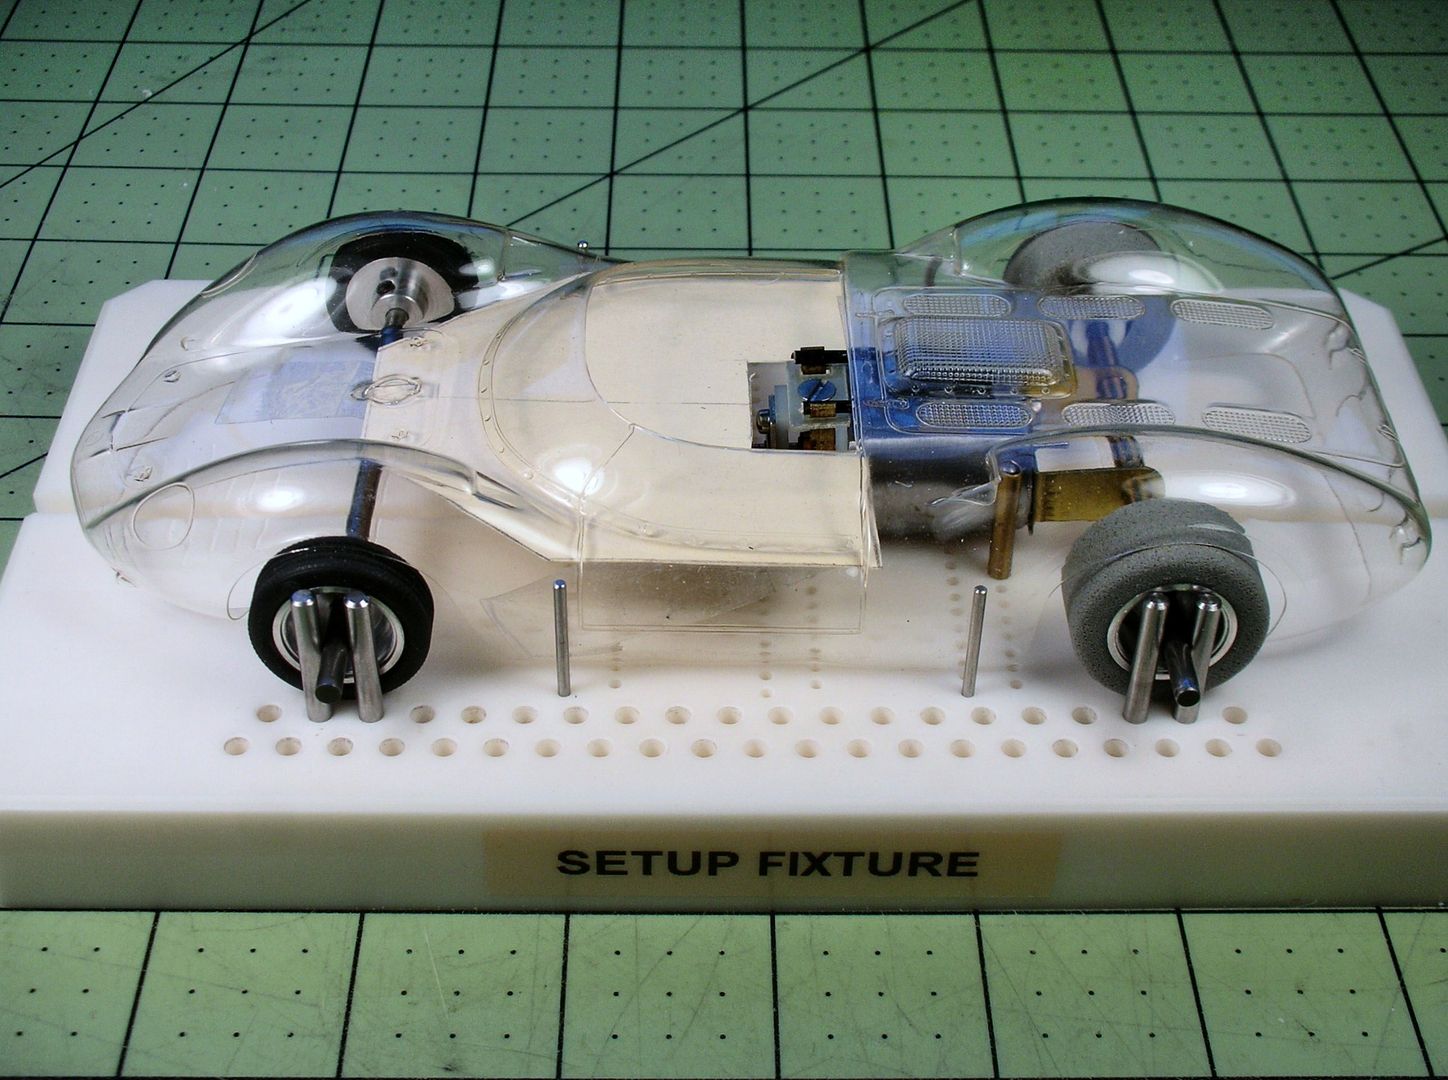
That little bit of extra height helps the body clear the brush spring. Here's a card stock mock-up of an interior plate with a hole cut for brush clearance:
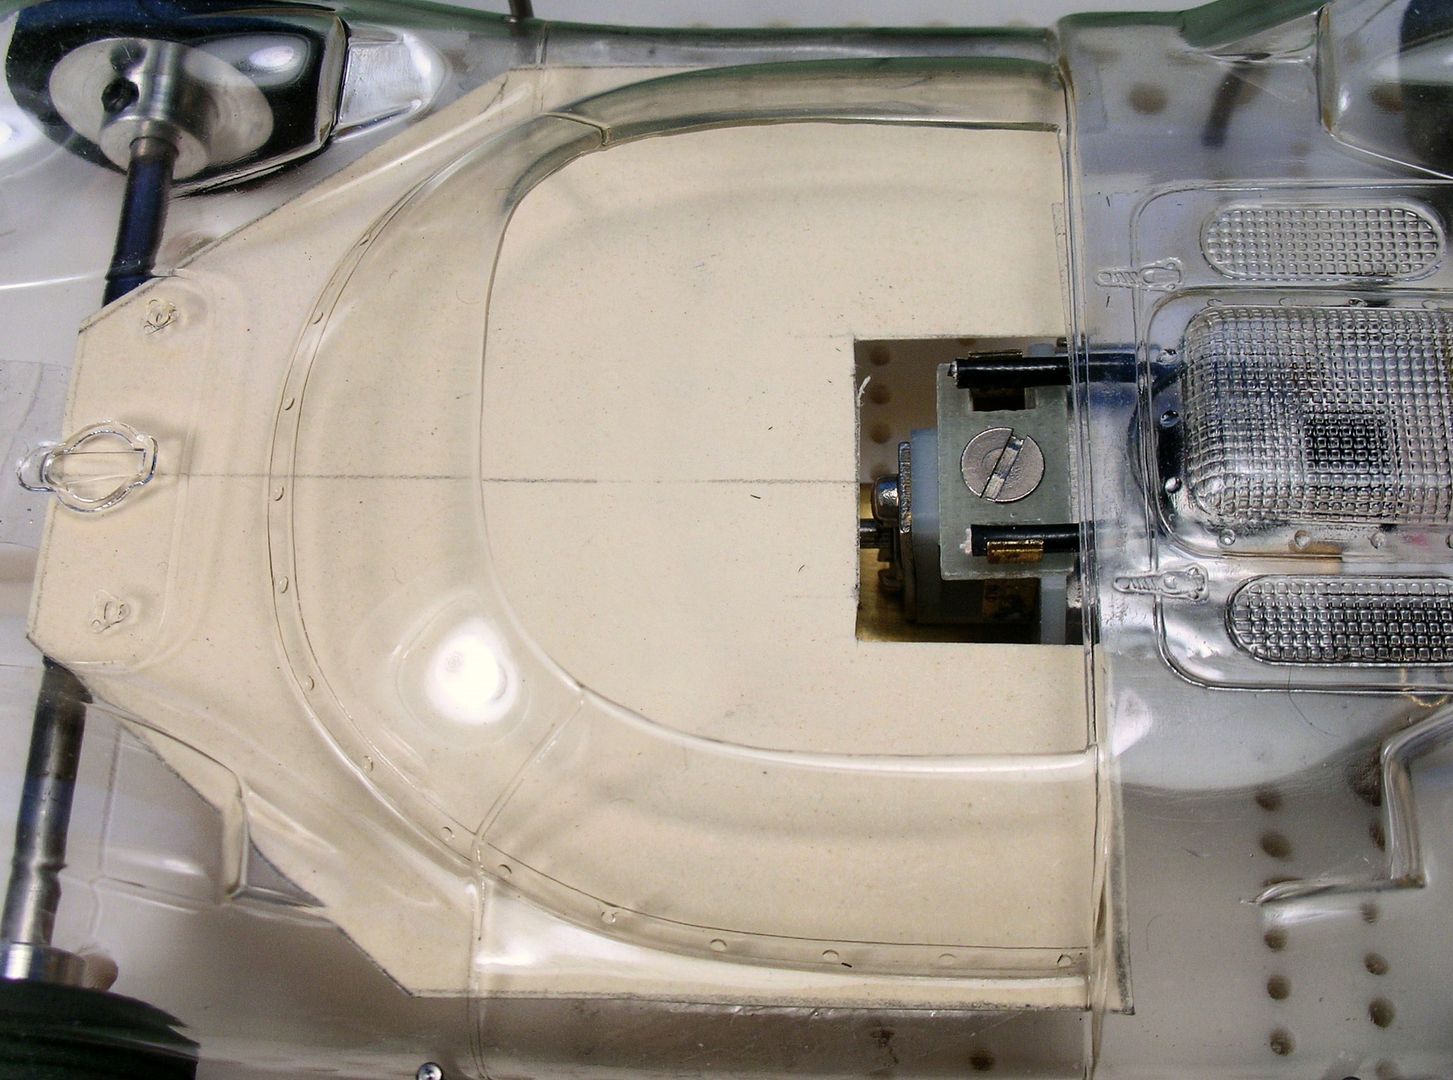
I'll have to come up with a "hose house" to cover the hole up.
Oh, I should explain the term "hose house":
"Hose house" is a technical term for a gizmo that's made to cover another gizmo or gizmos. ![]()
Thanks again Don for the Maverick kit. ![]()
Rick Thigpen
Check out Steve Okeefe's great web site at its new home here at Slotblog:
The Independent Scratchbuilder
There's much more to come...
Posted 14 January 2018 - 12:07 AM
Posted 18 January 2018 - 02:49 PM
Rick, looking good!
In the day, the R&C racers used a standard interior and melted the plastic over the motor to find the necessary room. It was not always well done... that is until Dynamic came up with proper drivers inserts with a hump behind the driver's figure. Hooray! ![]()
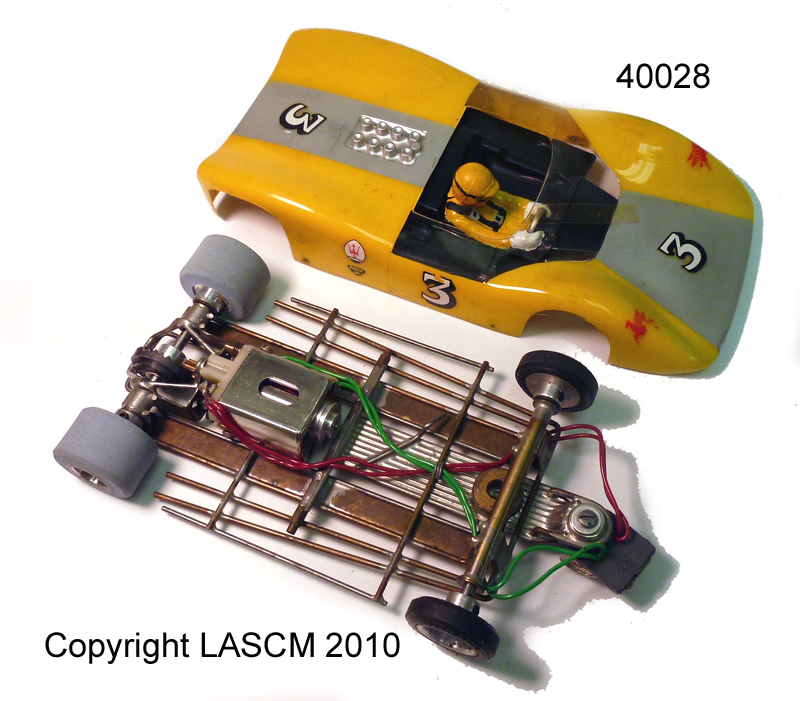
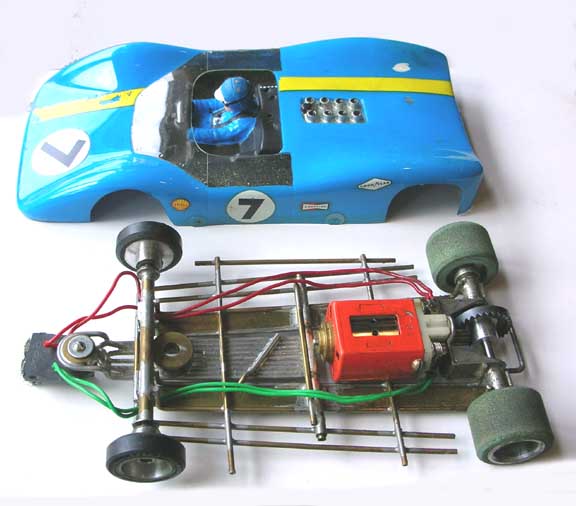
Philippe de Lespinay
Posted 18 January 2018 - 08:44 PM
Thanks Philippe ![]()
On my endbell drive cars I do the "melt the plastic over the motor" too:
I got the body mounted and then the same old problem with the interior showed its ugly head. The thing is made for a full sidewinder application and won't fit an inline. Here's a fix that looks pretty good and only takes about 10 minutes. Put a stripped can and end bell in your chassis like this. I used some Teflon tape on the can just to make sure it wouldn't stick to the interior. I'm not sure this is really necessary though:
Tape the interior into the body and force the body onto the chassis. Turn it upside down and apply heat from your soldering iron and
BAM! The interior will mold itself around the motor can:
Here is the modified interior on the left and stock on the right:
Rick Thigpen
Check out Steve Okeefe's great web site at its new home here at Slotblog:
The Independent Scratchbuilder
There's much more to come...
Posted 18 January 2018 - 10:55 PM
Perfect. I think that it is exactly how they were doing it. ![]()
Philippe de Lespinay
Posted 18 February 2018 - 04:08 PM
My inspiration (not a clone) for this project's chassis is going to be another Mike Steube beauty from the R&C races:
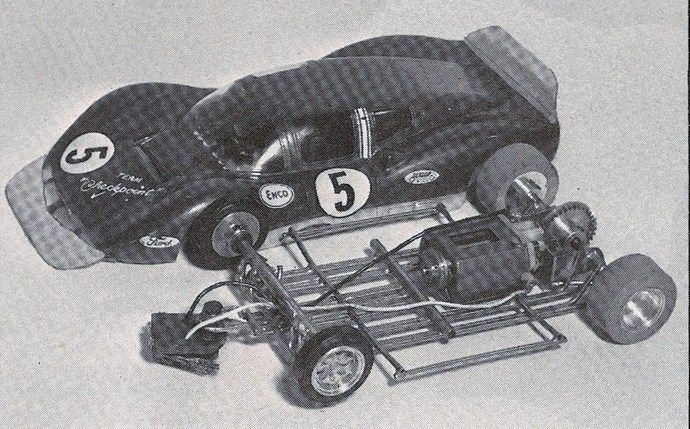
The rear bracket is a Russkit but I needed to make a little reducer bushing to fit the motor can's 1/4" ball bearing.
Speaking of ball bearings, I know most of the R&C guys used simple brass tubing for axle bushing but a RAM needs ball bearings.....RAM marketed ball bearings in the day:
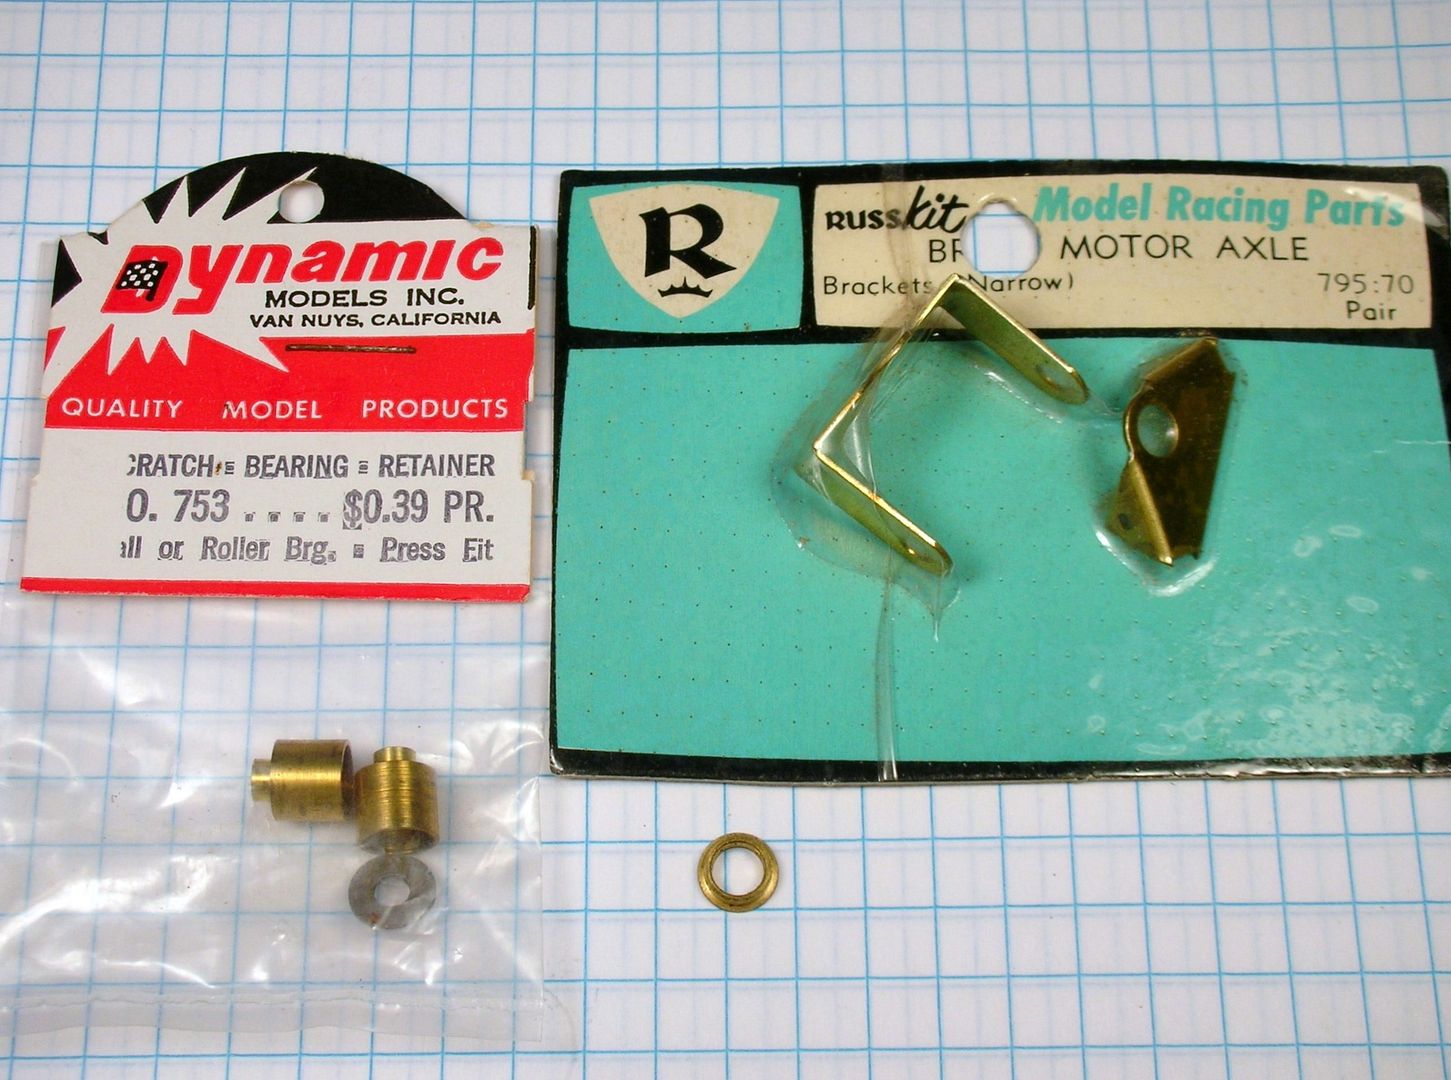
I modified a pair of Dynamic "duffies" for the job:
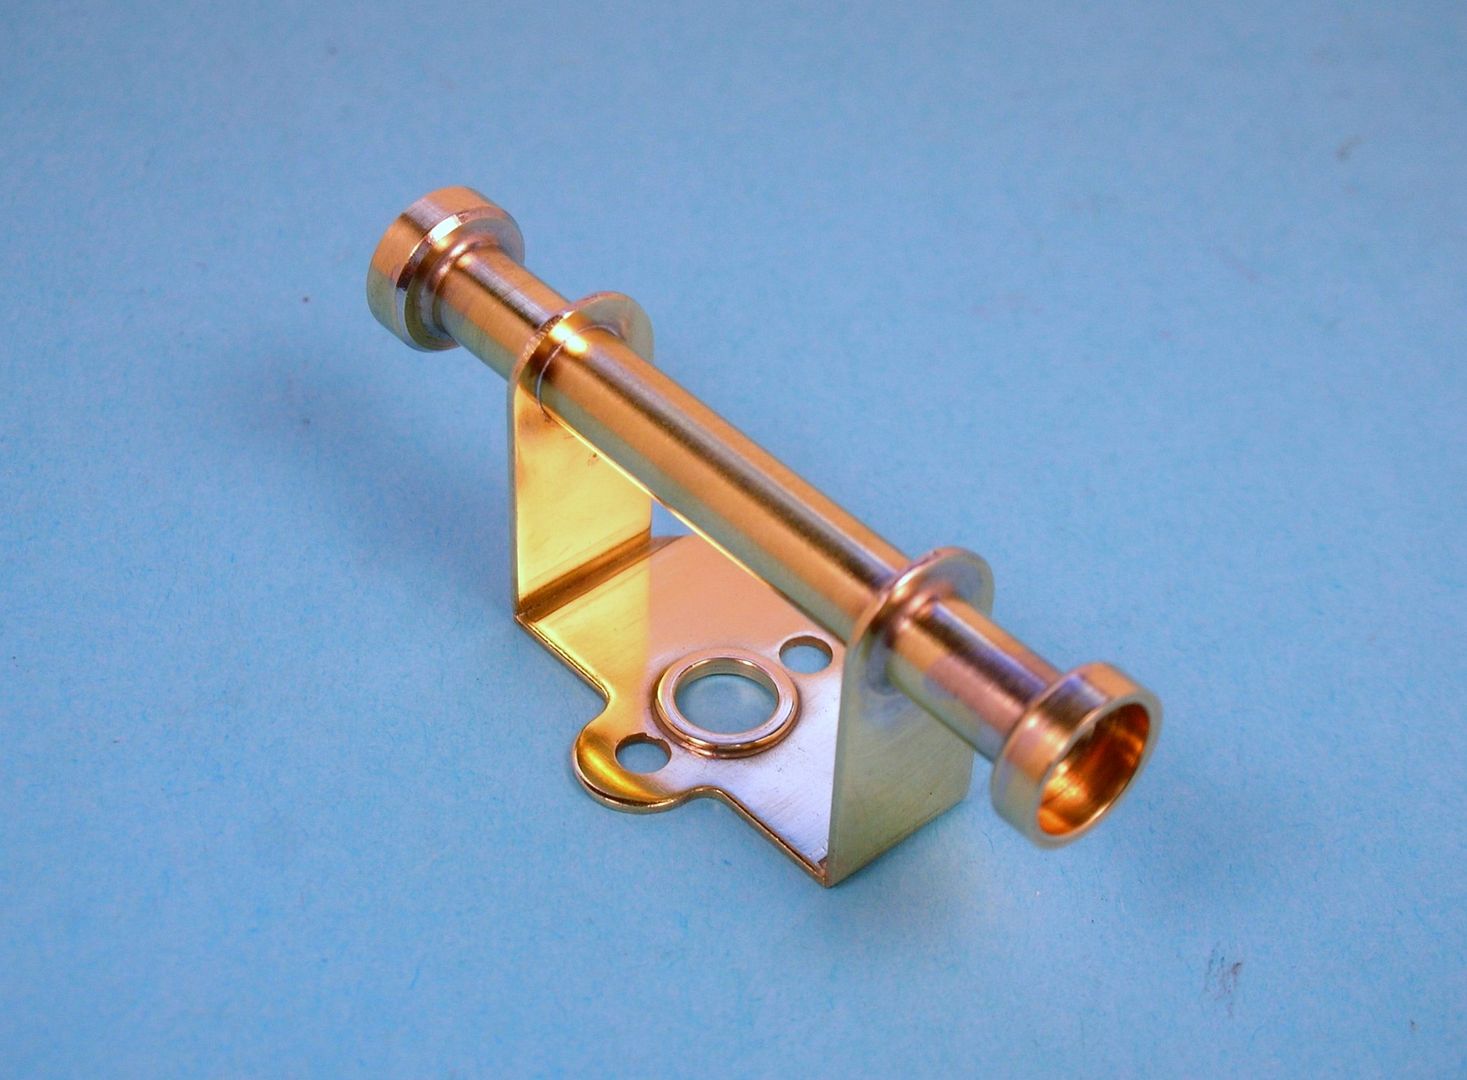
I decided to try making up all the individual pieces for the chassis (less the drop arm) before I started any soldering:
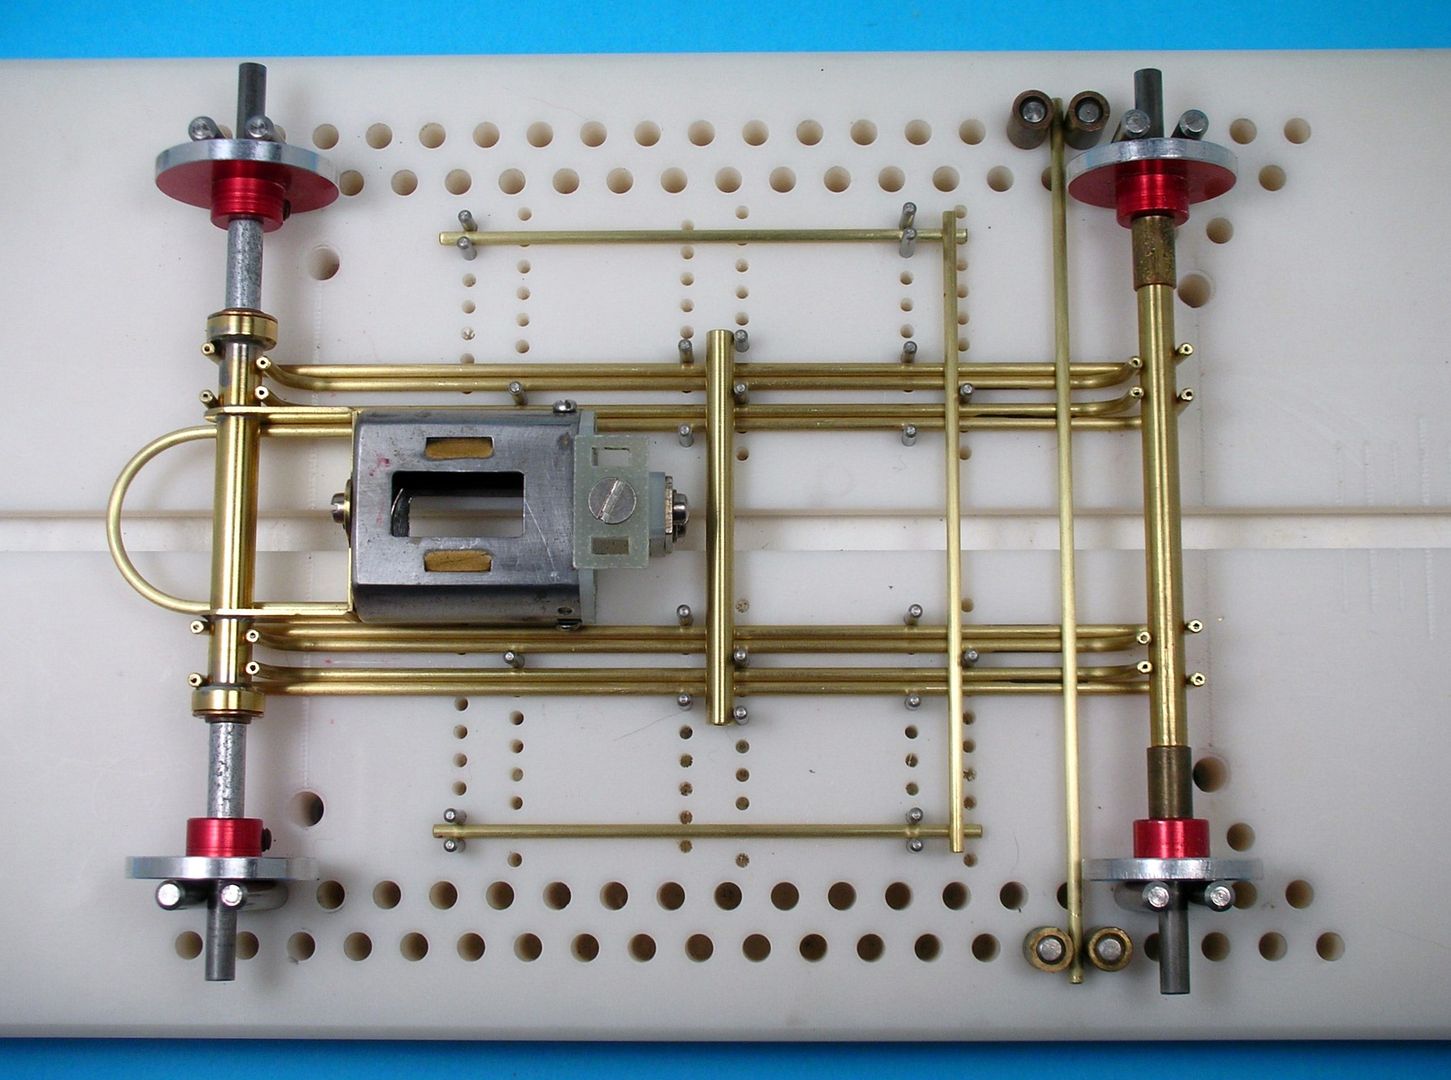
I think I'll double up on the outriggers. The main rails are in pairs so the outriggers might as well be too.
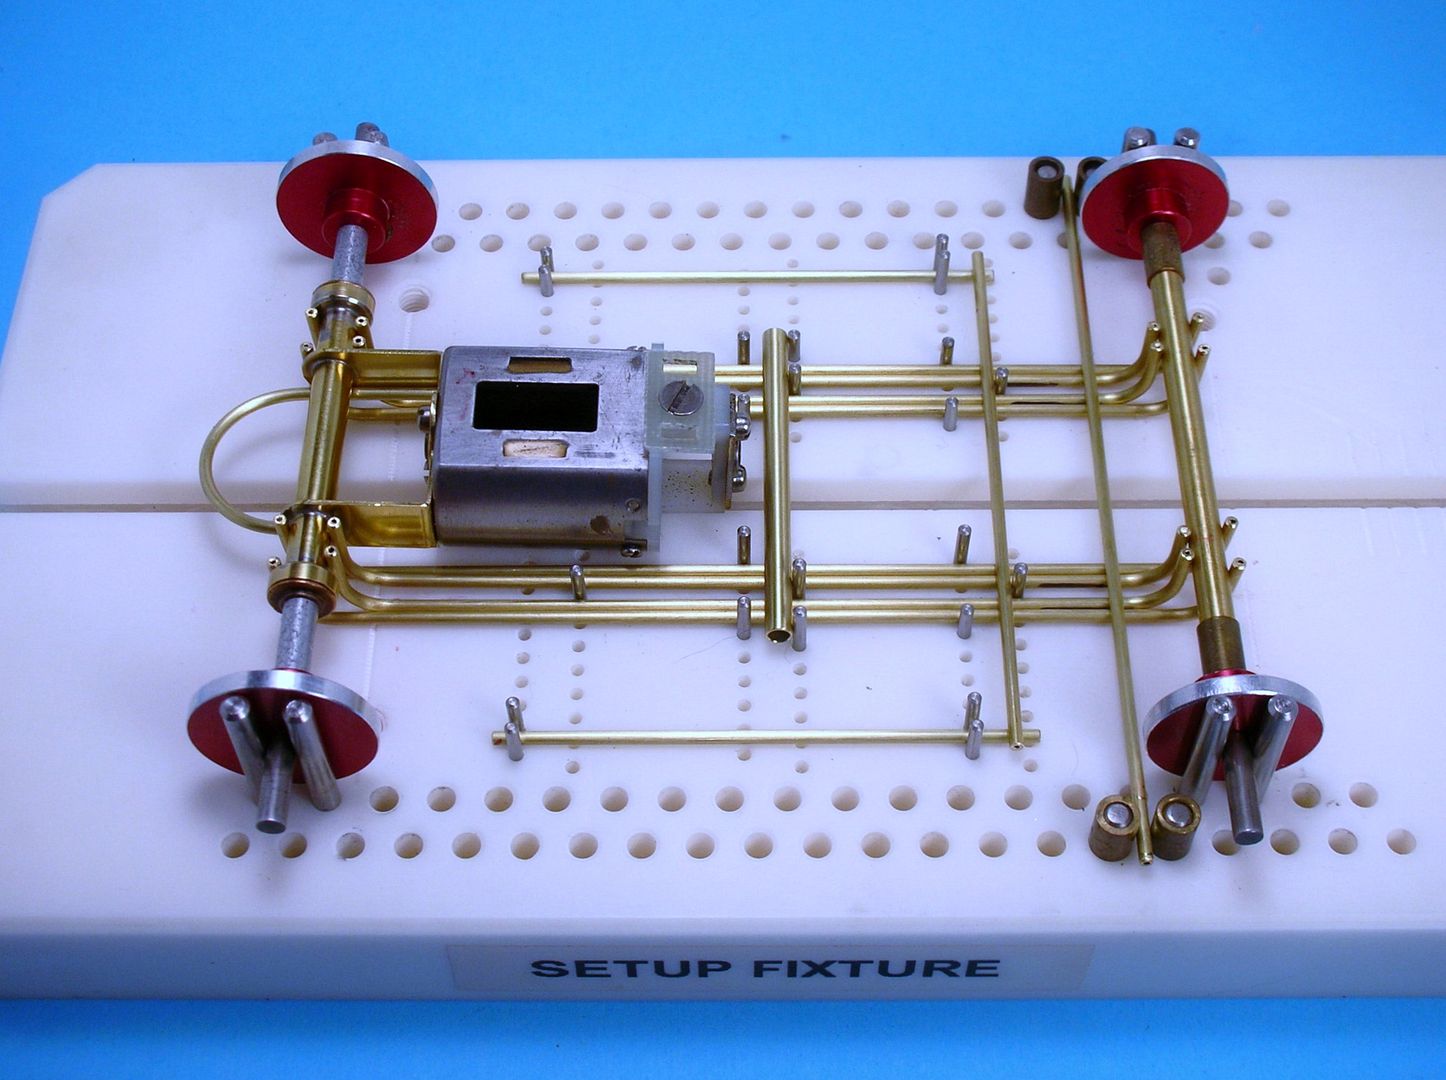
Time to fire up the Ungar iron..................
Rick Thigpen
Check out Steve Okeefe's great web site at its new home here at Slotblog:
The Independent Scratchbuilder
There's much more to come...
Posted 18 February 2018 - 06:44 PM
Posted 18 February 2018 - 06:53 PM
Hi Paul,
Now that all the bits are ready I've pulled them out of the jig. I will be soldering them in place one at a time.
My thought is I won't be doing the "cut - bend - solder" one piece at a time over and over with acid flux fingers.
Rick Thigpen
Check out Steve Okeefe's great web site at its new home here at Slotblog:
The Independent Scratchbuilder
There's much more to come...