Jump to content


Photo

Captain Rick's 5th Race Sports Car


  • Please log in to reply
63 replies to this topic

#1 dc-65x

dc-65x

    Grand Champion Poster

  • Subscriber
  • PipPipPipPipPipPipPipPip
  • 6,934 posts
  • Joined: 14-February 06
  • Gender:Male
  • Location:Captain Rick: The only vintage slot car nut in SW Oregon?

Posted 21 September 2014 - 03:39 PM

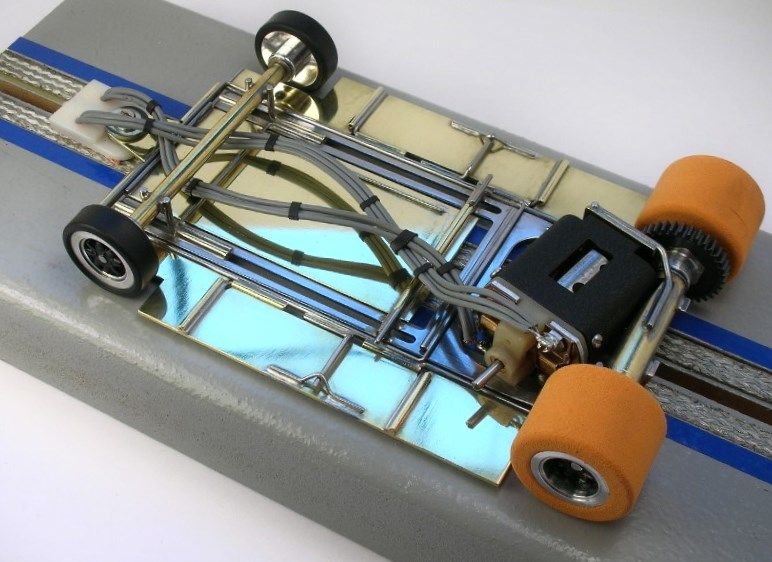
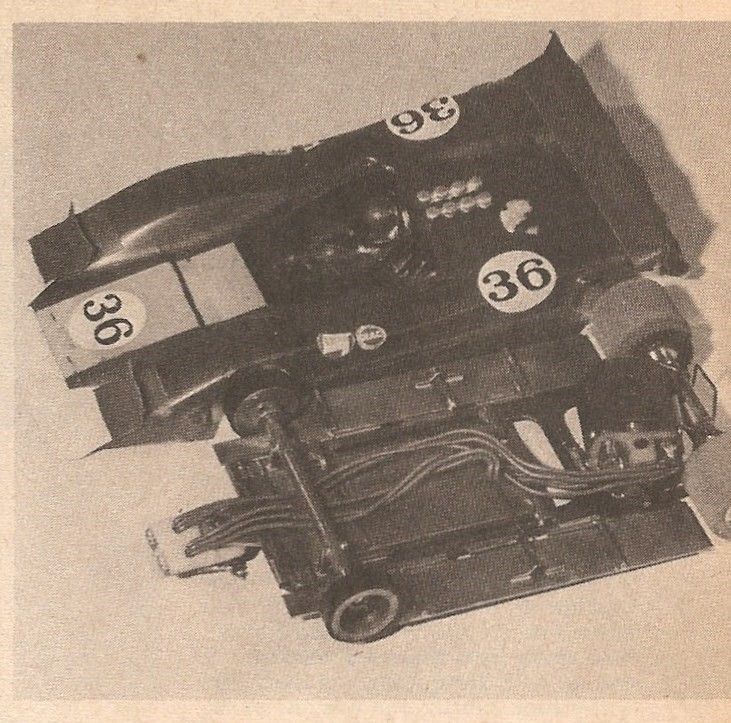
I've started building a racer "inspired" by Mike Steube's 5th race winner:
 

McLarenMk8A-19.jpg


Here's the link to the race reports:

5th 1969 MCS/USRA Road Race - Sports Cars

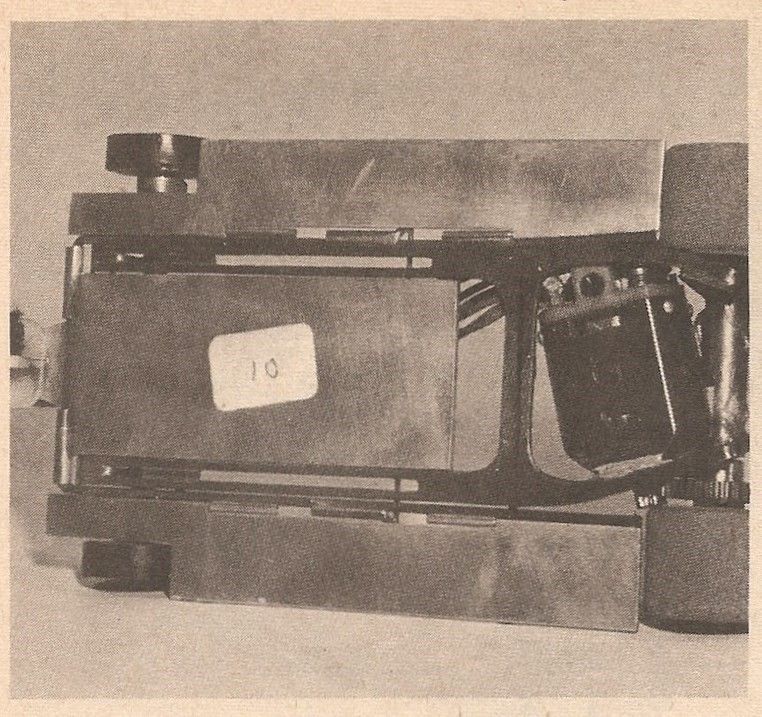
Mike's car used a hand cut steel center section for his chassis:
 

McLarenMk8A-18.jpg


Therein lies the problem. I really want to build a "steel car" and see it move but I'm no Mike Steube, not even close! :laugh2: No way am I going to try to hand cut a steel center section out of a hunk of spring steel with a Dremel tool. :shok: Then heat up the rear uprights with a torch, bend them up 90 degrees in the perfect location while red hot and then quench them in oil to re-temper them.


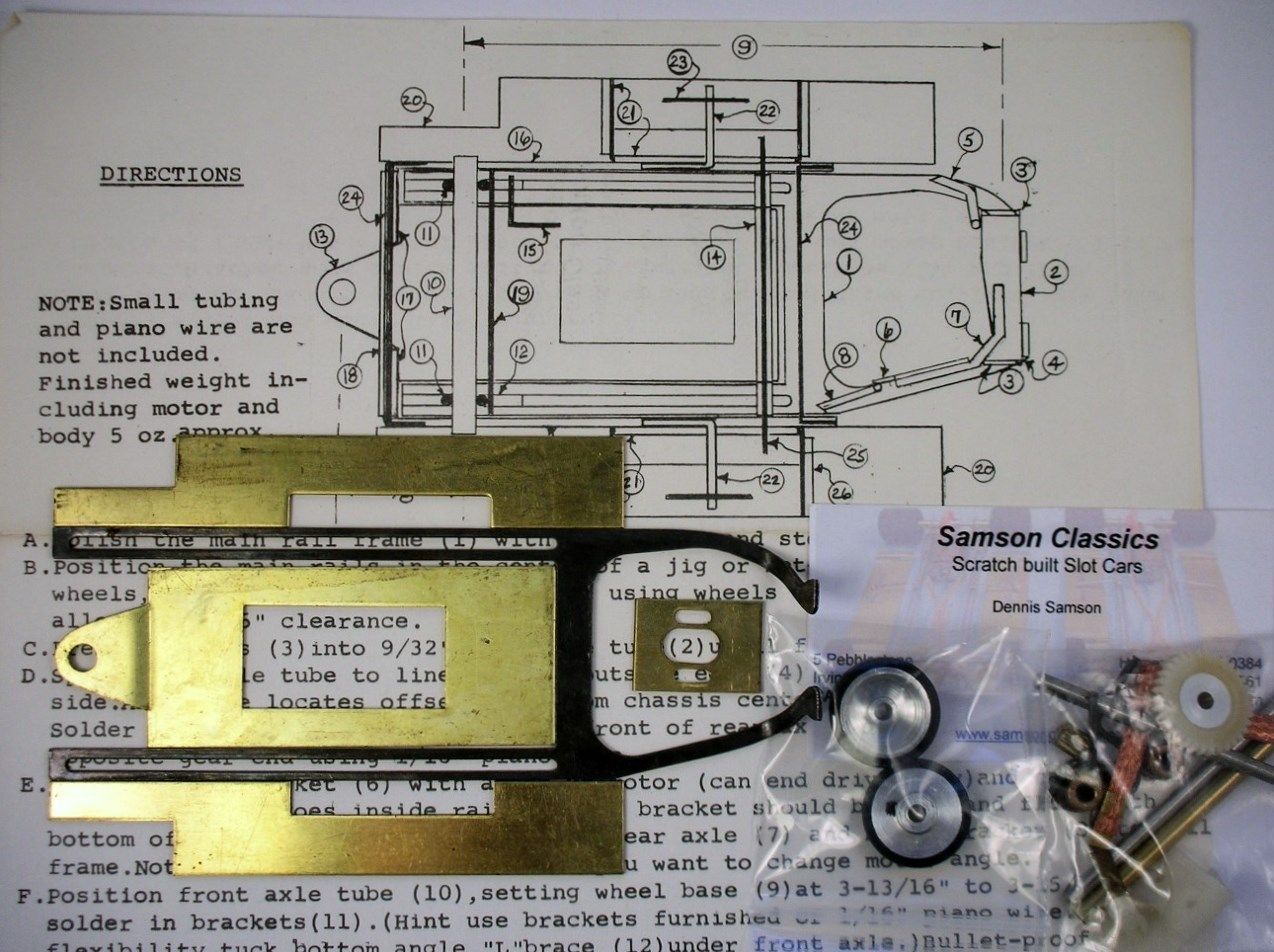
Please feel free to do so if you're so inclined but had another idea, thanks to Dennis Samson. He sent me the kit below.......thanks Dennis!     
 

McLarenMk8A--1.jpg


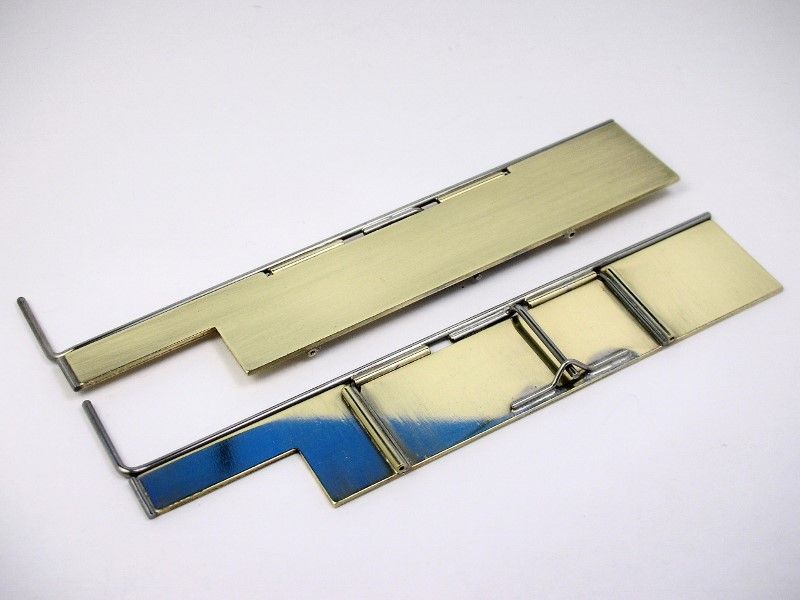
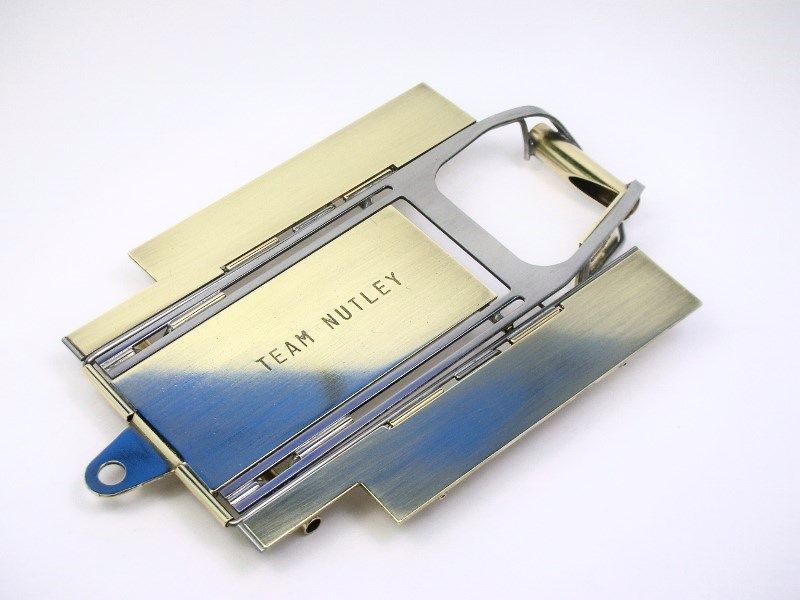
While I'm not going to use the kit for this build I am going to be looking at those cool instructions. The kit also reminded me that I had a right hand drive version (like Mike's car) of this commercial steel center section. It's not an exact replica of Mike's hand cut piece but it looks pretty good to me. These commercial pieces don't appear to have been available during early 1969.


But, I really want to build a "steel" car and see it run as a representation of the wonderful hand cut pieces of the original series. Every time I look at my commercial version I think of how amazing the period Pros were to make them by hand. :clapping: :good:


The steel center section was tweaked and bent until it laid down nice and flat. The steel is not true spring steel. It does feel much tougher to bend and file than mild steel....it feels more like working with modern piano wire.


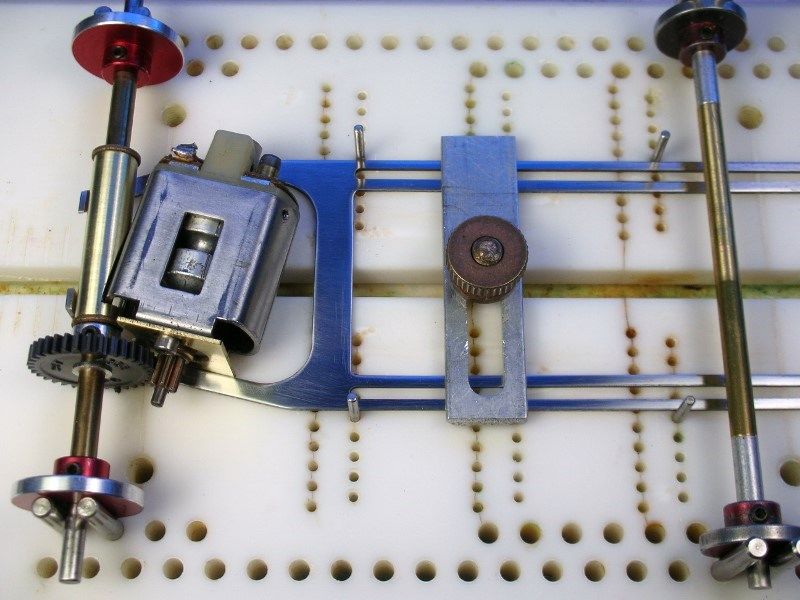
I sanded and polished the steel and set it up in my Rick's chassis jig. The jig motor with motor bracket and clearanced rear axle tube were set in place:
 

McLarenMk8A-16.jpg


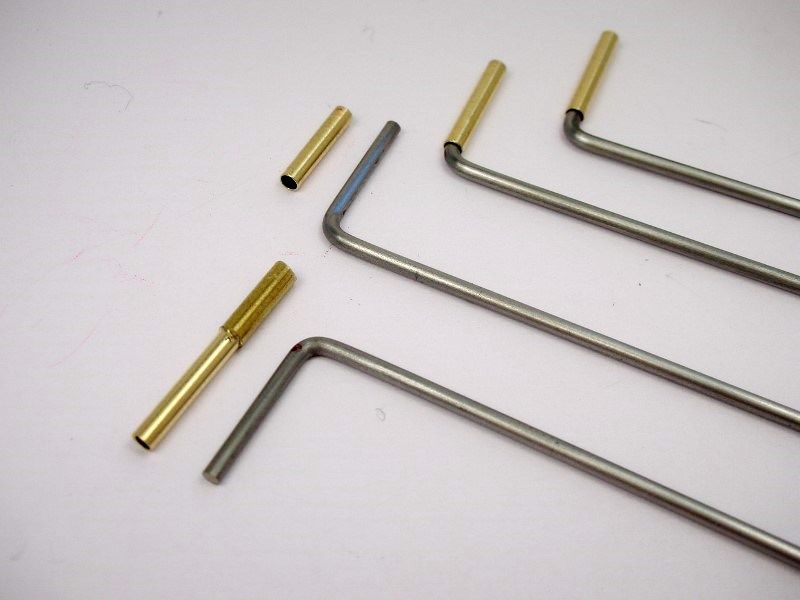
But when I test fit the 1/16" L-shaped front axle uprights there was a problem. The darn slots between the main rails are .080" wide.   :o The .062" axle uprights slop around in those wide slots like crazy. Not good  :wacko2:


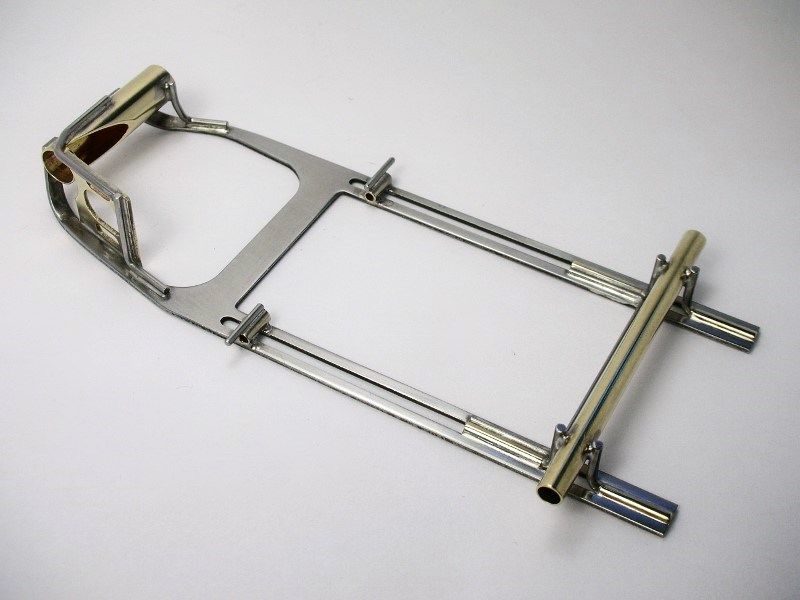
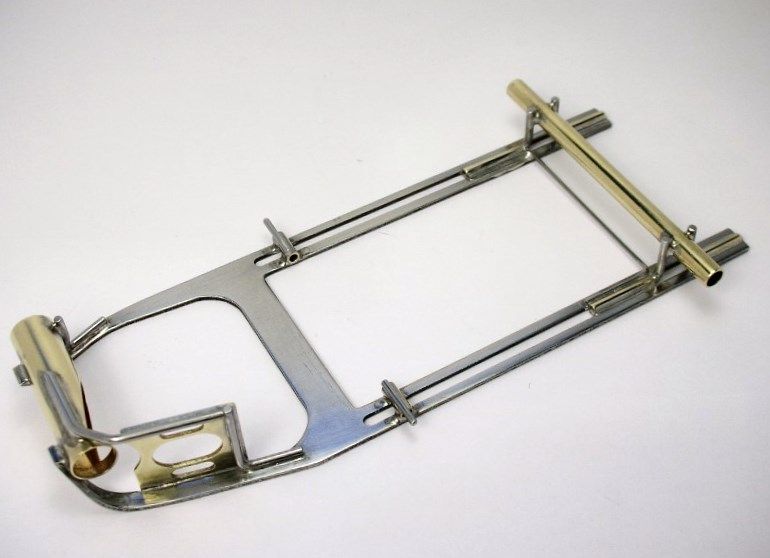
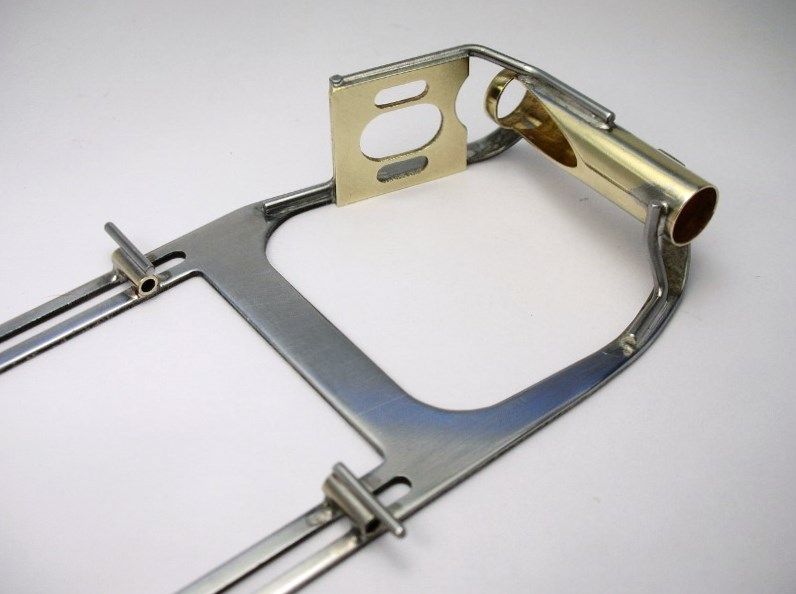
My fix was to machine down .080" diameter sleeves from 3/32" brass tube and slip them over the uprights as shown below:
 

McLarenMk8A-14.jpg


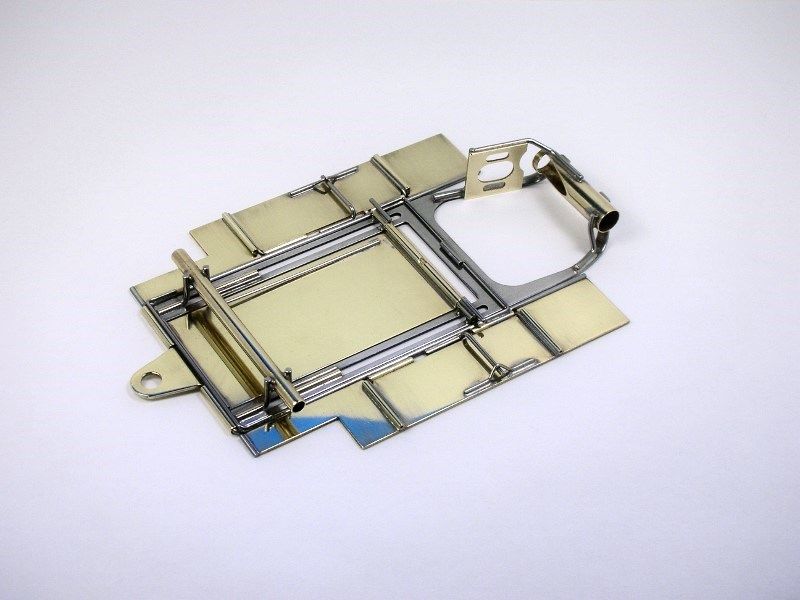
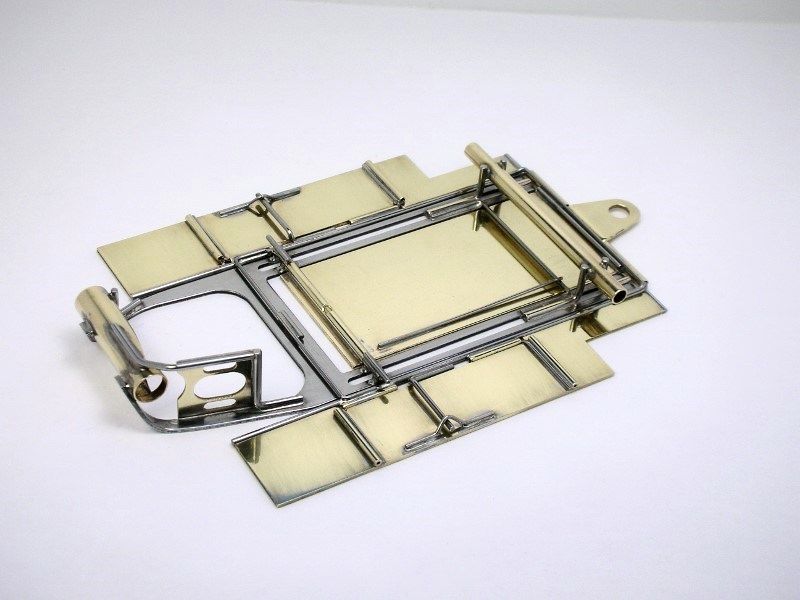
Everything all soldered up. Leaving the parts long make them easy to line up straight.....and hang onto:


McLarenMk8A-17.jpg


All trimmed and buffed up:


McLarenMk8A-6.jpg


McLarenMk8A-5-1.jpg


McLarenMk8A-3-1.jpg


It's good to be soldering again... :D


  • n.elmholt and Peter Horvath like this

Rick Thigpen
Check out Steve Okeefe's great web site at its new home here at Slotblog:
The Independent Scratchbuilder
There's much more to come...


#2 SlotStox#53

SlotStox#53

    Posting Leader

  • Full Member
  • PipPipPipPipPipPipPip
  • 4,084 posts
  • Joined: 13-March 13
  • Gender:Male
  • Location:TX

Posted 21 September 2014 - 03:48 PM

Good to see you back at the controls of the soldering iron Rick :D  Bet you've hidden the airbrush for a while :laugh2:


That kit Dennis sent you is amazing !!! As is the steel center section you already had.... 


When you started posting the race reports and the car pictures/write ups I was tempted to look at a steel center car but alas I have none on hand and I ain't dremeling one out either .... So will be watching this closely and staring in awe as it comes together :good:


Will look at starting off on the car/s I looked at building for this series :)


#3 Jairus

Jairus

    Body Painter Extraordinaire

  • Subscriber
  • PipPipPipPipPipPipPipPip
  • 10,174 posts
  • Joined: 16-February 06
  • Gender:Male
  • Location:Salem, OR

Posted 21 September 2014 - 06:02 PM

Very very nice!
I have one of those same steel center sections saved for just such a car.
Good to see you forging ahead and I wish I could join you. But other duties crowd out my dreams.

Still, watching with anticipation.


Jairus H Watson - Artist
Need something painted, soldered, carved, or killed? - jairuswtsn@aol.com

www.slotcarsmag.com

www.jairuswatson.net
http://www.ratholecustoms.com
Check out some of the cool stuff on my Fotki!


#4 dc-65x

dc-65x

    Grand Champion Poster

  • Subscriber
  • PipPipPipPipPipPipPipPip
  • 6,934 posts
  • Joined: 14-February 06
  • Gender:Male
  • Location:Captain Rick: The only vintage slot car nut in SW Oregon?

Posted 21 September 2014 - 07:54 PM

Thanks guys. :)


For a mere mortal, trying to do some justice to Steube's car ain't easy. First, I'm squeaking in a commercial center section that came a bit later than this series and trying to make it look more like his hand cut piece. To than end, I cut the big "ears" off the rear axle uprights. I also draw filed it to get rid of the stamping marks to make it look more like it was hand cut from sheet stock.


Next is the motor. I'll have to get by with a Mura B motor. Mike's was again, hand made. It's a Mura A (16D) cut down to fit Champion magnets (this size motor was perfected by Bob Green into his Green can which later became know as the Mura C-can). The endbell also had to be cut down. I'm not sure if Steube's motor had a lowered 16D end bell or used a narrowed and shimmed Mura B end bell.


Anyway, my point is that Steube's car is quite a piece of handiwork! :sun_bespectacled:


Rick Thigpen
Check out Steve Okeefe's great web site at its new home here at Slotblog:
The Independent Scratchbuilder
There's much more to come...


#5 Tex

Tex

    Grand Champion Poster

  • Full Member
  • PipPipPipPipPipPipPipPip
  • 9,241 posts
  • Joined: 07-July 06
  • Gender:Male
  • Location:Denton, TX

Posted 21 September 2014 - 08:12 PM

Great project, Rick! Communication being what it was back then, dweebs like me didn't find out about steel center sections 'til much later. I do remember cutting out a steel center section from a piece of commercially available(by then) spring steel. Nothing a schoolhouse wooden ruler and a Dremel couldn't handle.  LOL


Richard L. Hofer

Remember, two wrongs don't make a right... but three lefts do! Only you're a block over and a block behind.

#6 dc-65x

dc-65x

    Grand Champion Poster

  • Subscriber
  • PipPipPipPipPipPipPipPip
  • 6,934 posts
  • Joined: 14-February 06
  • Gender:Male
  • Location:Captain Rick: The only vintage slot car nut in SW Oregon?

Posted 28 September 2014 - 06:49 PM

I've been distracted by "real world stuff" but those distractions are almost over. I was able to build up the drop arm.....


McLarenMk8A-6-1.jpg


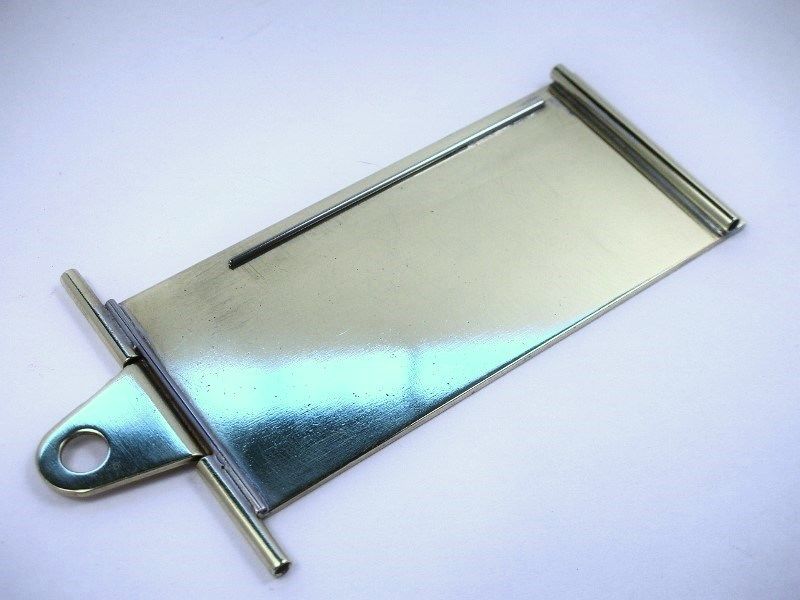
.........and the pan - plumber rail as a sub-assembly:


McLarenMk8A-7-1.jpg


I've never done things this way before but the pan stop on Steube's car and in the chassis kit instructions made it possible.


Time to finish the chassis off..................


  • Peter Horvath likes this

Rick Thigpen
Check out Steve Okeefe's great web site at its new home here at Slotblog:
The Independent Scratchbuilder
There's much more to come...


#7 dc-65x

dc-65x

    Grand Champion Poster

  • Subscriber
  • PipPipPipPipPipPipPipPip
  • 6,934 posts
  • Joined: 14-February 06
  • Gender:Male
  • Location:Captain Rick: The only vintage slot car nut in SW Oregon?

Posted 03 October 2014 - 09:26 PM

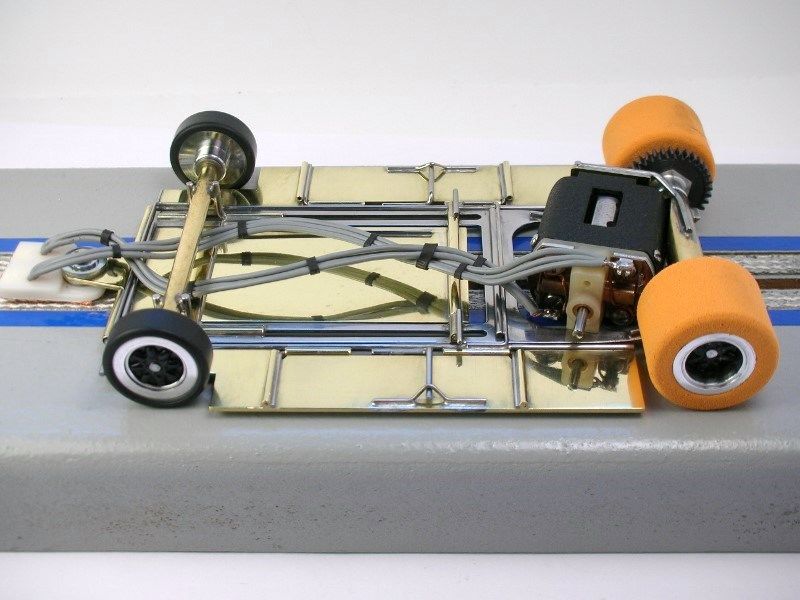
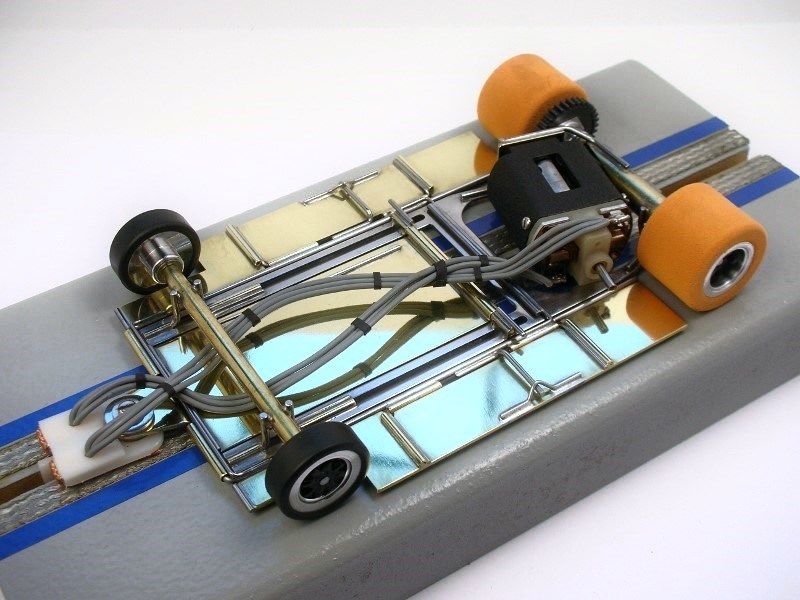
My chassis is done......finally!
 
McLarenMk8A-36.jpg
 
I'm pleased that it turned out nice and flat, square and everything works smoothly. I was worried about building an anglewinder as I think it's been years since my last one. :wacko2:
 
McLarenMk8A-33.jpg
 
I love my Pittman's and Rod & Custom inline's but these are fun to build too:  :D
 
 
McLarenMk8A-32.jpg
 
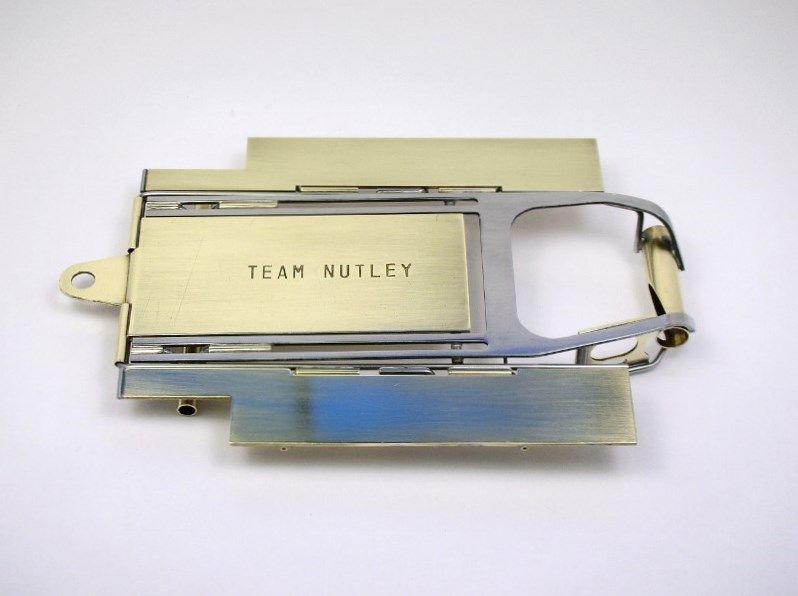
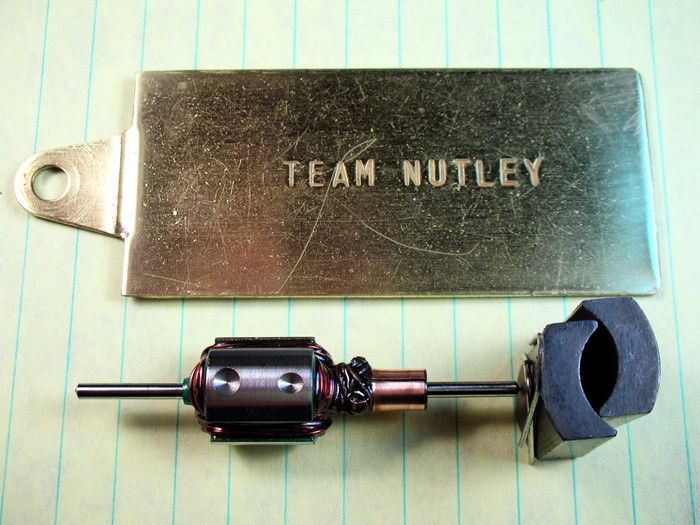
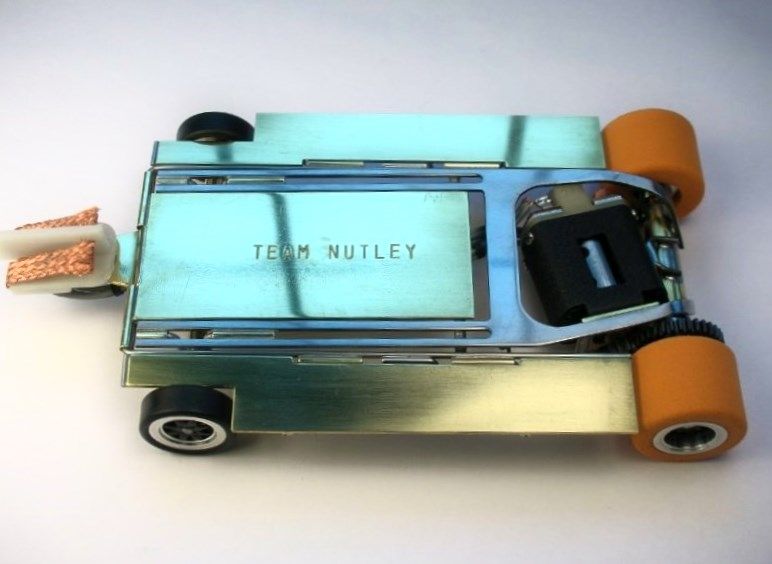
I had to use an "East Coast" drop arm on a "West Coast" inspired car. :shok: But that's what I had and Nutley stuff was absolutely top notch:
 
McLarenMk8A-37.jpg
 
Okie Dokie, what about a motor? :unknw:
 
How about resurrecting this B-Motor from my old eBay Motors thread. Here's a link to it:
 
eBay Motors


Here's a beauty in the rough... well maybe not. :laugh2: :

motors-031.jpg

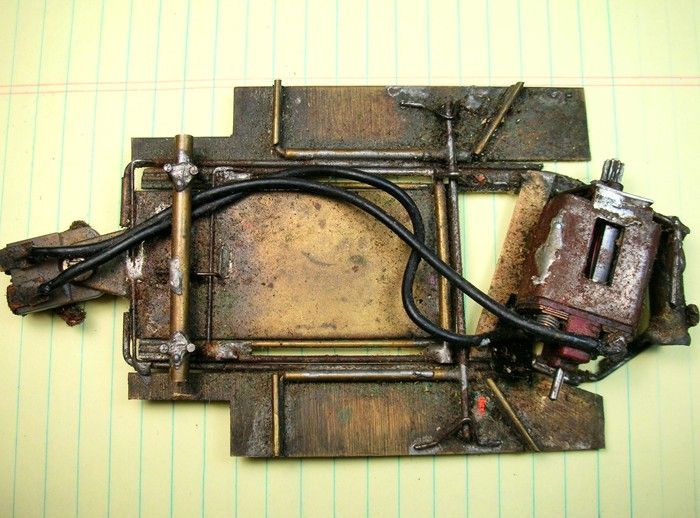
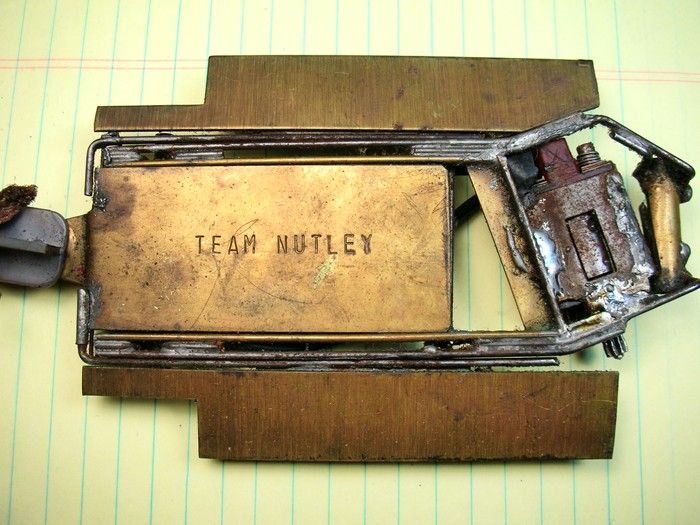
This looks like it could be an older endbell drive chassis for a 16D that's had a B-motor set on top of the frame rails. blink.gif :

motors-032.jpg

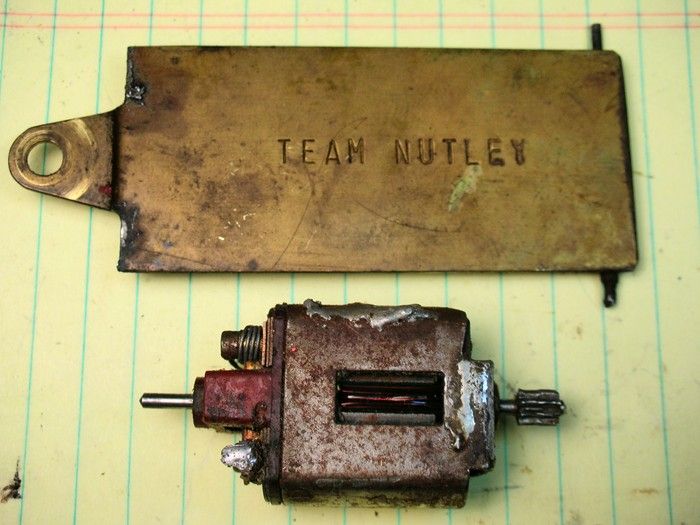
Not being overly impressed, here's what I pulled off of this one:

motors-033.jpg

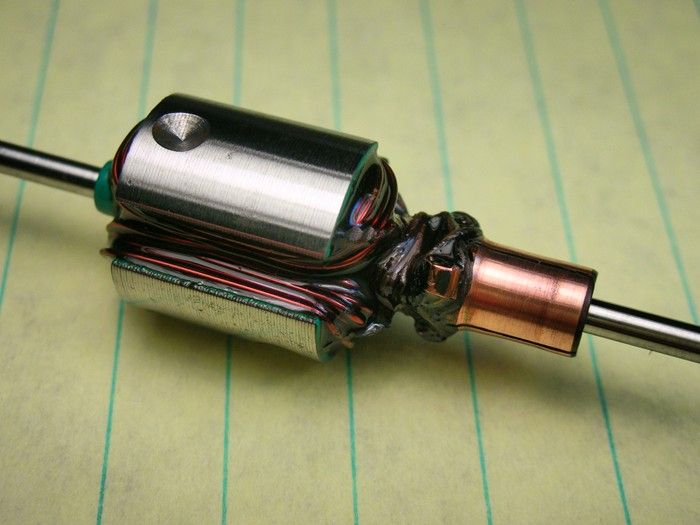
The can was all chopped up and the endbell, too. I saved the end bell hardware and this:

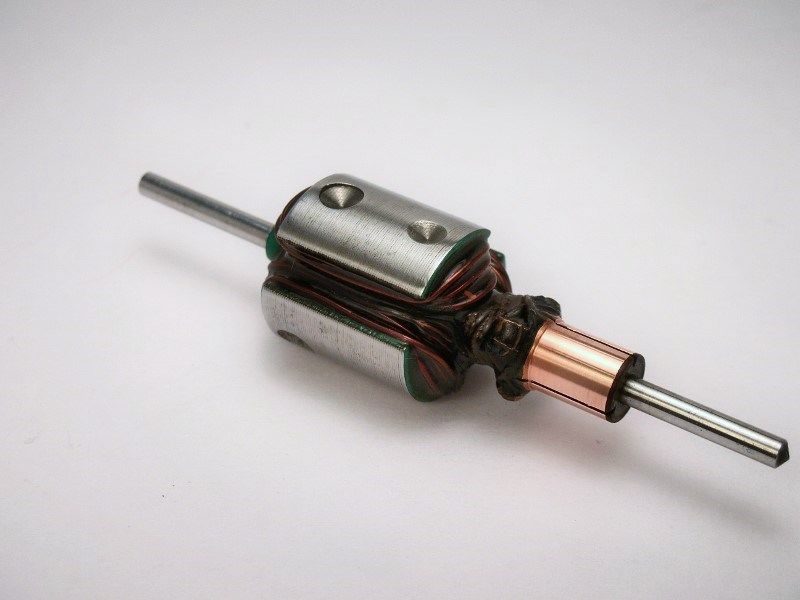
motors-036.jpg

The drop arm is the later style for a Jet flag. The magnets are the big honkin' Super Bs and the arm...

motors-034.jpg

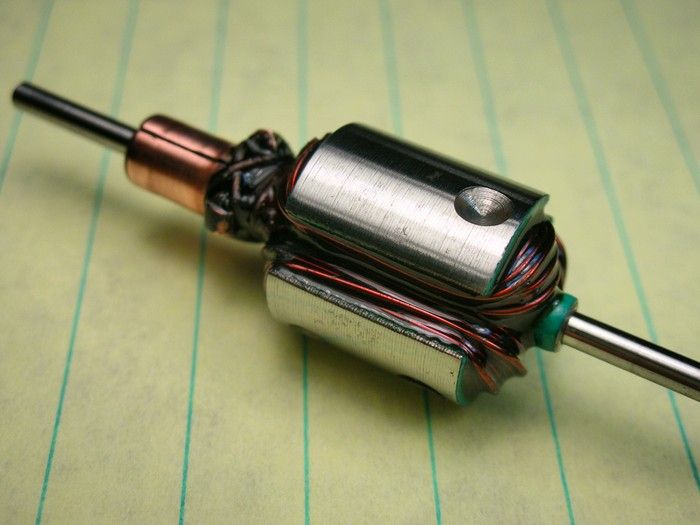
It could be a late style clockwise-timed Thorp?

motors-035.jpg

It's very nice. It just needs its comm cut.

Next...


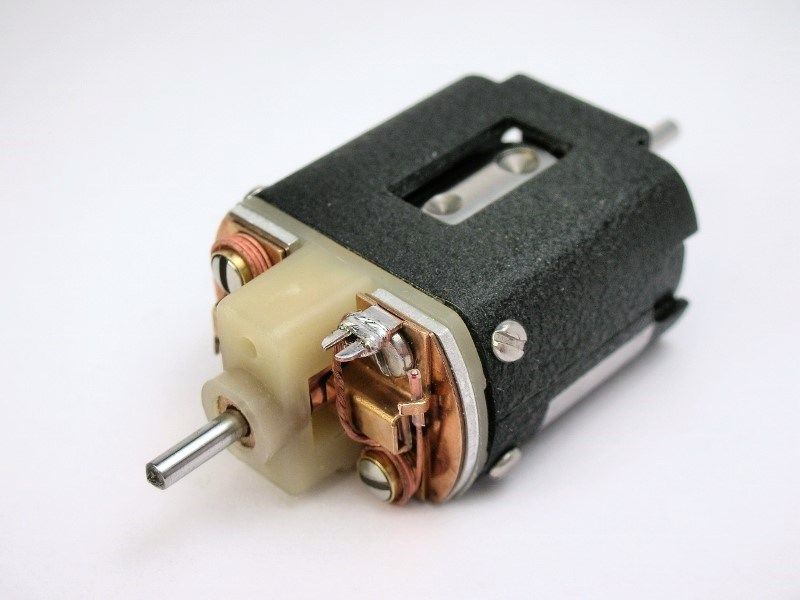
I think this will be cool. A real period B-motor coming back to life. :dance3: I'll give that arm a comm cut, put those magnets in a less rusted out can and top it off with a new end bell.


Onward


  • endbelldrive and Humbolt like this

Rick Thigpen
Check out Steve Okeefe's great web site at its new home here at Slotblog:
The Independent Scratchbuilder
There's much more to come...


#8 SlotStox#53

SlotStox#53

    Posting Leader

  • Full Member
  • PipPipPipPipPipPipPip
  • 4,084 posts
  • Joined: 13-March 13
  • Gender:Male
  • Location:TX

Posted 03 October 2014 - 09:36 PM

Simply first class work & beautiful end result Rick :good: :D


That steel center section & shiny brass just go so well together, almost makes the silly notion of dremeling out a sheet of spring steel not so totally bat *#*#* crazy :laugh2: A


As for that period cleaned up armature.... that looks to be a scorcher of an arm :dance3:...  done up in it's B clothing bolted into that eye candy chassis  is going to be well worth the wait...


Most definitely "Onward" Sir.....


#9 Jairus

Jairus

    Body Painter Extraordinaire

  • Subscriber
  • PipPipPipPipPipPipPipPip
  • 10,174 posts
  • Joined: 16-February 06
  • Gender:Male
  • Location:Salem, OR

Posted 03 October 2014 - 09:49 PM

Was the rectangle vent hole Mura B motor available then?
I think a more korrect B would be the one with the two small round holes.


Jairus H Watson - Artist
Need something painted, soldered, carved, or killed? - jairuswtsn@aol.com

www.slotcarsmag.com

www.jairuswatson.net
http://www.ratholecustoms.com
Check out some of the cool stuff on my Fotki!


#10 Tex

Tex

    Grand Champion Poster

  • Full Member
  • PipPipPipPipPipPipPipPip
  • 9,241 posts
  • Joined: 07-July 06
  • Gender:Male
  • Location:Denton, TX

Posted 03 October 2014 - 10:03 PM

Nice chassis, Rick! Rock ever onward!


Richard L. Hofer

Remember, two wrongs don't make a right... but three lefts do! Only you're a block over and a block behind.

#11 dc-65x

dc-65x

    Grand Champion Poster

  • Subscriber
  • PipPipPipPipPipPipPipPip
  • 6,934 posts
  • Joined: 14-February 06
  • Gender:Male
  • Location:Captain Rick: The only vintage slot car nut in SW Oregon?

Posted 03 October 2014 - 10:15 PM

Hi Jairus,


I'm going with what I dug up in my post on motors for this series:

Motor How-To Articles for the 1969 MCS/USRA Series

Here's my reasoning from that article:


August 28, 1969 MRJ article, "Setting Up The Mura Super B":


This article was published after the last race in the series. But after reading it, it seems to describe how the Pros were working the bugs out and setting up the B-motor during the series.


The race reports talked about cutting up the first B-can to clear the armature. This can also gives me a "hop up" article to work to. This can is by no means the "hot setup" as there are 2 later "hop up" articles that come after this one. So I thought it would be interesting and fun to work to this article and resurrect a motor from the "eBay Motors" past.


John Anderson's 6th race car also has the rectangular cut out in his can so.........


Rick Thigpen
Check out Steve Okeefe's great web site at its new home here at Slotblog:
The Independent Scratchbuilder
There's much more to come...


#12 Jairus

Jairus

    Body Painter Extraordinaire

  • Subscriber
  • PipPipPipPipPipPipPipPip
  • 10,174 posts
  • Joined: 16-February 06
  • Gender:Male
  • Location:Salem, OR

Posted 03 October 2014 - 10:26 PM

Okay, okay.
Just asking.
If you want to play with an  2-hole motor just let me know.
I pulled one out of an old chassis just like you did, but this one seems to have had the arm replaced with either a Dart or Certus arm due to the sheet metal drill bit used to balance. Pretty nice piece looking for a nice chassis.... hint.


Jairus H Watson - Artist
Need something painted, soldered, carved, or killed? - jairuswtsn@aol.com

www.slotcarsmag.com

www.jairuswatson.net
http://www.ratholecustoms.com
Check out some of the cool stuff on my Fotki!


#13 dc-65x

dc-65x

    Grand Champion Poster

  • Subscriber
  • PipPipPipPipPipPipPipPip
  • 6,934 posts
  • Joined: 14-February 06
  • Gender:Male
  • Location:Captain Rick: The only vintage slot car nut in SW Oregon?

Posted 03 October 2014 - 11:03 PM

Sorry, Jairus. I didn't mean to get wound up in the details. :)  I always appreciate your comments very much....thanks! :victory:


Rick Thigpen
Check out Steve Okeefe's great web site at its new home here at Slotblog:
The Independent Scratchbuilder
There's much more to come...


#14 Pablo

Pablo

    Builder

  • Administrator
  • PipPipPipPipPipPipPipPip
  • 18,437 posts
  • Joined: 20-February 06
  • Gender:Male
  • Location:Cleveland, Tennessee

Posted 04 October 2014 - 08:01 AM

Looks like a mirror.  SANO has now be re-defined.   :heart:  :heart:  :heart:  :heart:  :heart:


Paul Wolcott


#15 dc-65x

dc-65x

    Grand Champion Poster

  • Subscriber
  • PipPipPipPipPipPipPipPip
  • 6,934 posts
  • Joined: 14-February 06
  • Gender:Male
  • Location:Captain Rick: The only vintage slot car nut in SW Oregon?

Posted 04 October 2014 - 12:01 PM

Thanks :)


Hopefully she won't fall into the "if it don't go, chrome it" category. :laugh2:  To find out, when she's finished I'll be shipping the car to Rodney for a timed "Lightning Lap" on Eddie's Blue King.........WEEEEEEEEEEEEEEEEEEEE!!!!!!!!!!!!!!!!!!!!!!!!!!!!!!!!  :dance3:
 
So, if there's to be any "Lightning" in my lap times I've got to get this salvaged motor........motivated:

motors-033.jpg

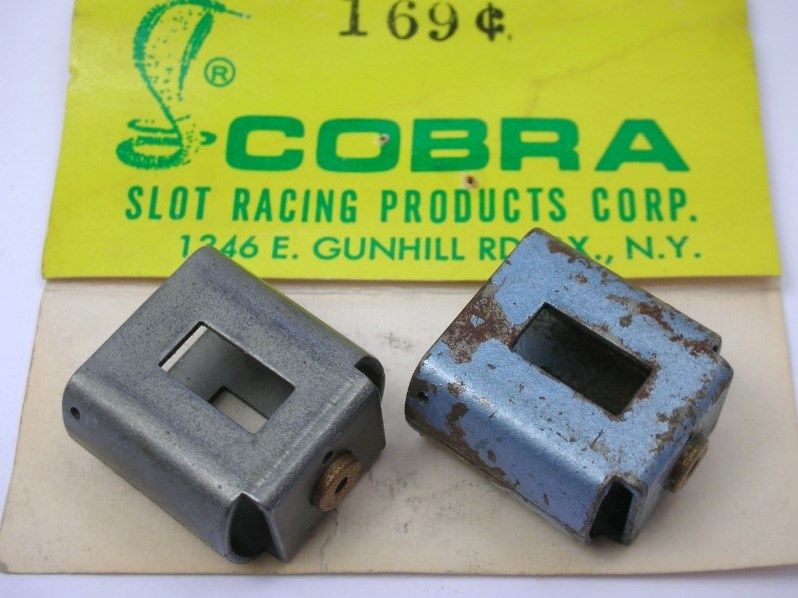
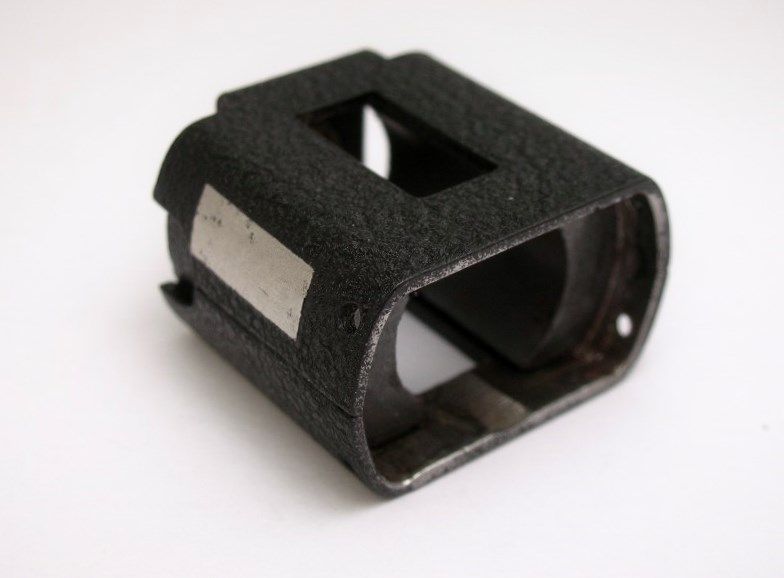
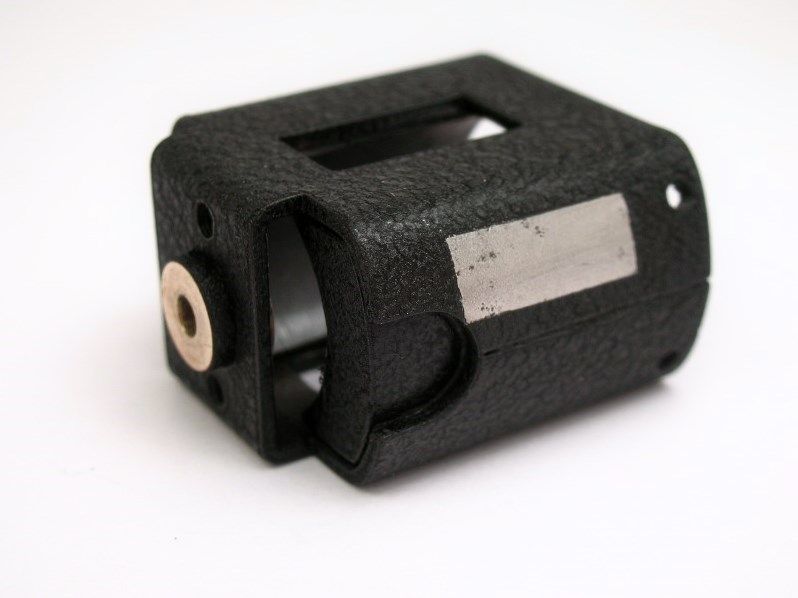
The can and endbell have been butchered so I'll need to replace them. Here is the blue can on the right I'll be using and a new old stock one for comparison:


McLarenMk8A-3.jpg


It needs the back of the can cut up for can drive as shown in the Model Racing Journal B-Motor hop up article:


MRJ V1N17 p4.jpg


MRJ V1N17 p5.jpg


MRJ V1N17 p6.jpg


MRJ V1N17 p7.jpg


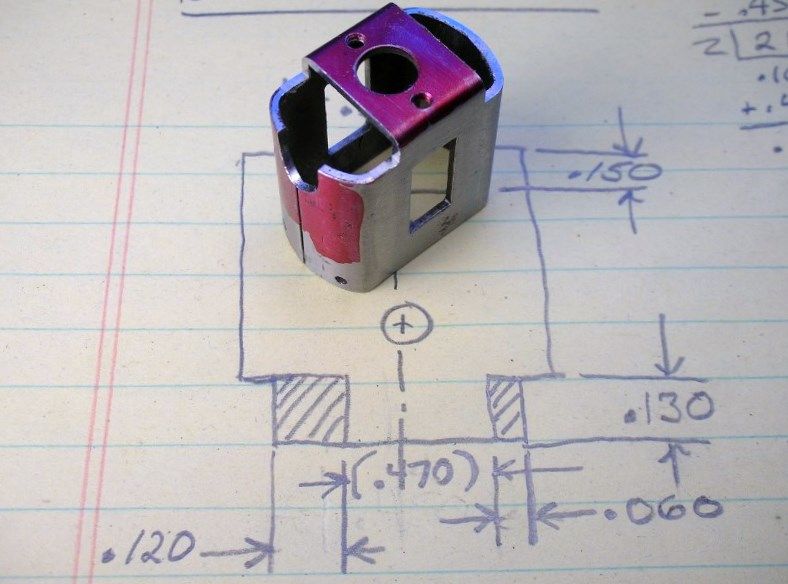
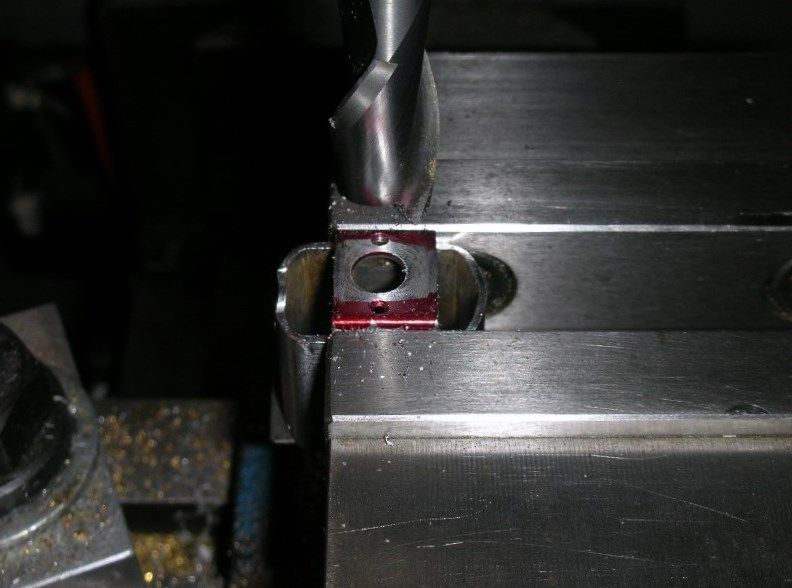
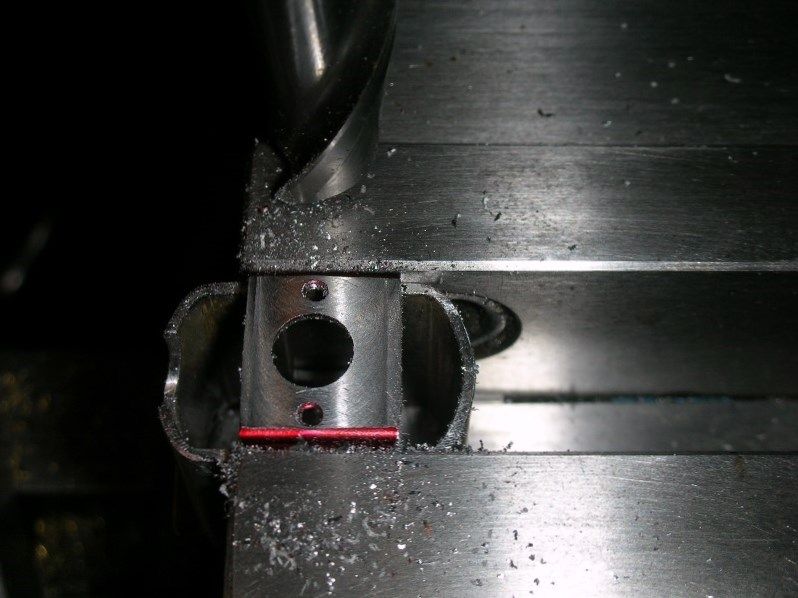
I did some ciphering, made a "measured drawing" and marked the back of the can for narrowing and one side for an axle clearance notch. Here's the can as it came out of "Mr. Milling Machine" and before deburring:


McLarenMk8A-4.jpg


This is as far as I was going with the motor as I wanted to use the can in a "setup motor" to build the chassis. When I screwed on a motor bracket to the can I saw a problem


Check out the last picture in the MRJ motor building article:


MRJ V1N17 p7 - Copy.jpg


The back of my can was REALLY "dome shaped" and the motor bracket fit like grunt. I took a "dust cut" on the can and you can see the high spot:


McLarenMk8A-9.jpg


A .003" deep cut and the can is nice and flat:


McLarenMk8A-10.jpg


The can's metal is thick so I decided to tap the motor mount screws for 2-56 machine screws. These won't "torque" the can like self tapping screws and are also less likely to strip out.


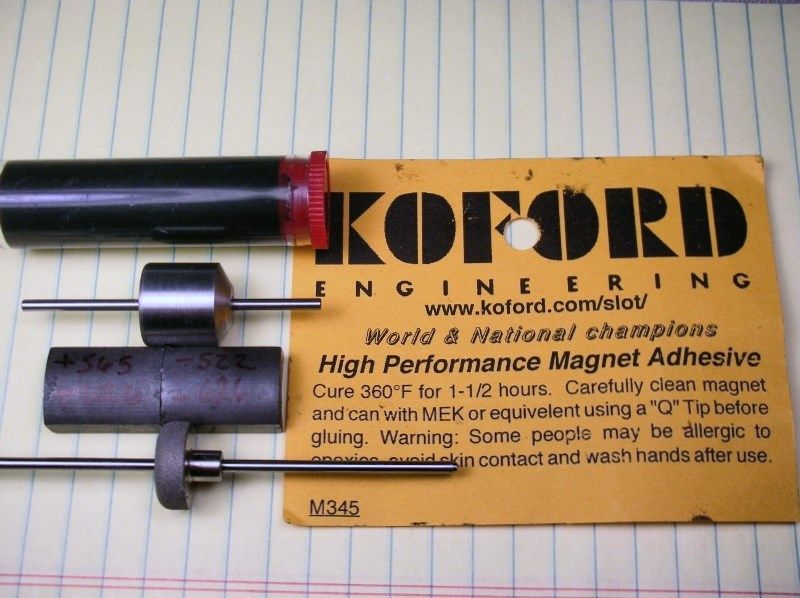
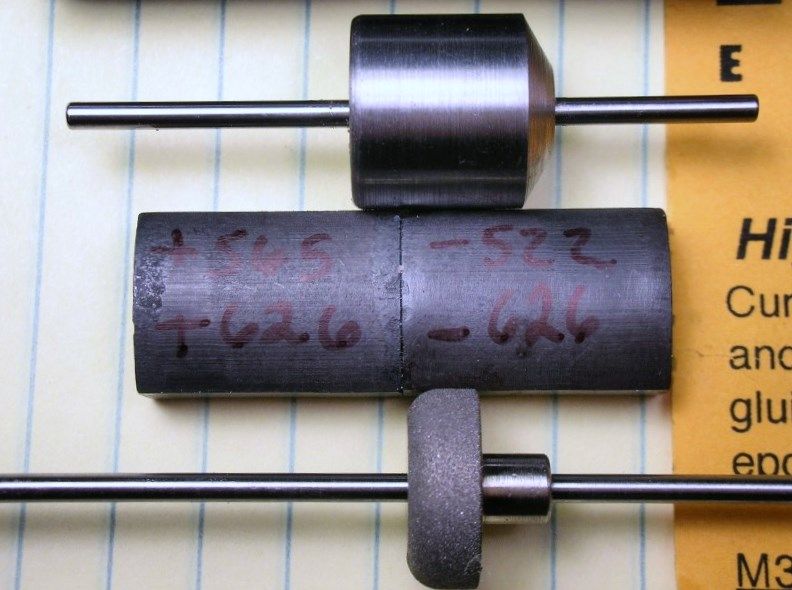
Pro motor builders of the period were highly skilled. They would hand sand and lap their magnets to fit their setups. They often used appropriate adhesives of the time to bond them in place.


 Not only lacking the "highly skilled" aspect of the vintage builders but also being lazy I'm confessing now that I'm using the modern items below to build my setup:


McLarenMk8A-1-1.jpg


Check out the before and after gauss readings on the magnets. I've never been so lucky with magnets "self matching" before but I'll take it!  :shok:


McLarenMk8A-8.jpg
 

Next will be the endbell mods, armature cleanup, can paint and putting all the bits together.........


Rick Thigpen
Check out Steve Okeefe's great web site at its new home here at Slotblog:
The Independent Scratchbuilder
There's much more to come...


#16 SlotStox#53

SlotStox#53

    Posting Leader

  • Full Member
  • PipPipPipPipPipPipPip
  • 4,084 posts
  • Joined: 13-March 13
  • Gender:Male
  • Location:TX

Posted 04 October 2014 - 04:04 PM

Should end up being a torque monster B Rick :good: :D  


Nice selection of modern tools & techniques to craft the mill for this sexy steel center chassis .


#17 dc-65x

dc-65x

    Grand Champion Poster

  • Subscriber
  • PipPipPipPipPipPipPipPip
  • 6,934 posts
  • Joined: 14-February 06
  • Gender:Male
  • Location:Captain Rick: The only vintage slot car nut in SW Oregon?

Posted 04 October 2014 - 09:53 PM

Hi Paul :bye:
 
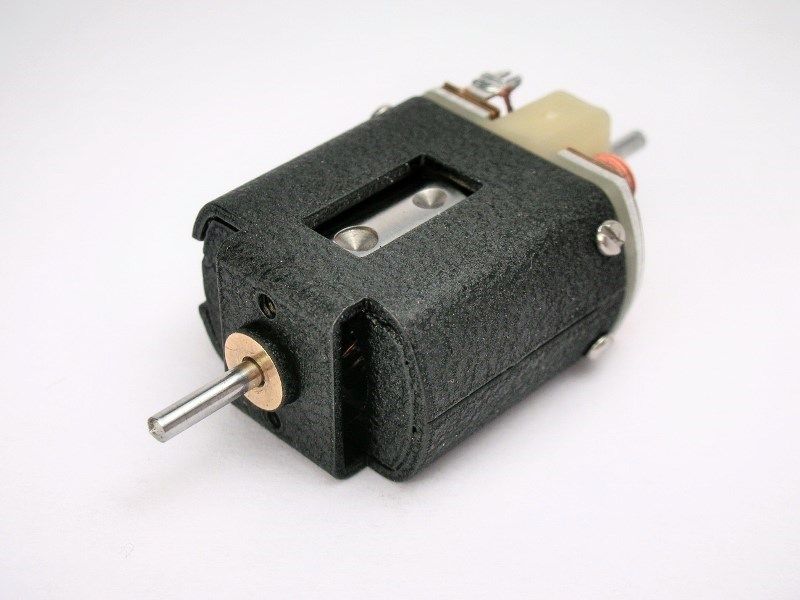
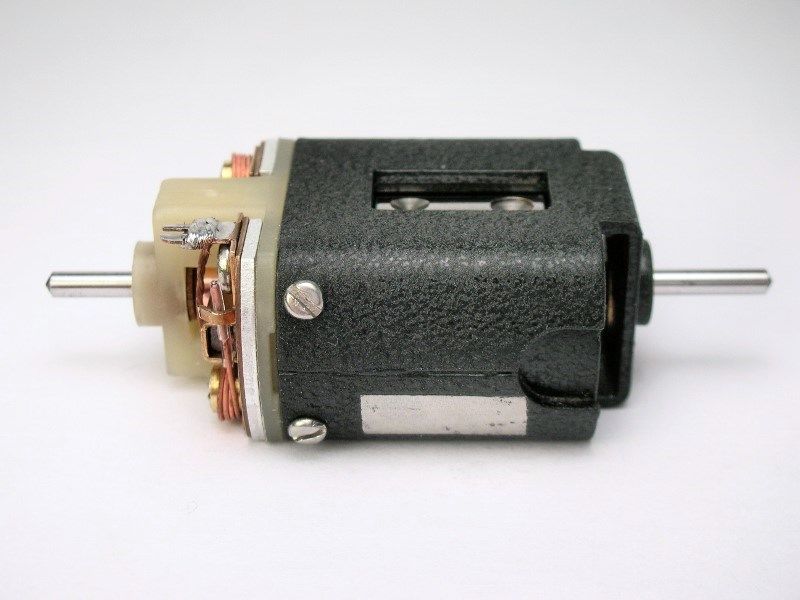
Here's the finished can. I love black wrinkle paint :
 
McLarenMk8A-38.jpg
 
The shiny patch is a tinned area for soldering in the motor brace:
 
McLarenMk8A-39.jpg
 
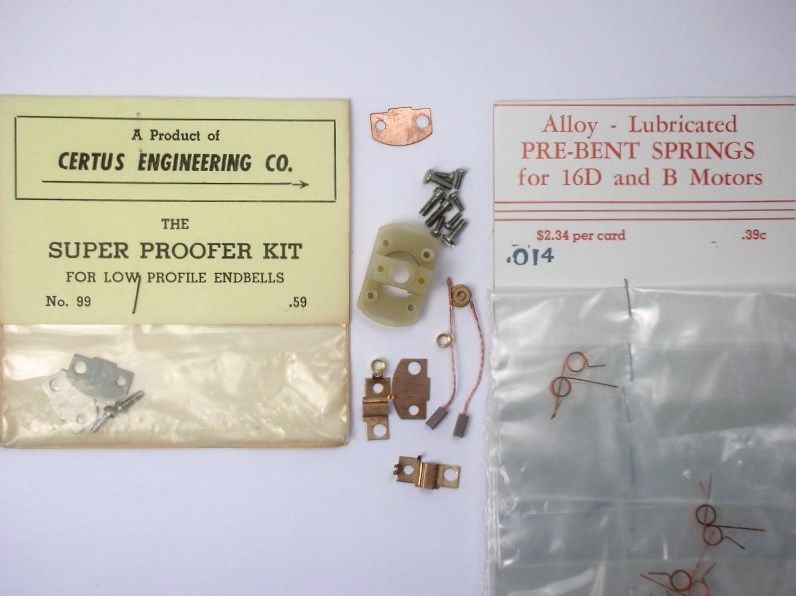
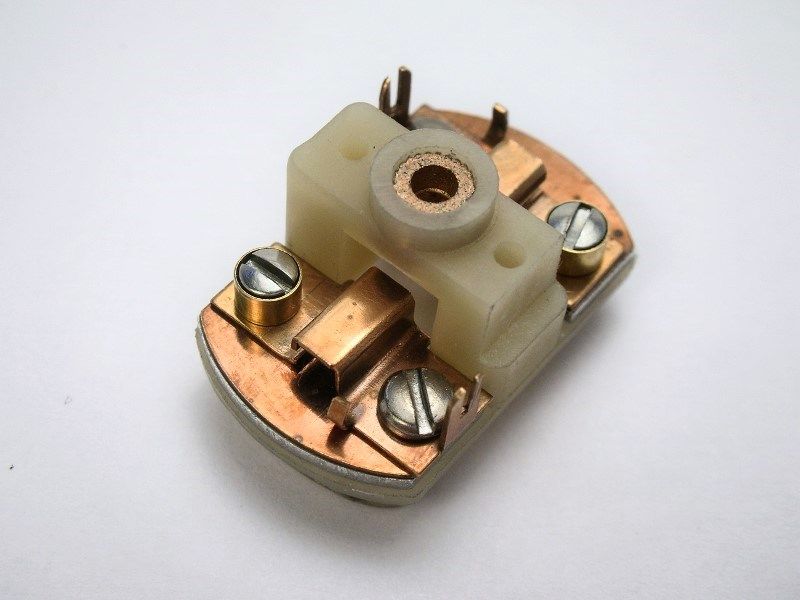
The rest of the motor is getting these bits. A new endbell tapped for stainless steel machine screws, thick aluminum Super Proofer brush backing plates, shunted 16D brushes and the lightest of the period Certus brush springs:
 
McLarenMk8A-12.jpg
 
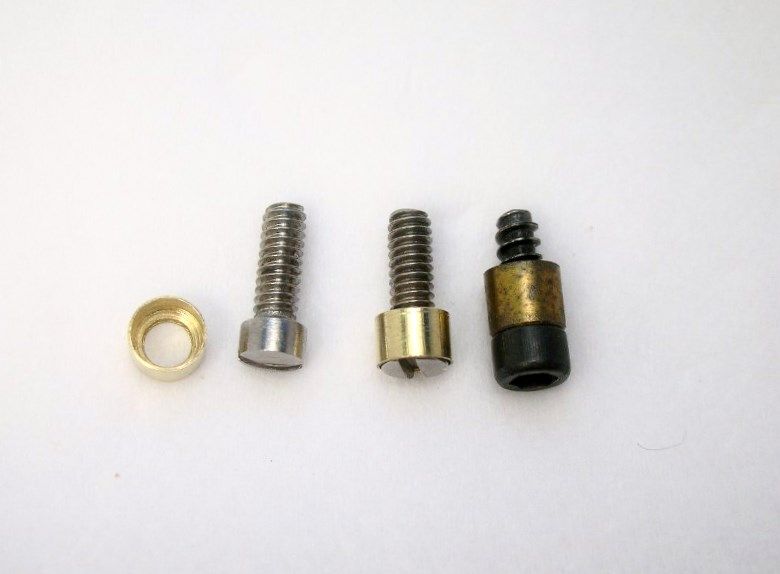
The "hop up" article suggests just using the screw head for a spring post but I'm using a different method. I'm slipping a fillster head screw into a reversed factory brass spacer as shown next to the stock setup on the right:
 
McLarenMk8A-13.jpg

Here's the finished endbell with frame clearance notch:
 

McLarenMk8A-44.jpg


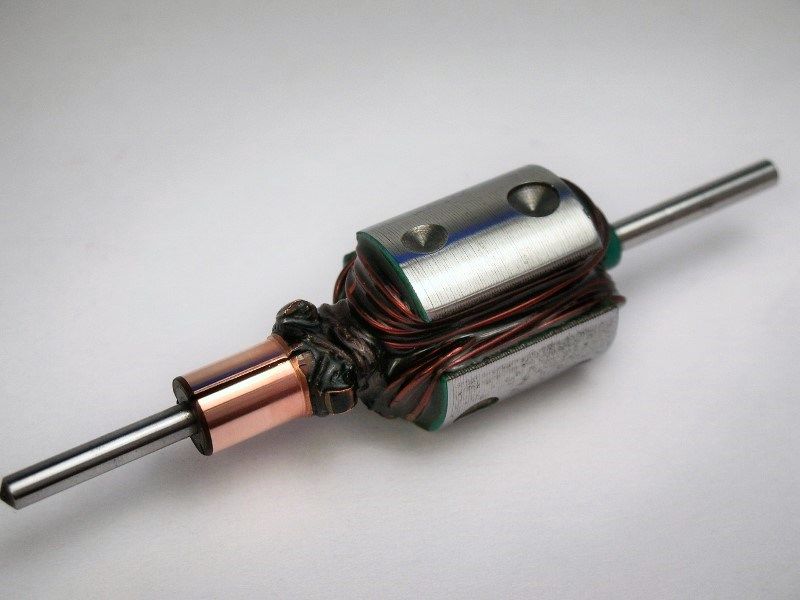
The armature is finished off with a comm cut to get rid of it's "valley of the comm":


McLarenMk8A-45.jpg


It's measures .1 ohm across all three comm segments so hopefully she'll "haul the beans" on its Lightning Lap:


McLarenMk8A-46.jpg


The finished motor:


McLarenMk8A-42.jpg


McLarenMk8A-41.jpg


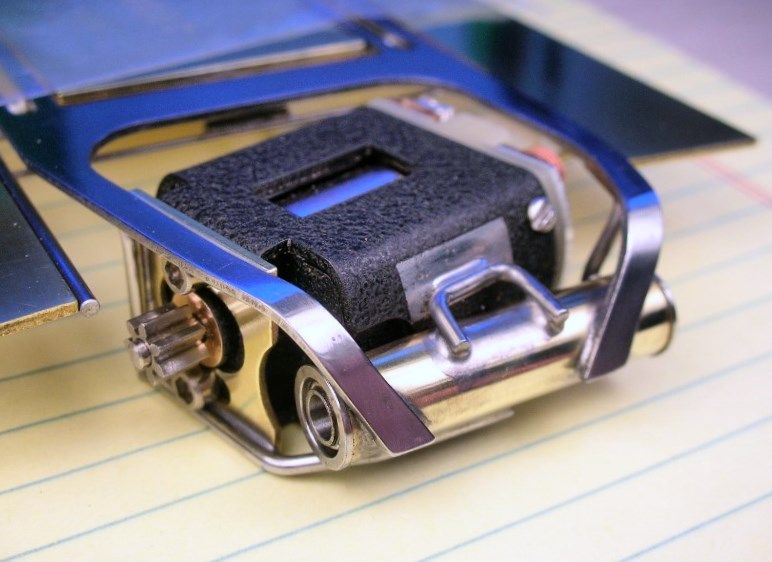
Time to stuff this puppy into its new home:


McLarenMk8A-43.jpg


  • endbelldrive likes this

Rick Thigpen
Check out Steve Okeefe's great web site at its new home here at Slotblog:
The Independent Scratchbuilder
There's much more to come...


#18 SlotStox#53

SlotStox#53

    Posting Leader

  • Full Member
  • PipPipPipPipPipPipPip
  • 4,084 posts
  • Joined: 13-March 13
  • Gender:Male
  • Location:TX

Posted 04 October 2014 - 10:30 PM

Hi Rick :)


I recognize those fillster screws & the technique for hiding them inside the brass spacer , got those very screws and springs to go with those B parts from you :D


Haven't forgotten my possible car/s ,just been hectic lately :laugh2:  Seeing this beauty all finished has made me look at the pile 'O B can parts .


All joking apart that armature has got some very stout wire on it !! Definitely in the coat hanger bracket with the size and those readings :shok:


#19 dc-65x

dc-65x

    Grand Champion Poster

  • Subscriber
  • PipPipPipPipPipPipPipPip
  • 6,934 posts
  • Joined: 14-February 06
  • Gender:Male
  • Location:Captain Rick: The only vintage slot car nut in SW Oregon?

Posted 11 October 2014 - 04:09 PM

I thought I was making progress getting the motor mounted with 2 screws into the motor bracket and soldered into the rear axle tube..............


McLarenMk8A-57.jpg


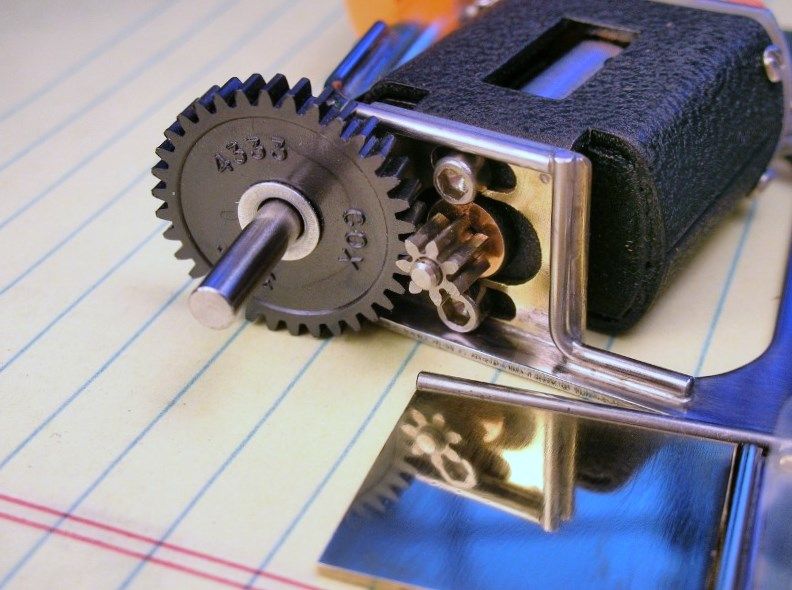
.............mounted up a vintage Cox 34T spur and modern Sonic 7T steel pinion gears made a very smooth gear mesh............


McLarenMk8A-58.jpg


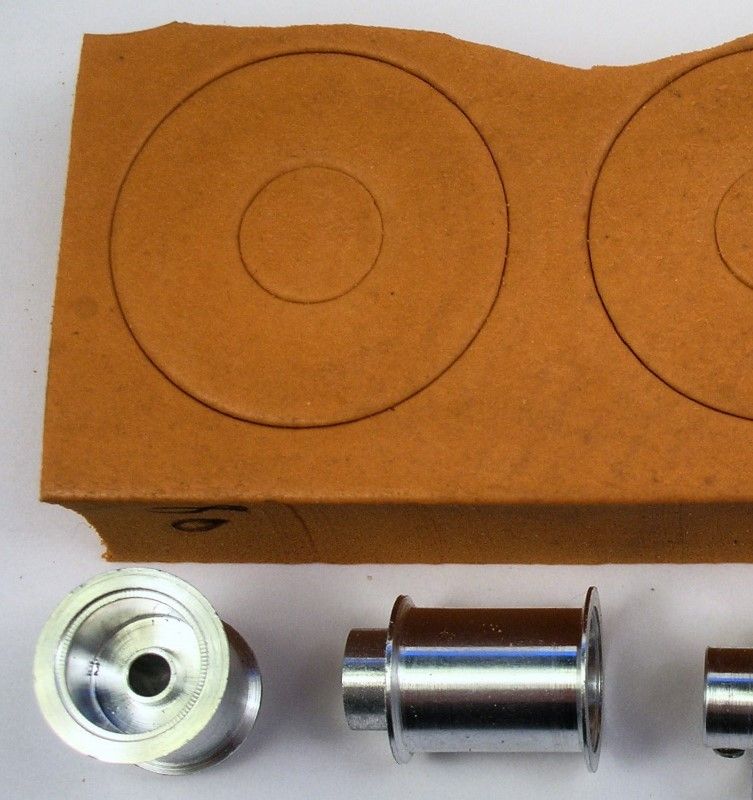
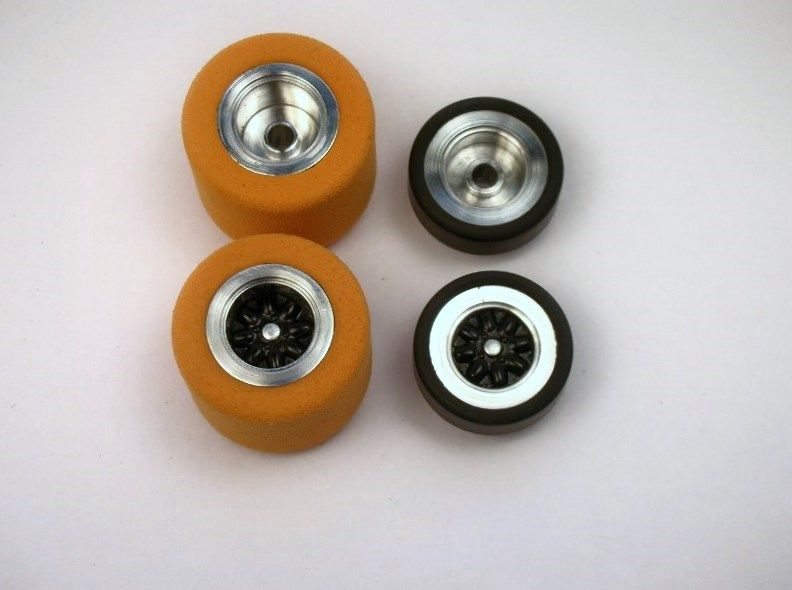
..............picked out some fresh vintage Riggen orange rubber on our repop Riggen wheels.........


McLarenMk8A--2.jpg


.................got them mounted and trued. Found a pair of vintage Riggen fronts and some vintage Monogram 1/32 wheel inserts (more on the use of wheel inserts later)...........


McLarenMk8A-48.jpg


.................and I go to mount the body when I confirm that I'm a bonehead!  :shok:


I forgot to narrow up the wide Parma pans and the chassis was 3 1/4" wide. :o Now, that's within the legal width rule but all the mid 1969 bodies I tried were 3 1/8" wide or less. :dash2: They all looked stupid with the sides splayed out an 1/8". :wacko2:


I really didn't want to rip the finished chassis apart as everything was looking really nice and working smoothly.


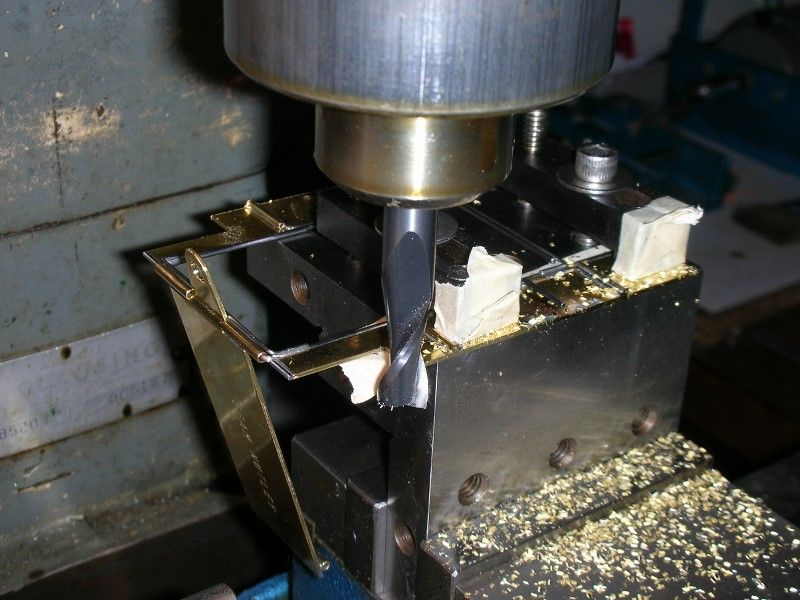
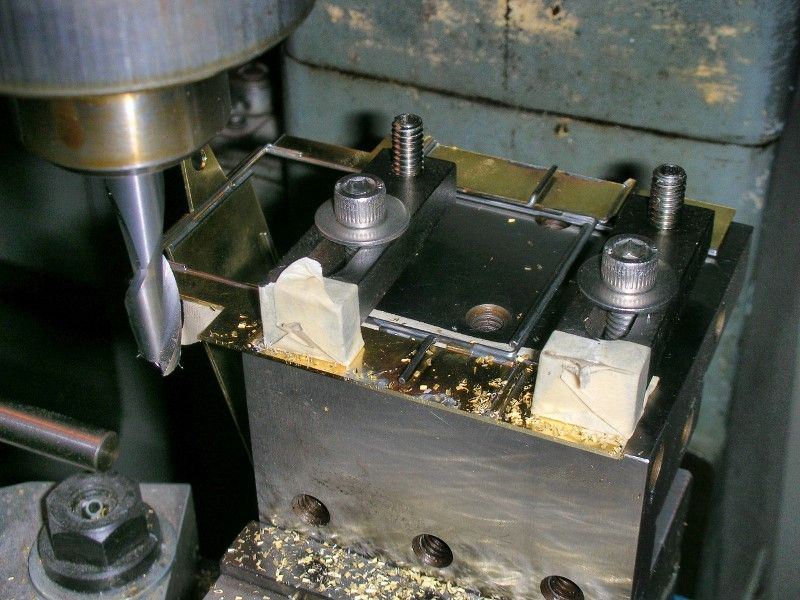
Luckily the drop arm pivot pin wasn't yet permanently attached so I manage to get the center section out complete with motor still soldered in. The pan, plumber and drop arm were clamped into Mr. Milling Machine and the pans narrowed 1/16" each:


McLarenMk8A-51.jpg


This really saved my bacon as I really didn't want to tear the pans off


McLarenMk8A-47.jpg


Here's the finished roller:


McLarenMk8A-56.jpg


McLarenMk8A-53.jpg


I track tested it and it scoots on my track:


McLarenMk8A-52.jpg


I think I'll add lead to the "four corners region" before it gets on Eddie's Blue King:


McLarenMk8A-55.jpg


Time to get that sports car body mounted.......... :)


  • miko and SlotStox#53 like this

Rick Thigpen
Check out Steve Okeefe's great web site at its new home here at Slotblog:
The Independent Scratchbuilder
There's much more to come...


#20 Jairus

Jairus

    Body Painter Extraordinaire

  • Subscriber
  • PipPipPipPipPipPipPipPip
  • 10,174 posts
  • Joined: 16-February 06
  • Gender:Male
  • Location:Salem, OR

Posted 11 October 2014 - 05:11 PM

Now, THAT looks much better!

(I've been there Rick, more times than I care to admit.)


Jairus H Watson - Artist
Need something painted, soldered, carved, or killed? - jairuswtsn@aol.com

www.slotcarsmag.com

www.jairuswatson.net
http://www.ratholecustoms.com
Check out some of the cool stuff on my Fotki!


#21 tonyp

tonyp

    Grand Champion Poster

  • Member at Peace
  • PipPipPipPipPipPipPipPip
  • 15,325 posts
  • Joined: 12-February 07
  • Gender:Male
  • Location:Sanford, FL, land of lizards and big roaches

Posted 11 October 2014 - 05:28 PM

Nice, very very nice! We used to use a lot of those center sections. They worked great. I found I could bend the legs at 90 degrees if it did it around an exacto and gently tapped on the leg. There was a later version of the center sold by team nutley that had the outer rail found down thinner for more flex. This is a cool period as it was right before the era where tuning glue was more important that tuning the chassis.

Anthony 'Tonyp' Przybylowicz

5/28/50-12/20/21
Requiescat in Pace


#22 dc-65x

dc-65x

    Grand Champion Poster

  • Subscriber
  • PipPipPipPipPipPipPipPip
  • 6,934 posts
  • Joined: 14-February 06
  • Gender:Male
  • Location:Captain Rick: The only vintage slot car nut in SW Oregon?

Posted 11 October 2014 - 05:41 PM

Thanks Jairus :)


Hi Tony, The big radius created by the Exacto knife must be the secret. Thanks for the tip. :victory:


Rick Thigpen
Check out Steve Okeefe's great web site at its new home here at Slotblog:
The Independent Scratchbuilder
There's much more to come...


#23 tonyp

tonyp

    Grand Champion Poster

  • Member at Peace
  • PipPipPipPipPipPipPipPip
  • 15,325 posts
  • Joined: 12-February 07
  • Gender:Male
  • Location:Sanford, FL, land of lizards and big roaches

Posted 11 October 2014 - 05:49 PM

I did break a few until I figured it out. Are these centers still around new?

Anthony 'Tonyp' Przybylowicz

5/28/50-12/20/21
Requiescat in Pace


#24 dc-65x

dc-65x

    Grand Champion Poster

  • Subscriber
  • PipPipPipPipPipPipPipPip
  • 6,934 posts
  • Joined: 14-February 06
  • Gender:Male
  • Location:Captain Rick: The only vintage slot car nut in SW Oregon?

Posted 11 October 2014 - 06:06 PM

They turn up on eBay every now and then. Unfortunately, that's about it as far as I'm aware. :unknw:


Rick Thigpen
Check out Steve Okeefe's great web site at its new home here at Slotblog:
The Independent Scratchbuilder
There's much more to come...


#25 tonyp

tonyp

    Grand Champion Poster

  • Member at Peace
  • PipPipPipPipPipPipPipPip
  • 15,325 posts
  • Joined: 12-February 07
  • Gender:Male
  • Location:Sanford, FL, land of lizards and big roaches

Posted 11 October 2014 - 06:12 PM

I'll have to check out eBay then they would make a great chassis for the Tottenham rules class in the UK for my friend Steve Kempson.

Anthony 'Tonyp' Przybylowicz

5/28/50-12/20/21
Requiescat in Pace


Electric Dreams Online Shop