

It was March 1969 and the Pro's raced GP cars in the Model Car Science / USRA series:


I think is time to build another one of these unique pieces of 1960s slot car history. Mike Morrissey did two how-to articles on these cool cars. Here's a link to them:
GP Chassis How-To Articles for the 1969 MCS/USRA Series
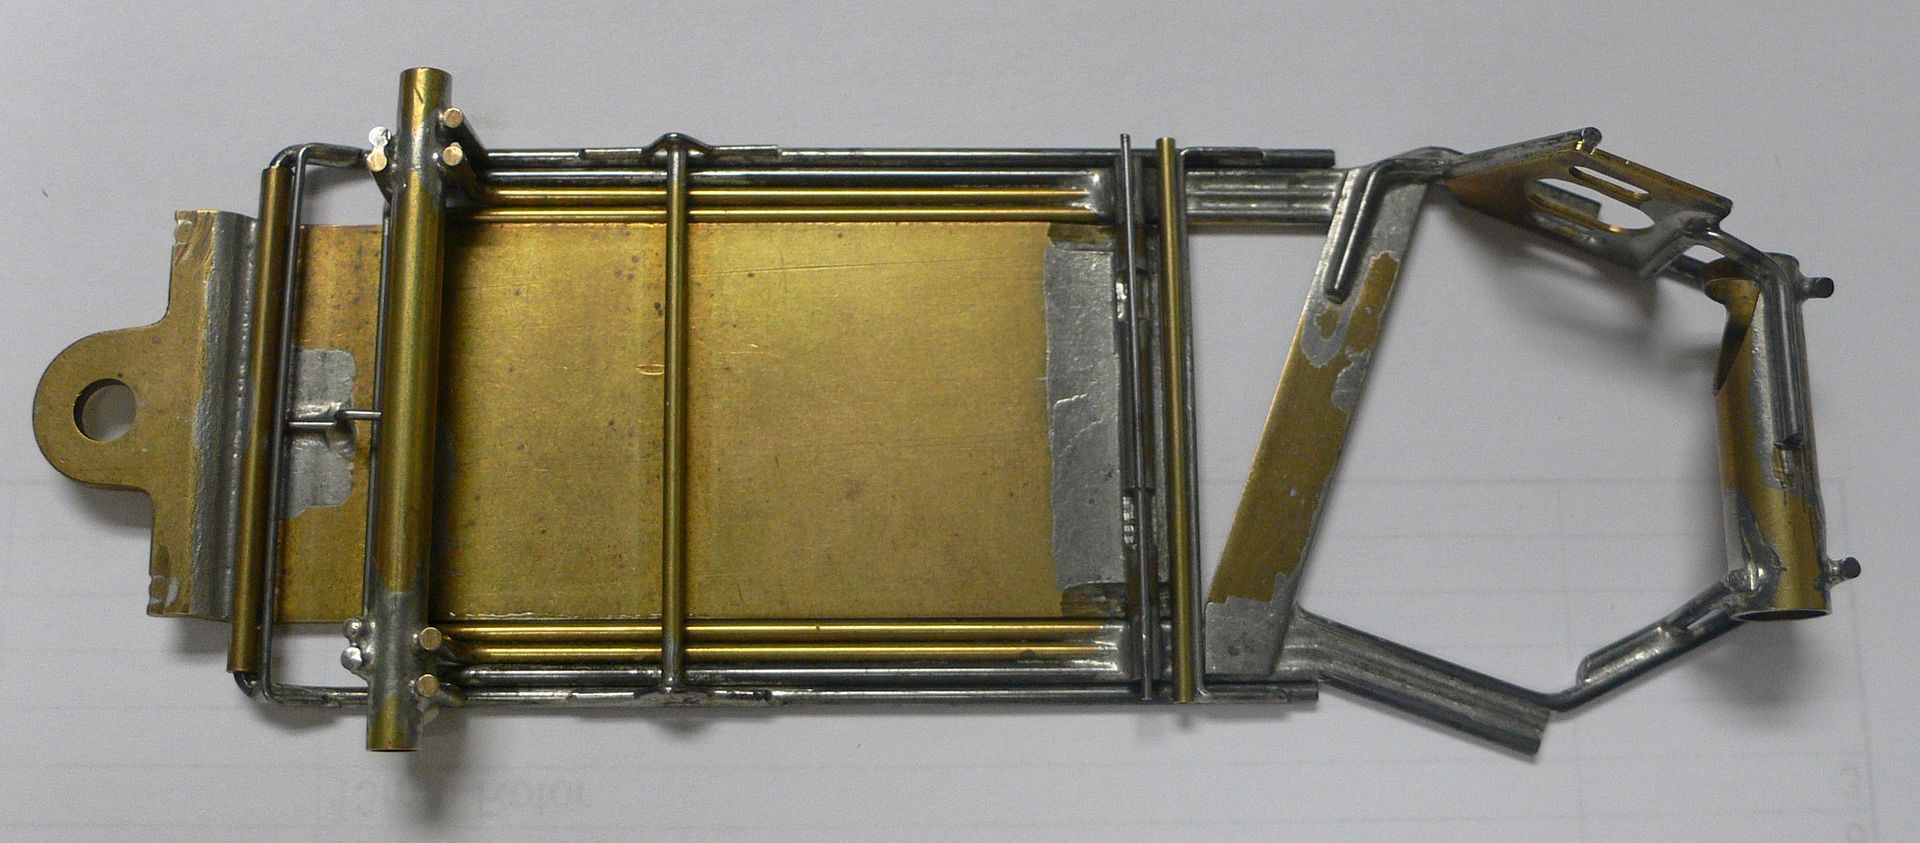
I built up this Dynamic Honda from his first article...
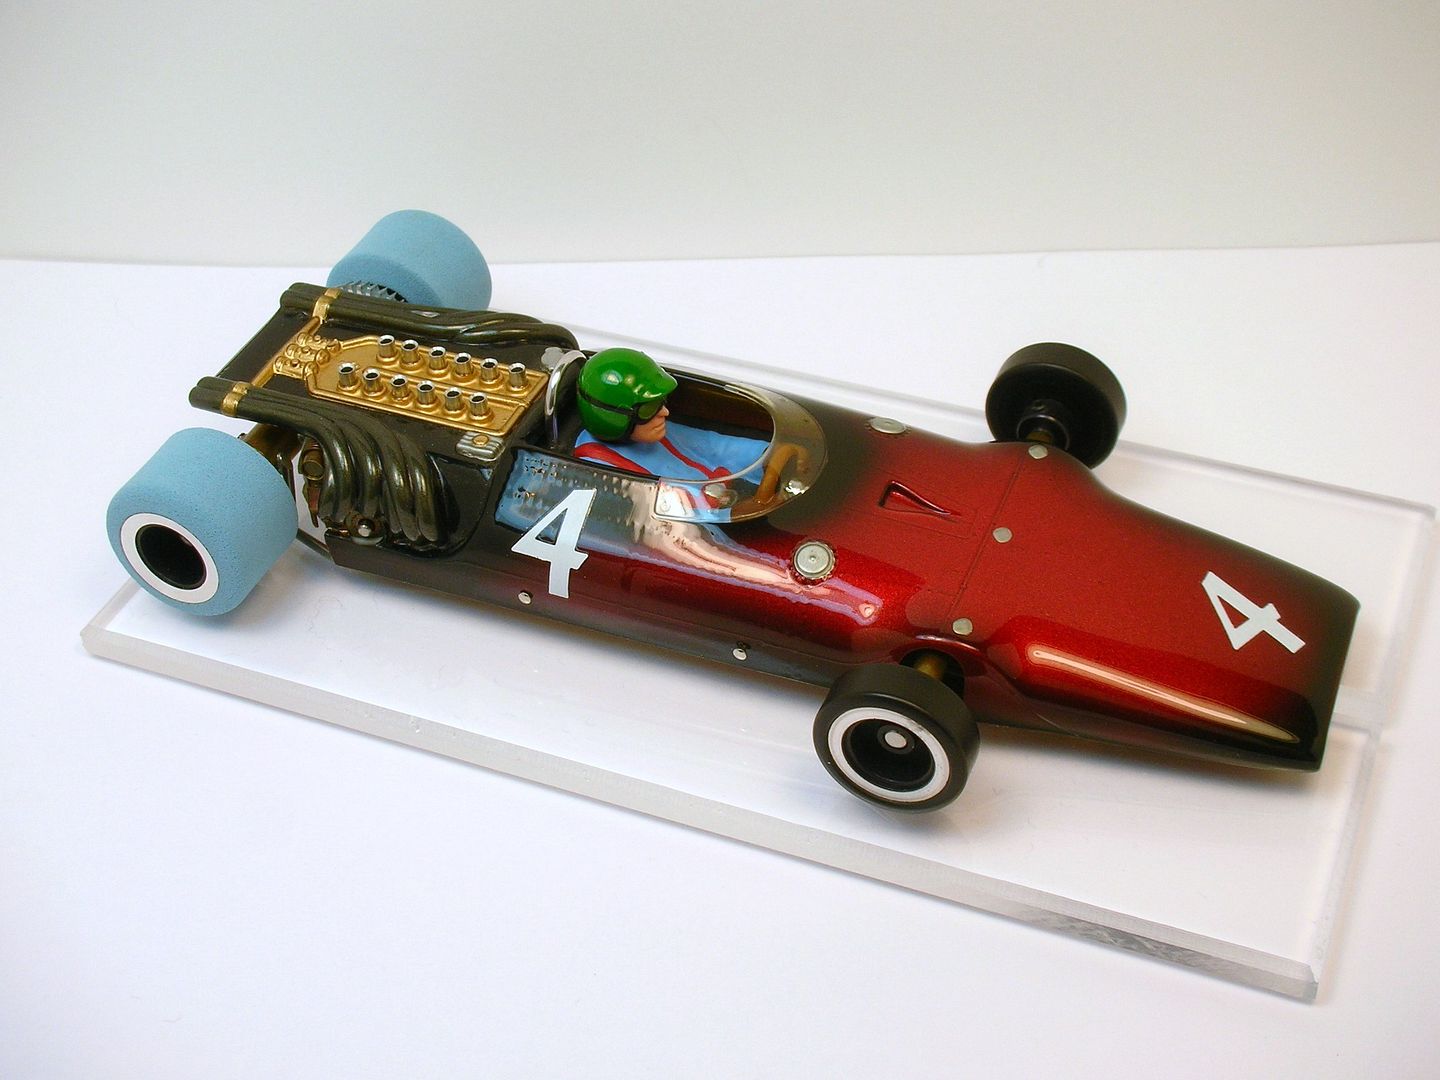
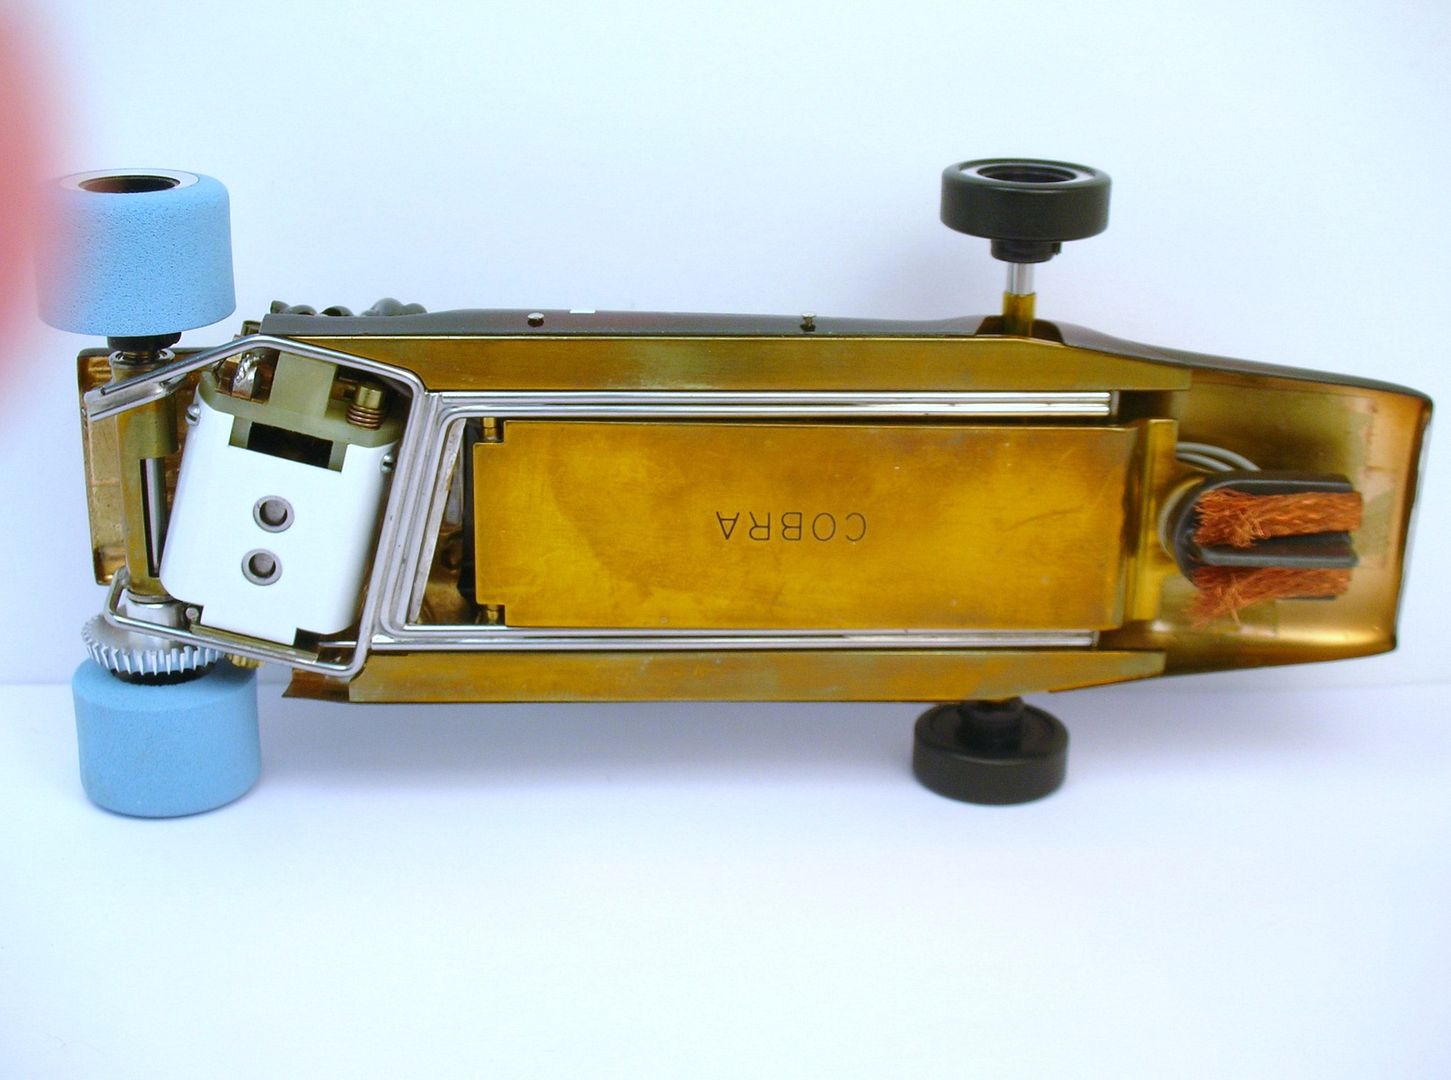
... and another Dynamic Honda from his second article:
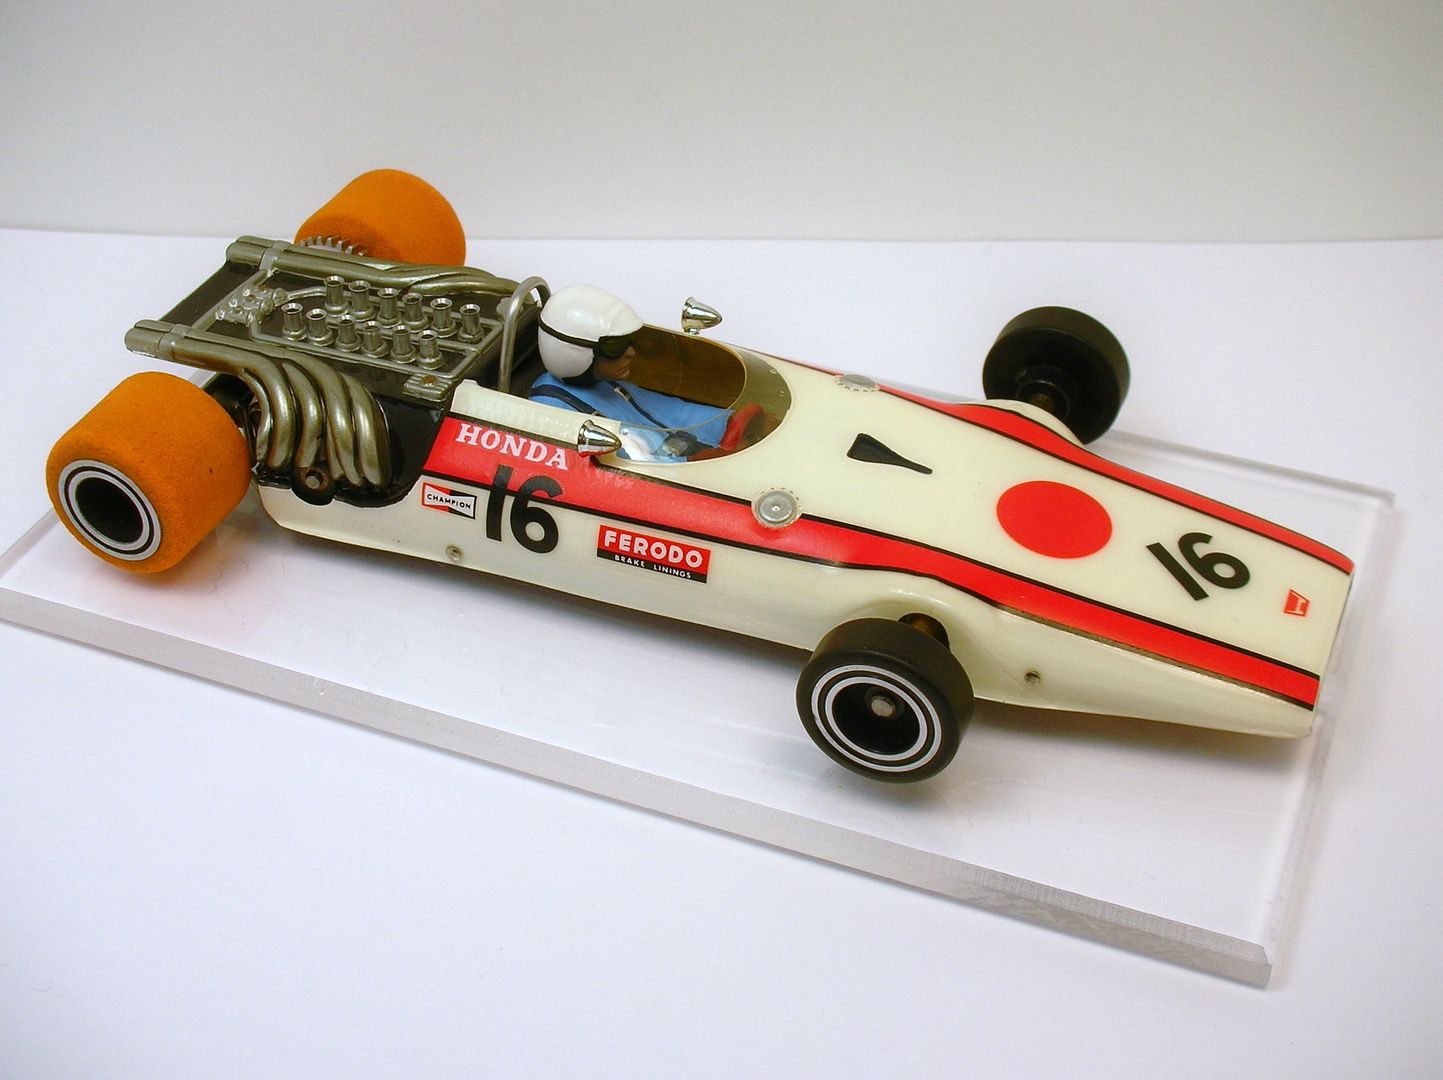
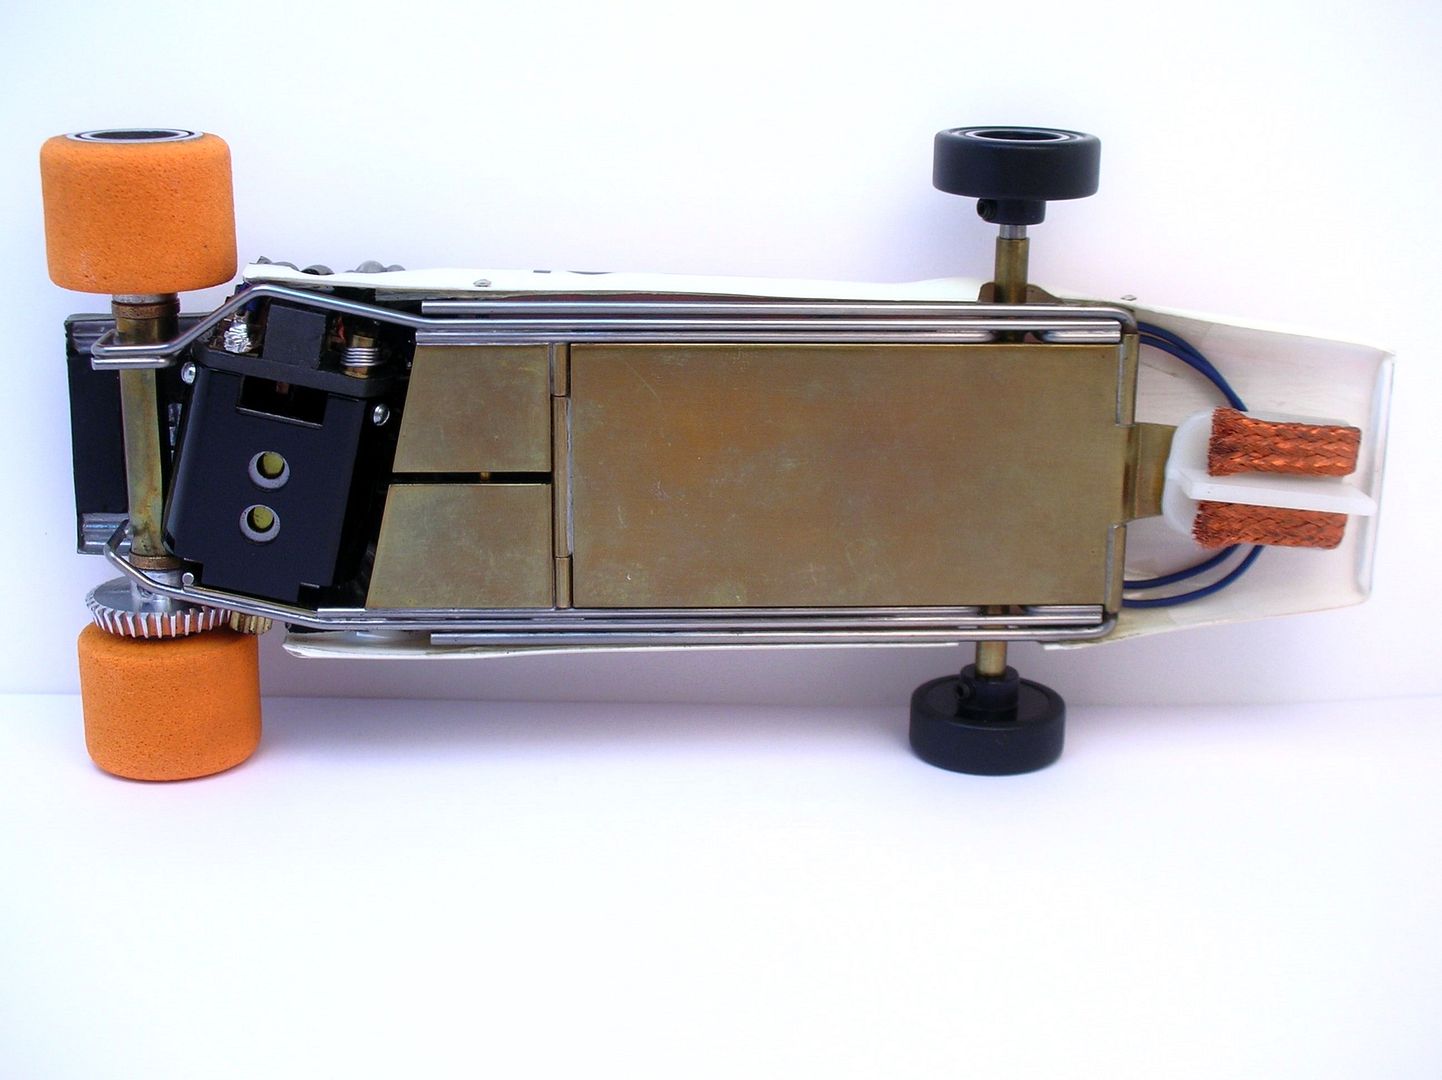
Geeeze... look at the tarnishing, I mean patina,  on the brass. It really is time to build a new one!
I'll use a non-Honda body and a different chassis. For inspiration, the chassis is from the great Bob Emott:

I'll go shoot some pictures of the Lancer Pro Series Ultra Light body for the build...

Anglewinder GP - Lotus 49B build
#1

-
- Subscriber
-

- 7,044 posts Joined: 14-February 06
Grand Champion Poster
- Gender:Male
- Location:Captain Rick: The only vintage slot car nut in SW Oregon?
Posted 11 November 2015 - 06:12 PM
- endbelldrive, Jencar17, Tex and 2 others like this
Rick Thigpen
Check out Steve Okeefe's great web site at its new home here at Slotblog:
The Independent Scratchbuilder
There's much more to come...
#2
-

- Full Member
-
- 4,084 posts Joined: 13-March 13
Posting Leader
- Gender:Male
- Location:TX
Posted 11 November 2015 - 06:32 PM
 them and that Emott chassis!!
 Just the combo of wiiide body and anglewinder is cool. When you first brought up the whole 1969 race series with these in I just had to build at least one of these.
Certainly never heard about that body you'll be using
Which reminds me, I'll have to search out a couple of wide F1s if I'm to finally get around to one..
#3
-
- Subscriber
-
- 7,044 posts Joined: 14-February 06
Grand Champion Poster
- Gender:Male
- Location:Captain Rick: The only vintage slot car nut in SW Oregon?
Posted 11 November 2015 - 07:39 PM

As for bodies to use today, I know the TrueScale Dynamic Honda and the #880 (NOT the narrow #980) reproduction Lancer Ferrari work great. Unfortunately they are both not the easiest to find today especially with TrueScale being down. Hopefully Victor will get rejuvenated and bring his outstanding TrueScale bodies back online.
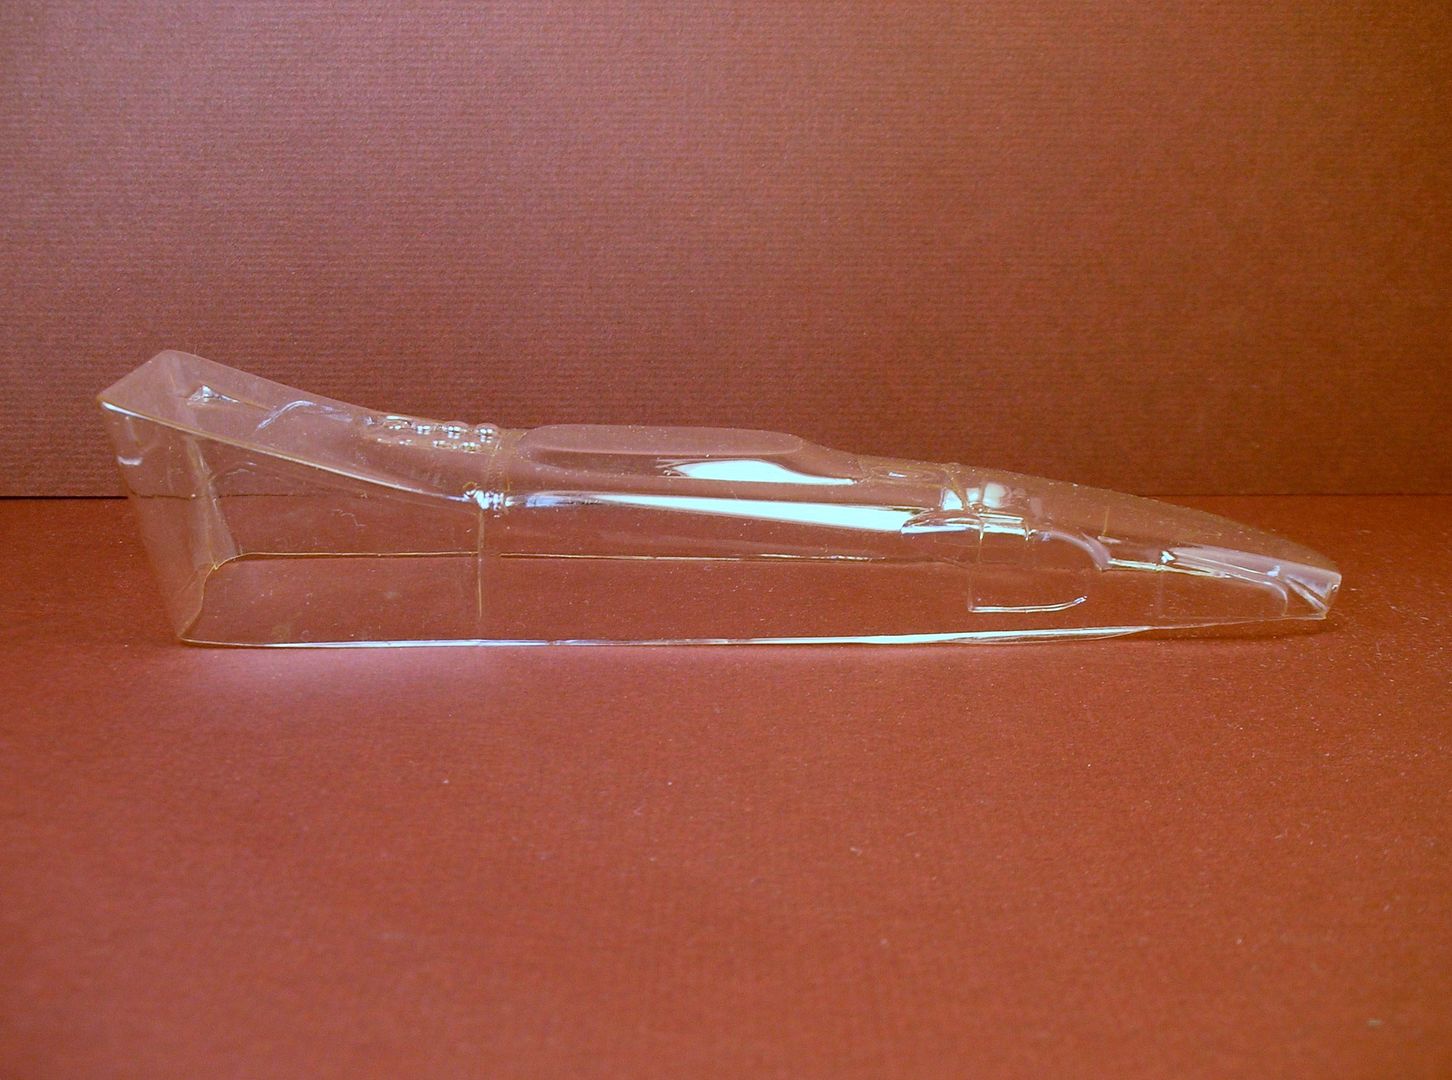
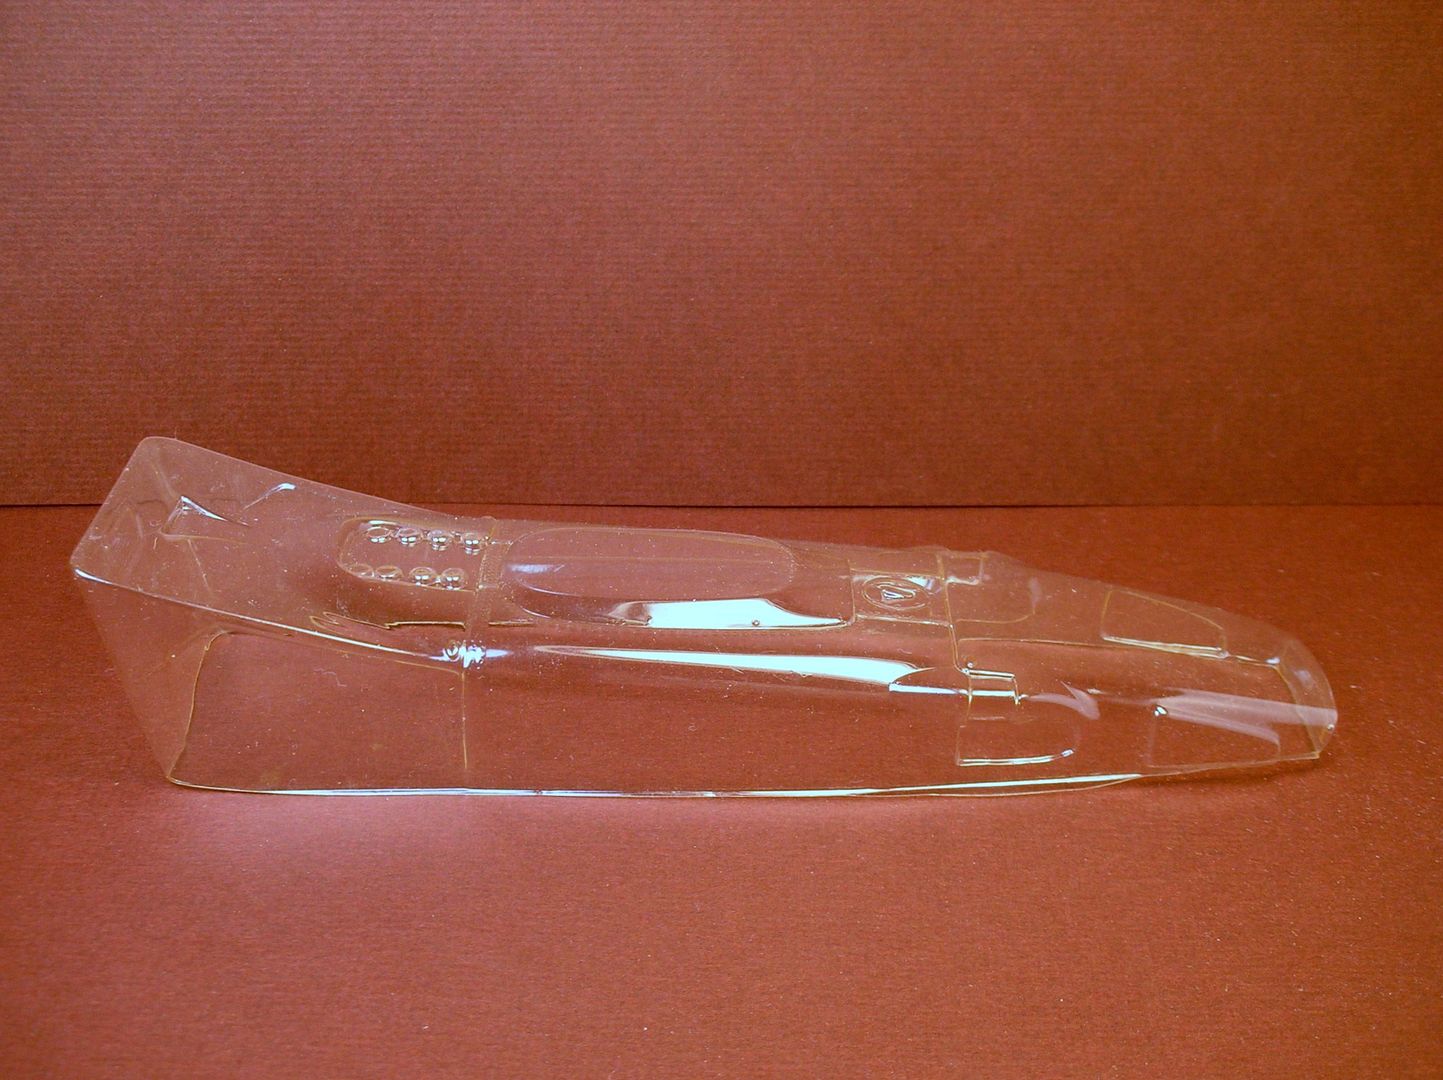
Anyway, here's what I'm using for this build:
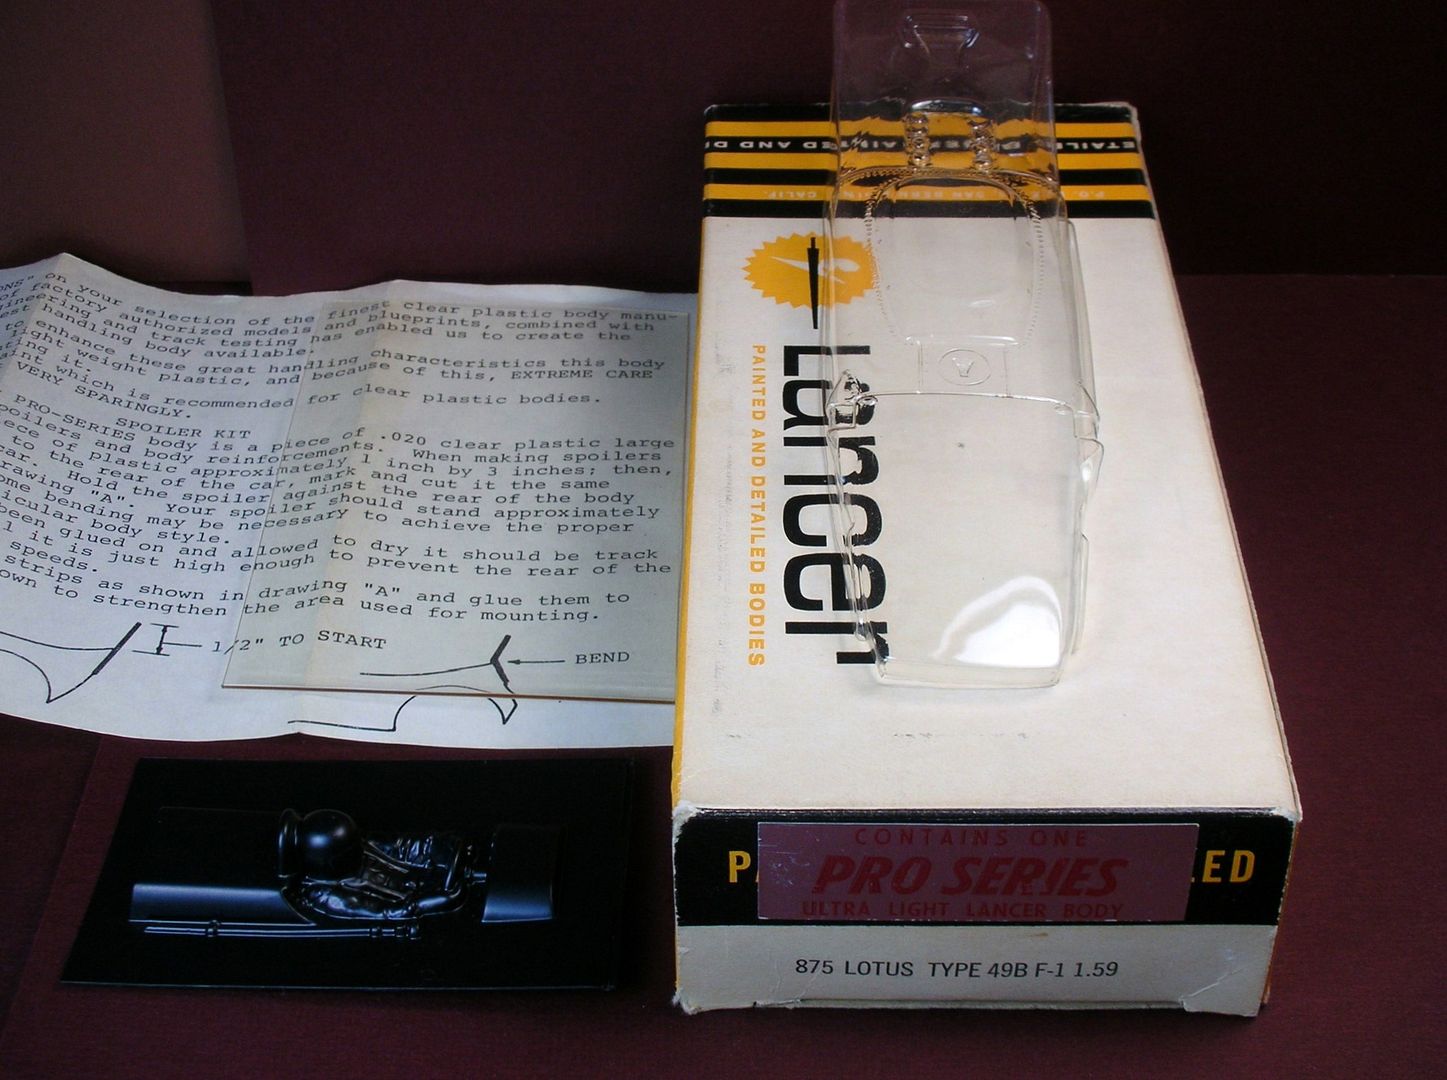
This is the 1-3/4" wide #800 series body. Lancer also made their bodies in a narrower #900 series that aren't really suited for anglewinder duty.
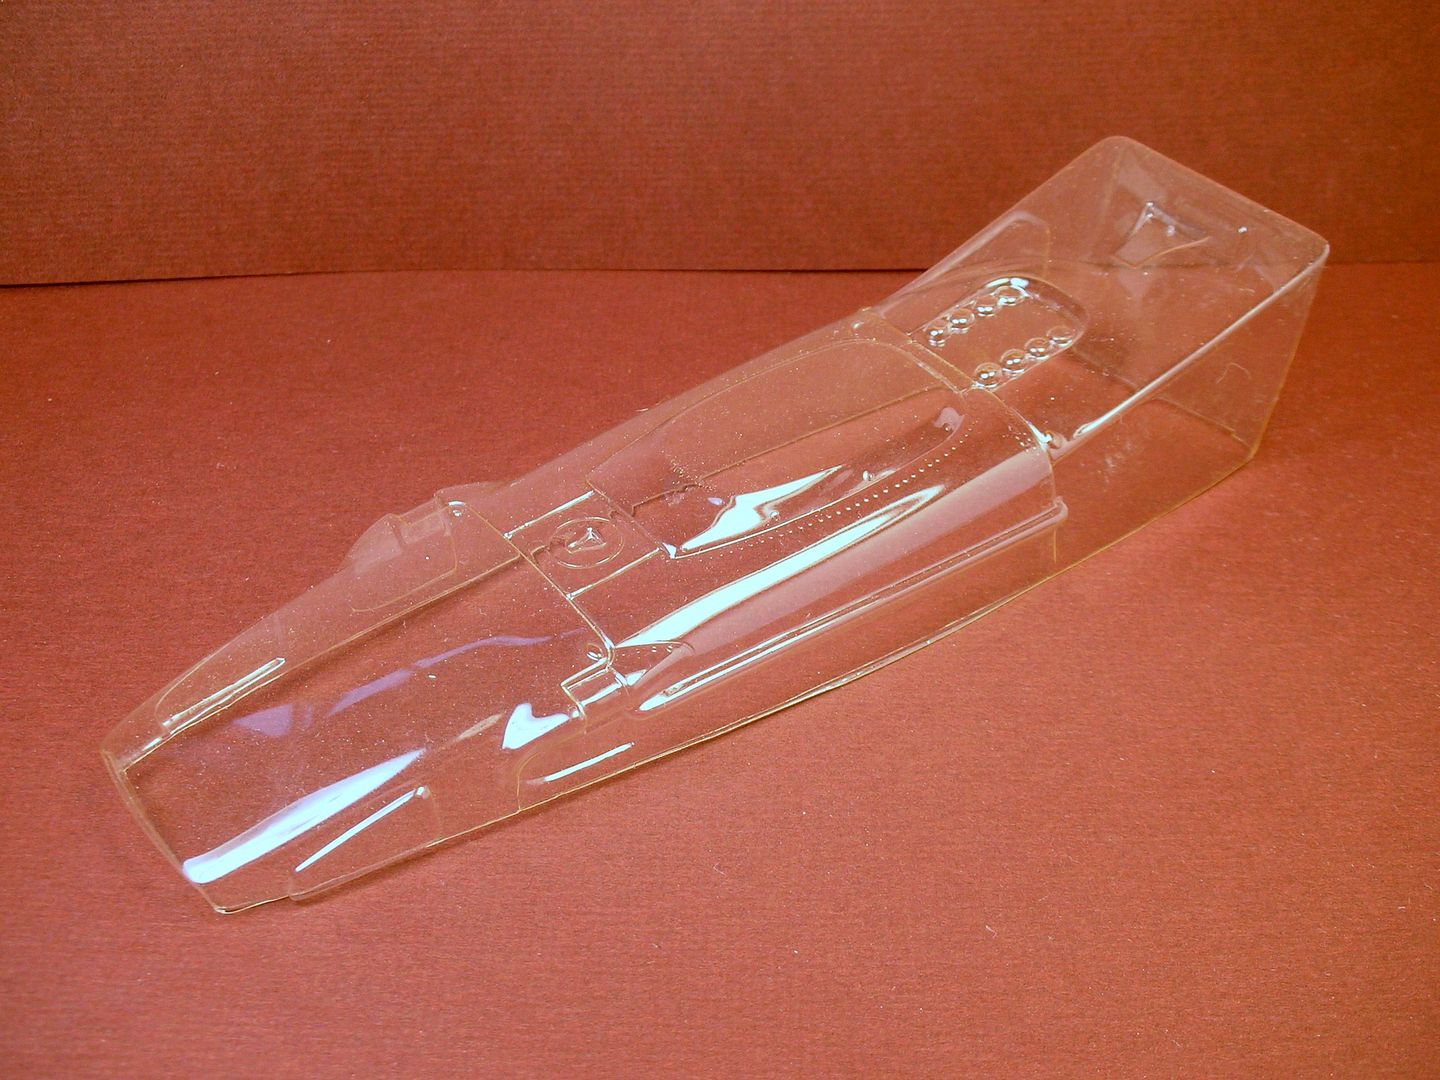
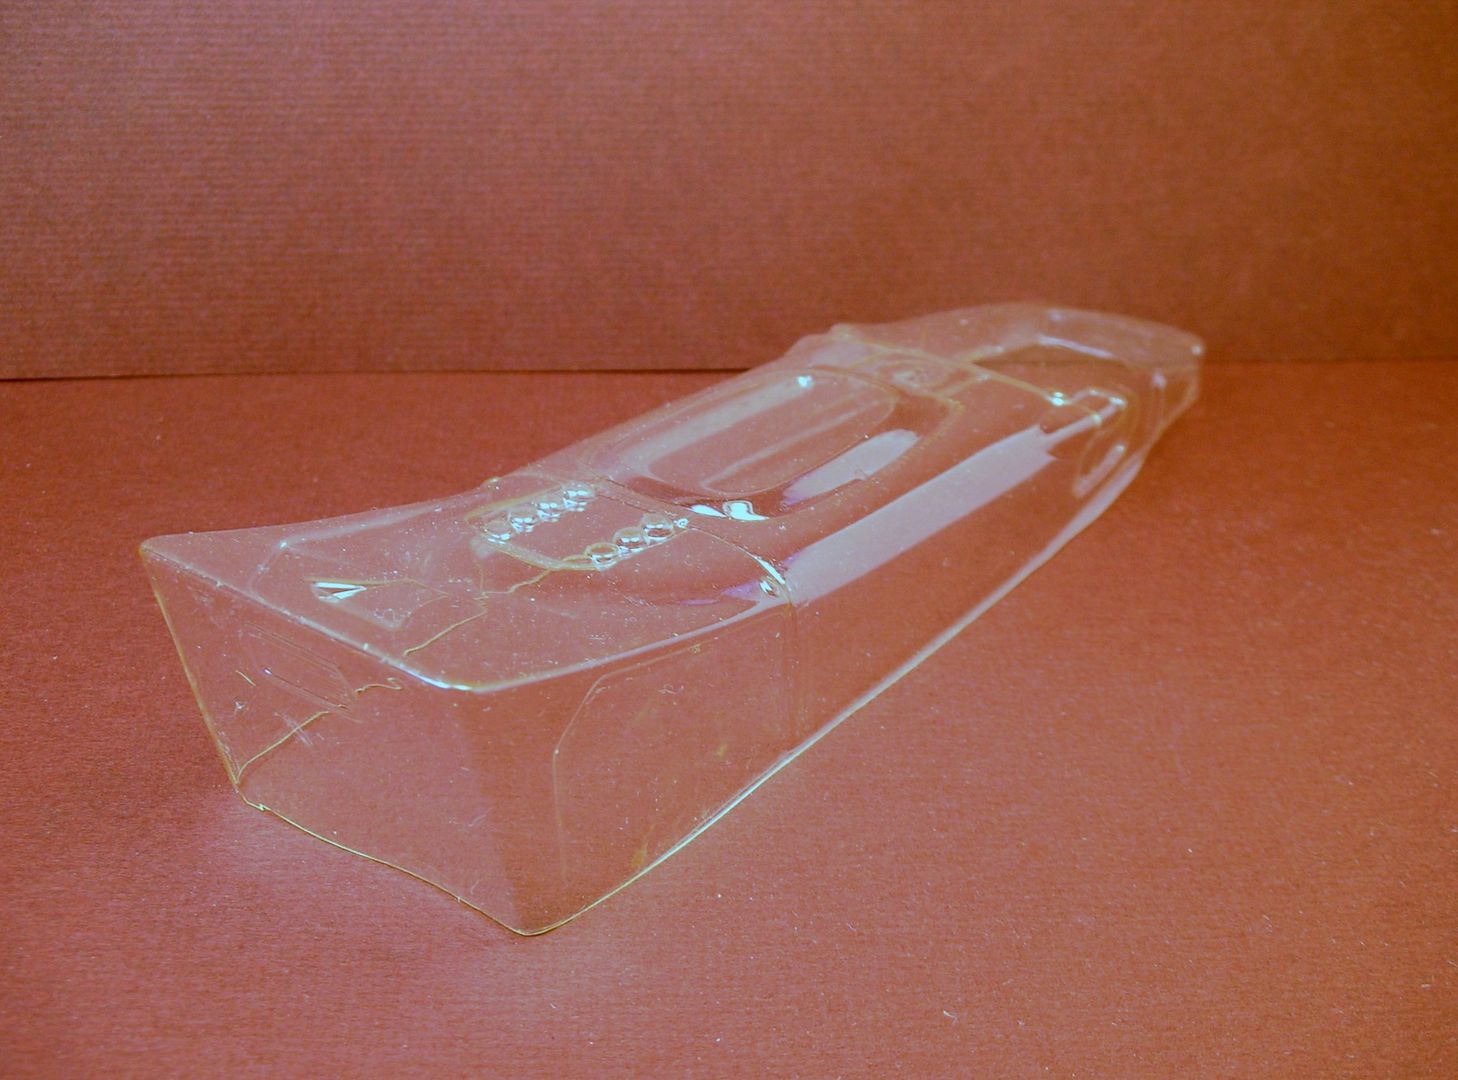
I love the "wedge" shape:
AND I love the real car:


- endbelldrive and miko like this
Rick Thigpen
Check out Steve Okeefe's great web site at its new home here at Slotblog:
The Independent Scratchbuilder
There's much more to come...
#4
-
- Full Member
-
- 4,084 posts Joined: 13-March 13
Posting Leader
- Gender:Male
- Location:TX
Posted 11 November 2015 - 09:56 PM
Got all excited for a moment, I have a Dilworth/Lancer Lotus 49B. Got out the measuring device, nuts, it's the narrower version.


Look forward to seeing what motor or combination of motor parts you have in store for this build.

#5
-

- Member at Peace
-
- 15,325 posts Joined: 12-February 07
Grand Champion Poster
- Gender:Male
- Location:Sanford, FL, land of lizards and big roaches
Posted 12 November 2015 - 08:10 AM
Anthony 'Tonyp' Przybylowicz
5/28/50-12/20/21
Requiescat in Pace
#6
-

- IRRA National Director
-
- 23,346 posts Joined: 08-November 06
Grand Champion Poster
- Gender:Male
- Location:Denville, NJ
Posted 12 November 2015 - 08:40 AM
Mine is in the LASCM.
Joe "Noose" Neumeister
Sometimes known as a serial despoiler of the clear purity of virgin Lexan bodies. Lexan is my canvas!
Noose Custom Painting - Since 1967
Chairman - IRRA® Body Committee - Roving IRRA® Tech Dude - "EVIL BUCKS Painter"
"Team Evil Bucks" Racer - 2016 Caribbean Retro Overall Champion
The only thing bad about Retro is admitting that you remember doing it originally.
#7
-

- Subscriber
-
- 2,629 posts Joined: 02-May 07
Keeper Of Odd Knowledge
- Gender:Male
- Location:NYC, Long Island
Posted 12 November 2015 - 12:09 PM
In the photo of the real car, I like how the photographer got "up close and personal" with a running race car!
Those were the good old days! 
Cheers,
Build on...
- Mike Patterson likes this
Bill Botjer
Faster then, wiser now.
The most dangerous form of ignorance is not knowing that you don't know anything!
Never attribute to malice that which is adequately explained by stupidity
#8
-

- Administrator
-
- 18,488 posts Joined: 20-February 06
Builder
- Gender:Male
- Location:Cleveland, Tennessee
Posted 12 November 2015 - 01:39 PM
 I love F1 anglewinders. This project is going to be badder to the bone than anything before it.
Paul Wolcott
#9
-
- Subscriber
-
- 7,044 posts Joined: 14-February 06
Grand Champion Poster
- Gender:Male
- Location:Captain Rick: The only vintage slot car nut in SW Oregon?
Posted 12 November 2015 - 01:48 PM
I was also thinking the Emott chassis might not have ever been used, Tony. The anglewinder GPs were so short-lived. But they were raced a couple of times along with the Sports Cars, GTs, and Stockers. I guess that's why I like the first half of the 1969 MCS-USRA race season so much.
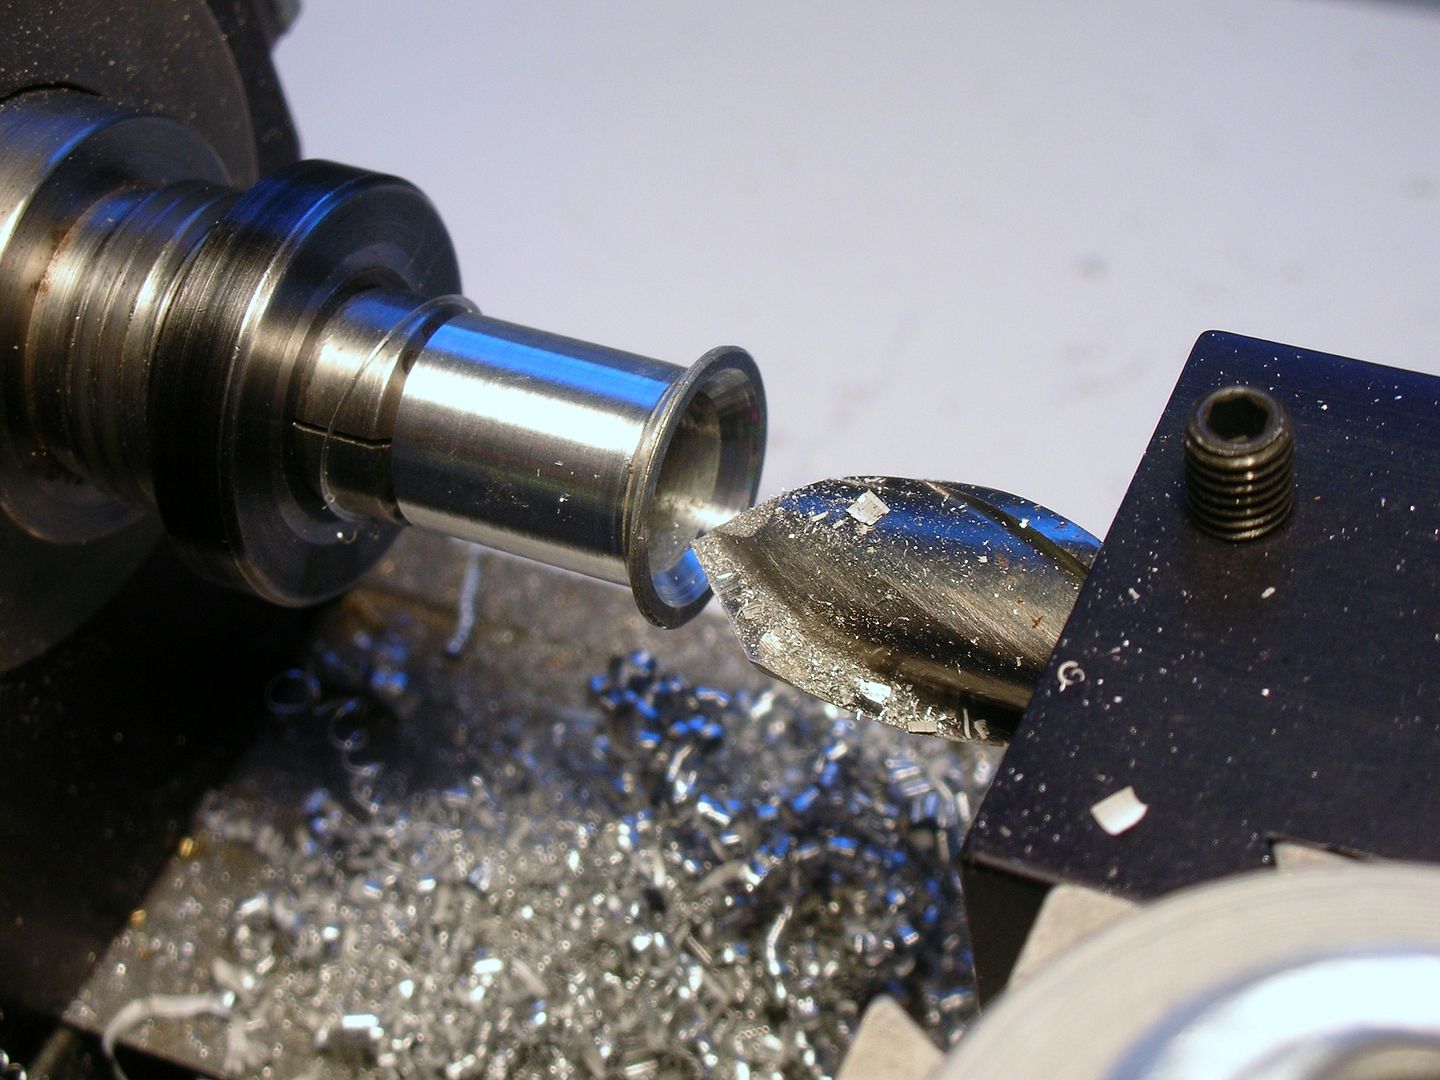
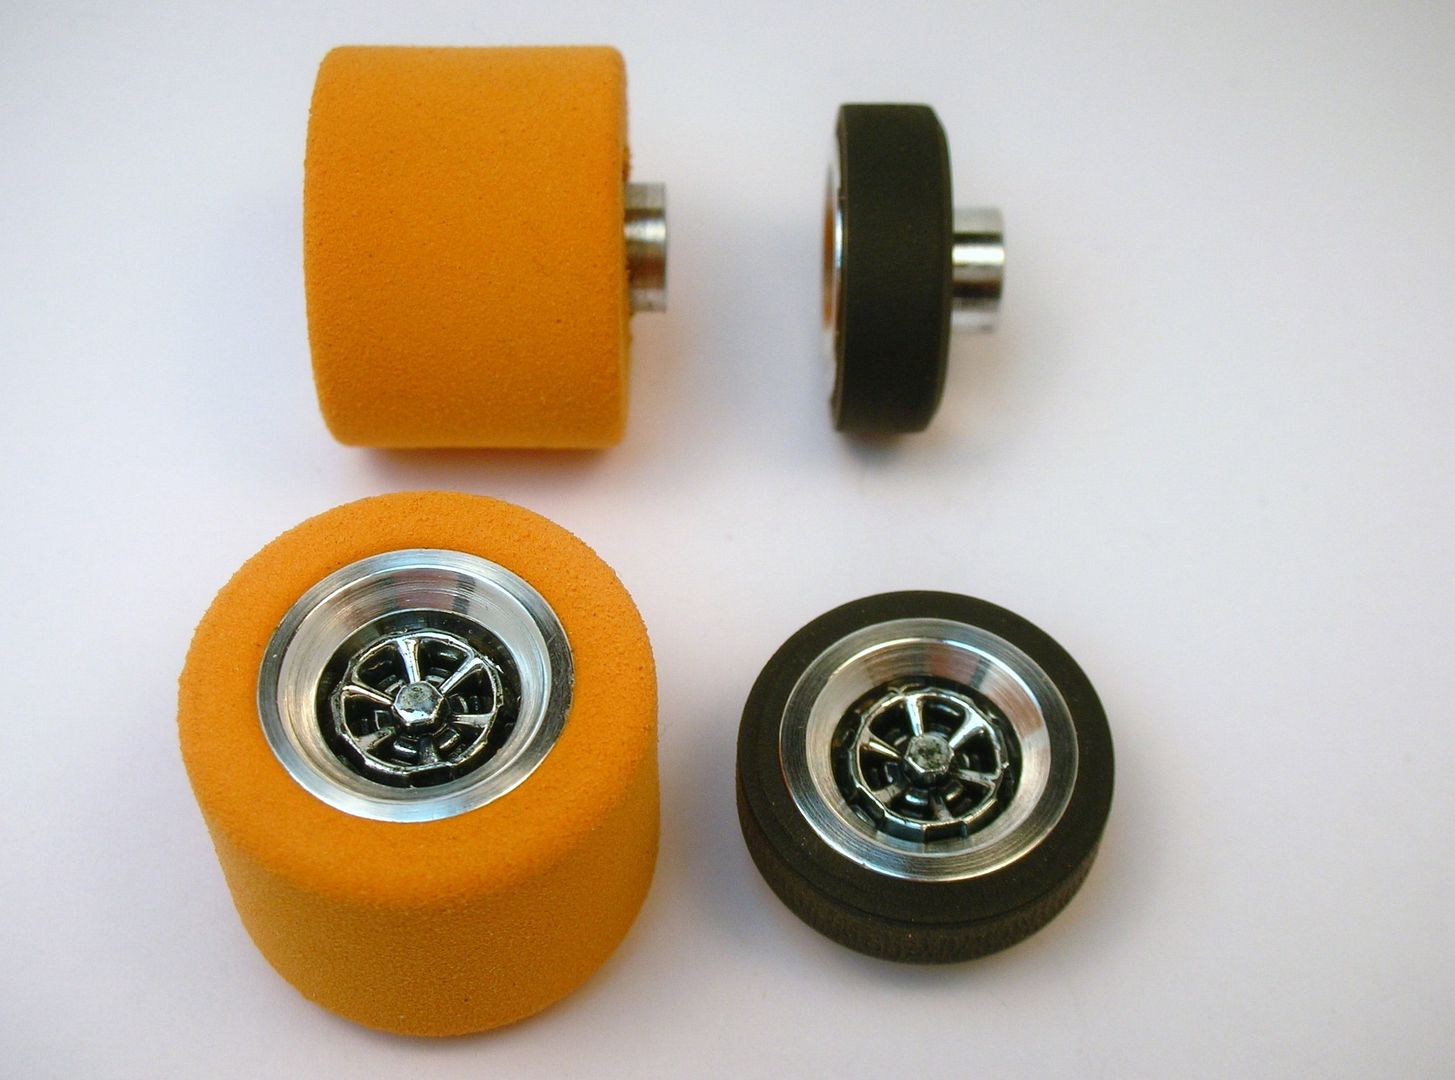
I also like that they had a Concours event for actual race cars. That leads me to my next part of this project... the unique conical shape of the wheel rims on the real car:

I'm making a "race car" not a "scale car" so my attempt at these ultra cool wheels on the real car will will lean toward "race". I used my little hobby lathe to modify some period Riggen AA wheels:
Here are the machined wheels in front of the stockers:
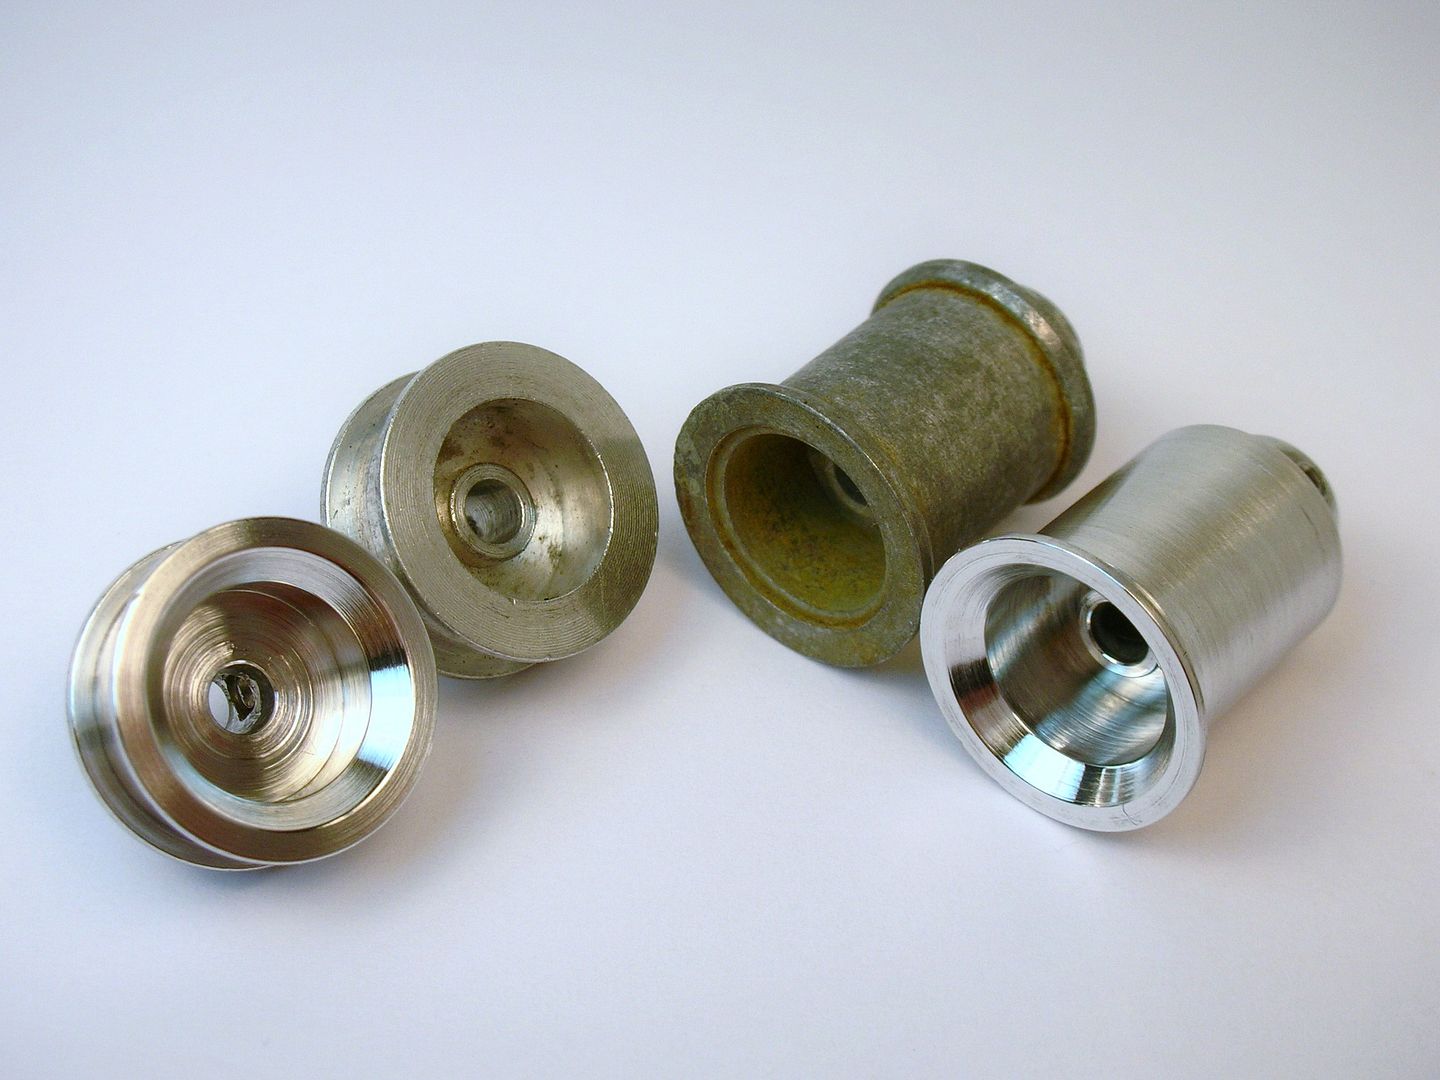
On the rear wheels, I also cut off the rear flange and thinned the front flange from the inside. The new Riggen rubber will glue up easier now.
I'm still working on the wheel inserts... 
- Jencar17 and miko like this
Rick Thigpen
Check out Steve Okeefe's great web site at its new home here at Slotblog:
The Independent Scratchbuilder
There's much more to come...
#10
-
- Full Member
-
- 4,084 posts Joined: 13-March 13
Posting Leader
- Gender:Male
- Location:TX
Posted 12 November 2015 - 02:15 PM
Including those Cox rims you turned down to use as inserts.
#11
-
- Subscriber
-
- 7,044 posts Joined: 14-February 06
Grand Champion Poster
- Gender:Male
- Location:Captain Rick: The only vintage slot car nut in SW Oregon?
Posted 15 November 2015 - 02:11 PM
The wheels and tires are done. I apparently have a "wheel fetish" so I get them finalized before tackling the rest of the project. I used vintage Monogram Lola GT wheel inserts with black highlighting on their chrome surface:
Next up was the motor setup which is needed to build the chassis. I chose a motor with an East Coast flair... a Champion 525 can with a Mura "unmeltable" endbell. I made shims for the top and bottom of the endbell per Tony P's advice. The endbell screws are 0-80 stainless steel flat head machine screws:
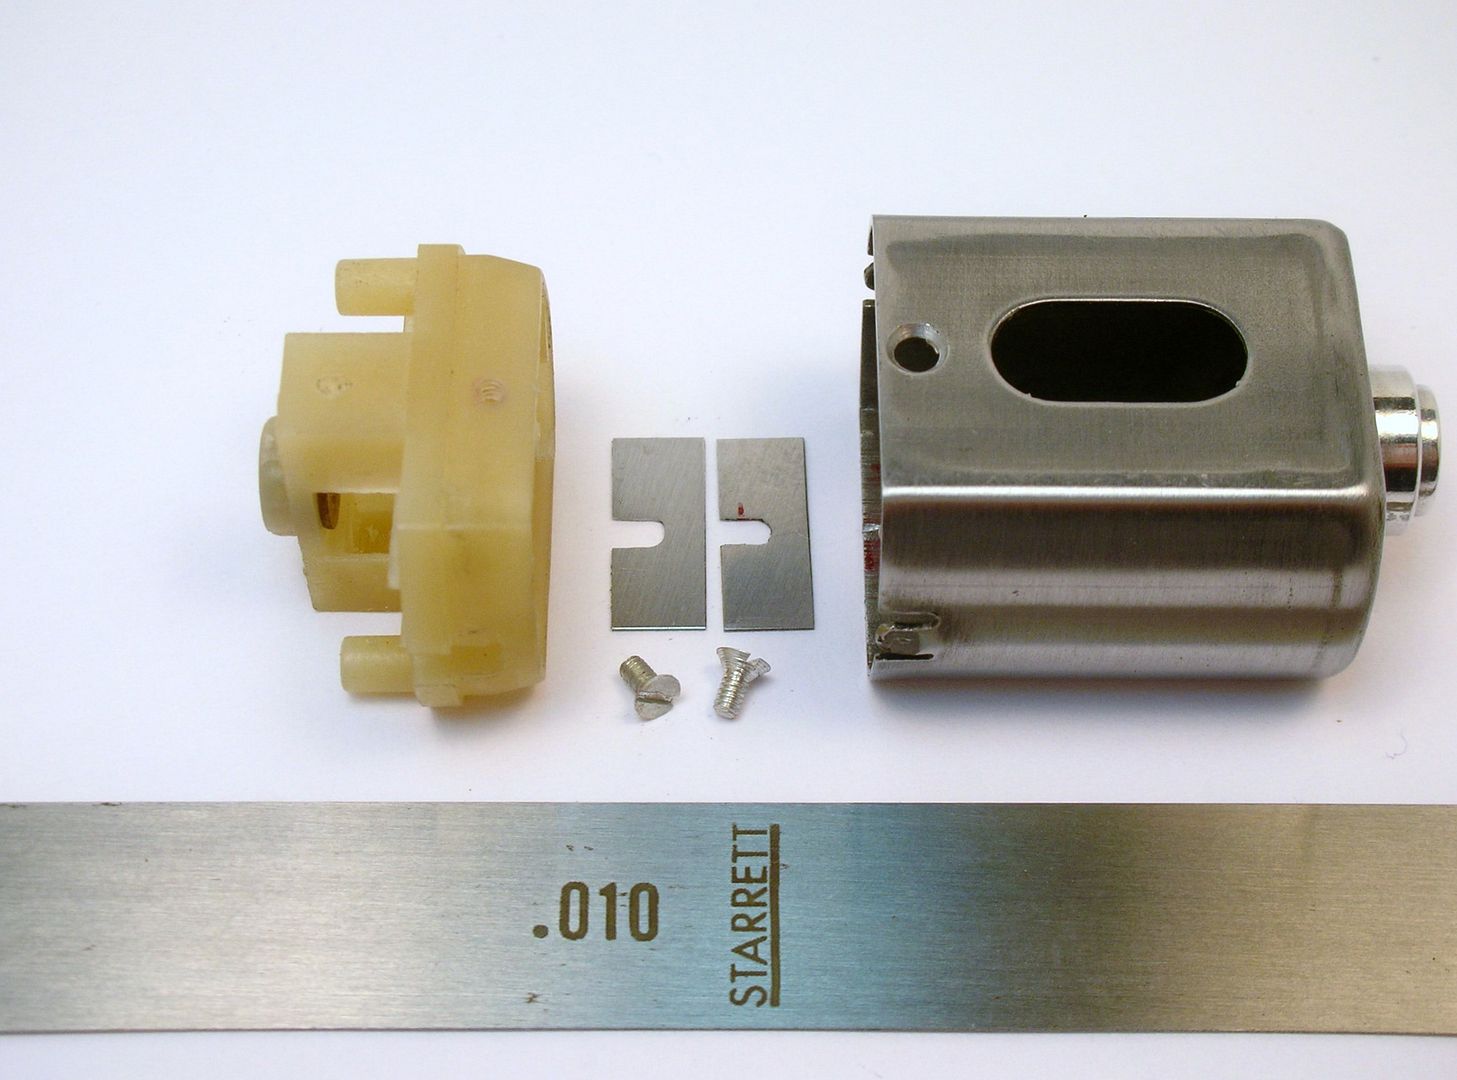
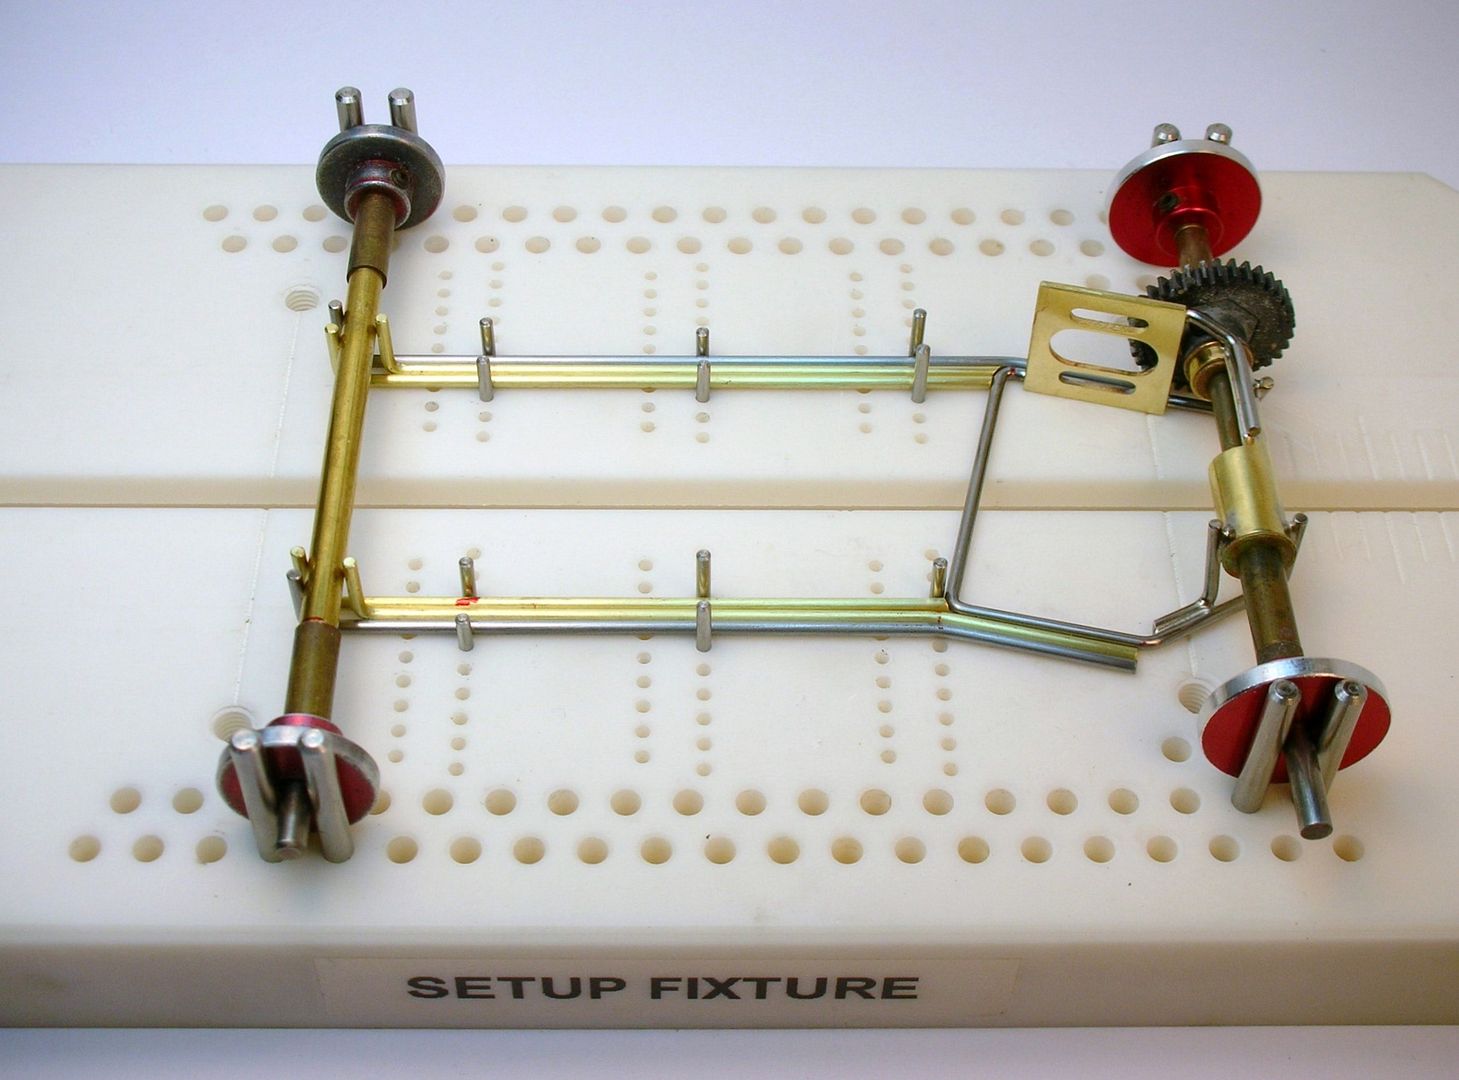
Here's the se-tup ready for chassis building duties. The hex brush holders are soldered to the brush hoods:
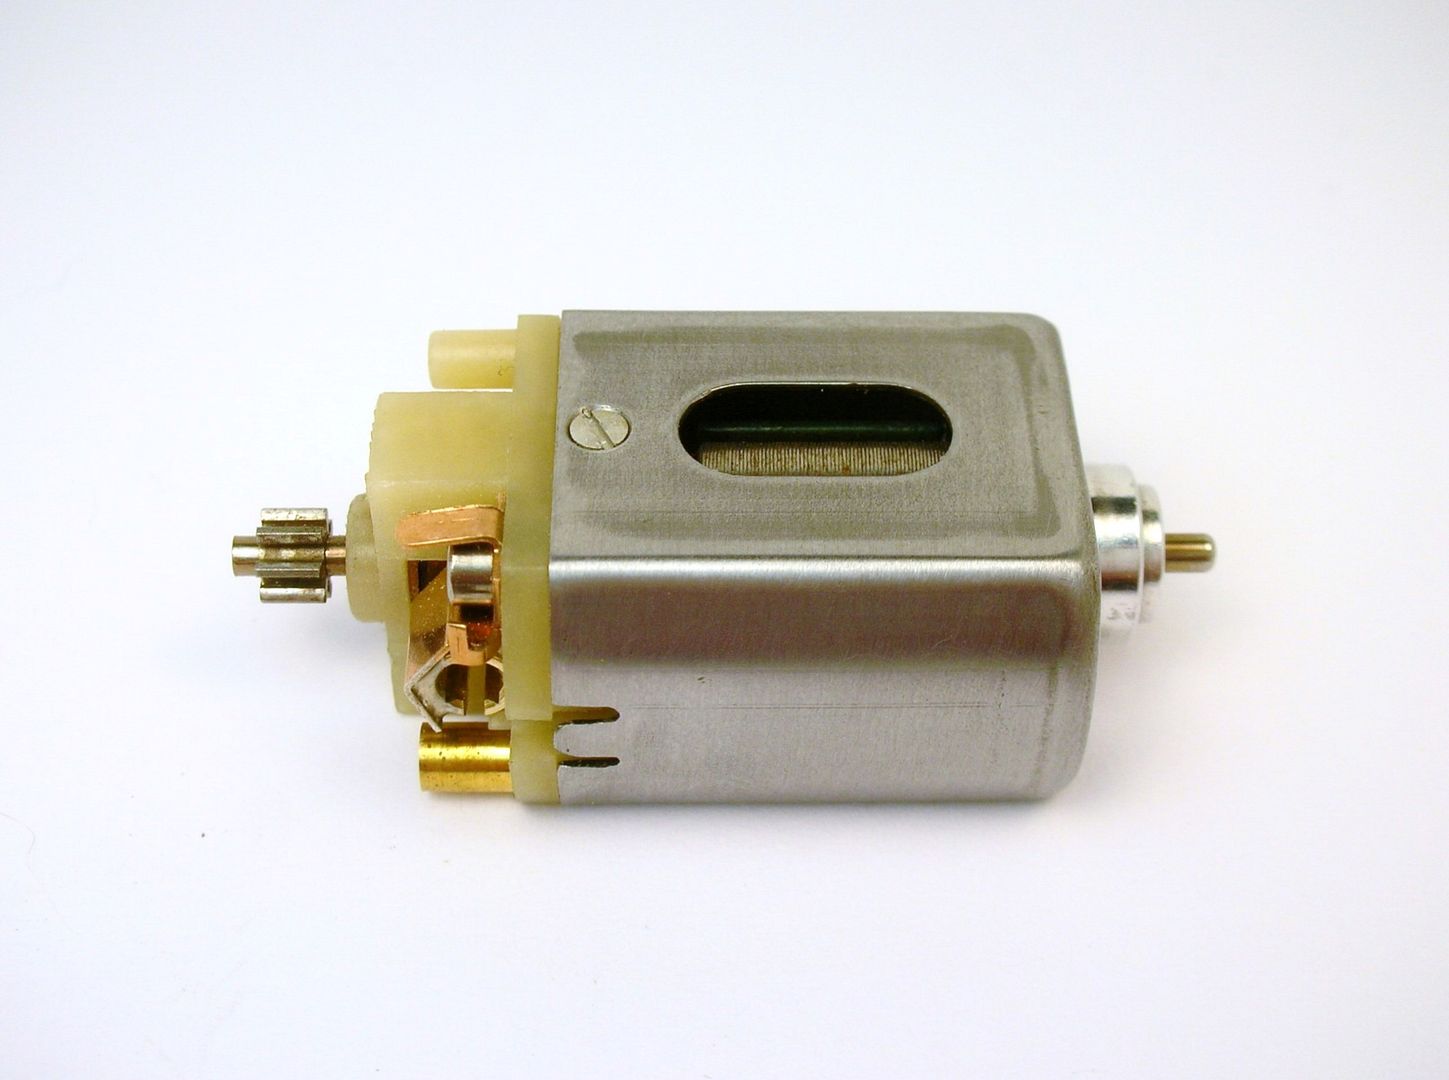
More East Coast parts with the Team Nutley B-motor axle tube and an unknown 16D motor bracket. The motor mount screws are 2-56 stainless steel machine screws. The motor box was made by my good buddy Steve Okeefe... thanks, Steve!

Time to fire up the soldering iron...
- slotbaker, Jencar17 and miko like this
Rick Thigpen
Check out Steve Okeefe's great web site at its new home here at Slotblog:
The Independent Scratchbuilder
There's much more to come...
#12
-
- Full Member
-
- 4,084 posts Joined: 13-March 13
Posting Leader
- Gender:Male
- Location:TX
Posted 15 November 2015 - 02:29 PM
The wayback is getting some good use with all these special endbells.
Wheels came our great and good on Steve for bending all those motor boxes for you!
Have to finally get around to bending them for myself soon. Got the magazine article all ready for when I dare pick up the pliers.
#13
-
- Administrator
-
- 18,488 posts Joined: 20-February 06
Builder
- Gender:Male
- Location:Cleveland, Tennessee
Posted 15 November 2015 - 02:54 PM
Is that a 6t pinion?
Paul Wolcott
#14
-
- Subscriber
-
- 7,044 posts Joined: 14-February 06
Grand Champion Poster
- Gender:Male
- Location:Captain Rick: The only vintage slot car nut in SW Oregon?
Posted 15 November 2015 - 04:13 PM
I waste so much piano wire the stock value of K&S Metals goes up when I try and bend up a motor box, Paul. It's a good thing the stuff is cheap.
Hi Pablo, the pinion is a used vintage 7t I'm using for set-up.
Rick Thigpen
Check out Steve Okeefe's great web site at its new home here at Slotblog:
The Independent Scratchbuilder
There's much more to come...
#15
-

- Full Member
-
- 14,923 posts Joined: 02-August 07
Age scrubs away speed!
- Gender:Male
- Location:New Boston, NH
Posted 15 November 2015 - 04:35 PM
Practice using a piece of 1/16" brass rod before using piano wire. It's a lot easier re-bending brass rod so everything fits properly. Then duplicate what you bent in brass rod to piano wire.
If you have the two Steve Okeefe DVDs you have the dimensions that Steube and Warmack used, as well as a bending jig used by Warmack.
I intend to live forever! So far, so good.
#16
-
- Full Member
-
- 4,084 posts Joined: 13-March 13
Posting Leader
- Gender:Male
- Location:TX
Posted 15 November 2015 - 05:08 PM
Got some brass rod and the magazine scans that Rick posted of the motor box dimensions and the jig that Warmack made.
Still keep meaning to snag the DVDs, that is until more car parts turn up.
Wonder if R-Geo ever made a box jig? I seem to remember him mentioning one he'd done in one of Rick's build threads. Will have to ask him.
#17
-
- Administrator
-
- 18,488 posts Joined: 20-February 06
Builder
- Gender:Male
- Location:Cleveland, Tennessee
Posted 15 November 2015 - 05:32 PM
If you try Bill's advice on using rod as a test before bending wire, you may not need a motor box jig.
Do you think I bent these front axles perfectly first time? :

Nope. I used brass rod and found the perfect bends before bending my precious tinned wires.
Exactly as Bill suggested.Capt. Rick, please forgive me for infecting your angle F1 thread with a strange car photo.

- Jencar17 and Don Weaver like this
Paul Wolcott
#18
-
- Full Member
-
- 4,084 posts Joined: 13-March 13
Posting Leader
- Gender:Male
- Location:TX
Posted 15 November 2015 - 05:51 PM
Mighty fine bent floating axles. Can well imagine it's best to practice before using the tinned rod...That reminds me, I've got some Phaze III pre-bent main rails to try using as well...
#19
-
- Subscriber
-
- 7,044 posts Joined: 14-February 06
Grand Champion Poster
- Gender:Male
- Location:Captain Rick: The only vintage slot car nut in SW Oregon?
Posted 15 November 2015 - 09:23 PM


- endbelldrive, Jencar17, Tex and 3 others like this
Rick Thigpen
Check out Steve Okeefe's great web site at its new home here at Slotblog:
The Independent Scratchbuilder
There's much more to come...
#20
-
- Subscriber
-
- 7,044 posts Joined: 14-February 06
Grand Champion Poster
- Gender:Male
- Location:Captain Rick: The only vintage slot car nut in SW Oregon?
Posted 20 November 2015 - 04:35 PM
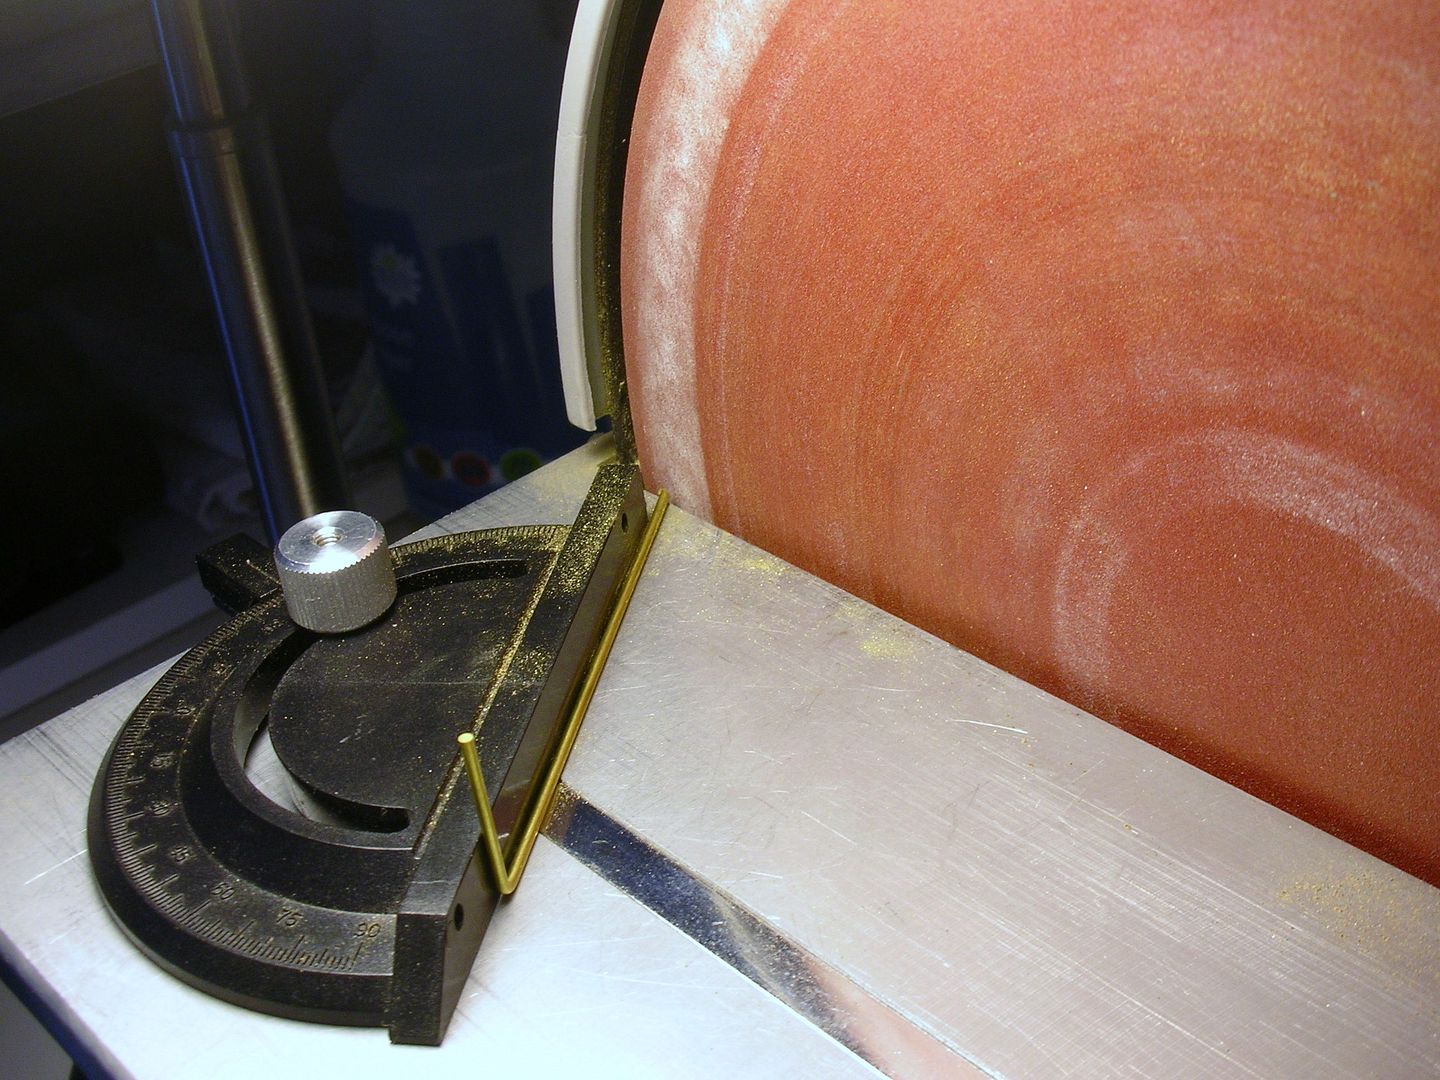
Several of the rails needed to be angle cut to fit neatly against the motor box like so:
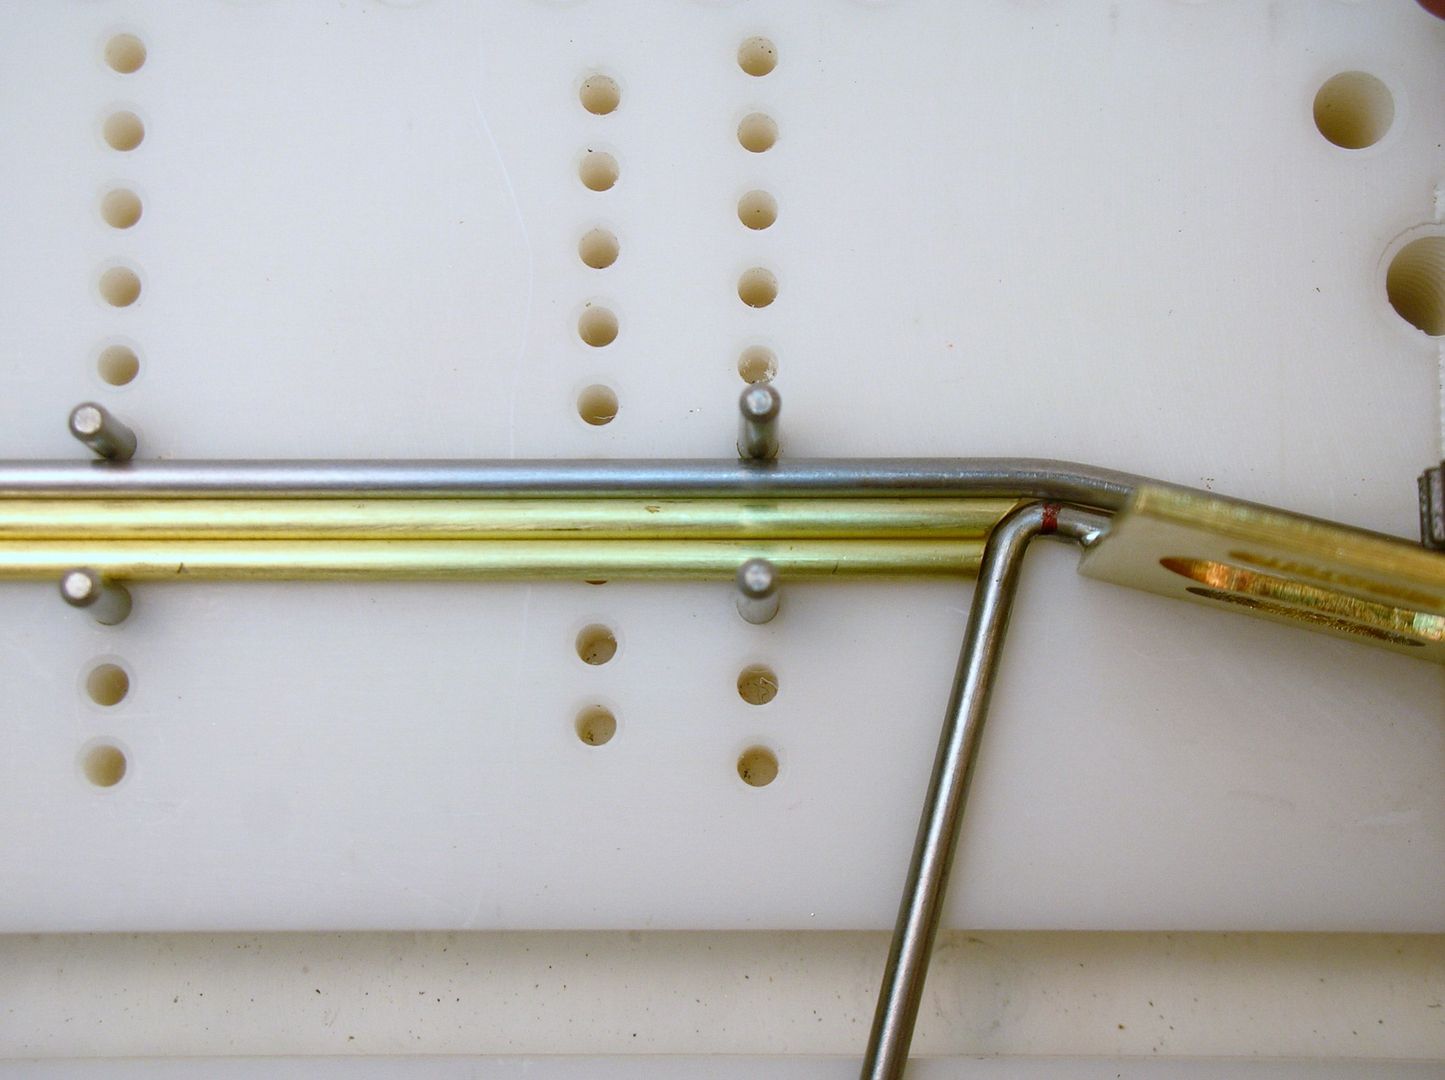
I've been doing this by hand with a cut-off wheel in my Dremel but using this disk sander with miter gauge made things neat and easy:
I also pre-cut and fitted the 1/4" brass strip motor box to main rail reinforcement piece:
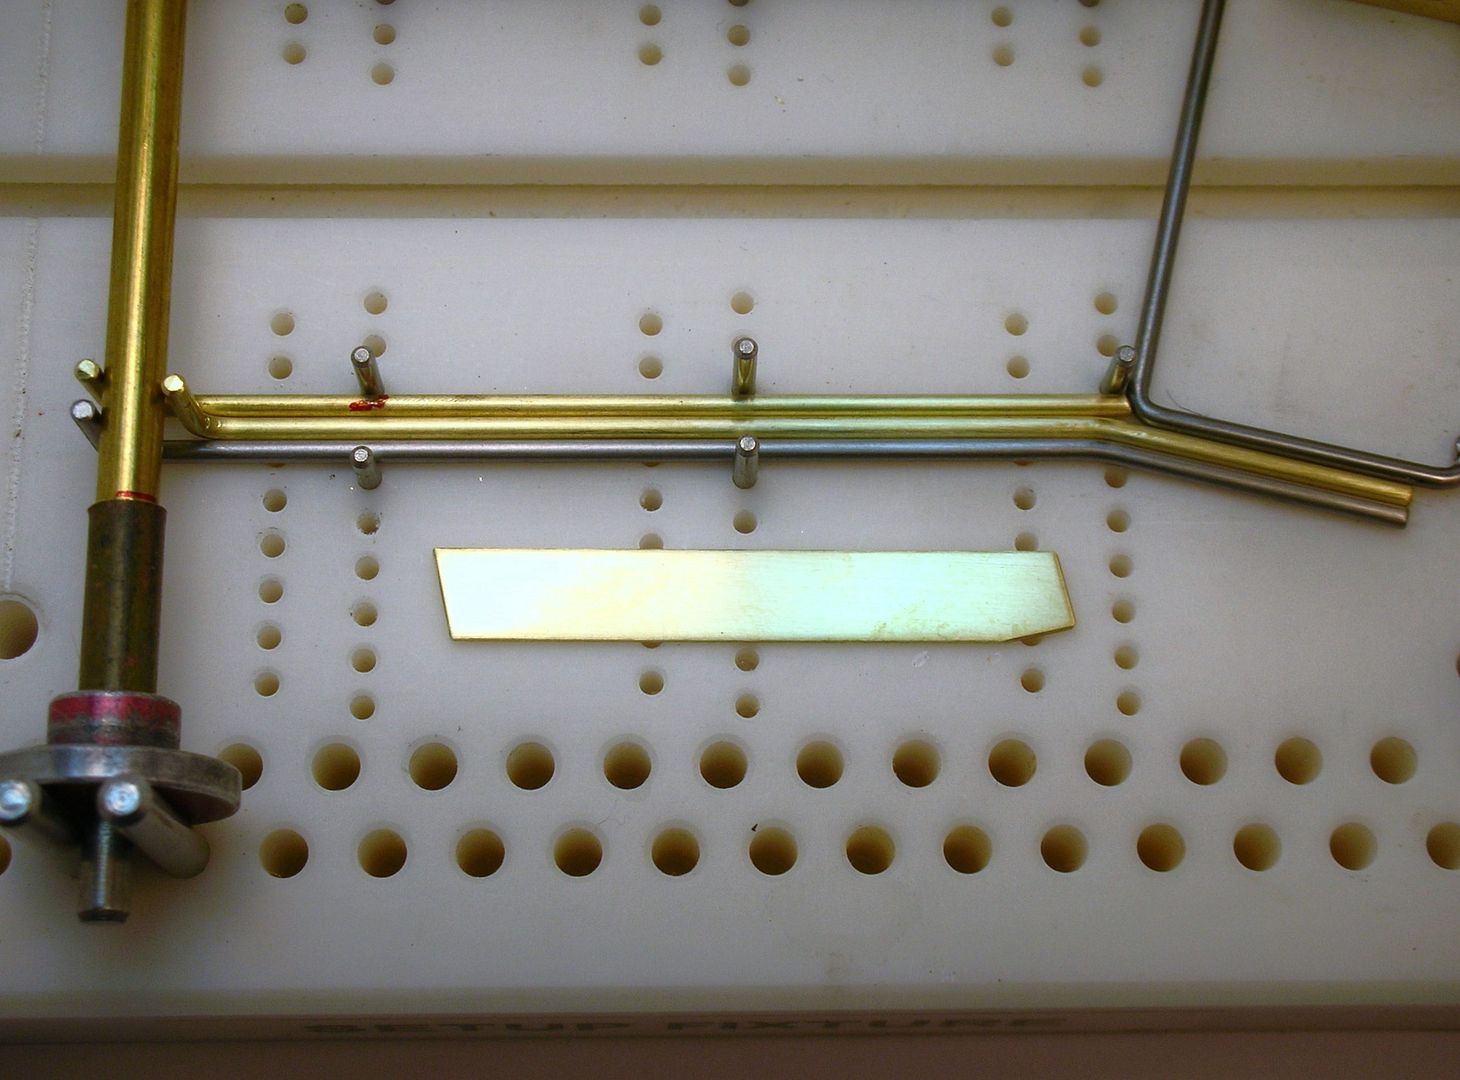
Here's the center section soldered up:
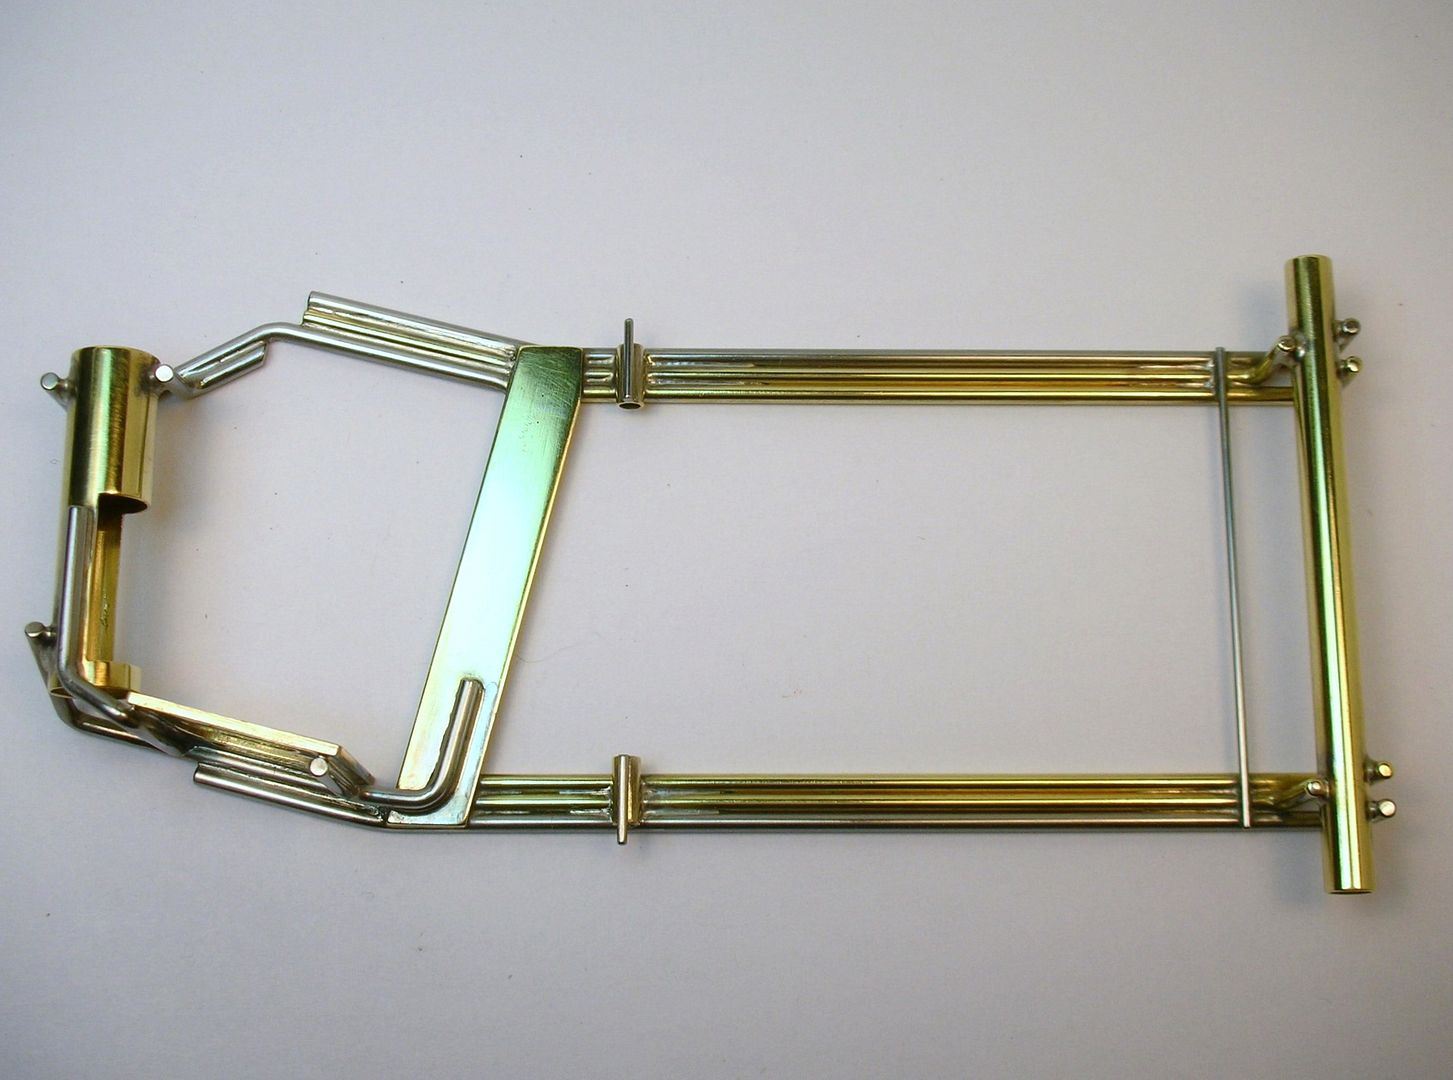
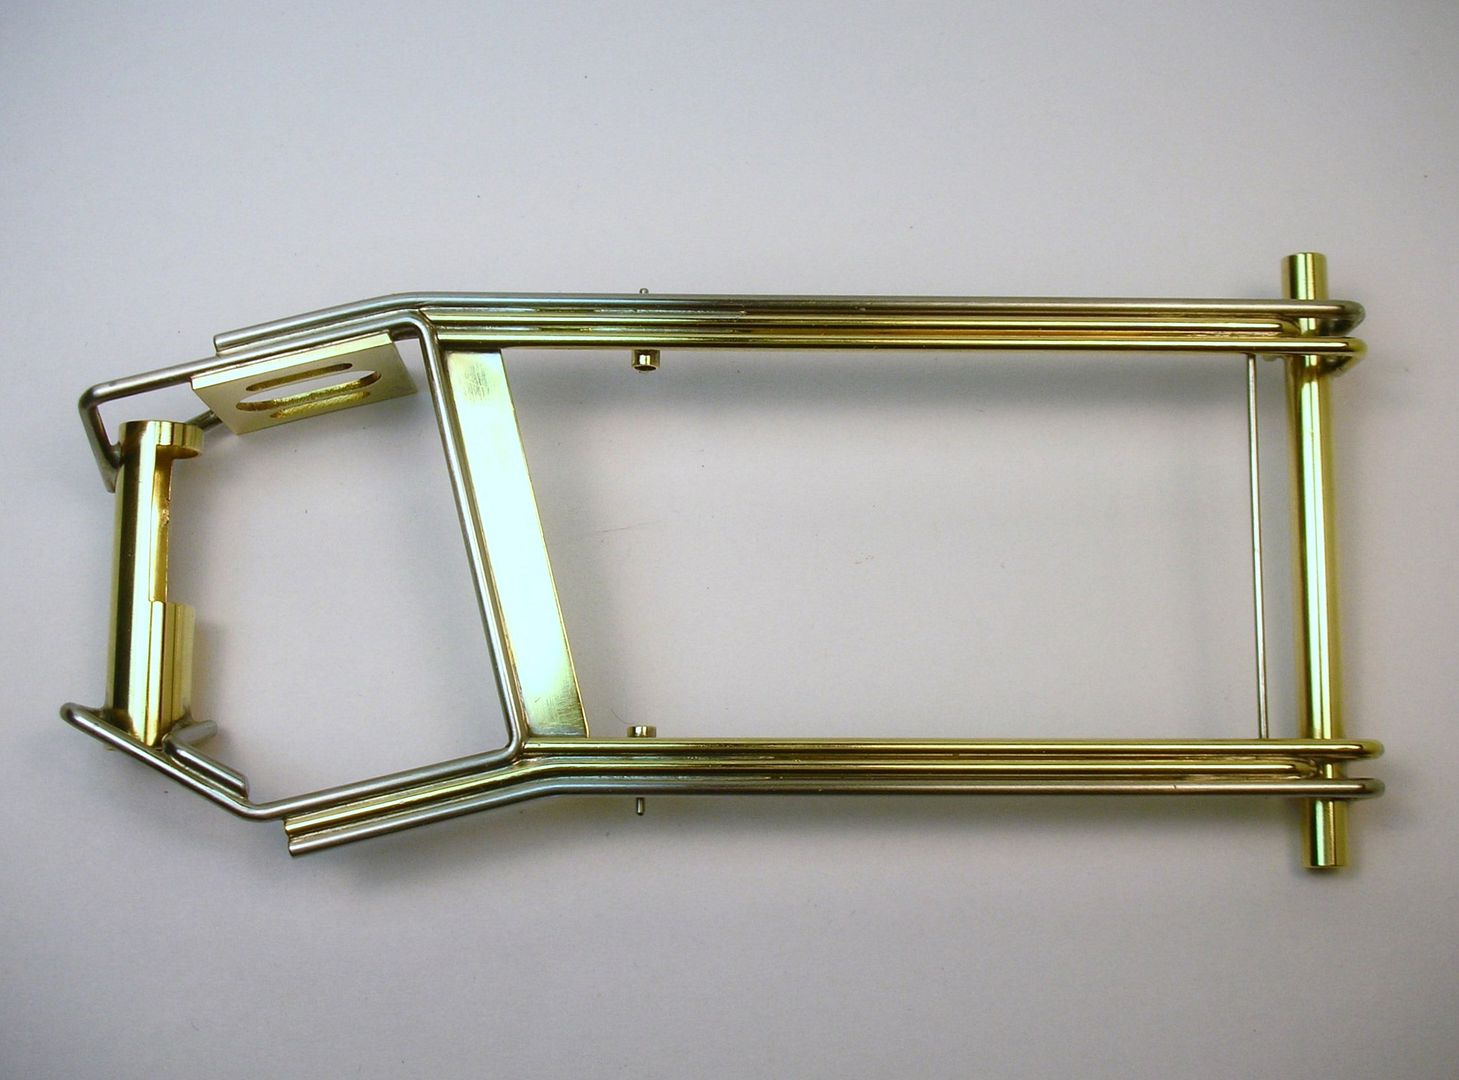
The motor mount gets some added reinforcement:
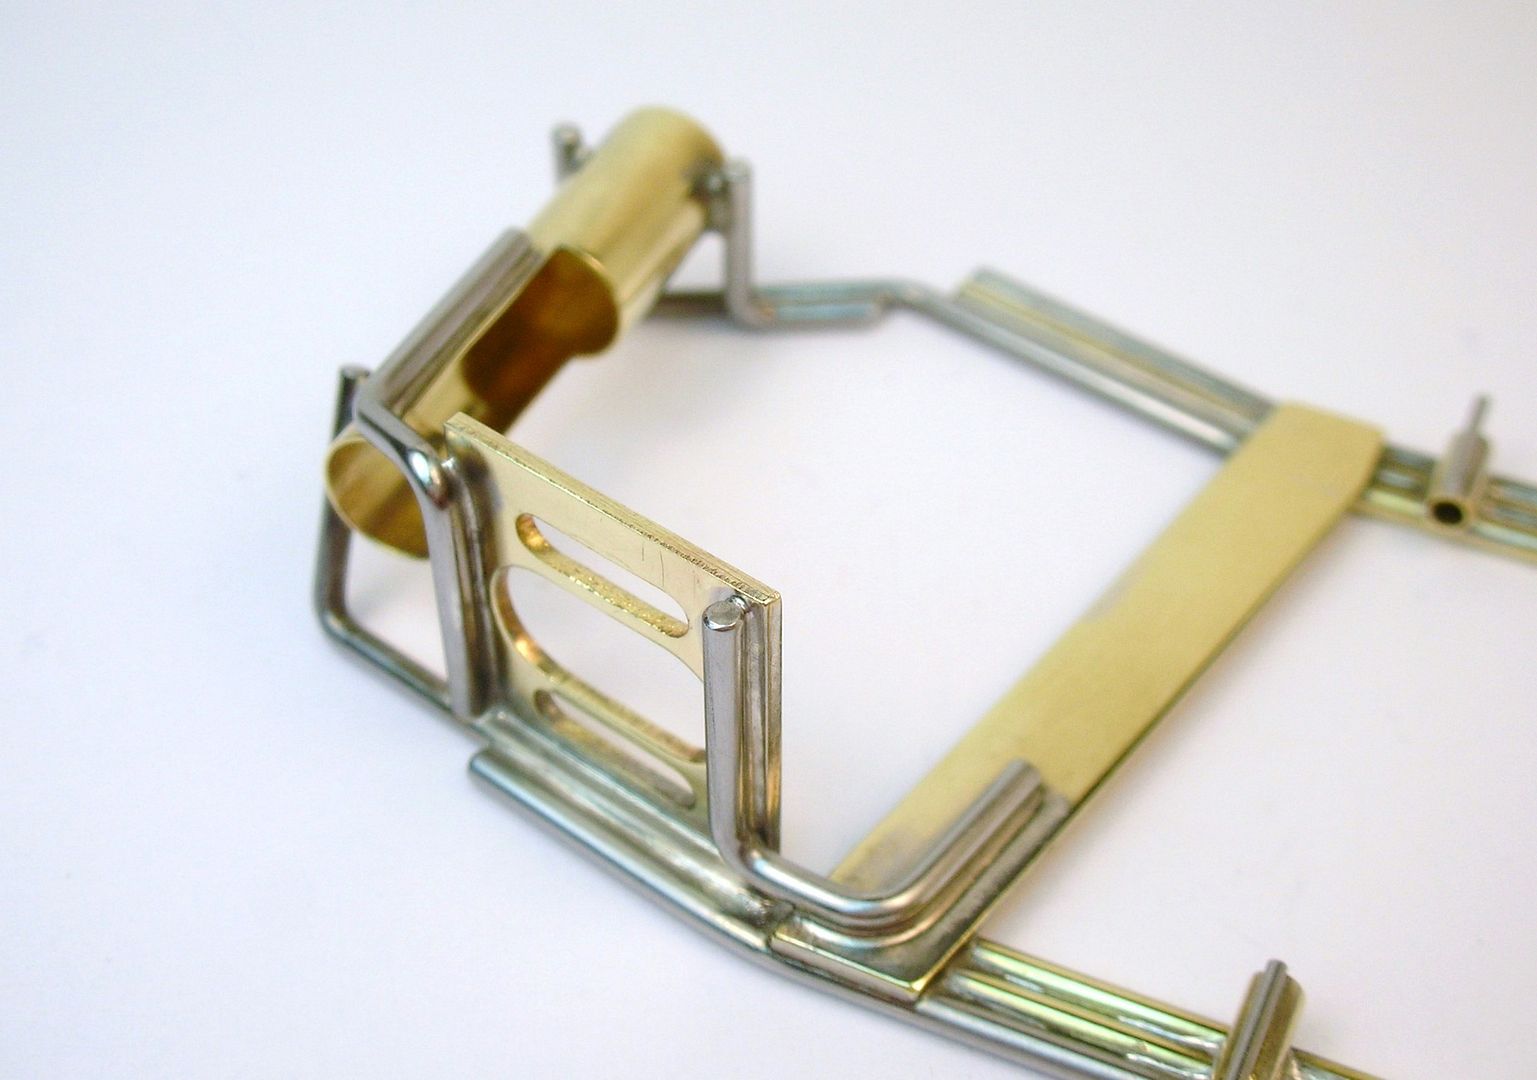
Next up is the drop arm...
- slotbaker, Jencar17, Tim Neja and 2 others like this
Rick Thigpen
Check out Steve Okeefe's great web site at its new home here at Slotblog:
The Independent Scratchbuilder
There's much more to come...
#21
-

- Full Member
-
- 355 posts Joined: 01-September 08
X Speed & Sport Racer
- Gender:Male
- Location:Lincoln City, OR
Posted 20 November 2015 - 05:37 PM
That is perfection, sir! Love your work!
#22
-
- Full Member
-
- 4,084 posts Joined: 13-March 13
Posting Leader
- Gender:Male
- Location:TX
Posted 20 November 2015 - 06:37 PM
Tasty! With the center section all together I keep expecting to see big brass pans thinking it's a GT/Can-Am.
Look forward to seeing what you have in store for a drop arm.
#23
-
- Administrator
-
- 18,488 posts Joined: 20-February 06
Builder
- Gender:Male
- Location:Cleveland, Tennessee
Posted 21 November 2015 - 09:28 AM
Paul Wolcott
#24
-

- Full Member
-
- 9,248 posts Joined: 07-July 06
Grand Champion Poster
- Gender:Male
- Location:Denton, TX
Posted 21 November 2015 - 09:40 AM
Oh, ferchrissake Rick, you're killin' us here!
Beautiful work. Superb craftsmanship.
Remember, two wrongs don't make a right... but three lefts do! Only you're a block over and a block behind.
#25
-
- Subscriber
-
- 7,044 posts Joined: 14-February 06
Grand Champion Poster
- Gender:Male
- Location:Captain Rick: The only vintage slot car nut in SW Oregon?
Posted 21 November 2015 - 10:27 PM
Hey, guys, I finally made the mods needed on the drop arm. At the back of the arm, two relief cuts to keep solder out of the pivot joint:
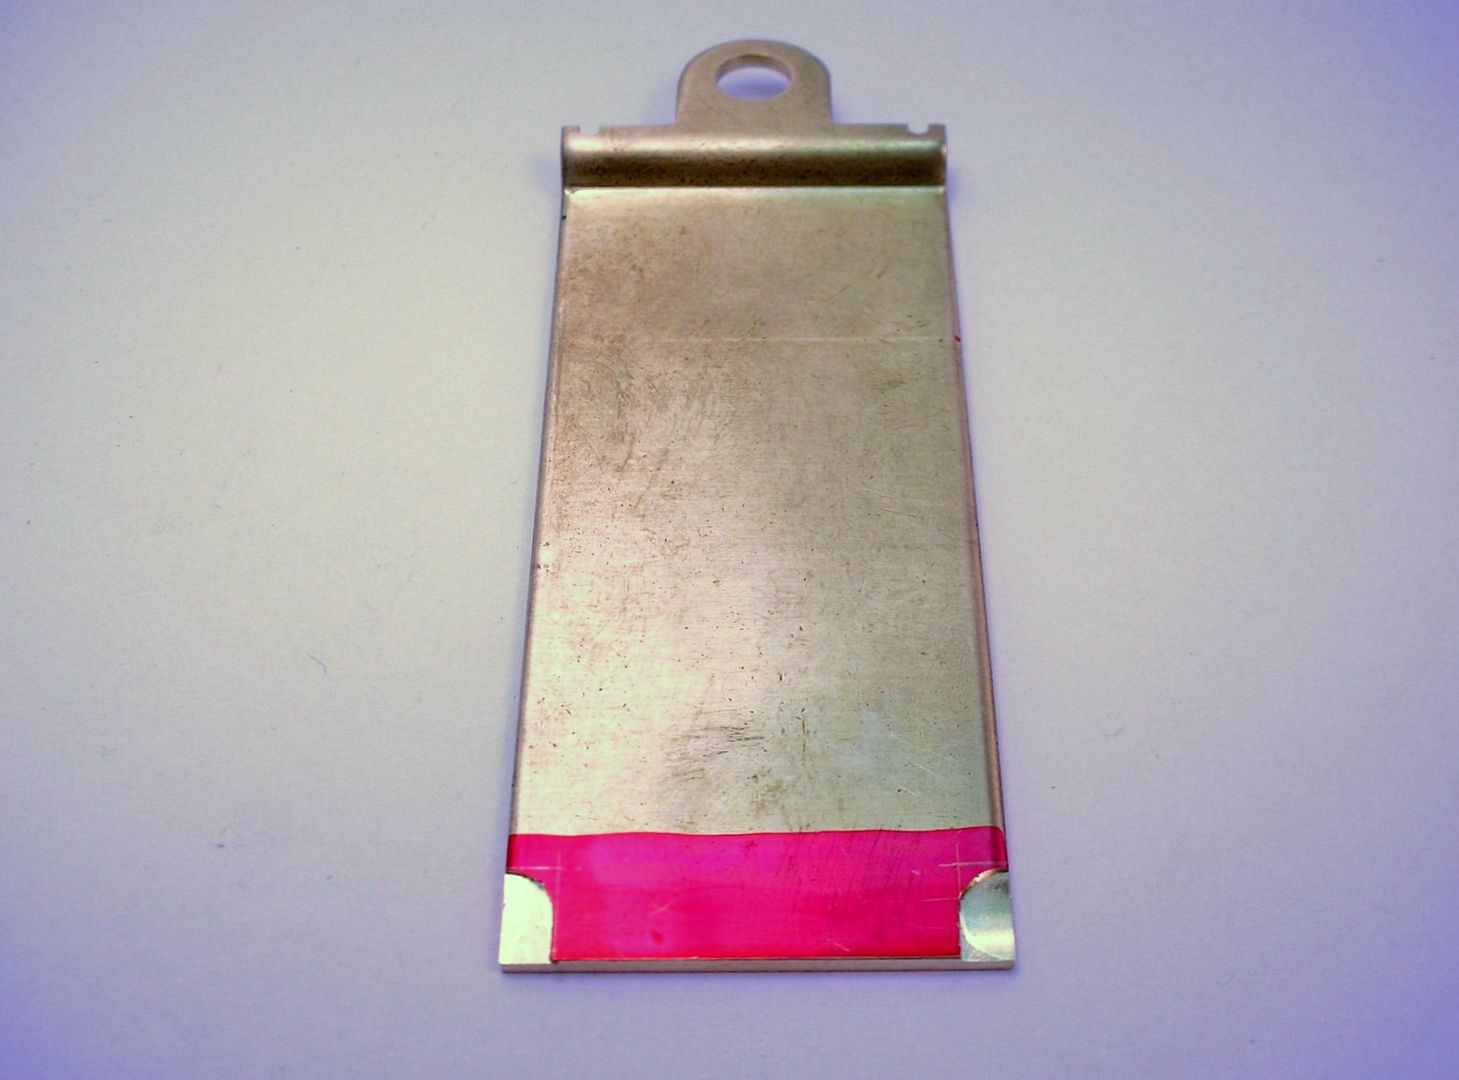
At the front, two cuts for 1/16" brass rod guide pivot stops and a plumber hinge tube sits ready. Since I'll be running a low profile Jet flag in this "Cox guide" style drop arm, I opened up the guide pivot hole for a spacer bushing I machined up for the Jet flag.
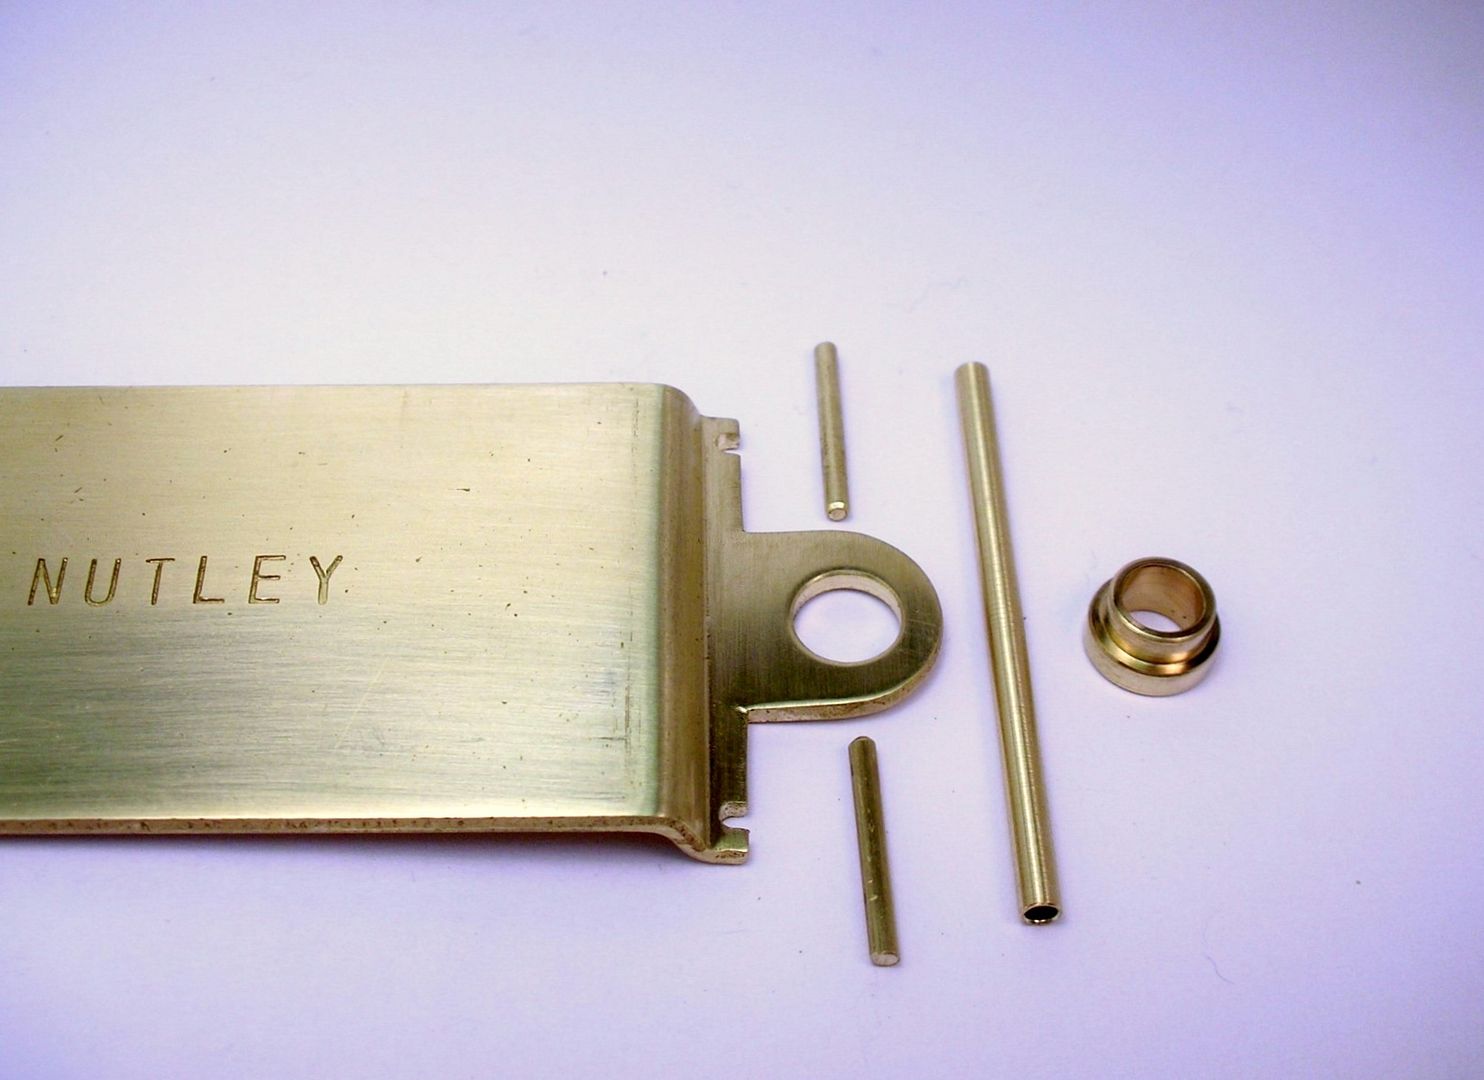
Soldering is next.........
- Pablo, miko and Peter Horvath like this
Rick Thigpen
Check out Steve Okeefe's great web site at its new home here at Slotblog:
The Independent Scratchbuilder
There's much more to come...


