

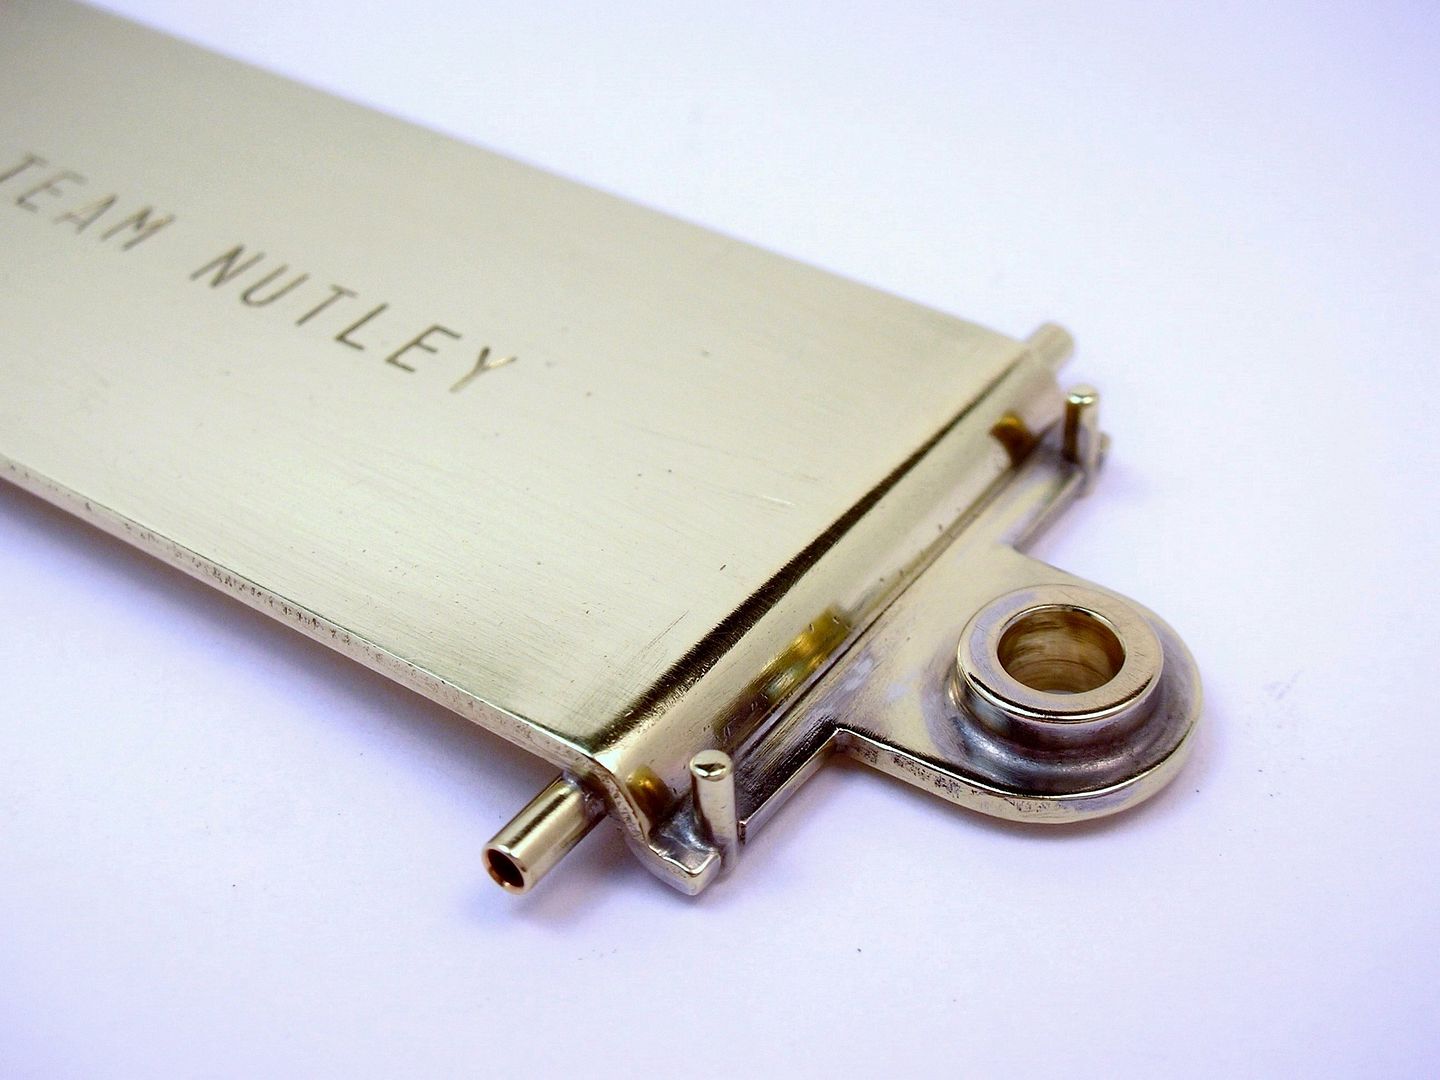
Like Tex said, it's all pretty sick, but the custom spacer to accommodate a Jet flag is really sick. 


Anglewinder GP - Lotus 49B build
Started by
dc-65x
, Nov 11 2015 06:12 PM
89 replies to this topic
#26

Pablo
-

- Administrator
-

- 18,460 posts Joined: 20-February 06
Builder
- Gender:Male
- Location:Cleveland, Tennessee
Posted 22 November 2015 - 08:24 AM
Paul Wolcott
#27
SlotStox#53
-

- Full Member
-
- 4,084 posts Joined: 13-March 13
Posting Leader
- Gender:Male
- Location:TX
Posted 22 November 2015 - 11:54 AM
Thought you were using one of those 1/4-3/16" bearings reducers for a moment until I read you'd machined it.
Epic!!
#28
dc-65x
-
- Subscriber
-
- 6,993 posts Joined: 14-February 06
Grand Champion Poster
- Gender:Male
- Location:Captain Rick: The only vintage slot car nut in SW Oregon?
Posted 22 November 2015 - 09:44 PM
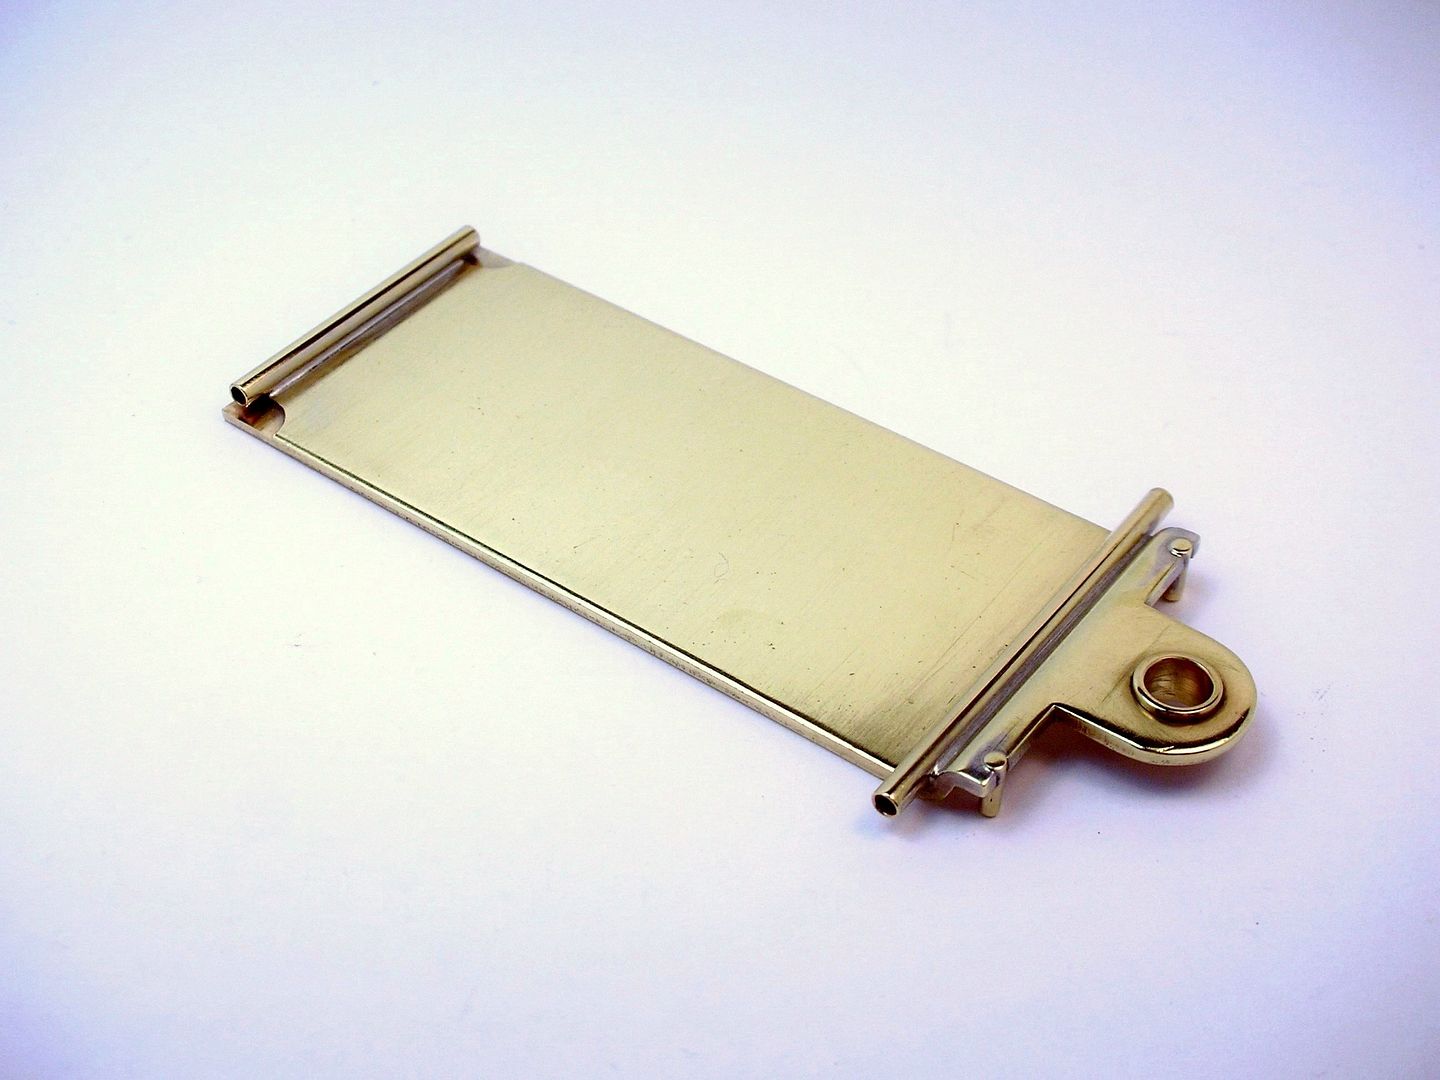
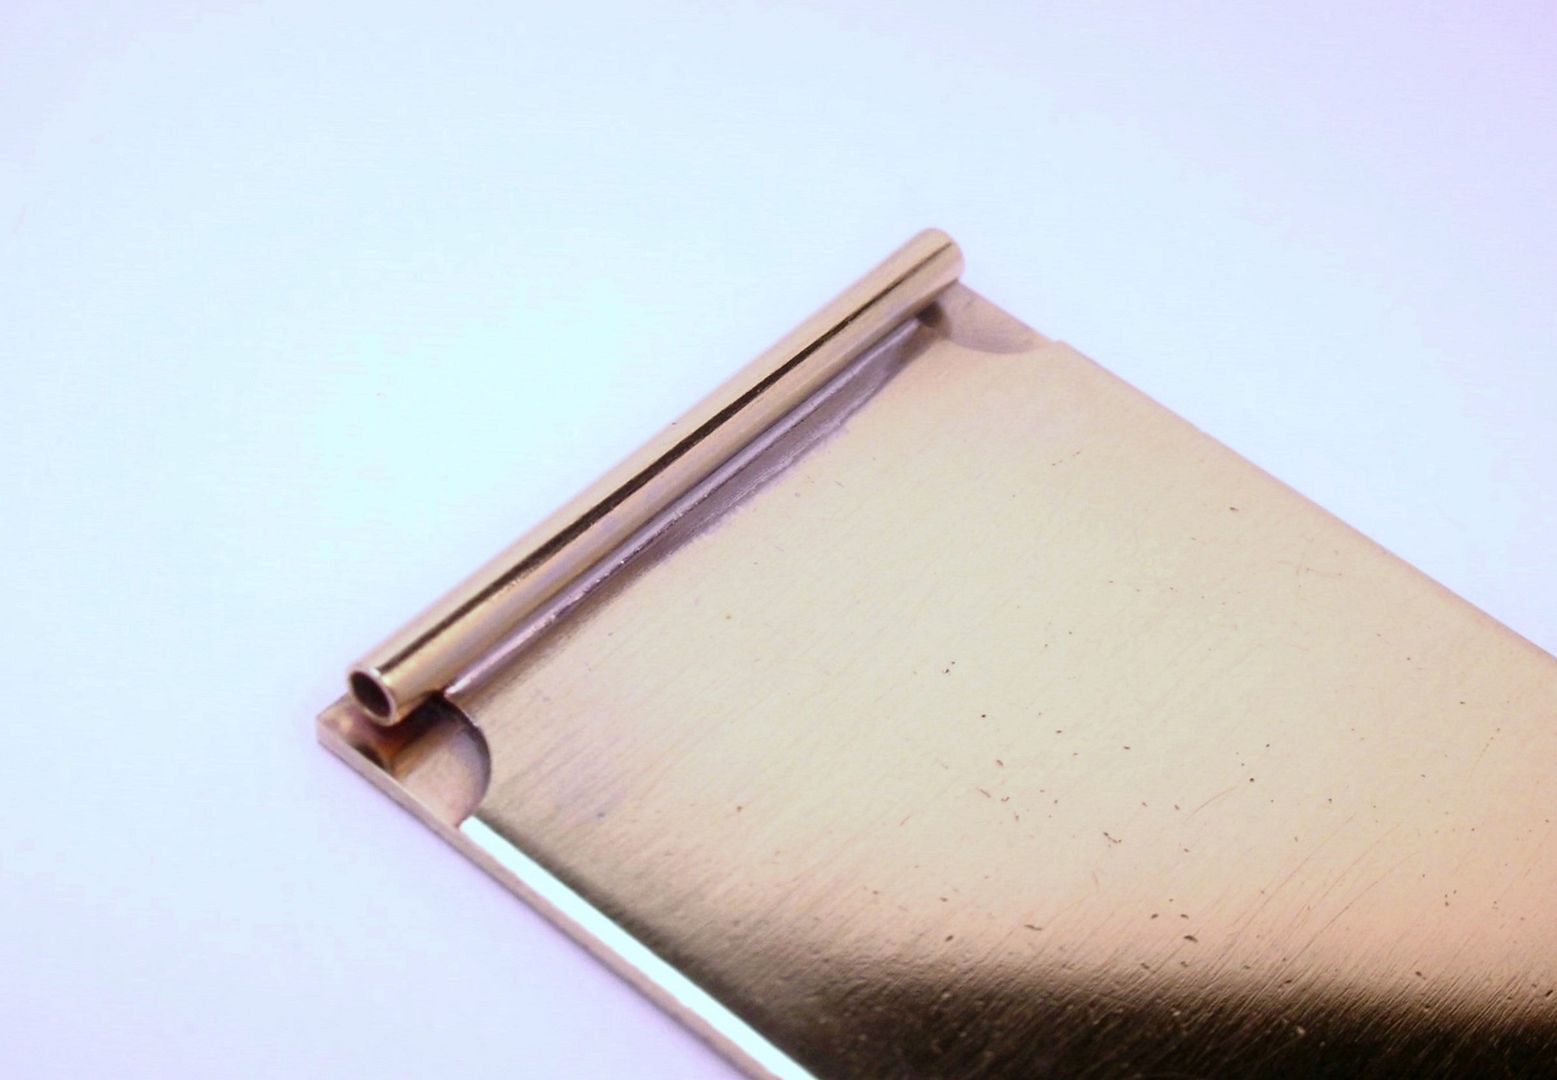
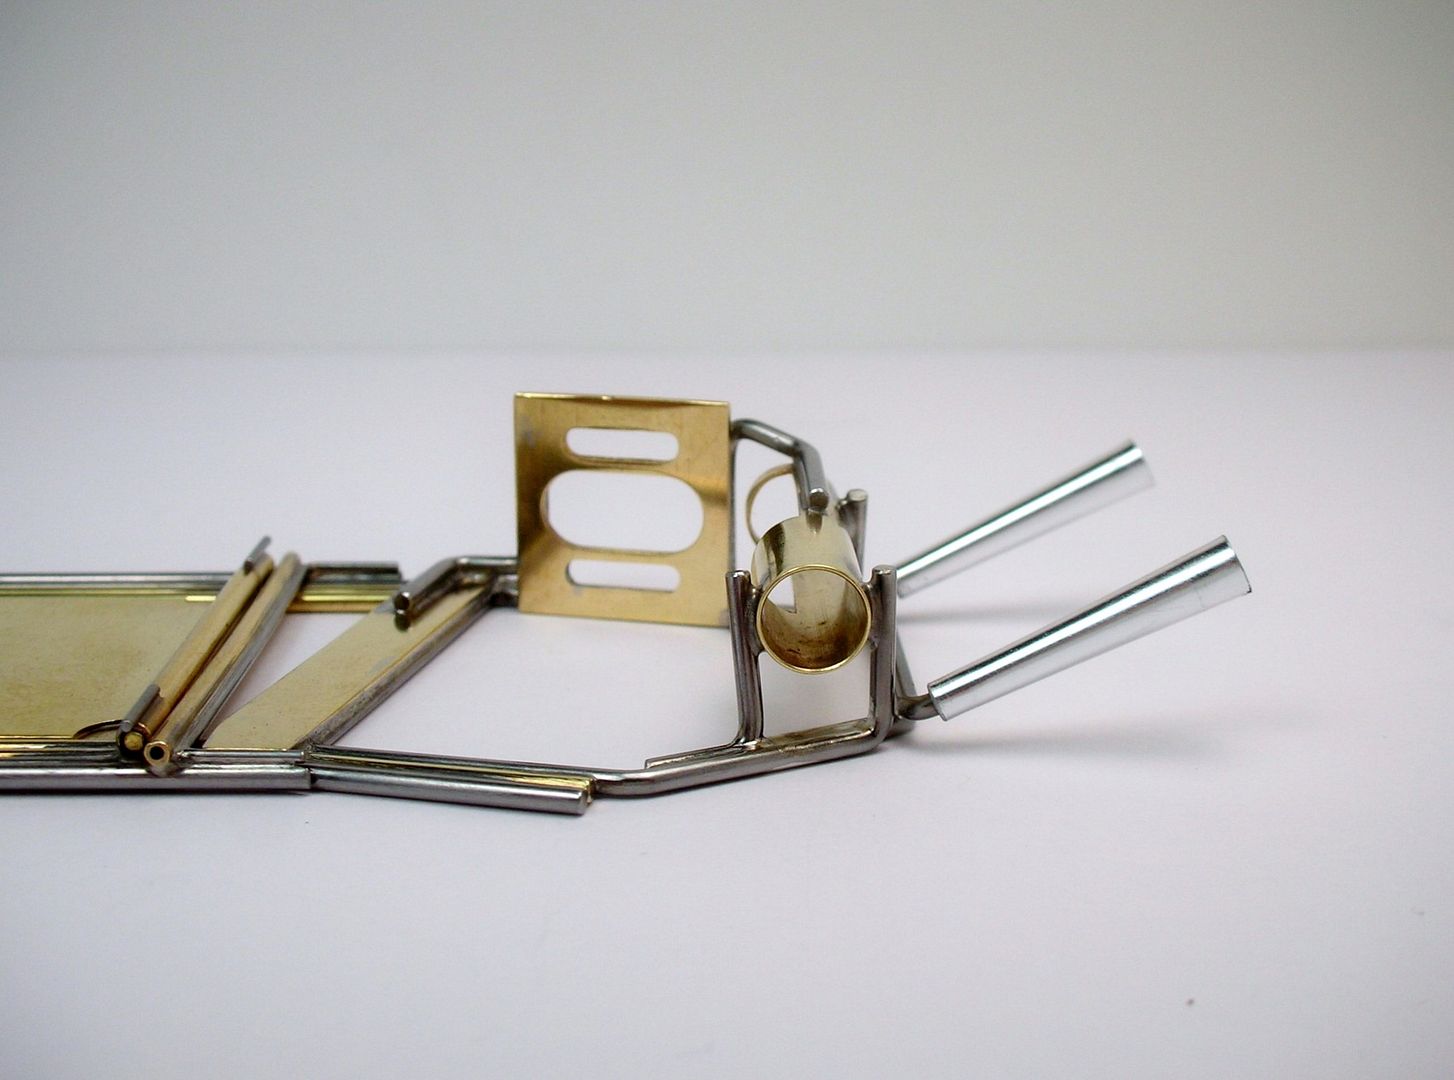
The drop arm is all soldered and buffed up:
Sorry for the weirdo coloring in my pictures. I've changed nothing but all of a sudden my pictures want to have a blue cast in the background. I've been messing with the "white balance" to try and fix it... no luck yet. 
- Jencar17 and Peter Horvath like this
Rick Thigpen
Check out Steve Okeefe's great web site at its new home here at Slotblog:
The Independent Scratchbuilder
There's much more to come...
#29
SlotStox#53
-
- Full Member
-
- 4,084 posts Joined: 13-March 13
Posting Leader
- Gender:Male
- Location:TX
Posted 22 November 2015 - 11:21 PM
Almost looks like you've used a filter/effect on the shots.
Rick, with the drop arm, did you do any shaping or trimming of the guide holder/tongue part besides soldering on that cool spacer?
Rick, with the drop arm, did you do any shaping or trimming of the guide holder/tongue part besides soldering on that cool spacer?
#30
Pablo
-
- Administrator
-
- 18,460 posts Joined: 20-February 06
Builder
- Gender:Male
- Location:Cleveland, Tennessee
Posted 23 November 2015 - 12:40 AM
Rick,
I've had a similar problem with bodies not appearing the colors they really are.
n my computer screen, your pics have had a very slight bluish tint for a long time. (Adding a microdot of blue to white paint sometimes make it look even whiter.  )
)
You work is so stunningly perfect, it's not even noticeable 
Paul Wolcott
#31
dc-65x
-
- Subscriber
-
- 6,993 posts Joined: 14-February 06
Grand Champion Poster
- Gender:Male
- Location:Captain Rick: The only vintage slot car nut in SW Oregon?
Posted 23 November 2015 - 11:42 AM
I don't know what's going on with my pictures, Pablo, I must just have the "blues" myself. 
Paul, the drop arm hasn't been reshaped, just opened up the guide pivot hole for the bushing and cut notches for the 1/16" guide rotation stops.
Rick Thigpen
Check out Steve Okeefe's great web site at its new home here at Slotblog:
The Independent Scratchbuilder
There's much more to come...
#32
dc-65x
-
- Subscriber
-
- 6,993 posts Joined: 14-February 06
Grand Champion Poster
- Gender:Male
- Location:Captain Rick: The only vintage slot car nut in SW Oregon?
Posted 23 November 2015 - 09:43 PM
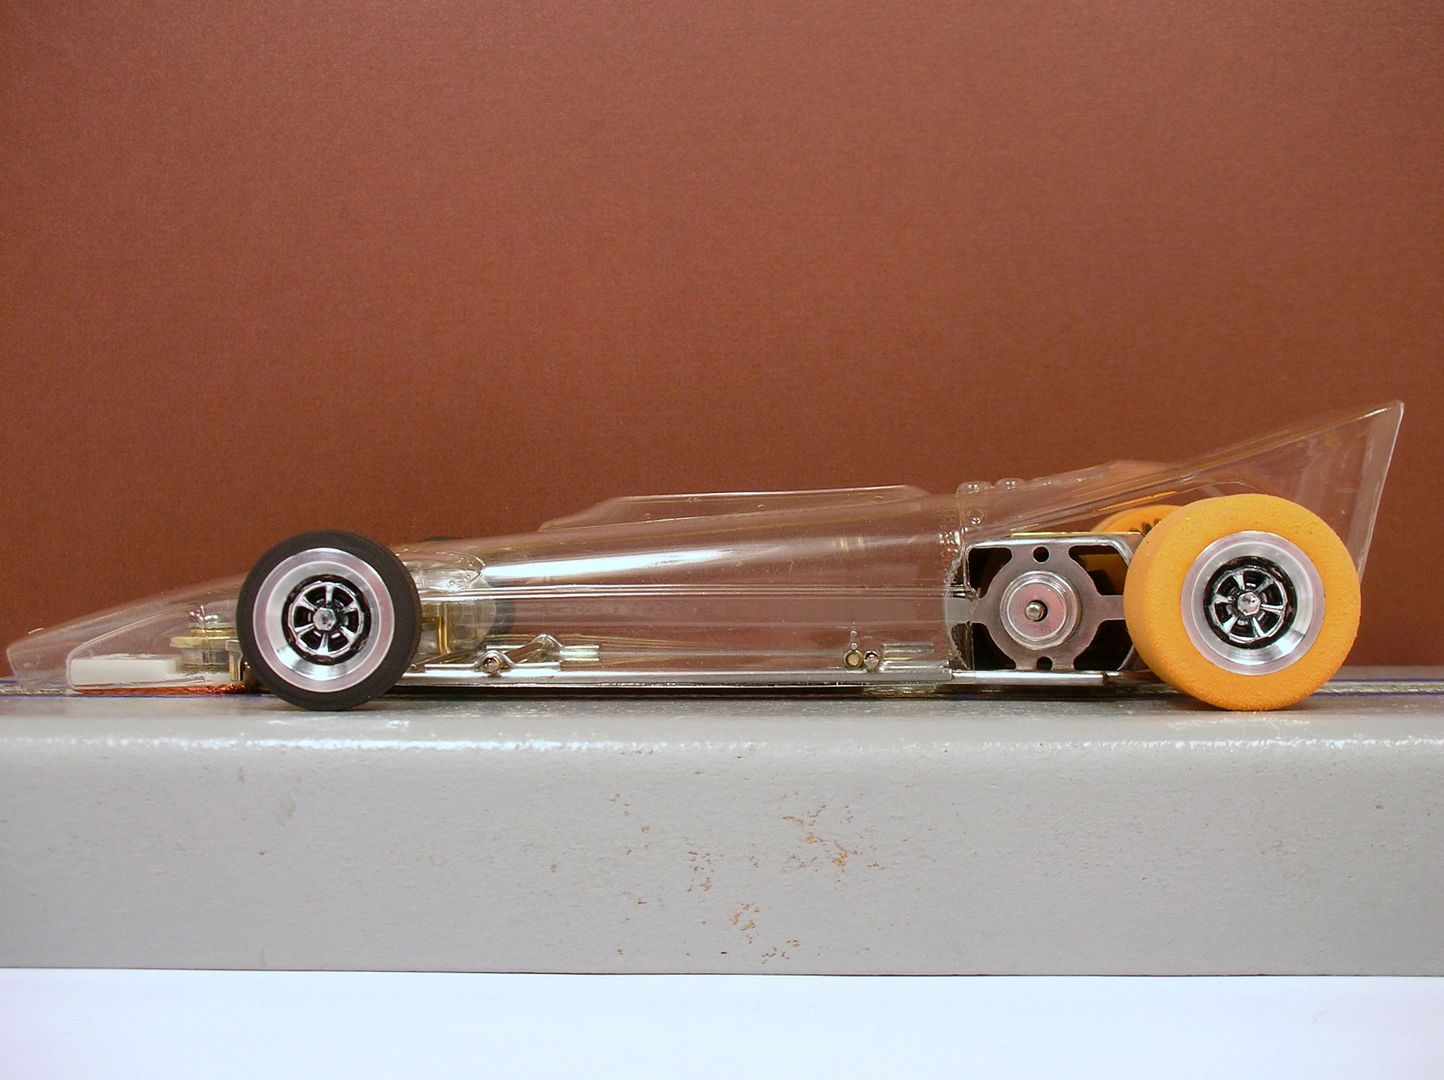
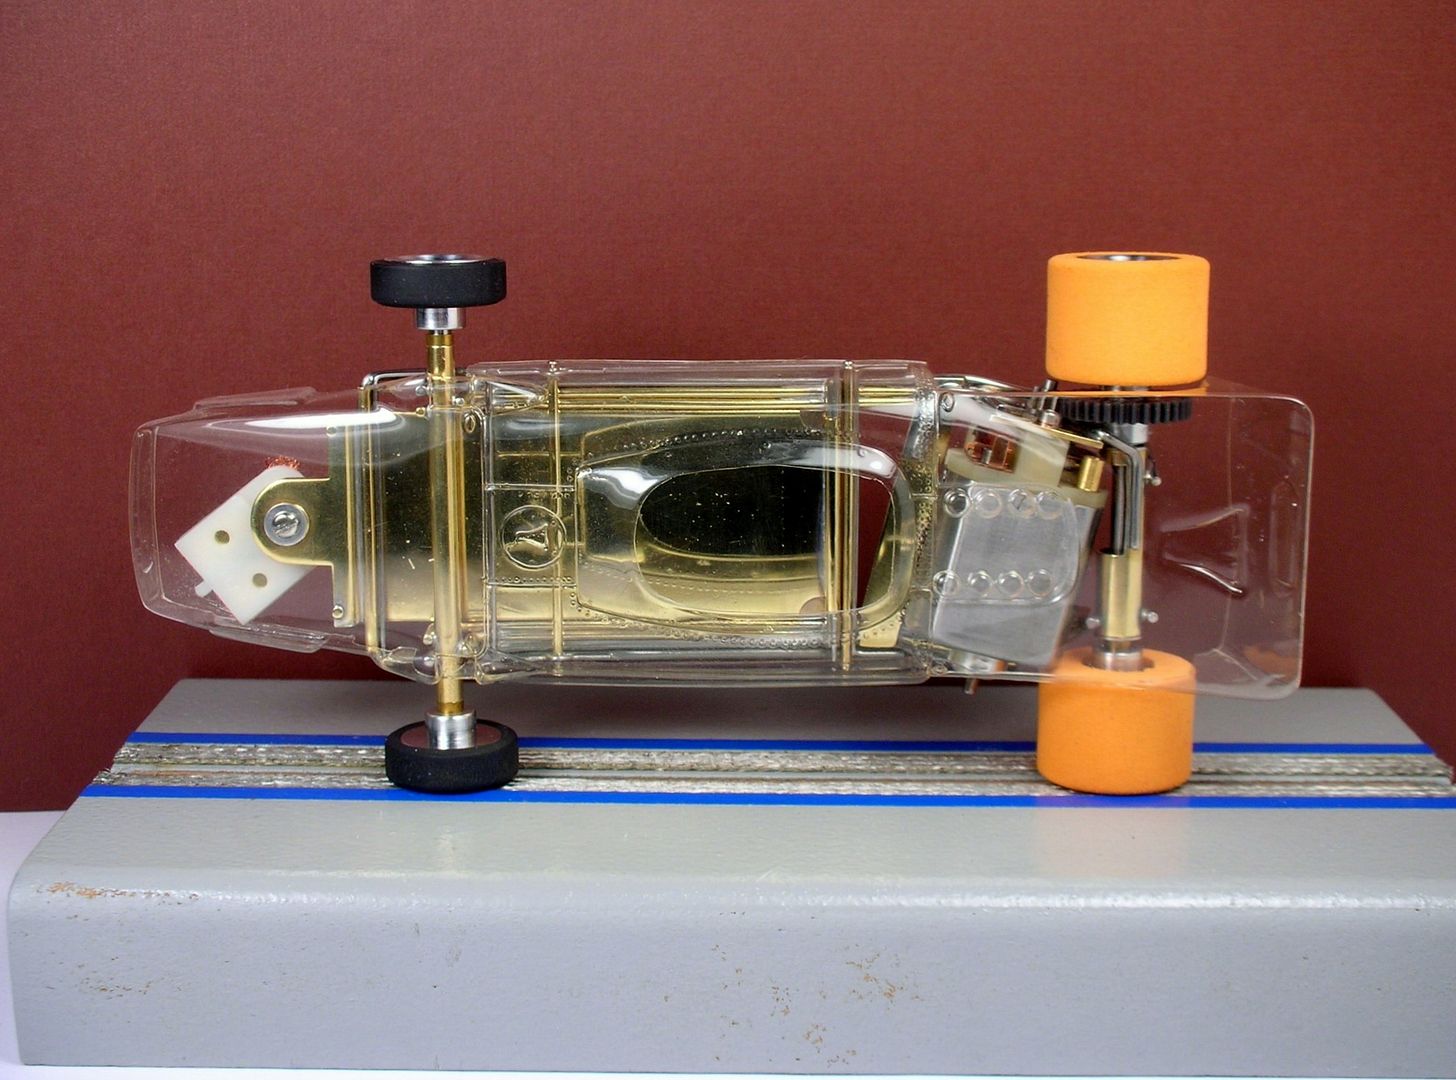
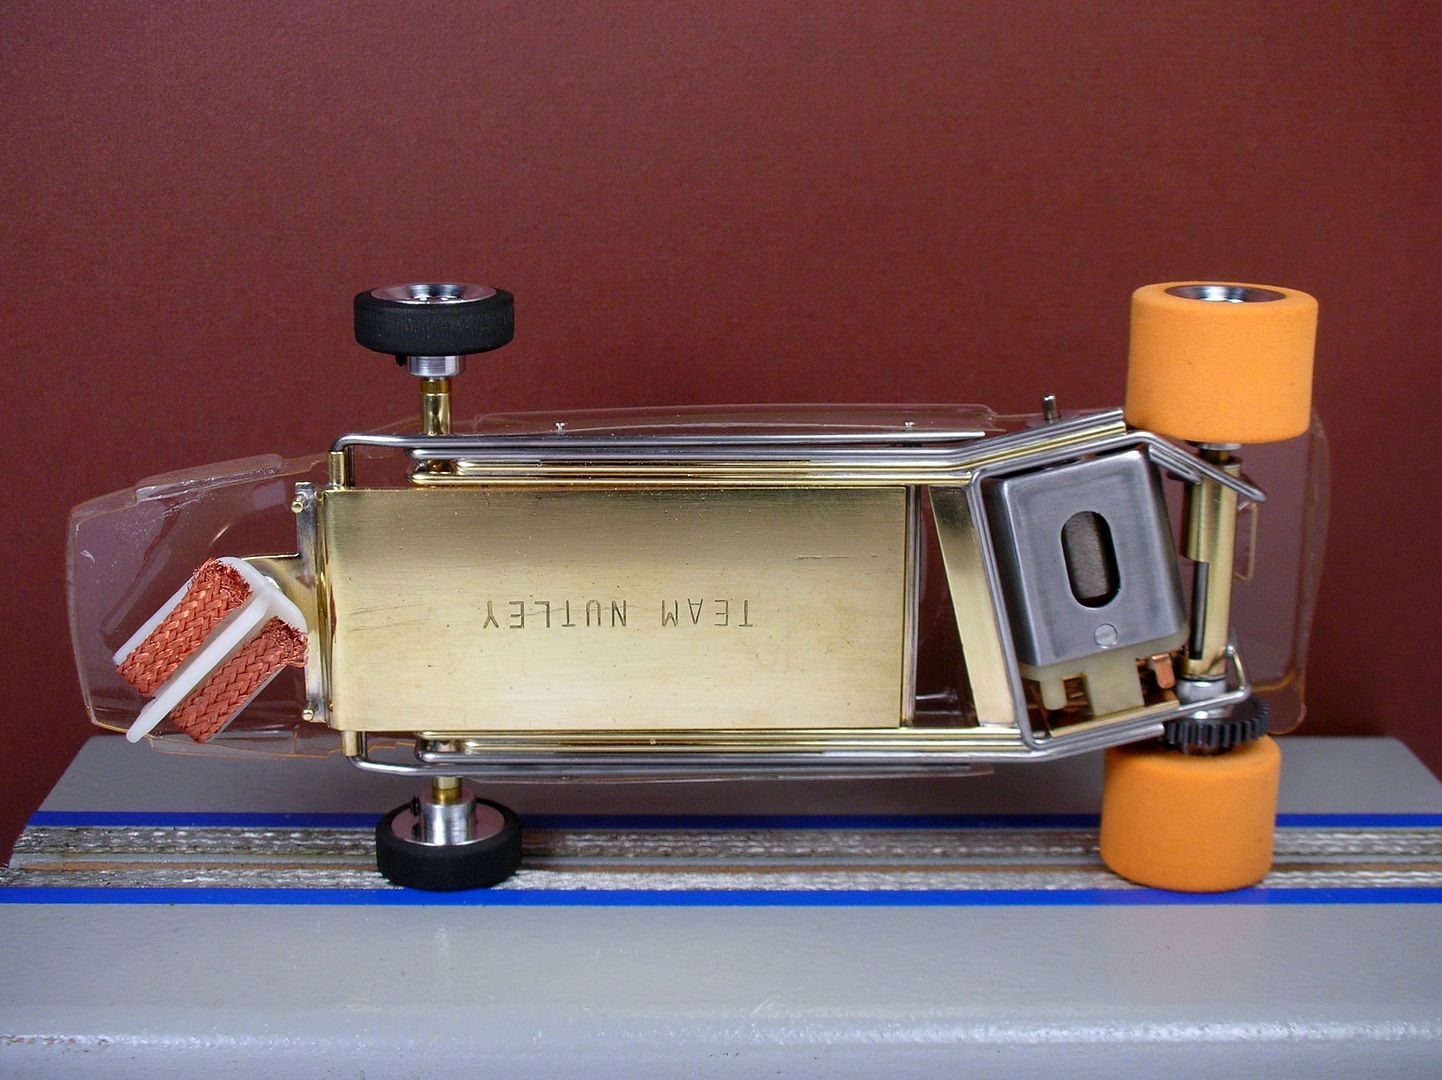
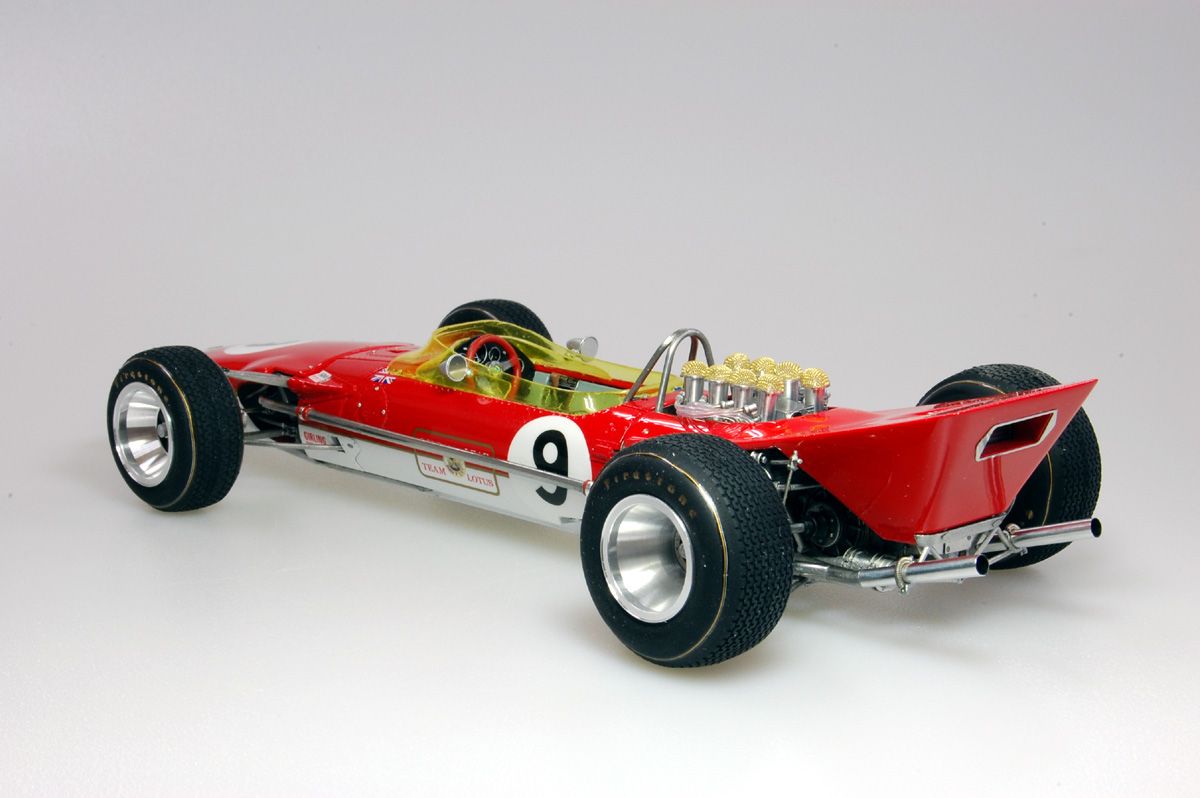
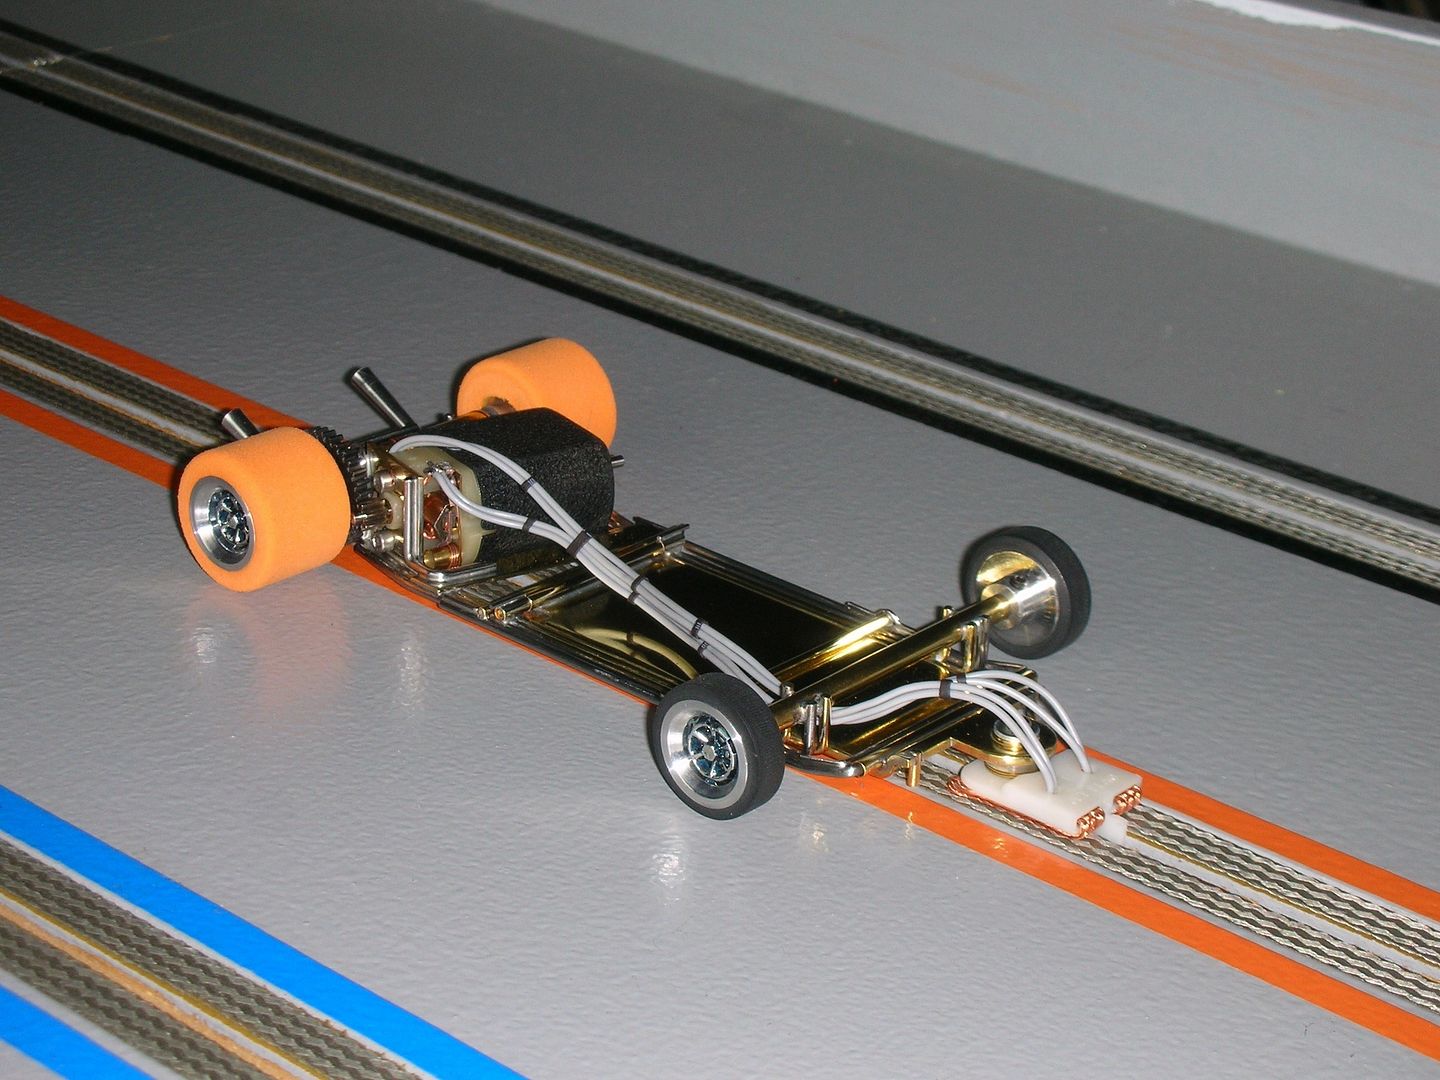
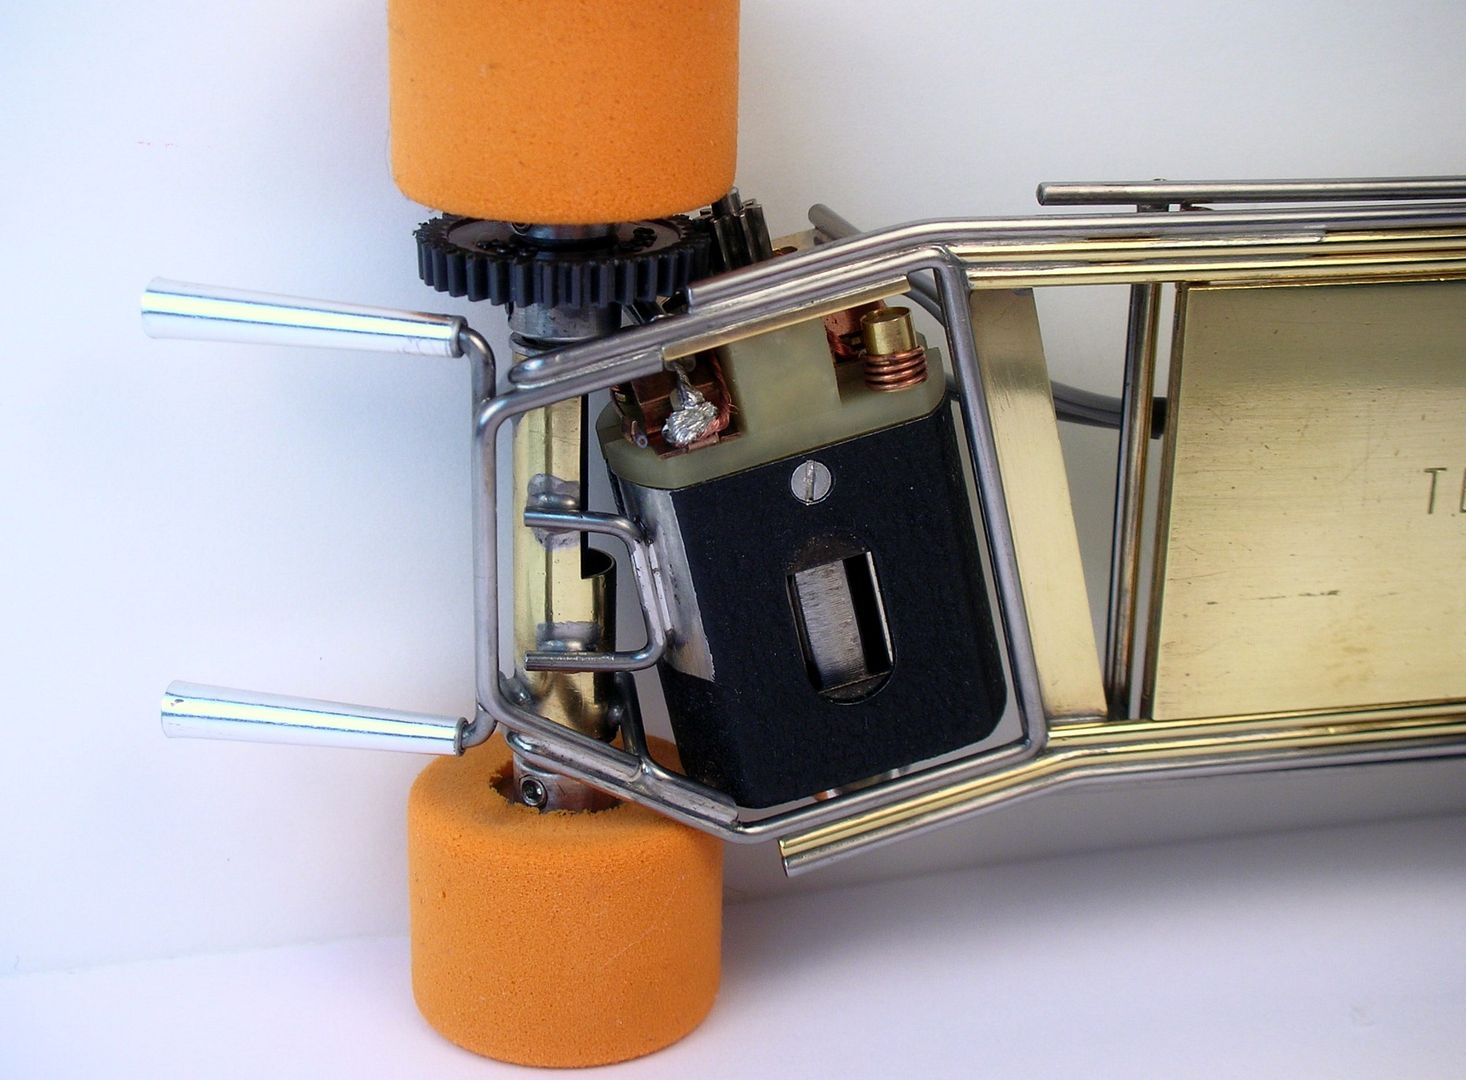
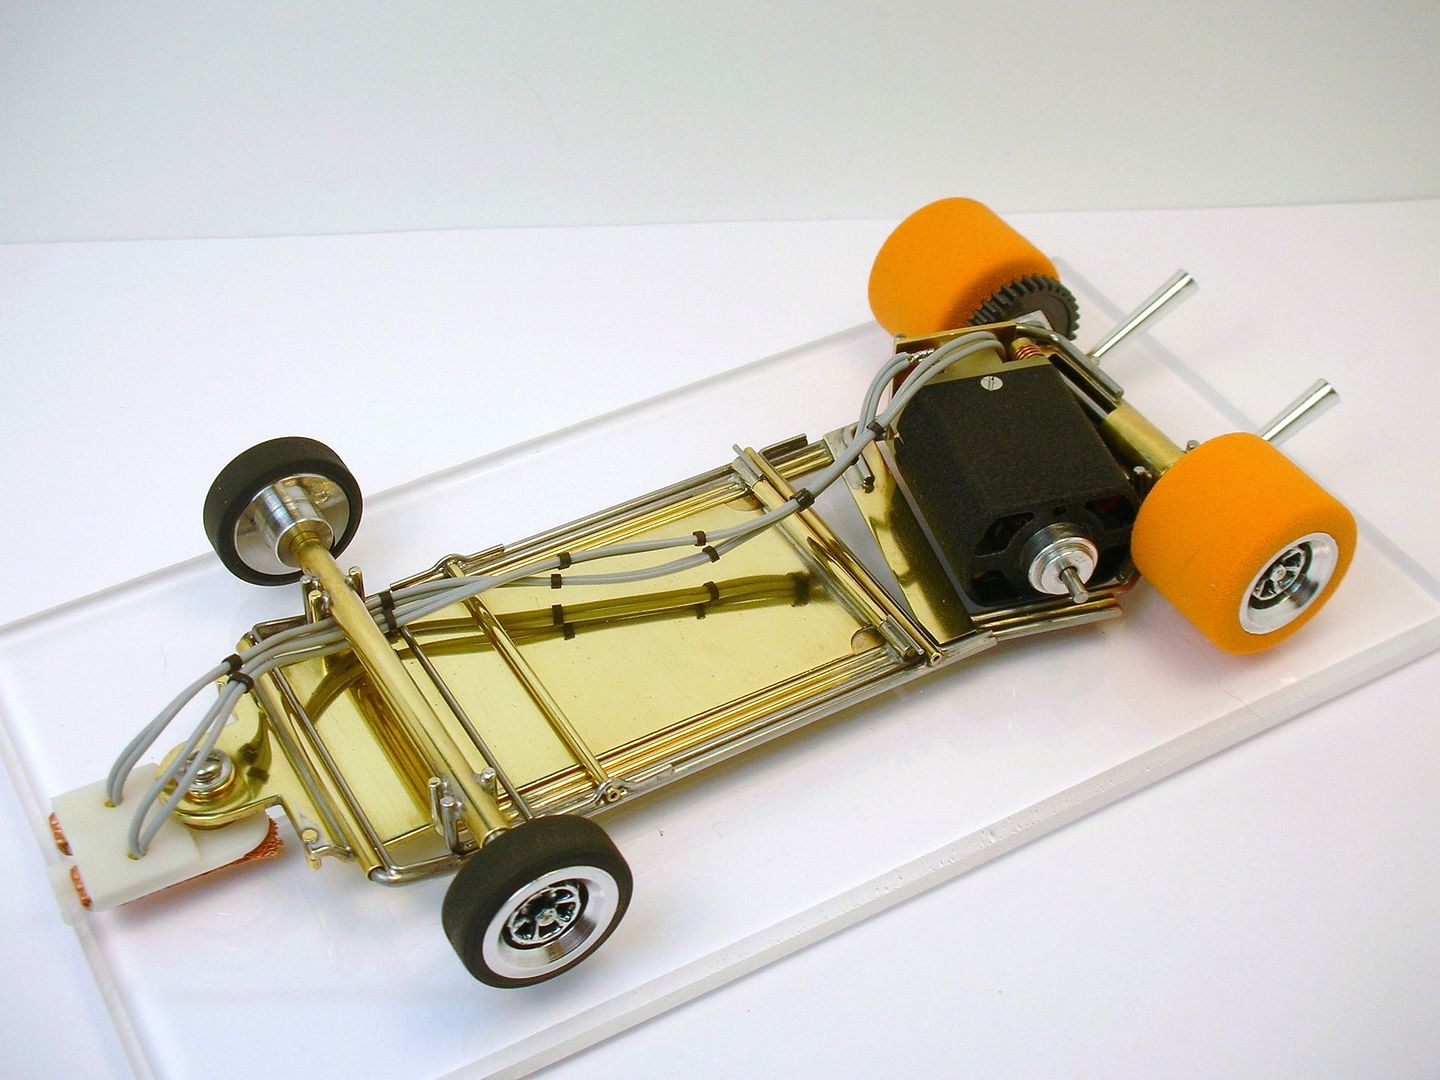
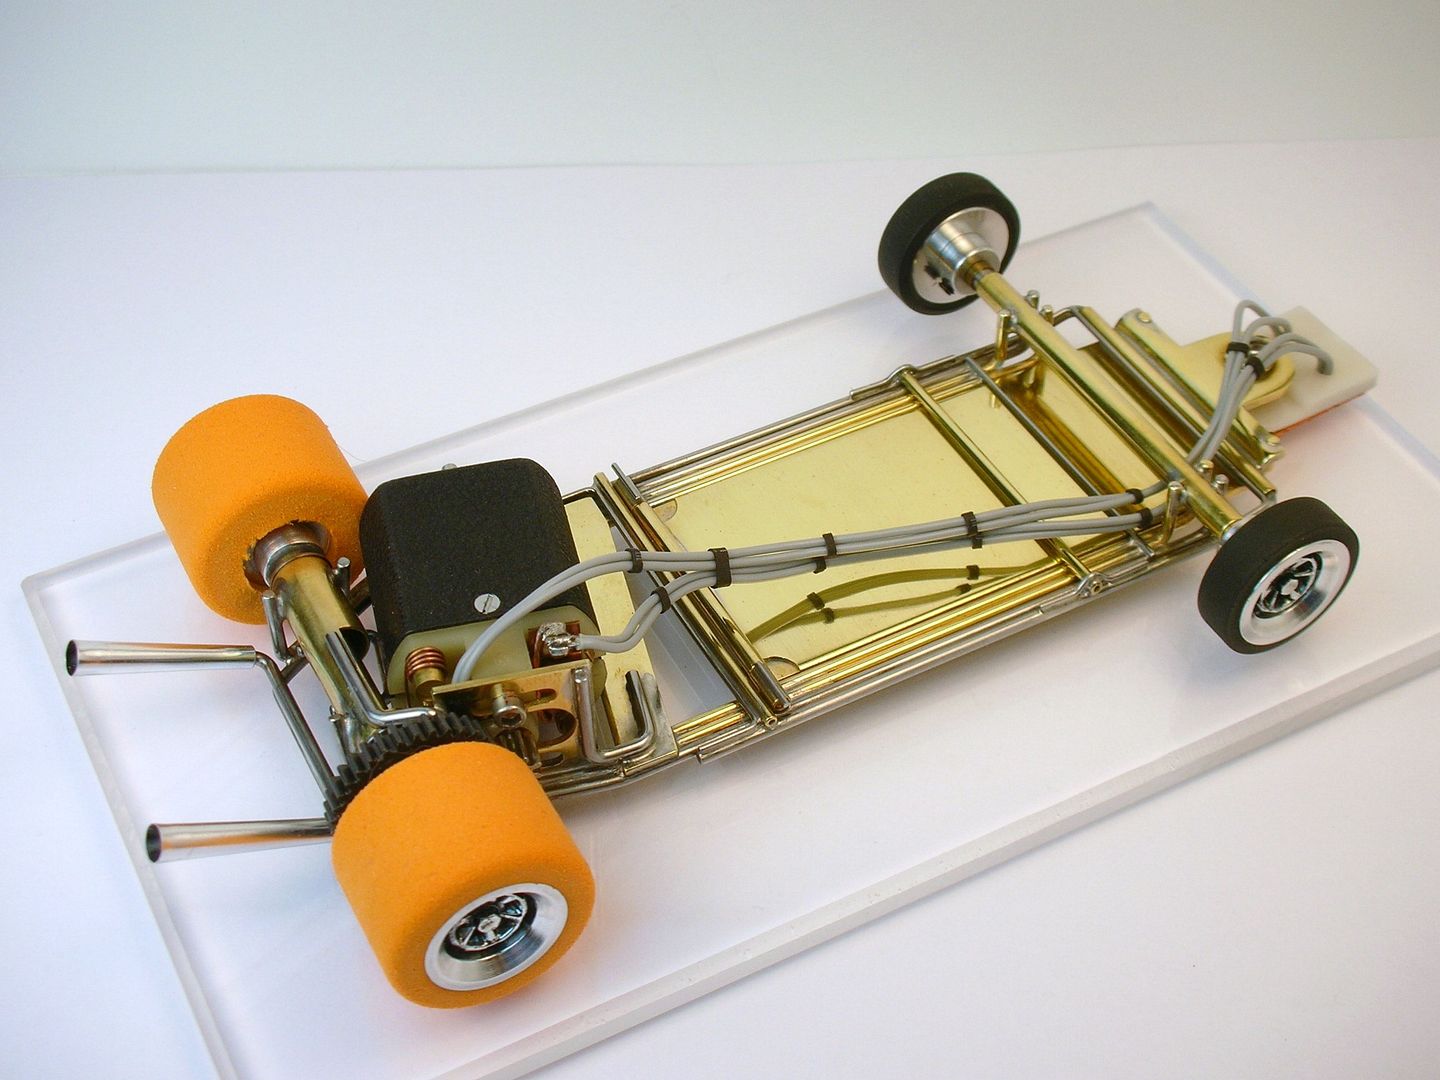
I've got the chassis all done... I hope!
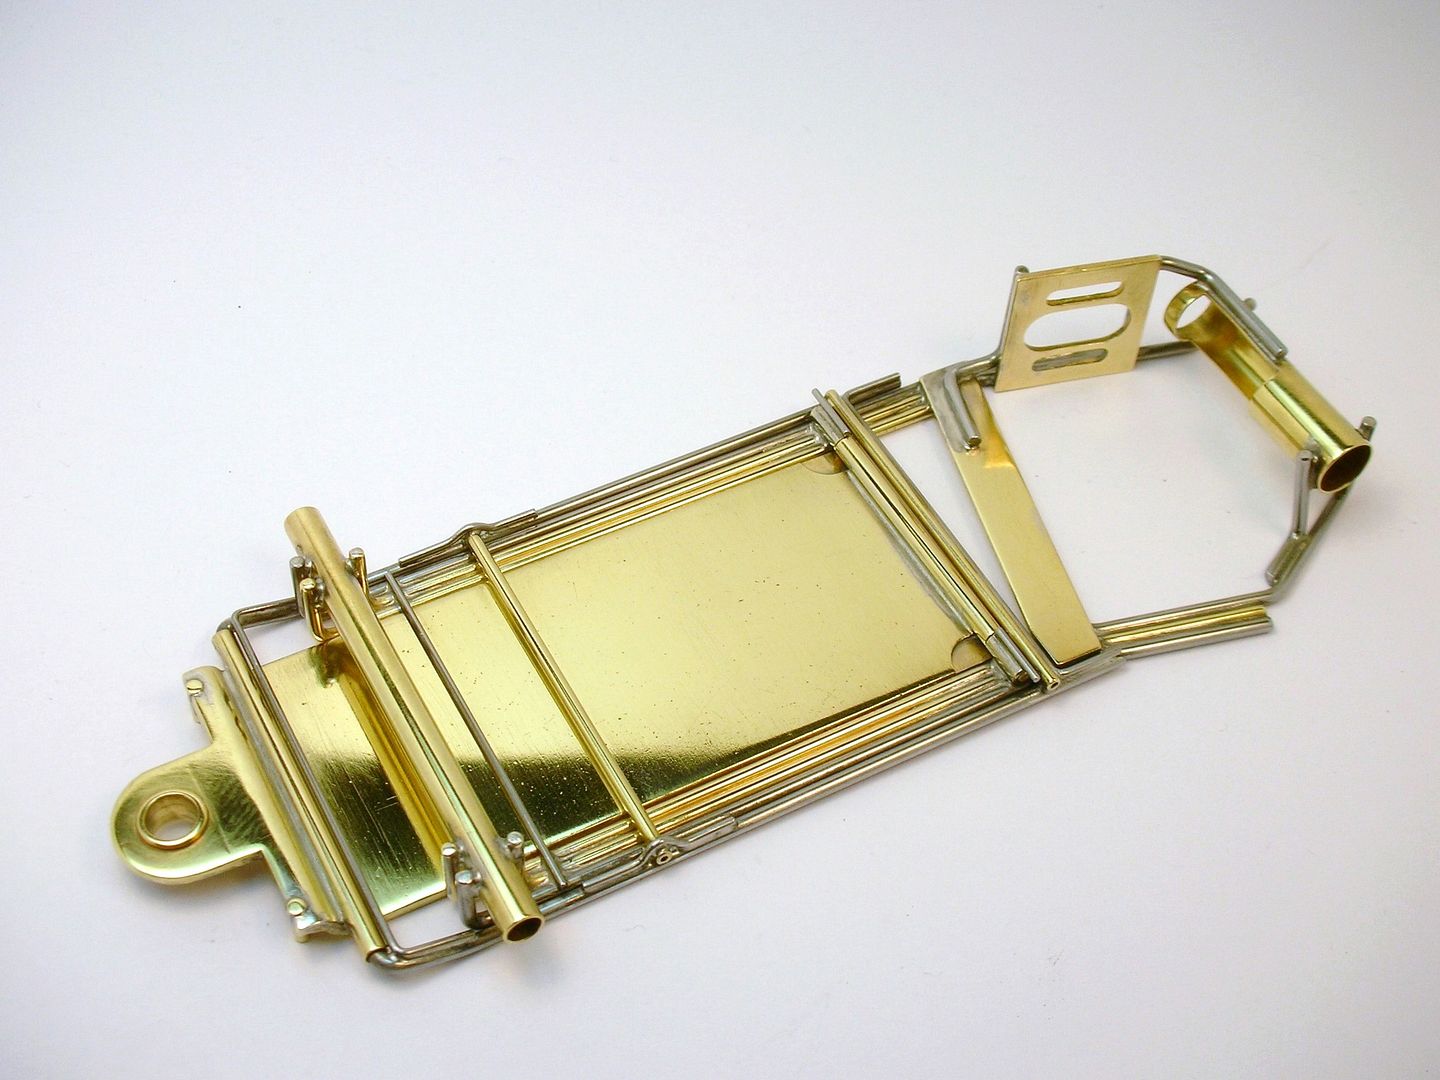
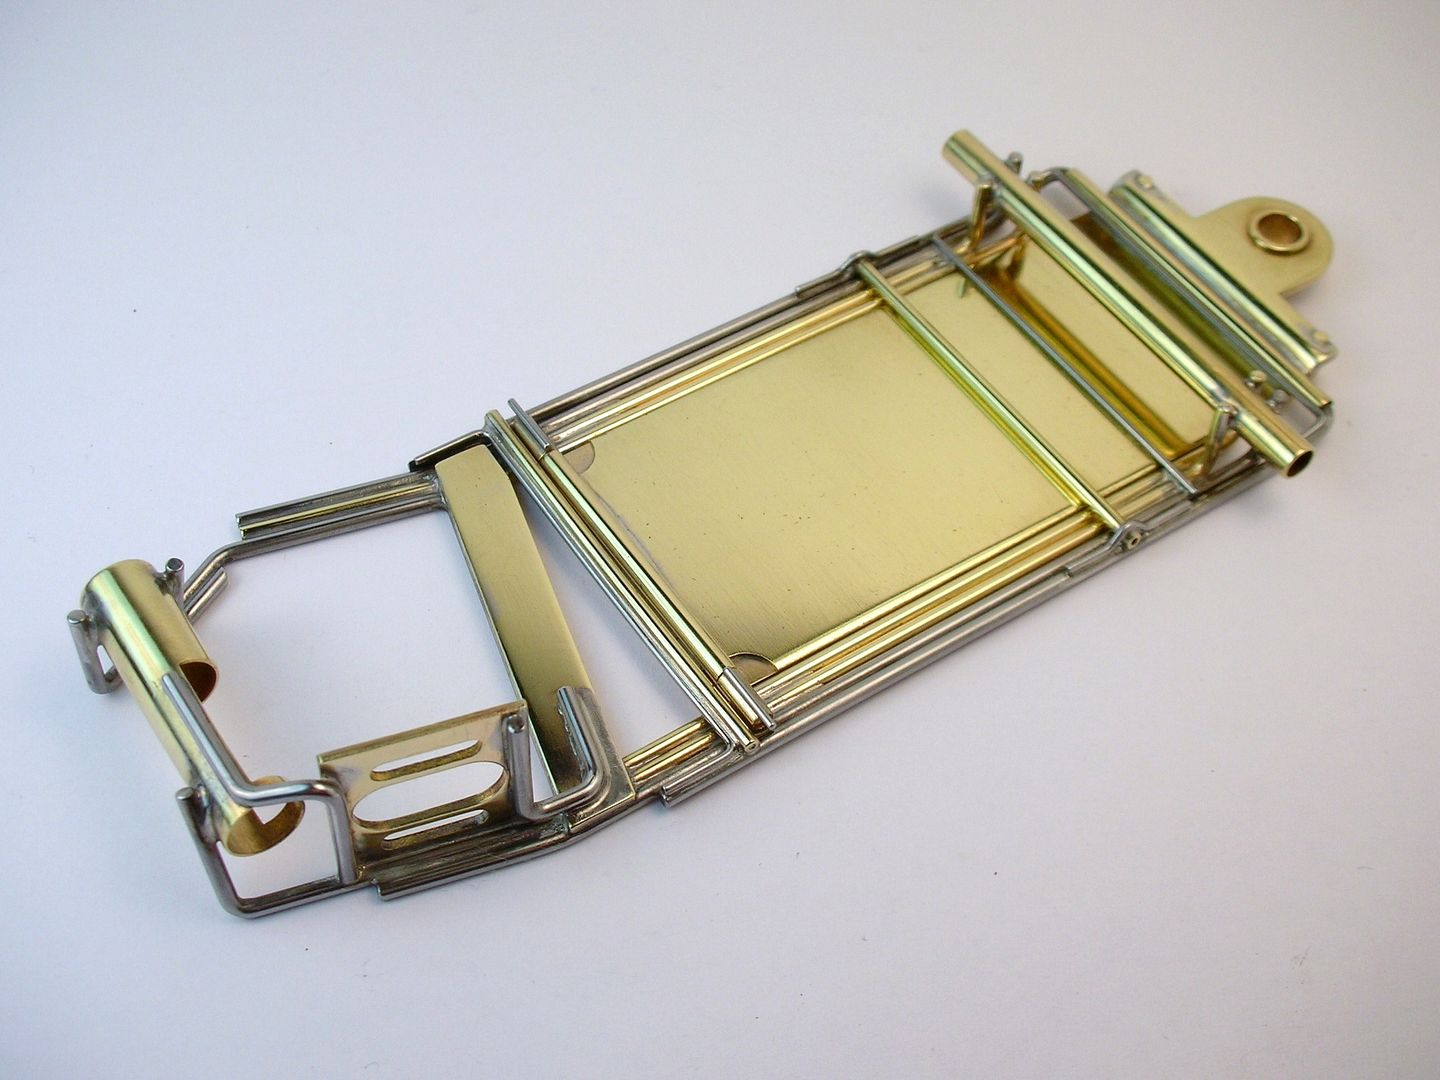
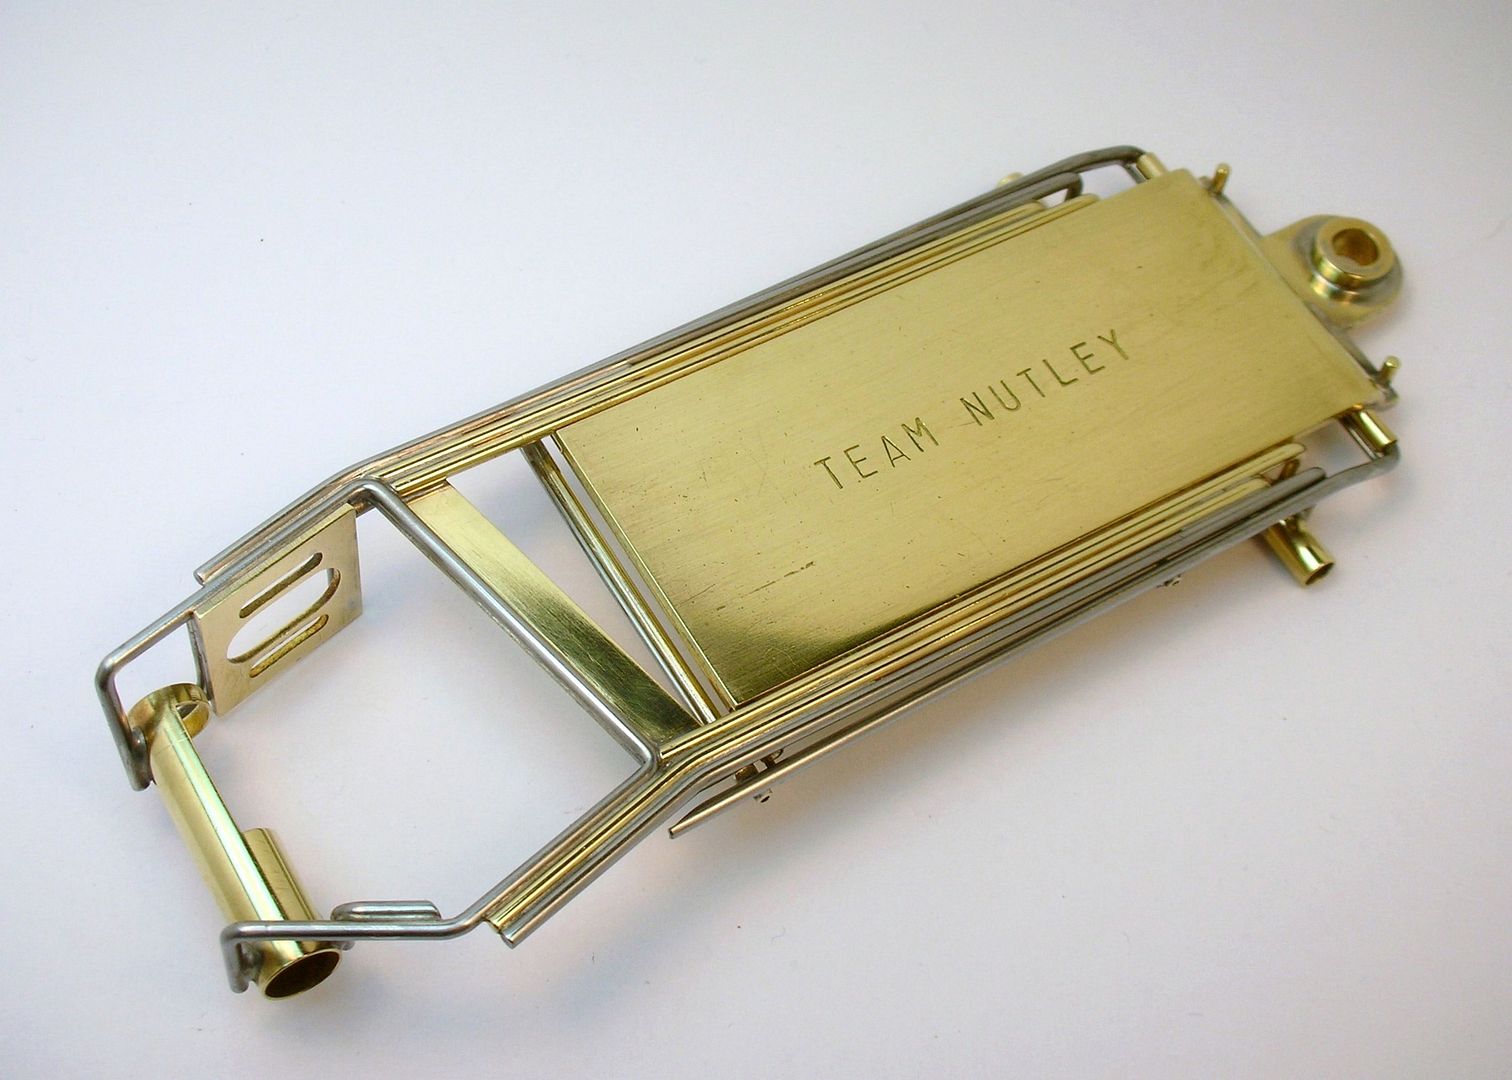
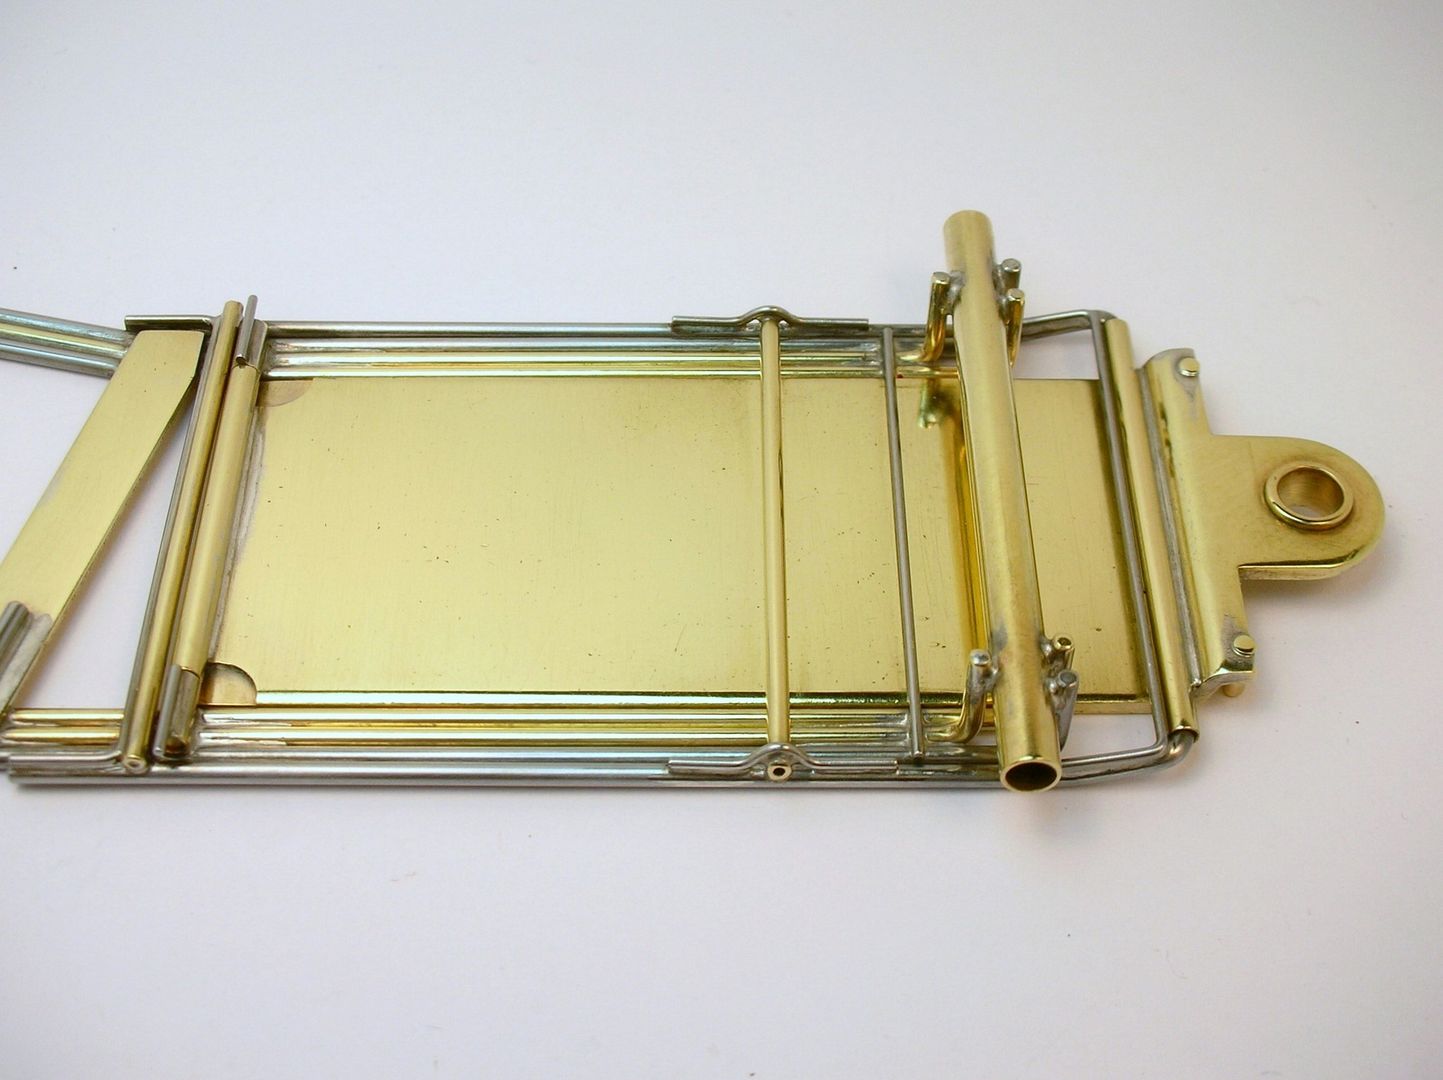
Now I've got to get the body to fit over the massive chassis and motor. 
- slotbaker, Pablo, Jencar17 and 6 others like this
Rick Thigpen
Check out Steve Okeefe's great web site at its new home here at Slotblog:
The Independent Scratchbuilder
There's much more to come...
#33
SlotStox#53
-
- Full Member
-
- 4,084 posts Joined: 13-March 13
Posting Leader
- Gender:Male
- Location:TX
Posted 23 November 2015 - 11:31 PM
Pure vintage slot car porn.
Good luck squeezing the chassis under that Lotus shell. 
Saved your pictures to compliment the "how to" article you posted and Steve's cool diagram and chassis build pictures. Will help greatly in doing one of these.
#34
dc-65x
-
- Subscriber
-
- 6,993 posts Joined: 14-February 06
Grand Champion Poster
- Gender:Male
- Location:Captain Rick: The only vintage slot car nut in SW Oregon?
Posted 29 November 2015 - 08:02 PM
It fits! 
The real car had the sides of the body open around the motor. So does this one:
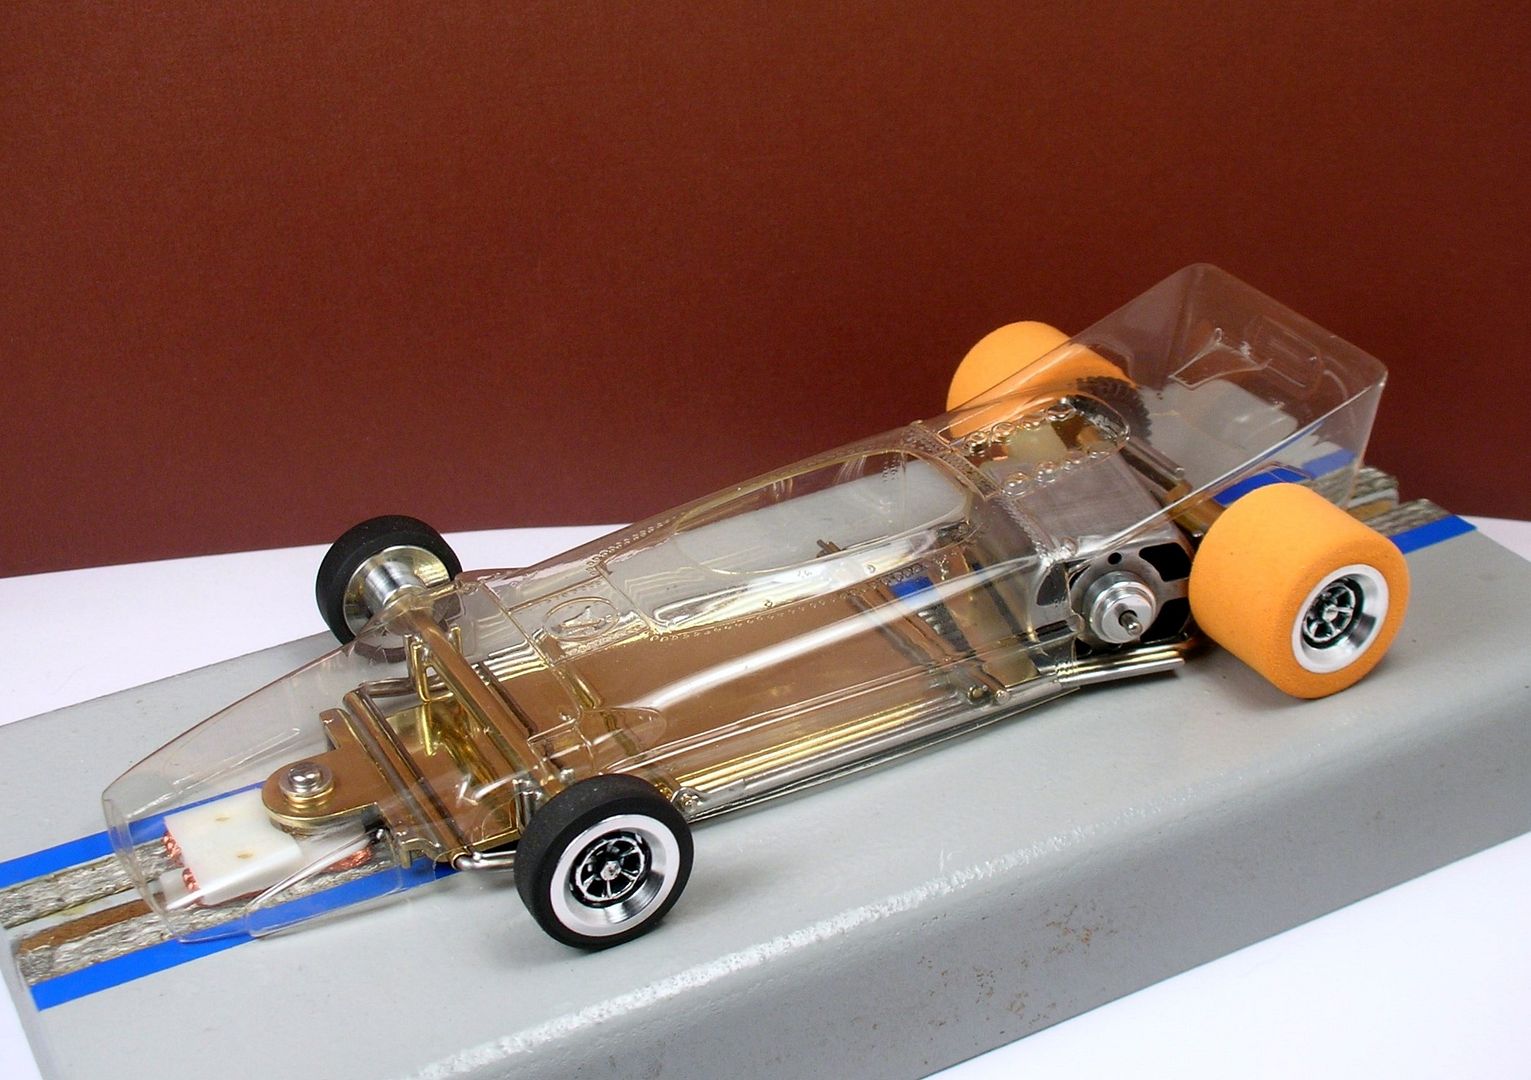
Lancer raised the back of the body up a bit more than the real car. Notice the "pipe" running down the side of the body is level with the track but the rear of the body is raised:
They might have done it for better rear downforce. But it also allows the spur gear and a bit of the rear tires some clearance:
Now that I know the body will work I'm excited to get the motor painted, assembled and this car on the track for a test. 
- slotbaker, Jencar17, Tex and 3 others like this
Rick Thigpen
Check out Steve Okeefe's great web site at its new home here at Slotblog:
The Independent Scratchbuilder
There's much more to come...
#35
SlotStox#53
-
- Full Member
-
- 4,084 posts Joined: 13-March 13
Posting Leader
- Gender:Male
- Location:TX
Posted 29 November 2015 - 08:15 PM
So relieved it fits!
One stunning car, Rick. Here's to a successful track report.
What color is it going to be?
#36
dc-65x
-
- Subscriber
-
- 6,993 posts Joined: 14-February 06
Grand Champion Poster
- Gender:Male
- Location:Captain Rick: The only vintage slot car nut in SW Oregon?
Posted 29 November 2015 - 08:51 PM
Hi Paul,
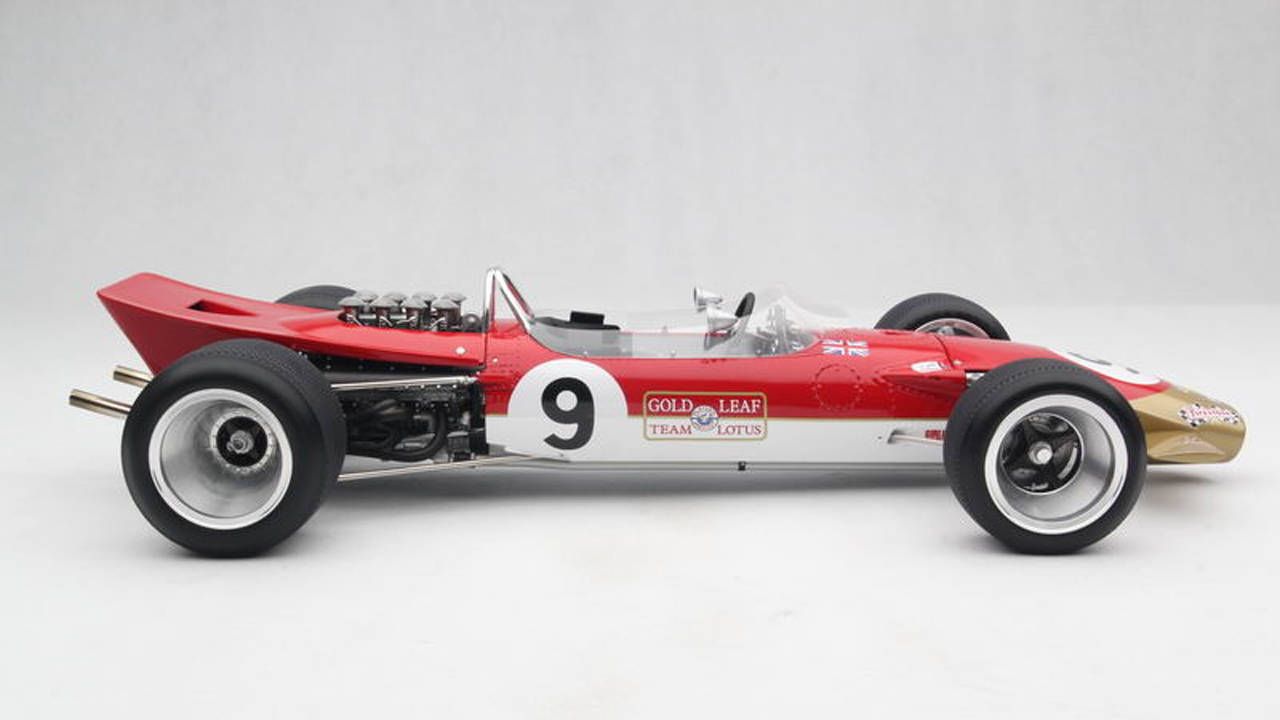
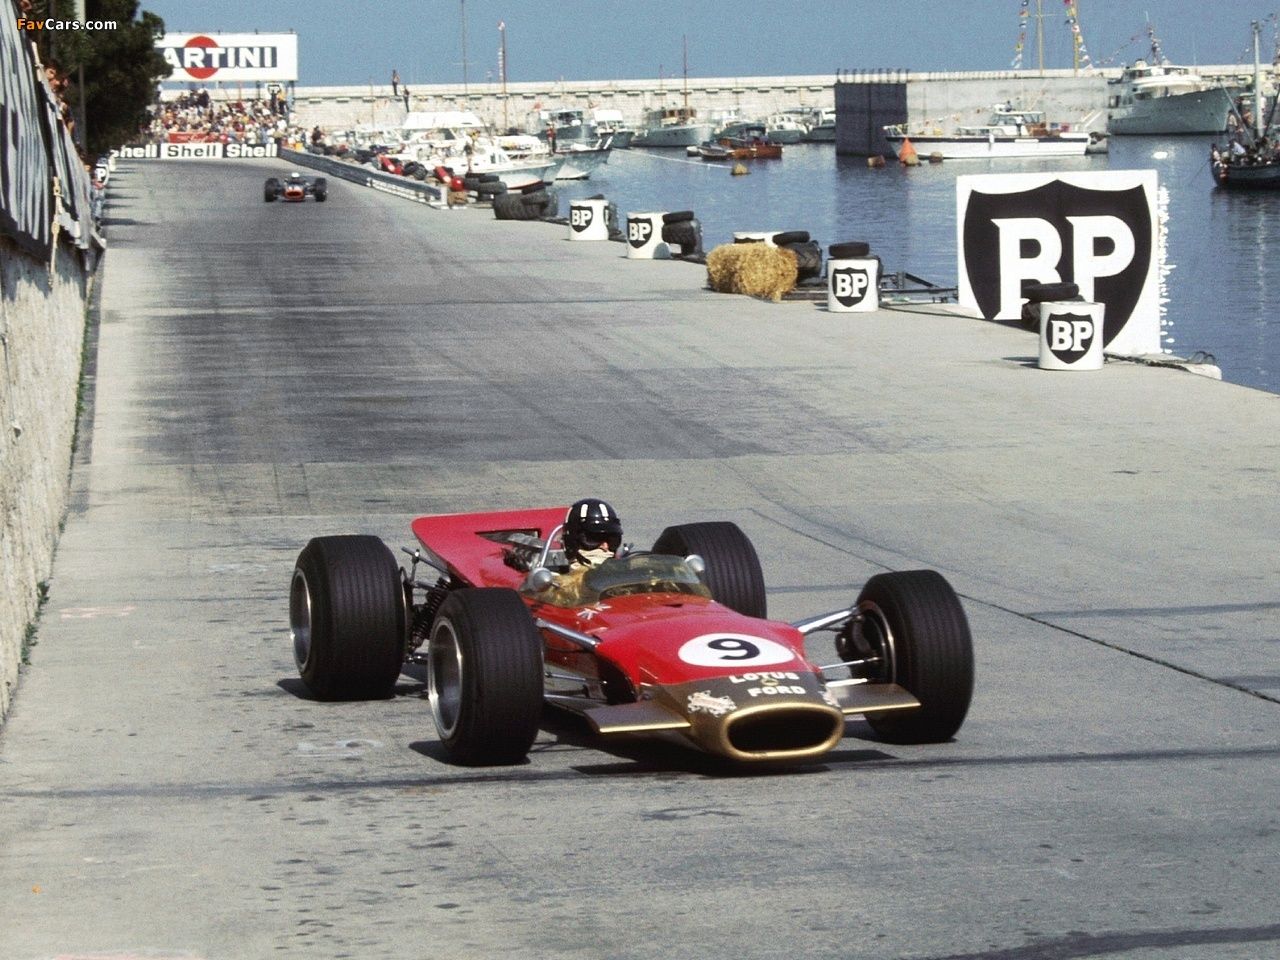
I hope to use this livery:
With "little version" of Graham Hill at the wheel:
Rick Thigpen
Check out Steve Okeefe's great web site at its new home here at Slotblog:
The Independent Scratchbuilder
There's much more to come...
#37
SlotStox#53
-
- Full Member
-
- 4,084 posts Joined: 13-March 13
Posting Leader
- Gender:Male
- Location:TX
Posted 29 November 2015 - 08:53 PM
That's just perfect.
Didn't know for sure if you'd go real life 1:1 or some cool vintage fogged type coloring.
#38
dc-65x
-
- Subscriber
-
- 6,993 posts Joined: 14-February 06
Grand Champion Poster
- Gender:Male
- Location:Captain Rick: The only vintage slot car nut in SW Oregon?
Posted 03 December 2015 - 01:00 PM
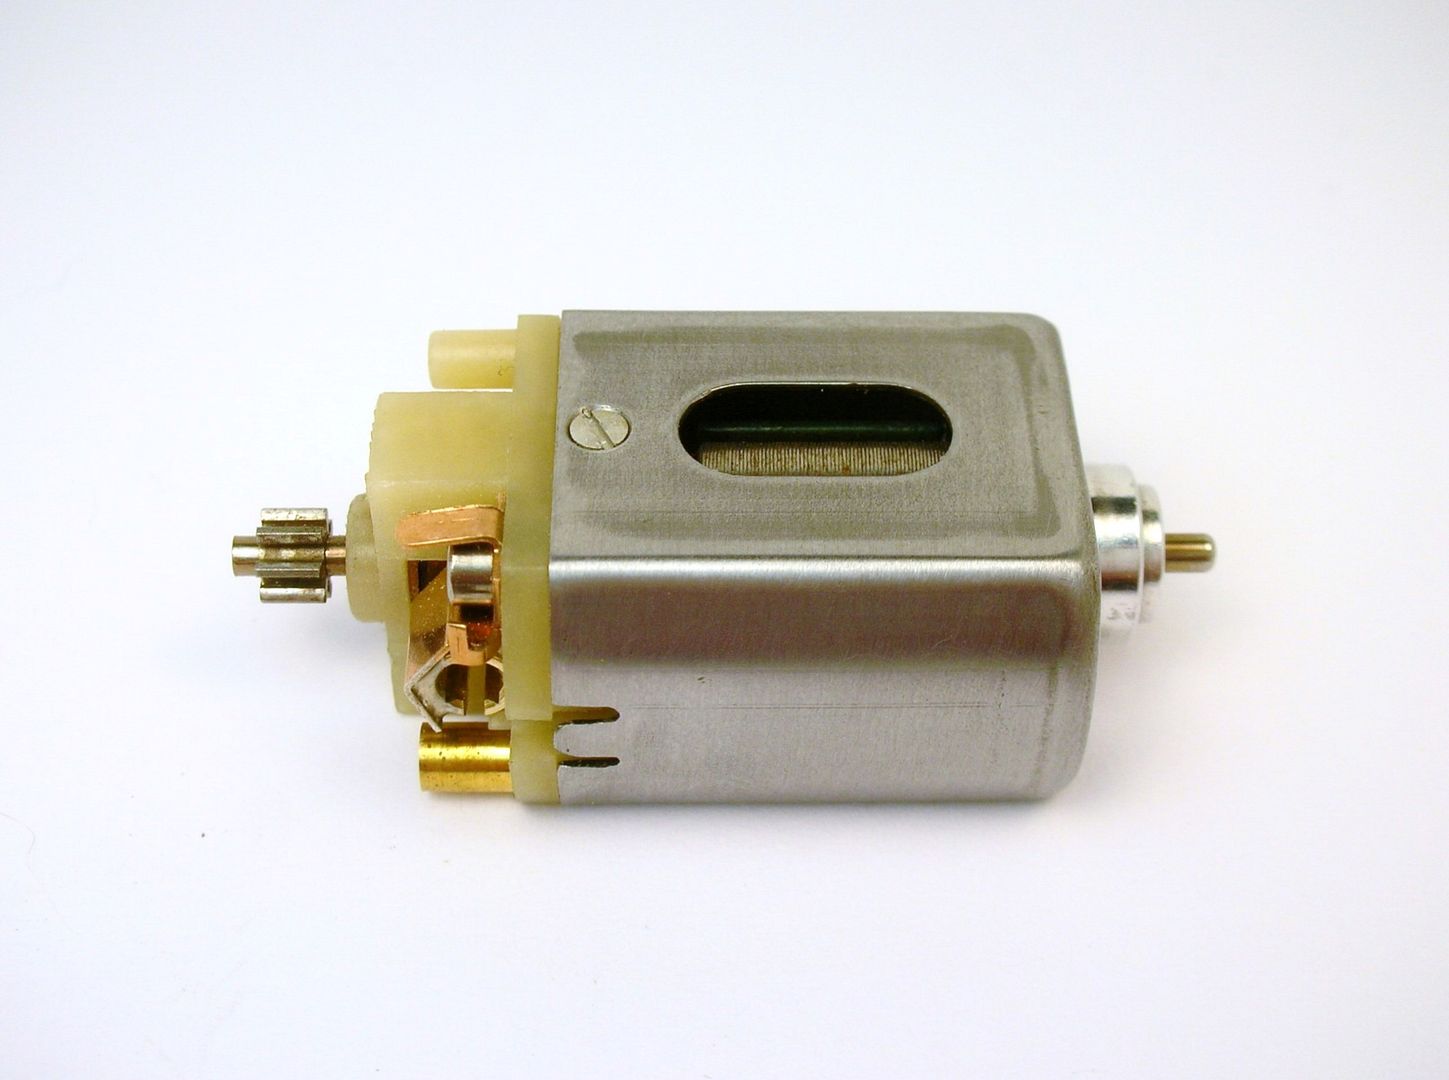
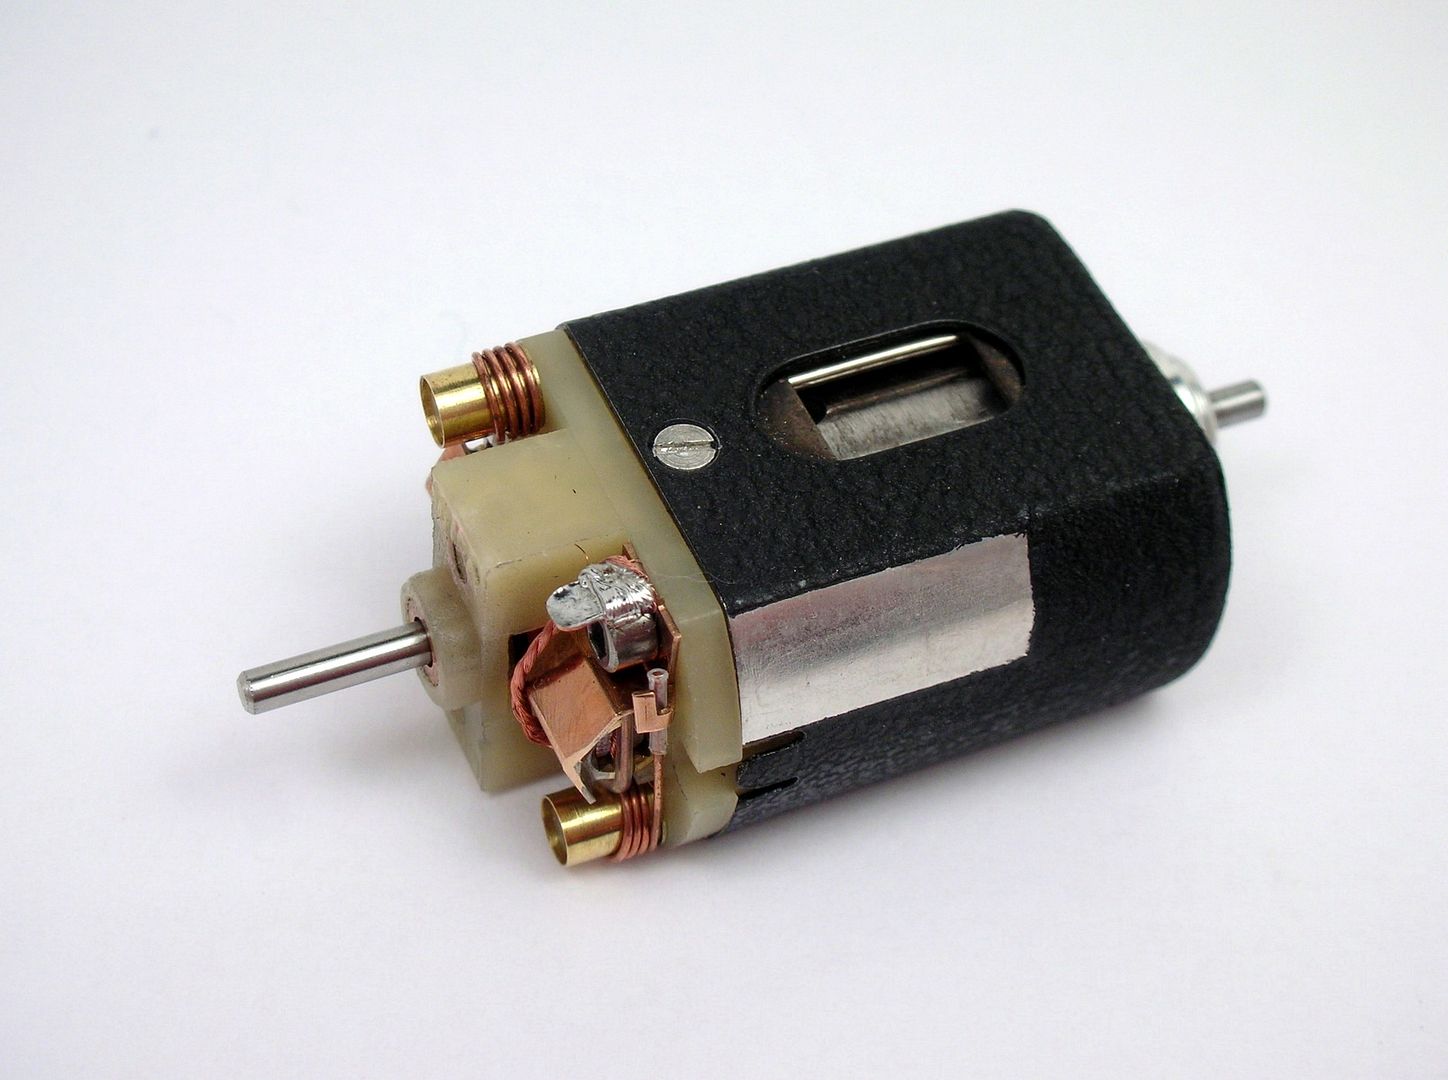
Time to turn this "jig motor" into a race motor:
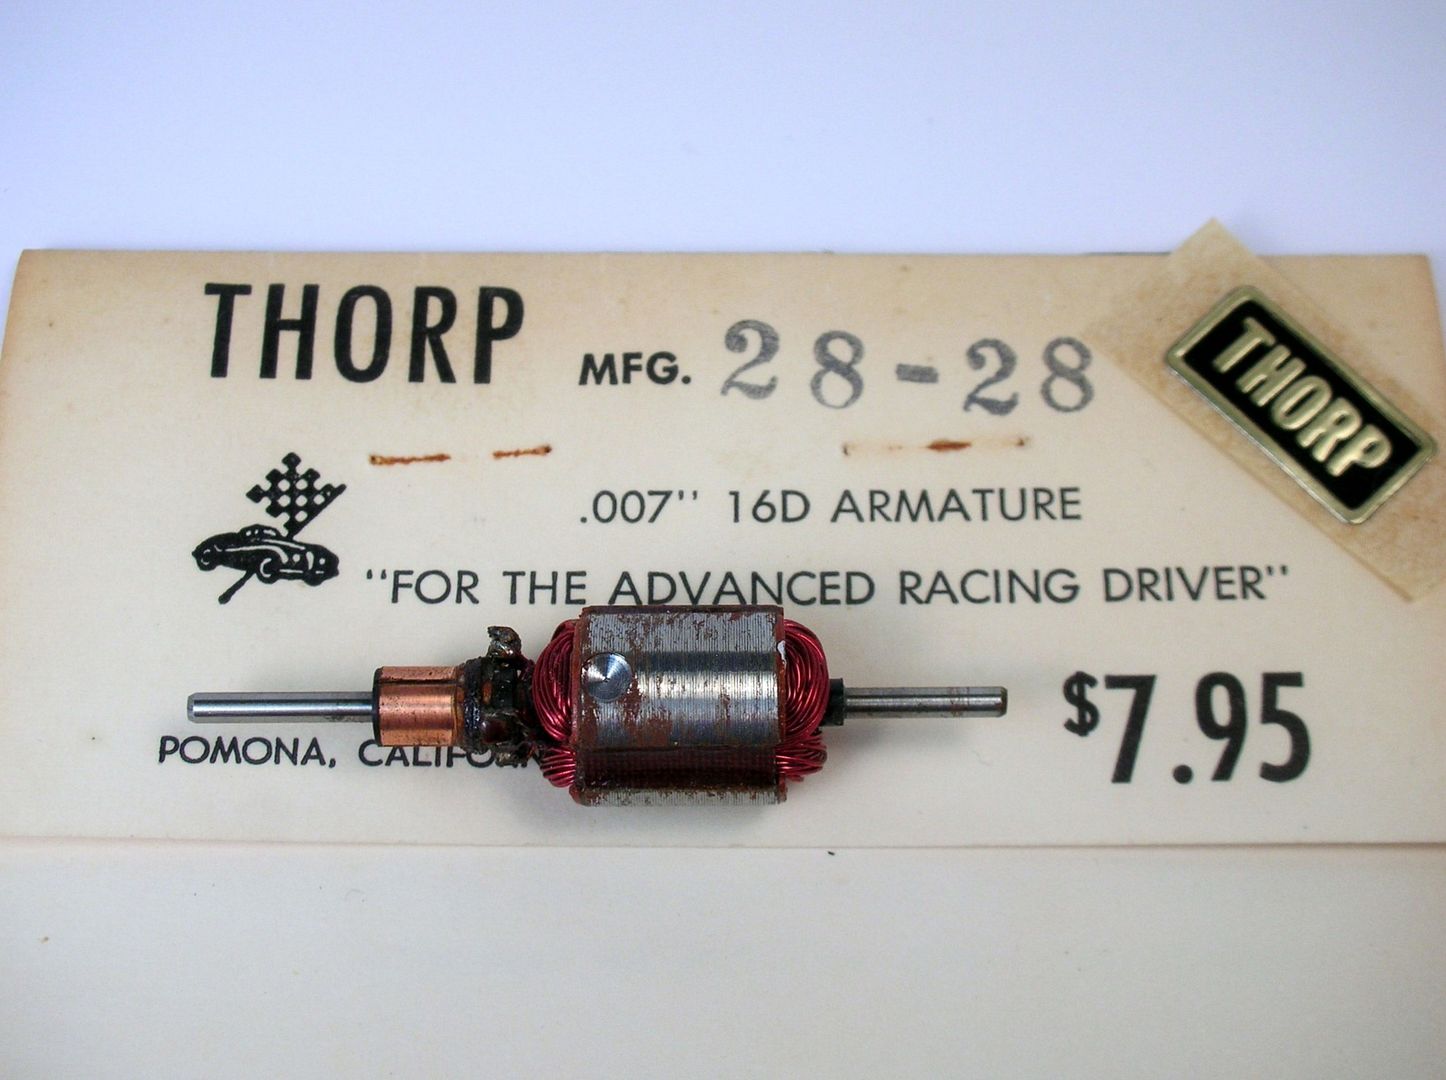
The heart of the beast, a new old stock Thorp D28 armature:
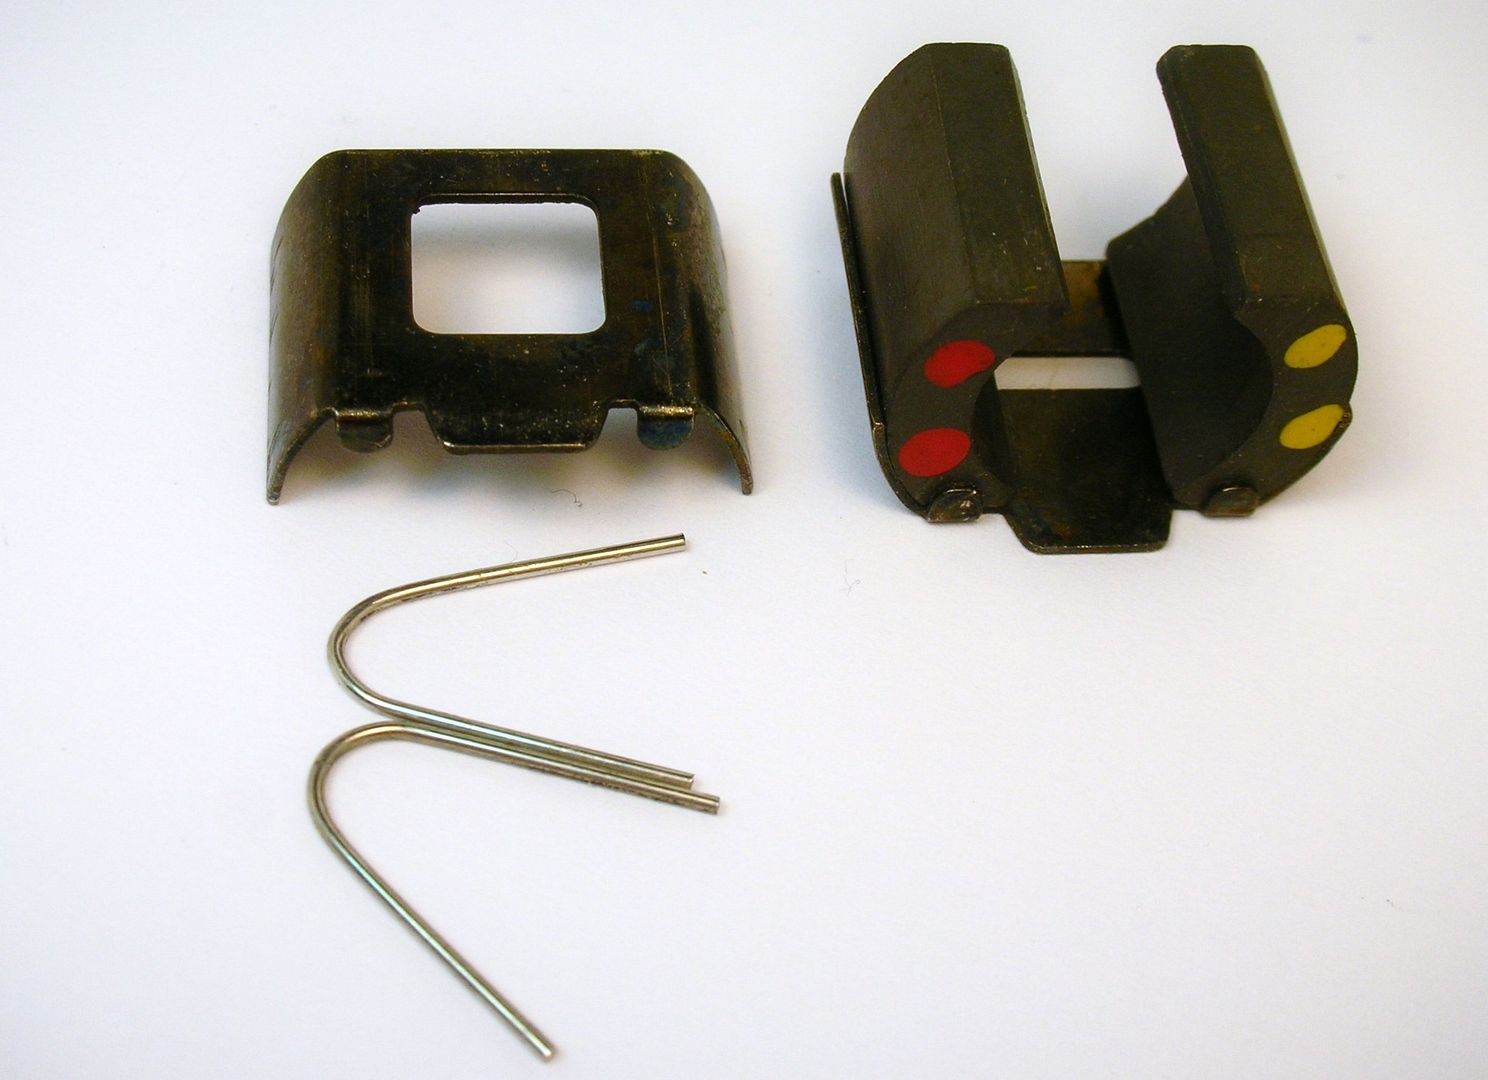
To try and tame this savage beast is a freshly-zapped Champion Arco DZ magnet and shim set:
The other parts are a Champion 525 can with a fresh coat of black wrinkle paint (except for the tinned and masked of area where the motor will be soldered into the frame). Also being used are Mura endbell, shunted brushes, brush springs, and spring post protectors.
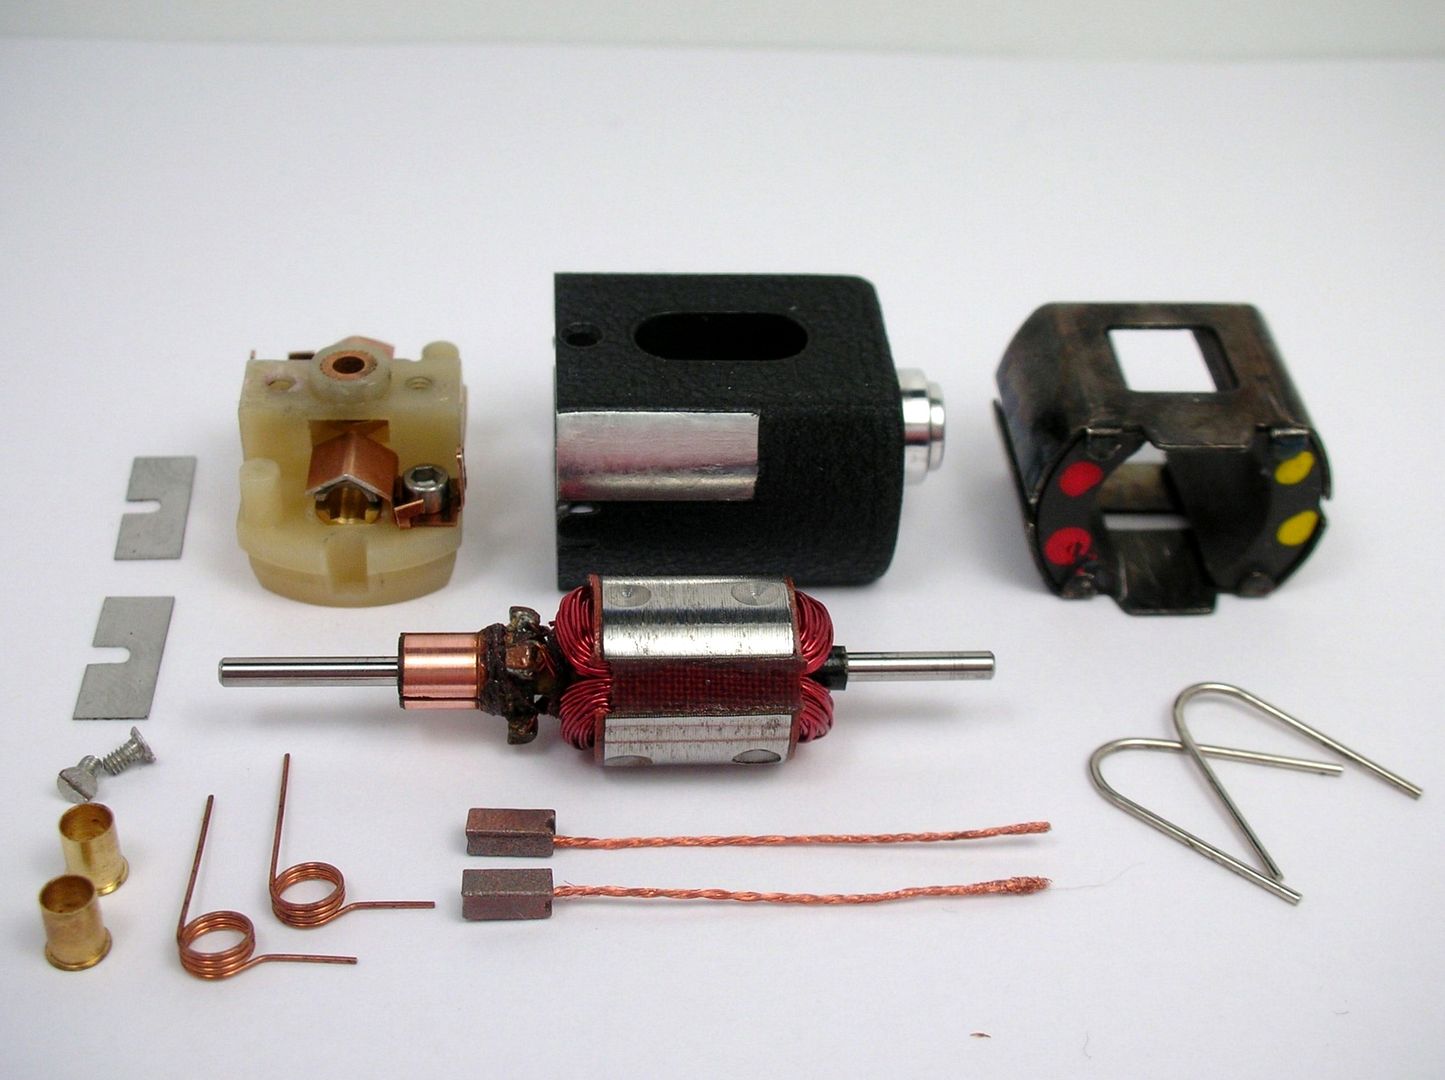
This motor runs smooth as silk and settled down to a 1 amp draw during its 2 volt break-in:
I hope to hit the track for testing soon...
- slotbaker, Jencar17, Tex and 1 other like this
Rick Thigpen
Check out Steve Okeefe's great web site at its new home here at Slotblog:
The Independent Scratchbuilder
There's much more to come...
#39
SlotStox#53
-
- Full Member
-
- 4,084 posts Joined: 13-March 13
Posting Leader
- Gender:Male
- Location:TX
Posted 03 December 2015 - 01:49 PM
Thorp double arm, DZ magnets, Mura endbell of the unmeltable kind =
Just the perfect parts list right out of the magazine ads!
Just the perfect parts list right out of the magazine ads!
#40
Pablo
-
- Administrator
-
- 18,460 posts Joined: 20-February 06
Builder
- Gender:Male
- Location:Cleveland, Tennessee
Posted 03 December 2015 - 04:23 PM
Paul Wolcott
#41
dc-65x
-
- Subscriber
-
- 6,993 posts Joined: 14-February 06
Grand Champion Poster
- Gender:Male
- Location:Captain Rick: The only vintage slot car nut in SW Oregon?
Posted 03 December 2015 - 10:18 PM
Okie-dokie, guys, I couldn't help myself. Check out these stacks and honkin' pipes:
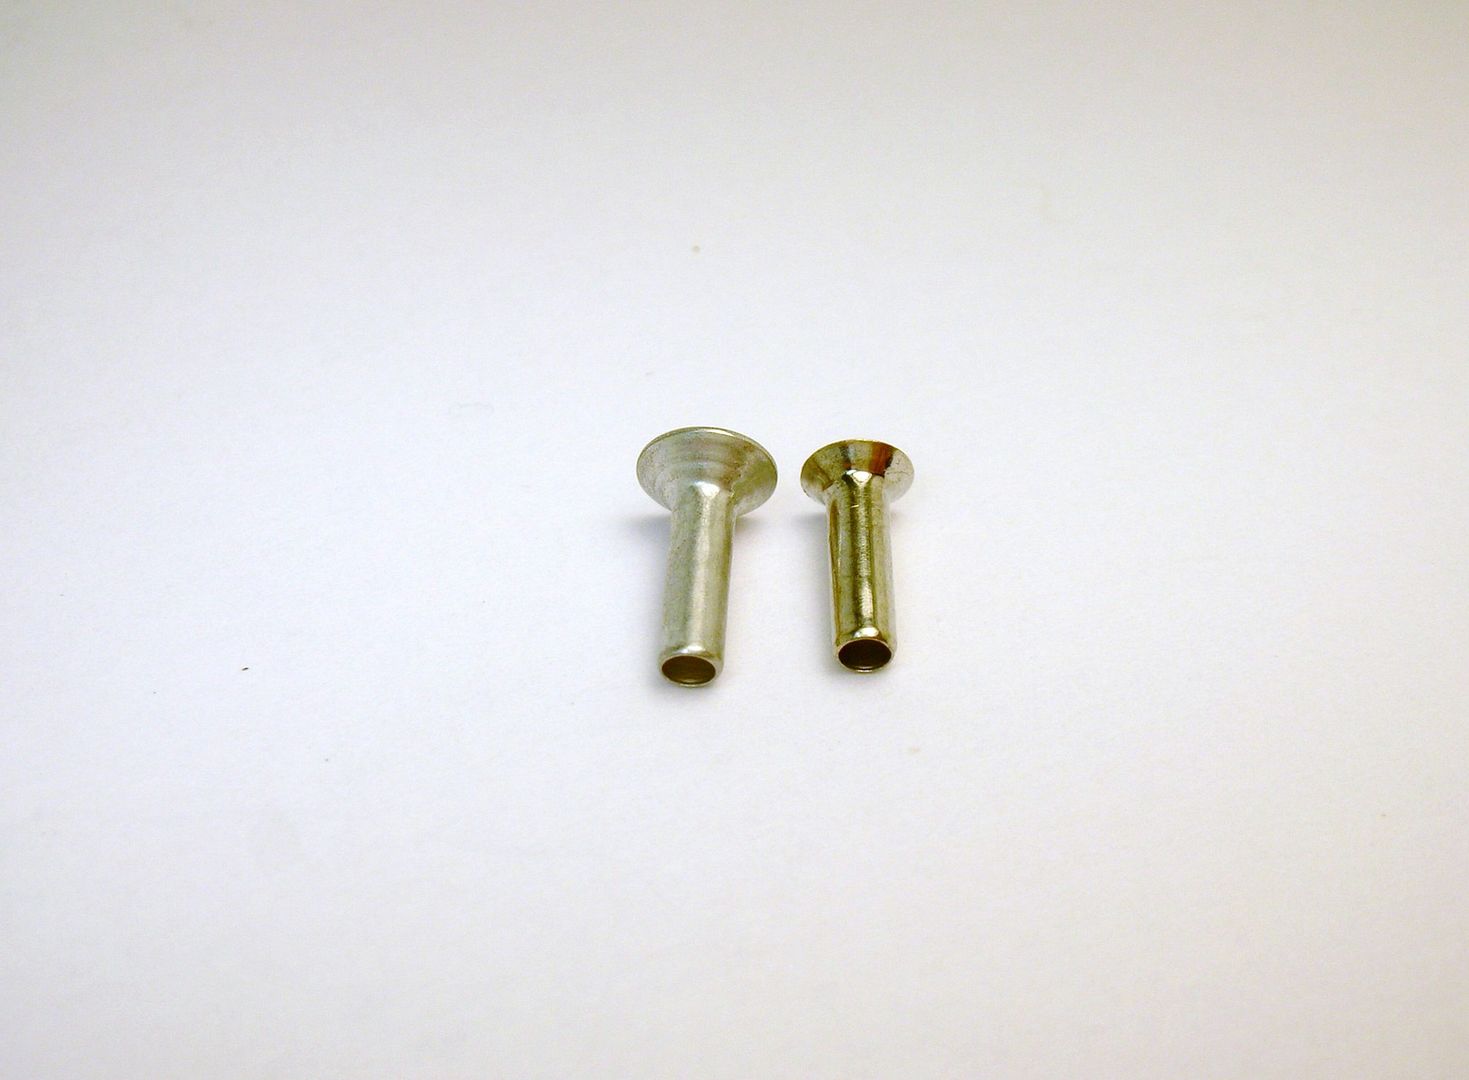
For pipes (exhaust pipe "trumpets") I've been using these vintage packaged pieces pictured below:
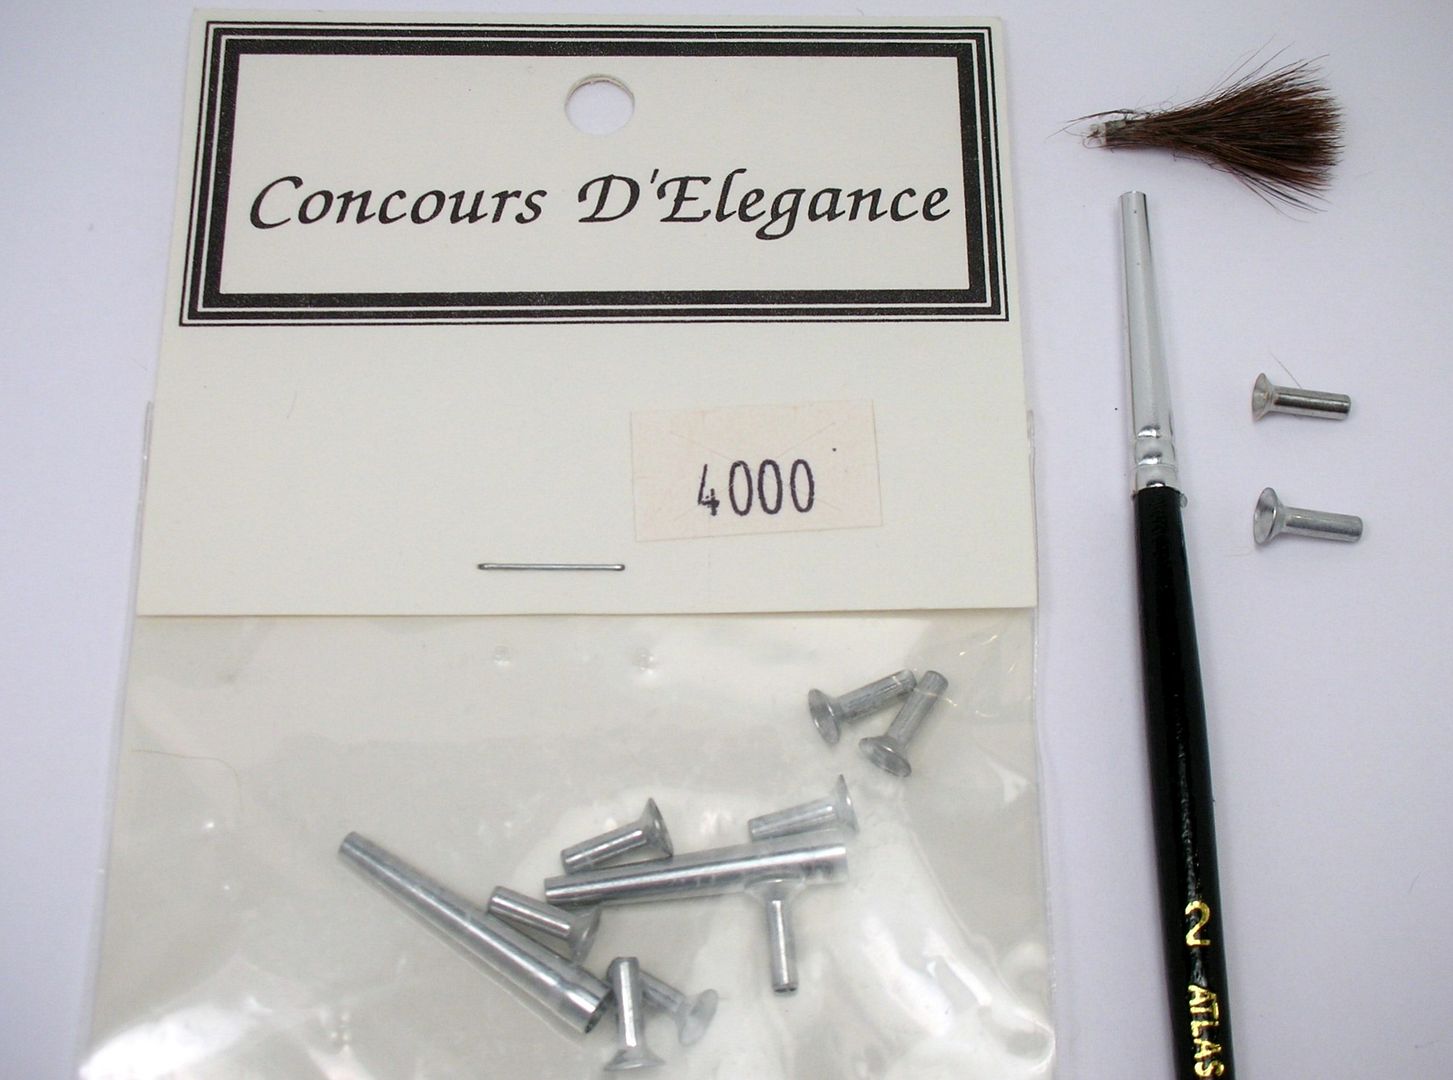
I'm almost out of them so I've come up with a paint brush alternative:
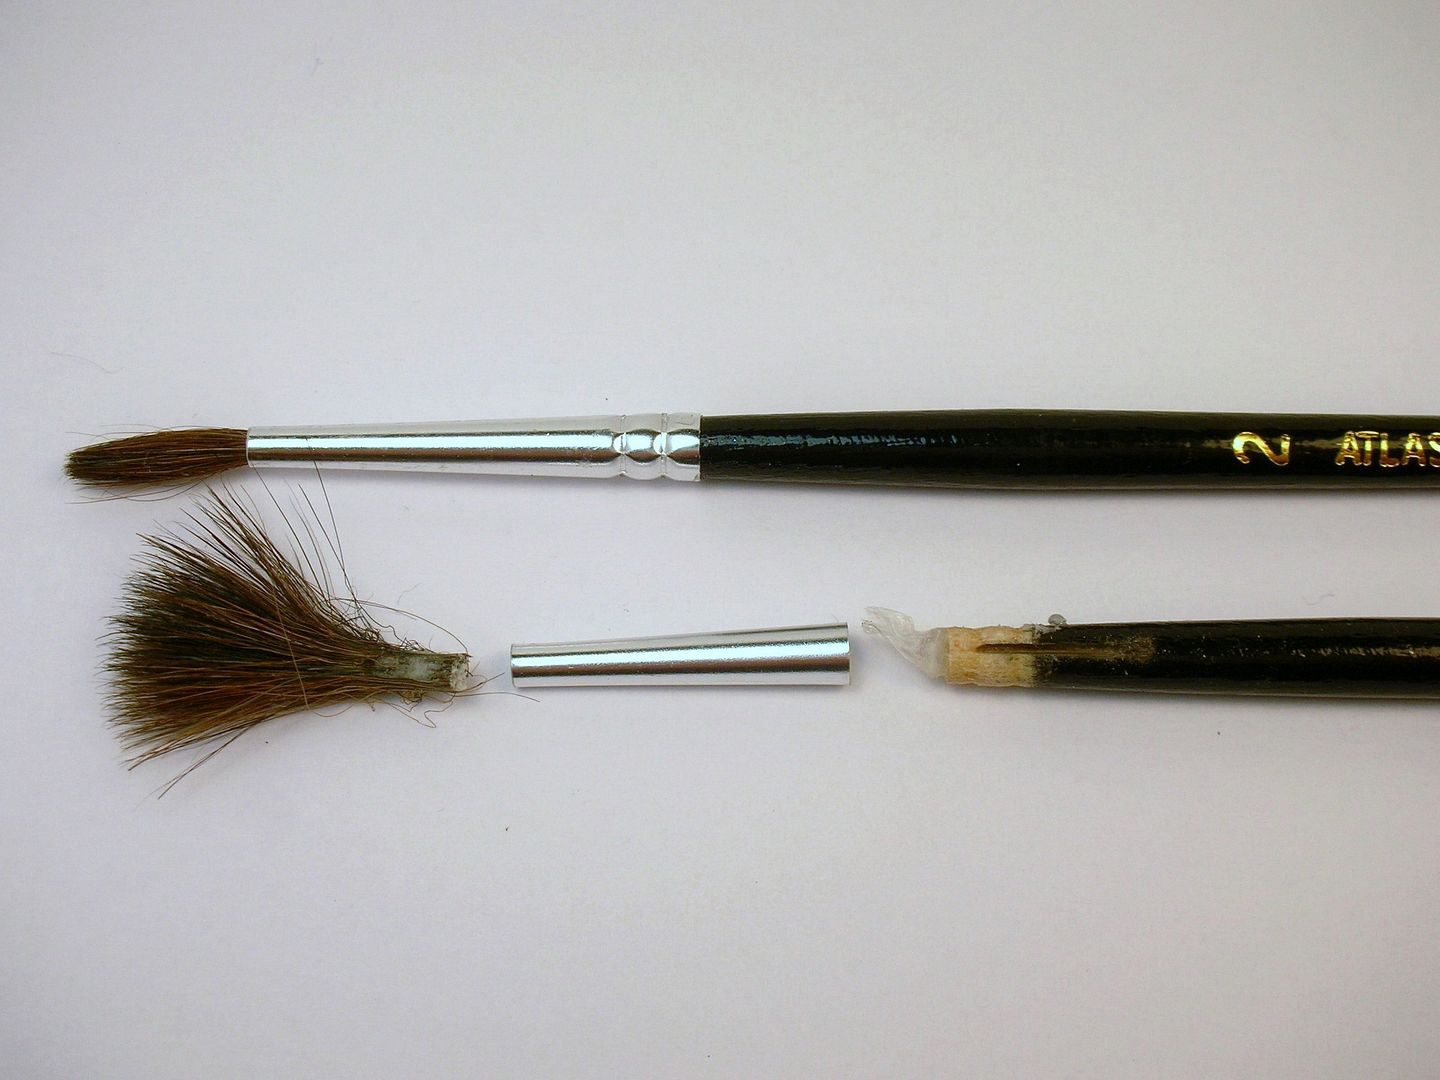
I also found the velocity stacks to be too large for my taste but with a bit of grinding with my Dremel cut-off wheel I think they will work:
But first I needed a good strong foundation for the exhaust trumpets to finish off the chassis:
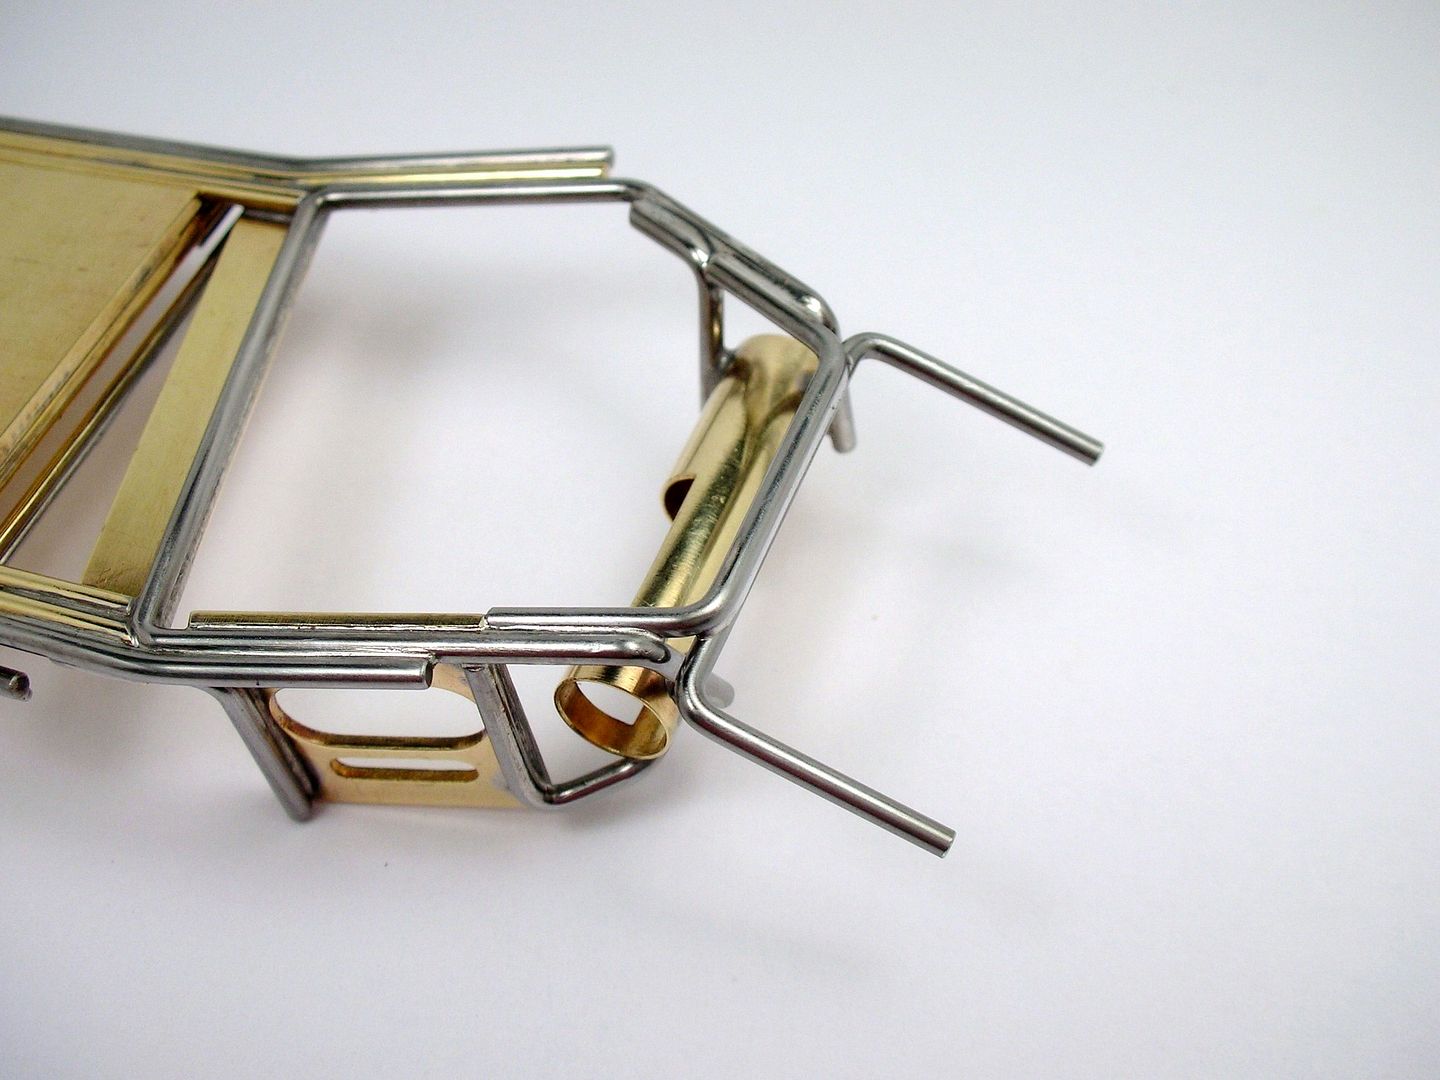
I think this should further stiffen up the rear end which I hope will help tame any "anglewinder GP chattering" in the corners:
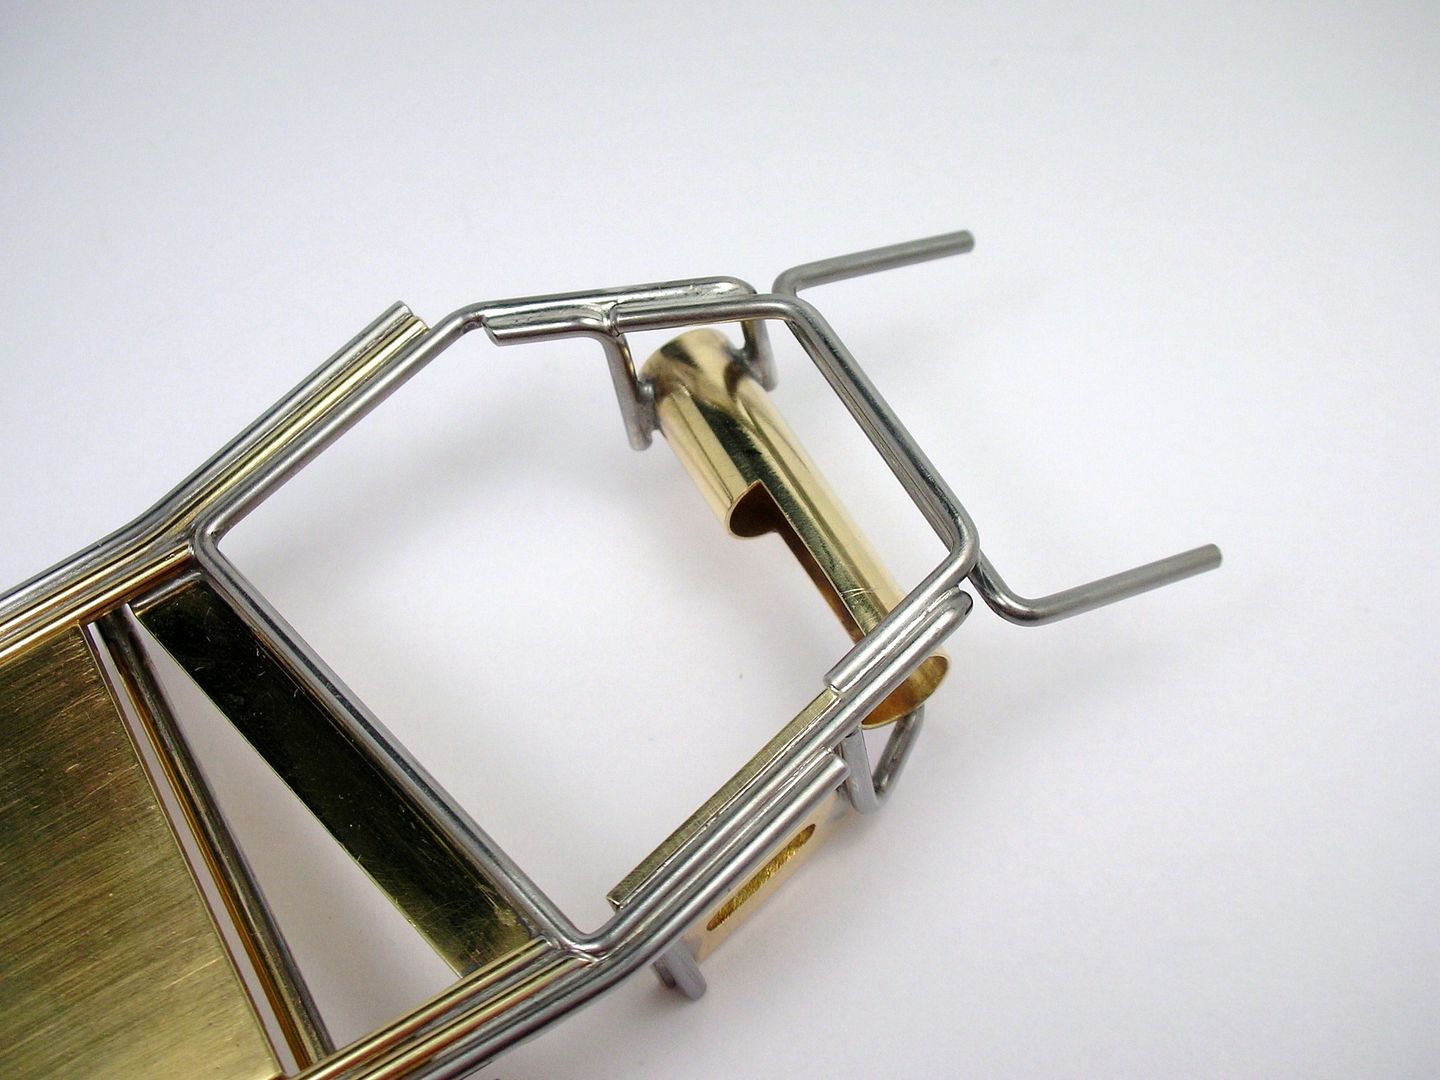
The exhaust trumpets are epoxied over the piano wire:
OK, now it's time to assemble the roller for testing...
- slotbaker, Jencar17, Tex and 3 others like this
Rick Thigpen
Check out Steve Okeefe's great web site at its new home here at Slotblog:
The Independent Scratchbuilder
There's much more to come...
#42
Tex
-

- Full Member
-
- 9,245 posts Joined: 07-July 06
Grand Champion Poster
- Gender:Male
- Location:Denton, TX
Posted 04 December 2015 - 08:54 AM
Those "Concours D'Elegance" pieces look like they could be repops of pieces supplied with Du-Bro bodies... very nicely done.
Richard L. Hofer
Remember, two wrongs don't make a right... but three lefts do! Only you're a block over and a block behind.
Remember, two wrongs don't make a right... but three lefts do! Only you're a block over and a block behind.
#43
dc-65x
-
- Subscriber
-
- 6,993 posts Joined: 14-February 06
Grand Champion Poster
- Gender:Male
- Location:Captain Rick: The only vintage slot car nut in SW Oregon?
Posted 04 December 2015 - 11:31 AM
Hi Tex,
Yup, you're right about those "pipes and stacks". They were originally supplied with the Du-Bro Sheraton Thompson Indy Special body.
Rick Thigpen
Check out Steve Okeefe's great web site at its new home here at Slotblog:
The Independent Scratchbuilder
There's much more to come...
#44
dc-65x
-
- Subscriber
-
- 6,993 posts Joined: 14-February 06
Grand Champion Poster
- Gender:Male
- Location:Captain Rick: The only vintage slot car nut in SW Oregon?
Posted 07 December 2015 - 10:00 PM
Track test:
The motor's soldered in and runs smooth and sweet:
I want to get the body finished and mounted before I see how it really handles...
... but I'm pretty happy with the way it turned out so far:
Testors rattle can time...
- Cheater, slotbaker, hiline2 and 7 others like this
Rick Thigpen
Check out Steve Okeefe's great web site at its new home here at Slotblog:
The Independent Scratchbuilder
There's much more to come...
#45
Pablo
-
- Administrator
-
- 18,460 posts Joined: 20-February 06
Builder
- Gender:Male
- Location:Cleveland, Tennessee
Posted 08 December 2015 - 08:18 AM
You could use the drop arm as a mirror to shave.
Paul Wolcott
#46
n.elmholt
-

- Moderator
-
- 1,114 posts Joined: 06-May 06
Checkered Flag in Hand
- Gender:Male
- Location:Denmark
Posted 08 December 2015 - 01:08 PM

Niels Elmholt Christensen, DK
Former Neckcheese Racing
www.racecars.dk - my Picasa Photos
#47
dc-65x
-
- Subscriber
-
- 6,993 posts Joined: 14-February 06
Grand Champion Poster
- Gender:Male
- Location:Captain Rick: The only vintage slot car nut in SW Oregon?
Posted 08 December 2015 - 09:29 PM
Thanks, Niels, I've got them on order now.
Rick Thigpen
Check out Steve Okeefe's great web site at its new home here at Slotblog:
The Independent Scratchbuilder
There's much more to come...
#48
SlotStox#53
-
- Full Member
-
- 4,084 posts Joined: 13-March 13
Posting Leader
- Gender:Male
- Location:TX
Posted 08 December 2015 - 10:37 PM
Fully-fitted roller looks amazing, Rick. With those decals Niels linked you to the icing on the cake.
With those decals Niels linked you to the icing on the cake.
#49
Mbloes
-

- Subscriber
-
- 629 posts Joined: 19-April 12
Race Leader
- Gender:Male
- Location:Los Angeles, CA
Posted 09 December 2015 - 04:05 PM
Rick,
How do you get your car to "hook up" on your track with that sponge? Do you use glue?
How do you get your car to "hook up" on your track with that sponge? Do you use glue?
Mike Bloes
#50
dc-65x
-
- Subscriber
-
- 6,993 posts Joined: 14-February 06
Grand Champion Poster
- Gender:Male
- Location:Captain Rick: The only vintage slot car nut in SW Oregon?
Posted 09 December 2015 - 06:05 PM
Mike,
I use a "dot" of Koford light glue in front of each turn. Then I run a flexi around and around the track to spread a very thin coat of glue. Mike Swiss talks about the method in this POST.
Rick Thigpen
Check out Steve Okeefe's great web site at its new home here at Slotblog:
The Independent Scratchbuilder
There's much more to come...


