Jump to content


Photo

1967 Gurney Indy Eagle 1/24 build


  • Please log in to reply
104 replies to this topic

#26 Pablo

Pablo

    Builder

  • Administrator
  • PipPipPipPipPipPipPipPip
  • 18,446 posts
  • Joined: 20-February 06
  • Gender:Male
  • Location:Cleveland, Tennessee

Posted 13 October 2016 - 07:50 PM

Thanks for the help, Rick - if those K&B 419 tires fit the 723 wheels, they would be perfect.


Today I put one of the Ortmann's to the test on the Hudy. So far they seem to be perfectly happy being trimmed, trued, and sanded.

They may work fine, but I'm not completely sure just yet. 3 more to go :) tomorrow.....


Paul Wolcott


#27 Pablo

Pablo

    Builder

  • Administrator
  • PipPipPipPipPipPipPipPip
  • 18,446 posts
  • Joined: 20-February 06
  • Gender:Male
  • Location:Cleveland, Tennessee

Posted 14 October 2016 - 09:14 PM

Found these inserts at Pattos :dance3:  They look close enough to me:


wi054.JPG


  • hiline2 and Jencar17 like this

Paul Wolcott


#28 Pablo

Pablo

    Builder

  • Administrator
  • PipPipPipPipPipPipPipPip
  • 18,446 posts
  • Joined: 20-February 06
  • Gender:Male
  • Location:Cleveland, Tennessee

Posted 15 October 2016 - 11:22 AM

Working through the challenges..... and learning as I go..... who knew waterslide decals would stick to tires ?

I can hardly believe it, but it works. Here is the test, and to top it off, Mop N Glo floor polish seals the decals and shines the tires after trimming:


IMG_3297.JPG


So I added 2 sets of these Goodyear decals to my Pattos order, one waterslide, one peel n stick:


godyeareagle24.JPG


  • Jencar17 likes this

Paul Wolcott


#29 Pablo

Pablo

    Builder

  • Administrator
  • PipPipPipPipPipPipPipPip
  • 18,446 posts
  • Joined: 20-February 06
  • Gender:Male
  • Location:Cleveland, Tennessee

Posted 15 October 2016 - 01:30 PM

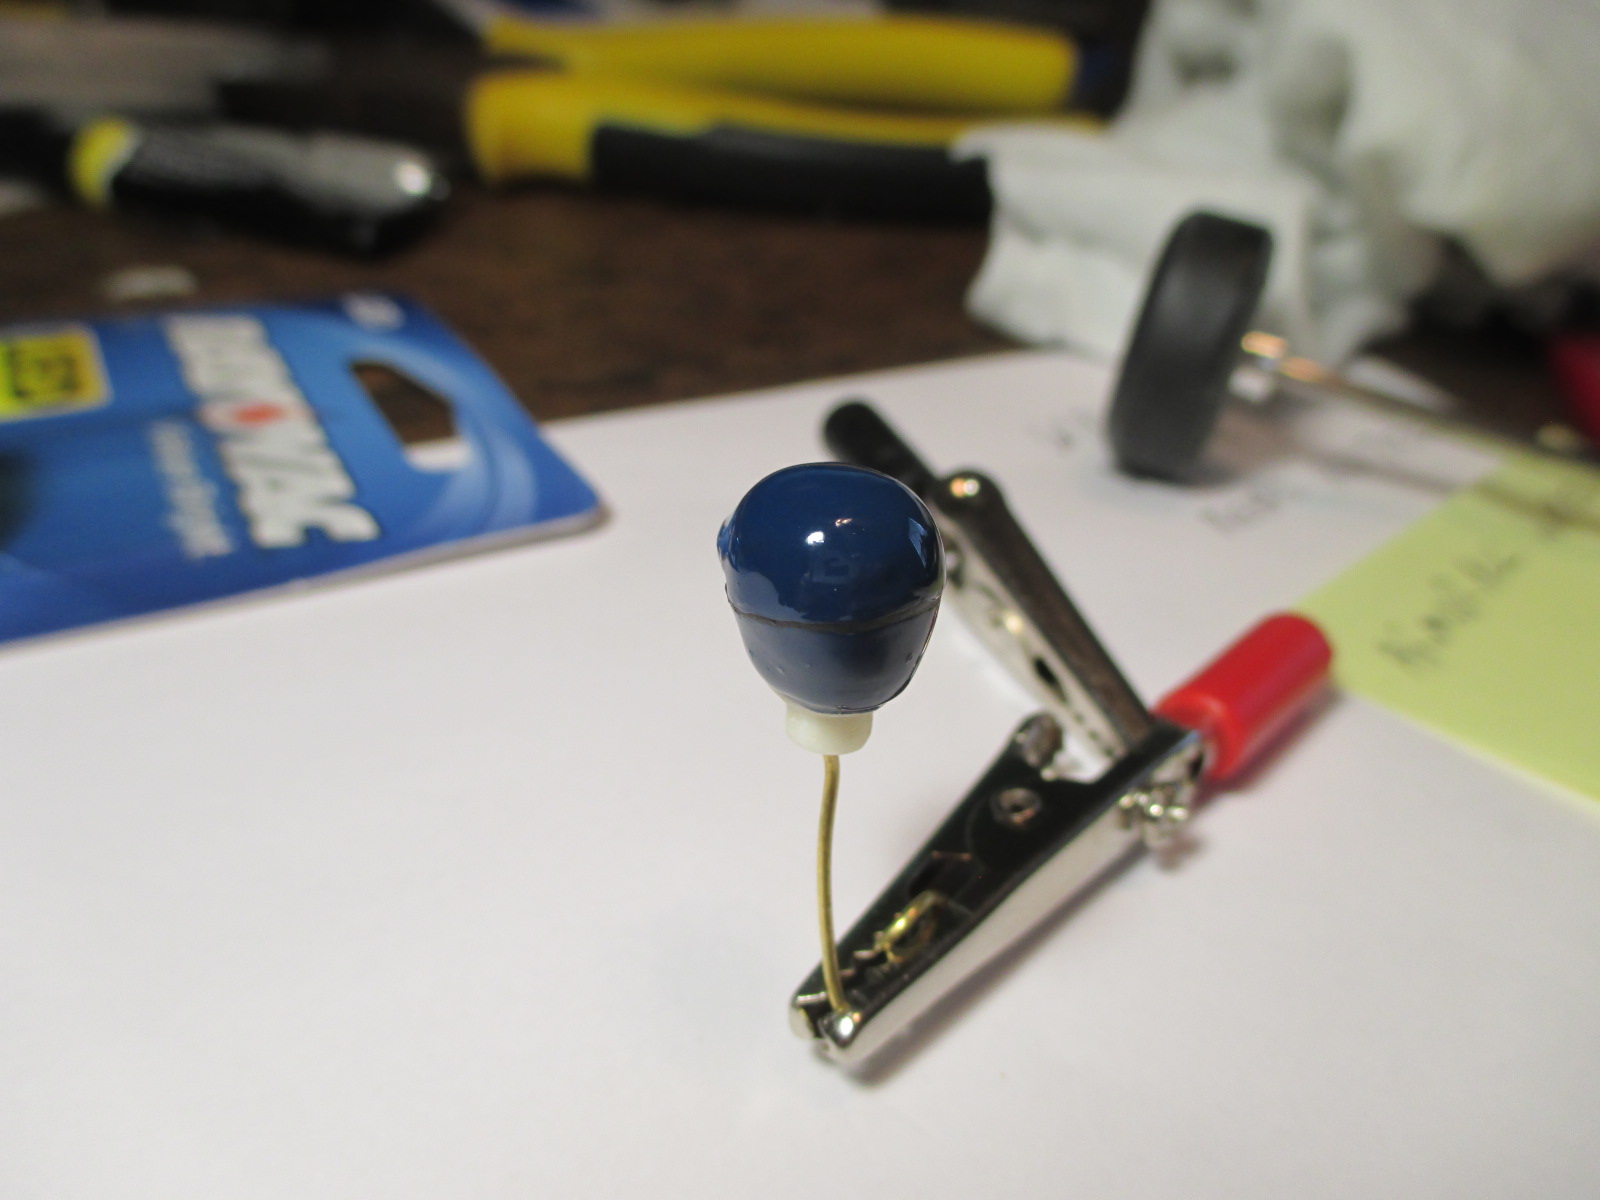
One more coat of paint on Gurney's helmet, this time with much less metallic and a little more black.


IMG_3301.JPG


I'm learning with enamels the shade on the inside of a shell is much different than outside.

Painted another test body (O/S GTP) with the same paint and it looks like it needs a hair more black and more metal flake.


IMG_3304.JPG


  • Jencar17 likes this

Paul Wolcott


#30 Dave Crevie

Dave Crevie

    Posting Leader

  • Full Member
  • PipPipPipPipPipPipPip
  • 4,484 posts
  • Joined: 16-February 09

Posted 15 October 2016 - 03:43 PM

Getting the color to match on Lexan and solid styrene requires a coat of a color very close to the bare styrene to

be applied inside the Lexan body. I have run into this many times in the past. Just adding more coats of the finish

color won't correct it. You need to back it up with the same color as the hard parts.


#31 Pablo

Pablo

    Builder

  • Administrator
  • PipPipPipPipPipPipPipPip
  • 18,446 posts
  • Joined: 20-February 06
  • Gender:Male
  • Location:Cleveland, Tennessee

Posted 15 October 2016 - 03:58 PM

So, are you saying if I backed up the GTP body with the paint I used on the driver head in post #14, it would be a closer match ?

I could do that.


Paul Wolcott


#32 n.elmholt

n.elmholt

    Checkered Flag in Hand

  • Moderator
  • PipPipPipPipPipPip
  • 1,112 posts
  • Joined: 06-May 06
  • Gender:Male
  • Location:Denmark

Posted 15 October 2016 - 04:36 PM

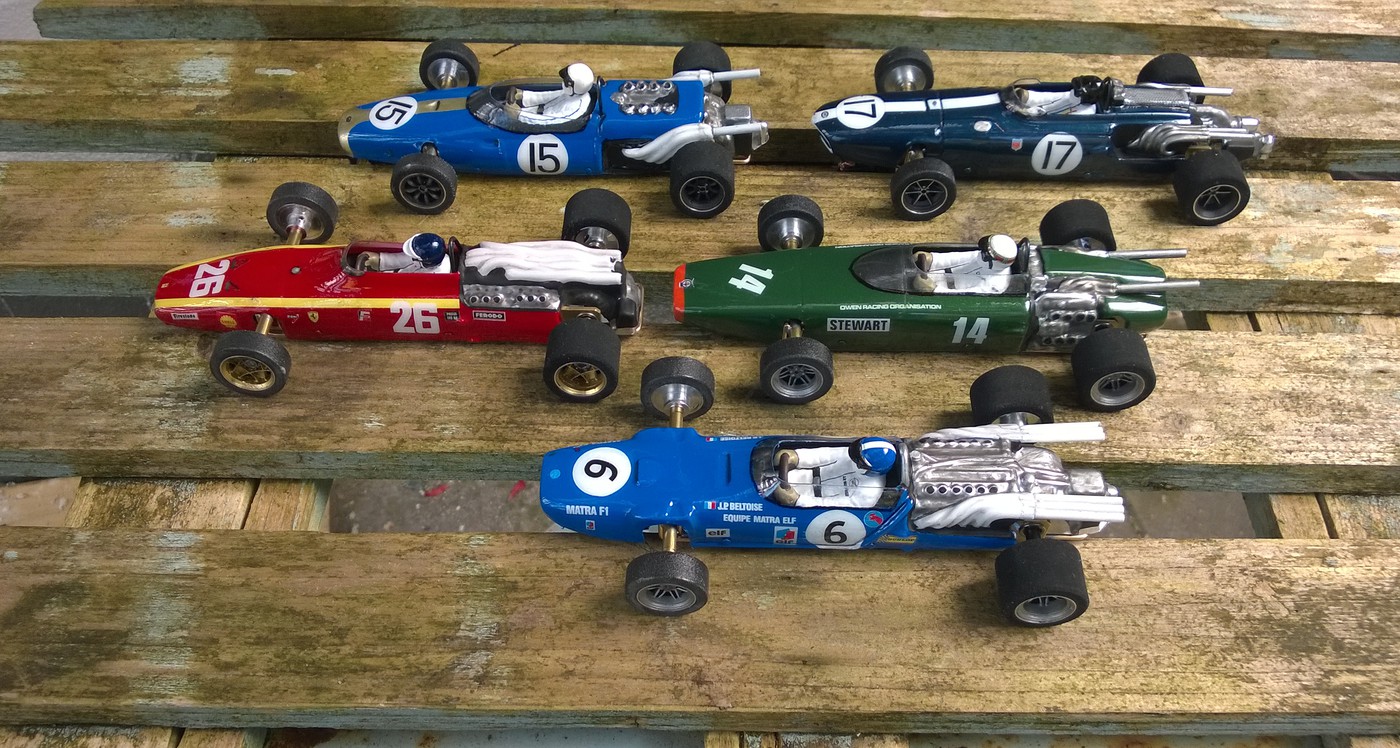
RetroF1FranceAbatch013-vi.jpg


Paul,


The Eagle in this picture is painted with a mixture of Vallejo Premium metallic blue and black. It can be backed by black if one wants it a bit darker.

The wheel inserts on the picture is my own cast in resin. They are 15mm outside diameter. Let me know if you can use these. They could be turned down a bit to suit smaller wheels.


Niels, DK


  • Jencar17 and Tim Neja like this

Niels Elmholt Christensen, DK

Former Neckcheese Racing
www.racecars.dk - my Picasa Photos


#33 Pablo

Pablo

    Builder

  • Administrator
  • PipPipPipPipPipPipPipPip
  • 18,446 posts
  • Joined: 20-February 06
  • Gender:Male
  • Location:Cleveland, Tennessee

Posted 15 October 2016 - 05:39 PM

Thanks Niels :) Your shade of blue looks perfect, I hope mine turns out as nice.

Pattos inserts should work fine for me, but I appreciate the offer.


In the end, Ortmann tires trimmed and trued up real nice on the Hudy.

Mop n Glo makes 'em look nice and with Pattos decals and inserts they should do the trick.

Rears 1.1" OD, fronts 1.0" OD; rears slightly wider than fronts


IMG_3311.JPG


  • Jencar17 and n.elmholt like this

Paul Wolcott


#34 drrufo

drrufo

    DR Racing Products

  • Full Member
  • PipPipPipPip
  • 359 posts
  • Joined: 26-January 13
  • Gender:Male
  • Location:Orange County, CA

Posted 15 October 2016 - 05:43 PM

tire chart.jpg


Here is a Paul Gage table that shows tire sizes for Slot It cars. It should be handy for you build.


  • Jencar17 likes this

John Andersen
DR Racing Products


#35 Pablo

Pablo

    Builder

  • Administrator
  • PipPipPipPipPipPipPipPip
  • 18,446 posts
  • Joined: 20-February 06
  • Gender:Male
  • Location:Cleveland, Tennessee

Posted 16 October 2016 - 05:21 PM

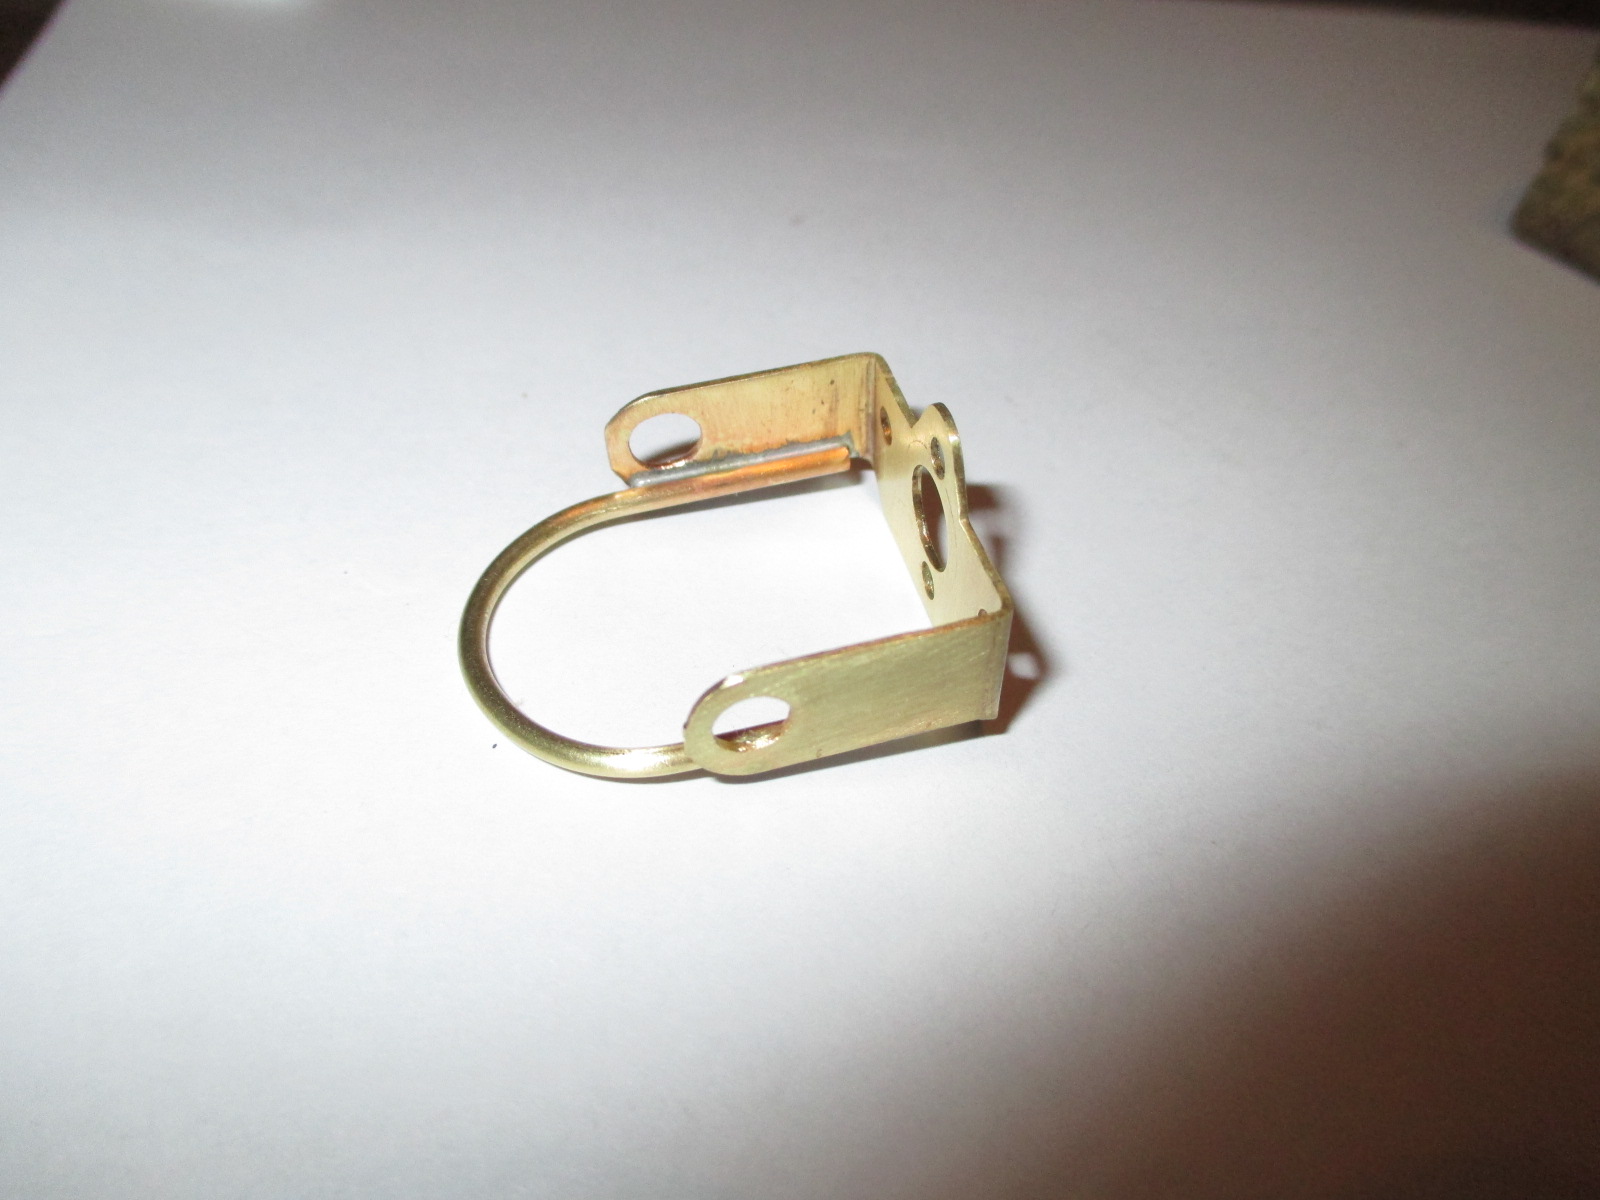
Castleton #103 motor bracket; straight, flat, true, and braced with a Cukras style "gear guard"


IMG_3316.JPG


  • Jencar17 likes this

Paul Wolcott


#36 Pablo

Pablo

    Builder

  • Administrator
  • PipPipPipPipPipPipPipPip
  • 18,446 posts
  • Joined: 20-February 06
  • Gender:Male
  • Location:Cleveland, Tennessee

Posted 17 October 2016 - 07:21 PM

Chassis builders take note - a trick Bill Fernald taught me -

lightly score the inside cut point of the tubing with a tubing cutter before soldering it to the bracket.

It gives you a visual reference point and makes the cut much easier.


In the end I'll probably true it up 100% with my dc-65x tubing gizmo, but I wish I had been doing this a long time ago in my retro builds .....


IMG_3329.JPG


This time I tried a better way to ensure the tubing is absolutely parallel to the bracket face:


IMG_3332.JPG  


  • Jencar17 likes this

Paul Wolcott


#37 bluecars

bluecars

    Checkered Flag in Hand

  • Member at Peace
  • PipPipPipPipPipPip
  • 1,273 posts
  • Joined: 26-June 13
  • Gender:Male
  • Location:Tuskegee, AL

Posted 18 October 2016 - 08:22 AM

Looks like your going for another winner. Also I have a good idea what color your next Dungeon GTP and JK car will look like. :D


Robert 'Red' Valantine
9/18/51-8/30/24
Requiescat in Pace

#38 Pablo

Pablo

    Builder

  • Administrator
  • PipPipPipPipPipPipPipPip
  • 18,446 posts
  • Joined: 20-February 06
  • Gender:Male
  • Location:Cleveland, Tennessee

Posted 18 October 2016 - 08:32 AM

Yep. Not gonna let the fact it will only be a display car hold me back from making a proper chassis for it :)


Paul Wolcott


#39 Pablo

Pablo

    Builder

  • Administrator
  • PipPipPipPipPipPipPipPip
  • 18,446 posts
  • Joined: 20-February 06
  • Gender:Male
  • Location:Cleveland, Tennessee

Posted 18 October 2016 - 04:04 PM

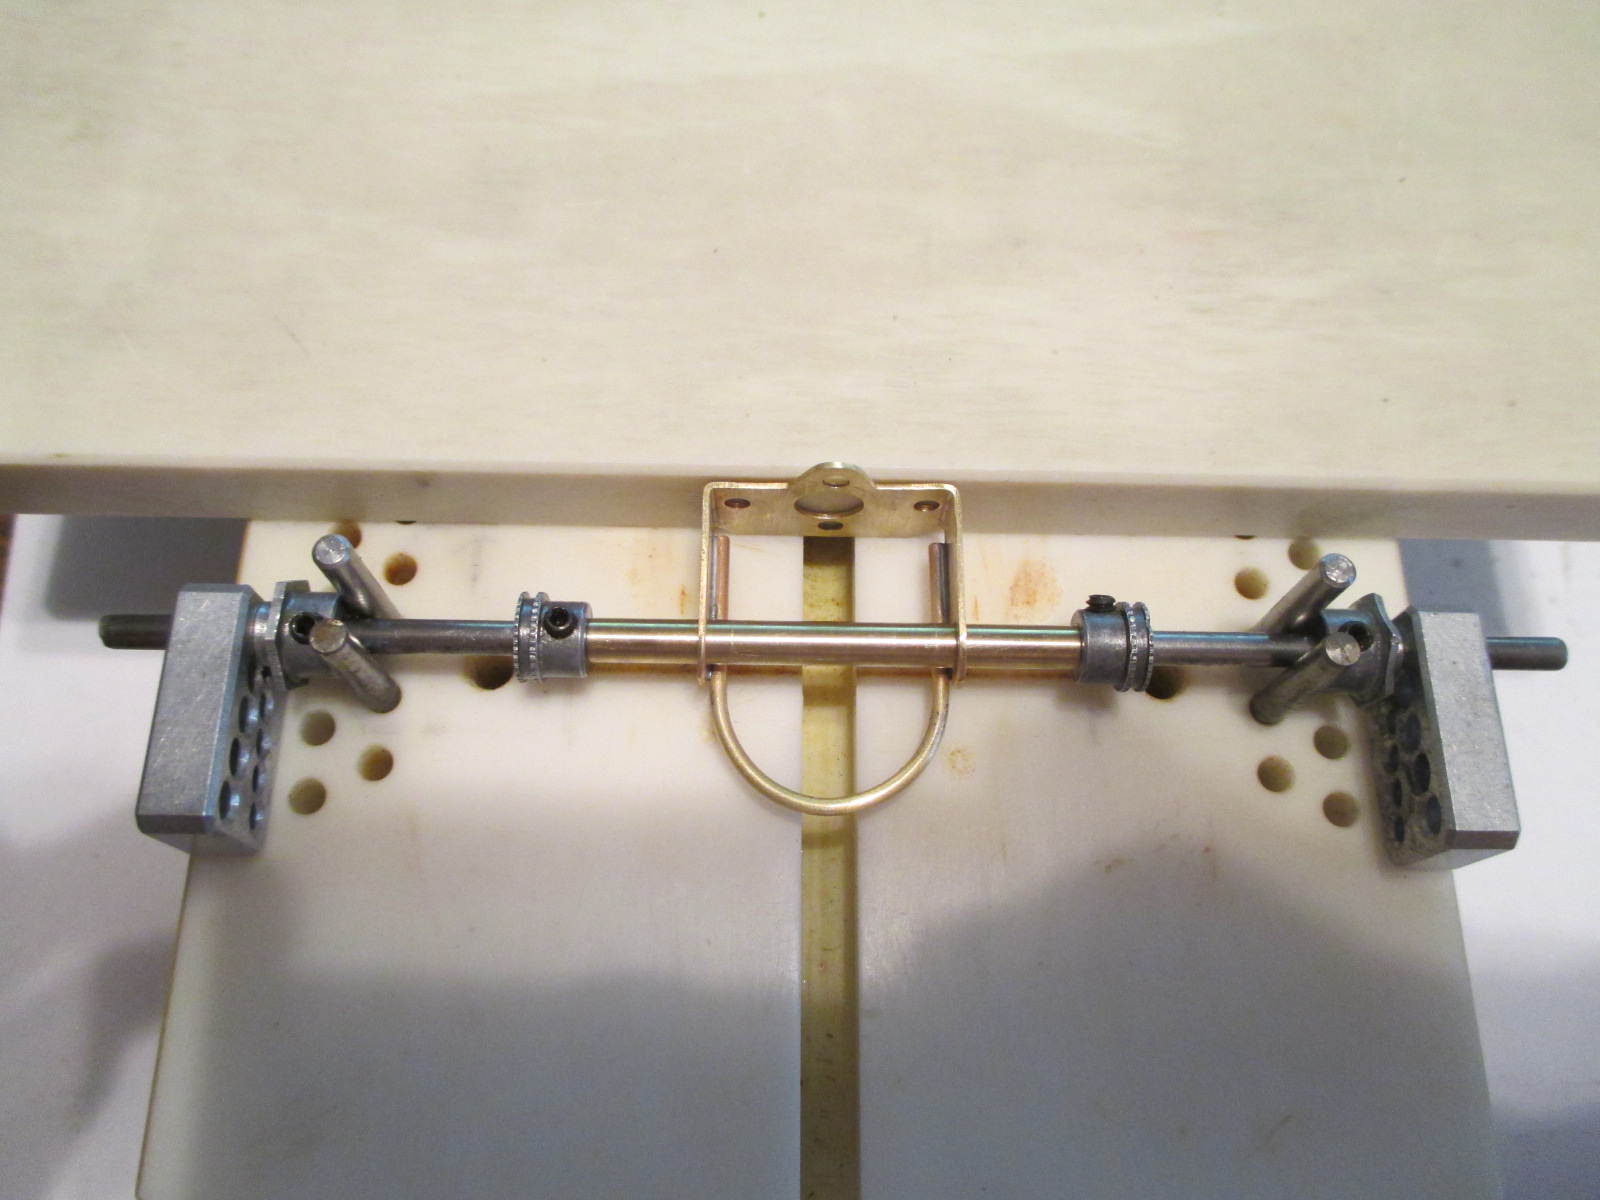
No 1.1" jig wheels here, so I improvised by using my Briggs Jig .063" aluminum plate :music:


IMG_3344.JPG


Yes, Bunky, I know the jig motor shaft is crooked - the EB face has been melted like 16 times. The bracket is true. Now go back to your trailer and let me work


post-91-0-26404900-1409619211.jpg


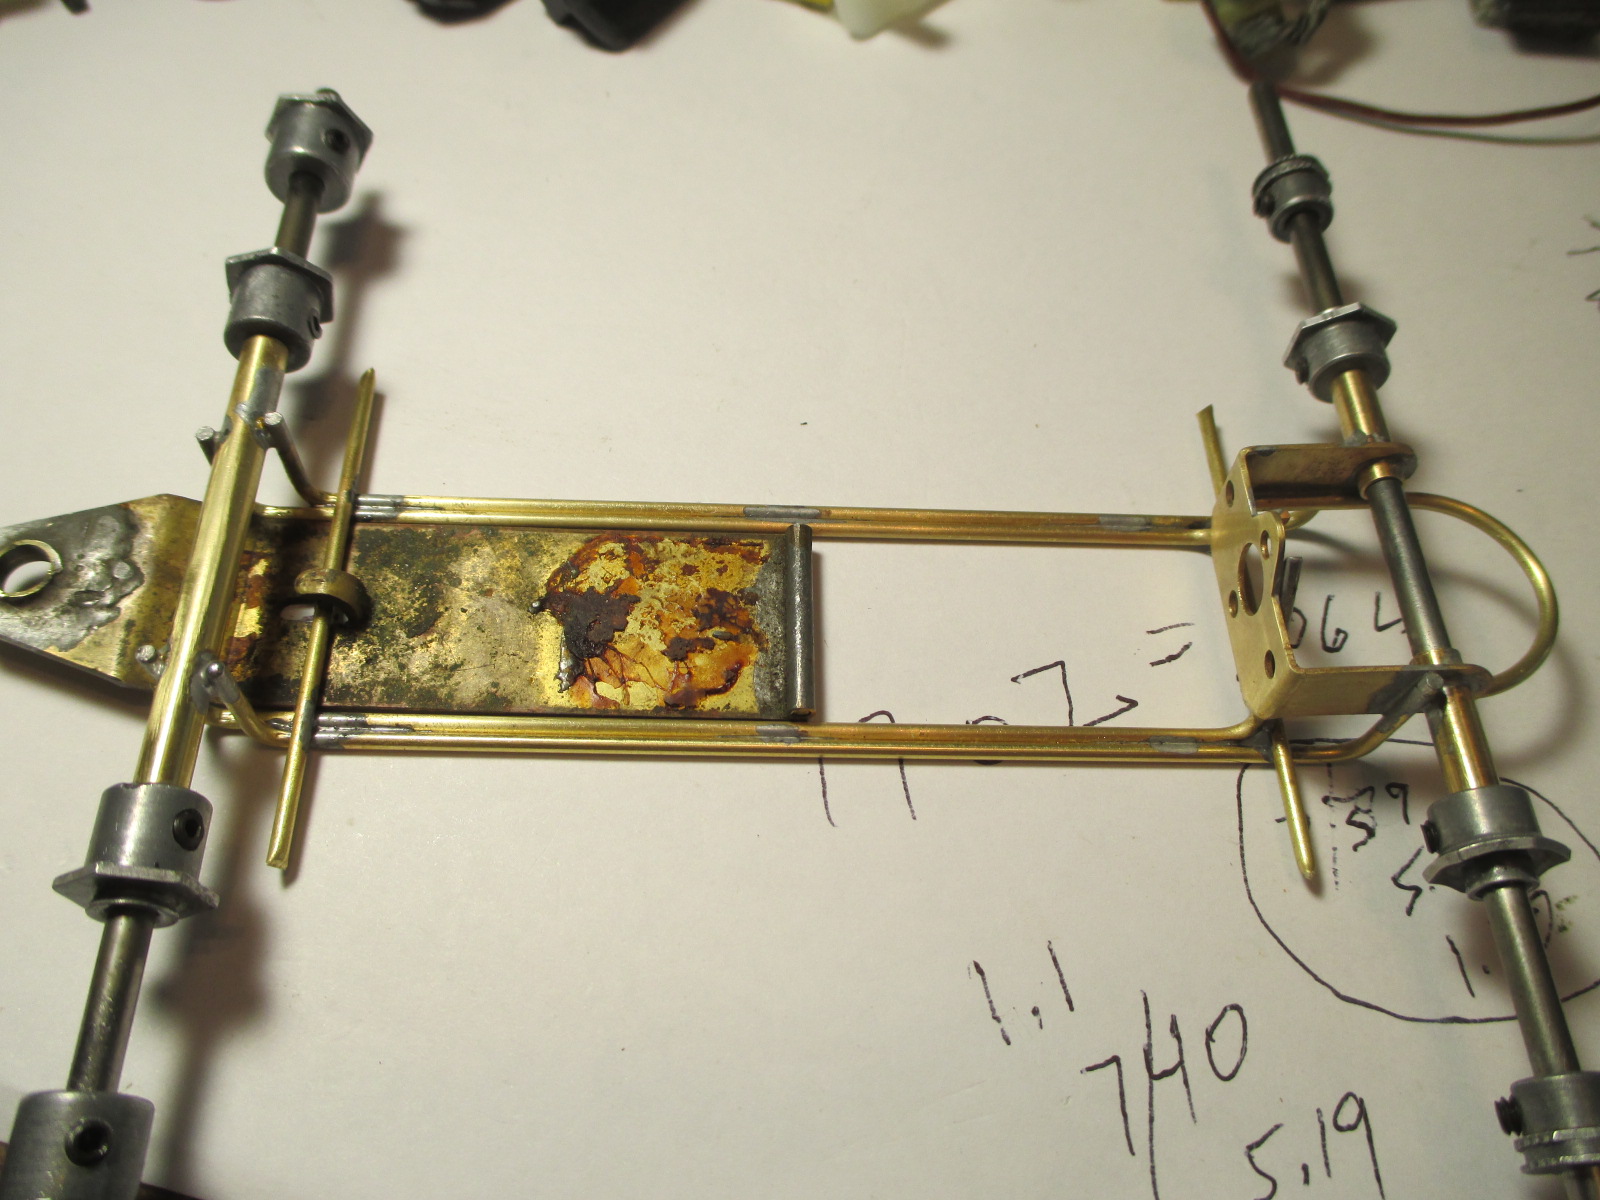
Twin .063 rails. Bracket is angled to make front of 16D motor sit at exact ground zero.

Motor mount tubes left long, for now


IMG_3345.JPG


  • Jencar17 and Bud Greene like this

Paul Wolcott


#40 Pablo

Pablo

    Builder

  • Administrator
  • PipPipPipPipPipPipPipPip
  • 18,446 posts
  • Joined: 20-February 06
  • Gender:Male
  • Location:Cleveland, Tennessee

Posted 19 October 2016 - 05:31 PM

Drop arm and flag - decisions, decisions...... :scratch_one-s_head:

I was planning to make a jaildoor drop arm, but digging around in my chassis parts drawer of horrors, I found this:


IMG_3354.JPG


If I choose to use it, here's what it would look like (cleaned up of course):


IMG_3356.JPG


Some potential flag candidates:


IMG_3351.JPG


If anybody knows the exact date of manufacture of the Ferret piece it would help my decision greatly.

I welcome your opinion on Ferret vs. jaildoor drop arm, and which flag, Jet, Cox Quickchange, Cox screw on braid, or Dynamic.

Especially if you are a bona-fide member of the Philippe de Lespinay Vintage Policia International University :D :dance3:


  • Jencar17 likes this

Paul Wolcott


#41 slotbaker

slotbaker

    Dan Gurney Fan

  • Subscriber
  • PipPipPipPipPipPipPip
  • 2,694 posts
  • Joined: 16-February 06
  • Gender:Male
  • Location:Sydney, Australia.

Posted 19 October 2016 - 06:31 PM

Nice project Paul.


I'm not sure if I qualify as a bona-fide member of the PdLVPIU (maybe one day) so my comments are not qualified.


While I like the Ferret drop arm, it looks to be a latter production item than when the Eagle was at full flight, so I think the jaildoor drop arm with the Cox quick change would look better and complement the rest of your build.


Another comment, if I may, on the colour of DSG's helmet. Should it not be black??

:huh:


:popcorm1:


Steve King


#42 Samiam

Samiam

    Posting Leader

  • Subscriber
  • PipPipPipPipPipPipPip
  • 4,768 posts
  • Joined: 18-January 12
  • Gender:Male
  • Location:Long Island, NY

Posted 19 October 2016 - 07:19 PM

Pablo,


If you want to save the Ferret D-A for another project I have a Ferret inline bracket you can have. Keep it korect. :dance3:


Sam Levitch
 
"If you have integrity, nothing else matters, and if you do not have integrity, nothing else matters."
    Robert Mueller, special counsel (2013)
 
"... because people have got to know whether or not their president is a crook."
    Richard M .Nixon, Nov 17, 1973
 
"Fool me once, same on... shame on you. Fool me... you can't get fooled again."
    George W. Bush

#43 Pablo

Pablo

    Builder

  • Administrator
  • PipPipPipPipPipPipPipPip
  • 18,446 posts
  • Joined: 20-February 06
  • Gender:Male
  • Location:Cleveland, Tennessee

Posted 20 October 2016 - 09:00 AM

Nice project Paul. I think the jaildoor drop arm with the Cox quick change would look better and complement the rest of your build.


You do qualify, Steve, thanks for helping me make that choice. Jaildoor w/ Quickchange it shall be. :good:


The helmet looks very dark blue to me; almost black but not quite.

Feel free to correct me if I'm wrong. Maybe it is black and the dark blue of the car is influencing it :)


1967-Indy-Qualifying-Dan-74-Eagle138-700x458.jpg


Thanks for the offer Sam, but I'm going jaildoor. If you need the Ferret you know where it is......


  • Jencar17 and Samiam like this

Paul Wolcott


#44 slotbaker

slotbaker

    Dan Gurney Fan

  • Subscriber
  • PipPipPipPipPipPipPip
  • 2,694 posts
  • Joined: 16-February 06
  • Gender:Male
  • Location:Sydney, Australia.

Posted 20 October 2016 - 05:32 PM

Paul, I'm pretty sure DSG's helmet was black.


There were a few of his early rides where he wore silver, or white, but he was famous for the black helmet.


He wore open face helmets up to the 68 Indy 500 and, 68 F1 at Nuremberg where he went full face Bellstar, in black..


It is well documented that DSG was the first to wear a full face Bell in a race car, but I've read that Swede Savage beat him to it the previous year, so maybe a bit of uncertainty there.


Steve King


#45 Pablo

Pablo

    Builder

  • Administrator
  • PipPipPipPipPipPipPipPip
  • 18,446 posts
  • Joined: 20-February 06
  • Gender:Male
  • Location:Cleveland, Tennessee

Posted 20 October 2016 - 06:06 PM

Steve, I found this photo and it convinced me :)


maxresdefault.jpg


So, thanks to you, I'll make the final coat on the helmet gloss black :yes3:


  • slotbaker and Jencar17 like this

Paul Wolcott


#46 Pablo

Pablo

    Builder

  • Administrator
  • PipPipPipPipPipPipPipPip
  • 18,446 posts
  • Joined: 20-February 06
  • Gender:Male
  • Location:Cleveland, Tennessee

Posted 21 October 2016 - 05:56 PM

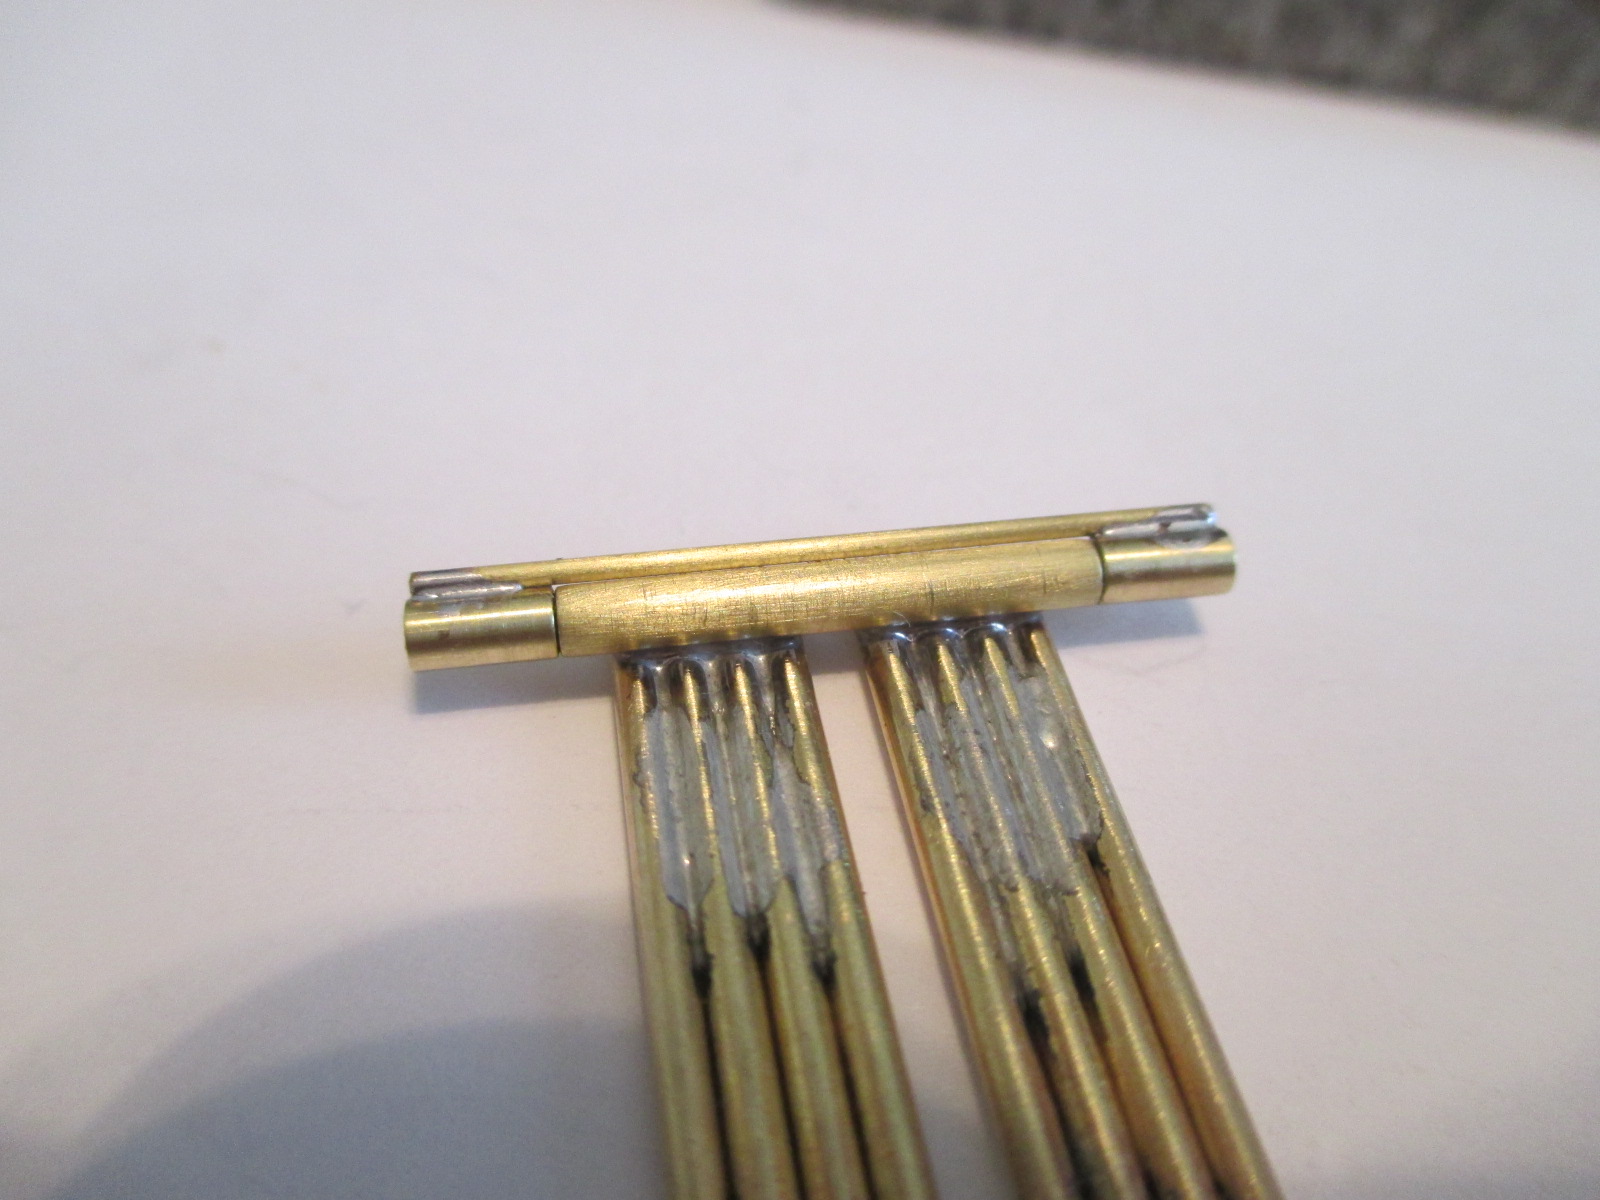
Drop arm is a blend of Cukras and Ursaner style. All rod, no wire. Outer rails act as flag stops.

Designed to use a Cox Quickchange flag. Weight is a genuine new Phase III


IMG_3368.JPG


  • slotbaker, Jencar17 and Bud Greene like this

Paul Wolcott


#47 Pablo

Pablo

    Builder

  • Administrator
  • PipPipPipPipPipPipPipPip
  • 18,446 posts
  • Joined: 20-February 06
  • Gender:Male
  • Location:Cleveland, Tennessee

Posted 22 October 2016 - 09:18 AM

Piece of .032 rod will prevent the hinge tubes from spreading when I solder them to the rails.


IMG_3374.JPG


  • Jencar17 likes this

Paul Wolcott


#48 Pablo

Pablo

    Builder

  • Administrator
  • PipPipPipPipPipPipPipPip
  • 18,446 posts
  • Joined: 20-February 06
  • Gender:Male
  • Location:Cleveland, Tennessee

Posted 22 October 2016 - 10:38 AM

Bodies with curved sides are always a challenge, but I have experience in this - here is how I eliminate guessing for a good fit.

Mark the lengths exactly where the pin tubes will go


IMG_3375.JPG


Cut a piece of something soft like a Q-tip shaft a little longer than the pin tube should be, and shorten it little by little until it fits perfectly.

In this case, my tubes are raised only 1/16" above the bottom of the body - plan accordingly.

Measure it, then cut a piece of 1/16 rod exactly the same length and use it to fine tune the length


IMG_3376.JPG


Lay the perfect size test piece next to the real tube. Now you know where to cut it, and you know it's going to be perfect


IMG_3378.JPG


  • Jencar17 and Samiam like this

Paul Wolcott


#49 Bill from NH

Bill from NH

    Age scrubs away speed!

  • Full Member
  • PipPipPipPipPipPipPipPip
  • 14,733 posts
  • Joined: 02-August 07
  • Gender:Male
  • Location:New Boston, NH

Posted 22 October 2016 - 11:09 AM

Question: What's your reasoning for not taking the pintube length directly off the Q-tip shaft length? I know you have one. :)  Is it the shaft's flexability & that it might not be straight?


Bill Fernald
 
I intend to live forever!  So far, so good.  :laugh2:  :laugh2: 

#50 Pablo

Pablo

    Builder

  • Administrator
  • PipPipPipPipPipPipPipPip
  • 18,446 posts
  • Joined: 20-February 06
  • Gender:Male
  • Location:Cleveland, Tennessee

Posted 22 October 2016 - 11:52 AM

You're right, I do have a reason :) Thanks for asking. The idea is to minimize the amount of scratching the body, and avoiding stretching it to make the chassis fit.


The Q-tip shaft is soft and won't scratch - it just gives me a rough estimate of length.

It's about .100 OD whereas a pin tube is .063 - makes a significant difference with this amount of curvature.


Some scratching is inevitable in the fitting; I'm just trying to avoid it as best I can.

Can't buy another one of these at my local hobby shop for $1.39 if I screw it up :shok:


Paul Wolcott


Electric Dreams Online Shop