Jump to content


Photo

Scratchbuilt chassis gallery


  • Please log in to reply
3139 replies to this topic

#276 Bob Campbell

Bob Campbell

    On The Lead Lap

  • Full Member
  • PipPipPipPip
  • 408 posts
  • Joined: 12-November 07
  • Gender:Male
  • Location:Colorado Springs, CO

Posted 28 February 2010 - 09:37 PM

Hey guys,

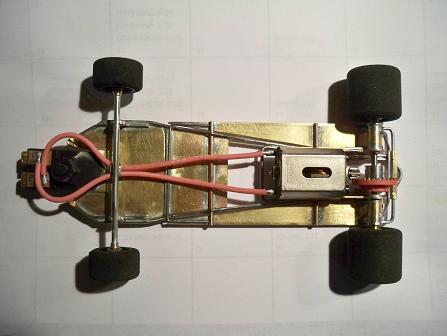
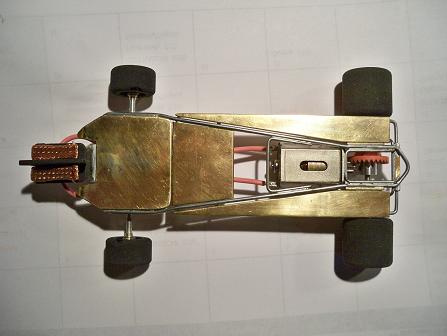
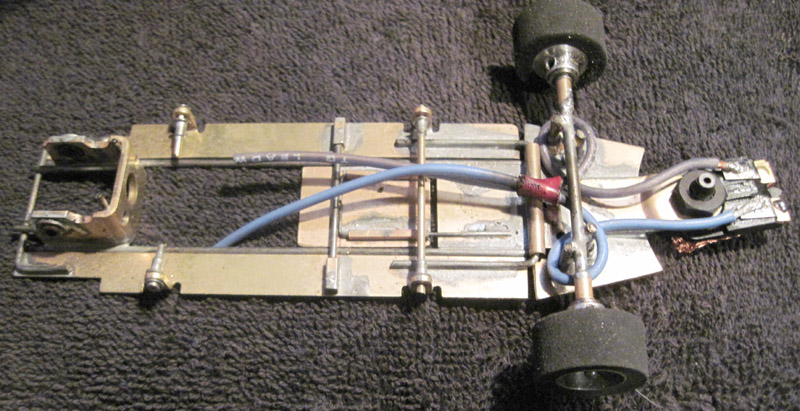
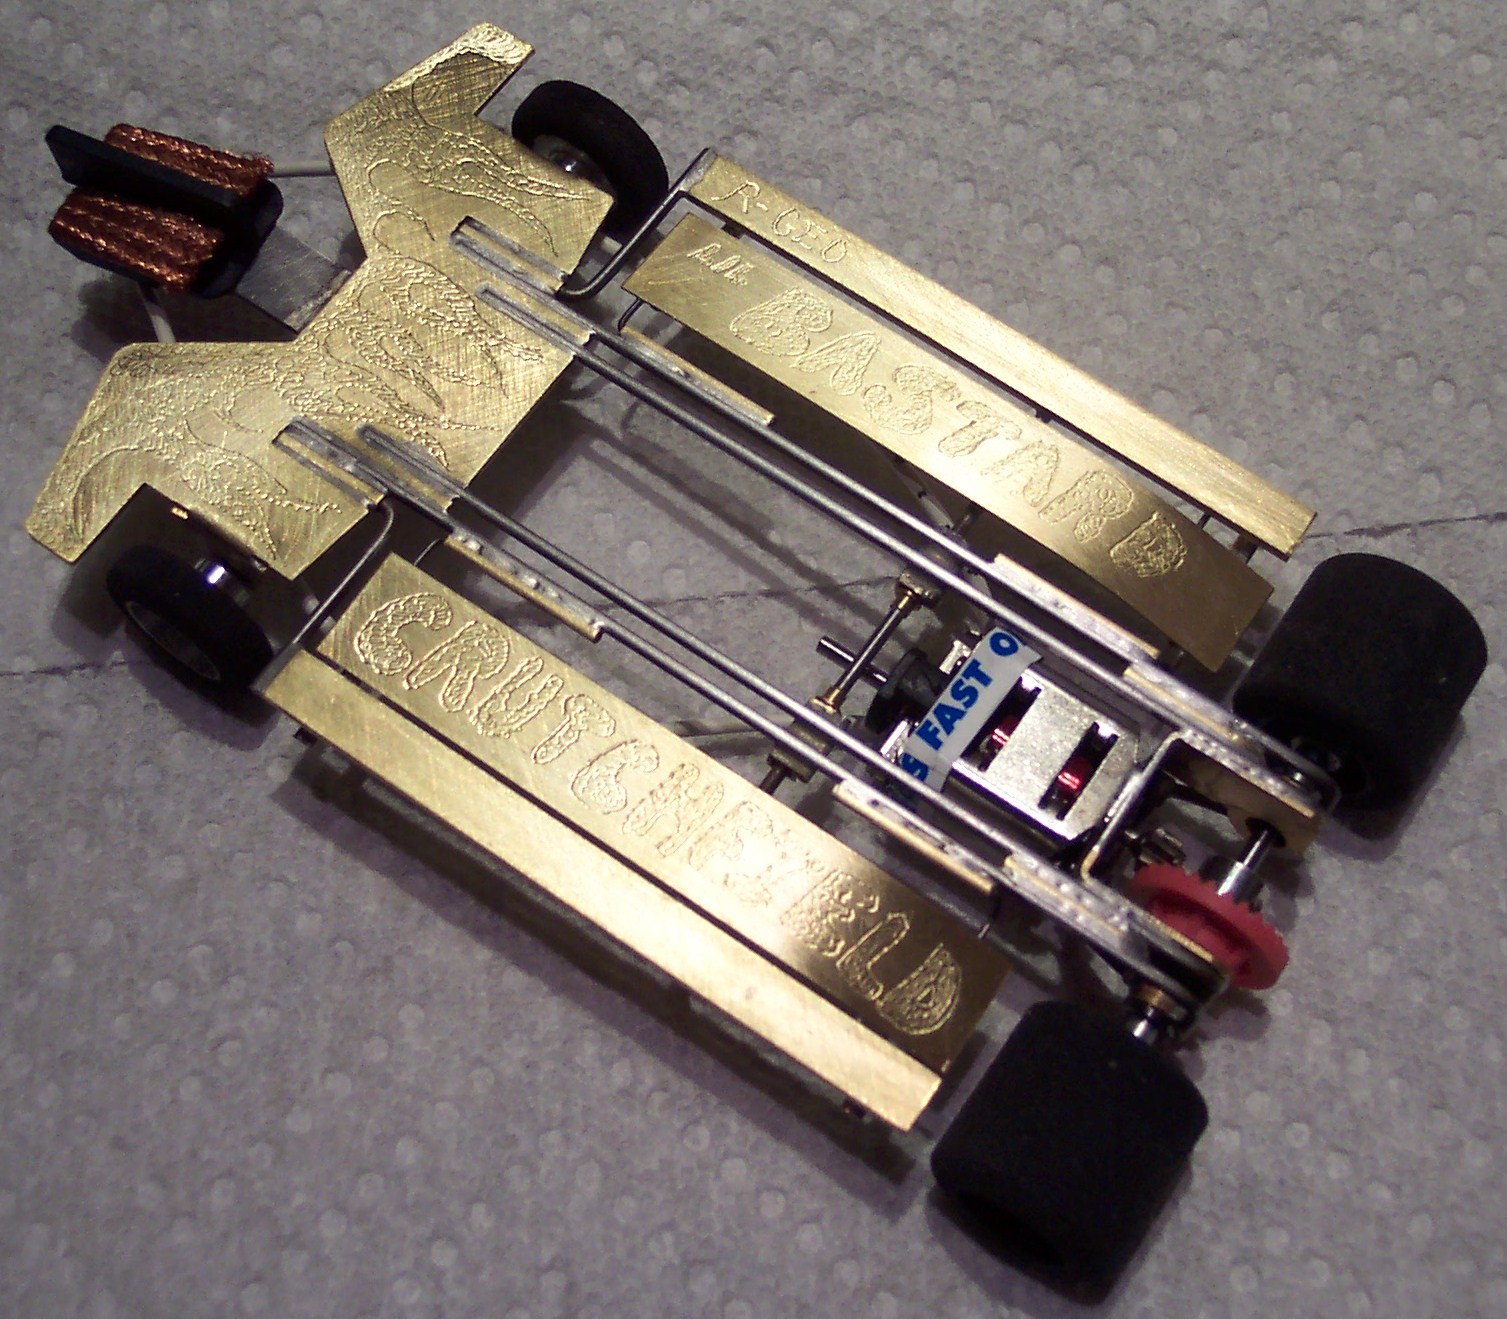
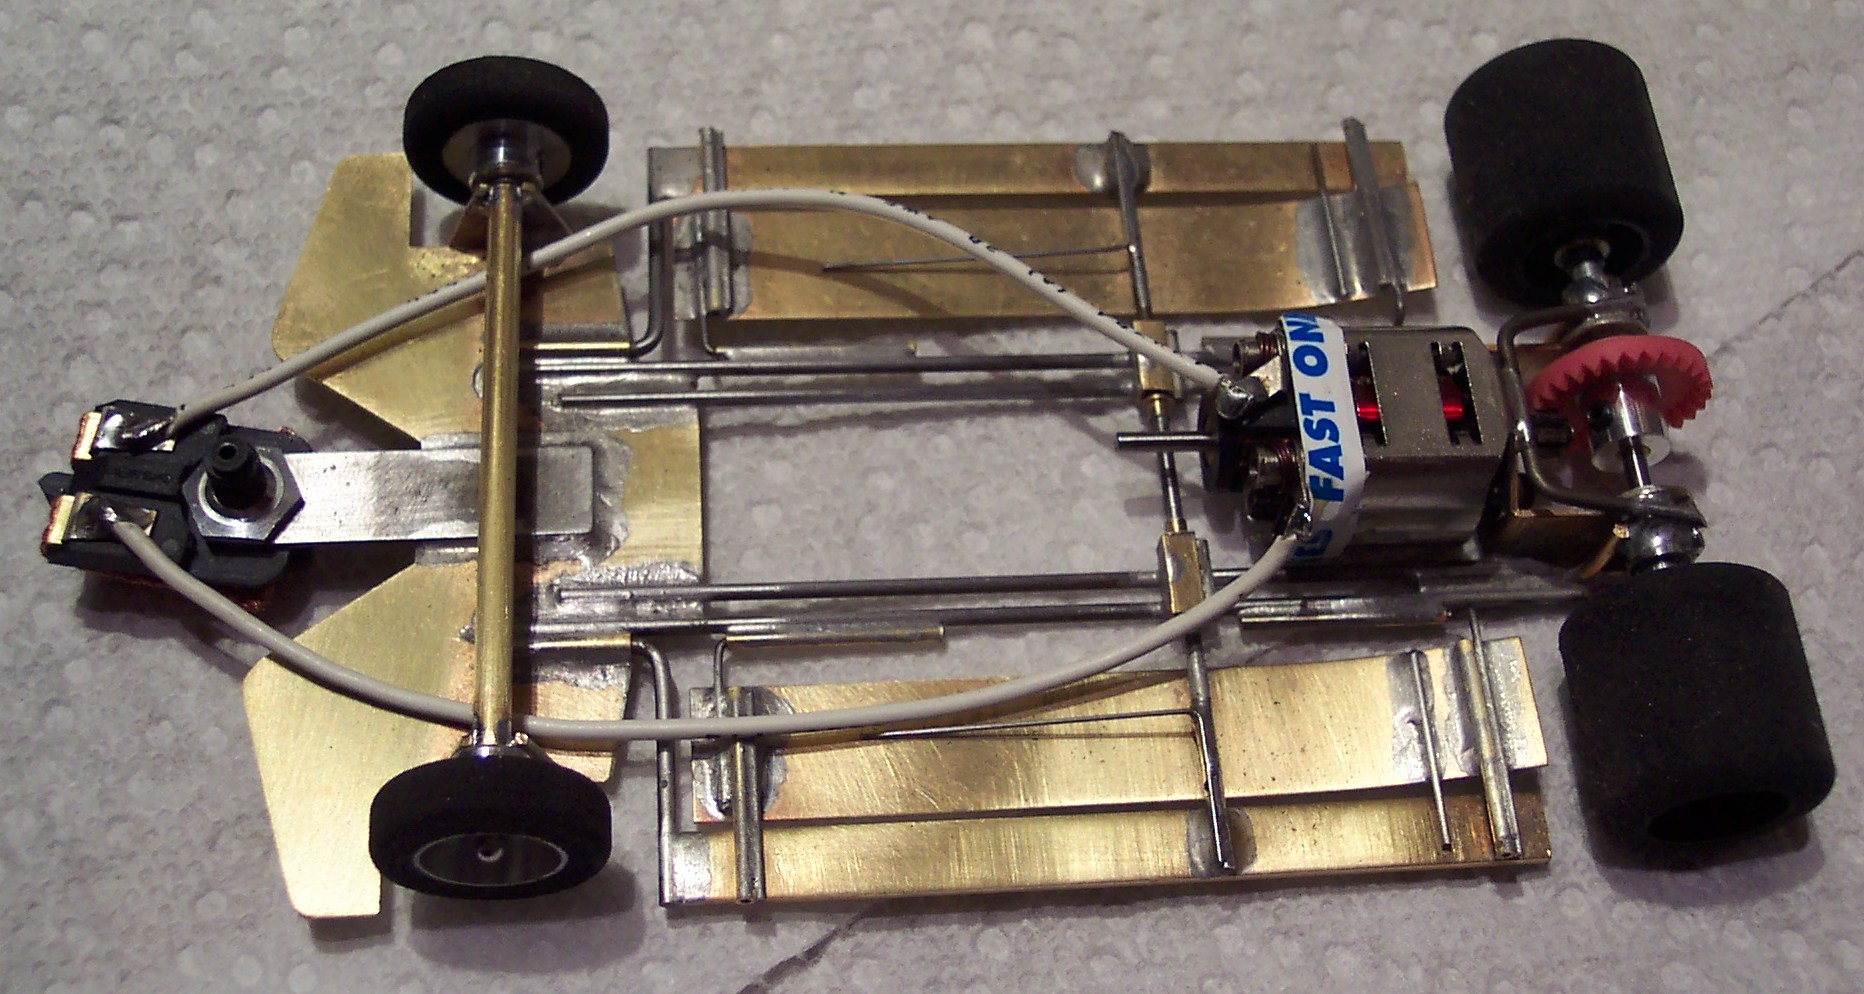
Just wanted to see what you think of my new F1 car. No kits were harmed in the making of this chassis.Posted Image 100% scratch built including the guide tongue!

We, the RMRRA guys that were man enough to carpool to Casper WY, raced on an original condition American Orange track February 20th 2010. This was the maiden voyage for this car and I ended up winning the main by 4 laps. Posted Image

Enjoy!

Bob C.

F1 Car 001.jpg
Here is the car (Lotus 49) after the race
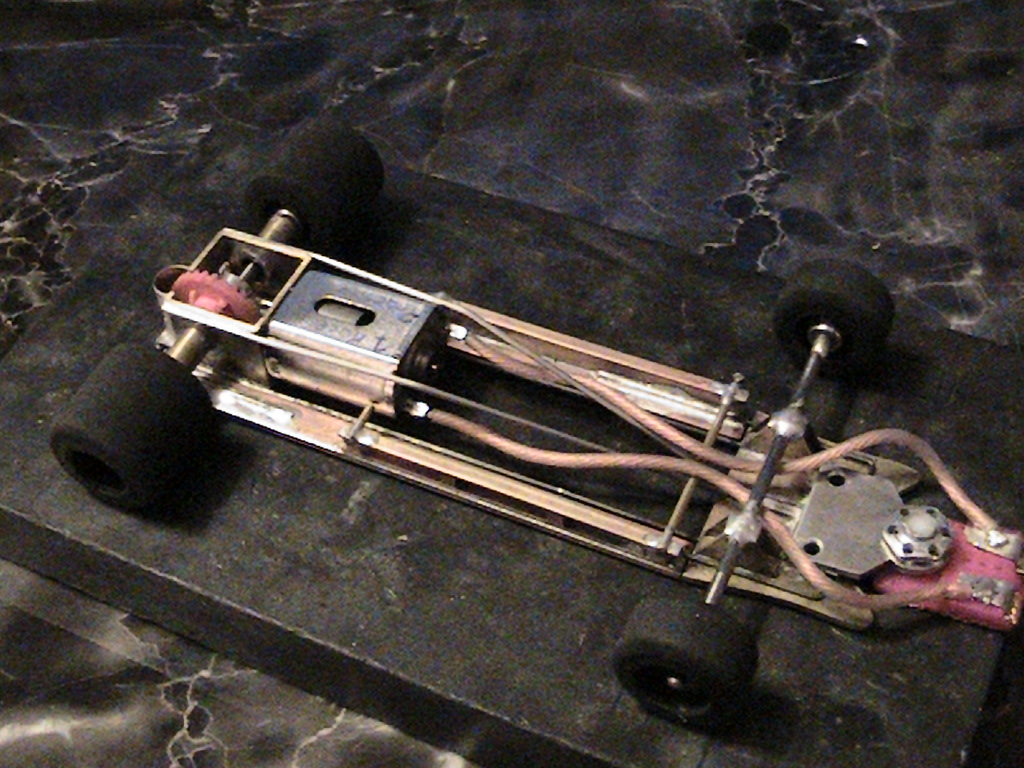
F1 Car 002.jpg
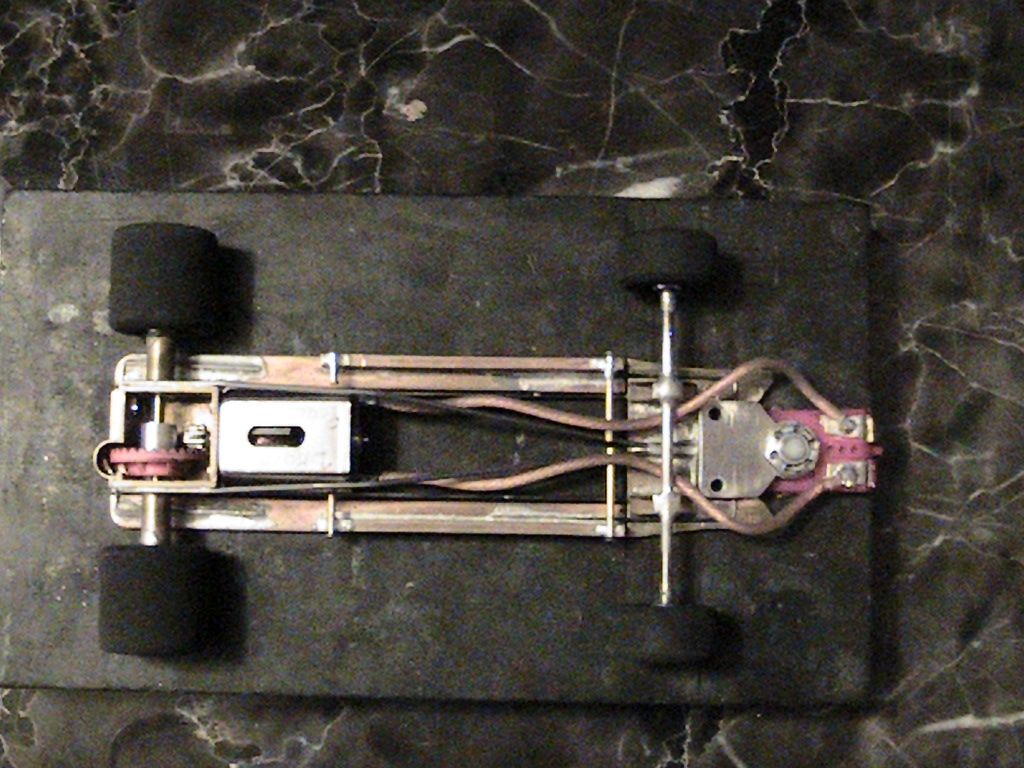
Side pans and nose are .062" rails are .047"
F1 Car 008.jpg

F1 Car 004.jpg
Close up of plumber hinge

F1 Car 005.jpg
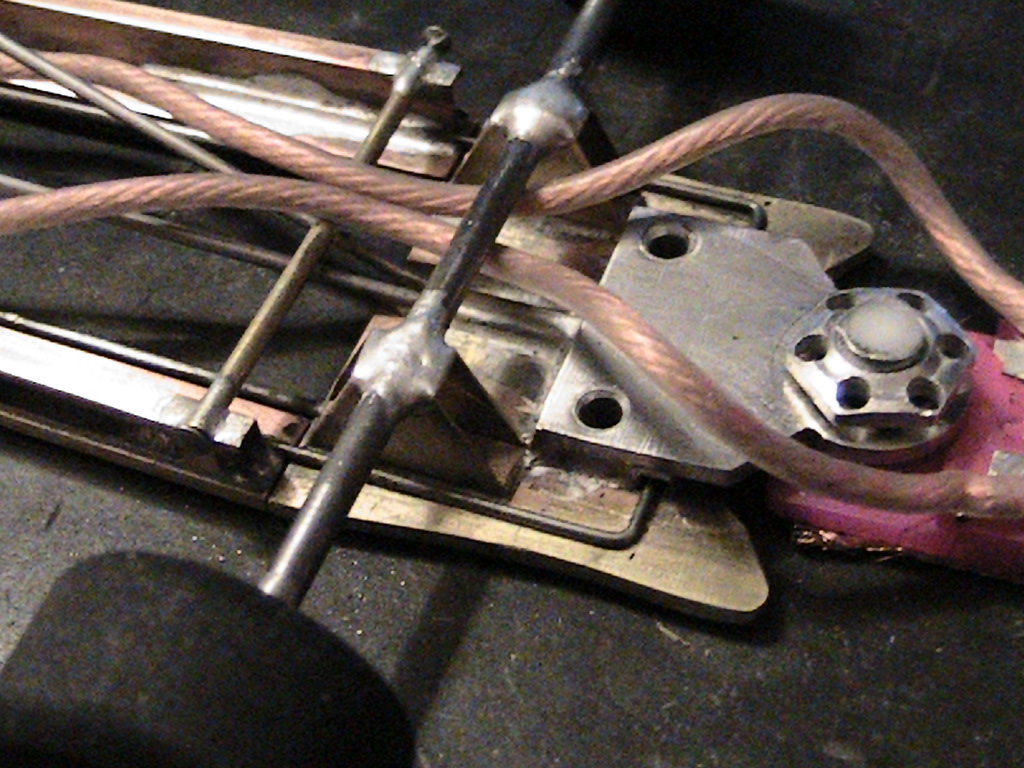
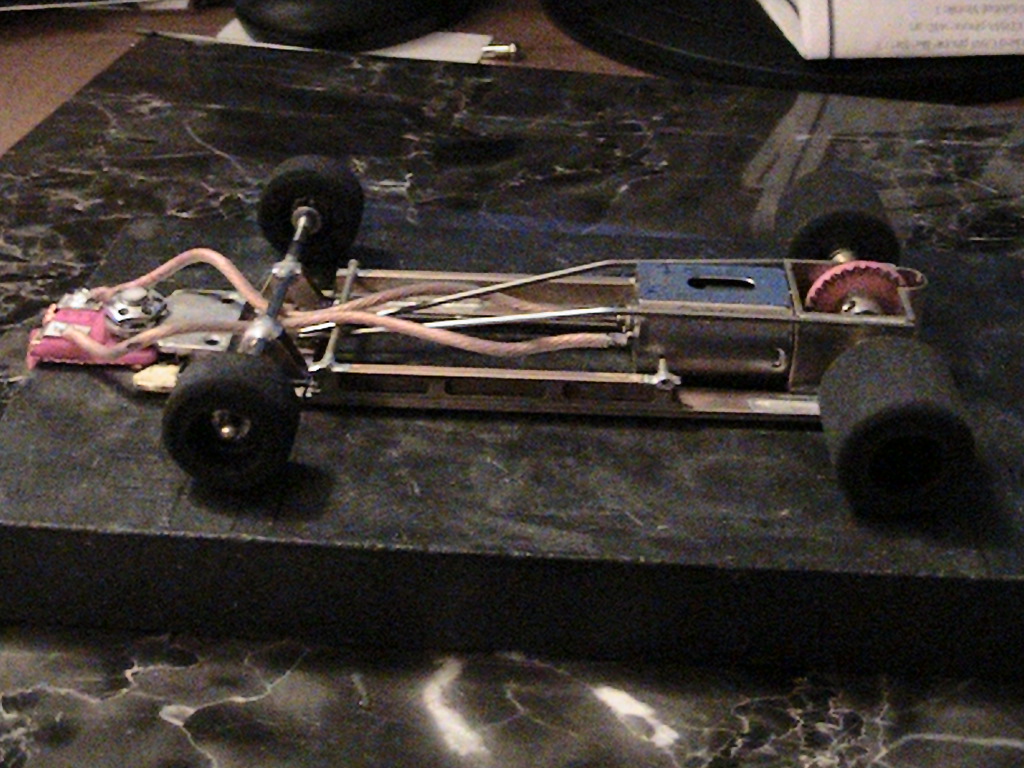
Rear up stops and gear guard. The two holes are access to motor screws
F1 Car 006.jpg
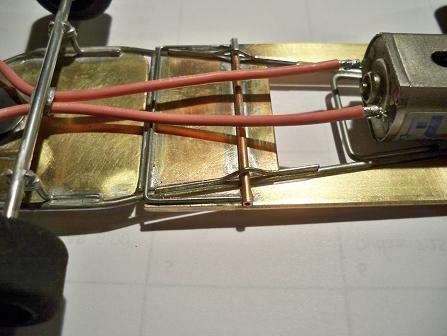
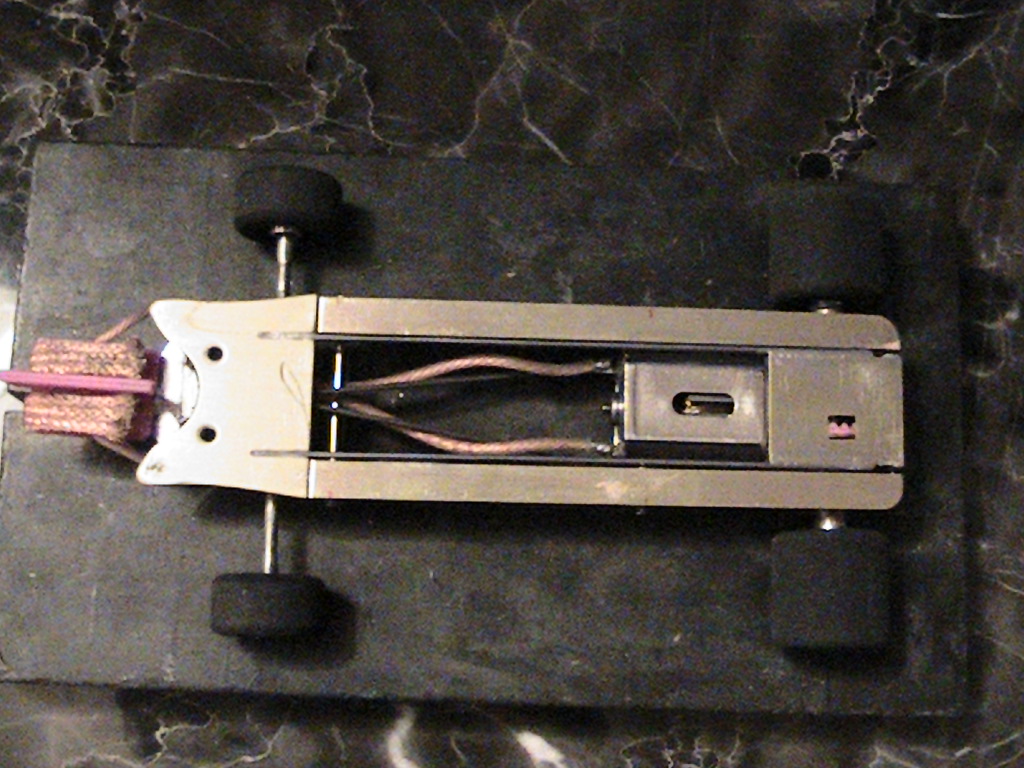
Milled rails that hold body sides. Also shows upper chassis rails.
F1 Car 007.jpg
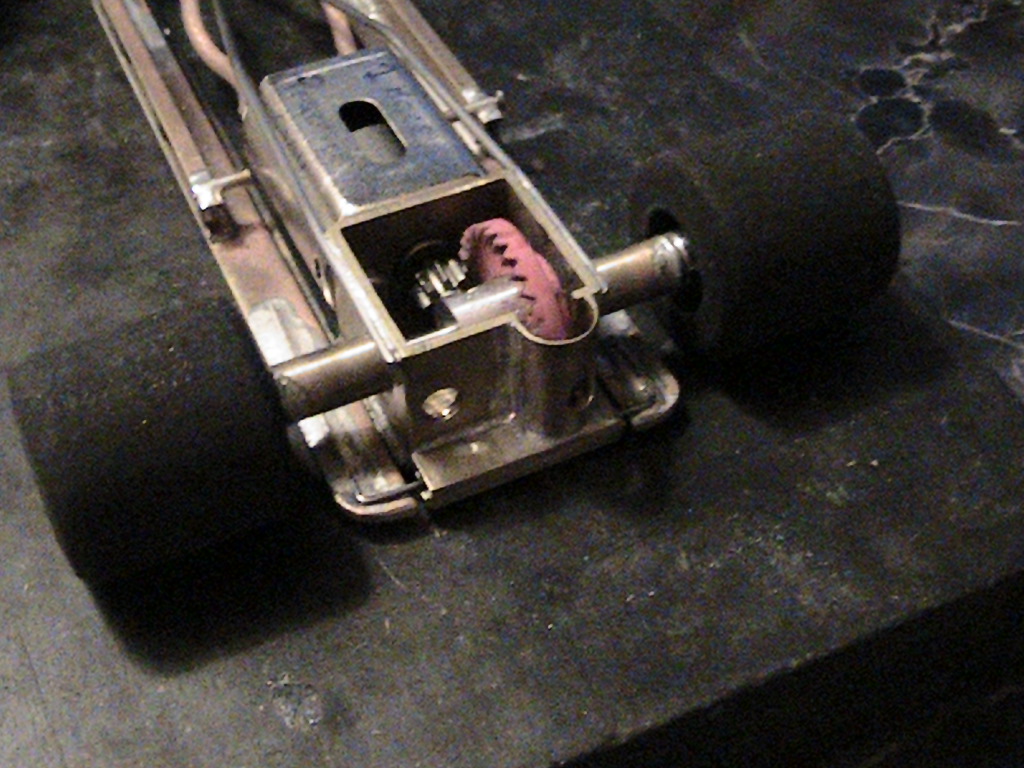
Enough clearance for a 29t gear, the largest I run.
  • Hans likes this

Bob Campbell
BC RallySport
Colorado Springs, CO


#277 Tex

Tex

    Grand Champion Poster

  • Full Member
  • PipPipPipPipPipPipPipPip
  • 9,241 posts
  • Joined: 07-July 06
  • Gender:Male
  • Location:Denton, TX

Posted 01 March 2010 - 11:07 AM

Very cool build! Grats on the win!
Richard L. Hofer

Remember, two wrongs don't make a right... but three lefts do! Only you're a block over and a block behind.

#278 Craig

Craig

    Checkered Flag in Hand

  • Member at Peace
  • PipPipPipPipPipPip
  • 1,691 posts
  • Joined: 13-March 08
  • Gender:Male
  • Location:S Lake Tahoe, CA

Posted 03 March 2010 - 09:23 PM

Hey Tony P.....

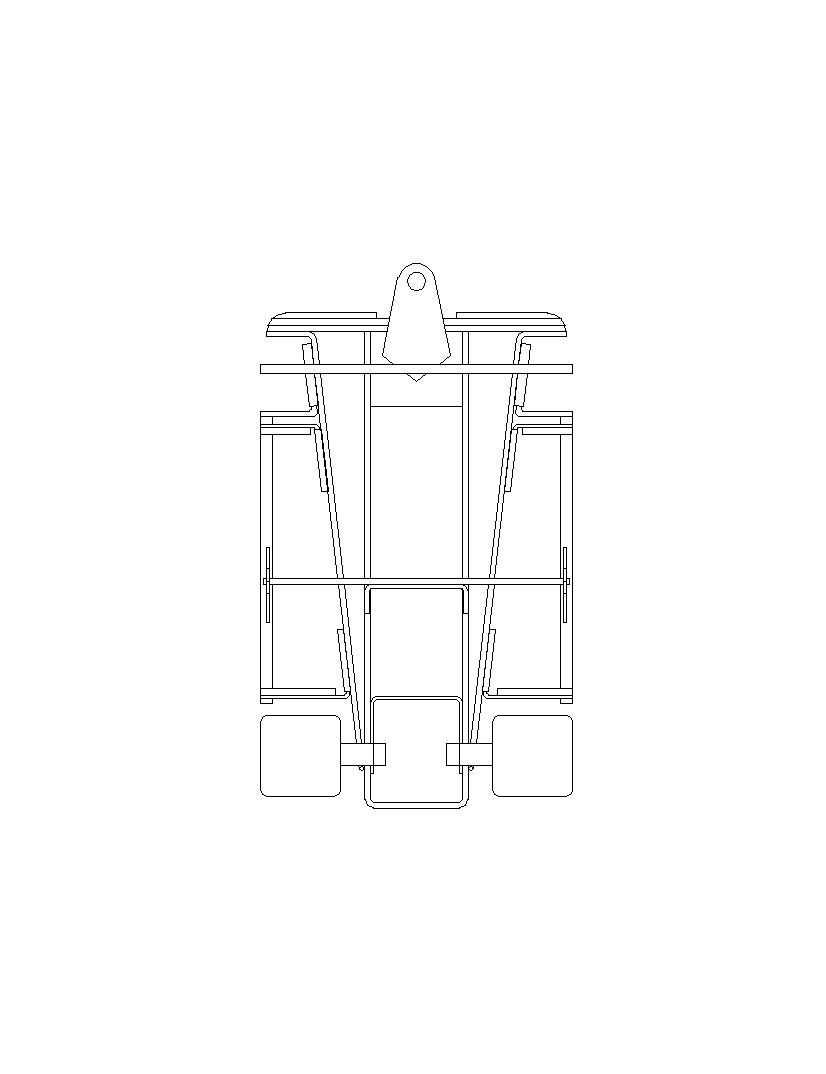
I hope you don't mind, I'm cloning your Aero Pod.....Have a look at the drawing I've done so far.

Attached Images

  • steube-2-Model.jpg

Craig Correia
11/27/57-8/12/22
Requiescat in Pace

#279 Marty Stanley

Marty Stanley

    Posting Leader

  • Member at Peace
  • PipPipPipPipPipPipPip
  • 2,582 posts
  • Joined: 21-July 08
  • Gender:Male
  • Location:Umatilla, FL

Posted 03 March 2010 - 11:35 PM

Craig,

I too am 'in the process'.

Your drawing is very good. I do have one question; What are you going to do to tie the inner pan together?
Marty Stanley
1/24/48-2/18/16
Requiescat in Pace

#280 Craig

Craig

    Checkered Flag in Hand

  • Member at Peace
  • PipPipPipPipPipPip
  • 1,691 posts
  • Joined: 13-March 08
  • Gender:Male
  • Location:S Lake Tahoe, CA

Posted 04 March 2010 - 03:47 AM

Hey Marty,

I'm still trying to work that out. I think I'm going to use an inner pan rather than the wire as shown in Tony's chassis. Once the drawing is complete I will post the revised layout.
Craig Correia
11/27/57-8/12/22
Requiescat in Pace

#281 Craig

Craig

    Checkered Flag in Hand

  • Member at Peace
  • PipPipPipPipPipPip
  • 1,691 posts
  • Joined: 13-March 08
  • Gender:Male
  • Location:S Lake Tahoe, CA

Posted 04 March 2010 - 04:12 AM

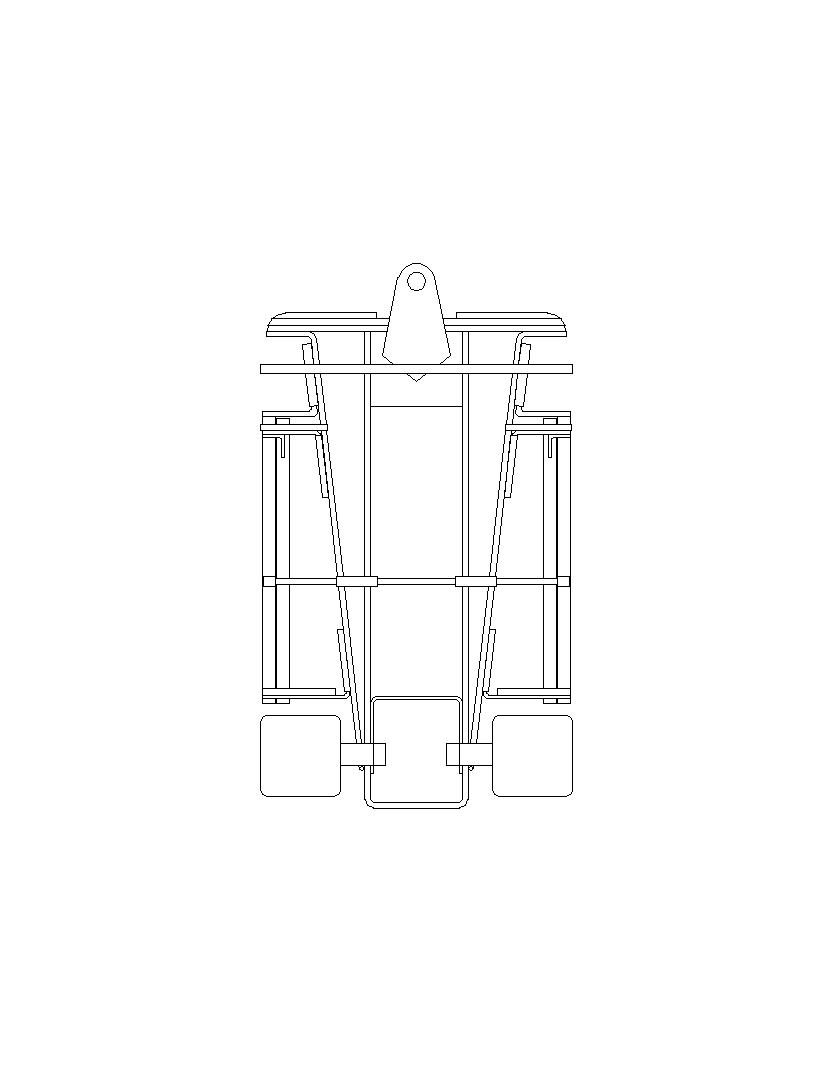
Okay, I think I have it worked out. Only one thing left to iron out. A way to hold the back of the outer pan. It's just to late to finish it tonight.

Attached Images

  • steube-2-Model.jpg

Craig Correia
11/27/57-8/12/22
Requiescat in Pace

#282 Marty Stanley

Marty Stanley

    Posting Leader

  • Member at Peace
  • PipPipPipPipPipPipPip
  • 2,582 posts
  • Joined: 21-July 08
  • Gender:Male
  • Location:Umatilla, FL

Posted 04 March 2010 - 05:43 AM

Okay, I think I have it worked out. Only one thing left to iron out. A way to hold the back of the outer pan. It's just to late to finish it tonight.


I thought that was the job of the connecting bar (some folks call it a 'bite bar') If you look at the relationship of the two front hinges and the connecting bar you have a tripod type of effect. The outer pans are free to move fore and aft, up and down and side to side. If you have the connecting bar setup properly the rear of the outer pans is supported very nicely. The closer the connecting bar is to the rear of the outer pans, the better. I hope this helps.
Marty Stanley
1/24/48-2/18/16
Requiescat in Pace

#283 tonyp

tonyp

    Grand Champion Poster

  • Member at Peace
  • PipPipPipPipPipPipPipPip
  • 15,325 posts
  • Joined: 12-February 07
  • Gender:Male
  • Location:Sanford, FL, land of lizards and big roaches

Posted 04 March 2010 - 08:33 AM

I solder the floating bite bar solid to the outer pans. I also use little keepers on the bite bar to keep the outer pan from moving side to side more than a few thousands and fouling on th iinner pan.

This setup lets the whole outer pan assembly move up and down a bit in the back and rock side to side.

Anthony 'Tonyp' Przybylowicz

5/28/50-12/20/21
Requiescat in Pace


#284 redbackspyder

redbackspyder

    Renegade, Mutineer

  • Full Member
  • PipPipPipPipPipPipPip
  • 2,995 posts
  • Joined: 09-January 08
  • Gender:Male
  • Location:Rowland Heights, CA

Posted 04 March 2010 - 02:58 PM

Just a stupid question, but isn't movement limited to only one plane ?

Mill Conroy
 

AKA : TWO LAP CONROY, Anointed Trigger Monkey by Mike Swiss


Deal me life's toughest cards, without chance for hope nor fame, just let me play this one last hand, and I'll win this whole damn game.

Second Most Interesting Man in the World.


#285 tonyp

tonyp

    Grand Champion Poster

  • Member at Peace
  • PipPipPipPipPipPipPipPip
  • 15,325 posts
  • Joined: 12-February 07
  • Gender:Male
  • Location:Sanford, FL, land of lizards and big roaches

Posted 04 March 2010 - 03:06 PM

Hinges are all in the same direction. That is all the rules specify. Play in the tubing is not regulated... It just worked out to move the way it does by accident. The original concept was to have the outer pans on a form of hinges simply so they were not soldered solid to the center which would tweak the center in case of a wreck....

Anthony 'Tonyp' Przybylowicz

5/28/50-12/20/21
Requiescat in Pace


#286 Noose

Noose

    Grand Champion Poster

  • IRRA National Director
  • PipPipPipPipPipPipPipPip
  • 23,231 posts
  • Joined: 08-November 06
  • Gender:Male
  • Location:Denville, NJ

Posted 04 March 2010 - 03:08 PM

Hinges are limited. What Tony is talking about is that there flexing but not another hinge movement.

The outer rails don't hinge up and down. They just flex. The inner portion is what hinges in a floppy manner.

Joe "Noose" Neumeister
Sometimes known as a serial despoiler of the clear purity of virgin Lexan bodies. Lexan is my canvas!
Noose Custom Painting - Since 1967
Chairman - IRRA® Body Committee - Roving IRRA® Tech Dude - "EVIL BUCKS Painter"
"Team Evil Bucks" Racer - 2016 Caribbean Retro Overall Champion
The only thing bad about Retro is admitting that you remember doing it originally.


#287 redbackspyder

redbackspyder

    Renegade, Mutineer

  • Full Member
  • PipPipPipPipPipPipPip
  • 2,995 posts
  • Joined: 09-January 08
  • Gender:Male
  • Location:Rowland Heights, CA

Posted 04 March 2010 - 03:30 PM

Thanks for the explanation guys, it now makes more sense. Noose, just another quick question, so If you put a small round wire in a large, box tube and the direction rotates front to back, up and down, side to side, then that is just considered one movement ? Thanks, Mill
  • Edward Bauer likes this

Mill Conroy
 

AKA : TWO LAP CONROY, Anointed Trigger Monkey by Mike Swiss


Deal me life's toughest cards, without chance for hope nor fame, just let me play this one last hand, and I'll win this whole damn game.

Second Most Interesting Man in the World.


#288 Noose

Noose

    Grand Champion Poster

  • IRRA National Director
  • PipPipPipPipPipPipPipPip
  • 23,231 posts
  • Joined: 08-November 06
  • Gender:Male
  • Location:Denville, NJ

Posted 04 March 2010 - 04:51 PM

It could be

Joe "Noose" Neumeister
Sometimes known as a serial despoiler of the clear purity of virgin Lexan bodies. Lexan is my canvas!
Noose Custom Painting - Since 1967
Chairman - IRRA® Body Committee - Roving IRRA® Tech Dude - "EVIL BUCKS Painter"
"Team Evil Bucks" Racer - 2016 Caribbean Retro Overall Champion
The only thing bad about Retro is admitting that you remember doing it originally.


#289 Dominator

Dominator

    Posting Leader

  • IRRA National Director
  • PipPipPipPipPipPipPip
  • 2,898 posts
  • Joined: 19-September 07
  • Gender:Male

Posted 04 March 2010 - 09:30 PM

This one has a little out of the box thinking. The pans have side to side play. With the front connecting hinge set up to allow for some flex in the main rails. The brace's in front and behind the motor were added after it's initials test laps when I found the rear end was "steering" when the motor torqued up because of the way I bent the rails. The bracing stiffened things up quite a bit and should resolve the steering issues, testing will continue next week when I finish fine tune for the Retro Thunder event.
.063 main rails
nose is .032 brass
pans and center are .063
JK F-1 bracket
JK fronts hard front and untreated rears
JK cut down guide and nylon nut
front and rear motor braces are .055
GL 7/8", WB 3.950"
Total weight 102.6g
100_1520.jpg 100_1523.jpg 100_1524.jpg

A motor is only as fast as the chassis it's in.
 
Dominic Luongo
Like Dominator Custom Chassis on Facebook
 
NERR photos from 2012-April 2016
NERR photos from 2016 to now


#290 PerryV

PerryV

    Rookie Keyboard Racer

  • Full Member
  • Pip
  • 39 posts
  • Joined: 10-February 10
  • Gender:Male
  • Location:Australia

Posted 05 March 2010 - 07:59 AM

Posted Image


Posted ImagePosted Image
Posted Image

The guide tongue was recycled from old parts.
I has .062" wire main rails, Center brass .063" and side pans .040" wheelbase is
4" and G/A is 4 9/16" will be short to suit GT40 body. Sliding rail allows pan spring change
for different tracks with one solder joint. (not shown in photo)

Perry

Perry Vaggelas
Win-em Slot Car Center
Retro Service Center
Black Controller Parts
designed by Perry


#291 GaryA

GaryA

    Rookie Keyboard Racer

  • Full Member
  • Pip
  • 27 posts
  • Joined: 06-February 09
  • Gender:Male
  • Location:Dunlap, TN

Posted 05 March 2010 - 09:33 AM

This one has a little out of the box thinking. The pans have side to side play. With the front connecting hinge set up to allow for some flex in the main rails. The brace's in front and behind the motor were added after it's initials test laps when I found the rear end was "steering" when the motor torqued up because of the way I bent the rails. The bracing stiffened things up quite a bit and should resolve the steering issues, testing will continue next week when I finish fine tune for the Retro Thunder event.
.063 main rails
nose is .032 brass
pans and center are .063
JK F-1 bracket
JK fronts hard front and untreated rears
JK cut down guide and nylon nut
front and rear motor braces are .055
GL 7/8", WB 3.950"
Total weight 102.6g
100_1520.jpg 100_1523.jpg 100_1524.jpg


Dominic:

It looks real nice. One question, how wide is it?

I still want to build a couple of F-1 cars. It looks wide.

Thanks

Gary Abramowicz


#292 Rick

Rick

    Grand Champion Poster

  • Full Member
  • PipPipPipPipPipPipPipPip
  • 8,844 posts
  • Joined: 17-February 06
  • Gender:Male
  • Location:PA

Posted 05 March 2010 - 10:08 AM

I have never built a plumber car and have been seeing a lot of F1's are built that way. I was just having a tough time getting my head around the concept, but when in Rome........
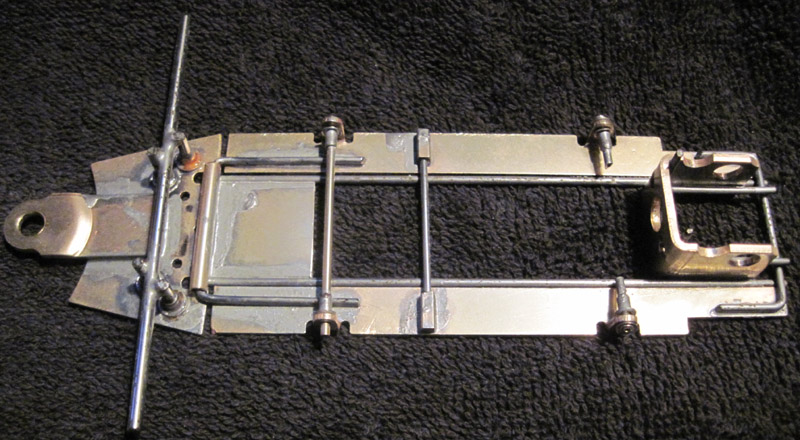
So here is a Victory 050 F1, Plumber version, shaker pins as recommended, 56 grams as pictured and no "rattler" installed yet. This will be compared with the other builds next week for the R4.
Plumber 001.jpg
Plumber 002.jpg

Rick Bennardo
"Professional Tinkerer"
scrgeo@comcast.net
R-Geo Products
LIKE my Facebook page for updates, new releases, and sales: Rgeo Slots...
 
Lead! The easy equalizer...


#293 Dominator

Dominator

    Posting Leader

  • IRRA National Director
  • PipPipPipPipPipPipPip
  • 2,898 posts
  • Joined: 19-September 07
  • Gender:Male

Posted 05 March 2010 - 11:44 AM

Gary,

This is built to the IRRA width of 1-5/8". D3 max width is 1-1/2". It very deceiving the way I have the pans and main rails hung. Another reason is the main rails run on the inside of the motor bracket allowing for a wider pan. With this design it would be difficult to use .078 wire for the main rails and still have enough motor clearance. I made the cuts on the motor bracket for the rails at each corner which barely provided enough clearance for the motor.

A motor is only as fast as the chassis it's in.
 
Dominic Luongo
Like Dominator Custom Chassis on Facebook
 
NERR photos from 2012-April 2016
NERR photos from 2016 to now


#294 Dominator

Dominator

    Posting Leader

  • IRRA National Director
  • PipPipPipPipPipPipPip
  • 2,898 posts
  • Joined: 19-September 07
  • Gender:Male

Posted 05 March 2010 - 11:46 AM

Perry,

Is that going to be a F-1 and Can Am combo? This gallery is getting a lot of art in it this week!

A motor is only as fast as the chassis it's in.
 
Dominic Luongo
Like Dominator Custom Chassis on Facebook
 
NERR photos from 2012-April 2016
NERR photos from 2016 to now


#295 gascarnut

gascarnut

    Posting Leader

  • Full Member
  • PipPipPipPipPipPipPip
  • 3,938 posts
  • Joined: 16-February 06
  • Gender:Male
  • Location:Irvine, CA

Posted 05 March 2010 - 07:32 PM

Gary,

This is built to the IRRA width of 1-5/8". D3 max width is 1-1/2".


D3 width is 1-3/8", makes it even more difficult to do that sort of design. Nice job, though, it will be interesting to see how it works.
Dennis Samson
--------------------------
Scratchbuilding is life
Life is scratchbuilt

Samson Classics

#296 PerryV

PerryV

    Rookie Keyboard Racer

  • Full Member
  • Pip
  • 39 posts
  • Joined: 10-February 10
  • Gender:Male
  • Location:Australia

Posted 05 March 2010 - 08:09 PM

Perry,

Is that going to be a F-1 and Can Am combo? This gallery is getting a lot of art in it this week!


Thanks you and yes it can be used for F1, Can-Am but GT Coupe to fit a GT40 is what its for.

Perry

Perry Vaggelas
Win-em Slot Car Center
Retro Service Center
Black Controller Parts
designed by Perry


#297 Marty Stanley

Marty Stanley

    Posting Leader

  • Member at Peace
  • PipPipPipPipPipPipPip
  • 2,582 posts
  • Joined: 21-July 08
  • Gender:Male
  • Location:Umatilla, FL

Posted 05 March 2010 - 08:36 PM

Rick,

I guess great minds thing a lot alike! Well almost!

Here's a couple of photos of my Victory Plumber Chassis.

Without a doubt, I think your Victory Formula 1 kit is the most versatile I've ever seen. Thanks for developing it.

Posted Image
Posted Image


Marty Stanley
1/24/48-2/18/16
Requiescat in Pace

#298 Rick

Rick

    Grand Champion Poster

  • Full Member
  • PipPipPipPipPipPipPipPip
  • 8,844 posts
  • Joined: 17-February 06
  • Gender:Male
  • Location:PA

Posted 05 March 2010 - 09:51 PM

I'm still not sure about a plumber but here's the update. Rattler, fronts, guide etc. Bushings in the rear until the test. Marty you have done a lot with your build.

Now on to build a R&C GP chassis. ugh!............
Plumber.jpg

Rick Bennardo
"Professional Tinkerer"
scrgeo@comcast.net
R-Geo Products
LIKE my Facebook page for updates, new releases, and sales: Rgeo Slots...
 
Lead! The easy equalizer...


#299 Josh Crutchfield

Josh Crutchfield

    On The Lead Lap

  • Full Member
  • PipPipPipPip
  • 456 posts
  • Joined: 10-January 08
  • Gender:Male
  • Location:Springfield, OH

Posted 05 March 2010 - 10:26 PM

Here's a couple pics of my new car for the R4. Pretty basic build.

002.JPG

001.JPG


Josh
  • James Fetherolf likes this

#300 Rick

Rick

    Grand Champion Poster

  • Full Member
  • PipPipPipPipPipPipPipPip
  • 8,844 posts
  • Joined: 17-February 06
  • Gender:Male
  • Location:PA

Posted 05 March 2010 - 10:32 PM

SHOWOFF! :laugh2: :laugh2: :laugh2: Go git em bro..................

Rick Bennardo
"Professional Tinkerer"
scrgeo@comcast.net
R-Geo Products
LIKE my Facebook page for updates, new releases, and sales: Rgeo Slots...
 
Lead! The easy equalizer...


Electric Dreams Online Shop