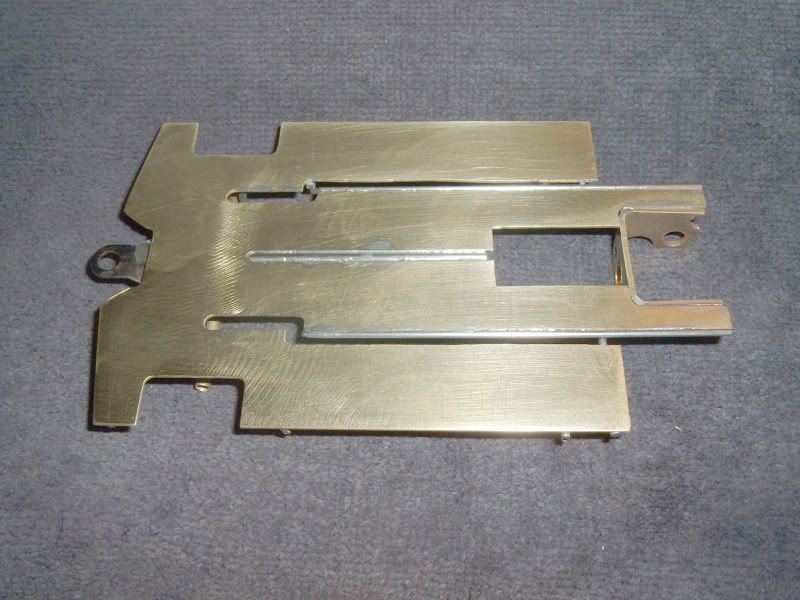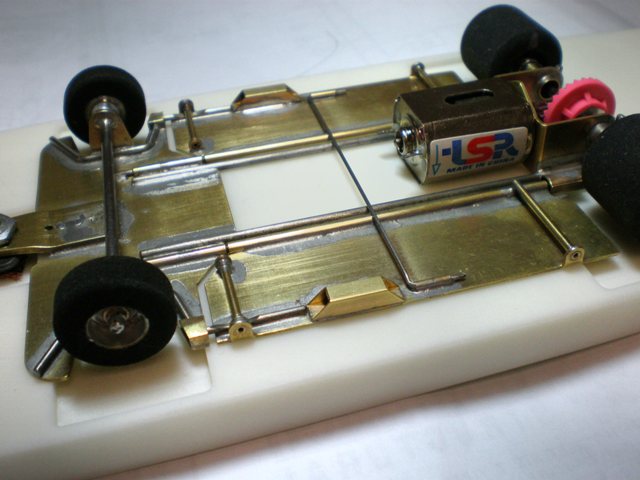
Scratchbuilt chassis gallery
#51
Posted 03 November 2008 - 12:08 PM
11/27/57-8/12/22
Requiescat in Pace
#52
Posted 09 November 2008 - 04:56 PM
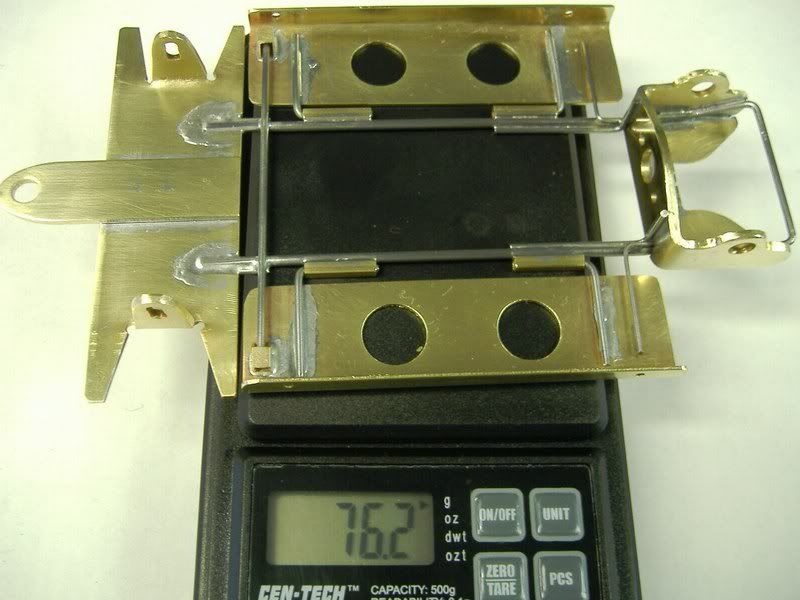
Don't have a reason or theory based on how or why this one is built the way it is?
Just hope that it works!
All pieces are fabricated by hand, and using what I believe Munter called an "Eyechrometer".
Slots-4-Ever
Brian McPherson
REM Raceway
"We didn't realize we were making memories, we just knew we were having FUN!"
#53
Posted 09 November 2008 - 05:48 PM
I'm kinda like Brian and just went for not knowing what is was going to be. Just wanted to build an all-brass chassis.
First chassis build since the early '80s. Now all I need is a tumbler and a little tweeking.
DND Raceway
"If you can't run with the big dogs stay on the porch"
That's why I sit there in my rocking chair and watch.
#54
Posted 13 November 2008 - 09:39 AM
#55
Posted 13 November 2008 - 12:32 PM
I decided to come up with a design that has lots of movement - kind of like watching Charo walk across the stage in a fringed skirt . . . . everything kinda moves in so many different directions, all together at the same time.
This eveing I will give it a run at one of my local tracks.
1/24/48-2/18/16
Requiescat in Pace
#56
Posted 13 November 2008 - 04:36 PM
Rick Bennardo
"Professional Tinkerer"
scrgeo@comcast.net
R-Geo Products
LIKE my Facebook page for updates, new releases, and sales: Rgeo Slots...
Lead! The easy equalizer...
#57
Posted 25 November 2008 - 12:10 PM
Rick Bennardo
"Professional Tinkerer"
scrgeo@comcast.net
R-Geo Products
LIKE my Facebook page for updates, new releases, and sales: Rgeo Slots...
Lead! The easy equalizer...
#58
Posted 27 November 2008 - 07:40 PM
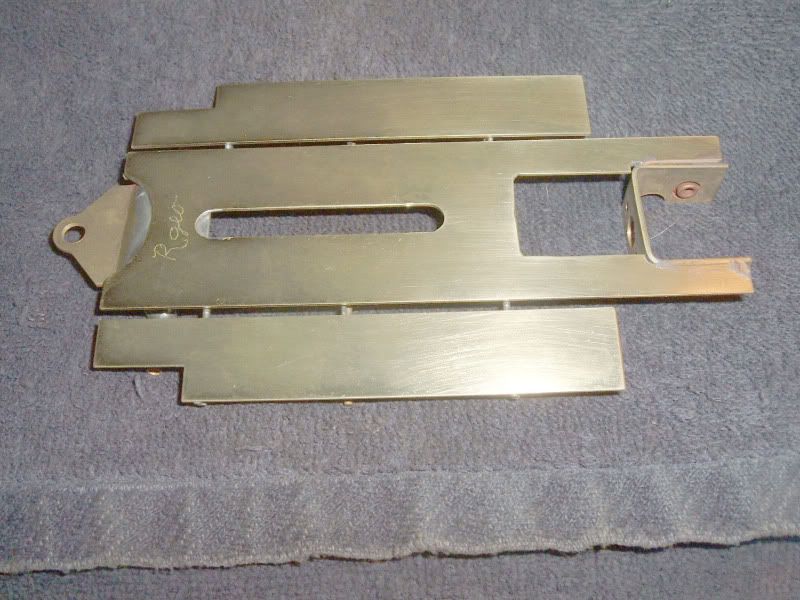
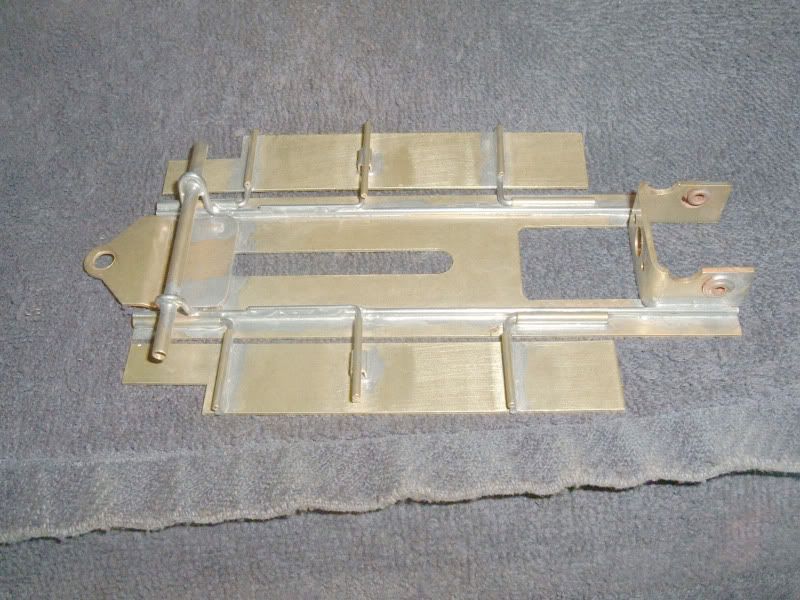
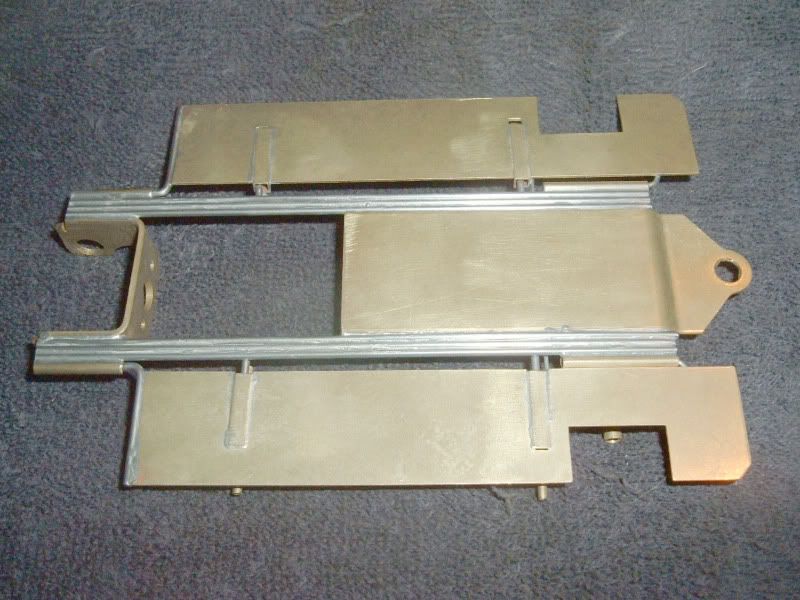
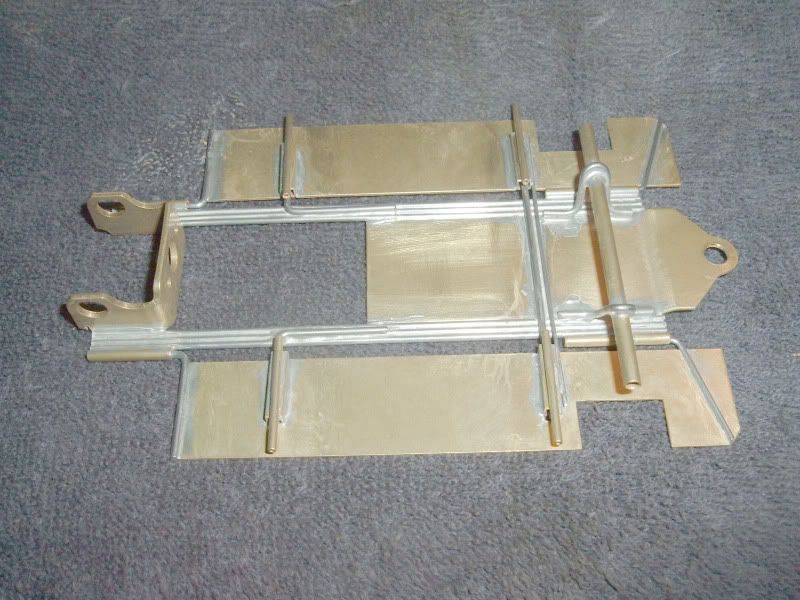
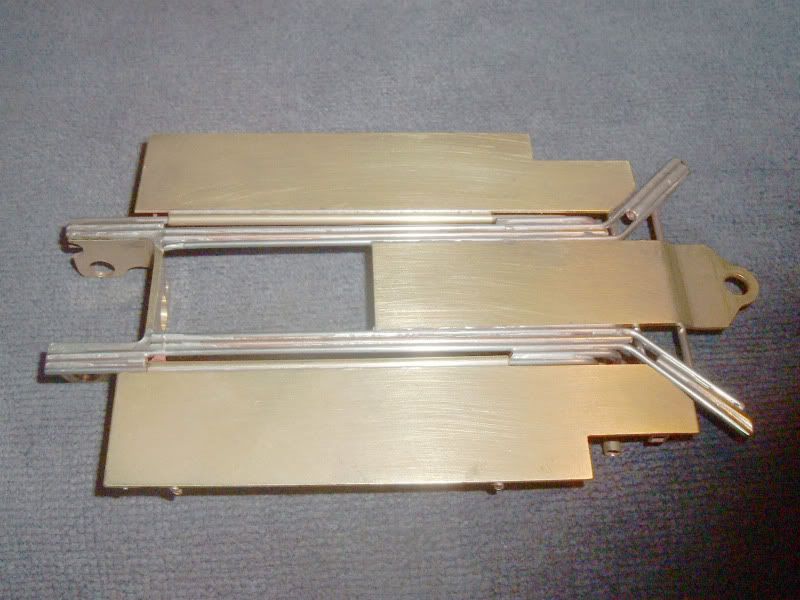
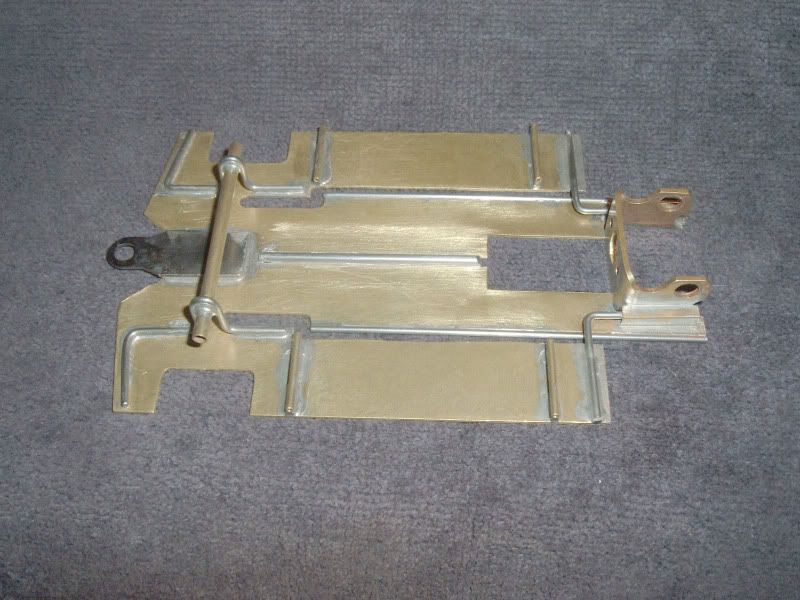
4 1/2" wheelsbase, 5 3/16" guide lead. All parts from the kit. .032 center plate, .032 pans, hypoid motor box. shortened guide tongue. Built very strong for rubbin. heavy hinge wires, 3 pin tubes per side, just in case. First time I used the tumbler after a build, 4 hours. Not as shiney as what I have seen but did a nice job on the solder joints and just a bit of scotchbright on the bottom, is what you see. 73 grams, should come in at under 125 and be a very nuetral chassis. Traditional floppy pan.
Rick Bennardo
"Professional Tinkerer"
scrgeo@comcast.net
R-Geo Products
LIKE my Facebook page for updates, new releases, and sales: Rgeo Slots...
Lead! The easy equalizer...
#59
Posted 28 November 2008 - 12:31 PM
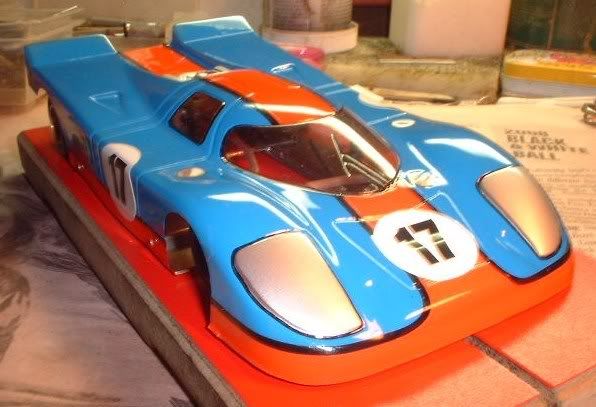
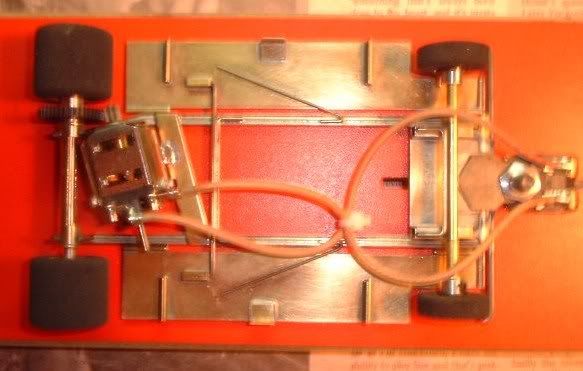
The body is from Red Fox, the chassis built by me & the motor is a Pro/Slot Big Dog. The car in its debut run was running very fast, but I popped a motor spring & lost power. Then I notice the motor brushes were almost gone & had to replace those before rejoining the race. With a little more tuning, I should get in the sub-5 second mark. Weird that the brushes worn out so fast, I'll have to figure that out later. Sorry about the crummy chassis pictures.
First Place Loser in the JK Products
International D3 Builders Competition
#60
Posted 28 November 2008 - 04:40 PM
I intend to live forever! So far, so good.
#61
Posted 28 November 2008 - 06:43 PM
Yeah but I was using the stock brushes, which are harder than Bigfoots or Golddust brushes. For some weird reason, the stock brushes work better. Go figure.Russ, the Pro Slot SpeedFX 16D motors have lousy brushes too. Around here it's common practice to change them out to Big Foots or Gold Dust before running the motors.
First Place Loser in the JK Products
International D3 Builders Competition
#62
Posted 01 December 2008 - 08:19 AM
Plumber set up with floppy/shaker body mounts..thus the "Plopper". Used a Warmack kit, Warmack shaker pin tube set-up that I saw on his car from the last race, and a JK Hypoid bracket. Weighs in at 65 grams which should yield a 115 gram car. 4 inch WB with a 1 inch guide lead.
Joe "Noose" Neumeister
Sometimes known as a serial despoiler of the clear purity of virgin Lexan bodies. Lexan is my canvas!
Noose Custom Painting - Since 1967
Chairman - IRRA® Body Committee - Roving IRRA® Tech Dude - "EVIL BUCKS Painter"
"Team Evil Bucks" Racer - 2016 Caribbean Retro Overall Champion
The only thing bad about Retro is admitting that you remember doing it originally.
#63
Posted 01 December 2008 - 11:25 AM
Yeah but I was using the stock brushes, which are harder than Bigfoots or Golddust brushes. For some weird reason, the stock brushes work better. Go figure.
Russ,
Since I've got back into slots at the first of the year and got involved in motor building (both American and Chinese) , I found the stock ProSlot brushes to be really super soft compared to Gold Dust or SBFII's. Going from soft to hard, it would be Pro Slot Stock then Gold Dust then SBF II's being the hardest. Stock PS brushes will be half gone after a 40 second water break in. Gold Dust Pro's will barely be 20% gone. I use mainly the Gold Dust with a heavy brush tension and get great wear out of them, usually a minimum of four races.
Michael Rigsby
"... a good and wholesome thing is a little harmless fun in this world; it tones a body up and keeps him human and prevents him from souring." - Mark Twain
#64
Posted 06 December 2008 - 03:06 AM
- Jocke P likes this
11/27/57-8/12/22
Requiescat in Pace
#65
Posted 06 December 2008 - 08:00 PM
Rick Bennardo
"Professional Tinkerer"
scrgeo@comcast.net
R-Geo Products
LIKE my Facebook page for updates, new releases, and sales: Rgeo Slots...
Lead! The easy equalizer...
#66
Posted 07 December 2008 - 11:40 PM
#67
Posted 08 December 2008 - 01:16 AM
Mike Katz
Scratchbuilts forever!!
#68
Posted 08 December 2008 - 02:37 AM
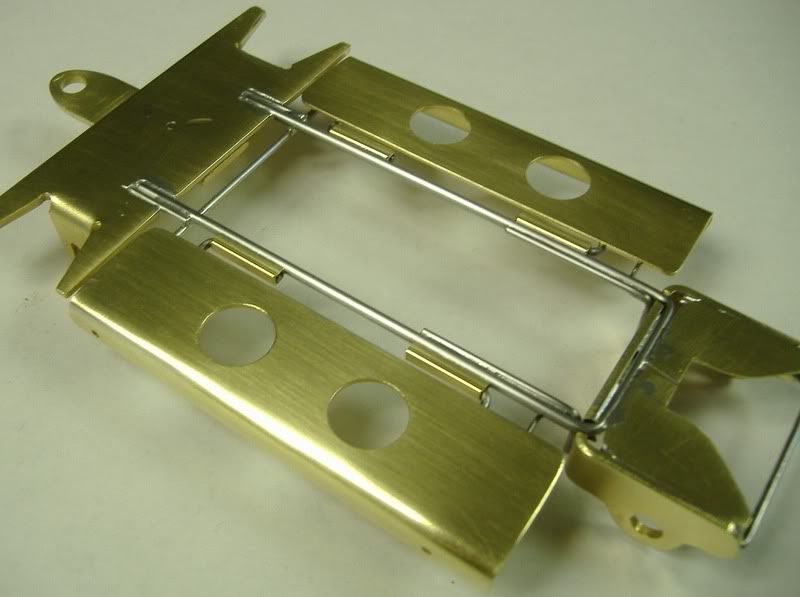
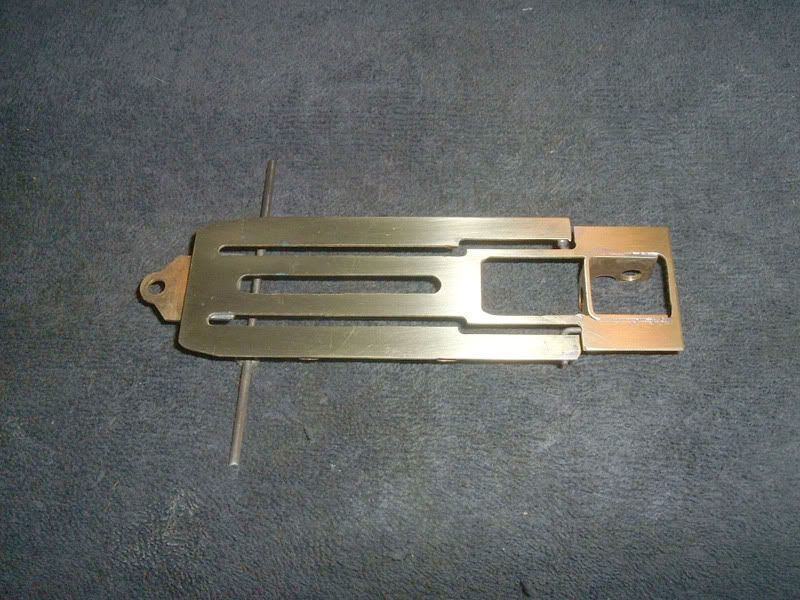
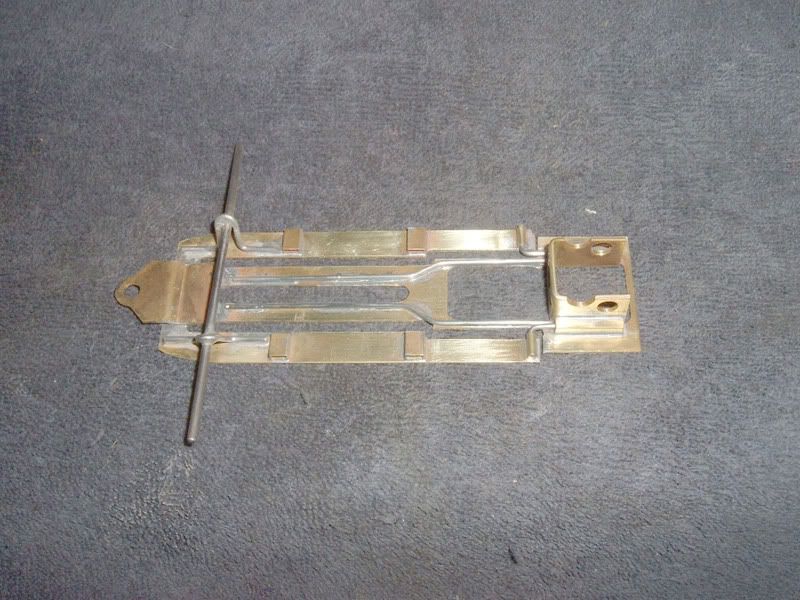
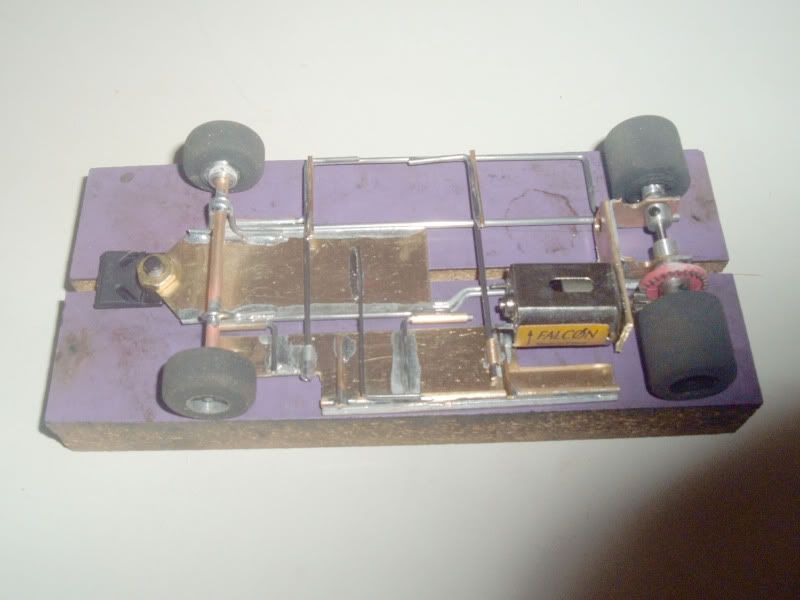
This was a chassis that started out to be something else, became that, partly and then got changed again to end like this,..lol
I changed my mind about Five times and ended up Trying a system that we Probably all Tried many years ago and also I noticed on one or two of Mr Steube's chassis.
When I had made my mind up Finally, I found I had an old set of Parma .032 'Bat Pans' that 'Fitted' Fine !
It uses an R-Geo motor bracket and Rails of .063 and .055, with the 'Sprung' Plumber using 2 x .055
Nose piece is .062 and an old Steel Guyide tongue I had a few of,..Slack I Know,..I should have Made my Own !!,..
WB is 4 1/8th with a 5" GL.
Have Yet to weigh it, but it Must be atleast 120 grams.
I must admit, after giving it a 'run' the Day after our recent State Titles, I feel if I had bothered to have gotten it ready for the race, I Might have used it as I think it would have handled the conditions on the day better than Old Faithful !!,..DOH !!
So far it's Handling on Our Johnson 110' is extremely Promising.
#69
Posted 10 December 2008 - 10:02 PM
After a 22 years sabbatical I am really excited to be designing, building and racing slot cars again.
Need less to say that i would not have the slightest interest if it were not for the Retro class of racing with sealed motors that has been introduced.
Interstingly enough I had never actually built an inline chassis previousley so the cars I am showing here represent the first two I have built - both went very well and I hope that other builders may get some ideas from these as I know that we all look at what other builders are doing and sometimes an idea can emerge from other builders efforts or a new way of modifying our existing designs can crystalise.
With both of these cars I wanted to utilise availiable brass and wire stock and the only prebuilt parts were the U brackets and the guide tongues.
Chassis #1 was designated 'Skinny Boy'
Motor Bracket (Rehco) is re-bent to get the bearings out wide and the motor back to the axle.
Rails are all .055" and all brass sheet is .063".
Front wheels (made from old rear wheels)are independant.
The pans rattle on the wire outriggers.
Front wheels are supported by .063 by .025 brass L brackets for simplicity, strength and weight.
Total weight is 97 grams (rolling chassis 90 grams plus body 7 grams).
This car was built prior to the first ever 'Aussie Retro' race held at Hornsby Slotcar Centre (HSC) here in Sydney Australia and in the lead up to the race held the fastest time after I had added lead as it was way too light.
Best time for this at HSC was 5.18.
I had added 13 grams of lead - ran out of room to stack much more on and so proceeded to build: -
Chassis #2 was designated 'Fat Boy'
On to Chassis #2 (Fat Boy) which I built on the back of my findings with Skinny Boy.
The difference between the two is I went from 17# wire to 16# wire in the rail construction and used larger sections of 16# brass strips for the front and pans. I used a conventional U bracket (JK Hypoid) this time as the space between the rear of the motor and the crown gear was limited after I bent the bracket for Skinny Boy.
Weight was 116 gms.
Wheel base is 4 inches
Length is 4 13/16 inches
Fat Boy worked well straight up and so I got some practice in the Friday night Practice Race prior to the first Aussie Retro.
Come race night Fat Boy set TQ at 5.11 secs and narrowly finished 3rd a second or so ahead of 4th.
I was certain that I could get this car under 5.00 secs with most of the improvement to be gained from the driver.
Took Fat Boy to HSC on Wednesday following the Race and after some fiddling was able to do a whole heap of times between 5.01 and 5.06 but could not crack 5.00. Added 3 gms (total now 119 gms) of lead to front and then reeled of a 5.00 and the magic 4.99 - totally stoked - first car to break 5 seconds at HSC.
Ultimately I disposed of the lead and added more brass to the front.
I would like to say that this exercise of designing, building and racing my Aussie Retro car has been the most fun I have had in years - the racing is close and the camaraderie among the racers is terrific. Its also been fun catching up with guys like Stoo Amos and Wayne Brambles who I used to race when we were at school in 1970.
Regards - Mark
'Do less with more focus'
#70
Posted 11 December 2008 - 02:51 AM
It's different and I like that. I have not thought of using a strip of brass to space the main wires that far apart and having hinges for the wing on the wire soldered on the front only like a tortion bar plumber affect .
Mmmm, something to think about
Ol'Phart
Phil
#71
Posted 11 December 2008 - 06:23 AM
I intend to live forever! So far, so good.
#72
Posted 12 December 2008 - 12:24 AM
Just like to share my latest design with you as it proved very effective at the recent (Saturday just past) NSW Aussie Retro Title race held at Hornsby Slotcar Centre (HSC).
This chassis really goes like stink as evidenced by TQ on the day of 4.773, the next best was by my old mate Stoo (Stewart Amos) - at 5.006.
Stoo and Slotbaker (Steve King) have posted some details on this race in the General Retro Racing (NSW Titles) forum if you are interested.
Firstly I will take you on a trip down memory lane (mine at least) to 1976 when as a slightly younger racer I developed a new chassis concept that was labelled the 'Ice Cream Cone' due to the triangulated or cone shaped rail construction. This concept travelled well and became known as the tripod in other lands. This chassis design also relied more on a rattling type of movement rather than hinges which were generally prevalent at this time. The other important feature at this time was that with the air dams being used on wing racers I did not see any need to have the front of the body flopping around on the pans so it was nailed to the front nose section.
I can't begin to describe how well this car and many follow-ups (built by myself and others) went compared to the other designs at the time.
The following pics are of the first 'Ice Cream Cone' as featured in an Aussie slotcar magazine called Mini Wheels which was produced by a guy called Dave Smith.
Back Page Plan - Mini Wheels - May 1977
Close-up of Plan
Pan Detail
The back page plan was a little lacking in detail so I have done a quick drawing to explain how it hung together. The plan is also a little inaccurate as the front end was actually composed of curves rather than straight lines as depicted.
Later Models
These non-inline cars are some that I built in the 80's and were actually the last cars I built and raced before 'retiring' in 1986.
These cars as set up were subsequently campaigned by Stoo after I stopped racing and I must thank Stoo for looking after these as I had no idea they were still in existence until Stoo dragged them out of deep storage.
This car was used for Group 12 and Group 20 racing.
This car was used for Group 20 and Group 27 racing.
So drawing on the design criteria (being strong and simple) of the origional 'Ice Cream Cone' and memories of the dozens of variations built by myself and others combined with the lessons learned in building 'Skinny Boy' and 'Fat Boy' (see my previous post in this forum) my brain and soldering iron gave birth to: -
'Retro Ice Cream Cone #1'
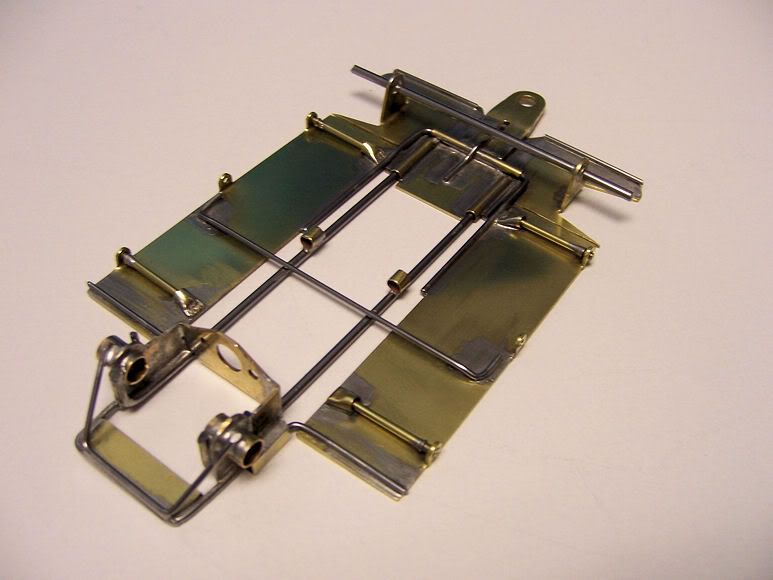
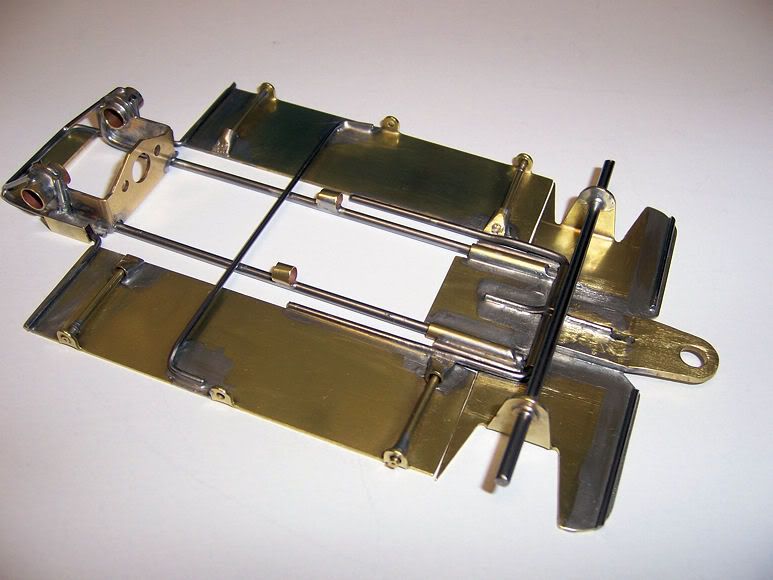
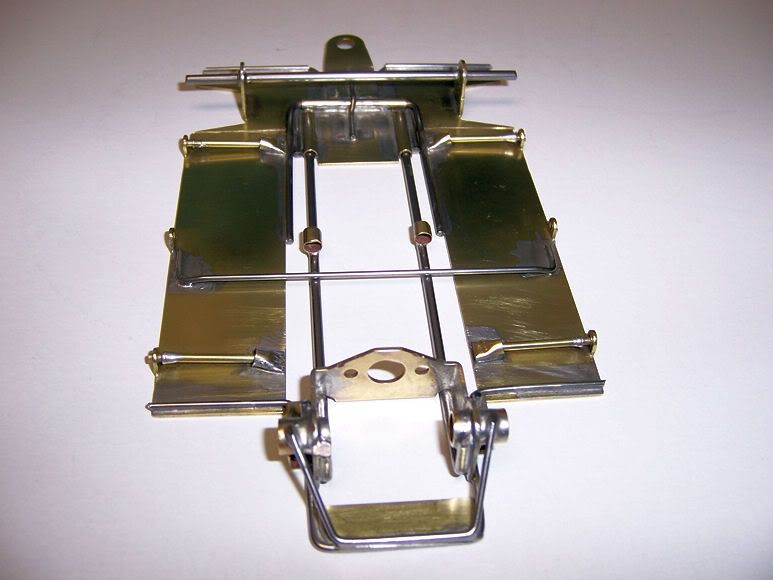
Here are some construction details
Weight ready to race with body is 122 grms.
Length back axle to guide post is 4 13/16th's.
Wheel base is 3 7/8th's.
Front section is .063 brass.
Rails are .078 p'wire filed to .063 on top.
The bracing on top of the mail rails and the cross brace and motor front L attachment are .063 brass.
Front wheels are independent.
Front wheel support is .063 x .250 brass.
Pans are .025 with .015 L section on outside edge and 1/16 ID brass tube on inside.
The pans are totally independent - the cross-bar floats in the 1/8 ID square tube soldered to the pans - moving the position of these tubes determines the amount of movement at the rear of the pan - further forward means more uplift potential at the rear - I will probably put a series of thes tubes on the next build so as to easily tune this variable.
The pans hinge on 1/16 ID square tube at front and rattle in 3/32 ID square tube at rear - they have 1/32 fore and aft play - the pans are secured by a bent .063 pin which can be pushed out to facilltate changing pans for different conditions.
The bracket is re-bent JK.
Guide tongue is commercial steel - dont know what brand.
I think that covers it - so now the pics - sorry I'm not a great photographer but will work on it
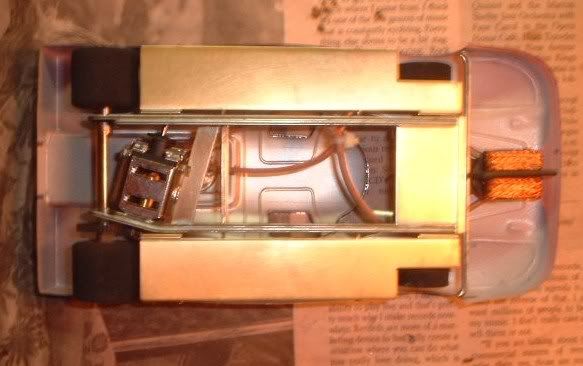
Bottom Shot with Body as raced
Top Shot with Body (True Scale TI 22) - I found that the Dave Bloom Champion Ferrari worked well also but the TI 22 was a little more stable on the gutter lanes.
Chassis Shots
Shots showing how the pans are detached - the bend in the .063 pan pins holds them solid - they are detached by using special tool XYZ which does double duty as my clearance measure.
Hope you have enjoyed the above and hopefully can take something away to ponder.
Regards,
'Do less with more focus'
#73
Posted 12 December 2008 - 10:24 PM
Rick Bennardo
"Professional Tinkerer"
scrgeo@comcast.net
R-Geo Products
LIKE my Facebook page for updates, new releases, and sales: Rgeo Slots...
Lead! The easy equalizer...
#74
Posted 14 December 2008 - 03:24 PM
Rick Bennardo
"Professional Tinkerer"
scrgeo@comcast.net
R-Geo Products
LIKE my Facebook page for updates, new releases, and sales: Rgeo Slots...
Lead! The easy equalizer...
#75
Posted 14 December 2008 - 05:00 PM
John Chas Molnar
"Certified Newark Wise Guy since 1984" (retired)
"Certified Tony P Chassis God 2007.2023
Retro Chassis Designer-Builder