#3401

Posted 29 January 2012 - 08:02 PM
I may have the bracket down stairs, let me check and I will get back to you....Kim
#3402

Posted 02 February 2012 - 05:34 PM
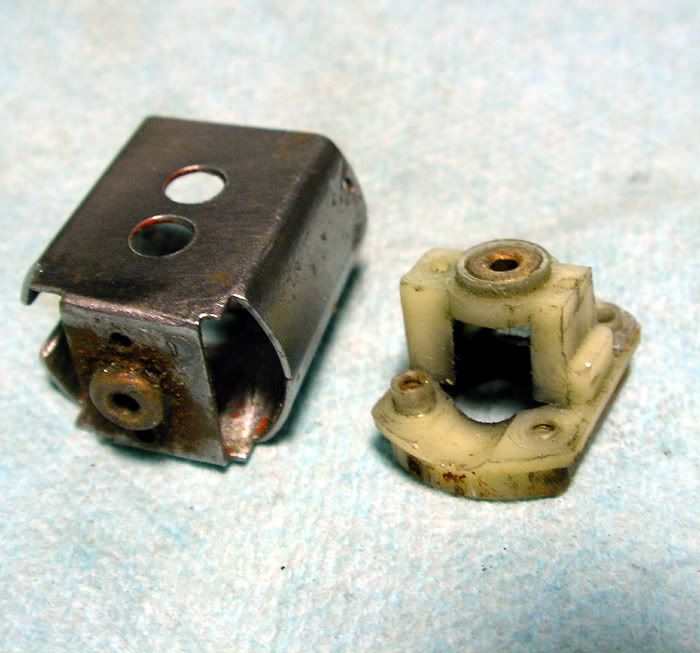
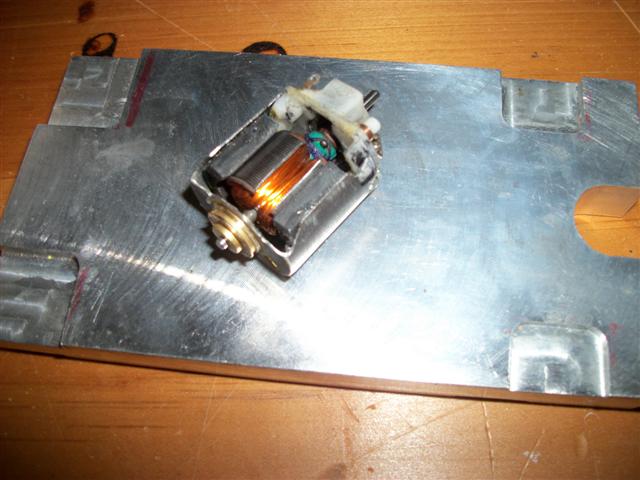
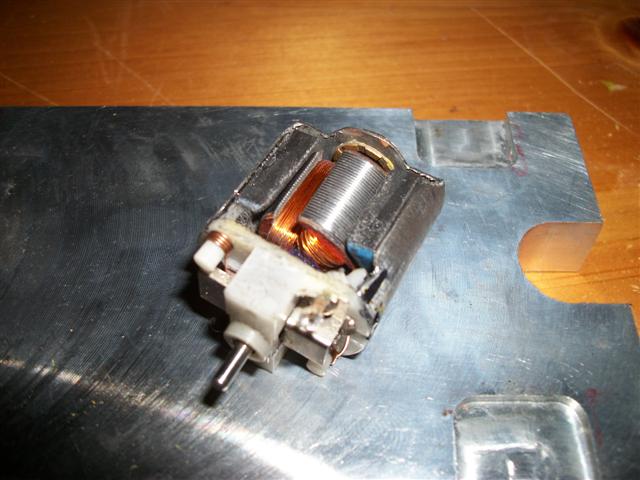
...so with some elbow grease and some body and fender work to get rid of the rust and the deep welds on the can sides, I got this:
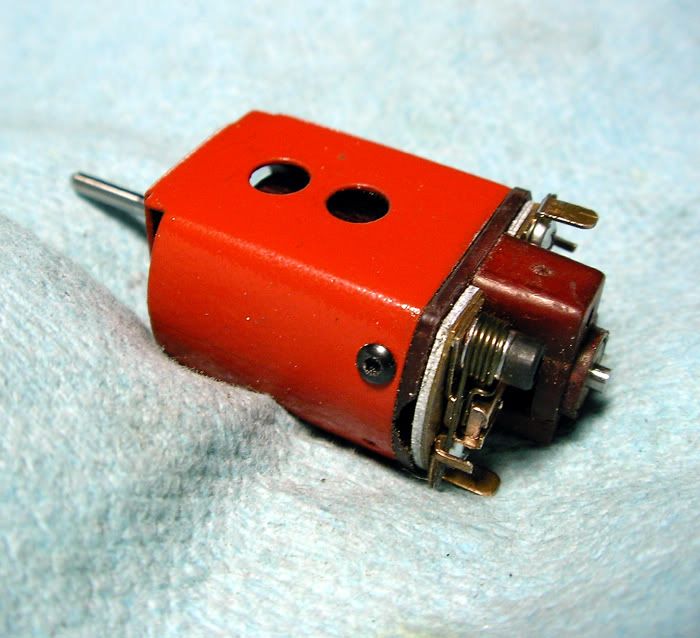
I set it up to run inline so no bussbars. Even though the magnets in both cans are very close in strength...as are the airgaps, the Mura can just seems to make a stronger field. The same arms in the Champion and this motor run noticeably faster in this one, but I'm still favoring the Champion just because it seems a little more correct in a thingie. Anyway, I at least have a plan B.
-john
#3403

Posted 08 February 2012 - 08:02 AM
I don't believe you need to set up an account with them to buy, but even if you do...it's nothing to worry about. They don't send out nuisance emails and you don't have to give them credit background information or anything like that. (this paragraph is really only about ordering magnet wire from Planet Engineers.com)
As for the general technique to winding an arm. You seem to have it correct. You start with a pole by winding either clockwise or counterclockwise, however you prefer. When you get to the number of turns you want, you cross over the top of the stack and proceed to the next com tab and then down from there and do the next pole. The direction you wind will dictate the progression direction from one pole to the next. This is all for a "normal" wind. A so-called "hemi" wind will have you reverse the direction you wind relative to the progression of poles so that the last turn never crosses over the stack.
You need to pay special attention to not getting shorts on sharp edges of the stack...stacks with fiber insulators or insulation coatings will help to prevent this. Also pay attentiuon to how your winding patterns work out on the first stack and try and repeat that as closely as possible on all three stacks. This will assure that you have precisely the same length AND number of turns on each pole for the best running motor. Finally, the wire should be tensioned by you as you wind the poles...of course not enough to break the wire, but enough for tight and neat coils. With a one pound spool, you'll have plenty of wire to practice and experiment with and doing that can pay off bigtime...so wind, test, discard, wind again etc., until you start to get consistent. It looks deceptively simple, but does take some practice. However when you start to get good results and can run a motor you wound, it's a beautiful thing. Even better when your friends start to run your arms!
To test your winds for shorts and (to a certain degree) consistency, a simple multimeter will do. Carefully contact the com segments of two poles at a time working your way around the stack and look for consistent readings when the meter is set to the lowest resolution for resistance (ohms or Ω). Really, to get very accurate resistance readings for an armature, you need a meter that reads to the thousandth of an ohm (start at around $200 and up), but a common meter will at least give you tenths of an ohm readings that are fairly accurate to around .5 ohm.
Finally, the way you connect the wire at each com tab is important. The wire needs to be stripped and you can use a sharp X-acto blade and go carefully around the wire where it will be when it sets on the tab, Scrape carefully, but only enough to remove the coating so you see shiny copper, then place the wire over the tab and around and under the tabe where you can cut it off by placing the blade under the tab and pressing on the wire while gently wiggling the wire back and forth until it breaks. This will crimp the wire temporarily to the tab and should hold it there until you solder it. You can do this at every pole's tabs or only at the first/last tab, simply looping the wire over each tab. Using either method, you just need to be sure the wire is stripped where it contacts each tab. If you do this at each tab, you will have three separate pieces of wire forming the coils for the poles. If you do this at only the first/last tab, you'll have one long piece of wire that goes around the whole armature and is only cut at thye beginning/end. Either way works as well, but using the "3-pieces-of-wire" method means that is you mess up a pole, you can only redo that one pole instead of tossing all three.
The last little bit I can think of is soldering the wire at the com tabs. For light rewinds (#29/30 awg wire and thinner), you can use a 4% silver solder...sometimes using a tiny bit of "Nokorode" paste applied with a toothpick. Never use acid for electrical connections. A good solder job should actually improve the resistance readings as you get better electrical connections at the poles that by simply laying the wire on there. For mild rewinds, you should be OK with hardware store epoxy such as that sold under the Devcon label. Don't use the fast-setting stuff, and lookm for clear regular epoxy. Don't use too much, just enough to lightly cover the coils applied with a toothpick. You can then speed up the initial cure by warming the arm with a hair drier and flipping it over every 15 seconds or so...because the epoxy will get very thin and runny (a good thing...it will penetrate the coils deeper) and you don't want it running onto the commutator or off the bottom of the stack.
If you want, you can tie the arm/com before epoxying and while kevlar thread or fishing leader works best, you can use 100% cotton thread or unwaxed floss. It will absorb the epoxy well and form a durable/strong composite when cured that will help to keep the wires from moving around AND strengthen the bottom of the com at the same time. Pure cotton will burn/weaken at a high enough temperature that you have far greater problerms if that happens than what you tied the com with. By the way, any thread you use to tie the com with will act as a "wick" and draw epoxy up onto the com if you use too much. You can put a tiny bit on each com tab with a toothpick...and some will wick up the thread from the top of the stack. You don't want any epoxy getting on the com segments or even between them in the com slots. If some does get up there, clean it off carefully before the epoxy cures. You can clean out the com slots by carefully running the back of a new X-acto blade down each slot and then wiping both the blade and the com until the blade comes out clean.
Try for consistency and good-looking coils, as well as neat connections at the com. In this case, beauty can make a significant difference in how the arm actually performs. Don't get frustrated or discouraged, you WILL get better at this and it only takes practice. If winding by holding the arm in your hand, you will never be able to get the best results. If you can manage, get a winding crank and a clamp fixture for the arms you will be working with. Rick ("Rgeo") at SlotBlog still makes them. If not, you can at least use a pin vise or even a small vise to hold the arm. This will allow you to keep even tension on the wire as you wrap each pole and concentrate on consistent wind-patterns as you do so.
There are actually many many ways to wind a pole, and if you stick with it, some of the alternatives may become apparent. I've found a couple of "special patterns" that I use on some stacks with some wire gauges because theyu make for a neater/more compact coil. I don't know that I've "invented" these, but I haven't found evidence that others have used them...so I keep them to myself. Like I said...it all looks deceptively simple, but there's a lot more going on with all this than it might seem at first. Winding alone can easily become a hobby unto itself with (at least for me) as much potential for creativity and enjoyment as building and running slot cars.
regards, john
- MarcusPHagen likes this
#3404

Posted 08 February 2012 - 06:30 PM
I appreciate it !!!
Paul Wolcott
#3405

Posted 08 February 2012 - 06:50 PM
-john
#3406

Posted 08 February 2012 - 07:27 PM
The slow rotation of the Rotisserie motor will keep the epoxy from pooling and should result in a more evenly balanced arm. I've not tried this, but I did make one for doing fly rods. It works really well on them to level out the epoxy on the winds.
#3407

Posted 08 February 2012 - 08:59 PM
BTW: If you wanted to, you could make a drying tool out of a Rotisserie motor and a piece of foam with a dowel sanded square similar to one of these.
The slow rotation of the Rotisserie motor will keep the epoxy from pooling and should result in a more evenly balanced arm. I've not tried this, but I did make one for doing fly rods. It works really well on them to level out the epoxy on the winds.
Yep, and a very good idea. Since I use a toaster oven for speed-curing the epoxy, I'd have to rig something that could work with that, so I just sit there and do the flip every few seconds for about 10 minutes until it's cured enough to not run anymore.
#3408

Posted 08 February 2012 - 09:17 PM
#3409

Posted 09 February 2012 - 06:20 AM
-john
#3410

Posted 19 February 2012 - 06:25 PM
My life fades, the vison dims. All that remains are memories... from The Road Warrior
#3411

Posted 22 February 2012 - 03:08 PM
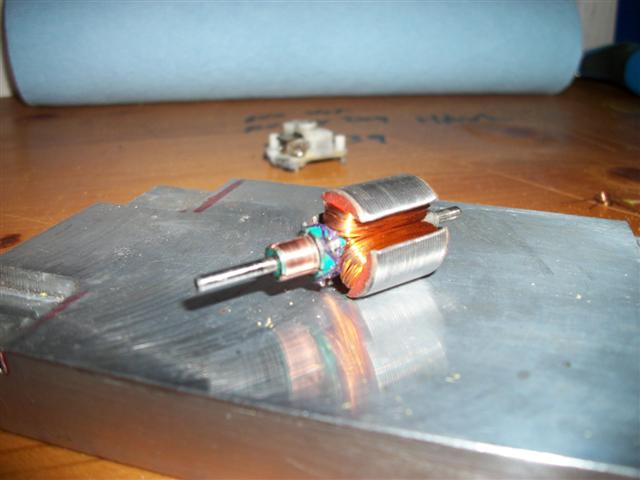
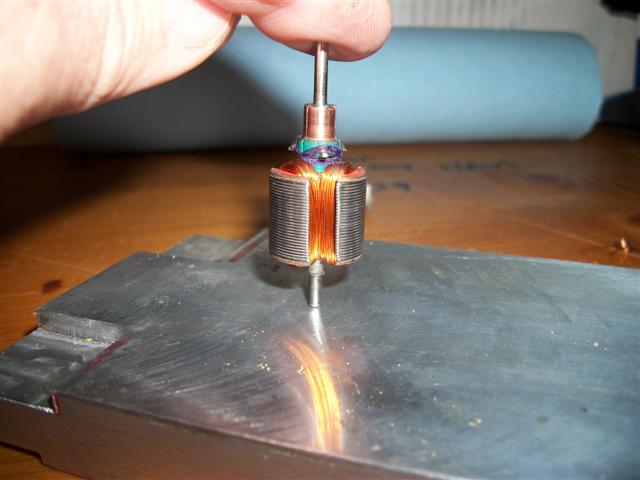
If you would look at the pictures and tell me what you would have done and what I did wrong. Your opinion on how this might work. This is the first motor I finished from wounding on up. Fun but a lot of patience. And one big question is setting the timing, how do i determain where to start it and how. I set this on I feel nuatral and as I turn the hood the rpm's pick up big time,so this motor could have started with more timing. Thanks for any help. I know its sloppy but don't have the skill you and others have. ya'll do a killer job.
- MarcusPHagen likes this
Russell Dobbs
#3412

Posted 22 February 2012 - 05:29 PM
From the looks of it, you did an excellent job of winding, nice and neat and it all looks tight on there...congrats!
I used speedfx mags and cut the tar out of the can for air and to see other drivers look like what in the crap...LOL. The power on the track is bulldog 14.1 Hillclimd and a small oval.
I can see you really DID cut the heck out of that can...you created a gigantic strap motor
If you would look at the pictures and tell me what you would have done and what I did wrong. Your opinion on how this might work. This is the first motor I finished from wounding on up.
Honestly, I can't see anything at all you've done wrong...only that you did what looks like an excellent job. I can't tell if you epoxied the arm, but even a #32 wind could use a little insurance against the coils moving around. Even some lacquer on there would be a lightweight and sufficiently strong way to "glue it all together". The Mabuchi com should be absolutely fine for that wind too, a well as soldering the tabs. The only other things I would do would be to at least static balance the arm, and I usually true the end of the com as well as the tail spacer...VERY lightly on the com when it's a Mabuchi com
Really, I wouldn't critique such a nice looking job, after all...who the heck am I? 108 turns of 32 is probably around what I'd put on a 16D, since I routinely do 80-ish turns of #31 on a 16D...so the motor might run a bit warm (or not!?). You really did a nice job and also created a pretty unique motor!
And one big question is setting the timing, how do i determain where to start it and how. I set this on I feel nuatral and as I turn the hood the rpm's pick up big time,so this motor could have started with more timing.
From what I can see, the com tabs appear to be centered in the pole gap. If so, that would produce a roughly "neutral timed motor" and it should spin about the same in either direction, as well as have good brakes and run cooler. Using your bottom picture as a guide (where you're balancing the arm on it's tail), if you set the com tab more to the right of the gap, the motor will spin faster in that direction but I wouldn't go past 15 degrees or so with the big "Buchi" for most mild winds...you won't gain "that" much and anyway, you have a hand built motor there you can sign...what could be better than that? (besides a Philly Cheesesteak with onions)
Thanks for any help. I know its sloppy but don't have the skill you and others have. ya'll do a killer job
Oh I don't know about that at all, I think you pretty much banged it out of the park right out of the locker room
-john
#3413

Posted 22 February 2012 - 06:07 PM
P.S. I love the motor you built for my entry!
Jairus H Watson - Artist
Need something painted, soldered, carved, or killed? - jairuswtsn@aol.com
www.slotcarsmag.com
www.jairuswatson.net
http://www.ratholecustoms.com
Check out some of the cool stuff on my Fotki!
#3414

Posted 22 February 2012 - 06:35 PM
I intend to live forever! So far, so good.
#3415

Posted 22 February 2012 - 07:19 PM
#3416

Posted 23 February 2012 - 06:59 AM
Holy cow John! That Champion/Mura motor is the bees knees! I love it and see no reason why it would not make a perfect motor for the next proxy. NOW, build a car and test it out!
P.S. I love the motor you built for my entry!
Thanks very much Jairus
-john
#3417

Posted 23 February 2012 - 11:29 AM
Russell Dobbs
#3418

Posted 29 February 2012 - 05:45 PM
-john
- MarcusPHagen likes this
#3419

Posted 29 February 2012 - 08:36 PM
Jairus H Watson - Artist
Need something painted, soldered, carved, or killed? - jairuswtsn@aol.com
www.slotcarsmag.com
www.jairuswatson.net
http://www.ratholecustoms.com
Check out some of the cool stuff on my Fotki!
#3420

Posted 01 March 2012 - 05:12 PM
Your hand winds always look as though it was done by machine - amazing!
Ernie
#3421

Posted 02 March 2012 - 07:10 AM
-john
#3422

Posted 02 March 2012 - 01:50 PM
can you elaborate on the differences please.
Pro motor and car builder
Australian AA/FC quickest car
#3423

Posted 02 March 2012 - 02:00 PM
I have tinkered with winding arms and have wondered what is the diference between " bell drive and can drive "
can you elaborate on the differences please.
Hi Robert,
There really isn't any difference. End bell drive just has the extra length of the shaft on the endbell side for mounting the pinion gear. Can drive will have that extra shaft length on the can end. With an inline car, you just flip the position of the pinion gear so the arm is turning in the proper direction for it's timing advance. With sidewinder/anglewinder cars, the drive end of the motor is more important because you could have a motor timed to run the "wrong way" for it's application (can or endbell drive). In either case, you can wind the arm which ever way you prefer (clockwise or counterclockwise, regular or hemi wind) as long as you time the com for the arm to rotate in the proper direction. You can also press many shafts to have enough for either can or endbell drive. Sometimes, a can drive motor can use extra shaft length on the end bell side for one of those nifty com coolers. You could even try a "posi" rear end on a slot car by using two pinions and two spur gears if the shaft was long enough.
-john
#3424

Posted 03 March 2012 - 05:09 PM
Pro motor and car builder
Australian AA/FC quickest car
#3425

Posted 03 March 2012 - 05:35 PM
have you tryed shelac ?
Either back then or now, I've tried most readily available and commonly used things for all this stuff.
-john


 This topic is locked


