
#751

Posted 09 November 2009 - 11:34 AM
You guys are scaring the bejeebers out of me!
But a fascinating tutorial none the less - okay, next time I wind an arm (by 2015, no later!), will it bite me?
Don
#752

Posted 09 November 2009 - 02:47 PM
okay, next time I wind an arm (by 2015, no later!), will it bite me?
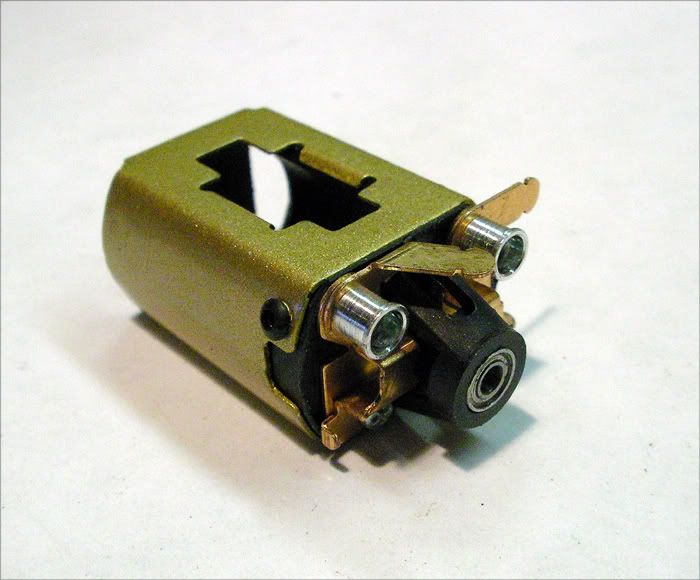
So I got the Pro Slot endbell kits today and of course Mr. Murphy saw to it that one of them had two of the same brush hoods
-john
#753

Posted 09 November 2009 - 02:59 PM
AWESOME!!!!
Jeff Easterly - Capt., Team Wheezer...
Asst. Mechanic, Team Zombie...
Power is coming on... NOW!!!
#754

Posted 10 November 2009 - 08:06 AM
Thanks again for the encouragement
-john
#755

Posted 10 November 2009 - 09:38 AM
Barney Poynor
12/26/51-1/31/22
Requiescat in Pace
#756

Posted 10 November 2009 - 10:51 AM
John, in the day when we were doing 27s as the upper limit, the ceramic magnets in our 16ds weren't any better than the ones you have in the FT130 can here. And you have better endbell hardware.
Now, a 24 would be pushing it ! Grin.
Fate
3/6/48-1/1/12
Requiescat in Pace
#757

Posted 10 November 2009 - 12:28 PM
Hey John when I get abck I'll send you some mags to play with for these. I hope you got the labels. The clear one are in the plastic heat sealed paks. Looks great!
Hey thanks Barney. I'll give em a try for sure. I just got the labels in the mail today, and they really do look great. What I like about them (besides the sharp/clear printing) is how thin the material is. It seems no thicker than the thin foil labels Mura used...maybe thinner. The gold color looks very cool against this sorta Russkit-gold motor, so I'm going to stick one on this motor in honor of Team Cort
John, in the day when we were doing 27s as the upper limit, the ceramic magnets in our 16ds weren't any better than the ones you have in the FT130 can here. And you have better endbell hardware.
Now, a 24 would be pushing it ! Grin.
Good to know Rocky. I actually had my hand on a spool of #26 wire and then retreated at the last minute...not so much because I thought it would vaporize, but I'm hoping for a really strong (for it's size) motor that will also live a good life
-john
#758

Posted 10 November 2009 - 01:36 PM
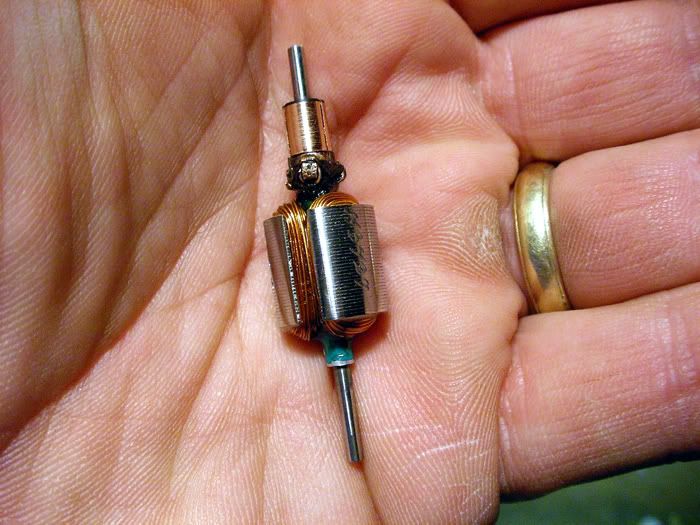
In it's new home with a quickie-setup:
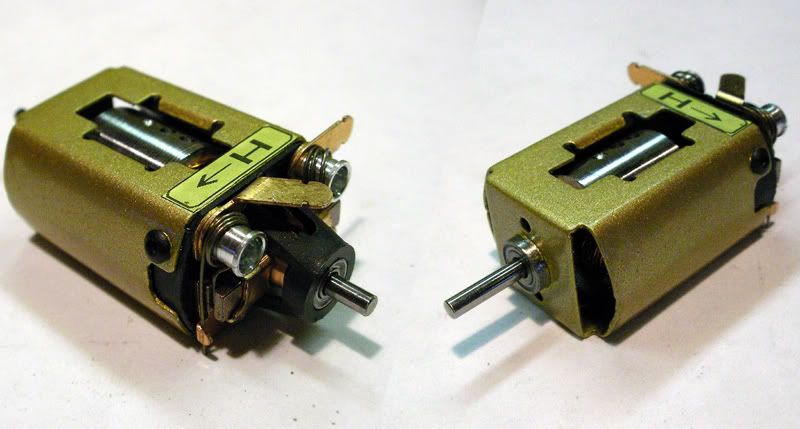
How does it run you say? It freakin' screams like a banshee somewhere way up in G20 land or so
-john
Note to Pablo: No fiber stack insulators were harmed in the making of this missle
#759

Posted 11 November 2009 - 12:49 PM
John, you realize that it sounds like a Group 20 because a 20 IS a 27 wind?
Grin.
A local track allows zero glue, and keeps the track super clean and doesn't allow foam. But I got some time ran something interesting that would spin the tires all the way down the main 30' straight. And?
The locas said "whats the point, you cannot race it here and it wouldn't be drivable anyway". These guys just seem to be missing the fun of playing with power for its own sake!
Fate
3/6/48-1/1/12
Requiescat in Pace
#760

Posted 11 November 2009 - 01:29 PM
Hi
John, you realize that it sounds like a Group 20 because a 20 IS a 27 wind?
Grin.
Sure...but this one was made from an el-cheapo motor and still sounds that way. Point is...there's all kinds of possibilities out there for rewinding if a person were so inclined and these SCX motors are an excellent platform. Even with the stock endbell and com, you can get a heckuva lot out of these things. Good can, very good magnets, good arm that's EZ to rewind.
-john
#761

Posted 11 November 2009 - 04:43 PM
Barney Poynor
12/26/51-1/31/22
Requiescat in Pace
#762

Posted 12 November 2009 - 10:34 AM
-john
Oh and...I always look forward to those care packages of yours so thanks for that also!
#763

Posted 12 November 2009 - 11:02 AM
I was totally caught up in this whole attitude, even at 12 years old, and my first "real" purchase was an RP66 for 5 bucks, probably in 1964 (World's Fair in NY) instead of a whole kit for 6 bucks! That motor sat on my desk for a long time before I could afford the rest of the car...
Don
#764

Posted 12 November 2009 - 11:38 AM
-john
#765

Posted 12 November 2009 - 11:53 AM
Don
#766

Posted 13 November 2009 - 08:58 AM
-john
#767

Posted 19 November 2009 - 03:00 PM
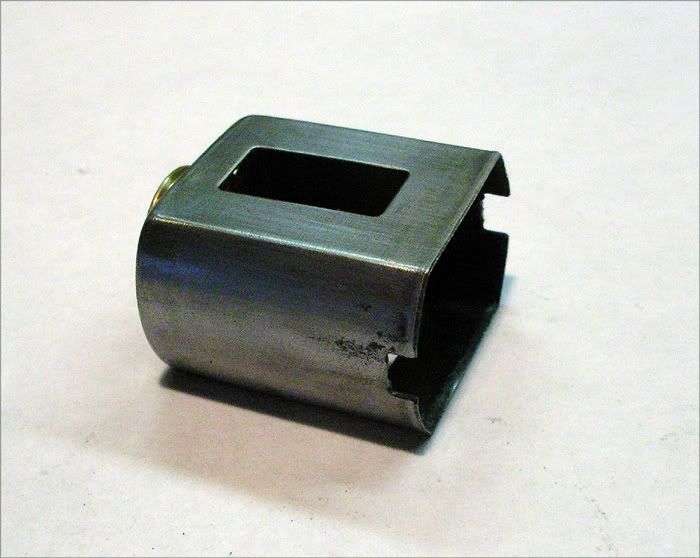
First order of business after laying out all the parts sent to me is to get the can stripped and to break off the endbell retainer tabs as well as the magnet stop tabs that also form the can-end ventilation holes. Here's the raw can ready for the next step:
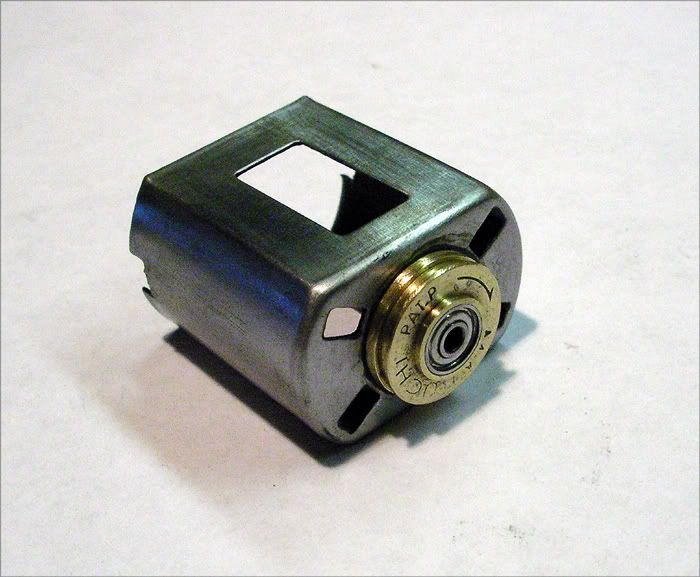
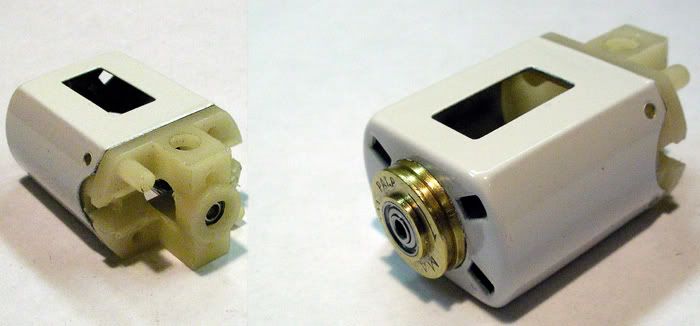
Of course, any NHB motor worth it's salt is gonna have to have quality bearings on both ends, so while I'm at it, it's time to remove the caged bushing and ream-out the brass bushing boss for the 2mm x 6mm bearing to be installed. I've sorta perfected my system for installing these and have got it to the point where it's both easier to get a nice clean job, as well as a no-brainer that the bearing will be centered and lined-up well with the bore of the motor. Here's an exterior look with the brass carrier rough-polished as well:
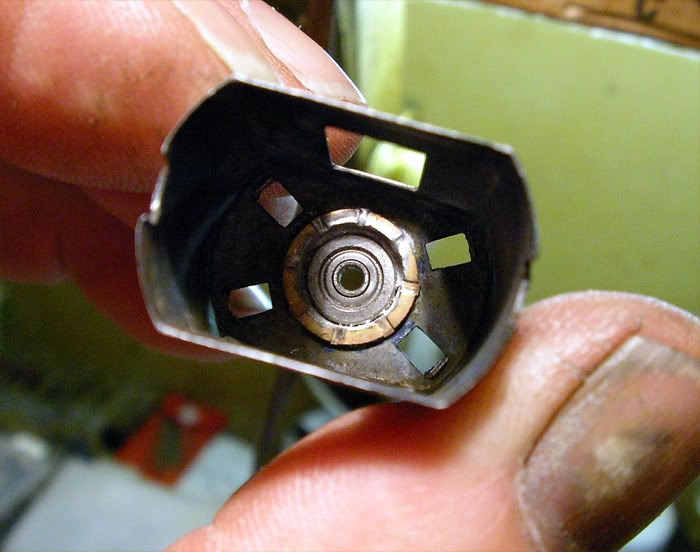
...and here's a look inside where you can see how well the 6mm flanged bearing fills the space after soldering it in:
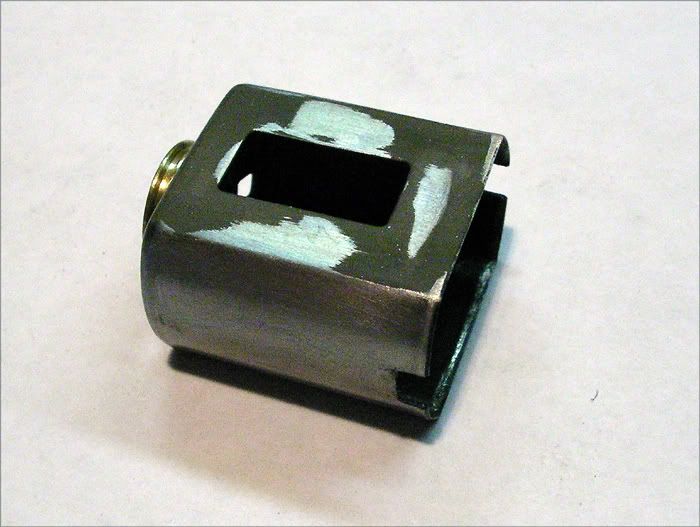
Next order of business is to flatten the magnet tabs and fill them in with solder (oldstyle body and fender work)
OK, with only some grinding of where the endbell retainer tabs used to be and drilling the setup for screws before it gets painted, I can put aside the can for now and pay some attention to the endbell. We're using a lovely Champion 16D endbell for this project because, as nice as the Tradeship endbells are, the Champion is a couple of notches better. For one, it comes drilled already for better cooling and for two it has generous openings on the sides for the brush tubes...which we're going to need here
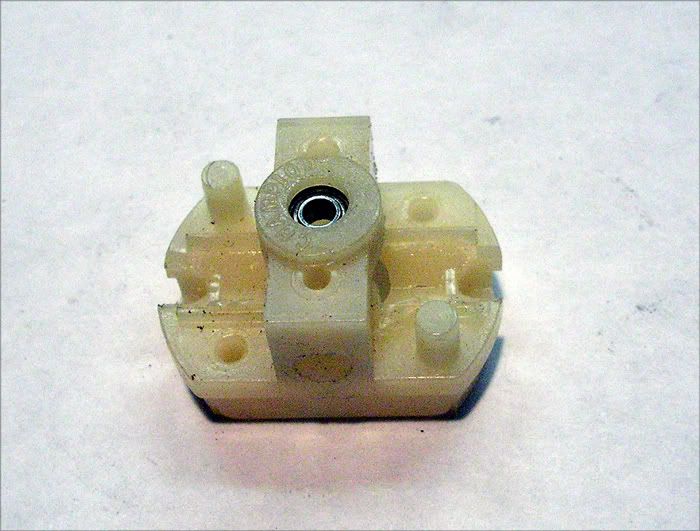
...and here's an interior shot where you can see the brass sleeve around the bearing:
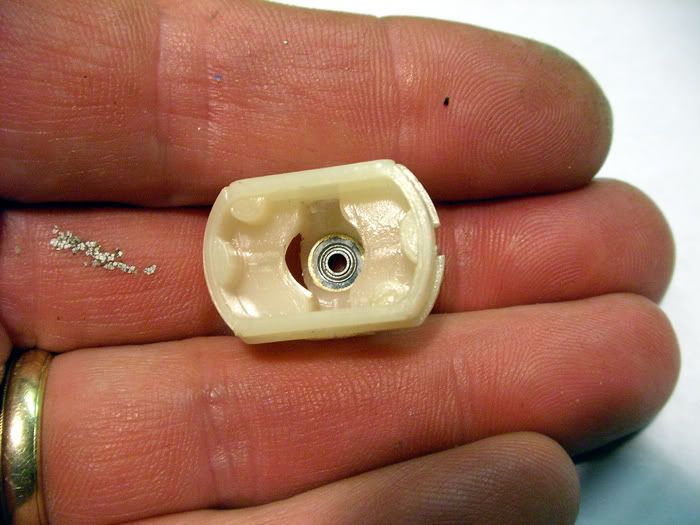
Now I just have to do a bit to the can and the new "H" arm will have a solid high-zoot setup to live in. The NHB motor is on the way
-john
#768

Posted 19 November 2009 - 03:17 PM
Rick Thigpen
Check out Steve Okeefe's great web site at its new home here at Slotblog:
The Independent Scratchbuilder
There's much more to come...
#769

Posted 19 November 2009 - 03:42 PM
-Max
David Ray Siller
MAXImum MOtion
Retired Video Game Creator/Designer/Producer
Thingies are my thingy!
#770

Posted 19 November 2009 - 03:55 PM
Now... will this get a Mabuchi-style blank, w/ the "thick" laminations? ... Or, an update to the new milenium & .007" lams?
I figure it'll get a Mura comm, eh?
Great work, as always, John... I dug thru the pile, & will get that "care package" in the postal shortly...
In the mean-time... ONWARD!!!!
Jeff Easterly
Jeff Easterly - Capt., Team Wheezer...
Asst. Mechanic, Team Zombie...
Power is coming on... NOW!!!
#771

Posted 19 November 2009 - 04:11 PM
Jeff...I think I'm going to use a .007" arm for this one. I've gotta see what fits and, if need be whether I can push the shaft on one because most of my .007" arm blanks are set for can drive.
-john
#772

Posted 19 November 2009 - 05:16 PM
-john
#773

Posted 19 November 2009 - 06:52 PM
Paul Wolcott
#774

Posted 19 November 2009 - 08:52 PM
This is gonna be one NICE "French" motor!
Great job, John.... Enjoying this project a bunch!
Jeff Easterly
Jeff Easterly - Capt., Team Wheezer...
Asst. Mechanic, Team Zombie...
Power is coming on... NOW!!!
#775

Posted 20 November 2009 - 08:49 AM
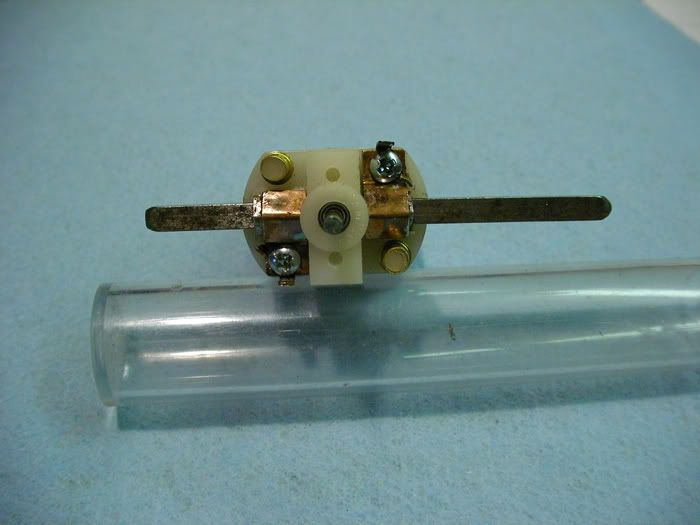
1)It provides a solid current path in the event the motor needs one. Even with shunts installed, I'm guessing that a higher-current-draw motor may need more capacity than a pair of skinny shunts might provide. Maybe...maybe not, but at least that current path is there. I've seen older motors where they won't even run without the shunts making me believe that there's corrosion buildup over time between the hoods and brush tubes.
2)Should the endbell start to soften as the hardware heats-up under running conditions, the brush tubes won't start doing their imitation of "The China Syndrome"...melting their way down into the endbell towards the center of the earth
Here's the endbell jigged and just soldered. I'll have to take it all apart and clean everything up before final assembly, but you can see how it all lines-up nicely with no additional machining of the parts.
-john


 This topic is locked


