#1001

Posted 11 January 2010 - 10:32 AM
Home of Area 51 Chassis Works
Steve Vogt, Sr.
#1002

Posted 11 January 2010 - 11:34 AM
-john
#1003

Posted 11 January 2010 - 11:55 AM
But, it is cool looking. I can't imagine how hard that would be to get balanced pressure on the brushes......
Home of Area 51 Chassis Works
Steve Vogt, Sr.
#1004

Posted 11 January 2010 - 01:57 PM
Steve, there has been a quality issue with the S16D Chinese Pro Slot arm quality for some time, and within the last six to eight months, it has carried over to the regular 16D chinese arms as well. It is not so much a comm issue, as it is with the windings either breaking, or being wound so tight they short out where they wind around the stack as the motor heats up and the epoxy they use softens allowing the wires to move. Neither problem has been addressed properly and I don't recommend these motors to anyone. I have had them last one race, a half race, or serveral races, it all depends if you get a good one or not. Both the 16D and S16D Chinese arms are timed about 28-31 degrees give or take. They can be taken up to 50 degrees by someone that knows what they are doing and can reliably epoxy the comm in place, but they don't last long. The heat kills them quickly. The sweet spot appears to be about 32 degrees on them. For what its' worth, I switched over to a 38 degree Pro Slot American made arm in my S16D powered GTP class car, and it will run circles around any of the Chinese motors I ever had and can be rebuilt numerous times. Our state spec ProSlot 16D arm timed at 30 degrees is better than any of the Chinese 16D arms. Avoid the Chinese made ProSlot arms like the plague.
Now back to John's regularly scheduled program.....sorry for the interuption
Michael Rigsby
"... a good and wholesome thing is a little harmless fun in this world; it tones a body up and keeps him human and prevents him from souring." - Mark Twain
#1005

Posted 11 January 2010 - 03:14 PM
Thanks very much for the info! Very interesting to know and surprising that the production quality still remains low with all the issues surrounding performance.
Secondly, you're absolutely right.....let's let John get back to his superb work on this thread. My apologies, John!
Steve
Home of Area 51 Chassis Works
Steve Vogt, Sr.
#1006

Posted 11 January 2010 - 03:57 PM
Secondly, you're absolutely right.....let's let John get back to his superb work on this thread. My apologies, John!
...don't be silly guys, post-away!
But, it is cool looking. I can't imagine how hard that would be to get balanced pressure on the brushes......
I don't know Steve. Since both brushes are being pushed by the two sides of the same spring, tension should be pretty near equal on both as long as the length and leverage point of the brush arms is the same. Seems like that would be one of the better points to that arrangement...less worrying about equal brush pressure at the com.
-john
#1007

Posted 12 January 2010 - 01:57 PM
One of the many things I've marveled at when looking at your work on this thread is the tying of armature after you've rewound it. Do you have a step by step, maybe in picture form, of this bewildering task? I look at those arms and can't imagine how that's done.
Thanks, John and I'm looking forward to seeing, as I'm sure a lot of readers will, as well.
Steve
Home of Area 51 Chassis Works
Steve Vogt, Sr.
#1008

Posted 12 January 2010 - 09:06 PM
Here - here! I second the motion of that request! Please John?! That would be so fascinating to review. I have to look at the motor John built for me - everyday - and really appreciate the workmanship. I'll need to put in a worthy chassis - hopefully soon. Thanks John!!
Ernie
#1009

Posted 13 January 2010 - 08:11 AM
-john
#1010

Posted 14 January 2010 - 12:39 PM
Home of Area 51 Chassis Works
Steve Vogt, Sr.
#1011

Posted 15 January 2010 - 01:52 AM
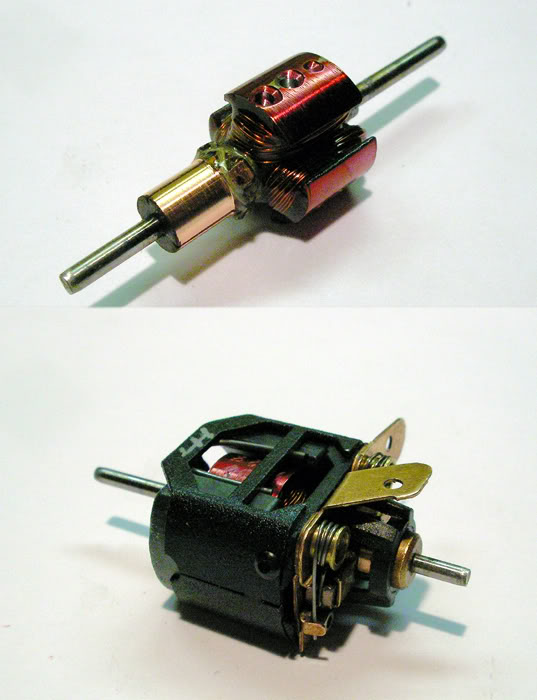
John was kind enough to grace my mailbox w/ this little terror
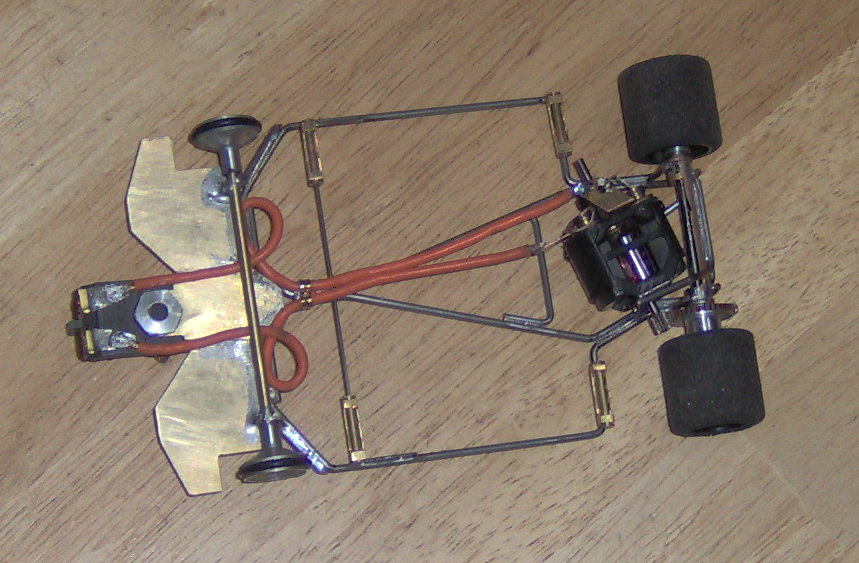
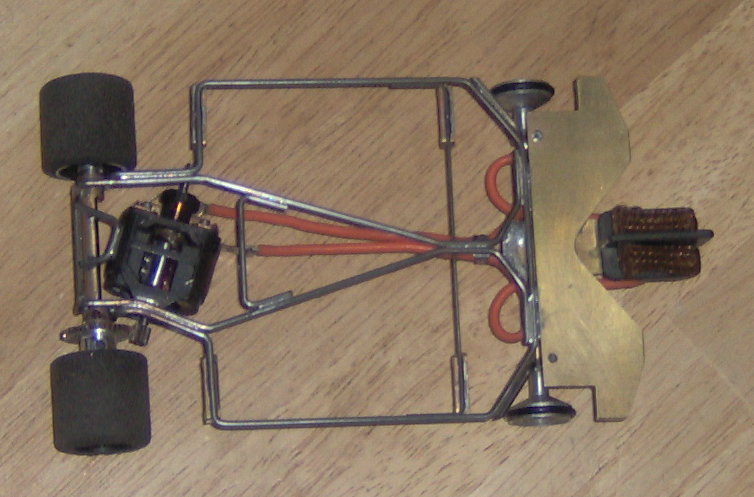
Then, Barney & friends ( kinda sounds immature, huh? ) started to promote the FrankenMotor race, & my buddy Mr. Bell had Ron Kiyomura build-up two Ron Hulka-inspired perimeter chassis, for Mr. Bigelow & Harley Ratto... Well, I saw Ron's work, & asked if he'd do one up, for this project... He agreed, but only bent-up the dual-rail perimeter section... I had to fabricate the nosepiece, from .050" brass, & the guide pivot from .035" brass, & do the final assembly... Ron did make-up the 4 shaker mounts, so...
Now the walnut has a new home!

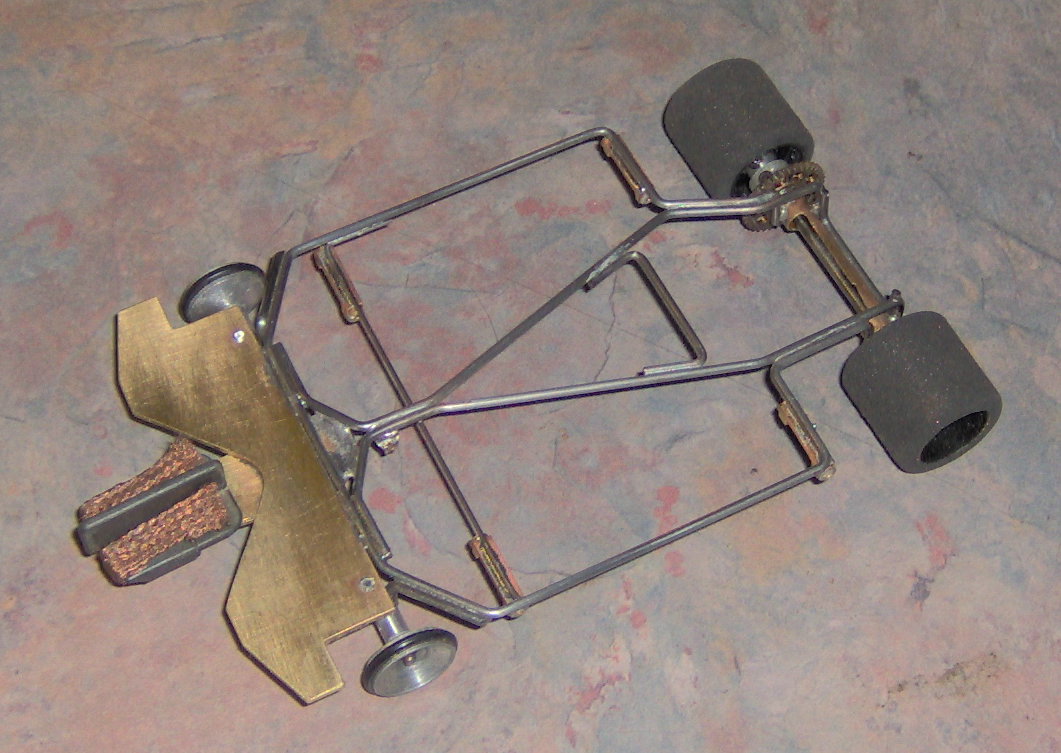
So, now we'll find a suitable period-incorrect body, so we can run that little rascal!
Stay tuned!
Jeff Easterly
Jeff Easterly - Capt., Team Wheezer...
Asst. Mechanic, Team Zombie...
Power is coming on... NOW!!!
#1012

Posted 15 January 2010 - 07:02 AM
That's pretty much the kind of chassis I think would work well with the motor. The walnut was a fun experiment (seeing how much I could shorten a C can without cutting the magnets or com). While I later saw some sort of imperfection in the epoxy, I think the arm is OK. Really, the only thing I would do differently now is to use less epoxy, and I don't remember if the com tabs were welded or not on that one. From what I remember, the motor seemed to have loads of RPMs...and it at least felt like torque was not far off a full size C can motor.
-john
#1013

Posted 15 January 2010 - 07:51 AM
So, now we'll find a suitable period-incorrect body, so we can run that little rascal!
Jeff, one of the old Lancer open-cockpit Porsches, as a few run in RetroPro & now made by O/S, would be a neat choice.
I intend to live forever! So far, so good.
#1014

Posted 15 January 2010 - 10:01 AM
Bill .... The Outisght Porsche is our 1st option!
Jeff Easterly
Jeff Easterly - Capt., Team Wheezer...
Asst. Mechanic, Team Zombie...
Power is coming on... NOW!!!
#1016

Posted 15 January 2010 - 10:12 PM
That may be a light car but it looks like it would be a TON-o-FUN to drive. Hope you get the right body you're looking for. Nice ride dude. Keep us updated till it's finished. Nice mill John.
It makes me want to build one!
"We offer prompt service... no matter how long it takes!"
"We're not happy unless you're not happy"
"You want it when?"
#1017

Posted 15 January 2010 - 10:50 PM
Hi Doug (thanks). I think you're going to like the motor I have in the works, a super nice ball bearing 517 that was in sorry shape and is so far about the nicest one I've done. The hardest part was removing the bearing from the can without disturbing the aluminum can cap. I wanted it to remain stock looking and was able to work a press fit on a modern bearing, important since you can't bond to aluminum. Anyway I got the new bearings installed in both the can and the endbell, 36D brush tunes and hoods and did a #29 double wind on a slick Champion blank/blowproof com. This one's going to be hard to part with!
-john
#1018

Posted 15 January 2010 - 11:45 PM
Jeff's motor is another incredible work of art! If I may ask you please, would you have pictures of Doug's motor to share? Thanks buddy!
Jeff,
Your walnut motor is awesome! What did it start out as please?
thanks,
Ernie
#1019

Posted 16 January 2010 - 08:16 AM
Jeff's motor is another incredible work of art! If I may ask you please, would you have pictures of Doug's motor to share? Thanks buddy!
The motor I'm referring to isn't for Doug, I just mentioned it to Doug as he's particularly fond of the old Champs (and who wouldn't be?)
Your walnut motor is awesome! What did it start out as please?
The walnut motor started out life as a modern Mura C can with either red dot or blue dot magnets...and then I just started cutting the can and shortening the arm. I probably could have also cut a bunch off the magnets (or just used shorter ones) and made the motor even lighter as magnets are relatively heavy, but decided to leave them stock. It runs like crazy for short spurts on the power supply, but who knows what will happen in a car and on the track. Jeff likes living on the edge a little and doing the test pilot thing!
-john
#1020

Posted 16 January 2010 - 09:56 AM
.....Jeff likes living on the edge a little and doing the test pilot thing!
-john
In other words...
I'm just crazy enough to build stuff to watch John's gems fly!
Jeff
Jeff Easterly - Capt., Team Wheezer...
Asst. Mechanic, Team Zombie...
Power is coming on... NOW!!!
#1021

Posted 16 January 2010 - 10:23 AM
-john (co-founder of Team Nutcase)
#1022

Posted 16 January 2010 - 11:13 AM
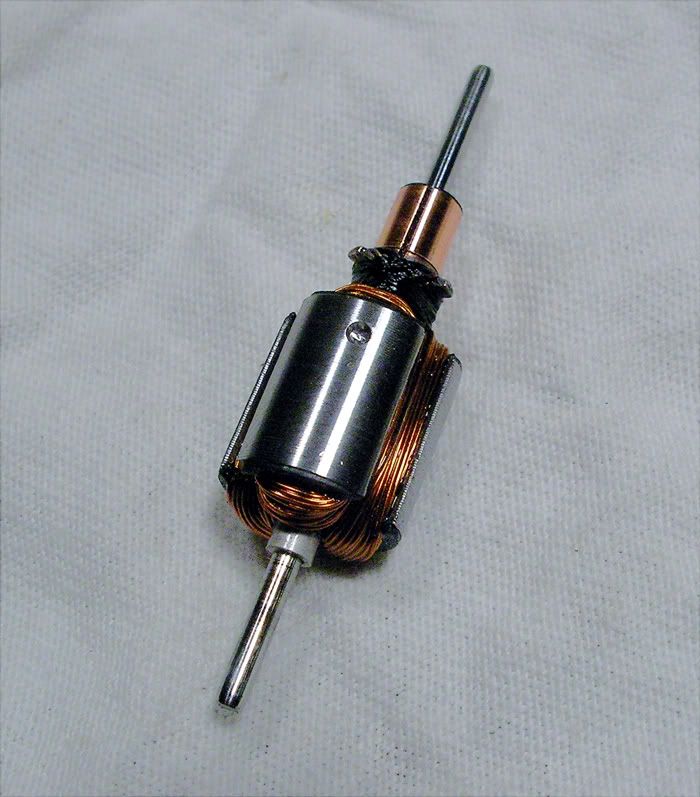
To start, I pass the end of the kevlar through one of the spaces where the magnet wire comes up to the com leaving just a bit sticking out the other side.
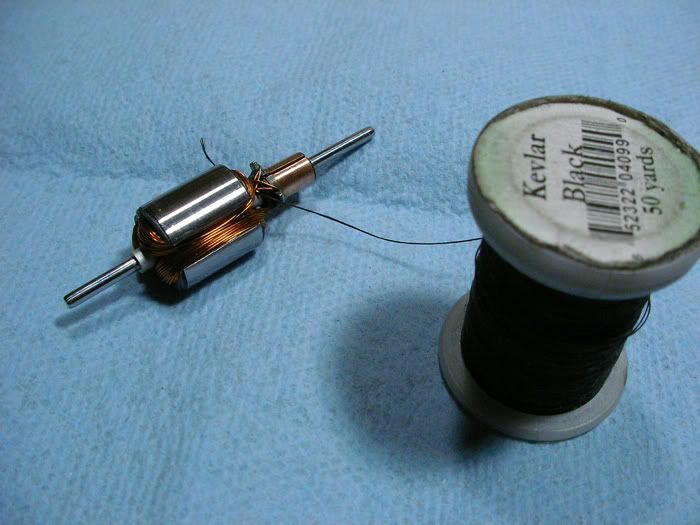
Then I flip it over the same place it passed through to start winding it around the arm just below the com. By doing this, the kevlar will "grab" after just one careful turn and you can start pulling it as you wind it around the arm without it slipping.
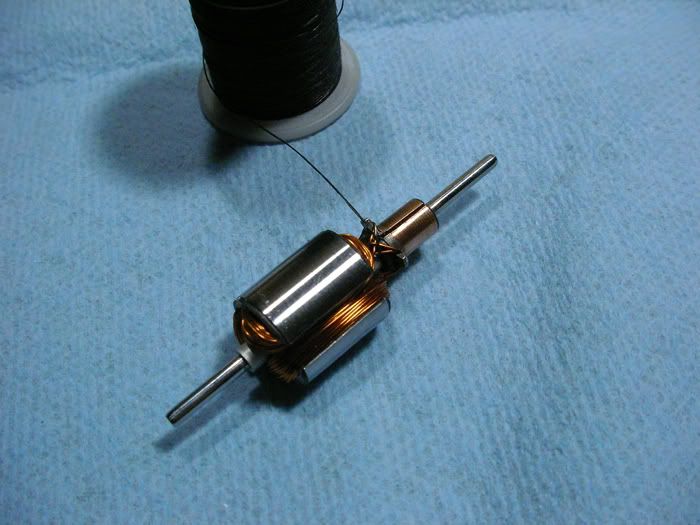
I continue around the arm until the kevlar reaches up to just below the com. If you were using thin cord, this would only be a few turns; with the kevlar thread it takes maybe 10 turns.
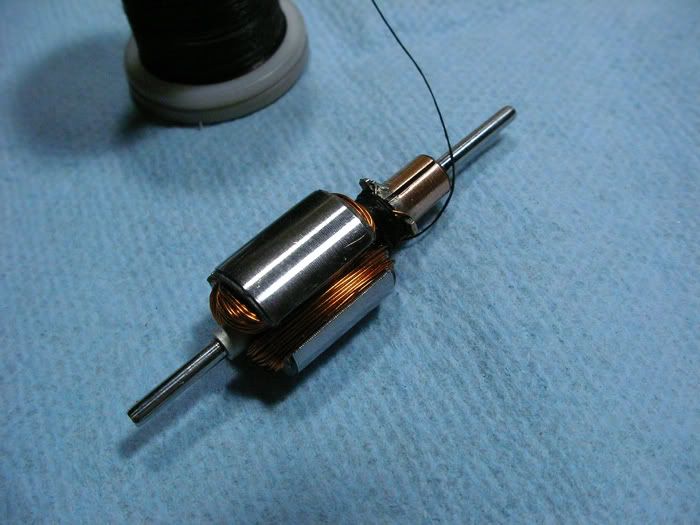
Once you get up to below the com tabs, I just go over the first tab and under the next...continuing around until I've gone over each tab at least three times.
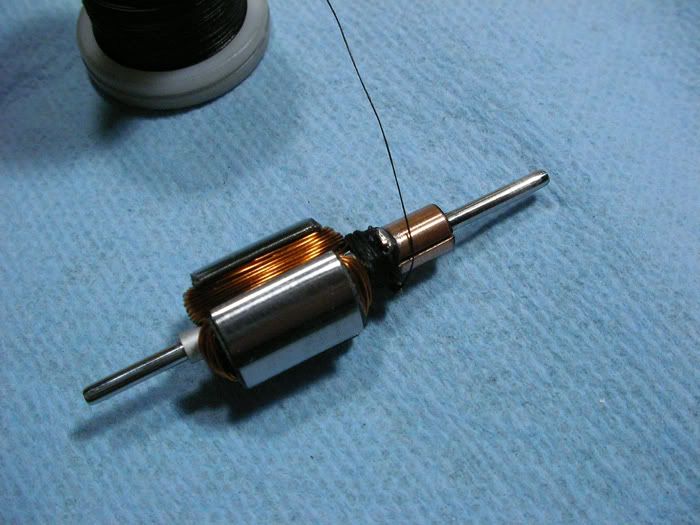
Then I continue under the tabs, winding downward to then pass the thread down the stack towards the tail end of the arm between the coils. I use a toothpick to guide the kevlar, and once down there, I give it a tug and it will snap in between the coils...usually disappearing in there.
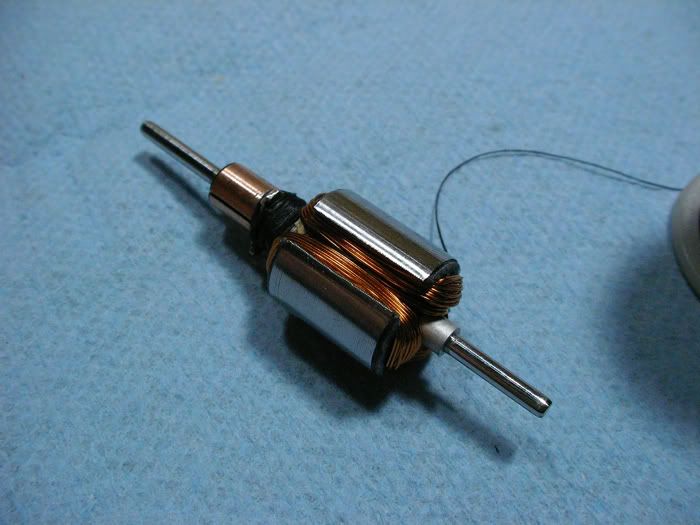
To finish, and instead of tieing a knot, I just pull the kevlar around the bottom of the arm and use the lower edge of the stack to break the thread by giving it a quick/sharp tug. Here it is all tied off:
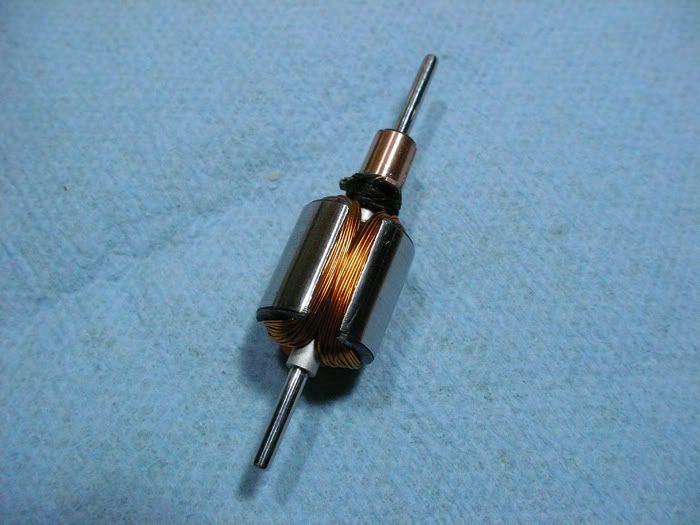
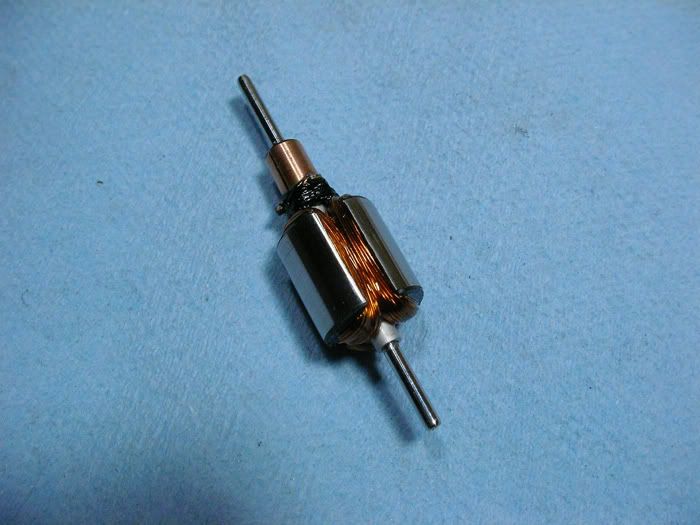
Ready for epoxy, I mix a very small amount of Cotronics' "Duralco 4461" low viscosity/high temperature epoxy and use a toothpick to apply it. I start at the com, making sure I get a bit over the tabs to saturate the kevlar up there, and work my way down to the tail spacer. By the time I'm done, the Duralco has already penetrated the arm pretty fully. After baking for 15 minutes, the epoxy is all but gone into the arm. Here's the arm BEFORE baking and as you can see, the Duralco has already done it's thing.
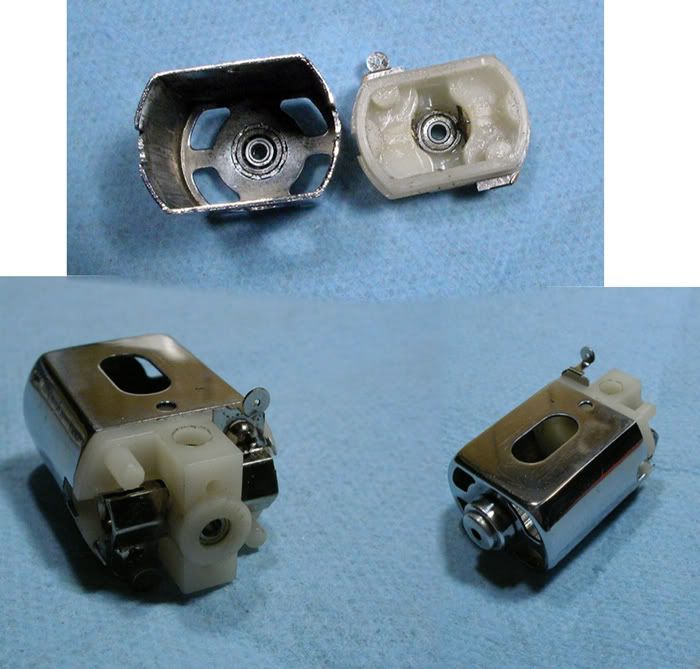
...lastly, here's the motor this arm will be going into. It's a beautiful old Champion that I spent a good deal of time and effort cleaning and polishing to take some of the years off. The bearings in the can were shot and getting them out of the aluminum retainer/cap without destroying it is a real PITA. I was able to do that and fit a sleeved 2x6mm bearing in there as a "press fit" so it won't be going anywhere. Epoxy doesn't really work on aluminum so it seemed that just getting it to fit snug was the only way to hold it in there. I could have used a urethane adhesive as they'll stick hard to about anything, but they don't do well with heat and I was worried about it failing.
I also sleeved another 2x6mm bearing for a snap fit to the endbell and fitted 36D brush hardware for a bit more robust and smooth endbell assembly. Of course, all this cutting/fitting/sleeving/trimming is only necessary because the roughly quater inch (.25" OD/2mm ID) bearings for these motors aren't around in new form. I'll later add some post protectors just to help things a little more. I have a dandy set of Champion magnets with the Champion shim I'll also install to complete what is essentially an all Champion motor that should run as good as it looks!
-john
#1023

Posted 16 January 2010 - 11:23 AM
Do you remember when the Doobie Brothers were on "What's Happening"?
#1024

Posted 16 January 2010 - 11:31 AM
-john
#1025

Posted 16 January 2010 - 12:32 PM
-john


 This topic is locked

