#1201
Posted 11 February 2010 - 06:48 PM
Love them 24-singles, John !!
Looks GREAT !!!
Looking forward to Ernie's test-report....
Jeff Easterly
Jeff Easterly - Capt., Team Wheezer...
Asst. Mechanic, Team Zombie...
Power is coming on... NOW!!!
#1202
Posted 11 February 2010 - 07:15 PM
I'm not a drag racer - so would running it for a few laps with a heat sink workout safely?
Thank you - thank you John!!
Ernie
#1203
Posted 11 February 2010 - 07:22 PM
Hi Ernie,
Sure...put a lap on it and see what's what before you get crazy. These setups are much more tolerant of stress because of heat, but when you get down into #24 territory, things can get hairy. It should be a real thrill though and I'd definiftely go with a very light perimeter piano wire chassis if you're making it, and some wings...some definite wings There's quite a spread between this motor and the first #27, so these oughtta keep you busy. Enjoy Ernie!
-john
#1204
Posted 14 February 2010 - 07:37 AM
Commutators not in short supply; they are available here:
http://cgi.ebay.com/...=STRK:MESELX:IT
--------------------
William Bugenis
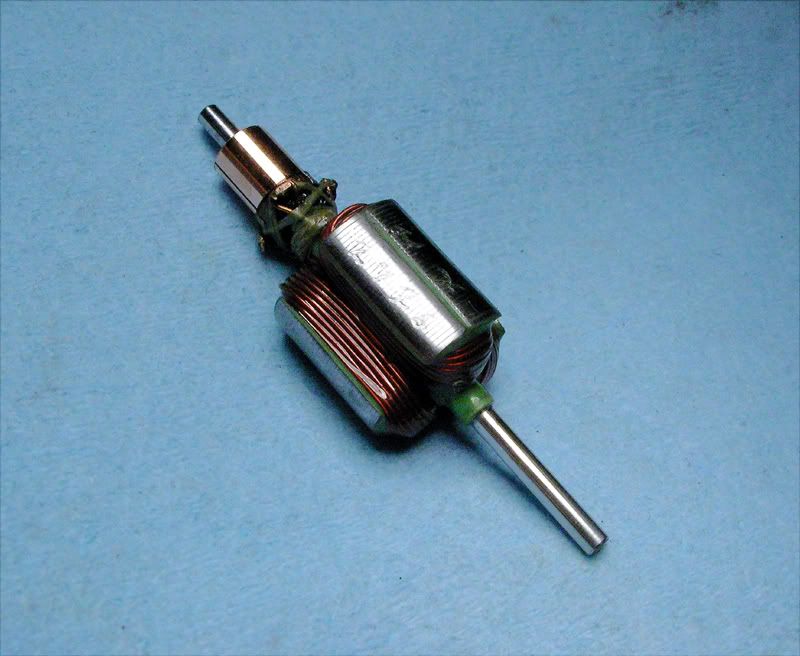
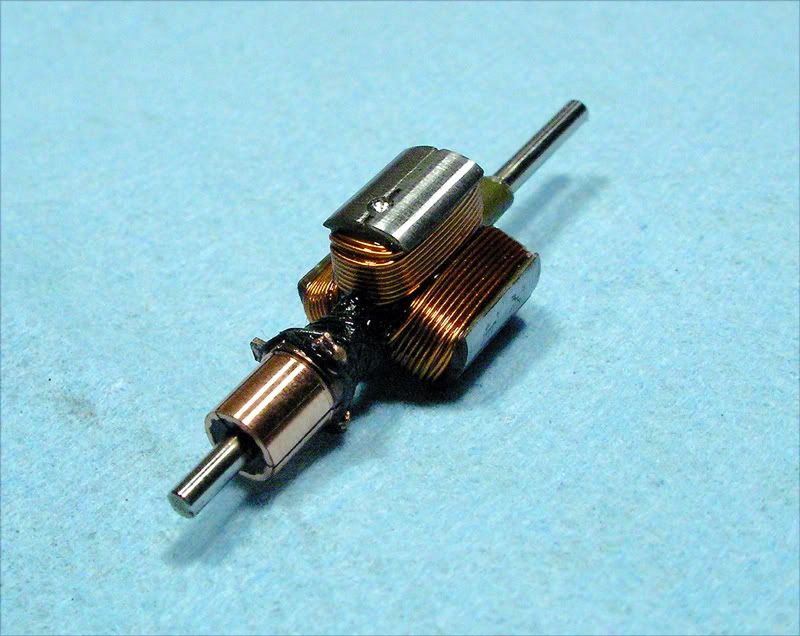
This piqued my interest (duh) and Bill was kind enough to send me some samples of coms as well as coated arm blanks. The arms had mild steel shafts instead of drill blanks (although those are available apparently)...but the shafts were very straight and round. I figured the best way to see how this stuff all works is to wind up a hot arm. Here's a picture of the arm, a #26.
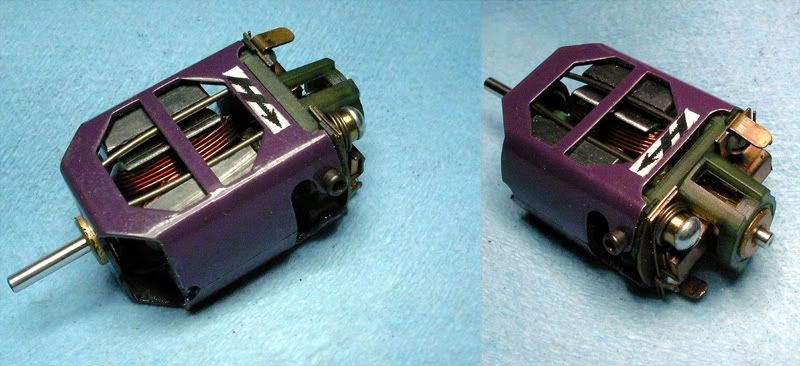
Here's a picture of the motor I put it in, a not at all special Mura Challenger setup with whatever magnets and other hardware comes with it:
As to how it all works...very well indeed. On the com, this is a straight tab com as many (Mura excepted) seem to be today and I was worried about being able to make a solid brazed connection there, but it seemed to work just fine and no doubt with a little practice I'll get better with these tabs. Of course, soldering them for milder arms would be a piece o' cake. The end of the com needed just a little facing for the surface to be true which is something that should be done to coms anyway. While coms will vary, the one in the picture wasn't as round as the Muras, but easily as round as many vintage coms and easily more round than many Kirkwoods. In any case, they all need to be cut once installed so that's a non-issue. What was nice is that the com metal seems like it might be a slightly harder temper than what I'm used to because it machined exceptionally smoothly and the cuts at the segments were small and uniform. The result was a very clean looking com surface and a smooth running motor right off the bat. In other words, these coms seem really nice!
The arms Bill sent were very nice too. While they had mild steel shafts on the ones he sent (he does have drill blanks), what really matters is that they were very straight and round and short of a wall shot at high speed...who cares? The arm balanced up right away and the proof is in the pudding. These arms have .014" lams, but again that's a small consideration as the arm I wound runs like Jesse Owens. What was a nice surprise is that even after a pretty healthy polishing, the arm came in a .515" where I normally would have been at .510" or even slightly under. So I did a little bit more polishing to take it down to .512". The web profile is thin on these arms as modern arms are, which allows a LOT of room to wind and the coating is nice and thick and hard. You'd have to be a gorilla to have problems with shorts winding on these blanks. So far, I've fully broken in the arm and repeatedly spun it all the way to 12V with no problems of any kind, trying to see if it would fail. It runs surprisingly "cool" for a pretty hot #26 wind and smooth. I don't know what I'll do with it now that it's done (anyone interested can PM me here), but it definitely served it's purpose well.
So there you have the good news...a new source for quality arm parts for the kitchen-table winder and the prices are very reasonable as well. If you are either winding arms now or thinking about doing so, these seem like a great value. I know I'll be shopping with Bill for sure.
-john
#1205
Posted 14 February 2010 - 12:13 PM
I always enjoy reading your "discoveries" and as a benefit I get to learn more about the technical aspects of rewound motors. As always John, I personally am thankful for what you share. Not to mention how much I also appreciate everyone else who shares their expertise and experience.
I can't drive very well - but I will definitely have some conversation pieces thanks to my friend Sir John H's "handiwork!"
Thank you.
Ernie
#1206
Posted 14 February 2010 - 01:04 PM
-john
#1207
Posted 14 February 2010 - 03:55 PM
Of course, I've come to expect nothing less!
Take care!
Jeff Easterly
Jeff Easterly - Capt., Team Wheezer...
Asst. Mechanic, Team Zombie...
Power is coming on... NOW!!!
#1208
Posted 14 February 2010 - 04:35 PM
This one's a #27 done on a short blank of around .360" with the powder coating. I didn't skimp on the wire and it comes in at between .2 ohm and .3 ohm. I also changed my brazing method a bit here. I used a larger carbon rod and shaped the tip to fit over the end of the com tabs. I figure a larger rod will slow down the heating process so I don't vaporize the tabs and give me a little more control and "leeway". Also by shaping the tip to fit these tabs, it won't slip (which can produce some startling results) and will give better electrical contact. It seemed to work very well and I think I have a better method now for straight-tab coms. Otherwise, there were again no surprises here and the com and arm blank were of the same high quality as the first test arm. The only problem here is that this arm is such a light one between the short stack and the smaller stack faces, it was hard to balance the thing. I stopped when I had to guess and again, it took very little work to get that far. VERY nice stuff here indeed!
-john
#1209
Posted 14 February 2010 - 04:47 PM
-john
#1210
Posted 14 February 2010 - 07:09 PM
-john
#1211
Posted 15 February 2010 - 06:52 AM
-john
#1212
Posted 15 February 2010 - 07:56 AM
Hi Phil,
From what I can tell from taking these things apart, the manufacturers are using some form of resistance spot welding. In other words, there's no additional metal/flux involved and they're using an electric current to fuse the brass com tabs with the copper magnet wire. The setup I'm using will doi thatr if I leave it in contact for a couple of extra seconds, but without a timing relay to precisely control the length of time the circuit is closed I'm as likely to blow right through the com tab and magnet wire as I am to make a good weld. Brazing with silver jeweler's wire allows a bit more leeway as the silver melts at a significantly lower temp than the brass and copper, but still much higher than whatever else might fail in a high-temp situation (usually the magnet wire insulation or something on the endbell).
-john
Depends on who and where the arm was MFG'ed. Some are "compression" welded which means no "sil-foss" is used in making the connection between the wire and comm tab.
Most all arms from X-12 and faster use "sil-foss" for the connection.
All Chinese arms are compression welded.
#1213
Posted 15 February 2010 - 06:58 PM
-john
#1214
Posted 16 February 2010 - 09:10 AM
#1215
Posted 16 February 2010 - 09:45 AM
We're in the same boat as I learn something about every time I wind an arm. BTW, Bill here is an excellent source for arms and coms from what I've seen and a "homerun guy" as we say in NY
-john
PS, your stuff is wrapped and on it's way to the P.O. Enjoy!
#1216
Posted 16 February 2010 - 02:20 PM
...i just wish i could see all the pictures ...
Robert, for some more photos, have a look at John's motor articles posted on "The Independent Scratchbuilder." Here's the link:
John's Motor Articles
I intend to live forever! So far, so good.
#1217
Posted 16 February 2010 - 10:58 PM
Robert, for some more photos, have a look at John's motor articles posted on "The Independent Scratchbuilder." Here's the link:
John's Motor Articles
Thanks for the link Bill!
Ernie
#1218
Posted 17 February 2010 - 05:35 PM
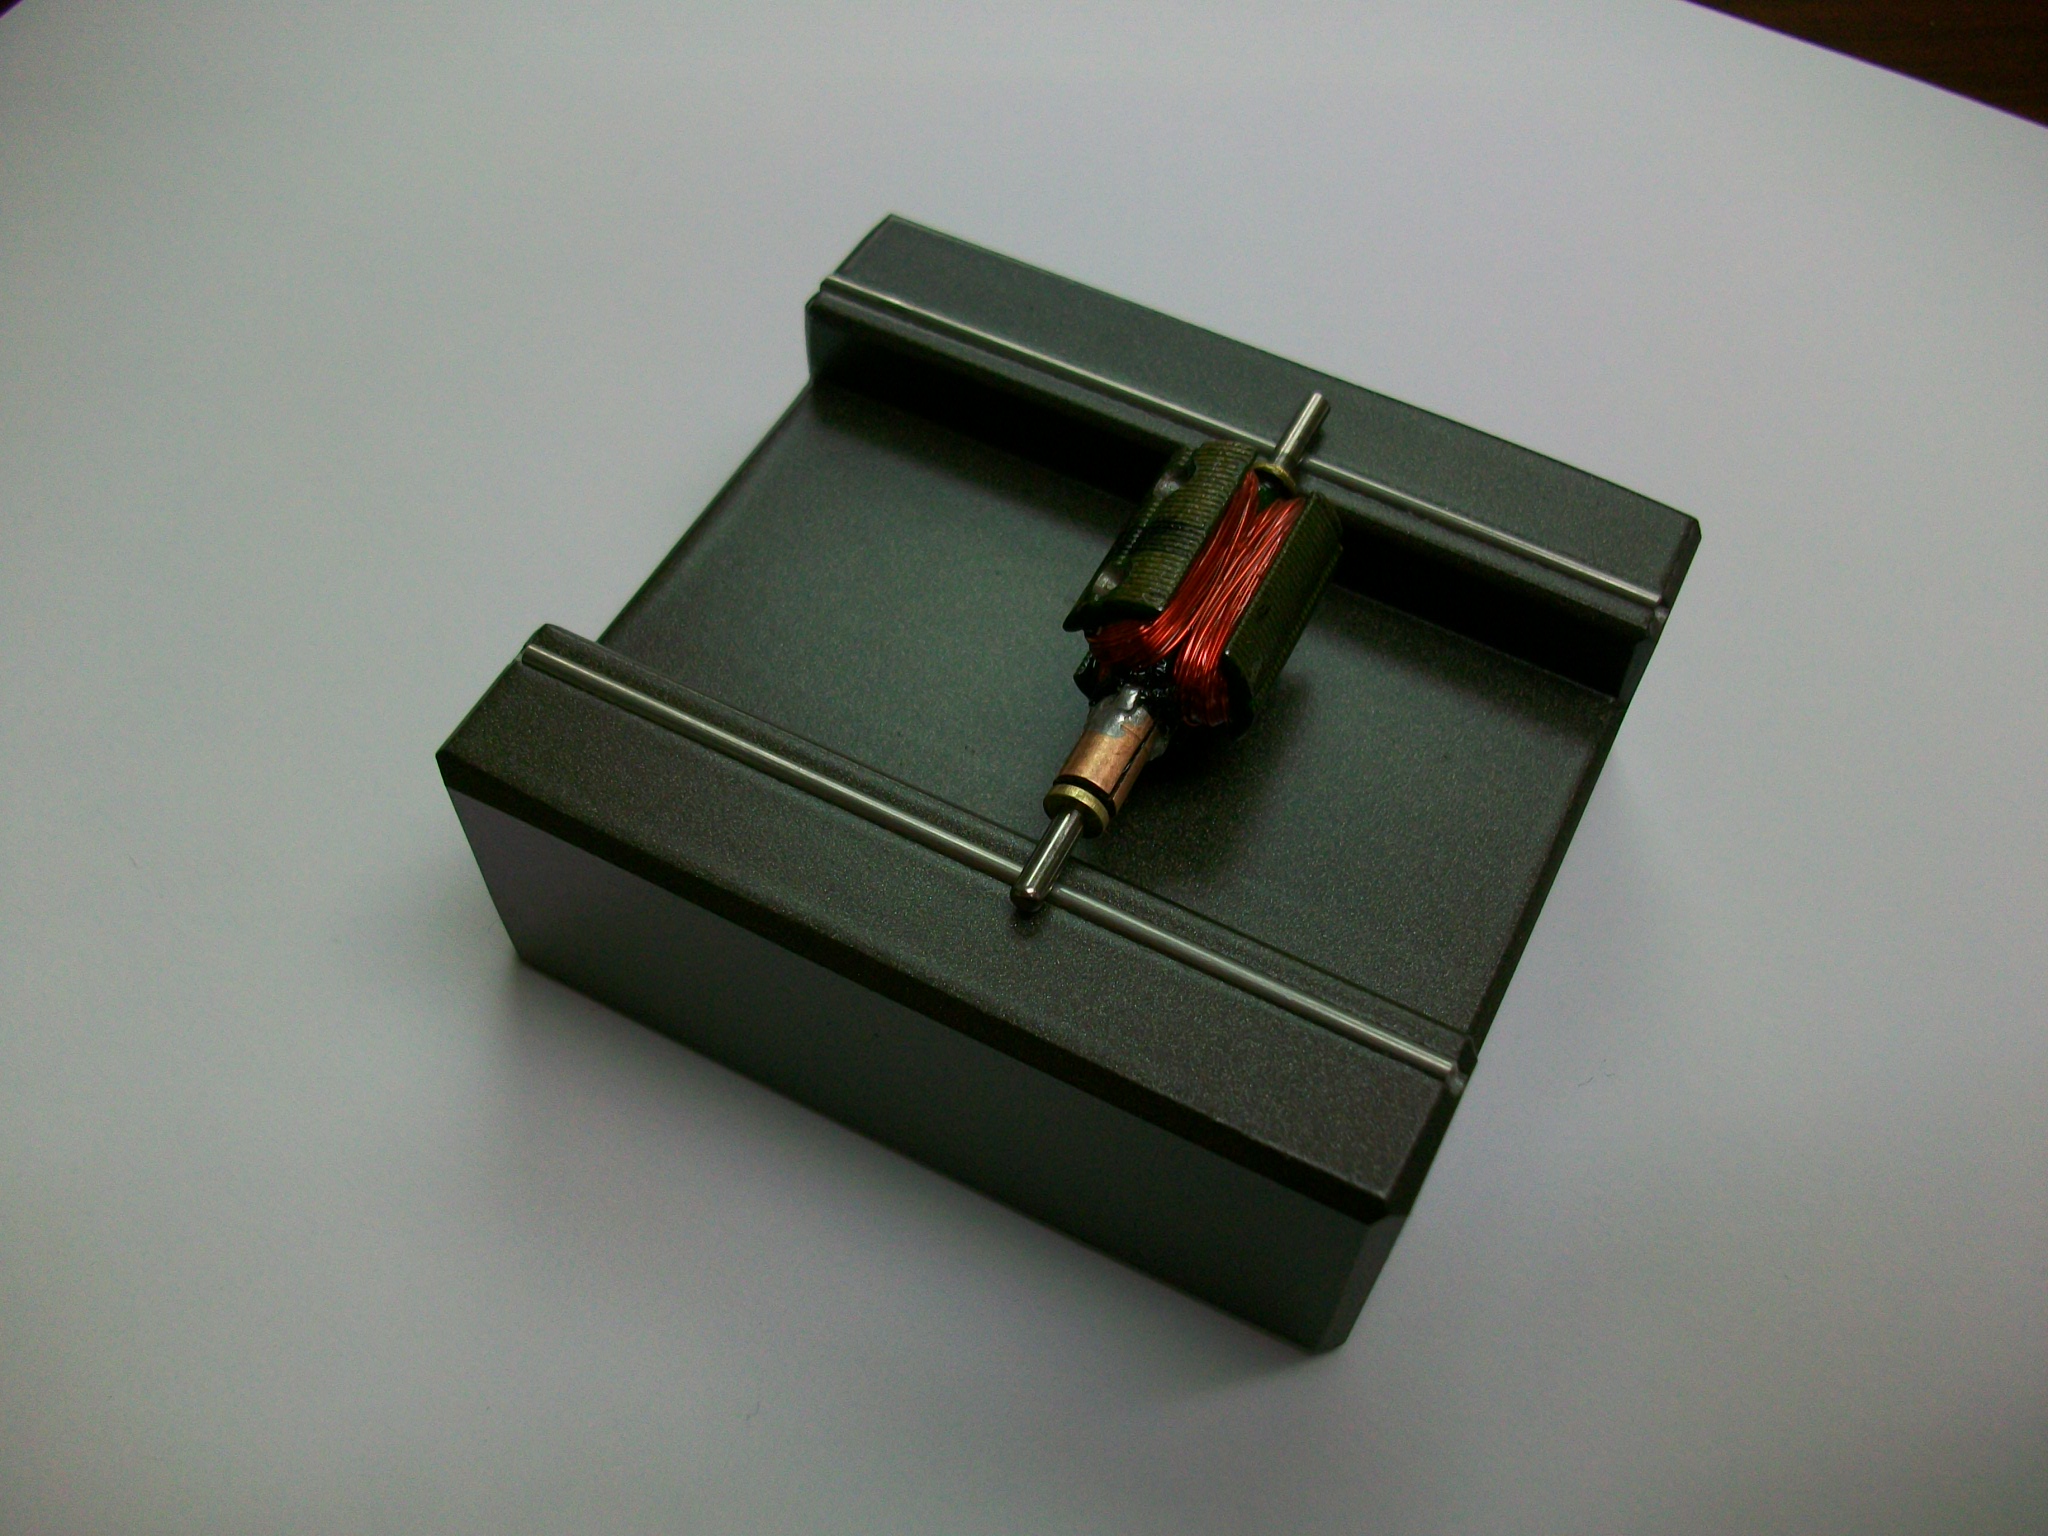
This was milled out of a solid block of aluminum and then painted with a ceramic paint.
.063 stainless rods for the motor to roll on, I realize that razor blades would have been more accurate but hoping to get my son involved, I figured this was safer.
Kelly
#1219
Posted 17 February 2010 - 08:05 PM
#1220
Posted 17 February 2010 - 08:46 PM
The balancer is beautiful and should work very well. If you want, you can substitute gauge pins or really any very round machined pins. From what I hear, a balancer using very accurate pins is just as good as one using razor blades, Niiiiiiiice!
Robert,
Just post here as you do any arms and we'll all figure this stuff out together!
-john
#1221
Posted 17 February 2010 - 08:50 PM
I intend to live forever! So far, so good.
#1222
Posted 18 February 2010 - 12:14 AM
A good source for winding thread in diff. sizes??
The ones I got didn't have good enough insulation. So I did a nice 50/#29 wind on a "350 stack timing about 20 degrees and when running it at about 5v it suddenly started to rev less.
Stack shortage because when I upped the volt I got a nice smokebomb, thread insulation to poor for arm winding, it melted.
I gotthe thread from one of our largest electronics supplier but it wasn't good enough obviously.
So where to get quality thread?
Regards,
Jens
#1223
Posted 18 February 2010 - 07:14 AM
It may have been a short in the wire...or a short between the wire and the armature and it's very hard to know which. I think that it's more likely that the wire is OK and that you got a short circuit between the armature wire and the stack. Keep in mind that the insulation on magnet wire is very thin and it can be damaged easily by:
1) catching the wire on any of the sharp edges of the armature or the commutator causing a "nick"
2) a poorly insulated armature, so that when you put tension on the wire, it will damage the insulation right where the wire passes over the corners of the armature stack at the top and bottom. This is most likely to happen on the first layer of winds...and afterwards out towards the curved "face" of the stack as you end a row and turn back around.
3) soldering with too much heat for too long (least likely unless you slip with the soldering iron
Most modern armatures have a very durable powder coating that makes it much less likely that you will have problems with shorts, but it can still happen if you're not too careful. The older arms varied in this regard. The Muras had a very nice coating on them...the Mabuchis had nothing but the fiber end insulators, so those required extra care. I have had very good results with the wire from Planet Engineers and if you want to try some different wire to see if it helps you can try ordering from them. I would get their higher-temperature rated wire just to be sure, and here's a link to that wire in #29 size:
200 degree celsius rated magnet wire
They also have a wire that's rated a little higher...220 degrees celsius, but it's twice the cost and probably not worth it for the extra 20 degrees.
I would take the extra time to be sure that the armature is well-insulated before winding. If you will be using an armature that has no fiber end insulators, try and slightly round over the edges at the top and bottom of the armature where ever the wire may touch and then coat the arm neatly with some epoxy in there to insulate it. There are also some high-temperature coatings in paint form that can help. This is probably one of the more common problems that people winding armatures at home will face...especially when using older or reclaimed armatures as opposed to newly produced armatures that are well coated. It can easily be overcome though with some extra preparation before winding and a bit more care taken during the actual winding. Jag är alltid glad att hjälpa
-john
PS: Of course, always test the armature for shorts before epoxying and to see if each pole has the same (or close...depending on how accurate your meter is) resistance. If there's a problem at that point, it's easy to take things apart and correct it. After epoxying, the arm wouldn't be repairable.
#1224
Posted 20 February 2010 - 10:34 AM
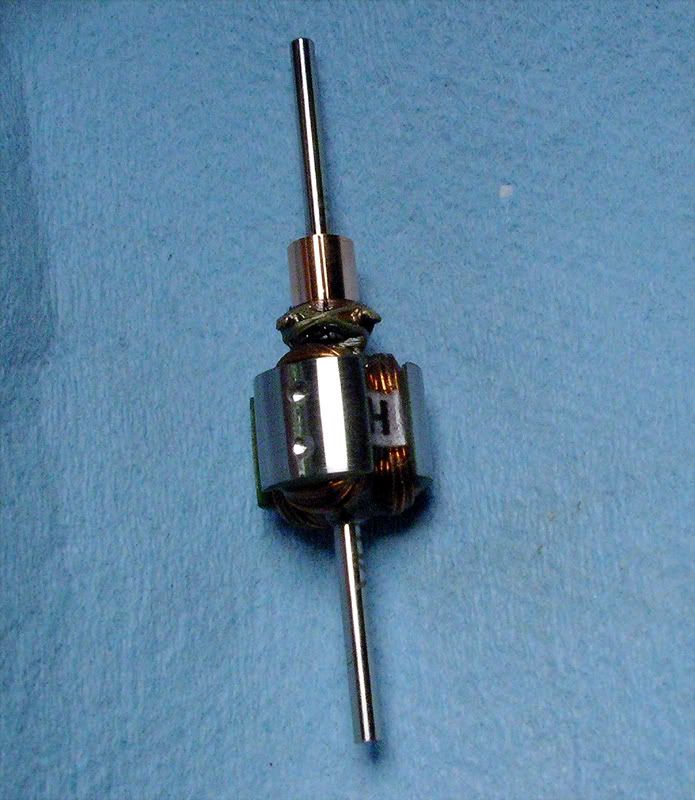
As for the actual wind, it's a 20T/#25 and because of the size of the stack (a bit over .300"), it meters somewhere down around .1Ω I guess this isn't particularly "out there" for these kinds of motors (?), but for me it's all uncharted waters. I also went a little heavy with the jeweler's silver when brazing the com jusy because this arm seems like a hand grenade with the pin pulled. Because I was feeling a little goofy (even more than usual), I also tagged the arm instead of engraving it Anyway, I hope it works out well, and it's been awfully nice getting to "meet" Bill and trying his stuff out. Once again, if you're interested in winding and want to get some new stuff instead of recycling, I don't think you'll possibly do any better than what Bill has.
-john
#1225
Posted 20 February 2010 - 04:07 PM
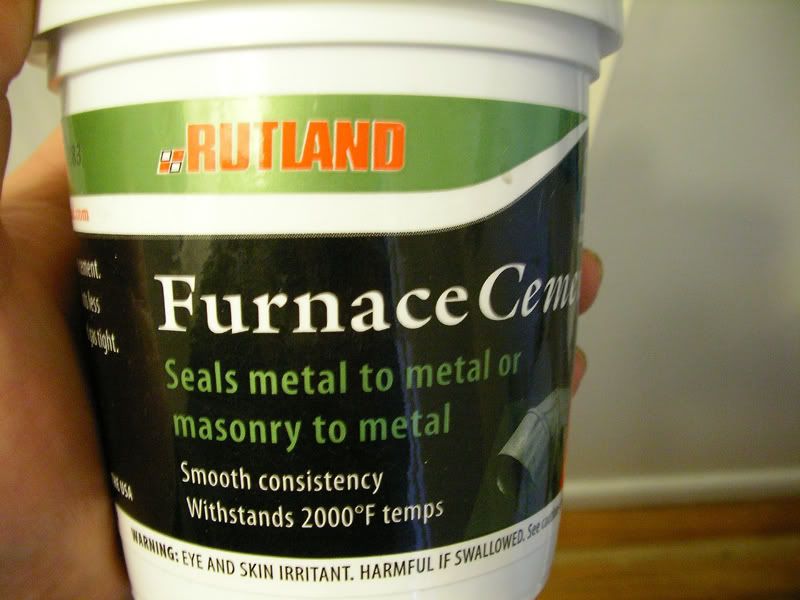
It's a high-silicate (sand) cement used for furnace connections that may be exposed to high heat. It also says it's for small joints, so I figured it would have to be a fairly fine consistency. I cracked the lid while I was standing there and what was inside was a gooey-but-smooth black material that looked very tar-like. However, it's water-based and very creamy which means that it's thinnable. Of course my mind starting considering the possibilities for rewinding (you didn't think I was looking at this for furnace connections did you ). So anyway, for the 5-spot I figured it was worth a try. I washed out an old small size carpenter's yellow glue bottle and scooped out enough of this stuff into the bottle to fill it about 2/3 of the way up and then started adding water a little at a time and shaking the stuff to thoroughly mix it. I did this until the stuff was what I thought would be a good brushable consistency. It didn't take much to get it "there", so I tried it on an arm I was to do for a blogger, using a small artist's brush to coat the inside of the stack as an insulator. What's neat about this gop is that as you work your way around the inside of the arm and come back to where you started, it has already started to dry so you can easily build the coating as you work. It states on the container that you need to expose it to 400 degrees to cure it, but I simply used my Easy Baketm oven at 250 for 15 minutes and it seemed very sturdy and not at all brittle as you would expect from a "cement". More over, it bonds seemeingly VERY well to steel. I then wound a #28 over it, tensioning the wire as I normally would and it all checked out fine...no shorts. The final nice thing is that the dried material is seemingly fairly porous so when you epoxy the arm, some of it penetrates the cement, no doubt enhancing it's final strength.
Short of getting a powder coating setup, this seems like the best method of insulating an armature against shorts. It's cheap, easy to use, cleans up and thins with water, and requires no special tools and or procedures of any kind. In short...even a Czech/Italian carpenter can do it! So if you're looking for a good soluytion for insulating your arm stacks, this seems better than epoxy or any other common coating you may be using. For $5...it's worth a try anyway!
-john
PS...in exchange for sharing my secrets with you two guys ( ), I accept no responsibility for failures resulting from using them