-john

#1701

Posted 25 May 2010 - 03:54 PM
-john
#1702

Posted 25 May 2010 - 04:03 PM
I'm looking for .007" arms to rewind. They can even be epoxied (I have a method for cleaning these) as long as they haven't been balanced...for example, the Mura Challenger I arms. C'mon...you know you have some somewhere in that pile of stuff you never use but have been saving! (Hi Barney
).
-john
John,
I have a box of used arms that I paw through for ya, not sure if I have any, but if I do there yours.
Vic
#1703

Posted 25 May 2010 - 06:15 PM
-john
#1704

Posted 26 May 2010 - 05:48 PM
My life fades, the vison dims. All that remains are memories... from The Road Warrior
#1705

Posted 26 May 2010 - 06:27 PM
Thank you.
Ernie
#1706

Posted 26 May 2010 - 07:10 PM
I intend to live forever! So far, so good.
#1707

Posted 27 May 2010 - 05:23 AM
Weren't those two Certus arm blanks I sent .007? I THOUGHT they were but maybe I'm coocoo (MAYBE?). I didn't actually measure them, just went by the magazine adds
...sure thing Gary, but two arm blanks go awfully fast around here
I did my first and only rewind back in the late 1970's on an HO scale motor and I did it by "hand". Is it less effective to do a rewind by hand or is it necessary to acquire a "rewind wire tool jig counter"? Advantages/disadvantages to "hand winding" without the tool please? Am I confused??
Hi Ernie,
Besides what Bill said, your post brings up (sorta) the confusion some have regarding the term "hand winding". This doesn't mean holding the arm in your hand and winding, it means winding by any means other than a machine. I agree with Bill that a counter isn't really necessary, and have never seen a good reason to have one. However, winding using a clamp and crank (like the Rgeo LeKrank or the LaGanke or similar) versus holding the arm in your fingers or even in a pin vise (which is still far better than holding the arm in your hand) allows you to do a much neater wind and with more even/consistent tension on the wire. It's also a dandy way to hold the arm when making the com connections.
-john
#1708

Posted 27 May 2010 - 11:17 AM
Back in the 50s I did winds by clamping the lower poles in a simple bench vice and winding which also works.
Again, this is a technique done by 12 year old kids, how hard can it be?
Fate
3/6/48-1/1/12
Requiescat in Pace
#1709

Posted 27 May 2010 - 03:08 PM
...hmmm, looks familiar for sure...maybe there's a bunch of similar-looking but cheapo substitutes in there. Time to open up the package and have a closer look:
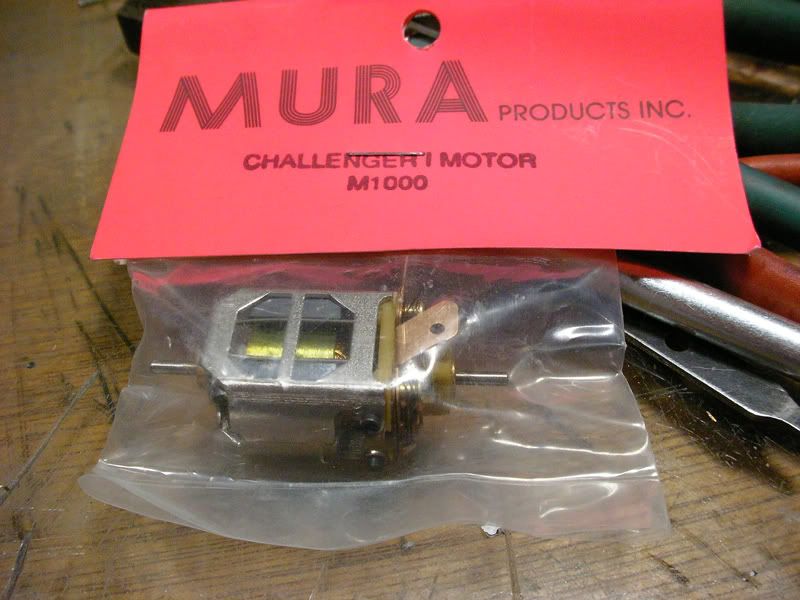
Sure looks like a regular Mura C can (except for the eye-catching color of the endbell)
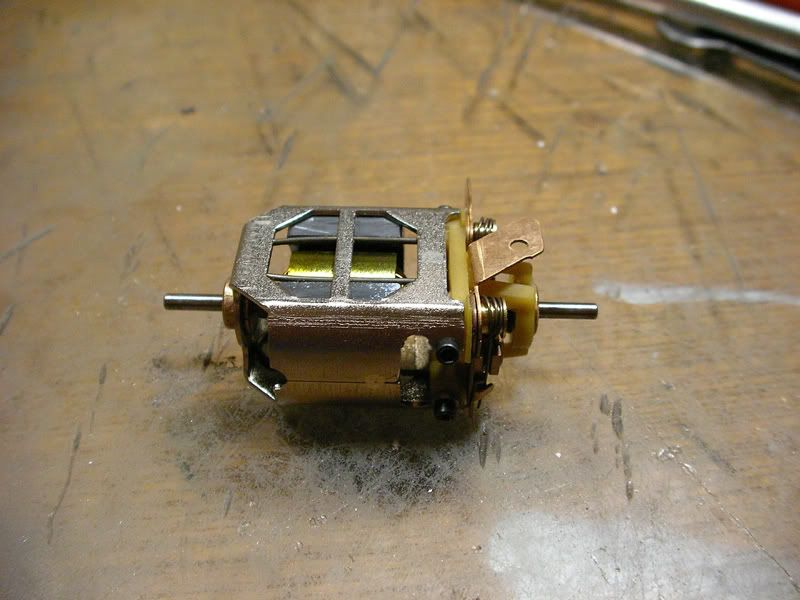
Looks like a darn nice setup to me. Solid can (probably not the lightest around but who cares?), quality endbell with good hardware, springs, brushes etc. all fine and would be at home in about any buildup. What about those magnets though, surely those gotta go? Nope, they measure 1150 on my meter and are within a point or two of each other so, in this case, they're really well matched to boot! That arm has a pretty thick coating of epoxy on it; sounds like trouble. Better remove the com (carefully prying the tabs with a sharp X-Acto knife to free the wire and then twisting it off works fine) and put it in with the rest of my salvaged coms for use later on.
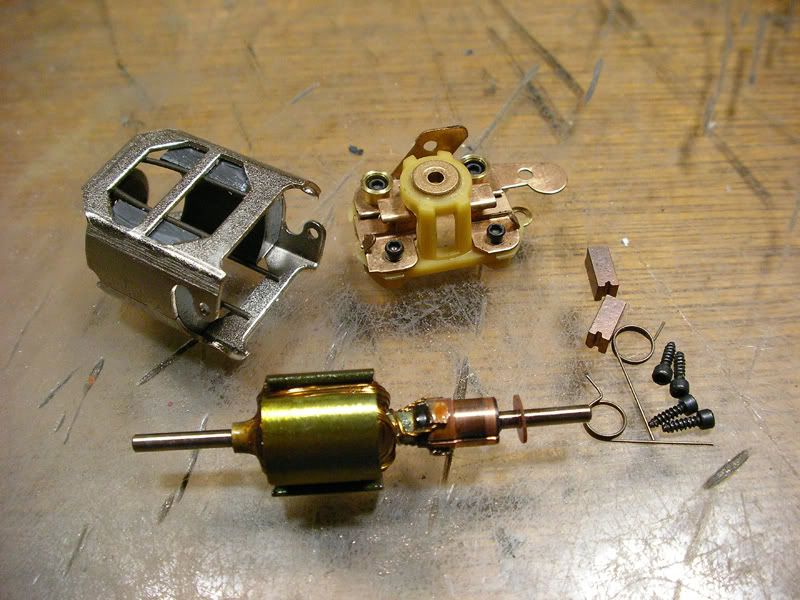
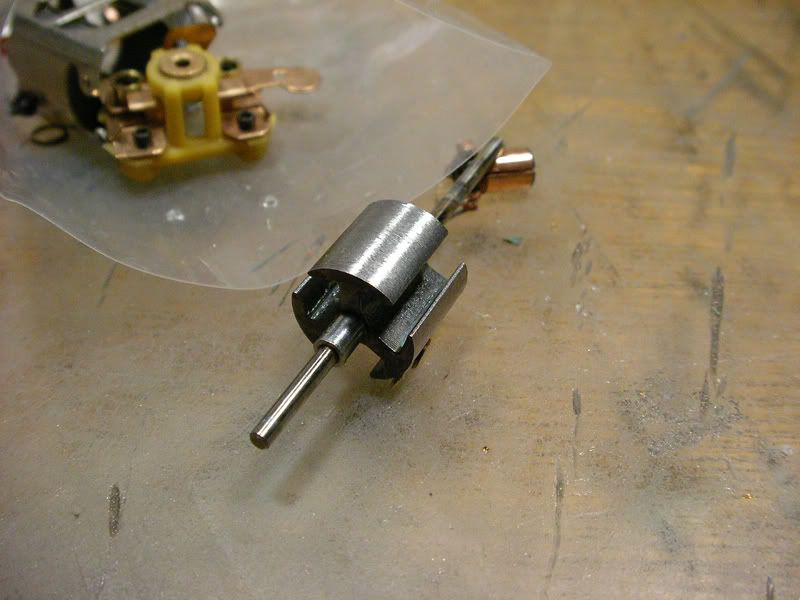
After removing the com and setting it aside, I'm faced with getting that heavy epoxy (check out the tail spacer area!) and magnet wire off the arm. Cutting it off with a Dremel is a difficult task that can damage the arm blank...there's gotta be a better way, and there is! Afterwards, you're left with a lovely .007" blank ready for prepping to wind. So for the $24, you get a great arm and a really nice/solid motor setup to stick it in afterwards. Since the magnets seem up to the task, this one will get a fat wire wind.
-john
#1710

Posted 27 May 2010 - 04:18 PM
You make it look sooooo easy!! I could get that far and then scratch my head asking - how does it go back together????! Without a meter to check the power of the magnets, is there another alternative to check magnet power?
Thanks for the breakdown John - it's really valuable info and greatly appreciated!!
Ernie
#1711

Posted 27 May 2010 - 05:41 PM
You make it look sooooo easy!! I could get that far and then scratch my head asking - how does it go back together????!
Aw go on, so far everything I've shown IS easy. Well, maybe except for getting the old epoxy and wire off there
Without a meter to check the power of the magnets, is there another alternative to check magnet power?
Well, I don't even know that there was such a thing as commonly available gaussmeters in the 60's, I sure never saw one. People just kinda "felt" the magnets to see how hard they pulled thge arm into the can or how strong they felt when sticking a piece of steel in there. I mean, just knowing the make and type of magnets is pretty much enough. It won't tell you how well the magnets are matched, but that's really for racers and bigtime motor-builders. Us "regular folks" just want things to turn out OK. So in this case, we know that if you haver a set of magnets from a Mura Challenger I, they're probably good solid magnets. If you're doubtful about their strength, you can have them zapped.
Oops! I got the arm cooking in the EasyBake oven to cure the epoxy holding the com in place and the furnace cement insulation inside the stacks. It should be just about "medium rare" right about now! Be back in a little while.
-john
#1712

Posted 27 May 2010 - 06:00 PM
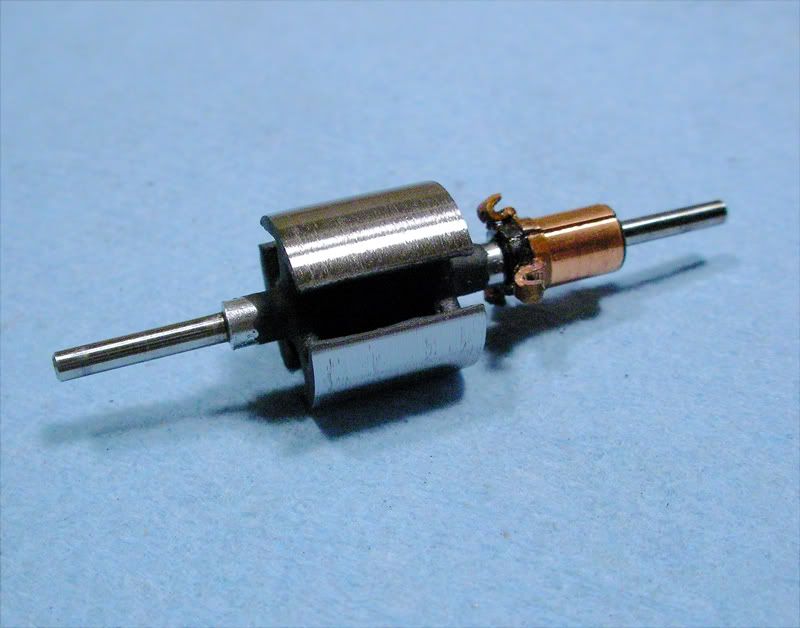
-john
#1713

Posted 27 May 2010 - 06:23 PM
My life fades, the vison dims. All that remains are memories... from The Road Warrior
#1714

Posted 27 May 2010 - 06:40 PM
-john
#1715

Posted 27 May 2010 - 06:51 PM
I intend to live forever! So far, so good.
#1716

Posted 27 May 2010 - 06:59 PM
Nice work.. Are you going to share the "better way" with us?Well, maybe except for getting the old epoxy and wire off there
, that part used to be a real PITA and I damaged as many arms as I was able to salvage. I've got a better way now that doesn't damage anything, except for maybe a few brain cells

That's one of the things slowing me down.
Thanks for showing us all this stuff. It is totally awe inspiring.
Steve King
#1717

Posted 27 May 2010 - 08:23 PM
Nice work.. Are you going to share the "better way" with us?

That's one of the things slowing me down.
Sure thing Steve...I was waiting for someone to ask me that

This stuff is nasty business and good care should be taken handling it...vapors and skin contact are a bummer. If you were to get some in your eyes, that would surely be something to remember. Anyway, it will not penetrate an arm fully in one application. What I do is put some in a film canister and then soak the arm (after I've removed the com since that's made of a form of resin also) for around a half hour. I take out the arm and rinse it well with soap and water. After that, you can usually remove some of the top windings on each pole. When it gets to the point where you think you might break the magnet wire...stop...soak the arm again and retry. Eventually, usually after three times, you should be able to get all the wire off there. The stuff turns the epoxy into a kind of "snotty" consistency and softens some of the underlying layers. It will also remove all or most of the arm's insulation underneath, so you wind up with a raw arm that needs re-insulating. I do a final cleanup with a wire wheel in the Dremel tool and the arm is ready to go.
Thanks for showing us all this stuff. It is totally awe inspiring
You're most welcome Steve, but thank YOU for looking. BTW, I hope that all this is just the opposite of awesome. It's my aim to show that not only can anyone do it, but that it's VERY enjoyable and satisfying. In this particular case, the inexpensive Mura C can Challenger I got from Roger is a GREAT motor to work on because it can almost be anything you want. There aren't any real roadblocks at all...can, magnets, endbell, hardware are all up to anything you want to throw at it. Sort of like the "small block Chevy" of slot car motors.
Hi Bill,
John, these Mura C-cans are some of the straightest ones that come from a factory. I straighten all my cans with the proper size mandrel & a metal working hommer. Often, I've had Mura cans that were the proper size & require no hammering. Yes, they are a bit heavy for competitive racing. None-the-less, you can still build some neat motors with them.
Thanks for the info Bill. I have to admit I'm awfully fond of these motors and hearing you say that only proves them to be even a better platform for working on. Truthfully, I only put the little thing about them being "heavy" in there because I've heard people say that. They seem like featherweights compared to older motors and if people were running a class limited to these things, I have no doubt that there would be some fast-as-heck racing!
-john
#1718

Posted 27 May 2010 - 11:56 PM
Thank you again for answering my questions.
It's appreciated!
Ernie
#1719

Posted 28 May 2010 - 05:44 AM
-john
#1720

Posted 28 May 2010 - 02:31 PM
I wanna see a whole bunch of people tearing motors apart!
As soon as I can sir!! LOL!!
John,
I have worked with paint stripper spanning over 30 years in the automotive restoration arena and can say I've stripped more than 100+ complete cars during this time frame. If I may offer you a suggestion please. As you're aware, Epoxies consist of two components that react with each other forming a hard, inert material. Part A consists of an epoxy resin and Part B is the epoxy crosslink or curing agent, sometimes called hardener. When "cured", the epoxy resin is highly resistant to "hot" chemicals like lacquer thinner - paint stripper=(PS). Which is why it will take a few or more PS applications to "breakthru" the surface before it starts to soften the resin.
Prior to soaking the arm, if I may suggest slicing the epoxy resin with a razor blade, as deep as possible, it will allow the PS to seep, penetrate and permeate the epoxy resin at its foundation, thus loosening the E-resin from its base thus decreasing the amount of PS applications required instead of trying to penetrate the "crosslinked" surface, layer by layer.
I have been able to remove 5 layers of paint from a panel with only one application of PS after I sanded/abraded the panel surface with 80# sandpaper and encapsulated the surface with a plastic sheet to retain the PS vapor. If you're wondering how I knew it was 5 layers of paint, I counted the different colors as I was scraping the paint off the panel.
Hope this helps.
Thank you.
Ernie
#1721

Posted 28 May 2010 - 04:19 PM
Prior to soaking the arm, if I may suggest slicing the epoxy resin with a razor blade, as deep as possible, it will allow the PS to seep, penetrate and permeate the epoxy resin at its foundation, thus loosening the E-resin from its base thus decreasing the amount of PS applications required instead of trying to penetrate the "crosslinked" surface, layer by layer.
Sounds reasonable Ernie except I don't know how much "slicing" I can do to the epoxy with a razor blade since what's on the arms is pretty hard and tough stuff. When epoxy resin cures, it acts more like one giant molecule than a polymer with a crosslinked surface. Me and resins go back a long way :-) Anyway, I will see if surface abrasion or scoring helps as long as I can do it without damaging the magnet wire, since the object is to unwind the arm...not to have to cut the wire off. Thanks for the idea
-john
#1722

Posted 28 May 2010 - 06:17 PM
You can always take some #180 grit or coarser sandpaper and break open the surface of the epoxy - that should help!
Ernie
#1723

Posted 28 May 2010 - 07:21 PM
I'll give it a shot and see if it speeds things up. It's not really much of a bother as it is, but anything that makes it quicker would be a plus. Let's face it, doing arms this way is never going to make economic sense anyway
-john
#1724

Posted 29 May 2010 - 06:13 AM
Michael Rigsby
"... a good and wholesome thing is a little harmless fun in this world; it tones a body up and keeps him human and prevents him from souring." - Mark Twain
#1725

Posted 29 May 2010 - 08:20 AM
Some time ago I won a couple from Roger on Evil Pay, and dissassembled them and built up a couple of Gr12 wing car motors using ProSlot arms.
...and if you or anyone does that...PULEEEEZE send the stock arms to me. I know there's got to be a bunch of those arms floating around (I hope they weren't tossed
Of course, ordering this stuff from Roger @ MidAmerica is a no-brainer if you don't have a local track that carries them. You click on your mouse and the stuff appears as if by magic a couple of days later. No problemo.
-john


 This topic is locked


