Jump to content


Photo

Dynamic Batwinder


  • Please log in to reply
95 replies to this topic

#26 Pablo

Pablo

    Builder

  • Administrator
  • PipPipPipPipPipPipPipPip
  • 18,449 posts
  • Joined: 20-February 06
  • Gender:Male
  • Location:Cleveland, Tennessee

Posted 19 October 2021 - 02:11 PM

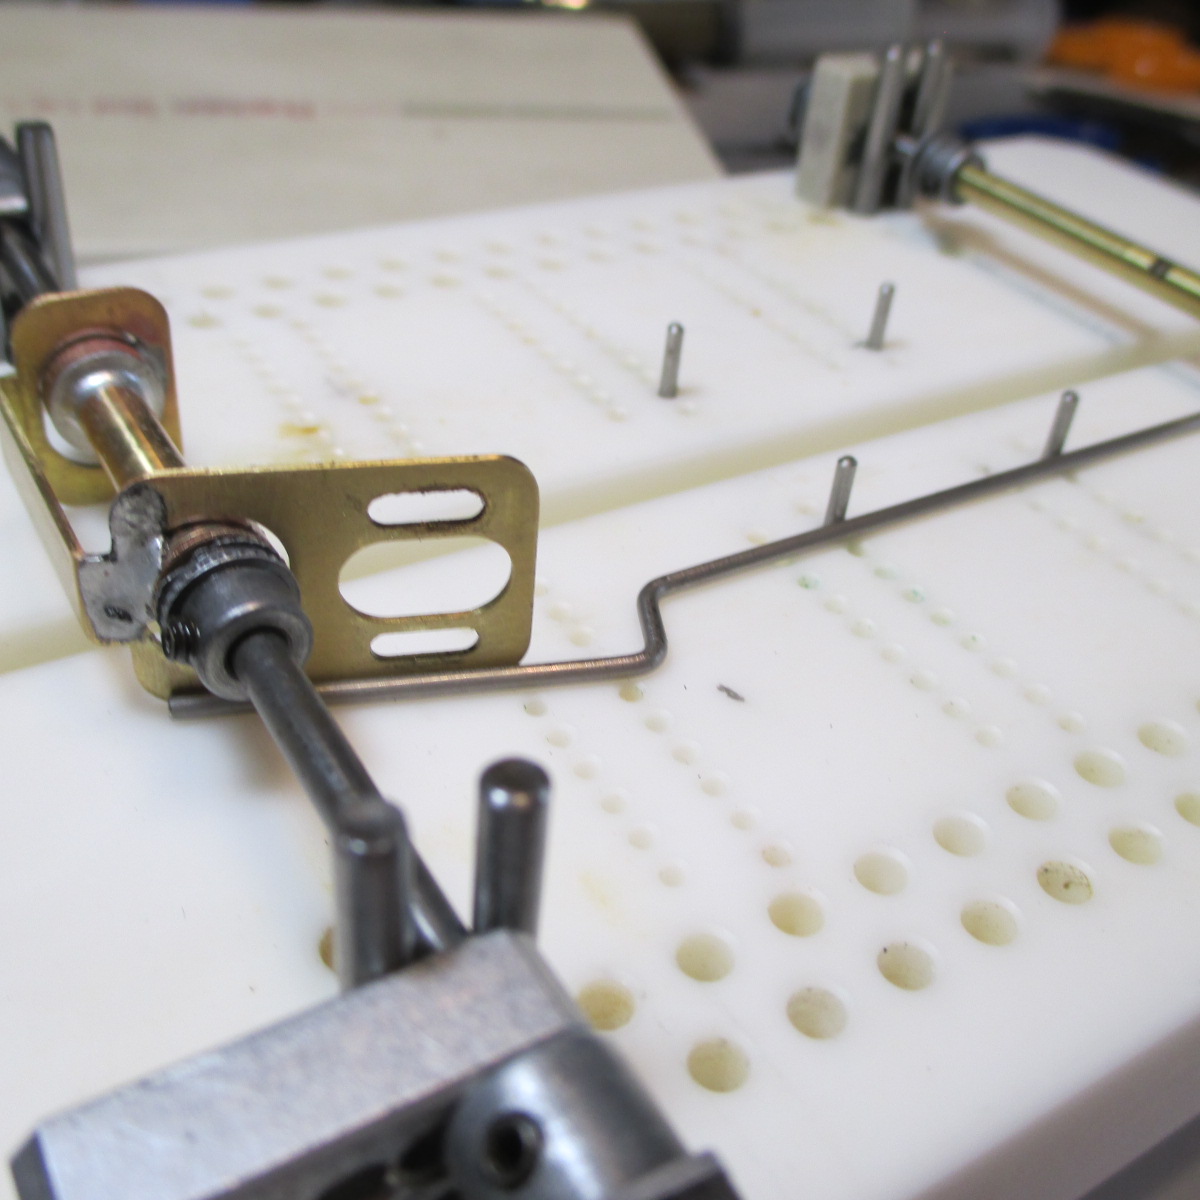
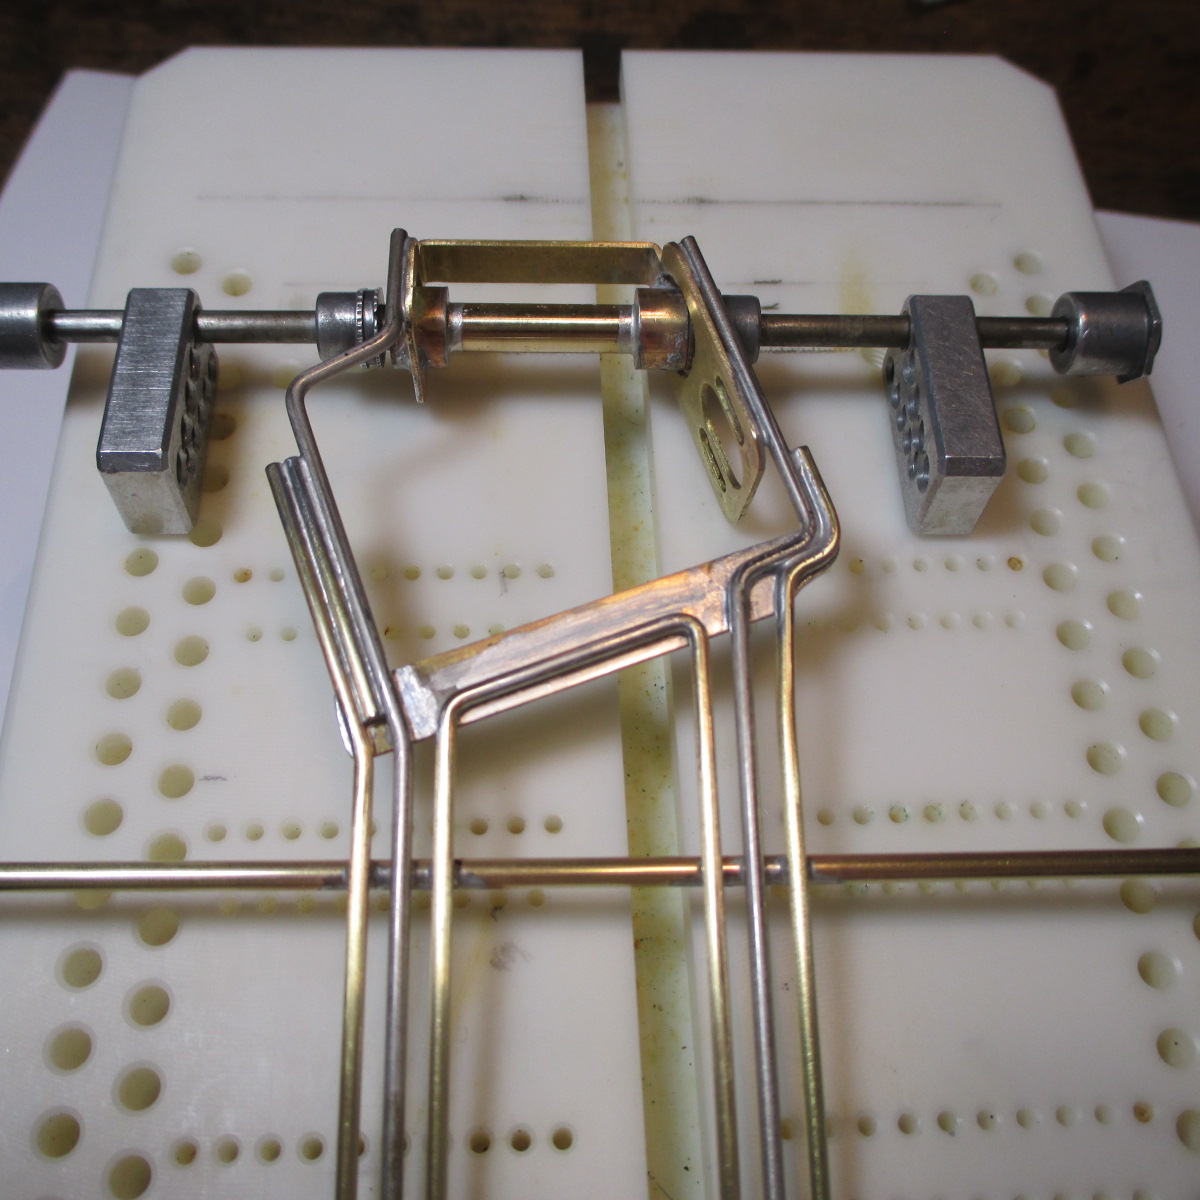
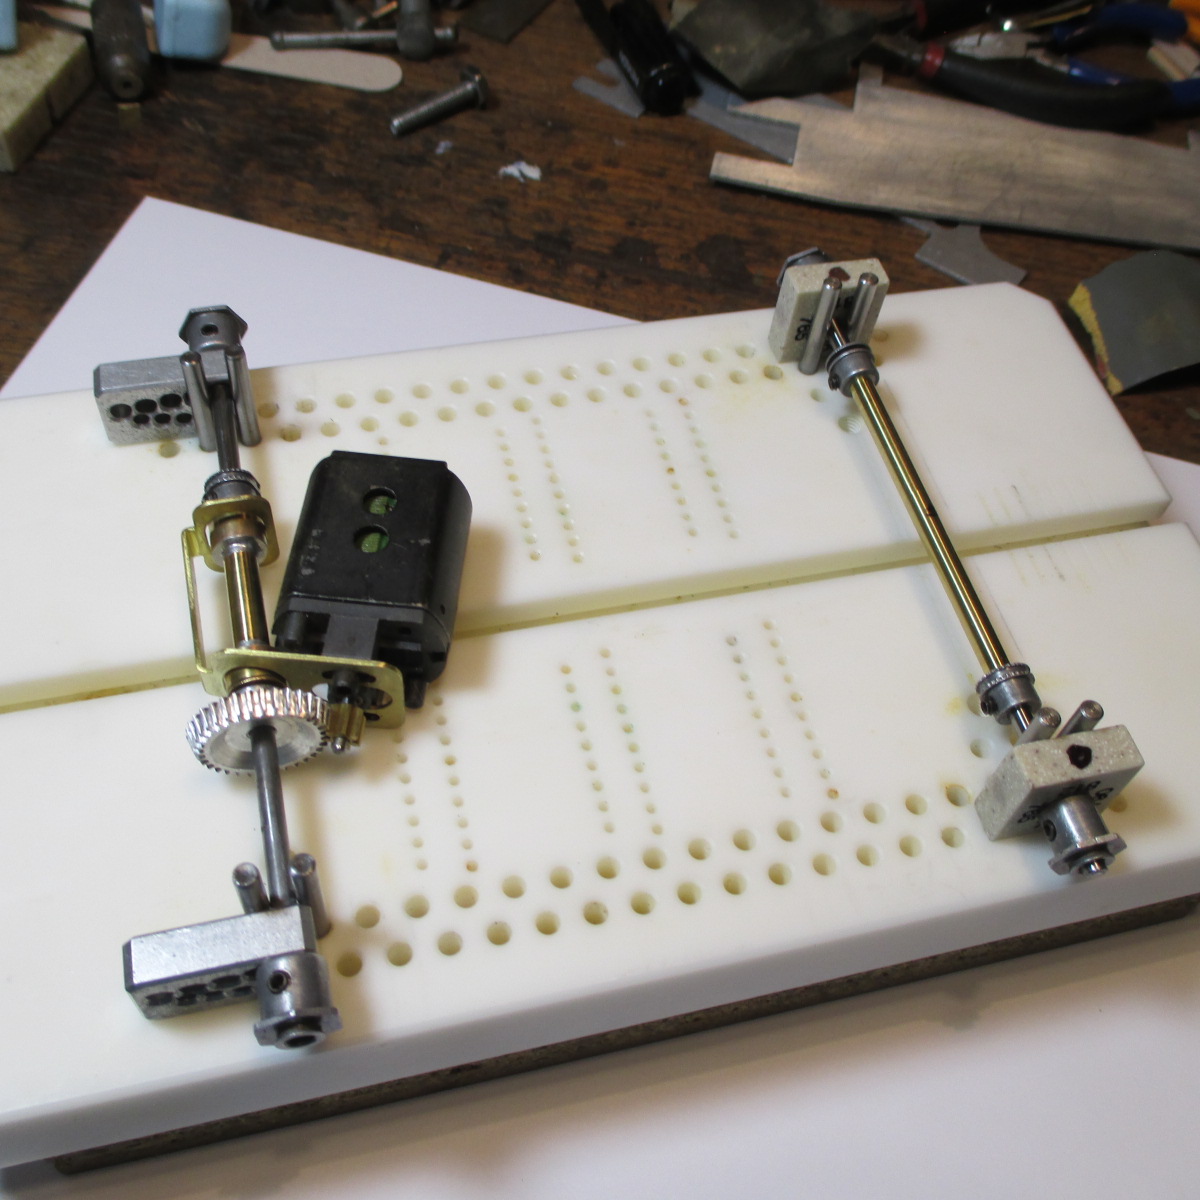
Diary of a Madman - ready for jigging - pencil math and a calculator to verify everything is proper


IMG_0554.JPG


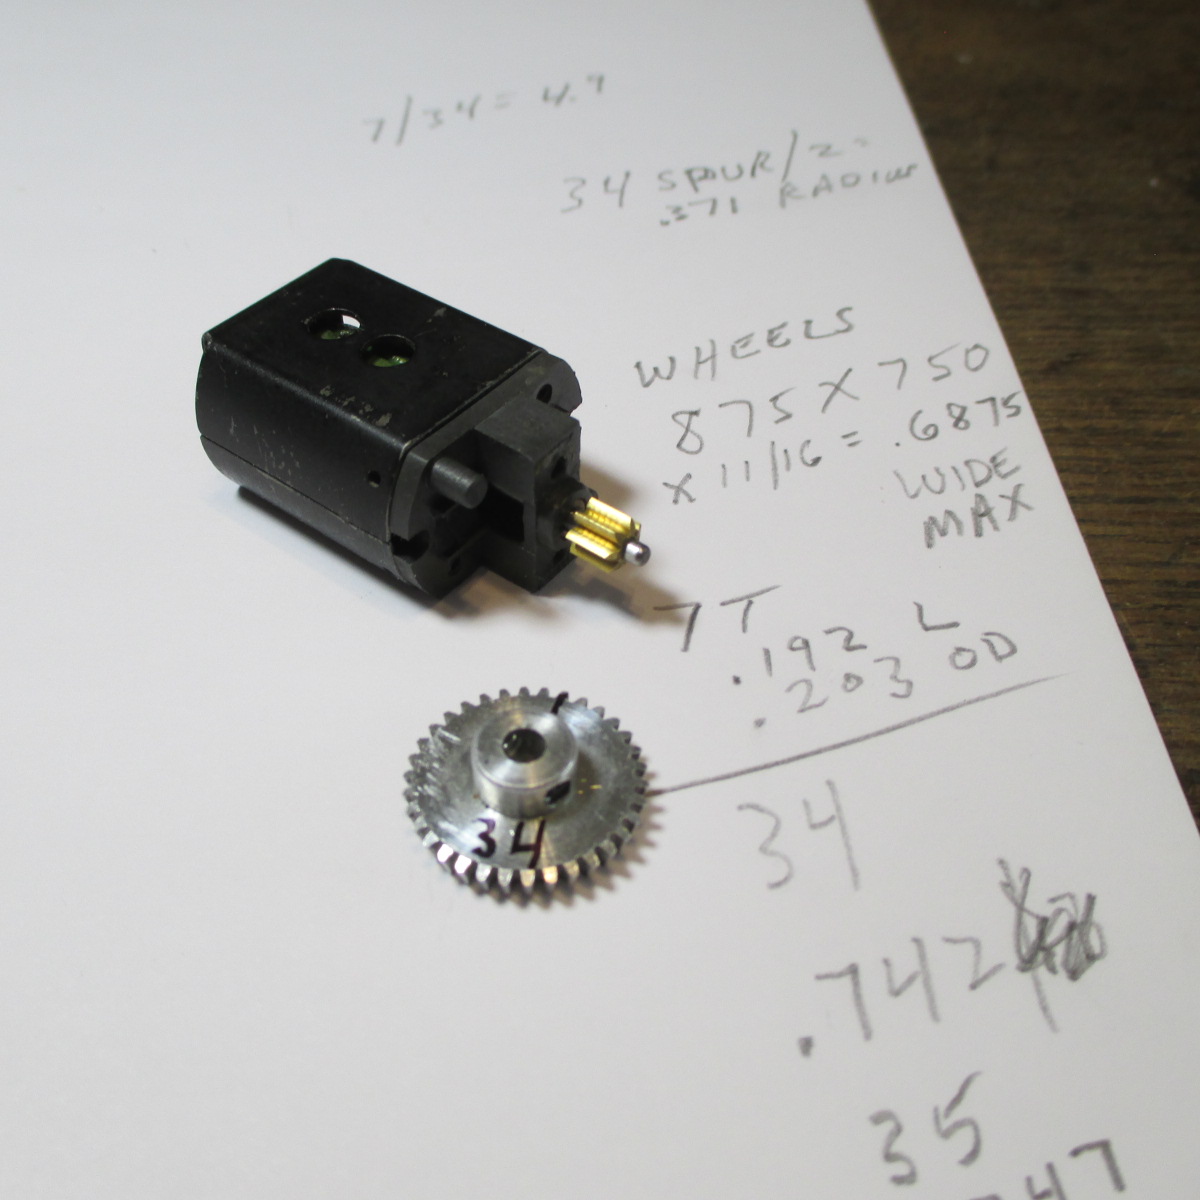
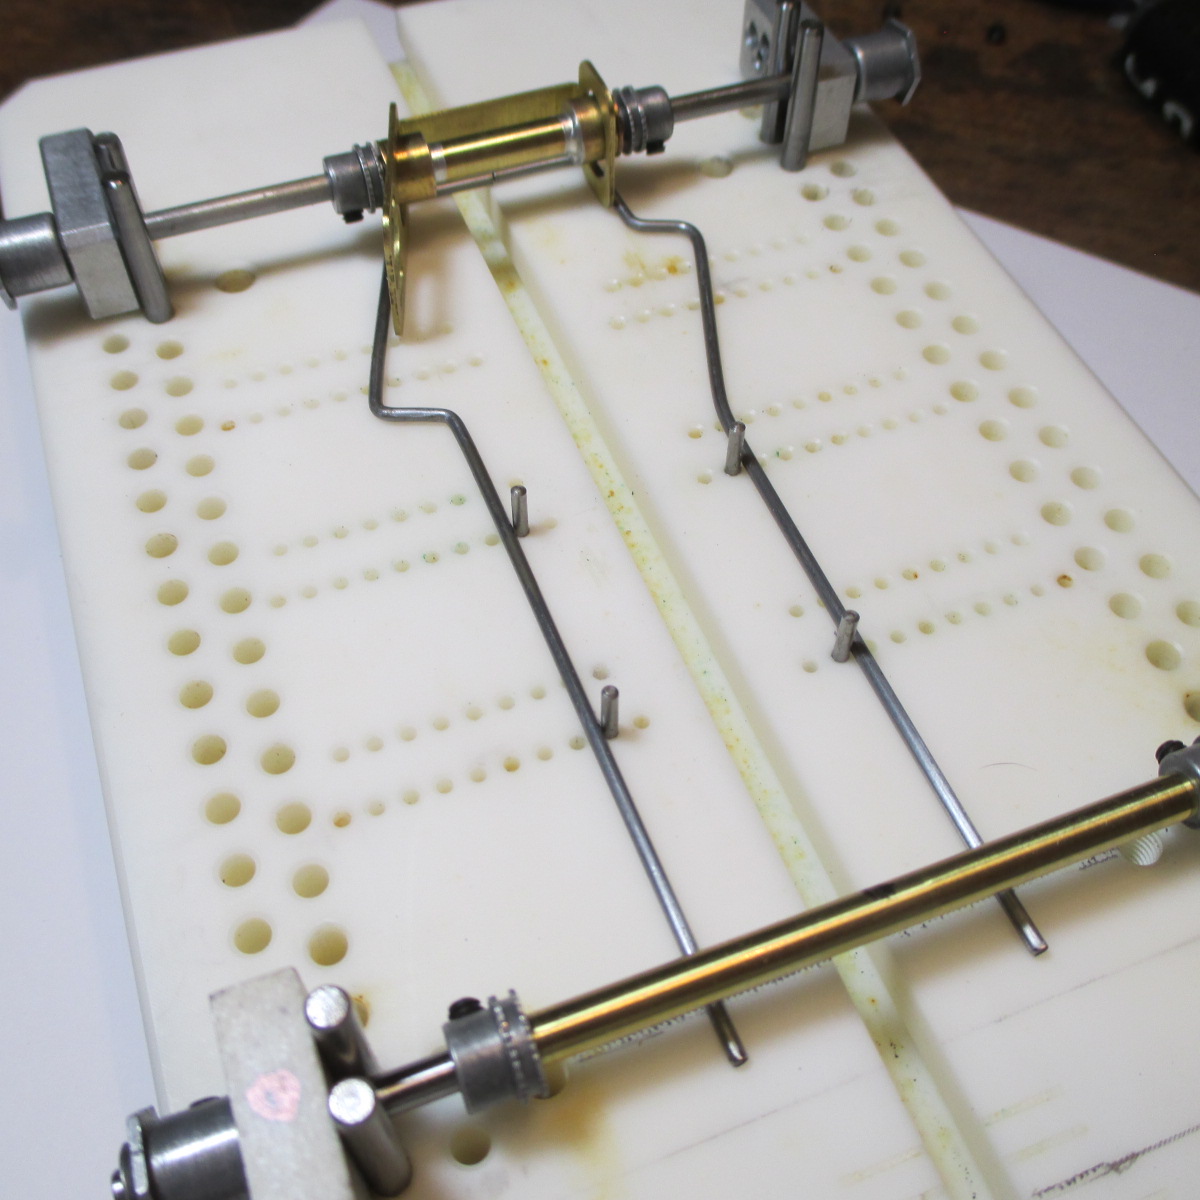
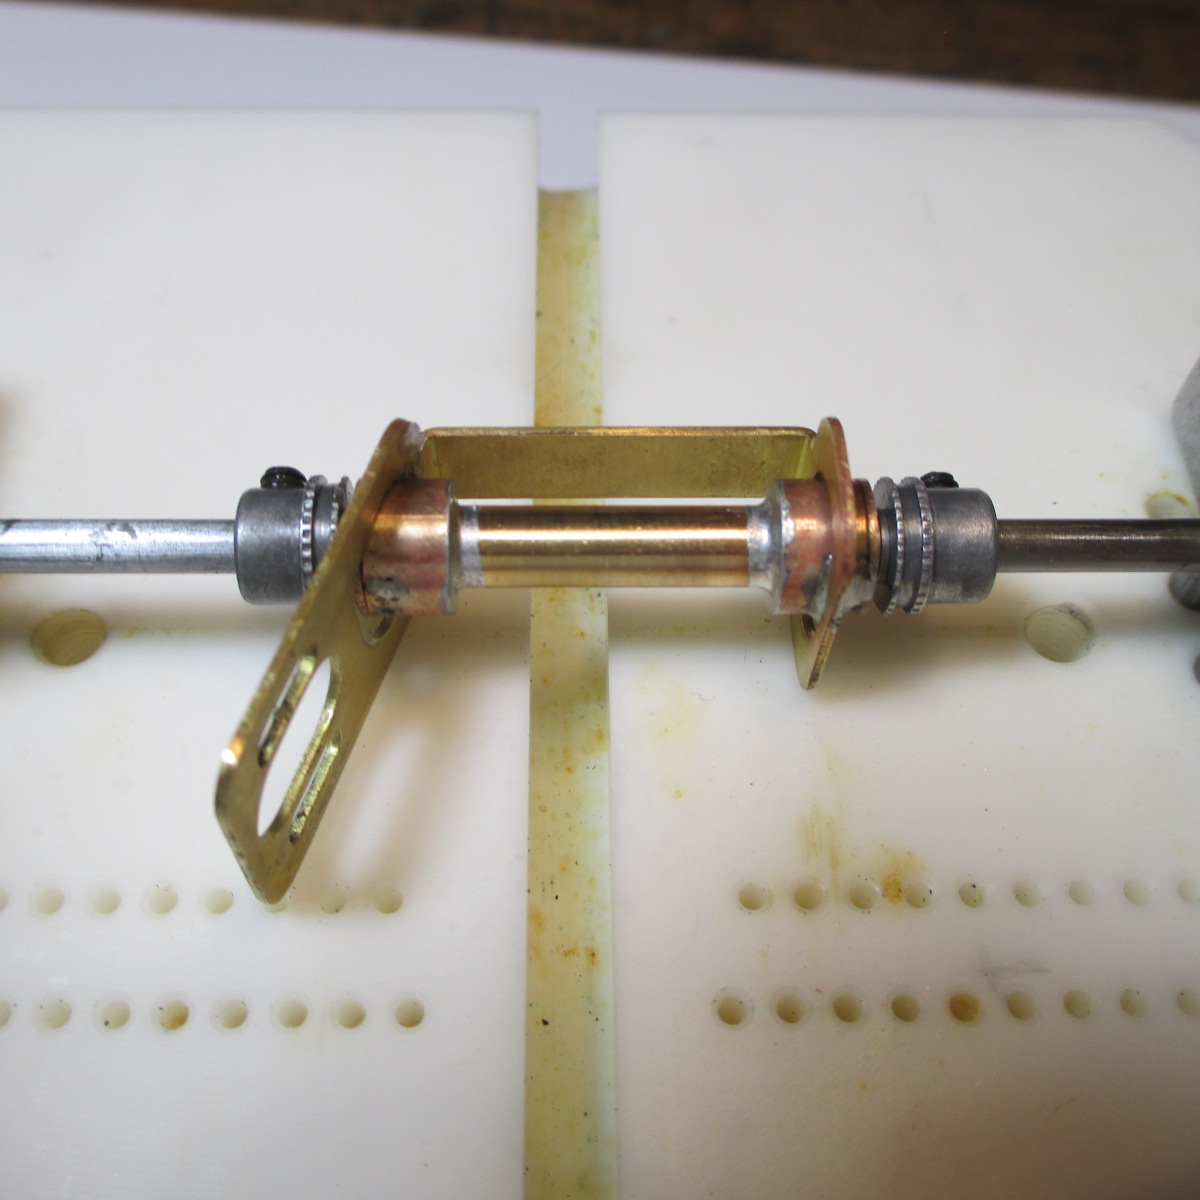
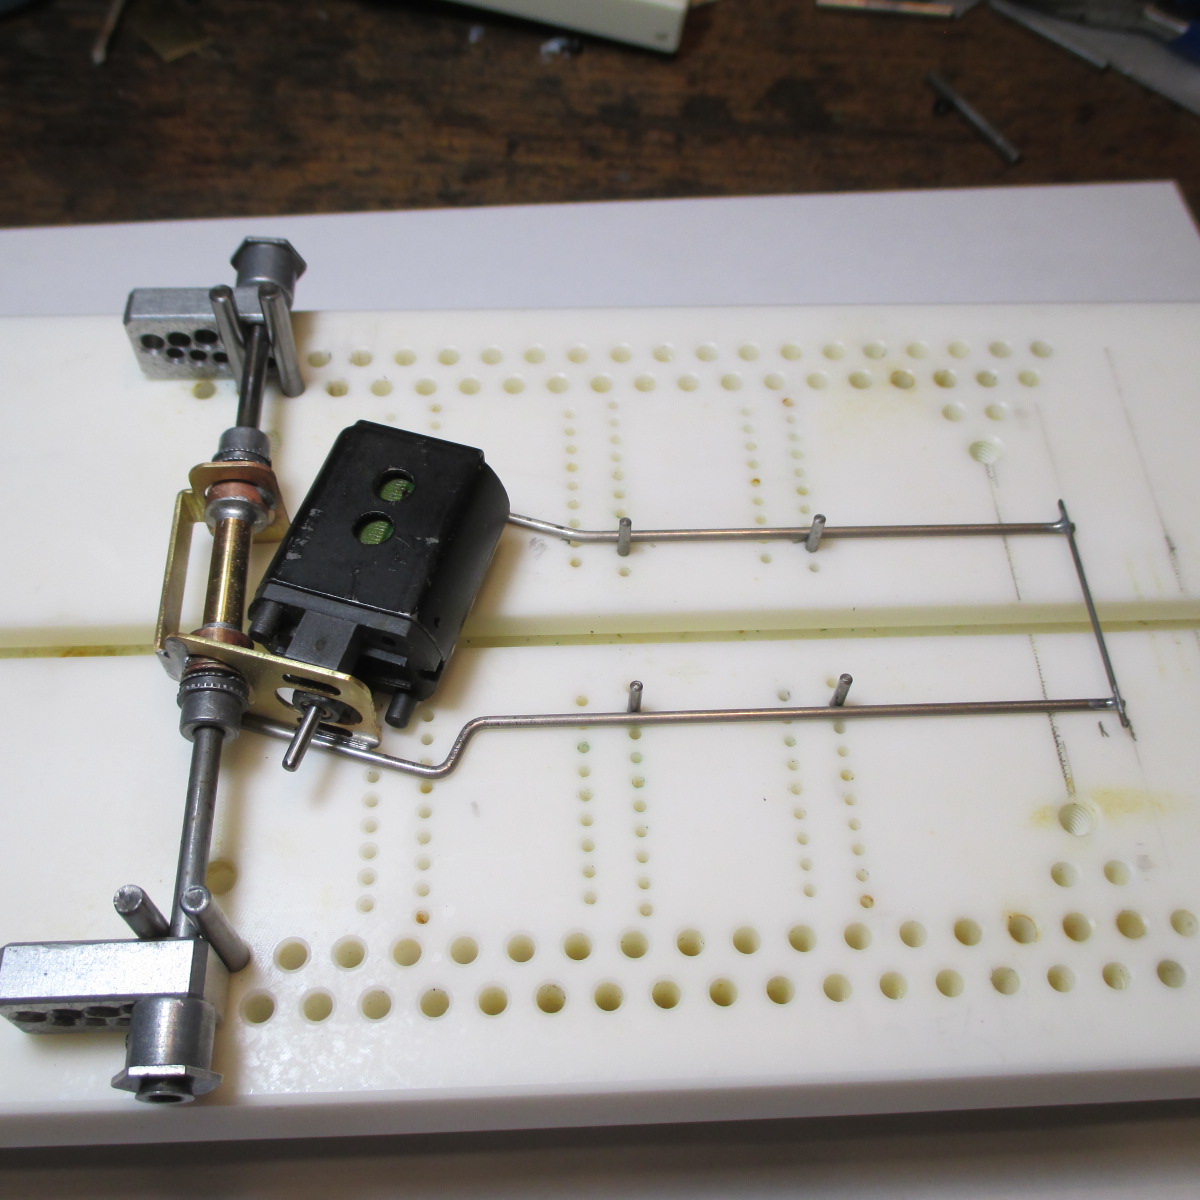
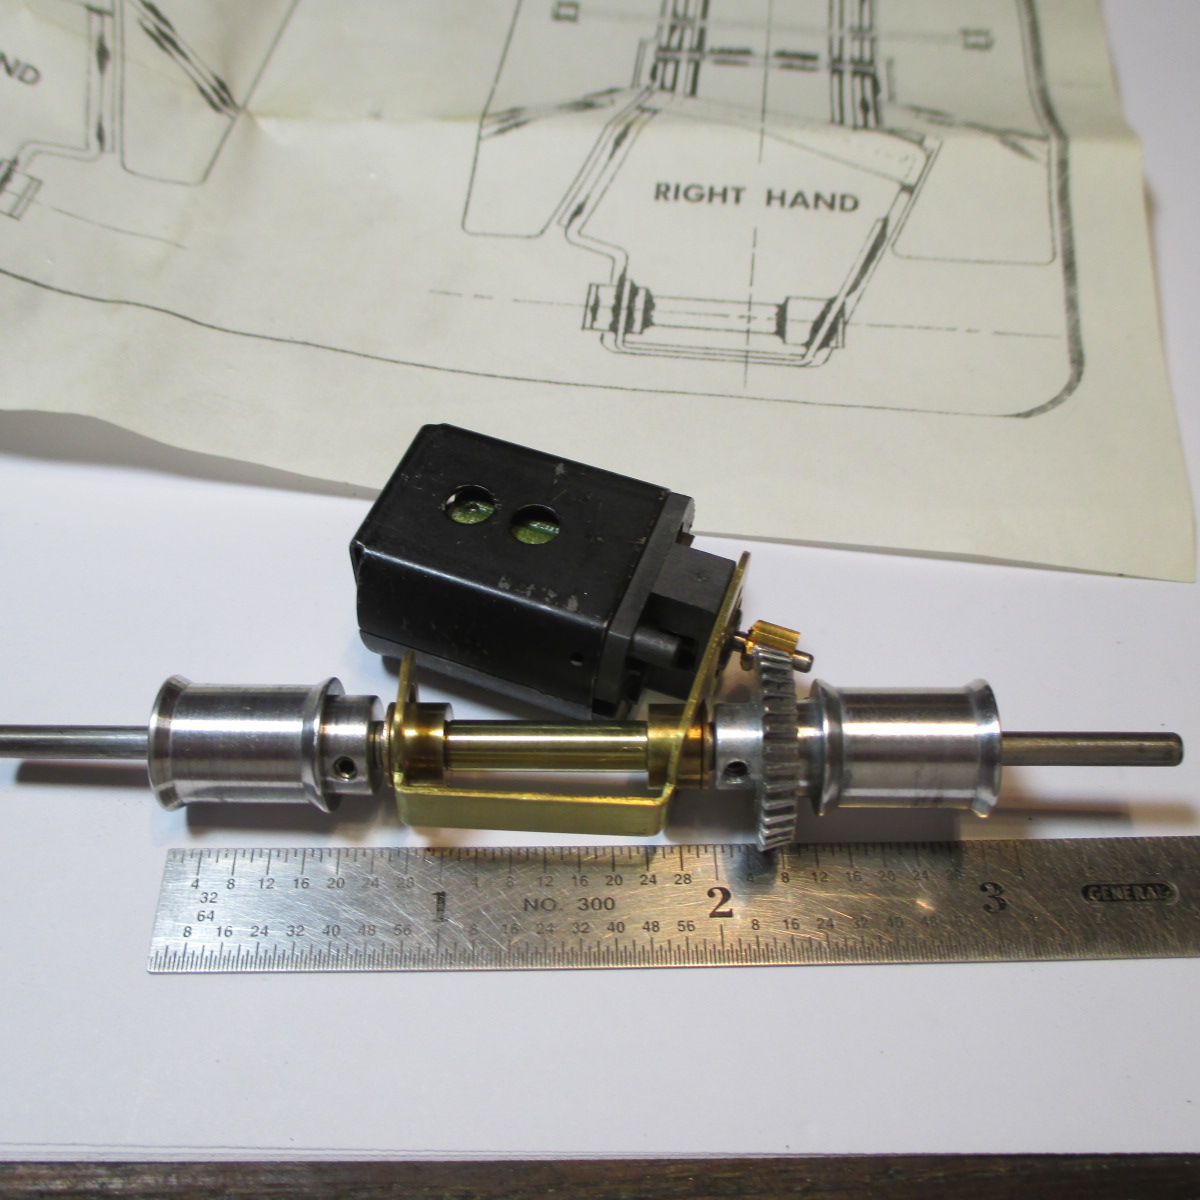
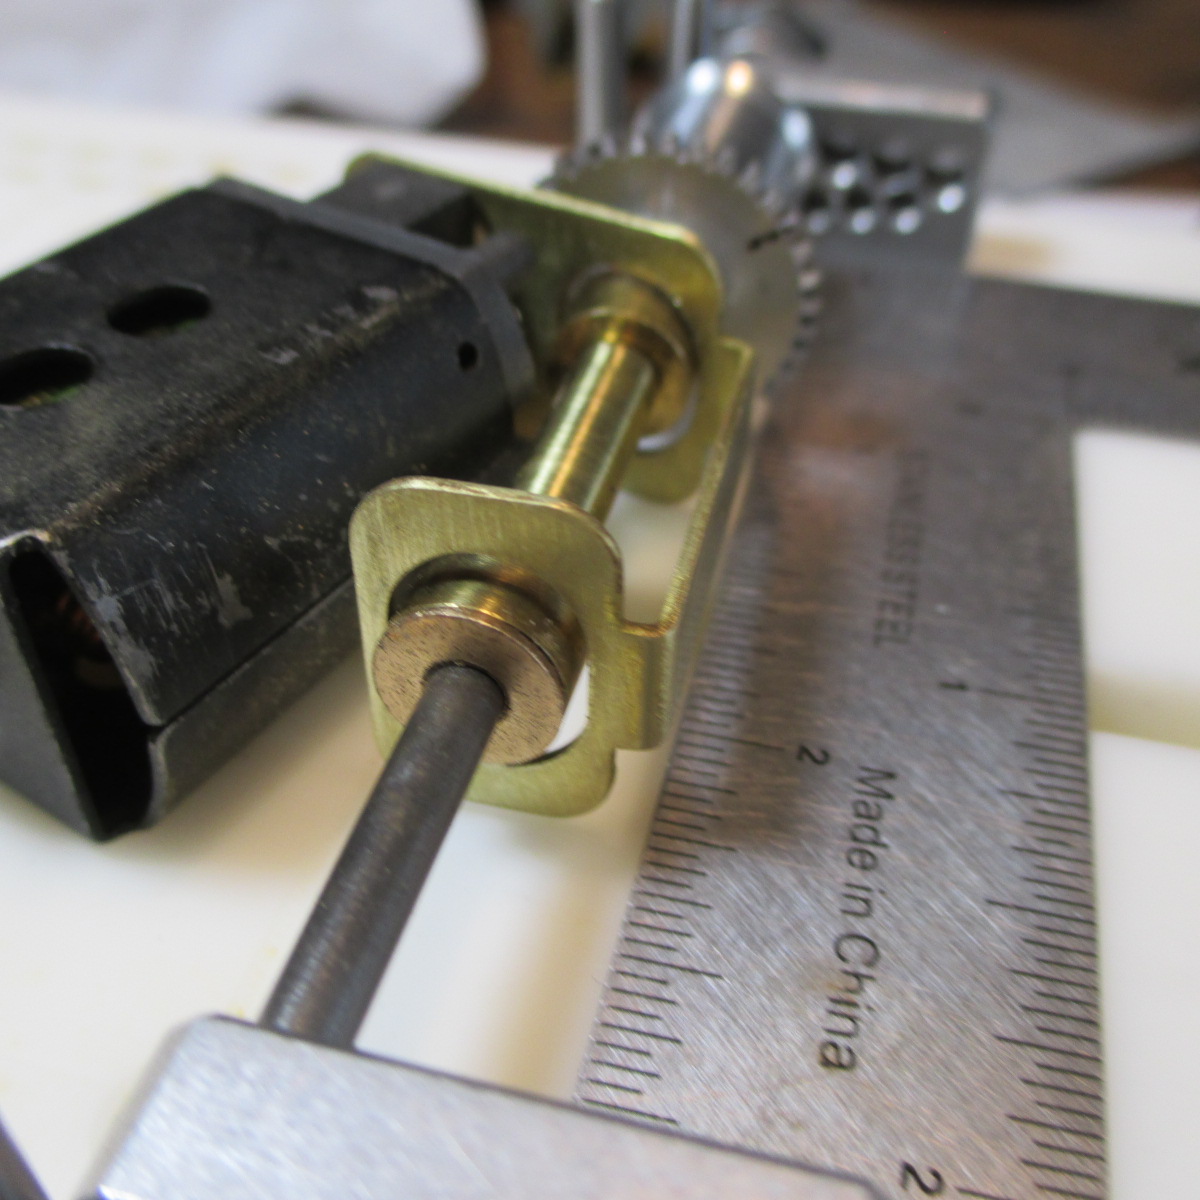
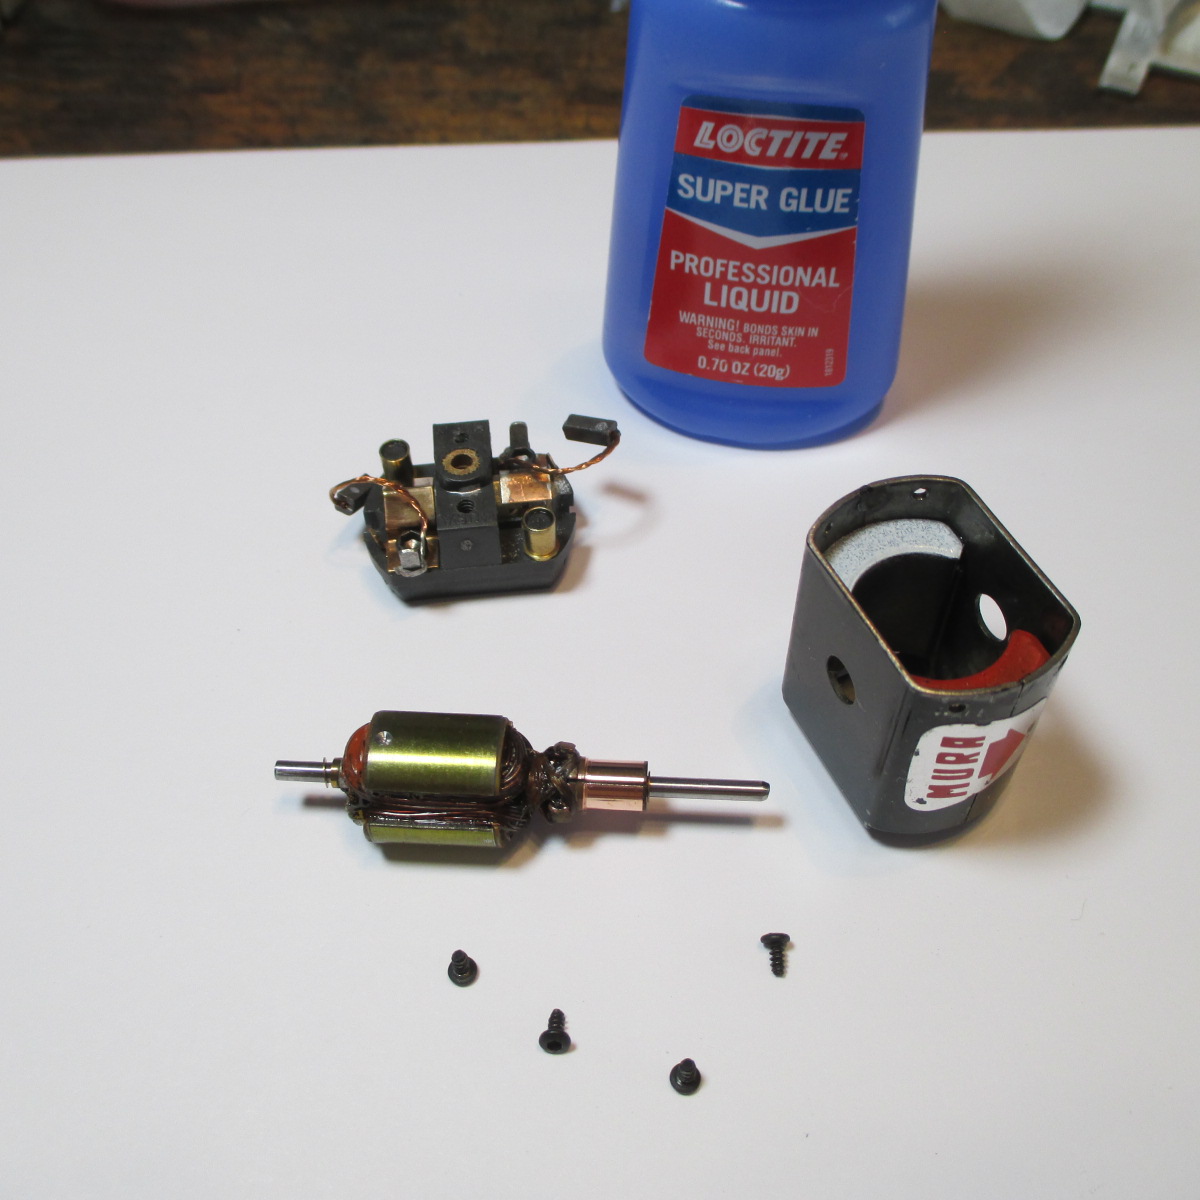
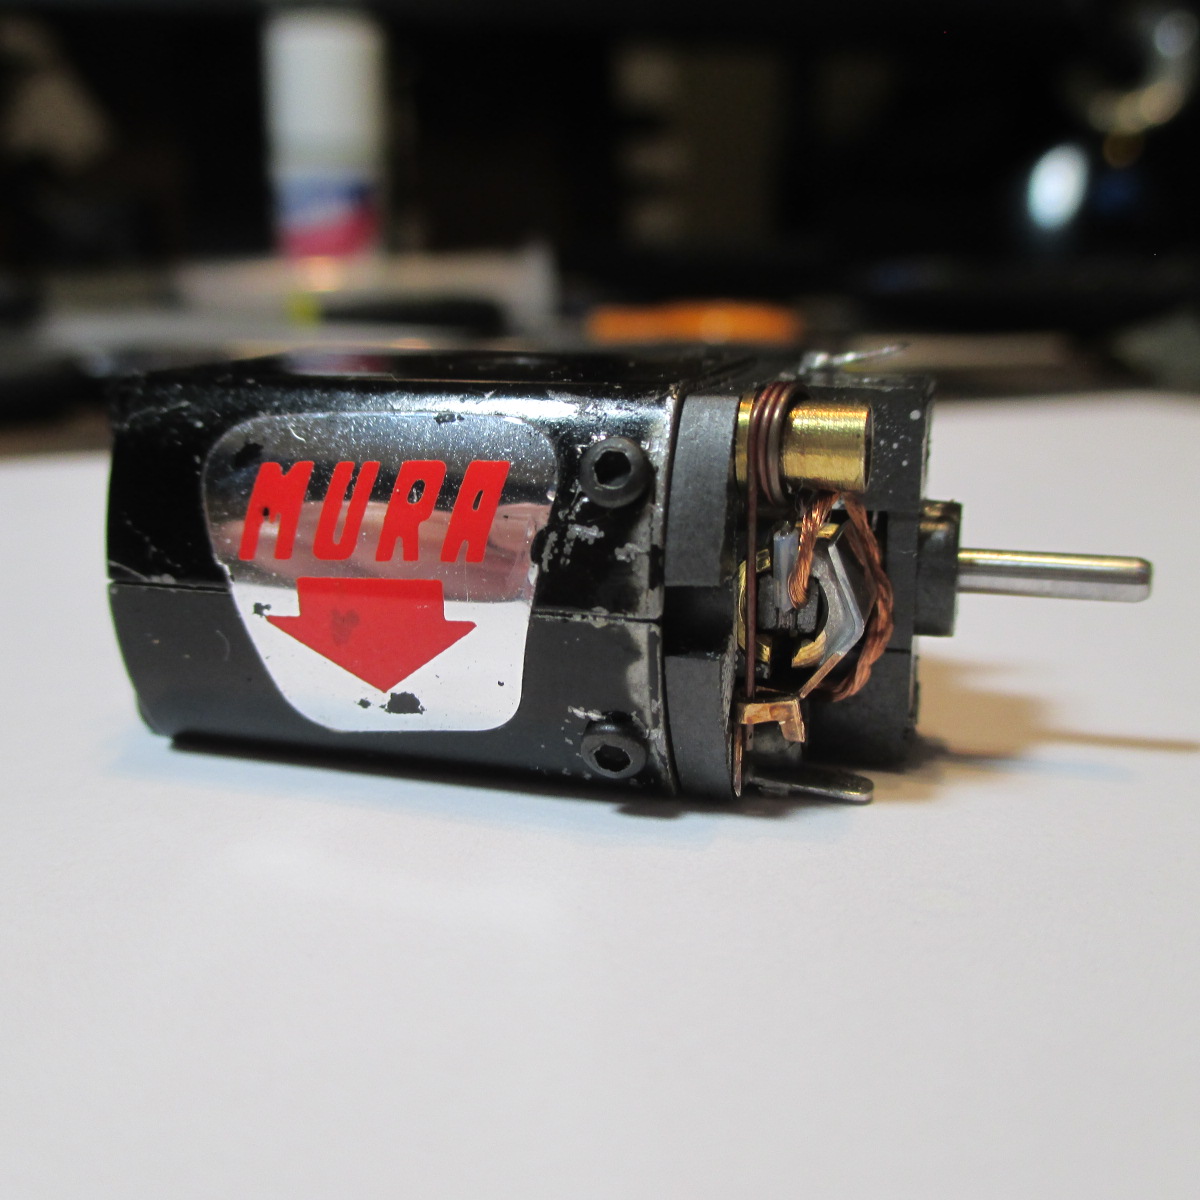
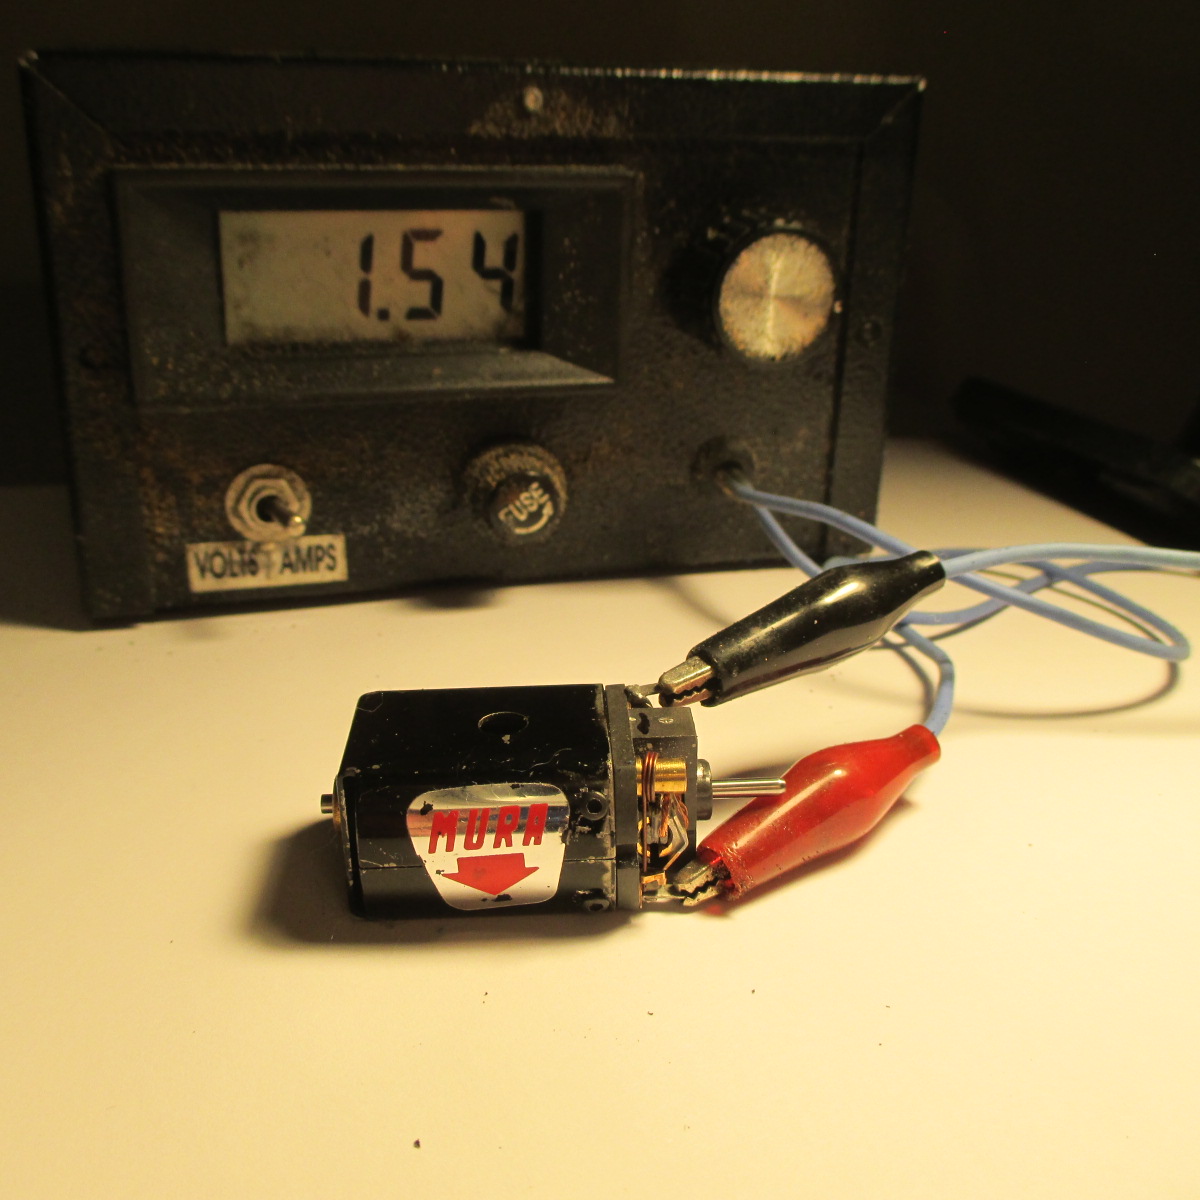
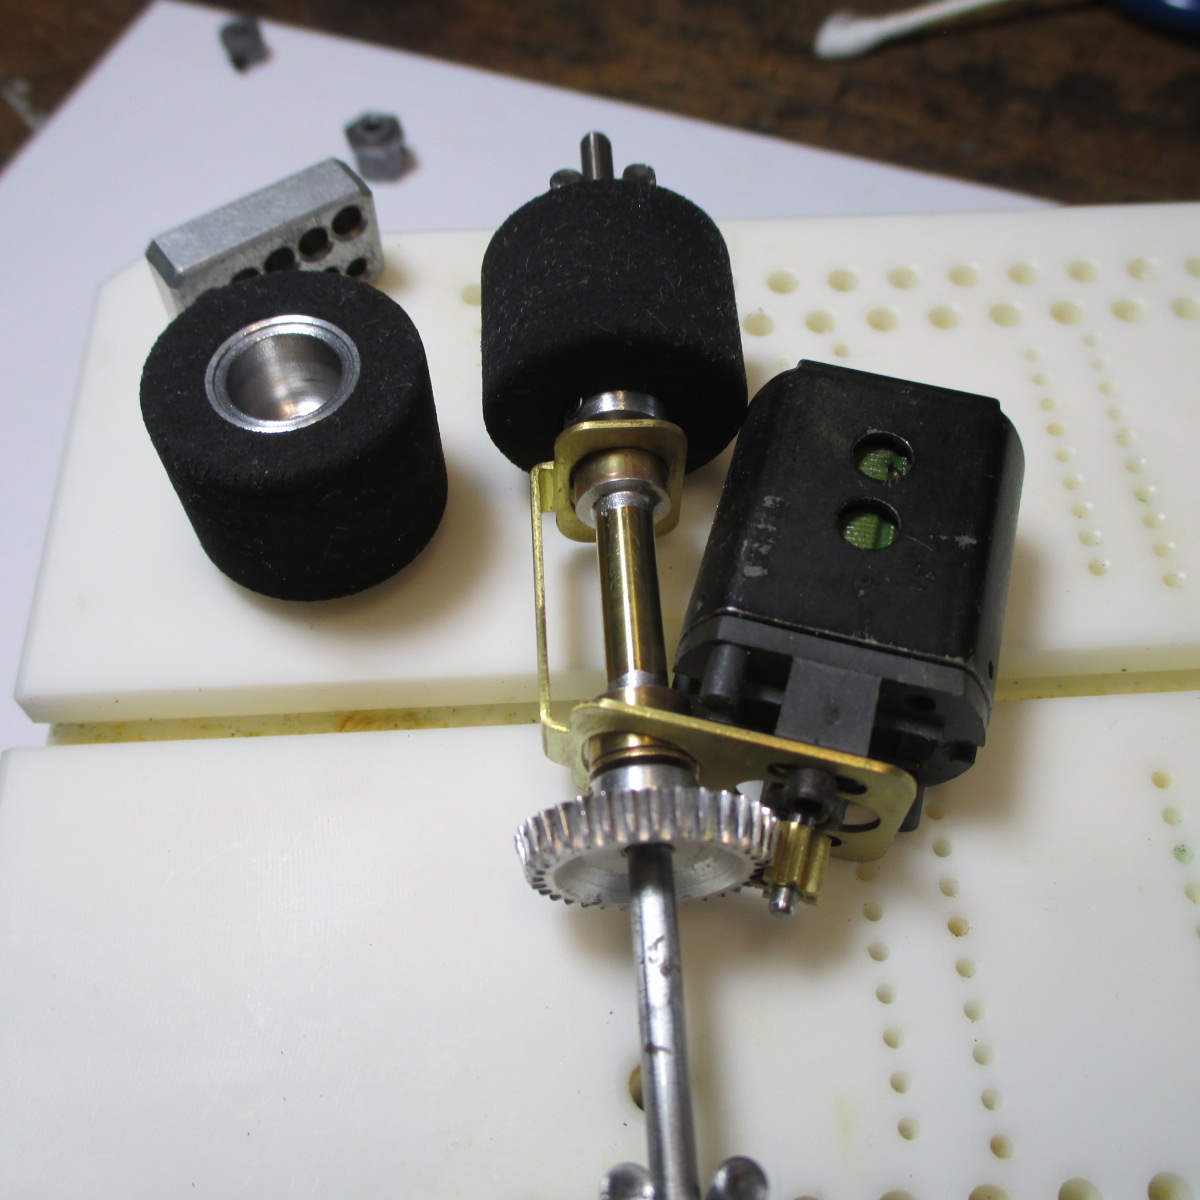
-Jig motor of exact same dimensions as the one-hole Mura assembled and ready. Junk arm is secured to both bushings and EB secured to can with CA so nothing will move. Gears are Dynamic 7/34 (4.9/1 ratio)


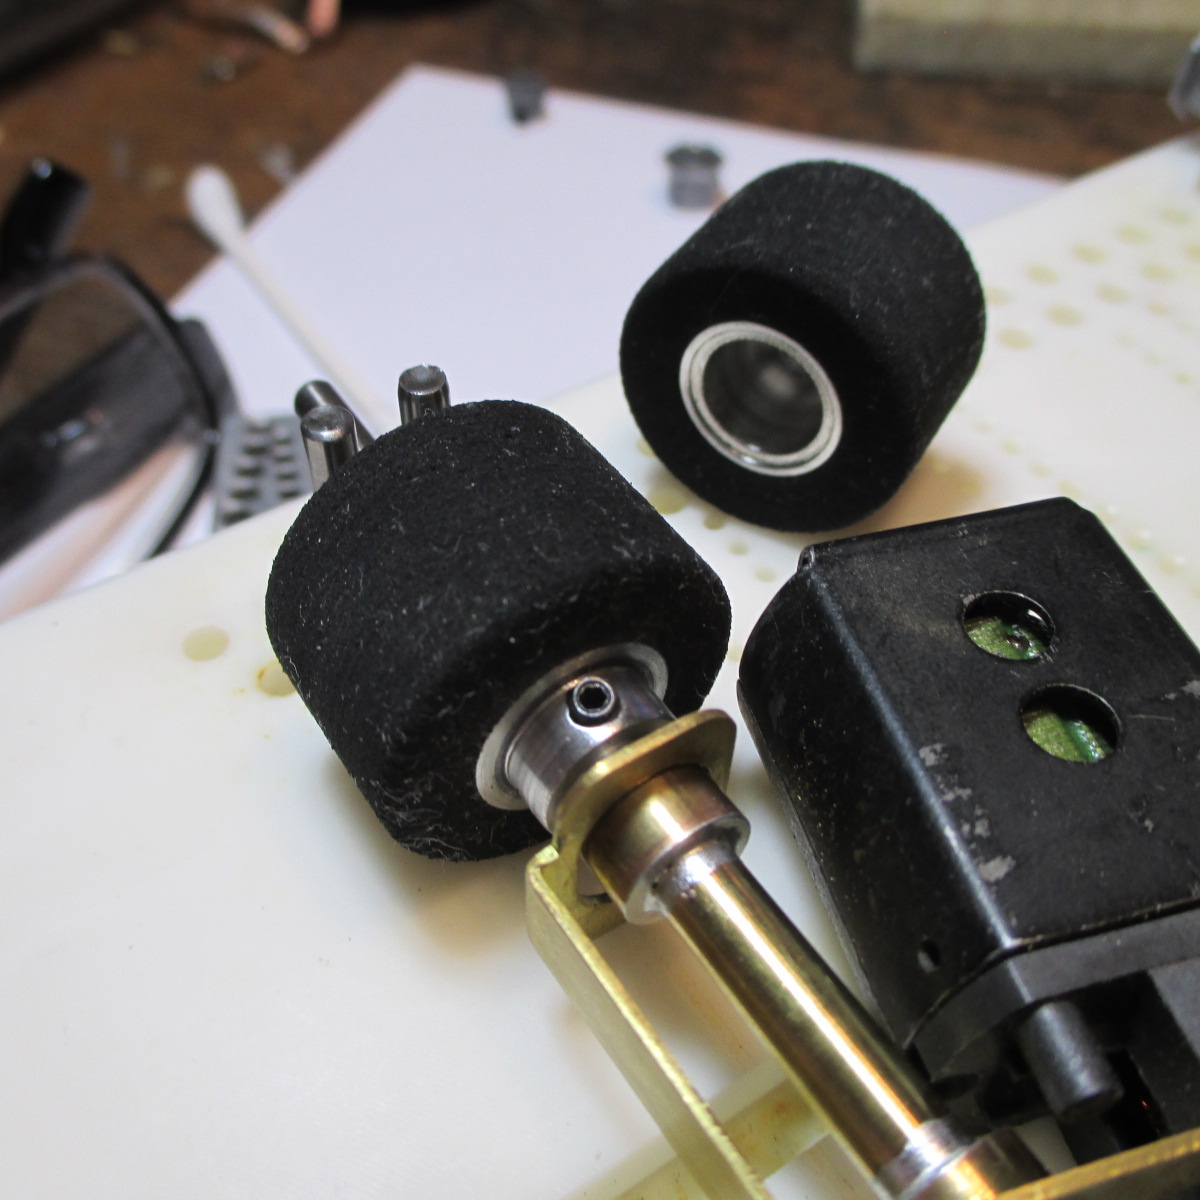
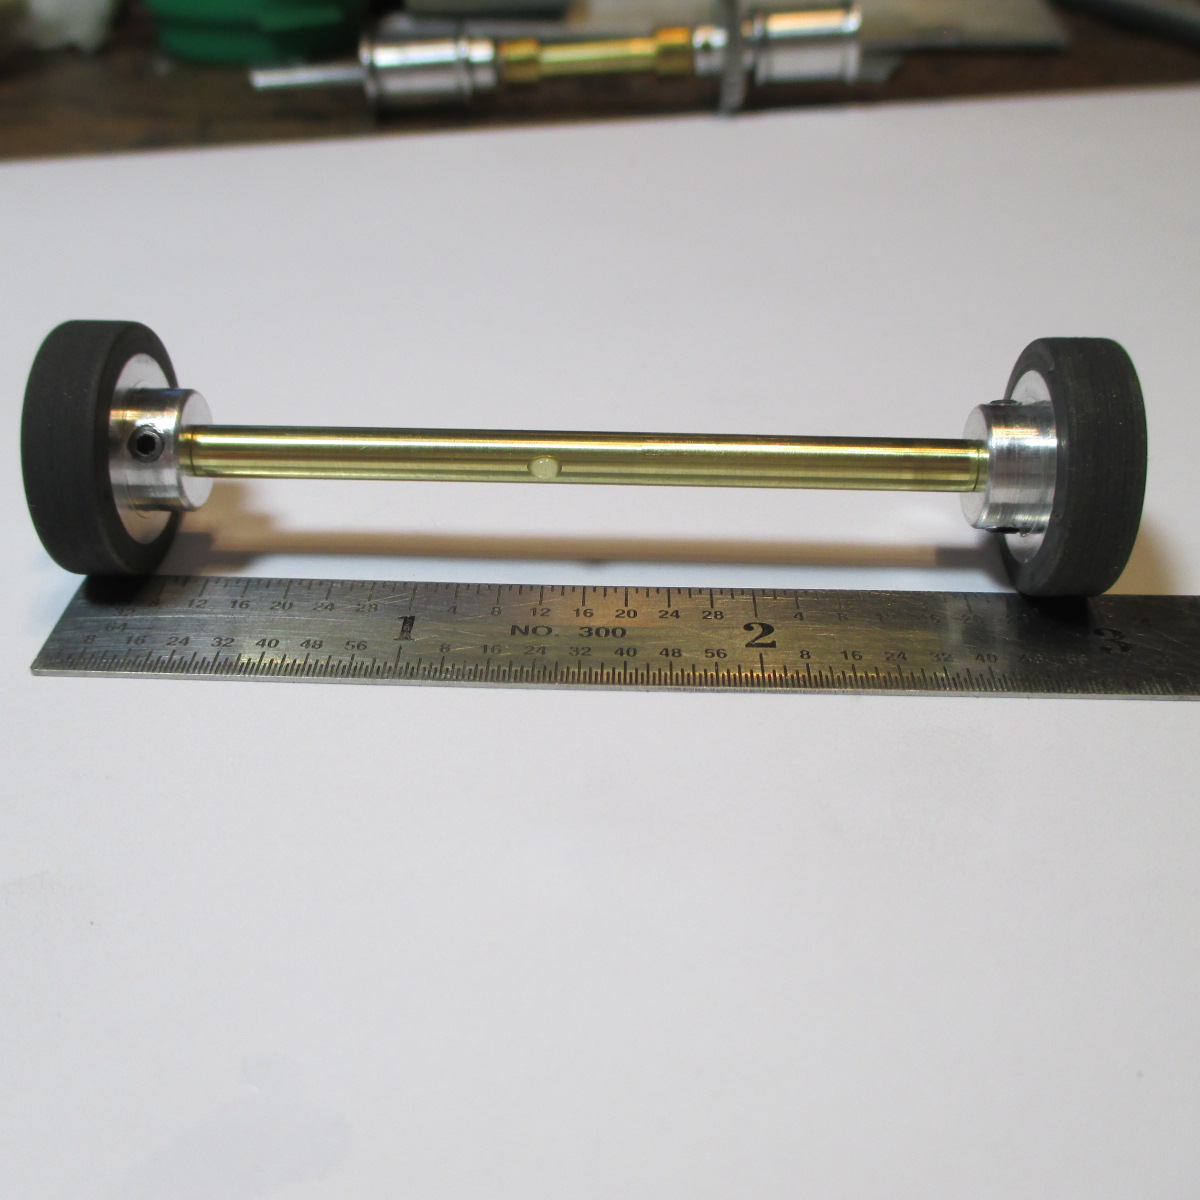
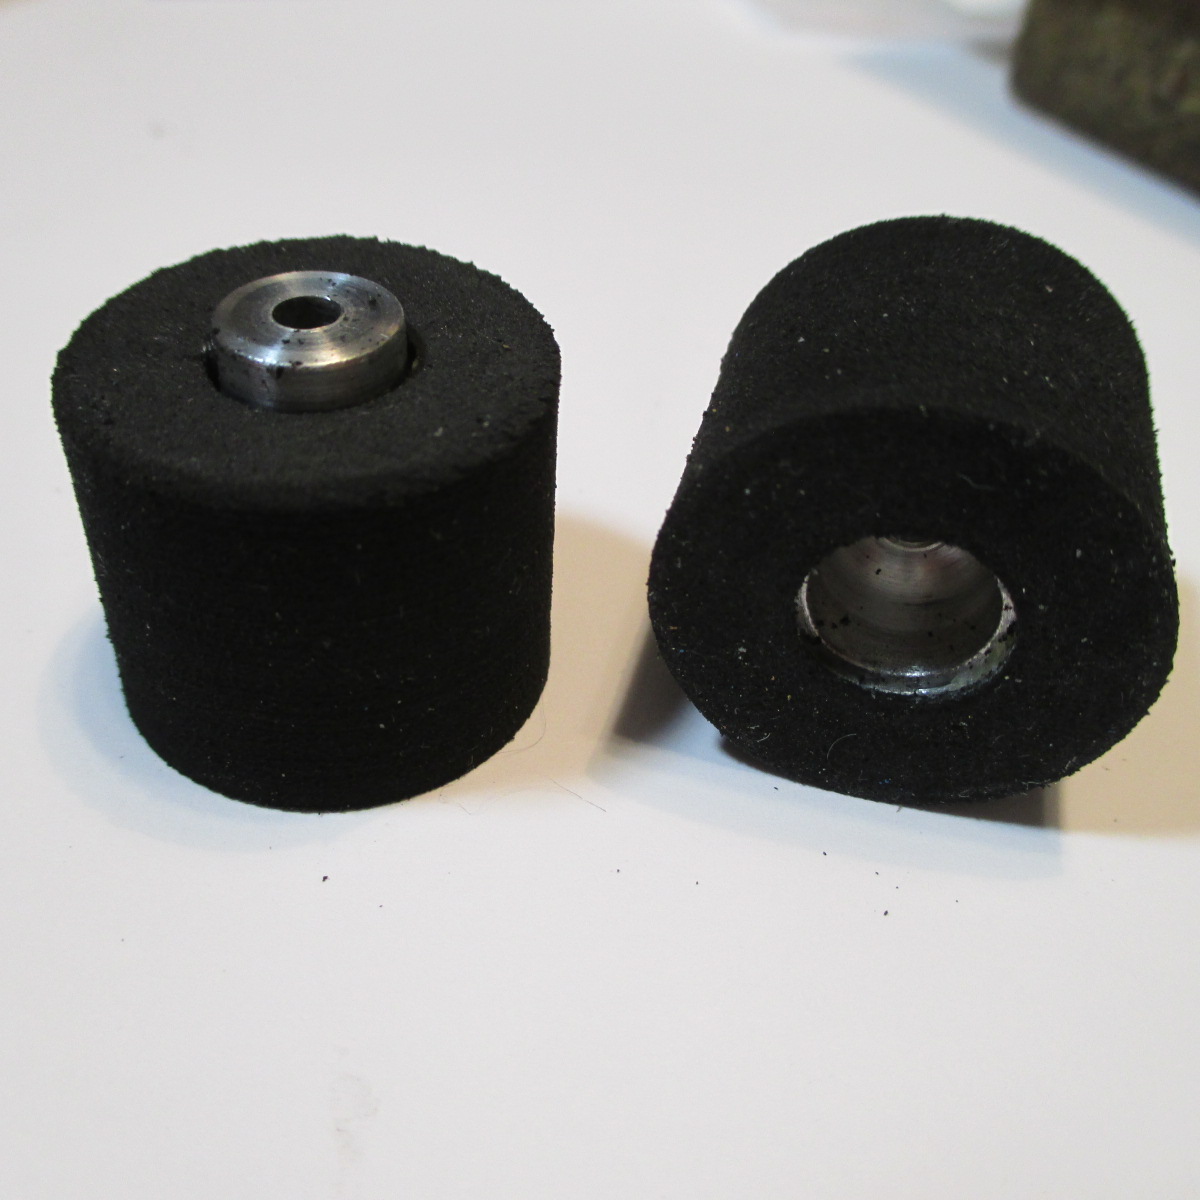
-Front wheels will be .75" OD; rear wheels max width 11/16, OD .875"


-34T Dynamic spur will clear a little better than 1/16". I have a new Dynamic 35T on standby if it needs a little fine tuning, and it will clear also (barely) 


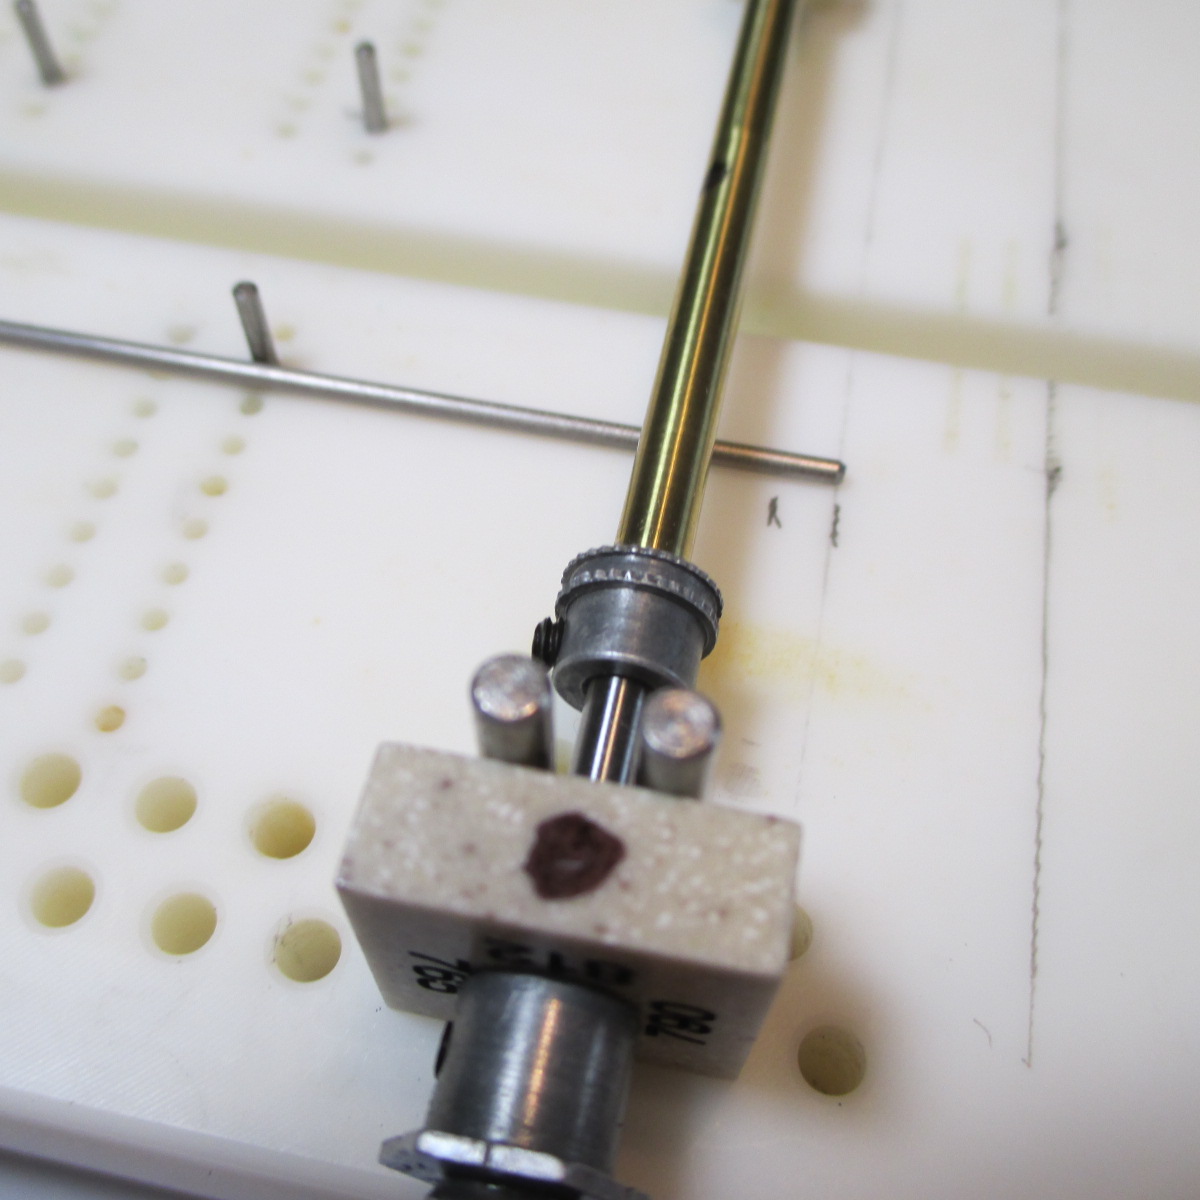
-I found out Dynamic 7T 48P brass pinions are slightly bigger than all the 7T 48P brass pinions in my stash. So the Dynamic gears must serve as "jig" gears. As soon as I get the jig motor placed they need to come out and get washed quick  :D


  • Slot Car Rod likes this

Paul Wolcott


#27 Pablo

Pablo

    Builder

  • Administrator
  • PipPipPipPipPipPipPipPip
  • 18,449 posts
  • Joined: 20-February 06
  • Gender:Male
  • Location:Cleveland, Tennessee

Posted 19 October 2021 - 09:51 PM

The forward ends of the main rail wire set came cut a little too short. I can fix them with some clever finagling no problemo. The rear axle tube was also too short at .686". It needs to be about .720" so I made a new one


IMG_0555.JPG


Front axle tube was too short also so I made a new one


IMG_0560.JPG


  • Peter Horvath likes this

Paul Wolcott


#28 Pablo

Pablo

    Builder

  • Administrator
  • PipPipPipPipPipPipPipPip
  • 18,449 posts
  • Joined: 20-February 06
  • Gender:Male
  • Location:Cleveland, Tennessee

Posted 21 October 2021 - 01:55 PM

Despite careful alignment/tweaking of the bracket, it still needed a little Dremel carving to make it right with all the axle bits installed. Now she sits perfect


IMG_0561.JPG


Bushing parts (duffies) and tube ready for soldering, jigged up and lubed with ATF to prevent solder from wicking into wrong places


IMG_0563.JPG


Soldered, washed and dried. Alignment is perfect  :hi:


IMG_0565.JPG  


  • Alchemist and Slot Car Rod like this

Paul Wolcott


#29 Pablo

Pablo

    Builder

  • Administrator
  • PipPipPipPipPipPipPipPip
  • 18,449 posts
  • Joined: 20-February 06
  • Gender:Male
  • Location:Cleveland, Tennessee

Posted 22 October 2021 - 11:24 PM

Jigged up and ready for soldering


IMG_0572.JPG


Arm came back from Alpha, excellent service


IMG_0570.JPG


Drizzled some CA to secure the mags. Owner supplied parts were an absolute perfect match, making my job easy.  Arm spaced perfectly. I don't know how to describe it, but when I spin it by hand and it stops, it kind of "shivers" for a microsecond. Tells me it's really "happy"  :D  :dance3:


IMG_0575.JPG  


  • Slot Car Rod likes this

Paul Wolcott


#30 Pablo

Pablo

    Builder

  • Administrator
  • PipPipPipPipPipPipPipPip
  • 18,449 posts
  • Joined: 20-February 06
  • Gender:Male
  • Location:Cleveland, Tennessee

Posted 24 October 2021 - 01:41 AM

New Koford donuts on vintage rims 


IMG_0580.JPG


IMG_0604.JPG


Motor assembly, piece of cake


IMG_0593.JPG


Testing was impressive. Spins up instantly upon clicking the power supply


IMG_0592.JPG


2 volts = 1.7 amps

3 volts = 1.5 amps

Lukewarm temperature and zero vibration. A rest, a couple drops of new oil, then I fed her some volts.

She screams. Motor is done  :D


  • Alchemist and Slot Car Rod like this

Paul Wolcott


#31 Pablo

Pablo

    Builder

  • Administrator
  • PipPipPipPipPipPipPipPip
  • 18,449 posts
  • Joined: 20-February 06
  • Gender:Male
  • Location:Cleveland, Tennessee

Posted 25 October 2021 - 08:04 PM

Final goal will be 7/8 OD, and 11/16 max width. This is just the first rough trim, then they settle and cure for a day or so


IMG_0621.JPG


Paul Wolcott


#32 Pablo

Pablo

    Builder

  • Administrator
  • PipPipPipPipPipPipPipPip
  • 18,449 posts
  • Joined: 20-February 06
  • Gender:Male
  • Location:Cleveland, Tennessee

Posted 26 October 2021 - 12:26 PM

Final trim/true of the rears at .900 OD for testing wear and clearance. I was concerned the left tire wouldn't clear the motor can at max rule width of 11/16" width. I was right


IMG_0623.JPG


No problemo. I'll trim some meat off the insides to about 5/8" and be good to go  :)


Paul Wolcott


#33 dc-65x

dc-65x

    Grand Champion Poster

  • Subscriber
  • PipPipPipPipPipPipPipPip
  • 6,976 posts
  • Joined: 14-February 06
  • Gender:Male
  • Location:Captain Rick: The only vintage slot car nut in SW Oregon?

Posted 26 October 2021 - 12:38 PM

Hi Pablo,


I think your collection of parts could very well put the build into the late 1968 time period. Then the needed 5/8" rear tire width would be perfect.   :victory:


  • Slot Car Rod likes this

Rick Thigpen
Check out Steve Okeefe's great web site at its new home here at Slotblog:
The Independent Scratchbuilder
There's much more to come...


#34 Pablo

Pablo

    Builder

  • Administrator
  • PipPipPipPipPipPipPipPip
  • 18,449 posts
  • Joined: 20-February 06
  • Gender:Male
  • Location:Cleveland, Tennessee

Posted 26 October 2021 - 01:01 PM

Thanks Capt. Rick, this is why I need smart people like you looking out for me. I looked at the "vintage wheel rules" document you sent me years ago. I was assuming 1969-ish, not 68. The wheels I'm using will be better at 5/8 anyway  :dance3:  :D


Paul Wolcott


#35 dc-65x

dc-65x

    Grand Champion Poster

  • Subscriber
  • PipPipPipPipPipPipPipPip
  • 6,976 posts
  • Joined: 14-February 06
  • Gender:Male
  • Location:Captain Rick: The only vintage slot car nut in SW Oregon?

Posted 26 October 2021 - 01:27 PM

I don't know about "smart"......... :crazy: ...........but I have always liked and remembered this ad from the July 1968 MCJ newsletter when Russkit showed their low and wide version of the Ford Mk 4 body:


Russkit Ford Mk4 MCJ V1N15 p3.jpg


Very cool   :sun_bespectacled:


  • NSwanberg and Rotorranch like this

Rick Thigpen
Check out Steve Okeefe's great web site at its new home here at Slotblog:
The Independent Scratchbuilder
There's much more to come...


#36 Pablo

Pablo

    Builder

  • Administrator
  • PipPipPipPipPipPipPipPip
  • 18,449 posts
  • Joined: 20-February 06
  • Gender:Male
  • Location:Cleveland, Tennessee

Posted 26 October 2021 - 06:47 PM

"May I have it?" (Edo B.) LOL 


Paul Wolcott


#37 Don Weaver

Don Weaver

    Checkered Flag in Hand

  • Subscriber
  • PipPipPipPipPipPip
  • 1,856 posts
  • Joined: 26-October 07
  • Gender:Male
  • Location:Lexington. SC

Posted 26 October 2021 - 06:58 PM

What ever happened to Edo?


Don Weaver

​A slot car racer who never grew up!


The supply of government exceeds demand.
L.H. Lapham
 
If the brain-eating amoeba invades Washington
it will starve to death...


#38 Pablo

Pablo

    Builder

  • Administrator
  • PipPipPipPipPipPipPipPip
  • 18,449 posts
  • Joined: 20-February 06
  • Gender:Male
  • Location:Cleveland, Tennessee

Posted 26 October 2021 - 07:08 PM

He's fine, busy making films with pretty women, playing on his home slot track, and tearing up the foothills on a Ducati


Paul Wolcott


#39 Pablo

Pablo

    Builder

  • Administrator
  • PipPipPipPipPipPipPipPip
  • 18,449 posts
  • Joined: 20-February 06
  • Gender:Male
  • Location:Cleveland, Tennessee

Posted 26 October 2021 - 08:06 PM

Now we have clearance, Clarence


IMG_0626.JPG


  • Slot Car Rod and Larry Horner like this

Paul Wolcott


#40 Pablo

Pablo

    Builder

  • Administrator
  • PipPipPipPipPipPipPipPip
  • 18,449 posts
  • Joined: 20-February 06
  • Gender:Male
  • Location:Cleveland, Tennessee

Posted 27 October 2021 - 09:51 PM

Back to my post #14 where I tried to make the wire rails as true to the plans as possible. I knew they were going to be too short up front. And I knew the more I tweaked them, the weaker they would be.


In the back of my walnut size brain I kept considering just bending my own. I know I can do better, especially making them in two pieces. And it would be sweet to use Swiss plated wire.


That time has come. Once I set the jig pins for them I realized there is only one way to do it right - bend my own. In this photo they may appear good, but they aren't even close to my standards


IMG_0628.JPG


I'll use them as templates and bend up some plated Chicagoland main rails. Bracket tacked to tube and wires will conform to it


IMG_0629.JPG


Paul Wolcott


#41 Pablo

Pablo

    Builder

  • Administrator
  • PipPipPipPipPipPipPipPip
  • 18,449 posts
  • Joined: 20-February 06
  • Gender:Male
  • Location:Cleveland, Tennessee

Posted 28 October 2021 - 01:29 PM

Traditional wisdom is never bend wire more than once. My new right side rail bends (!) the rule a little - two bends. The rear end will get a "U" connector


IMG_0633.JPG


It's long enough to make the "Alternate" front axle tube assembly correct


IMG_0631.JPG  


  • Slot Car Rod likes this

Paul Wolcott


#42 Pablo

Pablo

    Builder

  • Administrator
  • PipPipPipPipPipPipPipPip
  • 18,449 posts
  • Joined: 20-February 06
  • Gender:Male
  • Location:Cleveland, Tennessee

Posted 28 October 2021 - 11:28 PM

Pablo rails tacked to bracket. Cross piece up front is just a dummy temp to secure alignment


IMG_0636.JPG


Paul Wolcott


#43 Larry Horner

Larry Horner

    On The Lead Lap

  • Full Member
  • PipPipPipPip
  • 465 posts
  • Joined: 18-March 17
  • Gender:Male
  • Location:San Francisco

Posted 29 October 2021 - 12:05 AM

Looking good Pablo! So dumb question #1 (I can't promise there won't be more): What is Mike's wire plated with? I aways assumed it was just pre-tinned but this looks to have a brownish tint. Is it plated with brass or bronze?


#44 Pablo

Pablo

    Builder

  • Administrator
  • PipPipPipPipPipPipPipPip
  • 18,449 posts
  • Joined: 20-February 06
  • Gender:Male
  • Location:Cleveland, Tennessee

Posted 29 October 2021 - 12:26 AM

You'd have to ask Swiss. I'm not an expert on it. No, it's not simply "pre-tinned". It's much more complicated than that. All I know is, it saves me from having to tin, it's super quality, always straight, and stronger than standard wire. Here is the original product announcement link:


Nickel-plated music/piano wire from Chicagoland Raceway - The Parts Counter - Slotblog


Paul Wolcott


#45 Don Weaver

Don Weaver

    Checkered Flag in Hand

  • Subscriber
  • PipPipPipPipPipPip
  • 1,856 posts
  • Joined: 26-October 07
  • Gender:Male
  • Location:Lexington. SC

Posted 29 October 2021 - 07:03 AM

As the header says for the announcement of "Nickel-Plated music/piano wire from..."


  • Pablo and Phil Smith like this

Don Weaver

​A slot car racer who never grew up!


The supply of government exceeds demand.
L.H. Lapham
 
If the brain-eating amoeba invades Washington
it will starve to death...


#46 Pablo

Pablo

    Builder

  • Administrator
  • PipPipPipPipPipPipPipPip
  • 18,449 posts
  • Joined: 20-February 06
  • Gender:Male
  • Location:Cleveland, Tennessee

Posted 29 October 2021 - 09:08 AM

See Larry, I told you the smartest slotters hang out on "Pablo's Builds" subforum  :clapping:  :crazy:


Paul Wolcott


#47 Pablo

Pablo

    Builder

  • Administrator
  • PipPipPipPipPipPipPipPip
  • 18,449 posts
  • Joined: 20-February 06
  • Gender:Male
  • Location:Cleveland, Tennessee

Posted 29 October 2021 - 01:11 PM

Running into the exact same problems Rick and Tony P. described. I'm copying heavily from dc-65x' version. Improvise, adapt, overcome  :D 


Left brass outer rail is stock from the kit. Right brass outer rail, I had to make my own. So far everything is just tack soldered and left dirty


IMG_0638.JPG


Paul Wolcott


#48 Half Fast

Half Fast

    Keeper Of Odd Knowledge

  • Subscriber
  • PipPipPipPipPipPipPip
  • 2,628 posts
  • Joined: 02-May 07
  • Gender:Male
  • Location:NYC, Long Island

Posted 29 October 2021 - 01:38 PM

Interesting build PW.


What is a carbon polishing wheel?


Cheers


Bill Botjer

Faster then, wiser now.

The most dangerous form of ignorance is not knowing that you don't know anything!

Never attribute to malice that which is adequately explained by stupidity


#49 Pablo

Pablo

    Builder

  • Administrator
  • PipPipPipPipPipPipPipPip
  • 18,449 posts
  • Joined: 20-February 06
  • Gender:Male
  • Location:Cleveland, Tennessee

Posted 29 October 2021 - 01:54 PM

Dremel attachment


dremel-rotary-tool-accessories-428-02-64_1000.jpg


Paul Wolcott


#50 Pablo

Pablo

    Builder

  • Administrator
  • PipPipPipPipPipPipPipPip
  • 18,449 posts
  • Joined: 20-February 06
  • Gender:Male
  • Location:Cleveland, Tennessee

Posted 30 October 2021 - 01:59 PM

.032 X 1/4" brass strip crosspiece secured to rails with Koford silver solder. When you need to see when it melts and when it dries, this is the stuff to use. First cleanup


IMG_0641.JPG


  • Slot Car Rod and Larry Horner like this

Paul Wolcott


Electric Dreams Online Shop