


Ingenuity for sure...

Not your typical scratchbuilt chassis - a Retro mod
Started by
Alchemist
, Jun 02 2019 09:42 PM
67 replies to this topic
#51

Geary Carrier
-

- Full Member
-

- 614 posts Joined: 23-April 16
Race Leader
- Gender:Not Telling
- Location:CT
Posted 14 June 2019 - 01:45 PM
Yes, to be sure, this is it...
#52
Alchemist
-
- Full Member
-
- 2,834 posts Joined: 11-November 09
Posting Leader
- Gender:Male
- Location:Far, far away
Posted 14 June 2019 - 02:08 PM
Thank you so much Geary!
I purchased a TrueScale Porsche Carrera 906 body a while back, but I can't seem to find it!
I figured it would be KOOL "Retro" body to use.
Would anyone know where I may purchase another one please?
Thank you.
Ernie
Ernie Layacan
#53
Gene/ZR1
-

- Subscriber
-
- 853 posts Joined: 06-November 06
Race Leader
- Gender:Male
- Location:USA/Michigan
Posted 14 June 2019 - 02:55 PM
Thank you so much Geary!
I purchased a TrueScale Porsche Carrera 906 body a while back, but I can't seem to find it!
I figured it would be KOOL "Retro" body to use.
Would anyone know where I may purchase another one please?
Thank you.
Ernie
Ernie
Send Victor an e-mail, he's still making bodies.
g.
Gene Adams AKA Gene/ZR1
ZR1 Corvette owner
Hand-carved balsa bodies, resin body plugs, silicone molds, vacuum bodies
Genes_World@ymail.com
#54
don.siegel
-

- Subscriber
-
- 5,954 posts Joined: 17-February 06
Grand Champion Poster
- Gender:Male
- Location:Paris, France
Posted 14 June 2019 - 03:30 PM
But he doesn't necessarily answer emails...
D
#55
Alchemist
-
- Full Member
-
- 2,834 posts Joined: 11-November 09
Posting Leader
- Gender:Male
- Location:Far, far away
Posted 14 June 2019 - 03:52 PM
Hi Eldon,
Thank you for the suggestion, but I have sent him a couple of e-mails in the past.
Perhaps, he has so many orders to process?!.
Thanks just the same.
Ernie
Ernie Layacan
#56
Gene/ZR1
-
- Subscriber
-
- 853 posts Joined: 06-November 06
Race Leader
- Gender:Male
- Location:USA/Michigan
Posted 15 June 2019 - 07:17 AM
Hi Eldon,
Thank you for the suggestion, but I have sent him a couple of e-mails in the past.
Perhaps, he has so many orders to process?!.
Thanks just the same.
Ernie
Ernie
Send him 2 emails in a row.
G.
- Rotorranch likes this
Gene Adams AKA Gene/ZR1
ZR1 Corvette owner
Hand-carved balsa bodies, resin body plugs, silicone molds, vacuum bodies
Genes_World@ymail.com
#57
Alchemist
-
- Full Member
-
- 2,834 posts Joined: 11-November 09
Posting Leader
- Gender:Male
- Location:Far, far away
Posted 15 June 2019 - 07:12 PM
Should I decide to simply run lead wire from the motor to the guide, employing female push connectors, I would need a wire clip/holder to retain the lead wires centered onto the chassis.
I've seen the popular use of the "Butterfly earring stud backer" soldered to the center of brass chassis/s, but I can't solder it to the composite.
Even using the VHB RP tape would not work well because the earring backer has too small of a surface area for it to adhere well.
Even though the backer weighs literally "nothing", it is the lead wire movement that would cause the earring backer to detach from the bonding tape. (Epoxy could work well though!)
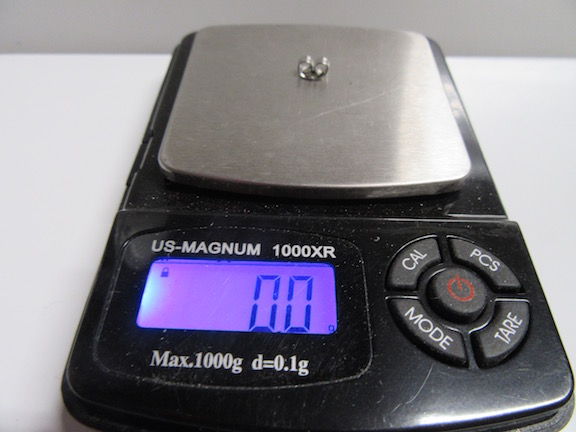
In an attempt to figure out the use of something similar, to hold the lead wires at the center of the chassis, I rummaged thru my slot car surplus and came across this cable holder.
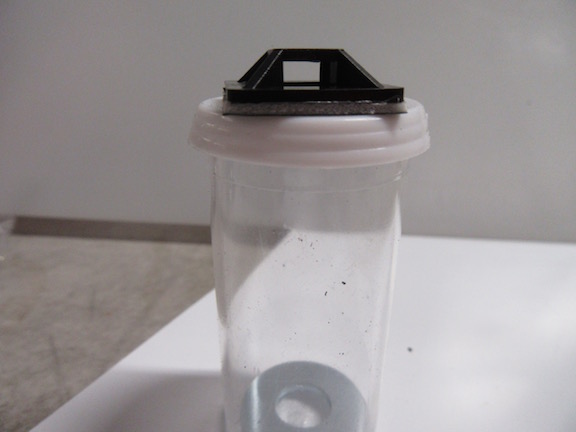
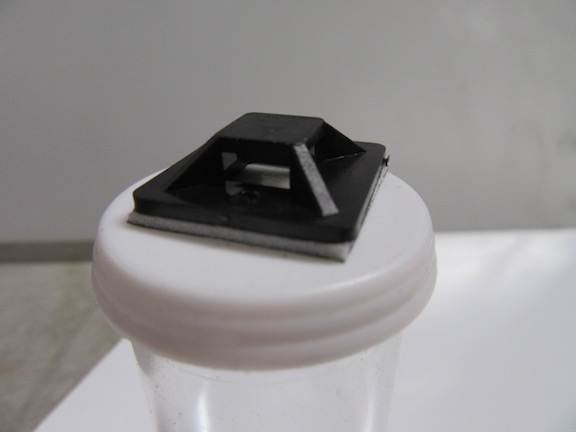
It is made from nylon and attached with adhesive backed foam tape. I would replace the foam tape with the VHB RP tape to allow for lower center of gravity of the holder.
It does not weight much . . .half a gram!
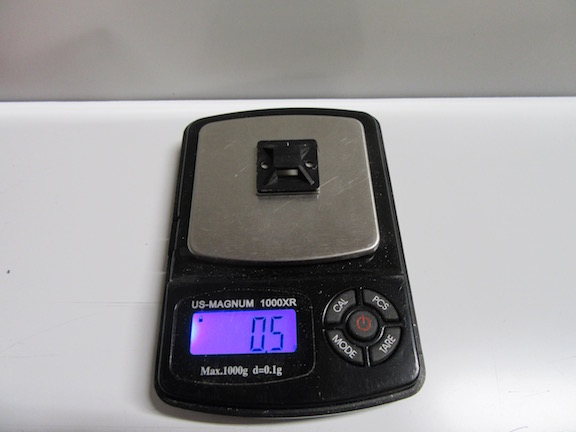
Both lead wires with the connectors will fit thru the cable holder, though feeding the second lead wire is a little snug, it does not take much effort.
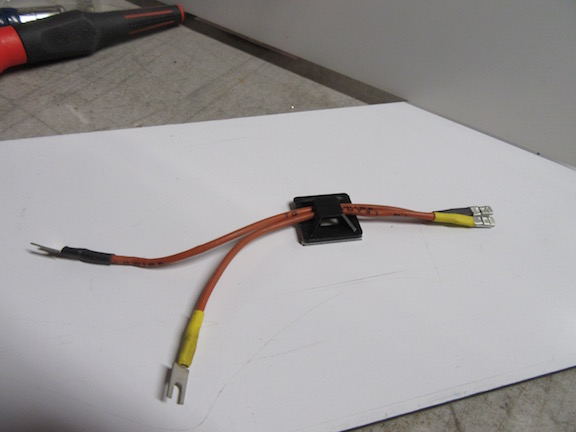
Here is a mockup to see how it might work for placement.
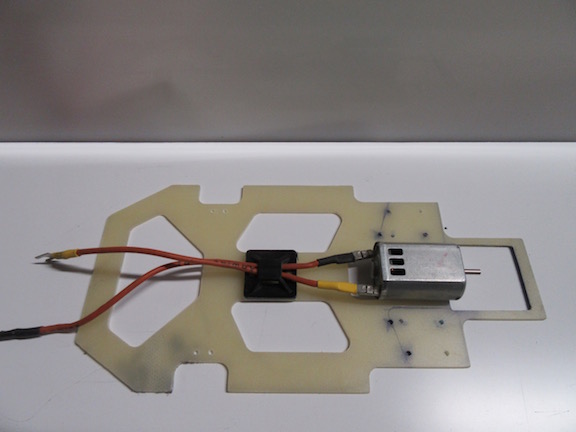
If the lead wires did not have the shrink tubing on them, I could move the cable holder closer to the center of the chassis or to the motor itself; the shrink tubing stiffens the wire.
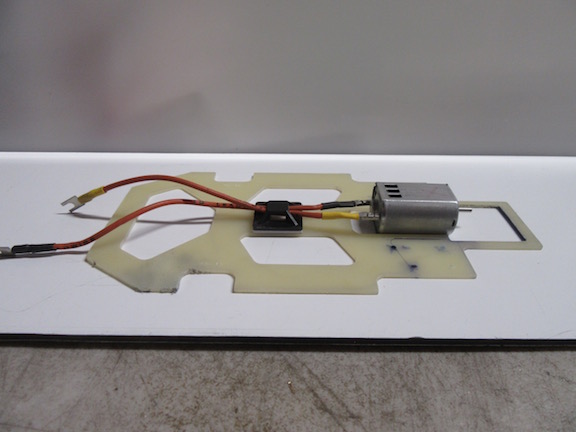
This is something I might consider on my next version of this chassis.
Thank you.
Ernie
- Geary Carrier and Jaeger Team like this
Ernie Layacan
#58
Rotorranch
-

- Member at Peace
-
- 1,755 posts Joined: 22-November 10
What's a title?
- Gender:Male
- Location:Atlanta, GA
Posted 15 June 2019 - 07:58 PM
- Buy a good soldiering iron, and practice. it's really not hard.
- Rotor
Jeff Chambers
3/14/58-4/20/26
Requiescat in Pace
3/14/58-4/20/26
Requiescat in Pace
#59
SpeedyNH
-

- Full Member
-
- 821 posts Joined: 18-July 15
Old Engineer
- Gender:Male
- Location:Cow Hampshire
Posted 15 June 2019 - 08:01 PM
that's a srick-on holder intended for nylon cable ties, or "tie wraps". should work.
speedy
- Geary Carrier likes this
Steve Lang
#60
Alchemist
-
- Full Member
-
- 2,834 posts Joined: 11-November 09
Posting Leader
- Gender:Male
- Location:Far, far away
Posted 15 June 2019 - 11:29 PM
Hi Jeff,
-
- Buy a good soldiering iron, and practice. it's really not hard.
I appreciate the suggestion, but I am choosing to build my slot cars "differently".
that's a srick-on holder intended for nylon cable ties, or "tie wraps". should work.
Hi Steve,
Yes, I could run the "zip ties" thru the holder to contain my lead wires, which would be another way to keep the wires centered - thank you for the reminder!
Ernie
Ernie Layacan
#61
Geary Carrier
-
- Full Member
-
- 614 posts Joined: 23-April 16
Race Leader
- Gender:Not Telling
- Location:CT
Posted 15 June 2019 - 11:43 PM
I am choosing to build my slot cars "differently".

Yes, to be sure, this is it...
#62
Alchemist
-
- Full Member
-
- 2,834 posts Joined: 11-November 09
Posting Leader
- Gender:Male
- Location:Far, far away
Posted 16 June 2019 - 01:14 PM
Well, I'd like to start this post with a "Happy Father's Day" to all my brethren!
I finished "grooming" a pair of older tires for testing and they came out fresh as new!
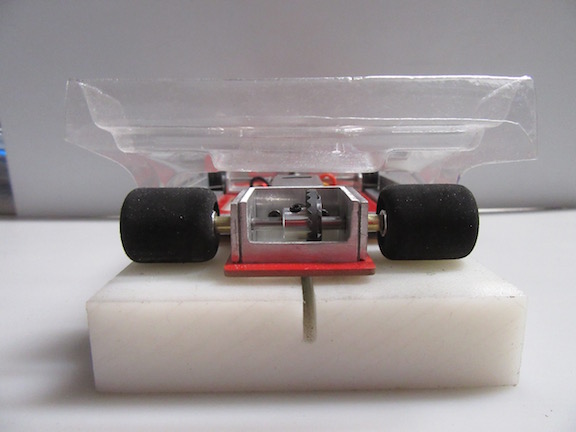
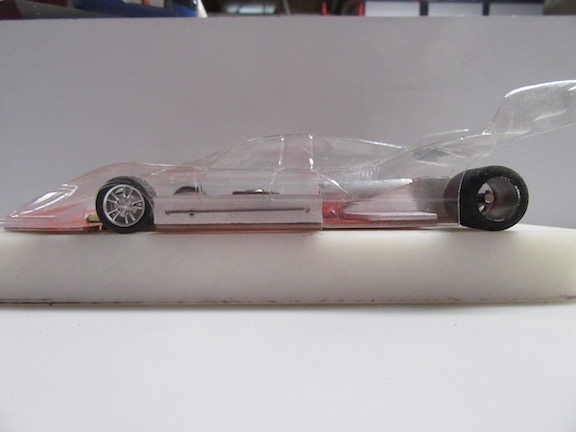
As for Father's Day, my daughter is wanting to come along for the excursion to do the testing at the Fast Track Hobbies in Rocklin, CA facility.
Have not been to a slot car track in about a year!
Again, "Happy Father's Day".
Thank you.
Ernie
- MSwiss, Rotorranch and Geary Carrier like this
Ernie Layacan
#63
Alchemist
-
- Full Member
-
- 2,834 posts Joined: 11-November 09
Posting Leader
- Gender:Male
- Location:Far, far away
Posted 16 June 2019 - 10:46 PM
I had lots of fun at Fast Track Hobbies this afternoon, as well as my daughter!
It was her first time to come with me and run a car - and now she's hooked! ! ! !
She's already planning our next race adventure, but the caveat is that I have to build her, her own car! LOL
I was pleased with the chassis's first test run.
It handled quite well and the only concern was that I had set the chassis much too low, so it was pulling up lots of "stuff" on the front end.
Then my test motor stopped working after 20 minutes or so, but I'm happy with the initial test run and will make the necessary adjustments.
I'll put in a better motor for the next test run - I believe I have "Retro" Hawk somewhere?!
Hope everyone had a greater day today!
Thank you.
Ernie
- Geary Carrier likes this
Ernie Layacan
#64
Alchemist
-
- Full Member
-
- 2,834 posts Joined: 11-November 09
Posting Leader
- Gender:Male
- Location:Far, far away
Posted 21 June 2019 - 12:34 PM
Hi Everyone!
So, I'm preparing to build my daughter her own slot car (she was driving a rental on our Father's Day excursion - I'm sure you guys know why! LOL) and I mentioned this to my wife.
Well, my wife looks at me and says "what about me?!!!!".
She has her own handful of stamped chassis slot cars that she used to use and I replied "you already have your own slot cars!".
She replied "I want one (or more) like the one you built that won't bend or break!"
I got to thinking about how long it would take to build the cars from scratch, when I suddenly realized (lightbulb!!) that I had a bunch of my "anglewinder" phenolic chassis's! ! ! !
I built these some years ago and are fabricated with .031" thick phenolic G10 composite.
So I had my wife and daughter select a car from my slot car box.
My anglewinder chassis cars, all have Sir John Havlicek's "hot built" motors!
The girls won't get them though - hahahahha!
I will put in stock motors . . . .I'm considering the M3 Hawk at this time.
So my daughter chose the purple car, while my wife selected the green one.
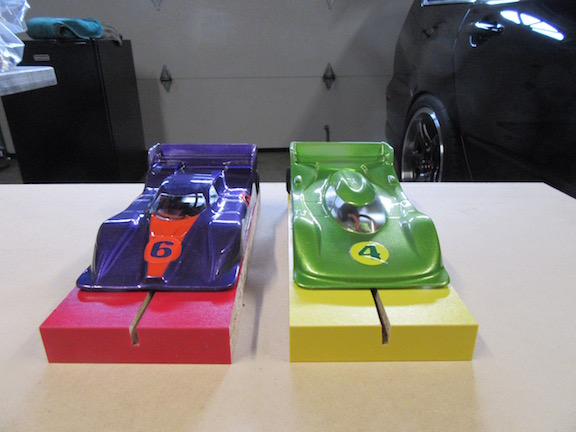
Here they are with the bodies off:
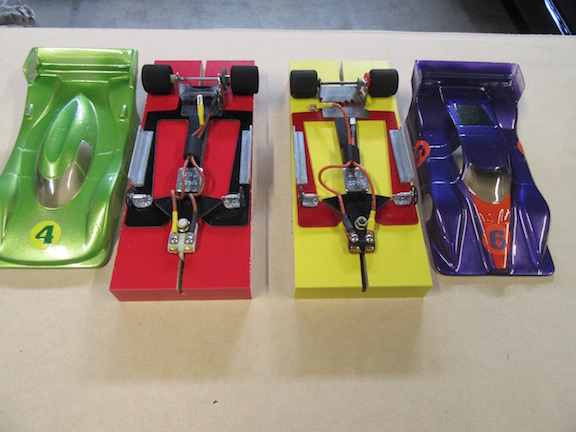
You can see the repurposed motor bracket which I "gleaned/salvaged" from my "bent up/irrepairable stamped chassis"; Motor brackets are bonded in place with the 3M VHB RP series bonding tape.
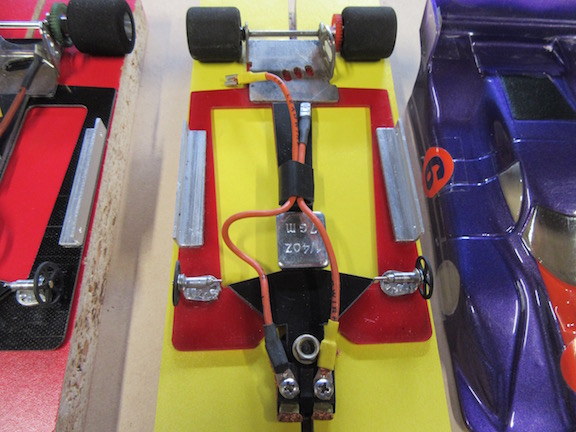
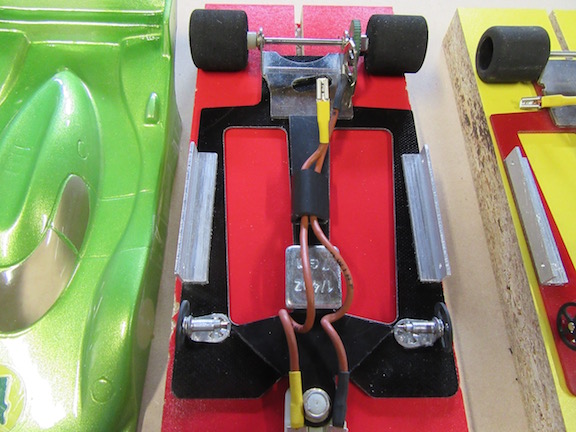
Being very light requires that "anvil" of a weight, to be placed up front and assists in its handling capabilities.
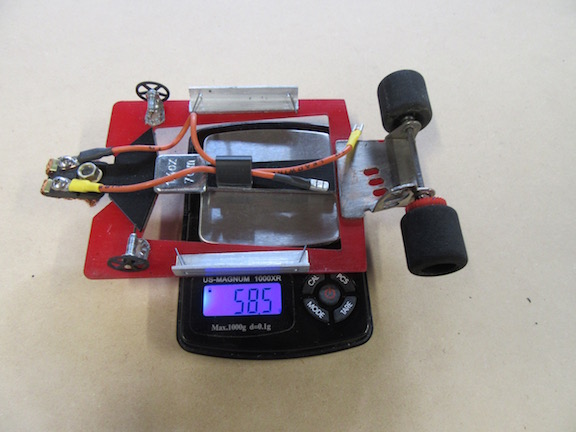
Here, I just wanted to show you another chassis, which employs one of the motors Sir John H had built for me.
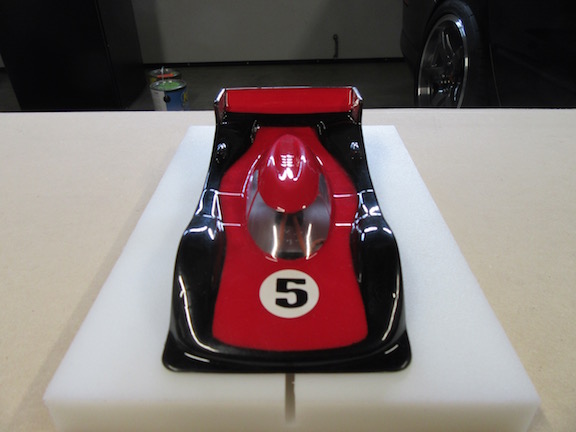
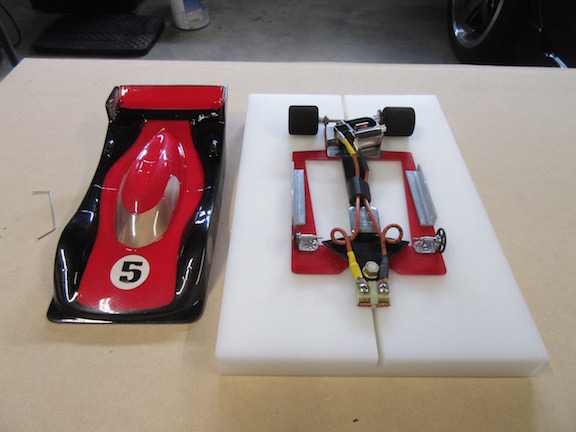
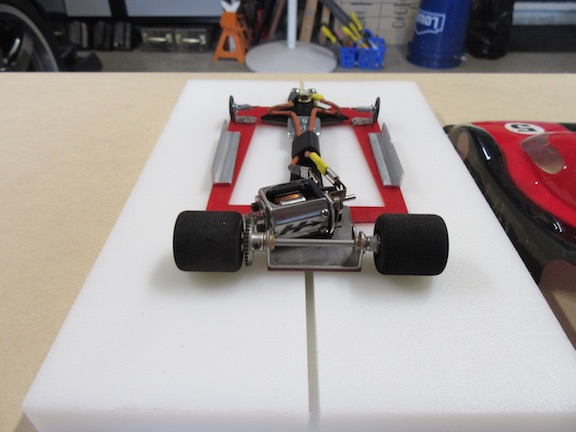
Even in full dress the car is still a lightweight.
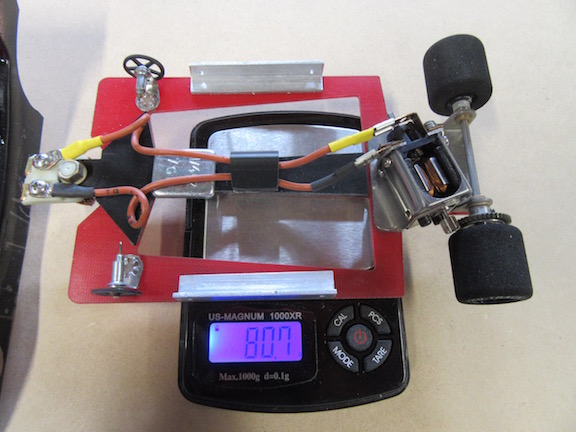
I'd like to share this story when I took a car for testing with one of Sir John's motors.
I remember that I did not have a fresh pair of tires to use and just ran it with the older ones already on the chassis.
I was testing it at Eddie's Slot Car World - Blue King Track, in Vallejo, CA.
I took a couple of "cautious" laps to check out the motor response. and on the third lap, when I approached the straightaway, I gunned it, and watched it slowly move down the track!
For a moment I was shocked that it was moving so slowly - when someone commented that the rear tires were spinning so fast because they were not putting power to the track.
As that was just finished being said, the car hit a spot with glue and took off like a gunshot.
Obviously, it crashed very hard and dramatically I might add. LOL
Most everyone that saw the incident presumed the car was done for, but to my delight, all that happened (once again) was that a body clip came loose from one end and I merely put it back and continued on.
I was thrilled to realize that this chassis didn't bend/ break or even develop any type of structural fracture.
Which is the reason I choose to continue and making an attempt to further develop this project of mine.
Thank you all, who have showed interest, and for offering the encouraging words which inspire me to continue to improve upon my chassis.
Thank you.
Ernie
- Geary Carrier likes this
Ernie Layacan
#65
Alchemist
-
- Full Member
-
- 2,834 posts Joined: 11-November 09
Posting Leader
- Gender:Male
- Location:Far, far away
Posted 03 July 2019 - 10:01 PM
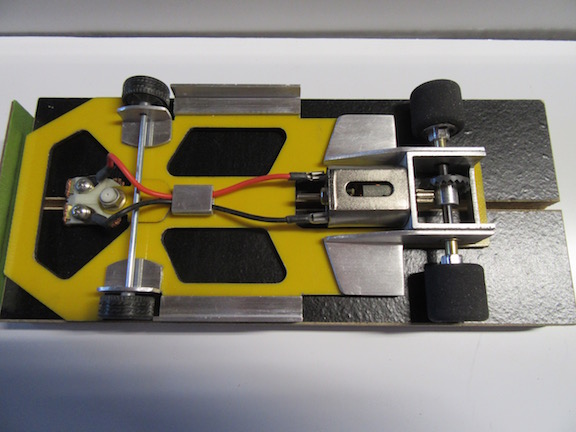
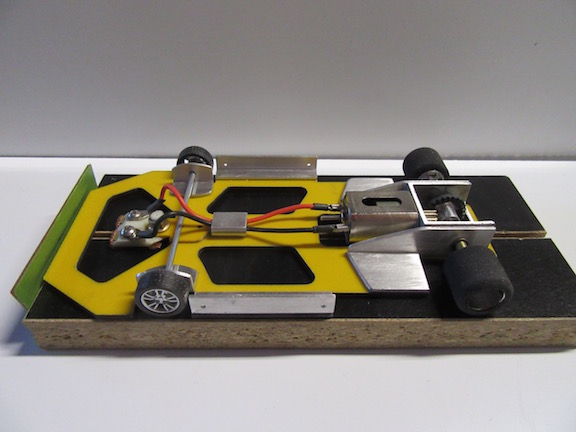
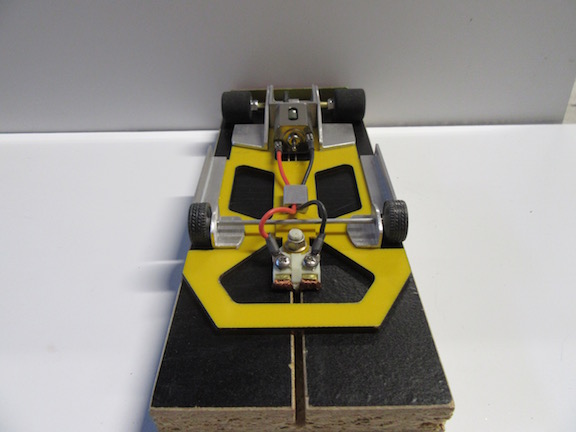
Here's the RTR "Production Model".
I decided to give the prototype to my daughter because she kept mentioning how she liked the way the it handled (I let her test drive it on Father's Day), and how KOOL she thought it looked, being able to see the chassis/hardware under the clear unpainted body, as it went around the track.
So, now that she has a car ready to "Rock N Roll" (RTR&R), I endeavored to put together the "Production Model".
Still needs a body, but the chassis and drivetrain are completed.
I'm running a Retro Hawk motor.
I also modified electrical connectors to better fit the motor tabs.
I satisfied my urge to use a terminal block on a slot car chassis and decided to employ a lead wire sleeve instead.
The lead wire sleeve is a 3/32" double wire aluminum ferrule aka aluminum cable/wire crimp sleeve, that was reduced in thickness, to keep things low in the chassis.
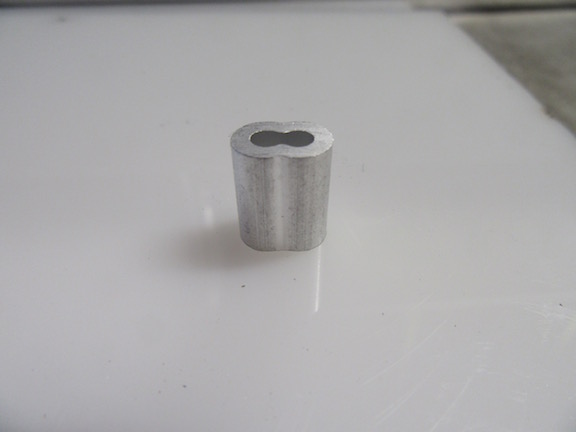
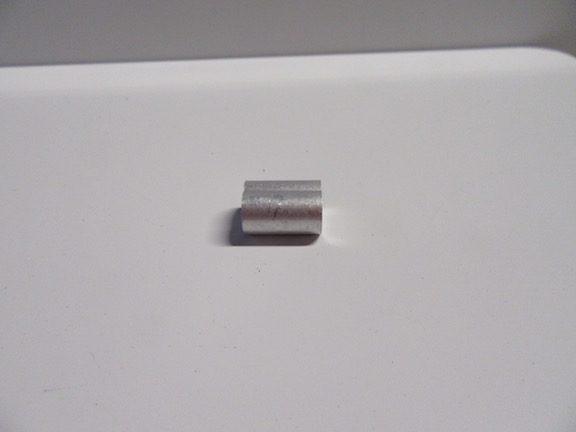
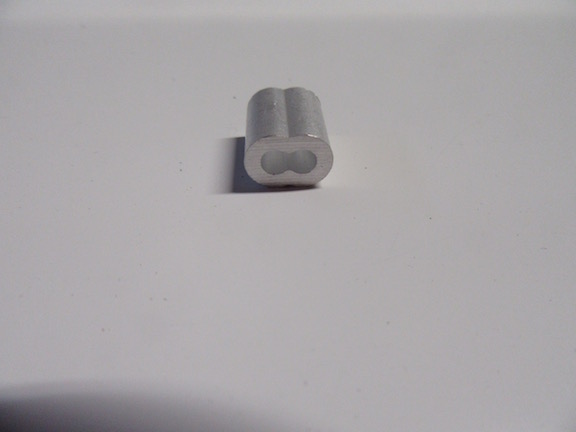
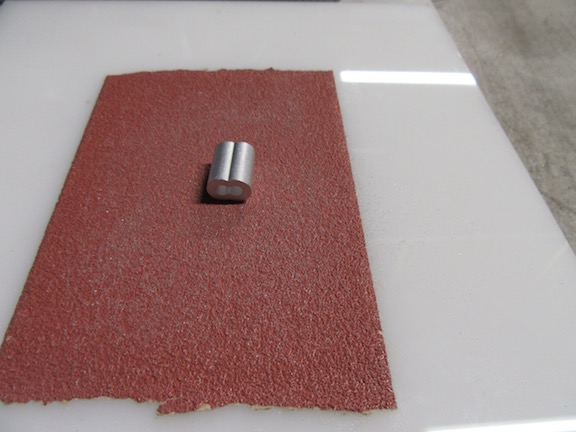
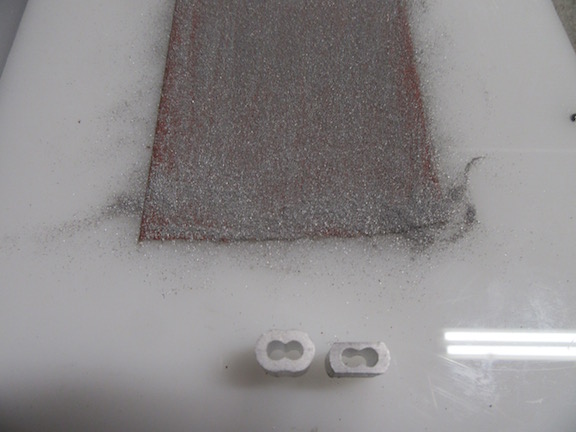
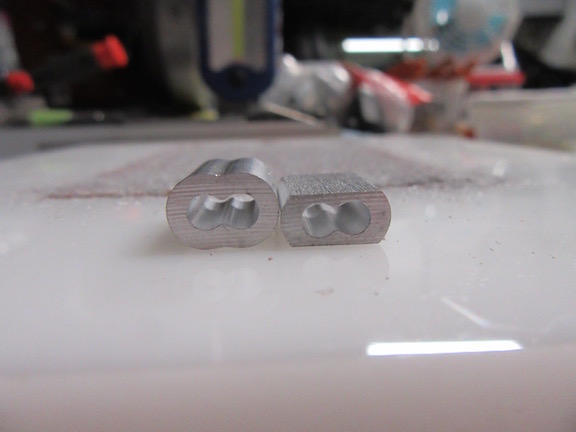
What was fortunate, is that the wires, even with the terminal connectors, fit through the sleeve!
Thank you.
Ernie
- Geary Carrier and Jaeger Team like this
Ernie Layacan
#66
don.siegel
-
- Subscriber
-
- 5,954 posts Joined: 17-February 06
Grand Champion Poster
- Gender:Male
- Location:Paris, France
Posted 04 July 2019 - 04:51 AM
Very elegant Ernie!
Which body are you using on it?
Don
- Geary Carrier likes this
#67
Alchemist
-
- Full Member
-
- 2,834 posts Joined: 11-November 09
Posting Leader
- Gender:Male
- Location:Far, far away
Posted 04 July 2019 - 10:01 AM
Greetings Don,
Thank you for the compliment!
Since I'm unable to find a Porsche 906 body - (I still cannot find my TrueScale body) I'm considering using a McLaren M6A body - but haven't made a definitive decision.
I plan on building a few more chassis for the different type of motors I've acquired over the years, for the fun of it.
At least I feel like I'm getting a little better at fabricating my chassis's.
Thank you for asking!
Ernie
Ernie Layacan
#68
Alchemist
-
- Full Member
-
- 2,834 posts Joined: 11-November 09
Posting Leader
- Gender:Male
- Location:Far, far away
Posted 05 April 2020 - 06:50 PM
An update!
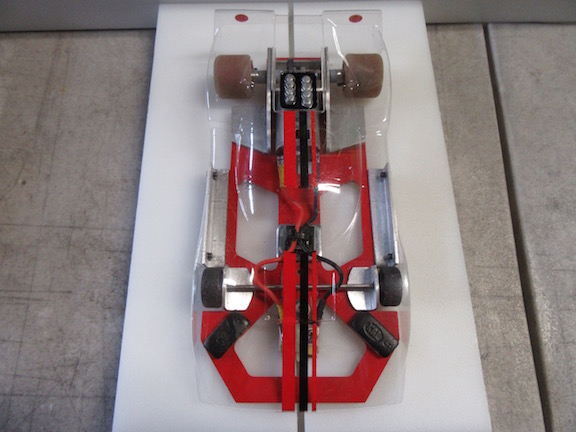
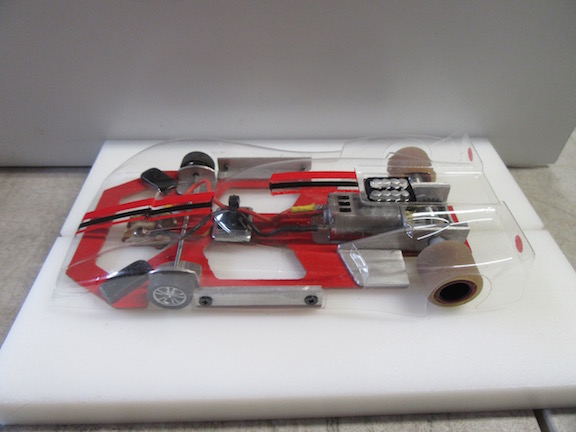
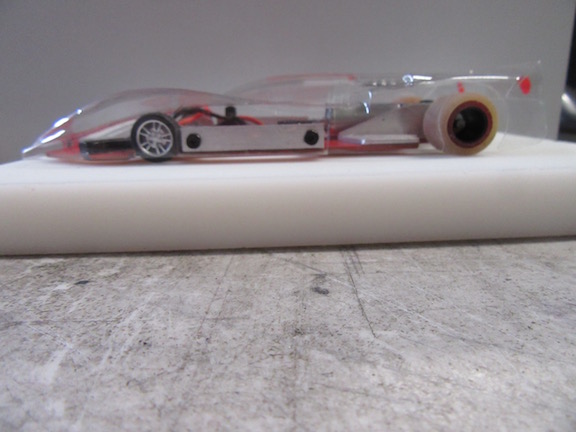
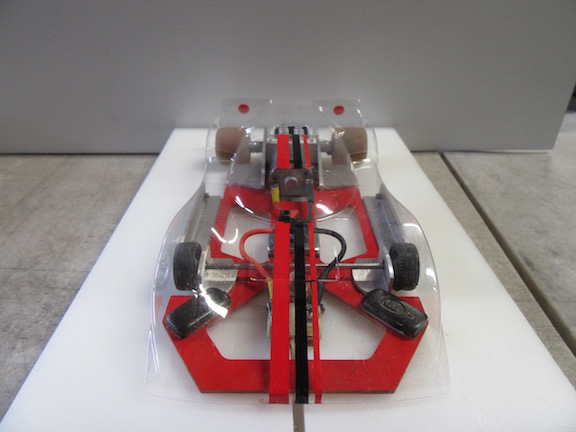
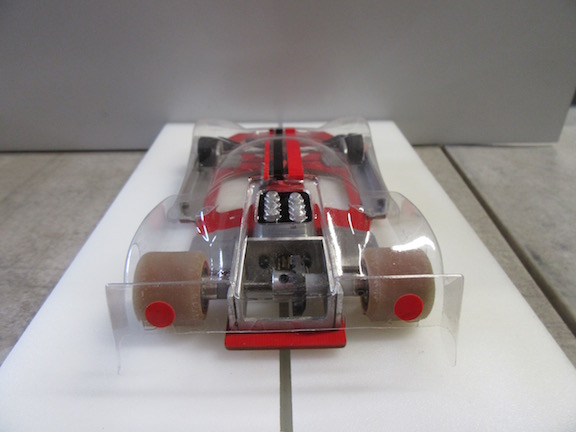
Well, I finally did acquire the Porsche 906 body from JK Products but just recently put the final touches on my inline project.
I finally decided to use the PARMA Retro Lola T70 - long nose body, kept it mostly transparent except for a couple of "discreet" racing stripes and made my own urethane rear tires from some urethane tubing I had.
It's very soft and for those requiring tech info, it's has a Shore 20A rating - which is soft and works very well for rear tires . . . at least for me!
I also went old school body mounting using 3mm wafer head screws.
Thanks again everyone, taking the time to look!
Ernie
Ernie Layacan




