Team Pittman R&C car
#26
Posted 01 October 2013 - 10:59 AM
Trust me Rick this is gonna be FUN been thinking of getting an adjust O jig but love my Ricks jig too !
Will be a case of build it, then maybe tweak/revisit the motor later on, at least it will get attacked by the hop up hole drilling monster !
If I had a milling machine would mill down the flat sides of the can like the 40/20 B cans
- George Blaha likes this
#27
Posted 01 October 2013 - 11:14 AM
You guys WAY underestimate the ability of the Weller Gun to solder well.
140 Watts within about 10 seconds. All you have to do is keep the nuts tight and the tip clean.
Also it's the ULTIMATE tool for tinning wire.
You will never wake up in the middle of the night and think "Uh Oh I think I left the iron plugged in"
Paul Wolcott
#28
Posted 01 October 2013 - 11:24 AM
Never really had a solder joint break with the contact nature of the sport
#29
Posted 01 October 2013 - 11:28 AM
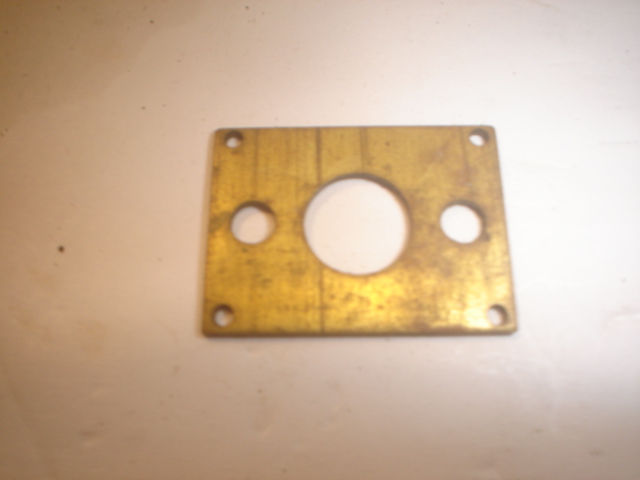
The brackets are in the mailbox waiting to be picked up today......
is the mail running, or not ?
Paul Wolcott
#30
Posted 01 October 2013 - 11:34 AM
#31
Posted 01 October 2013 - 02:20 PM
Pablo, I think you're gonna end up building at least one R&C car before this is over...
- SlotStox#53 likes this
Steve Okeefe
I build what I likes, and I likes what I build
#32
Posted 01 October 2013 - 02:44 PM
Dennis David
#33
Posted 01 October 2013 - 04:07 PM
USPS is running, the brackets are en-route
Paul Wolcott
#34
Posted 01 October 2013 - 04:10 PM
USPS is running, the brackets are en-route
Thank you Pablo !
#35
Posted 01 October 2013 - 04:17 PM
Maybe I should clarify before you get too excited, I meant to say SOMEBODY picked it up, hopefully it was USPS.
I was napping at the time
Sorry I couldn't help myself, Paul
- SlotStox#53 likes this
Paul Wolcott
#37
Posted 01 October 2013 - 04:39 PM
If ever those brackets don't fit for some reason, there's a Pittman can bracket up on ebay now...
Great project Paul, and looking forward to seeing the result. The stock Pittman is already a pretty powerful motor, so I wouldn't worry too much about hotting it up for now. Interesting info on the com George - I've used a couple of these in vintage racing, and they're pretty rugged! But not exactly stressed like they would be in an R&C series....
Hmmm, all we saw in the photos were 16D and Hemi cans, and a Tyco or two... I wonder if anybody tried to enter a 36D or a Kemtron?
Don
- George Blaha likes this
#38
Posted 01 October 2013 - 04:51 PM
I'm wondering about a 16d sidewinder....?
Jairus H Watson - Artist
Need something painted, soldered, carved, or killed? - jairuswtsn@aol.com
www.slotcarsmag.com
www.jairuswatson.net
http://www.ratholecustoms.com
Check out some of the cool stuff on my Fotki!
#39
Posted 01 October 2013 - 04:53 PM
No didn't need that one Pablo Just those 2 that got picked up by someone
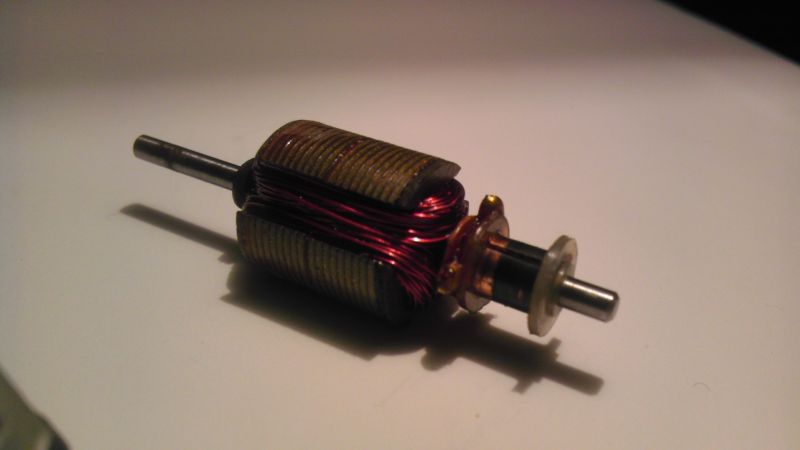
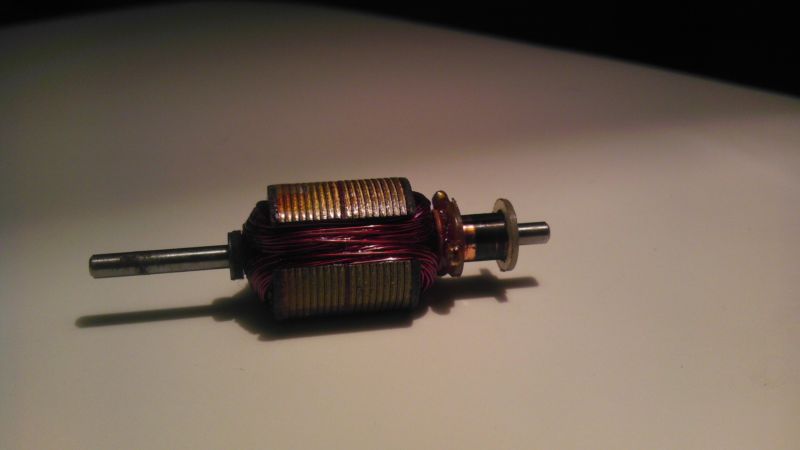
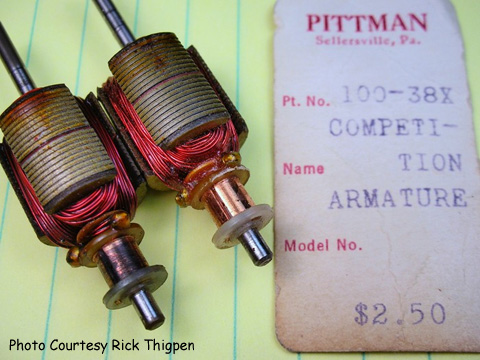
Good to know Don , never run a Pittcan before so only going by previous builds & experiences on here (including the various 6001 powered Dynamic Proxy cars!!) By the looks of it my motor has the Hotter arm in it!
Have been comparing it to pictures that Rick posted when he did the Jerry Hansen '66 Lotus 19 6001 sidewinder Has the ring to help hold the windings on, haven't measured it yet but does indeed look like the hot one ..Pictures to follow soon.
May just drill a few holes for now then & just blueprint it
36D or Kemtron.... very nice ideas for some different & cool R&C cars
#40
Posted 01 October 2013 - 04:57 PM
Yep, the more I think about it, the more tempted I am by something like a 36D sidewinder - let's see, I was 14 in 1966, and that's the year I got my Cox Lotus 40, which wasn't great shakes on our track... but maybe if I rewound the motor and put it in my first scratch built frame... A Chaparral 2D perhaps, actually the body I chose for my real first scratchbuilt in 1967 (a disaster...). Revenge will be mine!
Don
#41
Posted 01 October 2013 - 04:58 PM
I've tried a full sidewinder Jairus. It's posted in this section. It gave me some problems with hopping and bouncing like I've heard the early anglewinders did before they soldered the motors to the rear axle tube.
Rick Thigpen
Check out Steve Okeefe's great web site at its new home here at Slotblog:
The Independent Scratchbuilder
There's much more to come...
#42
Posted 01 October 2013 - 05:02 PM
Yep, the more I think about it, the more tempted I am by something like a 36D sidewinder - let's see, I was 14 in 1966, and that's the year I got my Cox Lotus 40, which wasn't great shakes on our track... but maybe if I rewound the motor and put it in my first scratch built frame... A Chaparral 2D perhaps, actually the body I chose for my real first scratchbuilt in 1967 (a disaster...). Revenge will be mine!
Don
Sounds good Make it So Don !! Would the RAMboochi 36D of been good enough for the events if it even came out during 1966 that is?
#43
Posted 01 October 2013 - 06:49 PM
hey Don,
I built and rewound motors in the 1960's and started with Pittmans lifted from worn out HO trains. The armature iron was good but the coms were made of nylon that would distort with hard slot car use. Trueing the com was statically possible but it could not last long under the heat of use. Uncle Fred, Roy Wong, and I won a 6 hour enduro (run on car batteries at Joe Kilkennys Raceway) with a DC70 rewind with a scratchbuilt aluminum pan chassis with a GT40 body in1965 a week before the Northeast Power Blackout. When the DC196b 3 pole motor came out, I transplanted Mabuchi coms and aftermarket coms and advanced the coms to get a sweeter sounding and cooler running motor. Also Ram made coms and HP silver motor brushes. When these new 6001's came out, Pittman used parts from their old bins and so I found the com was still the weak link and needed replacement for competition. Please enjoy the advantage of less competitive racing the war horses of yesteryear.
Shakey George Blaha
#44
Posted 01 October 2013 - 07:56 PM
Very cool about the use of Mabuchi & other comms on the Pittman arms , bet they ran well along with the rewinds !
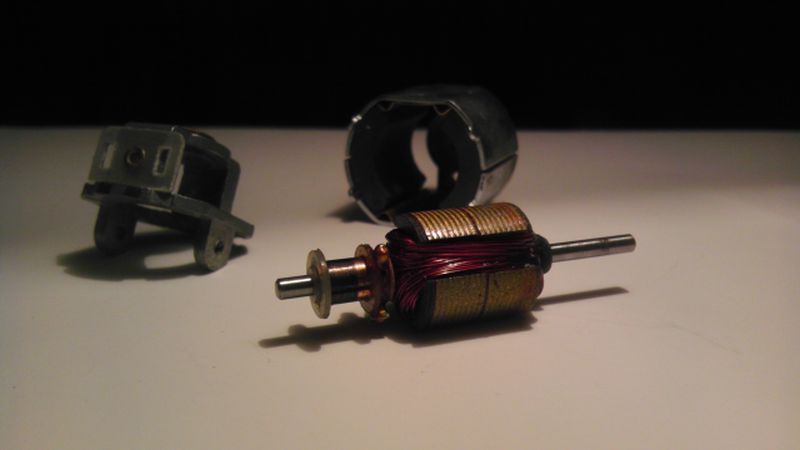
Opened the beast up , think it is indeed the hotter arm Rick documented
My arm
Ricks 6001X arm
Still sorting out an appropriate body, watch this space
#45
Posted 02 October 2013 - 10:08 AM
hey Paul,
It appears you have the best of the 6001's, if you use a protractor and add 90* from the midpoint between poles where they are wound (use Correct-o-type to mark this point) and reset the same protractor to this new 0* point and measure the angle to the solder point at the com....... this will give you the advance of the com. From a educated guess from your pictures, the advance is substantial so the motor will want to run faster in one direction. Get this arm balanced and com trued and this will lower motor operating temps and increase rpm performance .....so a gear change will give you more brakes.
Shakey George
#46
Posted 02 October 2013 - 04:43 PM
Valuable info on timing, thanks Haven't got a comm lathe (yet ) so just have to clean the comm up for now. As for balancing I've only ever used a file to lighten the heavy poles (almost like Champion with their grind balancing) never tackled drill balancing before If I was to do it would the file method be ok? Or what's the easiest (read less likely to fail & mess the lams up!!!) way to drill balance in a normal home enviroment!
Currently thinking the Team Pittman car will be a Porsche 906 they just look so low & swoopy! although like everything else this is subject to change
#47
Posted 02 October 2013 - 05:11 PM
If I was to do it would the file method be ok? Or what's the easiest (read less likely to fail & mess the lams up!!!) way to drill balance in a normal home enviroment!
Spreading the lams is a problem. Use a split point bit that cost very little more than a regular.
Wrap the ends of a pair of Vise Grips with tape. Gently but firmly clamp the ends of the stack with the grips. Then slowly drill into the stack using little force. Those lams can split and twist in a heartbeat. Luckily a person can often bend them back.
And if anyone knows a better method, post it!
11/6/54-2/13/18
Requiescat in Pace
#48
Posted 02 October 2013 - 05:36 PM
Thanks Don Will look into the split point bit and pluck up the courage to have at it & wait to see any other methods! Or just ship the arm off to Rick and ask him nicely
Or just bolt it back up & leave well alone for now .
#49
Posted 02 October 2013 - 06:26 PM
Would grinding the poles with a Dremel be satisfactory, and acceptable for the period?
Steve King
#50
Posted 02 October 2013 - 06:48 PM
A thorough epoxy job on the windings will hold the lamimations together for drill balancing.
I destroyed a Pittman DC-65-6V arm by attempting to drill balance it without epoxying the windings.....once. After that I always heavily epoxy coat all the windings and go over it with a heat gun, CAREFULLY! The heated epoxy really soaks into the windings. Any extra epoxy is simply wiped off. All of this must be done pretty quickly as heating the epoxy does cause it to thin out and flow for a minute or two but then that heat accelerates the curing process and it sets up fast.
Rick Thigpen
Check out Steve Okeefe's great web site at its new home here at Slotblog:
The Independent Scratchbuilder
There's much more to come...