
 This topic is locked
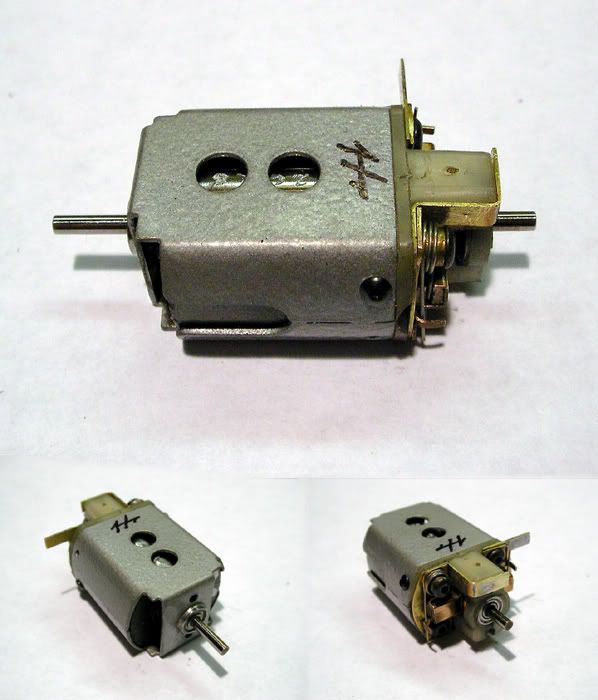
-john
PS...your arm is on the way Bill and I found a #24 awg with pretty high timing that should satisfy your Grp 7 jones


|

OCD Rewinder

Posted 25 June 2009 - 10:36 AM
Backmarker

Posted 25 June 2009 - 11:25 AM

OCD Rewinder
Posted 26 June 2009 - 05:49 PM
Grand Champion Poster

Posted 26 June 2009 - 09:08 PM
good stuff. I haven't put ball bearings in a Champion setup......yet. Now I know how. Thanks!Rick Thigpen
Check out Steve Okeefe's great web site at its new home here at Slotblog:
The Independent Scratchbuilder
There's much more to come...
**Numb Thumbs**

Posted 26 June 2009 - 09:17 PM
 I don't know how you can solder the bearing to that small ring of brass, though. Id have a nice blob of round silver solder when I was done.
  The paint came out nice also!
OCD Rewinder
Posted 27 June 2009 - 07:01 AM
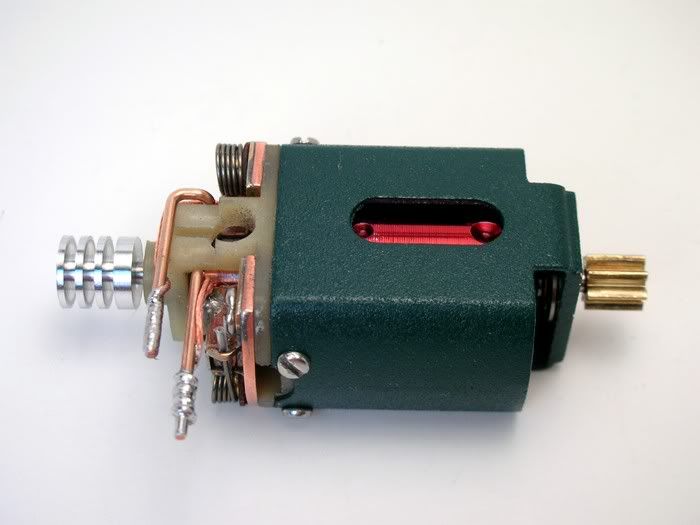
Nice setup John. That textured finish Rustoleum paint is really cool. I've used the dark green good stuff.
I haven't put ball bearings in a Champion setup......yet. Now I know how. Thanks!
Rick
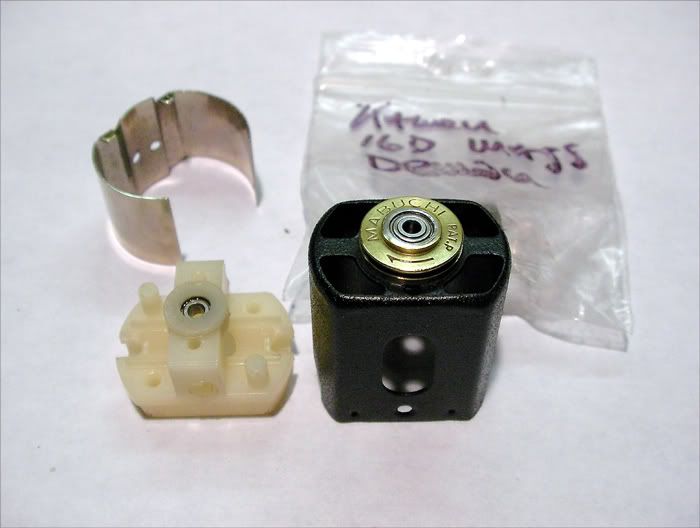
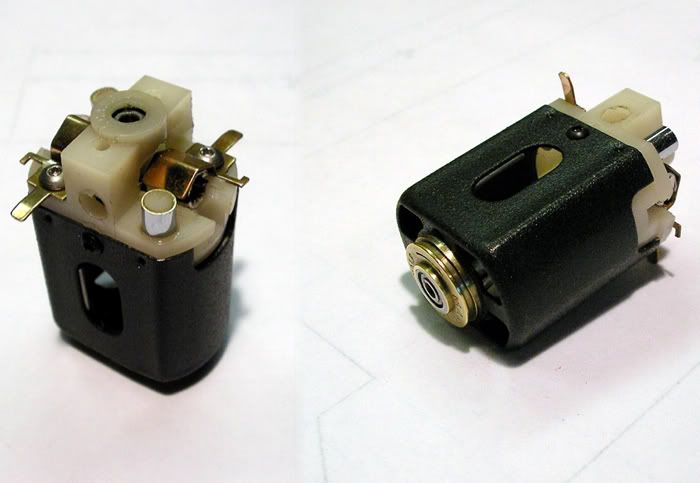
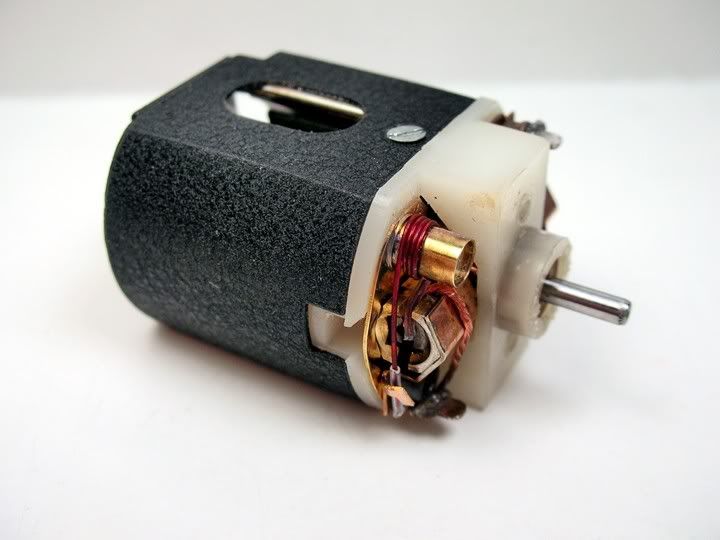
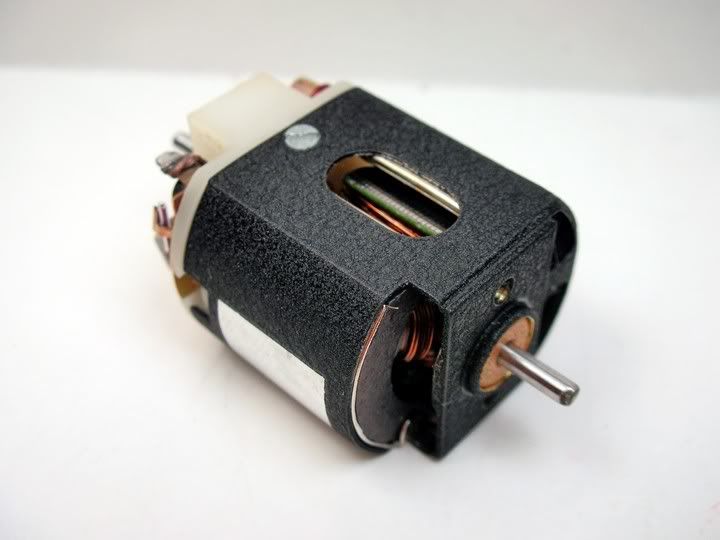
oh...I don't know...I think you'd manage just fine The can end is pretty easy, but the endbell was a bit more of a problem...but still plenty doable. Sleeving the bearing and then cutting the assembly off the larger brass tube you sleeved it with always presents the potential of getting brass powder and flux residue inside even a shielded bearing and sure enough the bearing felt a little rough when I cut it and the sleeve away from the tube. Also, washing it in baking soda and water with a small brush afterwards to be sure to get any flux residue neutralized and out of there probably doesn't help. I spent a while with some Slick 7 bushing/bearing lube spinning the bearing by hand with an old arm shaft, cleaning & re-soaking with more lube until it felt smoooooooth. Then I mounted the sleeved bearing on an arm shaft chucked in the Dremel and soaked it some more in Slick 7 and spun it while holding the sleeved bearing in my fingers...clean/re-soak just to be sure it was golden. ...I also roughed-up the inside of the bearing pocket and applied a few molecules of hi-temp epoxy with the end of a round toothpick before popping the sleeved bearing in for good. I then baked the endbell at a very low temp in my easy-bake oven for 15 minutes to help force-cure the epoxy and that bearing isn't going anywhere soon! This was the most worrisome part of the whole deal because the epoxy I use is very low-vis and gets even more so with a little heat. The slightest amount running into the bearing would have ruined the bearing I just worked so hard on  , but I got lucky

Man, that is some nice, precision work, John. I don't know how you can solder the bearing to that small ring of brass, though. Id have a nice blob of round silver solder when I was done. The paint came out nice also!
Grand Champion Poster
Posted 27 June 2009 - 11:40 AM
Rick Thigpen
Check out Steve Okeefe's great web site at its new home here at Slotblog:
The Independent Scratchbuilder
There's much more to come...
OCD Rewinder
Posted 27 June 2009 - 11:47 AM
 It usually involves ball-peen hammers, explosives, crow bars and the like I LOVE the way that green looks! It seems a lot like a slightly lighter shade of racing green from the picture if the color representation is good. Now I'm going to get me some!
OCD Rewinder
Posted 27 June 2009 - 12:36 PM
OCD Rewinder
Posted 28 June 2009 - 05:58 PM
**Numb Thumbs**
Posted 29 June 2009 - 04:28 AM
No one takes the time to do that kind of precision work any more. Ah, maybe a couple of master craftsmen here on SLOTBLOG! but that's it.  You always seem to come up with ingenious ideas for motor problems. I have some great ideas too!
  As soon as I can get one to work I'll clue you in.
OCD Rewinder
Posted 29 June 2009 - 06:18 AM
All this is just a more "grownup version" of the kinds of tinkering I'm sure many of us did as kids. About any car in the 60's, and many car parts, were lacking in some pretty obvious ways so we all did what we could to "improve" things. Of course as a kid, the "workmanship" was pretty horrid but the sometimes successes kept us all motivated and pointed us in the right direction even if our skills weren't up to our wishes. I did some godawful things to motors and chassis, but once in a while "got it right"...usually in spite of myself, and I suspect that a LOT of people got tons of enjoyment from trying to fix the brand-new stuff they just bought Grand Champion Poster
Posted 29 June 2009 - 12:11 PM
. . It would be for this project car: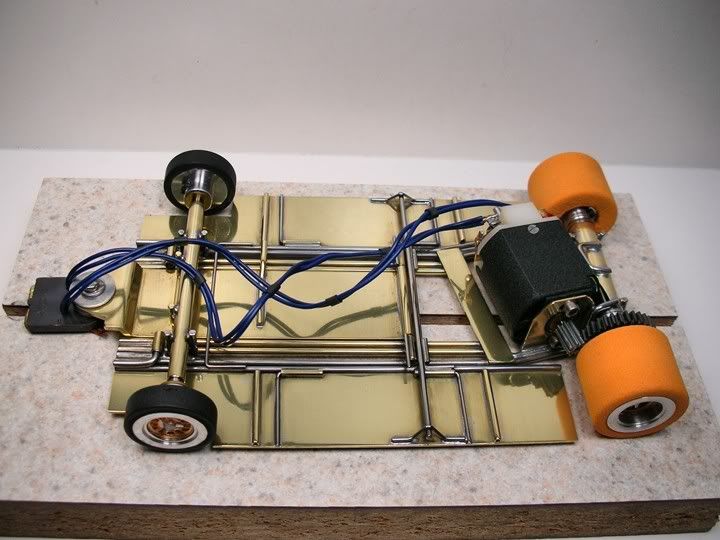
Rick Thigpen
Check out Steve Okeefe's great web site at its new home here at Slotblog:
The Independent Scratchbuilder
There's much more to come...
OCD Rewinder
Posted 29 June 2009 - 01:56 PM
Backmarker
Posted 29 June 2009 - 01:59 PM
) any way's 30 mins later and a wide use of power and non power tools i was able to finaly make my way to the prize inside and all hard work and stress was well worth the effort, (which is pale compaired to the effort you put into winding of this arm) now my problems are 2 fold one how to hope to acheve such a high lev of workman ship and second when the time comes finding the proper build to set this is but that is for another post. again thank you much for that and im going to be sending you some arm's back to do as you wish with.OCD Rewinder
Posted 29 June 2009 - 02:13 PM
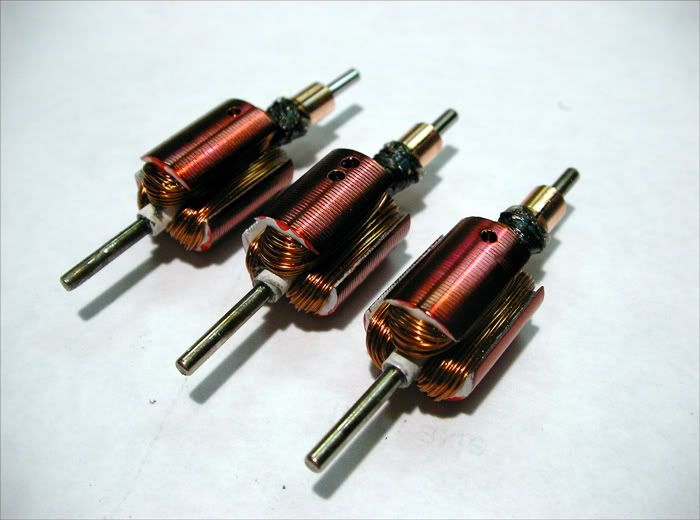
From my perspective, winding/rewinding is "the final frontier" of the retro movement and I'd love to see a resurgence in this aspect, even if it is only a relatively few people. People are scratchbuilding, painting bodies, doing all kinds of crazy designing and testing, now if only... 
Grand Champion Poster
Posted 29 June 2009 - 02:48 PM
Hi Rick,
Of course I'd do it................
-john
Rick Thigpen
Check out Steve Okeefe's great web site at its new home here at Slotblog:
The Independent Scratchbuilder
There's much more to come...
OCD Rewinder
Posted 29 June 2009 - 04:08 PM
S&E Raceway

Posted 29 June 2009 - 05:20 PM
OCD Rewinder
Posted 29 June 2009 - 07:18 PM
Backmarker
Posted 30 June 2009 - 07:51 AM
OCD Rewinder
Posted 30 June 2009 - 07:57 AM
OCD Rewinder
Posted 30 June 2009 - 09:04 AM
OCD Rewinder
Posted 30 June 2009 - 10:30 AM
Backmarker
Posted 30 June 2009 - 01:20 PM


