#1926

Posted 05 October 2010 - 11:25 AM
Barney Poynor
12/26/51-1/31/22
Requiescat in Pace
#1927

Posted 12 October 2010 - 09:46 PM
Ernie
#1928

Posted 13 October 2010 - 06:28 AM
-john
#1929

Posted 13 October 2010 - 08:55 AM
I'm liking the signature H on the stack, makes us all remember who done it.
Like we could ever forget getting one of your righteous motors!
Slots-4-Ever
Brian McPherson
REM Raceway
"We didn't realize we were making memories, we just knew we were having FUN!"
#1930

Posted 13 October 2010 - 07:56 PM
-john
#1932

Posted 14 October 2010 - 05:05 PM
-john
#1933

Posted 14 October 2010 - 06:58 PM
Barney Poynor
12/26/51-1/31/22
Requiescat in Pace
#1934

Posted 14 October 2010 - 07:15 PM
-john
#1935

Posted 14 October 2010 - 11:25 PM
That's some packaged "candy" you've got there! Looks real sweet with the different colors!
Hi John,
Perhaps you may not realize the impact you've made by sharing your "rewinds" with us, along with the technical info you provide along with the great pictures of your work. So for that, I thank you very much John!!! I wish to also thank all the other members that have been helpful with their responses to my inquiries.
Now, if I may ask another technical question please?!
If the air gap between the armature and the magnets are too close for your requirements, how does one "open up the air gap; tools, method/technique please? Also, what about the reverse situation where the air gap is too big?
Thank you!
Ernie
#1936

Posted 15 October 2010 - 06:04 AM
If the air gap between the armature and the magnets are too close for your requirements, how does one "open up the air gap; tools, method/technique please?
There's a couple of ways I can think of. For one, not all magnets are the same thickness so it is sometimes possible to get a magnet that's either a little thicker or a little thinner. The way to do it with a given set of magnets is to use a hone. These are short/round slugs of a given dimension with diamond abrasive on their circumference (because ceramic magnet material is difficult to sand) and a shaft like an armatiure running through the center. You start off with a magnet/can setup that leaves a "hole" for the arm that is smaller than what you want it to be. By working up from a hone that will abrade the hole when powered (drill, dremel etc.) to the next size etc., you can get a hole that is not only the right size for the armature ("air gap")...but which is perfectly centered/symetrical around the arm's center. This whole deal makes a real mess because the dust is (of course) magnetic and sticks to everything. When the magnets have been glued into the can, getting all that dust out of there is a pain in the neck. There's putty you can shove in there (although even plumber's putty can work) and you can also wad-up tape with the sticky side out and shove that in there until it comes out clean.
Also, what about the reverse situation where the air gap is too big?
That's the easier of the two...sort of. When the hole is too big, you can make it smaller by installing shims behind the magnets made of thin steel and pre-curved to fit the radius of the inside of the can and back of the magnets. If you have to shim the magnets a lot , you may have to use different magnet clips as the ones intended for the setup will start to deform rather than to work properly. Thin steel shim stock is relatively cheap and is a mild grade so that curving it isn't too bad. You can also cut it without it deforming as it would if you used a shear, by using a straight edge and scoring it a bunch of times with an X-Acto knife. Once it's been scored enough, you can let it hang off a solid surface and while keeping the straight edge over the score...start to gently bend it until it "gives". After you've cut strips, you can cross-cut it easily with a Dremel to length. I keep a bunch of .003" or .004" (I forget which) and it's a good thickness for most jobs...either singly or by putting two shims per side in the motor. To make installing the shims easier, it's good to radius the corners of the shims so they can be slid into the can behind the magnets with the front edge of the magnets being held just outside the end of the can.
For really thick shims, sometimes it's good to go back to the old "can-in-a-can" deal. For instance, you can make a "can-shim" for a D-motor (or an old Mabuchi-style FT16D) by carefully thinning out the sides and top of a modern c-can. It takes a while, but usually the top and bottom (flat sides) of a C can need less thinning-out than the radiused or curved sides. I do all the sides in passes as evenly as I can first with a thin diamond wheel and then finish them off with progressively finer sandpaper by hand until it seems as though the C-can will slide into the D (or FT16D) can. Then it's just a matter of cutting off the bushing end of the C can and trimming the other end as necessary. I then start the C can into the FT16D by hand and finish installing it by inverting the whole mess on a piece of glass and gently pushing the C can in. FT16D cans DO vary a thousandth or so ...especially between "types", but this is usually do-able with some effort. It's also not a method that was unknown back in the dark ages as "can-in-a-can" shims were sold by Dynamic, so for the "pure of heart" that can't stand the idea of "cheating"...this might be acceptable
The final thing about fitting magnets is the "top-to-bottom" size (height) of the magnets and not all magnets for a given can are the same height. If the height is a sloppy fit, the magnet clips will just slide between the magnets and the can top and bottom and not secure the magnets. Even if you're going to glue the magnets in, the clips can be a handy way to temporarily hold them until the glue cures. Sometimes you can just make thicker clips out of piano wire...sometimes you have to make thin shims for the top and bottom of the magnets. I've also seen it said here (I forget who) that shimming the magnets top and bottom works better with non-magnetic shims (brass) than with magnetic ones (steel). I just use steel and it seems OK to me, but maybe brass is slightly better...that would be above my paygrade!
-john
#1937

Posted 15 October 2010 - 07:34 AM
One way to increase a can's airgap is to use a can-straightening mandrell. Straightening a can will almost always result in stretching a can slightly larger.
I intend to live forever! So far, so good.
#1938

Posted 15 October 2010 - 08:42 AM
-john
#1939

Posted 15 October 2010 - 09:21 PM
#1940

Posted 15 October 2010 - 10:48 PM
-john
#1941

Posted 29 October 2010 - 03:44 PM

then:

Then:

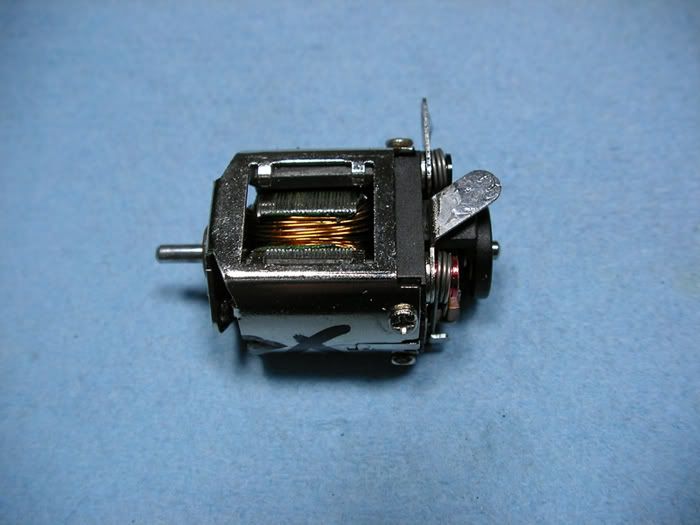
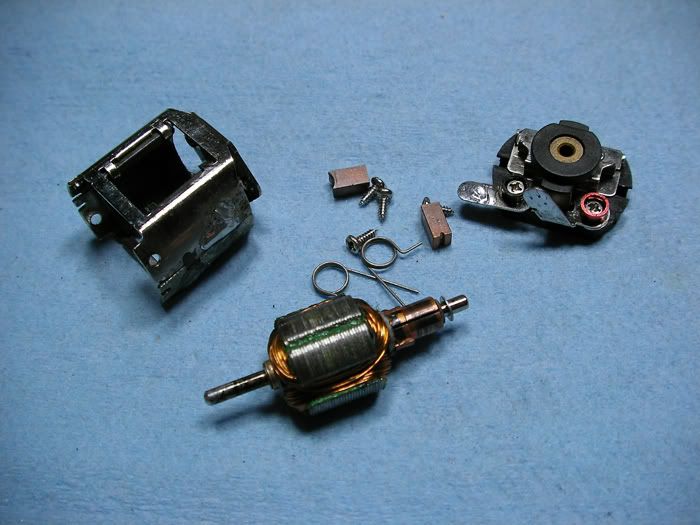
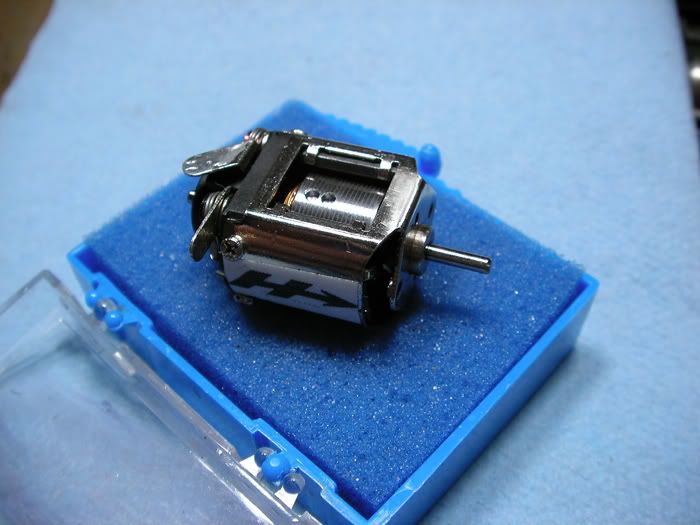
I backed off the stock timing, but did a stronger wind. It runs exceptionally smooth and doesn't get too warm at all, but has lots of torque and brakes. This little motor should be a strong runner and last well.
-john
#1942

Posted 29 October 2010 - 04:57 PM
That better not be faster than mine or I'll have to ask for a refund
Looks real nice John. If it runs as good as the one you wound for me, Ernie is going to be very happy with it. Maybe you should start doing some replacement arms for the Hawks. As far as I know, no one is making any yet. As you know, the Hawk is one of my favorite motors. At least one with a good arm in it
Vic
#1943

Posted 29 October 2010 - 06:44 PM
Maybe you should start doing some replacement arms for the Hawks. As far as I know, no one is making any yet.
Nah...but maybe a bunch of people should start a Hawk rewind class...stock motor, any non-factory wound arm. Like THAT would ever happen
-john
#1944

Posted 29 October 2010 - 06:52 PM
Like THAT would ever happen
-john
That pretty much said it all John !!
#1945

Posted 29 October 2010 - 06:58 PM
I intend to live forever! So far, so good.
#1946

Posted 29 October 2010 - 07:31 PM
If you'll pardon my "lack of knowledge" please - but the directional arrow is pointing parallel to the armature shaft - I'm confused as to which direction the motor is suppose to turn?!
Did you find any concerns with the way the arm shaft fit into the end bushings, e.g., misalignment etc., as was mentioned when you first looked at the HAWK motor??
Hi Vic!
What type of chassis have you employed with the HAWK please? How does it run?
Thank you - thank you - thank you John!!!
Ernie
#1947

Posted 29 October 2010 - 07:50 PM
Wow - awesome John!!
If you'll pardon my "lack of knowledge" please - but the directional arrow is pointing parallel to the armature shaft - I'm confused as to which direction the motor is suppose to turn?!
Hi Vic!
What type of chassis have you employed with the HAWK please? How does it run?
Thank you - thank you - thank you John!!!
Ernie
Hi Ernie,
I,ll be honest, I haven't yet. I'm just hanging on to the one John wound . I have done a lot of playing around with these Hawks though , and you can really go wild with them if you want to. The one John wound sounds like a strong running X-12 on the power supply. I did one up with a ProSlot open arm, roller bearings both ends, redid the endbell using Mura hardware, camen heavy springs, BF2 brushes, shunt wires, and the thing was a bear !!! I'm looking foward to doing alot more with these things.
#1948

Posted 29 October 2010 - 08:07 PM
Glad you like it
If you'll pardon my "lack of knowledge" please - but the directional arrow is pointing parallel to the armature shaft - I'm confused as to which direction the motor is suppose to turn?!
I couldn't fit one of my stickers on the usual place on the can. The arm only has a mild advance (around 12 degrees), but it will run better in the "normal" CCW direction (as viewed from the endbell)...or clockwise as viewed from the drive or can end. It's a sweet little motor indeed! Like Victor, I think they're about the best bet for hotrodding...better even that the SCX RX42 motors...better endbell and an even more compact package. Can you say 1/32 sidewinder???
-john
#1949

Posted 29 October 2010 - 08:08 PM
John, JK sells Hawk "take-out" arms for $5.95. Maybe not as far-fetched as first thought.

But where's the fun in that Bill???
-john
#1950

Posted 29 October 2010 - 08:13 PM
Ernie


 This topic is locked


