


You can grind/cut a semi-circular cutout in the top edge of the front heat sink for access to the can screw behind it. The bottom edge can be notched & bent up ninety degrees for screw clearance. 

Lancer scale Matich Can-Am build
Started by
dc-65x
, Aug 23 2025 03:14 PM
93 replies to this topic
#26

Bill from NH
-

- Full Member
-

- 15,318 posts Joined: 02-August 07
Age scrubs away speed!
- Gender:Male
- Location:New Boston, NH
Posted 06 September 2025 - 07:30 AM
Bill Fernald
I intend to live forever! So far, so good.
I intend to live forever! So far, so good.
#27
dc-65x
-
- Subscriber
-
- 7,205 posts Joined: 14-February 06
Grand Champion Poster
- Gender:Male
- Location:Captain Rick: The only vintage slot car nut in SW Oregon?
Posted 06 September 2025 - 01:01 PM
Good point Bill. If my motor was using screws in the sides of the can I'd be removing the front heat sink right about now and making those screw clearance cuts I forgot. Luckily, I'm using the top and bottom screw locations.
Here's my finished can with a fresh coat of VHT black wrinkle paint with a masked off and tinned space for motor mounting.
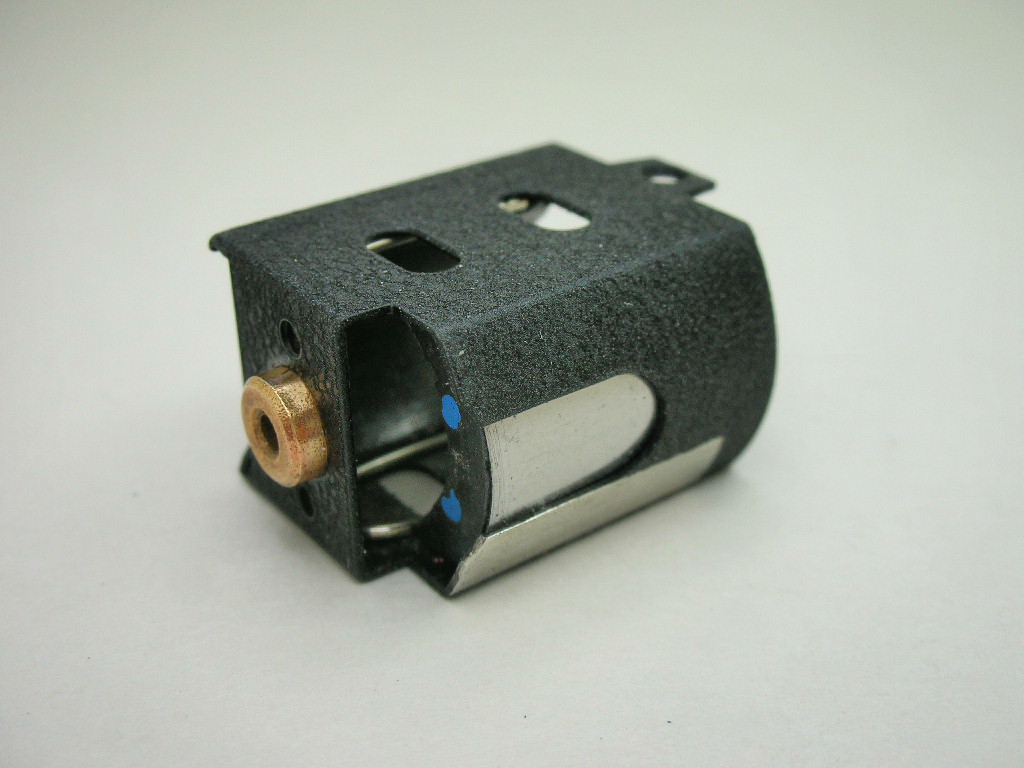
Magnets are Champion Blue Dots freshly zapped with .007" shims. Mura can bearing soldered in place from the inside.
- Tex and Slot Car Rod like this
Rick Thigpen
Check out Steve Okeefe's great web site at its new home here at Slotblog:
The Independent Scratchbuilder
There's much more to come...
#28
Bill from NH
-
- Full Member
-
- 15,318 posts Joined: 02-August 07
Age scrubs away speed!
- Gender:Male
- Location:New Boston, NH
Posted 06 September 2025 - 02:38 PM
If I remembered your can had the tabs, I never would have made the post. Most of my Champion builds used the earlier version with the cutoff tabs. I did buy two of the tabbed cans & the Champion endbell in the late '70s. I built one & still have the parts for the other.
A little history about Russ Boyington. Russ was a Connecticut slot racer from the mid-60s to the early-80s. By profession, he was a machinist at Pratt-Whitney Aircraft in Hartford. When I raced in CT during the 70s, he was a very good "Pro" racer. He built motors & setups for himself & other racers. He also had a line of various slot car parts. There are at least two versions of these heat sinks. I think yours are the original. The later version had slightly thinner material & the top heat sink was slotted above the can slots. Russ still lives in CT but hasn't been involved with slot cars for years. Bob Slain, in CT who posts on here, knows Russ a lot better than I do.
Bill Fernald
I intend to live forever! So far, so good.
I intend to live forever! So far, so good.
#29
old & gray
-

- Full Member
-
- 1,233 posts Joined: 15-April 11
Checkered Flag in Hand
- Gender:Male
- Location:CT
Posted 06 September 2025 - 07:24 PM
Russ still lives in CT but hasn't been involved with slot cars for years. Bob Slain, in CT who posts on here, knows Russ a lot better than I do.
Russ moved to Arizona for a time. I lost touch with him when my wife and I started with the SCCA.
Bob Schlain
Bob Schlain
#30
Bill from NH
-
- Full Member
-
- 15,318 posts Joined: 02-August 07
Age scrubs away speed!
- Gender:Male
- Location:New Boston, NH
Posted 07 September 2025 - 06:12 AM
I recall when they moved to Utah & came back to CT. My "still in CT" comment came from Gil Aubin a couple years back.
Bill Fernald
I intend to live forever! So far, so good.
I intend to live forever! So far, so good.
#31
dc-65x
-
- Subscriber
-
- 7,205 posts Joined: 14-February 06
Grand Champion Poster
- Gender:Male
- Location:Captain Rick: The only vintage slot car nut in SW Oregon?
Posted 07 September 2025 - 11:41 AM
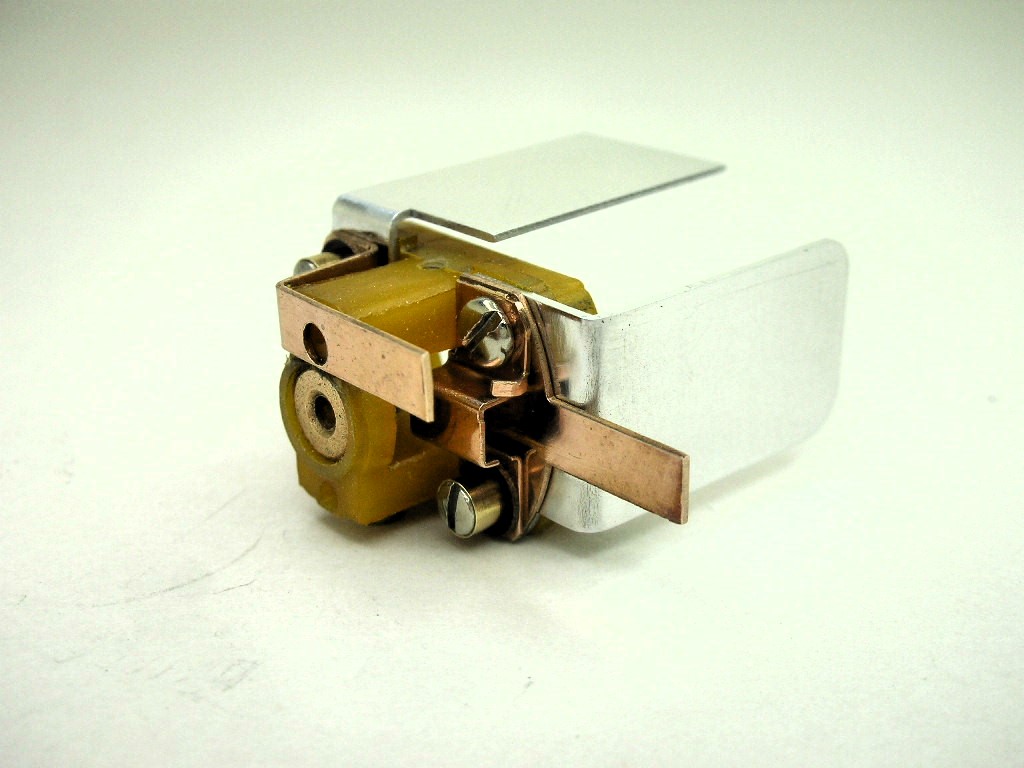
Here are those heat sinks installed on the finished end bell:
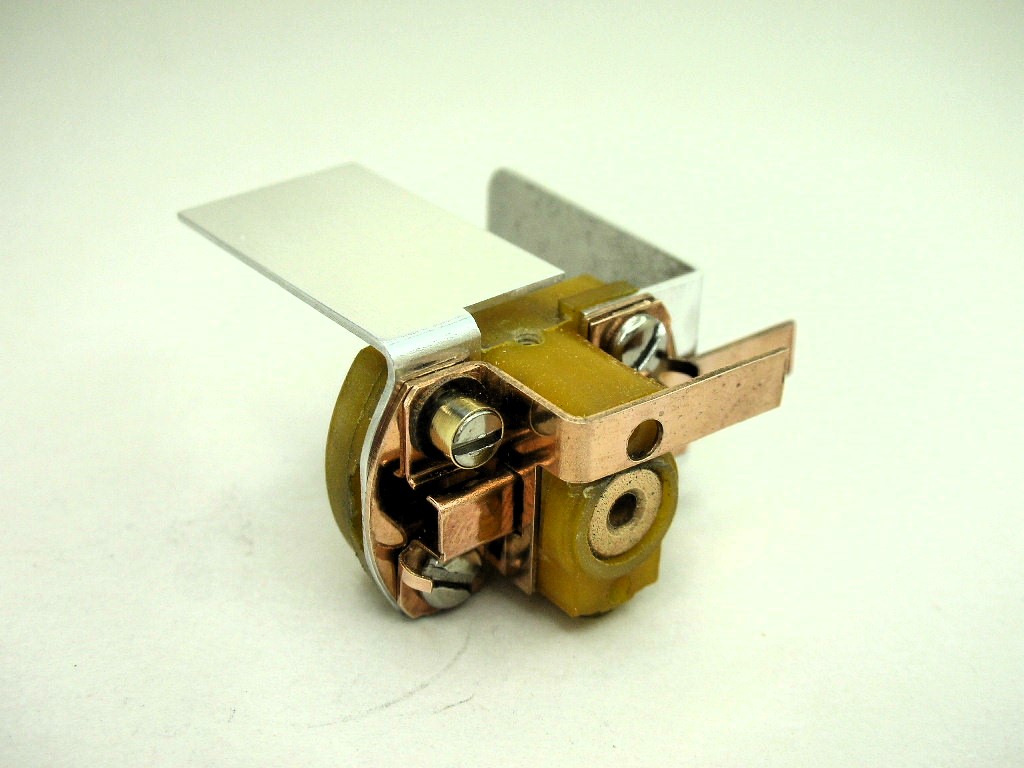
All these parts from different manufacturers took a bit of fiddling to make them all go together:
- Pablo, vfr750, Tex and 1 other like this
Rick Thigpen
Check out Steve Okeefe's great web site at its new home here at Slotblog:
The Independent Scratchbuilder
There's much more to come...
#32
Bill from NH
-
- Full Member
-
- 15,318 posts Joined: 02-August 07
Age scrubs away speed!
- Gender:Male
- Location:New Boston, NH
Posted 07 September 2025 - 03:56 PM
Mura brush hoods?
Bill Fernald
I intend to live forever! So far, so good.
I intend to live forever! So far, so good.
#33
dc-65x
-
- Subscriber
-
- 7,205 posts Joined: 14-February 06
Grand Champion Poster
- Gender:Male
- Location:Captain Rick: The only vintage slot car nut in SW Oregon?
Posted 07 September 2025 - 04:13 PM
Yes, the Mura brush hoods took the most fiddling with to make them work.
Rick Thigpen
Check out Steve Okeefe's great web site at its new home here at Slotblog:
The Independent Scratchbuilder
There's much more to come...
#34
Mark Onofri
-

- Subscriber
-
- 2,981 posts Joined: 18-November 20
Posting Leader
- Gender:Male
- Location:Syracuse, NY
Posted 08 September 2025 - 10:03 PM
Just have a couple of questions.
1) what's the diameter of this arm or, is it the same one you had previously mentioned?
2) I asked Victor this,but he hasn't responded. Are there any rules for MESAC? I'm ask you this because you have referenced some dimensions several times and I'd like to see them. Or if you can direct me to them, it would be great.
#35
Bill from NH
-
- Full Member
-
- 15,318 posts Joined: 02-August 07
Age scrubs away speed!
- Gender:Male
- Location:New Boston, NH
Posted 09 September 2025 - 07:27 AM
Posted 1/19/2007 on the Slot Car Illustrated board.
Anybody looking for info on Mesac will have better luck with period magazines than the books.
Model Car & Track did a profile of the club in the July 65 issue, and another one in July 67: the ultimate club track
Model Car Science has an article on their 1/32 cars in the March 70 issue
And a later magazine, edited by Ray Hoy, International Modeler, had a couple articles on Mesac cars in July and October 74.
Bill Fernald
I intend to live forever! So far, so good.
I intend to live forever! So far, so good.
#36
dc-65x
-
- Subscriber
-
- 7,205 posts Joined: 14-February 06
Grand Champion Poster
- Gender:Male
- Location:Captain Rick: The only vintage slot car nut in SW Oregon?
Posted 13 September 2025 - 10:59 AM
Mark, the armature is the same one I discussed earlier. As far as MESAC, Victor's Facebook page and the magazines Bill suggested are probably your best sources of information. To be clear, my build is not related to any MESAC class of cars but I am very inspired by their beautiful cars.
The motor is finished:
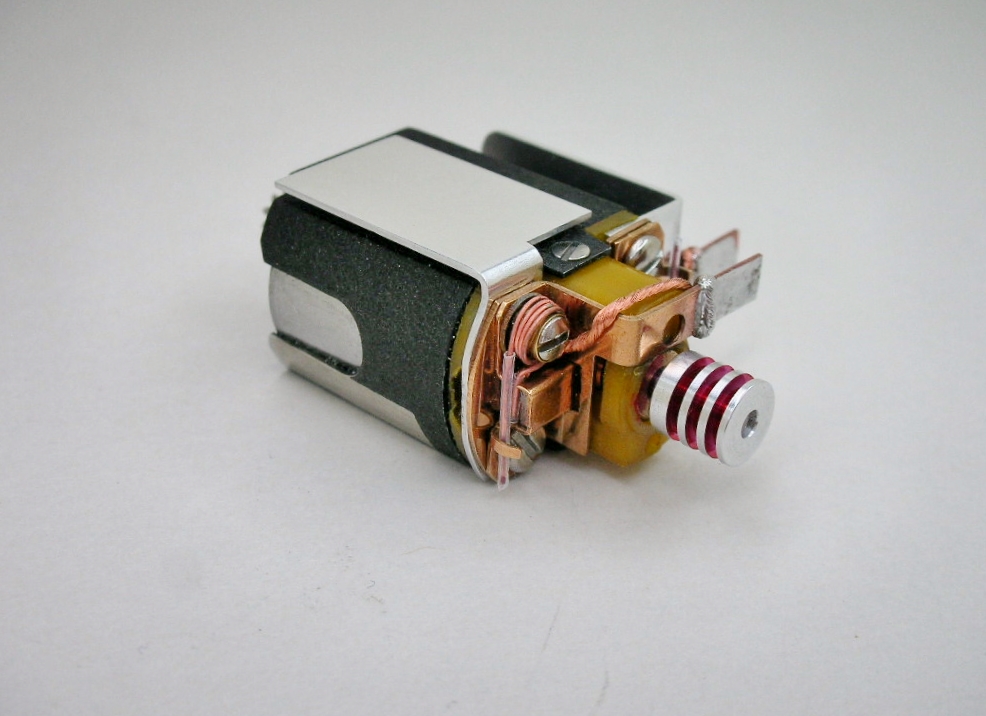
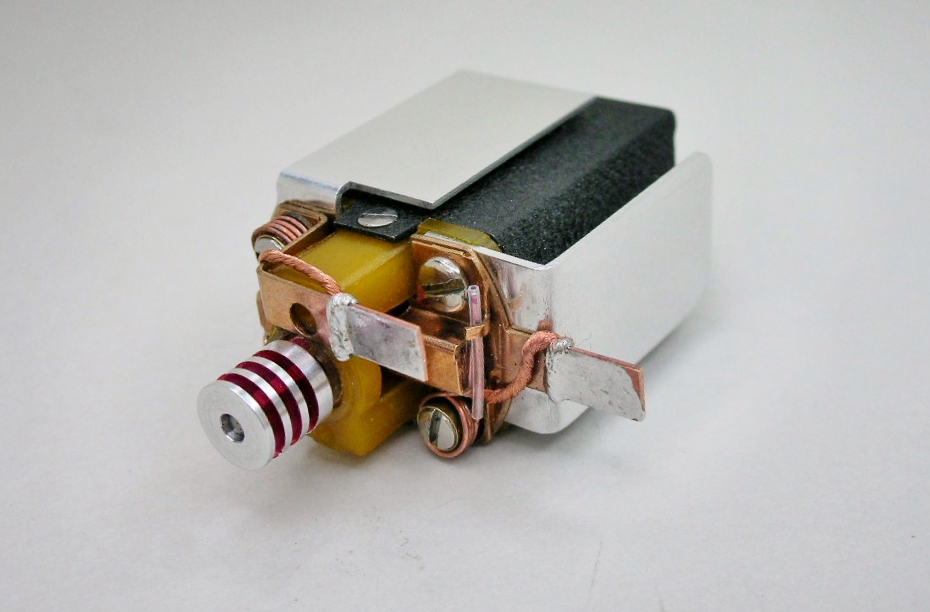
It runs super smooth and draws less than an amp at 4 volts:
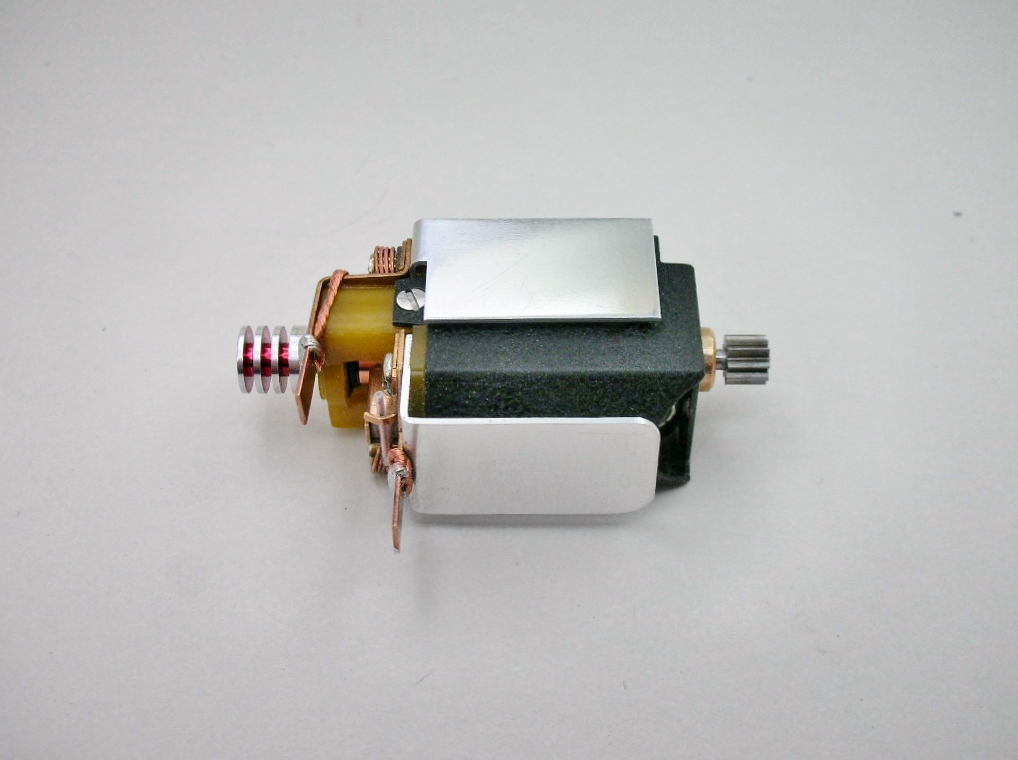
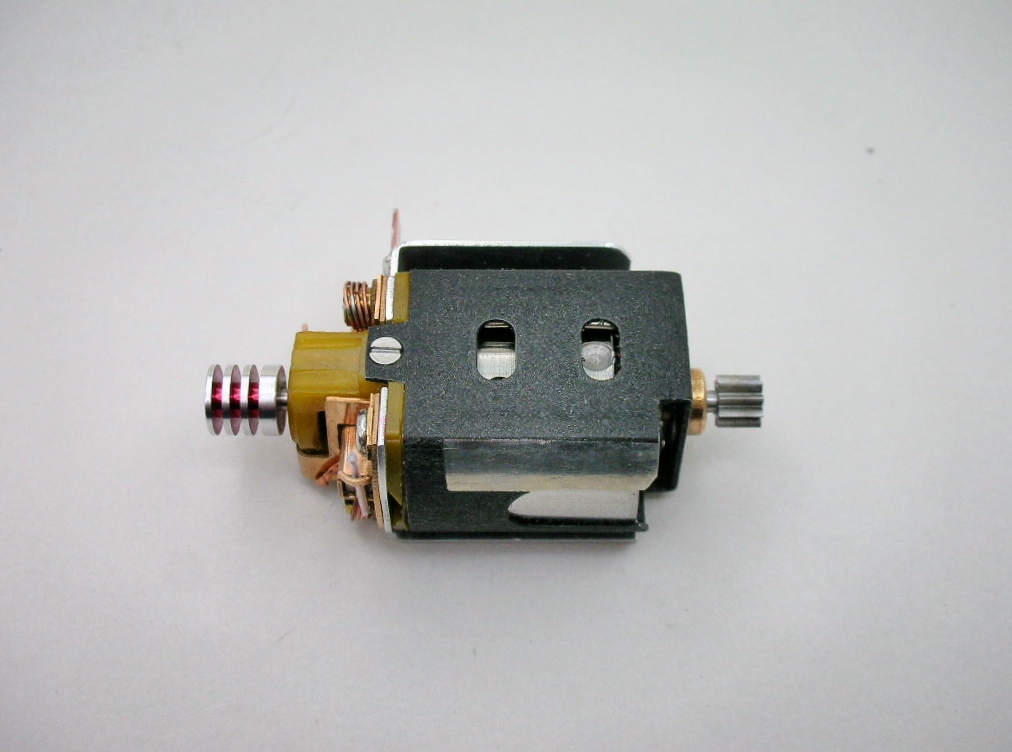
Cool little motor:
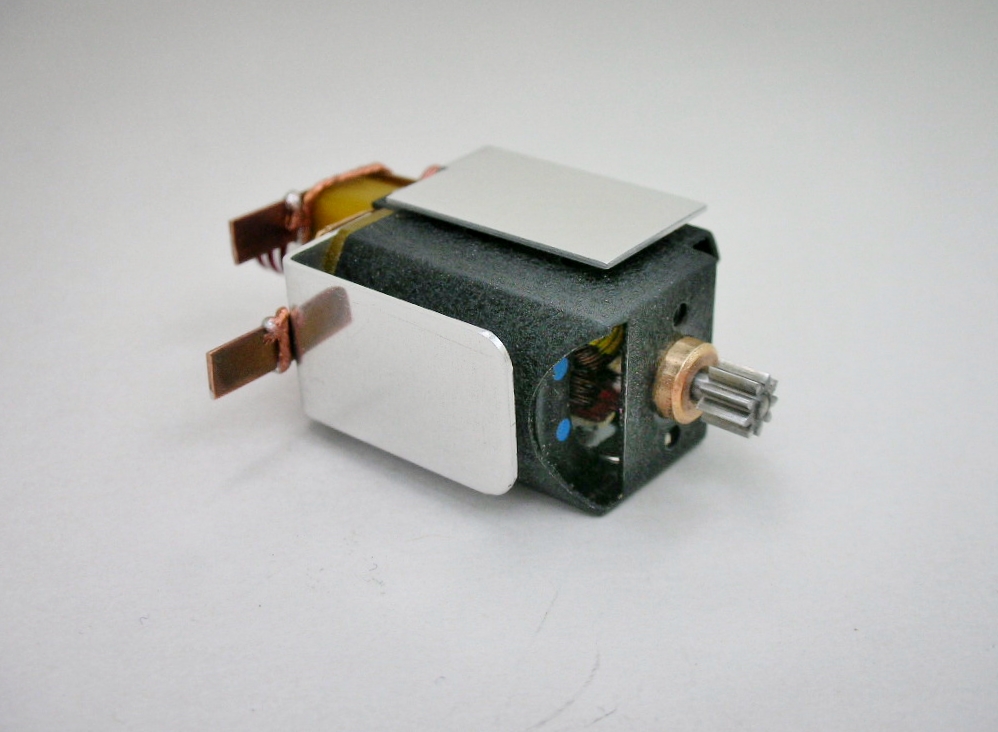
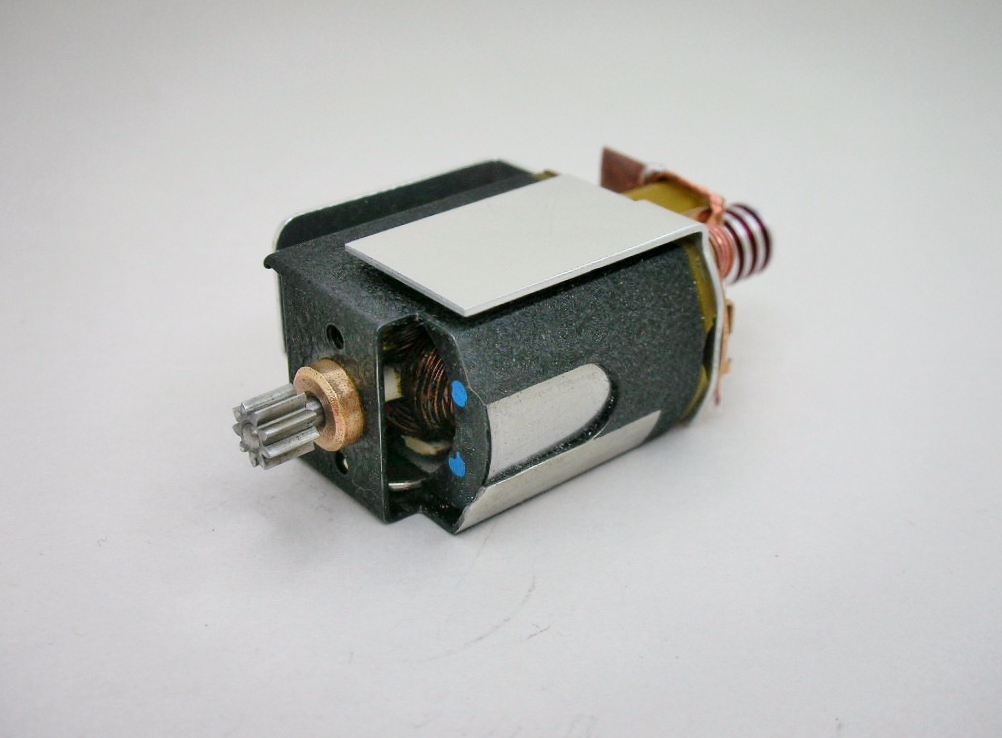
Now I need to finish the chassis to put it in. 
- Pablo, Jencar17, Tex and 3 others like this
Rick Thigpen
Check out Steve Okeefe's great web site at its new home here at Slotblog:
The Independent Scratchbuilder
There's much more to come...
#37
Mark Onofri
-
- Subscriber
-
- 2,981 posts Joined: 18-November 20
Posting Leader
- Gender:Male
- Location:Syracuse, NY
Posted 14 September 2025 - 07:01 PM
Thanks to you for re-ignighting my desire to build one, and, with almost Devine intervention from Victor, tomorrow (14th sept.25) I should have the main element.
Now back to your regularly scheduled post, all ready in progress
Now back to your regularly scheduled post, all ready in progress
#38
dc-65x
-
- Subscriber
-
- 7,205 posts Joined: 14-February 06
Grand Champion Poster
- Gender:Male
- Location:Captain Rick: The only vintage slot car nut in SW Oregon?
Posted 18 September 2025 - 08:16 PM
Making my A-arm front axles for a narrow track front end with tall, super wide front tires was a bit of a challenge. The A-arms need pretty steep bends and my 75 year old hands aren't happy making tight bends with 1/16" piano wire.
After several tires I made these:
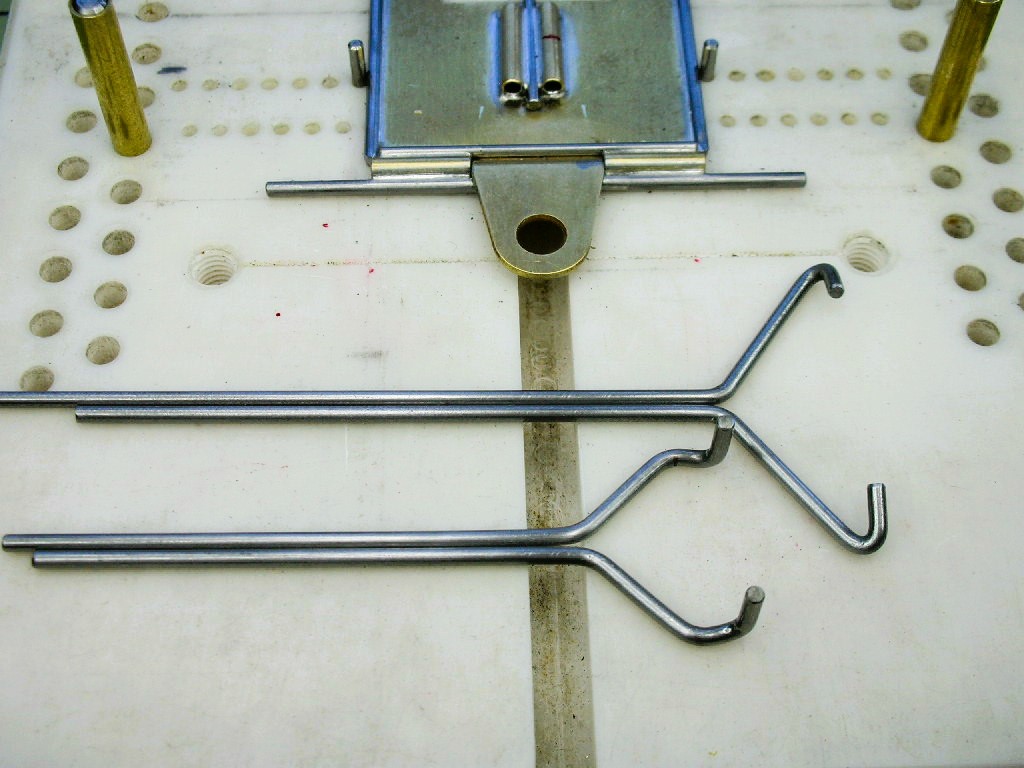
Making pairs as close to the same as I can is even more fun.
I was so focused on just getting the whole mess to work I neglected to take any pictures along the way. So here is the finished front end:
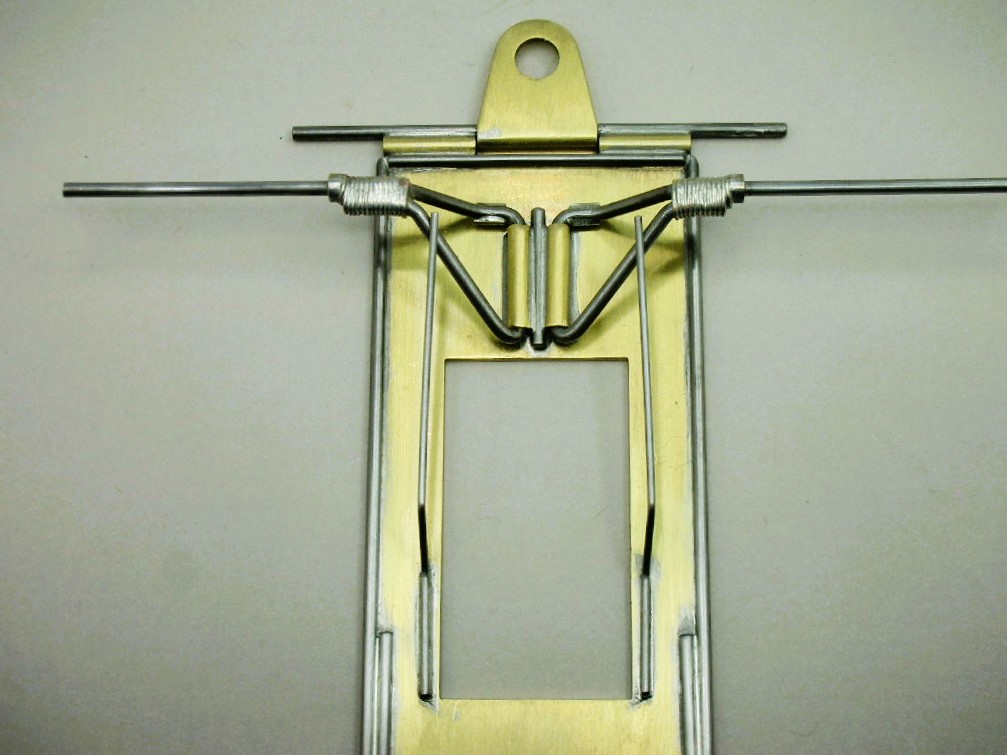
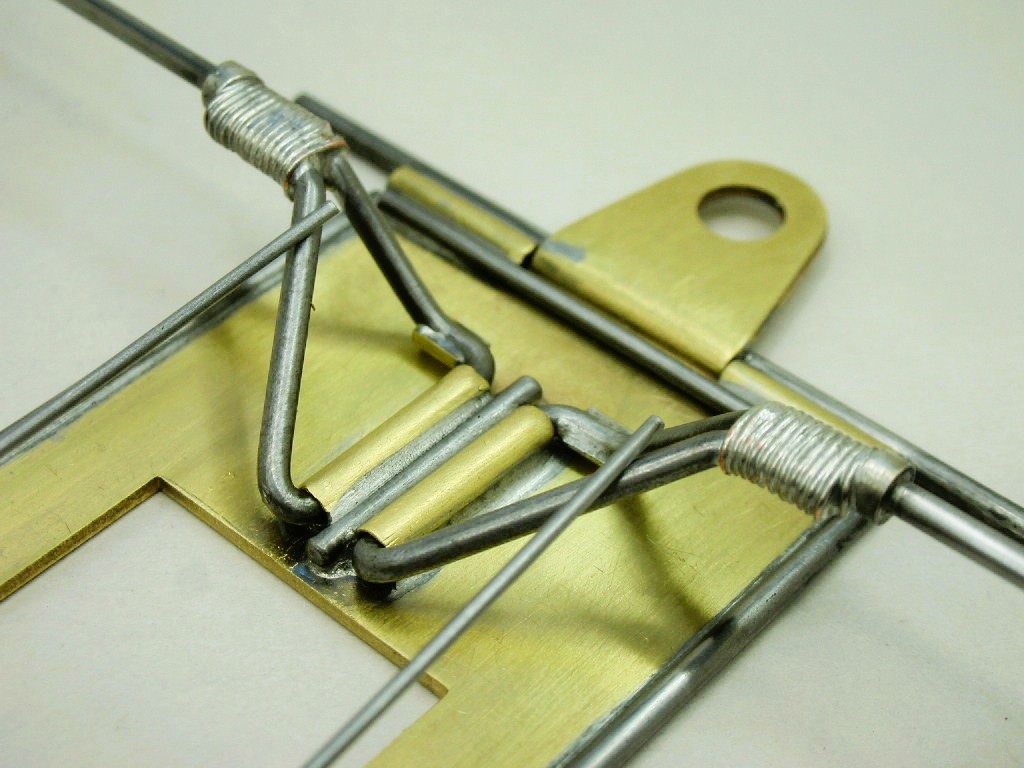
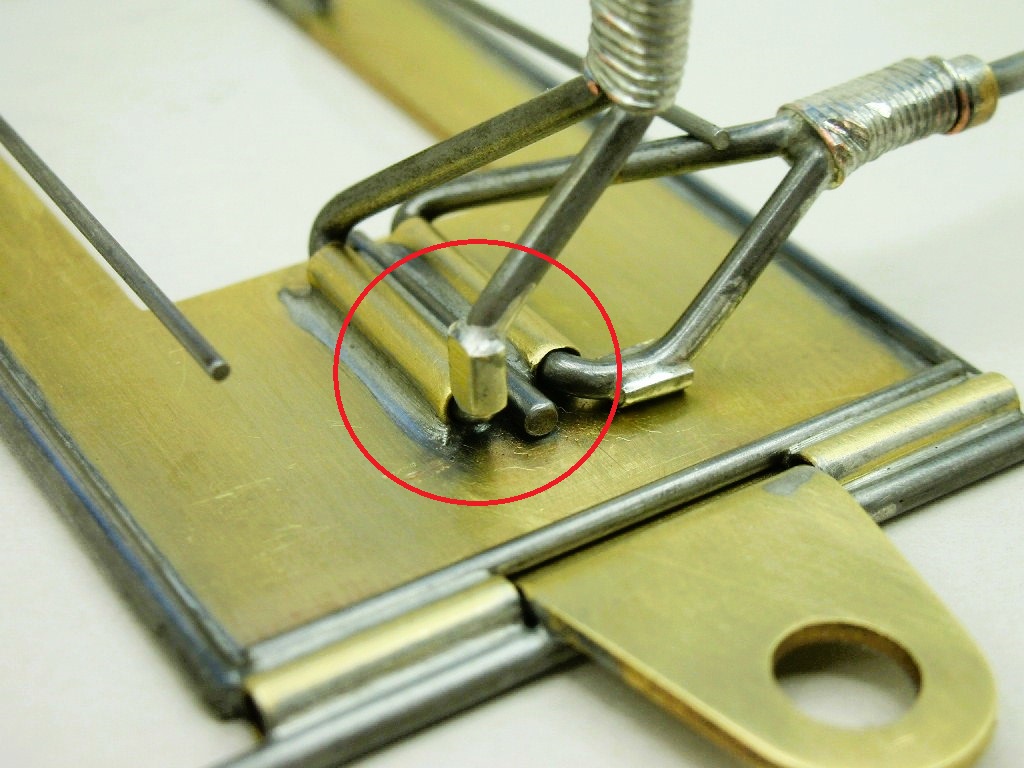
I want the front axles to have a downward stop that locates the chassis at 1/16" track clearance with my 15/16" front tires. I tried to incorporate that stop into the bends of the front axle but it was a bit off.
So I made some gizmos from 3/32" brass tube..........
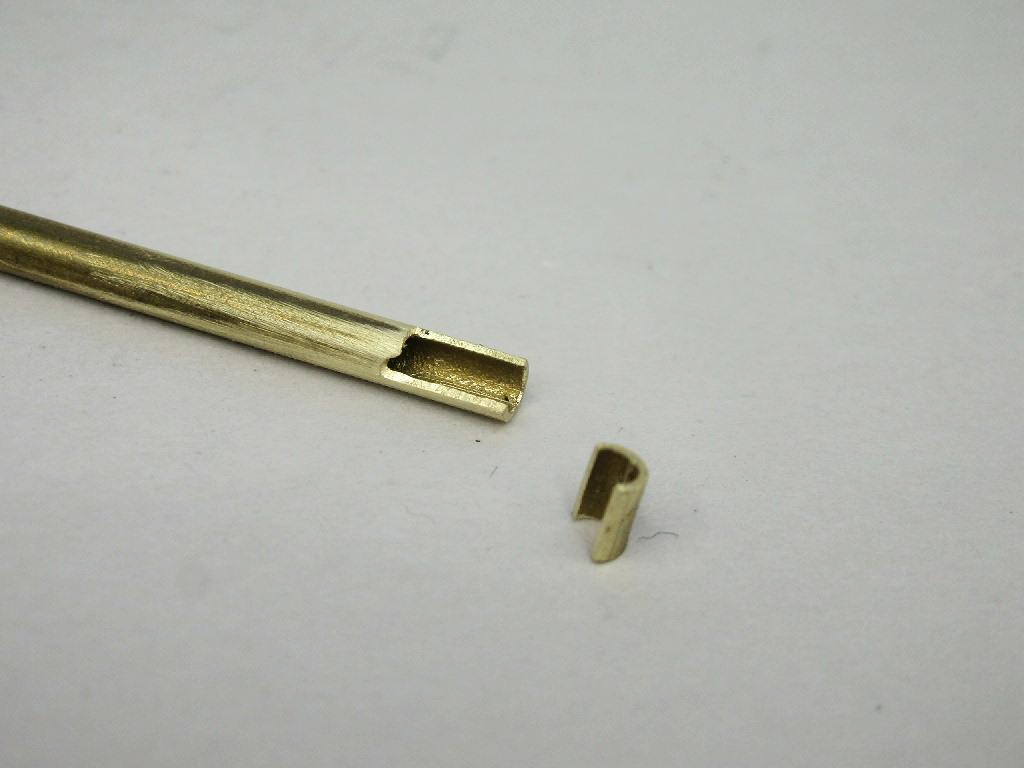
.........with the gizmos soldered on I could file them down a bit at a time until I got to that 1/16" track clearance:
Next up are some removable front wheels for a piano wire axle.
- Pablo, vfr750, stoo23 and 2 others like this
Rick Thigpen
Check out Steve Okeefe's great web site at its new home here at Slotblog:
The Independent Scratchbuilder
There's much more to come...
#39
Bill from NH
-
- Full Member
-
- 15,318 posts Joined: 02-August 07
Age scrubs away speed!
- Gender:Male
- Location:New Boston, NH
Posted 19 September 2025 - 06:13 AM
Rick, do you ever make your complex bends in brass rod first before bending the final product in piano wire? I think it's Pablo who says he sometimes does this.
Bill Fernald
I intend to live forever! So far, so good.
I intend to live forever! So far, so good.
#40
dc-65x
-
- Subscriber
-
- 7,205 posts Joined: 14-February 06
Grand Champion Poster
- Gender:Male
- Location:Captain Rick: The only vintage slot car nut in SW Oregon?
Posted 19 September 2025 - 07:36 PM
No Bill, I usually just go for it........K&S Metals loves me for the mass quantities of wire I buy.
Rick Thigpen
Check out Steve Okeefe's great web site at its new home here at Slotblog:
The Independent Scratchbuilder
There's much more to come...
#41
Dave Crevie
-

- Full Member
-
- 5,098 posts Joined: 16-February 09
Grand Champion Poster
Posted 20 September 2025 - 01:09 AM
You bend enough wire, you can do it in your sleep. I think our boy Rick is at that level.
#42
Bill from NH
-
- Full Member
-
- 15,318 posts Joined: 02-August 07
Age scrubs away speed!
- Gender:Male
- Location:New Boston, NH
Posted 20 September 2025 - 07:34 AM
I think Rick will admit that some of his slot car bends are more complex than a "L" bend.
Bill Fernald
I intend to live forever! So far, so good.
I intend to live forever! So far, so good.
#43
dc-65x
-
- Subscriber
-
- 7,205 posts Joined: 14-February 06
Grand Champion Poster
- Gender:Male
- Location:Captain Rick: The only vintage slot car nut in SW Oregon?
Posted 20 September 2025 - 11:48 AM
I think my wire bending is more persistence than anything else. 
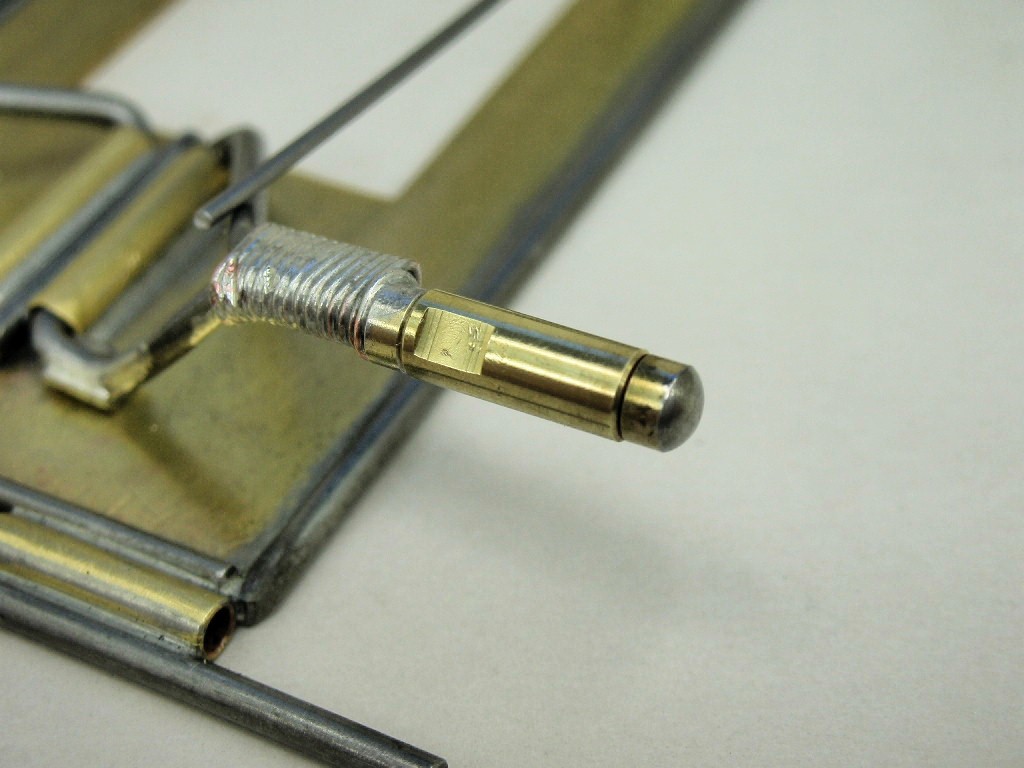
Capping off those axles are these 1/8" brass rod gizmos:
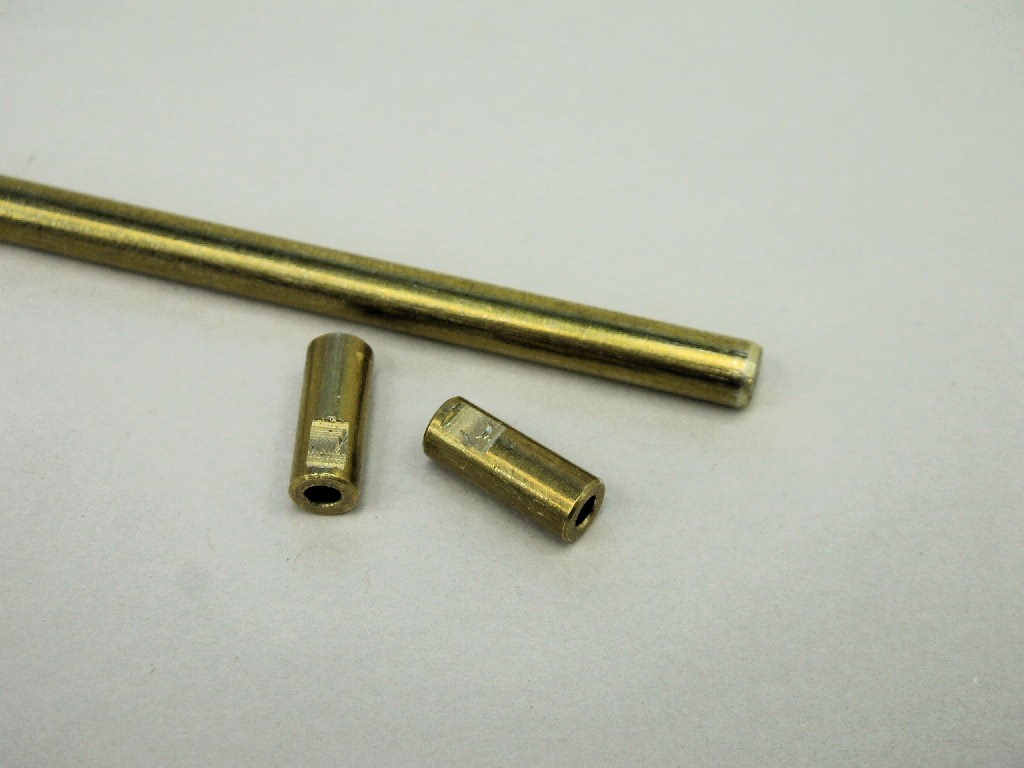
They spin on the axle and a regular set screw wheel clamps on them.
Time for the "plumber".......
- Pablo, Bill from NH, stoo23 and 2 others like this
Rick Thigpen
Check out Steve Okeefe's great web site at its new home here at Slotblog:
The Independent Scratchbuilder
There's much more to come...
#44
Mark Onofri
-
- Subscriber
-
- 2,981 posts Joined: 18-November 20
Posting Leader
- Gender:Male
- Location:Syracuse, NY
Posted 20 September 2025 - 01:36 PM
I'm a master plumber.
#45
dc-65x
-
- Subscriber
-
- 7,205 posts Joined: 14-February 06
Grand Champion Poster
- Gender:Male
- Location:Captain Rick: The only vintage slot car nut in SW Oregon?
Posted 08 October 2025 - 03:00 PM
I've been off line for a few weeks with health issues. I've been able to work on this project a bit.
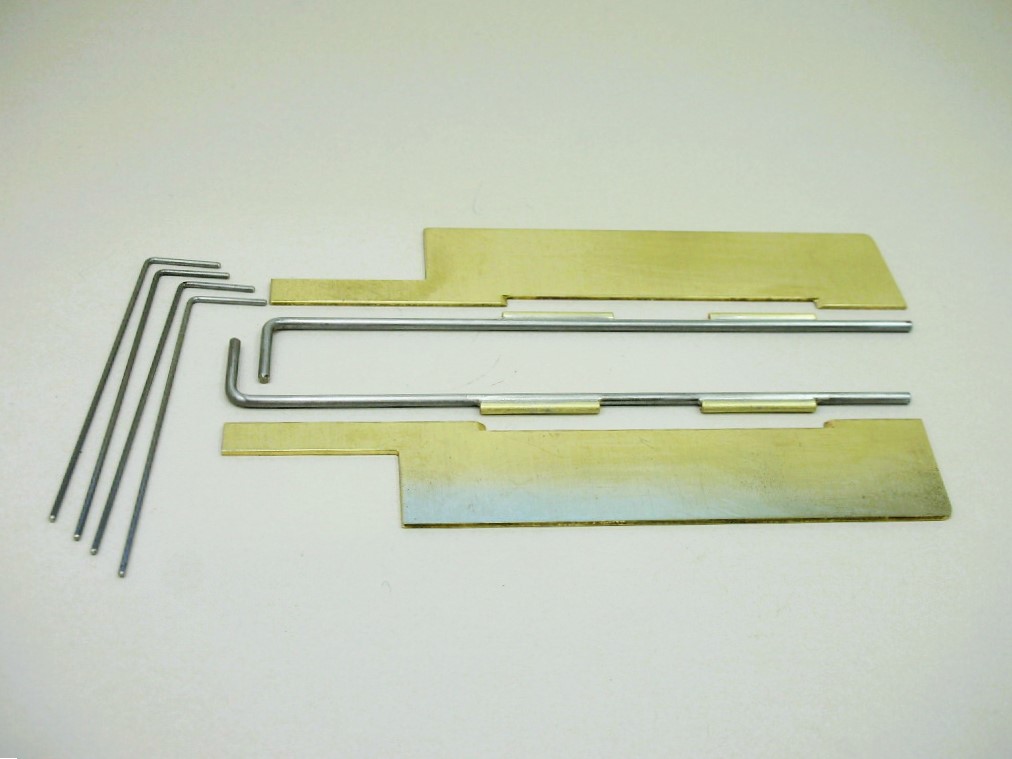
The plumber rails with the pan hinge tubes in place and the pans ready to be attached:
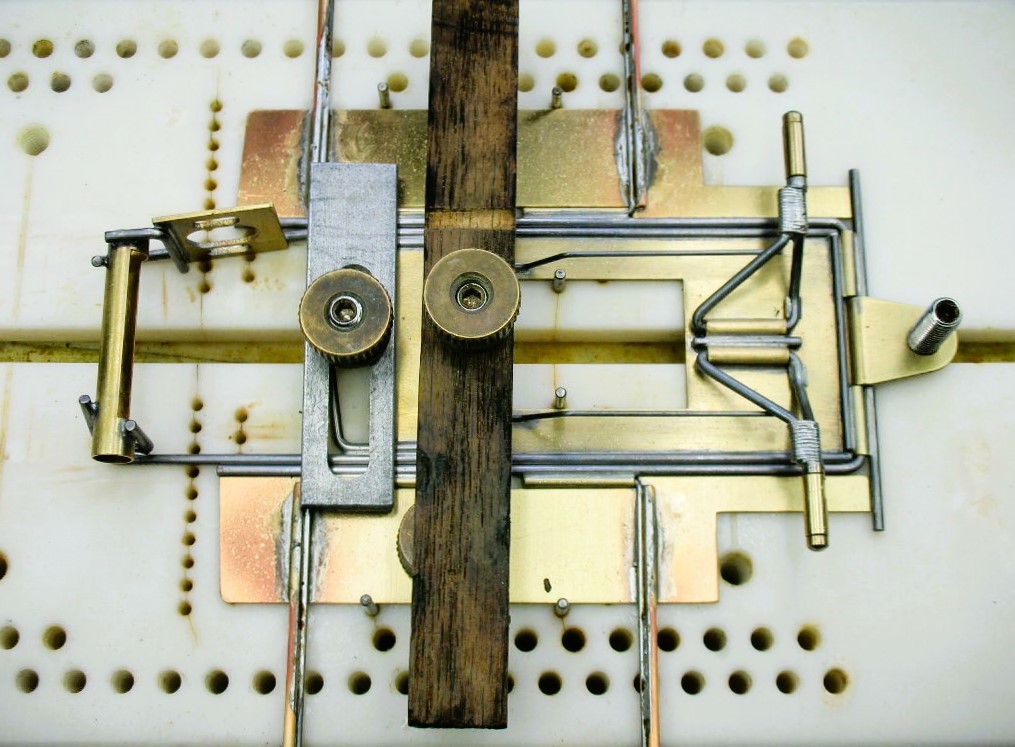
In the jig:
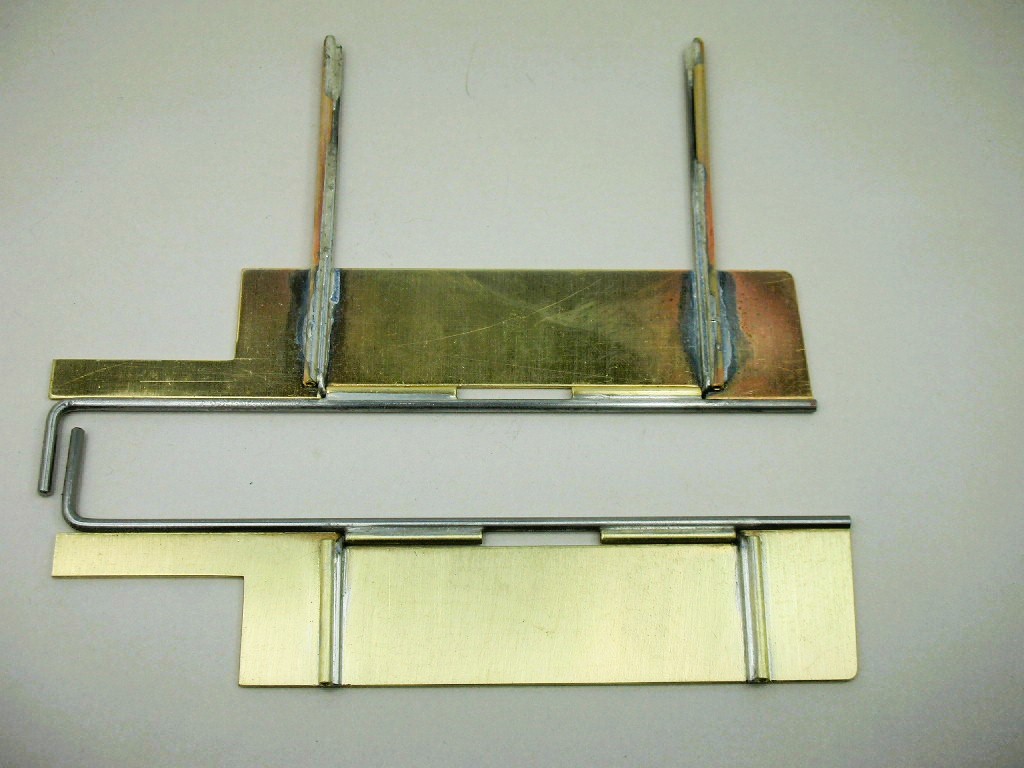
On top the hinges and pin tube soldered up and all trimmed and cleaned up on the bottom:
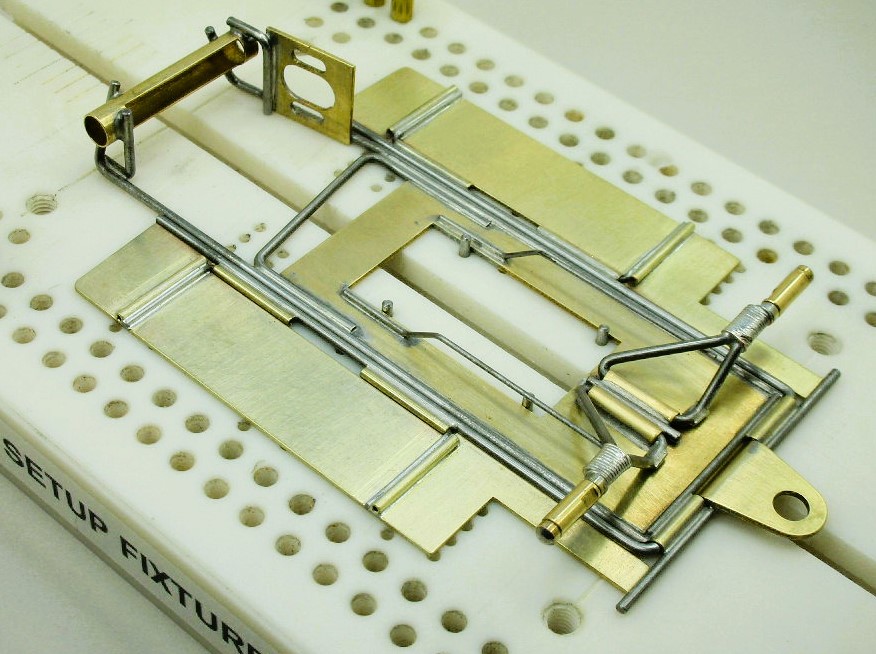
The chassis is starting to take shape :
- Pablo, vfr750, Tex and 3 others like this
Rick Thigpen
Check out Steve Okeefe's great web site at its new home here at Slotblog:
The Independent Scratchbuilder
There's much more to come...
#46
Larry Horner
-

- Full Member
-
- 550 posts Joined: 18-March 17
Race Leader
- Gender:Male
- Location:San Francisco
Posted 08 October 2025 - 05:48 PM
Funny but I'm also soldering on pans for one of my projects. Someday I hope to be able to do it this cleanly! 
#47
Bill from NH
-
- Full Member
-
- 15,318 posts Joined: 02-August 07
Age scrubs away speed!
- Gender:Male
- Location:New Boston, NH
Posted 08 October 2025 - 06:45 PM
Larry, a piece of .063 piano wire cut at 45 degrees on one end & pointed on the other makes a good scraper/chisel for cleaning up soldered joints before you sand/steel wool them. Square & triangular micro files work well too.
Bill Fernald
I intend to live forever! So far, so good.
I intend to live forever! So far, so good.
#48
dc-65x
-
- Subscriber
-
- 7,205 posts Joined: 14-February 06
Grand Champion Poster
- Gender:Male
- Location:Captain Rick: The only vintage slot car nut in SW Oregon?
Posted 08 October 2025 - 07:33 PM
Hi Larry,
I'm running the soldering iron tip on top of the piano wire hinge, not on the pan surface. I "drag" the extra solder off onto the extra long hinge wire and body mount tubes. The solder you see on the pans is a super thin solder flashing from the bubbling acid flux. It is easily removed from the pans with some 600 grit sandpaper.
Rick Thigpen
Check out Steve Okeefe's great web site at its new home here at Slotblog:
The Independent Scratchbuilder
There's much more to come...
#49
Larry Horner
-
- Full Member
-
- 550 posts Joined: 18-March 17
Race Leader
- Gender:Male
- Location:San Francisco
Posted 08 October 2025 - 08:30 PM
Thanks Rick,
And this gives me an idea try. One of the problems I'm facing is that the (huge) pans are .040" which is the thinest I can get from SendCutSend these days. And the thicker material is just sucking out all the heat my Hako 601 can generate. But if I tin the crap out of the hinge wires first and then lay them in a liberal bed of acid flux on the pans, I know my butane torch can bring the heat. What could possibly go wrong... 
Ok, enough about my problems ... carry on! Oh, and thanks for the idea too.
#50
dc-65x
-
- Subscriber
-
- 7,205 posts Joined: 14-February 06
Grand Champion Poster
- Gender:Male
- Location:Captain Rick: The only vintage slot car nut in SW Oregon?
Posted 09 October 2025 - 07:15 PM
Sorry to hear about you soldering iron problems Larry. I've been able to solder 1/16" thick drop arms. My iron is small and light but packs 50 watts and 1100 degrees of heat. One less thing to hold me back.
Rick Thigpen
Check out Steve Okeefe's great web site at its new home here at Slotblog:
The Independent Scratchbuilder
There's much more to come...




