


Rick, are you using the Weller version of the Ungar? Those put out a good amount of heat & recover quickly. I have 4 or 5 Ungars from the 70s. I don't own one of the Hakko 601s but thought they were a good chassis building iron. Larry didn't say what type of material he works on when soldering.

Lancer scale Matich Can-Am build
Started by
dc-65x
, Aug 23 2025 03:14 PM
93 replies to this topic
#51

Bill from NH
-

- Full Member
-

- 15,317 posts Joined: 02-August 07
Age scrubs away speed!
- Gender:Male
- Location:New Boston, NH
Posted 09 October 2025 - 08:39 PM
Bill Fernald
I intend to live forever! So far, so good.
I intend to live forever! So far, so good.
#52
Larry Horner
-

- Full Member
-
- 550 posts Joined: 18-March 17
Race Leader
- Gender:Male
- Location:San Francisco
Posted 10 October 2025 - 01:20 AM
Actually before I resorted to my Creme Brûlée torch, I tried Rick's method only using way more acid flux and being more patient for everything to come up to a temp. It worked like a champ so thank you again for teaching an old dog new tricks!
- NSwanberg likes this
#53
MSwiss
-

- Subscriber
-
- 26,207 posts Joined: 16-April 06
Grand Champion Poster
- Gender:Male
Posted 10 October 2025 - 10:36 AM
Larry,
What I've noticed about the Hakko, it will go from a fire breather to a dud as soon as the tip of the tip splits.
I just went through that issue.
What's aggravating is while the components are cheap enough to replace, heat and oxidation, frequently lock them into each other.
Hi temp Ungar's with the replacable tip suffer from the same malady.
If you haven't heard this tip before, if you are doing a project and you want max heat quickly without having to turn the iron, up and down, run a small fan on it while in the holder. The air flow will keep the tip from "torching" itself to death, as idling at full heat is the tips worst enemy.
- NSwanberg likes this
Mike Swiss
Inventor of the Low CG guide flag 4/20/18
Former IRRA® Components Committee Chairman
Five-time USRA National Champion (two G7, one G27, two G7 Senior)
Two-time G7 World Champion (1988, 1990), eight G7 main appearances
Eight-time G7 King track single lap world record holder
17B West Ogden Ave., Westmont, IL 60559, (708) 203-8003, mikeswiss86@hotmail.com (also my PayPal address)
Note: Send all USPS packages and mail to: 692 Citadel Drive, Westmont, Illinois 60559
#54
dc-65x
-
- Subscriber
-
- 7,204 posts Joined: 14-February 06
Grand Champion Poster
- Gender:Male
- Location:Captain Rick: The only vintage slot car nut in SW Oregon?
Posted 10 October 2025 - 12:52 PM
Yes Bill, I've been using the Weller rebranded Ungar style iron with the one piece 50 watt heater and tip for the last 25 years.  I use it for building and not for idling in the pits during a race. The heaters are expensive at $60 or more. I leave it turned off when not actually soldering. It come up to temp quickly and I usually plan multiple soldering operations at the same time.
I'm glad it worked for you Larry. Lots of heat and acid flux can really help.
Thanks for all the great advice on the Hako iron Mike. 
- MSwiss likes this
Rick Thigpen
Check out Steve Okeefe's great web site at its new home here at Slotblog:
The Independent Scratchbuilder
There's much more to come...
#55
MSwiss
-
- Subscriber
-
- 26,207 posts Joined: 16-April 06
Grand Champion Poster
- Gender:Male
Posted 10 October 2025 - 01:11 PM
Yep, that's the secret sauce.
Don't let it idle.
The tip needs both solder and the act of soldering to draw heat out of it, to preserve tip life.
Mike Swiss
Inventor of the Low CG guide flag 4/20/18
Former IRRA® Components Committee Chairman
Five-time USRA National Champion (two G7, one G27, two G7 Senior)
Two-time G7 World Champion (1988, 1990), eight G7 main appearances
Eight-time G7 King track single lap world record holder
17B West Ogden Ave., Westmont, IL 60559, (708) 203-8003, mikeswiss86@hotmail.com (also my PayPal address)
Note: Send all USPS packages and mail to: 692 Citadel Drive, Westmont, Illinois 60559
#56
Mark Onofri
-

- Subscriber
-
- 2,981 posts Joined: 18-November 20
Posting Leader
- Gender:Male
- Location:Syracuse, NY
Posted 10 October 2025 - 04:28 PM
Found out the hard way that the $25-$30 tempature control is worth every penny. Sal-ammoniac is also a must have. I've been using a 100wat iron that I got from a stained glass studio for about 6 mabe 7 years. It's like putting a trim nail in with a 32 Oz Estwing framing hammer. So, I sprung the $20 for a pencil sized digital 90wat pos. About to try it tonight. I just hope it doesn't wind up stuck in the wall or breaking a window.
#57
Bill from NH
-
- Full Member
-
- 15,317 posts Joined: 02-August 07
Age scrubs away speed!
- Gender:Male
- Location:New Boston, NH
Posted 10 October 2025 - 07:12 PM
90W pencil, you might want to put on a pair of gloves. I bought a cheap 80W Weller at HD, but I don't know why. I also have a friend's 100W Inland from when he quit slots. I've never needed to plug either one in. I won't mention the 3 or 4 micro torches I have. I used one once to burn bug cocoons out of a floral bush. If you ever need torch tips for chassis building, talk to Pablo, although now he uses a Hakko 601.
Bill Fernald
I intend to live forever! So far, so good.
I intend to live forever! So far, so good.
#58
dc-65x
-
- Subscriber
-
- 7,204 posts Joined: 14-February 06
Grand Champion Poster
- Gender:Male
- Location:Captain Rick: The only vintage slot car nut in SW Oregon?
Posted 10 October 2025 - 08:32 PM
OK, now it's time for some more soldering. 
I made up .032" piano wire front and rear U-shaped plumber rail connectors, a bite bar and while I was at it, the pan down stops.
Also shown below is the application of that brown high temperature Kapton tape to prevent any boo boos soldering things together by mistake:
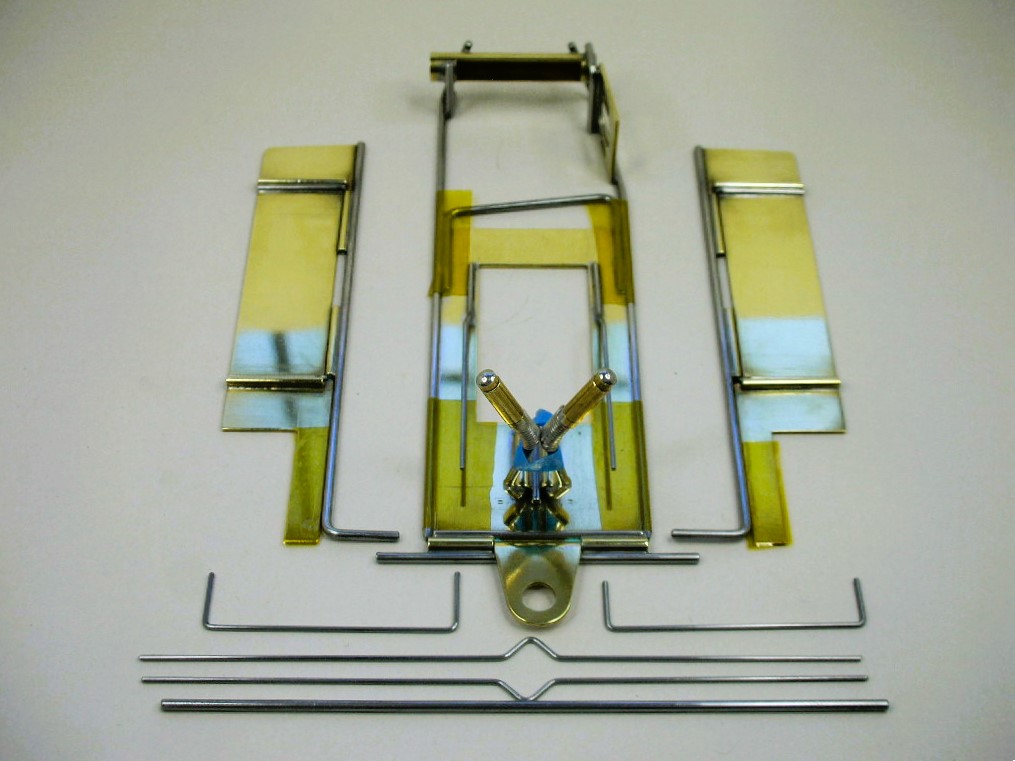
In the jig and ready to go:
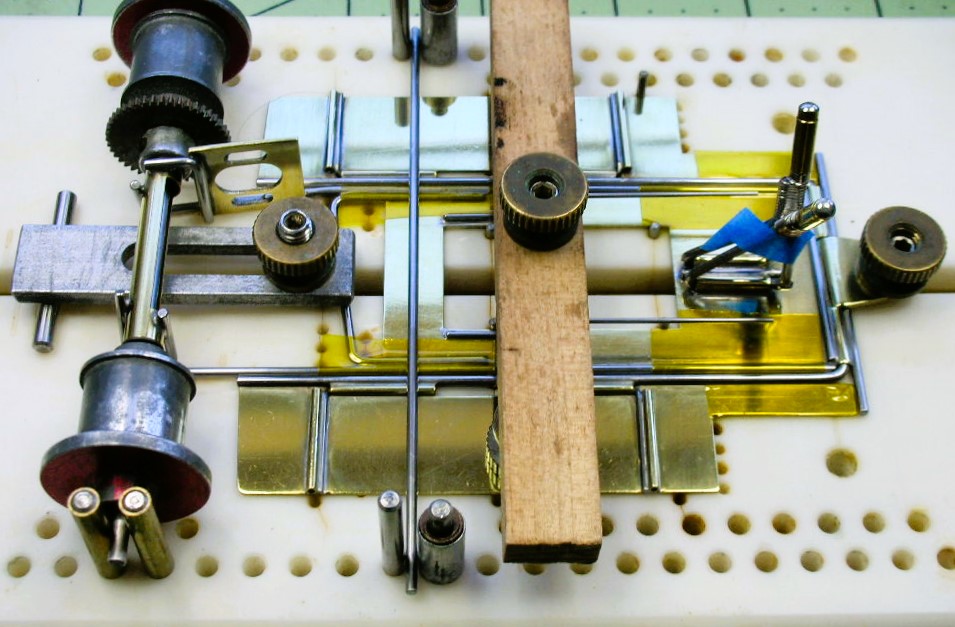
The front U-shaped plumber rail connector in place:
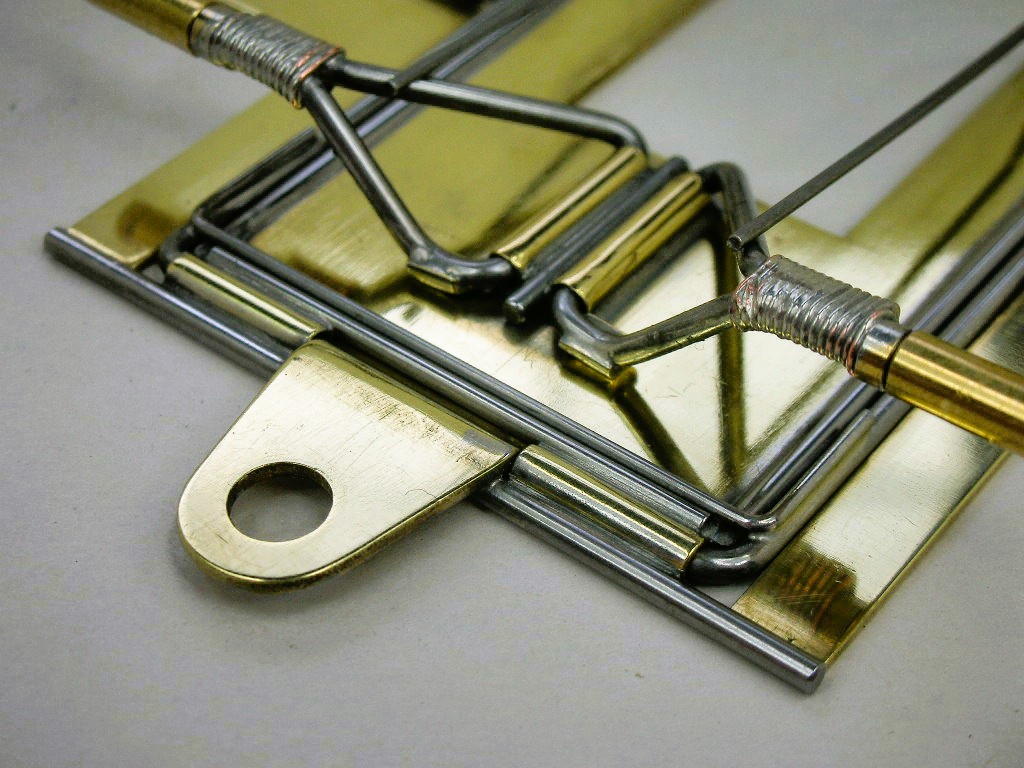
The rear U-shaped plumber rail connector and bite bar in place: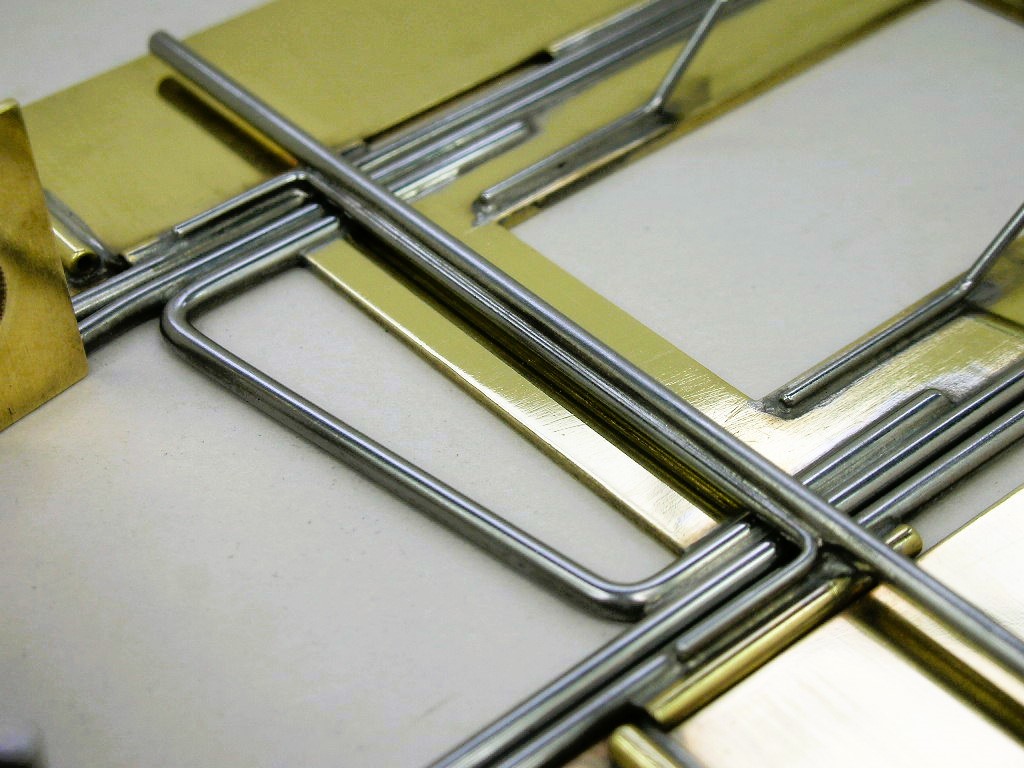
Into the WD40 soak until the final goodies go on........
- vfr750, Tex, Fergy and 3 others like this
Rick Thigpen
Check out Steve Okeefe's great web site at its new home here at Slotblog:
The Independent Scratchbuilder
There's much more to come...
#59
Mark Onofri
-
- Subscriber
-
- 2,981 posts Joined: 18-November 20
Posting Leader
- Gender:Male
- Location:Syracuse, NY
Posted 11 October 2025 - 05:23 PM
I backtracked to see if you had mentioned the main rail size. I'm going to guess.0.063"?
#60
dc-65x
-
- Subscriber
-
- 7,204 posts Joined: 14-February 06
Grand Champion Poster
- Gender:Male
- Location:Captain Rick: The only vintage slot car nut in SW Oregon?
Posted 14 October 2025 - 07:28 PM
Main rails are 1/16" Mark.
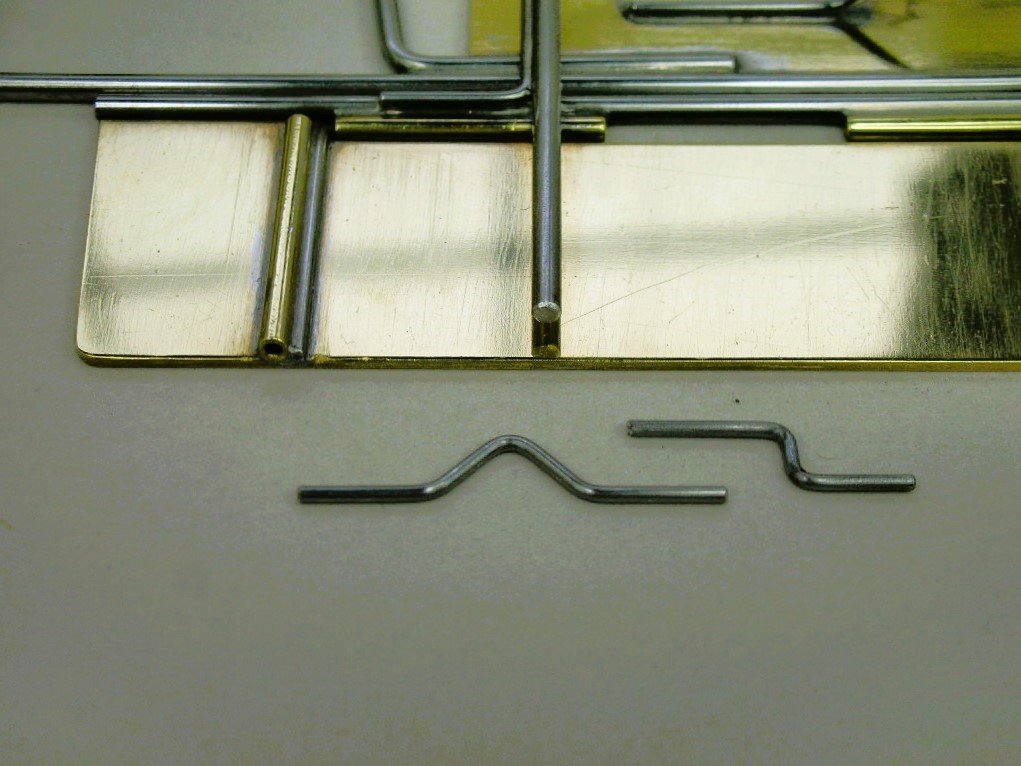
Here are the .032 piano wire pan down stops and plumber rail up stops:
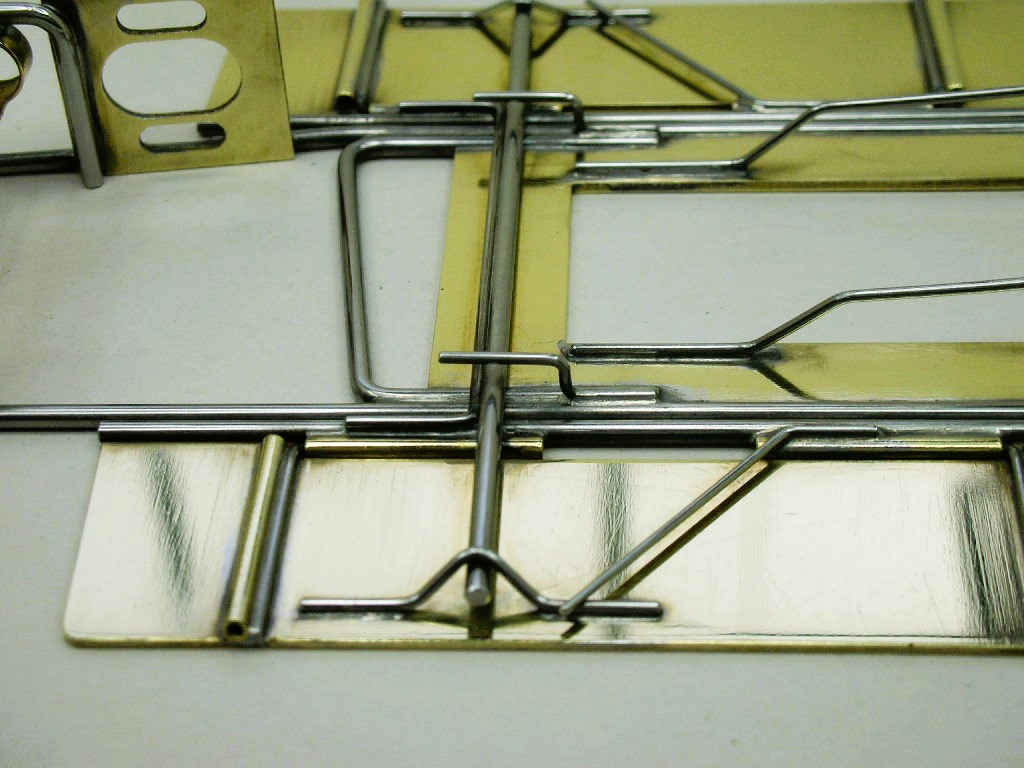
And in place along with pan preload springs:
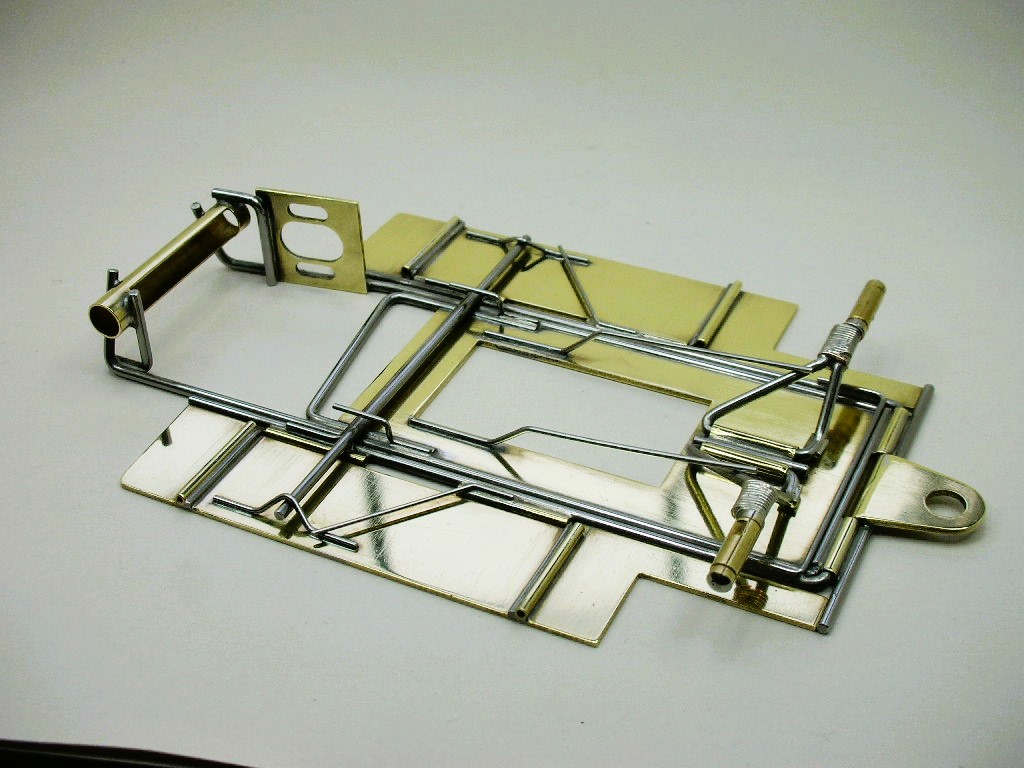
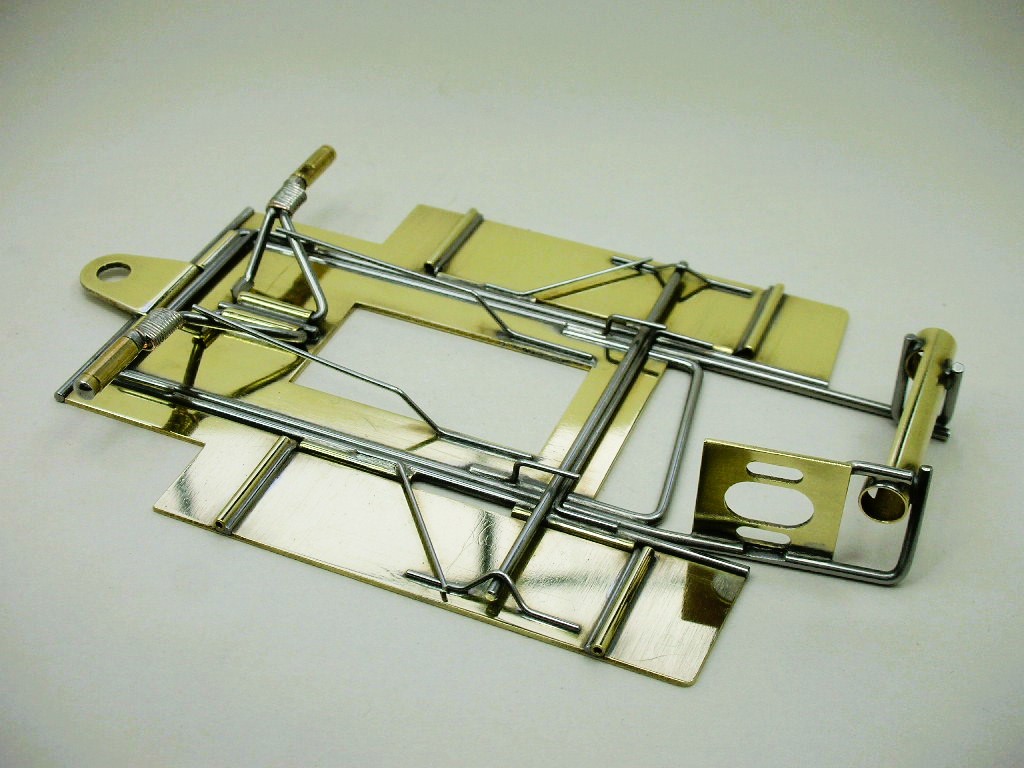
The finished chassis:
- slotbaker, Jencar17, vfr750 and 6 others like this
Rick Thigpen
Check out Steve Okeefe's great web site at its new home here at Slotblog:
The Independent Scratchbuilder
There's much more to come...
#61
Pablo
-

- Administrator
-
- 18,579 posts Joined: 20-February 06
Builder
- Gender:Male
- Location:Cleveland, Tennessee
Posted 15 October 2025 - 05:39 AM
One heck of a beautiful race machine 
- ajd350 likes this
Paul Wolcott
#62
dc-65x
-
- Subscriber
-
- 7,204 posts Joined: 14-February 06
Grand Champion Poster
- Gender:Male
- Location:Captain Rick: The only vintage slot car nut in SW Oregon?
Posted 25 October 2025 - 08:20 PM
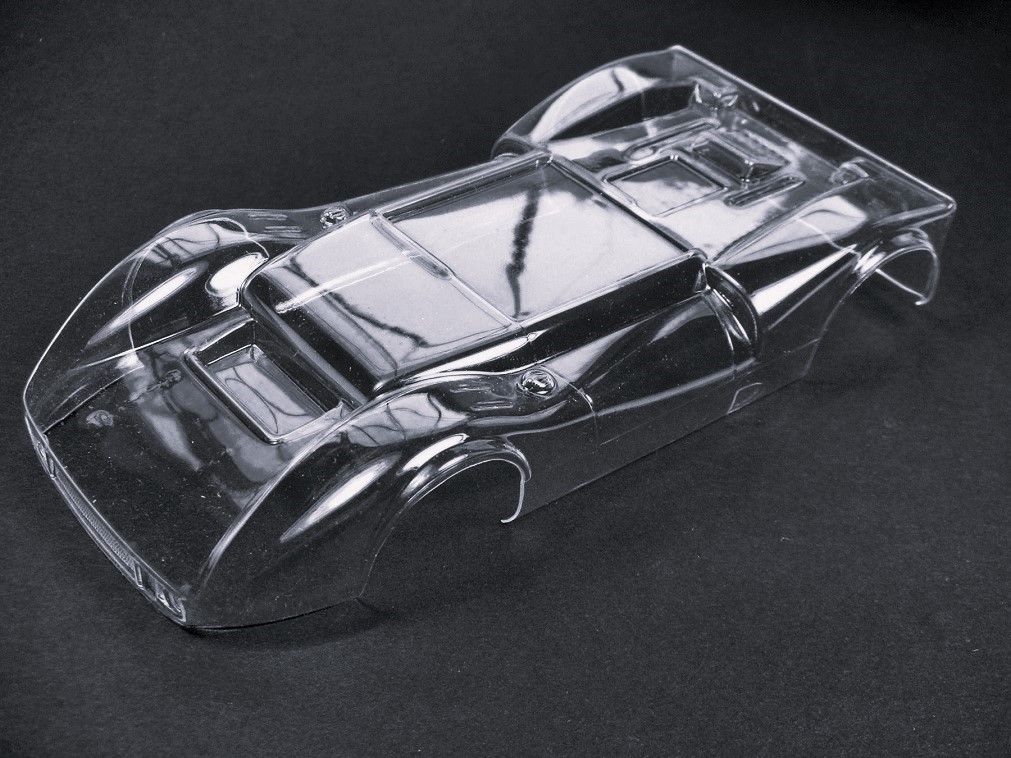
Thanks Pablo, now it's time to start working on the scale Lancer Light Weight Matich body I got from my good buddy Rodney:
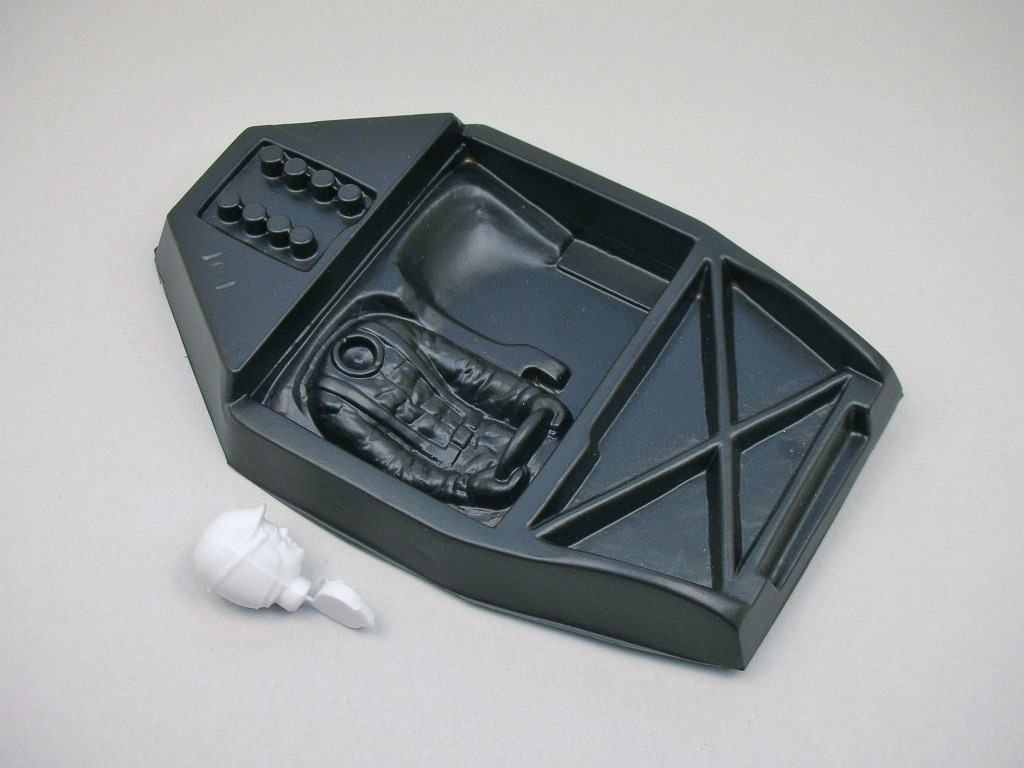
The stock Lancer interior and drivers head:
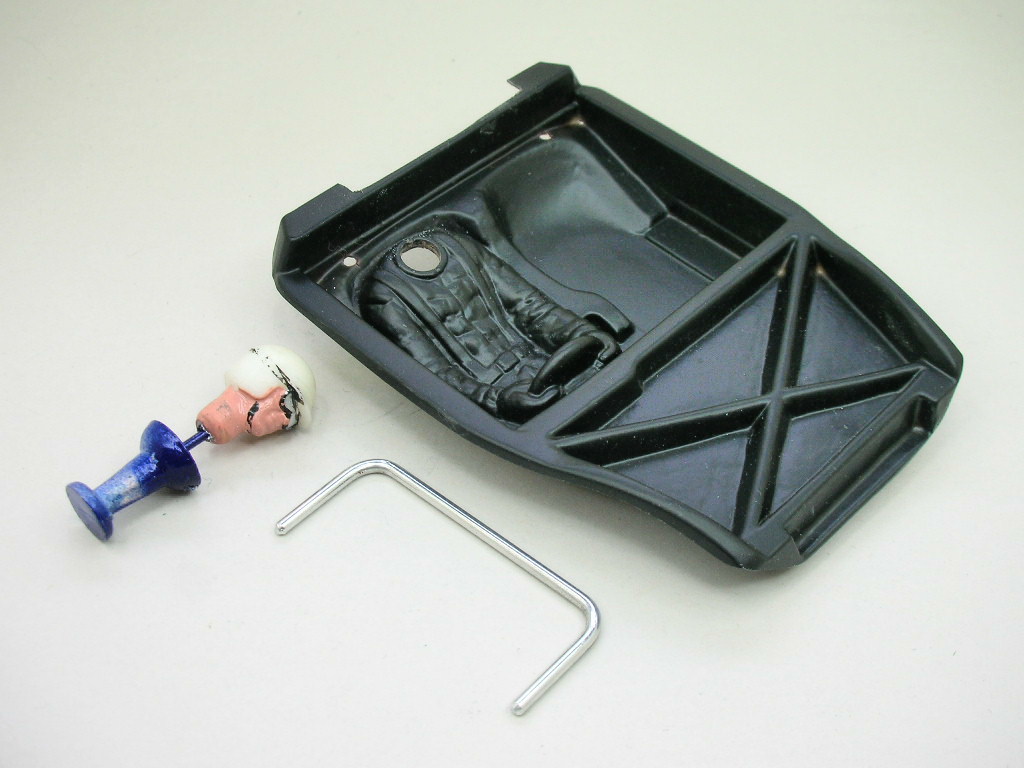
The interior trimmed to fit, a Russkit driver's head and an aluminum rod roll bar:
The car needs some transaxle detail:
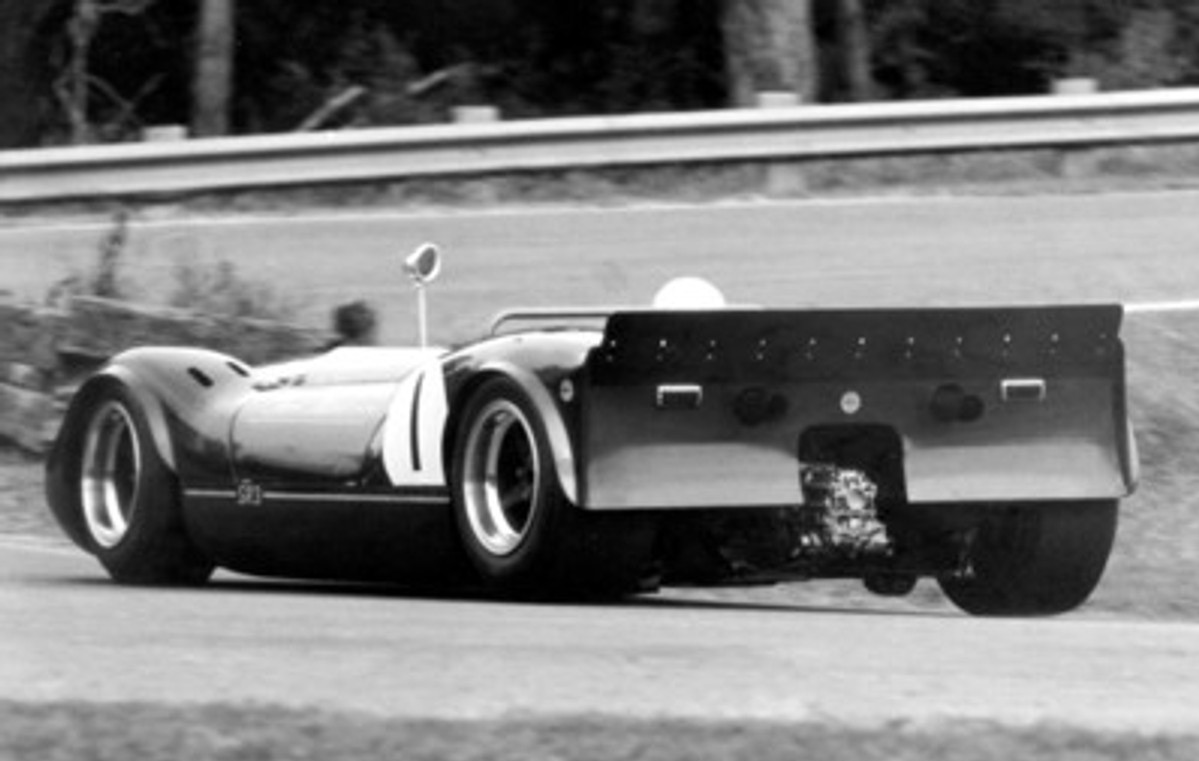
Here's what I'm going with:
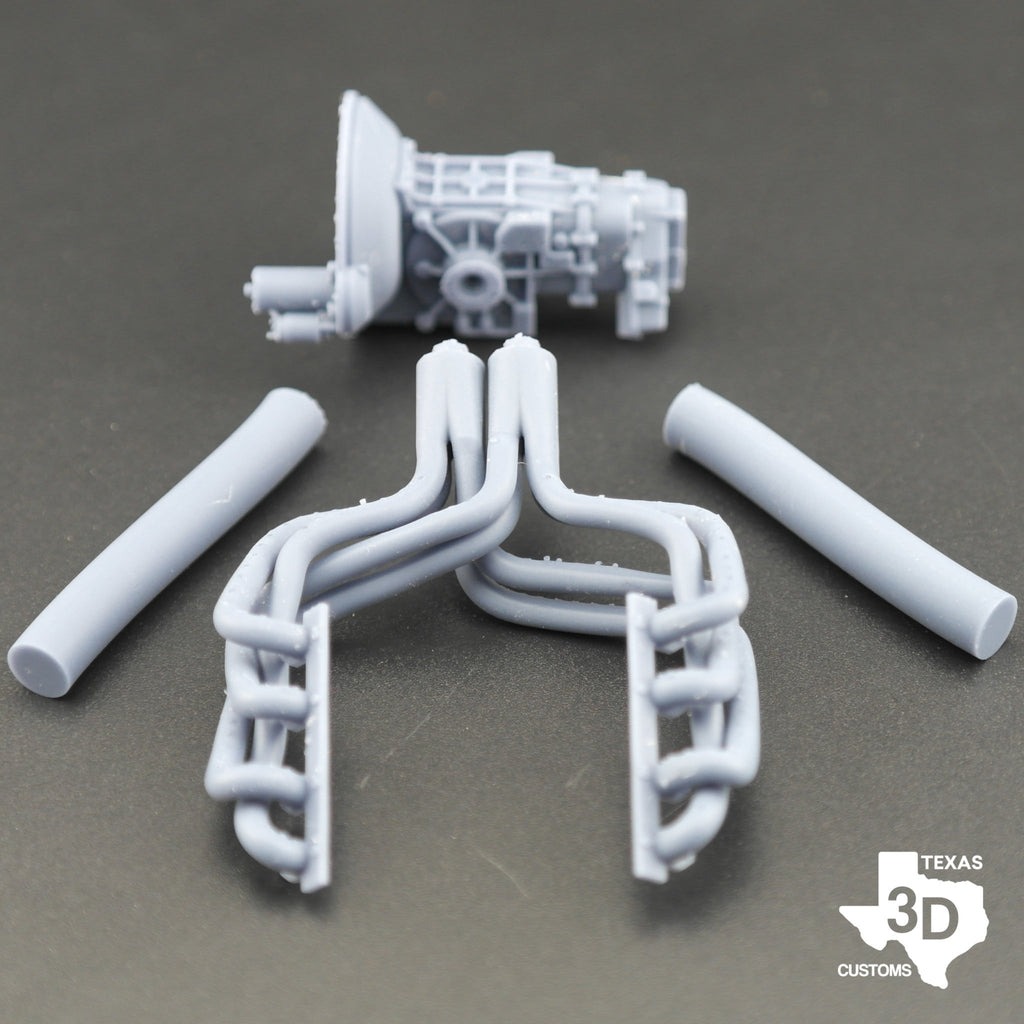
I cut the back end off and made a cradle to mount it to the body out of Evergreen styrene:
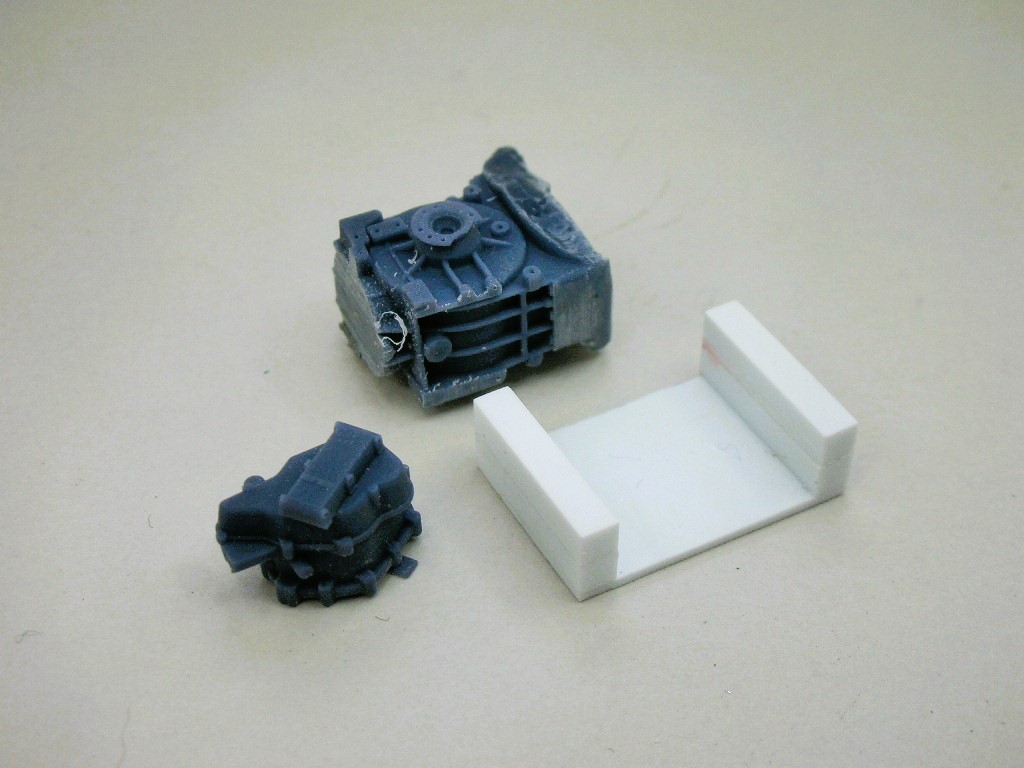
For an intake detail I'm using the same one I used on my scale King Cobra:
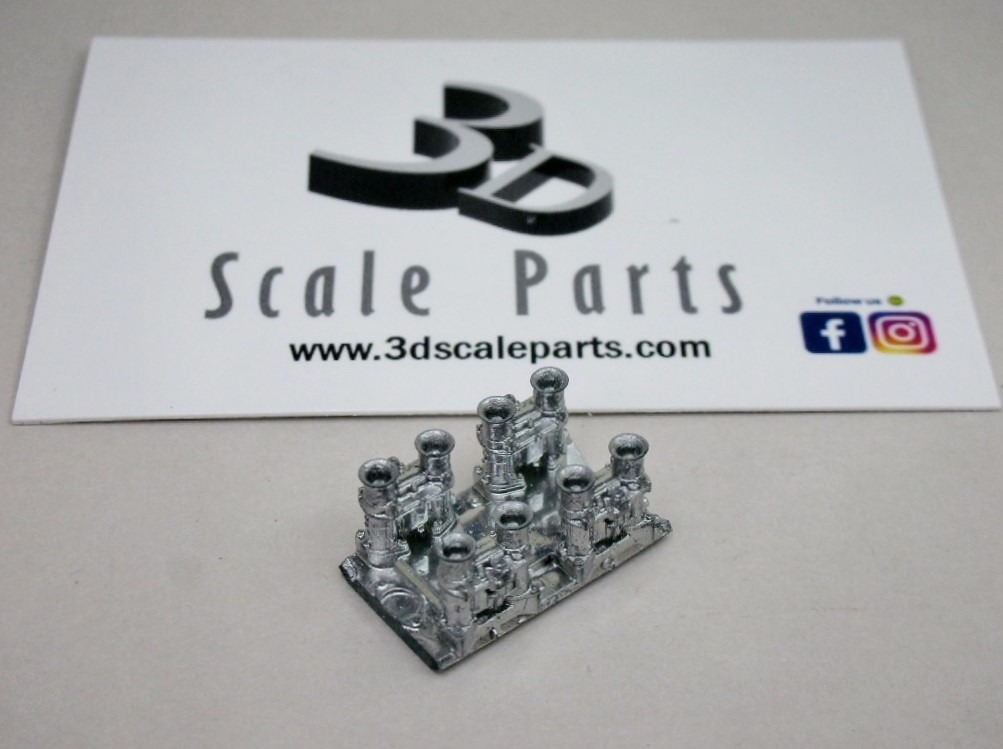
It's also going into an Evergreen styrene cradle to mount in the body. Shown is the non-chrome version:
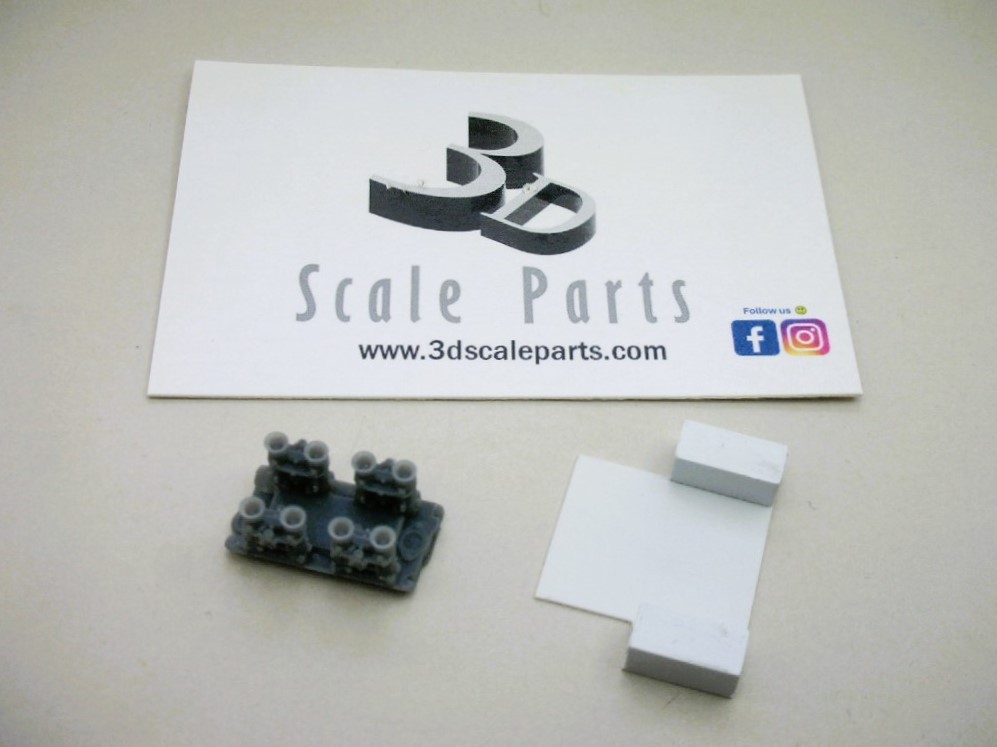
Here are all the goodies for the body.
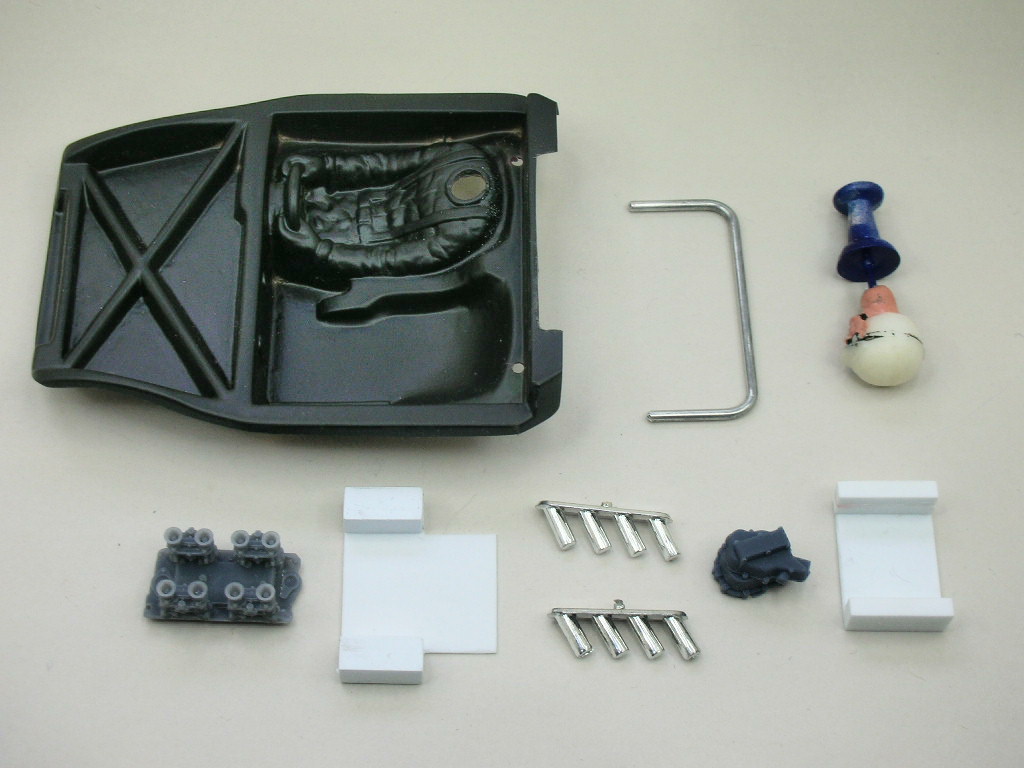
ARG.....time to paint. 
- Pablo, vfr750, Tex and 5 others like this
Rick Thigpen
Check out Steve Okeefe's great web site at its new home here at Slotblog:
The Independent Scratchbuilder
There's much more to come...
#63
Mark Onofri
-
- Subscriber
-
- 2,981 posts Joined: 18-November 20
Posting Leader
- Gender:Male
- Location:Syracuse, NY
Posted 27 October 2025 - 10:35 AM
Can I enter in for the Watkins Glen historic race this year?
#64
dc-65x
-
- Subscriber
-
- 7,204 posts Joined: 14-February 06
Grand Champion Poster
- Gender:Male
- Location:Captain Rick: The only vintage slot car nut in SW Oregon?
Posted 28 October 2025 - 11:17 AM
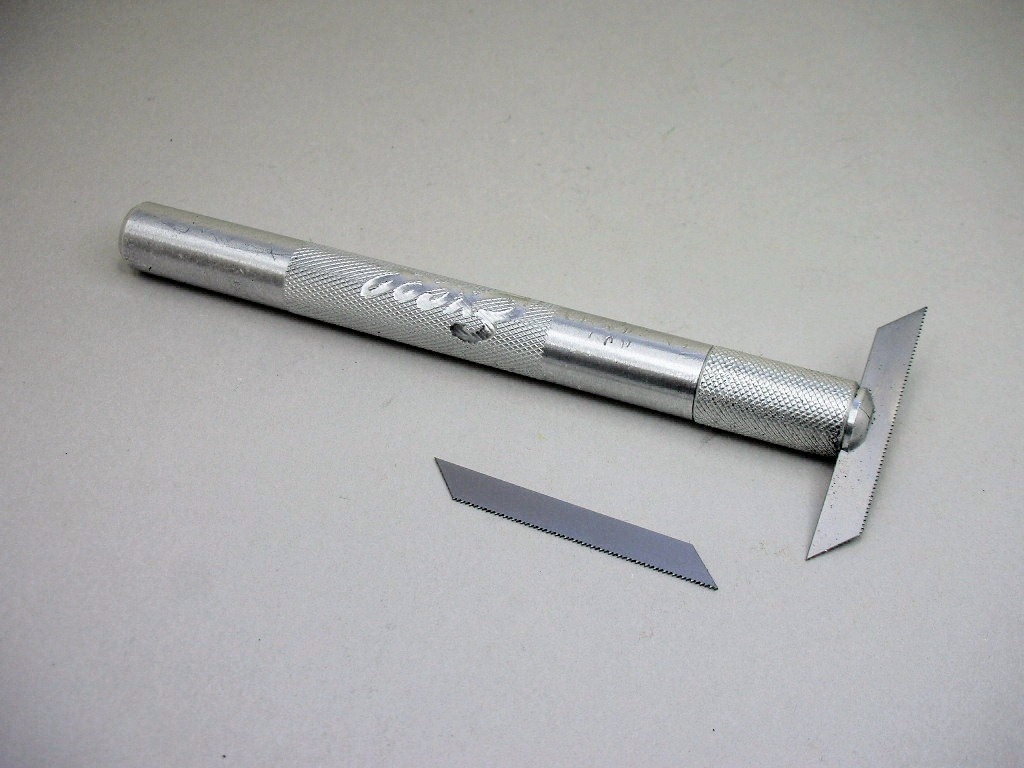
I remembered I need to finish up the wheel inserts and front tires. Anything to delay the painting process! 
The front tires get the MESAC style treads or grooves. This hobby knife and saw blade make a nice clean cut:
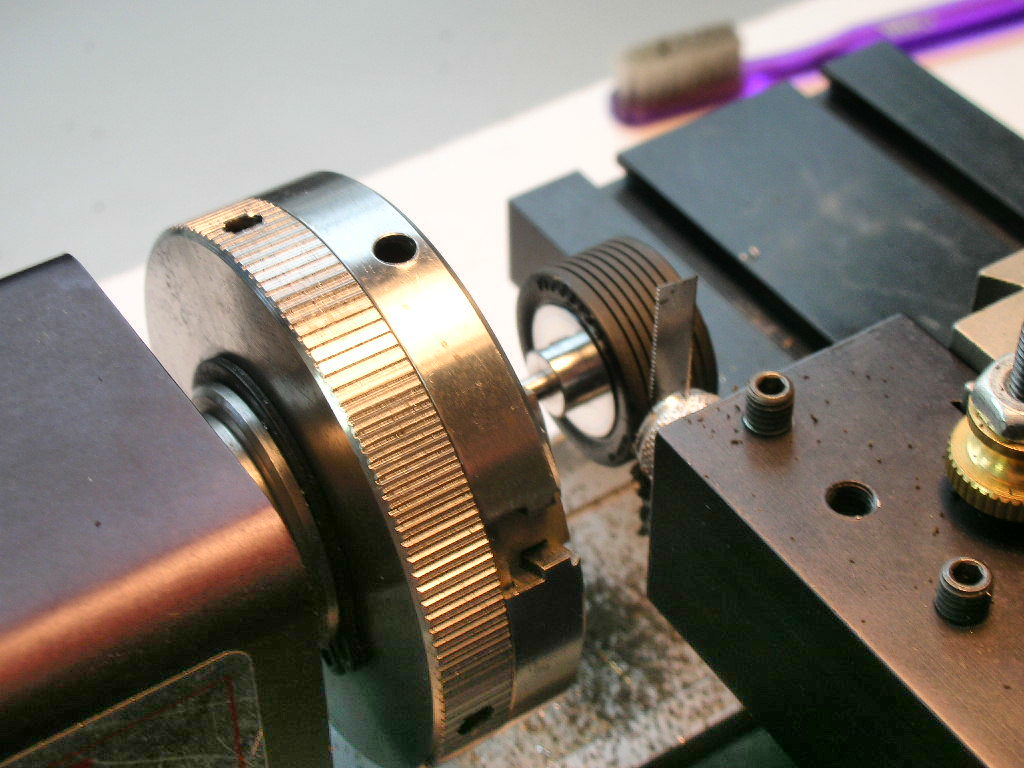
The hobby lathe spaces the tread grooves evenly:
I'm really happy with "the look" these fronts have:
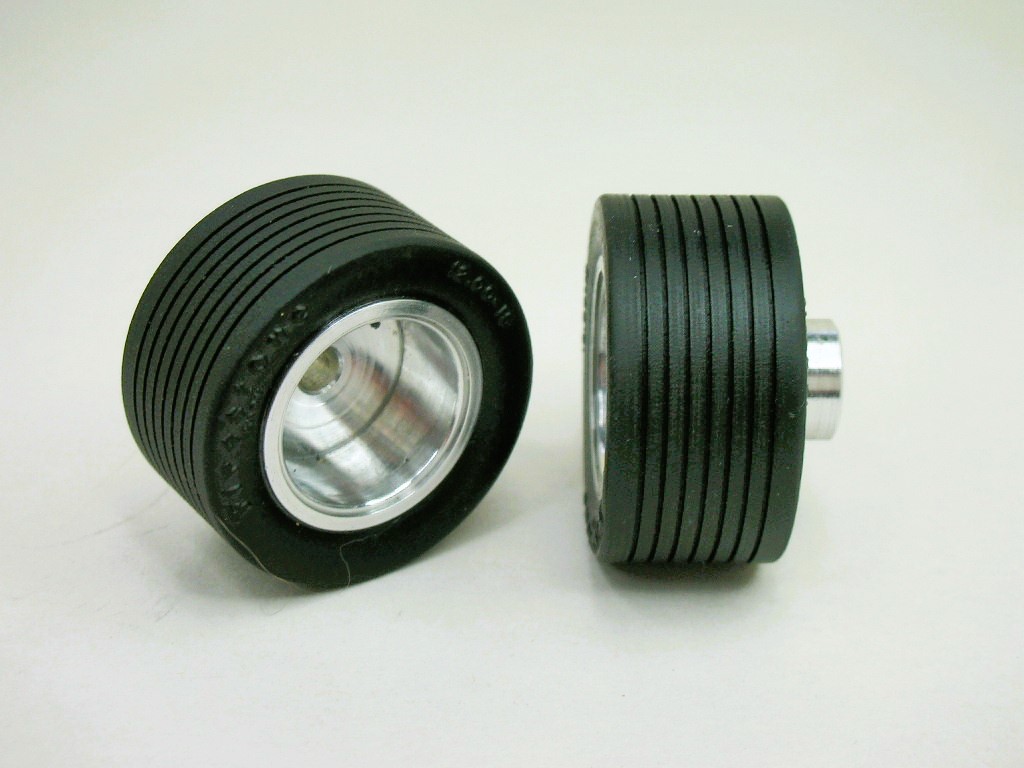
Wheel inserts are next...
- Pablo, vfr750 and Tex like this
Rick Thigpen
Check out Steve Okeefe's great web site at its new home here at Slotblog:
The Independent Scratchbuilder
There's much more to come...
#65
dc-65x
-
- Subscriber
-
- 7,204 posts Joined: 14-February 06
Grand Champion Poster
- Gender:Male
- Location:Captain Rick: The only vintage slot car nut in SW Oregon?
Posted 29 October 2025 - 08:02 PM
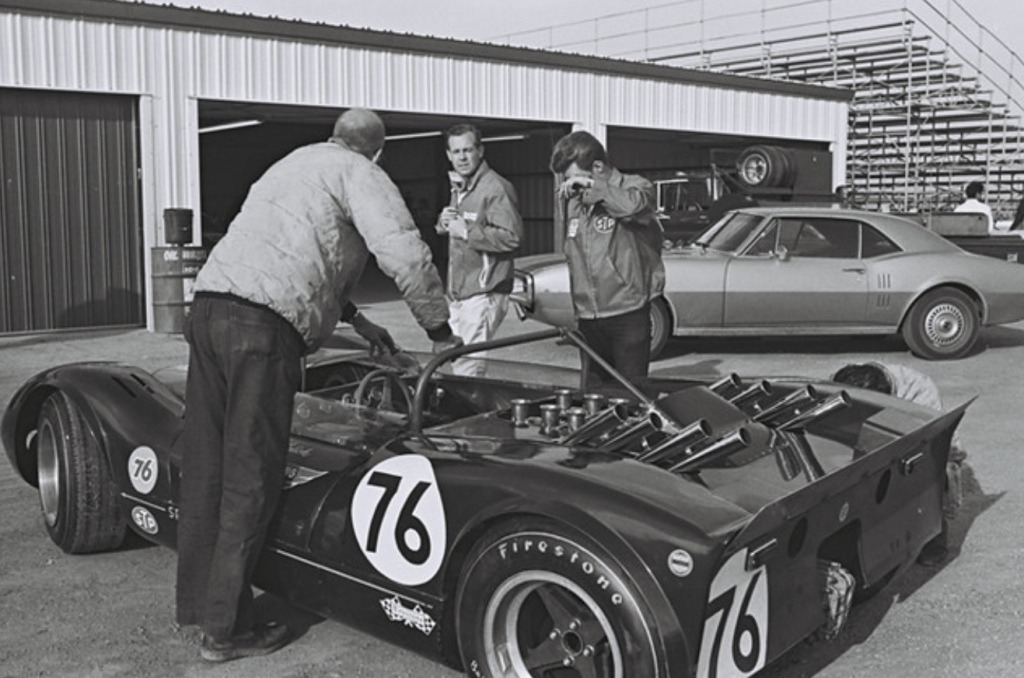
Here are the wheels on the SR3 Matich..........and those awesome ZOOMIES!
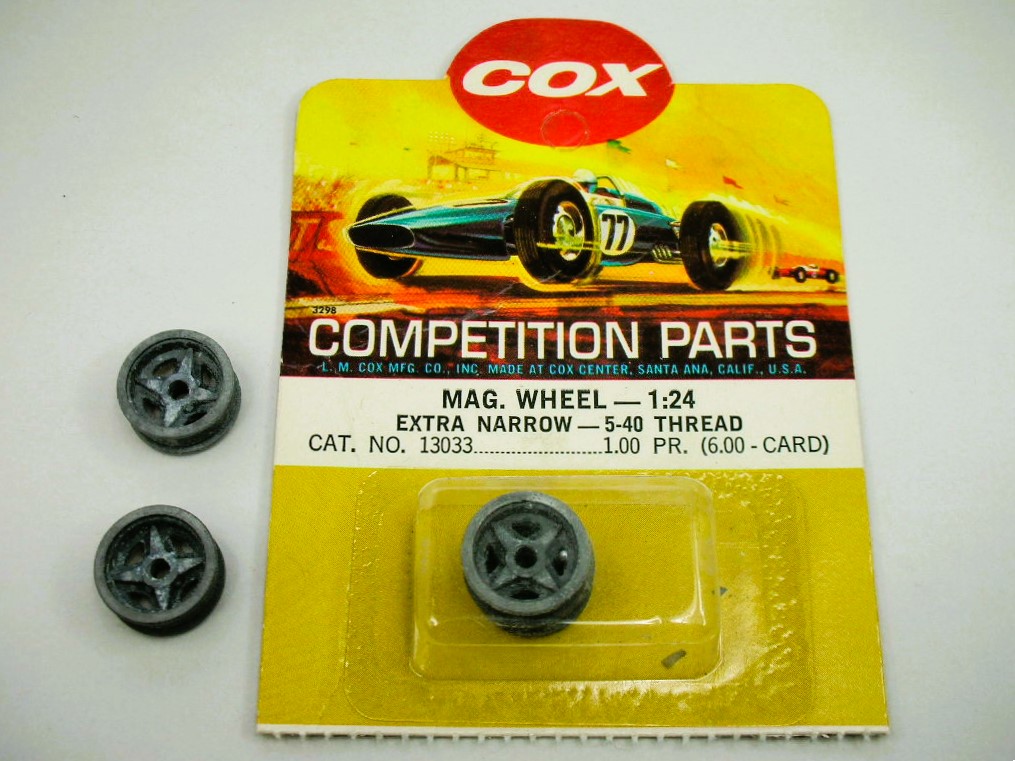
These Cox Lotus 40 seem reasonable with the same shape spokes:
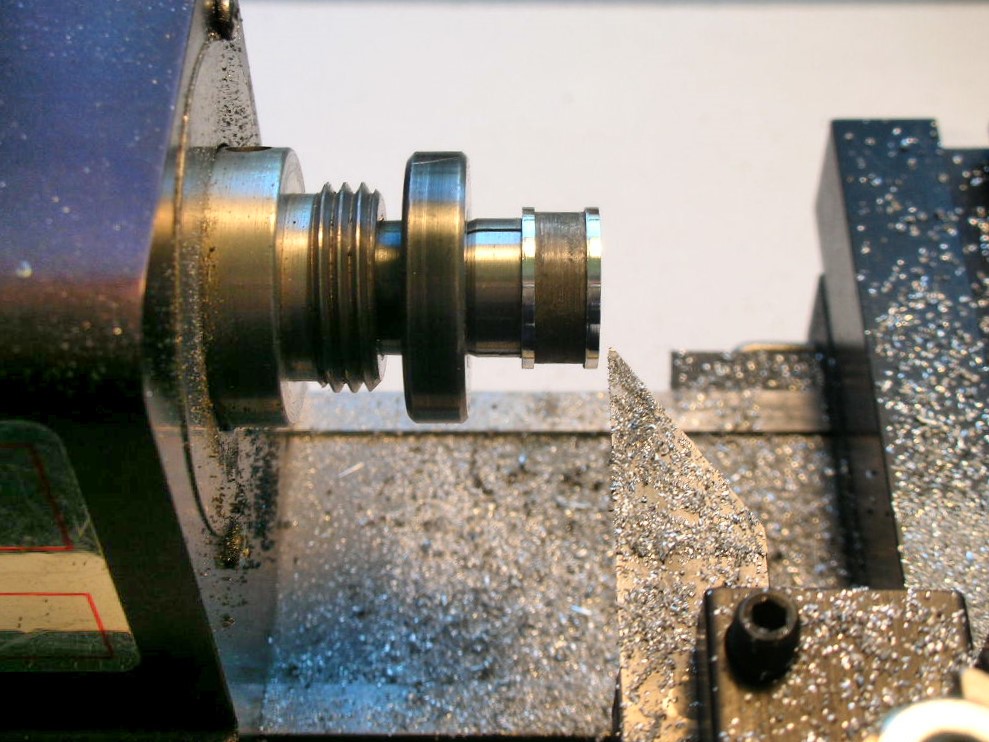
They needed to be turned down to .500" and the front and back faced to width:
Here is the front wheel insert turned down and the back counterbored for the soldered on front axle wheel retainers:
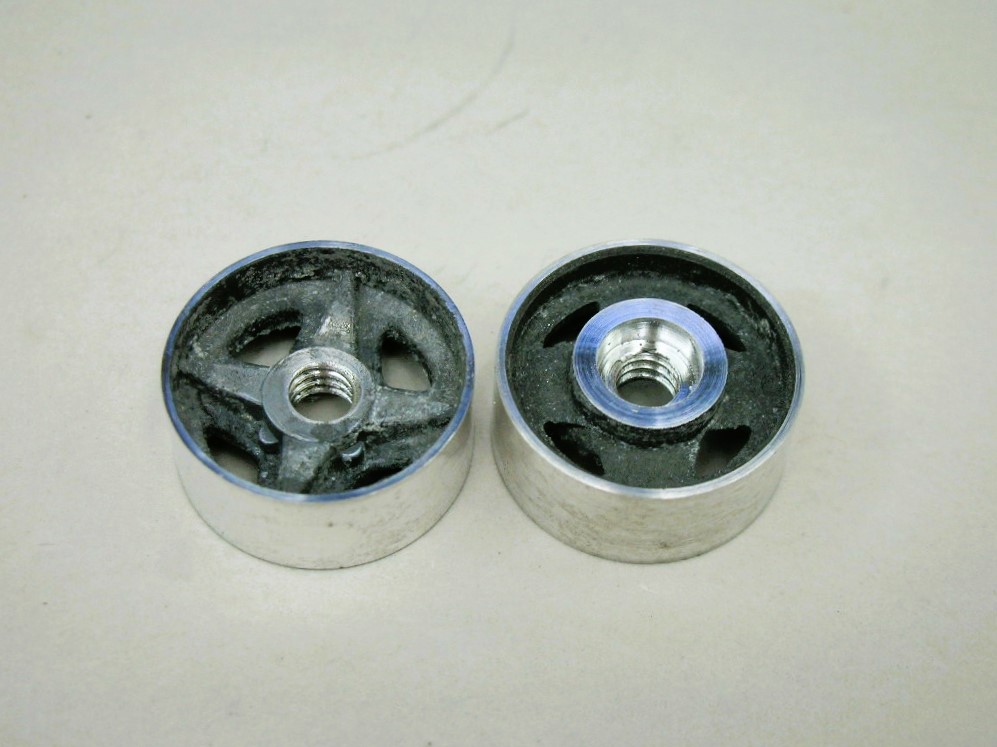
And micro bead blasted to clean off all the corrosion and clear coated:
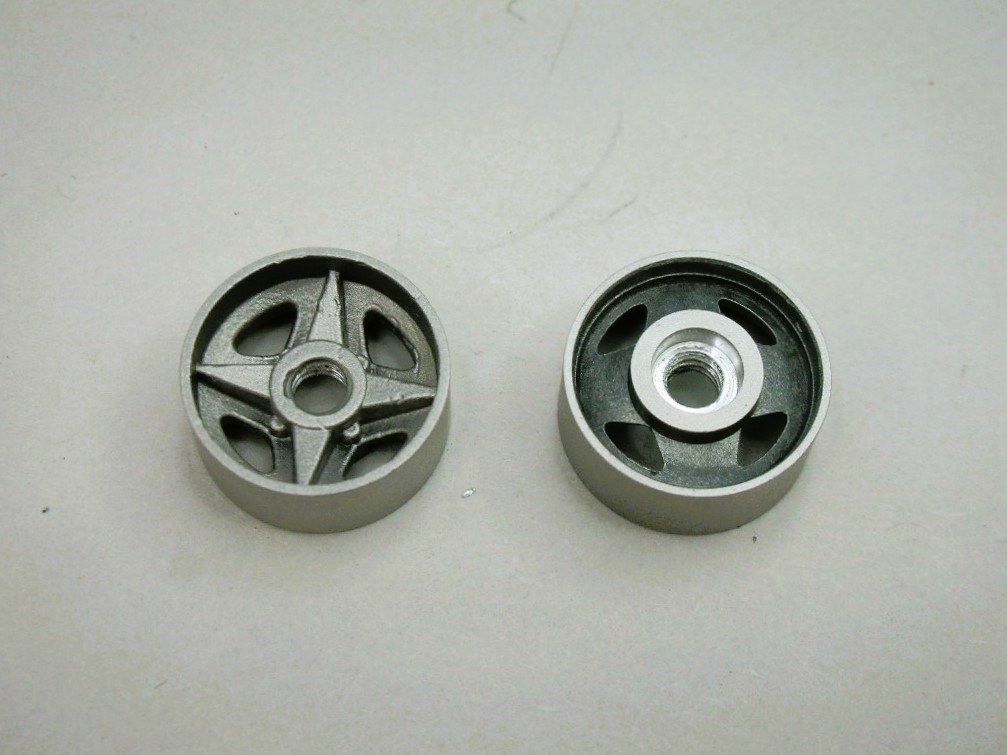
The finished wheels, tires and inserts:
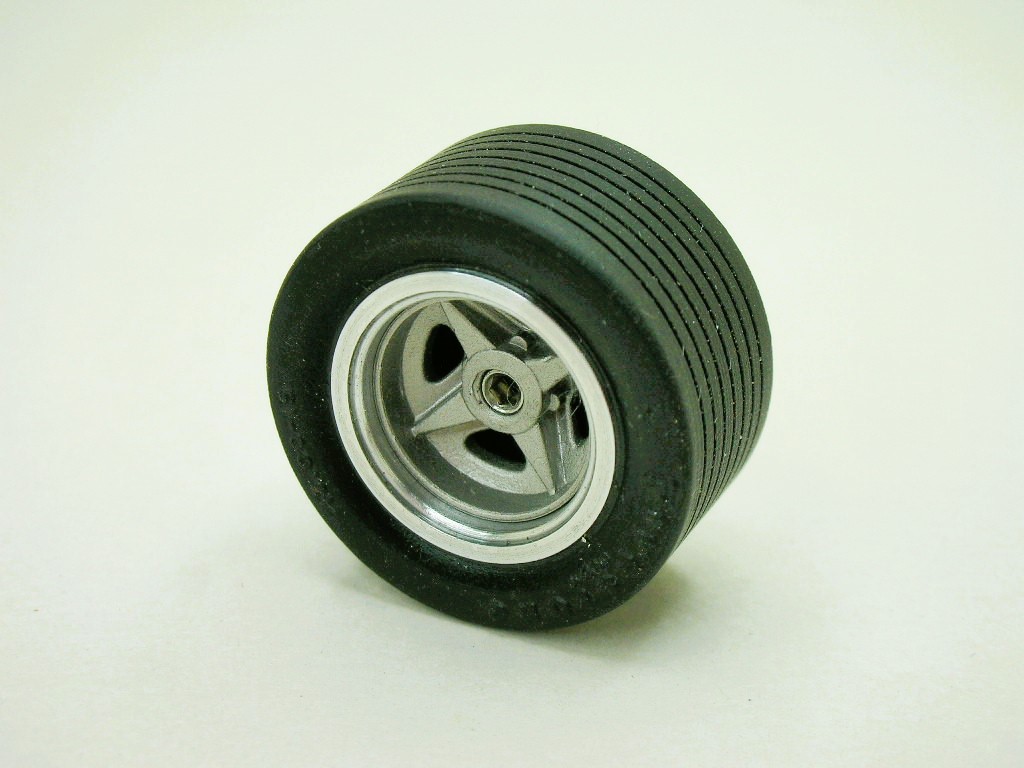
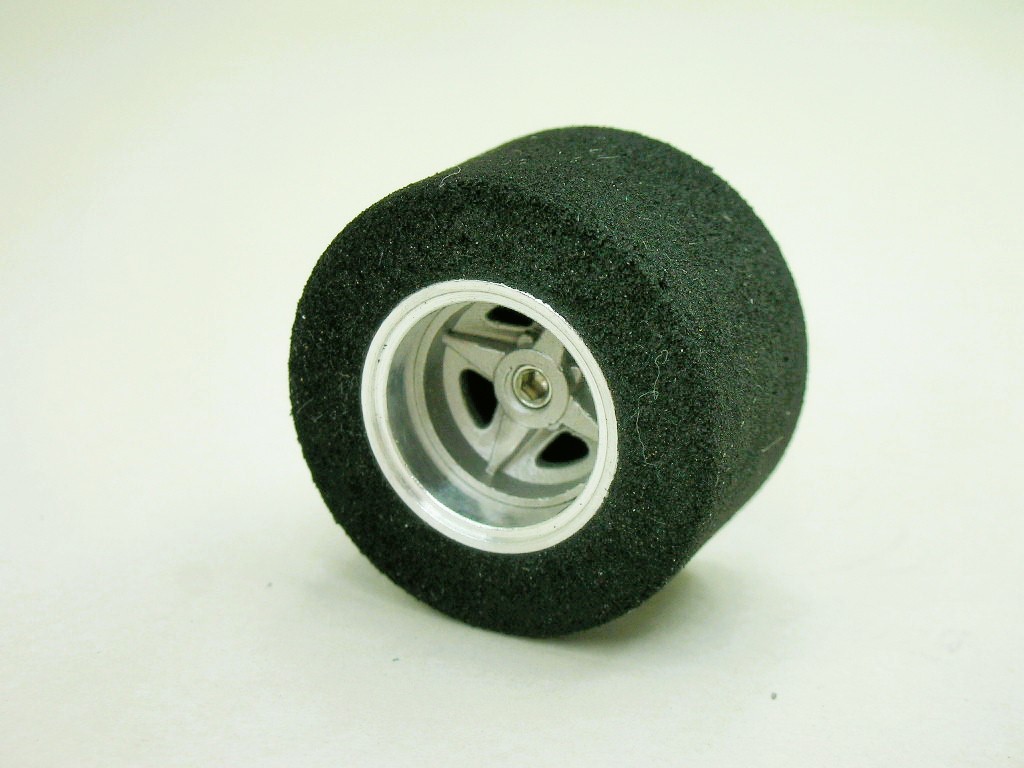
OK, I have no more excuses for not painting this project....
- slotbaker, Pablo, Jencar17 and 3 others like this
Rick Thigpen
Check out Steve Okeefe's great web site at its new home here at Slotblog:
The Independent Scratchbuilder
There's much more to come...
#66
Larry Horner
-
- Full Member
-
- 550 posts Joined: 18-March 17
Race Leader
- Gender:Male
- Location:San Francisco
Posted 29 October 2025 - 08:27 PM
Those look amazing Rick! I love that the proportions of the front to back look about the same as the actual car.
#67
stoo23
-

- Full Member
-
- 592 posts Joined: 26-July 08
Race Leader
- Gender:Male
- Location:Sydney, Australia
Posted 30 October 2025 - 05:43 PM
..........and those awesome ZOOMIES!
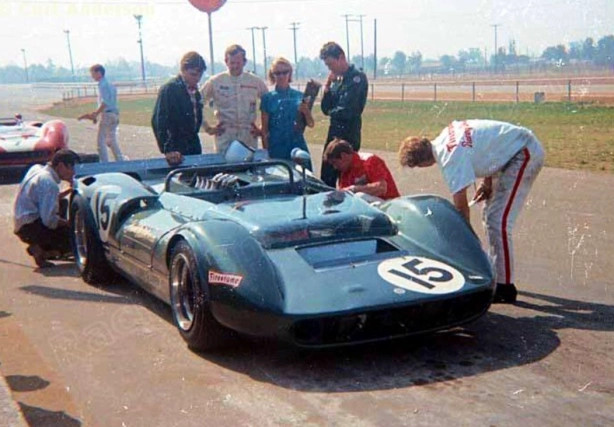
OH, ... Wow,... as a hardened Matich and general Can Am 'Fan' of that era, I both followed and regularly attended events at Sydney's Warwick Farm circuit and read many a magazine,.. and have 'pressed the flesh', as it were, up close the the SR-3 and SR-4 in the Pits, NEVER had I Ever seen the car with Zoomies like those in that Picture.
It IS clear from that pic that the car is NOT fitted with one of the Repco motors, as the Intake Trumpets on the Repco motors, were 'canted' inwards, whereas on the motor featured in the photo, it appears to be fitted with Carburetors with Normal, Vertical Trumpets.
I can only assume the car is fitted with the earlier Oldsmobile motors, perhaps used (or fitted), to obtain reliability, as I believe the team were having issues with the 4.4 litre Repco motors.
Perhaps this was one of the Customer cars Frank drove in a couple of the earlier races.
That statement, ... "Only in America"  ,.. seems to spring to one's mind .... LOL
This is the 'Other' Repco car, I believe at Riverside 1967, with ... NO Zoomies
- Tex and mickey thumbs like this
Stewart Amos
Old Racer from Sydney, Australia
FASTUFF Race Proven Products
https://ascra.au - Australian Slot Car Racers Association
#68
dc-65x
-
- Subscriber
-
- 7,204 posts Joined: 14-February 06
Grand Champion Poster
- Gender:Male
- Location:Captain Rick: The only vintage slot car nut in SW Oregon?
Posted 30 October 2025 - 08:14 PM
Thanks Larry, I love their proportions too. 
ZOOMIES! I was floored when I found the Matich SR3 fitted with zoomies and I knew I had to build it Stewart.
Here's a link to the car in question:
Rick Thigpen
Check out Steve Okeefe's great web site at its new home here at Slotblog:
The Independent Scratchbuilder
There's much more to come...
#69
Mark Onofri
-
- Subscriber
-
- 2,981 posts Joined: 18-November 20
Posting Leader
- Gender:Male
- Location:Syracuse, NY
Posted 31 October 2025 - 12:21 AM
The Repco Oldsmobile V8 was a amazing amalgamation of parts from various manufacturers. Didn't know that Black Jack wasn't the only recipient of this motor. And, to think, I also thought "zoomies" were just for hot wheels! Every doodle I drew in elementary school had em.
#70
dc-65x
-
- Subscriber
-
- 7,204 posts Joined: 14-February 06
Grand Champion Poster
- Gender:Male
- Location:Captain Rick: The only vintage slot car nut in SW Oregon?
Posted 07 November 2025 - 01:07 PM
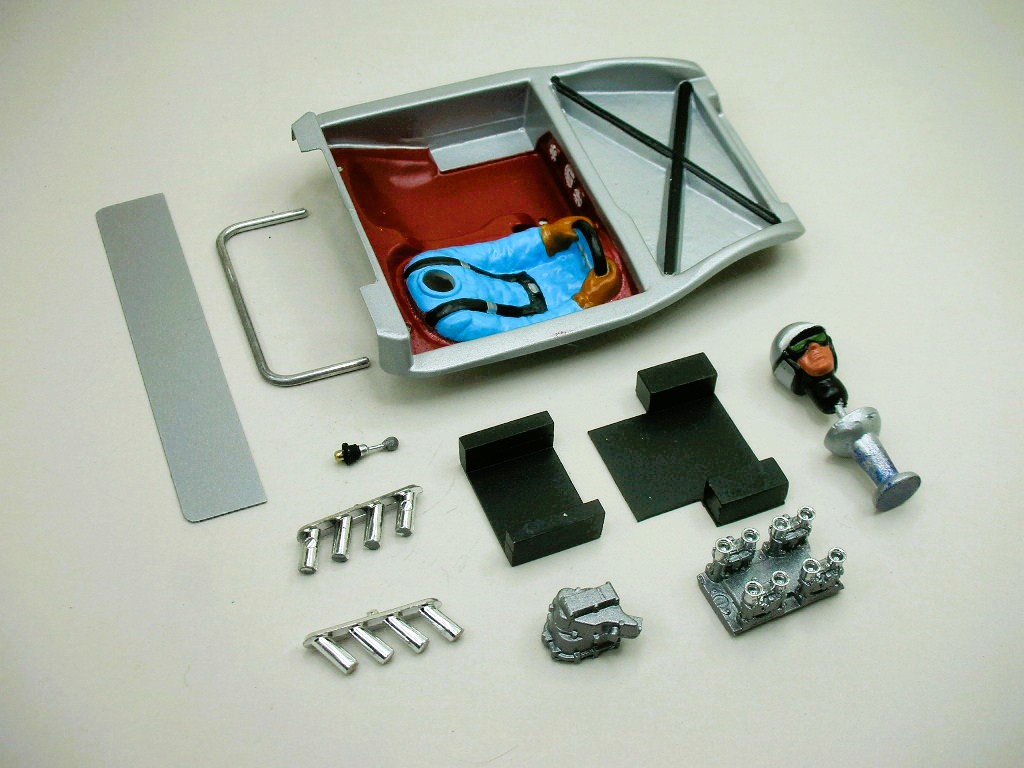
I have all the detail items finally painted. I can see a few things I need to touchup:
For fun I cobbled up a "kinda sorta" shift lever from a stick pin, some pin tube and a Slick 7 wheel retainer:
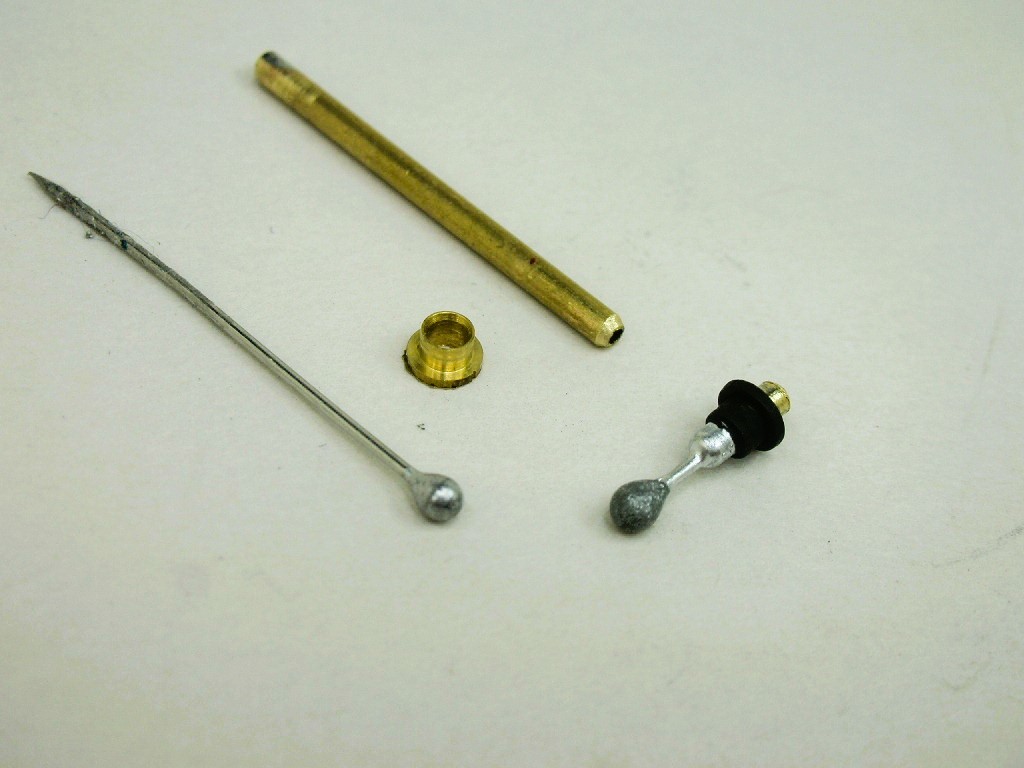
I hope to get the body painted tomorrow.
- vfr750, Tex, stoo23 and 2 others like this
Rick Thigpen
Check out Steve Okeefe's great web site at its new home here at Slotblog:
The Independent Scratchbuilder
There's much more to come...
#71
Brian Czeiner
-

- Full Member
-
- 601 posts Joined: 04-March 08
Race Leader
- Gender:Male
- Location:Tyler, TX
Posted 07 November 2025 - 11:08 PM
The shifter parts are a brilliant idea in detail!
If it's not a Caveman, It's HISTORY! Support Your local raceways!
#72
dc-65x
-
- Subscriber
-
- 7,204 posts Joined: 14-February 06
Grand Champion Poster
- Gender:Male
- Location:Captain Rick: The only vintage slot car nut in SW Oregon?
Posted 08 November 2025 - 01:39 PM
Thanks Brian, it was fun to make.
Here's another old school gizmo that's also fun to make:
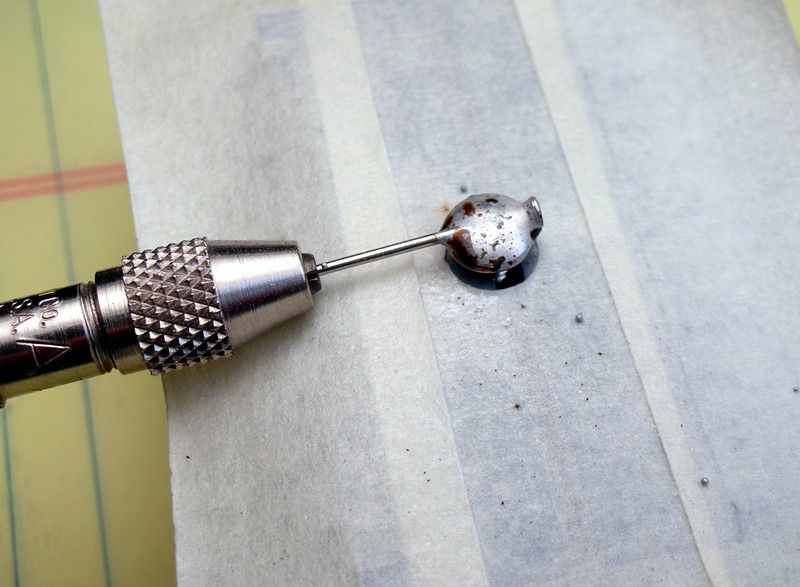
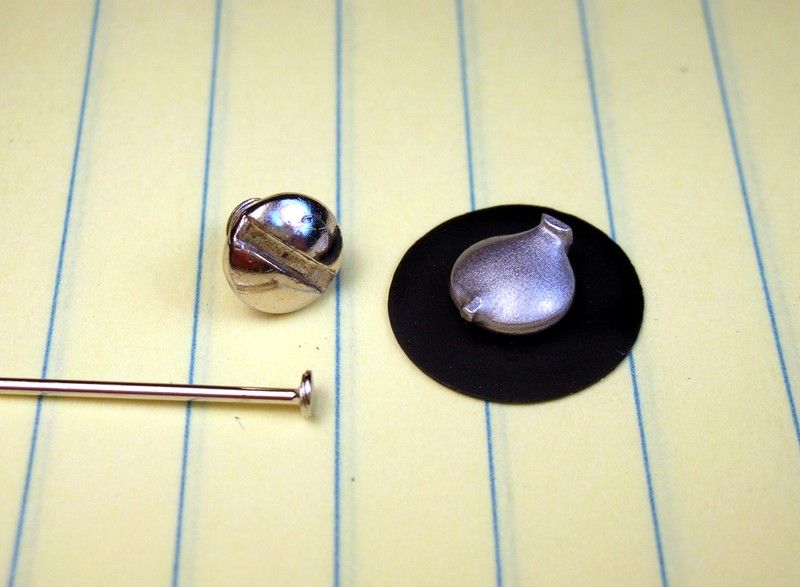
I made another doodad. It's a facsimile of a Monza or racing quick fill gas cap. The old magazines show making them by soldering together sheet metal screws and straight pins like so:
Here are the parts and my finished doodad. it's not an exact replica but it's what we did with what we had in the 60's and that's the look I'm going for with this car:
- vfr750, Tex, stoo23 and 1 other like this
Rick Thigpen
Check out Steve Okeefe's great web site at its new home here at Slotblog:
The Independent Scratchbuilder
There's much more to come...
#73
Alchemist
-

- Full Member
-
- 2,823 posts Joined: 11-November 09
Posting Leader
- Gender:Male
- Location:Far, far away
Posted 08 November 2025 - 01:46 PM
Hi Rick,
Thanks for sharing another incredible "How to" tip!
Ernie
Ernie Layacan
#74
dc-65x
-
- Subscriber
-
- 7,204 posts Joined: 14-February 06
Grand Champion Poster
- Gender:Male
- Location:Captain Rick: The only vintage slot car nut in SW Oregon?
Posted 08 November 2025 - 09:14 PM
You bet Ernie.
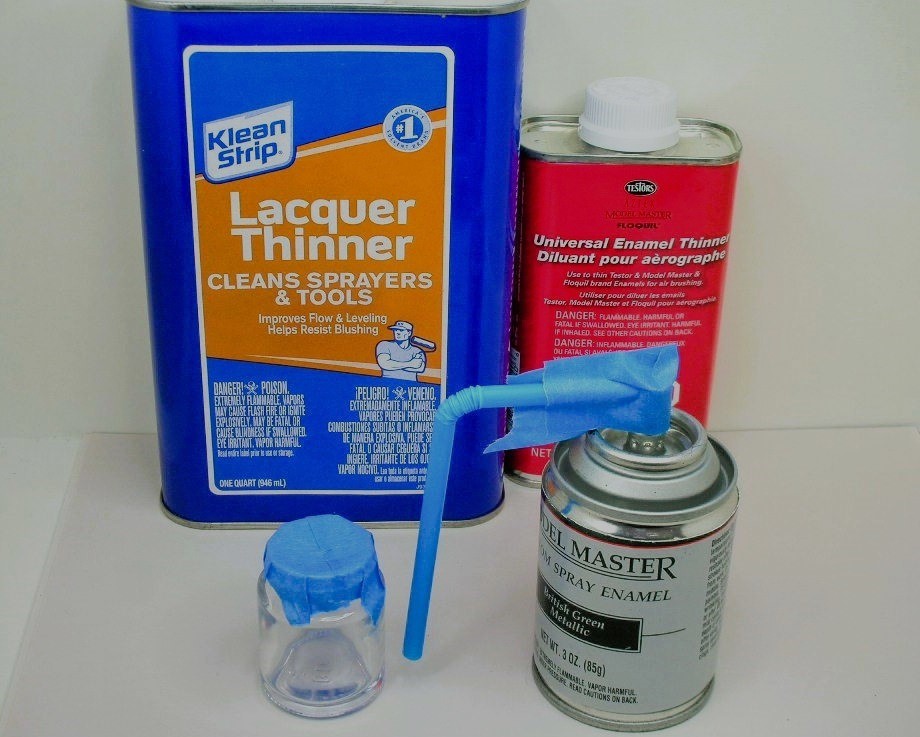
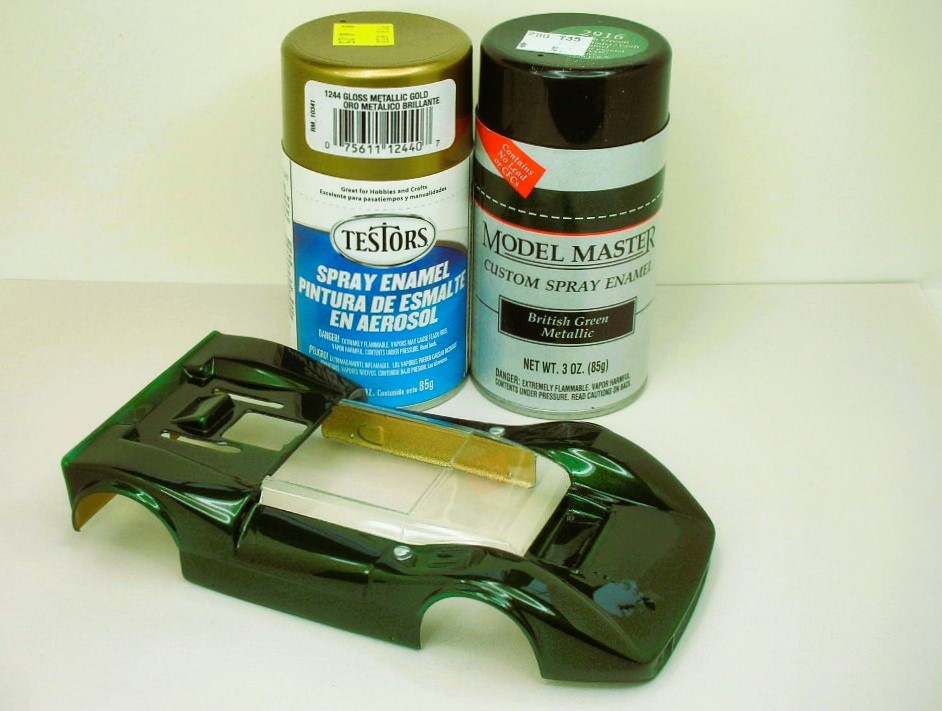
Well.......time to see if my time with YouTube videos pans out. I'm going to attempt to decant my discontinued Model Master British Racing Green Metallic spray paint into an airbrush bottle using an evil plastic straw and masking tape. 
To my delight it worked like a charm and was easy peasy. Also following the YouTube advise I'm using lacquer thinner to clean the airbrush as the Testors air brush thinner pictured is super expensive now. Maybe it's been discontinued too. 
After the airbrush is clean I going to blow a bit of the Testors thinner through it before I store it.
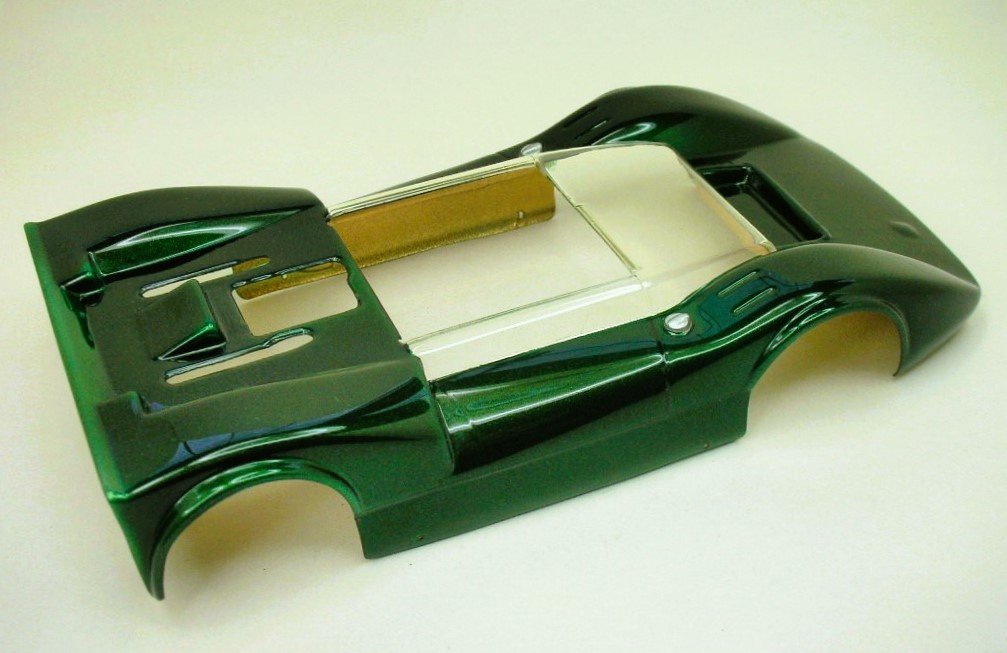
Everything worked like a charm. I backed the green with rattle can gold:
I really love this color so naturally it's no longer available. 
- Tex, Fergy, Alchemist and 1 other like this
Rick Thigpen
Check out Steve Okeefe's great web site at its new home here at Slotblog:
The Independent Scratchbuilder
There's much more to come...
#75
Bill from NH
-
- Full Member
-
- 15,317 posts Joined: 02-August 07
Age scrubs away speed!
- Gender:Male
- Location:New Boston, NH
Posted 09 November 2025 - 07:16 AM
YouTube has a number or different decanting procedures. Good to hear this one worked well for you. I think it's one of the latest posted on YouTube.
Bill Fernald
I intend to live forever! So far, so good.
I intend to live forever! So far, so good.




