Jump to content


Photo

Lancer scale Matich Can-Am build


  • Please log in to reply
93 replies to this topic

#1 dc-65x

dc-65x

    Grand Champion Poster

  • Subscriber
  • PipPipPipPipPipPipPipPip
  • 7,204 posts
  • Joined: 14-February 06
  • Gender:Male
  • Location:Captain Rick: The only vintage slot car nut in SW Oregon?

Posted 23 August 2025 - 03:14 PM

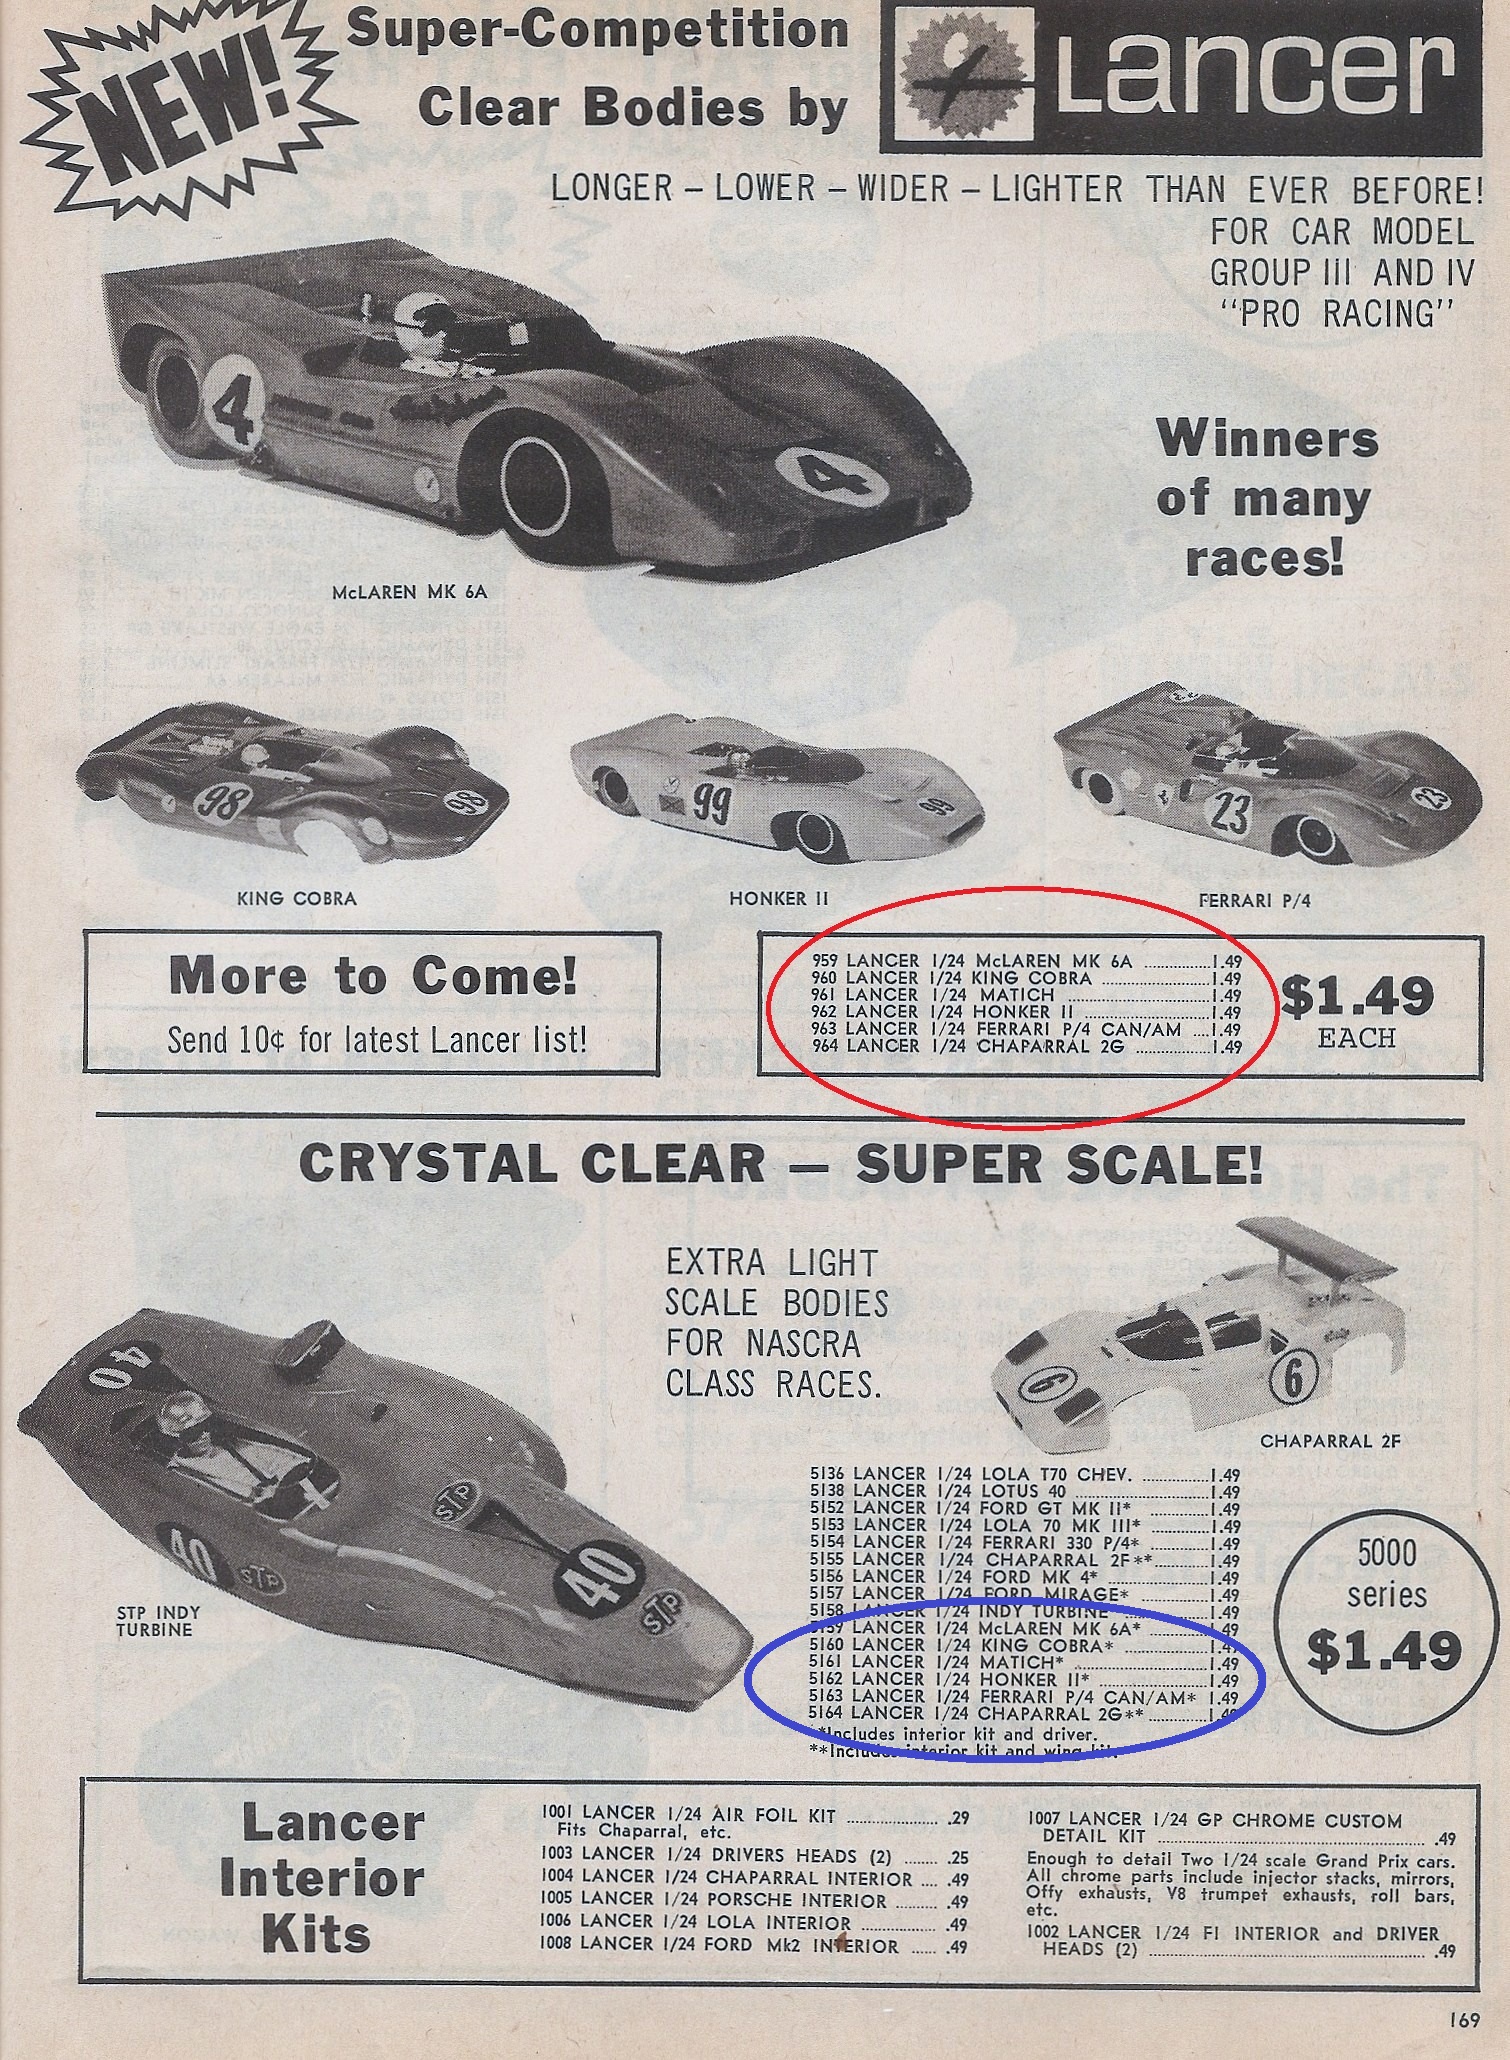
This will be my third car in a six-car project to build scale versions of Lancer’s first 6 Super Competition low and wide handling bodied cars I've already built.


In the Lancer ad below the low and wide handling bodies are circled in red and the scale versions are circled in blue:    
 

post-5-0-49472400-1574115768.jpg


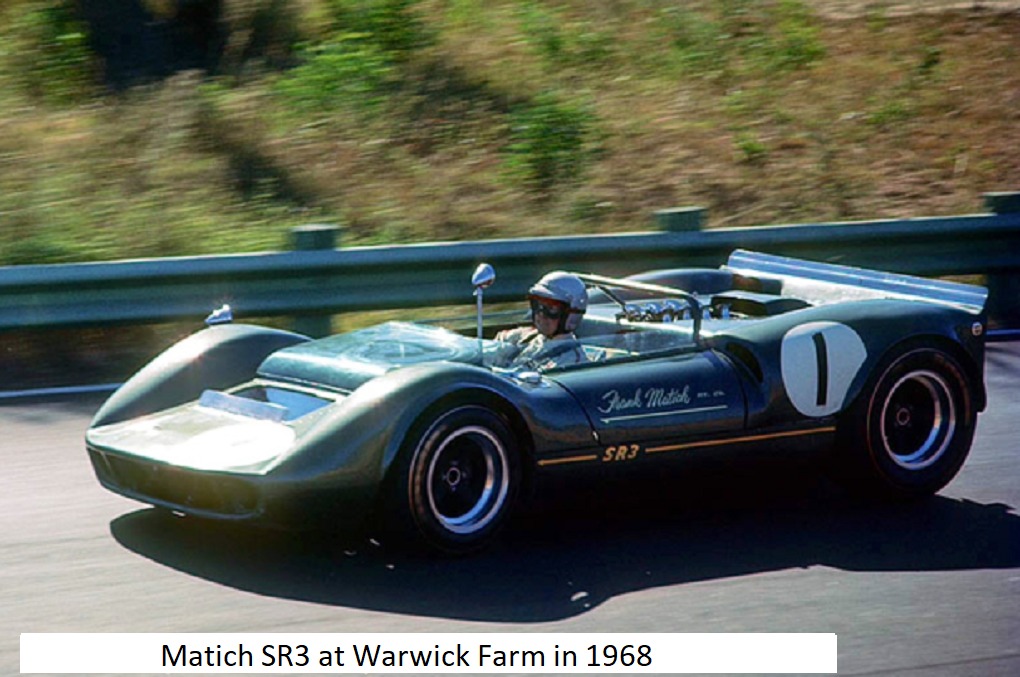
This time I'll be building the scale Matich Can Am car. Everyone has their own ideas about these cars but to me, this is a classic race car:
 

post-5-0-86631200-1628718889.jpg


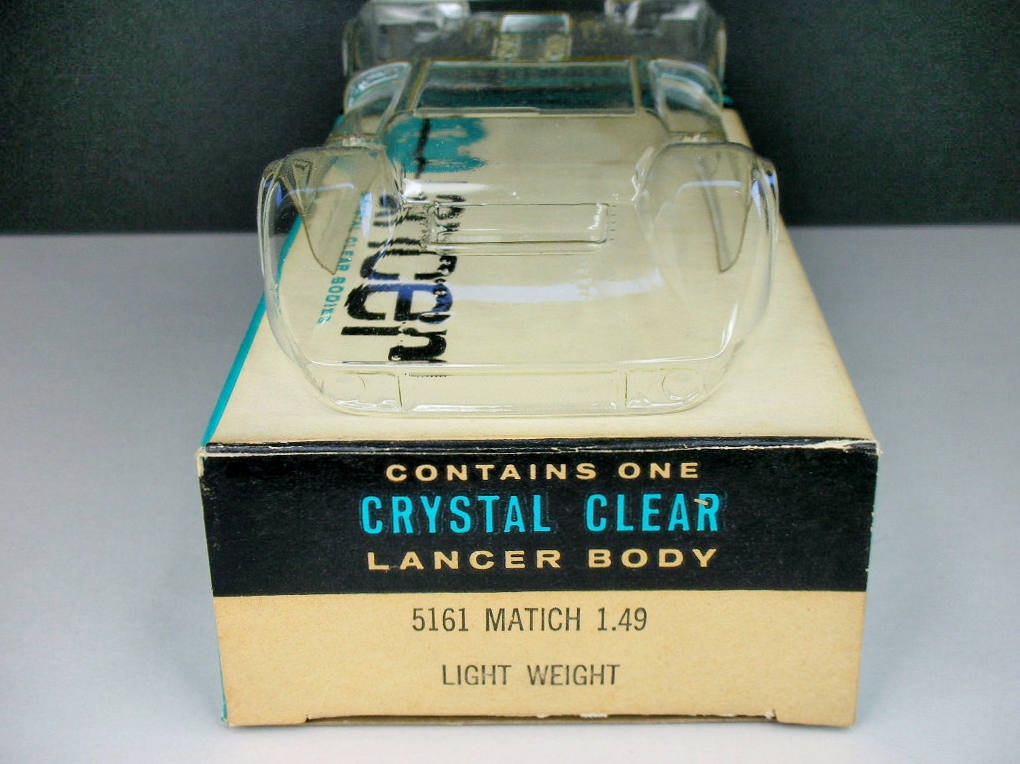
I'll be using this Lancer scale light weight body my friend Rodney kindly supplied:
 

FSCN6415.JPG


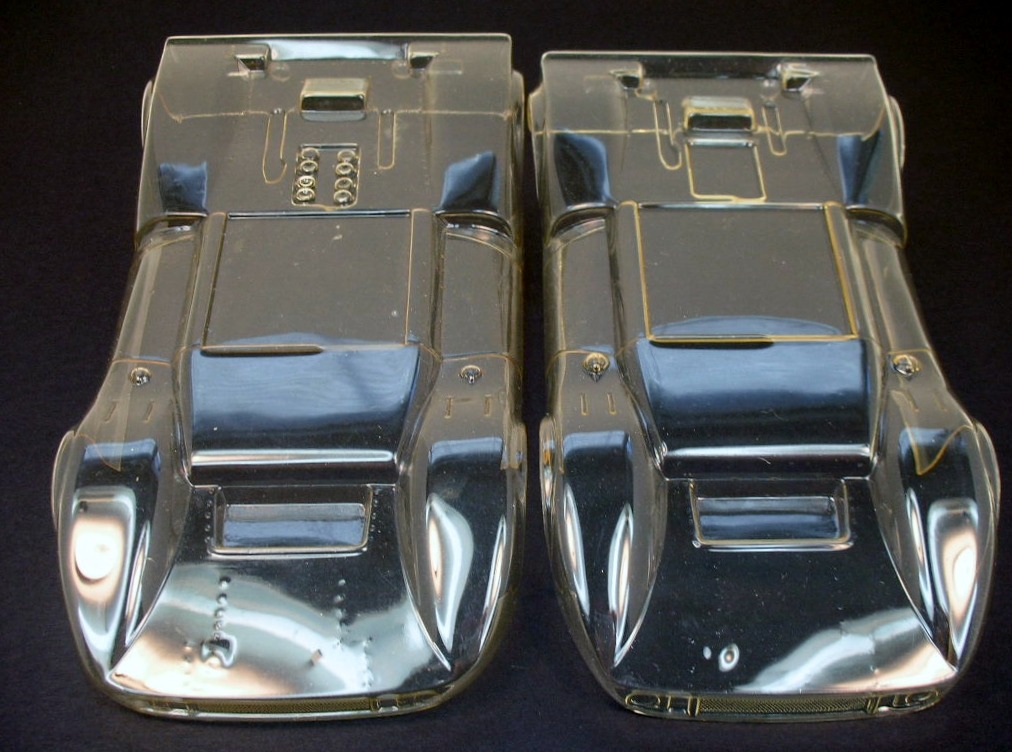
Here's are some comparisons with the low and wide handling body on the lefr and the smaller scale version I'll be using on the right:
 

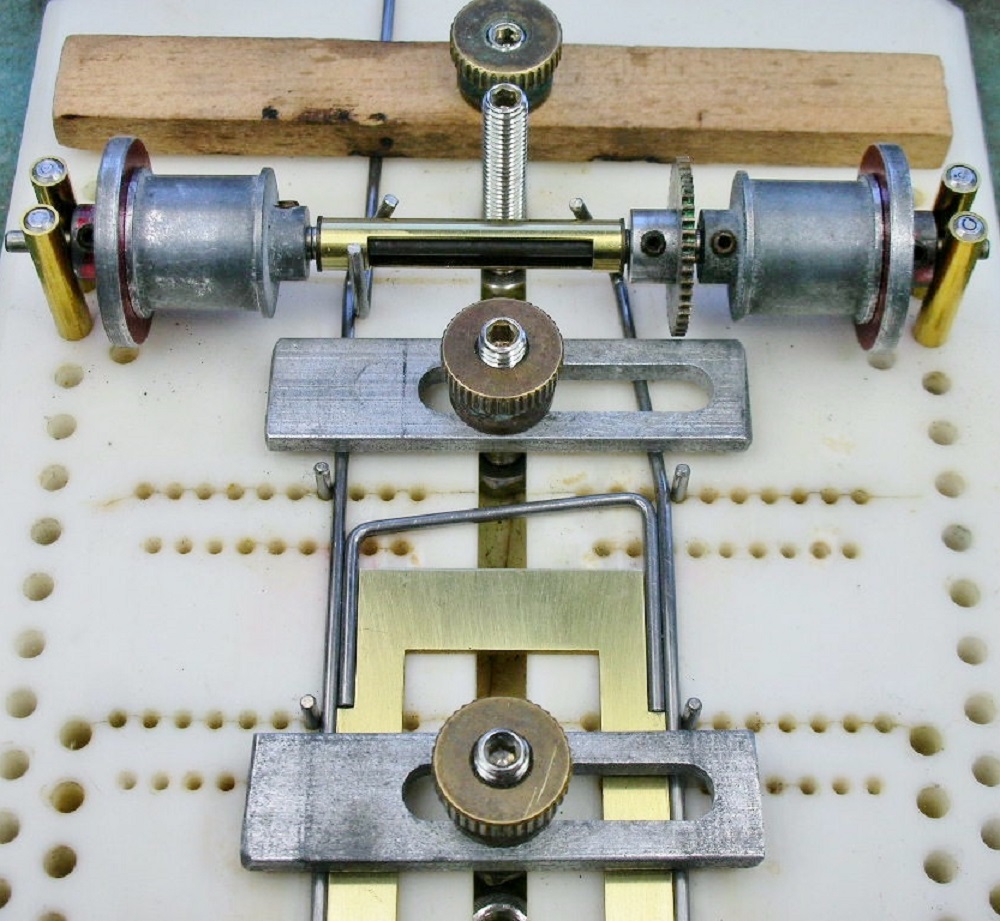
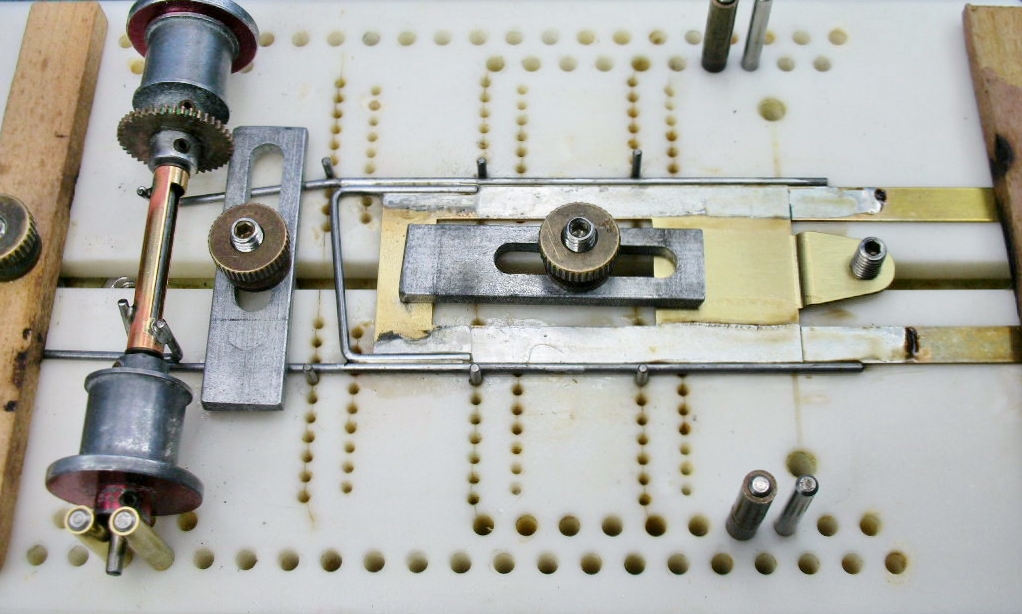
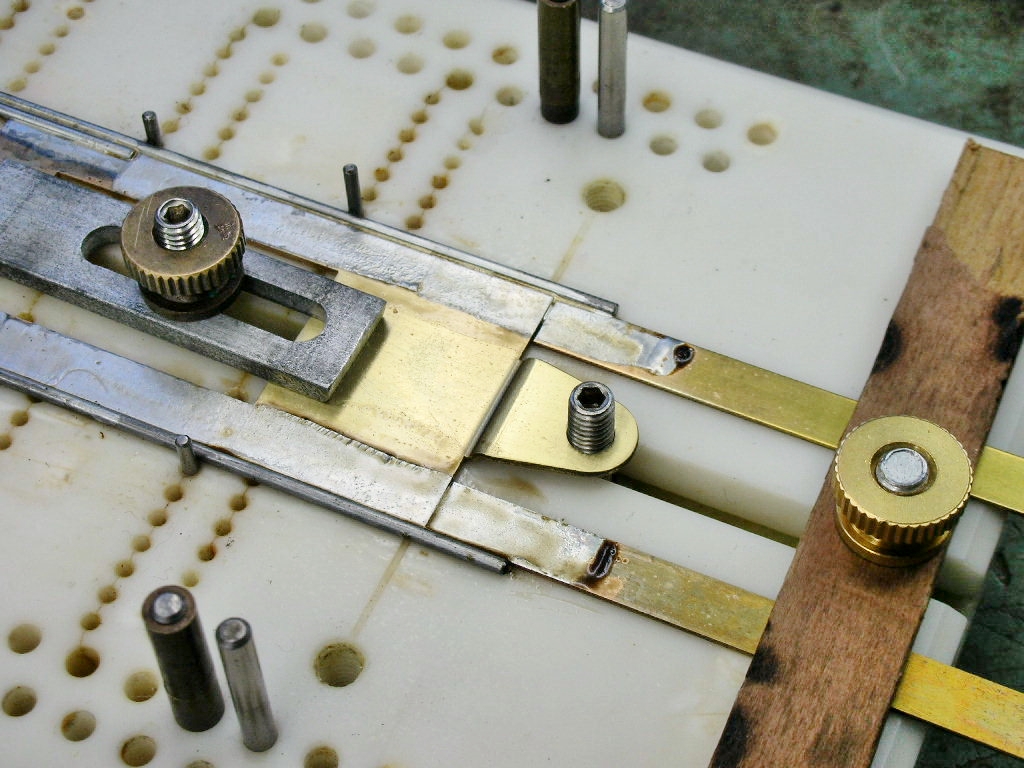
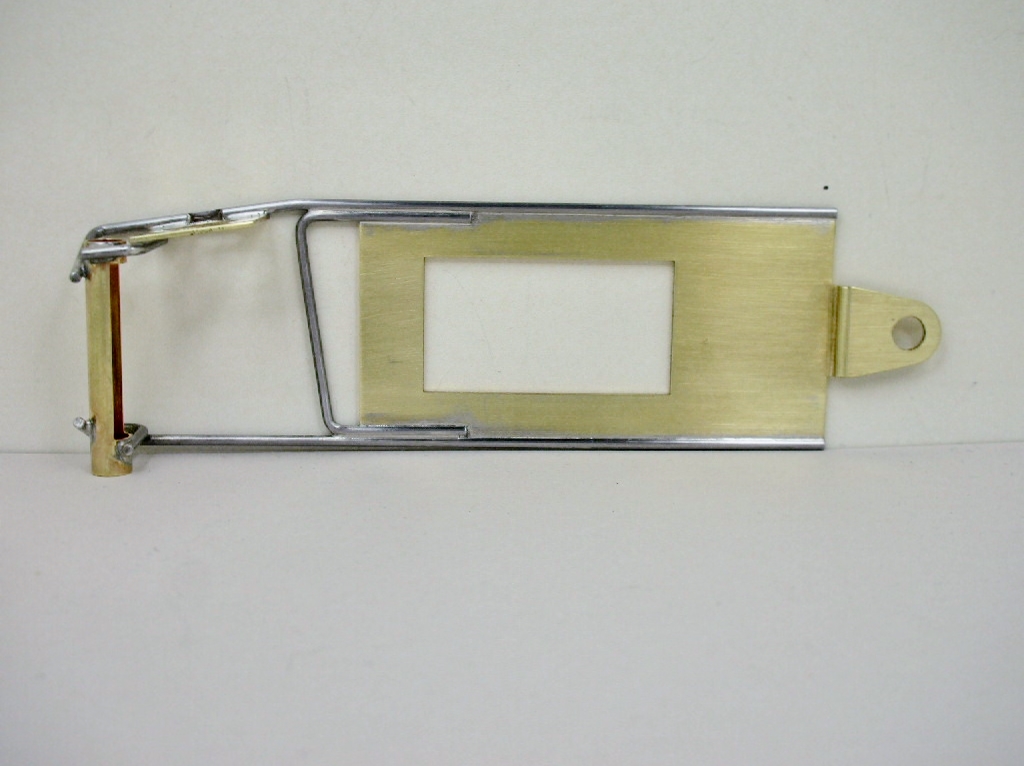
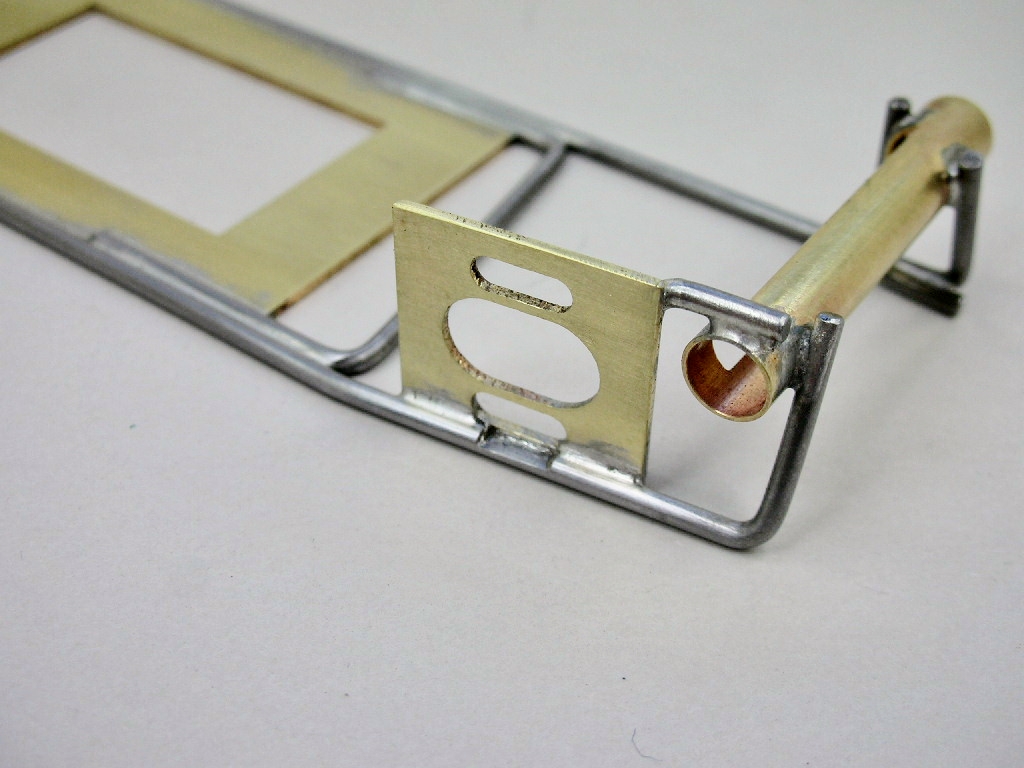
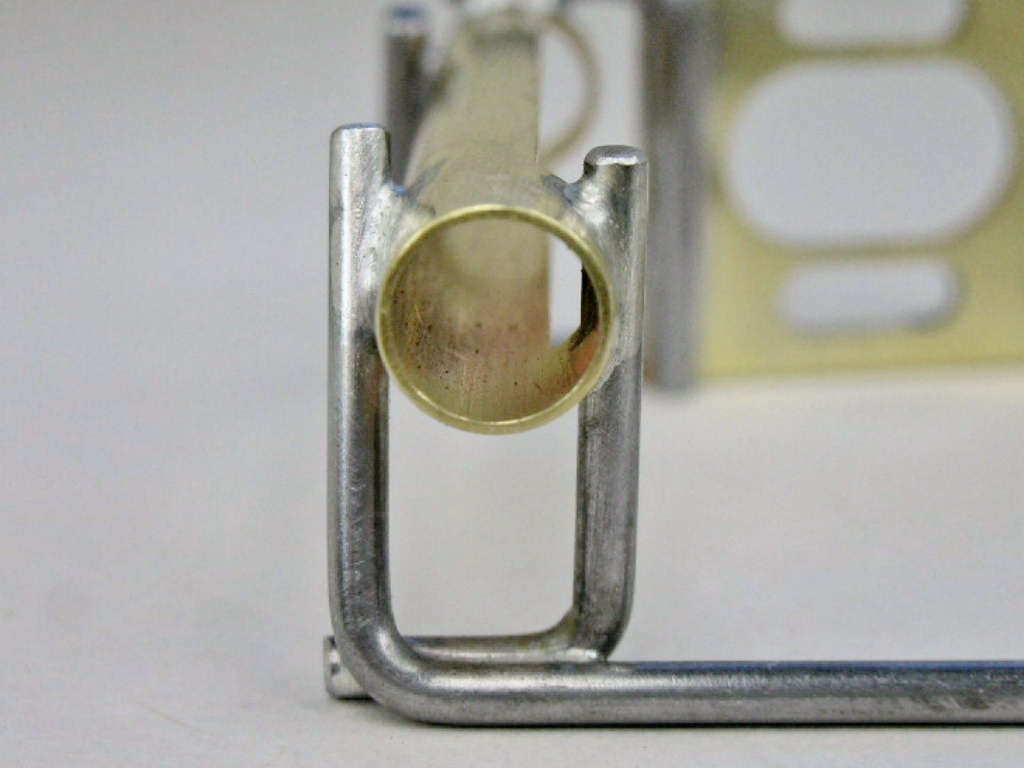
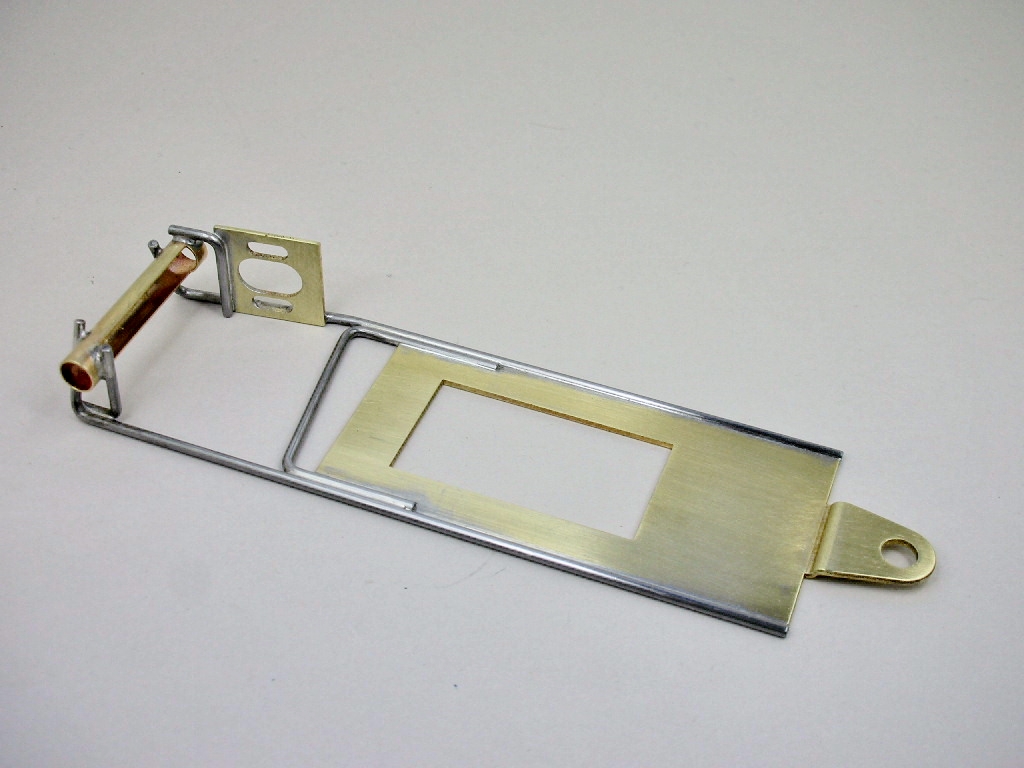
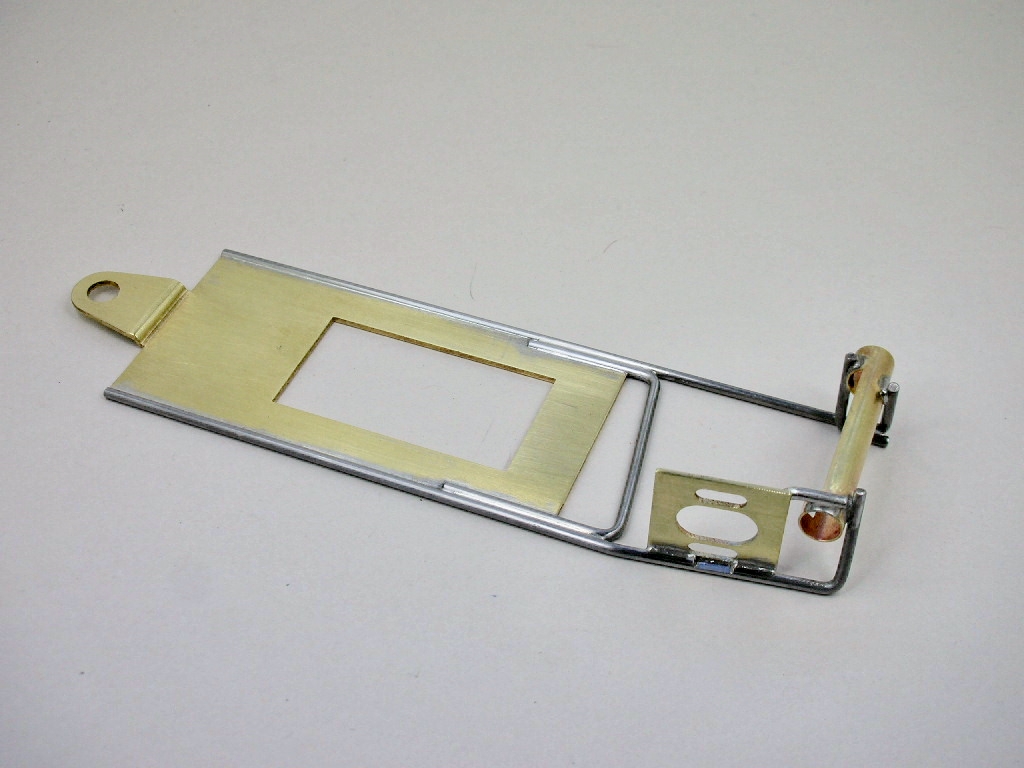
lancer matich bodies (3).jpg


My chassis for the scale version will be 2 7/8" wide to fit the narrower body:
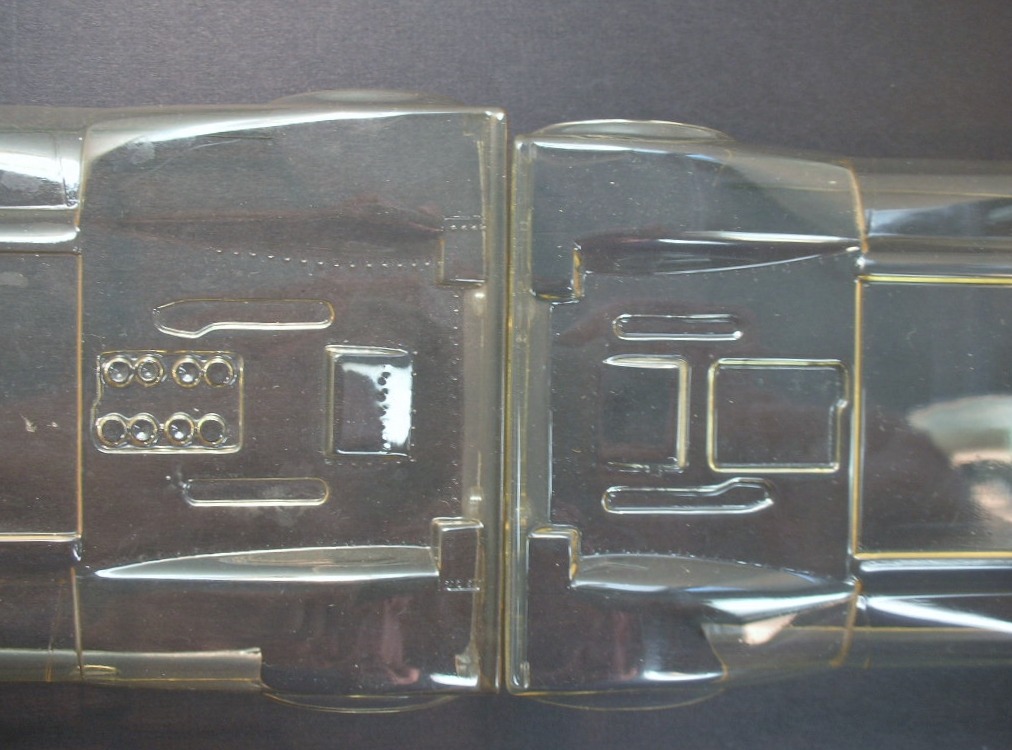
 

lancer matich bodies (2).jpg


The scale version is small enough to easily slip inside the handling body:
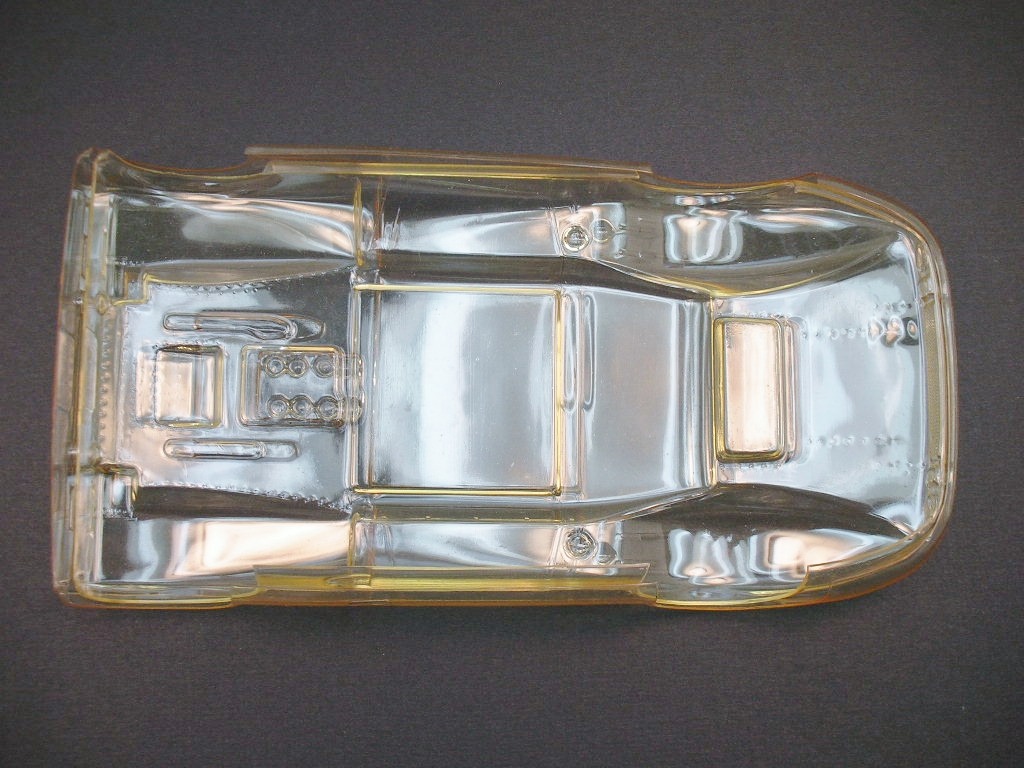
 

lancer matich bodies (1).jpg


More to come but it will be slower than I'd like. My 75 year old back has decided to act up.... :unknw:


  • don.siegel, Pablo, vfr750 and 8 others like this

Rick Thigpen
Check out Steve Okeefe's great web site at its new home here at Slotblog:
The Independent Scratchbuilder
There's much more to come...


#2 dc-65x

dc-65x

    Grand Champion Poster

  • Subscriber
  • PipPipPipPipPipPipPipPip
  • 7,204 posts
  • Joined: 14-February 06
  • Gender:Male
  • Location:Captain Rick: The only vintage slot car nut in SW Oregon?

Posted 24 August 2025 - 11:30 AM

I've had fun with my first 2 Lancer scale Can Am builds using the simple format outlined below so I'll be doing the same with this build:
 

I want to have some fun with my scale bodies like my Lancer Honker so I’m going to open things up from my usual approach to vintage building by doing the following:

  • Approach this build as if I was a hobbyist back in the early 70’s building just for the fun of it.
  • Use any vintage or repop vintage component available from the early 1960’s to the early 1970’s.
  • Use any style of vintage motor and chassis design from the early 1960’s to the early 1970’s.
OK, time to take my time machine back to the early 1970’s and get to work on my Honker.


I currently don't have any cars using the Champion Cee can motor. I think that's because I have lots of Mura parts and very few Champion.


I scrounged up a second generation thin wall Champion can:


champion motor (2).JPG


I pairing it with Champion Blue Dot magnets, magnet clips and some custom .007" thick magnet shims:


champion motor (13).JPG


I'll post some comparison pics of this can with the first gen thick wall Champion cans next........


  • Pablo and Alchemist like this

Rick Thigpen
Check out Steve Okeefe's great web site at its new home here at Slotblog:
The Independent Scratchbuilder
There's much more to come...


#3 Mark Onofri

Mark Onofri

    Posting Leader

  • Subscriber
  • PipPipPipPipPipPipPip
  • 2,981 posts
  • Joined: 18-November 20
  • Gender:Male
  • Location:Syracuse, NY

Posted 24 August 2025 - 01:35 PM

If you happen apon a extra 0.520 arm blank or a tossed one, I sure could use one.

#4 dc-65x

dc-65x

    Grand Champion Poster

  • Subscriber
  • PipPipPipPipPipPipPipPip
  • 7,204 posts
  • Joined: 14-February 06
  • Gender:Male
  • Location:Captain Rick: The only vintage slot car nut in SW Oregon?

Posted 24 August 2025 - 03:37 PM

Mark most of the arms I have are in the .510" to 515" diameter range. 


I have this Mura blank at .523":


FSCN6425.JPG


And this mystery unbalanced and not epoxied job also at .523":


FSCN6427.JPG


Rick Thigpen
Check out Steve Okeefe's great web site at its new home here at Slotblog:
The Independent Scratchbuilder
There's much more to come...


#5 Bill from NH

Bill from NH

    Age scrubs away speed!

  • Full Member
  • PipPipPipPipPipPipPipPip
  • 15,317 posts
  • Joined: 02-August 07
  • Gender:Male
  • Location:New Boston, NH

Posted 24 August 2025 - 03:42 PM

When we built Champion C-cans, we used a .530" hole with .510 arms. We later tried tightened the holes to be used with X-12 arms for scale racing & the motors became too punchy to race competitively.


I've heard of .520" dia. slugs but not arms.


Bill Fernald
 
I intend to live forever!  So far, so good.  :laugh2:  :laugh2: 

#6 dc-65x

dc-65x

    Grand Champion Poster

  • Subscriber
  • PipPipPipPipPipPipPipPip
  • 7,204 posts
  • Joined: 14-February 06
  • Gender:Male
  • Location:Captain Rick: The only vintage slot car nut in SW Oregon?

Posted 24 August 2025 - 06:48 PM

Bill, the arm I've dug up is .515" diameter and with the thin wall can and .007" shims I should end up with a .525" to .530" gap between magnets. I don't know what Mark has in mind but......


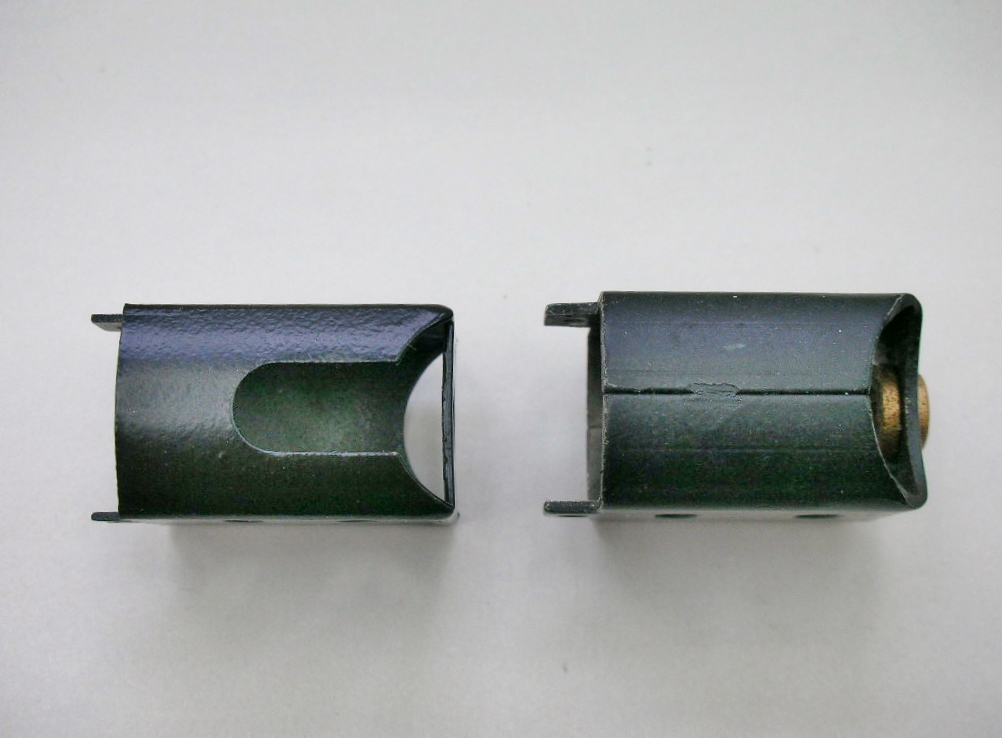
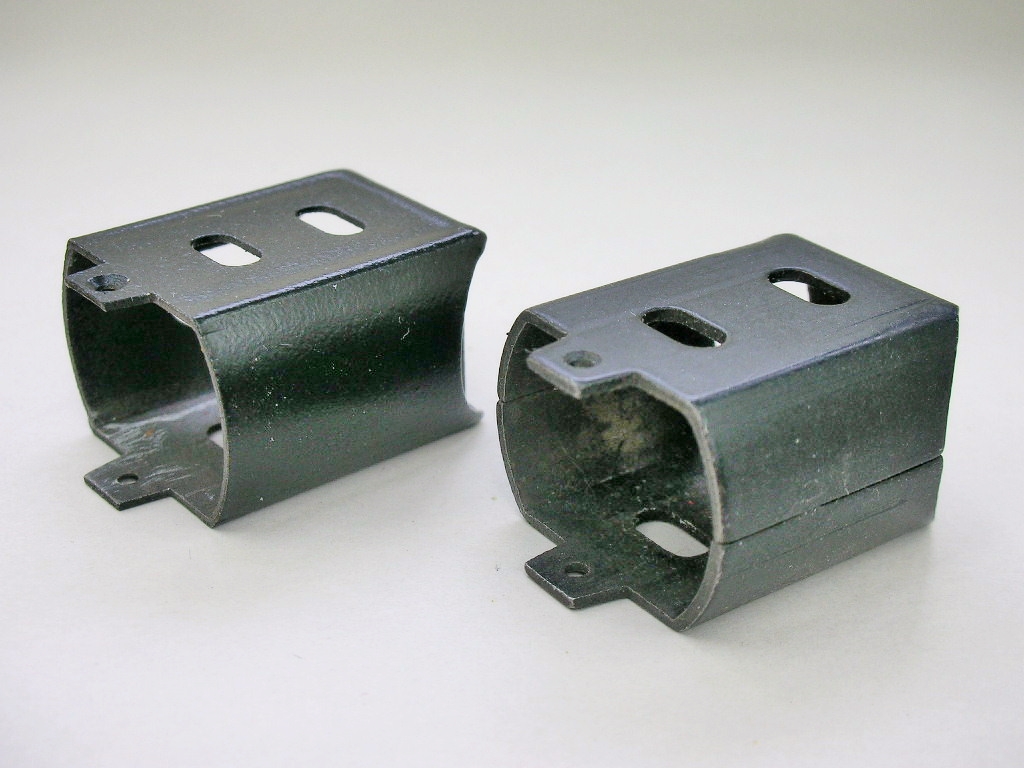
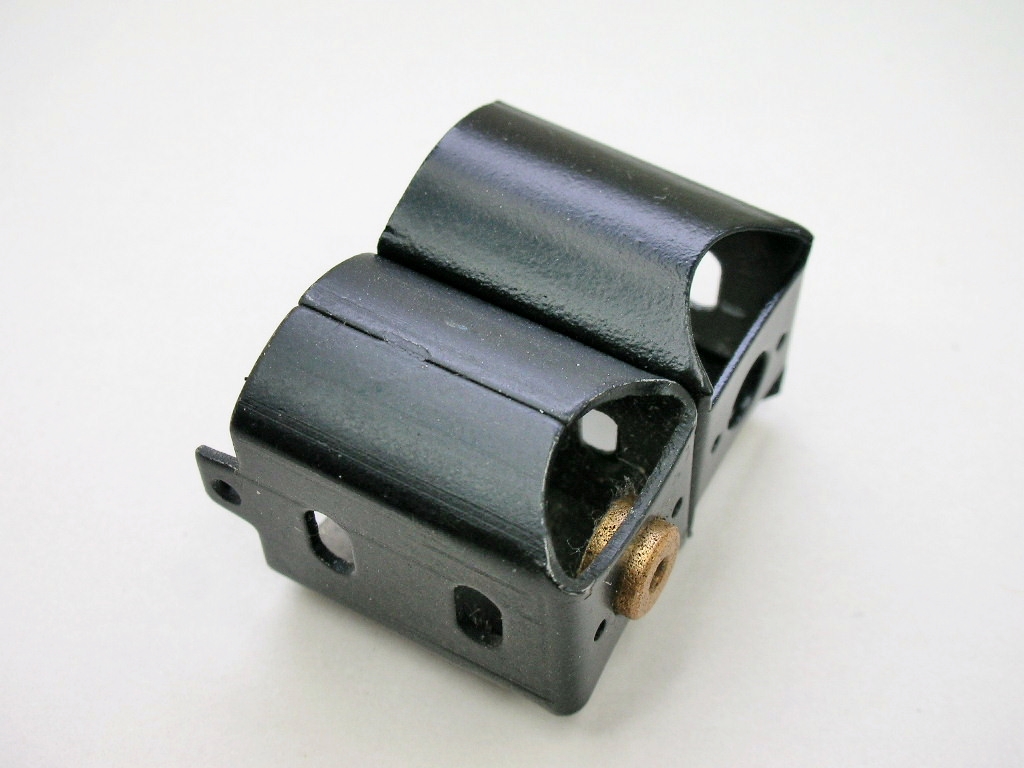
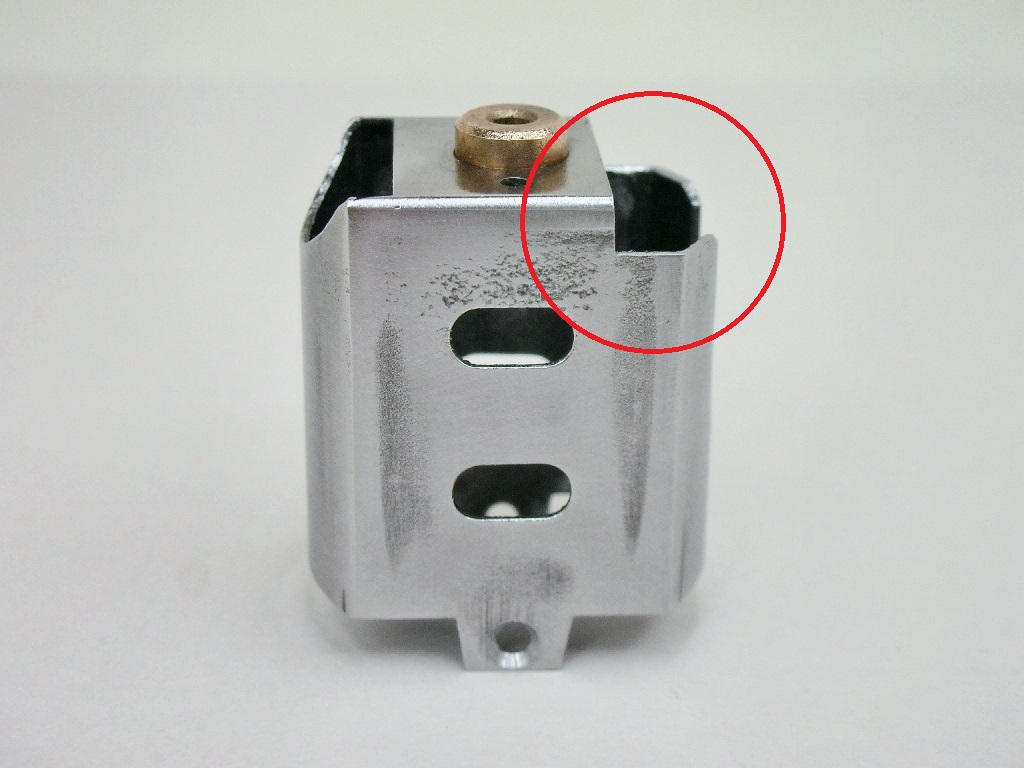
The 1st gen can on the right is of folded and welded construction. It is quite thick at .040" compared to the thin 2nd gen can I'll be using on the left with it's nice axle clearance notch:


champion motor (3).JPG


The both have the little finger sticking out the front of the can for the end bell attachment screw:


champion motor (4).JPG


I have 8 or 10 old cut up and raced to death Champion thick wall can open motors and all of them have those end bell mounting fingers cut off. They all have screw holes drilled in the side of the can like a Mura. 


champion motor (5).JPG


Rick Thigpen
Check out Steve Okeefe's great web site at its new home here at Slotblog:
The Independent Scratchbuilder
There's much more to come...


#7 Mark Onofri

Mark Onofri

    Posting Leader

  • Subscriber
  • PipPipPipPipPipPipPip
  • 2,981 posts
  • Joined: 18-November 20
  • Gender:Male
  • Location:Syracuse, NY

Posted 24 August 2025 - 07:53 PM

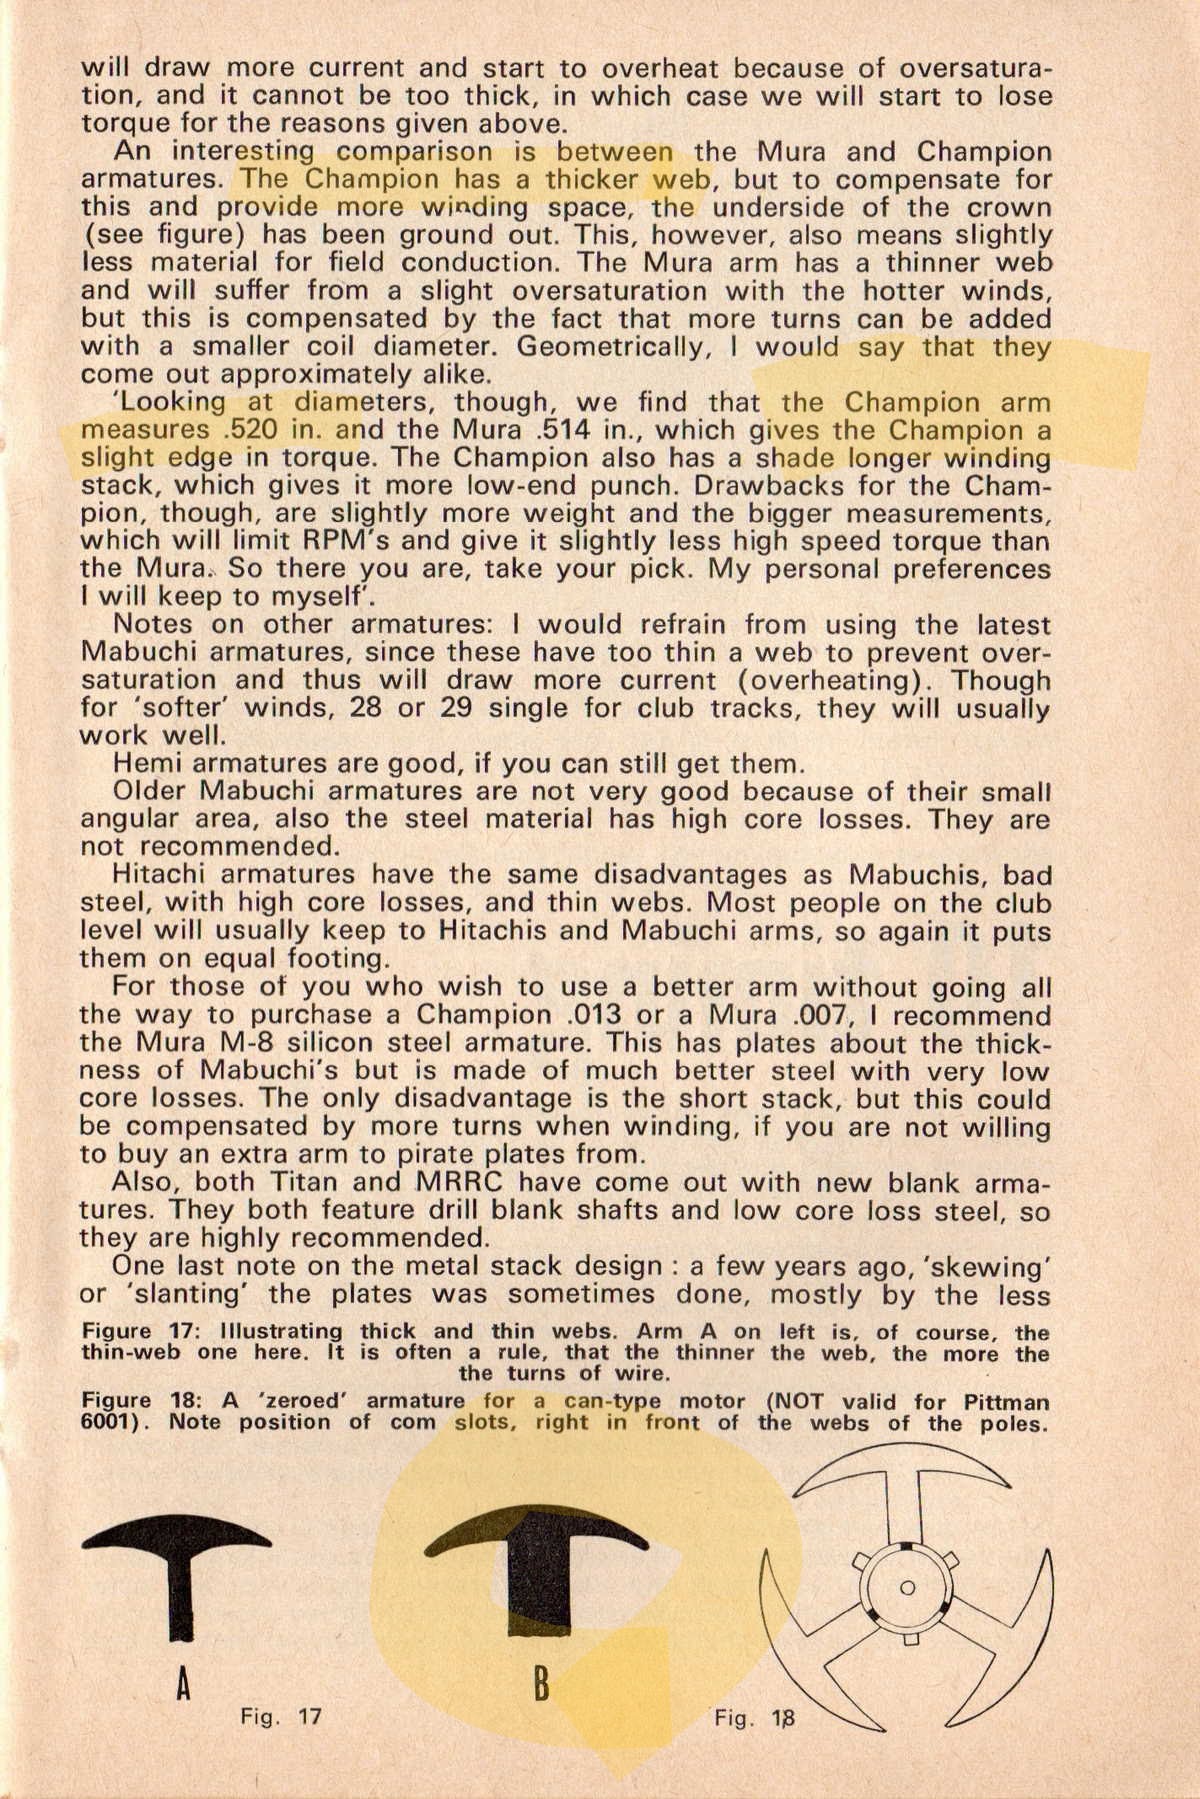
I was going from this for the sole purpose of having a champion arm in a champion can . Probably a 16D arm?

Attached Images

  • motor-tuning-2-019~2.jpg


#8 Bill from NH

Bill from NH

    Age scrubs away speed!

  • Full Member
  • PipPipPipPipPipPipPipPip
  • 15,317 posts
  • Joined: 02-August 07
  • Gender:Male
  • Location:New Boston, NH

Posted 24 August 2025 - 09:18 PM

Mark, what's the age of this writeup? Someplace I have two Champion blank arms with blue insulated coating & factory installed comms ready for winding. I think they might be C-can blanks. If I can find them, I'll measure their stack length & diameter. I hope they aren't packed away with that steel Tony P center section.  :laugh2:


Bill Fernald
 
I intend to live forever!  So far, so good.  :laugh2:  :laugh2: 

#9 Mark Onofri

Mark Onofri

    Posting Leader

  • Subscriber
  • PipPipPipPipPipPipPip
  • 2,981 posts
  • Joined: 18-November 20
  • Gender:Male
  • Location:Syracuse, NY

Posted 24 August 2025 - 11:00 PM

December 69

#10 dc-65x

dc-65x

    Grand Champion Poster

  • Subscriber
  • PipPipPipPipPipPipPipPip
  • 7,204 posts
  • Joined: 14-February 06
  • Gender:Male
  • Location:Captain Rick: The only vintage slot car nut in SW Oregon?

Posted 25 August 2025 - 04:26 PM

Pretty sure my 2nd gen Cee Can is later than Dec. 1969. As I mentioned, I have along with the can, Champion magnets, a Champion .515" armature and some custom shims to tie everything together.


So, moving along with the project, I modified the gear side back of the can by opening it up in the same manner as I do Mura C-cans:


champion motor (17).JPG


Note, with the paint removed, how crude the metal surface is. And this is after some filing and sanding.


End bell time. Below on the left is a Champion and a Mura on the right:


champion motor (7).JPG


The Champion end bell has a cut out to allow that finger on the can with the screw hole to pass through:


champion motor (8).JPG


The bottom side of the endbell is relieved for the frame half rails to pass under it....but not enough compared to the properly relieved Mura on the right:


champion motor (6).JPG


Next it's time to drill and tap to mount the end bell.


Rick Thigpen
Check out Steve Okeefe's great web site at its new home here at Slotblog:
The Independent Scratchbuilder
There's much more to come...


#11 Bill from NH

Bill from NH

    Age scrubs away speed!

  • Full Member
  • PipPipPipPipPipPipPipPip
  • 15,317 posts
  • Joined: 02-August 07
  • Gender:Male
  • Location:New Boston, NH

Posted 25 August 2025 - 07:25 PM

It was '73 or '74 before Champion sold C-cans with the screw tabs left on. Previously, they had been cut off. The Champion endbells became available the same time as the tabbed can. Before then, East coast builders used the Mura endbell, which was more precise. I agree these tabbed cans in the second lot are not nearly as nice as their first batch of C-cans. I bought two cans & endbells, built one, & still have the parts for the second.


Bill Fernald
 
I intend to live forever!  So far, so good.  :laugh2:  :laugh2: 

#12 Mark Onofri

Mark Onofri

    Posting Leader

  • Subscriber
  • PipPipPipPipPipPipPip
  • 2,981 posts
  • Joined: 18-November 20
  • Gender:Male
  • Location:Syracuse, NY

Posted 25 August 2025 - 08:56 PM

Are those small bearing endbells? Seems like no one has the small endbell or large can bearings. Either bb or oillight. I'm sure you just crank up the lathe and problems solved but....

#13 dc-65x

dc-65x

    Grand Champion Poster

  • Subscriber
  • PipPipPipPipPipPipPipPip
  • 7,204 posts
  • Joined: 14-February 06
  • Gender:Male
  • Location:Captain Rick: The only vintage slot car nut in SW Oregon?

Posted 25 August 2025 - 09:19 PM

Mark, those are Mura large end bell bearings which were the same diameter but bit thinner than their can bearings. I bought them in the 90's.


Rick Thigpen
Check out Steve Okeefe's great web site at its new home here at Slotblog:
The Independent Scratchbuilder
There's much more to come...


#14 Bill from NH

Bill from NH

    Age scrubs away speed!

  • Full Member
  • PipPipPipPipPipPipPipPip
  • 15,317 posts
  • Joined: 02-August 07
  • Gender:Male
  • Location:New Boston, NH

Posted 26 August 2025 - 05:53 AM

The original Mura over/under endbells used the same 6 mm bushings as their cans. When they came out with their latest endbell, which is underhead, they also came out with a narrower/shorted 6 mm bushing. This was probably the early 90s.


Mark, Professor Motor carries some obsolete slot car parts. they might have 6 mm bushings. A place called Herm's also has some old stuff too. I've not used them. Champion C-can bushings are 6 mm, as are Parma 16D motors.


Bill Fernald
 
I intend to live forever!  So far, so good.  :laugh2:  :laugh2: 

#15 Mark Onofri

Mark Onofri

    Posting Leader

  • Subscriber
  • PipPipPipPipPipPipPip
  • 2,981 posts
  • Joined: 18-November 20
  • Gender:Male
  • Location:Syracuse, NY

Posted 26 August 2025 - 08:05 AM

A little too much drift. I should have a separate thread about this.

#16 Bill from NH

Bill from NH

    Age scrubs away speed!

  • Full Member
  • PipPipPipPipPipPipPipPip
  • 15,317 posts
  • Joined: 02-August 07
  • Gender:Male
  • Location:New Boston, NH

Posted 26 August 2025 - 09:45 AM

Yup!


Bill Fernald
 
I intend to live forever!  So far, so good.  :laugh2:  :laugh2: 

#17 dc-65x

dc-65x

    Grand Champion Poster

  • Subscriber
  • PipPipPipPipPipPipPipPip
  • 7,204 posts
  • Joined: 14-February 06
  • Gender:Male
  • Location:Captain Rick: The only vintage slot car nut in SW Oregon?

Posted 26 August 2025 - 07:48 PM

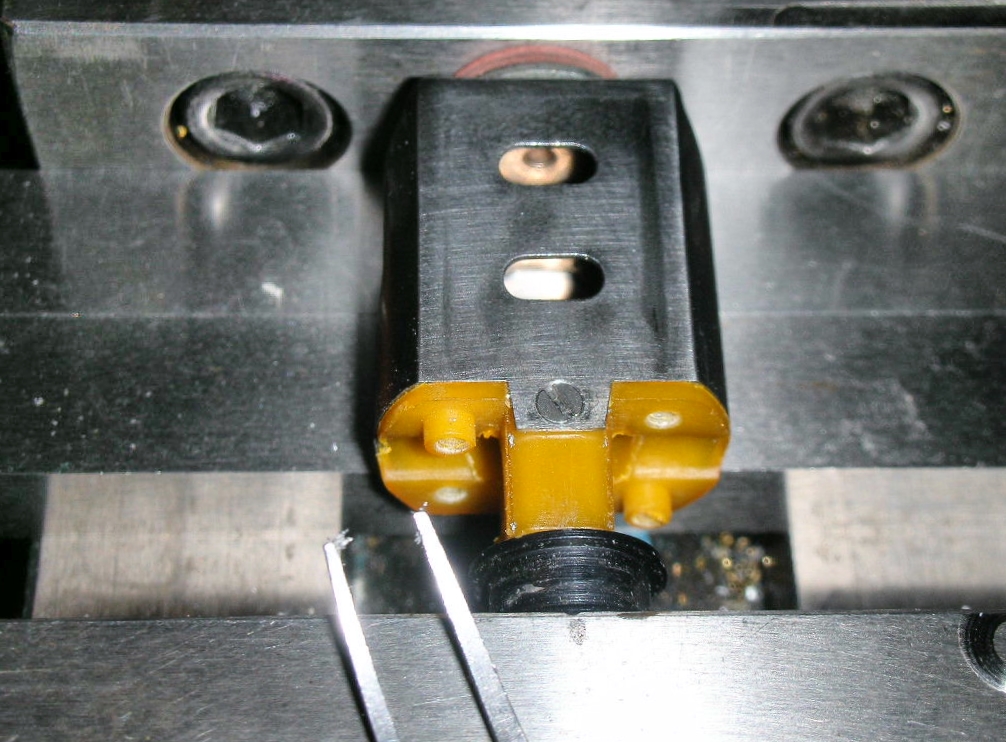
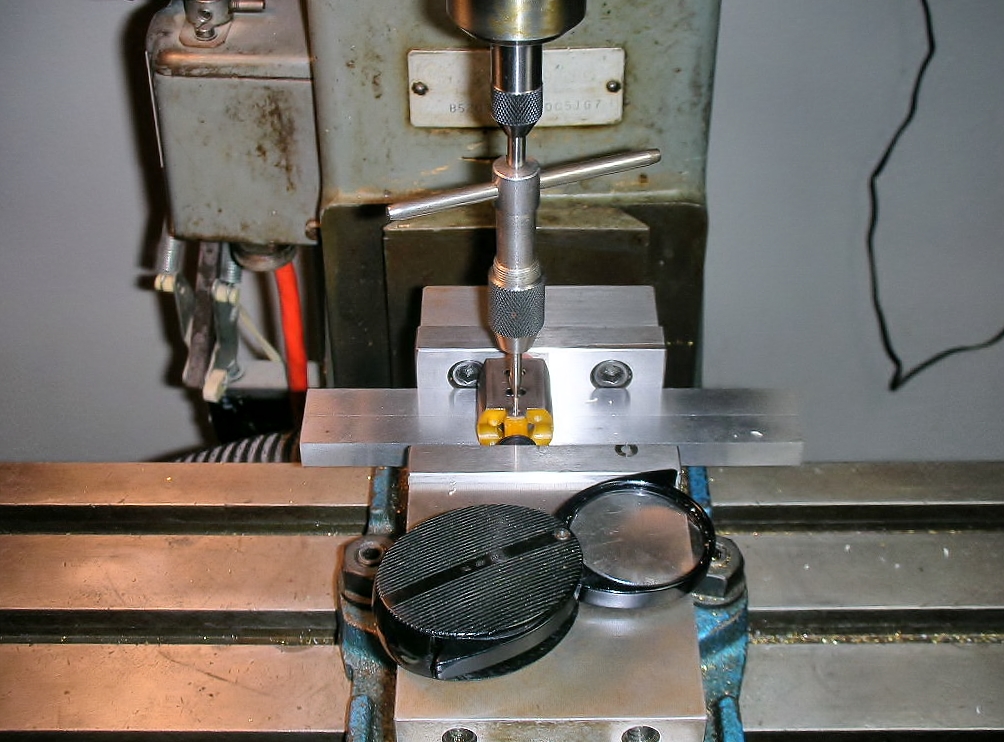
Here the setup is in my little 1950's milling machine getting the end bell mounting screw hole drilled and tapped. The vise is squeezing the end bell tightly into the can


champion motor (14).JPG


You can see the tap guide in the drill chuck locating the tap handle. Using it makes the screw thread perpendicular. The flat head screws I'm using really look ugly if they are misaligned:


champion motor (15).JPG


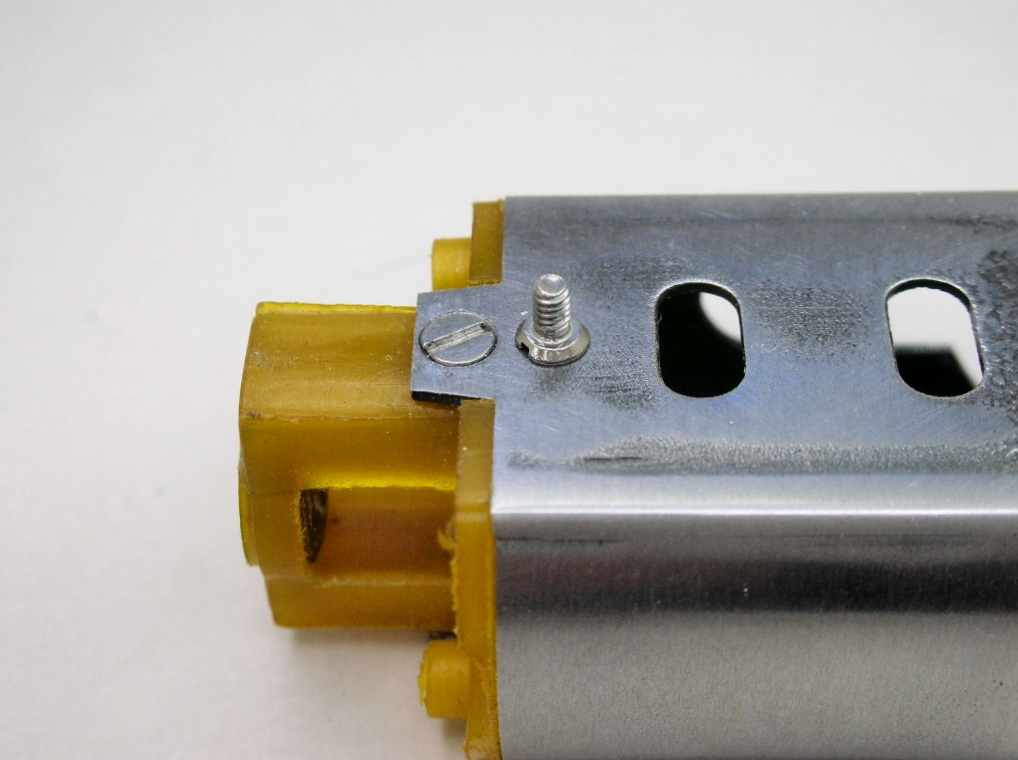
I'm using 0-80 stainless steel machine screws. They are undercut flat heads which works well with thin metal of the can:


champion motor (16).JPG


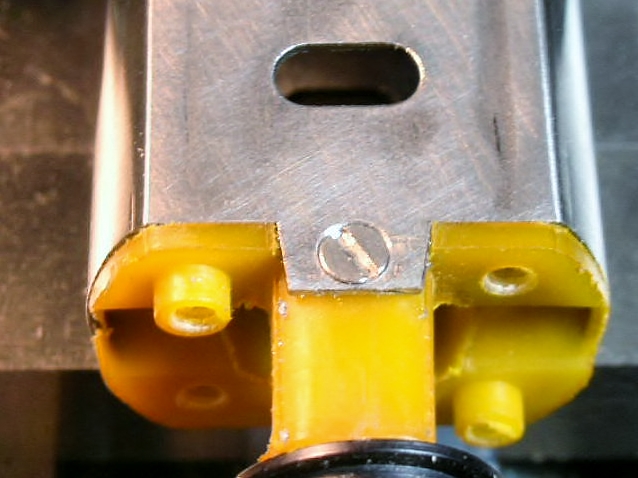
Good to go:


champion motor (18).JPG


Now I'll put this setup together with junker parts as a jig motor and start on the chassis.


  • Pablo, Tex and Alchemist like this

Rick Thigpen
Check out Steve Okeefe's great web site at its new home here at Slotblog:
The Independent Scratchbuilder
There's much more to come...


#18 Bill from NH

Bill from NH

    Age scrubs away speed!

  • Full Member
  • PipPipPipPipPipPipPipPip
  • 15,317 posts
  • Joined: 02-August 07
  • Gender:Male
  • Location:New Boston, NH

Posted 26 August 2025 - 08:49 PM

Your 0-80 screws are better than Champion's chrome plated self-tappers. I bought a box of
the self-tappers & they all turned black while stored away. When we built race motors, we put
a third slot between the factory slots & turned the can sides to a .020 thickness.
Bill Fernald
 
I intend to live forever!  So far, so good.  :laugh2:  :laugh2: 

#19 dc-65x

dc-65x

    Grand Champion Poster

  • Subscriber
  • PipPipPipPipPipPipPipPip
  • 7,204 posts
  • Joined: 14-February 06
  • Gender:Male
  • Location:Captain Rick: The only vintage slot car nut in SW Oregon?

Posted 27 August 2025 - 08:14 PM

Here is a 1st gen "thick" Champion can modified as I believe Bill is describing above. It was modified by Joel Montague for a Slotblog project I'm honored to say I got to work on with him. Project link below:


Joel Montague's 1973 Nats Winner


champion motor (21).jpg


I'm using the 2nd gen "thin" wall can so no machining to reduce wall thickness is possible.


Here is my setup as a jig motor with standard Mura hardware on the end bell. I'll be adding Champion buss bars, some cool elephant ear heat sinks and a comm cooler when its jig motor duties are done:


champion motor (20).JPG


  • Pablo, Tex, NSwanberg and 1 other like this

Rick Thigpen
Check out Steve Okeefe's great web site at its new home here at Slotblog:
The Independent Scratchbuilder
There's much more to come...


#20 dc-65x

dc-65x

    Grand Champion Poster

  • Subscriber
  • PipPipPipPipPipPipPipPip
  • 7,204 posts
  • Joined: 14-February 06
  • Gender:Male
  • Location:Captain Rick: The only vintage slot car nut in SW Oregon?

Posted 28 August 2025 - 08:32 PM

Chassis time.    :D   My design will be VERY LOOSELY influenced by PdL's fabulous Diamond chassis.
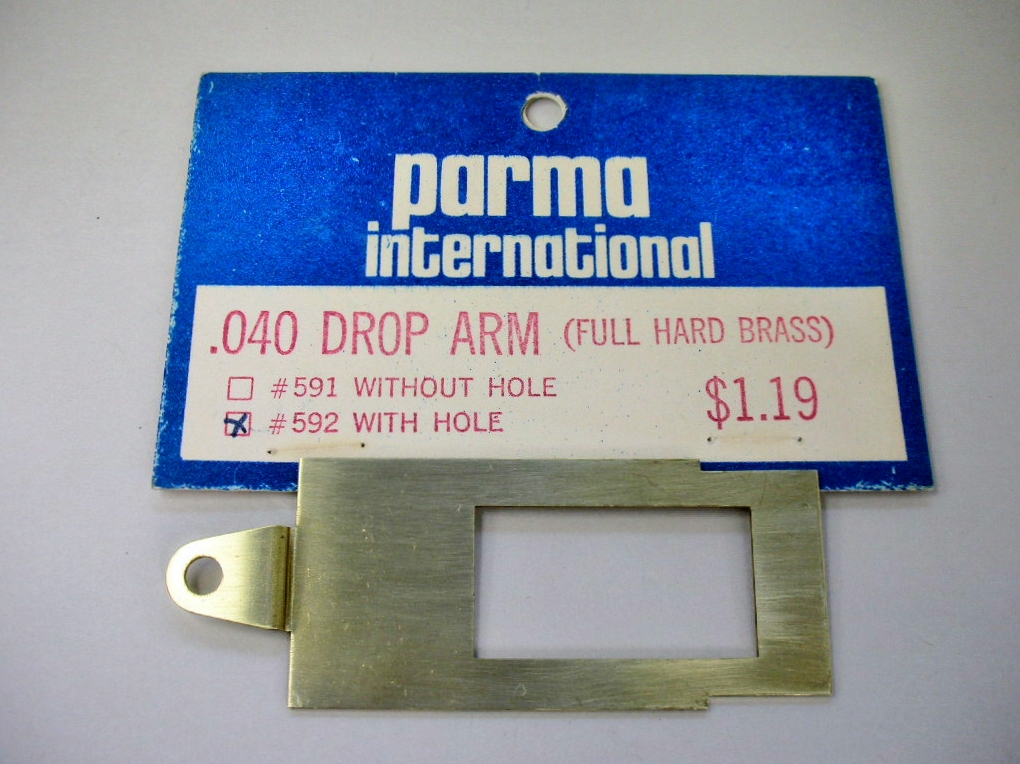
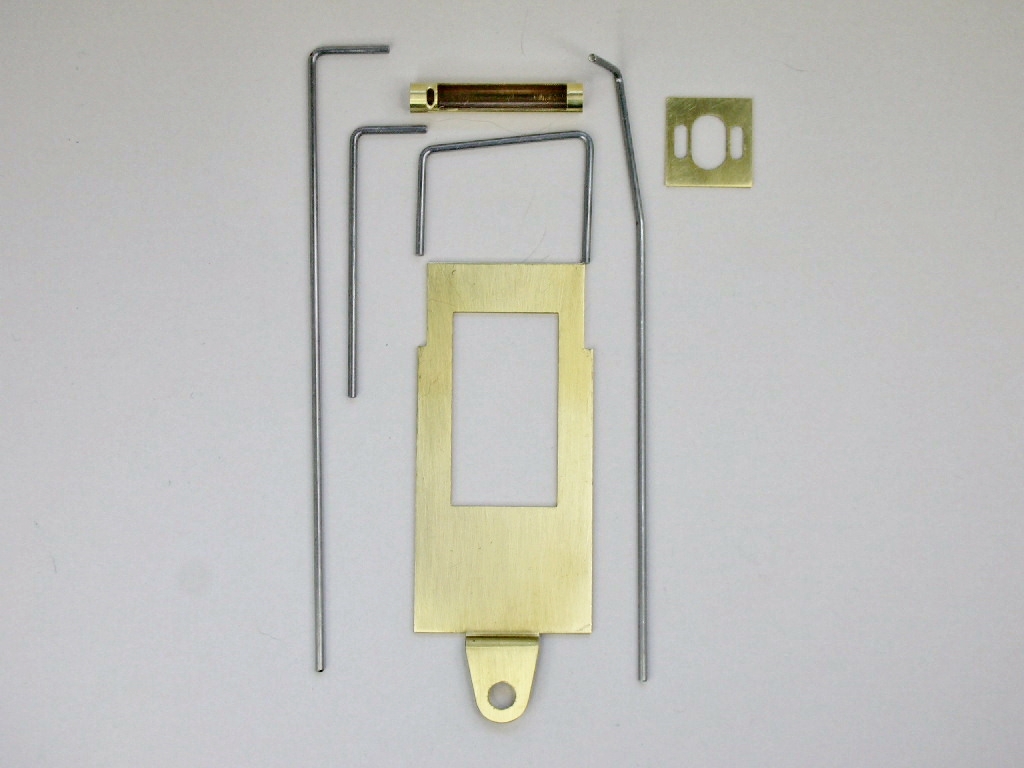
 

The foundation for this baby is the quality Parma drop arm. I've already added some 1/16" cut outs for my design:


chassis (9).JPG


All my center section components ready for soldering:


chassis (5).JPG


My axle tube needed a relief notch to move the rear axle tube brace away from the end bell a bit:
 

chassis (8).JPG


Everything in my Rick's jig all lined up and ready to solder up:


chassis (11).JPG


chassis (12).JPG


Time to fire up the good old 1100 degree Ungar...........now Weller iron.


  • Pablo, vfr750, Tex and 2 others like this

Rick Thigpen
Check out Steve Okeefe's great web site at its new home here at Slotblog:
The Independent Scratchbuilder
There's much more to come...


#21 dc-65x

dc-65x

    Grand Champion Poster

  • Subscriber
  • PipPipPipPipPipPipPipPip
  • 7,204 posts
  • Joined: 14-February 06
  • Gender:Male
  • Location:Captain Rick: The only vintage slot car nut in SW Oregon?

Posted 30 August 2025 - 11:34 AM

I soldered the main rails all the way down the side of the drop arm:


chassis (15).JPG


A piece of 1/4" brass strip placed at the end of the arm to drag the excess solder onto:


chassis (14).JPG


The thin coat of solder left behind is easy to sand off:


chassis (19).JPG


The motor bracket added and the main rail notched for the bottom can screw:


chassis (17).JPG


Endbell side L-brace inletted into the axle tube:


chassis (5).JPG


The center section ready for the independent front axles:


chassis (8).JPG


chassis (9).JPG


  • vfr750, Tex, Bill from NH and 7 others like this

Rick Thigpen
Check out Steve Okeefe's great web site at its new home here at Slotblog:
The Independent Scratchbuilder
There's much more to come...


#22 Pablo

Pablo

    Builder

  • Administrator
  • PipPipPipPipPipPipPipPip
  • 18,579 posts
  • Joined: 20-February 06
  • Gender:Male
  • Location:Cleveland, Tennessee

Posted 31 August 2025 - 07:06 AM

Very nice; some techniques I never seen before  :)  :clapping:


Paul Wolcott


#23 dc-65x

dc-65x

    Grand Champion Poster

  • Subscriber
  • PipPipPipPipPipPipPipPip
  • 7,204 posts
  • Joined: 14-February 06
  • Gender:Male
  • Location:Captain Rick: The only vintage slot car nut in SW Oregon?

Posted 01 September 2025 - 06:49 PM

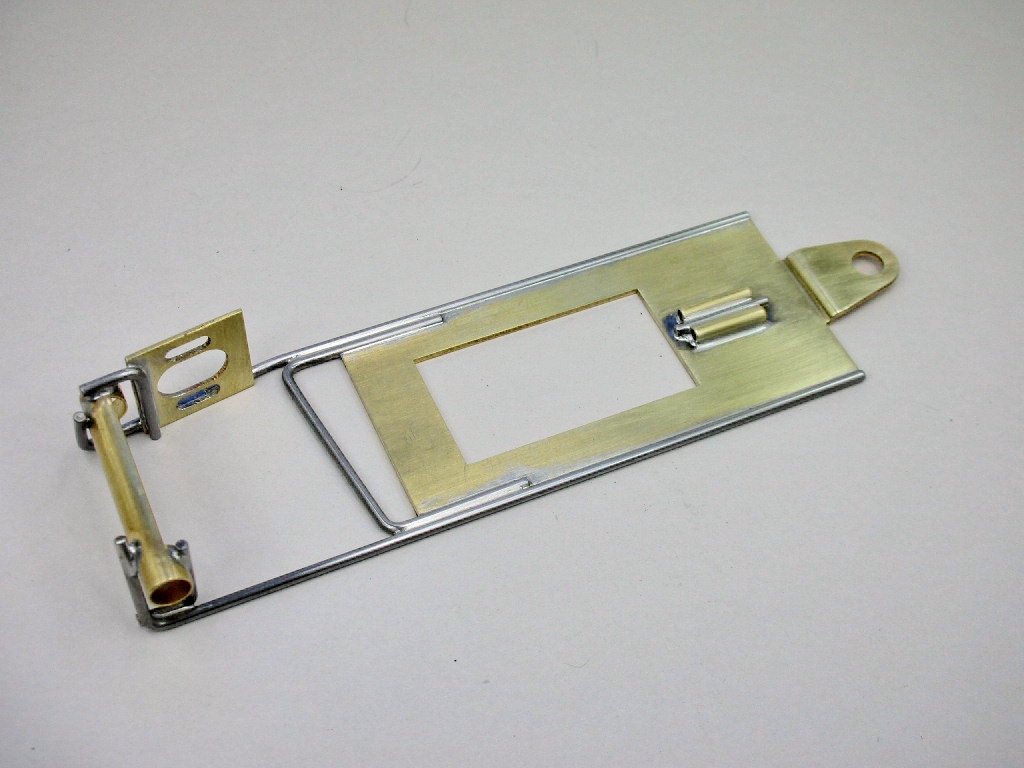
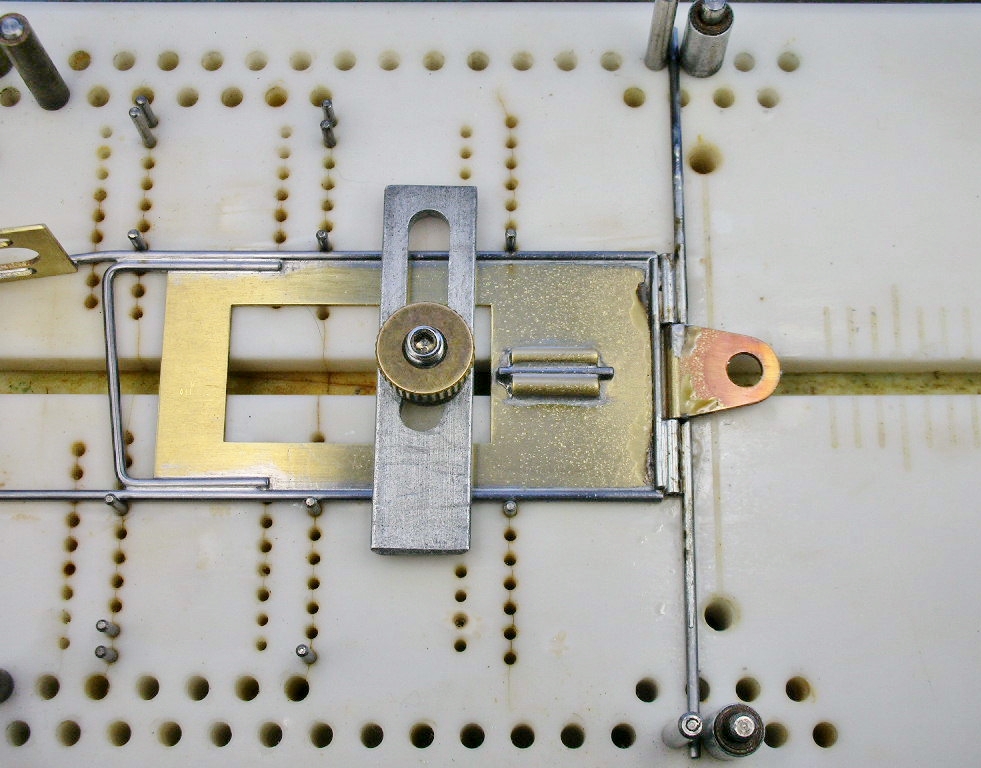
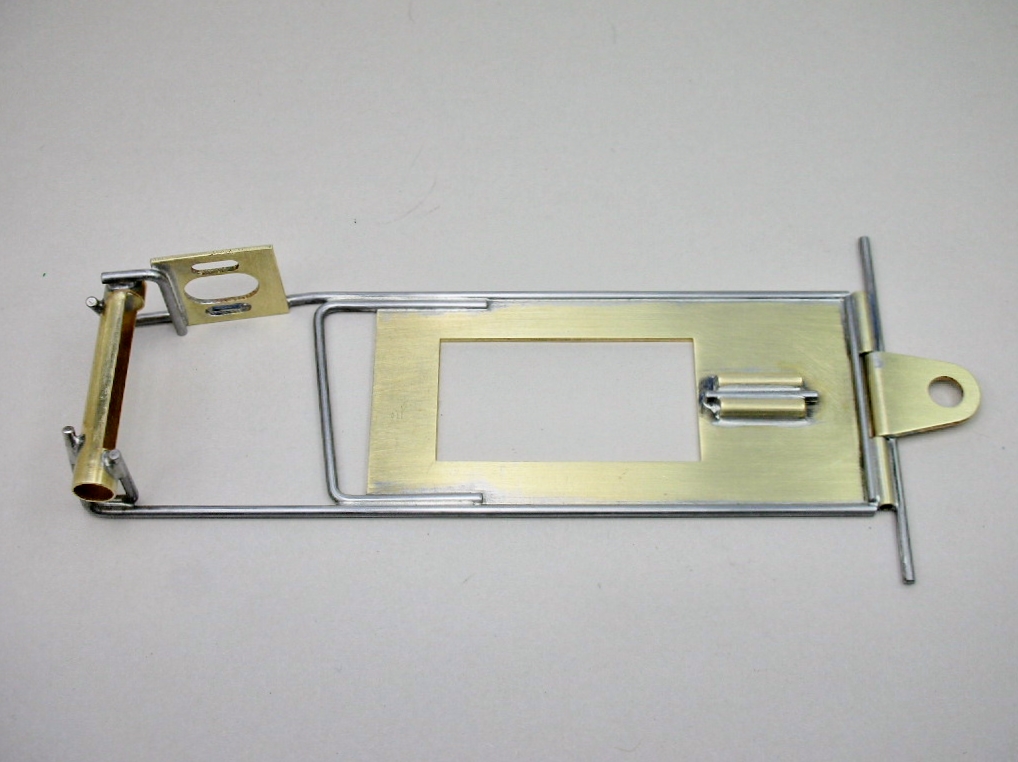
Thanks Pablo. The chassis dimensions to fit this scale Matich Can Am body make for an interesting project. It's got a short wheelbase at just a hair over 3 5/8", a width of only 2 7/8" and 1" diameter rear tires. I decided on the center section design so it would fit standard Parma 11/16" pans and a full 1 1/4" drop arm.


I've added the hinge tubes for a reinforced L-arm front axle:


FSCN6473.JPG


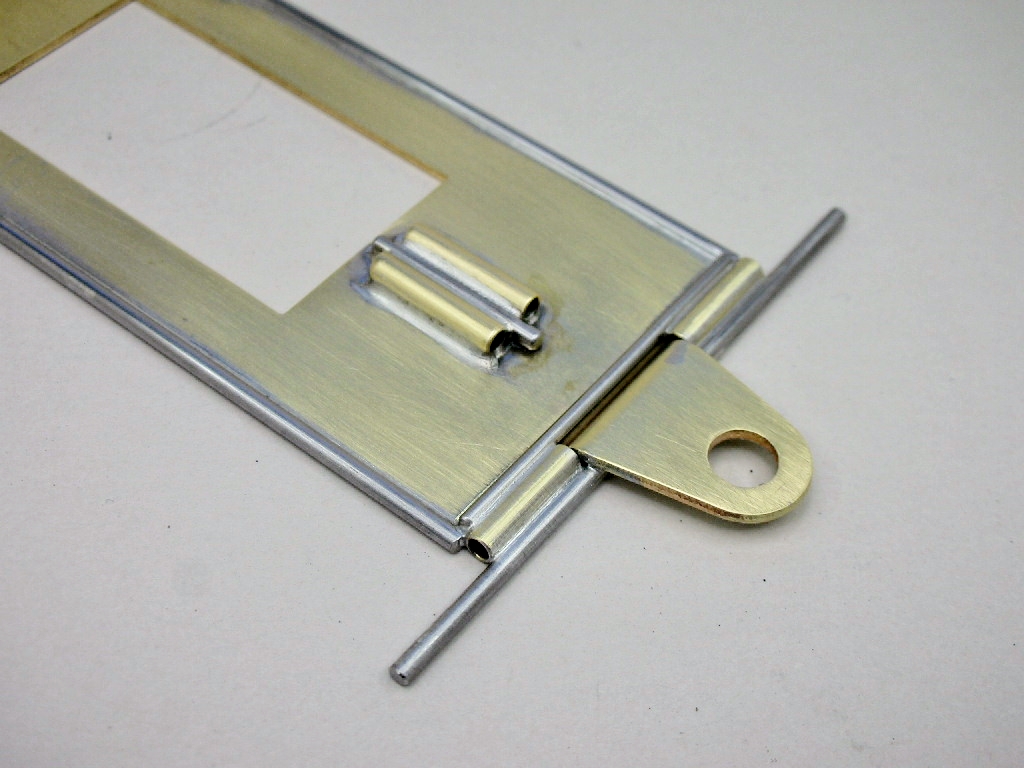
And then jigged it up for the plumber hinge tubes and bumper:


FSCN6476.JPG


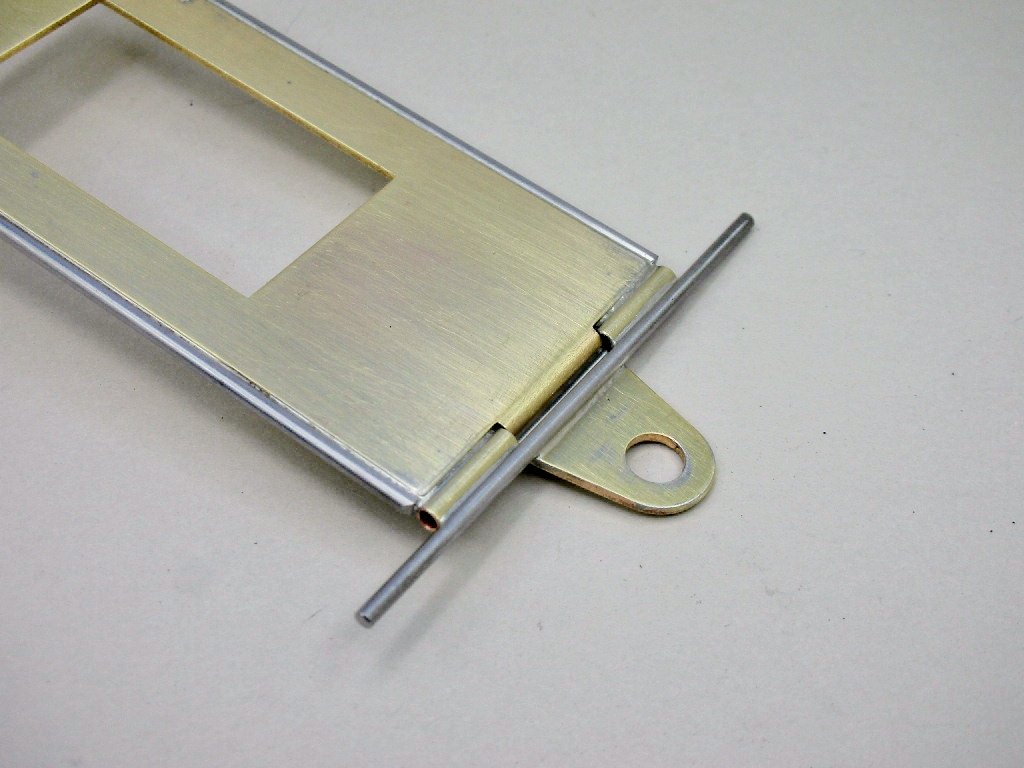
All cleaned up:


FSCN6478.JPG


FSCN6480.JPG


FSCN6482.JPG


Before I add front axles or pans I need to first make up those huge MESAC style fronts and 1" X 5/8" rear tires to check for clearances.


  • vfr750, Tex, Alchemist and 4 others like this

Rick Thigpen
Check out Steve Okeefe's great web site at its new home here at Slotblog:
The Independent Scratchbuilder
There's much more to come...


#24 dc-65x

dc-65x

    Grand Champion Poster

  • Subscriber
  • PipPipPipPipPipPipPipPip
  • 7,204 posts
  • Joined: 14-February 06
  • Gender:Male
  • Location:Captain Rick: The only vintage slot car nut in SW Oregon?

Posted 04 September 2025 - 08:33 PM

Wheel and tire time.


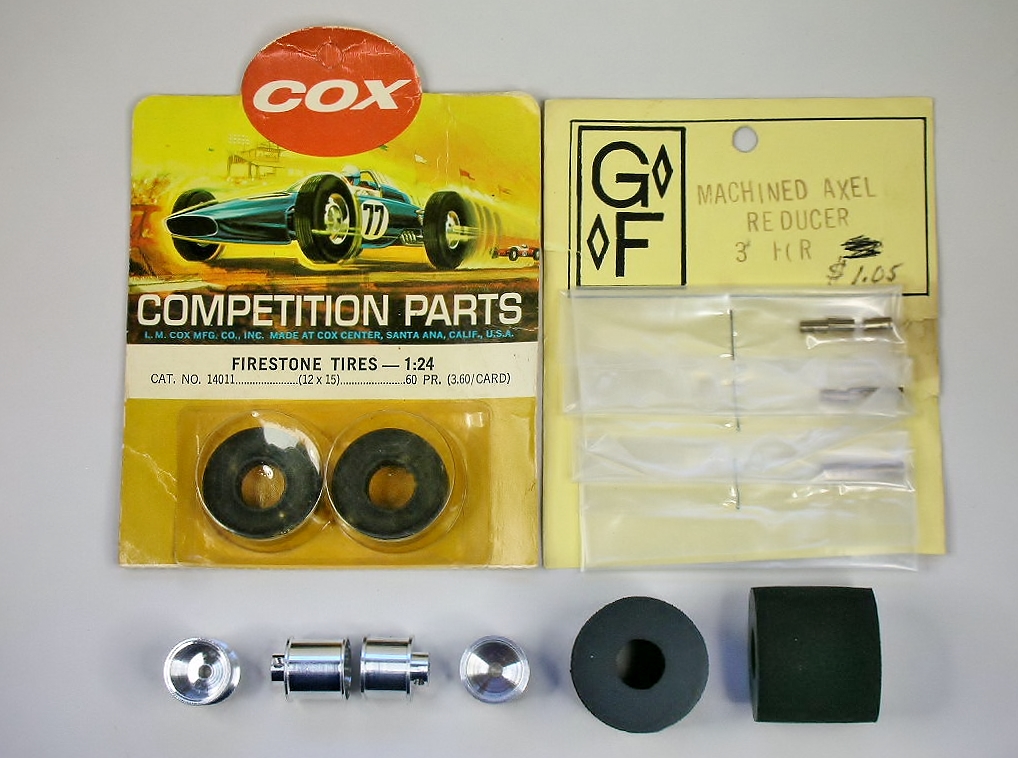
Again I'm going with Russkit X-wide rear wheels and Cox Chaparral Firestone tires for the front. For the rear it's Russkit super duper wide rear wheels with Fass 3/32" axle reducers and Alpha humongous donuts:


matich wheels and tires (1).JPG


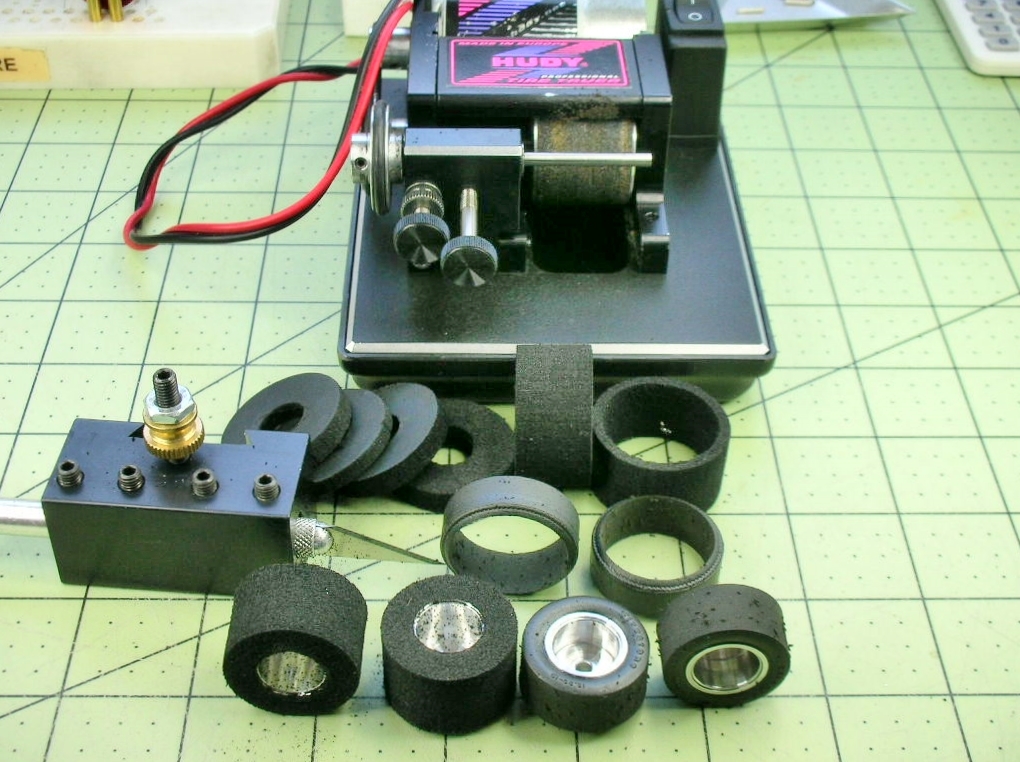
My little hobby lathe with an X-acto knife attached makes quick work of getting the tires close to finish size:


matich wheels and tires (4).JPG


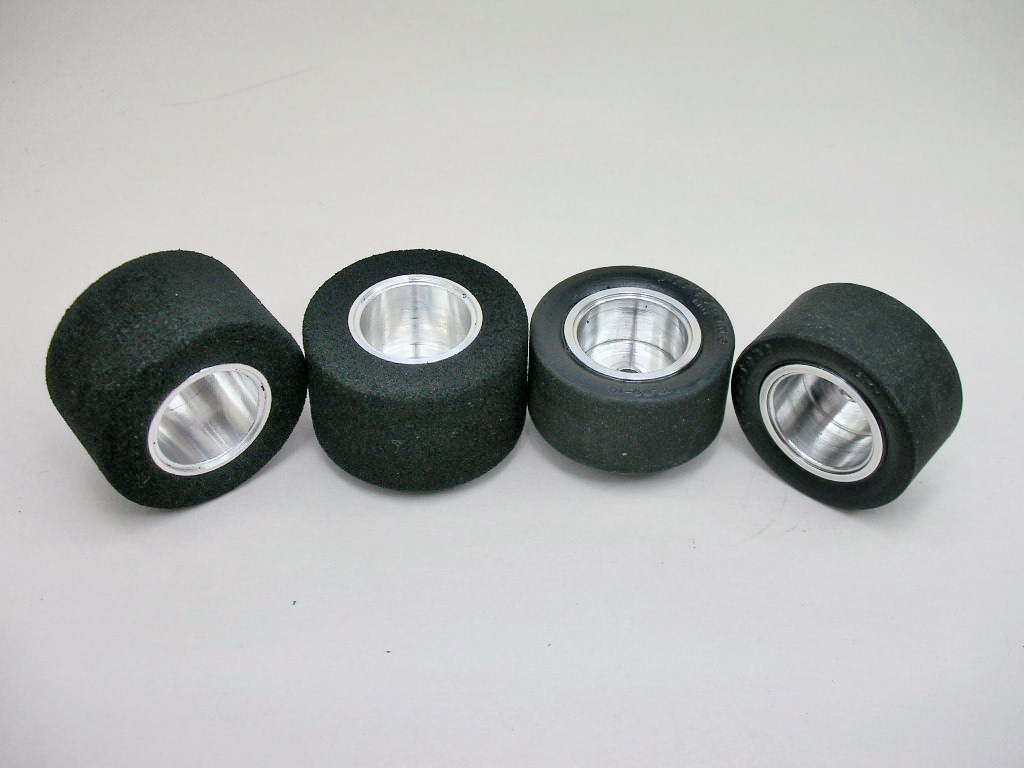
All ground to finish size in the Hudy:


matich wheels and tires (5).JPG


The front tires will still need to have the tread grooves cut........


  • Pablo, vfr750, Tex and 1 other like this

Rick Thigpen
Check out Steve Okeefe's great web site at its new home here at Slotblog:
The Independent Scratchbuilder
There's much more to come...


#25 dc-65x

dc-65x

    Grand Champion Poster

  • Subscriber
  • PipPipPipPipPipPipPipPip
  • 7,204 posts
  • Joined: 14-February 06
  • Gender:Male
  • Location:Captain Rick: The only vintage slot car nut in SW Oregon?

Posted 05 September 2025 - 08:39 PM

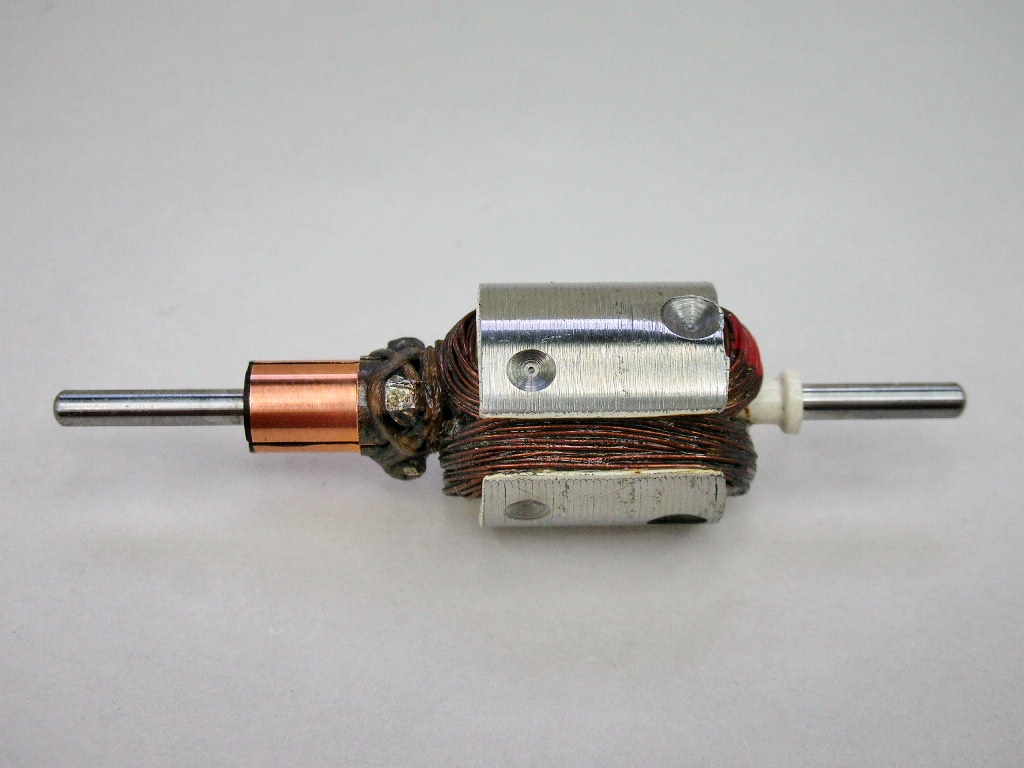
I felt like pulling the jig motor apart and turning it into my "race motor"......so to speak. 


Here's the armature I dug up:


champion motor (12).JPG


it's at least a Champion blank and it might even be a Champion wound.


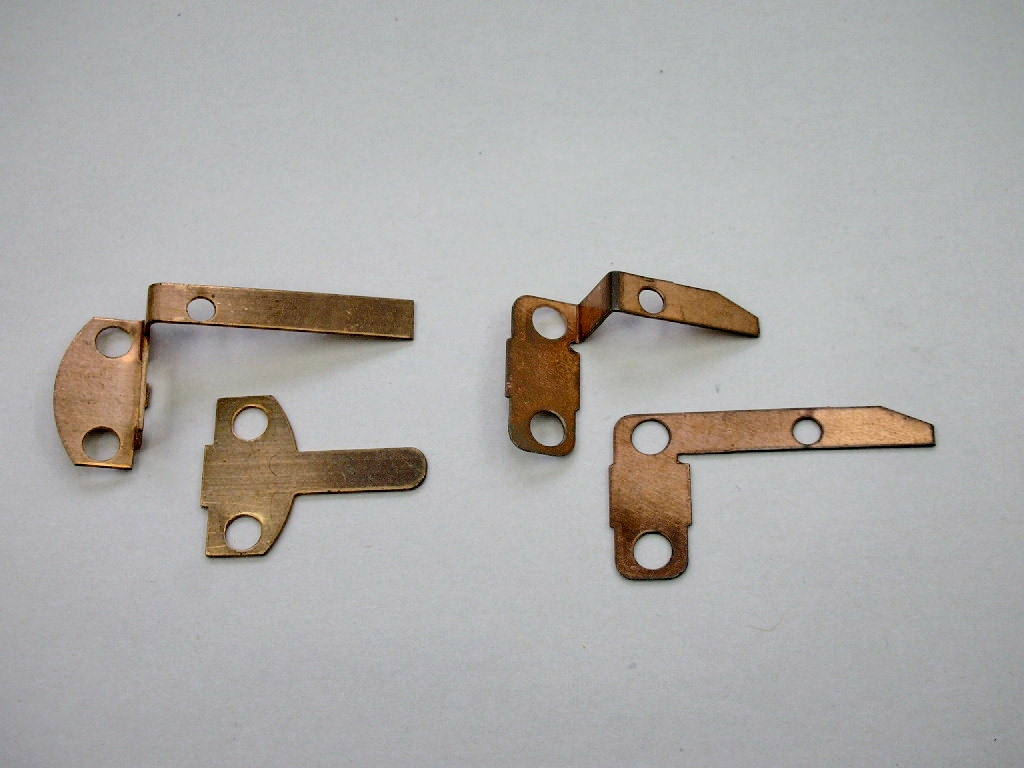
I've also got these Champion Cee Can buss bars on the left compared to the Mura "solid state" buss bars on the right:


champion motor (10).JPG


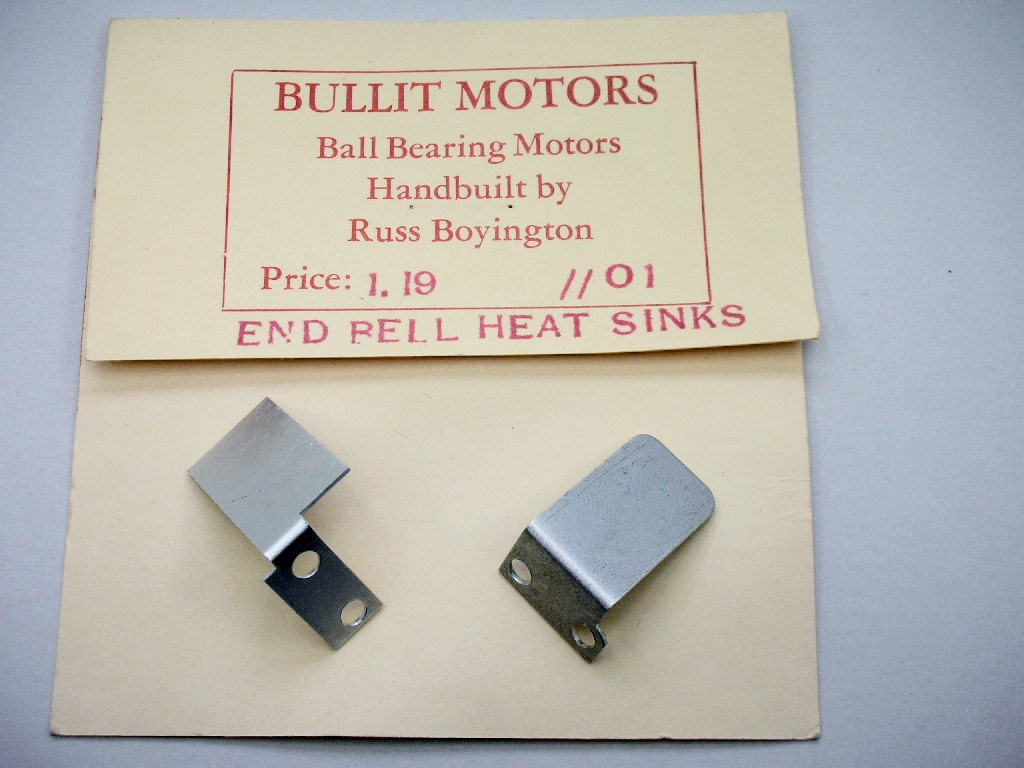
I'm also using my Russ Boyington Bullit Motors end bell heat sinks:


champion motor (1).JPG


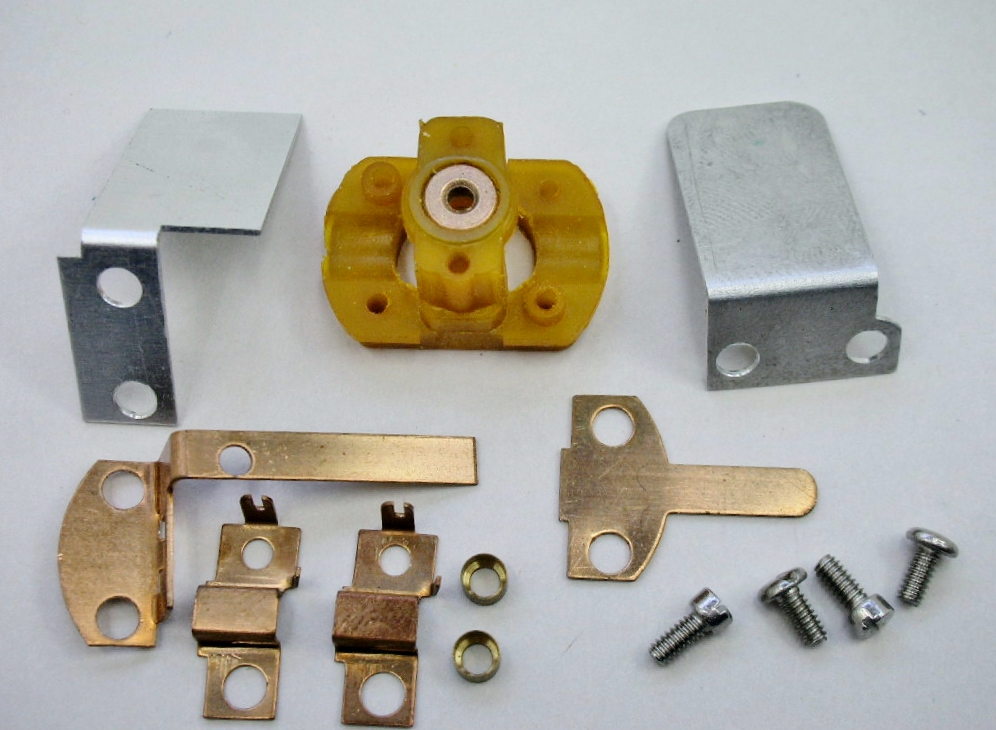
All the end bell goodies ready for assembly:


champion motor (11).JPG


  • Pablo and vfr750 like this

Rick Thigpen
Check out Steve Okeefe's great web site at its new home here at Slotblog:
The Independent Scratchbuilder
There's much more to come...


Electric Dreams Online Shop