Jump to content


Photo

Lancer scale McLaren M6 Can-Am build


  • Please log in to reply
106 replies to this topic

#51 munter

munter

    Checkered Flag in Hand

  • Full Member
  • PipPipPipPipPipPip
  • 1,059 posts
  • Joined: 11-April 08
  • Gender:Male
  • Location:Napier, New Zealand

Posted 17 March 2026 - 02:52 AM

Wow....beautiful chassis but I am starting to worry that it will be a heavy piece after seeing the body mount arrangement.


Any predicted final weight?


It will probably be meaningless to me as my weight concepts of slotcars are based in 1/32 scale and usually with a resin body.


John Warren
Slot cars are my preferred reality


#52 Tex

Tex

    Grand Champion Poster

  • Full Member
  • PipPipPipPipPipPipPipPip
  • 9,267 posts
  • Joined: 07-July 06
  • Gender:Male
  • Location:Denton, TX

Posted 17 March 2026 - 07:49 AM

such attention to detail, to maintain the curvature of the lower part of the body.... to be applauded. I agree that the extra weight of the body mounting pieces detracts from the "pro" aspect of the build but I am in favor of the scale appearance taking precedent over the "pro" aspect. Really super build!


Richard L. Hofer

Remember, two wrongs don't make a right... but three lefts do! Only you're a block over and a block behind.

#53 Pablo

Pablo

    Builder

  • Administrator
  • PipPipPipPipPipPipPipPip
  • 18,579 posts
  • Joined: 20-February 06
  • Gender:Male
  • Location:Cleveland, Tennessee

Posted 17 March 2026 - 09:00 AM

Heavyweight cars compliment the handling of a heavyweight body.


Paul Wolcott


#54 dc-65x

dc-65x

    Grand Champion Poster

  • Subscriber
  • PipPipPipPipPipPipPipPip
  • 7,204 posts
  • Joined: 14-February 06
  • Gender:Male
  • Location:Captain Rick: The only vintage slot car nut in SW Oregon?

Posted 17 March 2026 - 10:02 AM

The "racers" solution to the body mounting would be to use small diameter tires lowering the body past the curved area and simply cut it off. Widen the chassis to 3", splay the sides out a bit and you have your slammed racer.   :shok:


That's what the handling bodies are for. Since this is a scale body I chose a different route.
 

I have a Lee Gilbert "magazine car" chassis and I'll compare it in size and weight to this chassis next............ :victory:


  • SpeedyNH and mickey thumbs like this

Rick Thigpen
Check out Steve Okeefe's great web site at its new home here at Slotblog:
The Independent Scratchbuilder
There's much more to come...


#55 Larry Horner

Larry Horner

    Race Leader

  • Full Member
  • PipPipPipPipPip
  • 550 posts
  • Joined: 18-March 17
  • Gender:Male
  • Location:San Francisco

Posted 17 March 2026 - 12:15 PM

I just finished a chassis in which I used 1/4" angle stock to push the pin-tubes higher up into the body. And since the angle stock is only 1/64" thick, the finished assembly was super floppy hence I decided to go to rectangular stock instead. Rick, if you had posted this a week ago, it would have saved me a lot of trouble!  :dash2:


#56 Alchemist

Alchemist

    Posting Leader

  • Full Member
  • PipPipPipPipPipPipPip
  • 2,823 posts
  • Joined: 11-November 09
  • Gender:Male
  • Location:Far, far away

Posted 17 March 2026 - 12:59 PM

Rick,


The way you designed the body support to accommodate the curve of the body is really creative.


That is an excellent design! ! !


I find it so inspirational - thank you for sharing your creativity along with your craftsmanship Rick.


Ernie


Ernie Layacan

#57 Bill from NH

Bill from NH

    Age scrubs away speed!

  • Full Member
  • PipPipPipPipPipPipPipPip
  • 15,317 posts
  • Joined: 02-August 07
  • Gender:Male
  • Location:New Boston, NH

Posted 17 March 2026 - 01:21 PM

The chassis doesn't tend to look too heavy to me. Maybe it would have if all .050" sheet brass was used. People should remember not all slot cars run on Kings & other banked tracks. Differing weight cars run best on some of the various track designs. The few 1/32 scale chassis I've built don't look anything like my 1/24's. I don't build HO but they would be different still.


Bill Fernald
 
I intend to live forever!  So far, so good.  :laugh2:  :laugh2: 

#58 dc-65x

dc-65x

    Grand Champion Poster

  • Subscriber
  • PipPipPipPipPipPipPipPip
  • 7,204 posts
  • Joined: 14-February 06
  • Gender:Male
  • Location:Captain Rick: The only vintage slot car nut in SW Oregon?

Posted 17 March 2026 - 06:08 PM

Thanks Ernie and I agree Bill.   :)


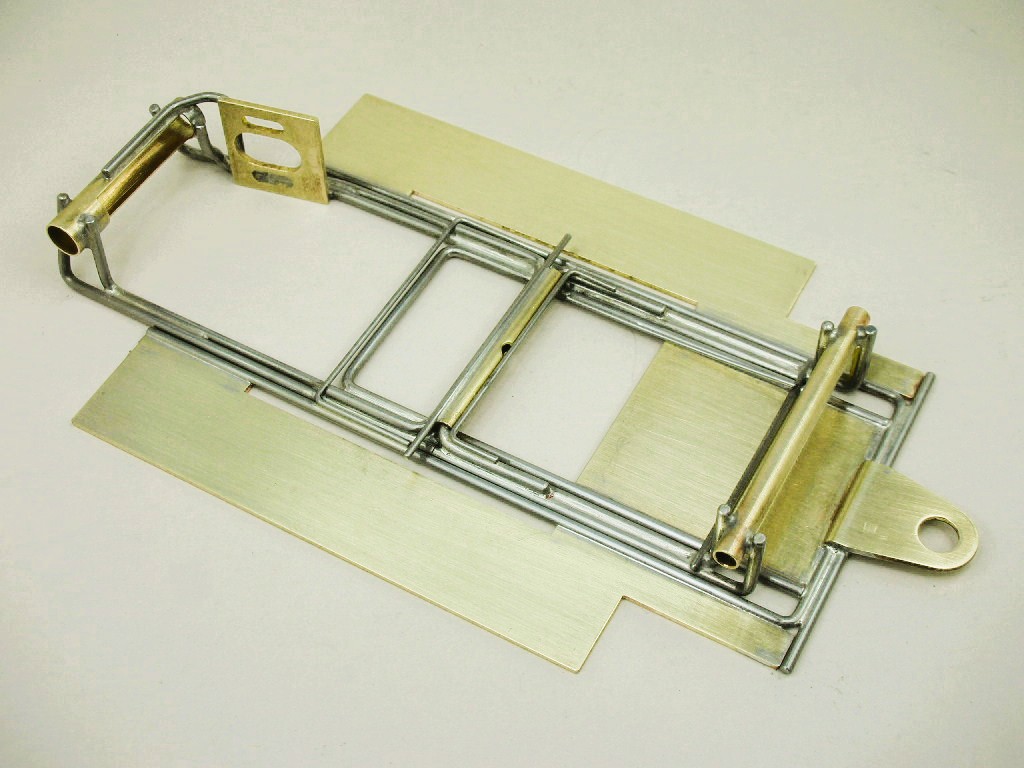
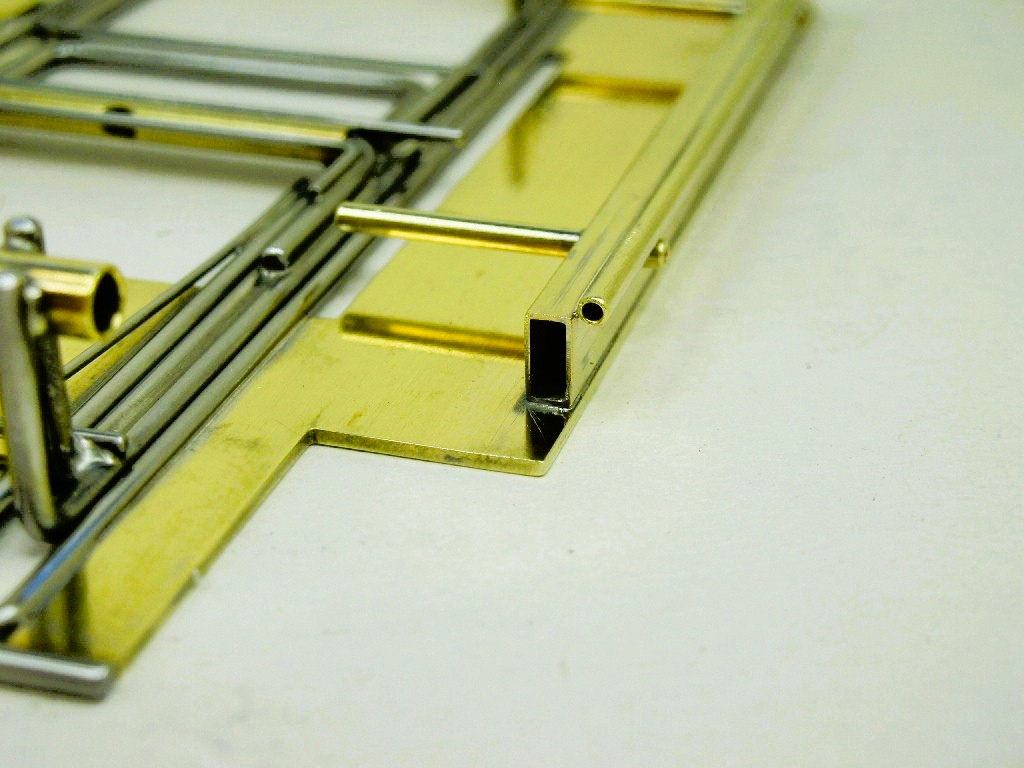
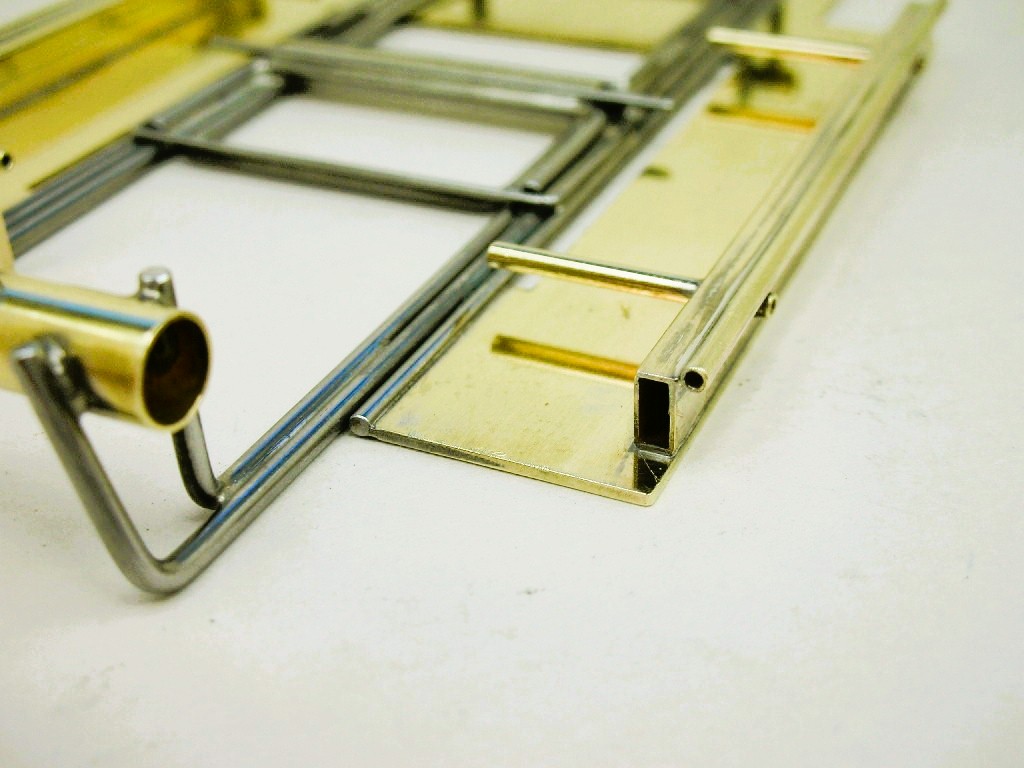
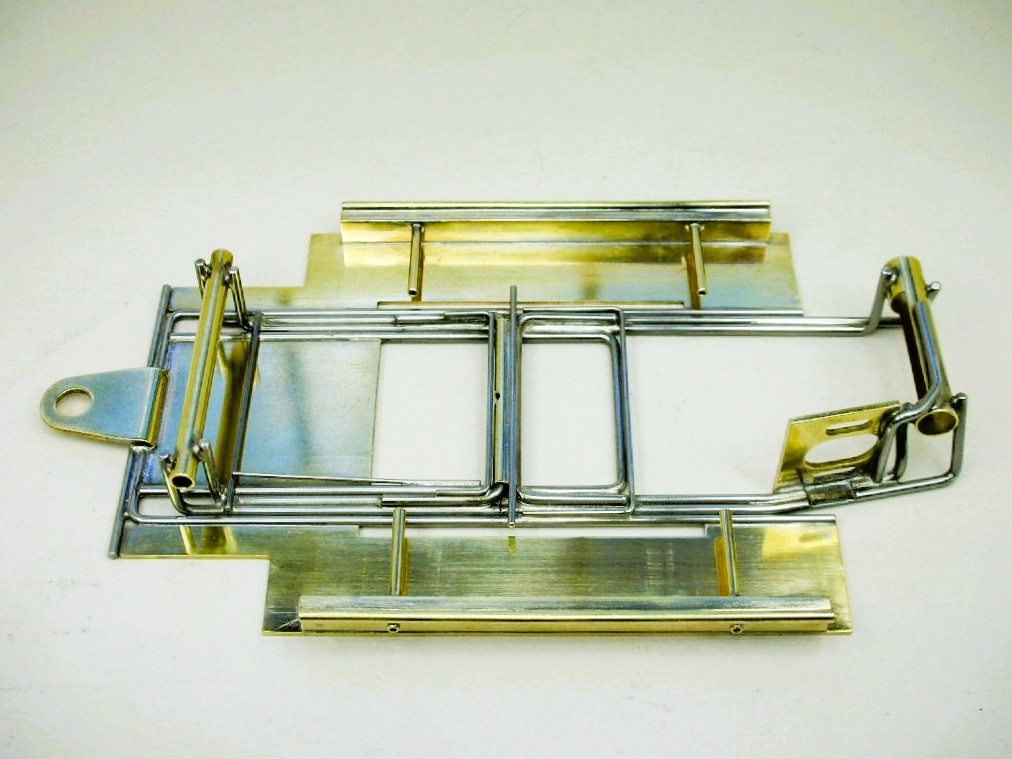
Larry, the rectangular tube also makes installing the pin tubes easy as they self align in their pair of holes if properly sized:


mclaren chassis (55).JPG


mclaren chassis (54).JPG


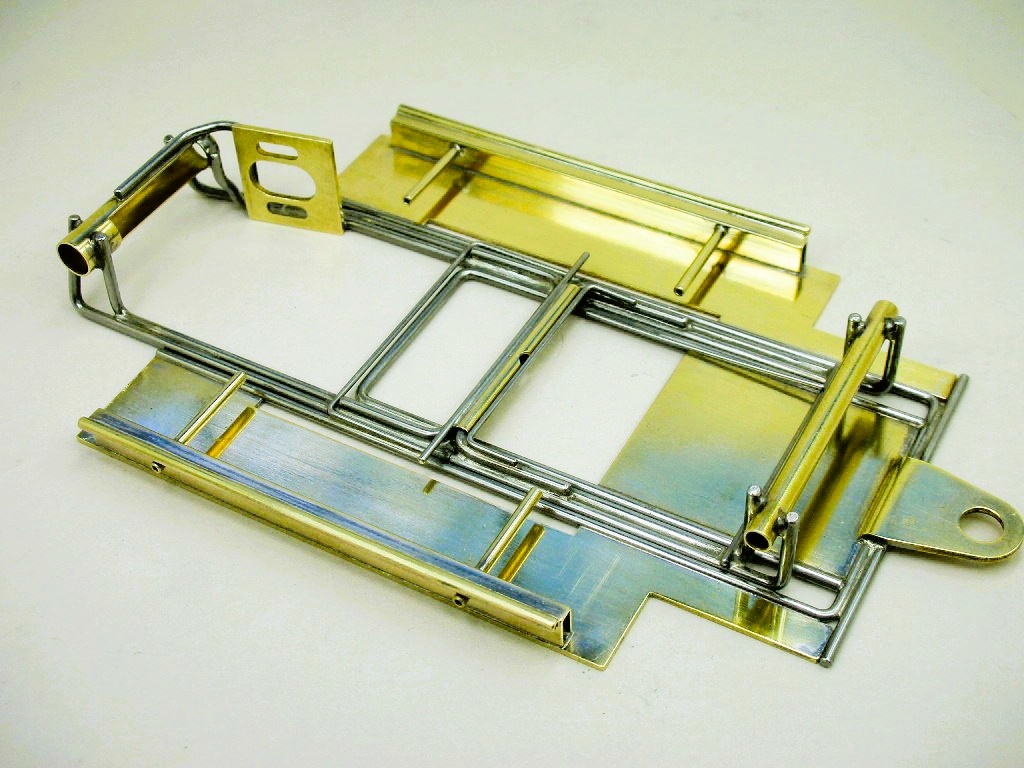
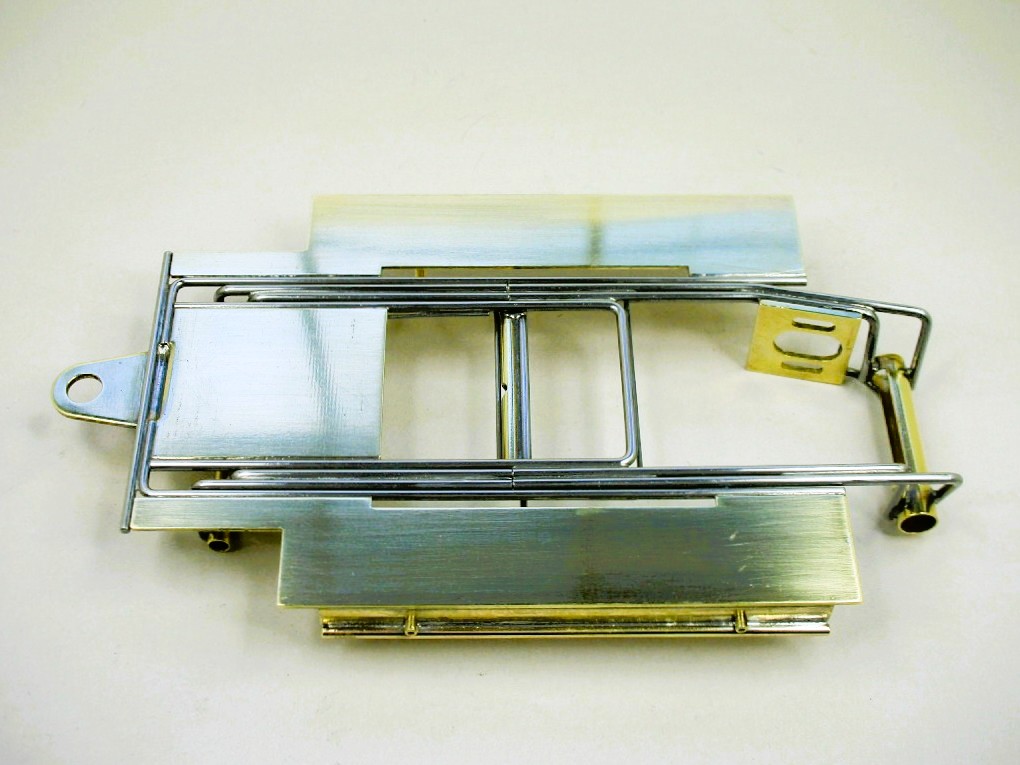
The finished chassis:


mclaren chassis (51).JPG


mclaren chassis (52).JPG


mclaren chassis (53).JPG


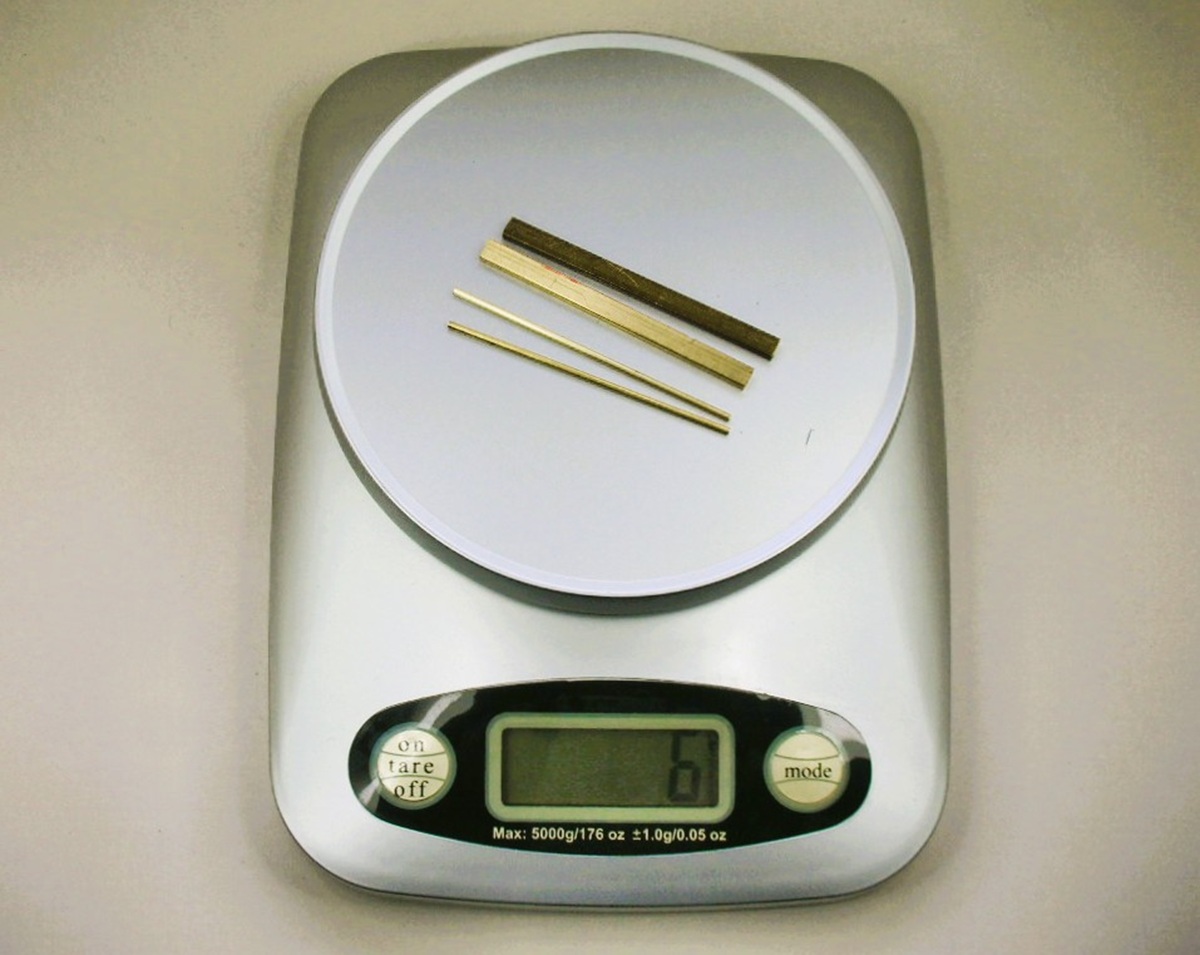
6 grams is the weight of the pieces of tube I added to support the scale body. In retrospect, I wish I'd have drilled a series of large holes in the rectangular tube. Not sure if it would save much weight but I think it would have looked awesome:  


gilbert vs mclaren chassis comparo (3).JPG


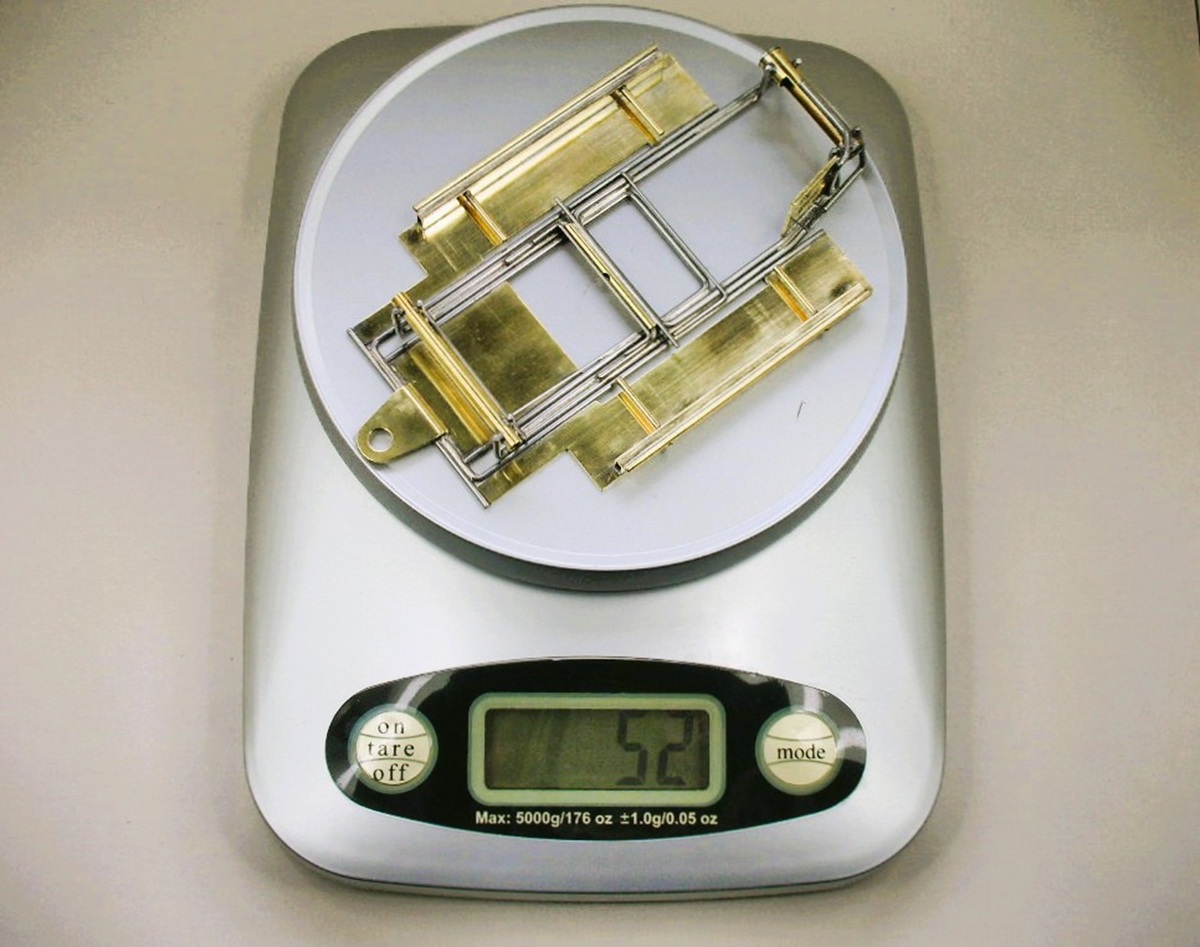
Here's my chassis weighing in at 52 grams:


gilbert vs mclaren chassis comparo (1).JPG


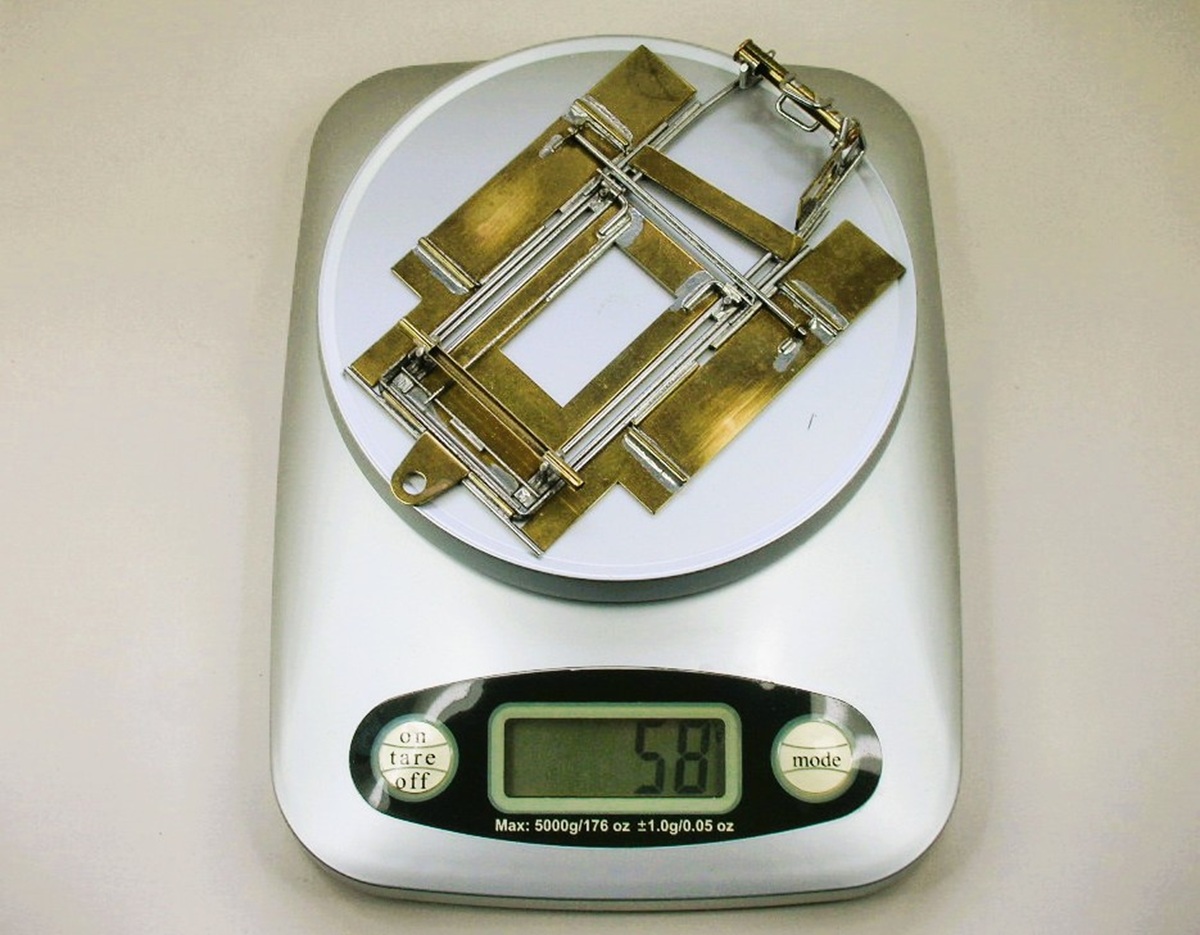
And a good example of a Blue King car from the 70's, the Lee Gilbert Car Model Magazine car at 58 grams:


gilbert vs mclaren chassis comparo (2).JPG


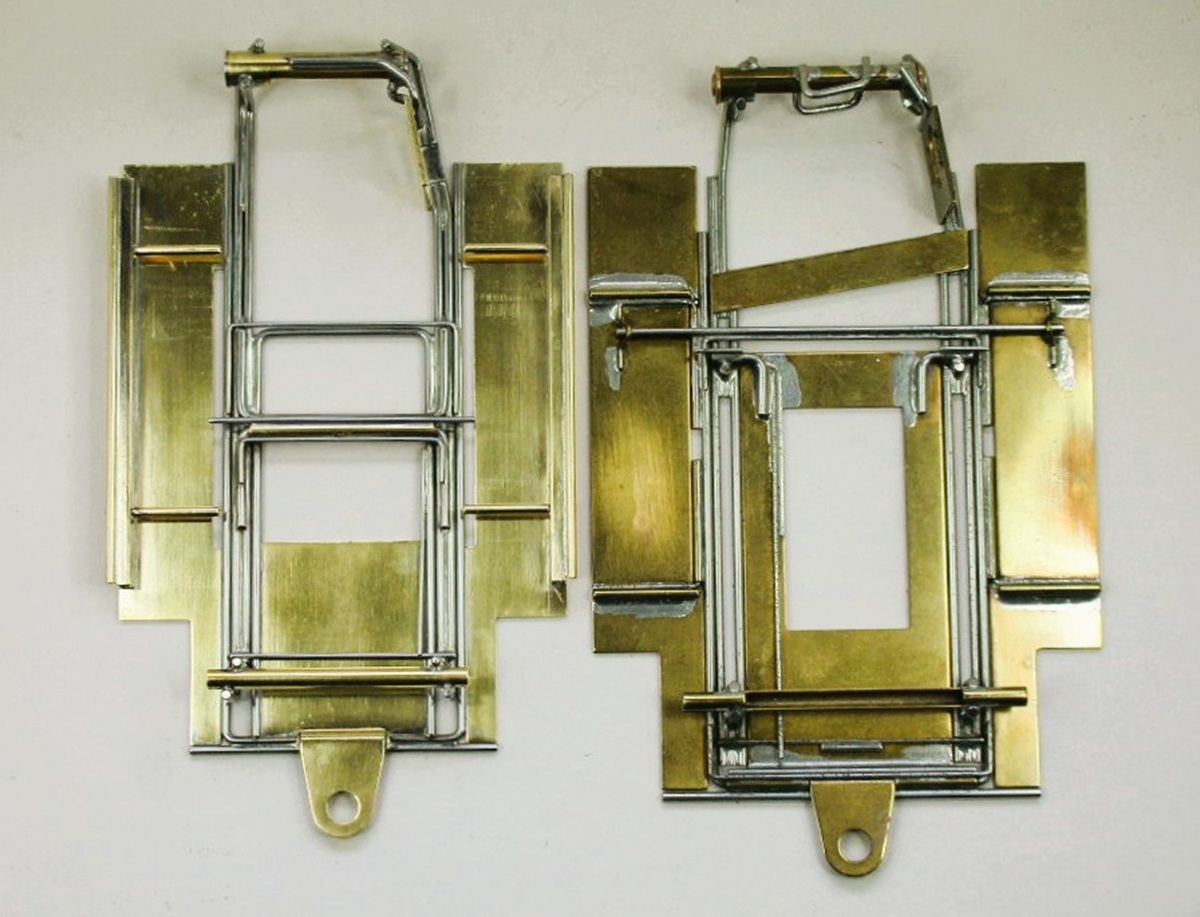
Finally a size comparison of my scale body chassis on the left and the handling body chassis on the right:


gilbert vs mclaren chassis comparo (4).JPG


OK, that's the "tale of the tape"..........time to final assemble the motor.


  • vfr750, Tex, munter and 8 others like this

Rick Thigpen
Check out Steve Okeefe's great web site at its new home here at Slotblog:
The Independent Scratchbuilder
There's much more to come...


#59 dc-65x

dc-65x

    Grand Champion Poster

  • Subscriber
  • PipPipPipPipPipPipPipPip
  • 7,204 posts
  • Joined: 14-February 06
  • Gender:Male
  • Location:Captain Rick: The only vintage slot car nut in SW Oregon?

Posted 19 March 2026 - 07:44 PM

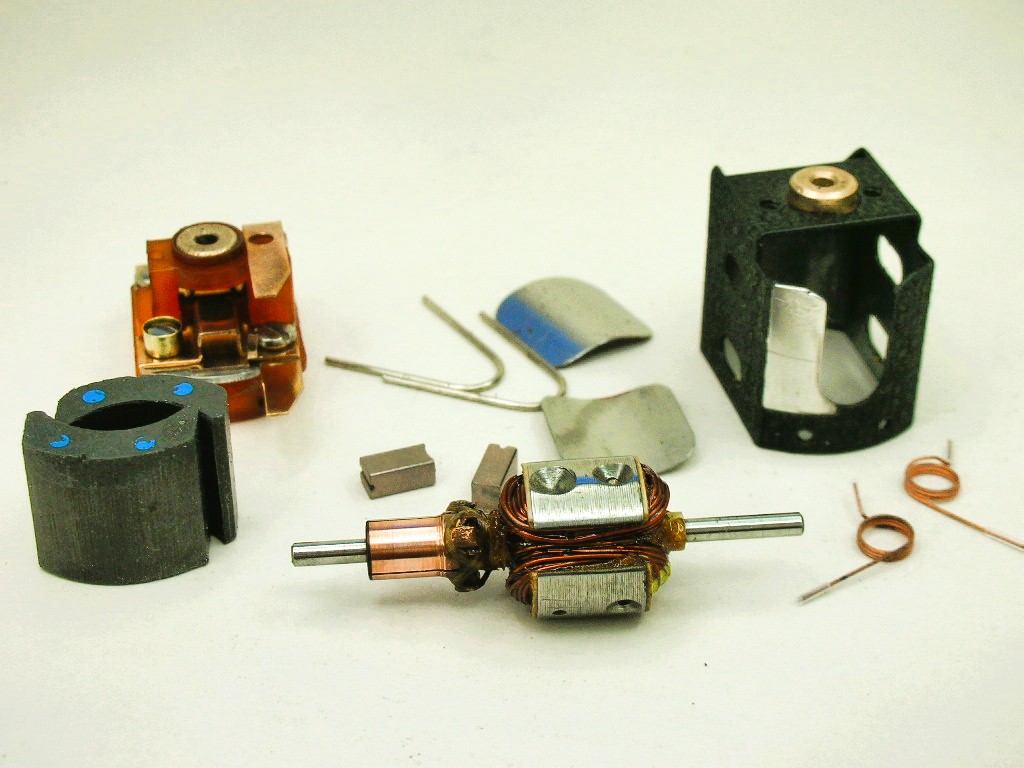
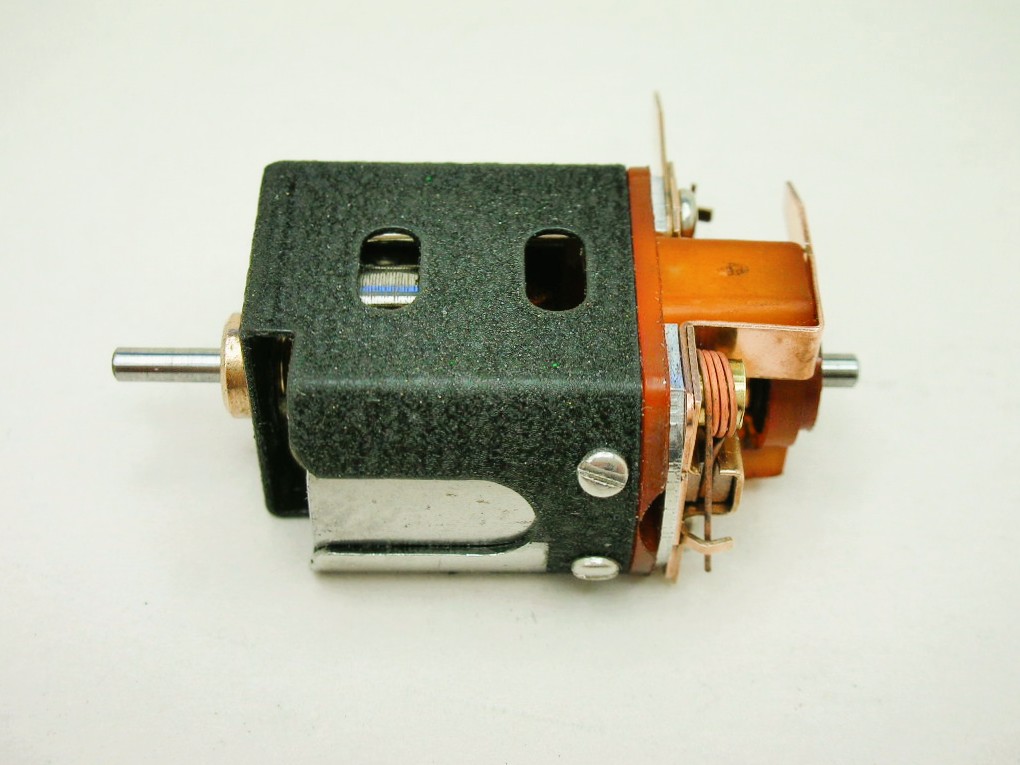
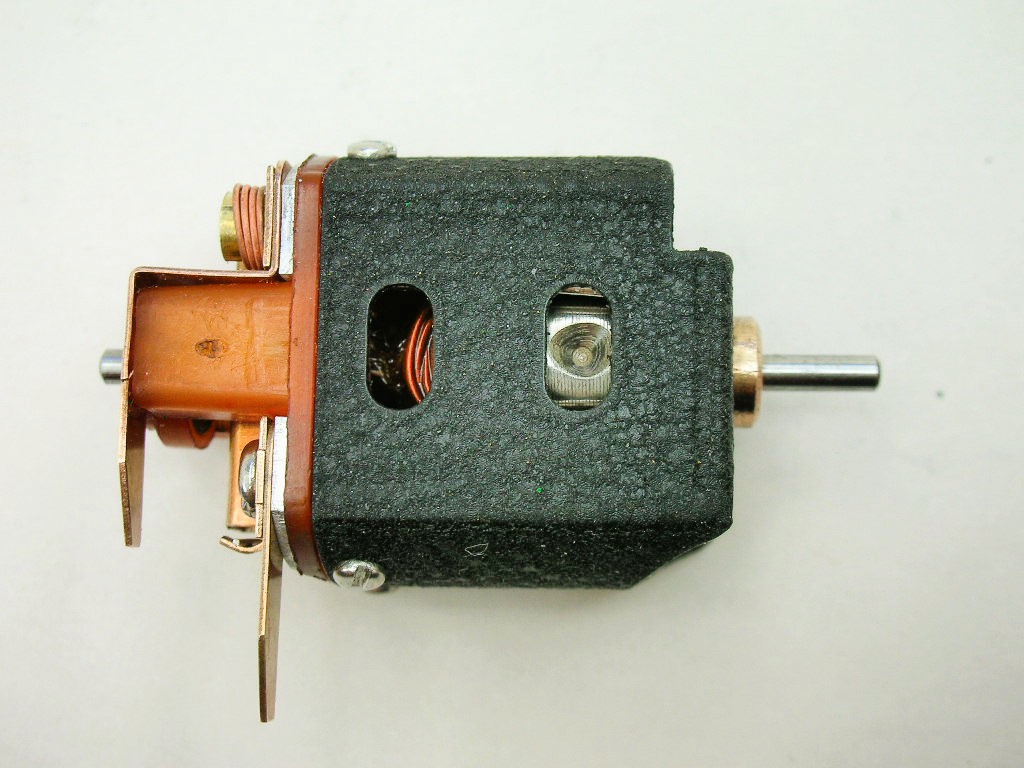
All the goodies for motor assembly:


mclaren motor (19).JPG


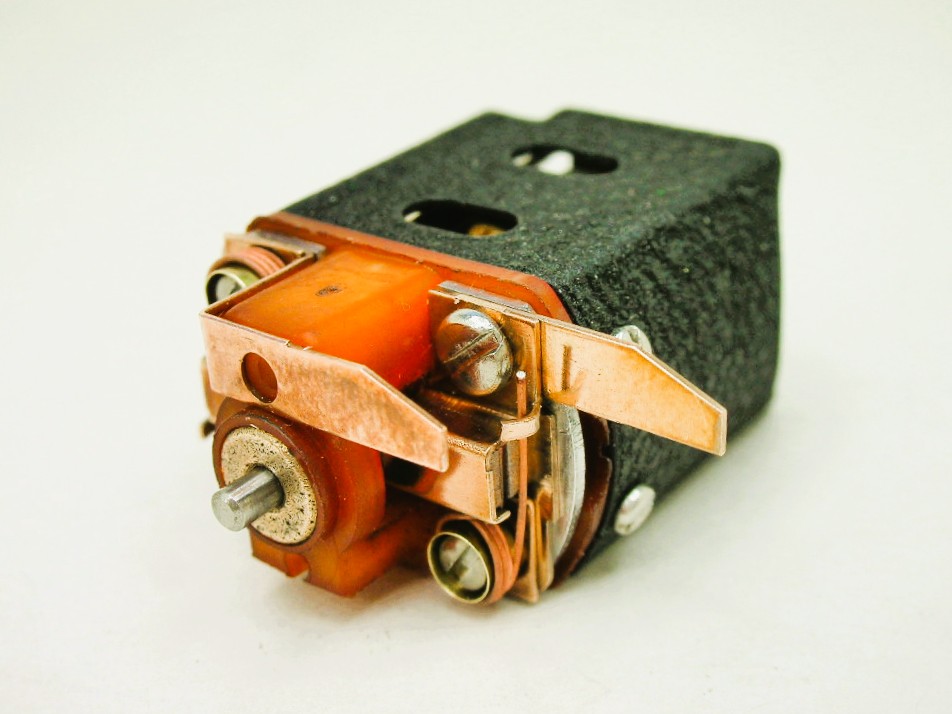
The motor runs smooth and cool drawing 1.5 amps at 3V:


mclaren motor (21).JPG


I use black wrinkle paint with an area tinned and masked off for a soldered on brace:


mclaren motor (22).JPG


mclaren motor (24).JPG


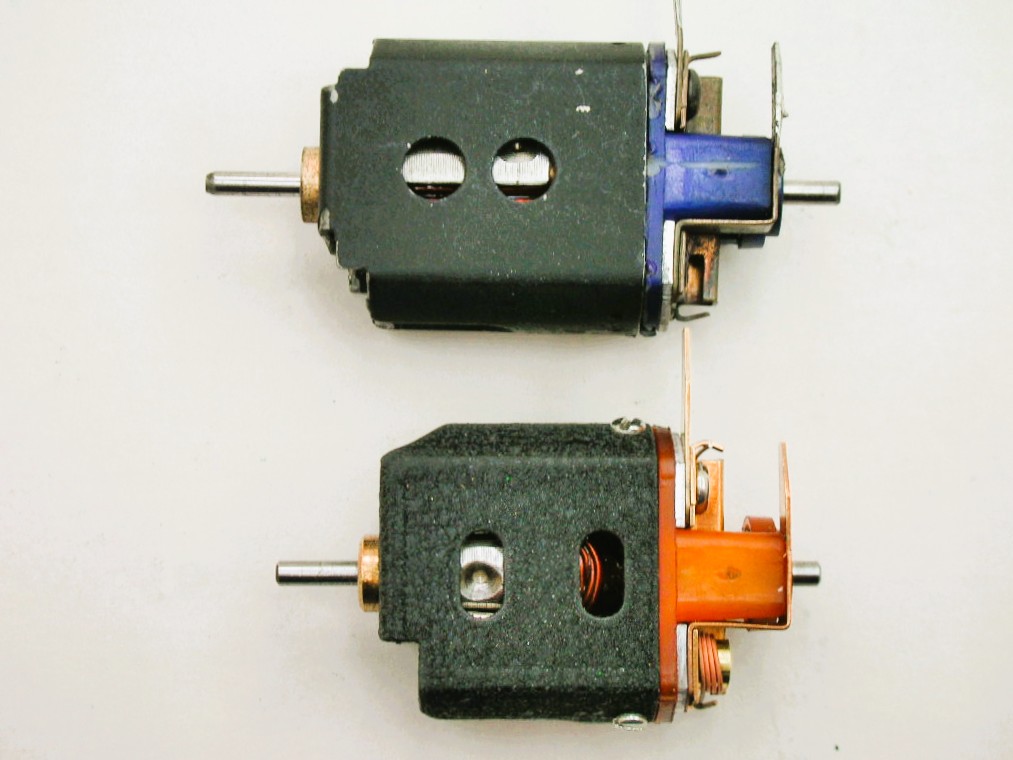
Here's a size comparison with my mini motor and a standard Mura C-can:


mclaren motor (25).JPG


  • Pablo, Jencar17, vfr750 and 6 others like this

Rick Thigpen
Check out Steve Okeefe's great web site at its new home here at Slotblog:
The Independent Scratchbuilder
There's much more to come...


#60 Mark Onofri

Mark Onofri

    Posting Leader

  • Subscriber
  • PipPipPipPipPipPipPip
  • 2,981 posts
  • Joined: 18-November 20
  • Gender:Male
  • Location:Syracuse, NY

Posted 20 March 2026 - 02:48 PM

Perfect size for a MESCA clone.

#61 dc-65x

dc-65x

    Grand Champion Poster

  • Subscriber
  • PipPipPipPipPipPipPipPip
  • 7,204 posts
  • Joined: 14-February 06
  • Gender:Male
  • Location:Captain Rick: The only vintage slot car nut in SW Oregon?

Posted 29 March 2026 - 07:40 PM

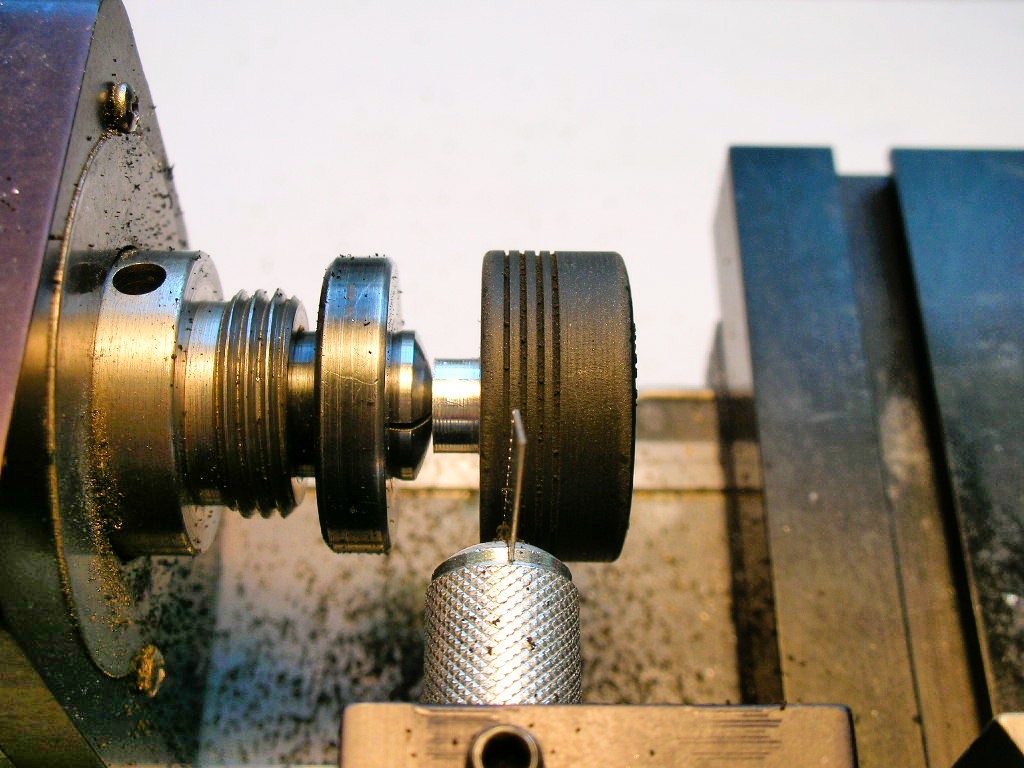
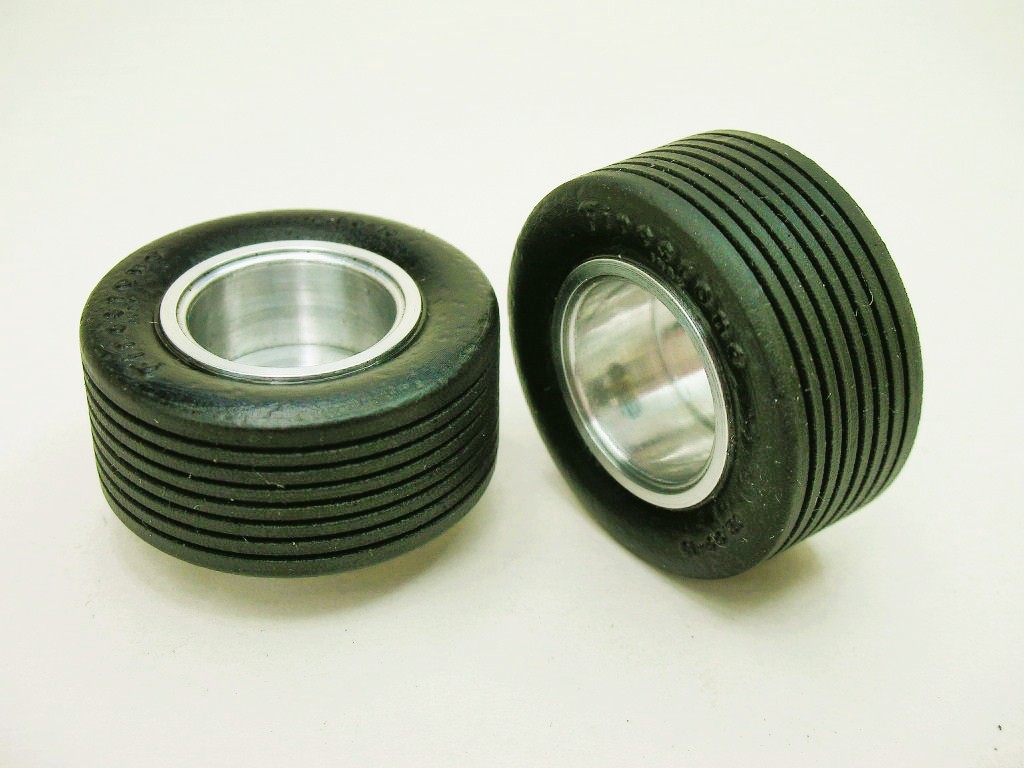
To finish up the roller I cut the cool MESAC style treads in the front tires:


mclaren wheels (8).JPG


mclaren wheels (7).JPG


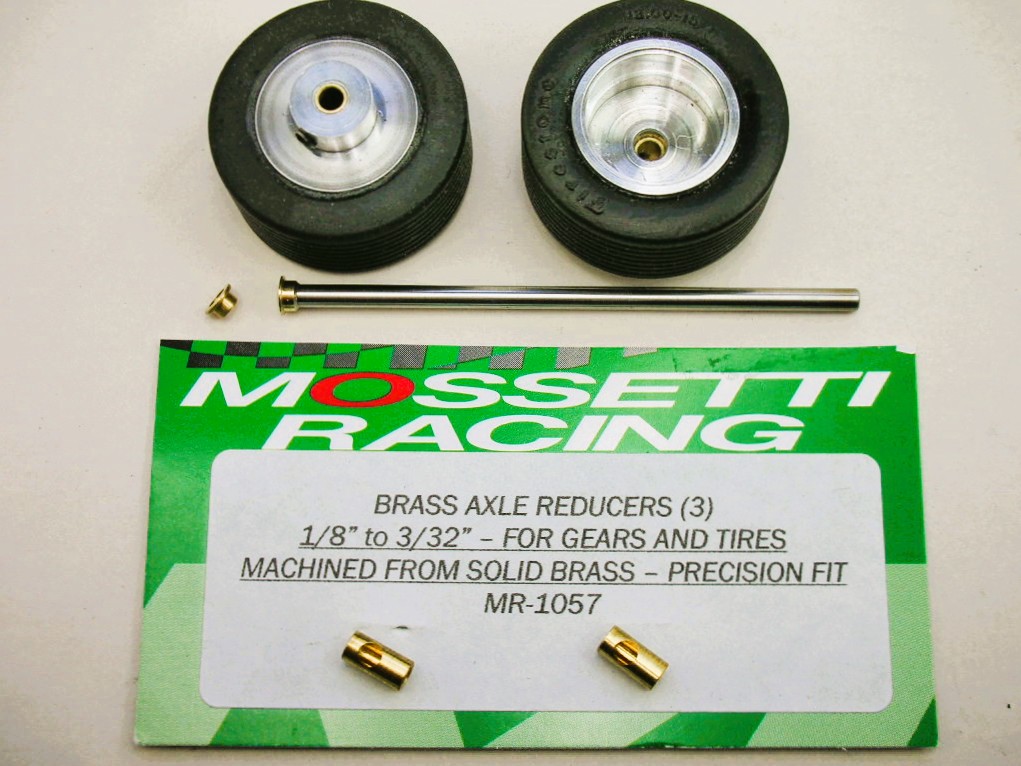
I'm finally running low on vintage FASS 3/32" axle reducers. But these current production pieces:


mclaren wheels (11).JPG


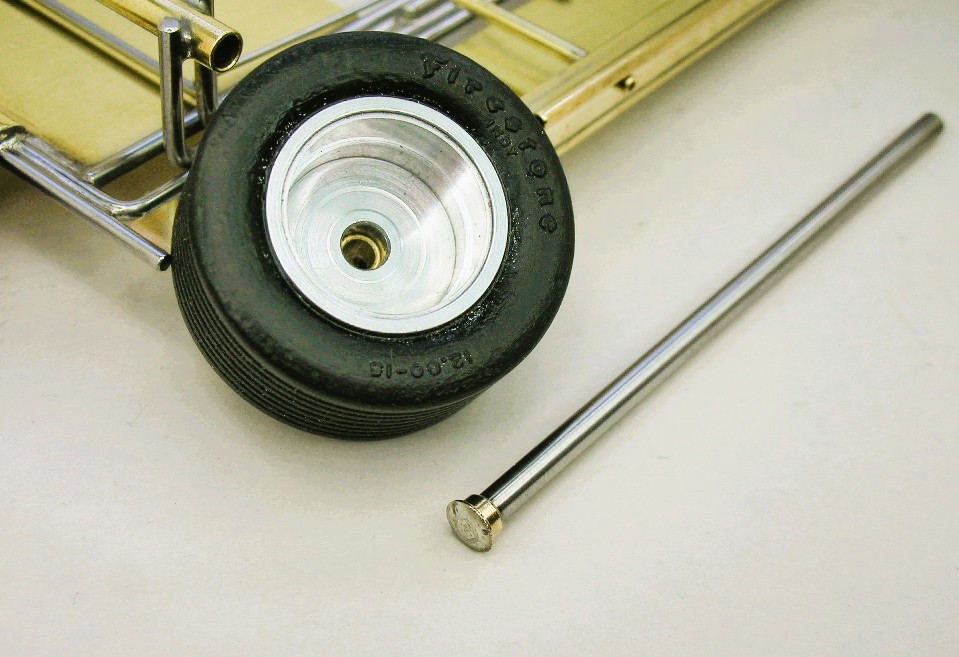
I've also converted the fronts to spin independently:


mclaren wheels (10).JPG


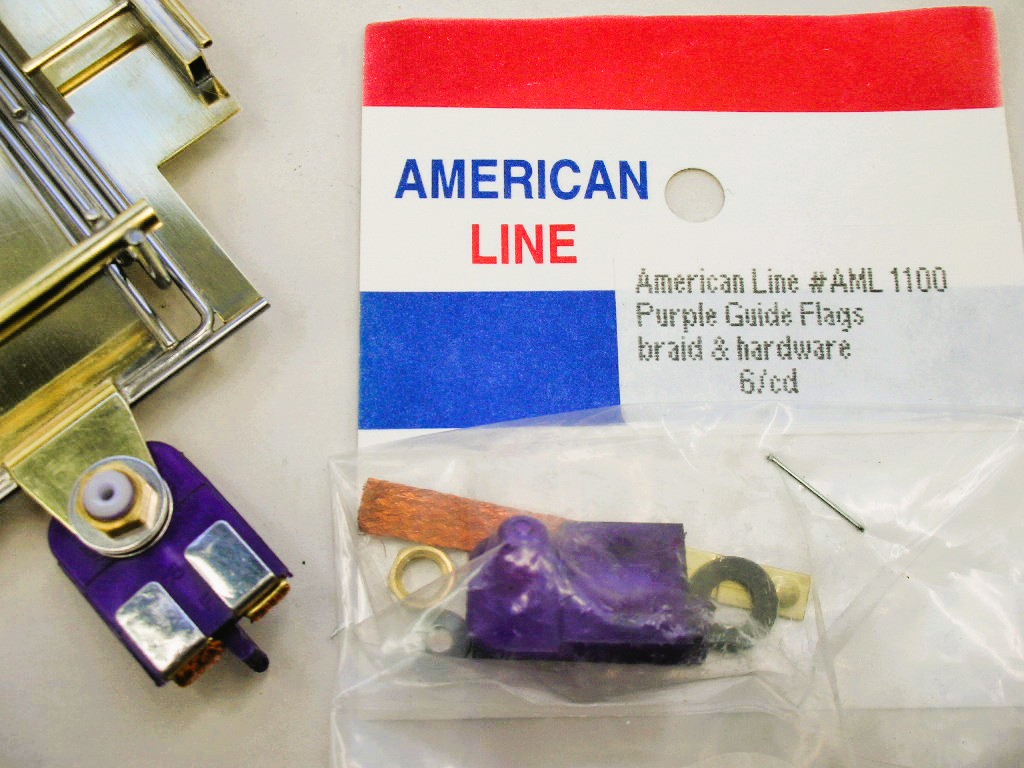
Finishing off the front end is an REH JET flag:


FSCN7043.JPG


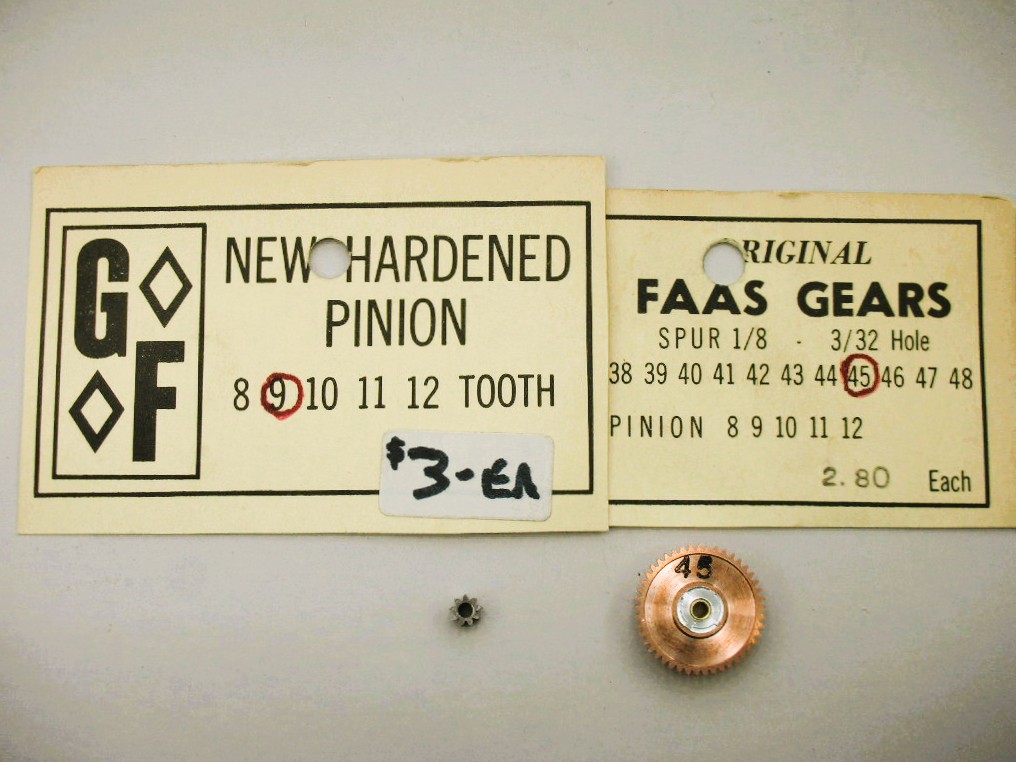
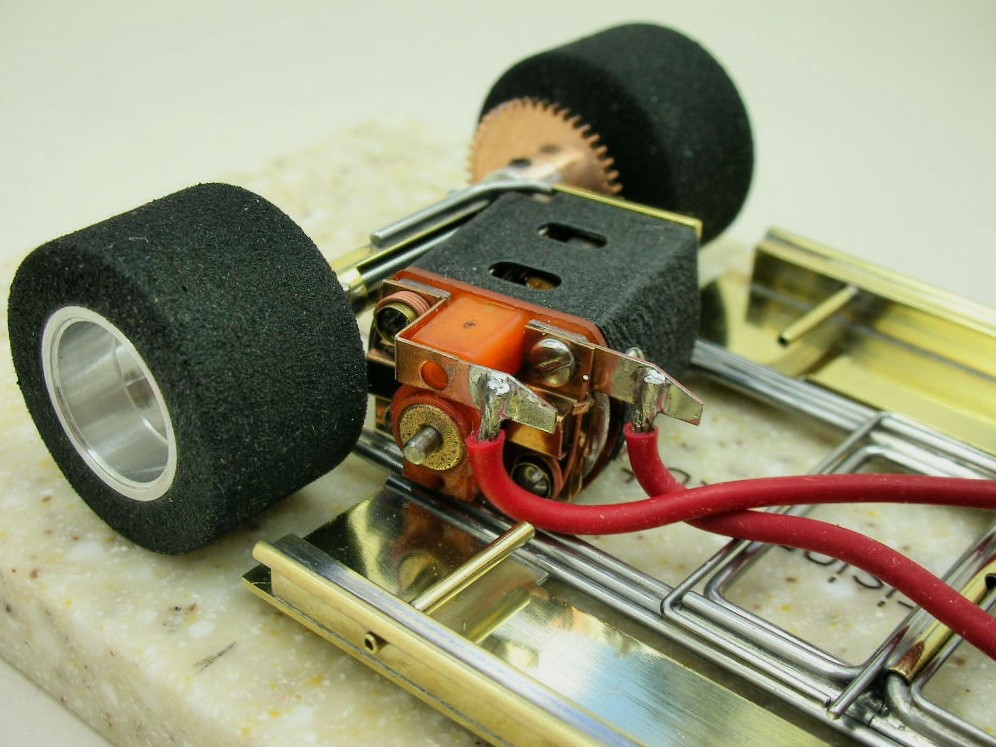
And finally a vintage FASS 45T spur and 9T pinion handle the gearing:


FSCN7036.JPG


  • Pablo, Tex, munter and 3 others like this

Rick Thigpen
Check out Steve Okeefe's great web site at its new home here at Slotblog:
The Independent Scratchbuilder
There's much more to come...


#62 Brian Czeiner

Brian Czeiner

    Race Leader

  • Full Member
  • PipPipPipPipPip
  • 601 posts
  • Joined: 04-March 08
  • Gender:Male
  • Location:Tyler, TX

Posted 30 March 2026 - 01:08 PM

Was there any performance gain we've since overcome or was it just appearance for using the MESAC front wheels?


If it's not a Caveman, It's HISTORY!          Support Your local raceways!


cavemanbodeez@gmail.com         CavemanBodeez.com


#63 dc-65x

dc-65x

    Grand Champion Poster

  • Subscriber
  • PipPipPipPipPipPipPipPip
  • 7,204 posts
  • Joined: 14-February 06
  • Gender:Male
  • Location:Captain Rick: The only vintage slot car nut in SW Oregon?

Posted 30 March 2026 - 04:27 PM

Hi Brian,


I think the wide fronts have a more scale appearance that goes well with the scale body I'm using. It's just my personal choice for the build. I wouldn't think they offer any performance advantage over skinny hard fronts or O-rings, most likely just the opposite. I've got an ISO front axle and the front wheels spinning independently to, hopefully, lessen any negative performance influence they might have.


But, you know, if everyone had to run them.......what difference to the outcome of a race would it have? 


  • Eddie Fleming likes this

Rick Thigpen
Check out Steve Okeefe's great web site at its new home here at Slotblog:
The Independent Scratchbuilder
There's much more to come...


#64 Bill from NH

Bill from NH

    Age scrubs away speed!

  • Full Member
  • PipPipPipPipPipPipPipPip
  • 15,317 posts
  • Joined: 02-August 07
  • Gender:Male
  • Location:New Boston, NH

Posted 30 March 2026 - 06:51 PM

Their rolling resistance has to be less than a tire with a solid footprint. Rick have you ever tried grooving urethanes? If grooved fronts were a production requirement, the grooves might be molded in or else all cut at once.


Bill Fernald
 
I intend to live forever!  So far, so good.  :laugh2:  :laugh2: 

#65 DeanJ

DeanJ

    Backmarker

  • Full Member
  • PipPip
  • 96 posts
  • Joined: 13-March 26
  • Gender:Male
  • Location:SoCal

Posted 30 March 2026 - 10:21 PM

Hi Rick, great build and craftsmanship! I thought I saw a Sherline in one of your pictures, can you share what tools you use, setup, etc?
Im new at brass chassis building and wonder how your pictures are pristine. What are you doing after soldering to clean up all the parts?
Dean John

#66 dc-65x

dc-65x

    Grand Champion Poster

  • Subscriber
  • PipPipPipPipPipPipPipPip
  • 7,204 posts
  • Joined: 14-February 06
  • Gender:Male
  • Location:Captain Rick: The only vintage slot car nut in SW Oregon?

Posted 31 March 2026 - 05:29 PM

Hi Bill,
 
I've never cut tread grooves in urethane tires. Many vintage manufactures did mold in tread grooves. K&B even had the authentic tread pattern on their Goodyear stock car special tires.
 
Thanks for the kind words Dean.
 
You wrote, "I thought I saw a Sherline in one of your pictures, can you share what tools you use, setup, etc?"
 
Yes, I use a little Sherline hobby lathe. My cutting tools are mostly high speed steel blanks I ground to shape. I also have a few carbide insert tools from LittleMachineShop.com. If by "setup" you mean how am I holding the workpiece, I mostly use collets, the surprisingly accurate 3-jaw chuck or bore out a collet pot chuck for an odd ball sized workpiece.
 
"...........and wonder how your pictures are pristine."
 
I'm still using my little 20 year old Nikon COOLPIX S1 pocket camera in Macro close-up mode.
 
"What are you doing after soldering to clean up all the parts?"


While obviously not necessary I enjoy sanding off all the excess solder from moving the iron's tip along the joint. I'm not shaping the actual solder joint, just removing the "collateral damage" around it with 400 grit. Then I scrub the entire chassis with a grey Scotch Brite pad.


Below is an example of of this including dragging the excess solder off the chassis onto scrap brass:


Clamps, clamps and more clamps. I have 2 locking the center section down, 1 each on the plumber and pans:
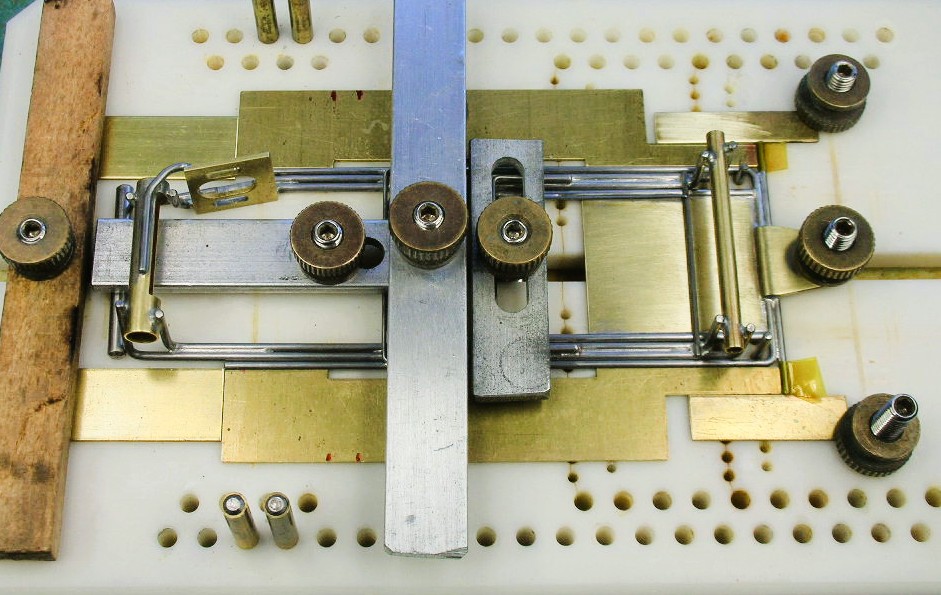
 
mclaren chassis (35).JPG
 
I also locked down 4 brass bits I used to drag excess solder off the pans as you can see below:
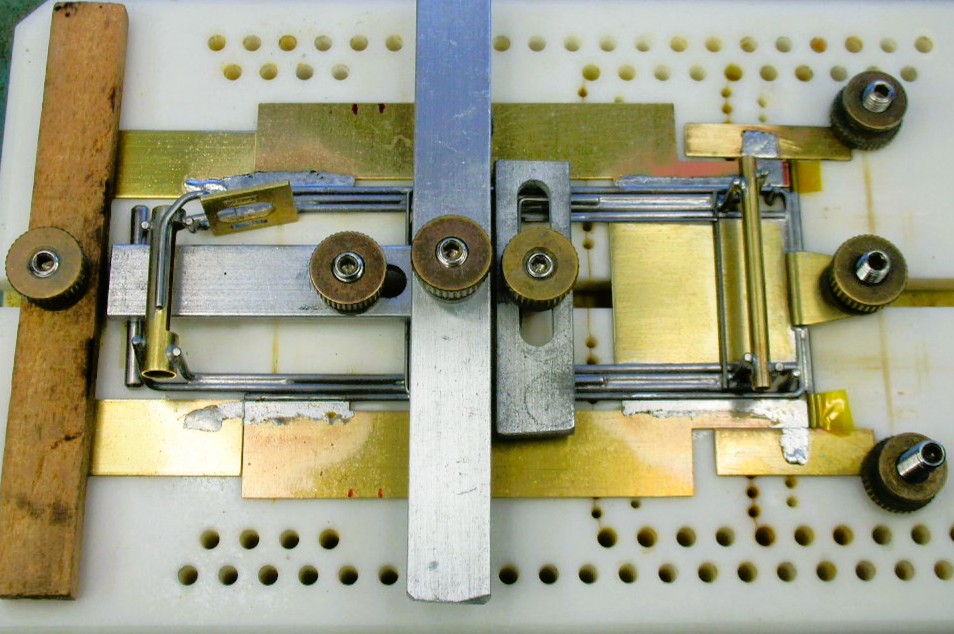
 
mclaren chassis (36).JPG
 
The chassis all scrubbed up:
 
mclaren chassis (37).JPG


Also not necessary, but something I enjoy, is a final polish with finer sandpaper, metal polish and a Dremel carbon steel wire wheel. I used to use a tumbler for this but there is something therapeutic in doing the final polish by hand.
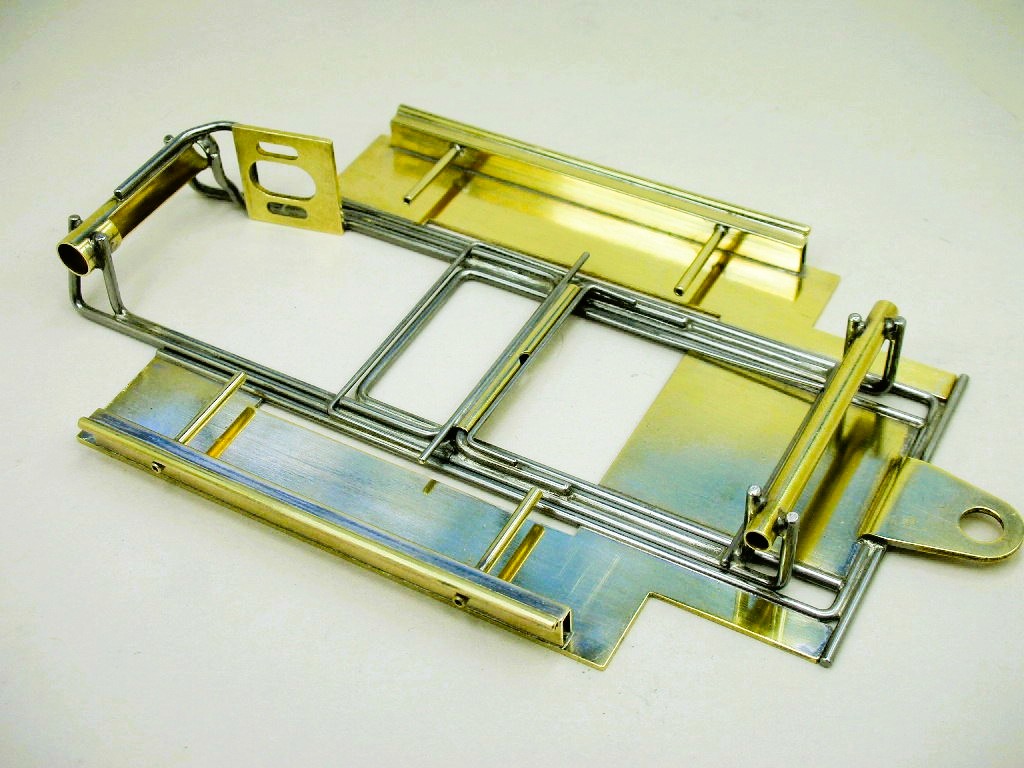
 

mclaren chassis (51).JPG


Hope this helps and thanks for following along.    :victory:


  • Pablo, vfr750, Tex and 2 others like this

Rick Thigpen
Check out Steve Okeefe's great web site at its new home here at Slotblog:
The Independent Scratchbuilder
There's much more to come...


#67 Jaeger Team

Jaeger Team

    Race Leader

  • Full Member
  • PipPipPipPipPip
  • 586 posts
  • Joined: 27-January 17
  • Gender:Male
  • Location:Palermo, Italy

Posted 31 March 2026 - 06:02 PM

Rick, there is also something therapeutic and inspiring in following the making of your masterpieces
  • olescratch likes this
Maurizio Salerno

#68 DeanJ

DeanJ

    Backmarker

  • Full Member
  • PipPip
  • 96 posts
  • Joined: 13-March 26
  • Gender:Male
  • Location:SoCal

Posted 31 March 2026 - 11:54 PM

Yes, Very helpful thank you!!!


Dean John

#69 dc-65x

dc-65x

    Grand Champion Poster

  • Subscriber
  • PipPipPipPipPipPipPipPip
  • 7,204 posts
  • Joined: 14-February 06
  • Gender:Male
  • Location:Captain Rick: The only vintage slot car nut in SW Oregon?

Posted 03 April 2026 - 11:43 AM

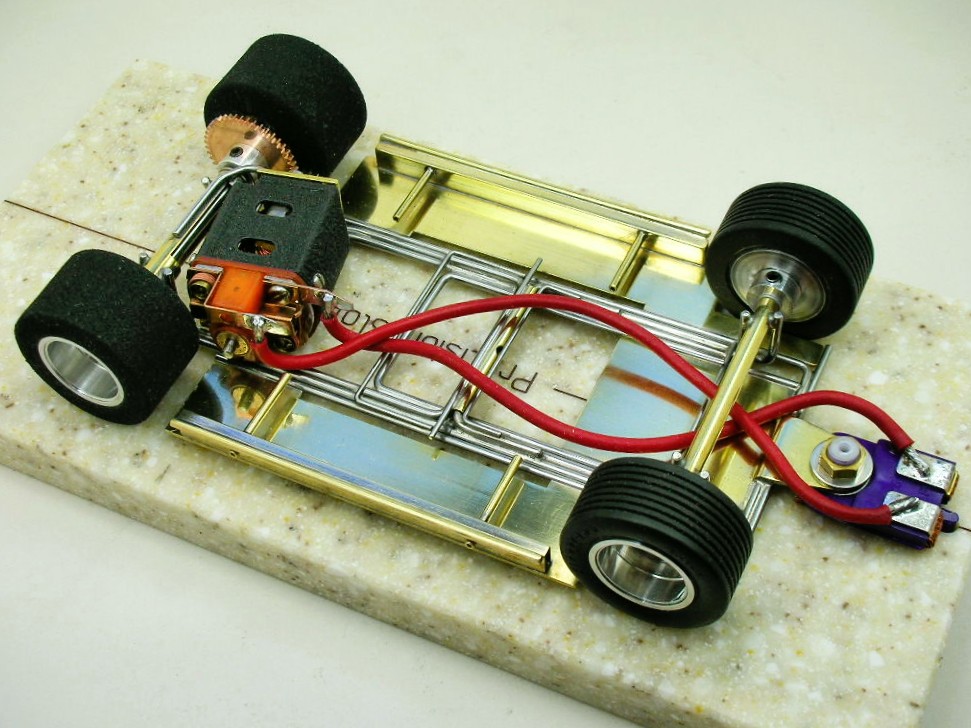
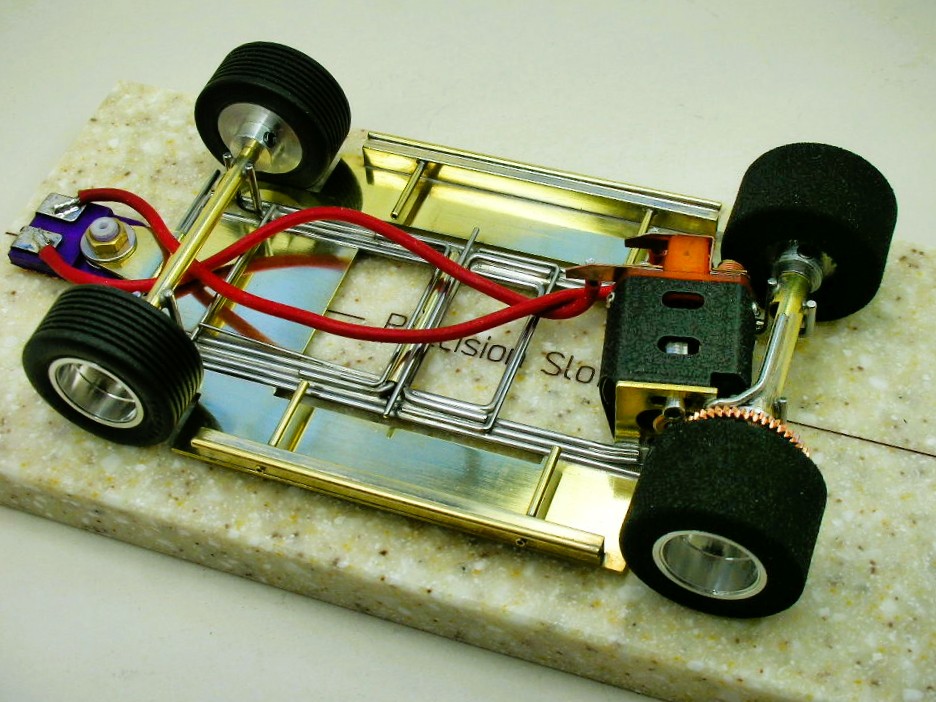
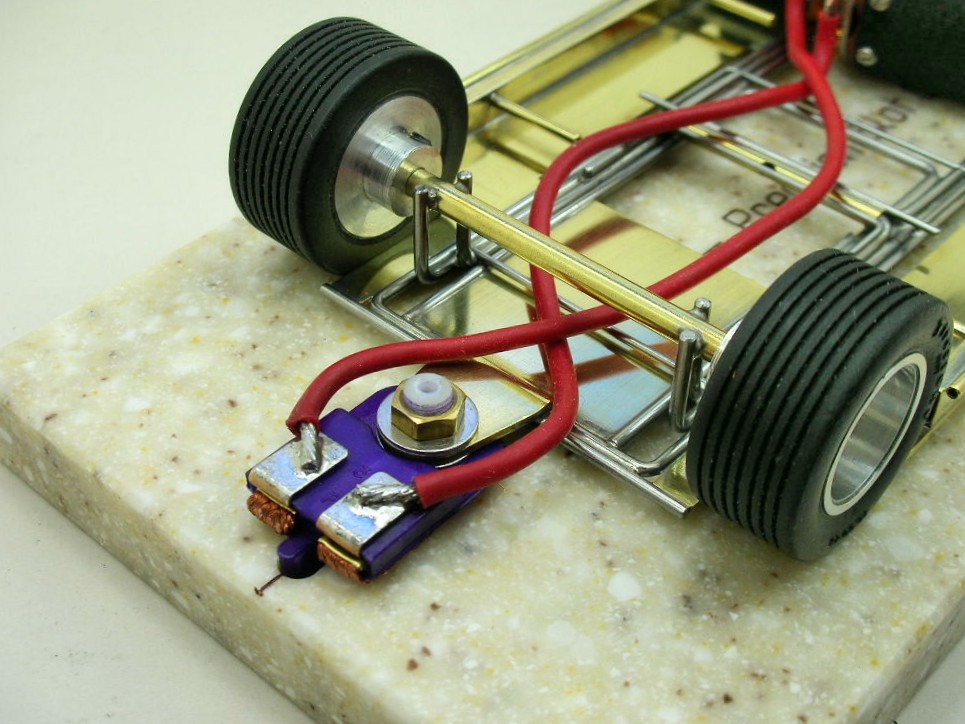
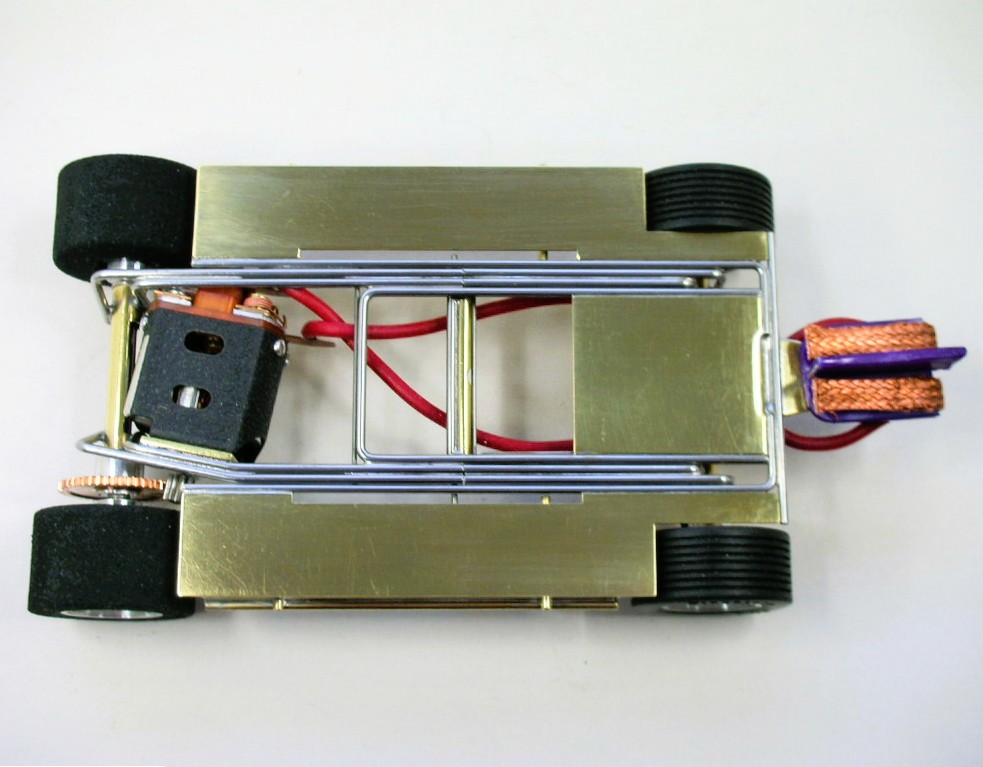
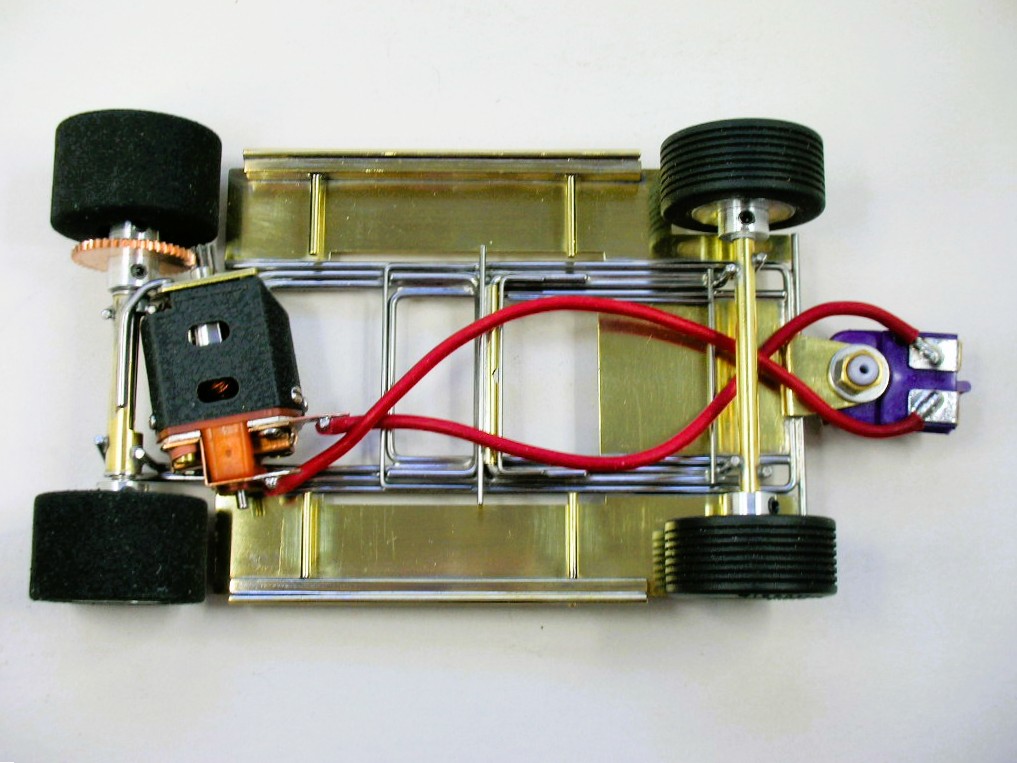
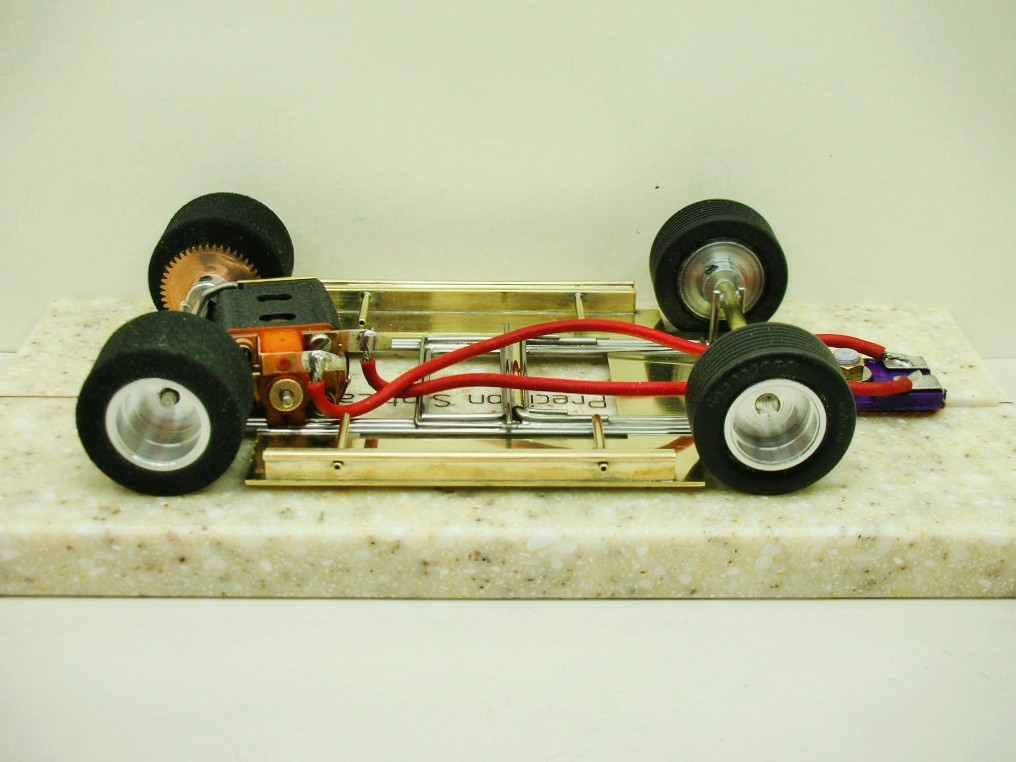
The roller is finished:


mclaren roller (1).JPG


mclaren roller (2).JPG


mclaren roller (3).JPG


mclaren roller (4).JPG


It's a relatively small car at just 2 3/4" wide across the pans and.....


mclaren roller (5).JPG


.......2 7/8" across the pin tube body mounts:


mclaren roller (6).JPG


1" diameter tires front and rear:


mclaren roller (7).JPG


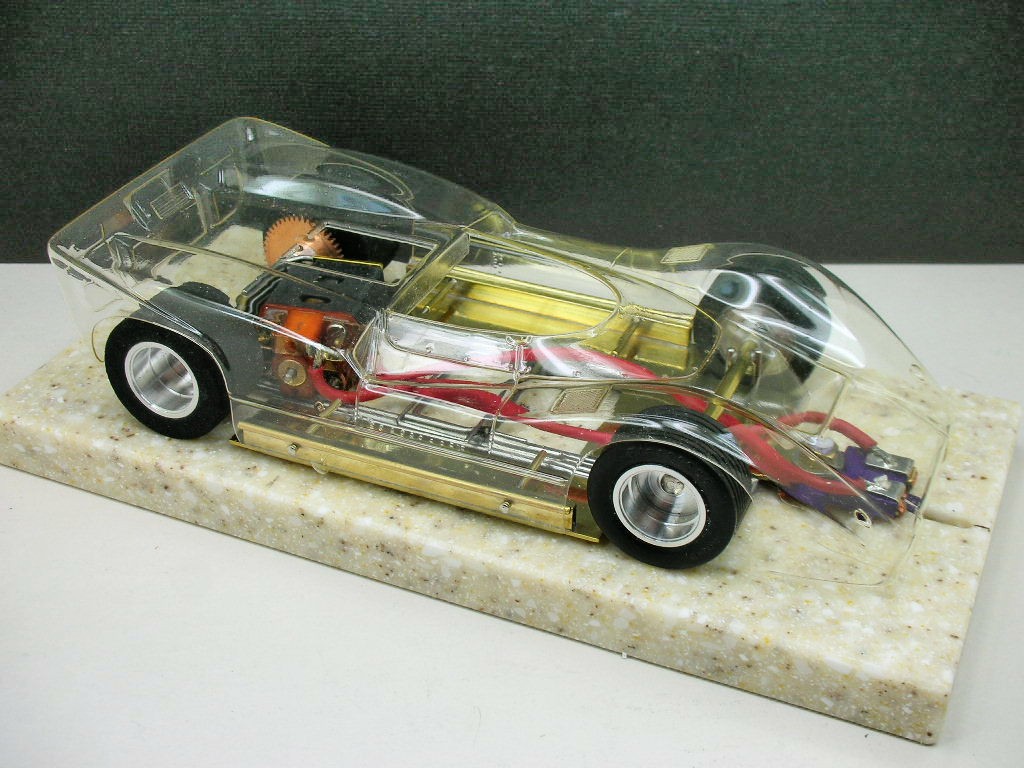
Matching the body mounts to the contours of the body paid dividends during body mounting:


mclaren roller (9).JPG


The body literally snapped in place and self centered:


mclaren roller (8).JPG


Time to start working on the detail parts.


  • don.siegel, Tex, munter and 5 others like this

Rick Thigpen
Check out Steve Okeefe's great web site at its new home here at Slotblog:
The Independent Scratchbuilder
There's much more to come...


#70 Pablo

Pablo

    Builder

  • Administrator
  • PipPipPipPipPipPipPipPip
  • 18,579 posts
  • Joined: 20-February 06
  • Gender:Male
  • Location:Cleveland, Tennessee

Posted 03 April 2026 - 12:57 PM

Matching the body mounts to the contours of the body paid dividends during body mounting


Before I even read this, looking at the mounting architecture, this is exactly what I was thinking.
Structurally and beautifully executed  :heart:  :heart:  :heart:  :heart:  :whistle3:


Paul Wolcott


#71 Brian Czeiner

Brian Czeiner

    Race Leader

  • Full Member
  • PipPipPipPipPip
  • 601 posts
  • Joined: 04-March 08
  • Gender:Male
  • Location:Tyler, TX

Posted 04 April 2026 - 09:21 AM

I always love this part of the build the most. I do wish I had your motivation to build at this level.


If it's not a Caveman, It's HISTORY!          Support Your local raceways!


cavemanbodeez@gmail.com         CavemanBodeez.com


#72 Mark Onofri

Mark Onofri

    Posting Leader

  • Subscriber
  • PipPipPipPipPipPipPip
  • 2,981 posts
  • Joined: 18-November 20
  • Gender:Male
  • Location:Syracuse, NY

Posted 05 April 2026 - 05:54 PM

Have you ever heard of, or tried wet sandpaper with a light oil for the initial polishing? It's been so long since I found out, about this method, I can't remember where I heard about it.

#73 dc-65x

dc-65x

    Grand Champion Poster

  • Subscriber
  • PipPipPipPipPipPipPipPip
  • 7,204 posts
  • Joined: 14-February 06
  • Gender:Male
  • Location:Captain Rick: The only vintage slot car nut in SW Oregon?

Posted 05 April 2026 - 07:49 PM

Thanks Pablo, I'll be using the lessons learned on this project on other bodies with similar contours.


I haven't used wet sanding with oil Mark. 


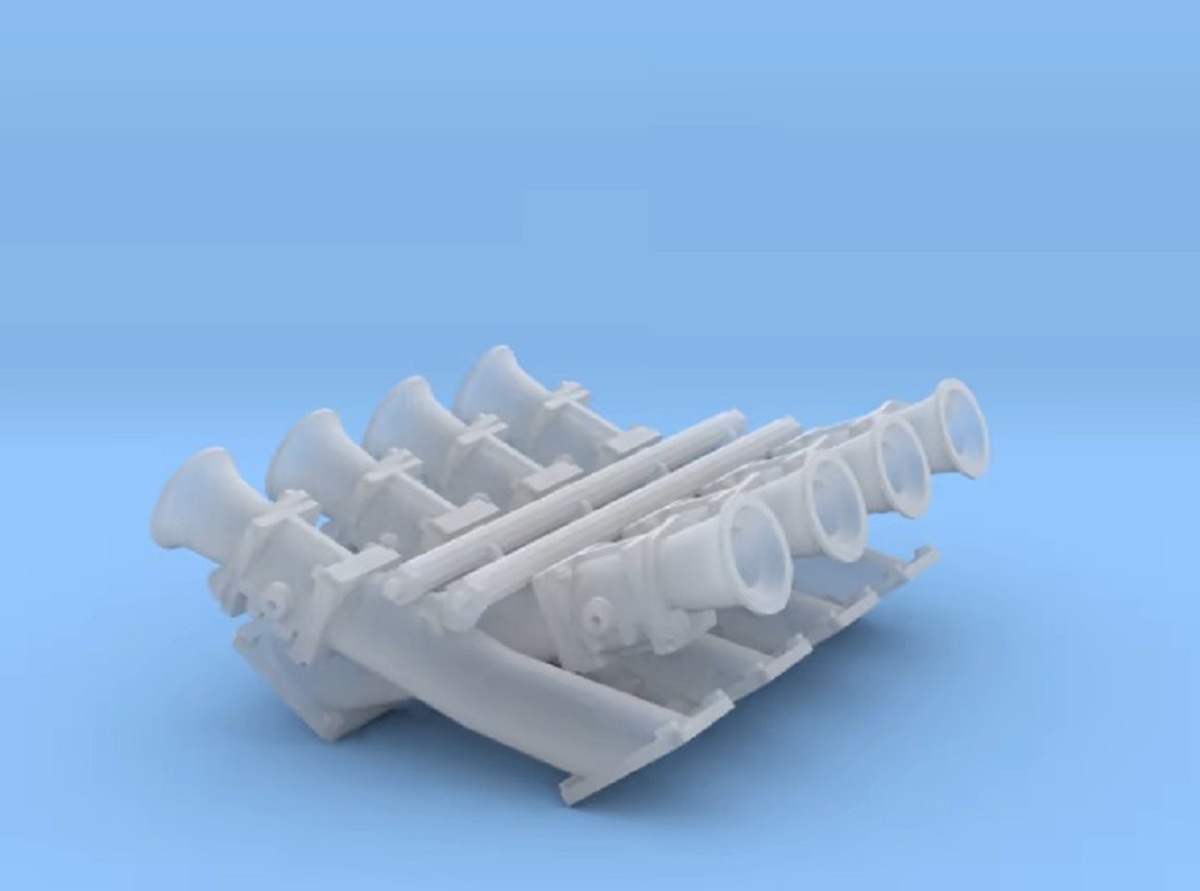
Ran into a snag on my engine detailing Brian. I used this beautiful fuel injection from Shapways on my previously built handling body McLaren. It is similar to the real cars injection system.


mclaren body (3).jpg


Problem is that Shapways has restructured their operation and no longer sells finished products. After searching the internet I've given up on finding another one for this prioject.   :unknw:


Sooooooo...................I've pulled the piece out of my handling body version to use on this scale body build. I'll replace it with a downdraft style in the handling body. 


Rick Thigpen
Check out Steve Okeefe's great web site at its new home here at Slotblog:
The Independent Scratchbuilder
There's much more to come...


#74 Bill from NH

Bill from NH

    Age scrubs away speed!

  • Full Member
  • PipPipPipPipPipPipPipPip
  • 15,317 posts
  • Joined: 02-August 07
  • Gender:Male
  • Location:New Boston, NH

Posted 05 April 2026 - 08:06 PM

Rick, how about using the one you have to make a mold & cast as many resin ones as you want. Mold making won't damage your original, which can go back on your handling body McLaren.


I don't see how the sandpaper & oil would work. Unless you use an ultra-fine grit sandpaper, you'll get a matt, not a polished surface. Before you use your sanded material, you'll have to remove the oil in order to get a strong solder joint. Then your bare wire is exposed to rusting once more.


Bill Fernald
 
I intend to live forever!  So far, so good.  :laugh2:  :laugh2: 

#75 SpeedyNH

SpeedyNH

    Old Engineer

  • Full Member
  • PipPipPipPipPip
  • 820 posts
  • Joined: 18-July 15
  • Gender:Male
  • Location:Cow Hampshire

Posted 06 April 2026 - 06:58 AM

bummer about shapeways. 


Steve Lang


Electric Dreams Online Shop