

I looked too on your behalf.
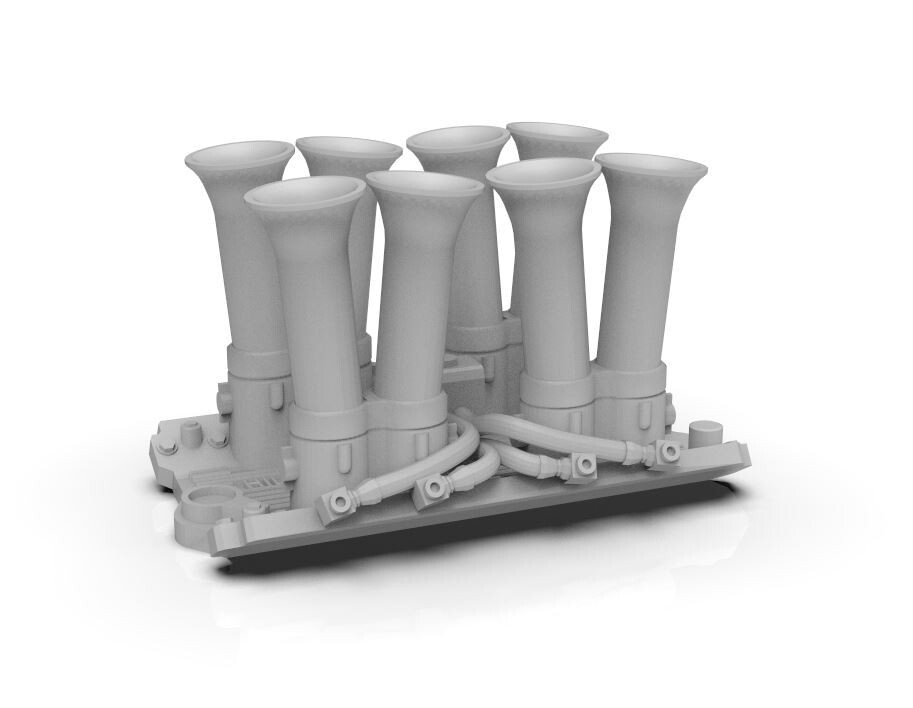
I did find this seller, I know its not the same but it may work for some future project?
https://www.ebay.com...1f7494a2ff:g:Cv

|


Posting Leader


Posted 06 April 2026 - 09:32 AM
I looked too on your behalf.
I did find this seller, I know its not the same but it may work for some future project?
https://www.ebay.com...1f7494a2ff:g:Cv
Posting Leader
Posted 06 April 2026 - 09:59 AM
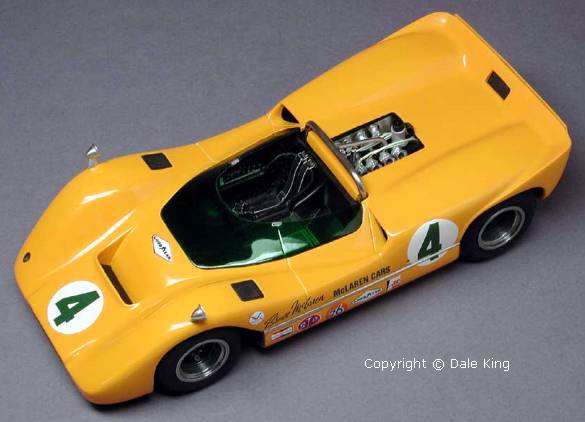
I found this also Rick.
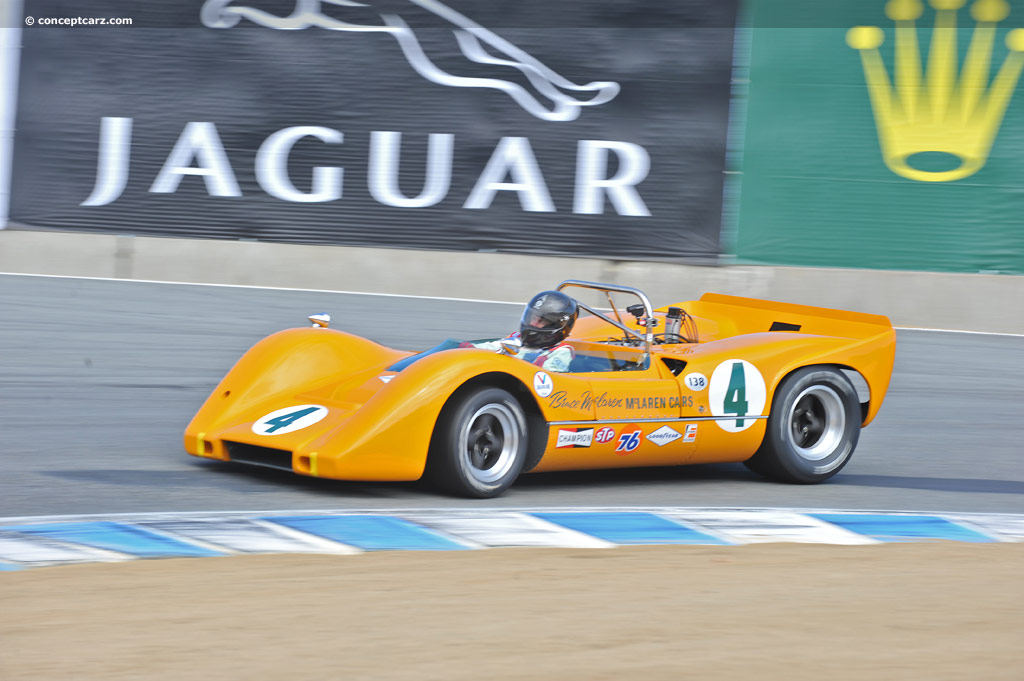
1/24 McLaren M6A
Model, Text, and Photos by Dale King
This is the Fisher resin kit of the 1967 McLaren M6 . It's painted with Tamiya TS-56 Brilliant Orange which is a fairly close match for the elusive 'McLaren orange.'
Backmarker

Posted 06 April 2026 - 12:08 PM
Grand Champion Poster
Posted 08 April 2026 - 07:19 PM
Thanks for the comments and support. 
The Fisher resin built model is a real beauty Martin. Someone did a wonderful build. It's too bad the Fisher company is out of business after they lost their workshop, in fact most of the town of Paradise, to a California wildfire.
I do, however, want to stress to people that Tamiya TS series paint is a lacquer and will damage or destroy vintage butyrate bodies like the Lancer I'm using in this thread. I've used Tamiya PS series RC paint with good results on a Lexan McLaren M8 build, although I chose their PS-19 Camel Yellow color.
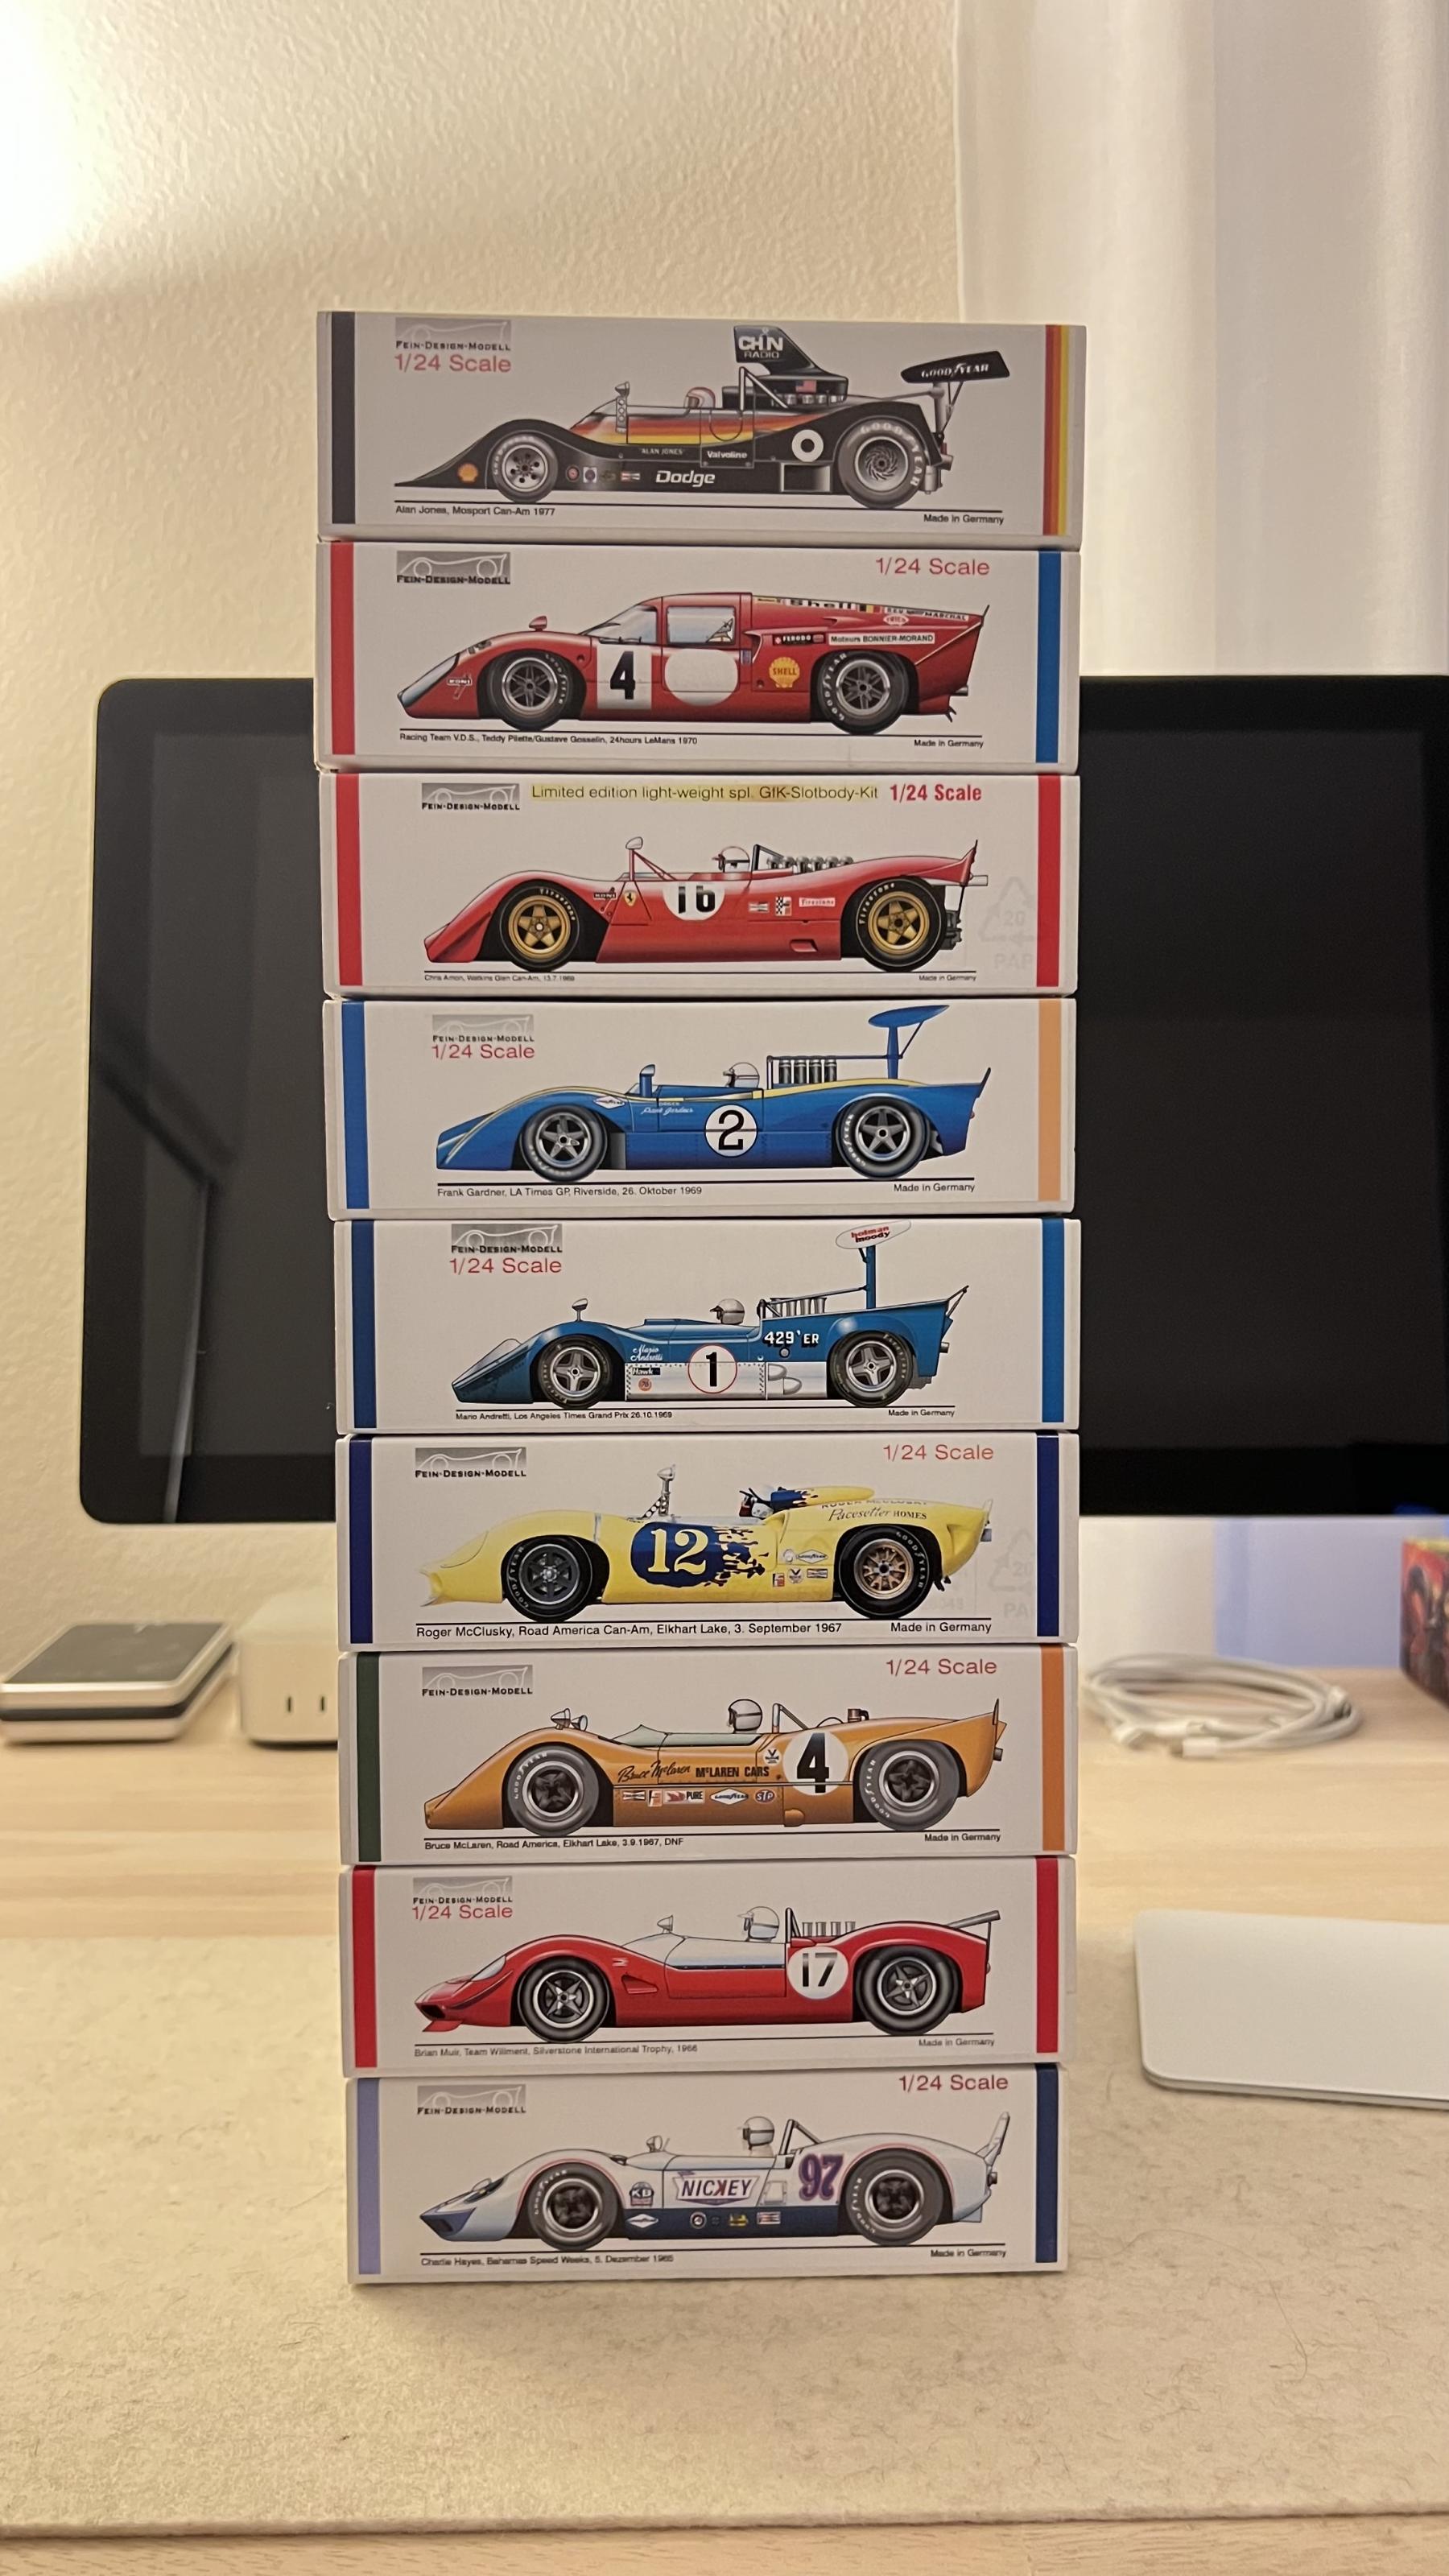
Those are some VERY tasty and expensive Fein resin kits Dean.  Congrats on a wonderful collection and thanks for the eye candy.
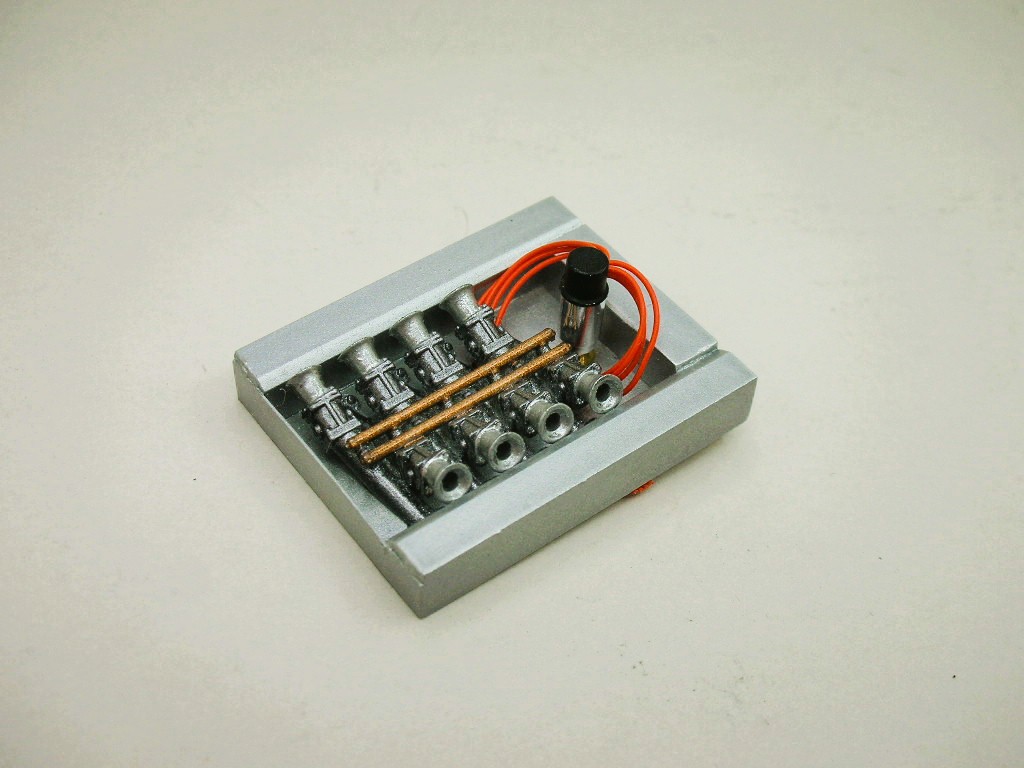
Here's that McLaren intake setup surrounded by an aluminum airbox........
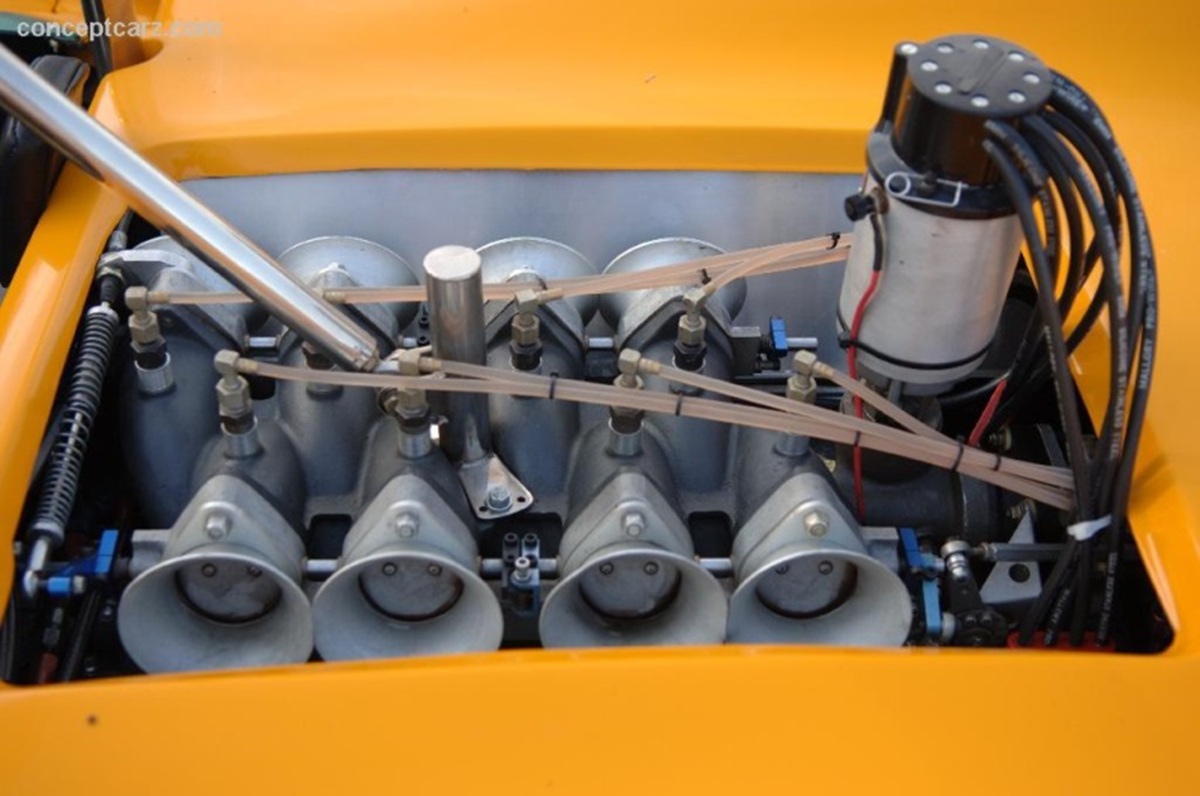
.......and sitting down low in the bodywork with a very prominent magneto riding high and proud:
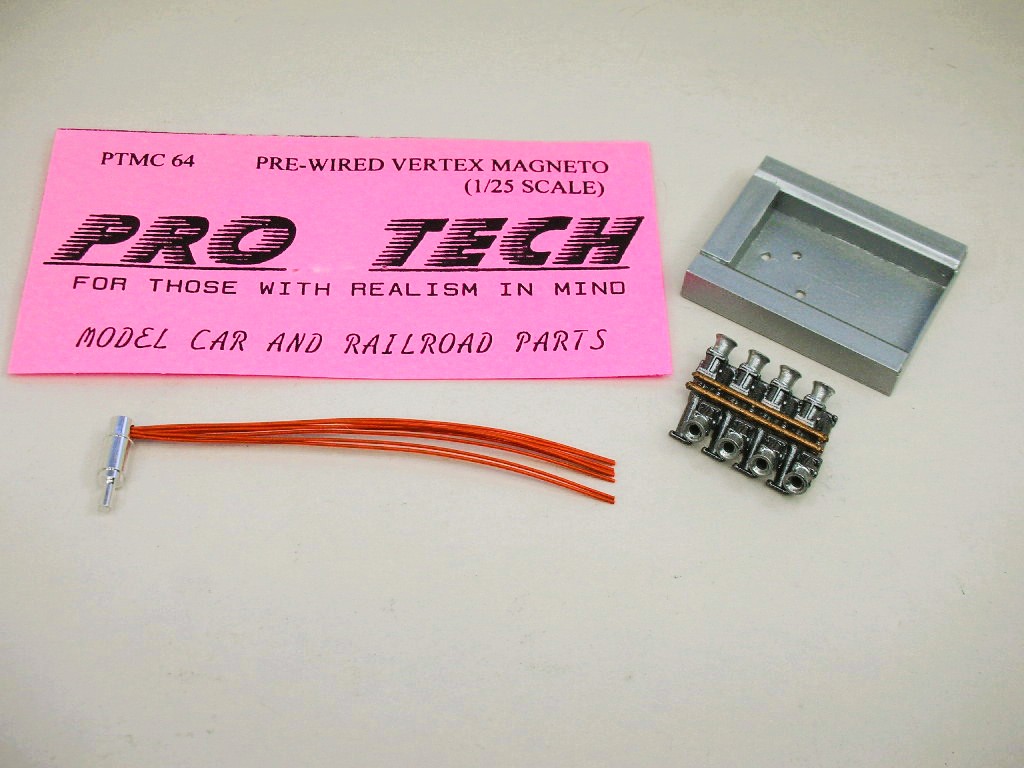
I built an airbox from Evergreen styrene plastic and added a cool prewired magneto:
Those velocity stacks just barely fit inside the bodies factory opening:
Time to tackle the interior next.
Rick Thigpen
Check out Steve Okeefe's great web site at its new home here at Slotblog:
The Independent Scratchbuilder
There's much more to come...
Posting Leader
Posted 09 April 2026 - 12:27 AM
I snagged the pic and the writing while looking for a intake you were looking for. Nothing to do with the hard body paint that was used. I should have erased that so as not to confuse some folk.
Did you find the intake or is it borrowed from a past build?
Posting Leader

Posted 09 April 2026 - 03:15 PM
Posting Leader
Posted 12 April 2026 - 11:34 AM
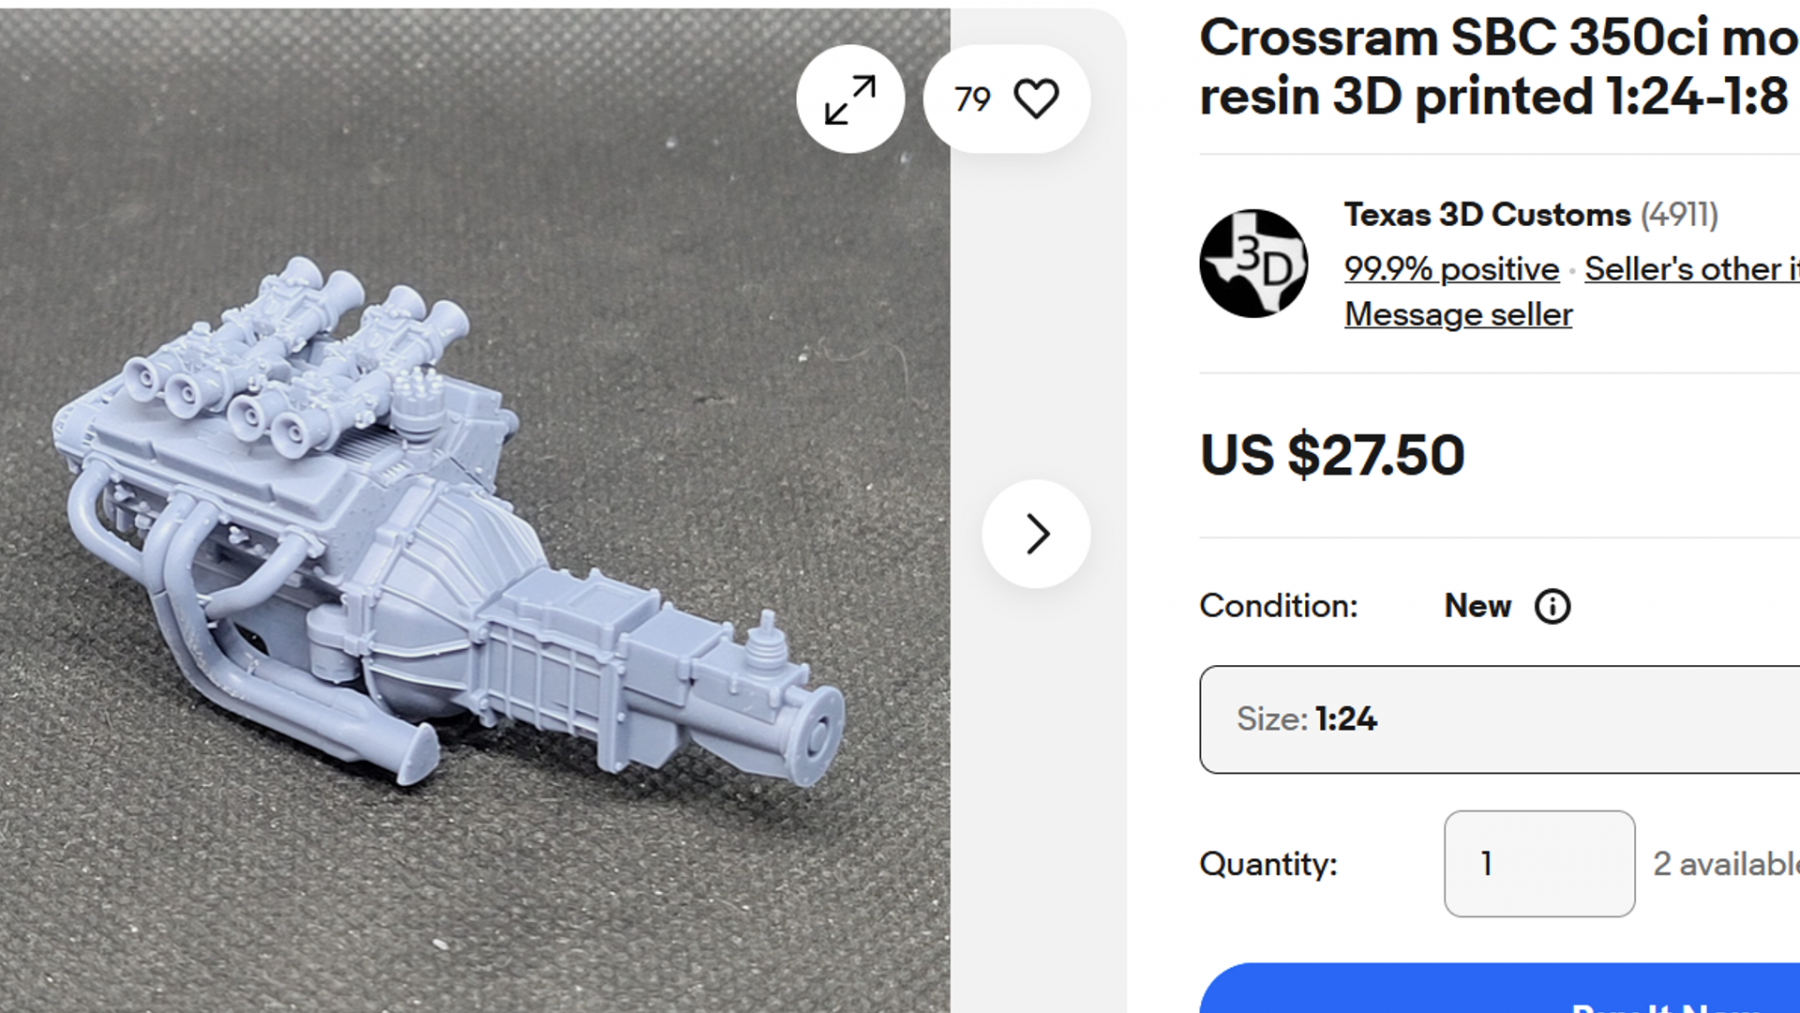
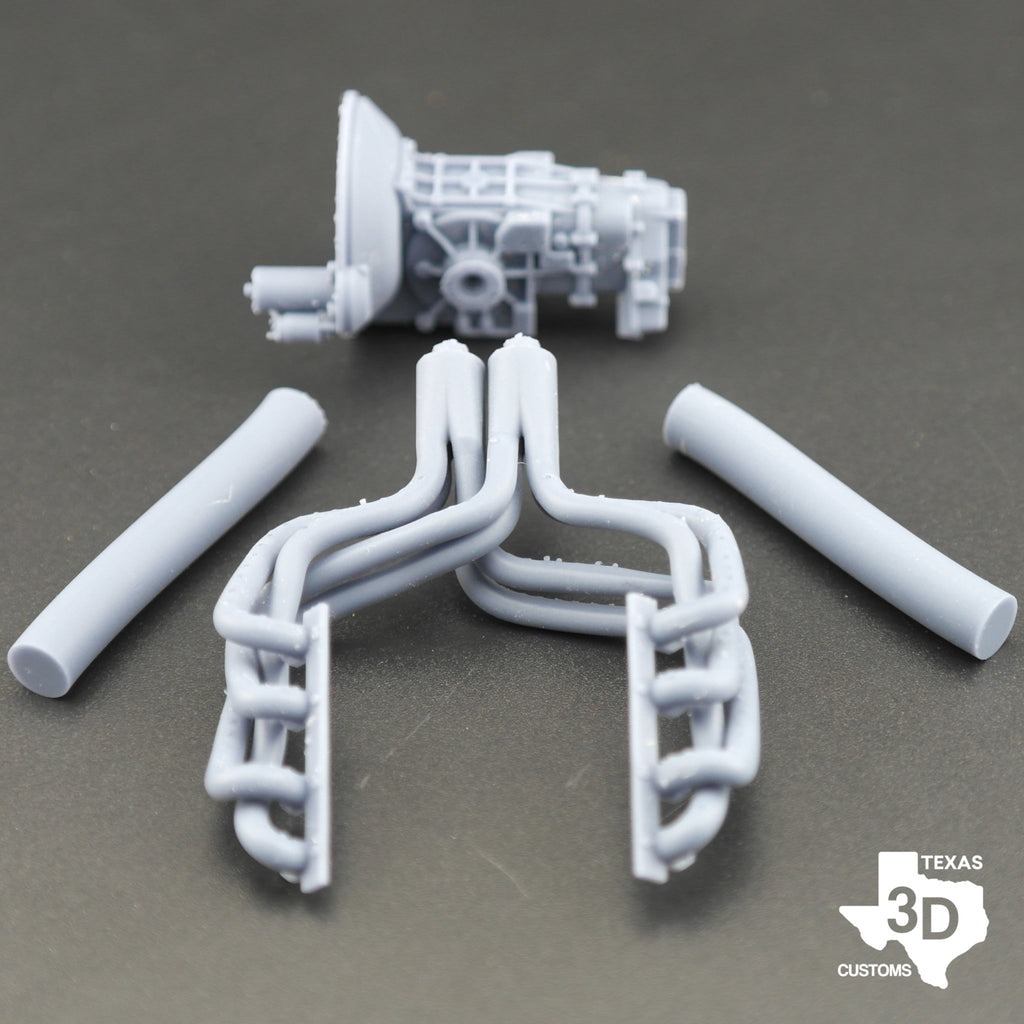
Found this one Rick.
Is this the same style as the one you found?
Grand Champion Poster
Posted 12 April 2026 - 11:46 AM
Texas 3D Customs is great. I have close to 10 of their various engines. In fact, I hope to use a neat transaxle they offer on their website in this build. We'll see..........
The one you show is a cross ram Weber carbureted engine. The McLaren M6A used cross ram fuel injection. Rodney came up with an interesting idea of leaving the carbs off and attaching velocity stacks directly to the cross ram manifold. Again, we'll see.......

Rick Thigpen
Check out Steve Okeefe's great web site at its new home here at Slotblog:
The Independent Scratchbuilder
There's much more to come...
Grand Champion Poster
Posted 12 April 2026 - 09:23 PM
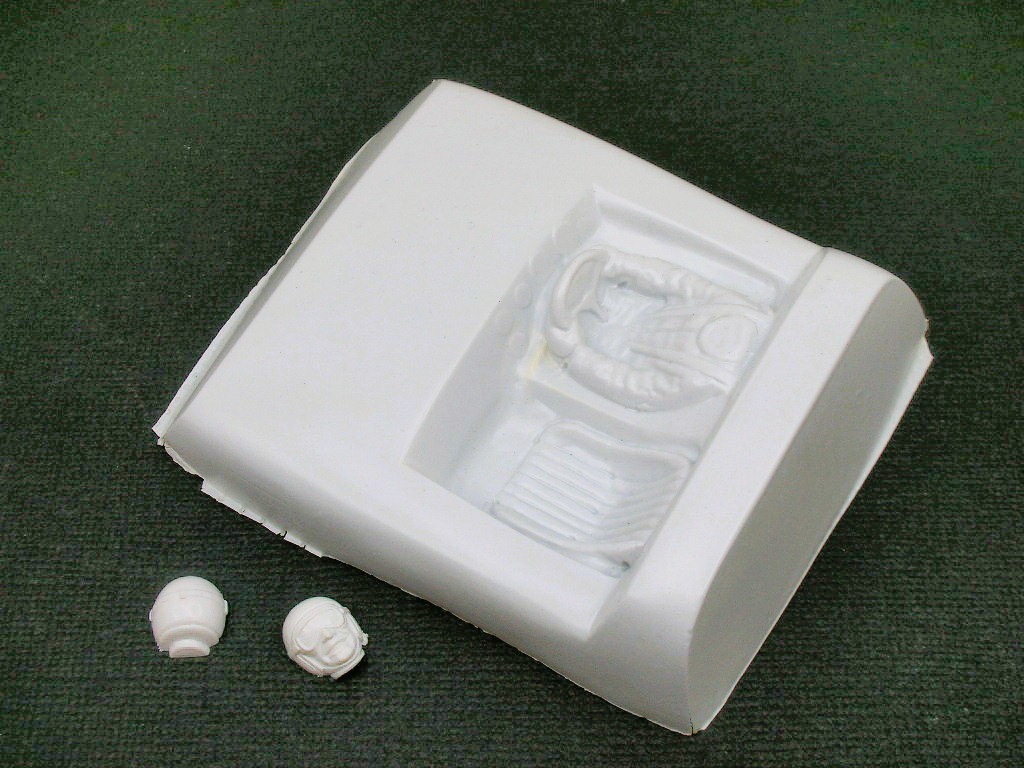
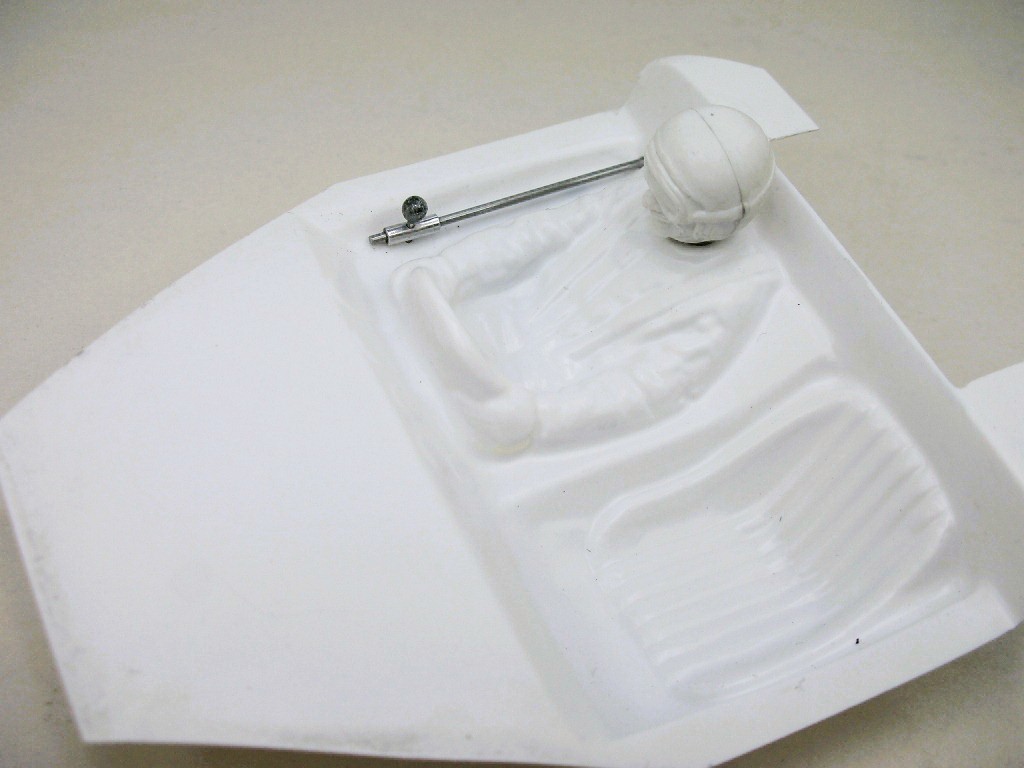
My supply of replica Lancer interiors from Victor (TrueScale) is finally running low.  For this project I'll be using a vintage Auto Hobbies interior with the supplied Revell smiley face drivers head:
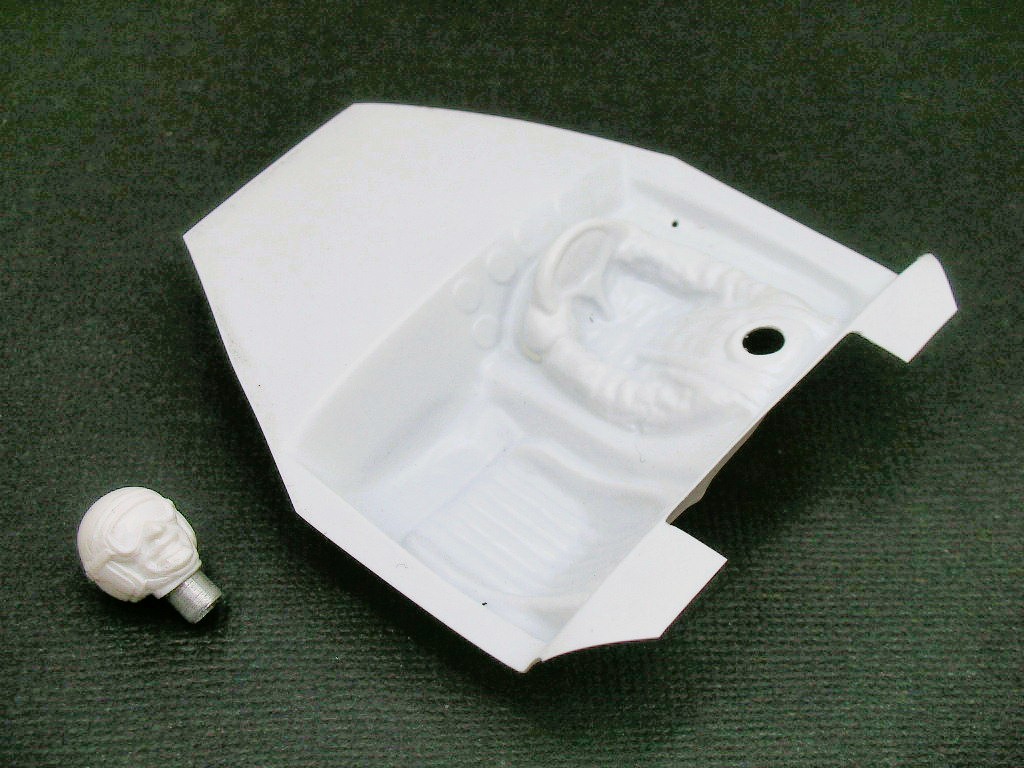
The interior all trimmed up and the head has an aluminum tube attachment added:
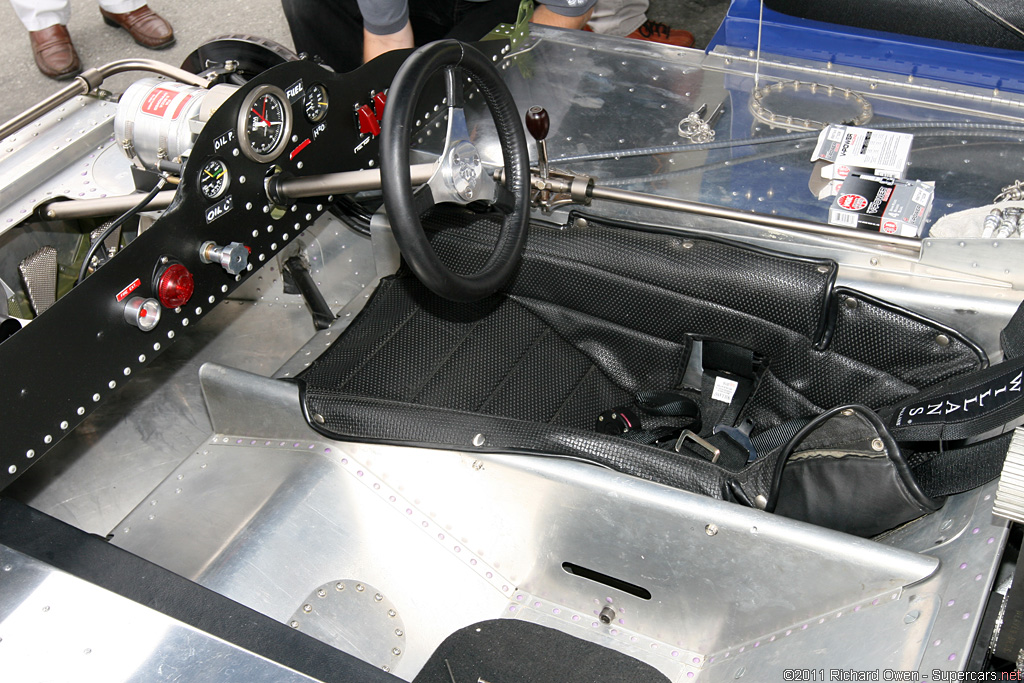
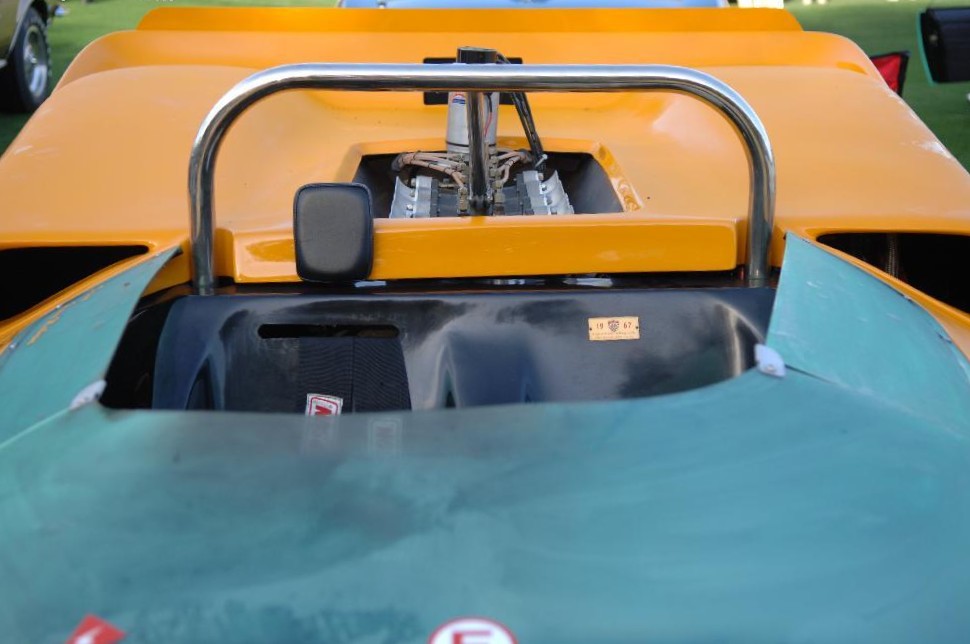
I was looking at this interior photo and became enamored with the shifter arrangement and thought I should try to make something similar:
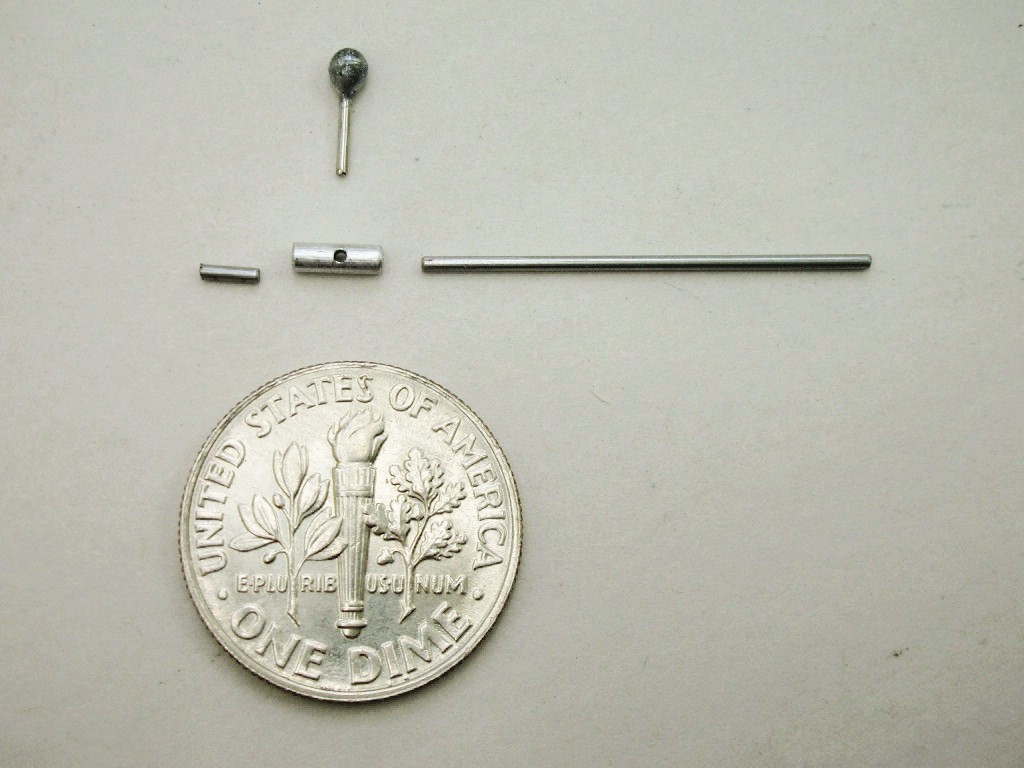
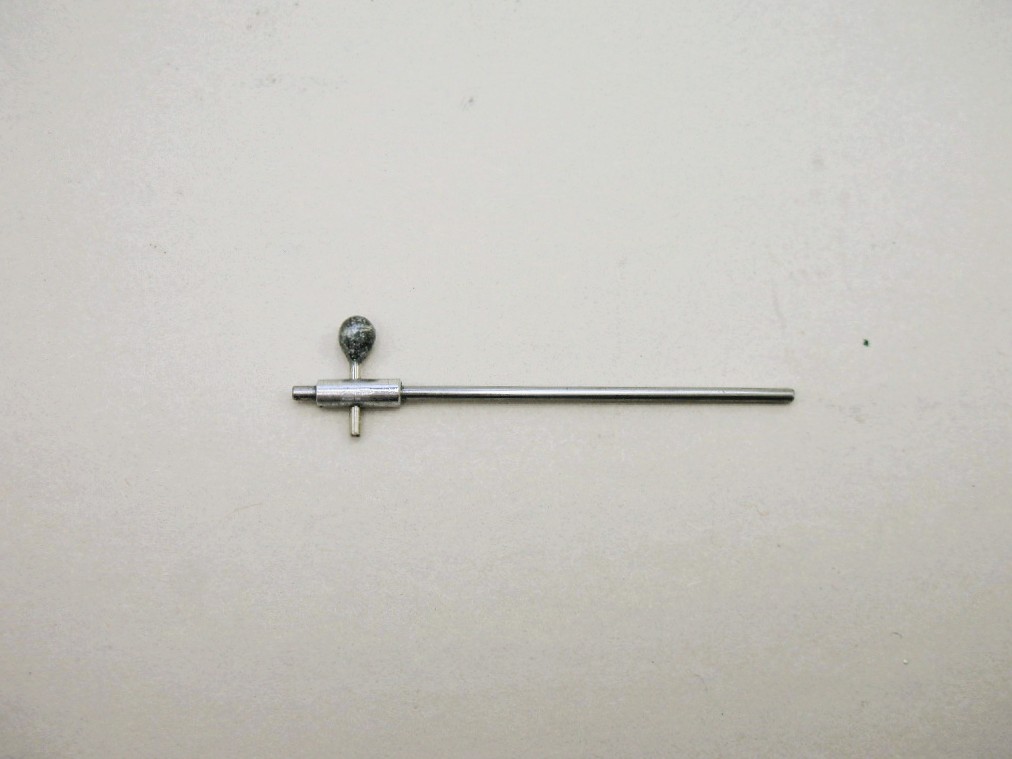
I used a stick pin with a shift knob look, 1/32" piano wire and 1/16" aluminum tube I drilled a .025" hole through. When I went to take this picture I thought this stuff is small so I added the dime:
All glued together:
This is how it fits into the interior:
More to do.........
Rick Thigpen
Check out Steve Okeefe's great web site at its new home here at Slotblog:
The Independent Scratchbuilder
There's much more to come...
Grand Champion Poster
Posted 15 April 2026 - 08:34 PM
The rollbar is up for fabrication next:
I keep finding new ways to use my beloved RGeo "Rick's" chassis jig. Below I'm using it as a roll bar making jig to bend 1/16" aluminum rod:
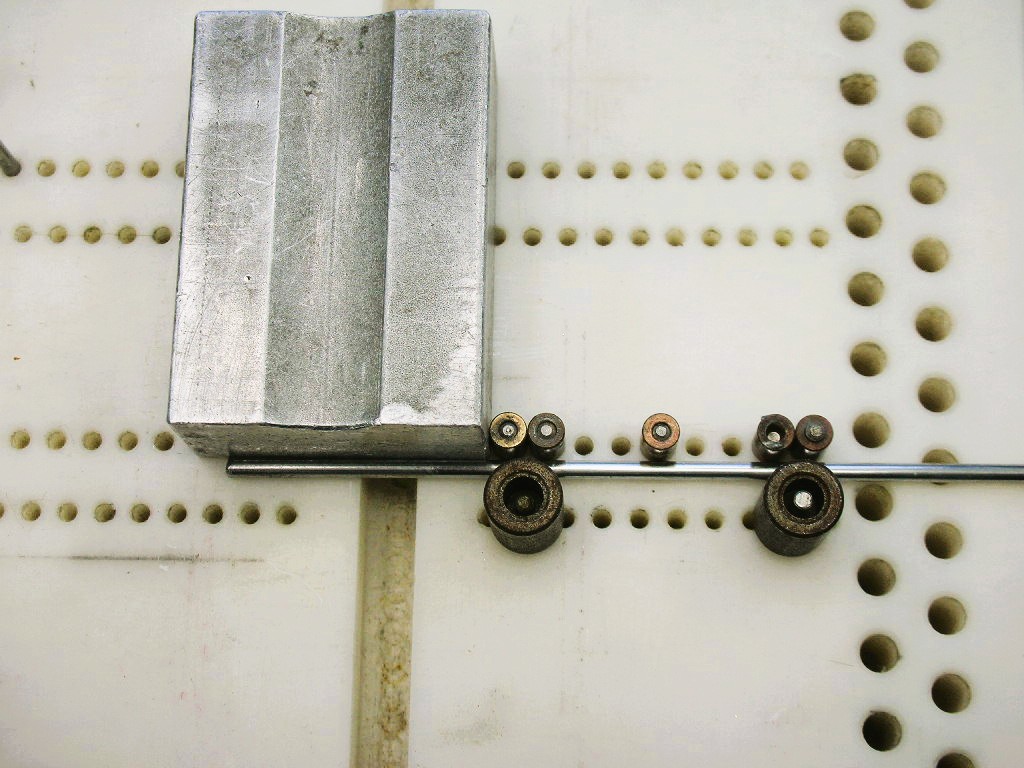
Using that aluminum block above, I bent my roll bar to exactly the width I needed with a nice consistent radius on both bends:
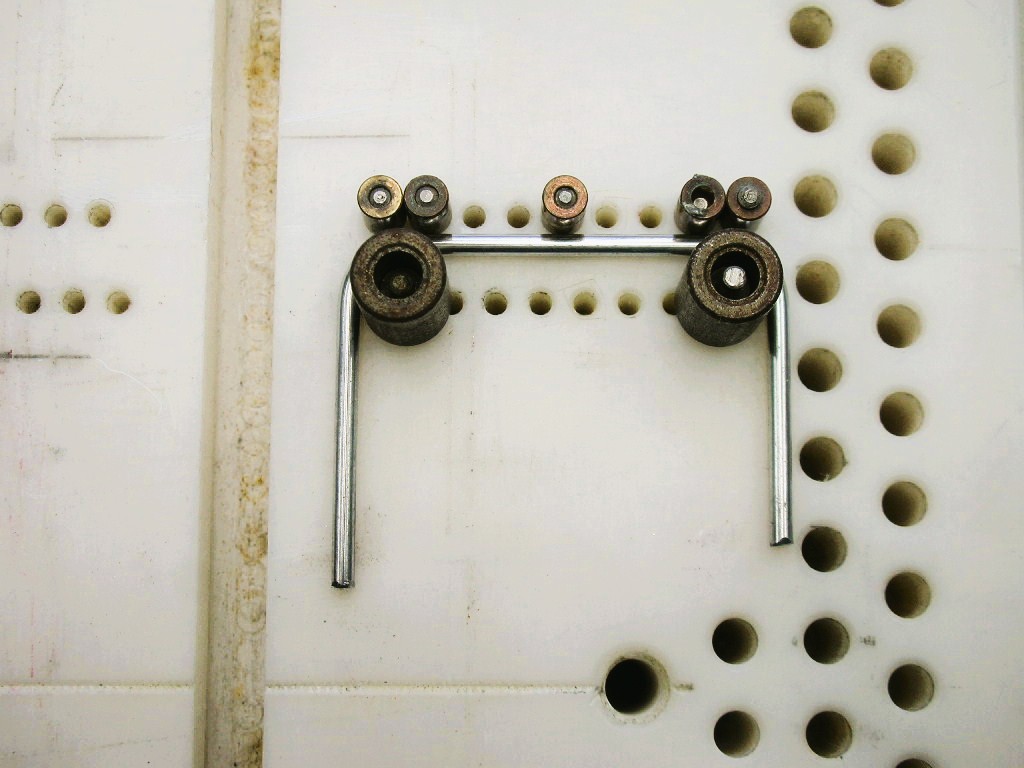
A bit of paste metal polish and it's good to go:
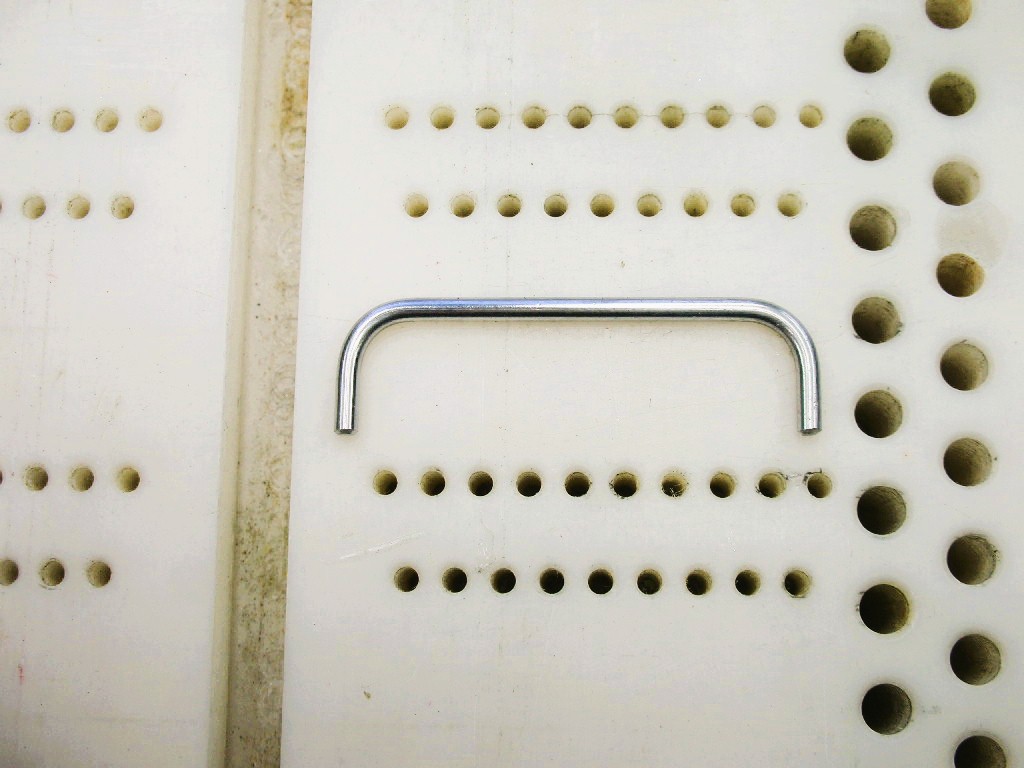
Rick Thigpen
Check out Steve Okeefe's great web site at its new home here at Slotblog:
The Independent Scratchbuilder
There's much more to come...
Race Leader

Posted 15 April 2026 - 08:38 PM
You totally nailed the radius ... nicely done!
Grand Champion Poster
Posted 20 April 2026 - 07:46 PM
Thanks Larry.
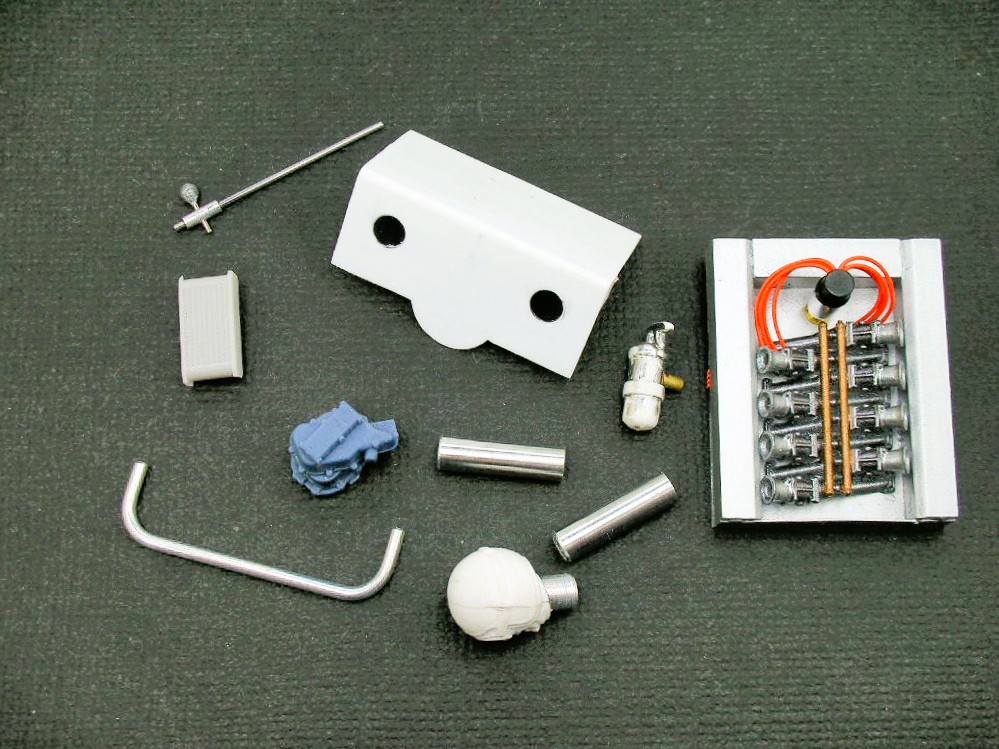
I've always liked how Russkit added "parts packs" of detail items to their vac bodies. So I've been working to try and add some details to the McLaren body.
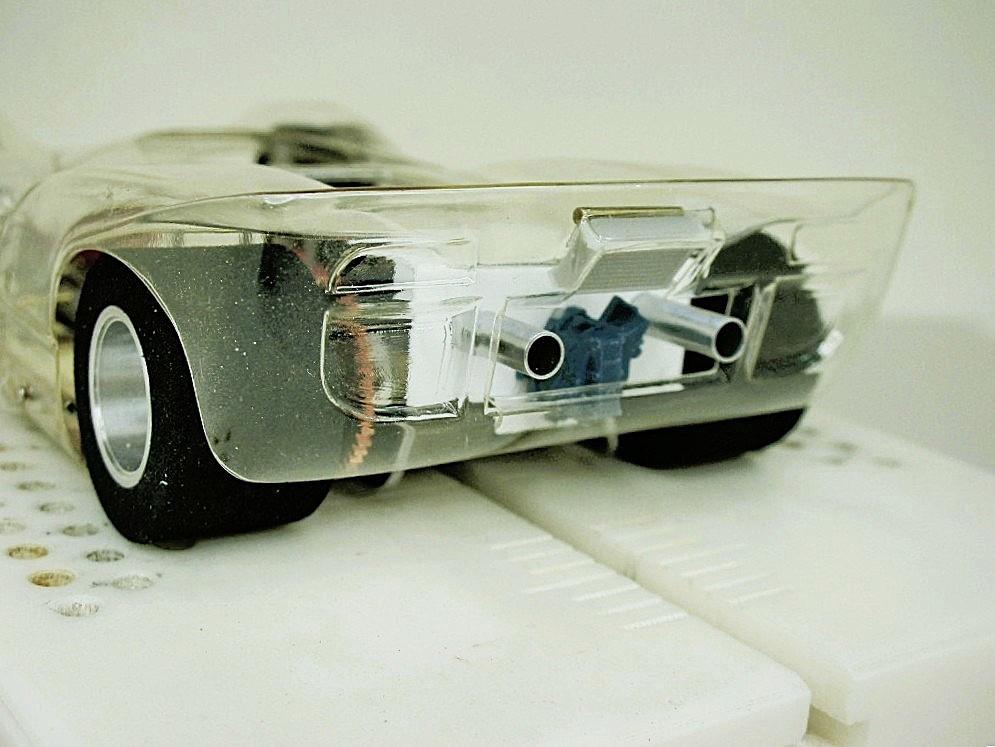
I decided to try and add some to the McLaren's bootie:
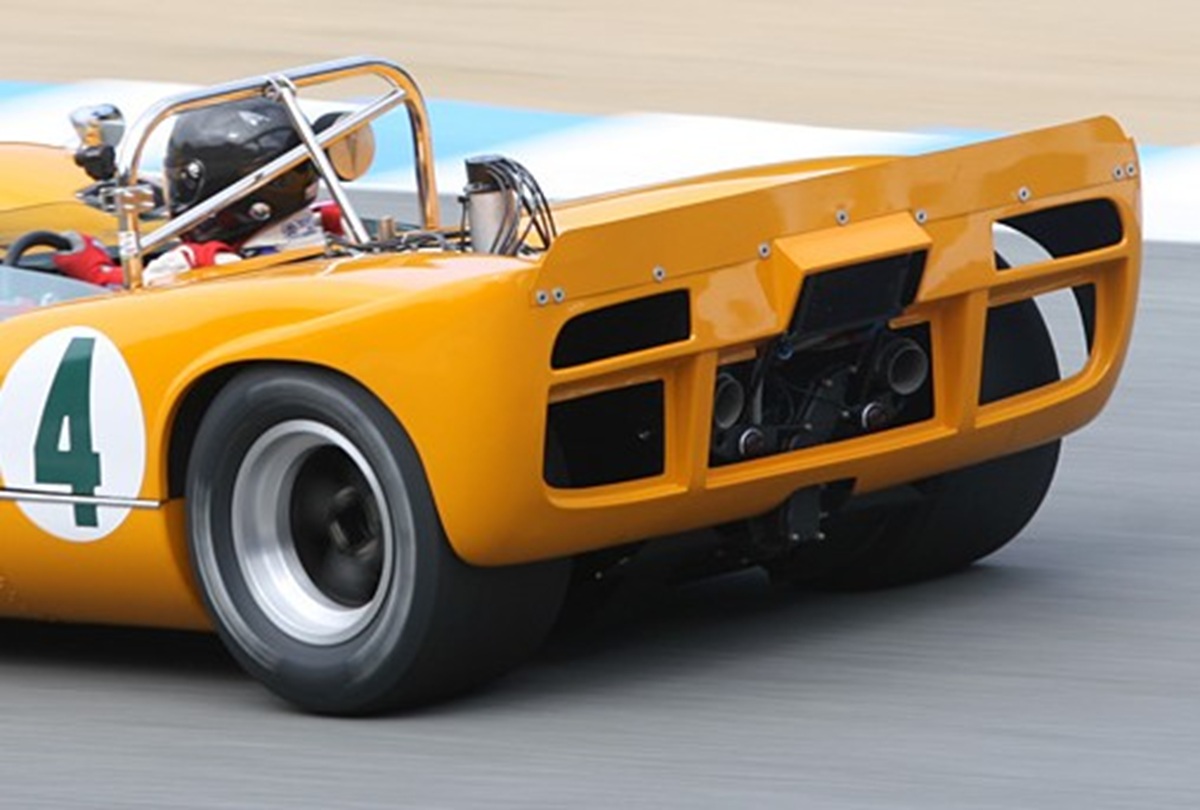
I'm using an eBay sourced oil cooler..........
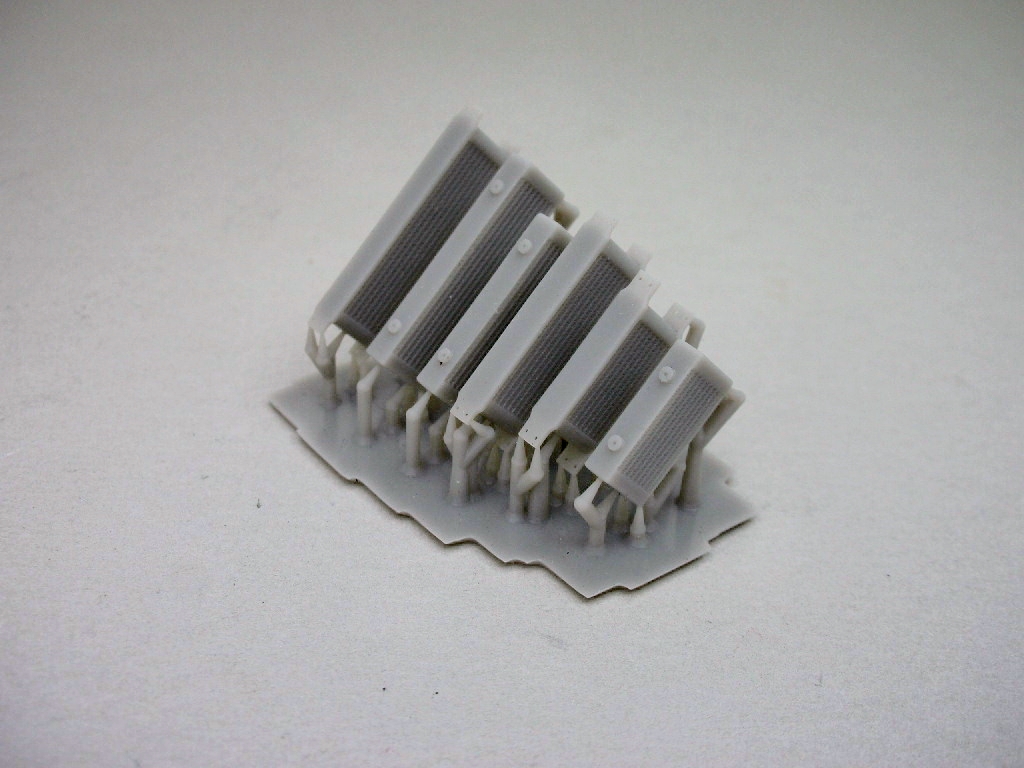
..........and a transaxle from Texas 3D Customs:
Here are some roughed in detail items attached with double sided tape as proof of concept:
Here's my "parts pack" of goodies ready for detailing:
I still need to make the rear spoiler and the plane from Australia just landed at LAX with my "racing mirrors", 
Rick Thigpen
Check out Steve Okeefe's great web site at its new home here at Slotblog:
The Independent Scratchbuilder
There's much more to come...
Grand Champion Poster
Posted 10 May 2026 - 07:49 PM
The painting of my detail parts is finally finished.........whew! 
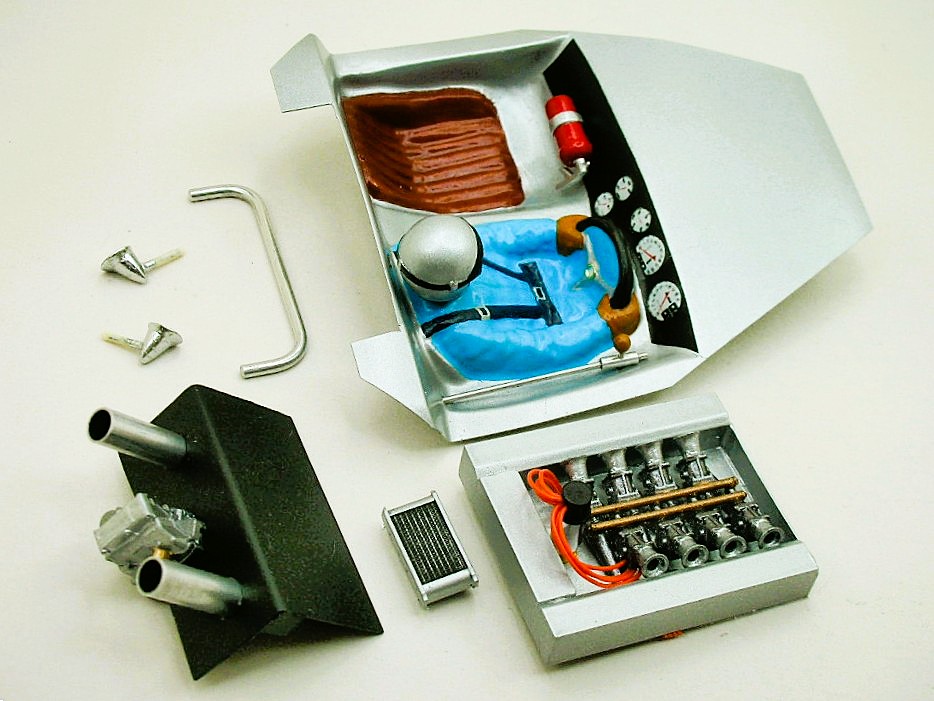
Time to mix up some paint and go to town on the body.
Rick Thigpen
Check out Steve Okeefe's great web site at its new home here at Slotblog:
The Independent Scratchbuilder
There's much more to come...
Posting Leader

Posted 10 May 2026 - 09:14 PM
Hi Rick,
It's always a pleasure to see your project progress.
Excellent craftsmanship and detail Rick!
Thanks for sharing!
Hope all is well Rick!
Ernie
Age scrubs away speed!

Posted 11 May 2026 - 09:03 AM
That instrument cluster doesn't appear to be painted with that "shaky" paint brush. Nice detail!

Grand Champion Poster
Posted 11 May 2026 - 12:05 PM
Hi Ernie and thanks!
You're right Bill. Detailing with a paint brush is becoming really difficult. I'm often forced to use not only "geezer goggles" but an additional attached magnifying glass. 
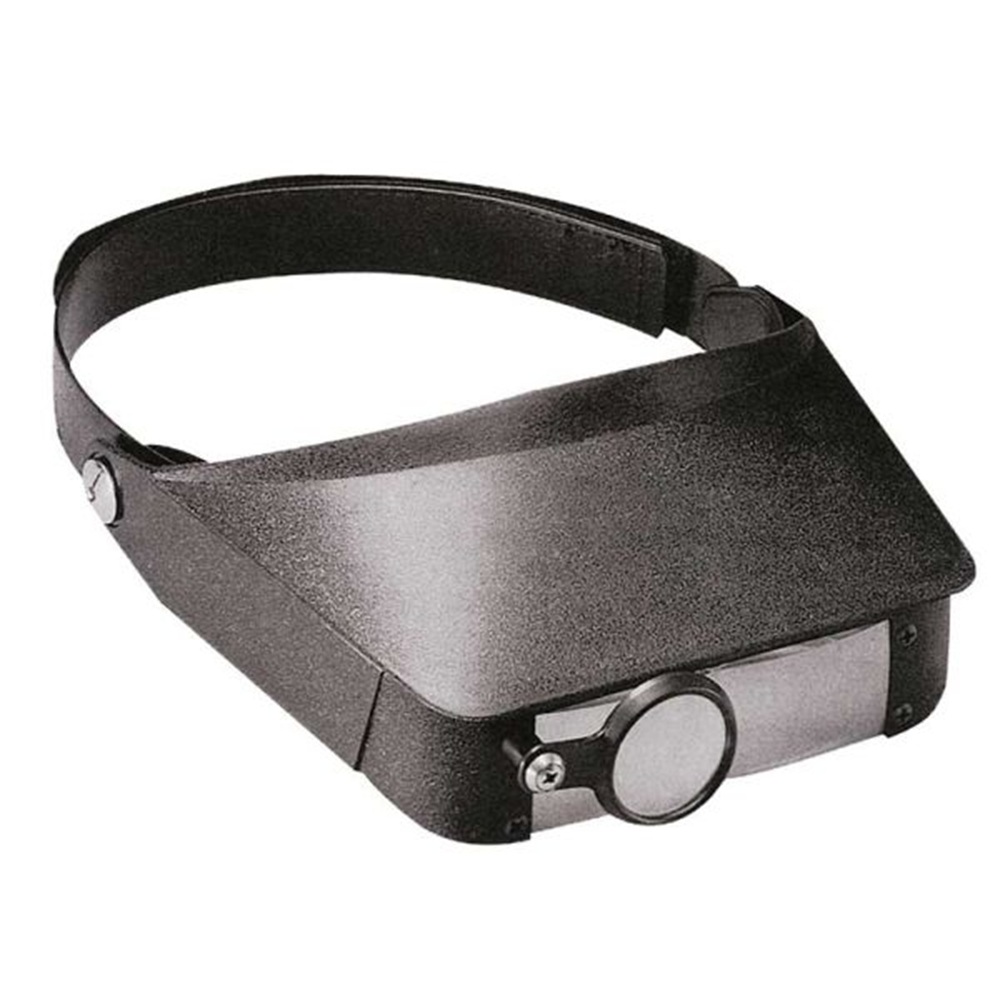
I'm relying more on masking things with tape wherever possible. That's what I did on the dashboard which turned out OK. I couldn't get the passenger seat masked so the "shaky" brush work shows:
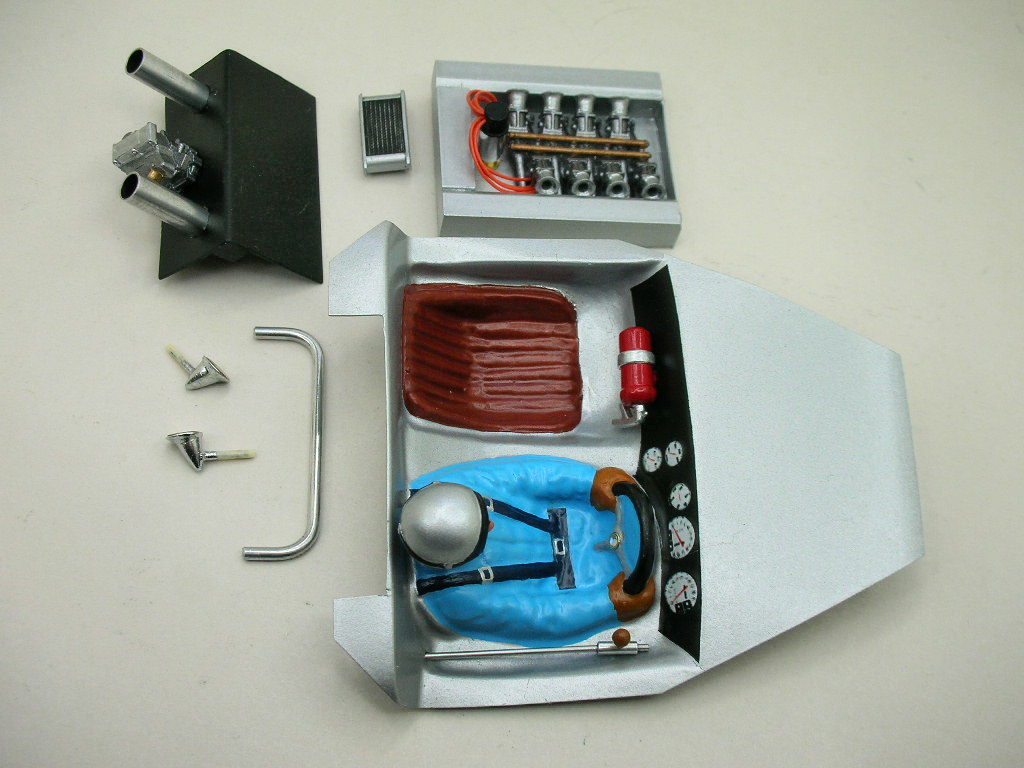
Fortunately, it much less noticeable when the interior is in the car and viewed in person than in these closeup photos. 
Rick Thigpen
Check out Steve Okeefe's great web site at its new home here at Slotblog:
The Independent Scratchbuilder
There's much more to come...
Age scrubs away speed!
Posted 11 May 2026 - 08:30 PM
I got a pair of those geezer goggles that also have lights. I seldom use them.
Backmarker
Posted 11 May 2026 - 10:21 PM
In Post #85, what what used as a bumper to bend the rod? Did you mill copper or aluminum for this project to get the bend radius?
Grand Champion Poster
Posted 12 May 2026 - 10:05 AM
Hi Dean,
The rod is soft aluminum and is easily bent......sometimes I think it bends if you look at it wrong.
I used a 1/4" diameter bronze bearing from McMaster Car to establish the bend radius. I simply pushed the rod around the bearing with the aluminum block to bend it as shown in the photo.
Rick Thigpen
Check out Steve Okeefe's great web site at its new home here at Slotblog:
The Independent Scratchbuilder
There's much more to come...
Grand Champion Poster
Posted 27 July 2026 - 07:59 PM
FINALLY......I have the McLaren body in paint.
The color is no doubt not a perfect match to the McLaren team color. But, for me, it gets the idea across that this is indeed a classic McLaren CanAm car.
I added a few drops or Testors flat red to their flat yellow, airbrushed it on and backed it with Testors rattle can flat white:
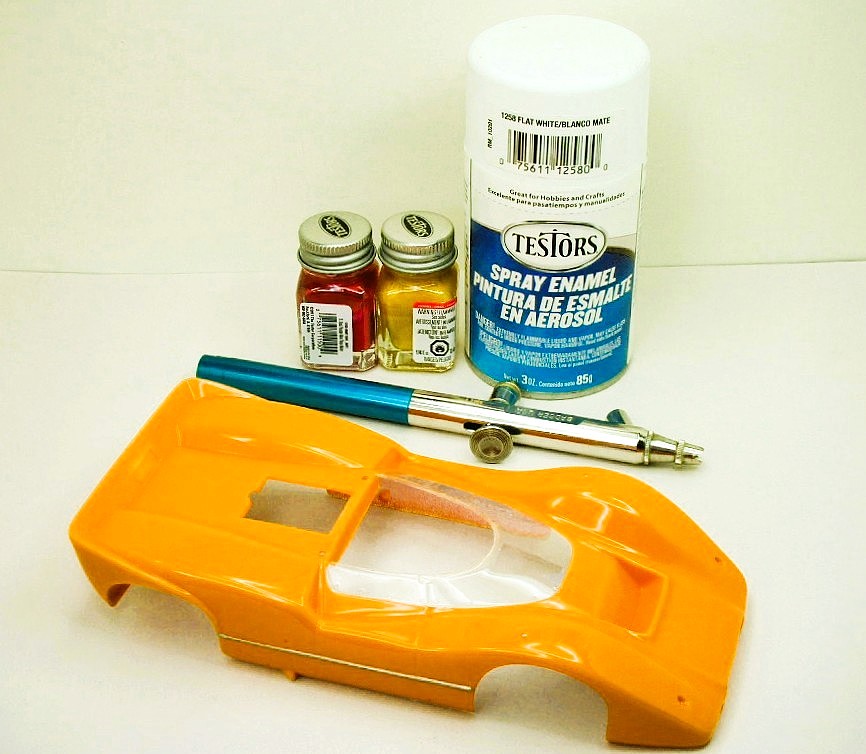
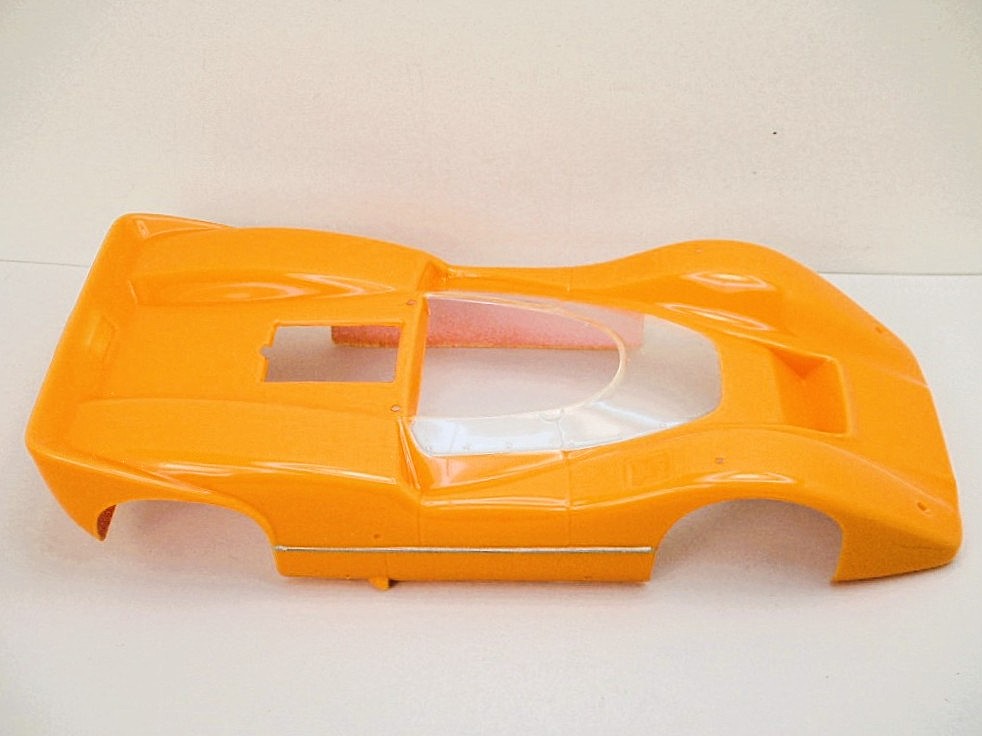
Next up is a little flat black detail painting, decals and final assembly of all the detail goodies.
Rick Thigpen
Check out Steve Okeefe's great web site at its new home here at Slotblog:
The Independent Scratchbuilder
There's much more to come...
Posting Leader
Posted 28 July 2026 - 04:19 PM
Yum yum yum, papaya. That looks like a perfect match to my eye. Love it Rick, great job.
I did an oil painting in art class (67 ish). Spent a lot of time mixing the chrome yellow with a hint of red as it goes into shadow.
It was an M6a BTW, so this is triggering good memories.
Age scrubs away speed!
Posted 28 July 2026 - 06:49 PM
Rick, do the Testors flat paints seem to adhere better to Lexan than their gloss enamels? I recall during a flexi race in the late 90s, an out-of-towner ran a car painted on the inside with a white Testors spray can. At the end of the race, he had a mostly clear body & the track looked like it had a snowstorm. The trackowner really scrutinized that fellow's bodies when he showed up after that.
Grand Champion Poster
Posted 28 July 2026 - 07:24 PM
Thanks Martin.
Hi Bill. The body I'm using is butyrate plastic and I use Testors enamel on that and also PETG plastic repop bodies. The flat paint is more opaque and covers better than the gloss. That said, the metallic gloss paints relative transparency can really pop when backed with the right color.
Here is a case in point, a Testors metallic British Racing Green (discontinued ) backed with gloss gold:
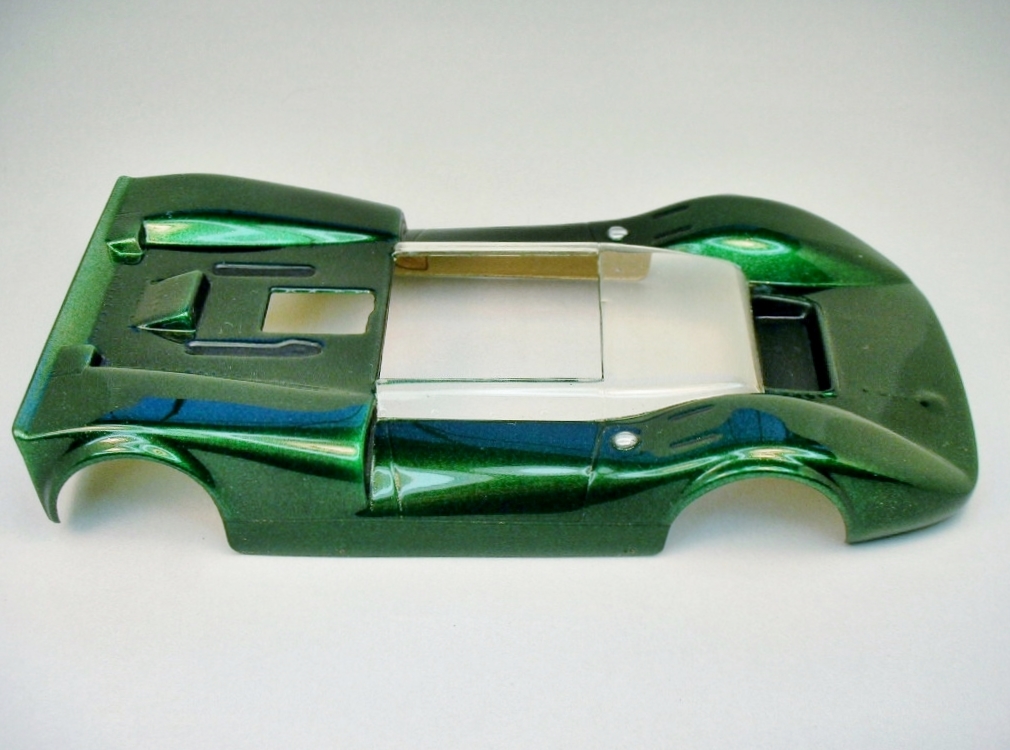
For Lexan bodies I like Tamiya PS series RC lacquer paint.
Rick Thigpen
Check out Steve Okeefe's great web site at its new home here at Slotblog:
The Independent Scratchbuilder
There's much more to come...
Grand Champion Poster
Posted 05 August 2026 - 01:40 PM
I am absolutely no good at the detail painting needed to finish off my vintage slot car projects.
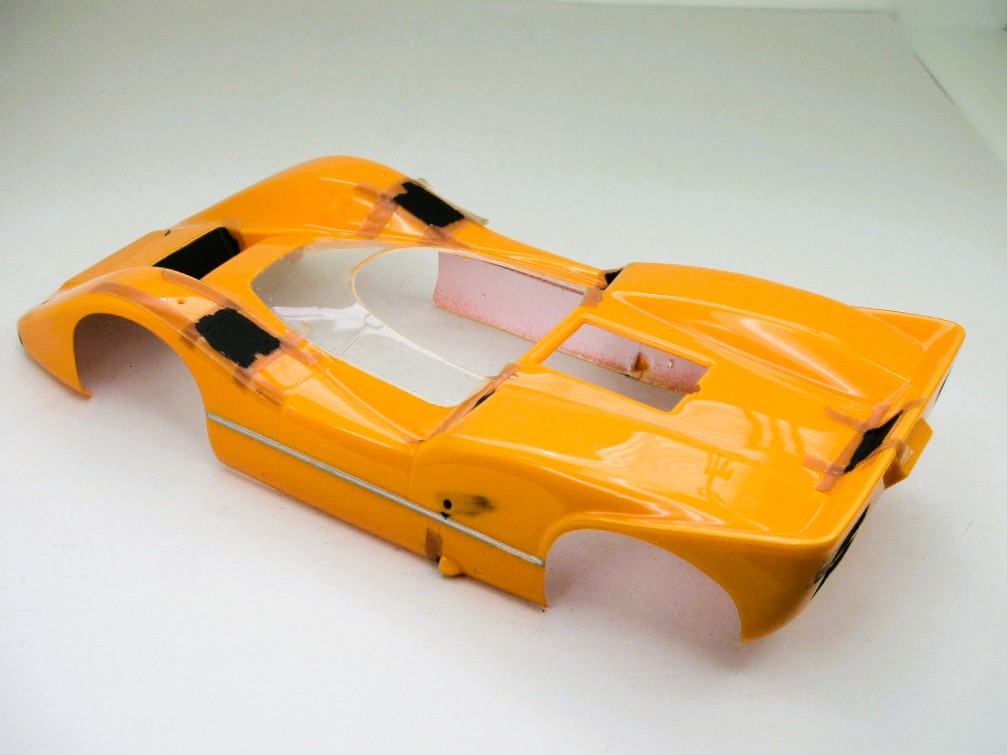
The following process pictures of my project show one way to do the black detail painting on the body without skilled paint brush work......a skill I don't have.
1. Below all the bodies detail areas requiring a straight painted line on a flat panel are masked off with strips of tape.
2. The detail areas that form a recess into the body with sharp edges don't require masking:
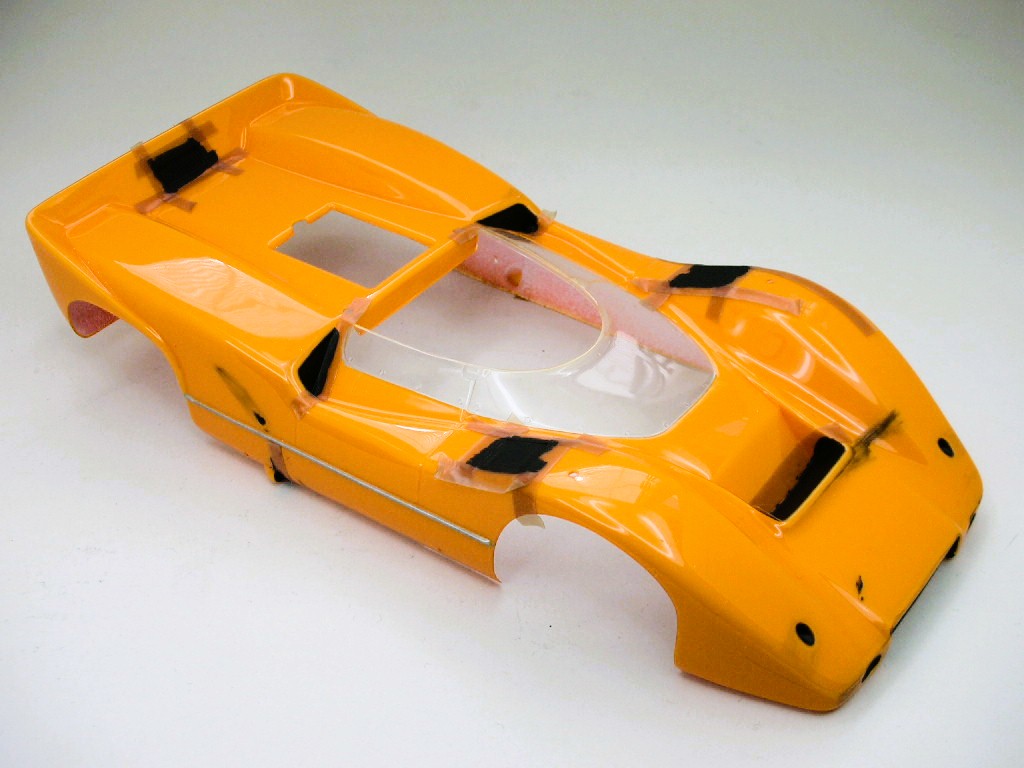
The black paint is brushed in liberally and the excess quickly wiped off along the edge with a finger:
When dry the edge can be further cleaned up (if needed) with the neato cotton swap shown below and some brush cleaner:
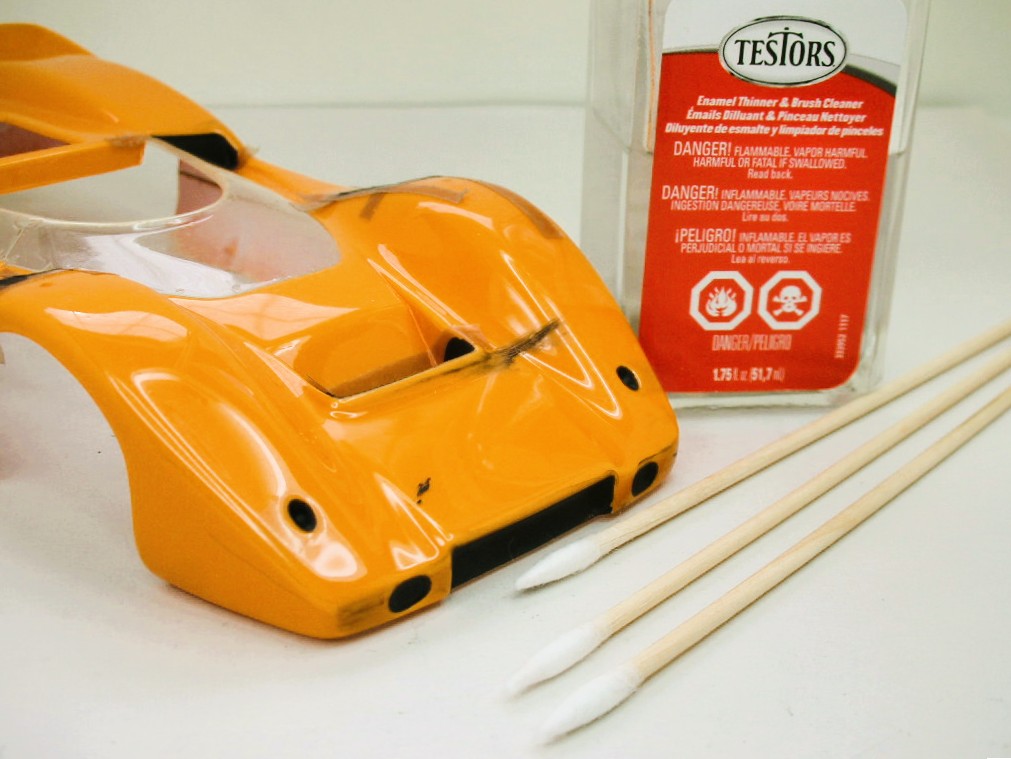
Here's the body with all the excess black paint cleaned up.........
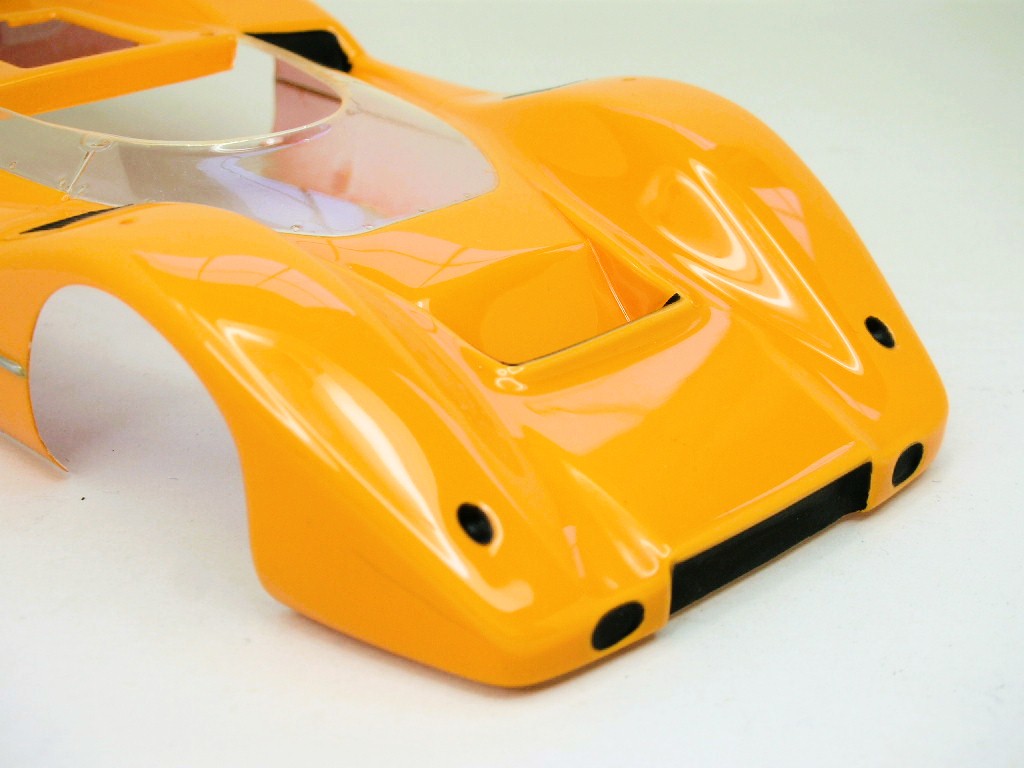
......... and the masking tape removed:
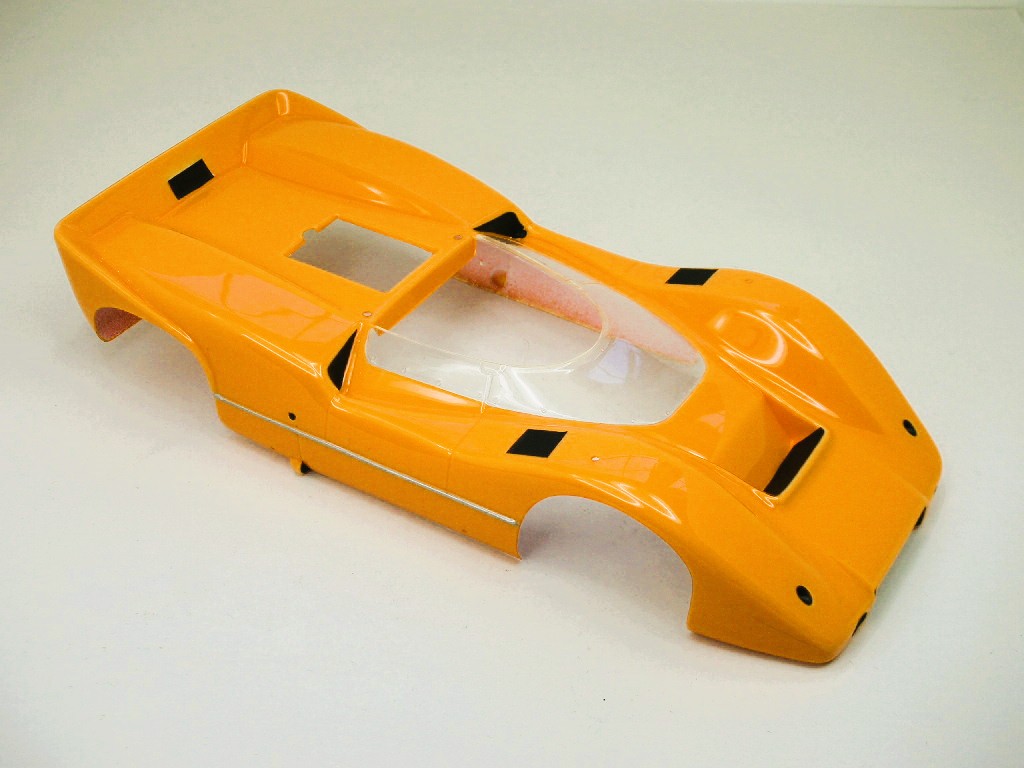
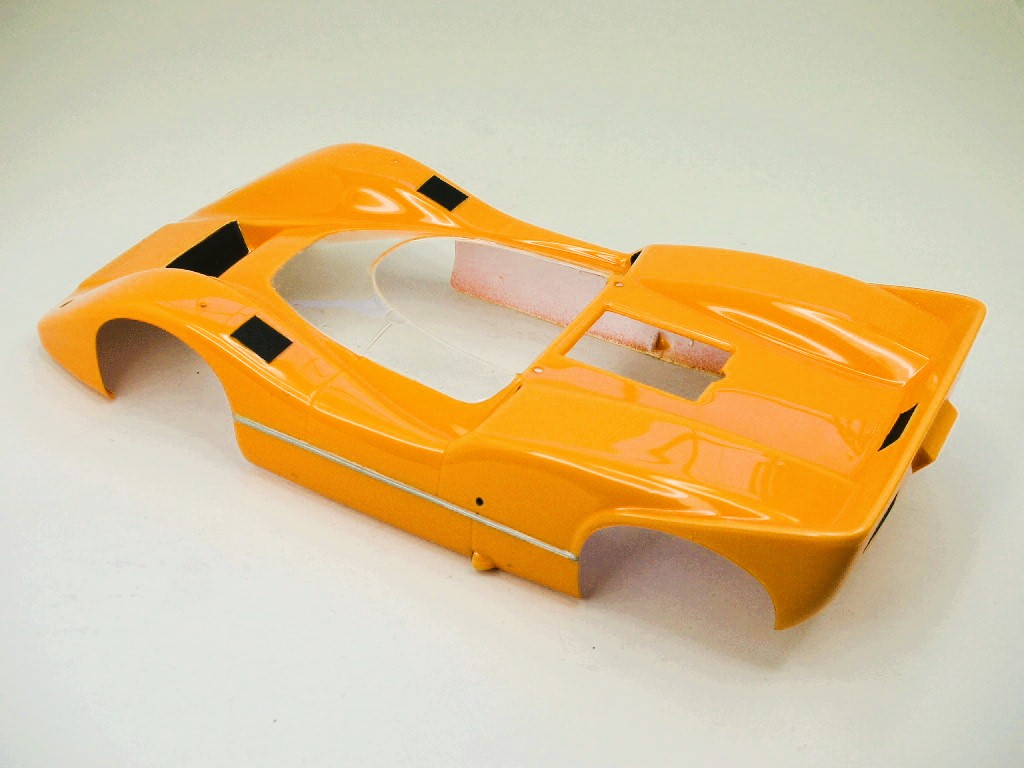
I'm pleased enough with the results and I hope that showing my process will give other Slotbloggers who struggle with detail painting some helpful ideas.
Rick Thigpen
Check out Steve Okeefe's great web site at its new home here at Slotblog:
The Independent Scratchbuilder
There's much more to come...
Age scrubs away speed!
Posted 05 August 2026 - 02:31 PM
Your results look as if it was a Lancer factory painted body from the early days. It looks very good.




