Jump to content


Photo

Restoration of Cox Chaparral


  • Please log in to reply
159 replies to this topic

#76 Jean-Michel Piot

Jean-Michel Piot

    Plastic surgeon

  • Full Member
  • PipPipPipPipPip
  • 654 posts
  • Joined: 16-March 08
  • Gender:Male
  • Location:Paris (France)

Posted 26 October 2009 - 05:37 AM

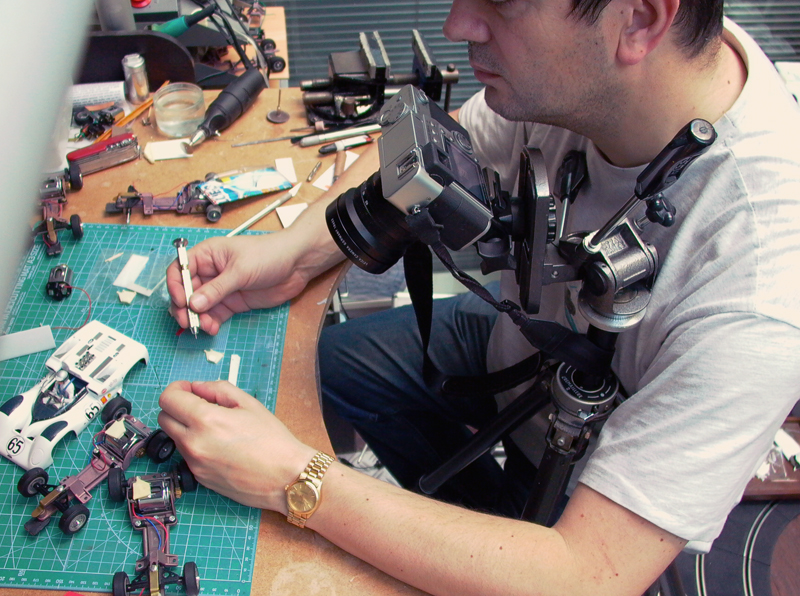
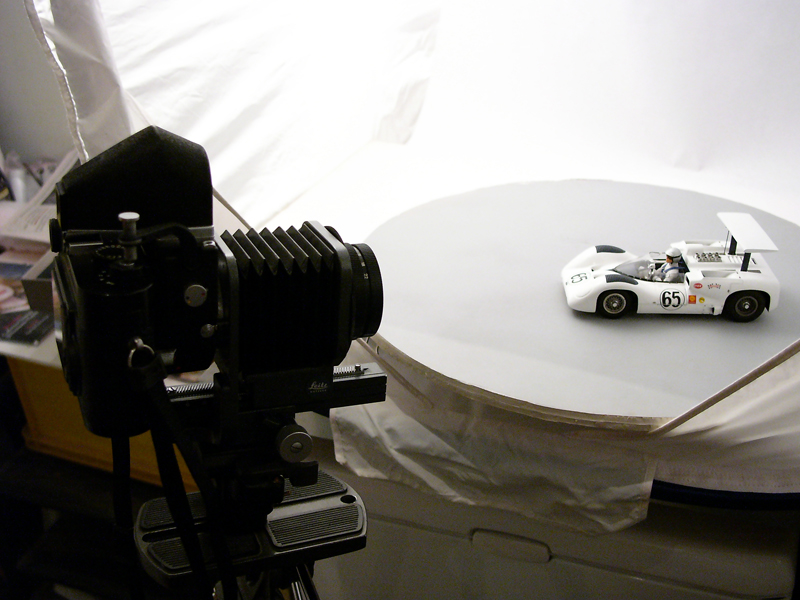
People have asked me how do I take pictures, so my two hands can be seen while I'm working.

Very classical means indeed.

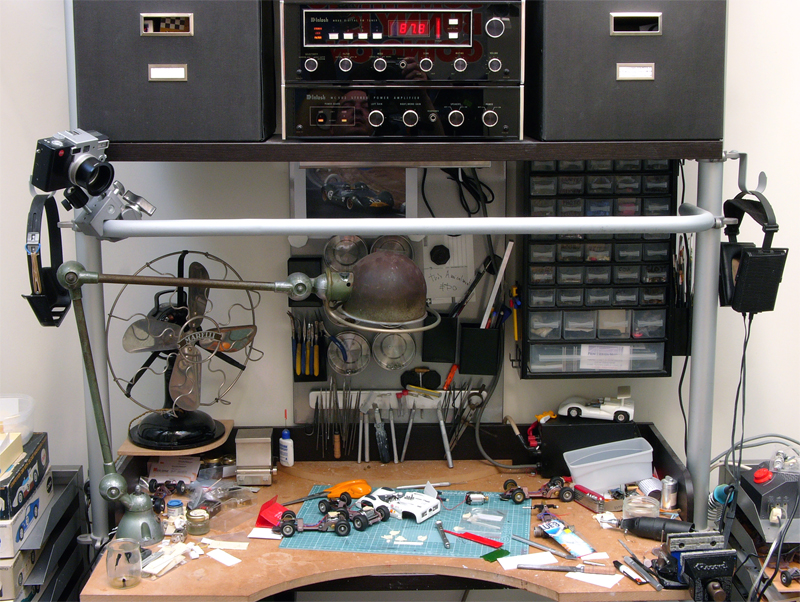
I simply use the self timer of the camera, that can be set out to either 2 seconds or 10 seconds. So, for the solitude mood picture of the workbench I took yesterday evening (my time, of course), you now realise that I had 10 seconds to get back on my seat ... :wink3: Or I'm pretty quick if I can do that in 2 seconds ... :laugh2:

When I have hands with gloves doing resin casting, I press the shooting button with a plastic rod in order to avoid to get resin on the camera...

The camera is more frequently mounted on an old Gitzo tripod, with a Manfroto additional head and a quick release system, like here:

Tripod.jpg

Now, the next question would be: how did I take this picture ? :laugh2:

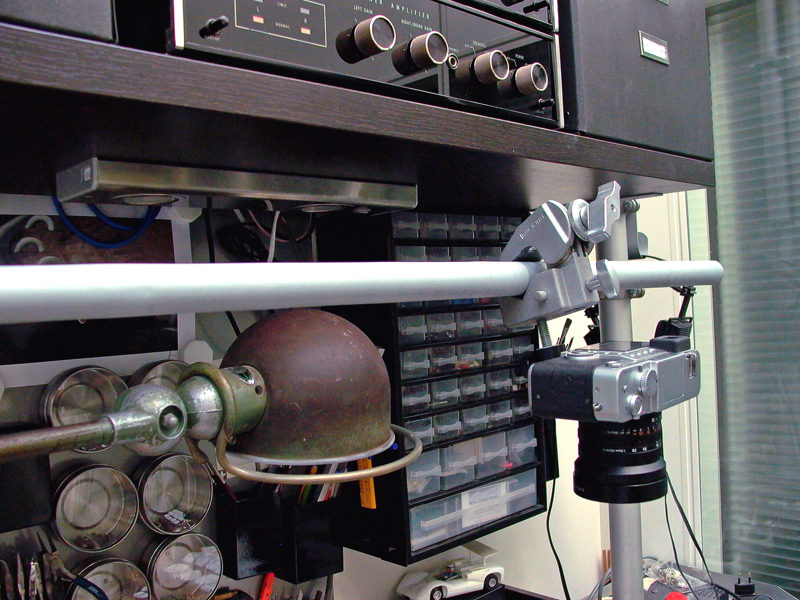
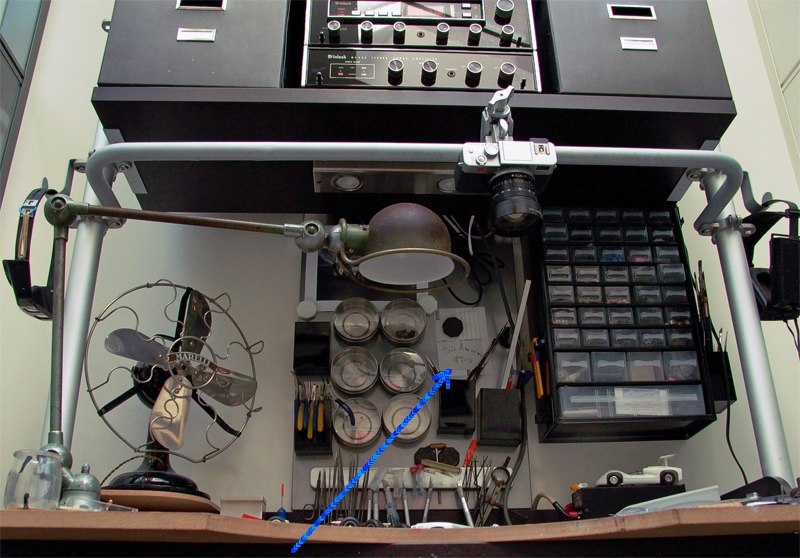
It was taken with this second camera, at the left corner of a kind of tie rod that I placed here for the sole purpose of taking pictures while working. Yes, when I do not use the tripod, I use this system.

Digilux_1_at_the_corner.jpg

A Manfrotto "Super Clamp" (here in silver rather than more frequently seen in black), equipped with a ball, can slide all along this tube...

Sliding_tube.jpg

Sliding_tube_2ter.jpg

Unfortunately, unlike Edo, (see his signature here ... :bye: ) I have no assistant ... :pardon:
  • strummer likes this
(Bud)light is right!


#77 Jean-Michel Piot

Jean-Michel Piot

    Plastic surgeon

  • Full Member
  • PipPipPipPipPip
  • 654 posts
  • Joined: 16-March 08
  • Gender:Male
  • Location:Paris (France)

Posted 26 October 2009 - 09:43 AM

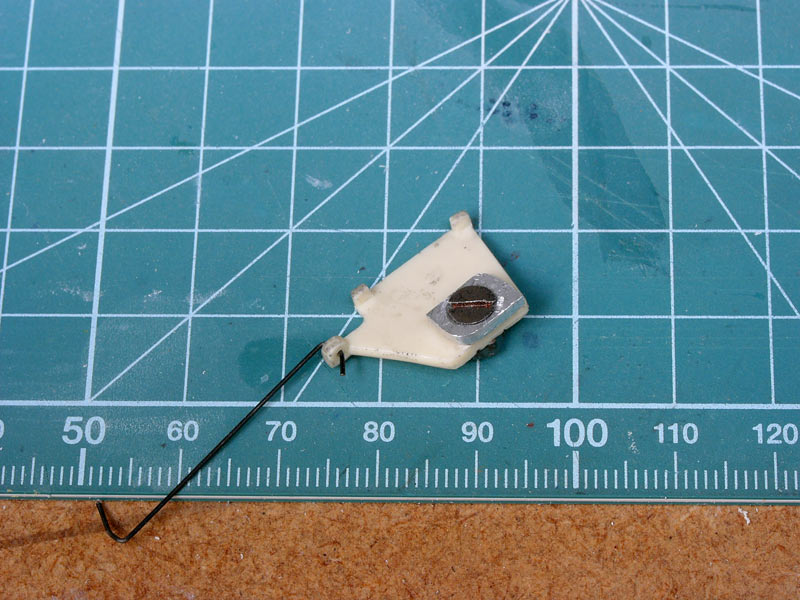
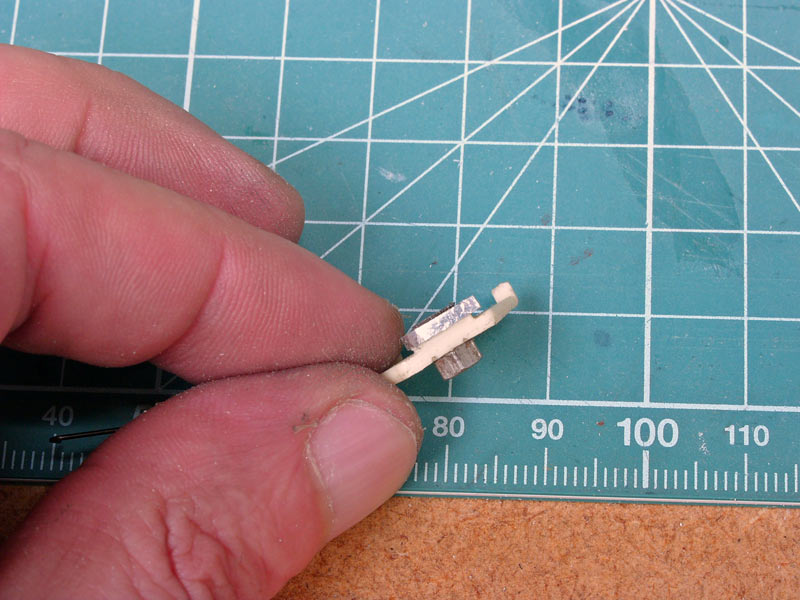
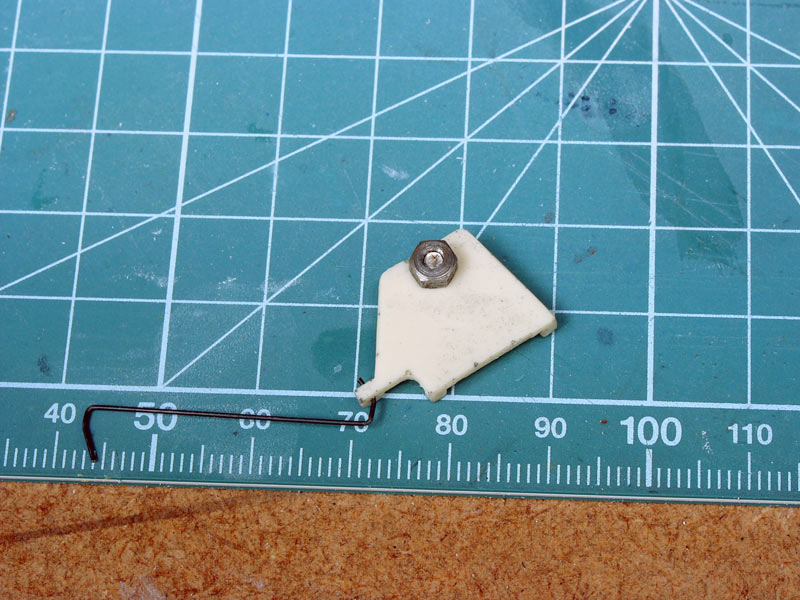
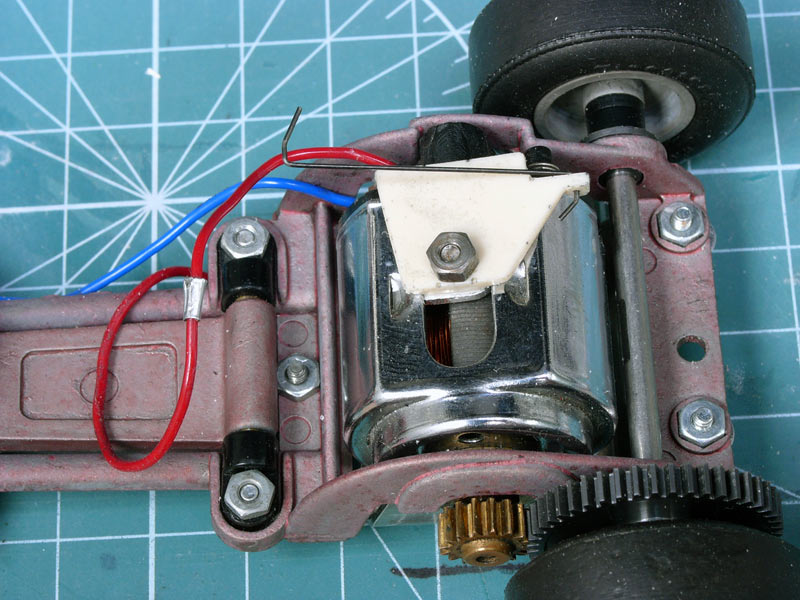
Today I made a trial with a different material for the additional part I make for the actuators.

I made it in aluminum that time and bolt it.

The tickness of the part is the same, so the engine can rev.

As for the top, there is room enough between the engine and the body.

I tried on my little test track, it works !

This will indeed be stronger than the plastic part bonded with contact glue. But make sure you really tighten the bolt.

1501.jpg

1502.jpg

1503.jpg

1504.jpg

In fact I'm sure the whole can be replaced with metal.
(Bud)light is right!

#78 Dennis M

Dennis M

    Mid-Pack Racer

  • Full Member
  • PipPipPip
  • 126 posts
  • Joined: 23-November 09
  • Gender:Male
  • Location:Meadville P.A

Posted 30 November 2009 - 10:44 AM

You do great work Jean' thank you for sharing your techiniques with us.
Dennis C. Mikelvich

#79 Jean-Michel Piot

Jean-Michel Piot

    Plastic surgeon

  • Full Member
  • PipPipPipPipPip
  • 654 posts
  • Joined: 16-March 08
  • Gender:Male
  • Location:Paris (France)

Posted 30 November 2009 - 06:00 PM

As you have seen, the 2Es bodies with their interiors (without the dash board) are now primer coated.

Well, not the whole body. The big air scoop and the radiators are still not there.

I will describe the mounting in few days, hopefully during the next week-end. Today, just few explanations and pictures for the holes that now have to be made in the firewall for the harness.

With the white primer, it is easy to draw the exact place for the two holes.

No need for you to measure, I made it once for my first 2E and here is the result: each aperture is 3mm long. The apertures are 4mm far from the bottom of the firewall.

First aperture is at 5mm from the right edge and the second one is at 15mm.

I made a template in plasticard because I have 5 Chaparral 2E to assemble and it was then easier to make and use the template rather than measure on all the cars.

1602.jpg

1601.jpg

1603.jpg

1604.jpg

You then have to drill holes ...

First use a conic tool to be sure you wil drill at the right place

1605.jpg

Now you can drill.

1606.jpg

And use a modeller knife…

1607.jpg

1608.jpg

And a file.

1609.jpg

1610.jpg

And now just one picture for the wire that link the actuator to the wing.

I tried different places in Paris, France, where I live, before I finally found almost the good size for the piano wire.

It should be 0.4mm thick but the 0,5mm wire I found is OK. It costs nothing but I spent hours to find that damned wire…

Note that only a steel piano wire has to be used. Brass would not be strong enough.

Here is the result. The genuine Cox wire is the one closer to the rear of the chassis at the front.

1701.jpg

By the way on the previous picture you can see that I improved the way I attach the small part that ameliorate the actuator. I use little rivets now:

Rivet_1.jpg

Rivet_2.jpg

Next article will be really bigger than this one.
(Bud)light is right!

#80 janj86

janj86

    Backmarker

  • Full Member
  • PipPip
  • 65 posts
  • Joined: 20-December 08
  • Gender:Male
  • Location:DFW, TX

Posted 05 December 2009 - 09:49 AM

jean-michel, you still amaze me - thank you again for your work- how is your little girl? i just got a new grandbaby girl cute as a bug !!! wondering about he wing actuactors and such = i just got a new purchase of a 2e-racha to tinker with but really wish to complete the 2e mag chassis - ley me know -
J. J. Williams

#81 Jean-Michel Piot

Jean-Michel Piot

    Plastic surgeon

  • Full Member
  • PipPipPipPipPip
  • 654 posts
  • Joined: 16-March 08
  • Gender:Male
  • Location:Paris (France)

Posted 05 December 2009 - 06:19 PM

Jim,

I recently sent you a private message...

Didn't you see it ? I was requesting the complete list of the parts you need...

To read from you (and congratulation :) !)
(Bud)light is right!

#82 stevefzr

stevefzr

    Race Leader

  • Full Member
  • PipPipPipPipPip
  • 598 posts
  • Joined: 23-February 06
  • Gender:Male
  • Location:Melbourne, Australia

Posted 28 December 2009 - 07:26 AM

Back on the subject of resin casting, is it possible to use either a 5-minute or super-strength epoxy resin? I expect that the epoxy will be a little more flexible than casting resin. Repro suspension arms and exhaust pipes I tried made with casting resin usually break pretty quickly. I thought epoxy might give a little more. What about smaller body parts like front and rear valances? Would epoxy work there? One advantage of the epoxy is that it comes in those convenient dual-syringe packs making it easy to mix a small batch when only a tiny part is being cast.

Anyone else tried 2-part epoxy glue for casting?

Regards,

Steve C

Stephen Corneille


#83 Prof. Fate

Prof. Fate

    a dearly-missed departed member

  • Member at Peace
  • PipPipPipPipPipPipPipPip
  • 6,580 posts
  • Joined: 20-February 06
  • Gender:Male
  • Location:Salt Lake City, UT

Posted 28 December 2009 - 01:12 PM

Hi

Steve over the last 5 or 6 decades I have cast stuff, the resins have really changed. Epoxy "superstrong" is "super" as an adhesive not really in this application. Even worse, the casting resins I used as recently as 20 years ago were often nightmares to work and might take days to cure if you wanted to avoid big shrinkage rates.

Modern resins are just better in every way and constnatly getting better. I don't know what you used in the past, but I expect it wasn't as good as the current stuff.

Fate
Rocky Russo
3/6/48-1/1/12
Requiescat in Pace

#84 Jean-Michel Piot

Jean-Michel Piot

    Plastic surgeon

  • Full Member
  • PipPipPipPipPip
  • 654 posts
  • Joined: 16-March 08
  • Gender:Male
  • Location:Paris (France)

Posted 29 December 2009 - 06:27 PM

Indeed! Some new resins are better than polystirene, quite soft and perfect for slot cars.

Epoxy glue can be casted, that is what I do for very small parts like rear lights, where the transparent aspect is a benefit. But those parts are not really hard and I feel this would not do the job for parts like a front valence.
(Bud)light is right!

#85 Mark Clemence

Mark Clemence

    Rookie Keyboard Racer

  • Full Member
  • Pip
  • 11 posts
  • Joined: 06-January 10

Posted 08 January 2010 - 08:12 PM

Jean-Michel - Thanks for the superb instructions. As soon as I have completed construction of my home track I have two COX 2A's waiting for restoration\refurburishing. Your instructions will be a grreat help in this.

One question: I also have a 2E ISO (I am the original owner) and the motor bracket (is it polyethylene?) that actuates the wing has become warped. Any suggestions on how to straighten this bracket?

#86 janj86

janj86

    Backmarker

  • Full Member
  • PipPip
  • 65 posts
  • Joined: 20-December 08
  • Gender:Male
  • Location:DFW, TX

Posted 05 September 2010 - 09:06 AM

jean michel -- thank you again for your help w/ 2e project as i keep getting sidetracked -- hope to sent picyures soon
J. J. Williams

#87 Jean-Michel Piot

Jean-Michel Piot

    Plastic surgeon

  • Full Member
  • PipPipPipPipPip
  • 654 posts
  • Joined: 16-March 08
  • Gender:Male
  • Location:Paris (France)

Posted 08 September 2010 - 09:28 AM

Jim, I'm glad that you are happy with the parts I send to you.

I still have things to make to other slotblogers. I know that… Please be patient. This will come soon and for sure before the end of the year. Jim Williams can testify that he had to wait (and wait, and wait …), but apparently he is satisfied. I do all this during my hobby time and have not enough of it … (like most of us I guess...)


OK guys (and Ladies…) it's been quite a year since I show you something new about the restoration of Cox Chaparral cars.

I hope that everyone had fun during the summer holidays. Now it is time to revert to those Chaparral cars.

Last time I thought that we were about to see how to paint those cars, what strategy had to be used when there were complex things to do like painting the 2E with those dark blue areas on white, or some Brown on white as for the 2A.

But recently I worked on the four 2D that I have (3 of them were mine, the fourth one belonged to a friend who unfortunately had to sell things; I bought the fourth one together with his 2A and his 2E). Between you and me, I may sell a 2D, one or two 2A, a copy of the 2E but will keep my two genuine 2Es.

So we will see the masking and painting tricks later on.


About the2D, then:

I quickly came to the conclusion that the Cox model was perfect to either represent theNurburgring car, with number 7, or the car that raced in the 1966 edition of Le Mans 24h race (with number 9).

But to either make #9 or #7 we first have to work on the body…

- On both cars, the rear aerodynamic blade is too small, too flat as there is no embossment (on the real cars this blade was bolt on the body).

We will see that each of the two cars (between # 7 and # 9) has its specific blade.

So we have to remove the emergence of a poor blade on the Cox bodies and create new parts.

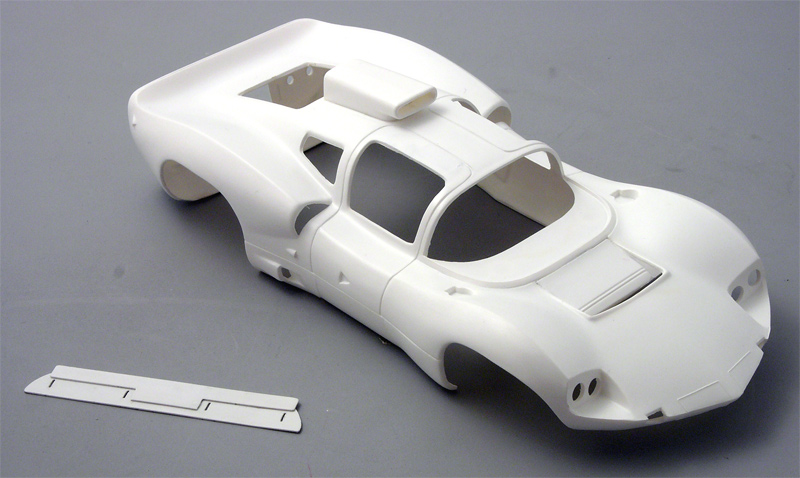
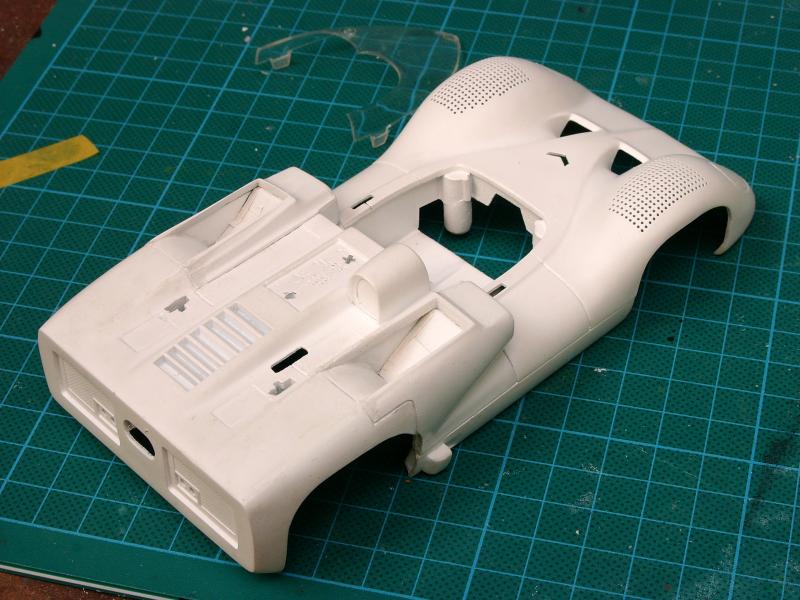
- On LeMans car (#9), the nose has to be modified in order to have front additional lights visible behind the transparent light covers.
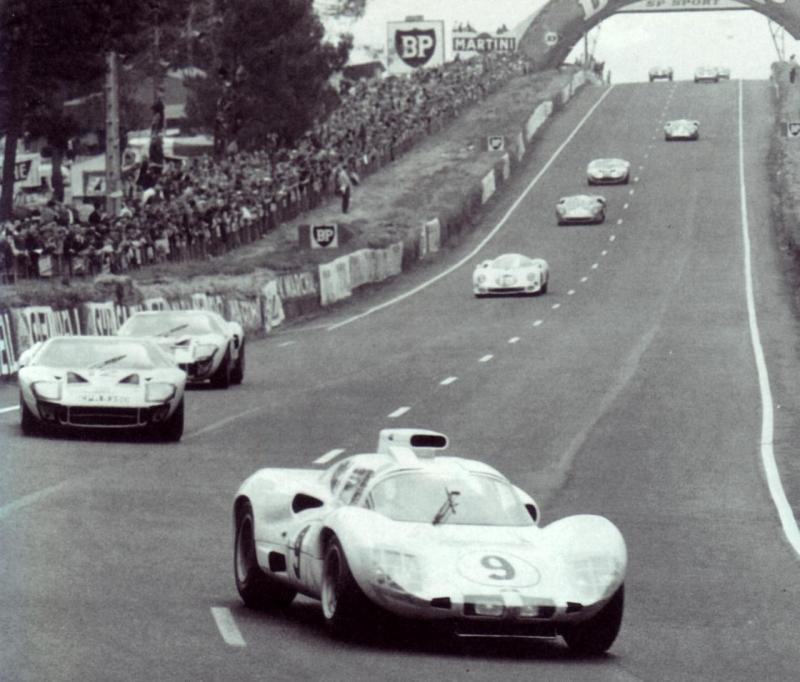
photo PP le mans.jpg


- On the Nurburgring car (#7), the top should be flat, with no fairing for the rear view mirror.
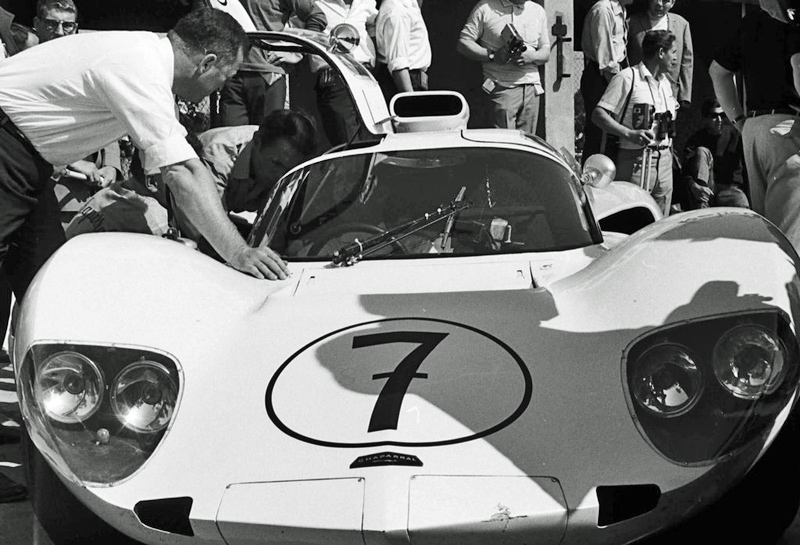
2-D-07.jpg


Let's first consider the Le Mans' race car:


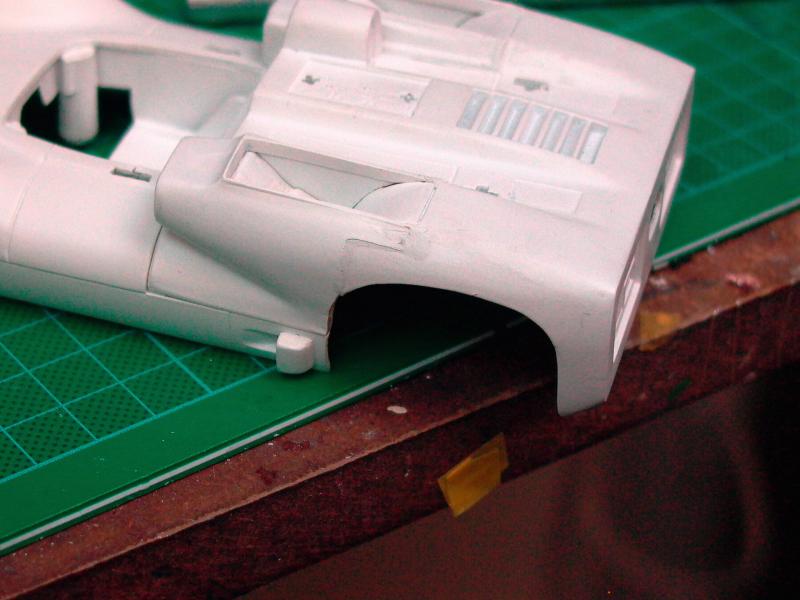
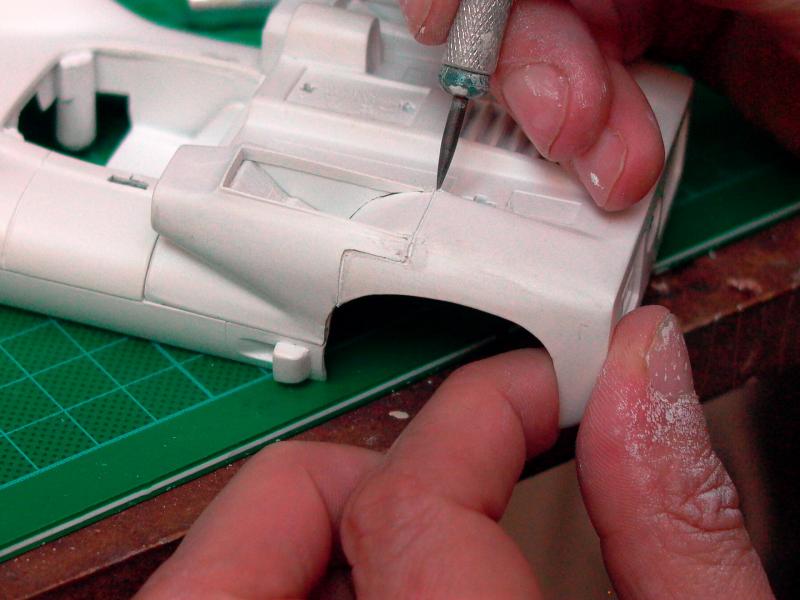
To open two apertures for the additional lights, I first used a pyrographer. It looks like an electric iron and can be equipped with different tools, notably a blade.
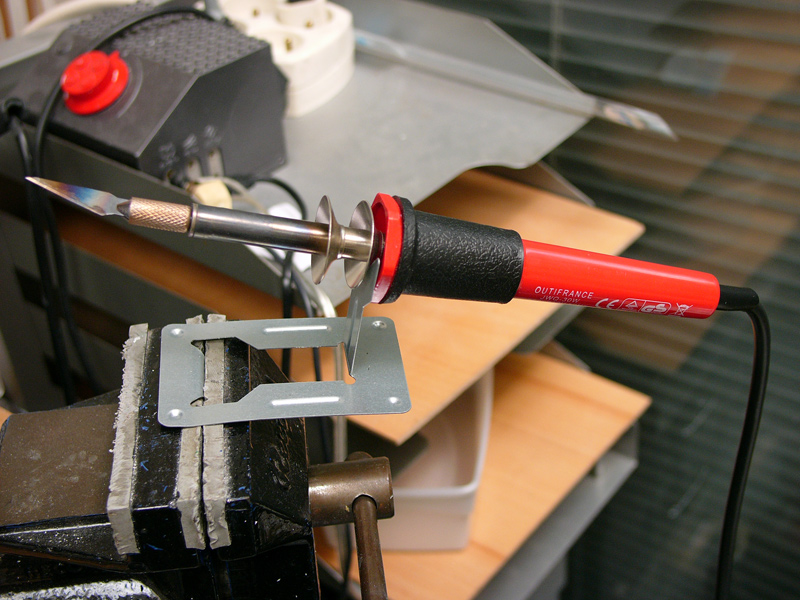
2-D-29.jpg

I cut inside the embossed lines that simulate the junction of panels on the model, and not exactly on the lines.
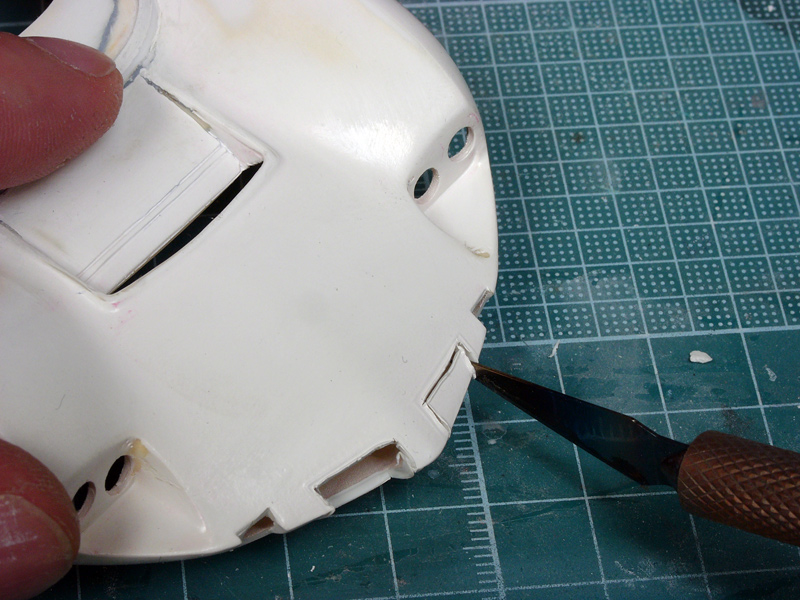
2-D-28.jpg

It is safer that way. Then you can finish with a file. The transparent covers shall be made the same way I did for the 2As.
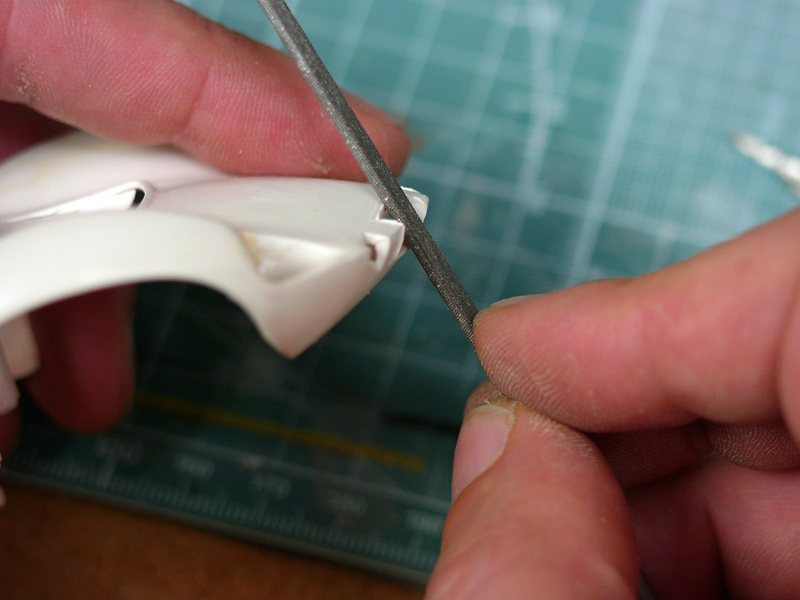
2-D-30.jpg

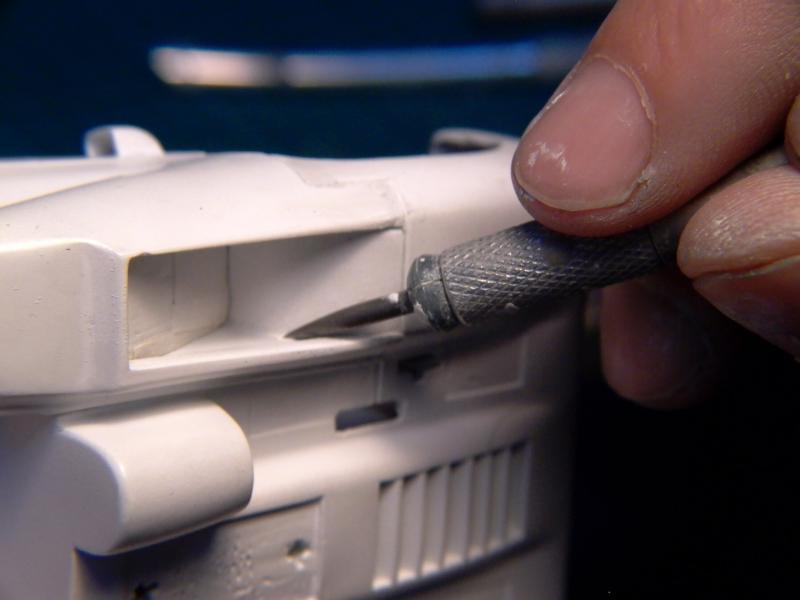
Once this done, you have to widen the little triangular apertures with an X-acto or similar and this, to simulate a more realistic thickness of the body. Those apertures are made for cooling down the front brakes.

Here below, the work is still to be made on the right of the picture (on the left side of thecar).
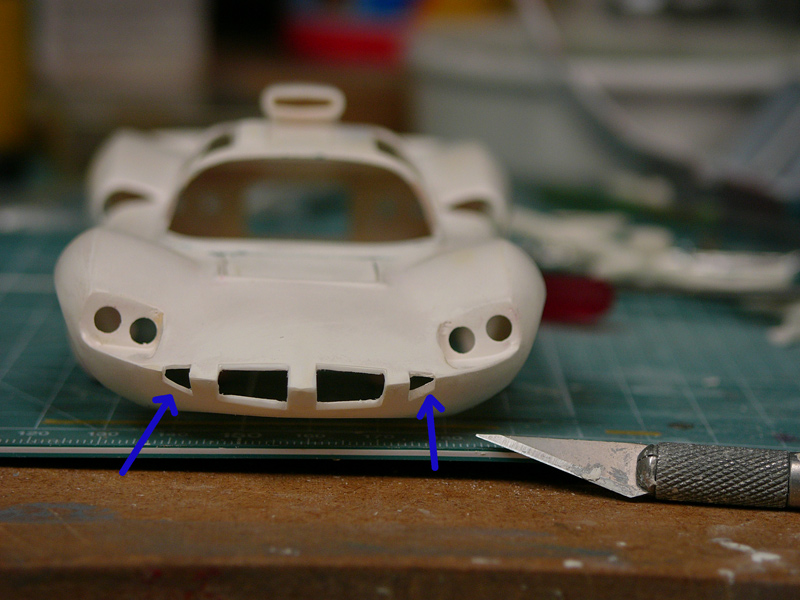
2-D-31.jpg

Of course, widening those triangular apertures has to be done on every 2D, no consideration of the race.


On the two different versions, you will also have to file down the rear left light (on the sole left rear wing, at the rear of the wheel). There is no race number on the rear left, so no light either. On the right side, on both models, there is a race number on the rear (and on the door of course).
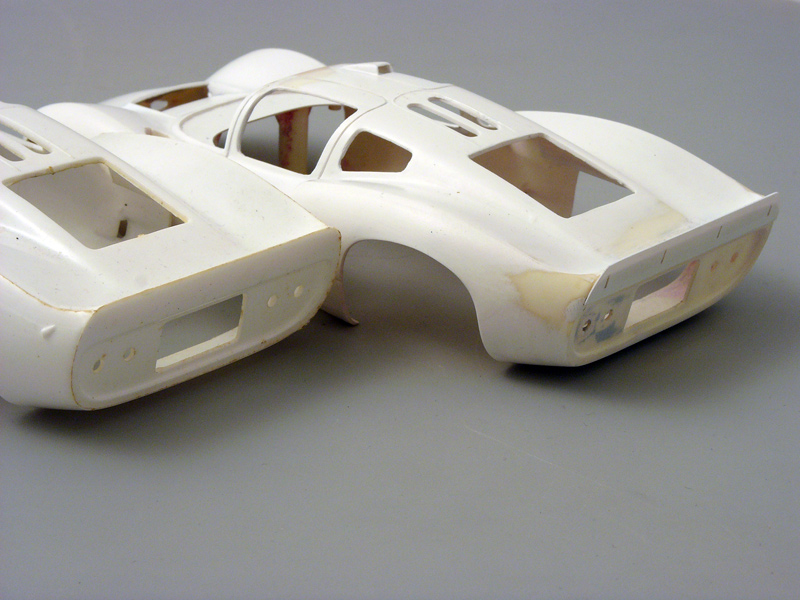
2-D-02.jpg


Same for removing the embossment at the rear that is supposed to be an aerodynamic blade, this has to be made on both versions.

Here you see from left to right: the modified body with a new rear spoiler, a body without the genuine embossment made by Cox (removed with files and sand paper), the genuine body.
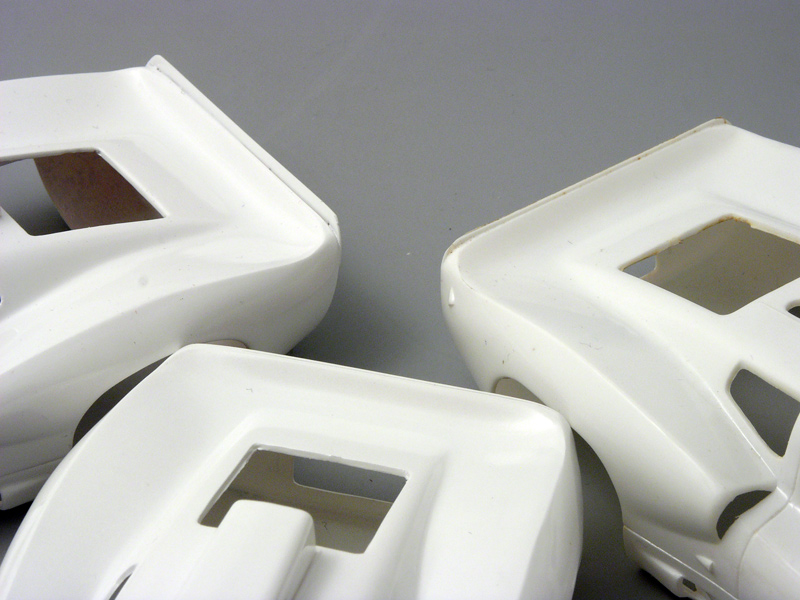
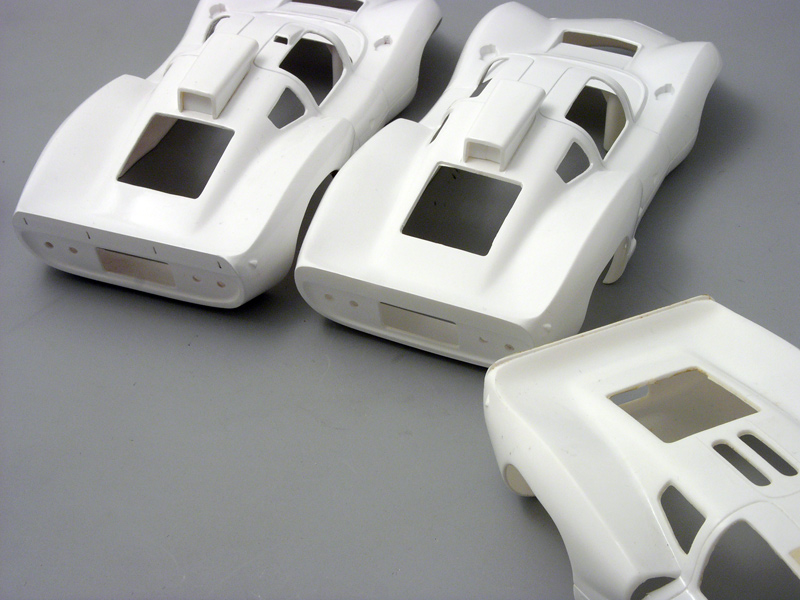
Virer-aileron-1.jpg


Virer-aileron-2.jpg


Now, to revert to the specific Le Mans version, here is again the difference between the genuine Cox body and the modification for the "Le Mans" rear blade.

2-D-02.jpg


The additional part was cut off in a thin plasticard foil.


The rear spoiler of the Nurburgring car is higher and made of 2 parts:
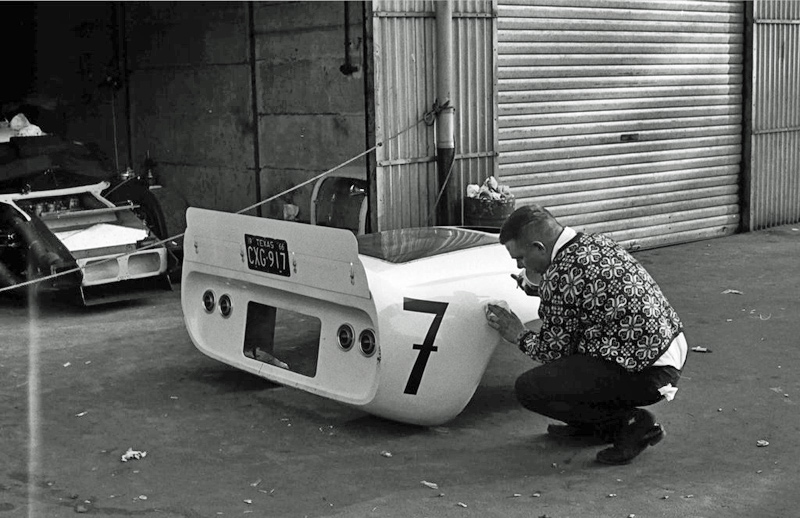
2-D-08.jpg


(To be continued)
  • strummer likes this
(Bud)light is right!

#88 Jean-Michel Piot

Jean-Michel Piot

    Plastic surgeon

  • Full Member
  • PipPipPipPipPip
  • 654 posts
  • Joined: 16-March 08
  • Gender:Male
  • Location:Paris (France)
Posted 08 September 2010 - 09:45 AM

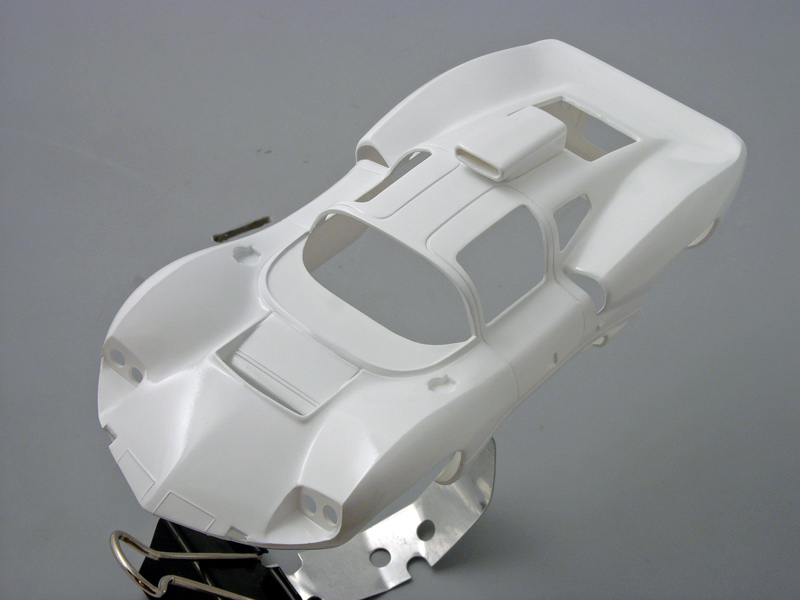
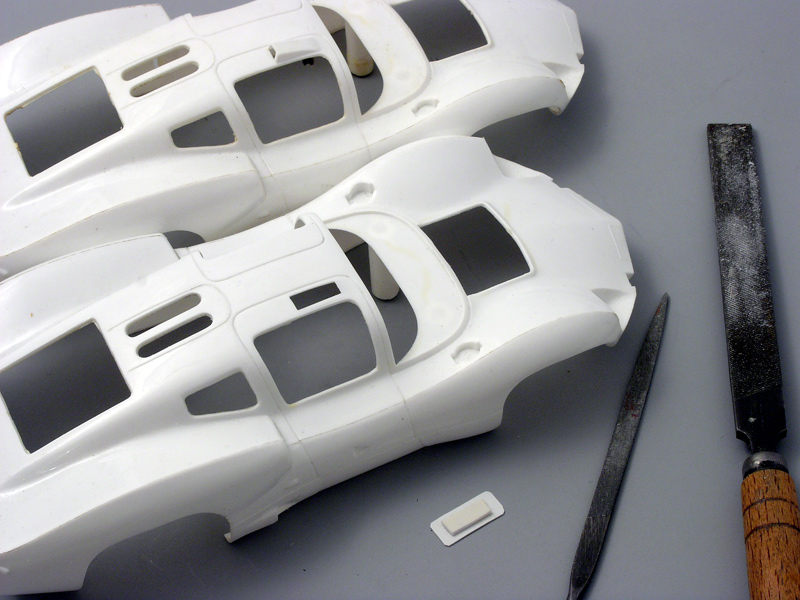
Here is the Nurburgring version with its specific higher rear spoiler.

The shape was taken from the excellent Japanese Modelers kit of a 2D, which I also have (together with the Monogram kit).
2-D-11.jpg

As it can be fragile due to its height, I do not glue it on the body. We will find a way to make it removable.


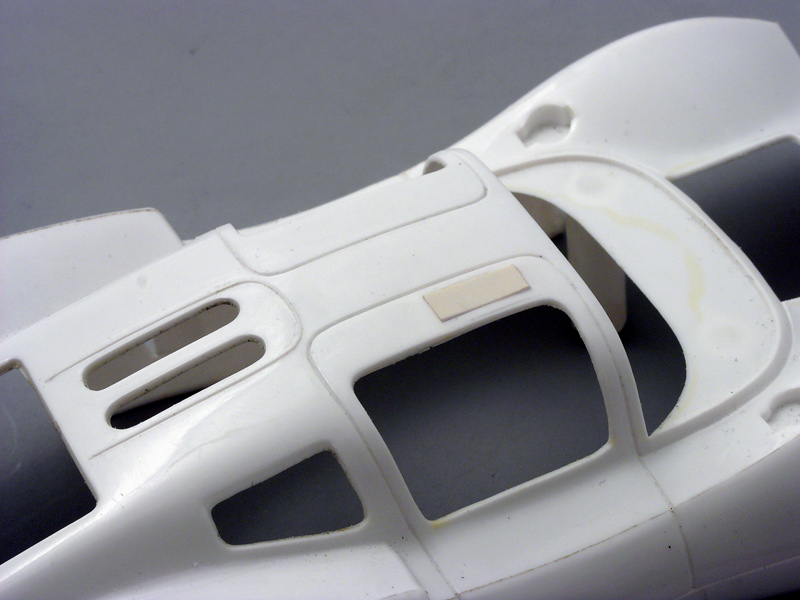
Another difference, as said before, between the Le Mans and the Nurburgring car: for the latter we have to file down the rear mirror fairing. This will leave a rectangular hole that will be filled up with a plastic part made of plasticard and that will be glued on place.

To easily make it, the part is made of 2 elements, one thin base, larger than the hole, and a main element that must be thicker than the body. Why this? the roof is not totally flat but slightly convex. Then, the sole way to do things is to have a thicker element that one can file down to the correct shape.

2-D-09.jpg

2-D-10.jpg


Once done, you will have to put on a thin coat of putty. Allow it to dry and sand it down.

Here is the final result, once painted:

2-D-20.jpg


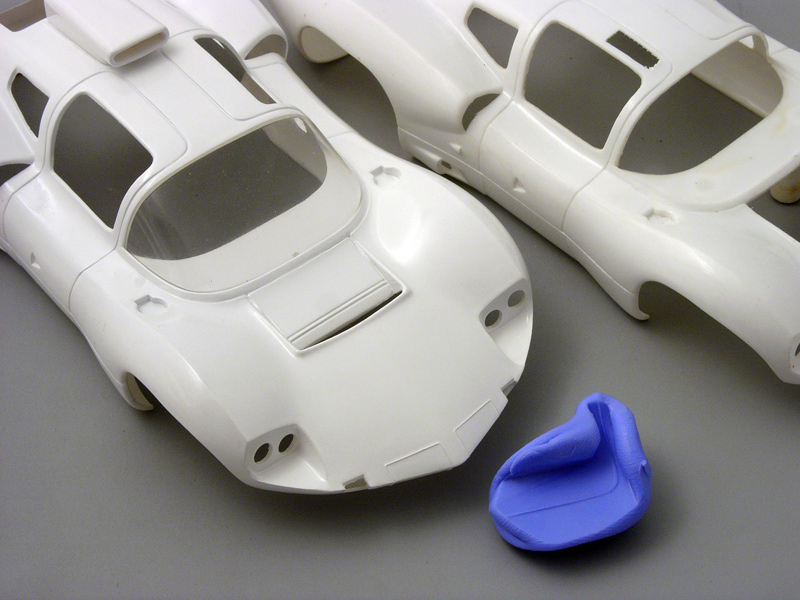
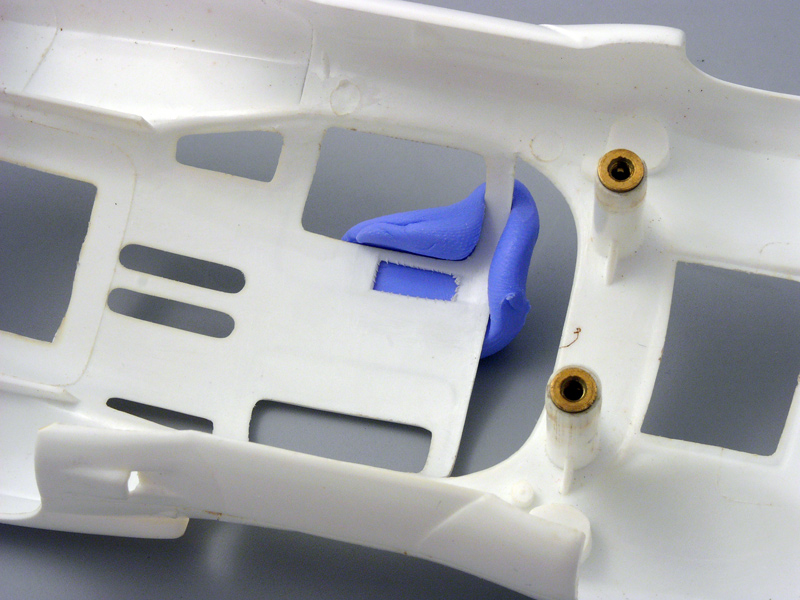
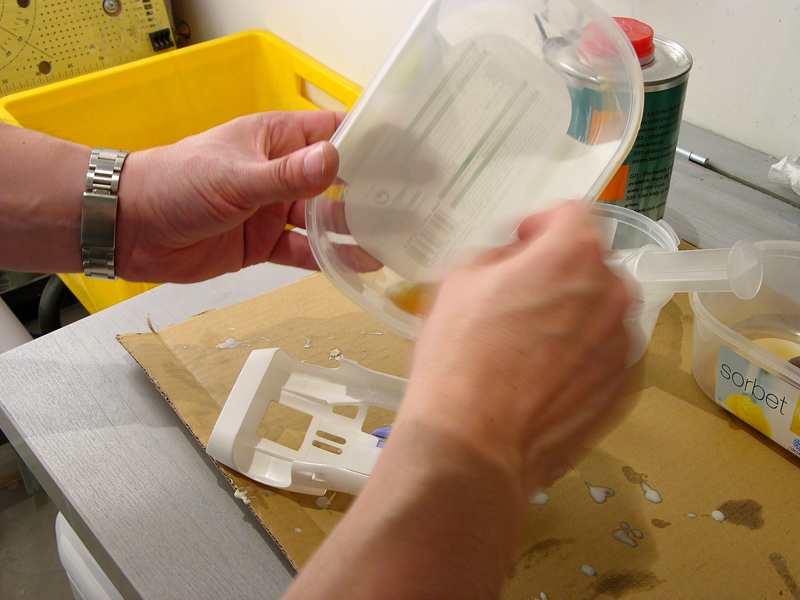
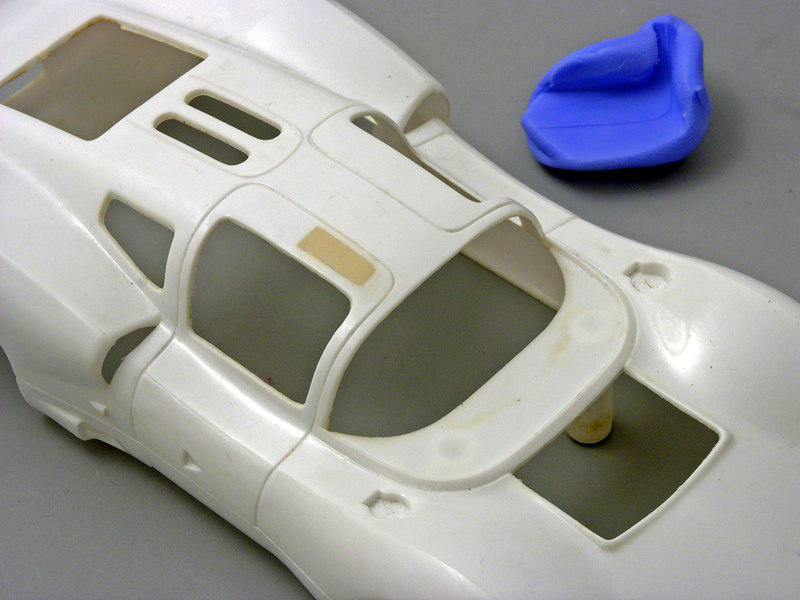
Now, just for the trick: as I wanted to have 2 Le Mans cars, once a first body modified I used a two components silicon paste and made a mould in few minutes.

2-D-21.jpg

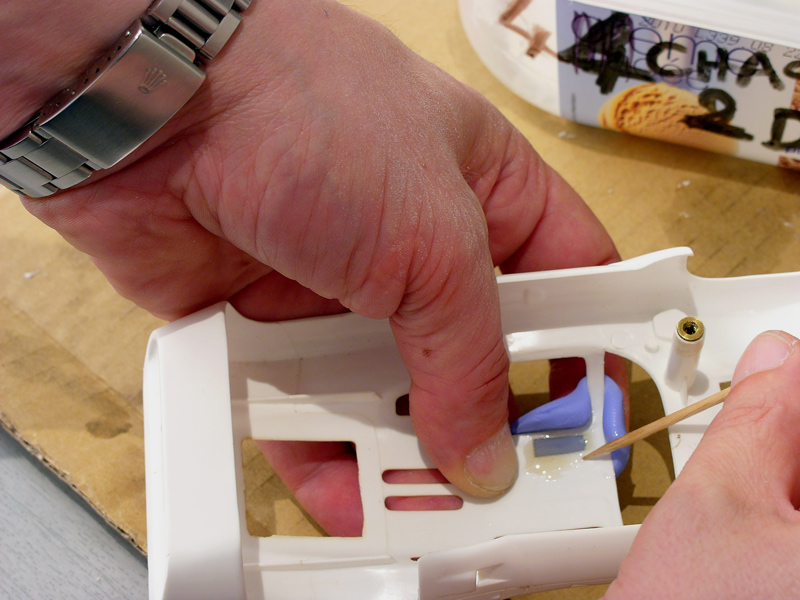
It was easy then to put some drops of resin from the inside…

2-D-22.jpg


2-D-23.jpg

2-D-24.jpg


2-D-25.jpg


No filing then! Just a thin coat of putty and a final sanding with sand paper.

Not really useful if you "only" have to build one of those rare 2D kits, but being familiar with the tips and tricks is always useful in our hobby.


We will see how to create the specific side rear mirrors of the Nurburgring later on, when it will be time for detailing.
  • strummer likes this
(Bud)light is right!

#89 Jairus

Jairus

    Body Painter Extraordinaire

  • Subscriber
  • PipPipPipPipPipPipPipPip
  • 10,174 posts
  • Joined: 16-February 06
  • Gender:Male
  • Location:Salem, OR

Posted 08 September 2010 - 10:38 AM

:good: :popcorm1: :drinks:

Jairus H Watson - Artist
Need something painted, soldered, carved, or killed? - jairuswtsn@aol.com

www.slotcarsmag.com

www.jairuswatson.net
http://www.ratholecustoms.com
Check out some of the cool stuff on my Fotki!


#90 Dave Wilson

Dave Wilson

    Backmarker

  • Full Member
  • PipPip
  • 54 posts
  • Joined: 24-November 08
  • Gender:Male

Posted 24 November 2010 - 06:03 AM

Like the idea Jean-Michel of adding a knife to a soldering iron. Neat !
:acute:

#91 Horsepower

Horsepower

    **Numb Thumbs**

  • Full Member
  • PipPipPipPipPipPipPip
  • 4,343 posts
  • Joined: 16-February 06
  • Gender:Male
  • Location:Chicago

Posted 10 December 2010 - 11:10 PM

In the 60's it was known as an "Auto cutter", mostly because the tool was distributed by Auto World in Scranton, PA.
Gary Stelter
 
My life fades, the vison dims. All that remains are memories... from The Road Warrior

#92 Jean-Michel Piot

Jean-Michel Piot

    Plastic surgeon

  • Full Member
  • PipPipPipPipPip
  • 654 posts
  • Joined: 16-March 08
  • Gender:Male
  • Location:Paris (France)

Posted 19 April 2011 - 09:32 AM

Hello all ! Yes I know it's been a loooooooooooooooooooooong time… As this is not the place for explanations about my absence and indeed better to go-on with this thread, I would simply say that it is a pleasure to be back with pictures about « how to end the preparation of a Chaparral 2 E before the final decoration. Or several of them ...


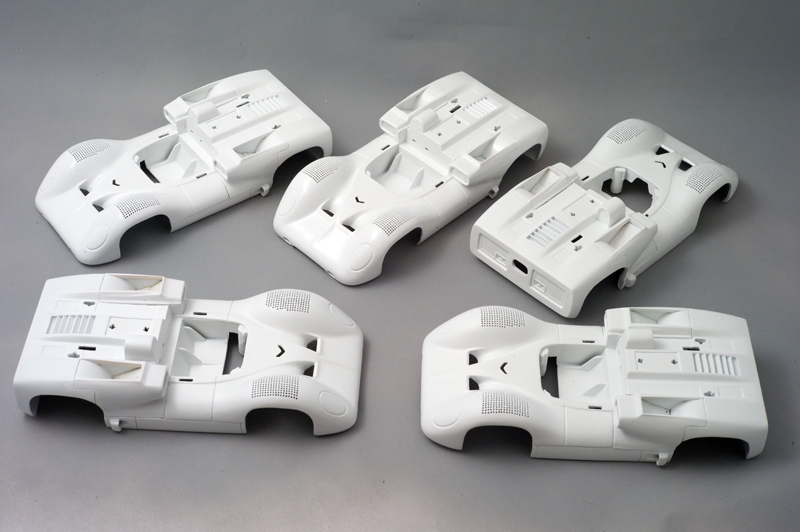
This very car is not easy to assemble and paint, if you want it to be realistic.


It took me few evenings, thinking of how I could get the result I wanted to have before I finaly found a solution.


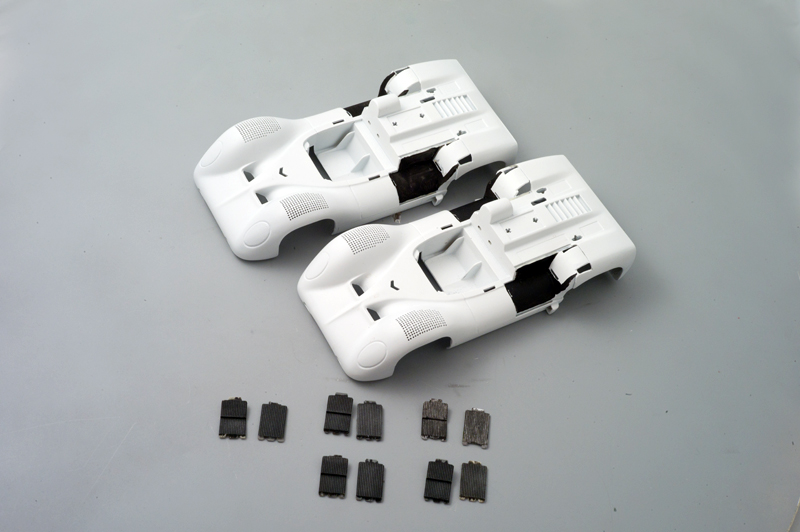
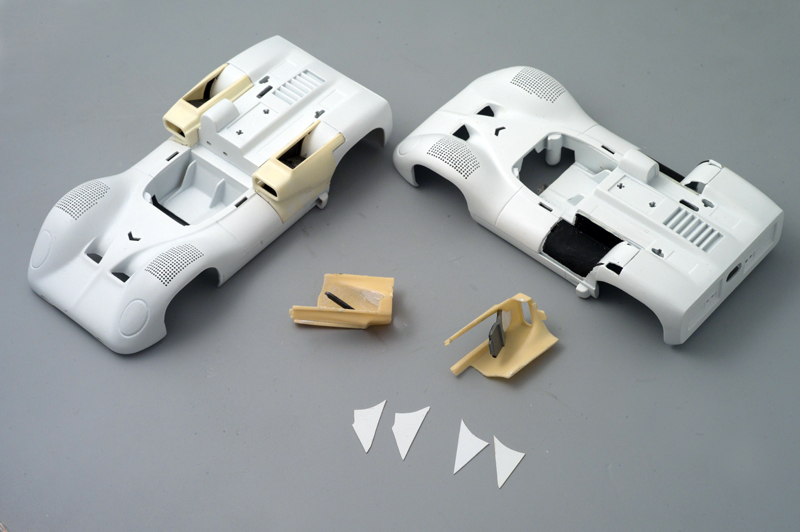
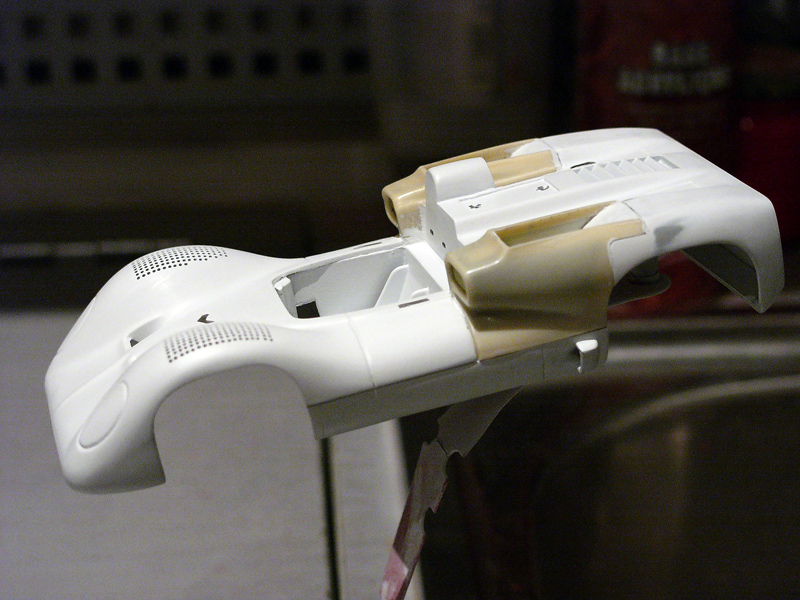
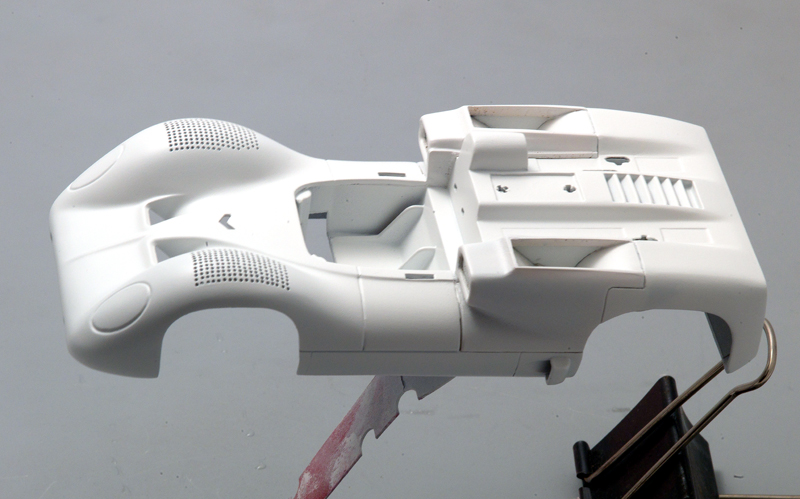
With the 2E we were at a point where the bodies were shot with white primer and were we still had to mount the big side air scoops. The interior of these should be flat black while the outside has to be white.


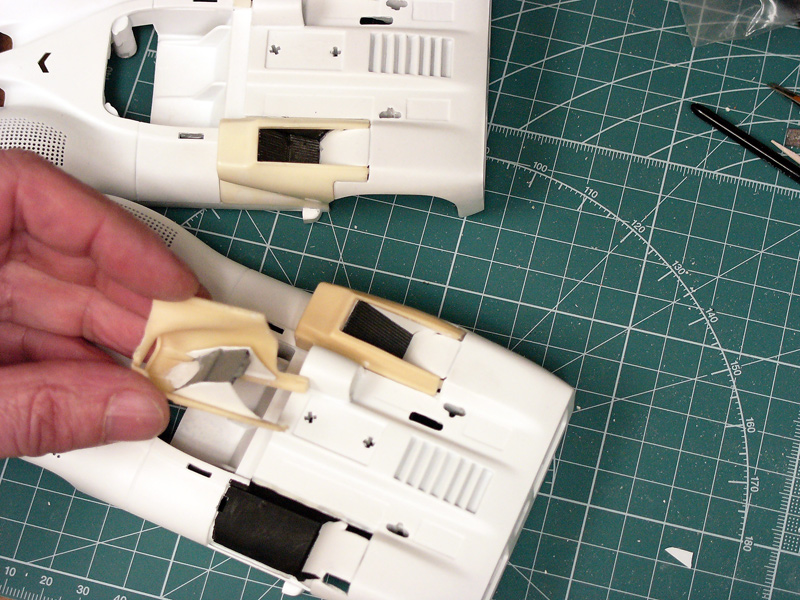
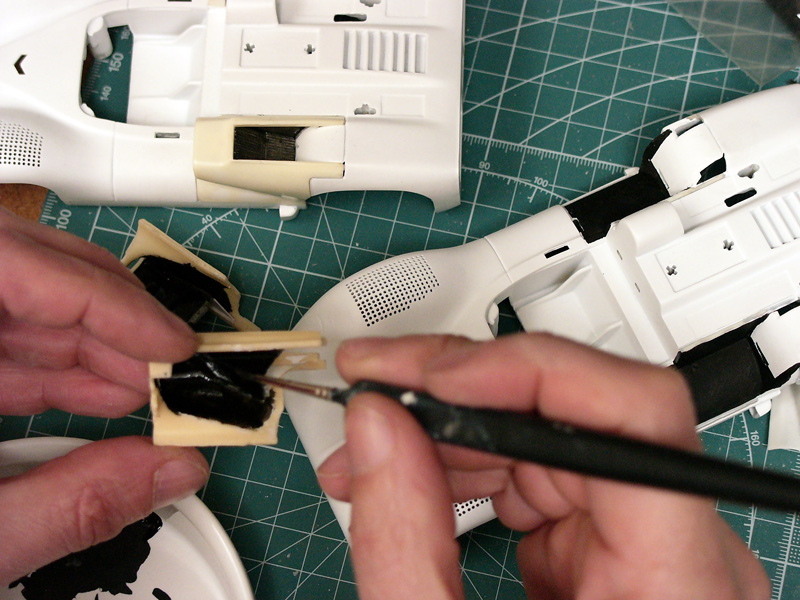
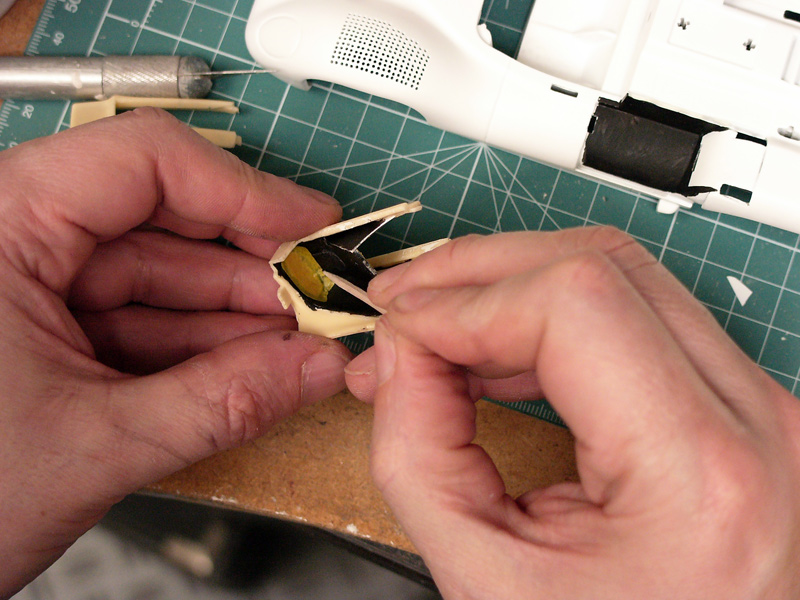
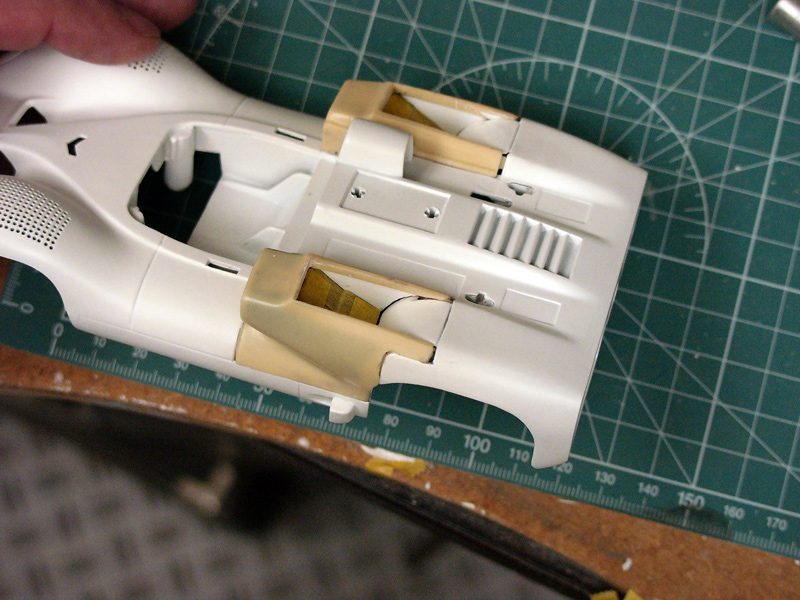
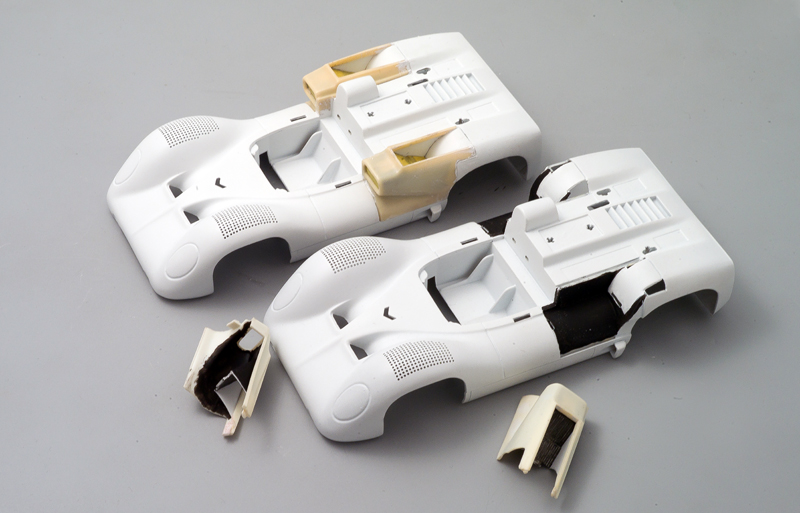
Here is the trick: creating small vertical walls that will be glued to the sides of the radiator before the final assembly. The two thin plasticard walls will separate the air scoop in two parts: the inside that will be black, and the outside.


The process I propose implies that we paint the inside in flat black and seal it, so when the air scoops are assembled they can be painted in white with no effect on the black interior.


The sealing will be realized with masking tape as for the big oval front aperture. It will also be made, at the rear and all around, with epoxy mastic.


This process also implies that the radiators be formerly painted (chrome is not realistic) and thereafter protected with masking tape. The radiator will be painted in flat black with a silver dry brush finish (or chrome/silver with a wash of flat black if you prefer this way).


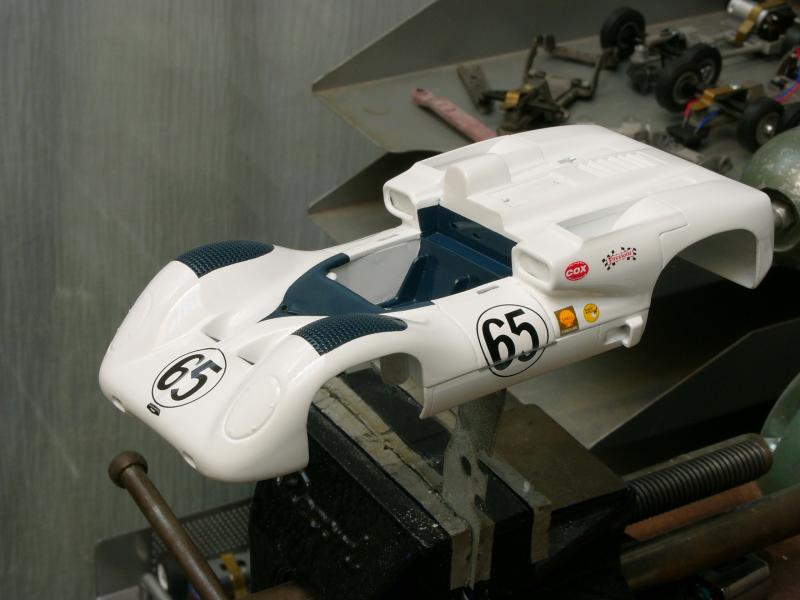
At the end of the process, when the painting (in white, then in blue for the interior and few areas around the screen and on the front wings), decoration with decals and varnishing will be over, the masking tapes shall be removed. This will reveal the black of the interior of the air scoop and the realistic finish of the radiators.


Now, let's see this in details…


You have to paint the radiators and glue them in position to the sole air scoop.


Radiateurs-2E.jpg


With a thin foil of plasticard you can create thin "walls".


Radiateurs-2E-colles.jpg


Adjusting the rear side of those thin walls to the front side of the rear fender may take some time but will be rewarding.


Collage-parois-1.jpg


It is now time to paint the interior flat black, both on the body and inside the air scoop.


Peinture-Parois-2.jpg


Once this done, it is time to use the masking tape for the both of the air aperture (sealed from the inside) and the superior, external part of the radiators.


Fermeture-grotte-3.jpg


Masquage-radiateur-5.jpg


Masquage-radiateur-4.jpg


To be continued...
  • strummer likes this
(Bud)light is right!

#93 Jean-Michel Piot

Jean-Michel Piot

    Plastic surgeon

  • Full Member
  • PipPipPipPipPip
  • 654 posts
  • Joined: 16-March 08
  • Gender:Male
  • Location:Paris (France)

Posted 19 April 2011 - 10:00 AM

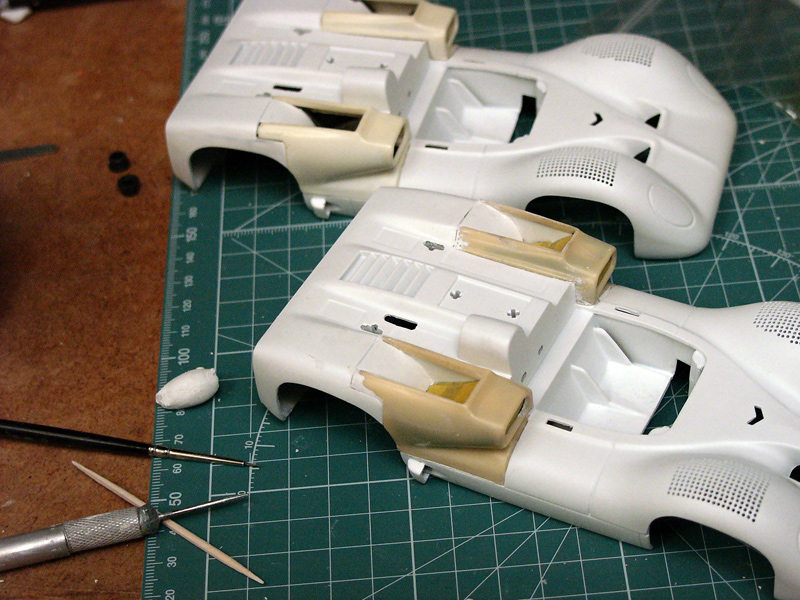
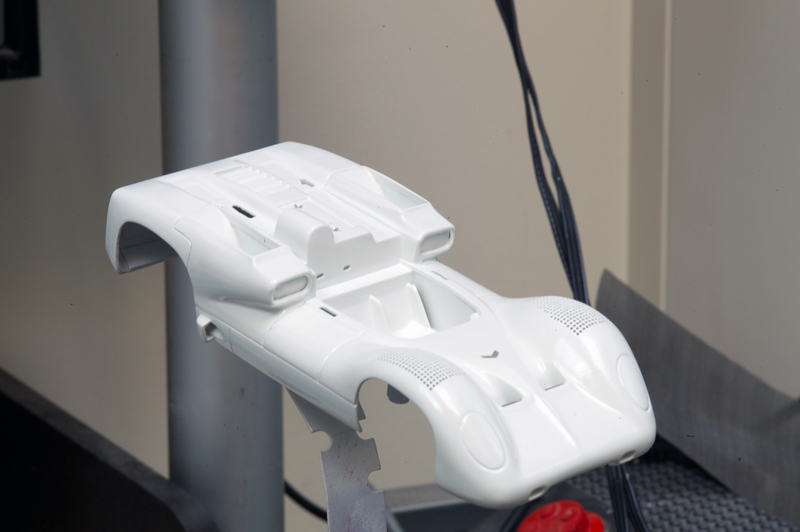
Now you can glue the air scoops in position.

Collage-ecopes-7.jpg

A perfect sealing and nice finish of the air scoop shall be made with epoxy mastic.

Mastic-9.jpg

Mastic-8.jpg


Once dry, you can sand down …

Poncage-2E-1.jpg

And spray a coat of white primer.

Appret-2E-1.jpg


Now you can paint the whole thing in white. I personally shot two coats of gloss Tamiya pure white.

2E-peinte-blanc.jpg


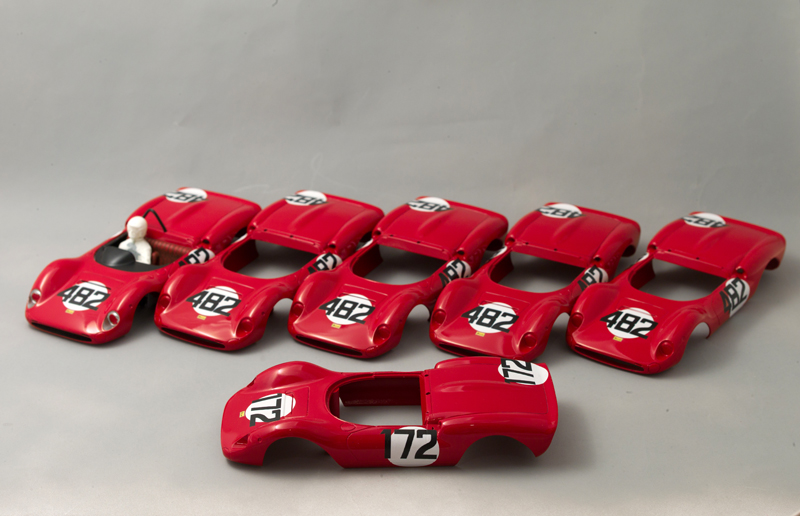
And repeat the process for all the numerous 2E that you of course have at home that were waiting for this thread…

Sixieme-Dino.jpg


Posted Image

OOPS! Sorry… A mistake, I made a confusion with a very confidential project… I cannot tell you what will be the next Cox models that will leave my workbench…

Tout-blanc.jpg

Ok, that's better.

Allow it to dry and, at this stage, DO NOT REMOVE the masking tape.

Indeed, as already said, the masking tapes will be left in place for quite a time during which we will complete the decoration up to the final clear coating.

Then, after this step …

Prochaine fois.jpg
  • strummer likes this
(Bud)light is right!

#94 Jean-Michel Piot

Jean-Michel Piot

    Plastic surgeon

  • Full Member
  • PipPipPipPipPip
  • 654 posts
  • Joined: 16-March 08
  • Gender:Male
  • Location:Paris (France)

Posted 20 April 2011 - 01:32 AM

As we talked of that, just a message for Edo...

Edo, my friend, remember this ?

Let's face it Dokk:

a Leica lens quality would do wonders for the iconographic part of your Book!

The S1 it's not gonna cut it for It!

Sell the Bertha and get a real camera!

:laugh2:


Yes J-M, you do take great pics!

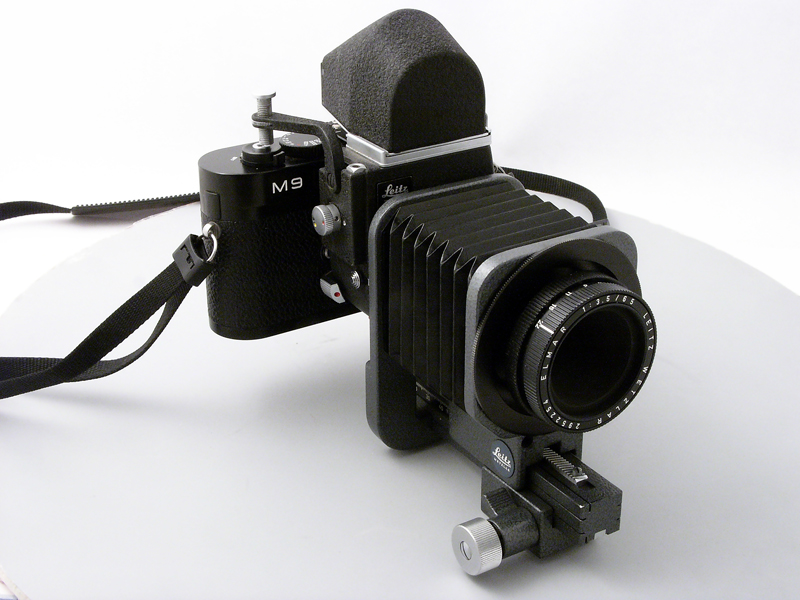
Gee, are you going to photograph your toys with a rangefinder M9? You're such a dandy! ;)

Edo (still taking pics with film cameras)


Don't know if I'm a dandy but since last Xmas ...

Elmar-65.jpg


La-chose.jpg

Posted Image
  • strummer likes this
(Bud)light is right!

#95 Jean-Michel Piot

Jean-Michel Piot

    Plastic surgeon

  • Full Member
  • PipPipPipPipPip
  • 654 posts
  • Joined: 16-March 08
  • Gender:Male
  • Location:Paris (France)

Posted 20 April 2011 - 04:16 AM

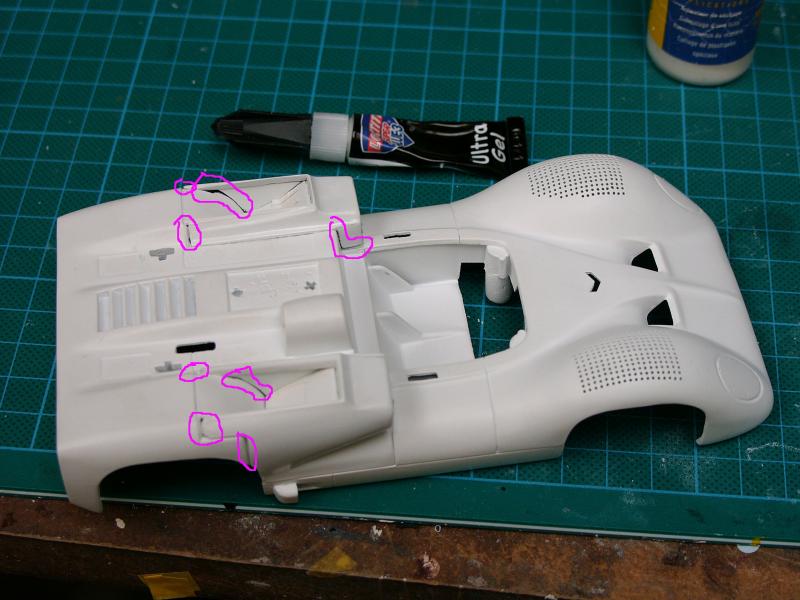
I have to go back on the way to seal the air scoops with epoxy mastic, as I feel that I've been too quick on the method.

Here are, on another 2E, the different areas that have to be treated:

11 0.jpg


Now with more close-ups...

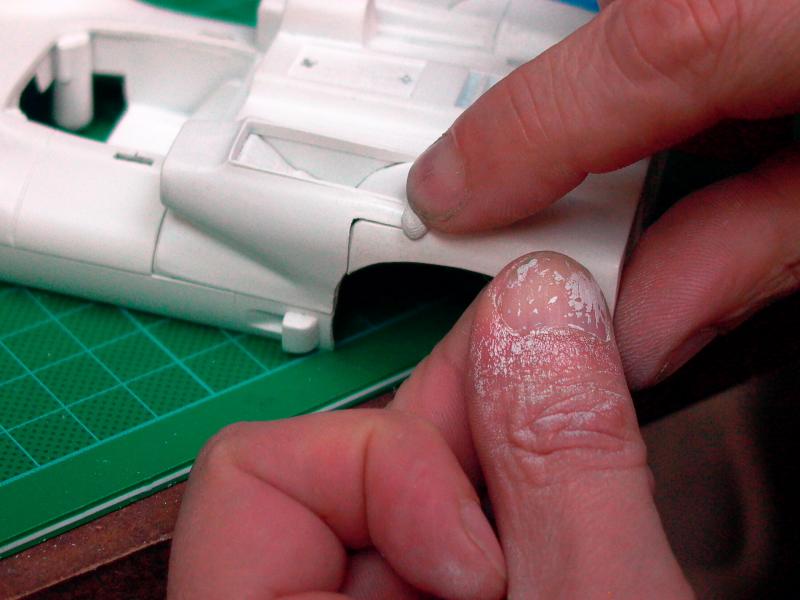
You first fill the big gaps with epoxy mastic. A white mastic will be easier to later cover in white and, by the way, as for the Milliput brand the white product is the thinner and then the best for a high quality surface.

11 1.jpg


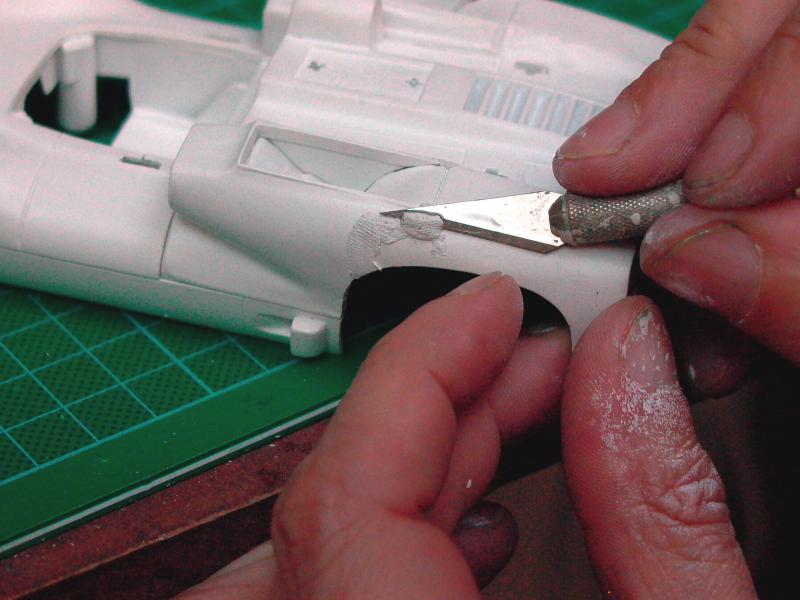
You remove the exces with a knife first droped in a glass of water (alway work with wet tools when you have to sculpt the epoxy mastic).

11 2.jpg


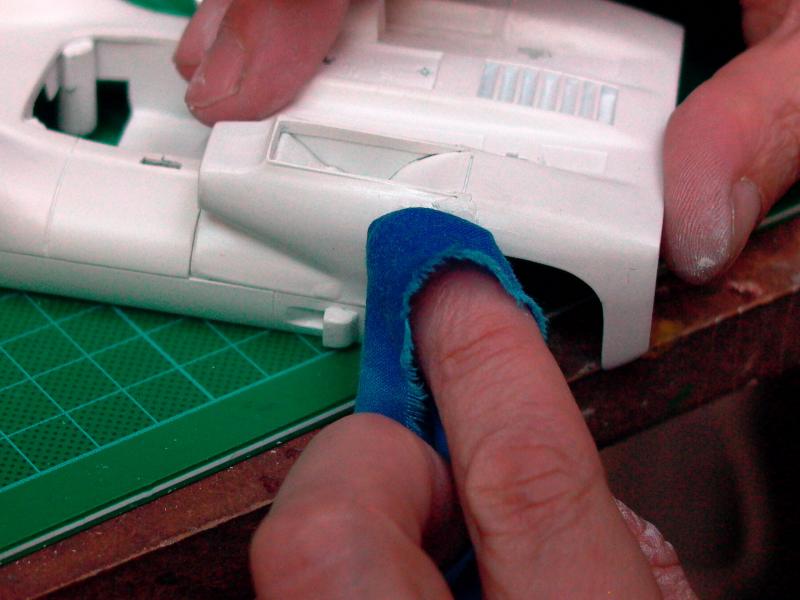
I also found out that wiping down with a damped cloth really helps.

11 3.jpg


11 4.jpg


You then have to engrave the lines, yes... with a tool first dropped in the water.

11 5.jpg


Now for the sealing in the area at the junction between rear fender and the thin plasticard walls we created:

11 6.jpg


11 7.jpg


You may also smooth the surface down with a wet paint brush.

And here's the result, at a stage where you have to let it dry at least half a day if not more before sanding it down (and spay primer and paint...)

11 8.jpg
  • strummer likes this
(Bud)light is right!

#96 Rotorranch

Rotorranch

    What's a title?

  • Full Member
  • PipPipPipPipPipPip
  • 1,755 posts
  • Joined: 22-November 10
  • Gender:Male
  • Location:Atlanta, GA

Posted 20 April 2011 - 12:16 PM

There's a few pretty good Chap 2E pics here:
http://www.conceptca...,0,0/photo.aspx

Rotor

Jeff Chambers

Posted Image      Posted Image
                                         "Kinky Kar"

#97 Tilrug

Tilrug

    Rookie Keyboard Racer

  • Full Member
  • Pip
  • 19 posts
  • Joined: 24-February 11
  • Gender:Male
  • Location:Japan

Posted 04 May 2011 - 09:54 AM

Hello Jean-Michel,


Thanks for your reply to my PM but have you received and confirmed my response with my address dated April 20th?


Please let me know.


Thanks,

Amadeus


Amadeus Gurlitt

#98 tlbrace

tlbrace

    On The Lead Lap

  • Full Member
  • PipPipPipPip
  • 218 posts
  • Joined: 11-August 11
  • Gender:Male
  • Location:USA

Posted 13 August 2011 - 10:28 AM

Hello. New here, not new to collecting vintage slots.

I have a nicely restored Cox 2D chassis, and have found an injection molded white styrene reproduction Cox Chap. 2E body (and all the bits), and sourced elsewhere a resin repro of the interior and mounting posts needed for the mag frame car.

What I cannot find of course is the metal motor bracket unique to the 2E. Jean-Michel, I know you bought the last of Electric Dreams' stock. I confirmed with them that one did not fall out of the bag, hiding under something in a drawer.

Any idea where to source one, or Phillipe, how to get your provider to make a few more? I will, when they arrive, have an EXTRA resin repro 2E interior and mounting posts to trade, and of course willing to buy.

Thanks!

Todd

Please reply here or via email, as I don't think my browser likes this site, I cannot pull down the menu that gets me to my PM area.

tlbrace2008@yahoo.com
Todd Brace

#99 tlbrace

tlbrace

    On The Lead Lap

  • Full Member
  • PipPipPipPip
  • 218 posts
  • Joined: 11-August 11
  • Gender:Male
  • Location:USA

Posted 24 August 2011 - 12:38 PM

Found a bracket!

As luck would have it, I saw an interesting collectible car on ebay. Not something I would bid on, but it occurred to me that the seller is a serious collector, and like most serious collectors has a parts bin or two. On a whim I sent him a message, asking if by chance he has a motor bracket for a Cox 2E mag frame, and if so, would he sell it? He got back to me in minutes, saying "Of course I do, make me an offer!" I did and it's now mine.

Great luck! I wish, though, I could get that kind of luck when I'm buying a lottery ticket!
  • strummer likes this
Todd Brace

#100 TSR

TSR

    The Dokktor is IN

  • Full Member
  • PipPipPipPipPipPipPipPip
  • 42,299 posts
  • Joined: 02-February 06
  • Gender:Male
  • Location:Marxifornia

Posted 24 August 2011 - 01:45 PM

Todd,
Told you you would!
Expensive little sucker, but hey, what do you expect when a given car is given sainthood status! :)

Philippe de Lespinay


Electric Dreams Online Shop