Jump to content


Photo

How to build slot car tracks


  • Please log in to reply
405 replies to this topic

#251 Steve Ogilvie

Steve Ogilvie

    Race Leader

  • Subscriber
  • PipPipPipPipPip
  • 630 posts
  • Joined: 17-November 14
  • Gender:Male
  • Location:Kincardine, Ontario, Canada

Posted 18 May 2020 - 06:26 PM

Thanks for the replies. It might have been mdf I am not sure when it took over from particle board. I always took my slot box with some cars in it to do installs. I really did not maintain those test cars very well but it was always a shock when they go down a main straight and do not turn. Once I found the blade still in the slot only 5 feet after the lead on. Still made it all the way to the bank before the ultimate launch.


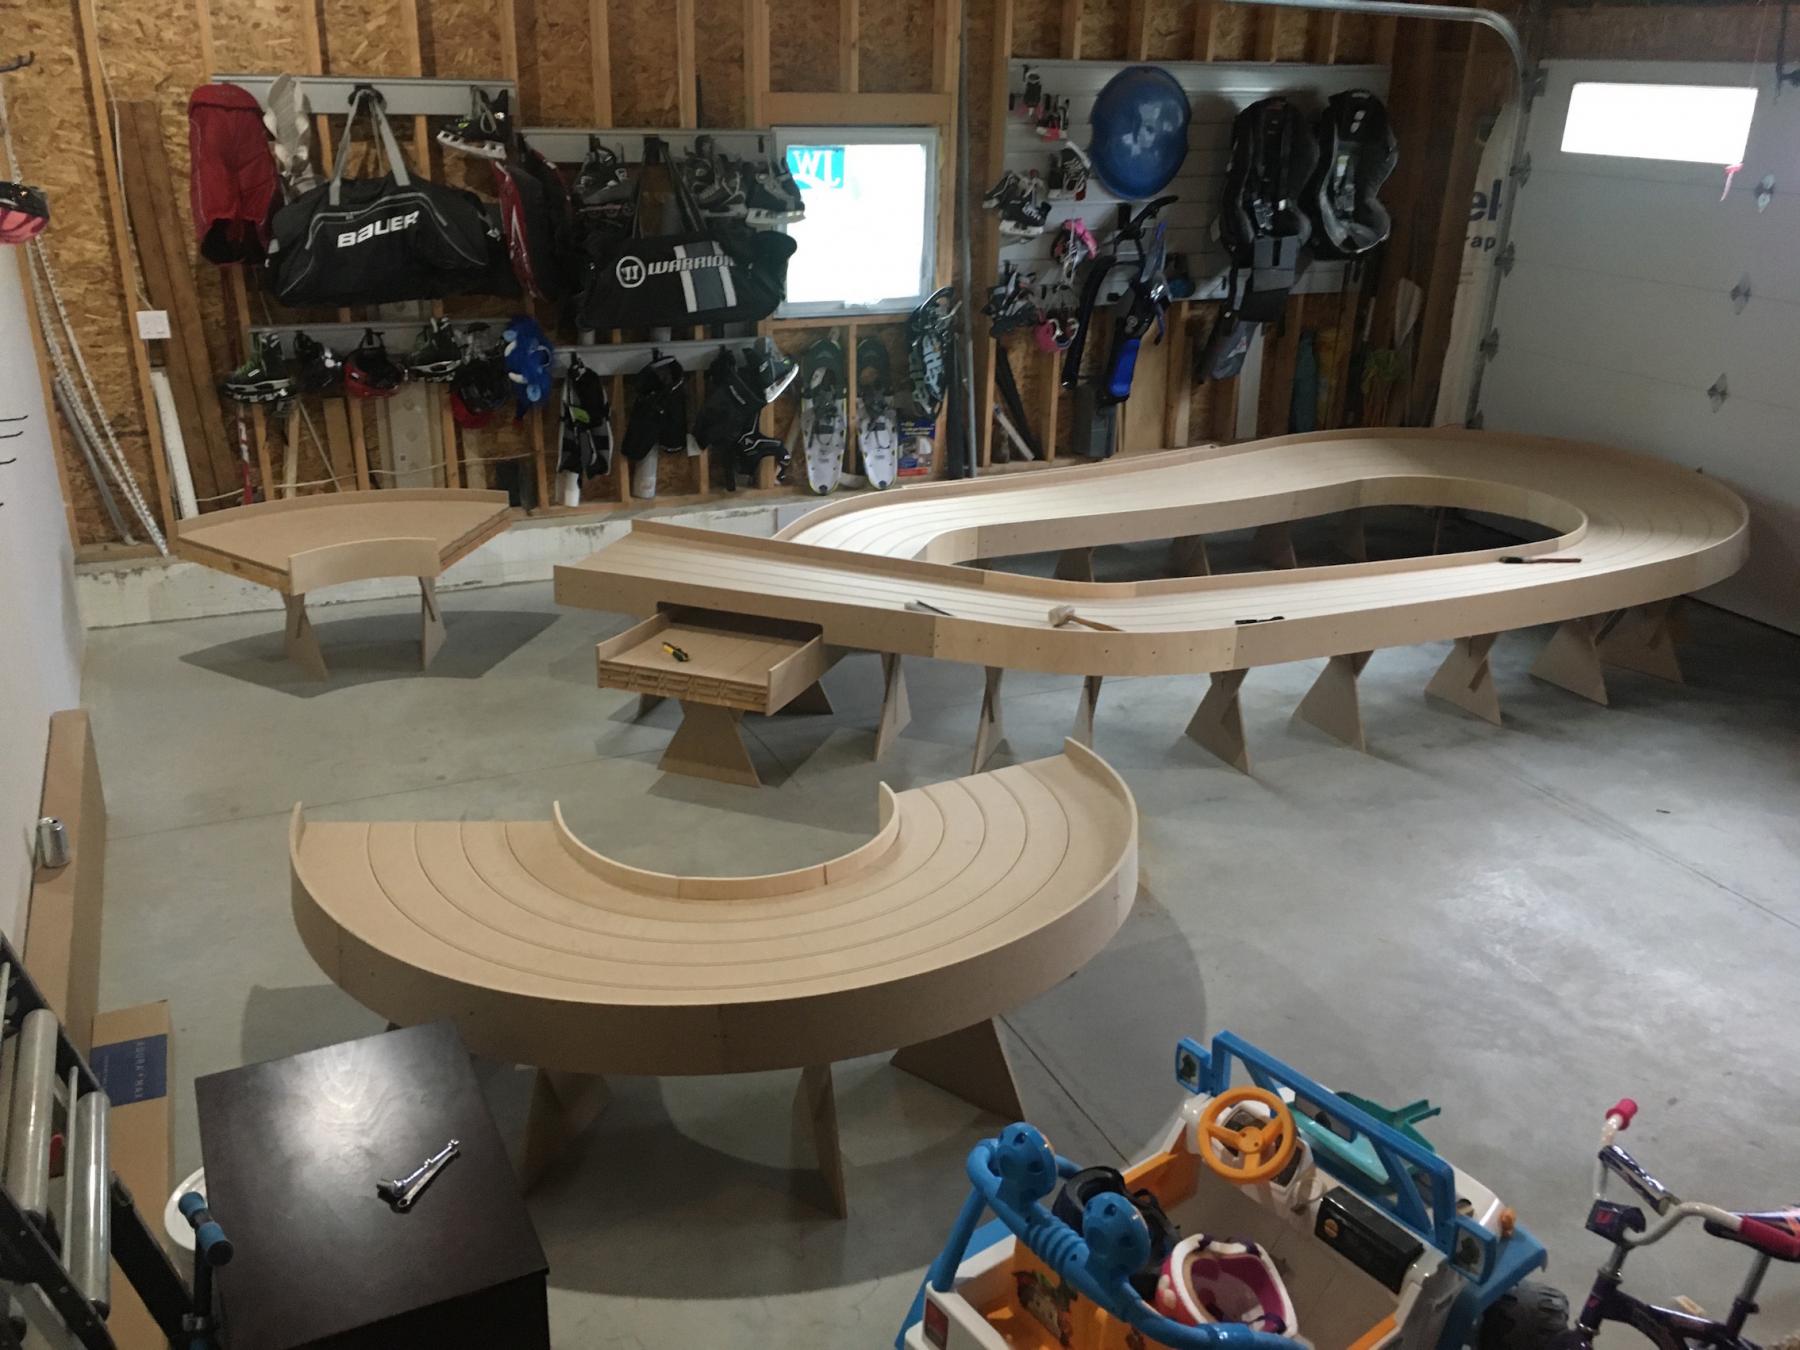
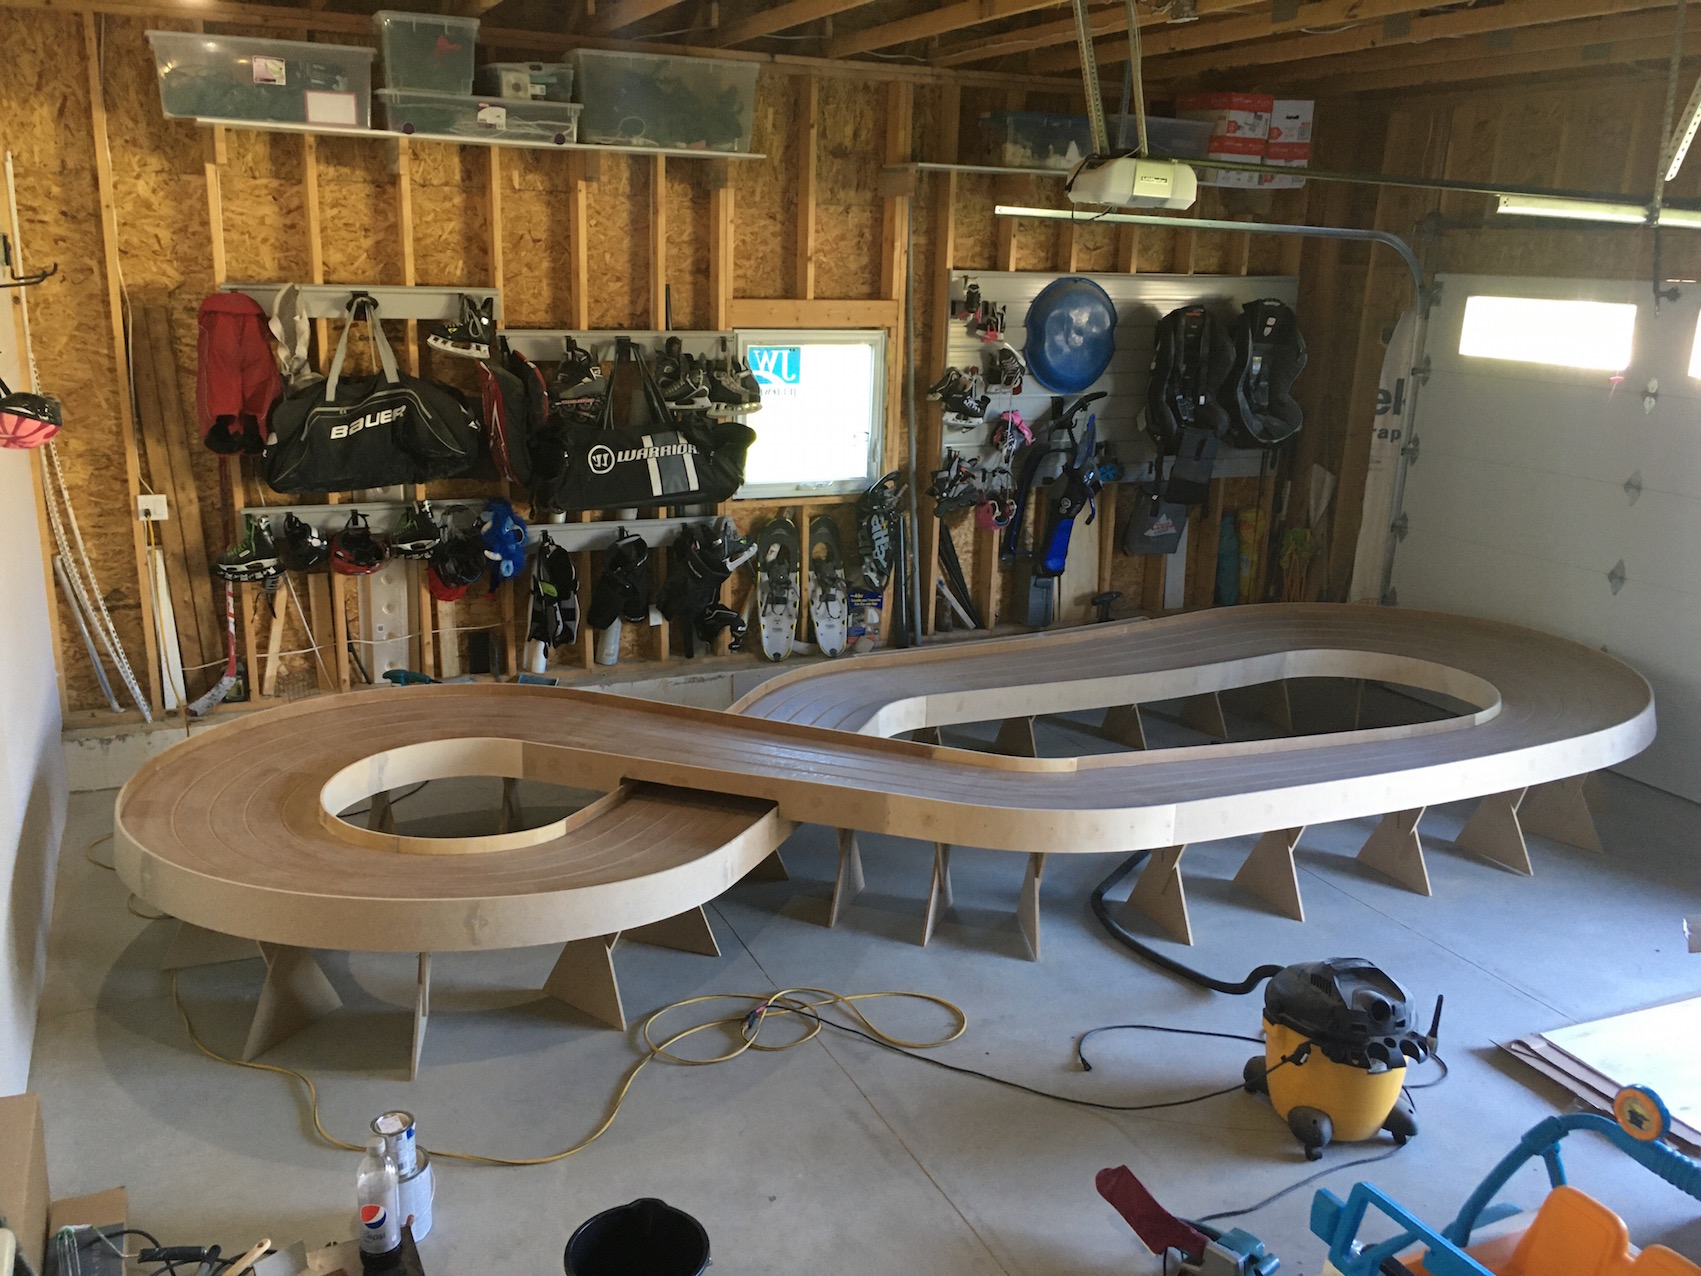
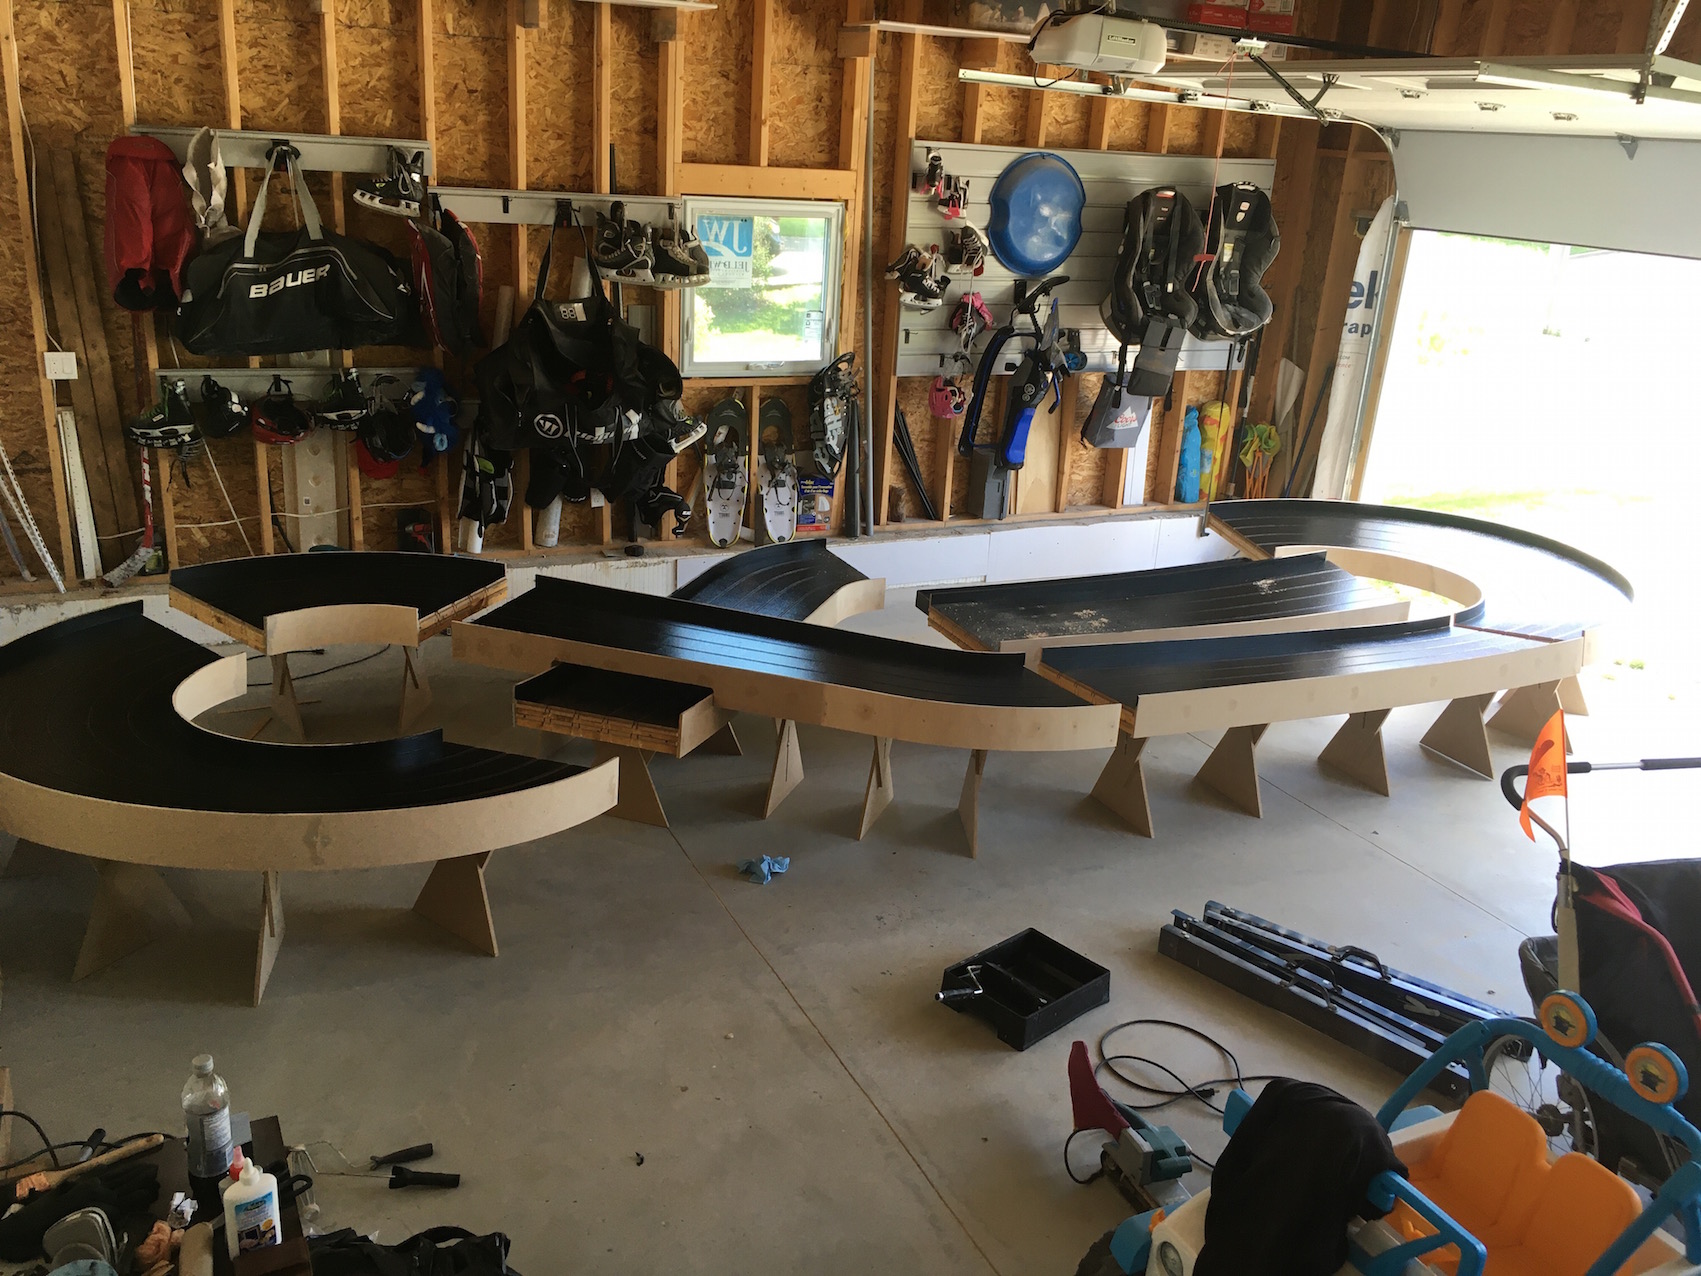
Today I took the track over to my oldest son's place and we set it up in the garage. I am going to clear coat with solvent base Verathane for the base. I have to order the epoxy in, Canadian Home Depot stores do not stock Rustoleum 5300 series water based epoxy and I will find out tomorrow if I can get any at all. I may have to go with a Sherwin Williams oil based epoxy, good stuff I have used before but not my first choice.


Track going back together:


IMG_3181.jpg


Forgot to get a pic with it all together but I made a short video I will post later.


  • Pappy, slotbaker, Lou E and 3 others like this


#252 Steve Ogilvie

Steve Ogilvie

    Race Leader

  • Subscriber
  • PipPipPipPipPip
  • 630 posts
  • Joined: 17-November 14
  • Gender:Male
  • Location:Kincardine, Ontario, Canada

Posted 18 May 2020 - 06:43 PM

(25) Steve Ogilvie Builds a Track- Moved to a cleaner spot - YouTube


  • slotbaker, Zippity, Rob Voska and 2 others like this

#253 Steve Ogilvie

Steve Ogilvie

    Race Leader

  • Subscriber
  • PipPipPipPipPip
  • 630 posts
  • Joined: 17-November 14
  • Gender:Male
  • Location:Kincardine, Ontario, Canada

Posted 20 May 2020 - 11:52 AM

(25) Steve Ogilvie builds a Slot Car track- Holes filled and sanded - YouTube


  • slotbaker, Rob Voska, MattD and 3 others like this

#254 Steve Ogilvie

Steve Ogilvie

    Race Leader

  • Subscriber
  • PipPipPipPipPip
  • 630 posts
  • Joined: 17-November 14
  • Gender:Male
  • Location:Kincardine, Ontario, Canada

Posted 22 May 2020 - 12:16 PM

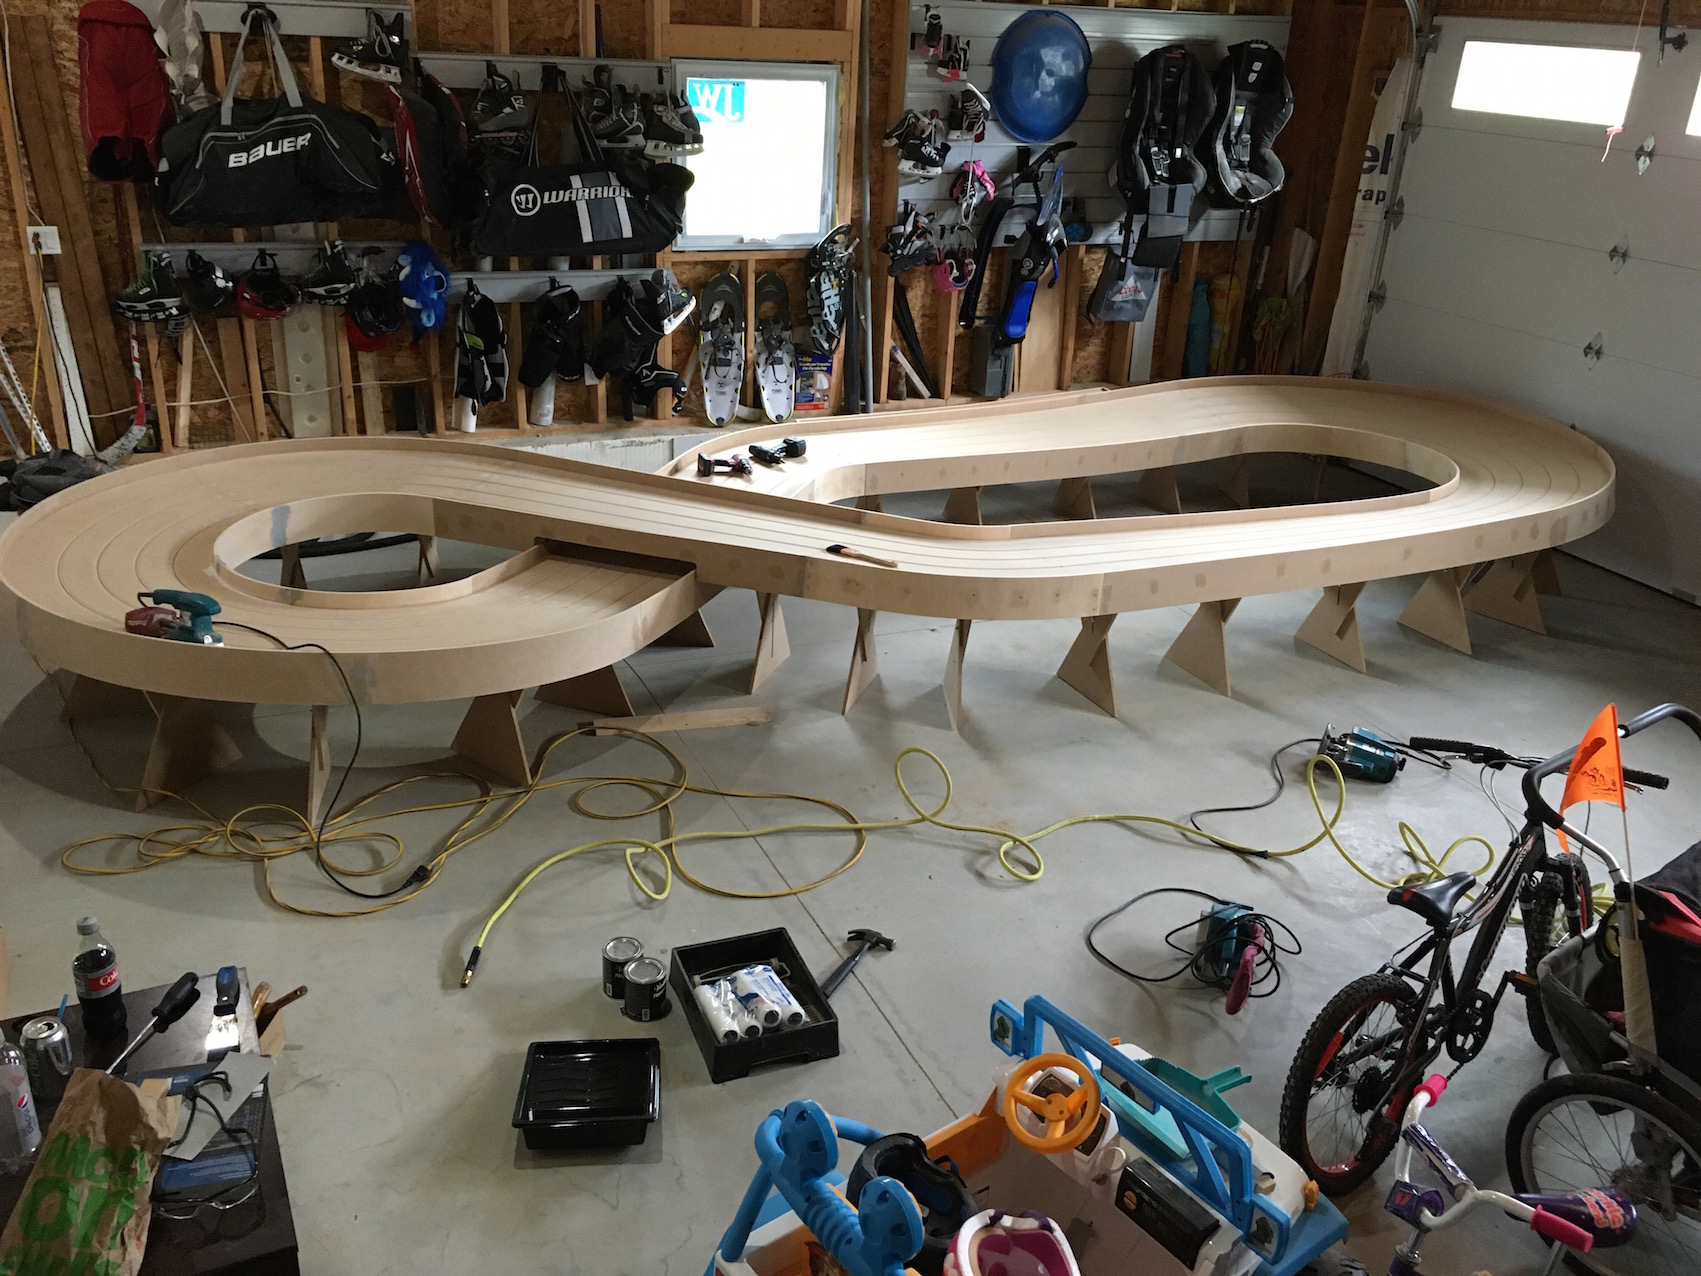
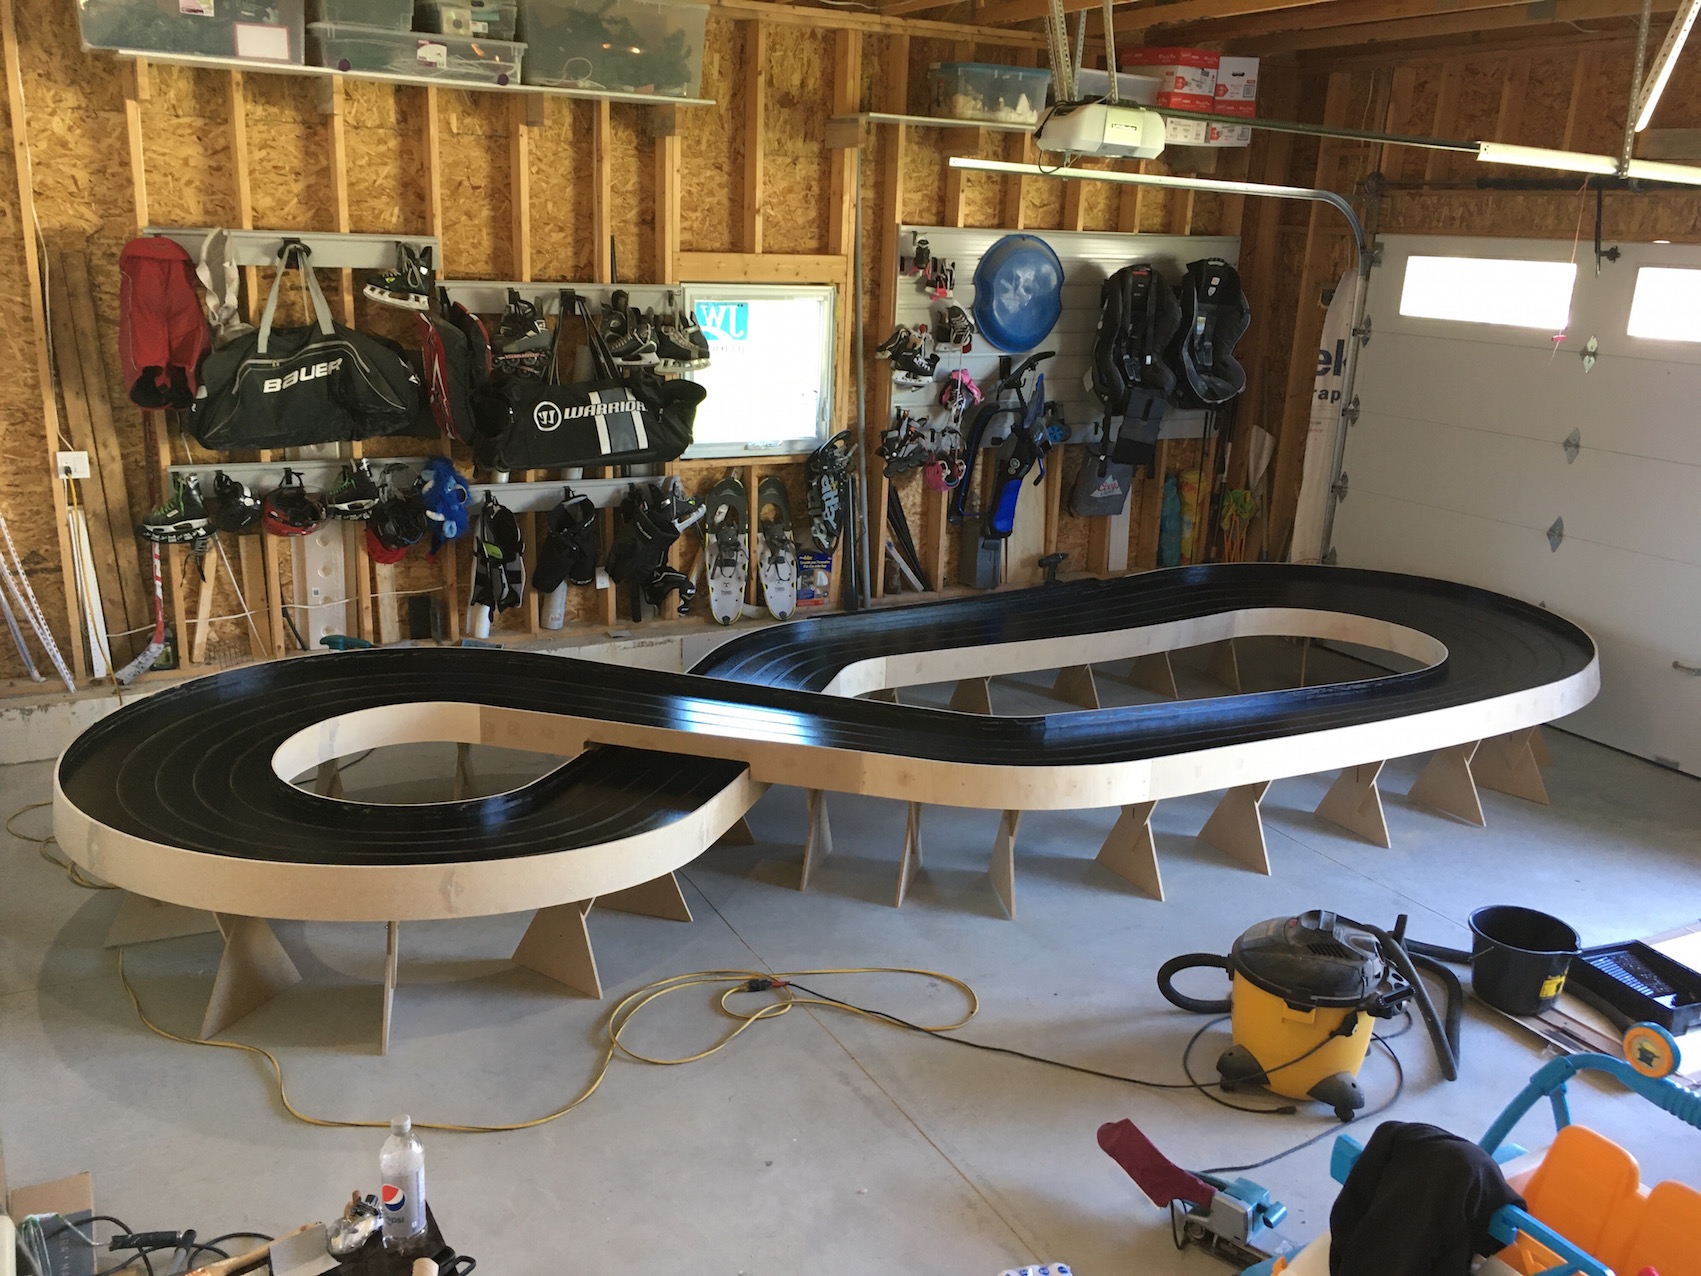
For the last couple of days I have been clear coating, sanding and cleaning and cleaning some more and this morning I mixed up the epoxy and put the first coat on the track surface. Yesterday was a nice warm day day so I rode my motorcycle down to London to pick up the epoxy kit. I should have taken a picture of the kit but I forgot so I will do that later. Here are some pics of the painting process. The whole track was sanded with a 1/3 sheet orbital sander, then vacuumed, tack ragged then clear coated with Varathane brand oil based clear gloss. Then sanded with 220 grit paper, vacuumed wiped with a dry cotton rag and the tacked again, then the first coat of epoxy.


IMG_3186.jpg


IMG_3188.jpg


IMG_3190.jpg


  • Pappy, Zippity, Lou E and 2 others like this

#255 Steve Ogilvie

Steve Ogilvie

    Race Leader

  • Subscriber
  • PipPipPipPipPip
  • 630 posts
  • Joined: 17-November 14
  • Gender:Male
  • Location:Kincardine, Ontario, Canada

Posted 22 May 2020 - 12:30 PM

Sanded off just before epoxy


IMG_3192.jpg


And the first coat of black epoxy


IMG_3193.jpg


With oil based epoxy the recoat time is a minimum 8 hours wait provided ambient temperature is 77F. Since the pot life after mixing is only 2.5 hours, the rest of the leftover mixed epoxy can not be used tomorrow. I measured and mixed up half of the kit, so I have lots left for a final coat tomorrow morning.


That is one big advantage with Rustoleum 5300 series water based epoxy, the pot life is a lot longer and you can recoat as soon as it is dry to the touch, usually an hour or so. And the water cleanup is great. 


  • Pappy, slotbaker, Zippity and 7 others like this

#256 MattD

MattD

    Posting Leader

  • Full Member
  • PipPipPipPipPipPipPip
  • 3,561 posts
  • Joined: 13-August 11
  • Gender:Male
  • Location:IN

Posted 22 May 2020 - 10:36 PM

WOOOOOO!


  • Steve Ogilvie likes this

Matt Bishop


#257 Steve Ogilvie

Steve Ogilvie

    Race Leader

  • Subscriber
  • PipPipPipPipPip
  • 630 posts
  • Joined: 17-November 14
  • Gender:Male
  • Location:Kincardine, Ontario, Canada

Posted 24 May 2020 - 06:13 AM

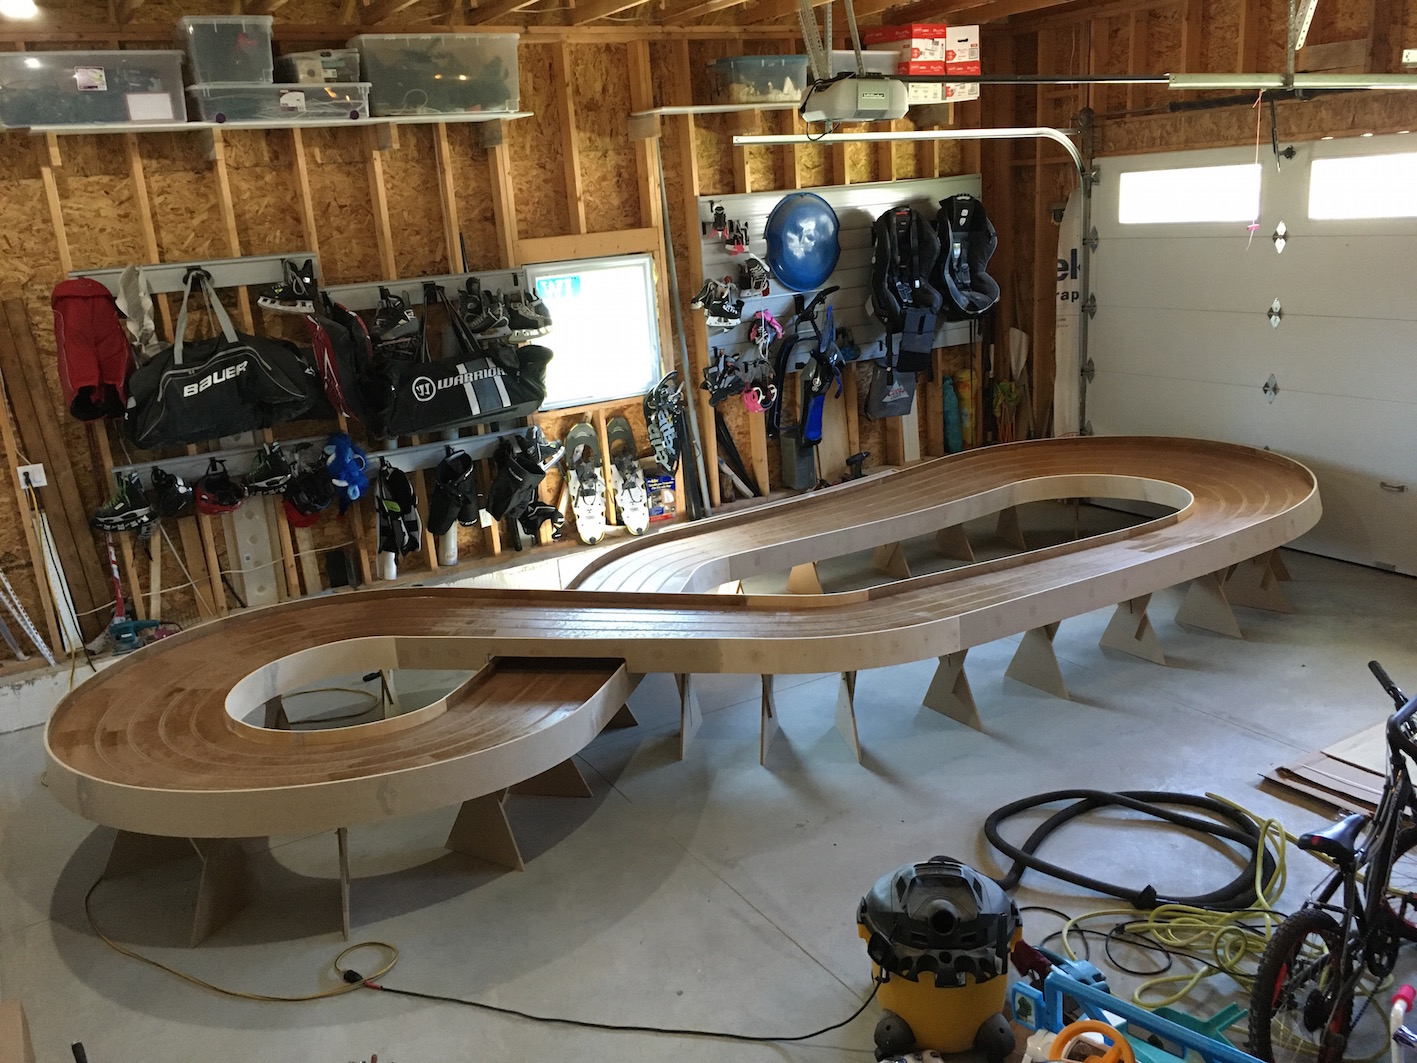
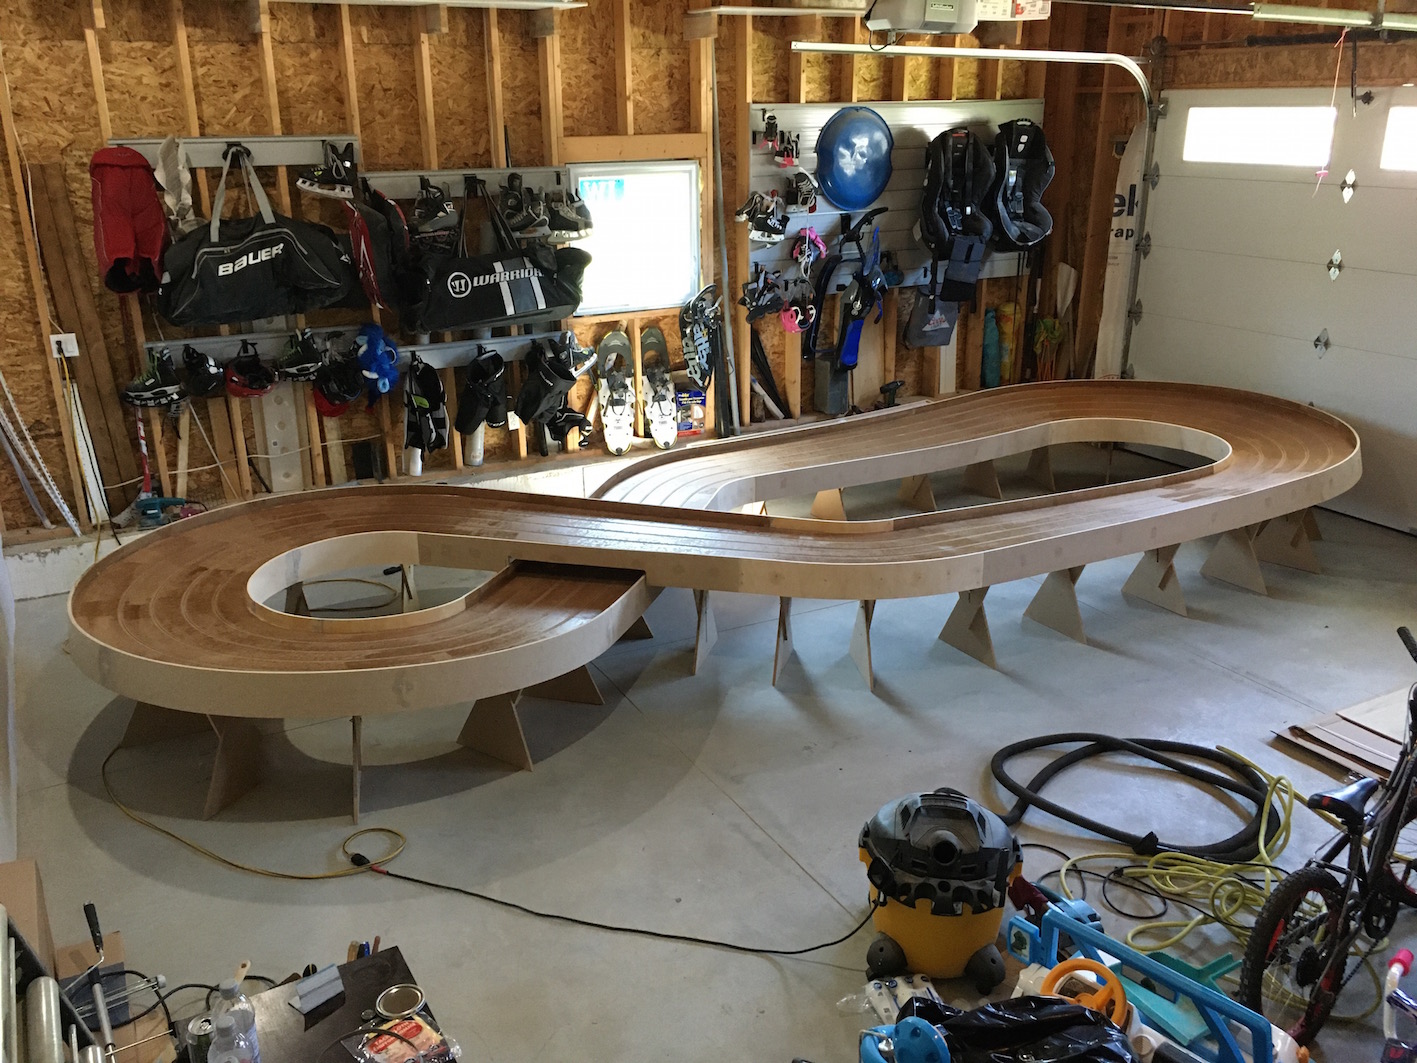
I now have the track surface painted with 2 coats of the black epoxy. It looks good except the lint free rollers were not so lint free. My preferred roller type is a short mohair style that of course no one around here keeps in stock. The mohair style roller is the only true lint free roller that I have ever found.


So now I am going to let the paint harden up for about 3 days before taking it apart for braiding. Oil based epoxy is about the toughest finish I have ever used but it takes a lot longer to fully harden. So unless you want to leave finger prints all over the track, be patient with it.


In the mean time, I have started to make the relay board and the individual lane power reducer.  


  • Lou E, Eddie Fleming and William Bowden like this

#258 Jay Guard

Jay Guard

    Posting Leader

  • IRRA National Director
  • PipPipPipPipPipPipPip
  • 2,812 posts
  • Joined: 10-December 06
  • Gender:Male
  • Location:DeLand, FL

Posted 24 May 2020 - 09:19 AM

Really looking forward to see how you make the individual lane power reducers as I've been wanting to do the same on my track.


Jay Guard

IRRA Board of Directors (2022-Present),

Gator Region Retro Racing Co-Director (2021-Present)

SERRA Co-Director (2009-2013)

IRRA BoD advisor (2007-2010)

Team Slick 7 member (1998-2001)

Way too serious Retro racer


#259 Steve Ogilvie

Steve Ogilvie

    Race Leader

  • Subscriber
  • PipPipPipPipPip
  • 630 posts
  • Joined: 17-November 14
  • Gender:Male
  • Location:Kincardine, Ontario, Canada

Posted 24 May 2020 - 11:50 AM

I will try to post some pics later today.


  • William Bowden likes this

#260 MSwiss

MSwiss

    Grand Champion Poster

  • IRRA National Director
  • PipPipPipPipPipPipPipPip
  • 25,872 posts
  • Joined: 16-April 06
  • Gender:Male

Posted 24 May 2020 - 12:07 PM

Steve,
What are you going to use for a power supply?

Mike Swiss
 
Inventor of the Low CG guide flag 4/20/18
IRRA® Components Committee Chairman
Five-time USRA National Champion (two G7, one G27, two G7 Senior)
Two-time G7 World Champion (1988, 1990), eight G7 main appearances
Eight-time G7 King track single lap world record holder

17B West Ogden Ave., Westmont, IL 60559, (708) 203-8003, mikeswiss86@hotmail.com (also my PayPal address)

Note: Send all USPS packages and mail to: 692 Citadel Drive, Westmont, Illinois 60559


#261 Steve Ogilvie

Steve Ogilvie

    Race Leader

  • Subscriber
  • PipPipPipPipPip
  • 630 posts
  • Joined: 17-November 14
  • Gender:Male
  • Location:Kincardine, Ontario, Canada

Posted 24 May 2020 - 01:33 PM

I hope to get a Bulldog 55A or something equivalent. We used to use Rivergate 75 A and I would like one of those but I really do not know what is available. If anyone has a used one they are no longer using let me know. 


  • William Bowden likes this

#262 Steve Ogilvie

Steve Ogilvie

    Race Leader

  • Subscriber
  • PipPipPipPipPip
  • 630 posts
  • Joined: 17-November 14
  • Gender:Male
  • Location:Kincardine, Ontario, Canada

Posted 24 May 2020 - 02:56 PM

Steve Ogilvie Builds a slot car track-Starting the wiring - YouTube


  • Zippity and William Bowden like this

#263 Gak

Gak

    Rookie Keyboard Racer

  • Subscriber
  • Pip
  • 13 posts
  • Joined: 12-May 20
  • Gender:Male
  • Location:Suffolk, Great Britain

Posted 24 May 2020 - 02:58 PM

Hi Steve , ex carpenter & noob here, Do you mind me asking what size router cutter you use for the slot again? is it 1/8th (3.2mm) or bigger?

will my 1/8th 2 flute cutter be ok, as I've noticed my router has a slight wobble creating a 3.9mm slot.... will this be to wide / to small for guide flags?

Edit, also forgot to ask , braid bed width, is 17.5mm - 11/16th ok or the full 19mm - 3/4"
also recommended depth between braid & race track surface 0.3 or 0.5 or ? (apologies if my terminology is not up to speed)

My motto is "measure twice, cut once"...

Thanks for the treasure trove of info
 

Gak ( Graham )


Edited by Gak, 24 May 2020 - 04:20 PM.

  • Rob Voska and William Bowden like this
Graham Bowden

#264 Steve Ogilvie

Steve Ogilvie

    Race Leader

  • Subscriber
  • PipPipPipPipPip
  • 630 posts
  • Joined: 17-November 14
  • Gender:Male
  • Location:Kincardine, Ontario, Canada

Posted 24 May 2020 - 04:49 PM

I use a 1/8" two flute carbide tipped bit for the slots and a 3/4" bit for the reliefs or lands. The braid I have is a little under 30 thousands of an inch thick so I cut the relief about 47 thou below the surface. Should have the braid about 10 thou below the surface of the track factoring in glue and paint thickness.


I used to use an 11/16" bit for the reliefs and it works fine for standard braid. But even with standard braid I like the 3/4 bit better because the braid is a little further away from the slot so cars do not hook on it as much coming out in corners. 


I do not think a slightly wider slot will bother anything. Cars still made it around worn out T slots without many problems. Thanks for the reply.


  • William Bowden and Gak like this

#265 MSwiss

MSwiss

    Grand Champion Poster

  • IRRA National Director
  • PipPipPipPipPipPipPipPip
  • 25,872 posts
  • Joined: 16-April 06
  • Gender:Male

Posted 24 May 2020 - 05:05 PM

Hi Steve , ex carpenter & noob here, Do you mind me asking what size router cutter you use for the slot again? is it 1/8th (3.2mm) or bigger?

will my 1/8th 2 flute cutter be ok, as I've noticed my router has a slight wobble creating a 3.9mm slot.... will this be to wide / to small for guide flags?

Edit, also forgot to ask , braid bed width, is 17.5mm - 11/16th ok or the full 19mm - 3/4"
also recommended depth between braid & race track surface 0.3 or 0.5 or ? (apologies if my terminology is not up to speed)
My motto is "measure twice, cut once"...

Thanks for the treasure trove of info
 
Gak ( Graham )

No, no, no.

If your router is that bad, buy a new one.

It's not just 3.9mm /.154" is huge, how are you going cut the braid recess, which uses a 1/8" guide pin?

I guess you could make your own recess cutter , with a larger pin, if you have a lathe, or want to pay someone to to do it.

On a long shot, you could try using a 3/32" router bit, and see if it will wobble to .123"-125".

But without being at my raceway, I'm not sure if the fluting is long enough on a 3/32" router bit.

It needs to be at least .350".

PS-would the slot even be perpendicular to the track surface, with that much wobble?
  • William Bowden likes this

Mike Swiss
 
Inventor of the Low CG guide flag 4/20/18
IRRA® Components Committee Chairman
Five-time USRA National Champion (two G7, one G27, two G7 Senior)
Two-time G7 World Champion (1988, 1990), eight G7 main appearances
Eight-time G7 King track single lap world record holder

17B West Ogden Ave., Westmont, IL 60559, (708) 203-8003, mikeswiss86@hotmail.com (also my PayPal address)

Note: Send all USPS packages and mail to: 692 Citadel Drive, Westmont, Illinois 60559


#266 Gak

Gak

    Rookie Keyboard Racer

  • Subscriber
  • Pip
  • 13 posts
  • Joined: 12-May 20
  • Gender:Male
  • Location:Suffolk, Great Britain

Posted 24 May 2020 - 08:04 PM

No, no, no.

If your router is that bad, buy a new one.

It's not just 3.9mm /.154" is huge, how are you going cut the braid recess, which uses a 1/8" guide pin?

I guess you could make your own recess cutter , with a larger pin, if you have a lathe, or want to pay someone to to do it.

On a long shot, you could try using a 3/32" router bit, and see if it will wobble to .123"-125".

But without being at my raceway, I'm not sure if the fluting is long enough on a 3/32" router bit.

It needs to be at least .350".

PS-would the slot even be perpendicular to the track surface, with that much wobble?

thanks for the quick replies & info folks.

Yep new router it will have to be Mike, probably safer as well!

I do have a 3/4" proper relief cutter, with 1/8th center pivot, its exactly the same as the one you (Steve) show how to make.
bought it 17 years ago from a Canadian guy on ebay. Just ordered a feeler gauge, its been few years since I used "thou"  :o 

I did run a few tests cuts with the relief cutter, ended up at 20.5mm - 13/16ths, due to wobble
I have a made a perspex router jig as you explained back in the thread, works perfectly
& cuts without wiggling even with the dodgy router, will re tool to new router or make another asap.

Intended use for track will be predominantly 1/32, but want to be able to race 1/24 too, so will build 108mm - 4" 1/4 lanes.

Any ideas & suggestions most welcome

Thank you all so much, this forum is awesome :yahoo: 


  • Steve Ogilvie likes this
Graham Bowden

#267 Steve Ogilvie

Steve Ogilvie

    Race Leader

  • Subscriber
  • PipPipPipPipPip
  • 630 posts
  • Joined: 17-November 14
  • Gender:Male
  • Location:Kincardine, Ontario, Canada

Posted 24 May 2020 - 08:42 PM

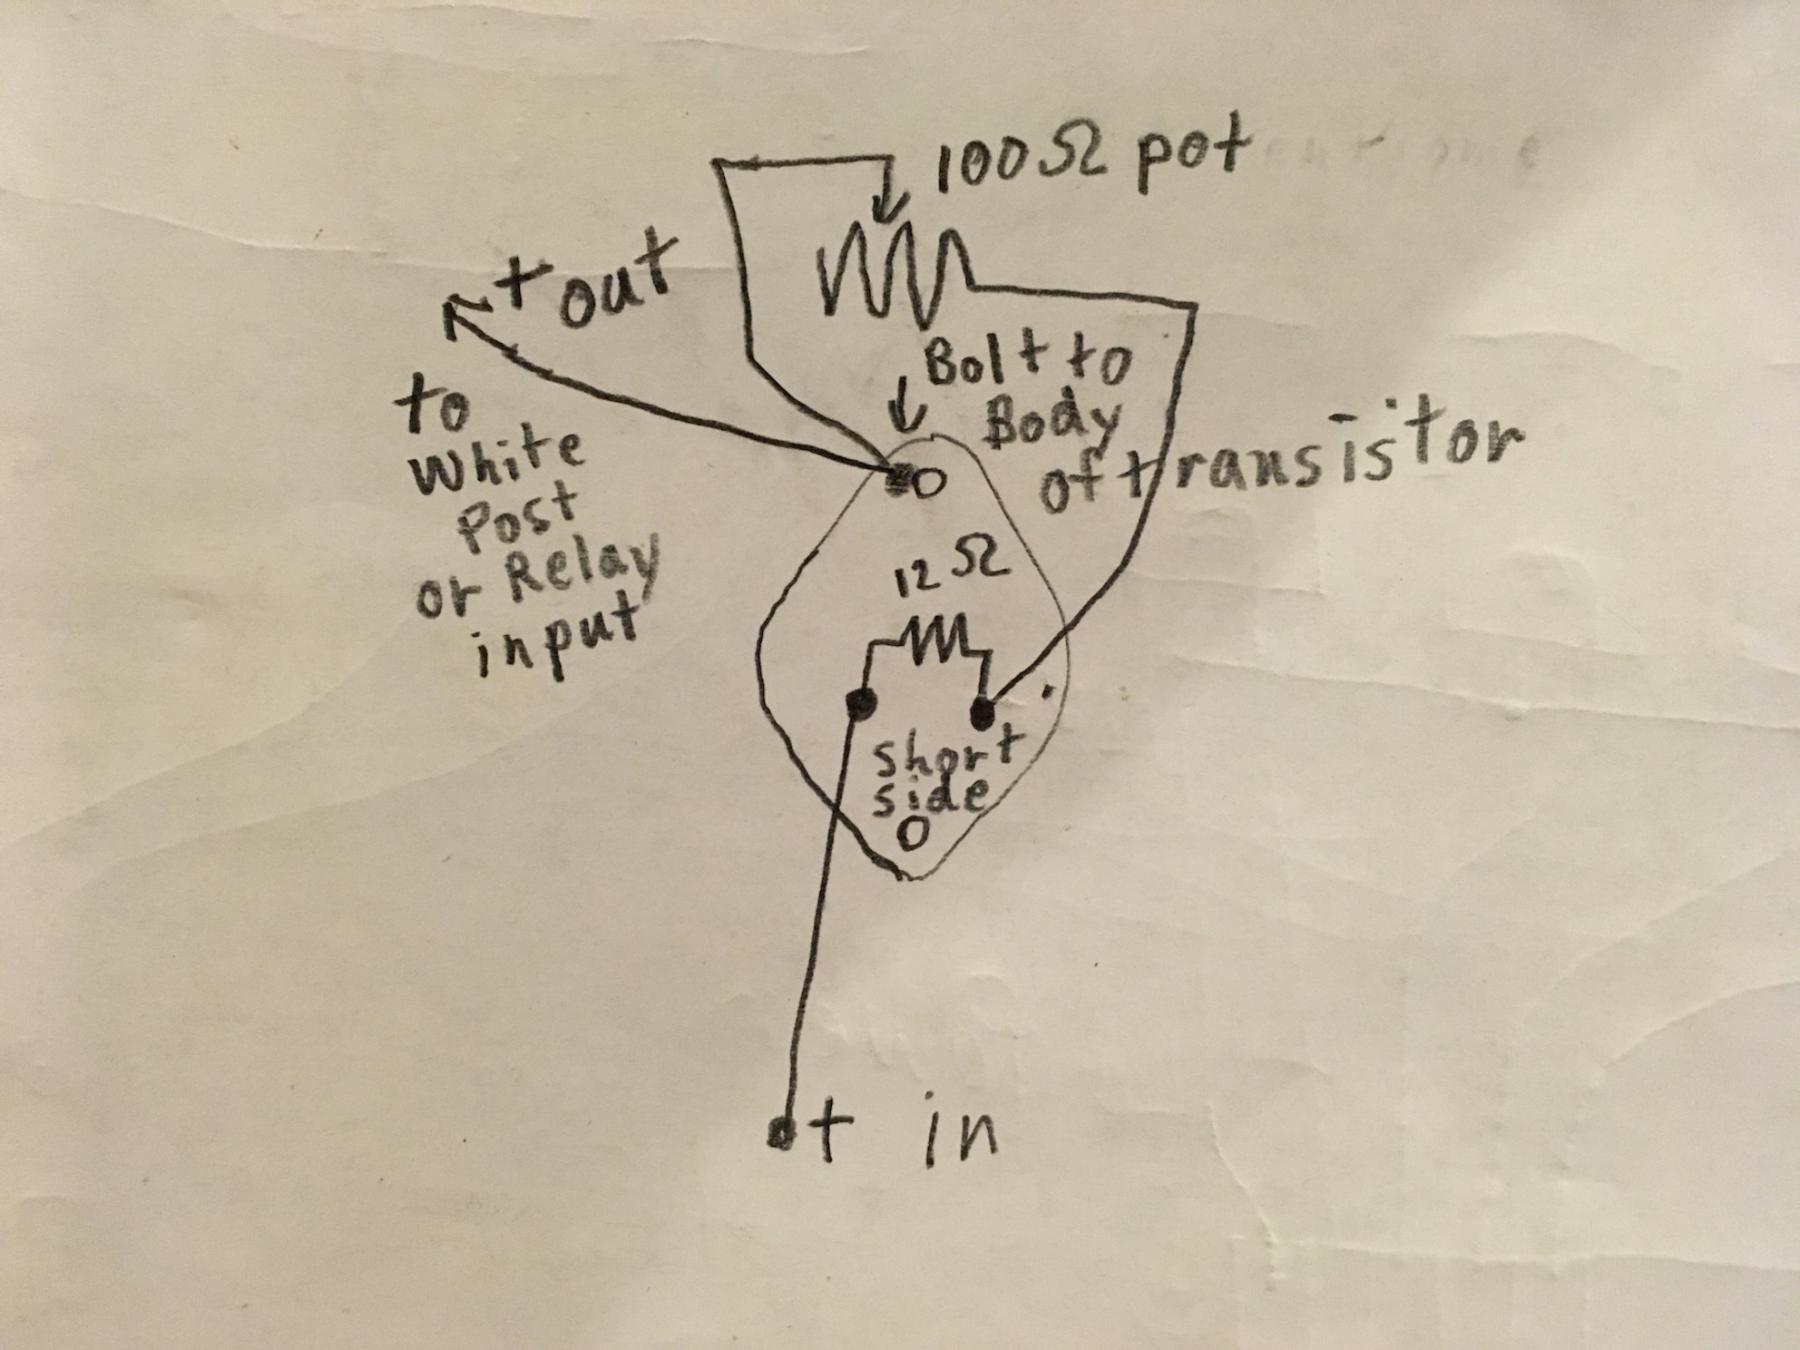
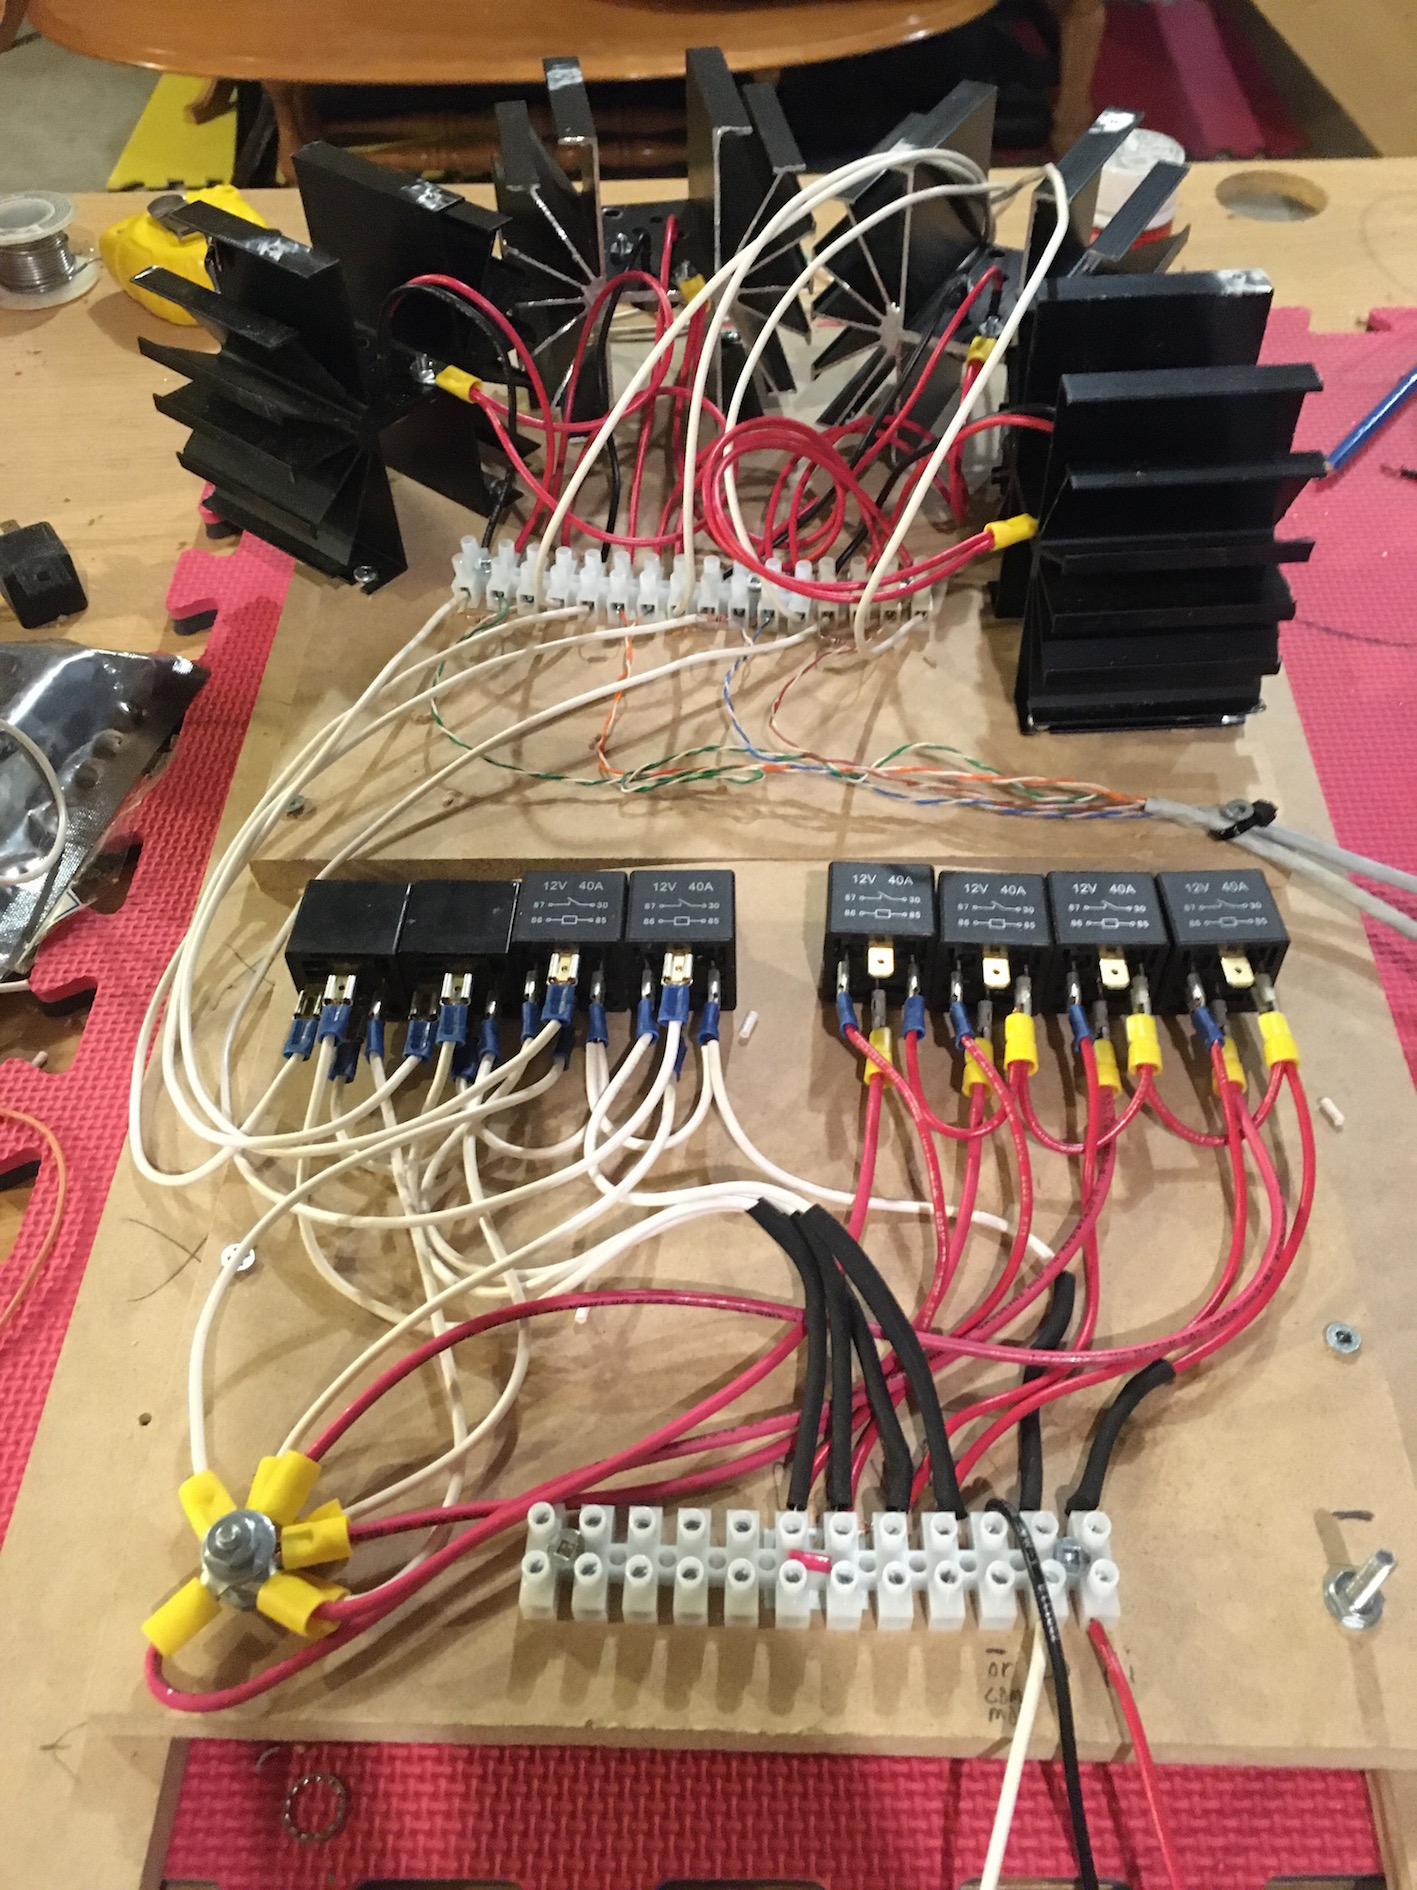
Working on the relay board and individual lane power reducer. This is the basic diagram for the power reducer:


IMG_3209.jpg


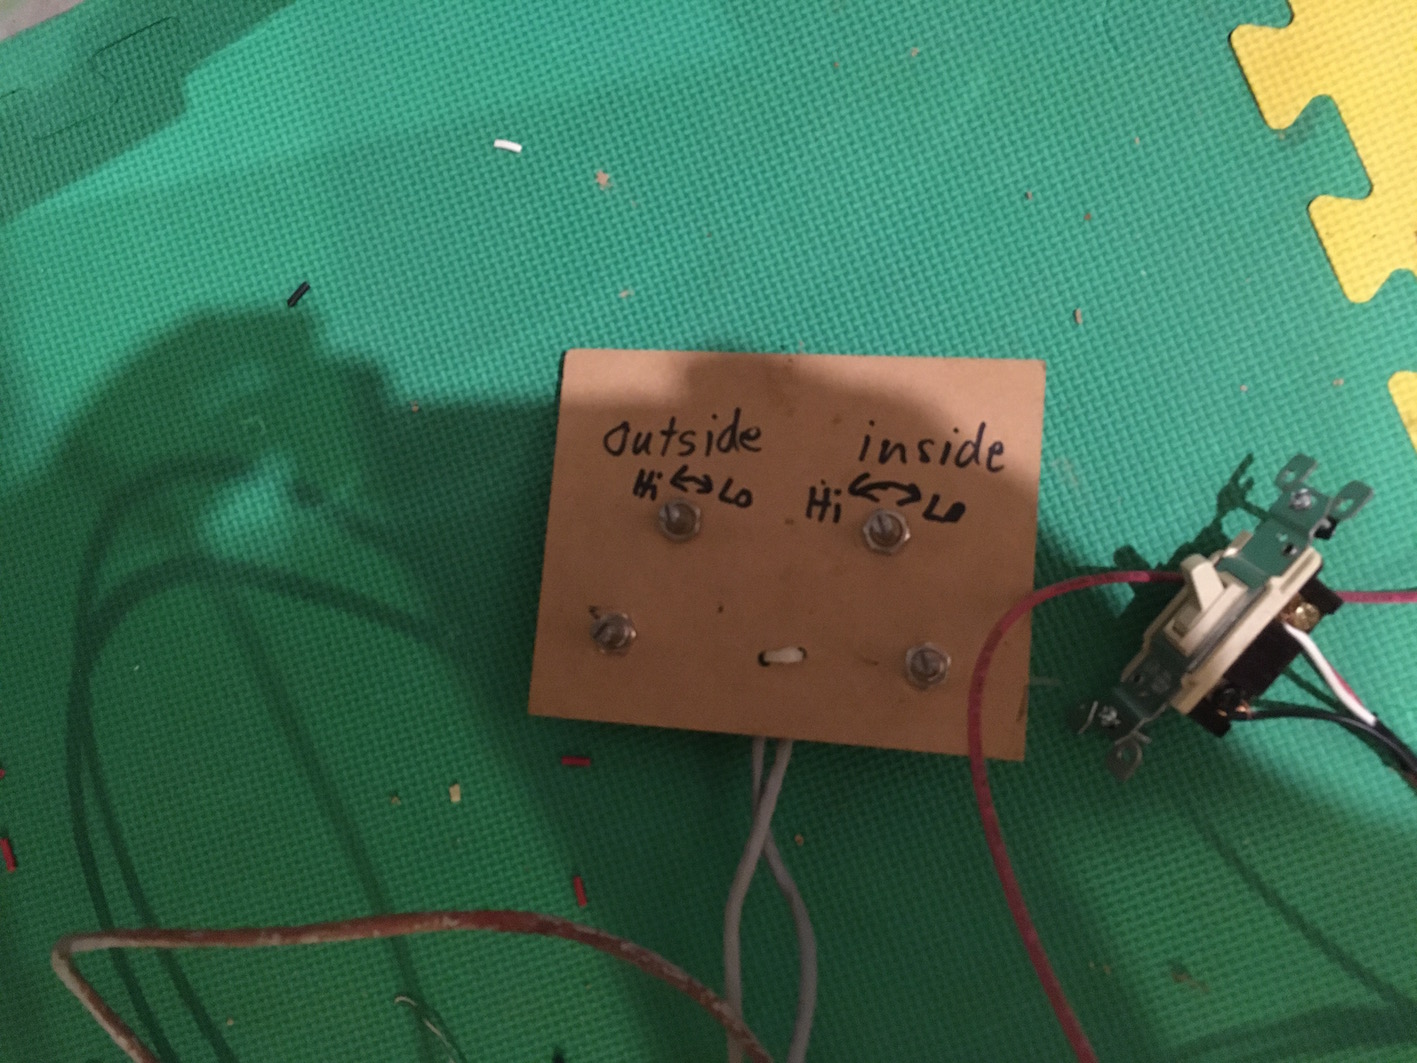
Pots and the three way switch:


IMG_3210.jpg


And the mostly finished control panel


IMG_3211.jpg


  • Rob Voska and William Bowden like this

#268 MSwiss

MSwiss

    Grand Champion Poster

  • IRRA National Director
  • PipPipPipPipPipPipPipPip
  • 25,872 posts
  • Joined: 16-April 06
  • Gender:Male

Posted 24 May 2020 - 09:38 PM

I hope to get a Bulldog 55A or something equivalent. We used to use Rivergate 75 A and I would like one of those but I really do not know what is available. If anyone has a used one they are no longer using let me know. 

It looks like you moved along, but I was going to say if you had $200+, in your budget, buy 4-10amp power supplies off of Ebay.

Infinitely adjustable, plus you have the 4 digital voltage meters, for repeatability.

I use 8 on my King, for birthday parties and rentals.

Guys occasionally run G12's on them, without a problem.

Apologies if I already mentioned that option, in this thread.
  • William Bowden likes this

Mike Swiss
 
Inventor of the Low CG guide flag 4/20/18
IRRA® Components Committee Chairman
Five-time USRA National Champion (two G7, one G27, two G7 Senior)
Two-time G7 World Champion (1988, 1990), eight G7 main appearances
Eight-time G7 King track single lap world record holder

17B West Ogden Ave., Westmont, IL 60559, (708) 203-8003, mikeswiss86@hotmail.com (also my PayPal address)

Note: Send all USPS packages and mail to: 692 Citadel Drive, Westmont, Illinois 60559


#269 Steve Ogilvie

Steve Ogilvie

    Race Leader

  • Subscriber
  • PipPipPipPipPip
  • 630 posts
  • Joined: 17-November 14
  • Gender:Male
  • Location:Kincardine, Ontario, Canada

Posted 25 May 2020 - 08:54 AM

I did read about those small power supplies from one of your posts but I had most of this stuff on hand. And I wanted to show how people can build their own system like this on an existing track. 


The transistor is a Motorola MJ11015. The pot is 100 ohms. Any diode will work as long as it can handle about 1/2 amp or better. I don't know the current draw of the relay coils off hand. 12 or 20 ohm resistors. I have a resistor colour reading chart and I believe I just used 20ohm resistors. I could be wrong, not much on electronics. The resistor has a red band then 2 black bands then a gold band going from left to right. The relays are just 30A automotive relays, available from any auto parts store. The relay coil and all low power feeds are wired with 18 awg, the high power relay contacts are fed with 12 awg wire.


I am waiting on a pinstriper to show up, I can't find any old ones laying around and they are getting rare I am getting ripped to the tune of 89.00 for this one.

Embee master striping kit, used to buy them for 10 bucks.


  • Zippity, Rob Voska, Eddie Fleming and 1 other like this

#270 Steve Ogilvie

Steve Ogilvie

    Race Leader

  • Subscriber
  • PipPipPipPipPip
  • 630 posts
  • Joined: 17-November 14
  • Gender:Male
  • Location:Kincardine, Ontario, Canada

Posted 26 May 2020 - 02:08 PM

Drilled all the holes for the dead strip and for the hook ups in front of the drivers panel. Then I took the track apart again, hope to get started with braid tomorrow.


61220773383__941D7D1E-A18E-46CE-8E08-7396516A2EE6.jpg


  • Zippity, Rob Voska and William Bowden like this

#271 Shiggy

Shiggy

    Green Hornet race director

  • Subscriber
  • PipPipPipPip
  • 230 posts
  • Joined: 06-December 12
  • Gender:Male
  • Location:Dead Center, WA

Posted 27 May 2020 - 08:36 AM

Steve, is there a reason you drilled the dead strip holes after painting and not before?
  • William Bowden likes this
D. "shiggy" Person

#272 Steve Ogilvie

Steve Ogilvie

    Race Leader

  • Subscriber
  • PipPipPipPipPip
  • 630 posts
  • Joined: 17-November 14
  • Gender:Male
  • Location:Kincardine, Ontario, Canada

Posted 27 May 2020 - 09:18 PM

It is easy to drill the dead strip holes after painting but no easier than before painting if that makes any sense. I just had not decided where I wanted to put it.


What I had to take in to account was where I was going to mount the relay board under the track, and since I had the track ready to paint I just decided to leave it till later.


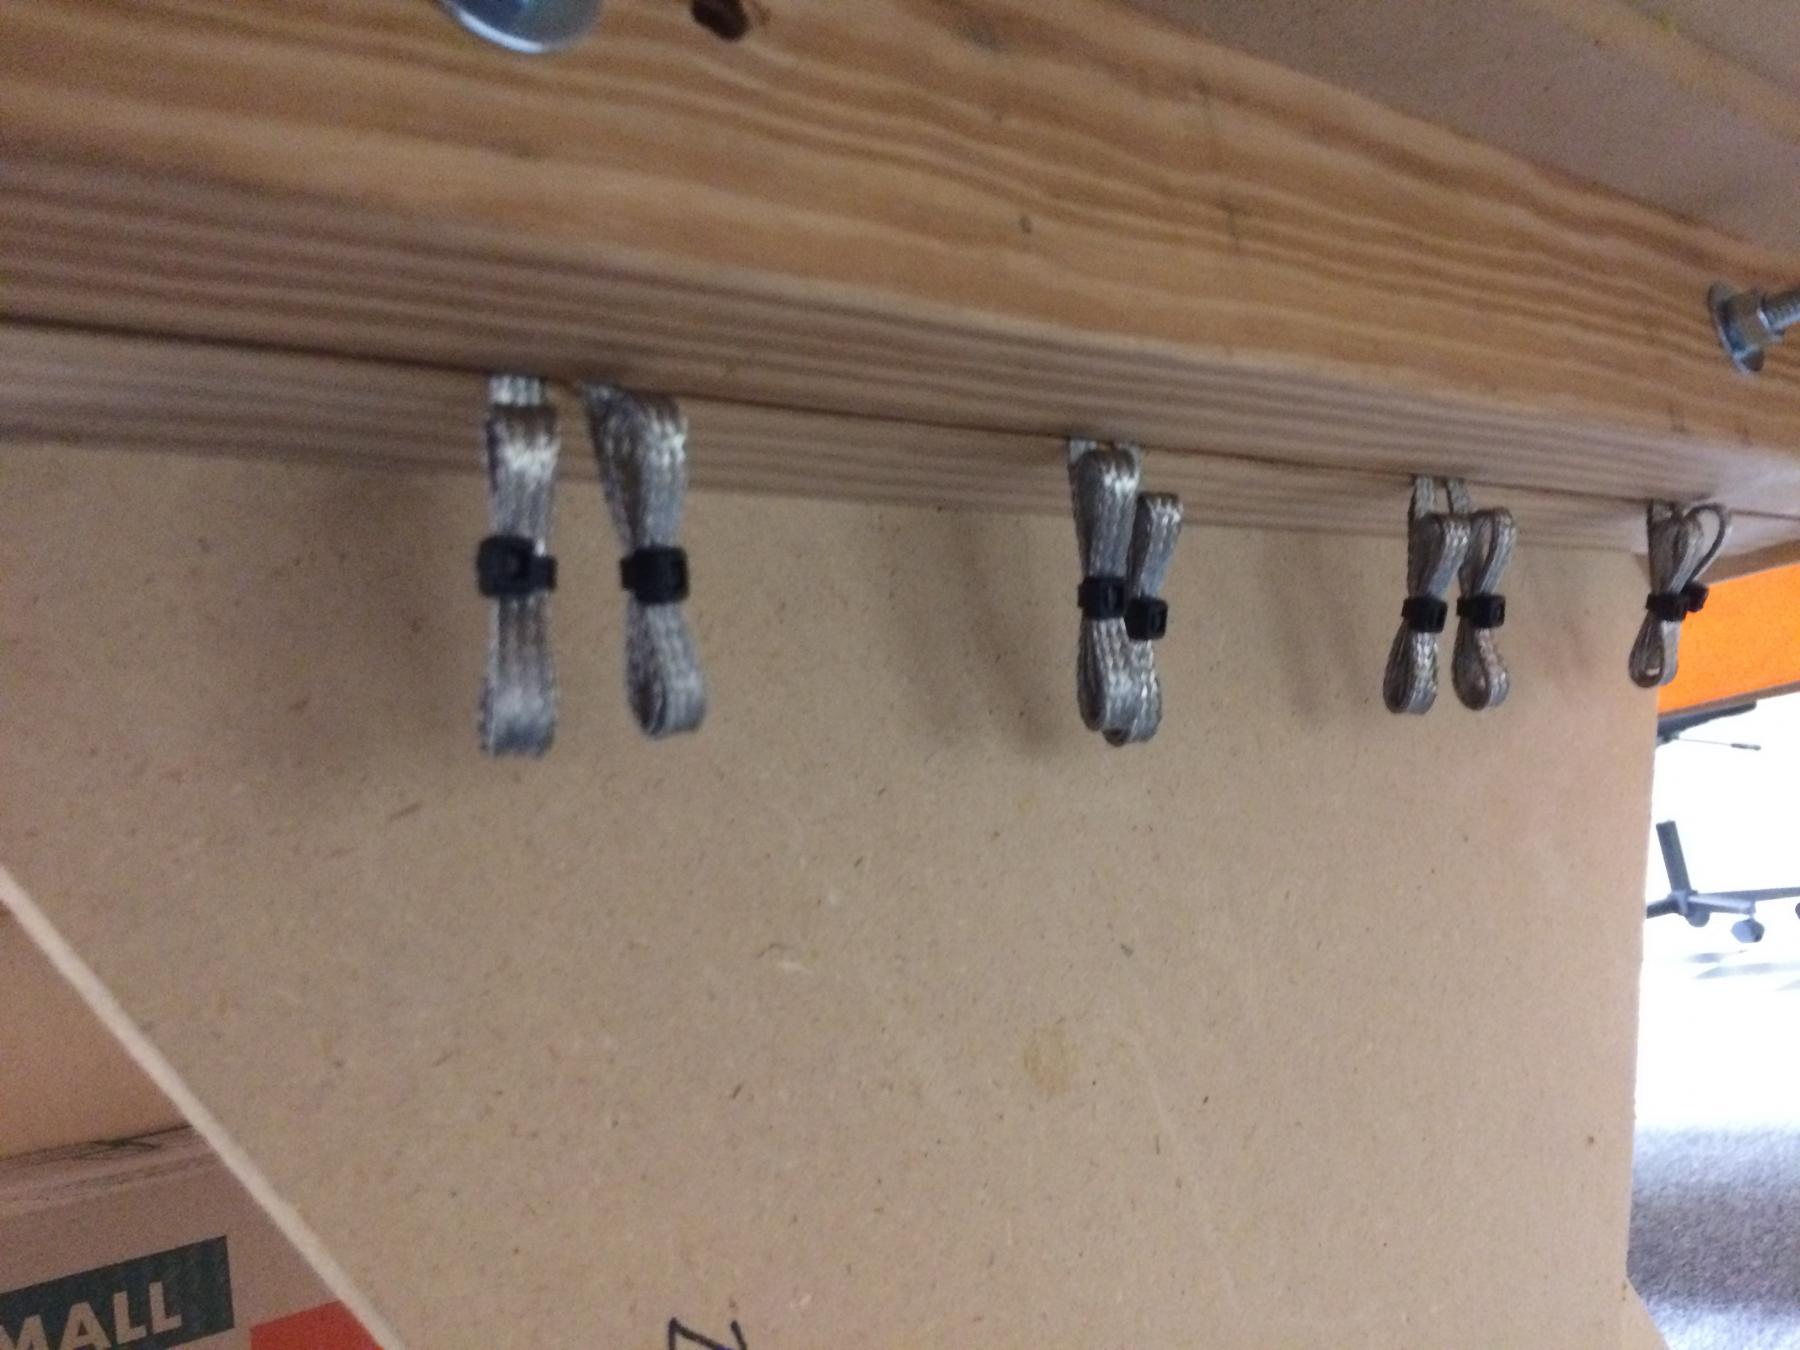
As it turned out, some of the drops are not right in front of the panel hook ups because of the limited room between the leg supports. As you can see 2 of the drops are right beside each other because the relay board is going to take up the space where they would normally go. With a longer straight this would not be a problem.


IMG_3231.jpg


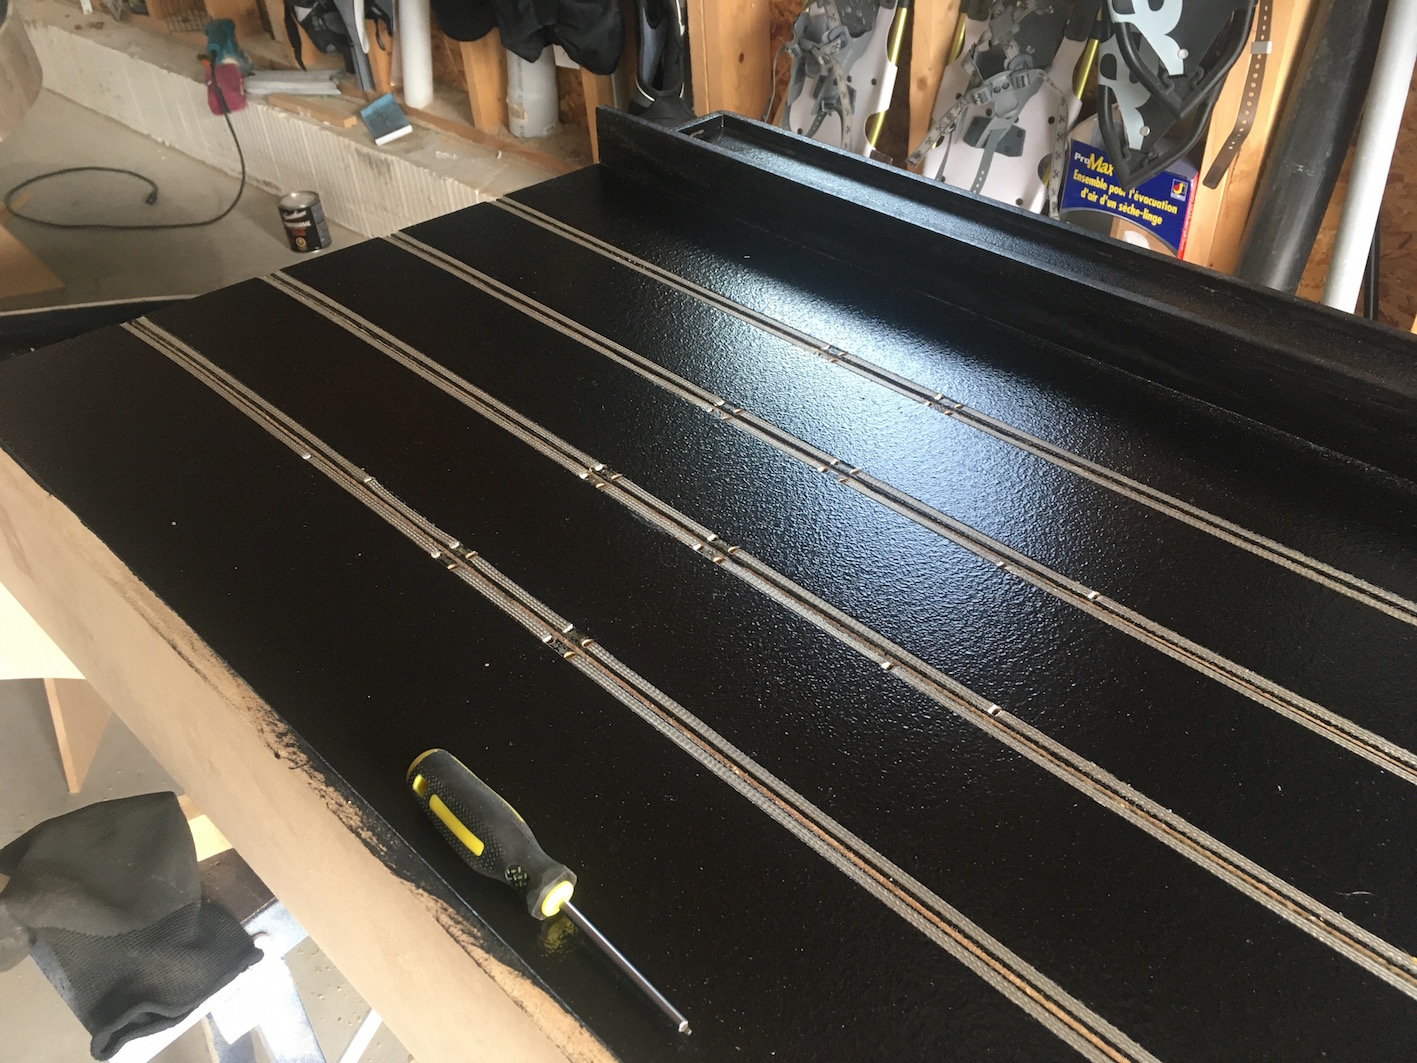
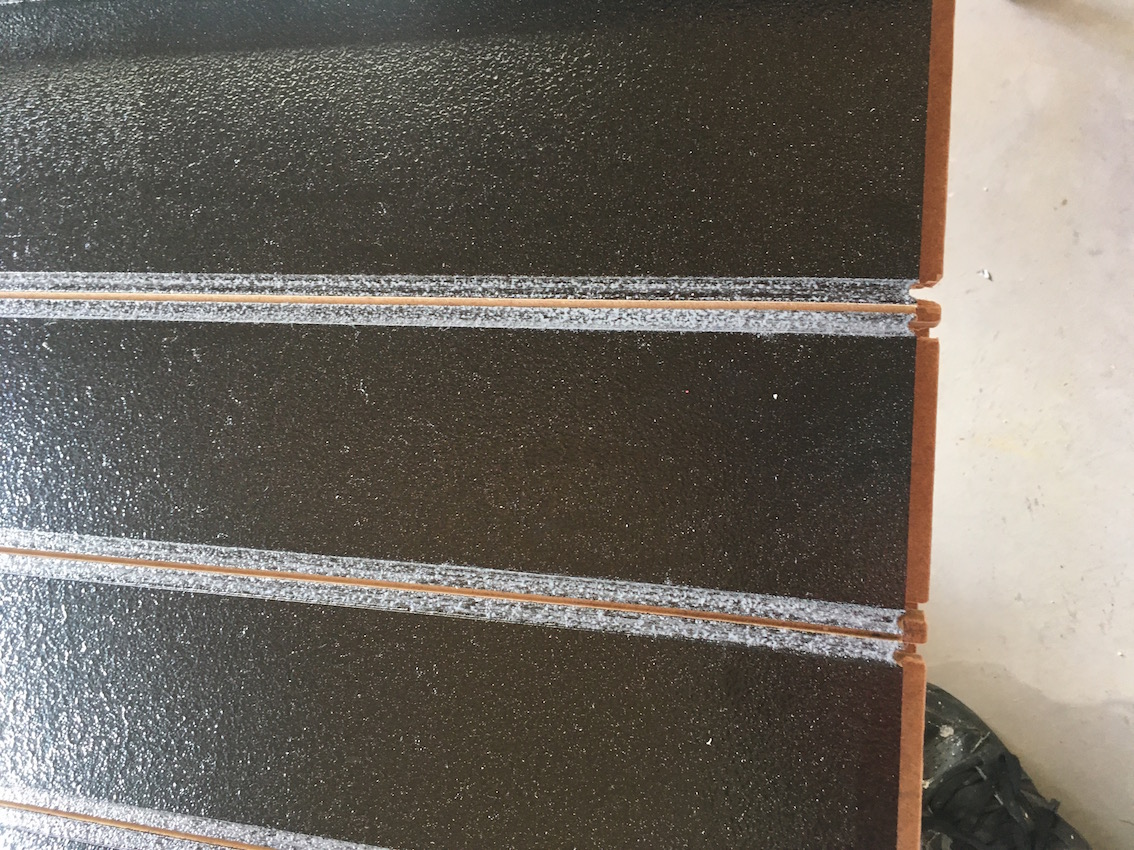
Oil based epoxy rolls with the consistency of molasses in February. So the braid lands end up bumpy and rough. So I hand sand them to get rid of the bumps and to remove the high gloss so the glue adheres better.


IMG_3221.jpg


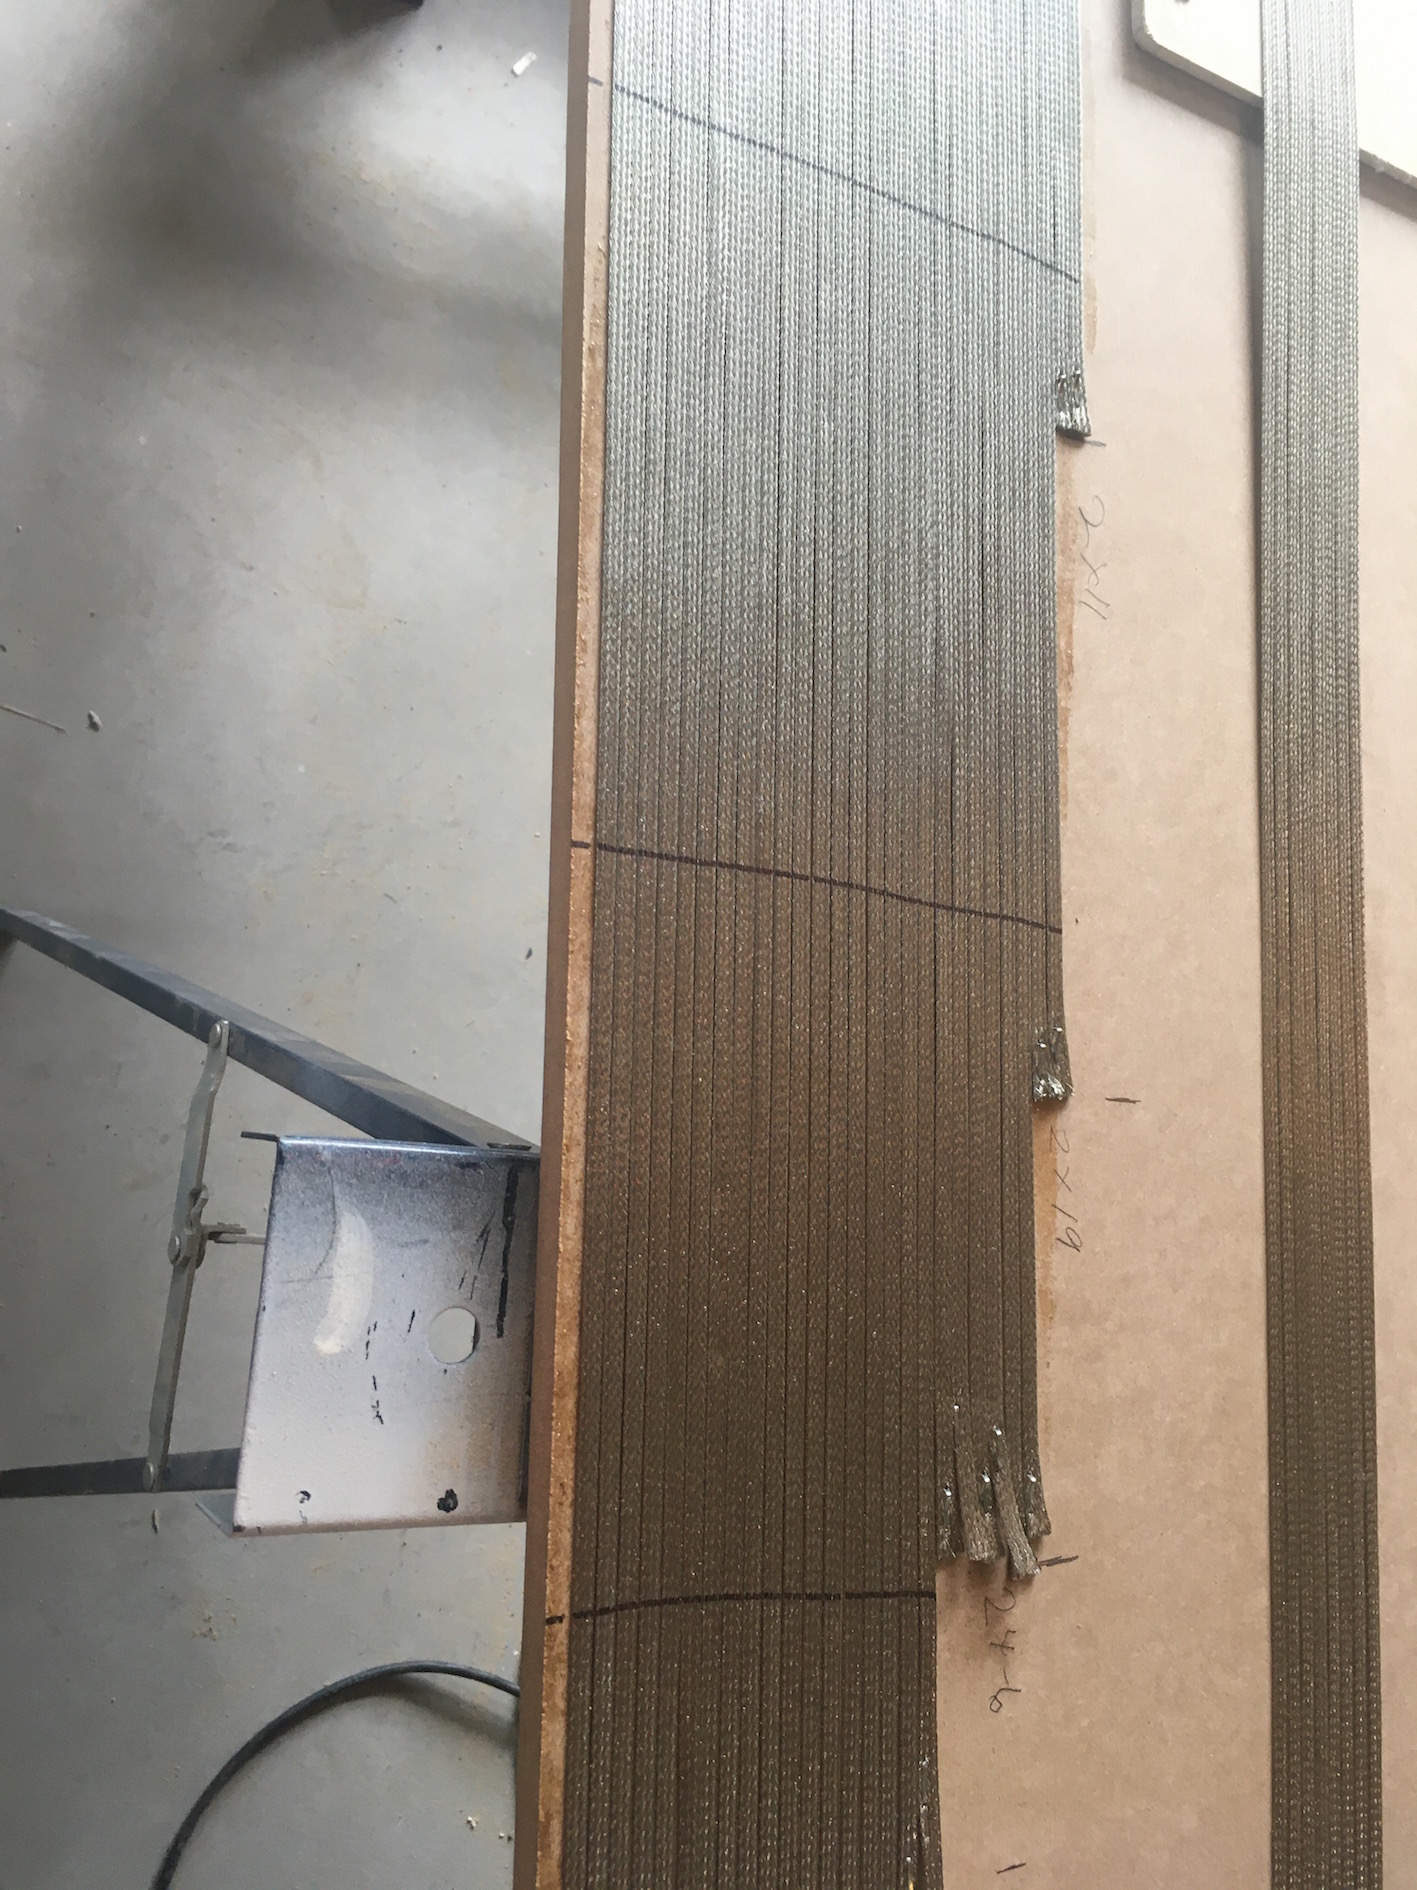
I made a makeshift braid table out of a left over sheet of 1/2" mdf and a small piece of plywood. Because I only have one 500' roll of braid to work with, I measured all the individual lengths to fit and pulled them out on the table. They get stapled at each end and then I use a small roller and paint them with glue, in this case Lepages solvent based contact cement. Then my son Dan grabs a sharpie and draws lines every two feet or so on the glue side of the braid. I had absolutely forgot about that but Dan helped braid hundreds of tracks as a kid. The marks are just to remind which side of the braid has the glue on it because once the glue has dried it is hard to tell the difference. A quick glance to make sure the stripes are down saves a world of hurt later. How much contact cement does it take to stop 12 volts? Not much.


IMG_3223.jpg


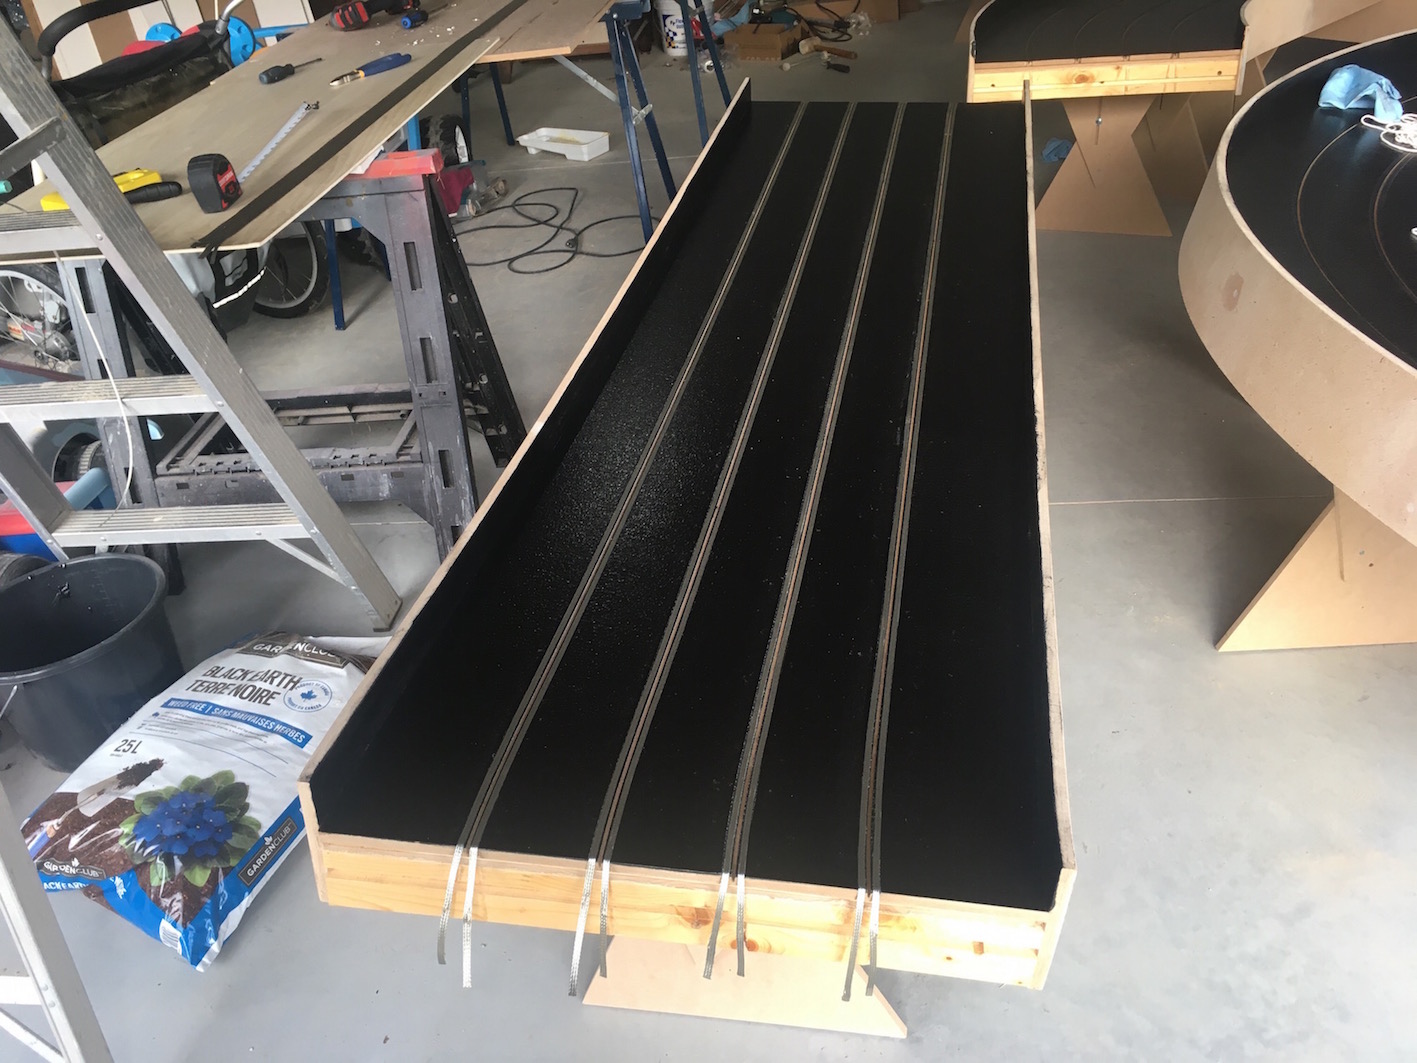
One braided piece of track. We only did two sections today, did not get at it too early and it was Canadian hot in the garage today. It hit 31C .


IMG_3232.jpg


  • Pappy, slotbaker, Zippity and 4 others like this

#273 Steve Ogilvie

Steve Ogilvie

    Race Leader

  • Subscriber
  • PipPipPipPipPip
  • 630 posts
  • Joined: 17-November 14
  • Gender:Male
  • Location:Kincardine, Ontario, Canada

Posted 27 May 2020 - 10:13 PM

(4) Steve Ogilvie Builds a Slot Car Track- Braiding - YouTube


  • slotbaker, Zippity, Rob Voska and 2 others like this

#274 Steve Ogilvie

Steve Ogilvie

    Race Leader

  • Subscriber
  • PipPipPipPipPip
  • 630 posts
  • Joined: 17-November 14
  • Gender:Male
  • Location:Kincardine, Ontario, Canada

Posted 28 May 2020 - 06:42 PM

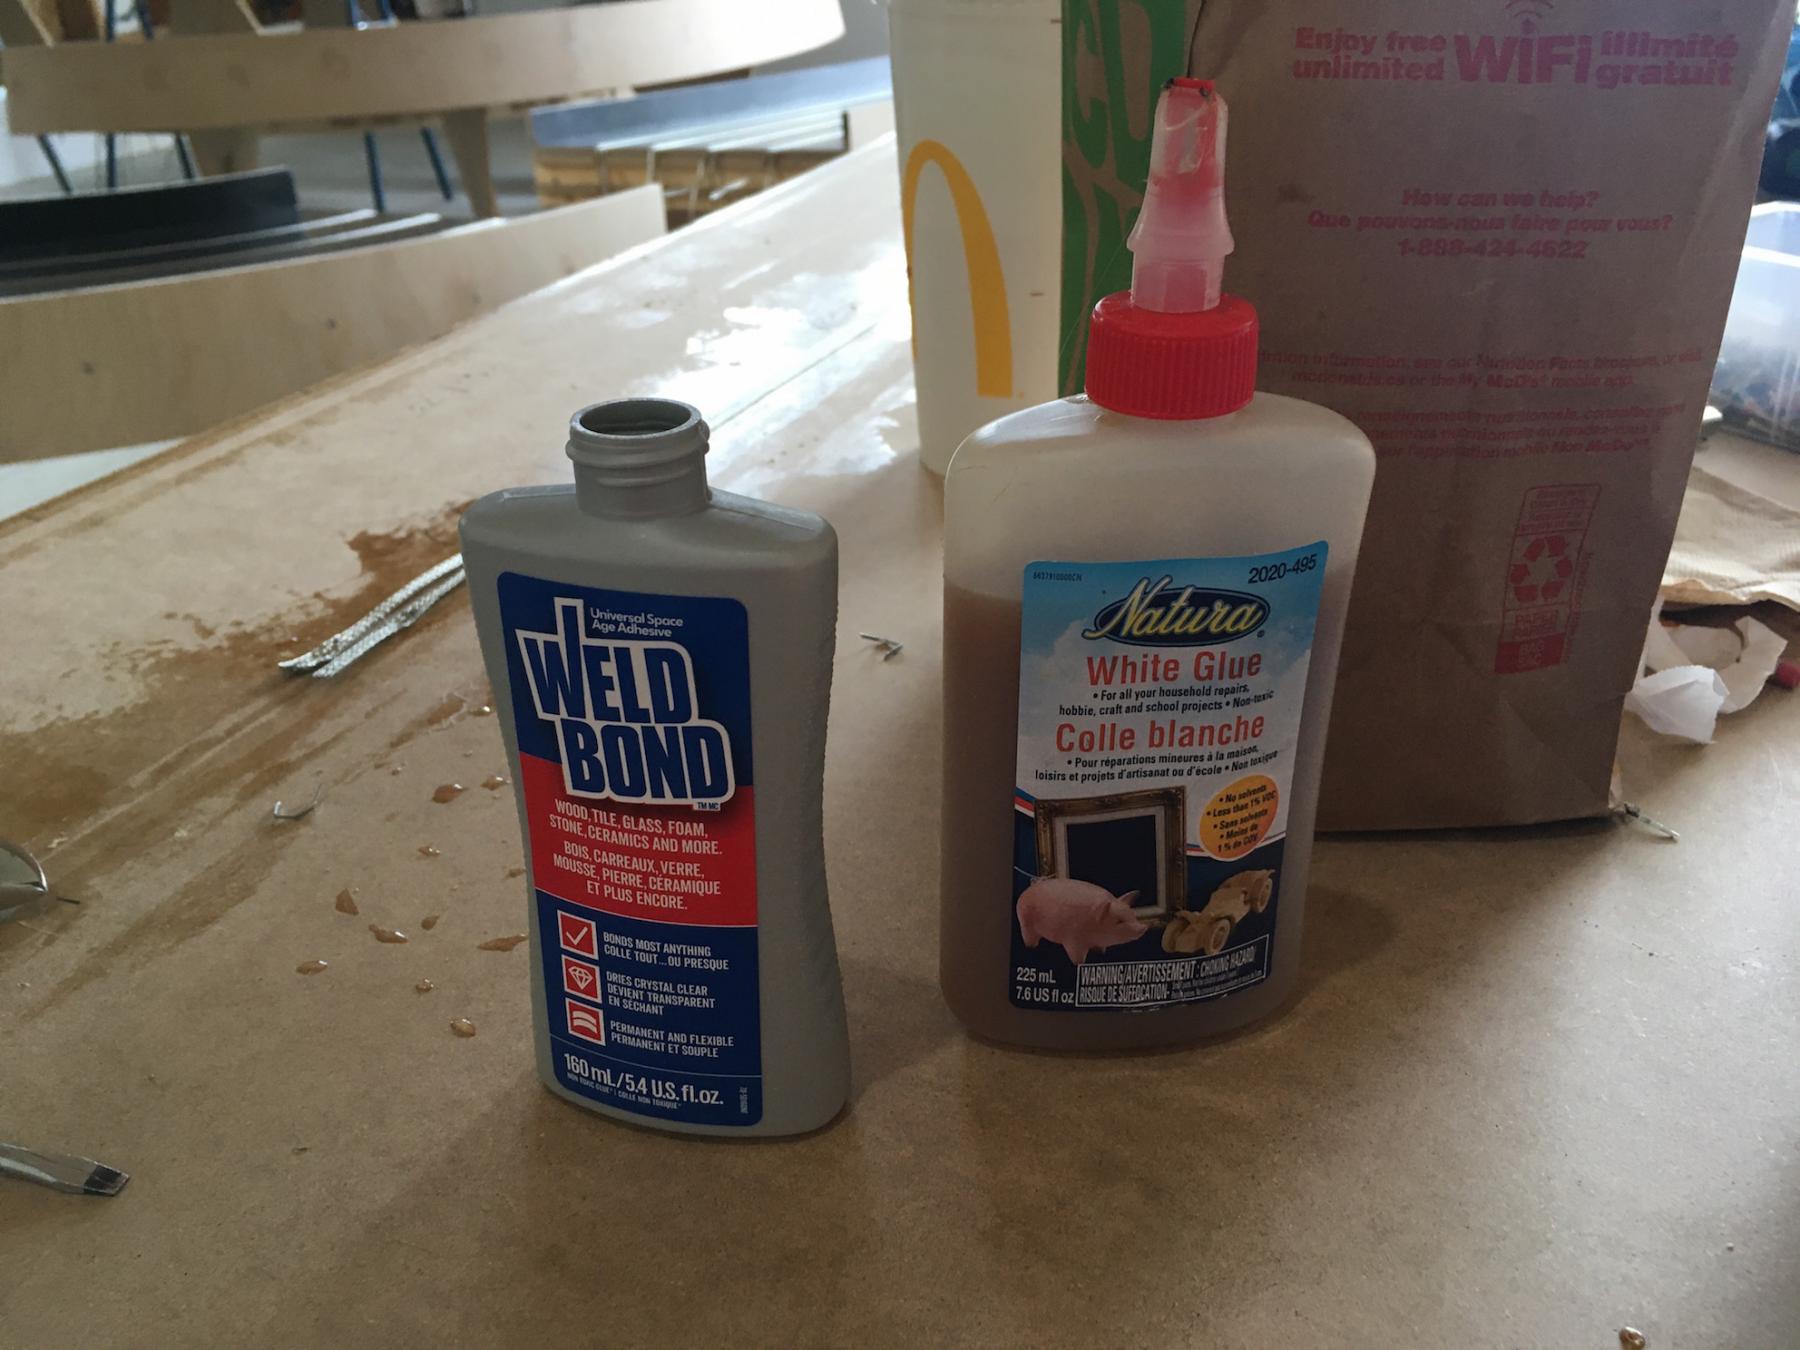
When I did this for a living and I needed an applicator bottle for spreading glue on tracks, I would go to a grocery store and buy 3 French's mustard squeeze bottles. Pop the tops off, dump the mustard down the drain, rinse and that was enough bottles to braid a big track with. They worked great because you could set the flow up easily by adjusting the tip. They did not last long but they were cheap.


Then French's changed their squeeze bottle design. That was ok the no name and bargain brands continued to use the old bottles. I went looking for some of the no name mustard but neither of our 2 grocery stores had any in stock. So I ended up using this combination


IMG_3236.jpg


I used the top of the weldbond glue bottle on the bargain glue bottle. They both have the same thread. Hard to keep the flow steady but did the job. They take a long time to rinse out,unlike the mustard bottles.


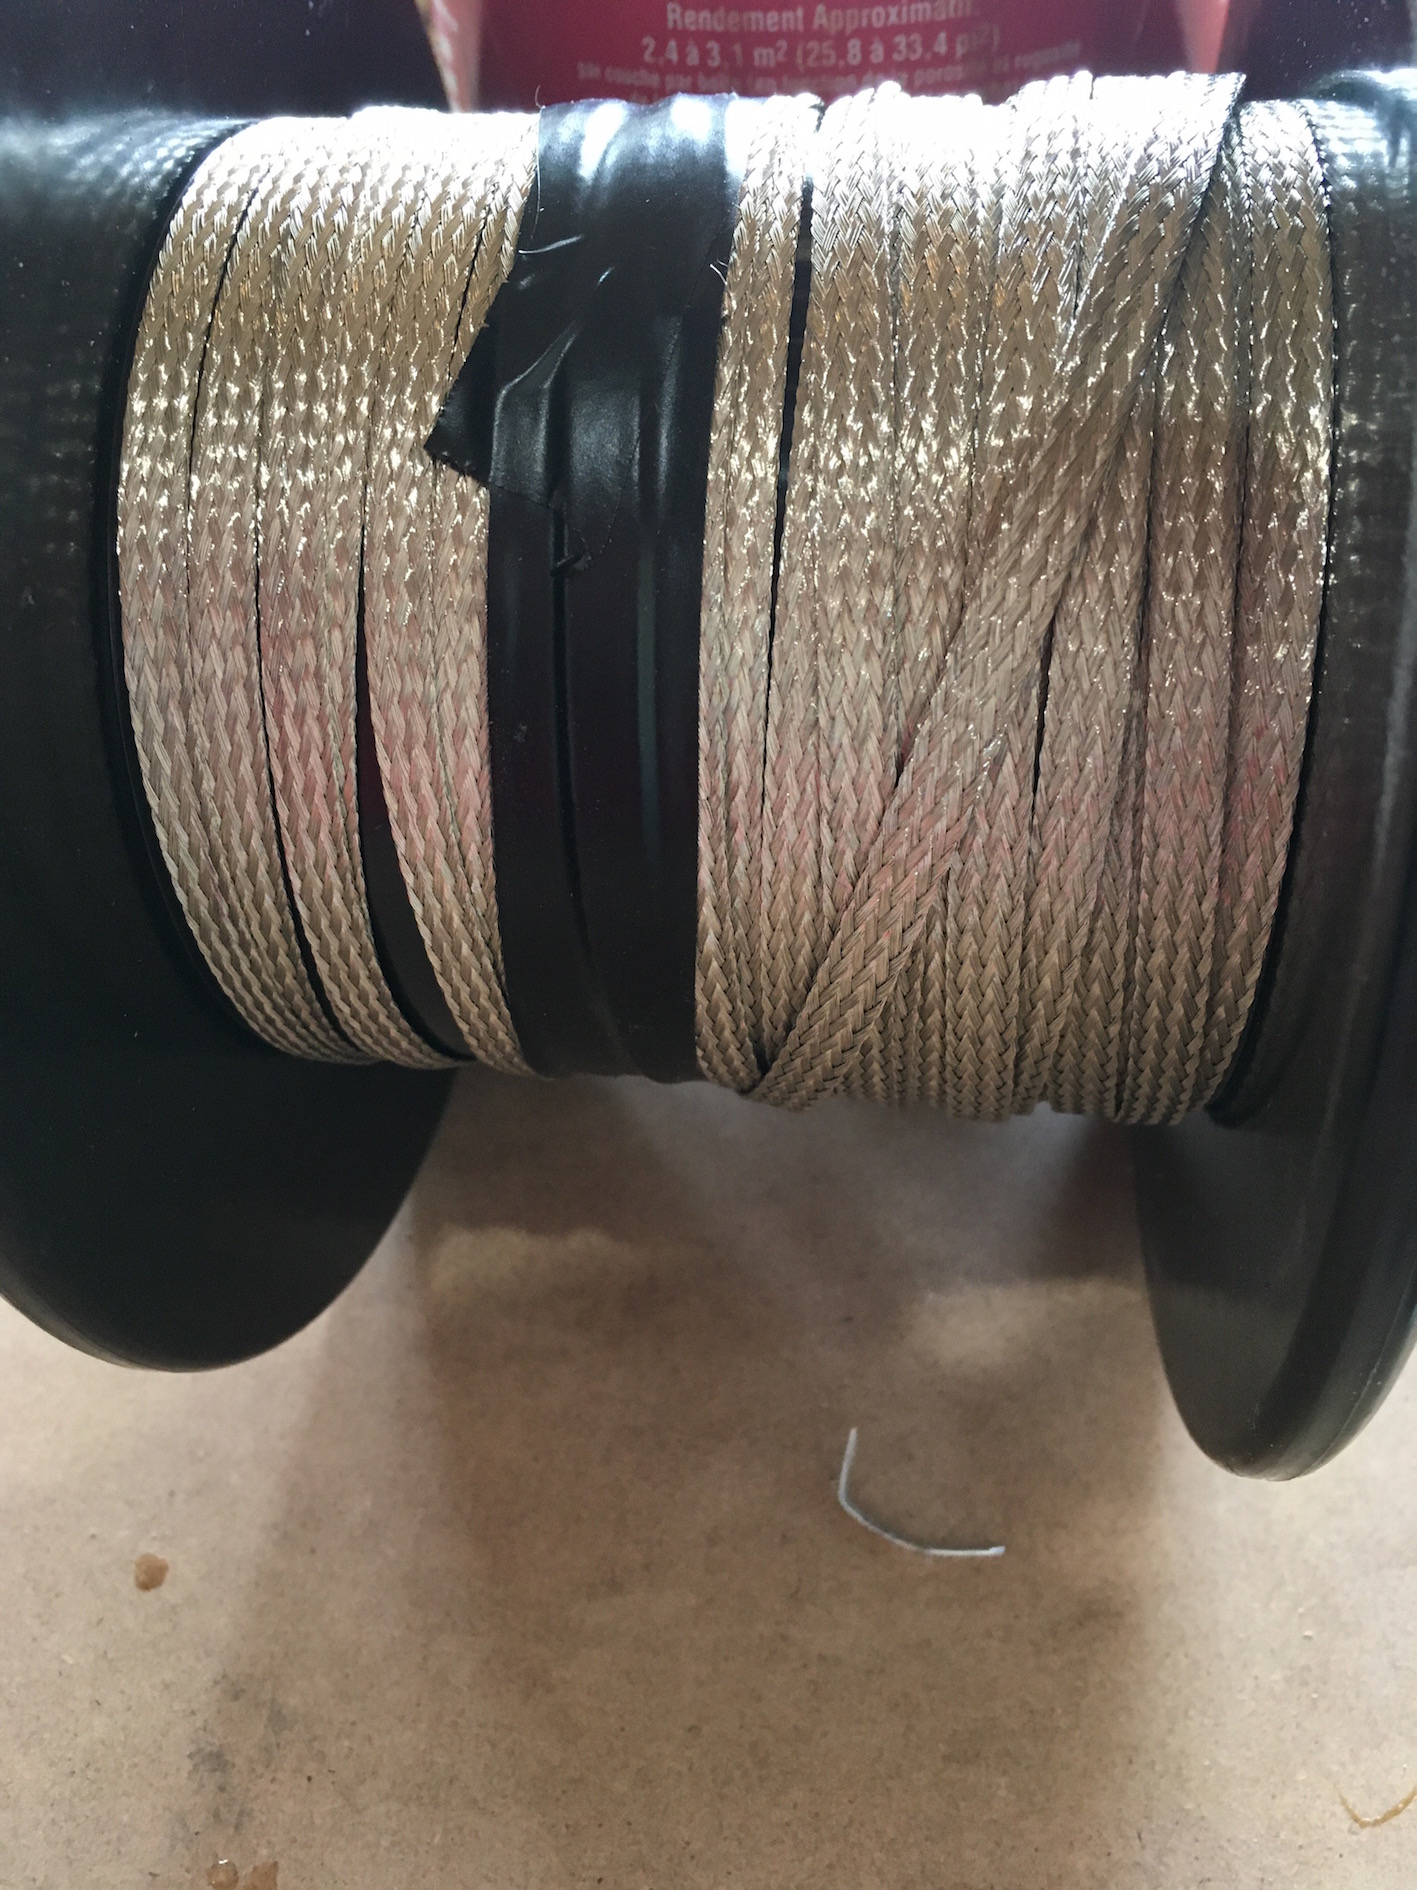
The track is all braided now and I think my estimated track length is pretty close because as you can see there is maybe a layer and a half left on the roll.


IMG_3237.jpg


Tonight I ordered a 55A Bulldog power supply from Rivergate and a 4 lane deadstrip lap counter from Trackmate. Tomorrow the track goes in the basement and I will do the final wiring.


  • Pappy, Zippity, Eddie Fleming and 1 other like this

#275 Jay Guard

Jay Guard

    Posting Leader

  • IRRA National Director
  • PipPipPipPipPipPipPip
  • 2,812 posts
  • Joined: 10-December 06
  • Gender:Male
  • Location:DeLand, FL

Posted 28 May 2020 - 07:44 PM

Steve:

I'm not sure how you are planning to connect the braids at each drop-thru under the track but here's how I did mine and it worked great, super quick and easy, also easy to undo and redo when needed.


post-359-0-27108500-1549075086.jpg


  • Zippity and William Bowden like this

Jay Guard

IRRA Board of Directors (2022-Present),

Gator Region Retro Racing Co-Director (2021-Present)

SERRA Co-Director (2009-2013)

IRRA BoD advisor (2007-2010)

Team Slick 7 member (1998-2001)

Way too serious Retro racer


Electric Dreams Online Shop