Jump to content


Photo

How to build slot car tracks


  • Please log in to reply
405 replies to this topic

#226 Steve Ogilvie

Steve Ogilvie

    Race Leader

  • Subscriber
  • PipPipPipPipPip
  • 630 posts
  • Joined: 17-November 14
  • Gender:Male
  • Location:Kincardine, Ontario, Canada

Posted 12 May 2020 - 09:18 PM

Thanks Ron and everyone else for the likes and replies. I am really enjoying doing this thread, nice to share everything.


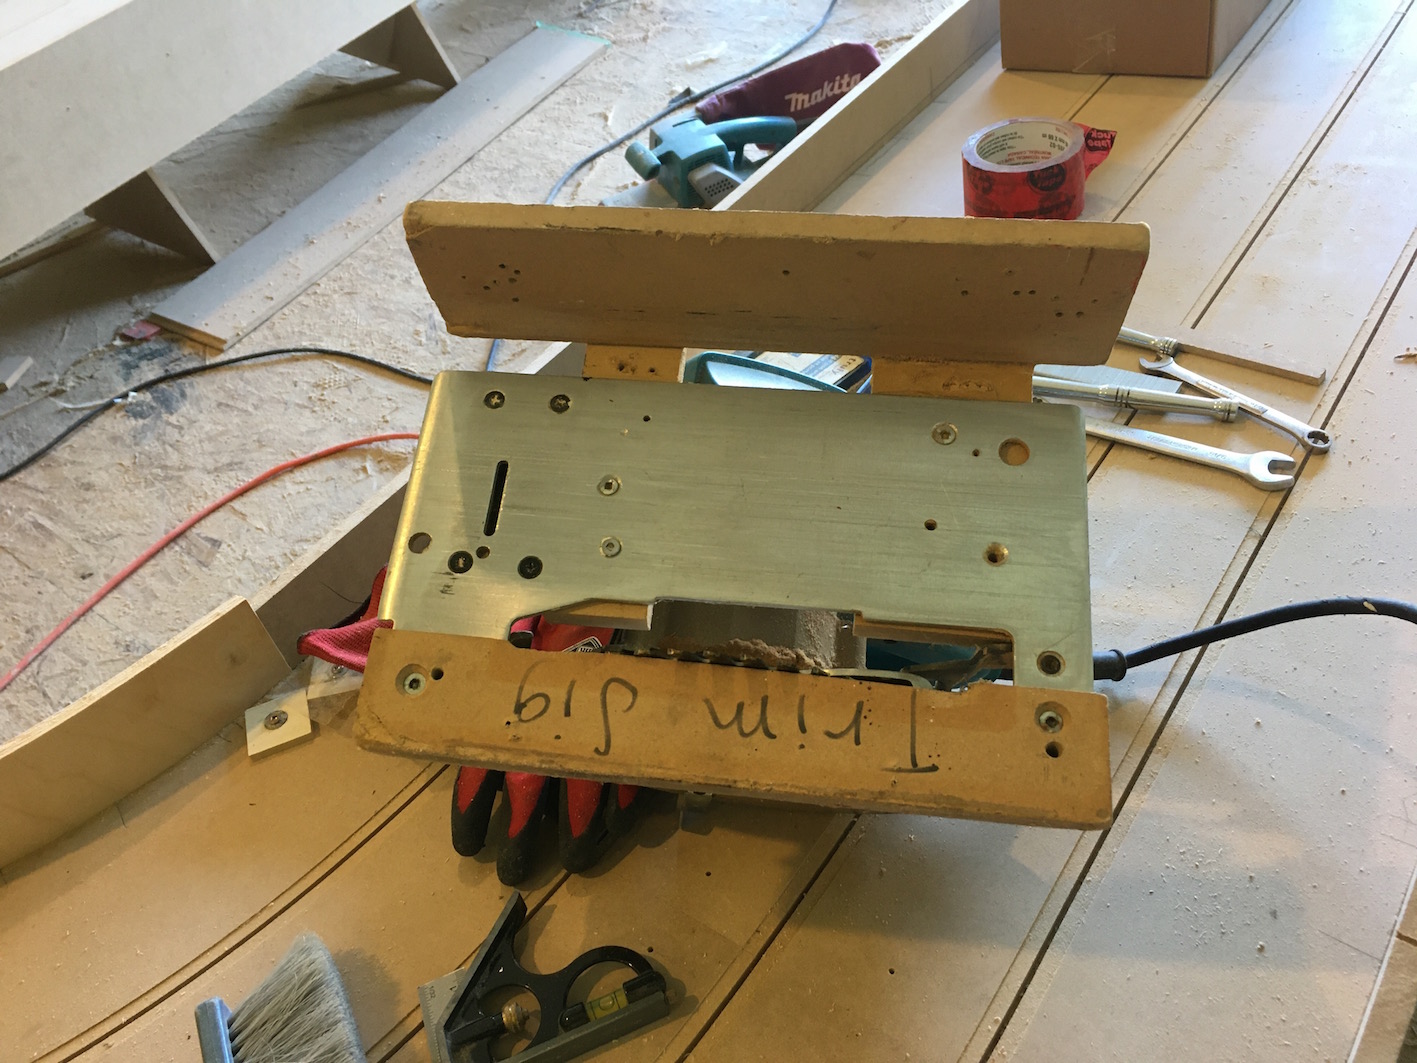
I dug out our old side wall trimmer today. This is something Brian Crosby and I came up with together to speed the process of trimming the top and bottoms of sidewalls. For cutting the bottom of the walls it works well. For trimming the tops of the walls it works well too but it is a little dangerous. Actually a lot dangerous. I will show some pictures of it but I will be using the router off my circle cutter to trim the tops of the walls.


IMG_3123.jpg


The board marked trim jig rides on the track surface while the blade of the saw trims the top of the side wall. There is nothing to protect the operator from the exposed spinning blade. I never allowed an employee to use this tool. I never hurt myself with it luckily but really not that eager to tempt fate again. It was much quicker than a router but I don't need to be in a big hurry these days.


IMG_3127.jpg


The attachment for trimming the bottom of the wall is much more civilized. It just hangs off the top of a trimmed wall and the operator is protected by the sidewall and the saw guard. When going around the inside of a corner you have to let more blade out but nothing can touch you. You have to be careful to make sure the saw does not ride up and ruin the wall but it is fairly stable. 


The router that is on the circle cutter cuts a 2" high sidewall with 1/4" carbide tipped bit. I used to have a jig to hang it off the wall to trim the bottom of the wall but it was really hard to keep the cut from creeping up. Normally I would have a dedicated router for top of wall trimming but I only have one of theses routers now. We used to wear out one of these routers every year.


I have a lot of stuff to clean up in the morning but I hope to be trimming walls by the afternoon and I will try to make another video.


  • Pappy, Bill from NH, Rob Voska and 4 others like this


#227 Steve Ogilvie

Steve Ogilvie

    Race Leader

  • Subscriber
  • PipPipPipPipPip
  • 630 posts
  • Joined: 17-November 14
  • Gender:Male
  • Location:Kincardine, Ontario, Canada

Posted 13 May 2020 - 06:49 PM

Trimmed all the walls today (except under the bridge) and I am uploading videos now. Everything went well, I used the router from the circle cutter to trim the tops of the walls and the circular saw attachment for bottom wall trimming. The plan for tomorrow is to build a drivers panel and maybe drill the rest of the holes in the joints. I will post at least one video tonight, I have 3 to upload. 


  • William Bowden likes this

#228 Steve Ogilvie

Steve Ogilvie

    Race Leader

  • Subscriber
  • PipPipPipPipPip
  • 630 posts
  • Joined: 17-November 14
  • Gender:Male
  • Location:Kincardine, Ontario, Canada

Posted 14 May 2020 - 05:56 AM

Here is the first video. Notice they do not have a title anymore, I am having a hard time figuring out the new uploader I am being forced to use.


(22) GOPR0085 - YouTube


  • Eddie Fleming and William Bowden like this

#229 Steve Ogilvie

Steve Ogilvie

    Race Leader

  • Subscriber
  • PipPipPipPipPip
  • 630 posts
  • Joined: 17-November 14
  • Gender:Male
  • Location:Kincardine, Ontario, Canada

Posted 14 May 2020 - 06:20 AM

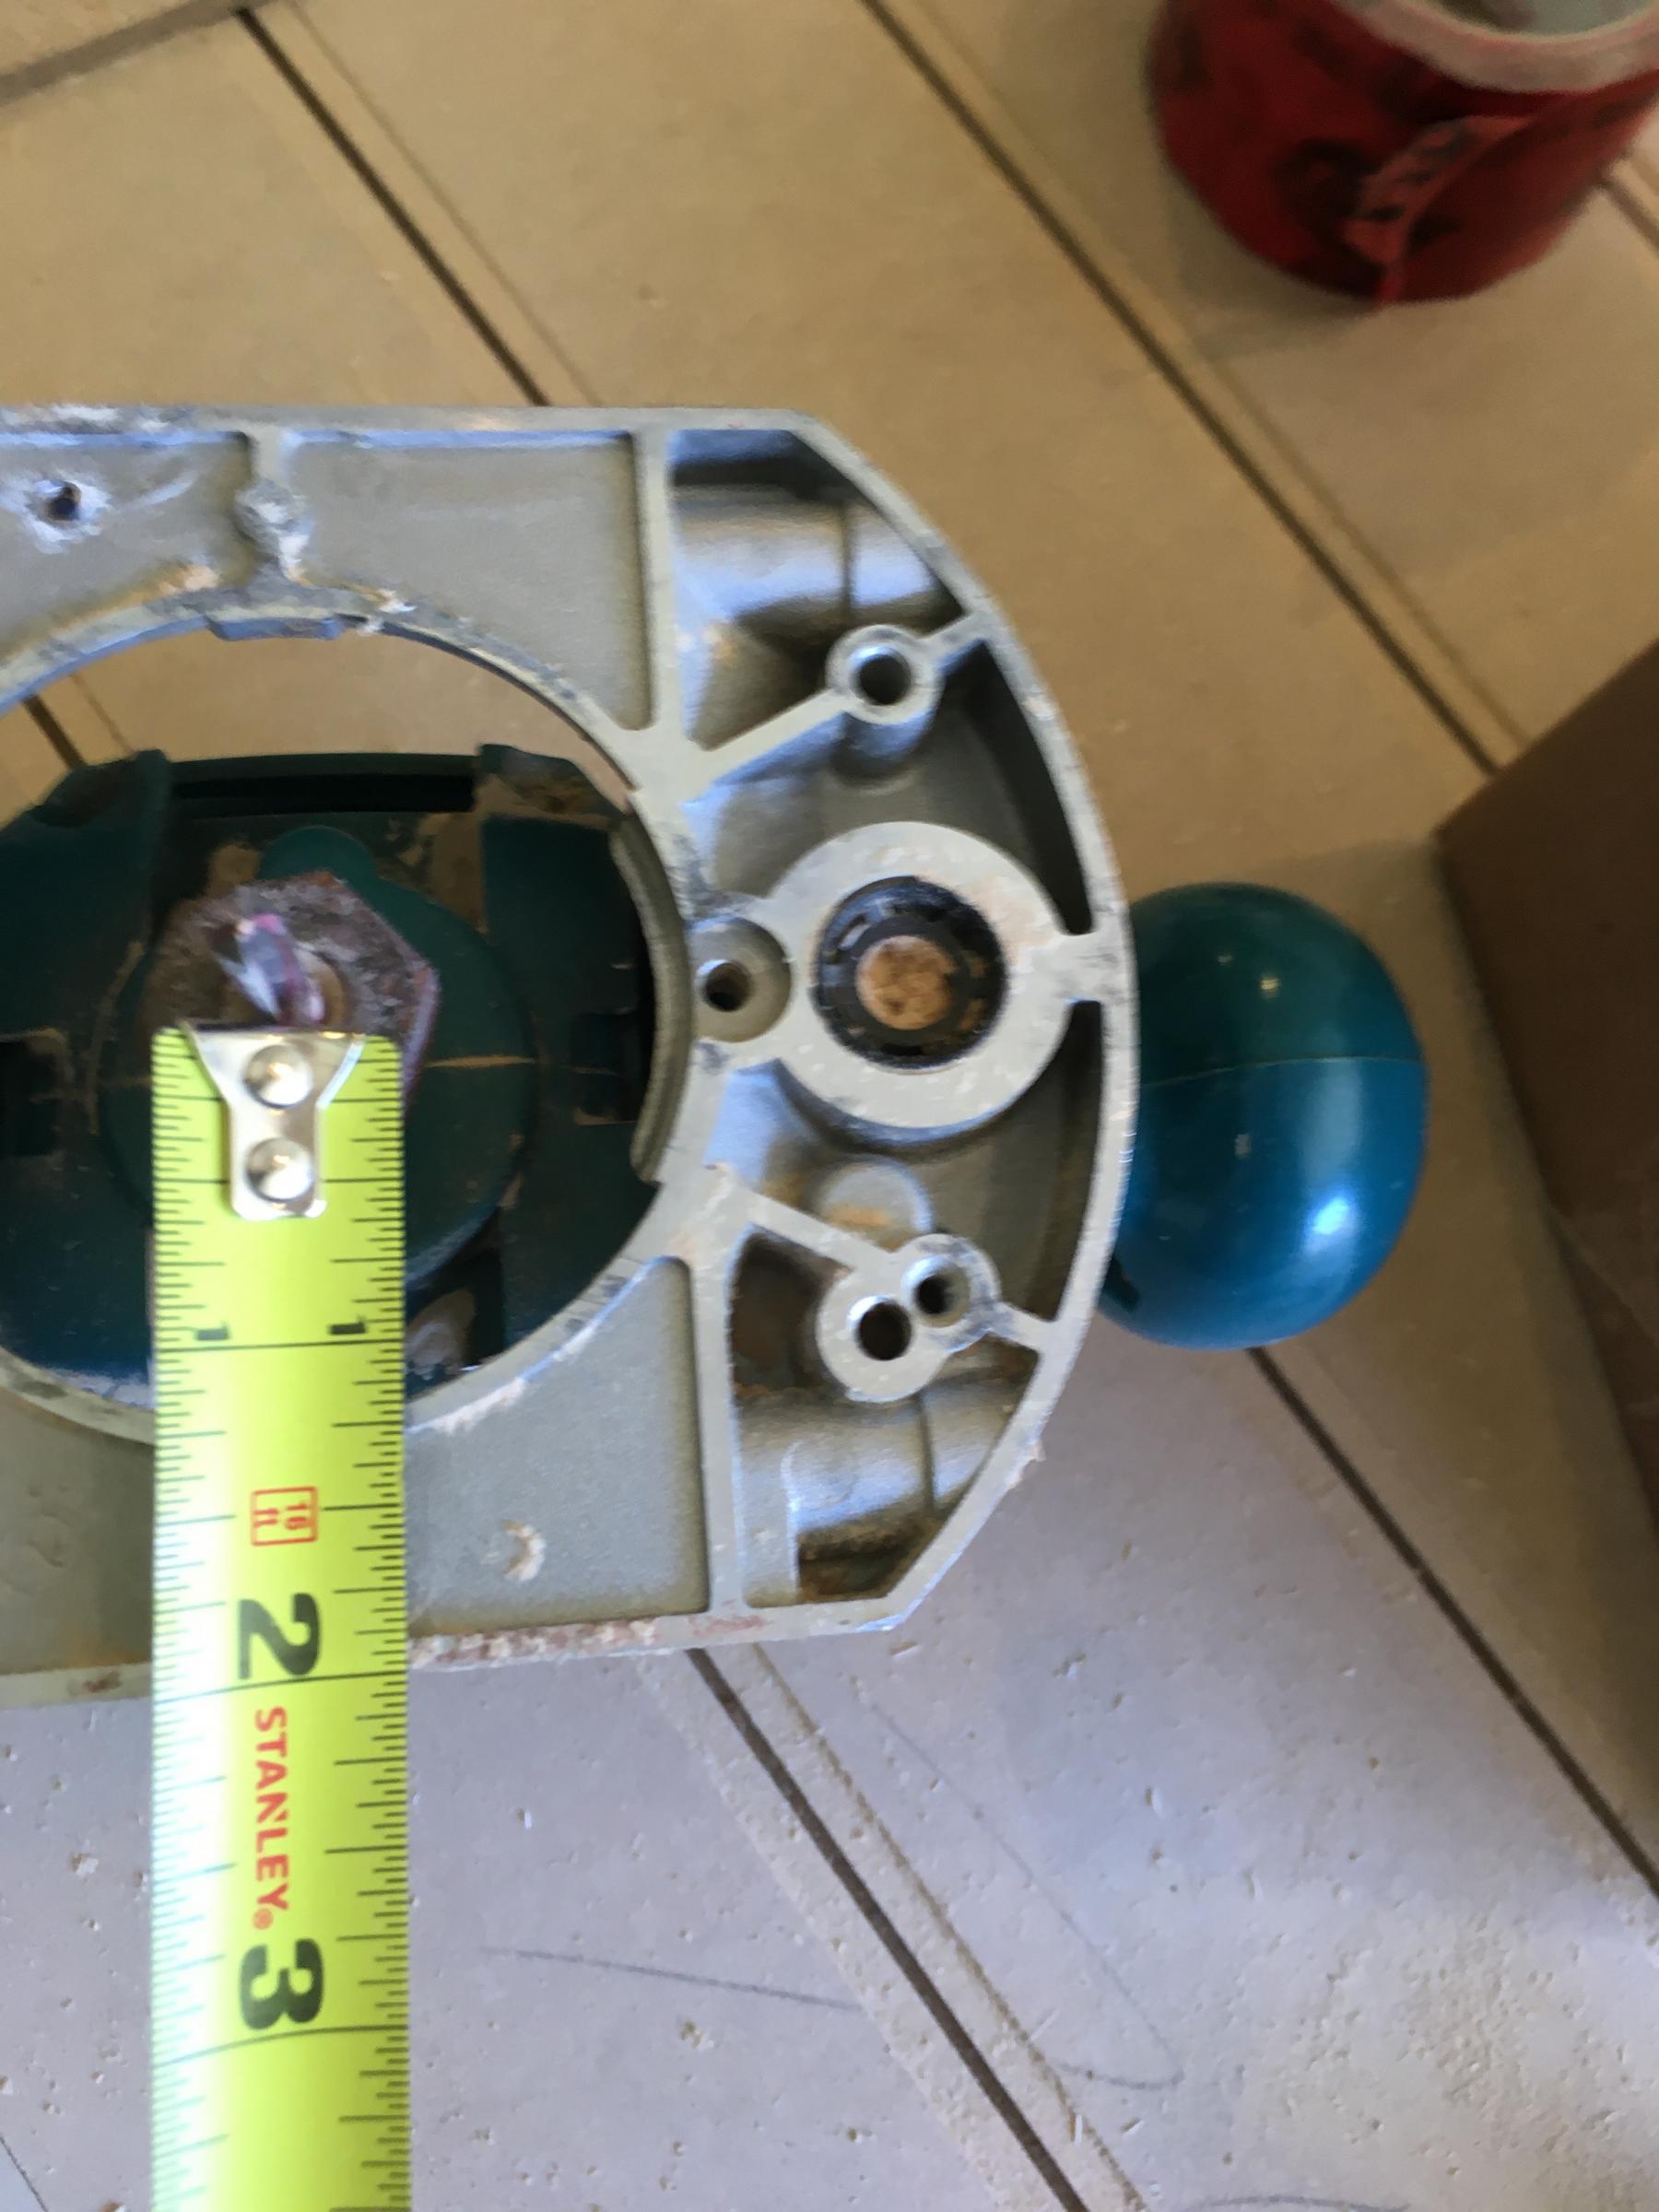
Just some shots of the  router removed from the circle cutter tool. I started with a brand new 2 flute 1/4" carbide tip bit. I did about half the outside of the track and switched to a single flute. When you are using a router as a saw, a single flute works much better.


IMG_3131.jpg


IMG_3130.jpg


IMG_3133.jpg


And the track as it is now:


61109095790__9284F8F9-7F89-45D3-AB85-53F5E3F5DBF2.jpg


  • Pappy, slotbaker, Tim Neja and 3 others like this

#230 MattD

MattD

    Posting Leader

  • Full Member
  • PipPipPipPipPipPipPip
  • 3,561 posts
  • Joined: 13-August 11
  • Gender:Male
  • Location:IN

Posted 14 May 2020 - 10:12 AM

Steve, I wish I had trimmed my sidewalls  with the router as you have.   That would have made a much better job of it.    I made a "U" shaped  guide  that laid on the track surface and went over the wall and down the outside of the wall.   I used to pencil a line all the way around the outside of the track.   I cut some with a sabre saw and it had a tendency to wander (could have been the operator).     I learned  that from cutting the outside of the corners to the sidewalls  the router makes the nicest cuts of all.


  • Steve Ogilvie and William Bowden like this

Matt Bishop


#231 Eddie Fleming

Eddie Fleming

    Posting Leader

  • Subscriber
  • PipPipPipPipPipPipPip
  • 2,919 posts
  • Joined: 27-April 14
  • Gender:Male
  • Location:Fayetteville, GA USA

Posted 14 May 2020 - 10:44 AM

It is probably somewhere in this thread but what is the footprint of the track?


Eddie Fleming

#232 Steve Ogilvie

Steve Ogilvie

    Race Leader

  • Subscriber
  • PipPipPipPipPip
  • 630 posts
  • Joined: 17-November 14
  • Gender:Male
  • Location:Kincardine, Ontario, Canada

Posted 14 May 2020 - 11:18 AM

it is 22' long overall plus about 2.5" with the sidewalls on. Across the bank turn is a little over 8' and that dimension carries down to where the small turns are. The donut is a little over 7'diameter. I always draw my tracks up ignoring the sidewalls because it is just easier. And if you do not have room for an extra inch or two you probably don't have room for a track.


  • Pappy, Eddie Fleming and William Bowden like this

#233 Steve Ogilvie

Steve Ogilvie

    Race Leader

  • Subscriber
  • PipPipPipPipPip
  • 630 posts
  • Joined: 17-November 14
  • Gender:Male
  • Location:Kincardine, Ontario, Canada

Posted 14 May 2020 - 04:14 PM

(22) Steve Ogilvie Builds a Slot Car Track - YouTube   more trimming


  • Eddie Fleming, William Bowden, Dale Tomczyk and 1 other like this

#234 Steve Ogilvie

Steve Ogilvie

    Race Leader

  • Subscriber
  • PipPipPipPipPip
  • 630 posts
  • Joined: 17-November 14
  • Gender:Male
  • Location:Kincardine, Ontario, Canada

Posted 14 May 2020 - 06:37 PM

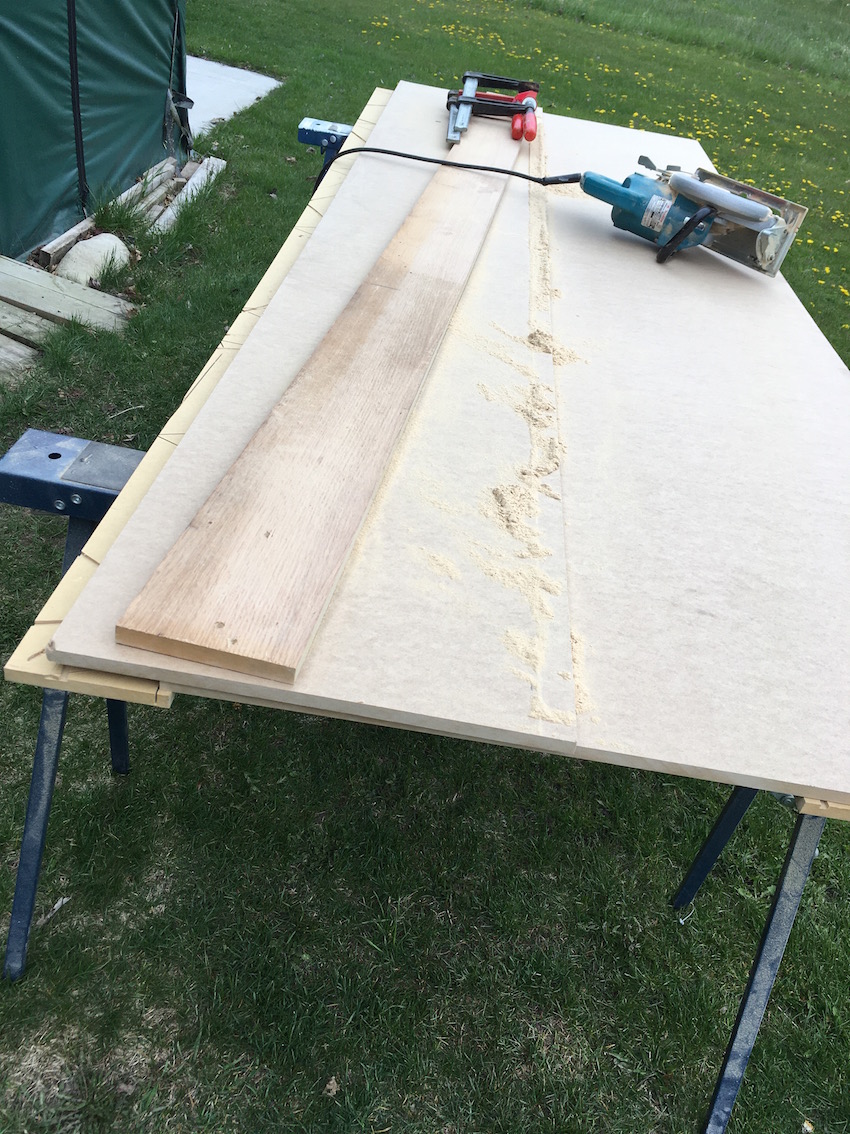
Today I did not get in the shed til the afternoon and I built the driver panel. The hardest part of that was to drag the last full sheet of 1/2" mdf out of the back of the shed and set it up on saw horses. Then I cut 16" off of it lengthwise with a circular saw and a straight edge. I do not have enough room in the shed to slide a 4x8 sheet on the table saw easily. A 16" strip is nice to cut all the pieces up on the saw. 


IMG_3135.jpg


IMG_3136.jpg


IMG_3137.jpg


IMG_3139.jpg


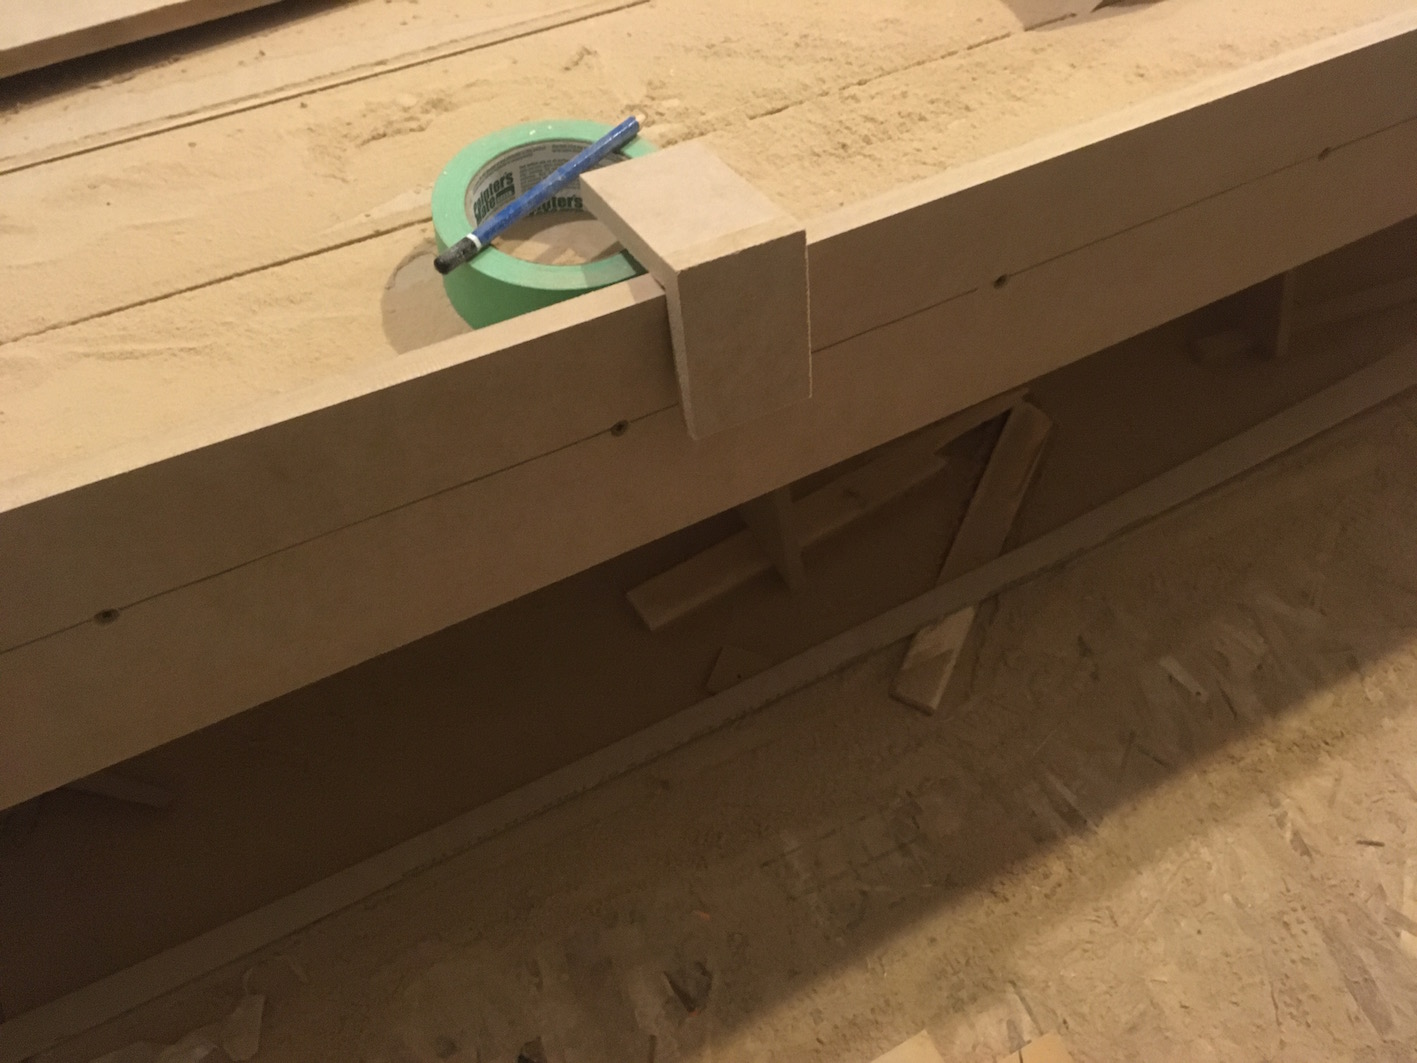
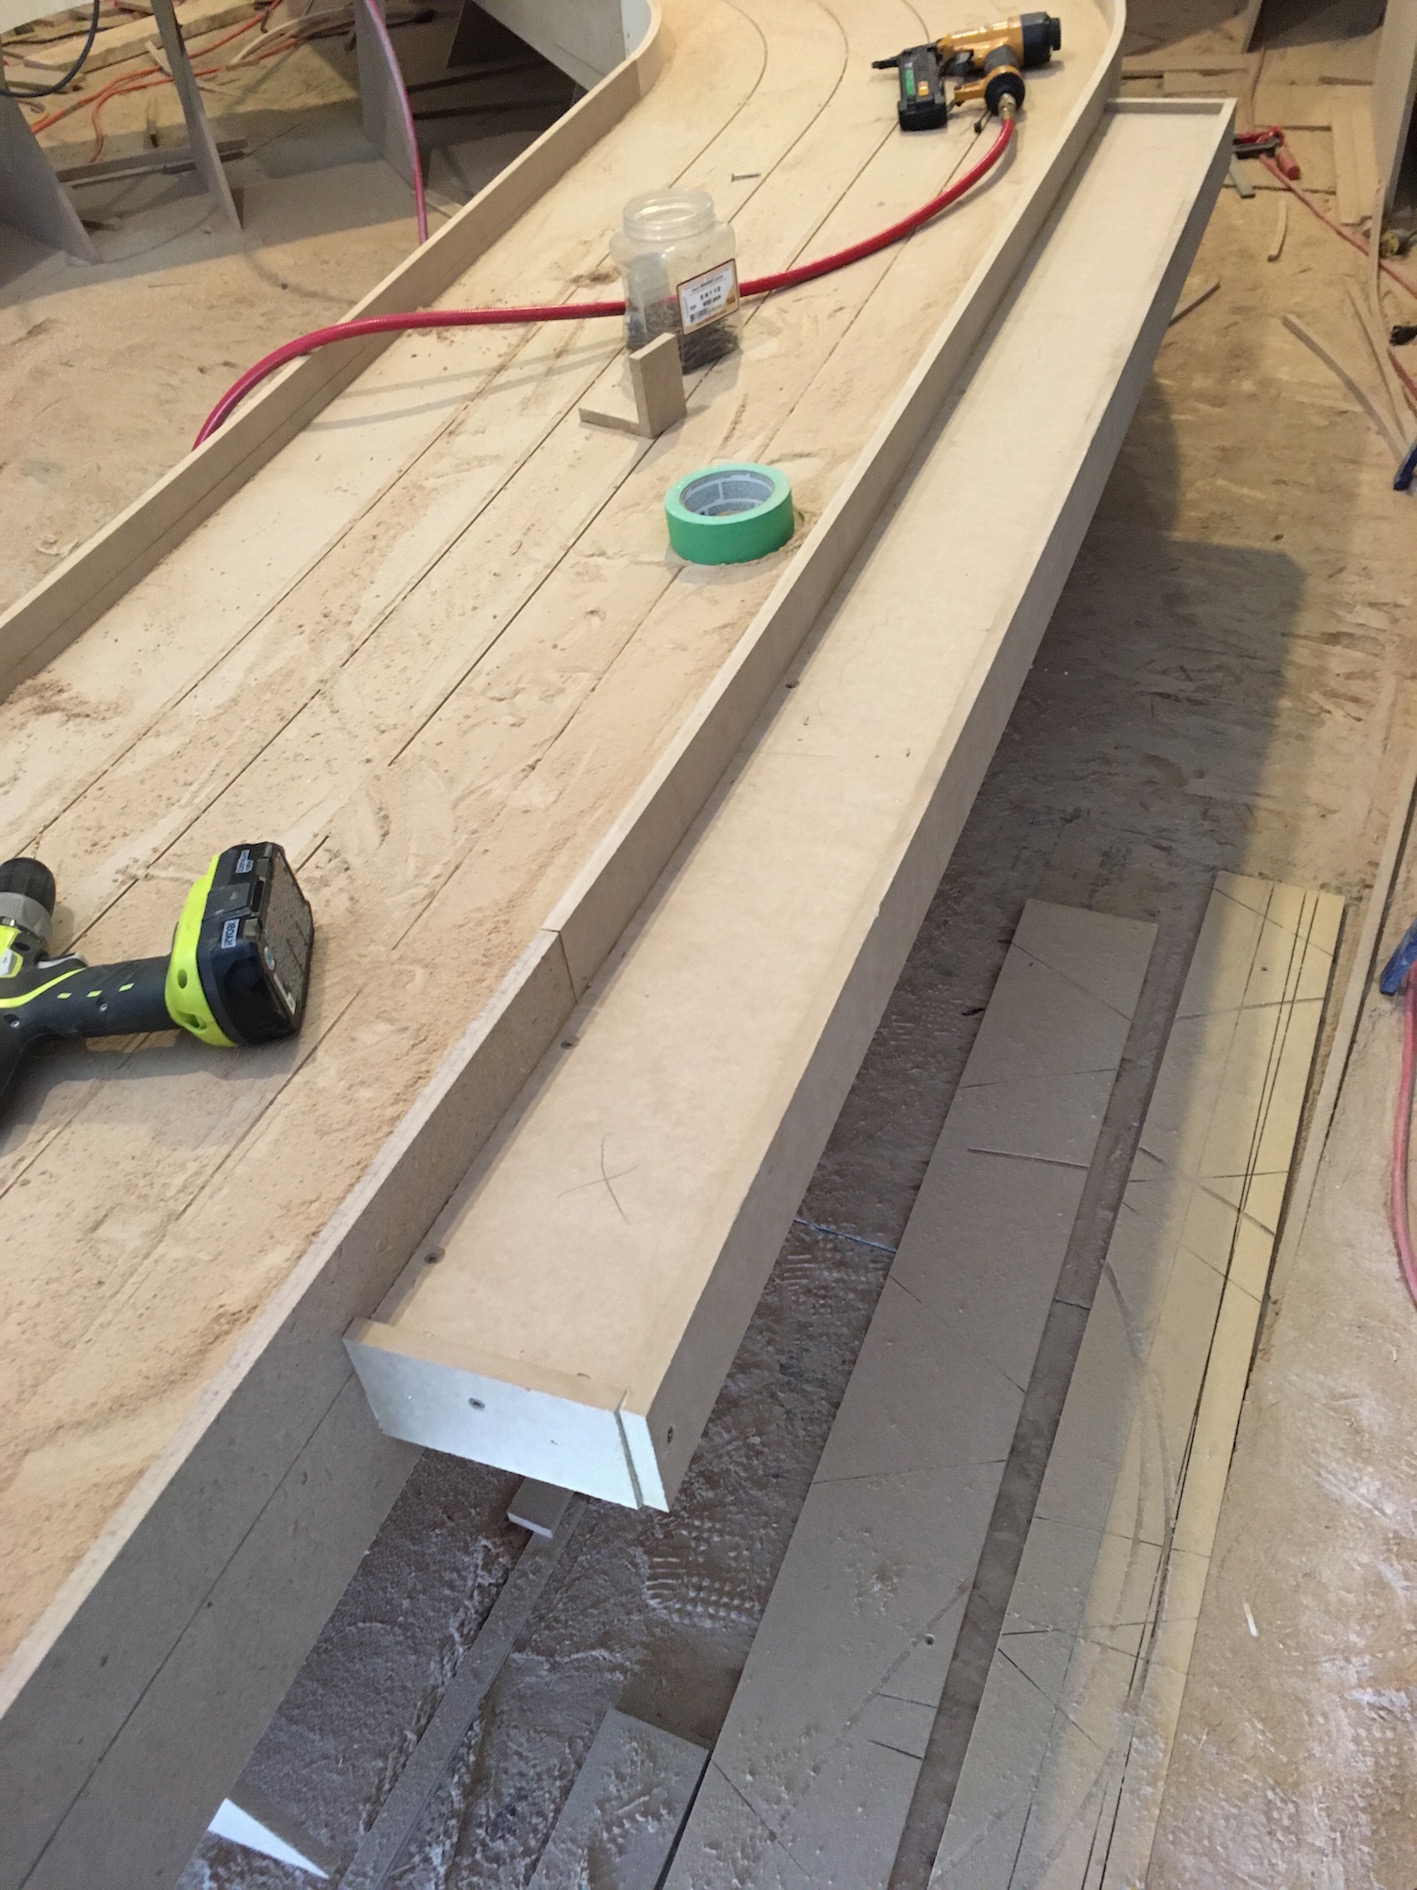
I use the short side of an L bracket to mark a line that follows the contour of the sidewall. That distance (2.5") makes the top of the panel even with the surface of the track. Has the added bonus of covering all the screws and screw holes on the sidewall so you do not have to fill them. One of the 2" strips is glued and stapled and screwed to that line. Then the 5 1/2" piece is glued stapled  and countersunk screwed to the 2" piece on the wall. I made the panel 72" long. Underside support pieces are cut to length and glued and stapled under the top of the panel. Then the 3" piece is cut to length and glued and stapled on to the front of the panel. Screws are added as needed to keep it line up. Short pieces are added of 3" to box the ends in.


  • MattD and William Bowden like this

#235 Steve Ogilvie

Steve Ogilvie

    Race Leader

  • Subscriber
  • PipPipPipPipPip
  • 630 posts
  • Joined: 17-November 14
  • Gender:Male
  • Location:Kincardine, Ontario, Canada

Posted 14 May 2020 - 06:59 PM

IMG_3149.jpg


IMG_3155.jpg


After the glue drys I will take my belt sander and round off the corners. That is why I am not too worried that the one end did not match perfectly. When I mix up some bondo to fill some gaps on the sidewalls I will touch the driver panel up too. I do not use bondo on the surface of the track, the small holes get filled with polyfilla or drywall mud whatever I have laying around.


  • Pappy, slotbaker, Tim Neja and 3 others like this

#236 Steve Ogilvie

Steve Ogilvie

    Race Leader

  • Subscriber
  • PipPipPipPipPip
  • 630 posts
  • Joined: 17-November 14
  • Gender:Male
  • Location:Kincardine, Ontario, Canada

Posted 14 May 2020 - 07:58 PM

A short video showing the driver's panel.


(24) IMG 3156 - YouTube


  • slotbaker, MattD, Eddie Fleming and 1 other like this

#237 omahaslot

omahaslot

    Rookie Keyboard Racer

  • Full Member
  • Pip
  • 1 posts
  • Joined: 14-May 20
  • Gender:Male
  • Location:Omaha, NE

Posted 15 May 2020 - 06:59 AM

Dumb question, but how do you decide where to separate the completed track so that you can move it? Do you wait to lay the braid down until after it's in its final location? 


Sorry, a noob here


Dustin


  • Zippity, William Bowden and Gak like this
Dustin Culton

#238 Steve Ogilvie

Steve Ogilvie

    Race Leader

  • Subscriber
  • PipPipPipPipPip
  • 630 posts
  • Joined: 17-November 14
  • Gender:Male
  • Location:Kincardine, Ontario, Canada

Posted 15 May 2020 - 09:40 AM

Good question. Positioning of joints are decided by getting the biggest track section I can cut out of a 4' x 8' sheet of mdf and putting a joint at the end of each piece.On this track there are 7 sections and each joint will be drilled and then the track will be taken apart and the holes get slotted. Normally I drill the holes, paint the track, pull it apart slot the holes and braid it section by section. But in this case there is no way I can get the shed clean enough to paint the track. So I am going to drill the holes, do the final sanding, clean it as best I can, take it apart slot the holes and move it in to my son's garage, put it back together, paint it then take it apart again and braid it. Then take it down to the basement, wire it up and then put it back together. A bit of extra work because I don't have a decent sized workshop to do it all at once.


  But I always braid a track with it taken apart, section by section. 


  • William Bowden likes this

#239 William Bowden

William Bowden

    Rookie Keyboard Racer

  • Full Member
  • Pip
  • 2 posts
  • Joined: 06-February 17
  • Gender:Male
  • Location:Courtice, Ontario, Canada

Posted 15 May 2020 - 03:59 PM

Steve:


Could you tell me the size of crown staples you use?


Are they 7/32-Inch x 3/4 Crown Finish Staple or 1/4-inch x 3/4?


Thanks,

William


#240 Steve Ogilvie

Steve Ogilvie

    Race Leader

  • Subscriber
  • PipPipPipPipPip
  • 630 posts
  • Joined: 17-November 14
  • Gender:Male
  • Location:Kincardine, Ontario, Canada

Posted 15 May 2020 - 06:51 PM

For attaching the leg supports and L brackets to track sections they are 3/4" by 1/4". For the sidewalls they are 1" by 1/4". I would rather use 1.25" for the sidewalls but I did not have any left. Thanks for the reply   Steve


  • William Bowden likes this

#241 Steve Ogilvie

Steve Ogilvie

    Race Leader

  • Subscriber
  • PipPipPipPipPip
  • 630 posts
  • Joined: 17-November 14
  • Gender:Male
  • Location:Kincardine, Ontario, Canada

Posted 15 May 2020 - 07:08 PM

IMG_3164.jpg


  • Tim Neja, Lou E, Eddie Fleming and 2 others like this

#242 William Bowden

William Bowden

    Rookie Keyboard Racer

  • Full Member
  • Pip
  • 2 posts
  • Joined: 06-February 17
  • Gender:Male
  • Location:Courtice, Ontario, Canada

Posted 15 May 2020 - 07:12 PM

Time to clean shop


  • Steve Ogilvie likes this

#243 Steve Ogilvie

Steve Ogilvie

    Race Leader

  • Subscriber
  • PipPipPipPipPip
  • 630 posts
  • Joined: 17-November 14
  • Gender:Male
  • Location:Kincardine, Ontario, Canada

Posted 16 May 2020 - 06:26 AM

Yes once I get the track out of the way, cleaning up is the plan. Uploading a video now showing taking apart the completed track for the first time.


  • William Bowden likes this

#244 Steve Ogilvie

Steve Ogilvie

    Race Leader

  • Subscriber
  • PipPipPipPipPip
  • 630 posts
  • Joined: 17-November 14
  • Gender:Male
  • Location:Kincardine, Ontario, Canada

Posted 16 May 2020 - 10:40 AM

(24) Steve Ogilvie Builds a Slot Car Track-Taking the track apart - YouTube


  • slotbaker, Zippity, MattD and 3 others like this

#245 Steve Ogilvie

Steve Ogilvie

    Race Leader

  • Subscriber
  • PipPipPipPipPip
  • 630 posts
  • Joined: 17-November 14
  • Gender:Male
  • Location:Kincardine, Ontario, Canada

Posted 16 May 2020 - 06:44 PM

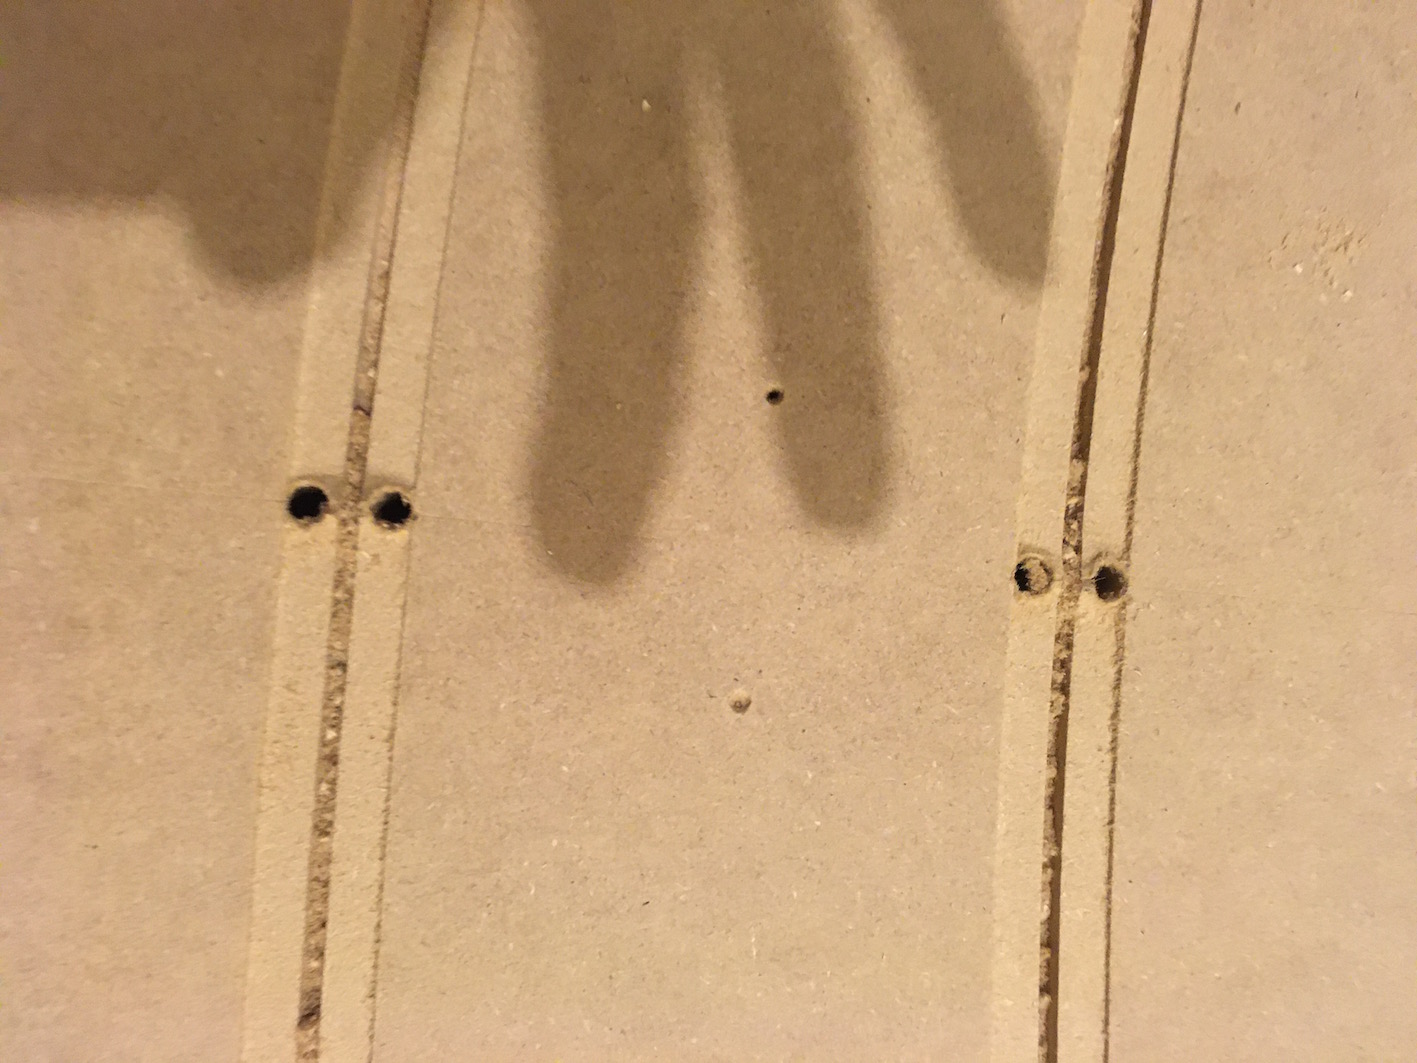
When you drill down through the centre of the joints for the braid drops, and you have done a good job of making and fitting your sections together, you are going to have a joint that looks like this:


IMG_3158.jpg


you are not going to be able to clearly see the joint line so to get the holes right in the middle you need to draws lines on the lands so you can get the holes drilled perfectly. Another way to drill the holes is to go ahead and paint the track and then after the paint is dry loosen the joint bolts leaving about an eighth inch slack, bump the joints apart with a good bump and then you have a good line to drill the holes. With the dry paint you will not get the small bumps that show up when you drill bare wood. I remove those by running the relief cutter over the joint and hand sand.


You drill down on the centre of the relief but tilt the drill so the hole goes away from the bottom of the slot.


IMG_3160.jpg


IMG_3159.jpg

Attached Images

  • IMG_3158.jpg

  • Pappy, slotbaker, Zippity and 2 others like this

#246 Steve Ogilvie

Steve Ogilvie

    Race Leader

  • Subscriber
  • PipPipPipPipPip
  • 630 posts
  • Joined: 17-November 14
  • Gender:Male
  • Location:Kincardine, Ontario, Canada

Posted 16 May 2020 - 07:10 PM

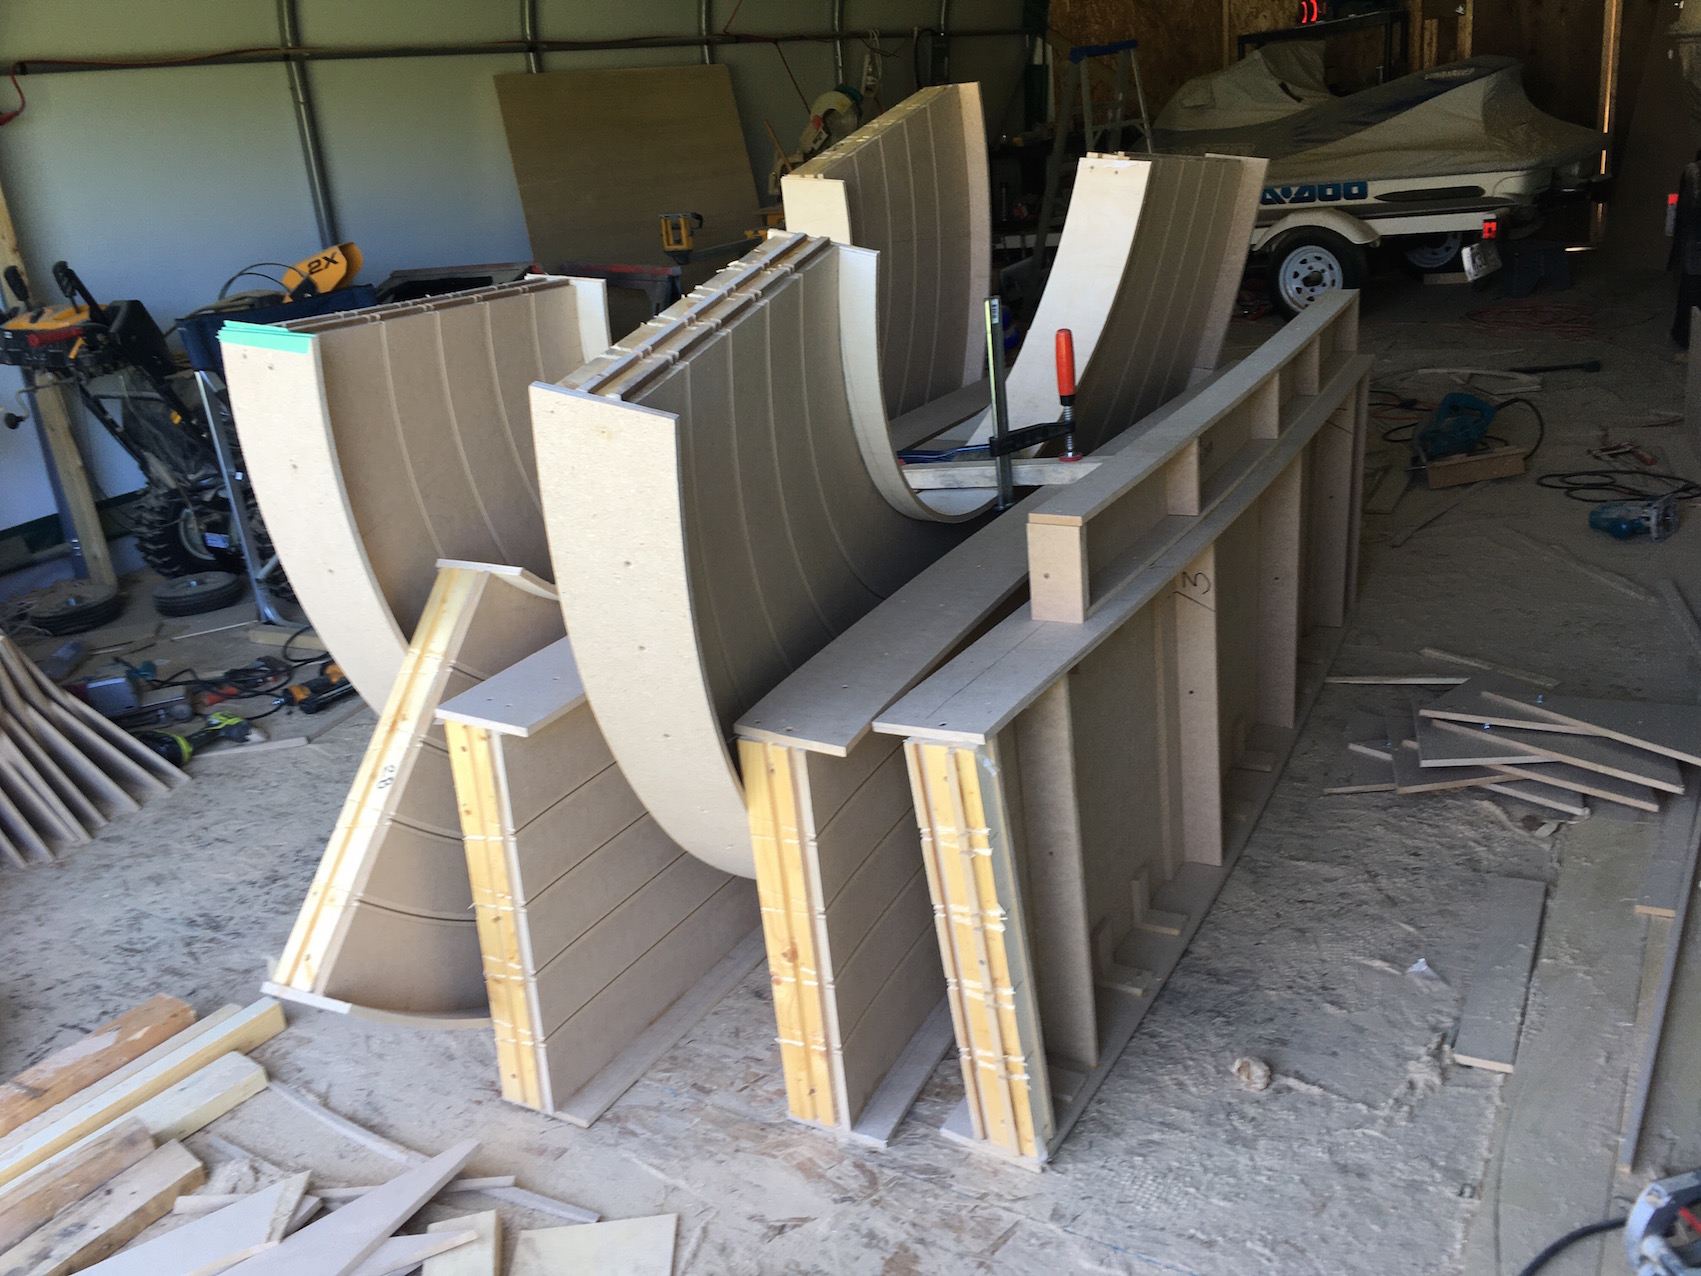
After the track is taken apart and you are ready to ship or move it to it's final location, this is the only way you ship it or store it to prevent damage. Takes up very little room and the track can not warp or change shape.


IMG_3175.jpg


If you are crating it up or putting in a truck or container, drill pilot holes through the sidewalls below the track surface in to the truck or container floor. Use 1.25" length #8 screws and no one will care. Instead of using clamps accross the top use strips of mdf and  screws to join the sections together in the middle. The screws will not shake loose during transport, but clamps will. There is only one rule for packing anything to transport that you do not want to get damaged- If it can move it will move.


  • Pappy, slotbaker, Zippity and 2 others like this

#247 Steve Ogilvie

Steve Ogilvie

    Race Leader

  • Subscriber
  • PipPipPipPipPip
  • 630 posts
  • Joined: 17-November 14
  • Gender:Male
  • Location:Kincardine, Ontario, Canada

Posted 16 May 2020 - 07:48 PM

(24) IMG 3163 - YouTube


  • slotbaker and William Bowden like this

#248 Mr. M

Mr. M

    Race Leader

  • Full Member
  • PipPipPipPipPip
  • 582 posts
  • Joined: 04-July 11
  • Gender:Male
  • Location:Florida Space Coast

Posted 17 May 2020 - 03:35 PM

What do you do to the slot to get it ready to use? The one time I raced on a new track we were changing guides every heat at our monthly 27 race circa 1984.


Chris McCarty

#249 Steve Ogilvie

Steve Ogilvie

    Race Leader

  • Subscriber
  • PipPipPipPipPip
  • 630 posts
  • Joined: 17-November 14
  • Gender:Male
  • Location:Kincardine, Ontario, Canada

Posted 17 May 2020 - 04:51 PM

Slots have to wear in, not so bad with MDF but the old particle board tracks would eat guide flags for about a month. So what I do is try to chamfer the top of the slots on the corners to prevent the top of the slot from chipping, chamfer the braid lands if they are rough to minimize tire wear. I usually paint the slots with clear urethane paint to strengthen the slots in the corners, but that does make the brake in period take a little longer but for long term durability it is worth it.


While the track is bedding in and people are wearing out guide flags, they are coating the wear side of the slot with plastic. I have not seen it take more than a couple of weeks for a track to wear in. Depending on how many people hung around to try out a new track after  I got it running, the track was pretty well worn in by the time I left.


  • Zippity, Rotorranch, Eddie Fleming and 2 others like this

#250 Mr. M

Mr. M

    Race Leader

  • Full Member
  • PipPipPipPipPip
  • 582 posts
  • Joined: 04-July 11
  • Gender:Male
  • Location:Florida Space Coast

Posted 18 May 2020 - 04:59 PM

My one experience was with a Hasse resurfaced original Deluxe American Orange Monarch. He took out all the bumps and increased  the bank a bit. Damn that thing was fast! Yes, in a couple of weeks the guide wear was back to normal and I think it was particle board in the early 80s.


Chris McCarty


Electric Dreams Online Shop