![]()

NAMRA - Jose Rodriguez Jr. inspired Ferrari P4 Can-Am build
#26

Posted 13 October 2021 - 08:07 PM
Paul Wolcott
#27

Posted 14 October 2021 - 07:35 PM
#28

Posted 14 October 2021 - 07:35 PM
#29

Posted 14 October 2021 - 07:58 PM
Thanks for chiming in Pablo and Mark.
I did need to add a couple of details to the drop arm. Adding its down stop now is much easier:
Since this chassis won't be disassembled for parts after its first race, I want to keep the hinges from rusting up solid over time. Others have their methods but I prefer the "BLOW HOLE":
The hinge tube can be blown out with 100 psi of compressed air followed by a high pressure WD40 flush. ![]()
- Alchemist and Peter Horvath like this
Rick Thigpen
Check out Steve Okeefe's great web site at its new home here at Slotblog:
The Independent Scratchbuilder
There's much more to come...
#30

Posted 14 October 2021 - 08:52 PM
Looks like a gold bar ![]()
- Isaac S. likes this
Paul Wolcott
#31

Posted 14 October 2021 - 08:59 PM
Love that drop arm. ![]()
#32

Posted 15 October 2021 - 08:12 PM
The drop arm is much easier to buff up before the plumber rails are installed. It's interesting, I have a tumbler and was one of the first to share that method here on Slotblog that Mike Steube and PdL taught me. I guess I must enjoy the process of hand polishing because that's all I've been doing for quite a while.
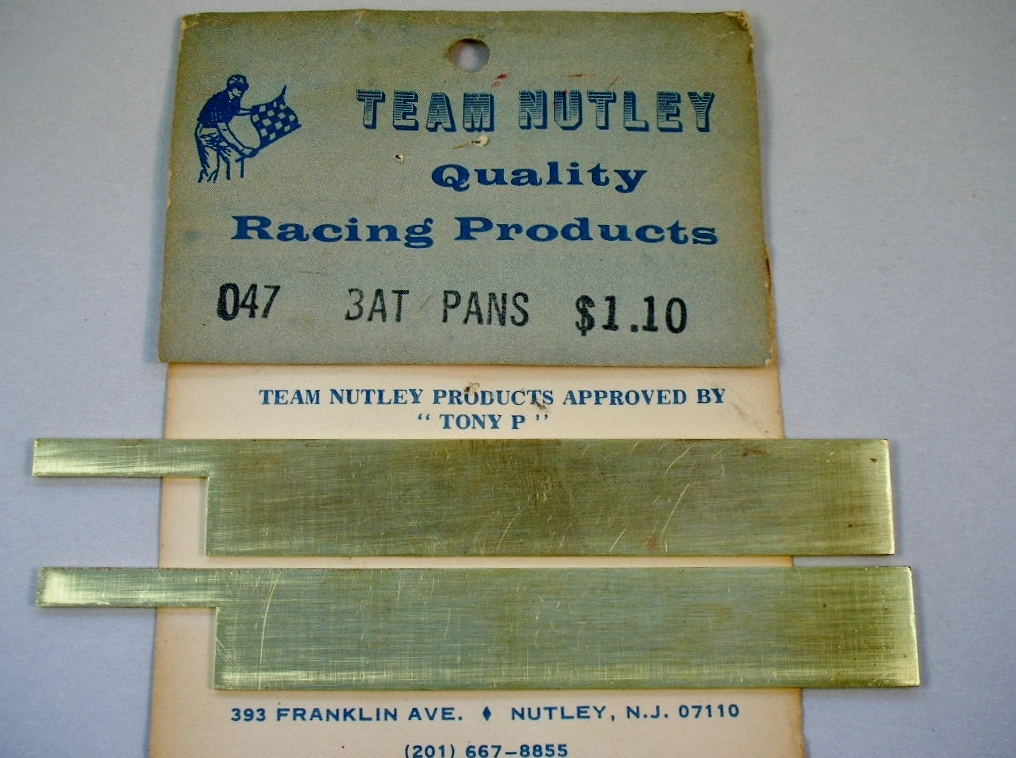
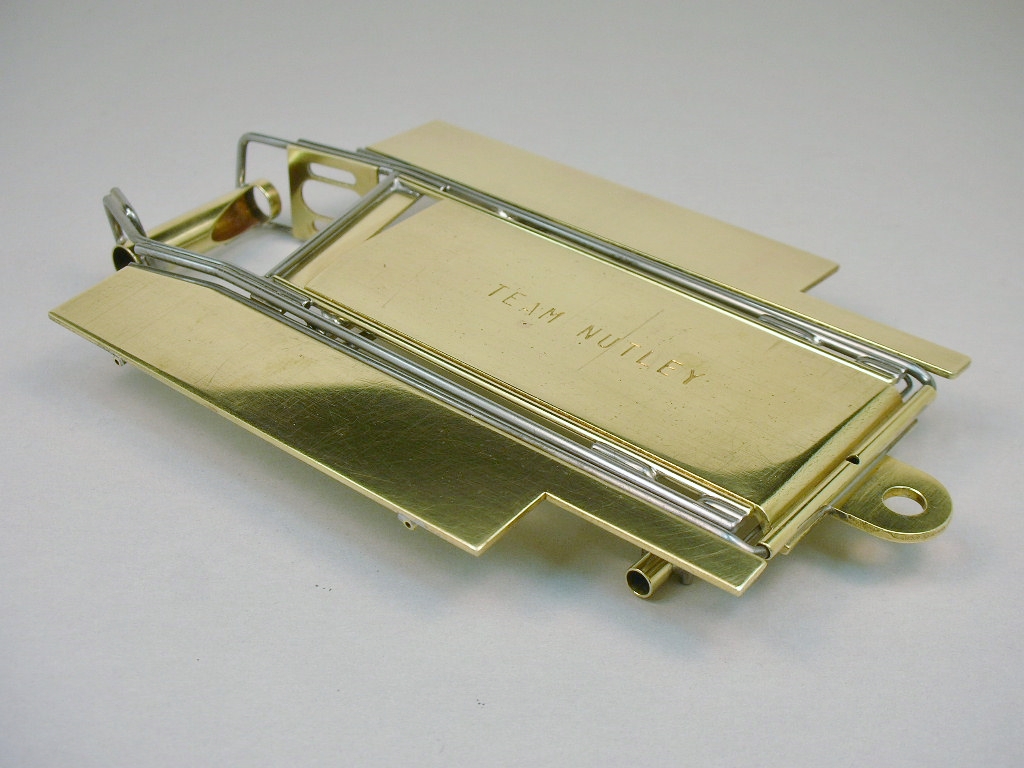
Speaking of plumber rails, I need the bat pans before I can make them. I'm using another tonyp approved Team Nutley part. These puppies are .047" thick and along with the 1/16" thick drop arm will give this car plenty of "road hugging weight":
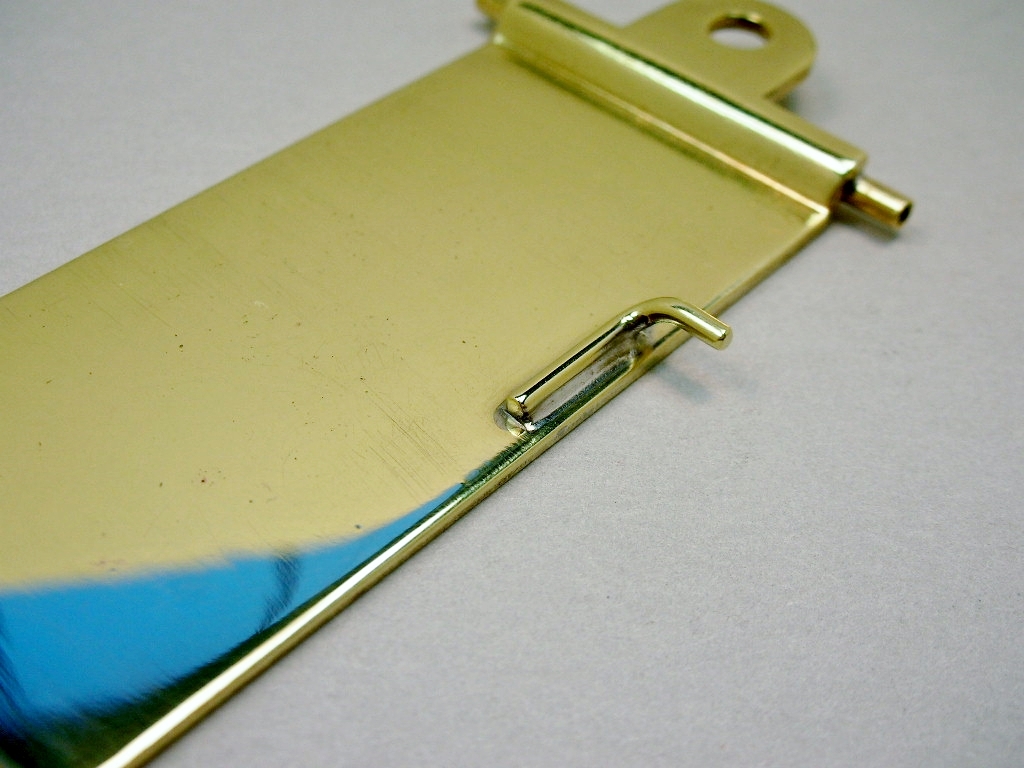
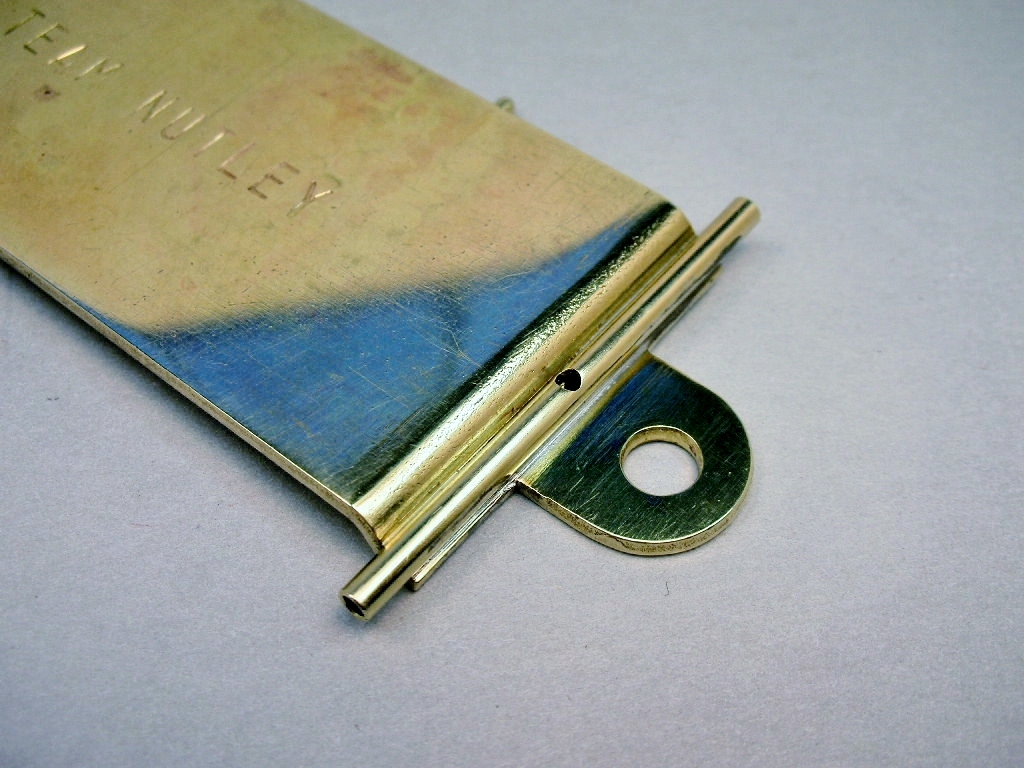
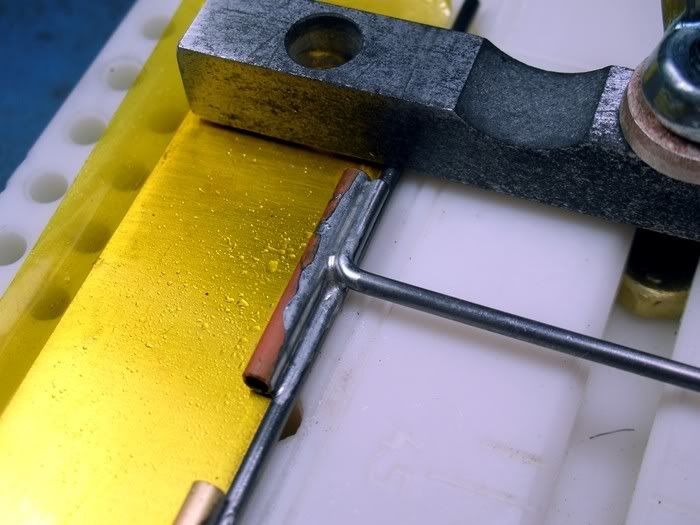
As was common during this cars time, the pans were not cut out for hinge tubes. They sit on top of the pan. I punked out and used Kapton tape on the pans to make sure the hinges didn't get accidently soldered to them. I don't imagine the Pro builders needed to use it as they built a chassis the night before the race on a motel room coffee table.....just skill:
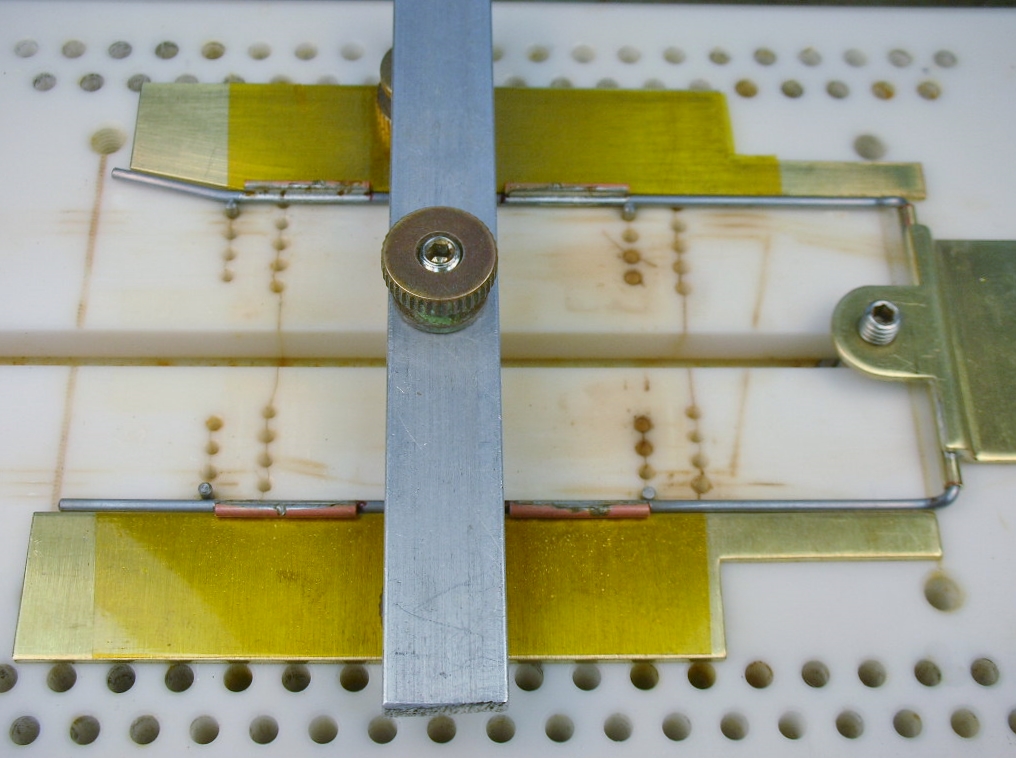
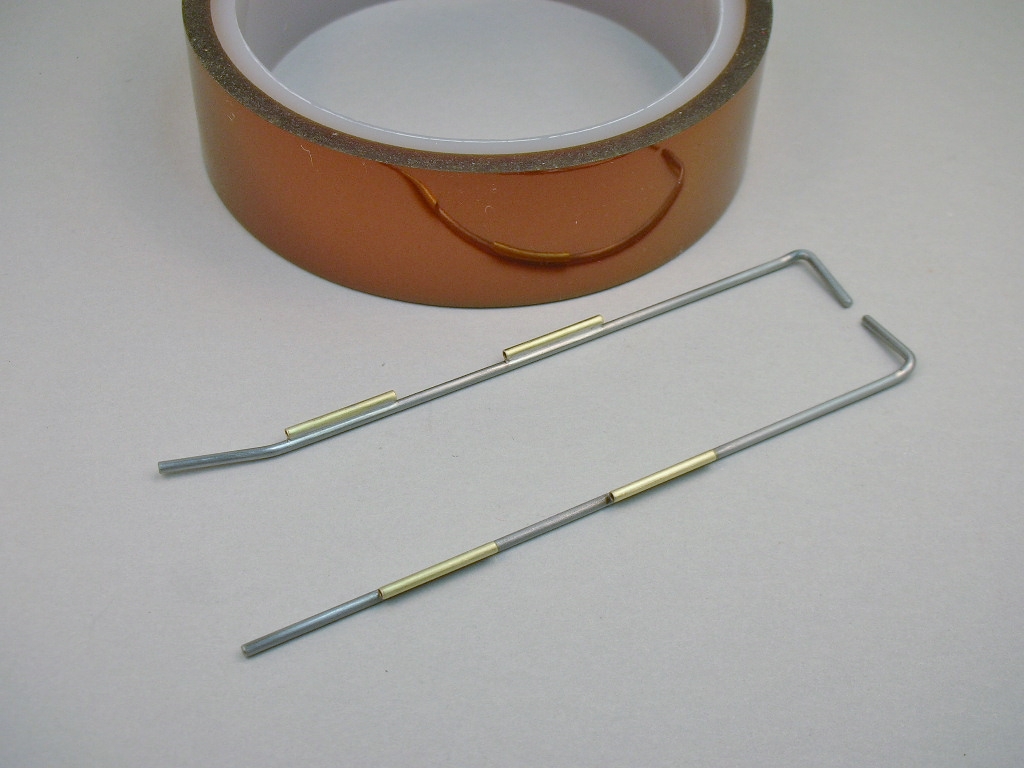
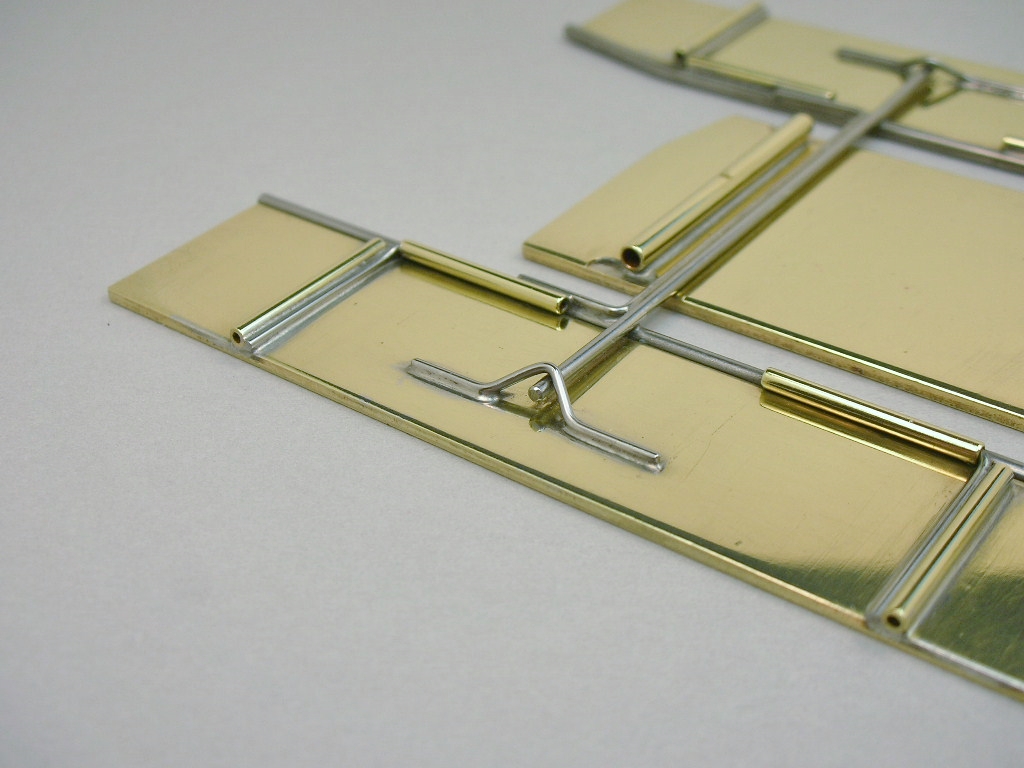
Here are those plumber rails with the pan hinges soldered on along with that roll of Kapton tape:
- Tex and Peter Horvath like this
Rick Thigpen
Check out Steve Okeefe's great web site at its new home here at Slotblog:
The Independent Scratchbuilder
There's much more to come...
#33

Posted 16 October 2021 - 07:36 AM
#34

Posted 16 October 2021 - 07:52 AM
![]()
#35

Posted 16 October 2021 - 09:14 AM
Never heard of Kapton tape before. ![]()
???-2/31/23
Requiescat in Pace
#36

Posted 16 October 2021 - 09:51 AM
#37

Posted 16 October 2021 - 10:20 AM
Kapton high temperature tape is handy stuff even if you're not planning on a space flight like Captain Kirk.
I first showed using it here in a 2008 build:
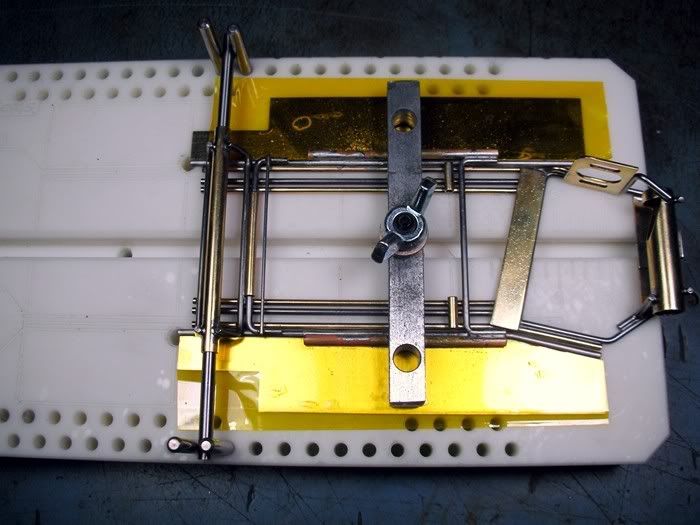
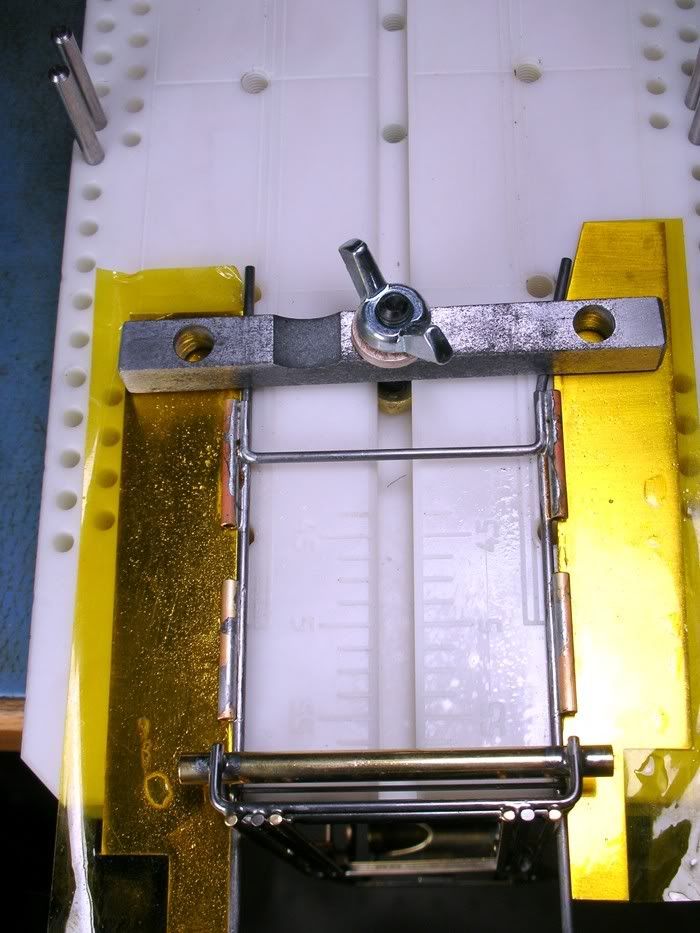
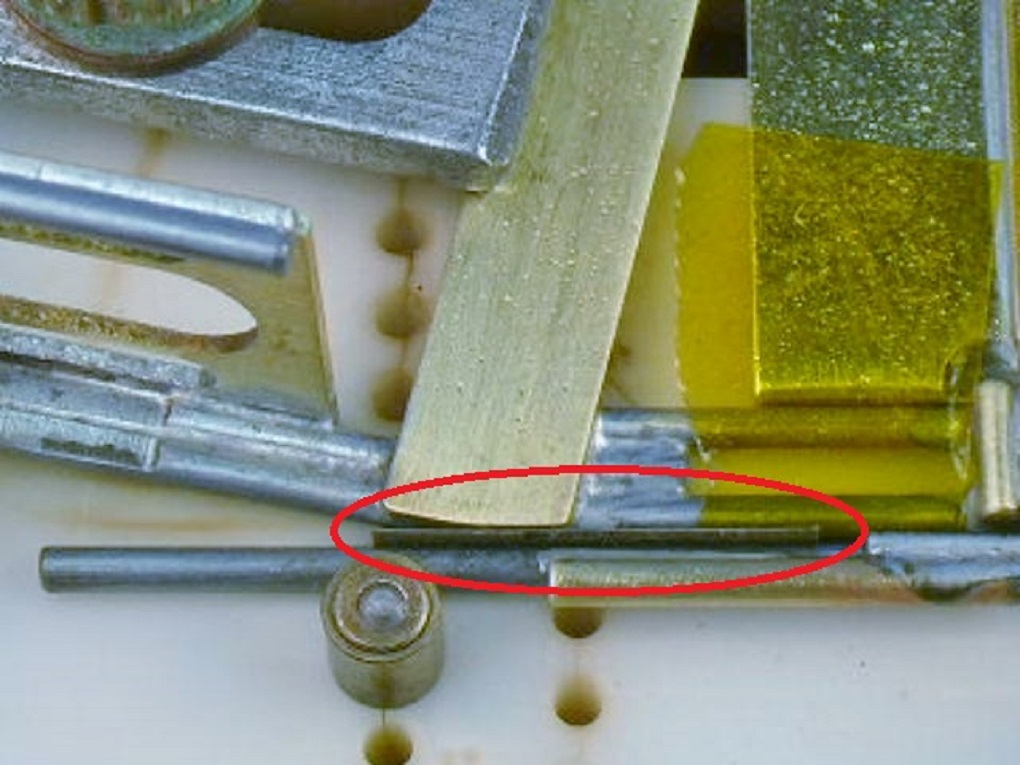
I'm trying out my new Rick's chassis jig. I need to clamp the chassis center section and plumber rails down flat against the block. Then slide the pans against the plumber rails and set the pan hinge tubes ON TOP of the pans. I'm using Rick's guide tongue stud and wing nut and a 5/16" wide clamp I made. The clamp also sets the space between the tubes (notice the funny transparent amber colored tape on the pans
more on that later ):
I couldn't get the tip of the iron between the clamp and drop arm pivot tubes so I just soldered the pan tubes to the plumber cross piece for now:
To solder the rest of the pan tube I clamped the plumber rails only and let center section hang down off the end of the bench (This new jig is coming in handy).
I used Mike Steube's technique of soldering the tube in halves, watching the color of the solder so that it didn't melt the full length of the joint. It worked great. THANKS MIKE!( You do have Mike's chassis building video right?)
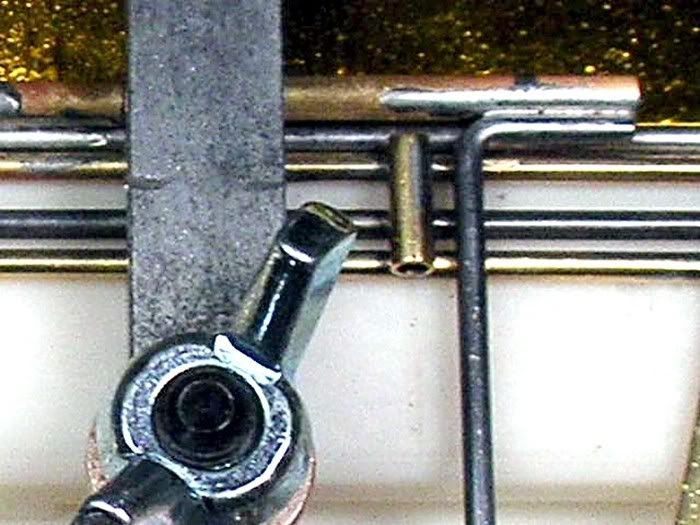
The pans do not have a cut out for the hinge tubes, they sit on top of the pans. The first time I soldered the pan tubes onto the plumber rails some solder wicked down and also soldered the tubes onto the pans
. I hate it when that happens
. Now for the funny colored tape. It goes by a trade name of Kapton and is very high temperature and very thin. You can Google Kapton and find out were to get it cheapest. It is somewhat expensive but I think the one roll I bought should last the rest of my life. Here is a link to one source:
Kapton Tape
Here is the bottom of the pan hinge tube. See where the solder wicked down? It would have soldered the tube to the pan again for sure. The Kapton tape didn't even have any marks in it from the heat of soldering:
Time to spiff up the collateral damage with some sanding and polishing

- Pablo, Tex, Phil Smith and 1 other like this
Rick Thigpen
Check out Steve Okeefe's great web site at its new home here at Slotblog:
The Independent Scratchbuilder
There's much more to come...
#38

Posted 16 October 2021 - 02:09 PM
#39

Posted 16 October 2021 - 08:07 PM
You bet Mark. Kapton tape came in handy again attaching the 2 plumber rails together.
I used 3 little strips of 400 grit sandpaper between the plumber rail and frame on both sides. It gives just a little side to side plumber movement:
Ready to hang those Team Nutley pans:
- Peter Horvath likes this
Rick Thigpen
Check out Steve Okeefe's great web site at its new home here at Slotblog:
The Independent Scratchbuilder
There's much more to come...
#40

Posted 16 October 2021 - 08:52 PM
Those little bits of sandpaper are smart. I will have to remember that.
#41

Posted 19 October 2021 - 08:51 PM
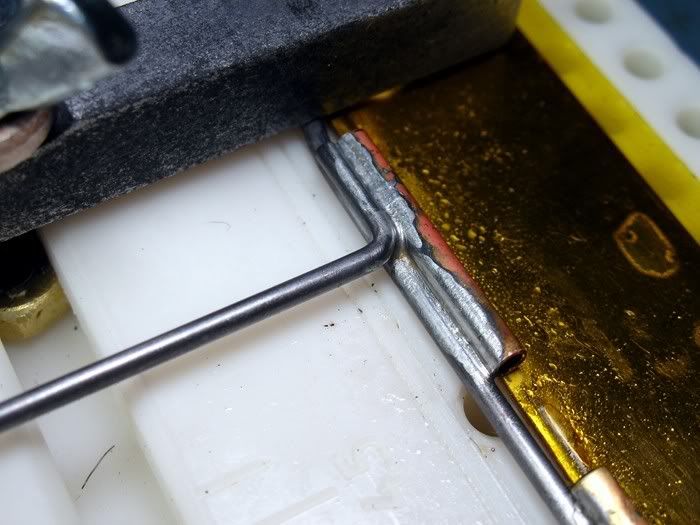
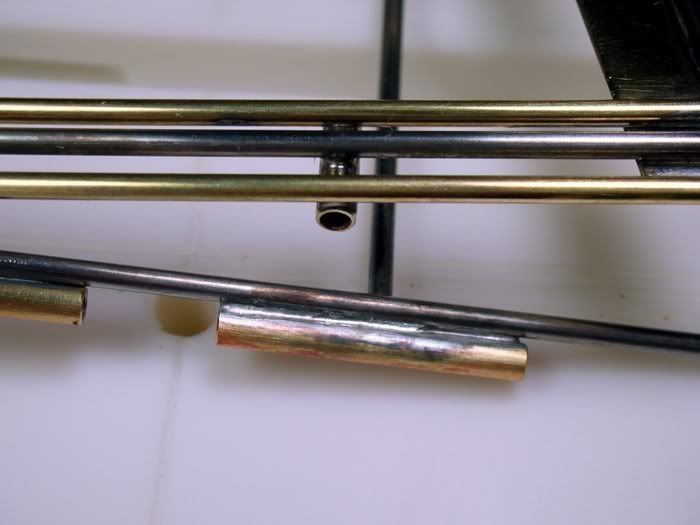
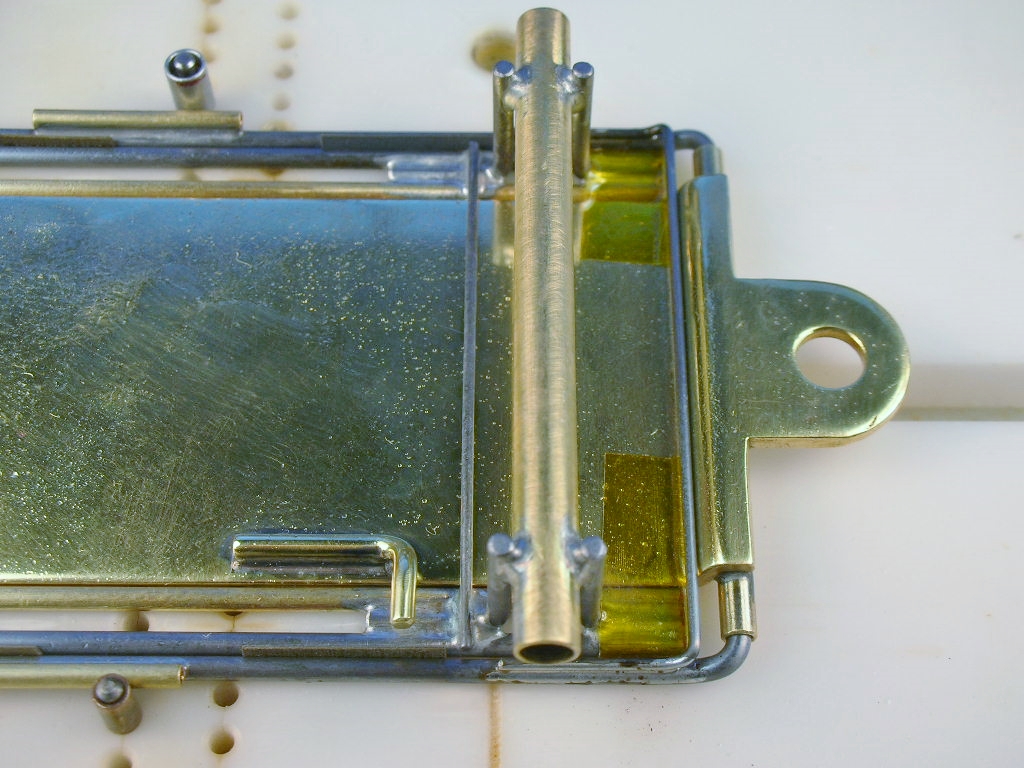
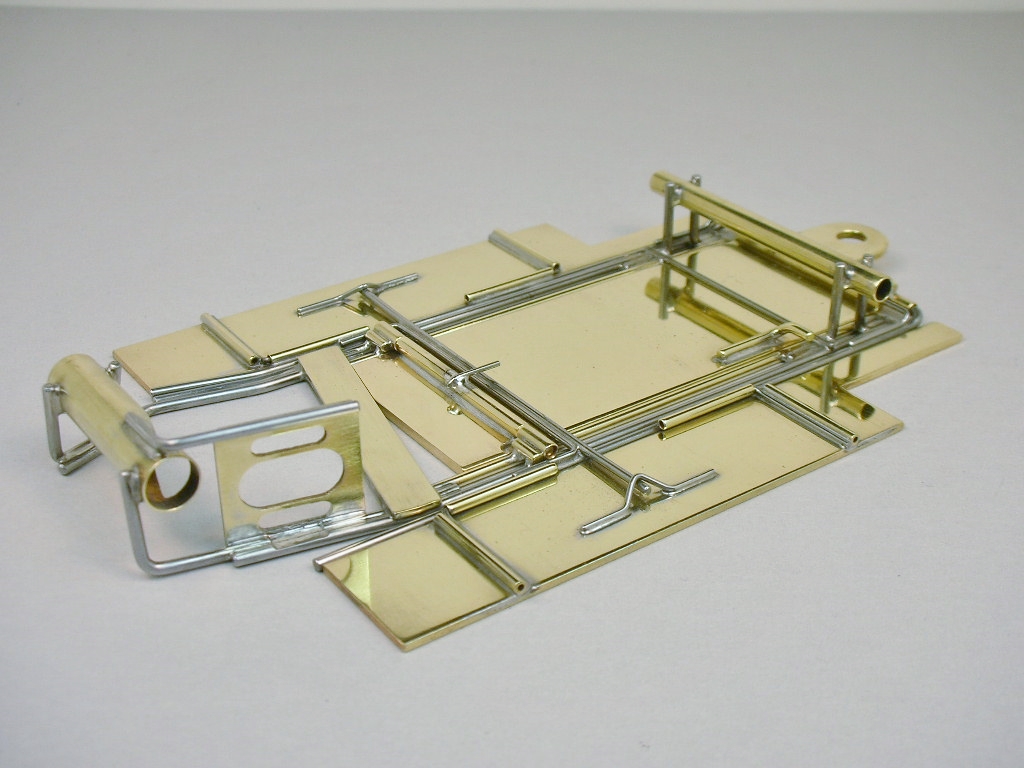
I decided to hang my pans differently than Mike did. I'm using just 2 hinges instead of 4 and I'm laying my body mount pin tubes along side the hinges to reinforce them.
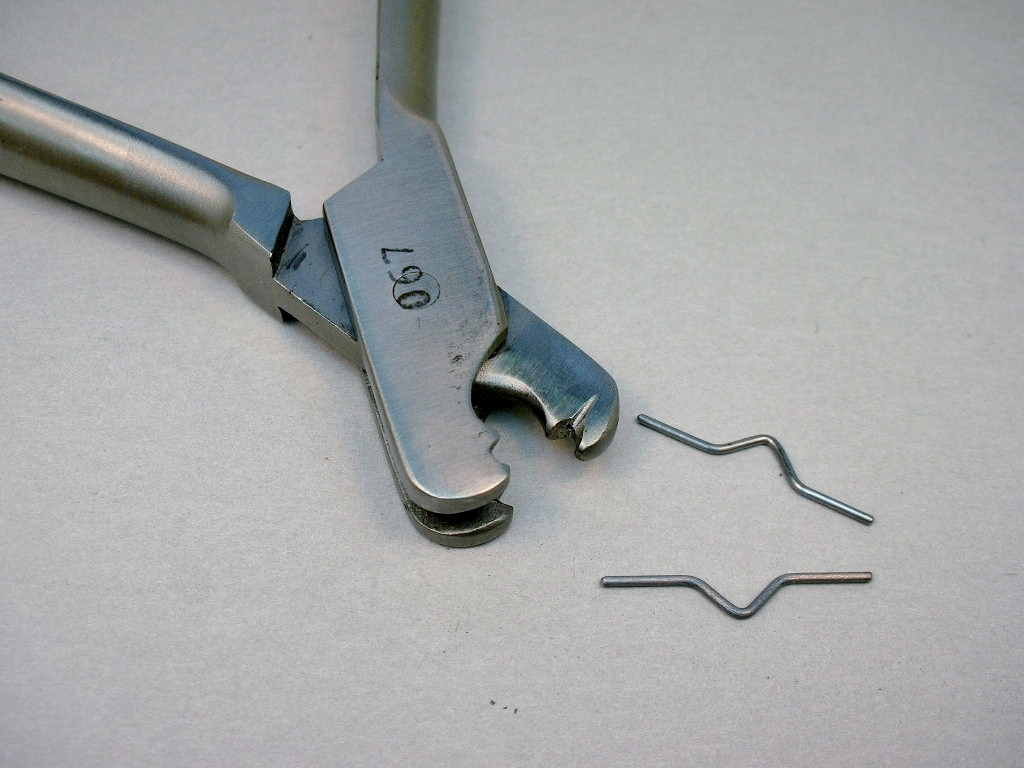
For my pan downward stops I made mine like Mike's. I used this dental tool to help with the process. Even with this gizmo it takes tweaking to get them made up "korrectly":
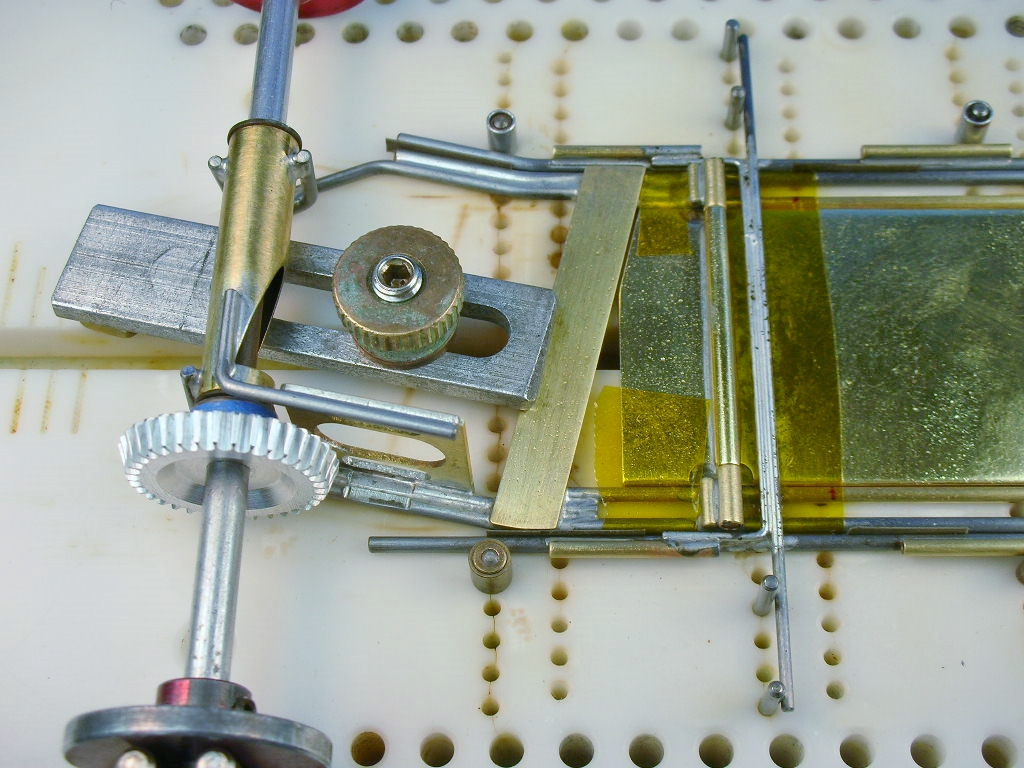
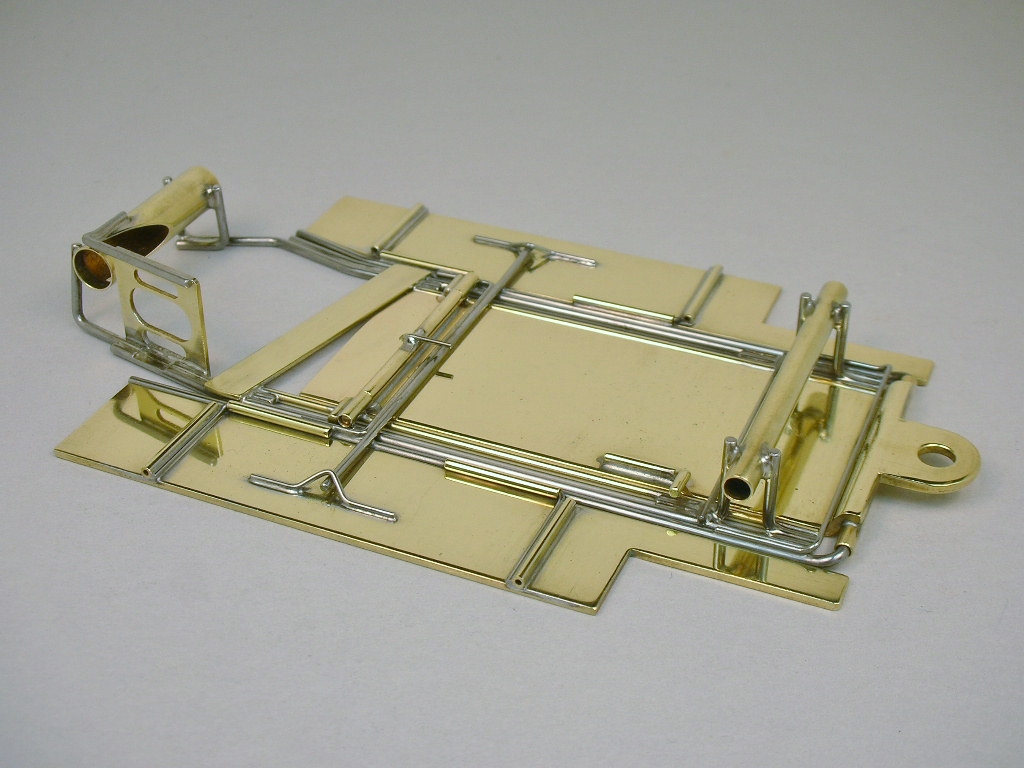
So with that, it's time to assemble the pans and plumber to the center section for the last time. Once this little upward plumber stop is installed the chassis is together for good:
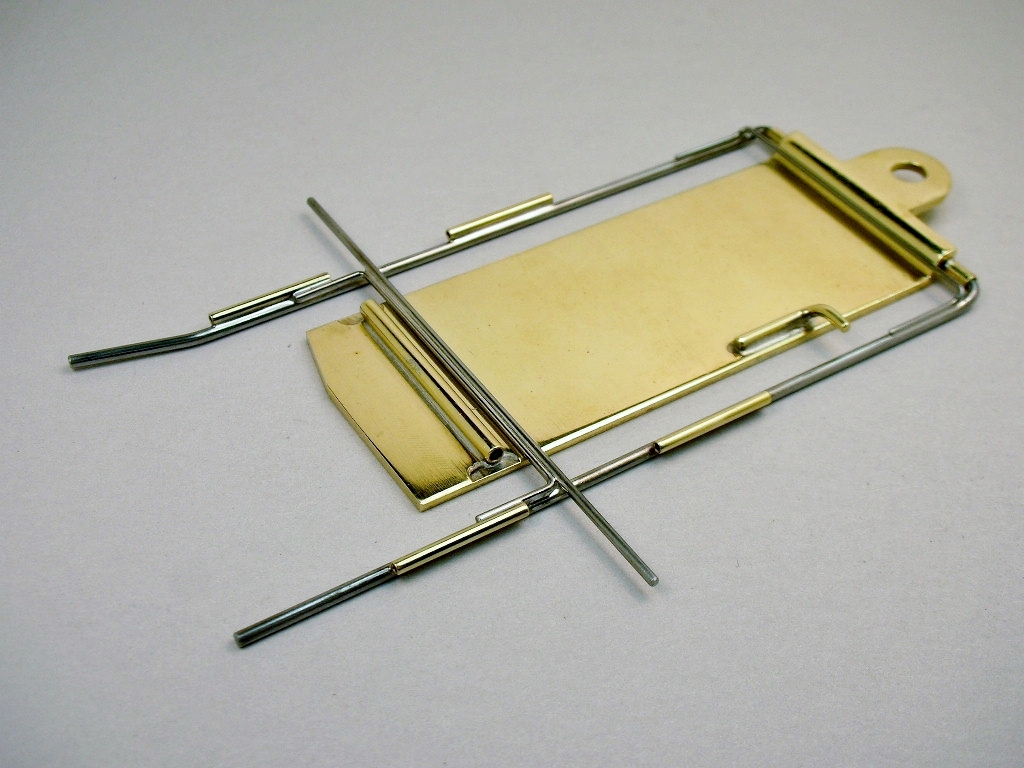
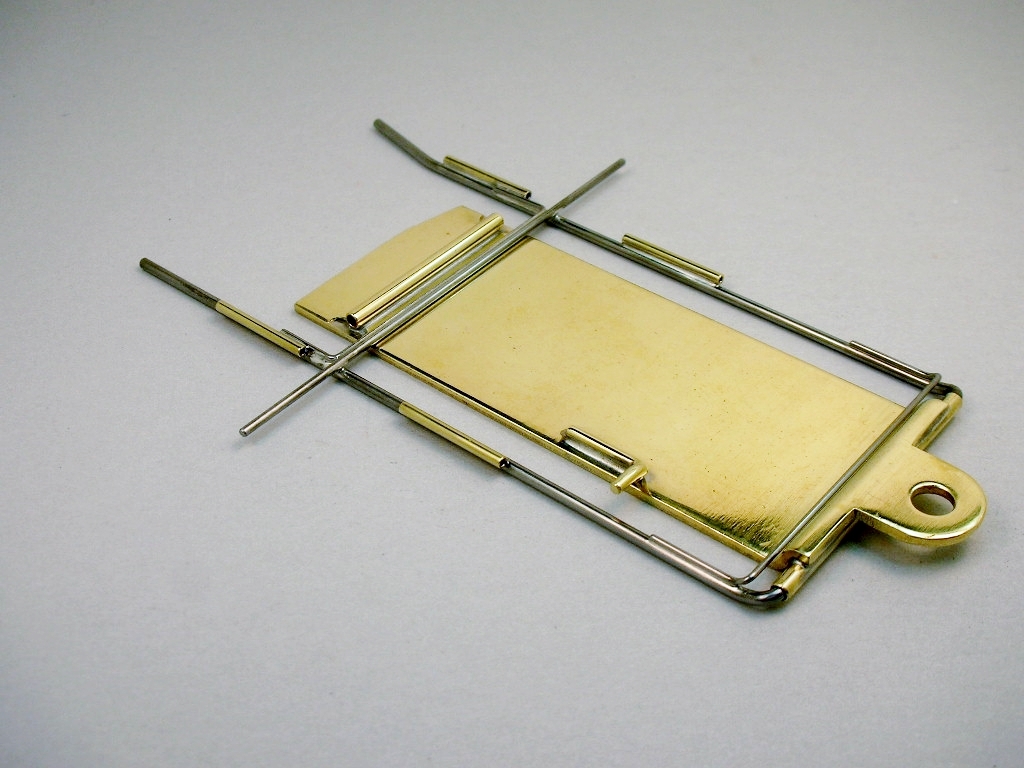
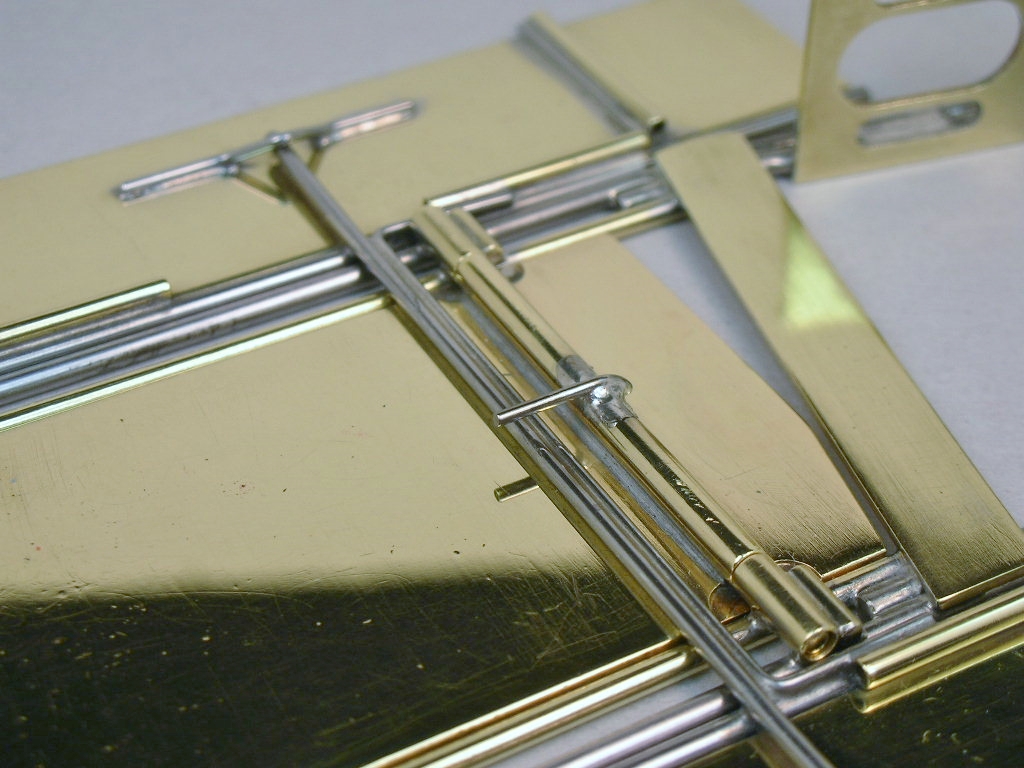
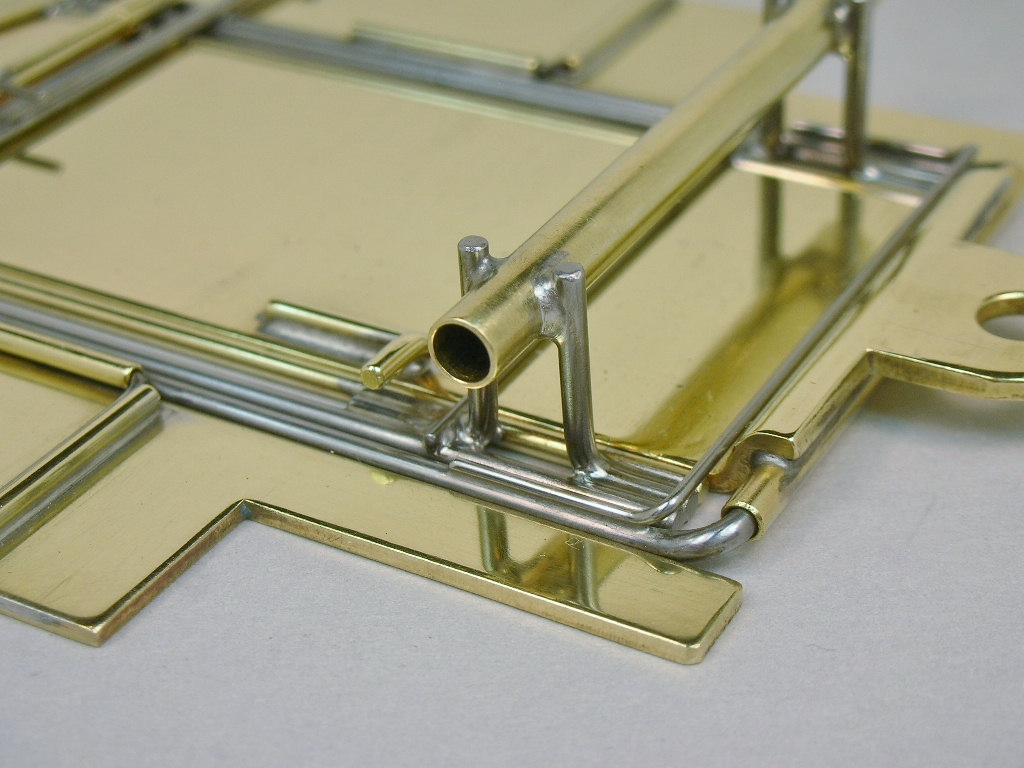
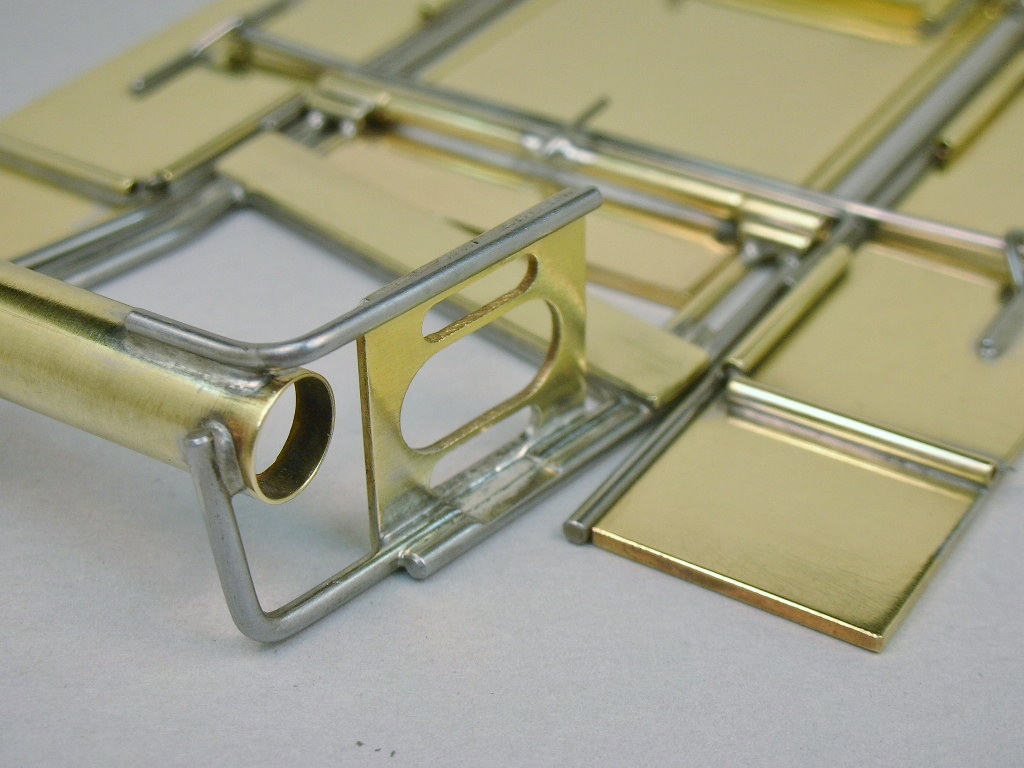
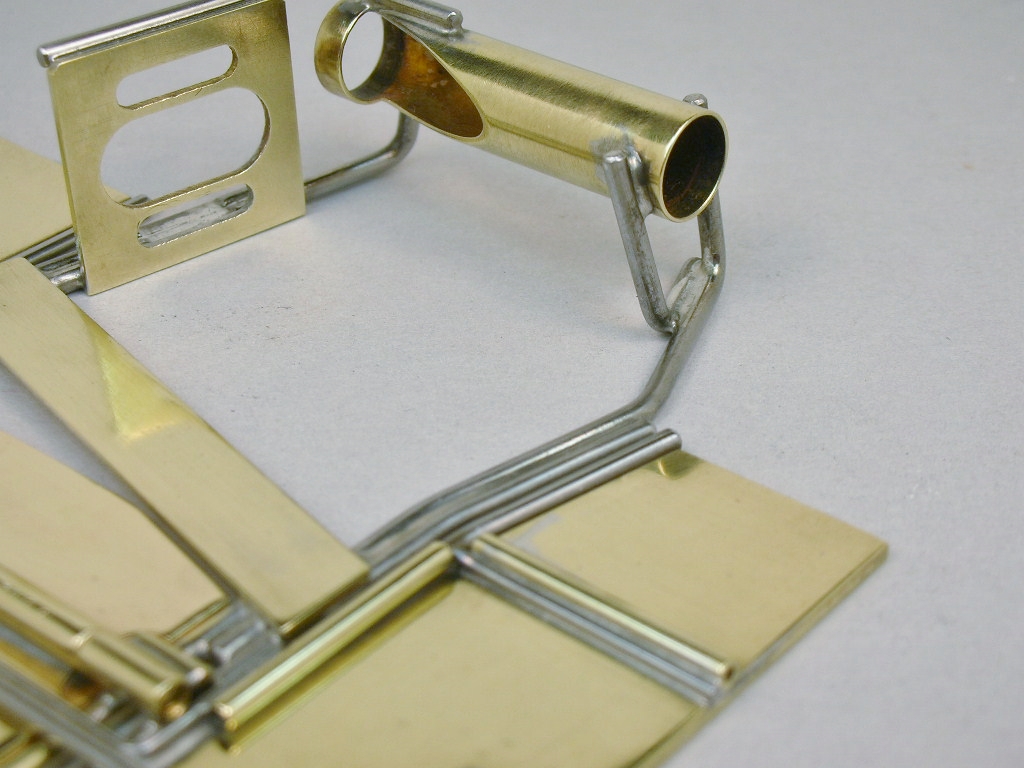
I'm pleased with the completed chassis. It's nice and flat and all the hinges work smoothly.....and it has lots of shiny brass ![]()
With my old eyes I can't see the details like I can with these closeup photos:
I learned as an apprentice machinist how to deburr parts working at the "burr bench". You were supposed to be able to run your hand over the part and not feel sharp, cutting edges.
Sharp edges is what you get after you cut a wire with the Dremel. I try to chamfer everything. I can feel if things are smooth but with these photos I see the results and I'm happy with them.
Next it's time to finish up the motor.........
- Pablo, Phil Smith, Regis4446 and 2 others like this
Rick Thigpen
Check out Steve Okeefe's great web site at its new home here at Slotblog:
The Independent Scratchbuilder
There's much more to come...
#42

Posted 19 October 2021 - 09:14 PM
I decided to hang my pans differently than Mike did. I'm using just 2 hinges instead of 4 and I'm laying my body mount pin tubes along side the hinges to reinforce them.
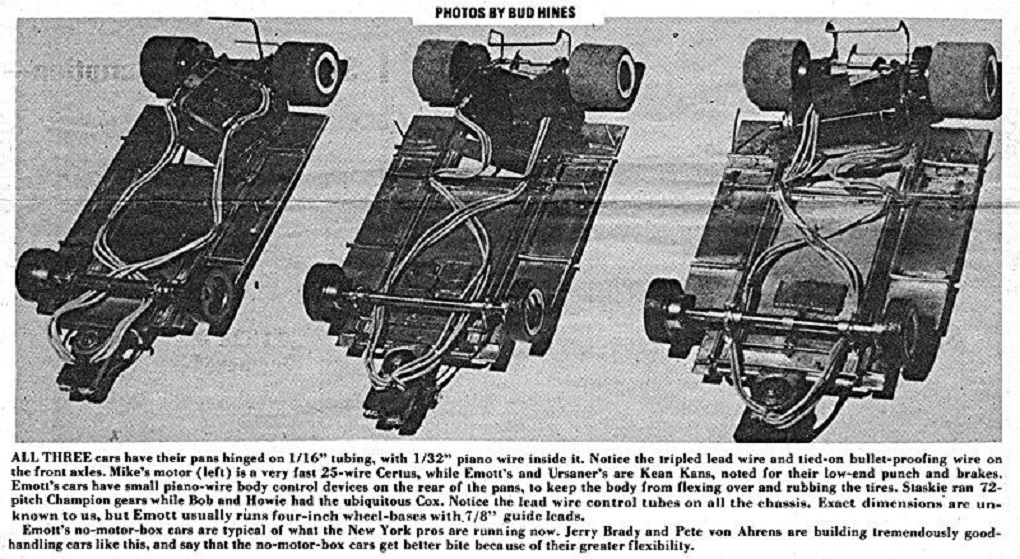
Rick, this was the standard way we hinged pans with pin tubes on wing car chassis built in the '70s. No problems as long as you stayed out of heavy crashes. ![]()
I intend to live forever! So far, so good.
#43

Posted 20 October 2021 - 11:42 AM
Yup Bill, that turned into the standard procedure for pans. Some builders headed in that direction during the late 60's time period of my build too:
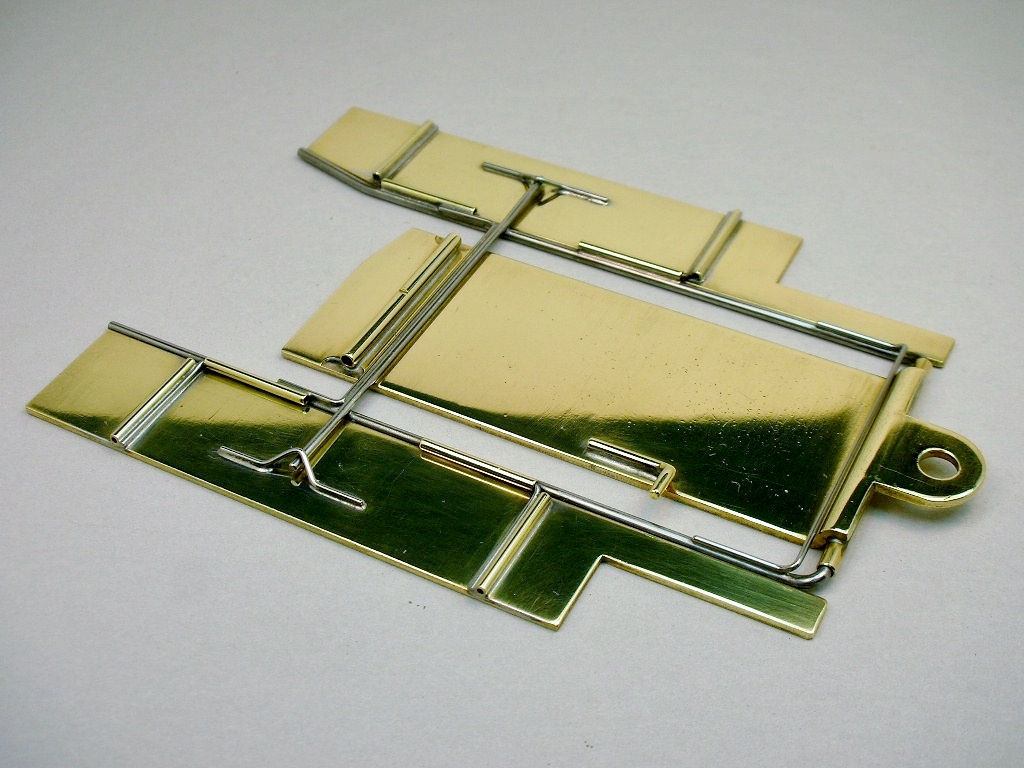
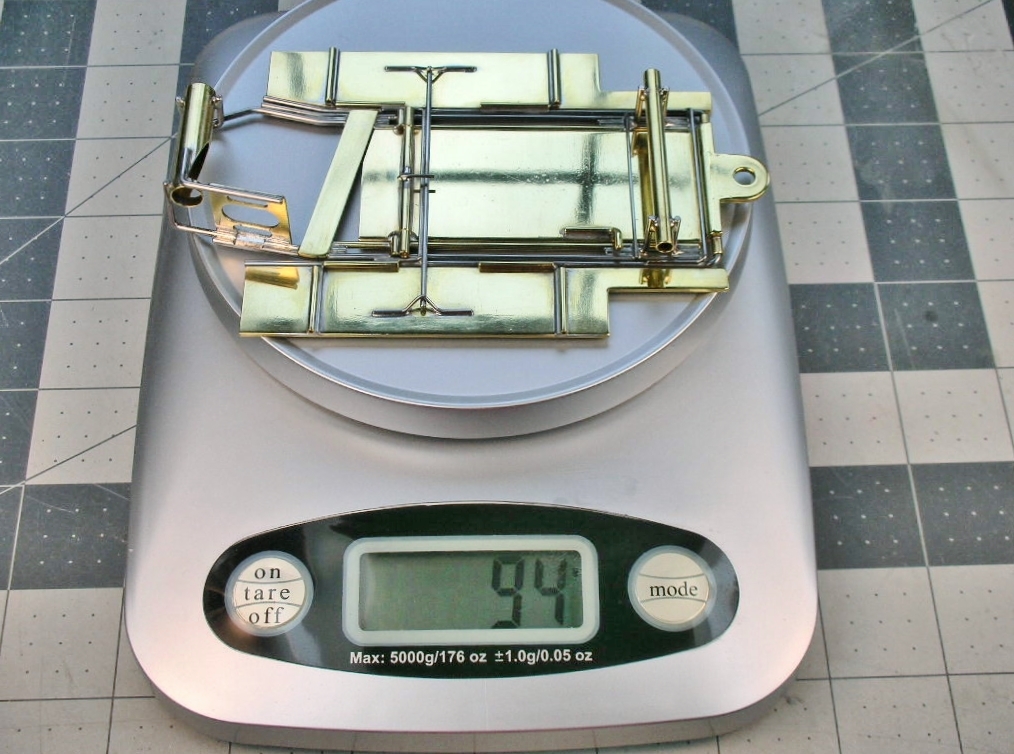
And speaking of 70's cars, here's a weight comparison of my early 1969 chassis:
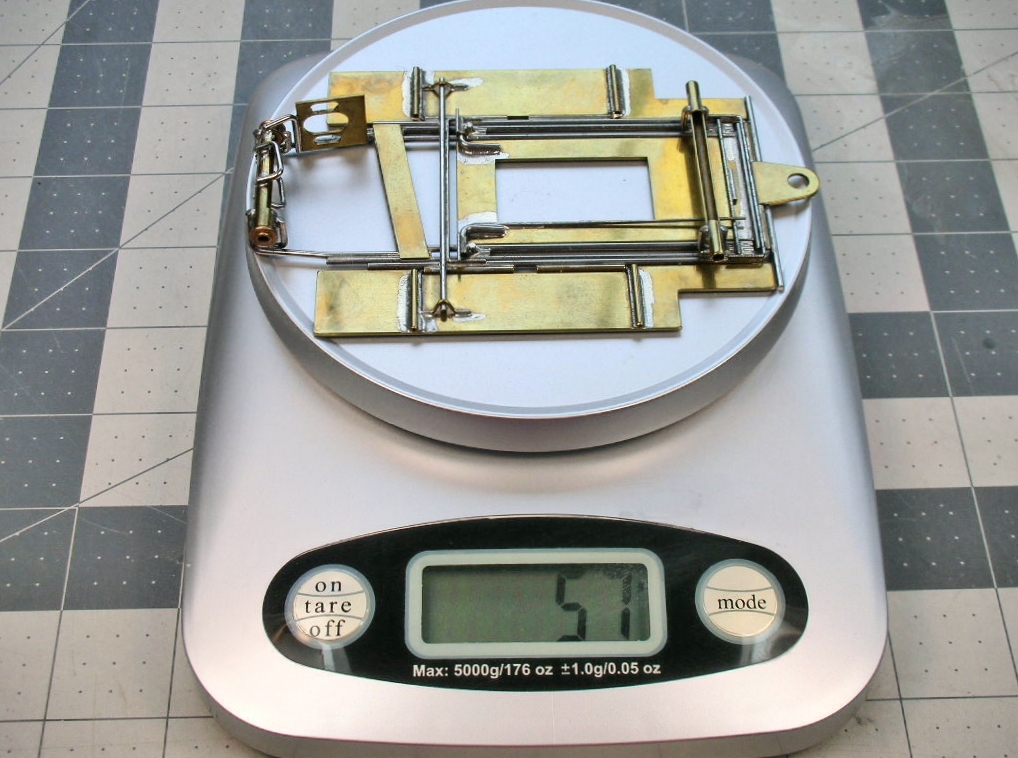
Here is an early 1970's Lee Gilbert - Car Model Magazine build article style chassis:
That's quite a weight difference. ![]()
- Tex likes this
Rick Thigpen
Check out Steve Okeefe's great web site at its new home here at Slotblog:
The Independent Scratchbuilder
There's much more to come...
#44

Posted 20 October 2021 - 01:43 PM
That be purdy ![]() !!
!!
Don Weaver
A slot car racer who never grew up!
The supply of government exceeds demand.
L.H. Lapham
If the brain-eating amoeba invades Washington
it will starve to death...
#45

Posted 20 October 2021 - 03:00 PM
#46

Posted 20 October 2021 - 08:43 PM
Thanks Don.
Isaac, I was surprised at how heavy the chassis felt when I got it finished. Those pans and drop arm a big percentage of the chassis weight.
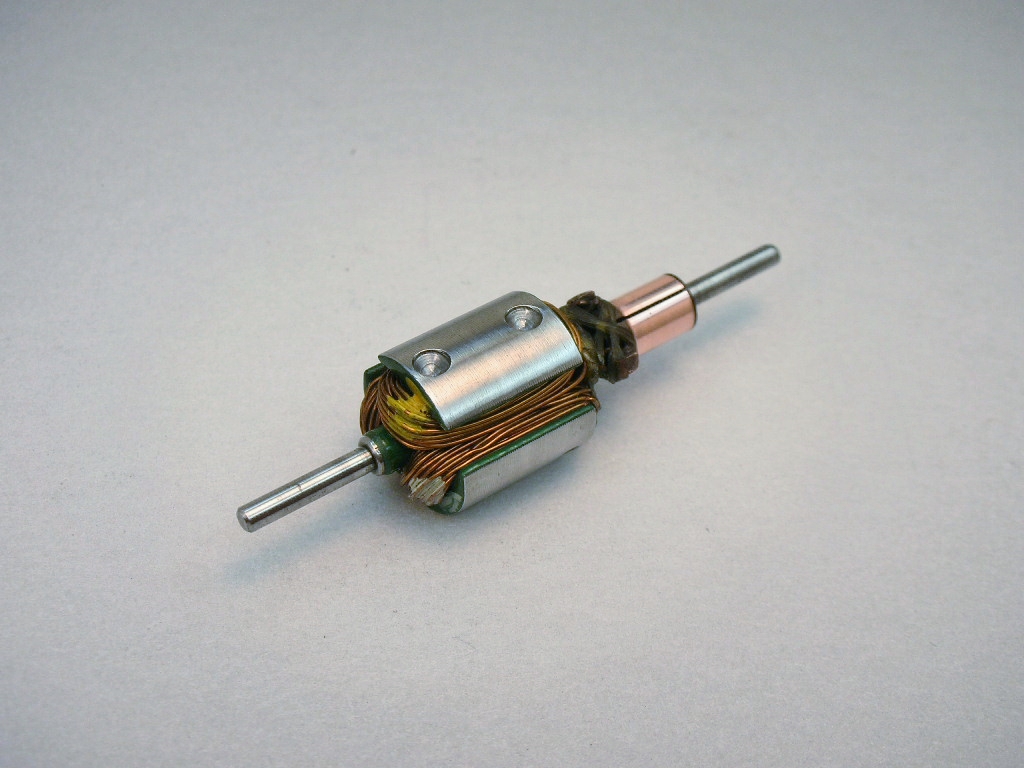
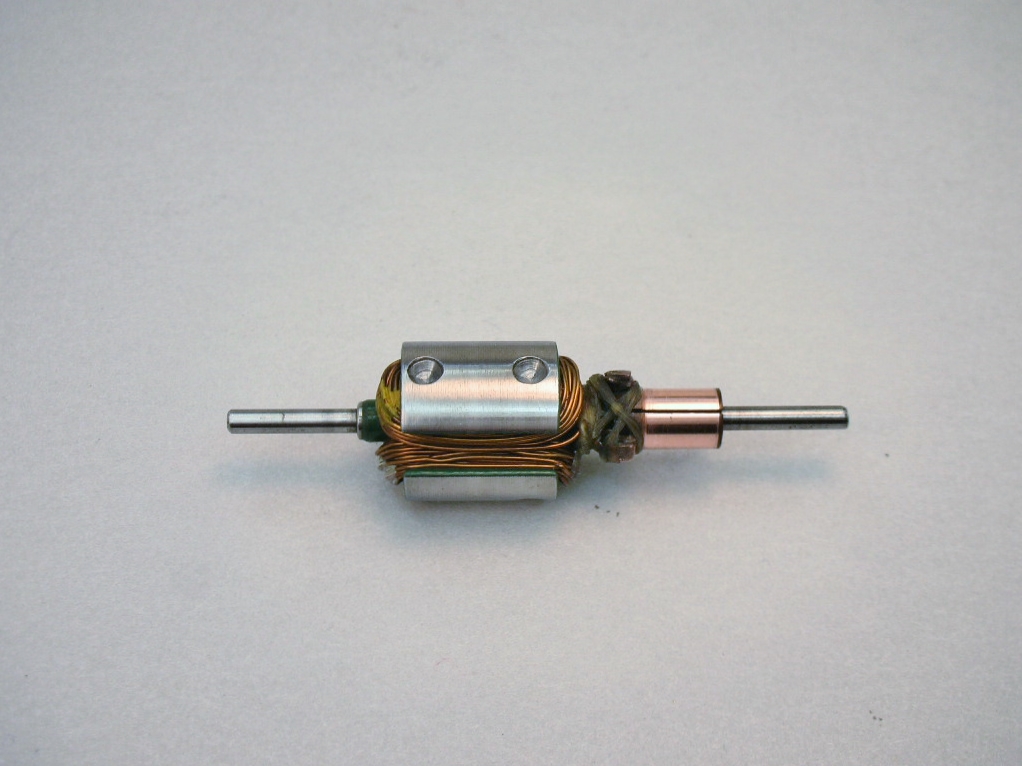
For an armature I found this "mystery arm":
It's a fairly heavy single wind.....maybe an S25:
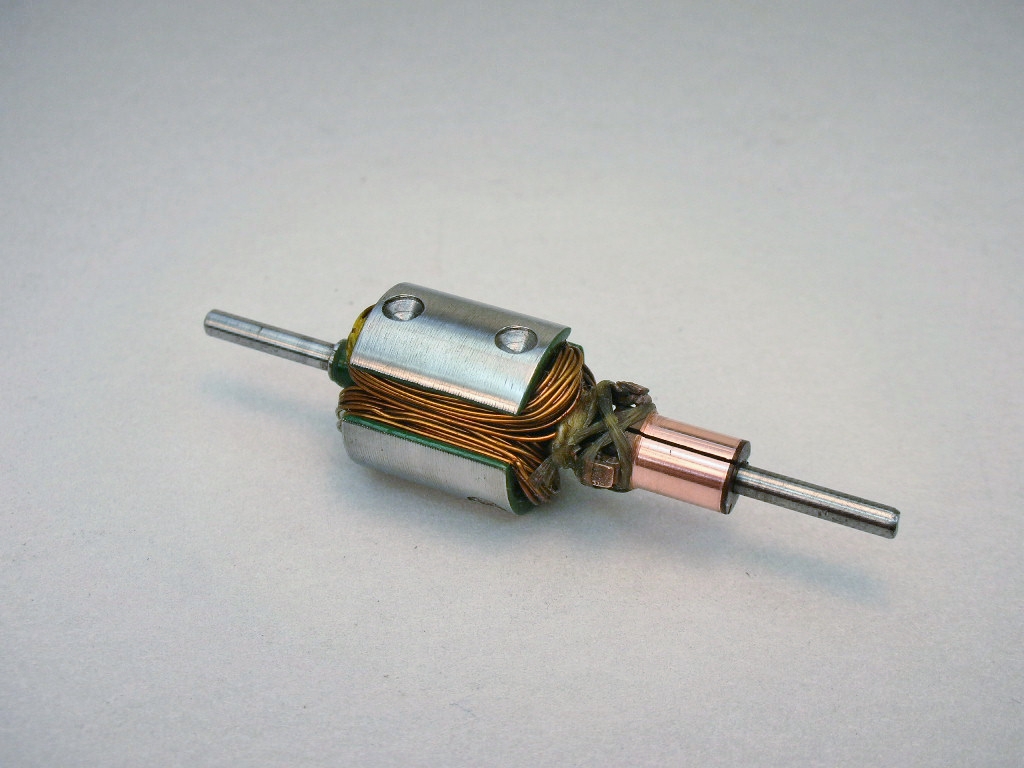
The commutator has been cut previously at least once (probably more) and was in bad shape from hard running. I re-cut it and brought it back to life....at least for limited running:
- Peter Horvath likes this
Rick Thigpen
Check out Steve Okeefe's great web site at its new home here at Slotblog:
The Independent Scratchbuilder
There's much more to come...
#47

Posted 21 October 2021 - 08:11 AM
Your going to stick THAT into your early '69 setup! Sounds fun and fast. ![]() Looks like C-can era to me but should work good.
Looks like C-can era to me but should work good. ![]()
#48

Posted 21 October 2021 - 10:34 AM
Hi Isaac,
The late 1969 B-can era had similar arms too. Here's an example:
My son is working today and won't be here for Thanksgiving dinner until late so I may as well keep playing
.
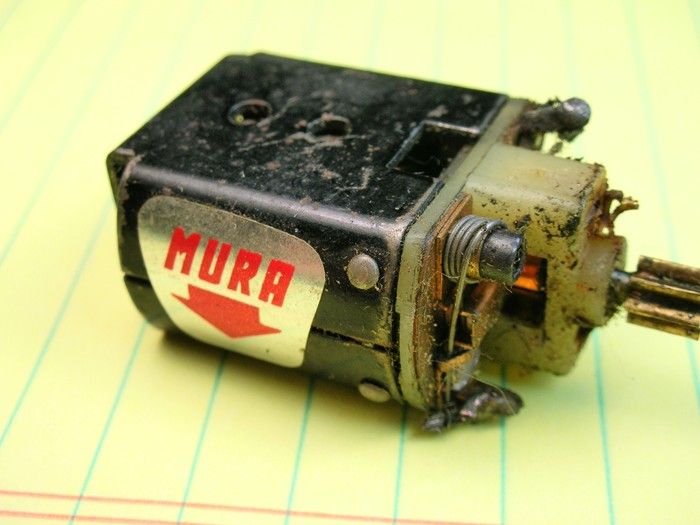
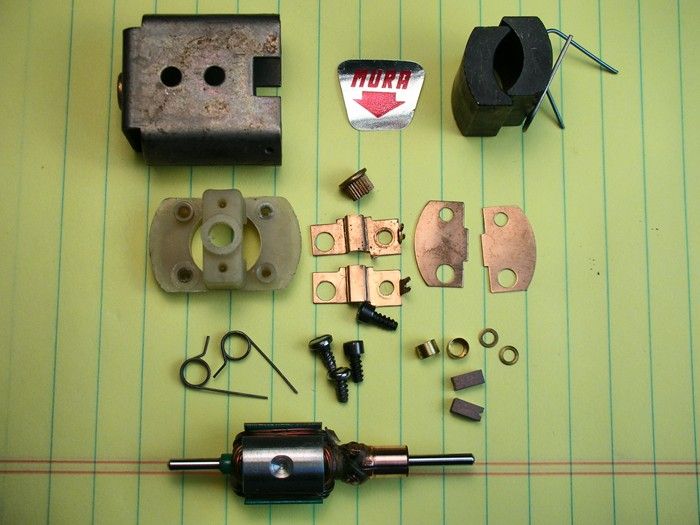
Next is a little-used Mura B Production motor, first generation I believe:
It's had a soldering iron melt into the end bell and the can is all scratched up. I think it will be a good candidate for a complete NOS type restoration. Let's crack her open:
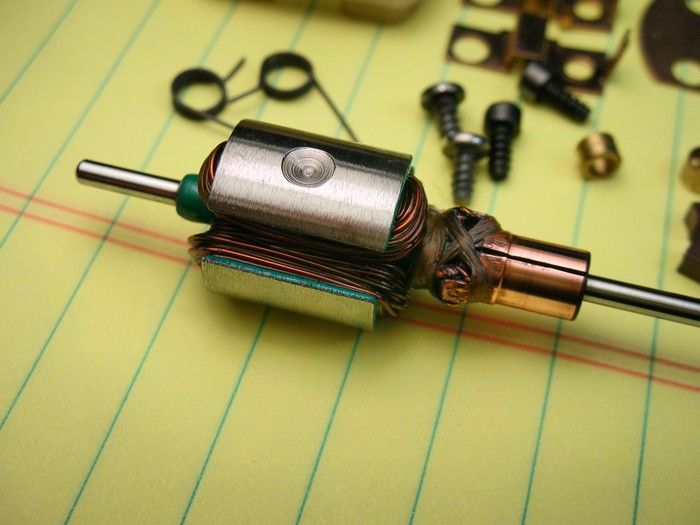
All the parts are ready to go with new brushes and endbell. The cans stripped and ready for a coat of gloss black paint and to have the Mura sticker applied. The armature looks like new. It's a single wind of pretty big wire and meters .2 ohms:
Next...
The arm I'm using is what I could come up with, "You build a vintage car with the parts you have, not the parts you wish you had".
Have you seen this thread?
eBay Motors
Rick Thigpen
Check out Steve Okeefe's great web site at its new home here at Slotblog:
The Independent Scratchbuilder
There's much more to come...
#49

Posted 21 October 2021 - 05:38 PM
#50

Posted 21 October 2021 - 05:39 PM


